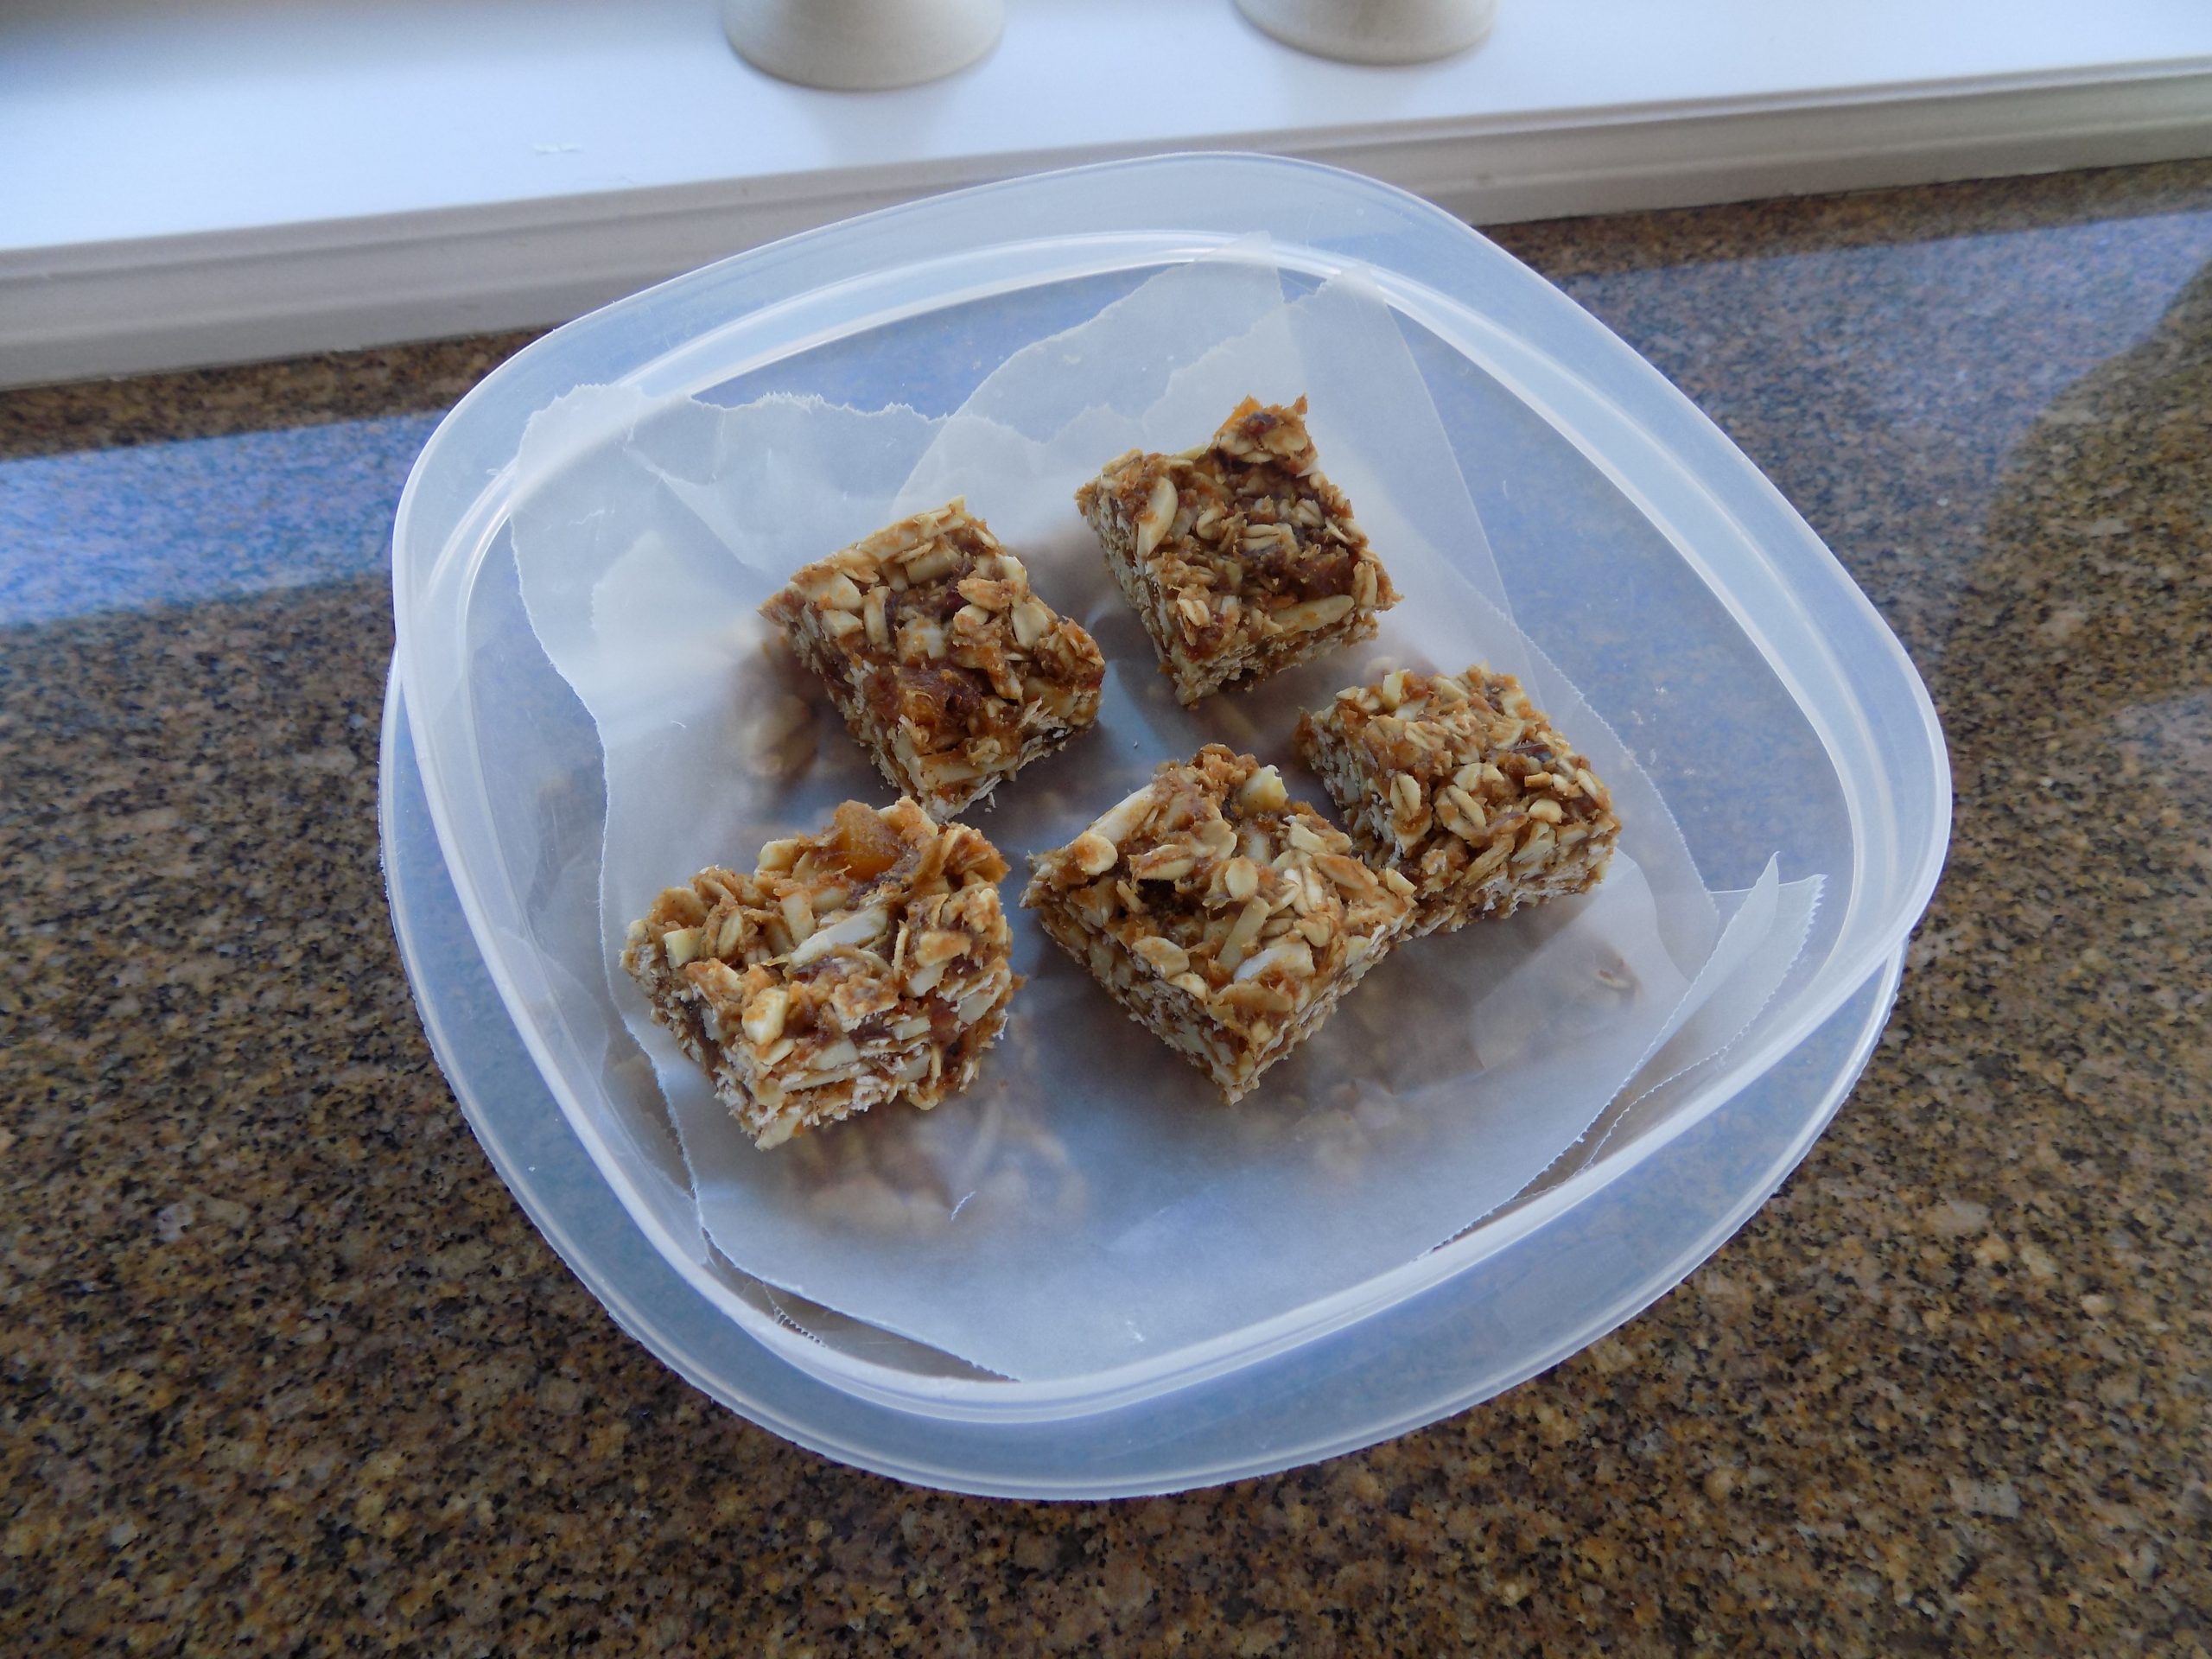
Sometimes all that is required is a tiny bit of sweet for dessert. And these delightful apple bars make just the perfect end to almost any old meal you care to serve. They are easy to prepare, contain no fancy ingredients, and taste divine. And they will happily co-exist with all the other items in your refrigerator for several days. (Like these bars ever last that long!) But if they did, they would!
So, next time a treat is in order, give this recipe from the tutti-dolci.com site a try. These bars are kind of like apple crisp on steroids. So, if you love apple crisp, you are going to go bonkers over this apple bar. But if regular apple crisp is your thing, give my Apple Crisp with Spiced Rum and Cinnamon Whipped Cream a try.
Now I know what you’re thinking. Patti, you shouldn’t be eating desserts anymore. Right you are. But desperate times call for desperate measures. And having company for dinner absolutely requires some kind of sweet to end the meal. I know that to be true because I read it in a cooking magazine years ago. And we all know that if something is in writing, it must be true! Right?!?! Anyway, I made these bars for dessert when Mr. C’s sister Katie and her husband were visiting recently. And the bars were a thundering success. So, if you too would like to create a thundering success, I suggest you give this recipe a try.
Well, that’s it for now. I’m going to take it easy today. I’m going through the process of getting off one med and upping another and my body is rebelling. But I am going to win this battle because my brain and my will are in accordance. In the meantime, there will probably be less posts from me. But never fear. I’m a crusty old gal and I plan to be back to my usual relentless search for perfect recipes to share with you in no time. But for now, don’t be surprised if I post fewer recipes than usual. (Gives you a break too.) Just know that I have the greatest respect for all of you and feel honored to be a part of your life.
Peace and love to all.
Crust and Crumble:
1¼ c. unbleached all-purpose flour
½ tsp. baking soda
¼ tsp. kosher salt
¾ c. brown sugar
1 c. old-fashioned rolled oats
½ c. (1 stick) unsalted butter, melted
1½ tsp. vanilla extract
Whisk the flour, baking soda, and salt together in a medium sized mixing bowl. Stir in the brown sugar and rolled oats. Make a well and pour in the melted butter and vanilla. Stir until combined.
Reserve a scant cup of the dough to be used as the crumble topping. Keep the reserved dough in the refrigerator until needed.
Press the remaining dough (the crust) into a lightly buttered 8×8-inch baking pan. Bake in a pre-heated 350-degree oven for 16 minutes or until the crust is a light, golden brown. Remove from oven and let cool for at least 15 minutes.
Apple Filling:
2 med. sized apples, diced (I use Honey Crisp apples)
1 tsp. fresh lemon juice
¼ c. granulated sugar
½ tsp. ground cinnamon
5 tsp. cornstarch
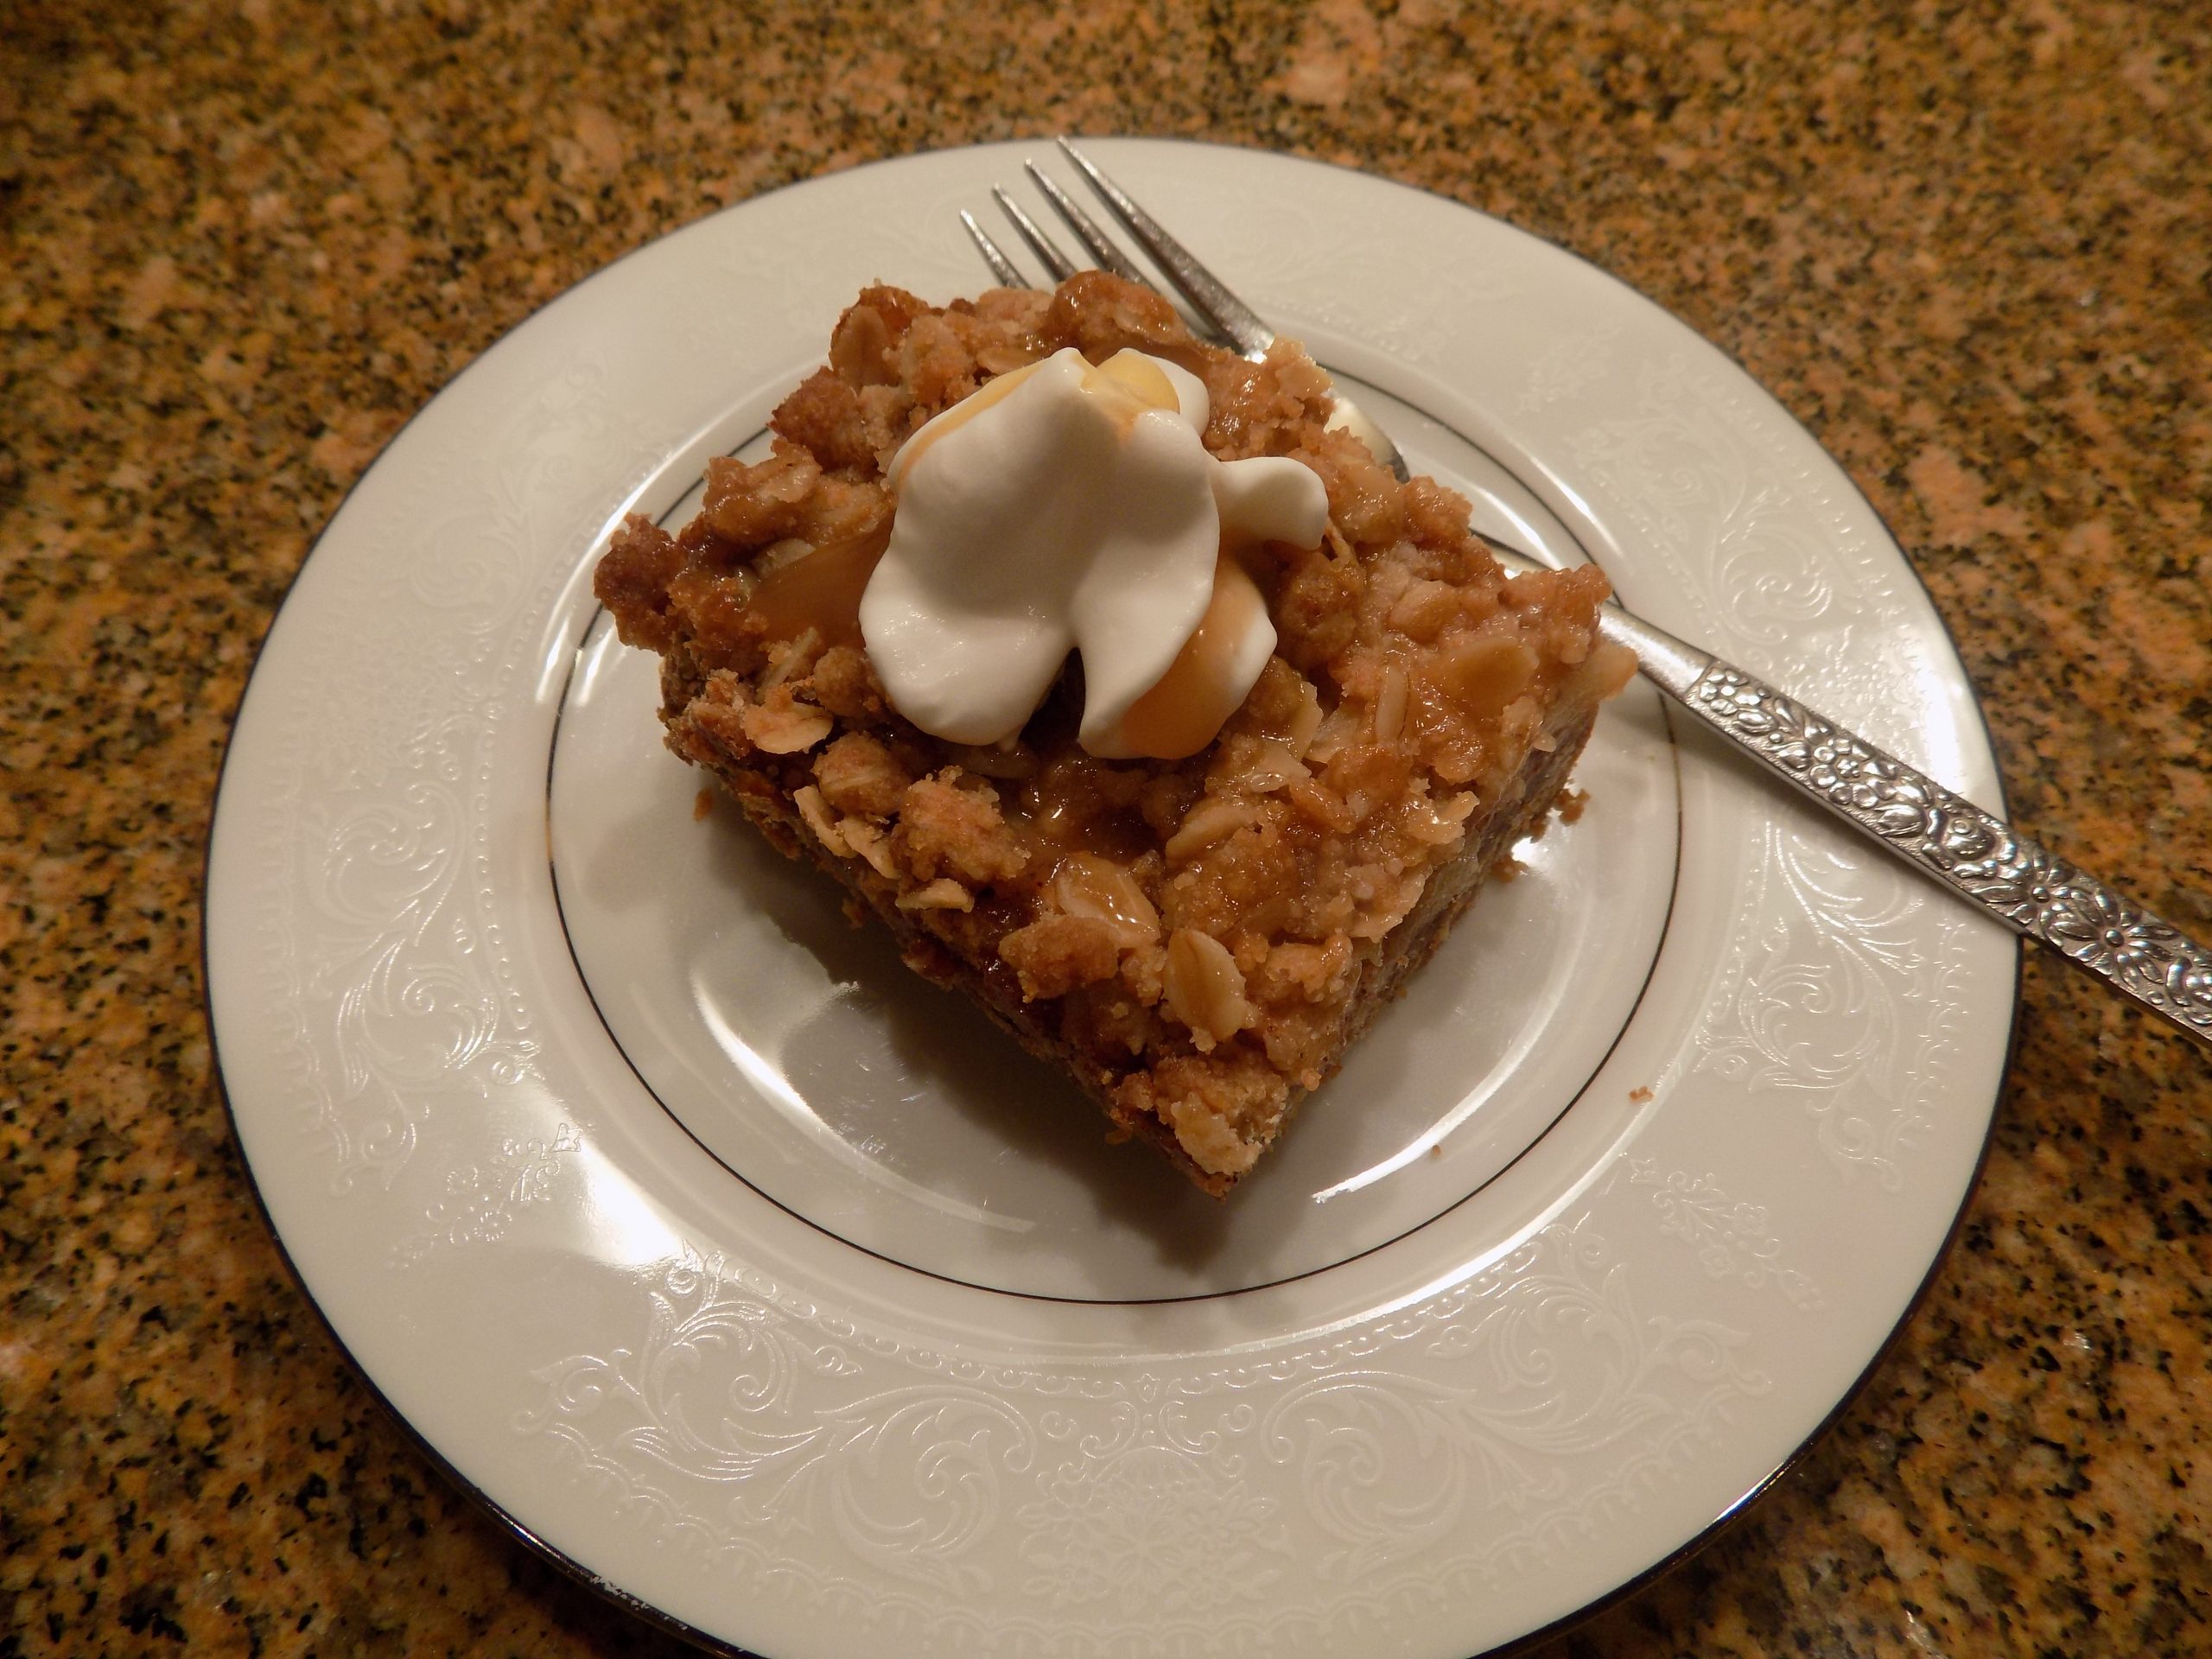
½ c. regular or salted caramel sauce
Stir the apples and lemon juice together in a medium bowl. Whisk the granulated sugar, cinnamon, and cornstarch together in a separate bowl and add to the apples. Toss together until combined.
Spoon apple filling evenly over the cooled crust and drizzle with ¼ cup of the caramel sauce. Crumble reserved dough over the top.
Bake for another 35 to 40 minutes, or until the topping is golden and the filling is slightly bubbly. Cool completely on a wire rack before drizzling with the remaining ¼ cup caramel sauce. Place in the refrigerator until ready to cut and serve.
Serve cold or warm briefly before serving. Great with just a bit of whipped cream and another tiny spoon of caramel sauce as a garnish.