Category Archives: CASSEROLE RECIPES

AU GRATIN POTATOES WITH CARAMELIZED ONIONS

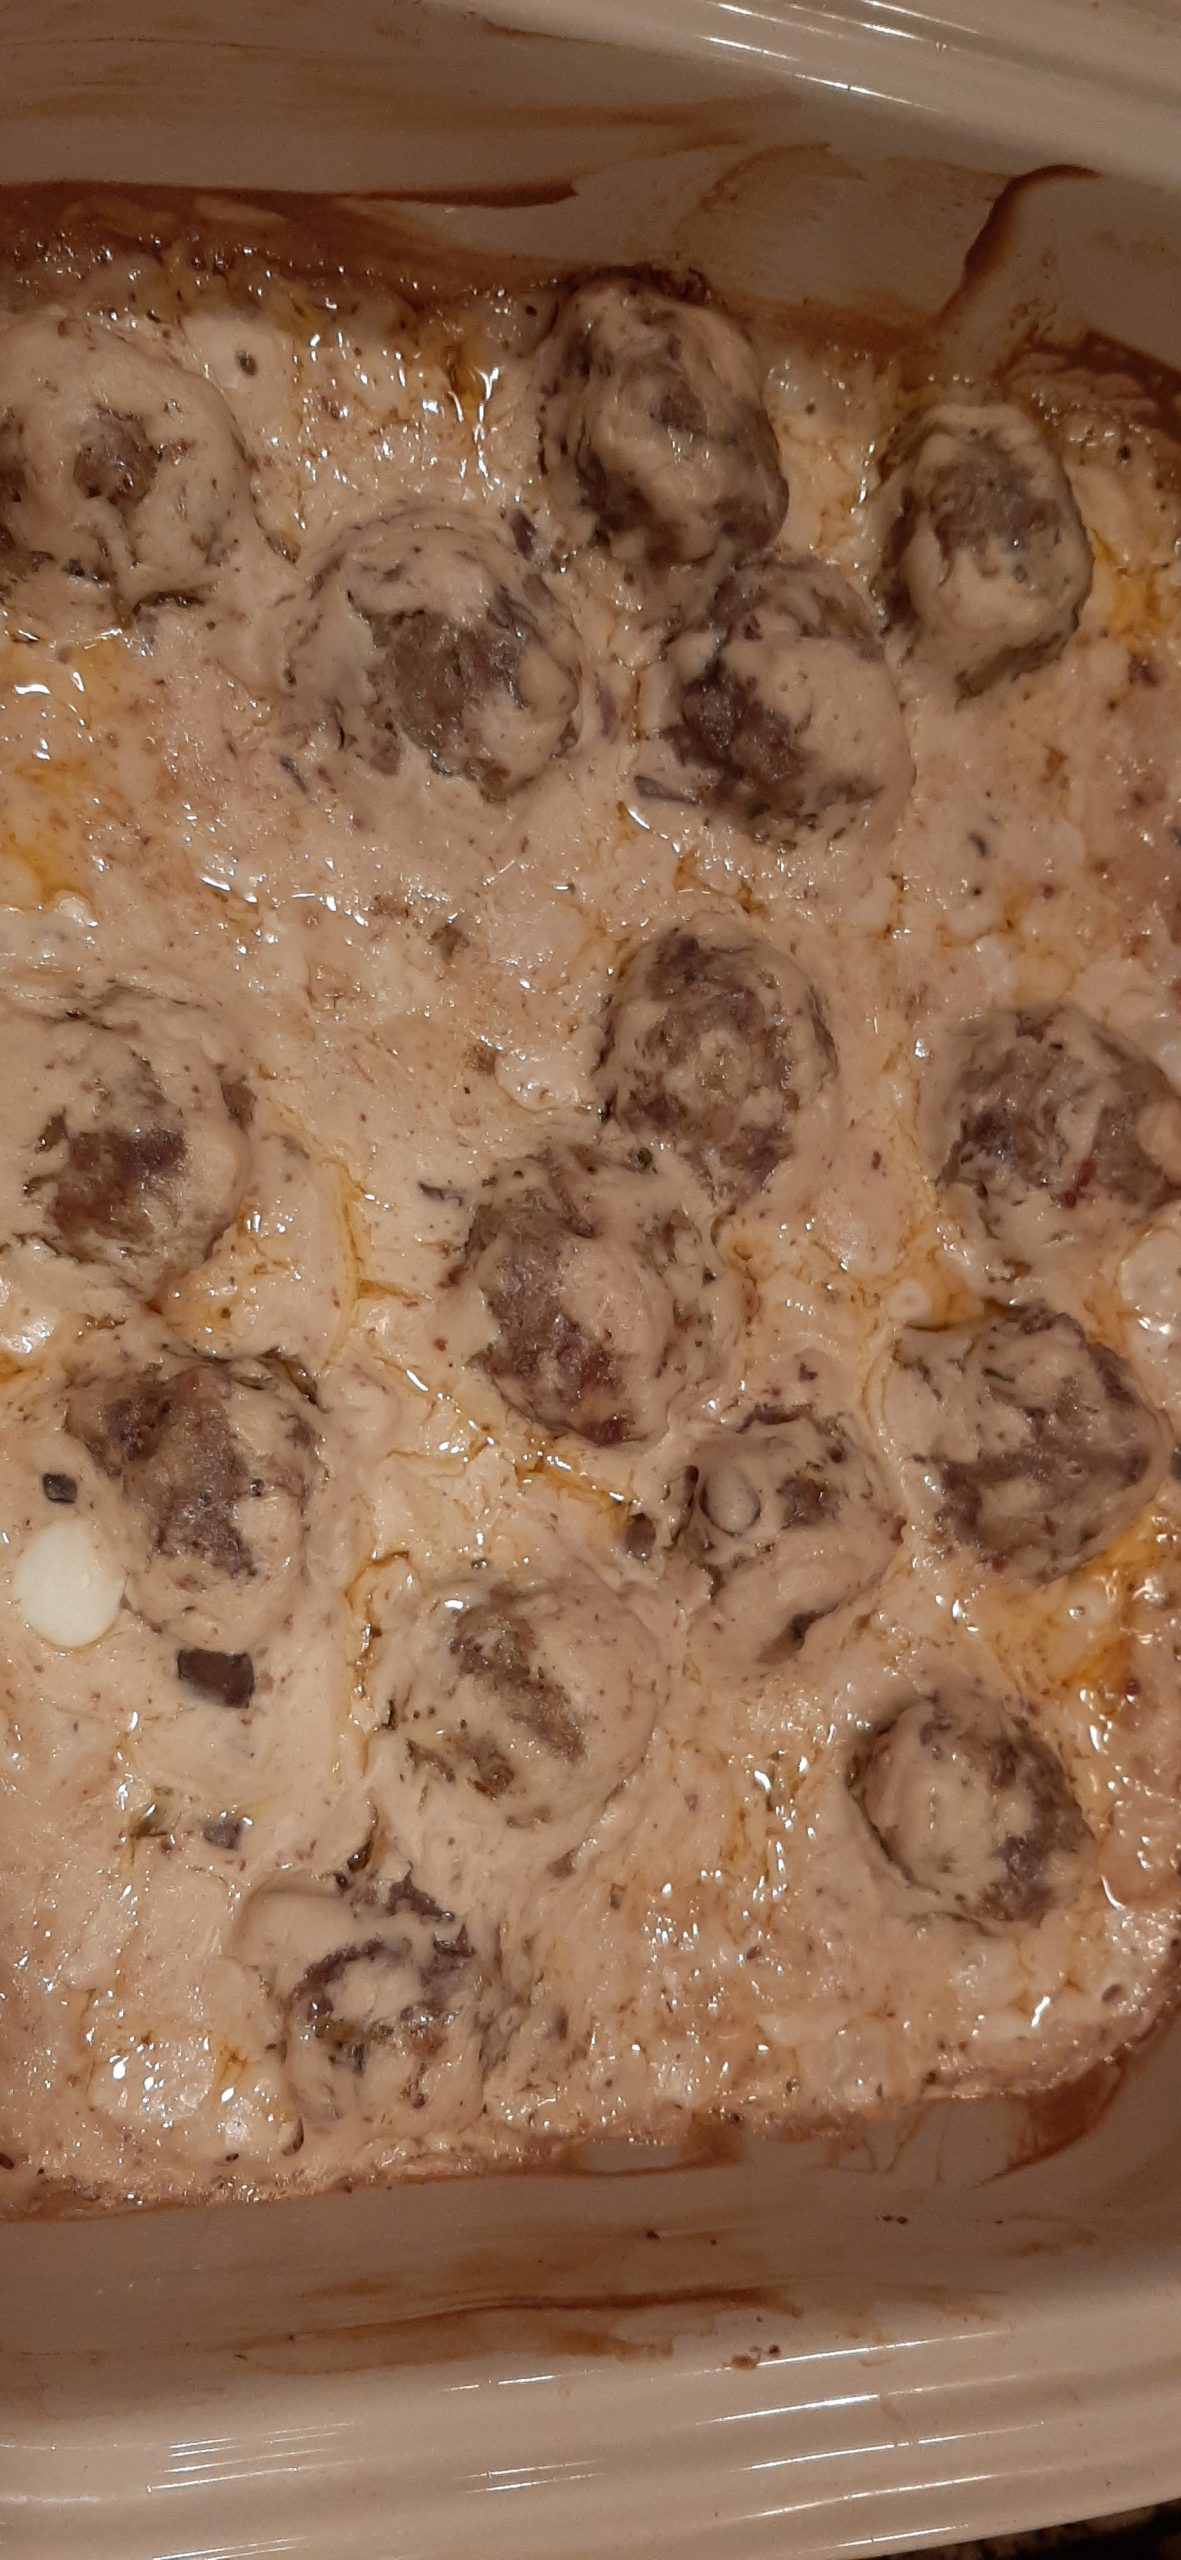
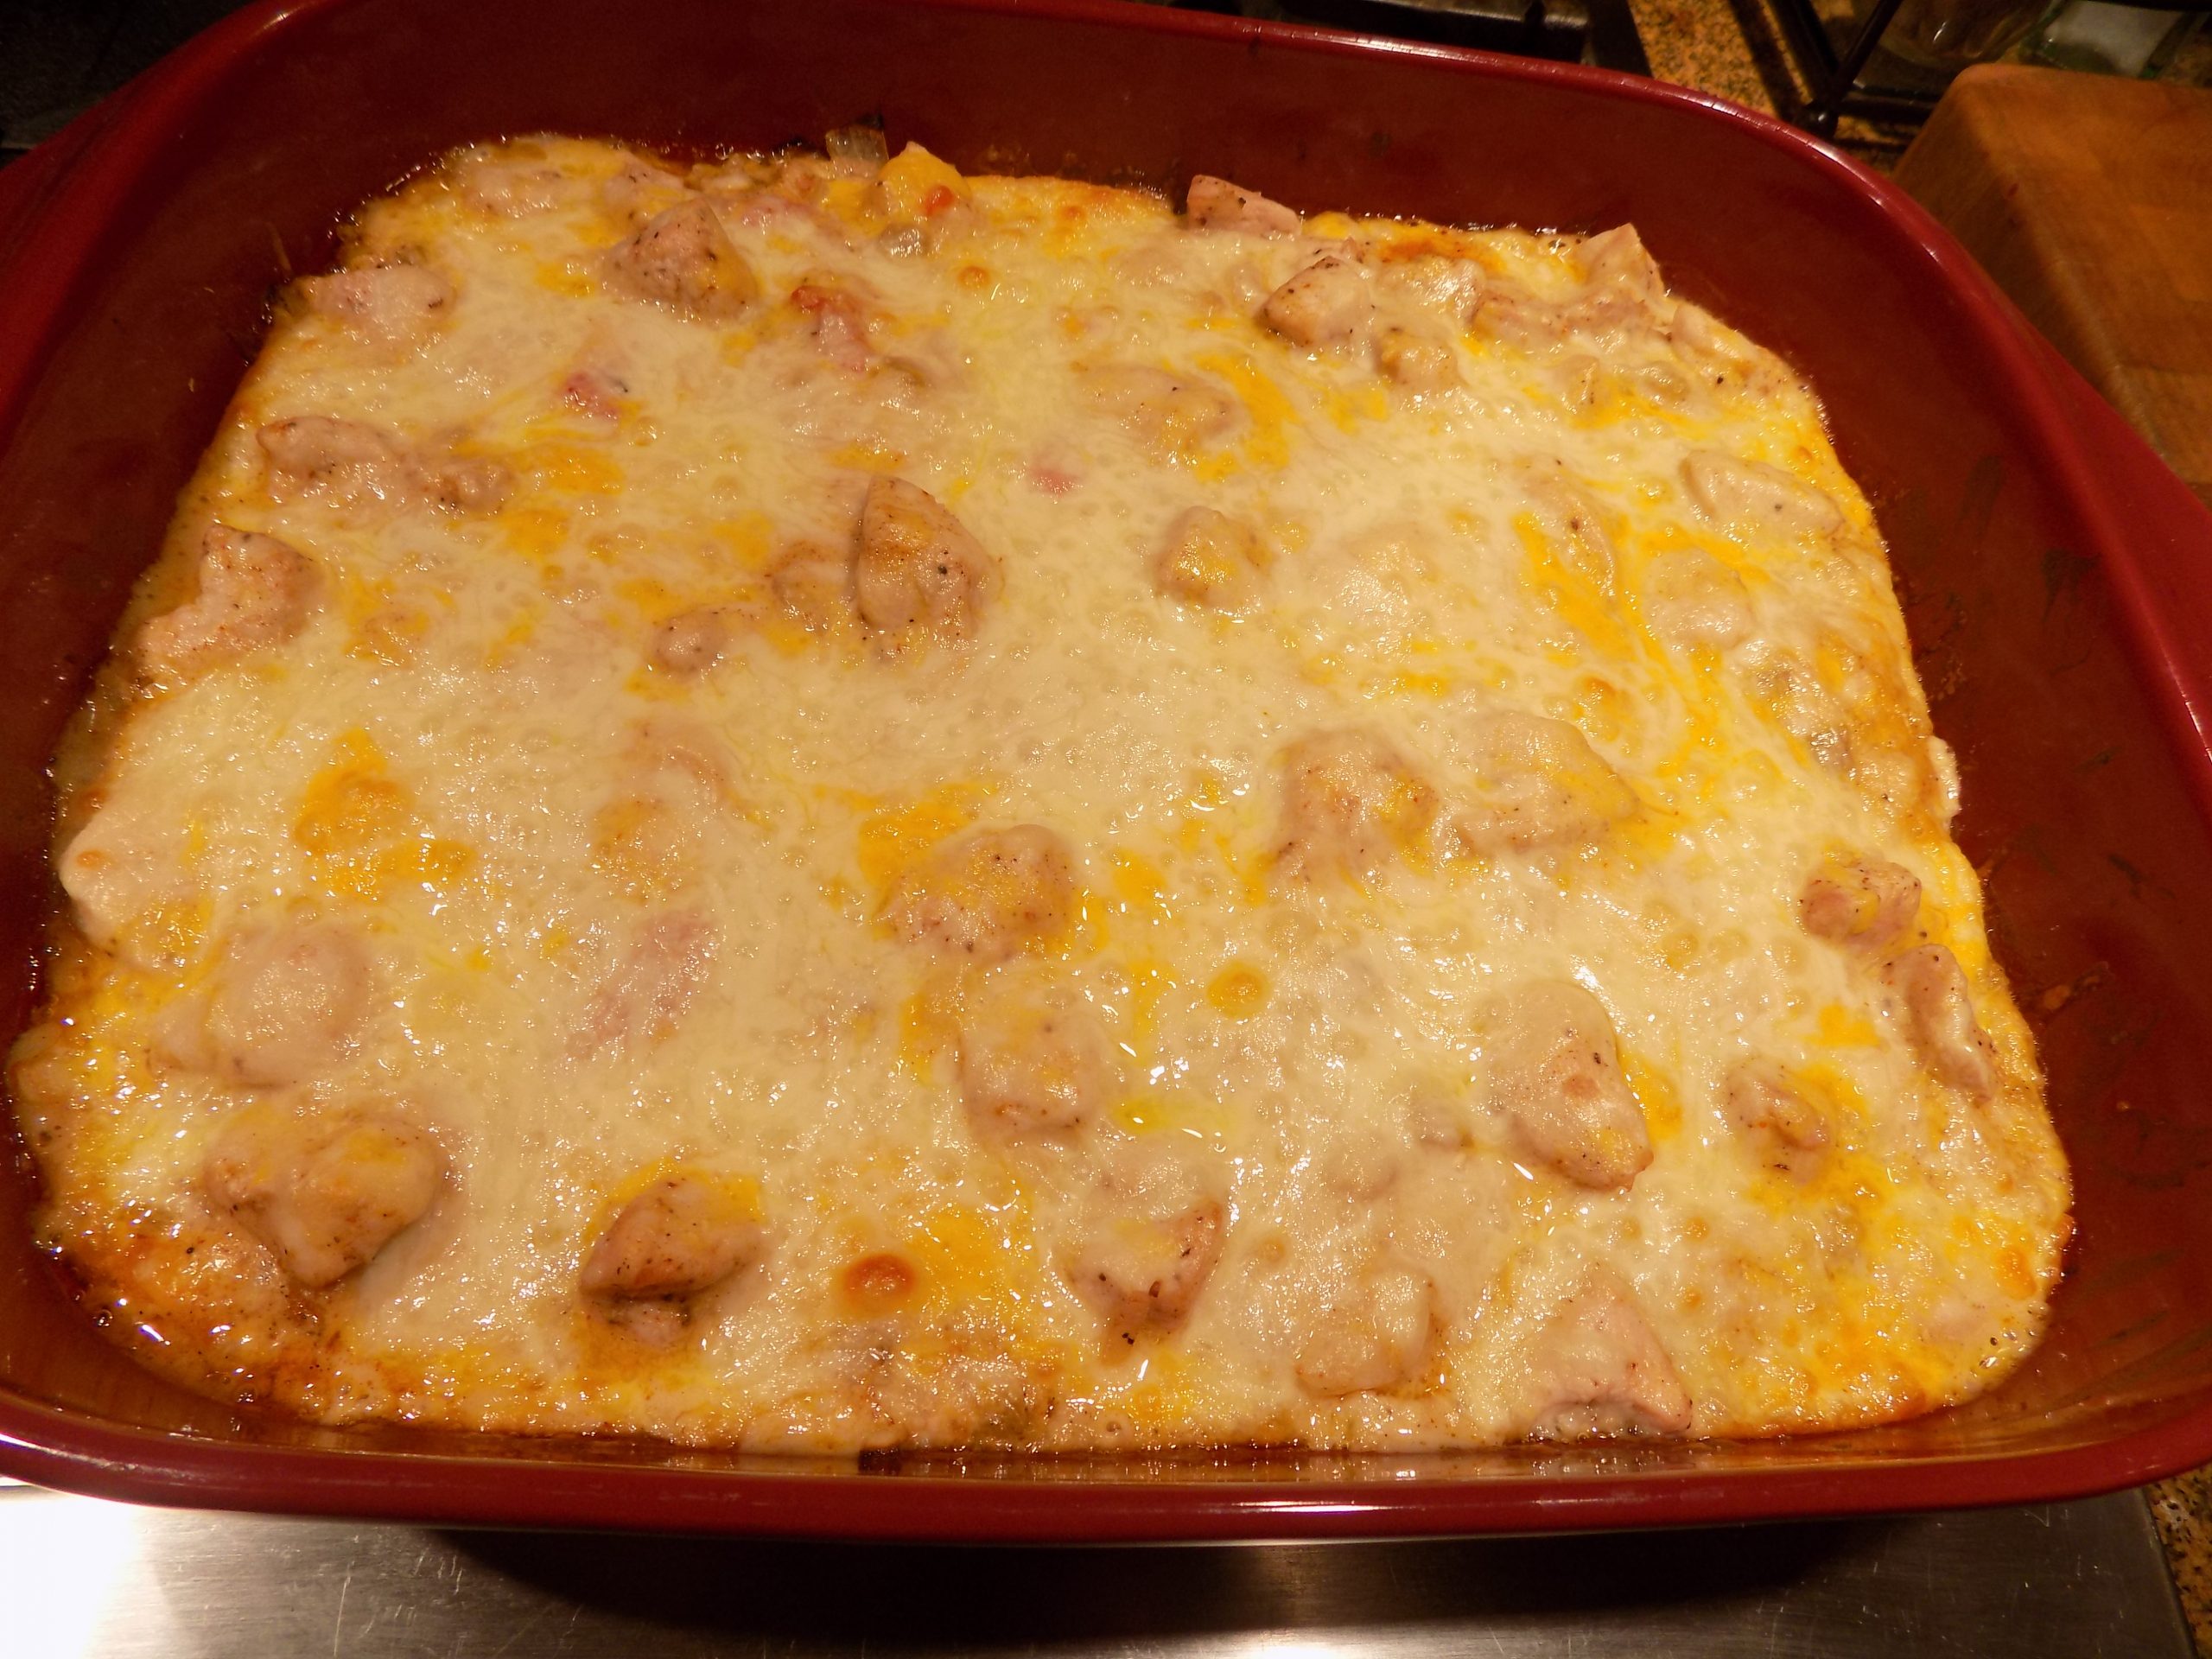
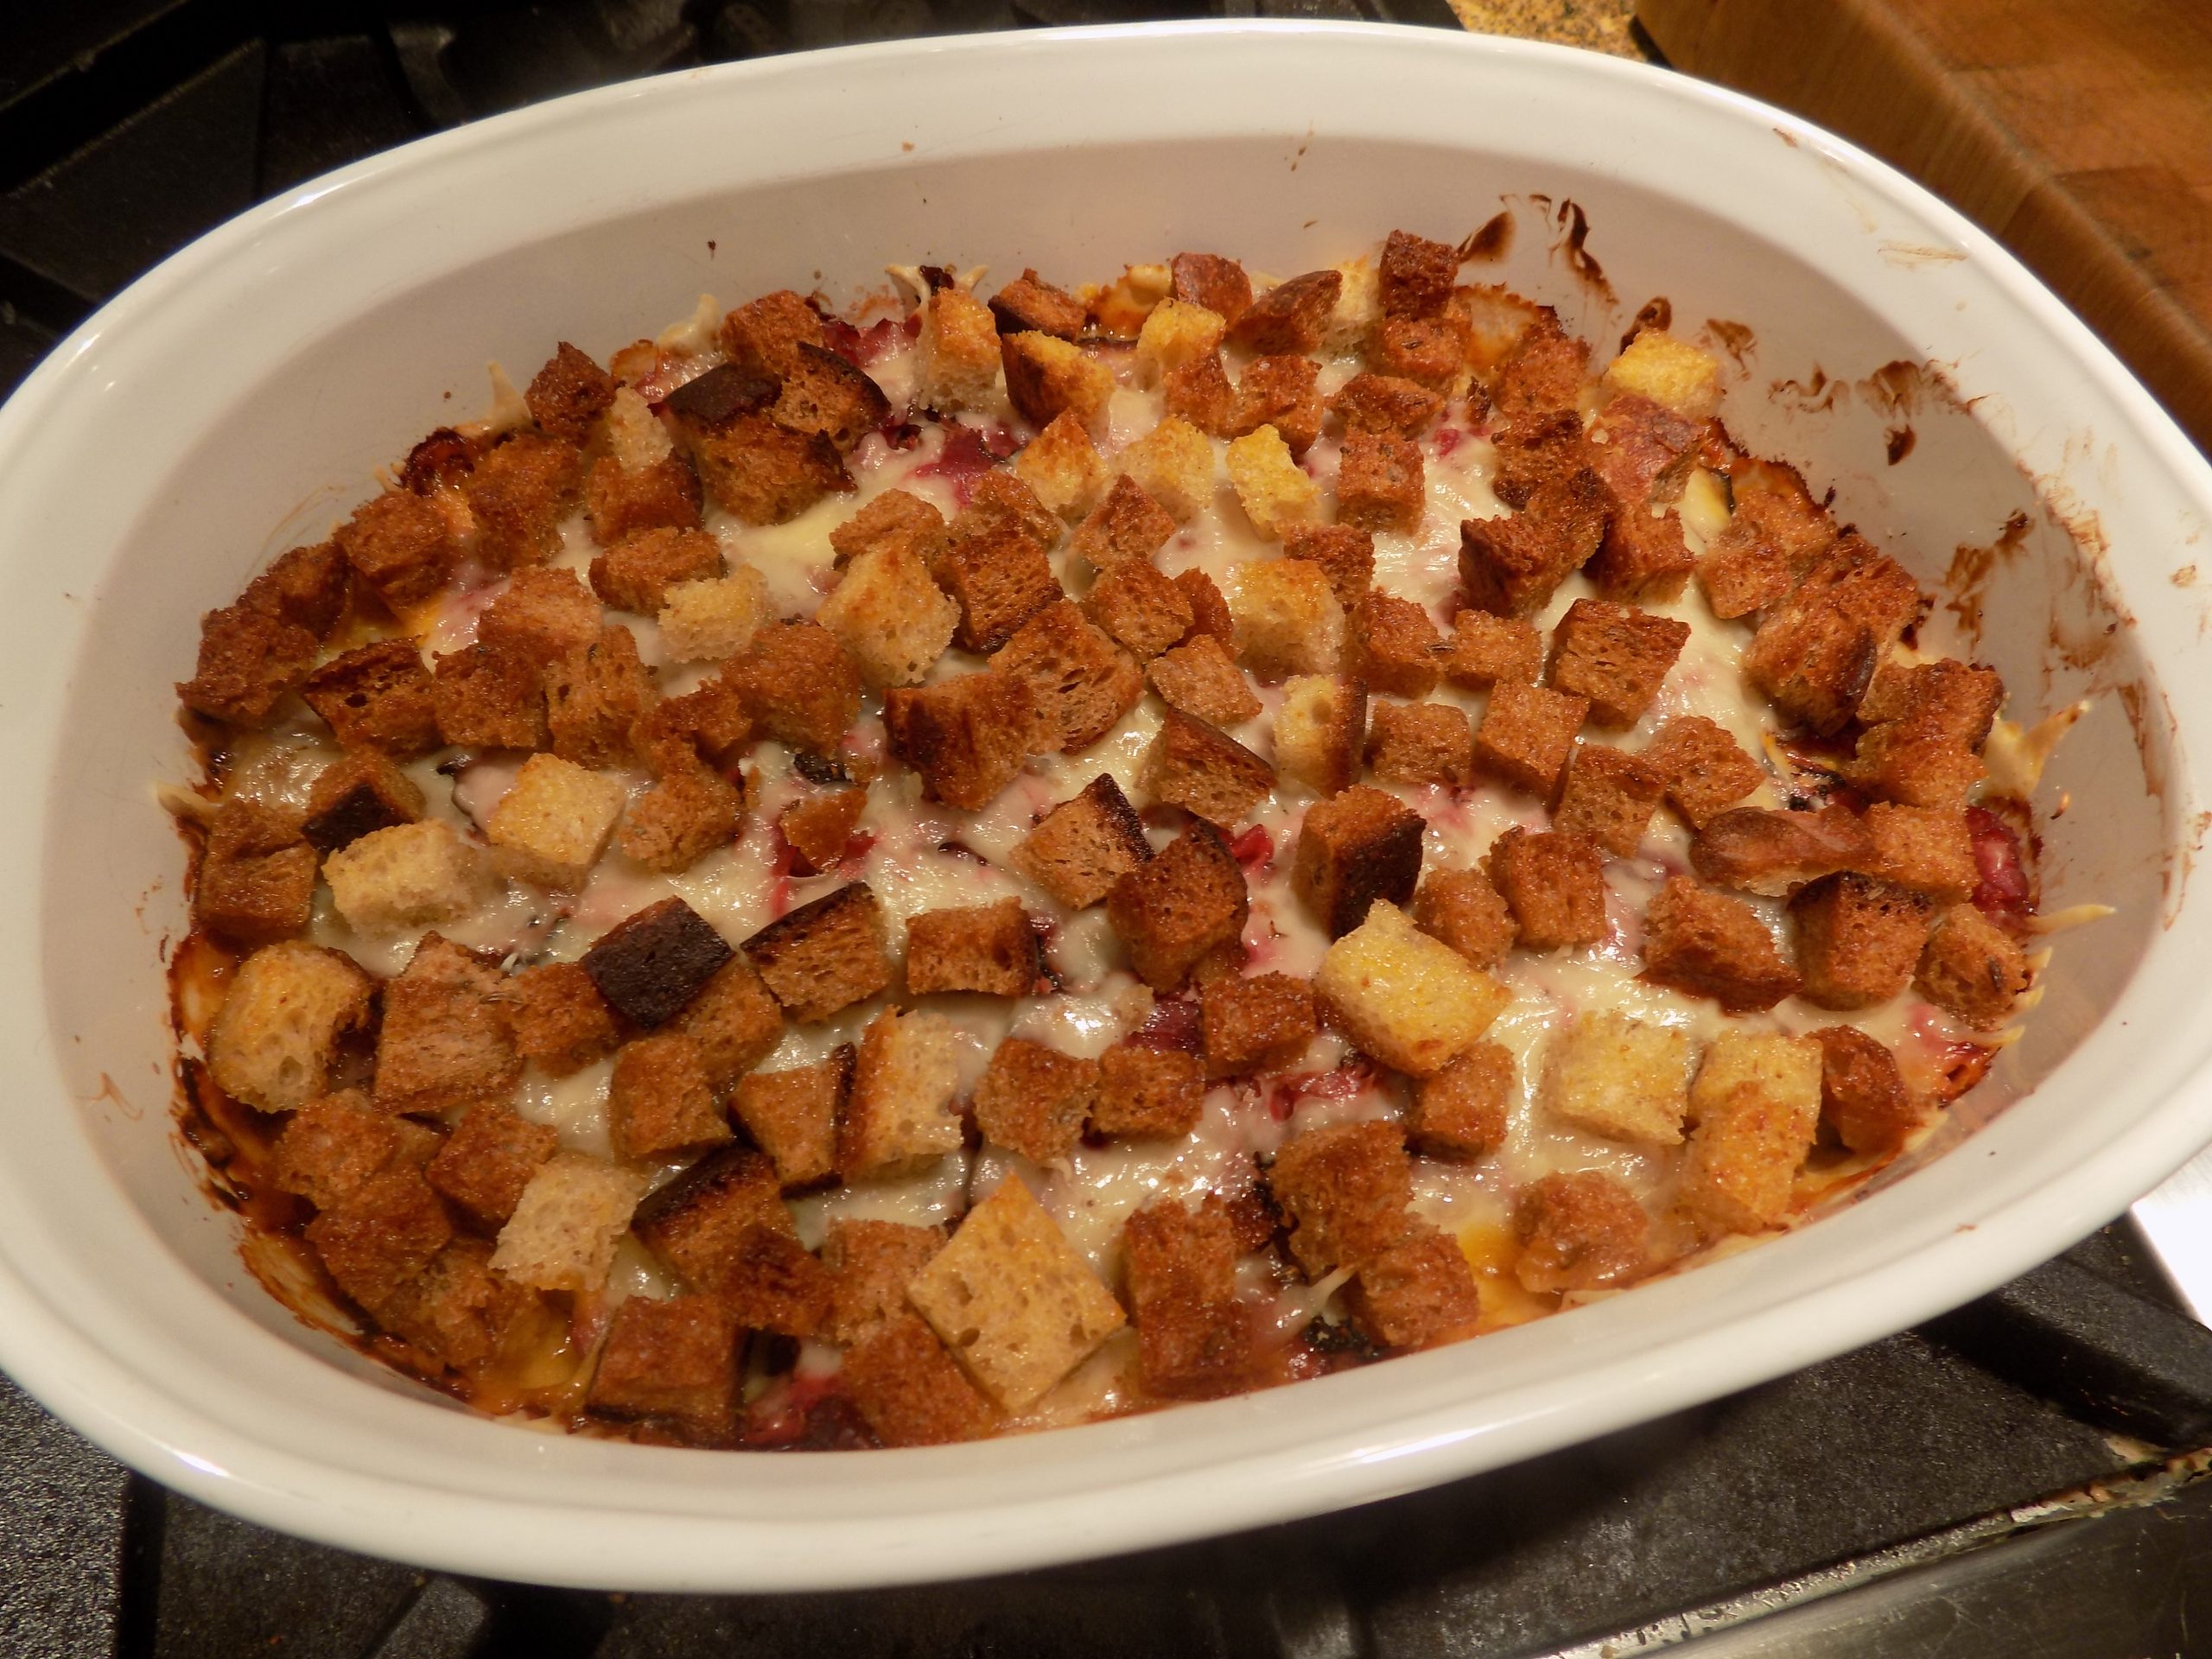
To see a picture of this dish, you need only look at the one for “Scalloped Potatoes”. These two dishes look exactly the same.

Well, have I got an exciting, time saving way to make scalloped potatoes (excuse me – au gratin potatoes) with lots of cheese and caramelized onion. And yes, I have a very similar recipe for Scalloped Potatoes on this site, but it doesn’t contain caramelized onion. And I have found that I really like that little bit of caramelized onion in my potato casseroles.

Which brings me to an interesting point that I feel you too should know.

A traditional scalloped potato casserole does not contain cheese. Instead, the potato slices are cooked in a cream sauce made of whole milk, heavy cream, and often fresh herbs. However, you will still find many recipes calling themselves “scalloped potatoes” that contain cheese. Are you now as confused as I am? And does it really make a darn bit of difference what these potatoes are called? Of course not. But I always like to educate my readers on the finer points of haute cuisine. But back to the time saving aspect of this dish that I promised to reveal in the first sentence of this post. (I do so ramble on and on sometimes……) (Sometimes?)

Anyway, I pre-cook my potatoes when I make potato casseroles. Thus, saving about 1½ hours of oven time. Plus, the fear that the bloody potatoes will never get tender. Or at least not in our lifetime.

So, if you too love potato casseroles, you might enjoy having this recipe in your recipe arsenal. And just in case you are interested, using cornstarch in place of flour makes these babies gluten free. But if you prefer, you can always use flour.

Well, that’s it for today. It’s very windy today with rain in the forecast. But that’s OK. We need more snow in the mountains. So, bring it on.

I hope you too are warm and snug in your own home. And feel as blessed as I do to be able to make that statement.

Peace and love to all.

2 lb. Yukon Gold or yellow potatoes (yellow potatoes are cheaper and just as good)

2 T. unsalted butter

¾ c. finely chopped onion

2 T. cornstarch

2 c. whole milk

freshly ground black pepper

4 c. shredded sharp cheddar cheese (or cheese or cheeses of choice) 

paprika

Peel potatoes and cut them in half. (And yes, I peel my potatoes for this recipe, because boiled potato skins tend to become tough.) Then slice each half potato into ⅓-inch slices. (If the potatoes are large, cut them in thirds and proceed from there.)

Place in a pan, cover with cold water, and bring to a boil. Reduce heat, add a bit of kosher salt, and cook until just about tender. (You don’t want mushy potatoes, so watch carefully). Drain.

Meanwhile, melt the butter in a medium sized saucepan. Add onion and cook until just starting to brown (caramelize). Then add cornstarch and let burble in pan for about a minute. Gradually whisk in the milk and pepper, bring to a boil, reduce heat, and let simmer for 2 minutes. Remove from heat and slowly stir in the cheese. Taste and adjust seasoning. (The sauce will be quite thick.)

Carefully add the cheese sauce to the potatoes. Scoop mixture into a lightly buttered baking pan and sprinkle lightly with paprika.

Bake in a pre-heated 350-degree oven for 30-40 minutes or until the top starts to brown and the sauce is bubbling around the edges of the casserole dish.

Remove from oven, cover, and let sit for a few minutes before serving.

Note: Don’t be afraid to mix and match the cheeses for this recipe. This dish is a perfect way to use up those bits and pieces of cheese that aren’t aging gracefully! Also, this recipe doubles and triples beautifully.

DARK RUM BAKED BEANS WITH BACON  

This is my second posting for these beans. The first post was published on New Year’s Eve. Then a few days later I deleted the recipe. Because I had baked the beans in a Corning Ware covered casserole dish, (for a pretty presentation), but the beans never got tender. After several hours in the oven. So, I took this recipe off my blog. Even though I had made these beans successfully for decades. Then I realized (after the fact) that the type of casserole dish I used does not hold the heat like a Dutch oven. Either the old-fashioned kind or like a Le Creuset enamel coated cast iron pot. Duh. Then my dear friend Vicki said she looked for my recipe because she liked the beans so much. So, I am re-posting this recipe. But please note: Either use a heavy cast iron pot (as shown in the picture) or cook the beans part of the time on your stove top so they can get really hot and tenderize completely.

Original post: OK, this is a recipe for old fashioned, starting from scratch, no fancy equipment required, baked beans. The kind you find in great BBQ joints – if you’re lucky. And the kind of delicious baked beans that take hours of time in your oven. I’m serious. Great baked beans need to spend several hours in a low and slow oven. But OMG is it worth the time. And patience. Because if there is anything better than baked beans, I have yet to discover what dish that could be! And all thanks go to my father – Albert Merz. Smart, educated, never said a mean word about anyone, Swiss-French musical genius. Not a perfect man, but the one who taught me to be happy and love life.

Now, my dad could build baked beans. But his baked beans did not contain dark rum. That was my addition. And a fine one if I may be so bold. And several of the other additives like Worcestershire sauce, thyme, and savory are all on me. But if he were still alive, I’m sure he would approve. But molasses and brown sugar – oh yah. He would add them in large quantities. Because really, baked beans are meant to be sweet. Or at least, in my opinion, great baked beans are sweet. Other types of bean dishes, not so much. But baked beans – go on over to the dark side and add brown sugar like it was going out of style! And bacon.

And yes, I do have a recipe for Vegetarian Baked Beans that is really very nice. But nothing beats this recipe when you want to go all out. I also have a recipe for Instant Pot and Oven old Fashioned Baked Beans that is lovely. (If you happen to have an instant pot, that is.) (I did but gave it back to daughter Paula because I never used it.) Call me old fashioned, but I like to soak beans and go from there. But the result is very much the same.

But regardless of what recipe you use, homemade baked beans are one of the reasons life is worth living. And because life is too short to eat mediocre food, go the extra mile and fix baked beans from scratch. And yes, I have doctored canned baked beans before to good result. Because once upon a time I too was a working mother and time was of the essence. But now, being a retired person with a bit more time on my hands, I wouldn’t think of paying good money for a small can of baked beans when I could build the whole mess from ingredients I almost always have on hand. So, consider this recipe next time you throw a BBQ party, or your family has requested a ribs, baked beans, and potato salad meal. But please, if you are in the area, let me know. I’ll bring dessert.

Well, that’s it for now. It’s New Years Eve and we are off to a potluck dinner at our neighbors Andy and Amy’s home. And guess what I’m bringing. Got it in one. Baked Beans.

So, to all – HAPPY NEW YEAR.

And as always, peace and love to all.

3 c. dry Navy beans (about 1½ lbs.) picked over and washed 

¾ lb. meaty bacon, cut into ½-inch pieces 

1 lg. yellow onion, chopped

3 garlic cloves, chopped

2 c. water, plus more if needed

2/3 c. molasses (not blackstrap – too strong)

1½ c. ketchup

½ dark rum, opt. (but why?)

2 T. Worcestershire sauce

2 tsp. paprika

½ tsp. seasoned salt

½ tsp. dried thyme leaves

½ tsp. dried savory

tiny pinch ground cloves

freshly ground black pepper

¼ c. Dijon mustard

1½ c. brown sugar, or more to taste

Day 1:

Place the washed dry beans in a bowl. Cover with 2 to 3-inches of cold water and set the bowl on your counter overnight. If it’s very warm in your kitchen, place the beans in your refrigerator. Drain and rinse the beans before using.

Day 2:

Fry the bacon till most of the fat has been rendered in a large covered Dutch Oven. (And no, you don’t drain off the bacon fat unless there is quite a bit. But with lean bacon you shouldn’t have too much.)  Add the onion and sauté just until translucent. Add the garlic and cook for one minute.

Stir in the drained, soaked beans, water, molasses, ketchup, rum, Worcestershire sauce, paprika, seasoned salt, thyme, savory, cloves, black pepper, Dijon mustard, and brown sugar. Taste the sauce and adjust seasoning and brown sugar as desired.

Cover and bake in a pre-heated 300-degree oven for about 7 hours. Remove the lid and continue baking for another hour so that the top can brown nicely. (During the covered baking time, check the beans periodically to make sure they aren’t drying out too much. You can even give them a stir. Add water as needed. Or salt if required.)

Remove from oven and serve warm.

Can be made ahead, refrigerated, and warmed just before serving.

SWEDISH MEATBALLS

Staying on the theme of Christmas and my favorite recipes, I again offer you my recipe for Swedish Meatballs. Which BTW, was one of my kids’ favorite dishes. (Probably still is!) They would gobble the meatballs up every time I made them. And for me, they were easy to build. Especially if I’d made the meatballs ahead and either refrigerated them overnight or hid them in the freezer.

So, even on a work night, I could throw this dish in the oven and dinner would be ready in about an hour. That left me time to start a load of laundry, make a salad or steam a green veggie, and slowly unwind from my workday. And I often needed that little bit of time to transition from managing people at work, to managing kids at home. (Not that different BTW!) It also left me time to talk with the kids about their day, even though we would be sitting down to dinner together and every subject imaginable would be fodder for our conversations. With 4 kids there were always stories to be told. Sometimes even more information was provided than I wanted or felt I needed to know. But the discussions were always lively. And I learned a lot about what the kids were experiencing just by these easy and relaxed exchanges. But I bet you are wondering why Swedish Meatballs would be considered a Christmas dish.

Every Christmas Eve my sister-in-law Evelyn and brother-in-law Dan and their kids feast on homemade lefsa and Swedish Meatballs. They spend the day making the lefsa and the meatballs and it is a tradition cherished by one and all. So, I too think of Swedish Meatballs as a part of what makes Christmas special.

So, if you too are still making Christmas traditions, I offer this recipe for your consideration. But don’t stop at Christmas time to serve this dish to family and friends. Meatballs are good any old time of year.

Well, enough posting for today. There are presents still to be ordered. And Christmas goodies to be baked.

But before I leave you today, just a hint about making cookies. Especially if you are crazy like me and insist that there be several different types of cookies for family and friends to enjoy. Make all the dough one day and bake it off the next. Most cookies profit from time spent in the fridge anyway. And make refrigerator cookies whenever possible. Much easier slicing the dough rather than shaping it. And making all the dough in one day only makes sense.

I place all the ingredients I will be using that day on a kitchen counter or sometimes on my kitchen table. Then any recipe calling for room temperature butter, vanilla, all-purpose flour, etc. etc., is right at hand. No putting ingredients away just to have to get them out again for the next recipe.  Plus, you only make a mess one time. And measuring cups and spoons if used for dry ingredients can be used repeatedly thus saving time for cleanup. And yes, it took me years to figure this out. But there is no looking back now. This system just plain makes cookie baking easier and faster.

OK Patti, enough pontificating. Let these fine folks get back to their real lives. And the real reason they are reading this post in the first place!

As always, may you find peace and love in your life. And Merry Christmas.

⅓ c. dehydrated chopped onion

½ tsp. granulated garlic

2 T. parsley (dried or fresh)

½ tsp. ground savory

¼ tsp. paprika

½ tsp. dried thyme leaves

¼ tsp. dried rosemary

pinch nutmeg

½ tsp. seasoned salt

freshly ground black pepper

2 eggs

2 T. milk

¾ c. uncooked oats

1 lb. ground beef

1 lb. pork sausage

1 can cream of mushroom soup

1 tsp. beef base

2 c. sour cream

Combine the onion, garlic, parsley, savory, paprika, thyme, rosemary, nutmeg, salt, pepper, eggs, and milk in a bowl. Add the oats, ground beef, and pork sausage. Form into balls with a small ice cream scoop. Place on a low sided baking pan and bake in a pre-heated 350-degree oven for 20 minutes or until cooked through.

Meanwhile whisk the cream of mushroom soup, beef base, and sour cream together. When meatballs are out of the oven, layer them with the sour cream mixture in a covered casserole.

Cover dish and bake at 350-degree for 30 minutes. Remove the cover and continue baking an additional 15 minutes.

Great served with thick al dente egg noodles.

SLOPPY JOE STUFFED GREEN PEPPERS

There is just something about stuffed green peppers that practically brings me to my knees. First of all, I am a veggie lover. Have been my entire life. My parents often told the story that as a toddler I preferred green onions to ice cream. I’m not sure I believe them, but I stole veggies out of the garden as a child, (especially peas and tomatoes) so, my parents may have been telling the truth. (They usually did!) Anyway, I have loved stuffed green peppers from my earliest recollection. What I didn’t have as a child, however, were sloppy Joes. And there’s a good reason for that.

Some attribute the original Sloppy Joe to a cafe in Sioux City, Iowa, where, in 1930 a cook named Joe added tomato sauce to his “loose meat” sandwiches. Voila: a new between-the-bread offering, and the sandwich’s official name.

Well, I didn’t grow up anywhere near Iowa, and Manwich, a portmanteau of man and sandwich, was the brand name for a canned sloppy joe sauce produced by ConAgra Foods and Hunt’s, introduced in 1969. And that was long after I had gone away to college.

Apparently, this canned product contained seasoned tomato sauce that was to be added to ground beef. It was marketed as a quick and easy one-pan meal for the whole family. Which, BTW, you can still buy at your local grocery store. But please don’t!

Sloppy Joes are just so much better made from scratch and don’t contain ingredients that no one can pronounce and require a PhD in food chemistry to analyze. So, if you are so inclined to make a real sloppy Joe some evening for dinner, you will find my recipe under the captivating title – Sloppy Joes. But back to these stuffed green peppers.

Since I already had several recipes for stuffed peppers on this site but am always up for changing things up a bit, I thought using meaty sloppy Joe sauce as the filling for stuffed peppers would make a nice change of pace. And boy howdy, were these babies tasty. And just the right amount of filling for 3 halved peppers. (And how often does that happen? In my case, never!) Anyway, we thoroughly enjoyed our dinner last night. Along with half a baked sweet potato each, we feasted in style.

And tonight, for dinner, I am going to serve the leftover peppers with Cheesy Grits (see recipe below) and Fried Zucchini (also find recipe below). So, another opportunity to eat like kings.

And isn’t that the way it should be. Good homemade food with just a minimum of processed ingredients. Of course, a true food snob  would look askance at store-bought ketchup and bottled Worcestershire sauce. But you know, there is being reasonable and then there’s being crazy. And to the best of my knowledge, I haven’t reached the “crazy” classification yet. (I don’t make homemade mayonnaise either.) (But I do make homemade hollandaise, but then that’s entirely different!)

Anyway, for every person there is what works for them in the kitchen. And a lot of it depends on time, monetary, and physical constraints. For me, I can still make most things from scratch. But that doesn’t mean that in 5 years (or less), I won’t be eating the words I wrote above about serving only homemade this and that. We can only do what we can do.

So, if taking shortcuts here and there gets delicious and nutritious food on your table, then go for it. We are after all, only human.

Peace and love to all.  

1 T. extra virgin olive oil

1 lb. lean ground beef

1 med. white or yellow onion, diced

2 lg. clove garlic, minced

1 tsp. dried marjoram

½ tsp. chili powder

1 tsp. kosher salt

freshly ground black pepper

¾ c. water

3 T. tomato paste

2 tsp. beef base (I use Better Than Bouillon Beef Base)

¼ c. ketchup

2 T. packed brown sugar

3 T. Worcestershire sauce

2 T. red wine vinegar

1 T. yellow mustard (don’t even think about using a fancy mustard)

3 green bell peppers, cut lengthwise (or red, yellow, or orange bell peppers)

1/3 c. beef broth (or water and beef base)

1 c. grated Mozzarella cheese

paprika

In a large, covered pan, heat the oil over medium-low heat; add ground beef and sauté until browned. Add onion and garlic and continue cooking until onion translucent. Add marjoram, chili powder, salt, pepper, water, tomato paste, beef base, ketchup, brown sugar, Worcestershire sauce, vinegar, and mustard.

Bring to a boil, reduce heat, and let simmer until filling is thick, about 20 minutes.

Place the cut pepper halves in a large baking dish. Divide the beef mixture evenly between the 6 halves. Pour the beef broth into baking dish (to help peppers steam) and cover with foil.

Bake in a pre-heated 400-degree oven until peppers are tender, about 60 minutes. Uncover, and top with the mozzarella cheese. Bake another few minutes until the cheese is melted.

Remove from oven and lightly sprinkle with paprika. Serve immediately.

CHEESY GRITS

1½ c. whole milk  

1 c. water

¾ tsp. kosher salt

freshly ground black pepper

½ tsp. granulated garlic  

½ c. + 2 T. stone ground corn grits – not instant or quick-cooking grits 

3 T. unsalted butter

1 c. grated sharp cheddar cheese (or half cheddar, half pepper Jack)

Mix the milk, water, salt, black pepper, and granulated garlic in a covered sauce pot. Set over medium-high heat and bring to a boil.

Once boiling, gradually whisk in the grits, until there are no clumps. Lower the heat to medium-low. Cover and simmer for 12-20 minutes, (depending on the package instructions), stirring occasionally.

Once the grits seem soft and thick, stir in the butter and grated cheese. Taste, then adjust seasonings as needed.

If the grits are thicker than desired, stir in ¼ – ¾ cup hot water. The grits will continue to thicken as they cool.

FRIED ZUCCHINI

1 egg, or more as needed

½ c. cornmeal, or more if required

butter

zucchini, cut into 1/3 inch thick slices

seasoned salt

freshly ground black pepper

Beat the egg in a shallow container. (I use an 8-inch round cake pan.) Pour cornmeal in another shallow container. (You got it, I use another cake pan.)

Melt as much butter as it takes to cover the bottom of a griddle or fry pan.

Dip the cut zucchini in the egg (both sides), then the corn meal (both sides), and place on the griddle.

Sprinkle on seasoned salt (don’t be shy) and a nice sprinkling of pepper. Using a paring knife, cut off small amounts of butter and tuck them in between each of the pieces of zucchini on the griddle. (This dish requires a bit more butter than is usually associated with a fried veggie dish. Thank you, grandma!)

Fry the zucchini until it is crispy brown on the bottom side. Carefully flip the pieces and fry the second side until crispy brown. Serve hot off the griddle. 


ITALIAN SAUSAGE, ZUCCHINI, AND ORZO STOVE TOP CASSEROLE  

As you might have guessed by now, I am getting lazier and lazier in all aspects of my life. Even cooking. Or to be exact, mostly in the day in day out, what should I cook for dinner, realm of cooking. Which for those of you who know me, or are yourself in your late 70s, is not a condition I am experiencing any different than most other cooks my age. As a group, we are all slowing down. And most of us have been preparing dinners now for 5 decades. That’s a blooming lot of dinners to not only cook but think up! So, both the appeal of cooking 7 dinners a week and the reality of the work involved has diminished at least my eagerness to continue performing miracles in the kitchen. So, for me, it’s mainly the energy involved that has dampened my zest for providing unique and tantalizing dishes every stinkin’ night! Which is hard for me to accept since I have always been kind of an energizer bunny! But Mother Nature has put the kibosh on what was once my norm. Because boy howdy, things have changed dramatically in this old gal’s body! And one of the major changes is how I feel about cooking dinner EVERY BLOODY NIGHT!

Luckily Mr. C. understands where I am coming from because as strange as it may seem, he is slowing down too. Funny how that works. And of course, with all his gigs that are often held in restaurants, I get a break from cooking dinners every night. So, that helps. Plus, there are the days when I simply announce that I am not cooking dinner. And bless his heart, he has never questioned my decision or tried to change my mind.  

Now don’t get me wrong. I still love to cook. And I especially like to prepare food for gatherings at our home. And I love to hear Mr. C. verbalize his pleasure over food items that I have set before him. So, of course I continue to enjoy that aspect of dinner preparation. I just don’t want to spend as much time in the kitchen as I did when I was younger. But I still insist that the food be as healthy and tasty as possible. Thus, the recipe you find below.

I found this recipe on the tippsinthekitchen.com site. I had some bulk Italian sausage in the freezer and a couple of zucchinis that were trying to self-destruct, so to the internet I proceeded. Not only was this pasta dish extremely quick and easy to prepare, but it was also delicious. I made a couple of slight changes, but then, that’s just what I do!

So, I hope you too enjoy this lovely main dish. I served it with a crisp green salad, and dinner was delightful.

And as a gentle reminder, let’s all remember to cut ourselves some slack. Our bodies all change as we get older. So, we need to be reminded that not only are we changing, but so are others around us. And as our bodies morph into their new reality, let’s all work even harder to keep our minds focused on kindness, patience, forgiveness, empathy, and the willingness to accept what we can’t change. Because aging is not for the faint of heart! But luckily, kindness, etc. is a gift you can give others that doesn’t adversely impact your aging body in any way, shape, or form. In fact, quite the opposite. Being a thoughtful human being brings on a high that not even the best-known uplifting drugs can duplicate or exceed. A natural high, as the saying goes!

Peace and love to all.

2 T. extra virgin olive oil

1 lb. bulk Italian sausage  

2 sm. zucchini squash, chopped in 1-inch pieces

4 cloves garlic, finely minced

pinch crushed red pepper flakes

¼ tsp. fennel seeds

1½ c. dried orzo (Make sure the orzo was made in Italy)

3 c. chicken broth  

½ tsp. kosher salt

freshly ground black pepper

1 c. grated Parmesan, plus more for passing

2 c. fresh baby spinach or arugula, optional

Heat the olive oil in a large, heavy, covered pan over medium high heat. Add the sausage and cook, breaking up the sausage as it browns. Add the zucchini and sauté for 2 minutes. Add the garlic and cook for one minute. Then add in the crushed red pepper flakes, fennel seeds, and orzo. Cook for 1 minute.

Pour in broth, bring to a boil, reduce heat, cover, and simmer for 10-12 minutes, stirring every few minutes until orzo is cooked. (If the consistency seems a bit watery, remove the lid for the last bit of cooking time.) Add the Parmesan and stir until well blended.   

Add the spinach or arugula and cook only till wilted. Taste and adjust seasoning. Offer additional grated Parmesan to the table.

CURRIED CHICKEN, BROWN BASMATI RICE, AND MUSHROOM CASSEROLE

Last evening, I served this very simple to prepare casserole for dinner. Our dear friend and neighbor Vicki joined us for the occasion. She was by herself because her husband Mark was down in Nashville recording some of his original songs in a professional studio accompanied by session musicians and backup singers. What fun is that! Anyway, I wanted to serve a dish that was easy to prepare and contained fairly healthy ingredients including brown basmati rice. Because I had special ordered brown basmati rice and was eager to use it again after my first recipe (Mediterranean Brown Basmati Rice Salad) had worked out so well.

Well, you know the old saying about best laid plans. Well, mine sure went asunder. Because for the life of me, I couldn’t find the brown basmati rice in my pantry. Apparently, I had tucked it in a place I was sure to find it. Wrong! I searched for 10 minutes before I threw my hands in the air, declared myself a freaking idiot, and used white balsamic rice in place of its brown relative. I was so mad at myself. But I couldn’t keep looking because Mr. C. had a rehearsal last evening, so I had to get the casserole in the oven by a certain time. And being late to rehearsal because his scatter-brained wife couldn’t find a certain ingredient was simply not a good enough excuse. Plus, what husband would want to admit to their wife’s disorganization (and that’s a kind word for it) in front of a bunch of fellow musicians! Even though, or maybe because, they are all friends and would nod their heads in an understanding and sympathetic way. I simply could not subject Mr. C. to that kind of genuine commiseration at my expense!

Anyway, I used white basmati rice, and all was well. The casserole was delicious, and it was on the table in time for the three of us to enjoy a leisurely dinner together.

And in case you were wondering, I did find the brown basmati rice. In fact, I walked straight to it after dinner. And yes, I had put it just where it belonged.

I have decided that this type of thing is just going to be part of my life from now on. I can’t ski any longer. I can’t hike any more. I can still walk up a hill, but I can’t come back down. (My knees are shot!) And Mr. C. more often than not, has to supply the last word in my sentences. I can’t hear or see like I used too. But I still know when the sun’s over the yardarm, even when there is no clock in sight.

And I can still laugh at myself. Which believe it or not, is the best medicine for wending your way through the intricacies of aging. Better laughter than tears is my new life motto.

So, as always, laugh rather than cry, be positive rather than negative, and always cut yourself some slack. Most of us are harder on ourselves than we are on others. Most of us would rather give than receive. But I have recently given myself permission to accept what I can’t change, change what I can, and say “to hell” with all the rest!

Peace and love to all.

1 T. extra virgin olive oil

1 T. unsalted butter

1 lb. boneless skinless chicken thighs, cut into small bite-sized pieces  

¼ tsp. fine sea salt

freshly ground black pepper

½ med. onion, chopped

6-8 oz. button mushrooms, sliced

1 lg. clove garlic, minced

3 T. dry sherry 

1 c. water

2 rounded tsp. chicken base (I use Better Than Bouillon Chicken Base) 

⅓ c. sour cream

2 T. milk or half & half

2 tsp. curry powder, or more to taste

¼ tsp. turmeric

¼ tsp. garam masala  

½ c. uncooked brown basmati rice, rinsed

Heat the olive oil and butter in a large sauté pan over medium heat.  Season the chicken pieces with the fine sea salt and pepper. Brown the chicken pieces and remove to a small bowl. (The chicken doesn’t have to be cooked through, only browned.)

In the same sauté pan add the onion and mushrooms; cook until the onion is translucent, and the mushroom slices are brown. Add the garlic; cook 30 seconds more. Remove to the same bowl with the chicken.  

Add the dry sherry to the pan to deglaze it, scraping up the browned bits from the bottom. Allow the sherry to reduce completely then add the water and chicken base and remove from heat. Stir in the sour cream, milk, curry powder, turmeric, and garam masala. Add the chicken and veggies back to the pan along with the rice. Pour the whole mess into a lightly buttered covered baking dish.  

Bake, covered, in a pre-heated 375-degree oven for 45 minutes or until the rice is tender.

Remove from oven and let sit for about 5 minutes before serving. Great served with a bit of chutney on the side and a simple green salad.


CHICKEN ENCHILADA CASSEROLE  

Oh, the siren call of a truly delicious casserole. And yes, I know that part of the definition of “siren call” includes “potentially harmful and dangerous”. And the kind of casseroles I am always drawn to, can be just that for me. Because I am always tempted to eat more casserole (like this one) than is healthy or required by my body to stave off starvation. And let’s face it. My aged body doesn’t need very much nourishment to keep it alive and healthy. But my mouth, has obviously decided to ignore the memo from my brain. Because my mouth keeps wanting more, more, more! So, my common sense is often driven to intercede in my brain’s defense. Which is quite a difficult thing for it to do, as some of you might attest. But, whenever possible, I allow my common sense to prevail. And it absolutely must take over when I am sitting at dinner with a big old pan of this kind of casserole beckoning me to have seconds a mere 6 feet from where I am dining. It isn’t fair, but then, what in life is?!

So, I guess what I am trying to relate, is that this is a very tasty casserole. And quite easy to prepare. And the kind of casserole that everyone in your family will enjoy. And I know that some people have an aversion to casseroles. What’s with that? It’s got to be a holdover from when they were children and forced to eat a dry tuna casserole. (Like the one my mother used to make.) To these people I say – GET OVER IT! Times change, recipes change, and when made correctly, casseroles can be fantastic. And this is a good one to prove that point!

So, even if you have a family member who is casserole resistant, make one anyway. This person will soon learn that a good casserole is a joy and a delight! I’ve got broad shoulders. Tell them, Patti made you do it.

Peace and love to all.

3 T. unsalted butter, divided

2 boneless, skinless chicken breasts, cut into small bite sized pieces

½ c. finely diced onion

2 T. unbleached all-purpose flour

2½ c. water

4-5 tsp. chicken base (I use Better Than Bouillon Chicken base)

12 regular size corn tortillas  

½ c. sour cream (Mexican sour cream is best)

¼ tsp. seasoned salt

freshly ground black pepper

1½ tsp. chili powder

1/8 tsp. cayenne

1 tsp. granulated garlic

⅓ c. diced roasted red peppers

4 oz. can diced green chilies (I use Hatch chilies)

2 c. grated sharp cheddar cheese

1 c. grated Monterey Jack or mozzarella cheese

Melt 2 tablespoons of the butter in a good-sized frying pan. Cook the chicken until still a bit of pink remains. Add the onion and cook for about 3 minutes. Using a slotted spoon, remove the chicken and onion to a small bowl.

Add the remaining 1 tablespoon butter to the pan. Add the flour and whisk together for about 3 minutes. Add the water and chicken base. (And of course, you can skip the water and chicken base and use chicken broth.) Bring to a boil, reduce heat, and let burble for a couple of minutes as the mixture thickens. Before adding the other ingredients, remove a half cup of the mixture and spread on the bottom of a lightly greased 9×13-inch casserole or Pyrex baking dish.

Then stir in the sour cream, seasoned salt, pepper, chili powder, cayenne, granulated garlic, roasted red peppers, green chilies, and chicken and onion mixture plus any residual juice.    

Next add 6 tortillas evenly distributed to the baking dish. Then spread the tortillas with half of the chicken mixture, and half of both kinds of grated cheese.

Repeat with the remaining 6 tortillas, remaining chicken mixture, and top with the remaining grated cheese.

Bake uncovered in a pre-heated 350-degree oven for 35-40 minutes or until bubbly.   

ITALIAN SAUSAGE PASTA WITH ROASTED RED PEPPERS AND MOZZARELLA CHEESE

Well, once again laziness and frugality paid off here at Chez Carr.

I had a couple of left-over Italian dinner sausages, half a jar of Cento brand roasted red and yellow peppers, and a couple of cups of shredded mozzarella cheese in the fridge that either needed to be used or added to the yard waste barrel. (And no, they were neither engulfed in blue fur or too far gone to use safely. Just great ingredients that really should be used before they went bad.) So, what immediately sprang to mind was a pasta dish. (Unfortunately, pasta is never far from what’s on my mind, but that’s a discussion for another day.)

So, I decided a quick and easy “lasagna like” casserole for a lazy Saturday evening meal would be perfect.

Starting with my old standby marinara recipe, I deleted a couple of ingredients, added a couple of others, and came up with what you see written below. And OMG, for the brief time I spent on this dish, it tasted like I had spent hours slaving over its preparation. Plus, I got to use part of a package of strozzapreti pasta in the process. Which BTW, we discovered we really liked. (I had been a bit reluctant to try it because A) it is hard to find in our part of the world, B) I thought it might be difficult to eat, and C) because I’d purchased it two or three years ago and it might no longer be good.) Well, not only was it still good; it was absolutely delicious. And my hesitation about the shape making it hard to eat; completely unfounded. Of course, I did break the roughly 3-inch pieces in thirds, which significantly reduced any chance of choking. (Read about the history of strozzapreti below.)

So, if you too love a pasta casserole, give this recipe a try. And don’t be afraid of using fennel seed. After all, it’s what makes Italian sausage so delightfully delicious. Stay safe everyone. And peace and love to all.

3 T. extra virgin olive oil, divided

½-1 lb. Italian dinner sausage, cut into thin slices (or bulk Italian sausage)

½ med. onion, chopped

4 garlic cloves, finely minced

1 (28-oz.) can chopped or diced tomatoes (Italian tomatoes preferably)

1 c. chopped roasted red/yellow peppers (Cento brand is amazing)

1 bay leaf

pinch crushed red pepper flakes

1½ tsp. dried oregano (I use Mexican oregano)

1½ tsp. ground fennel seed

½ tsp. kosher salt

freshly ground black pepper

6 oz. strozzapreti*, gemelli, or fusilli pasta – cooked al dente

2 generous c. shredded mozzarella cheese, divided

In a large fry pan, heat 1 tablespoon of the olive oil. Add the sliced Italian sausage and cook until the sausage is nicely browned on both sides. Remove from heat and set aside.

In a medium sized heavy covered pan, heat the remaining 2 tablespoons of olive oil. Add the onion and cook just until softened. Add the garlic and cook for one minute.

Add the chopped or diced tomatoes, roasted red peppers, bay leaf, crushed red pepper flakes, oregano, ground fennel seed, salt, and black pepper. Bring to a boil, reduce heat, cover, and simmer for about 30 minutes.

Meanwhile lightly butter a 9×9-inch baking dish. Set aside.

After the sauce has burbled for 30 minutes, stir in the browned sausage and al dente pasta. Scoop half of the mixture into the prepared baking dish. Then sprinkle with half of the shredded mozzarella, them layer on the remaining sauce. Sprinkle on the remaining shredded mozzarella cheese.

Bake uncovered in a pre-heated 350-degree oven for 30 minutes. Remove from oven and let sit for 5-7 minutes before serving.

*To quote Chef Stef “Strozzapreti is the taller cousin of cavatelli and the gangsta of the pasta family. Strozzapreti‘s name literally means “Priest Stranglers”. Yes, in the Middle Ages this pasta was designed to choke priests to death right in front of you as you were having dinner. The Heimlich maneuver hadn’t been invented yet.  But a hatred of paying taxes to the church had been. Furthermore, medieval Italy had a love of curses. Apparently a sfoglina (female pasta maker) would mutter a curse damning the priest with each cut of pasta. Think of strozzapreti as the semolina version of John Wick**!”

**Apparently, John Wick is a fictional character and the titular protagonist of the neo-noir action thriller film series “John Wick,” portrayed by Keanu Reeves. John is a legendary hitman who had retired until a gang invades his house, steals his car, and kills the puppy that his late wife Helen had given him.


EGGPLANT PARMESAN LIGHT

I absolutely love Eggplant Parmesan. But I don’t like all the calories and mess associated with most homemade versions. Even my favorite recipe from Marcella Hazan, my favorite Italian chef BTW, requires frying the eggplant. And there was a time when the mess was just part of the deal and I accepted that the top of our range would be spattered with grease. But those days are over. I no longer have the strength to clean up that much mess, nor do I need the associated calories. So, when I decided to make Eggplant Parmesan for brother-in-law Rick and sister-in-law Katie last evening, I went looking for a new and improved method of pre-cooking the eggplant.

I found several recipes that baked the eggplant before layering it together with sauce and various cheeses. So, I took inspiration from others and glommed this recipe together, including the use of my old reliable and simple to prepare Marinara Sauce.  

So, if you too love Eggplant Parmesan, I hope you give this recipe a try. It is absolutely delicious without being in the least bit greasy tasting. In fact, the end product fulfilled all my requirements and then some. (In other words, it turned out even better than I expected.)

But in all fairness, Eggplant Parmesan is never going to be a quick and easy fix. It takes a certain amount of time to do all the hacking, slashing, and grating. But I can promise you that all the work involved is worth the effort. And of course, you can use a jar of marinara sauce in place of homemade. But if you have the time, I truly feel that you can’t beat the recipe below for ease of preparation or flavor.

As always, have fun preparing good food. The food you yourself consume and provide for your family and friends should never be just a means of survival. It should always be a pleasure to consume, a treat to smell, and attractive to the eye. And as good cooks, we can make that happen.  

Peace and love to all.

3 lbs. eggplant (about 3 medium sized), ends removed, partially peeled, and sliced into between ¼ and ½-inch thick rounds

kosher salt

extra virgin olive oil

12-16 oz. low fat cottage cheese, whirled in a food processor or blender until smooth

about 3 c. Marinara Sauce (see recipe below)

2/3 c. grated Parmigiano-Reggiano, divided

2 lg. eggs

½ c. loosely packed chopped fresh basil 

2½ c. grated low-fat mozzarella (8-oz.), divided 

Sprinkle kosher salt over the slices of eggplant, being sure to salt both sides. Set the salted eggplant in a colander and let it rest for about 30 minutes. By then the eggplant should begin to sweat. Rinse the eggplant under cold water to remove the excess salt. Then press the eggplant between clean kitchen towels or paper towels to extract as much liquid as possible.    

Lightly grease 2 low-sided sheet pans (or one large sheet pan) with olive oil. Lay the first layer of eggplant on the greased pan. Then lightly brush the eggplant slices with olive oil. Lay the next layer down, and lightly brush the top of this layer too. Bake for about 20 minutes in a pre-heated 450-degree oven or until the top layer of eggplant is a light golden brown.

Meanwhile, combine the cottage cheese, ⅓ cup of the grated Parmesan, eggs, basil, and ½ cup of the grated mozzarella cheese.

Butter the bottom and sides of a 10×16-inch baking or casserole dish. Spread ½ cup of the marinara sauce on the bottom of the pan. Add ⅓ of the eggplant to cover the bottom of the dish. Top with ⅓ of the cottage cheese mixture, ⅓ of the mozzarella cheese, and ⅓ of the marinara sauce. Add another layer of eggplant and repeat with the cottage cheese mixture, mozzarella cheese, and sauce two more times, reserving the third layer of mozzarella for topping. Sprinkle with the remaining ⅓ cup of grated Parmesan cheese.

Cover with aluminum foil and bake in a pre-heated 400-degree oven until the cheese is melted and bubbling, about 40 minutes. Remove foil and bake an additional 15 minutes. Remove from oven and let sit about 10 minutes before serving.

Marinara Sauce

2 T. extra-virgin olive oil

½ c. chopped onion

2 cloves garlic, chopped

1 (28-oz.) can chopped, diced, or Roma tomatoes (Italian tomatoes preferably)

1 bay leaf

pinch crushed red pepper flakes

1 tsp. dried oregano (I use Mexican oregano)

½ tsp. kosher salt

freshly ground black pepper

3 T. chopped fresh basil leaves

1-2 T. unsalted butter, opt.

In a large, covered saucepan, heat the oil over medium heat. Add the onion and sauté until soft and translucent, about 6 minutes. Stir in the garlic and cook for an additional minute. Add the tomatoes, bay leaf, red pepper flakes, oregano, salt, and pepper. Stir to combine ingredients. Bring to a boil, reduce heat, cover, and simmer for about 30 minutes.

Remove from heat, discard bay leaf, add the basil, and adjust seasoning. If the sauce tastes acidic, add butter 1 tablespoon at a time to round out the flavor.


REUBEN SANDWICH CASSEROLE

This lovely recipe comes curtesy of the vintagedishandtell.com site. Although I changed amounts here and there, some of the layering instructions, and added black pepper, Sarah’s recipe came closer to what I envisioned than any of the other on-line recipes I perused. So, Sarah is the real hero of this blog post.

The ingredients for this simple to prepare and delicious casserole can be purchased at almost any reputable grocery store. The prep time is so quick, that it is a perfect weeknight dish to serve your family. Especially for those of you poor folks who are still working. Or folks like me, who used to work for a living, but now are too tired to produce the likes of Beef Wellington followed by Baked Alaska every evening for dinner. Yah think!?!?

Now having said that I’m unable (also unwilling) to fix fancy dinners every evening, I need to step back a bit. Because in all honesty, three of the ingredients listed in this recipe I made from scratch – Homemade Sauerkraut, Thousand Island Dressing, and Sourdough Light Rye Bread with Caraway Seeds. (And yes, I actually prepared all three of these items with this casserole in mind. How’s that for good planning and follow up at the ripe old age of 76?) But just because I am crazy enough to find making everything from scratch a joy and a delight, doesn’t mean you have to follow suit. I’m sure Mr. C. would agree that one crazy cook per county is enough! And I claim Island County. So back to my original statement. You can buy the ingredients for this dish and it will still be absolutely delicious. (And a great deal less work.) And yes, all three of the recipes highlighted above are on this site.

This casserole basically tastes like a really wonderful Jewish deli Reuben sandwich. Just a lot less messy to eat. (And yes, I still miss Brenner Brothers Bakery in Bellevue. They made the best sandwiches I ever tasted.)

So as always, have fun creating wonderful food for your family. And don’t stop thinking about new and delicious ways to put everyday ingredients to use. We are lucky in that regard. Through the wonders of modern technology, there isn’t a recipe ever envisioned that someone hasn’t already thought of and posted on the internet. For which, I will forever be grateful. Takes so much less effort to prepare someone else’s beloved recipe. Or start with a recipe and afford your brain the luxury of only constructing changes rather than full on invention. I don’t know about your brain, but mine I’m sure appreciates every effort I make on its behalf.

Peace and love to all.

2 c. well drained sauerkraut

2 T. very finely chopped onion

1 T. dried parsley

½ tsp. caraway seed

freshly ground black pepper

2 c. grated Swiss cheese

2/3 c. Thousand Island dressing

½-¾ lb. thinly sliced pastrami or corned beef

2 c. cubed (¼-inch cubes) light or dark rye bread (crusts welcome)

2 T. butter, melted

Combine the sauerkraut, onion, parsley, caraway seed, and pepper in an ungreased 8 x 8-inch baking dish or equivalent sized casserole dish. (I used my French White Corningware casserole dish for this recipe.)

Top with 1/3rd of the cheese and half of the Thousand Island dressing. Layer on half of the pastrami. Spread another 1/3rd cup of the grated cheese over the top and then the remaining dressing. Add the remaining meat and sprinkle on the remaining cheese.

Toss bread cubes with melted butter and sprinkle on top of casserole. Lightly press down on the bread cubes to compact the casserole a bit.

Bake uncovered in a pre-heated 350-degree oven for about 40 minutes or until the cheese is melted.

Remove from oven and allow to sit for about 5 minutes before serving.

Great served with the usual suspects – dill pickles, thick potato chips, a crispy green salad, and of course a cold dark beer!