Category Archives: FRENCH CUISINE

CASSOULET

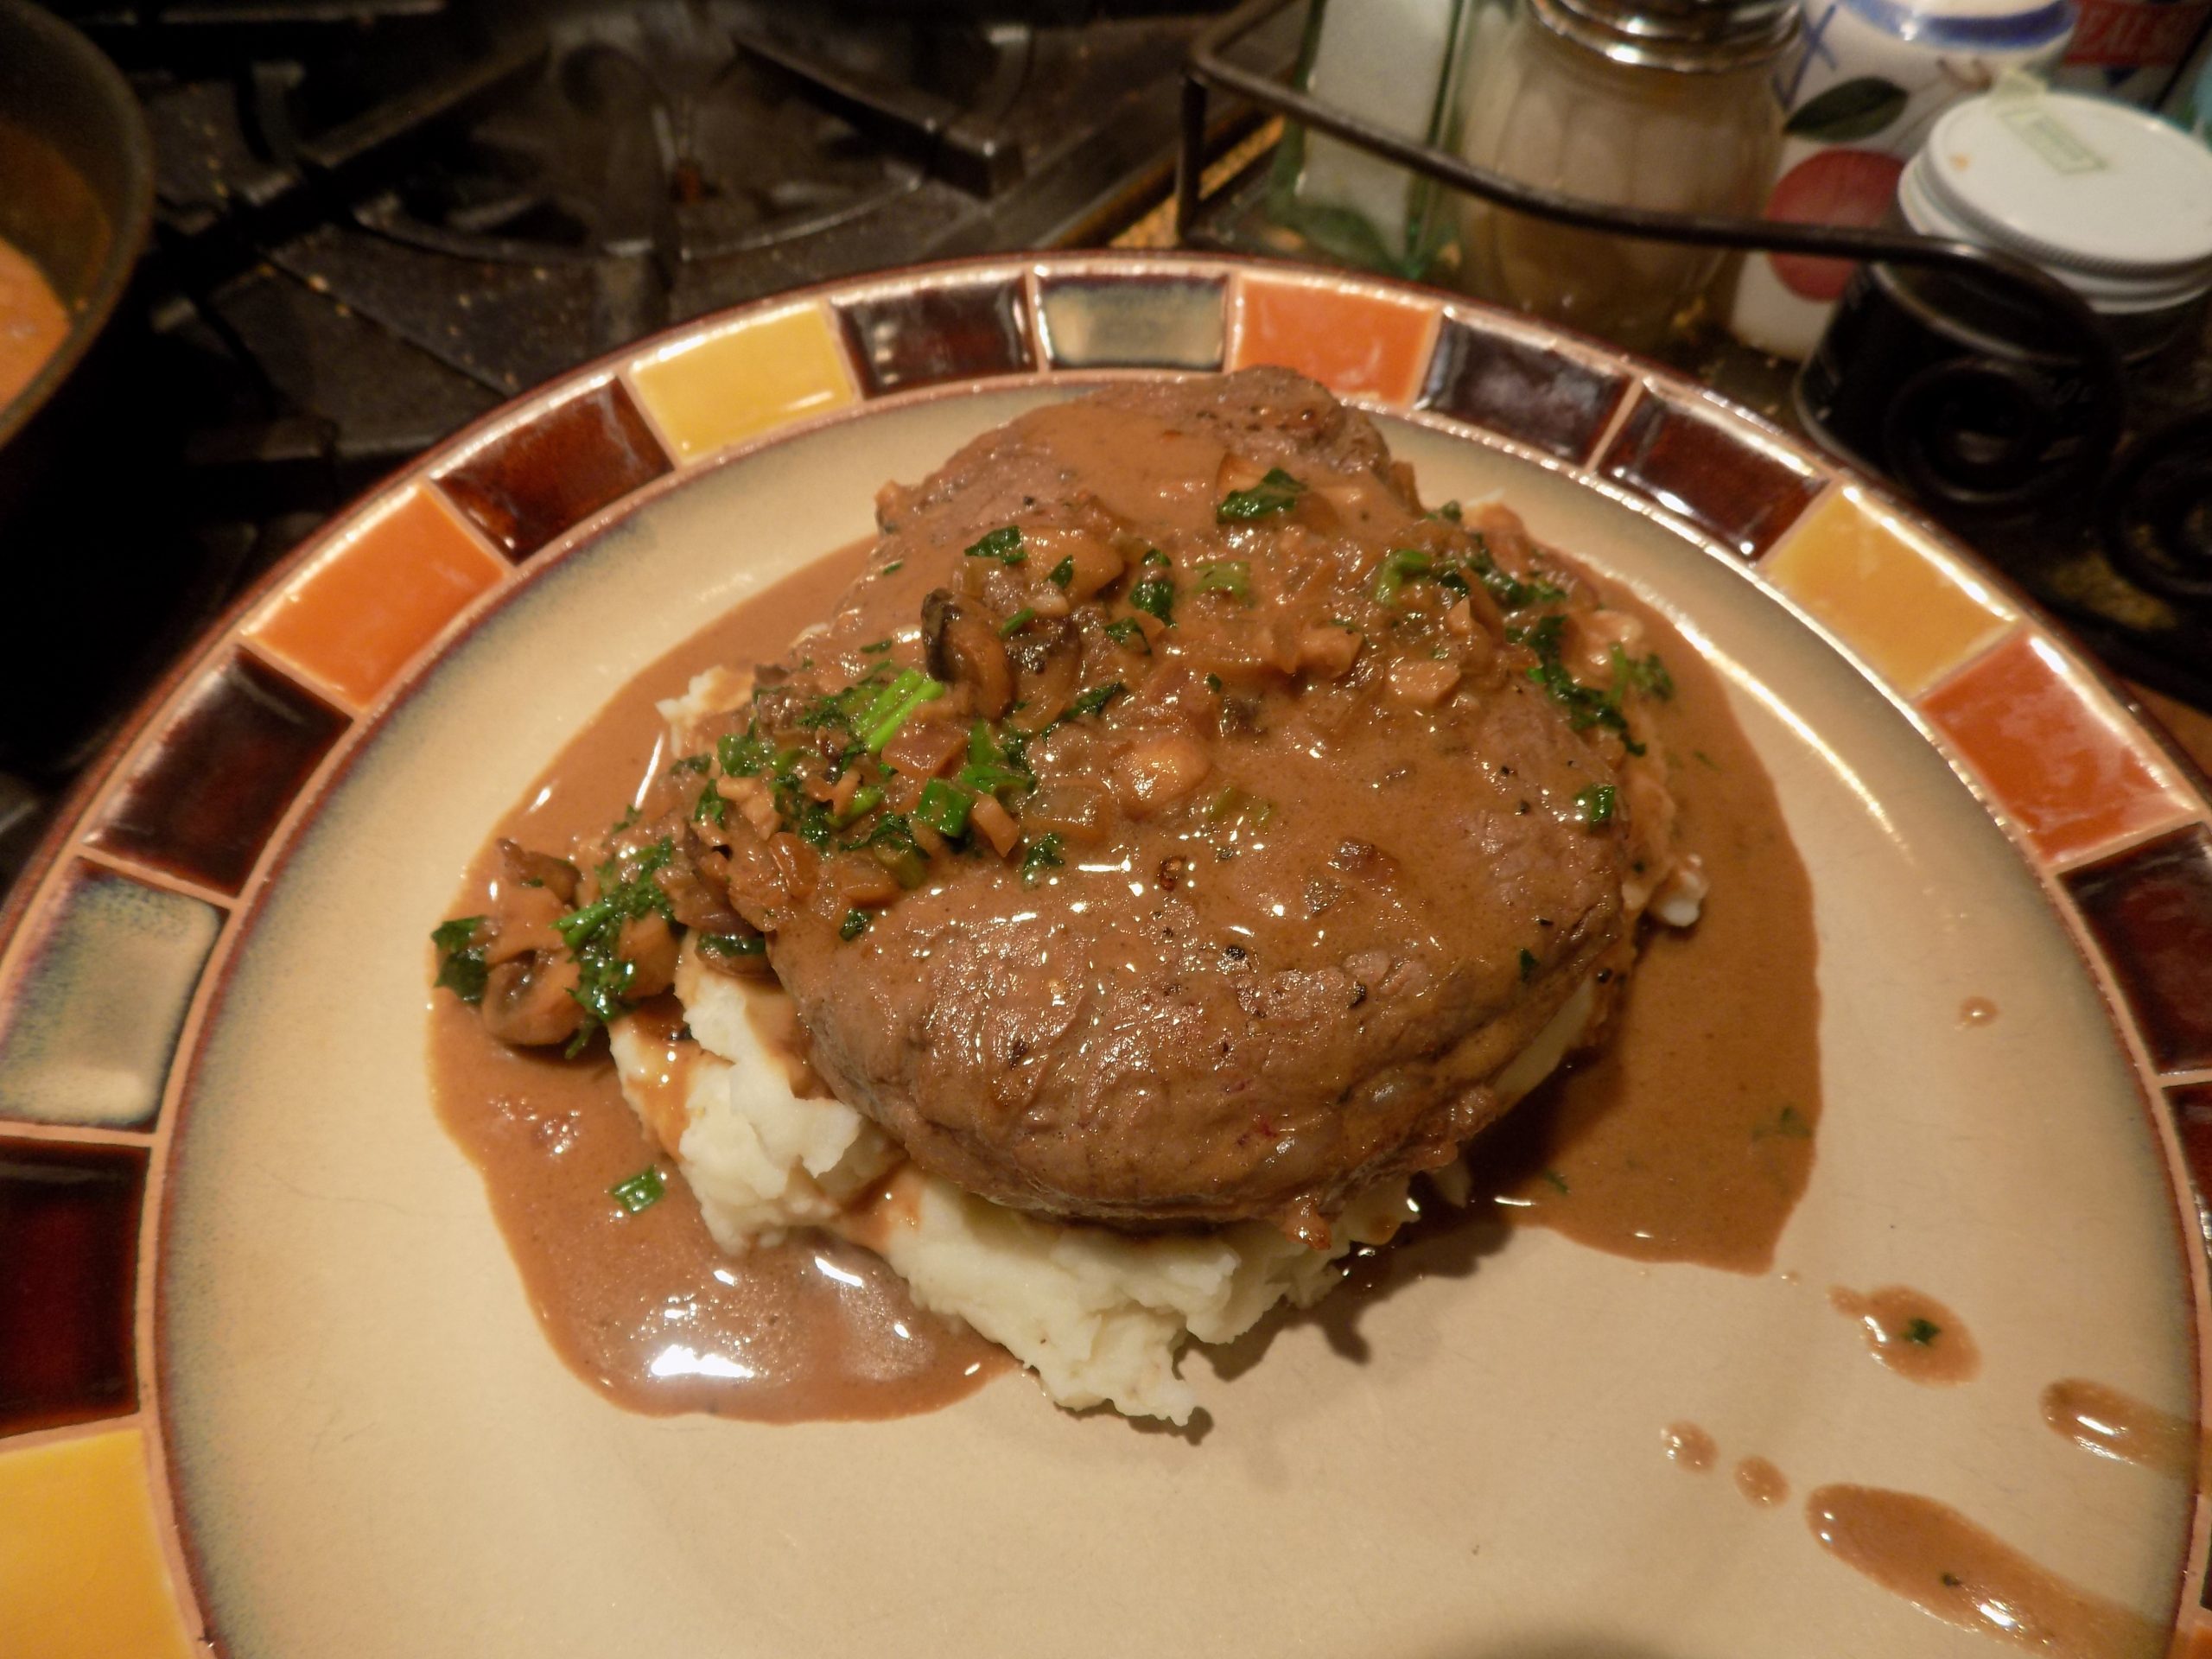
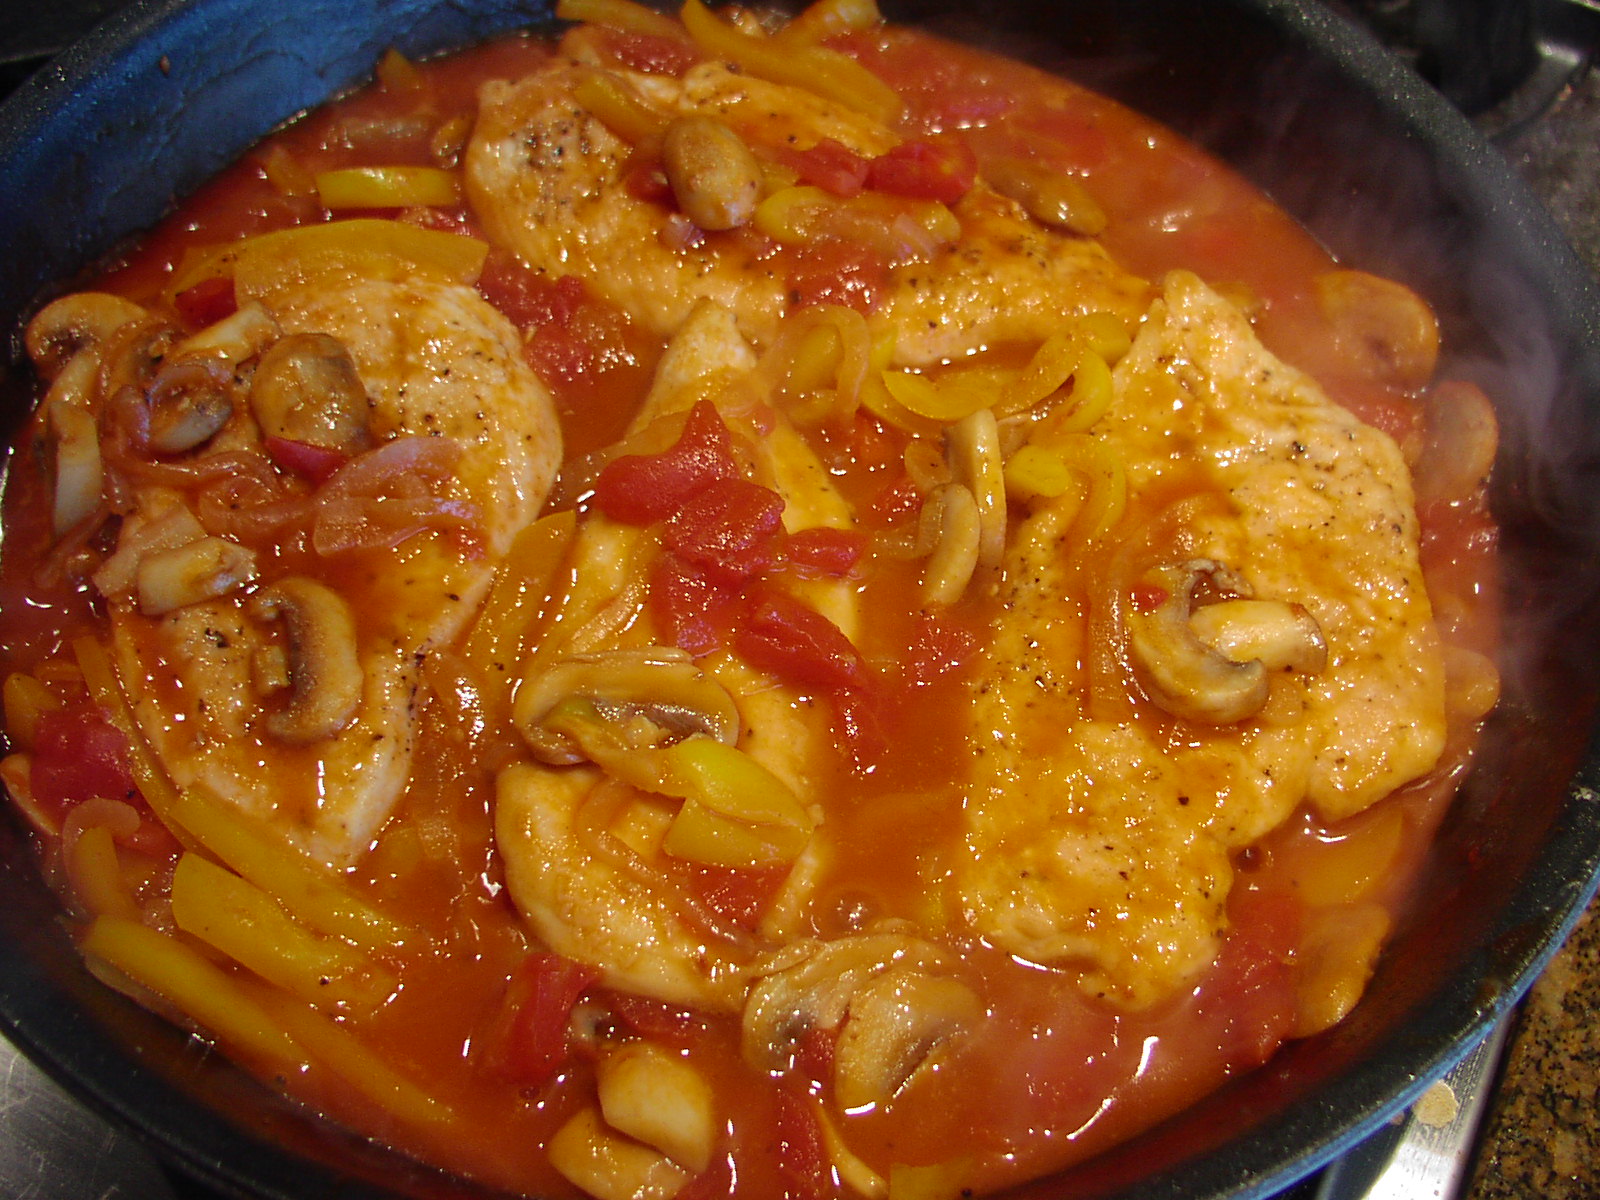
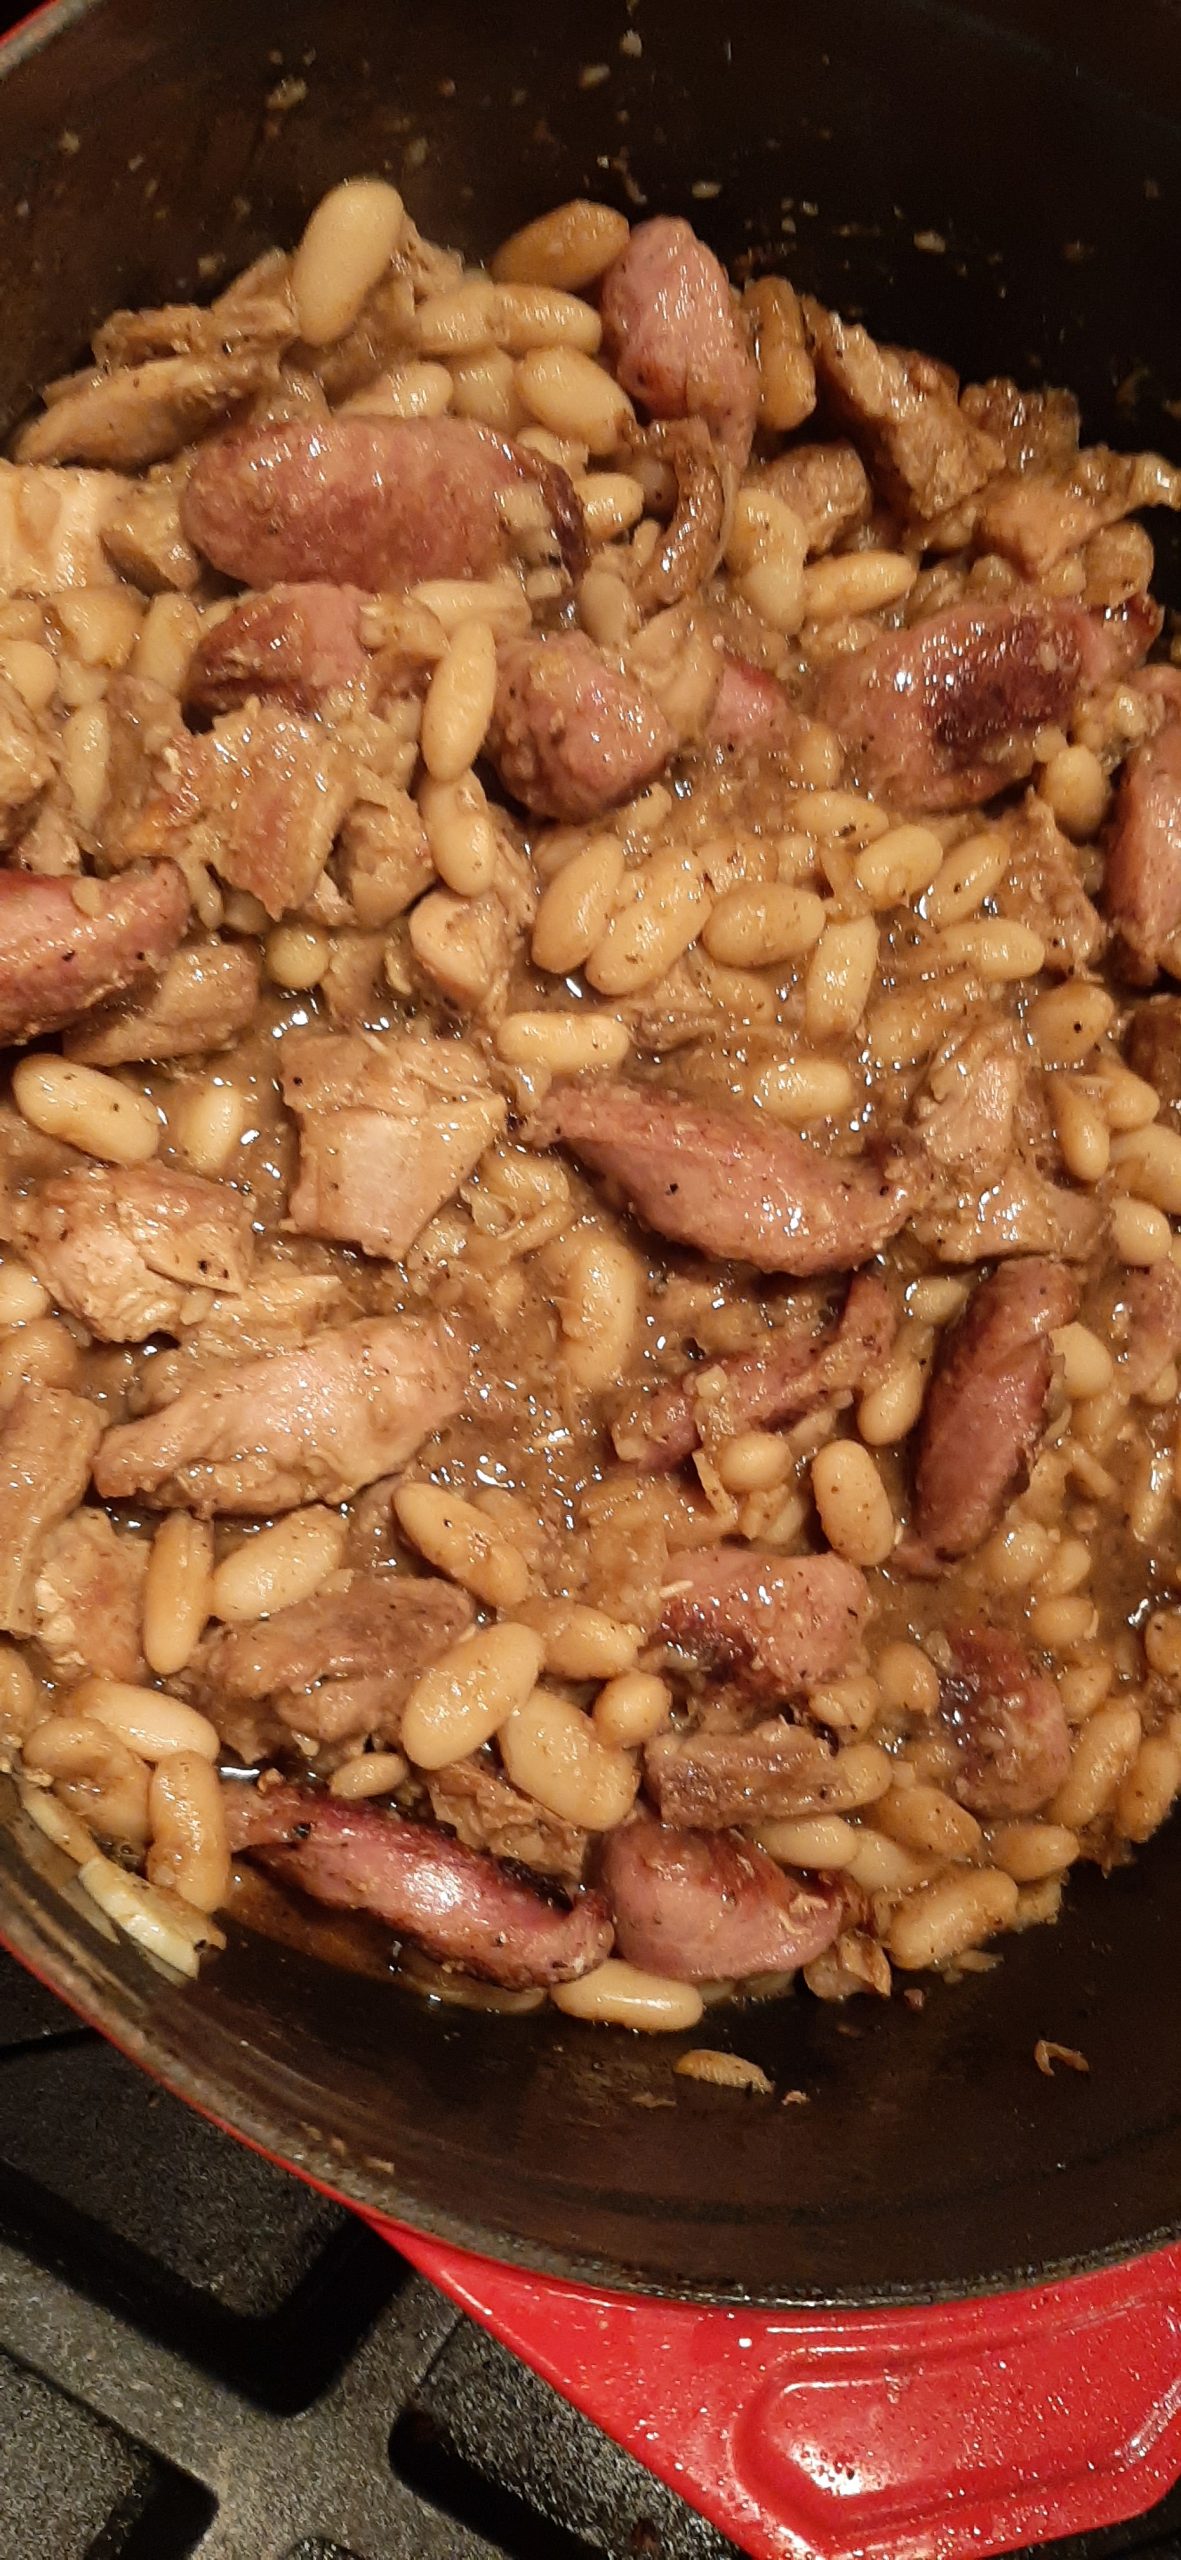
Cassoulet before topped with duck

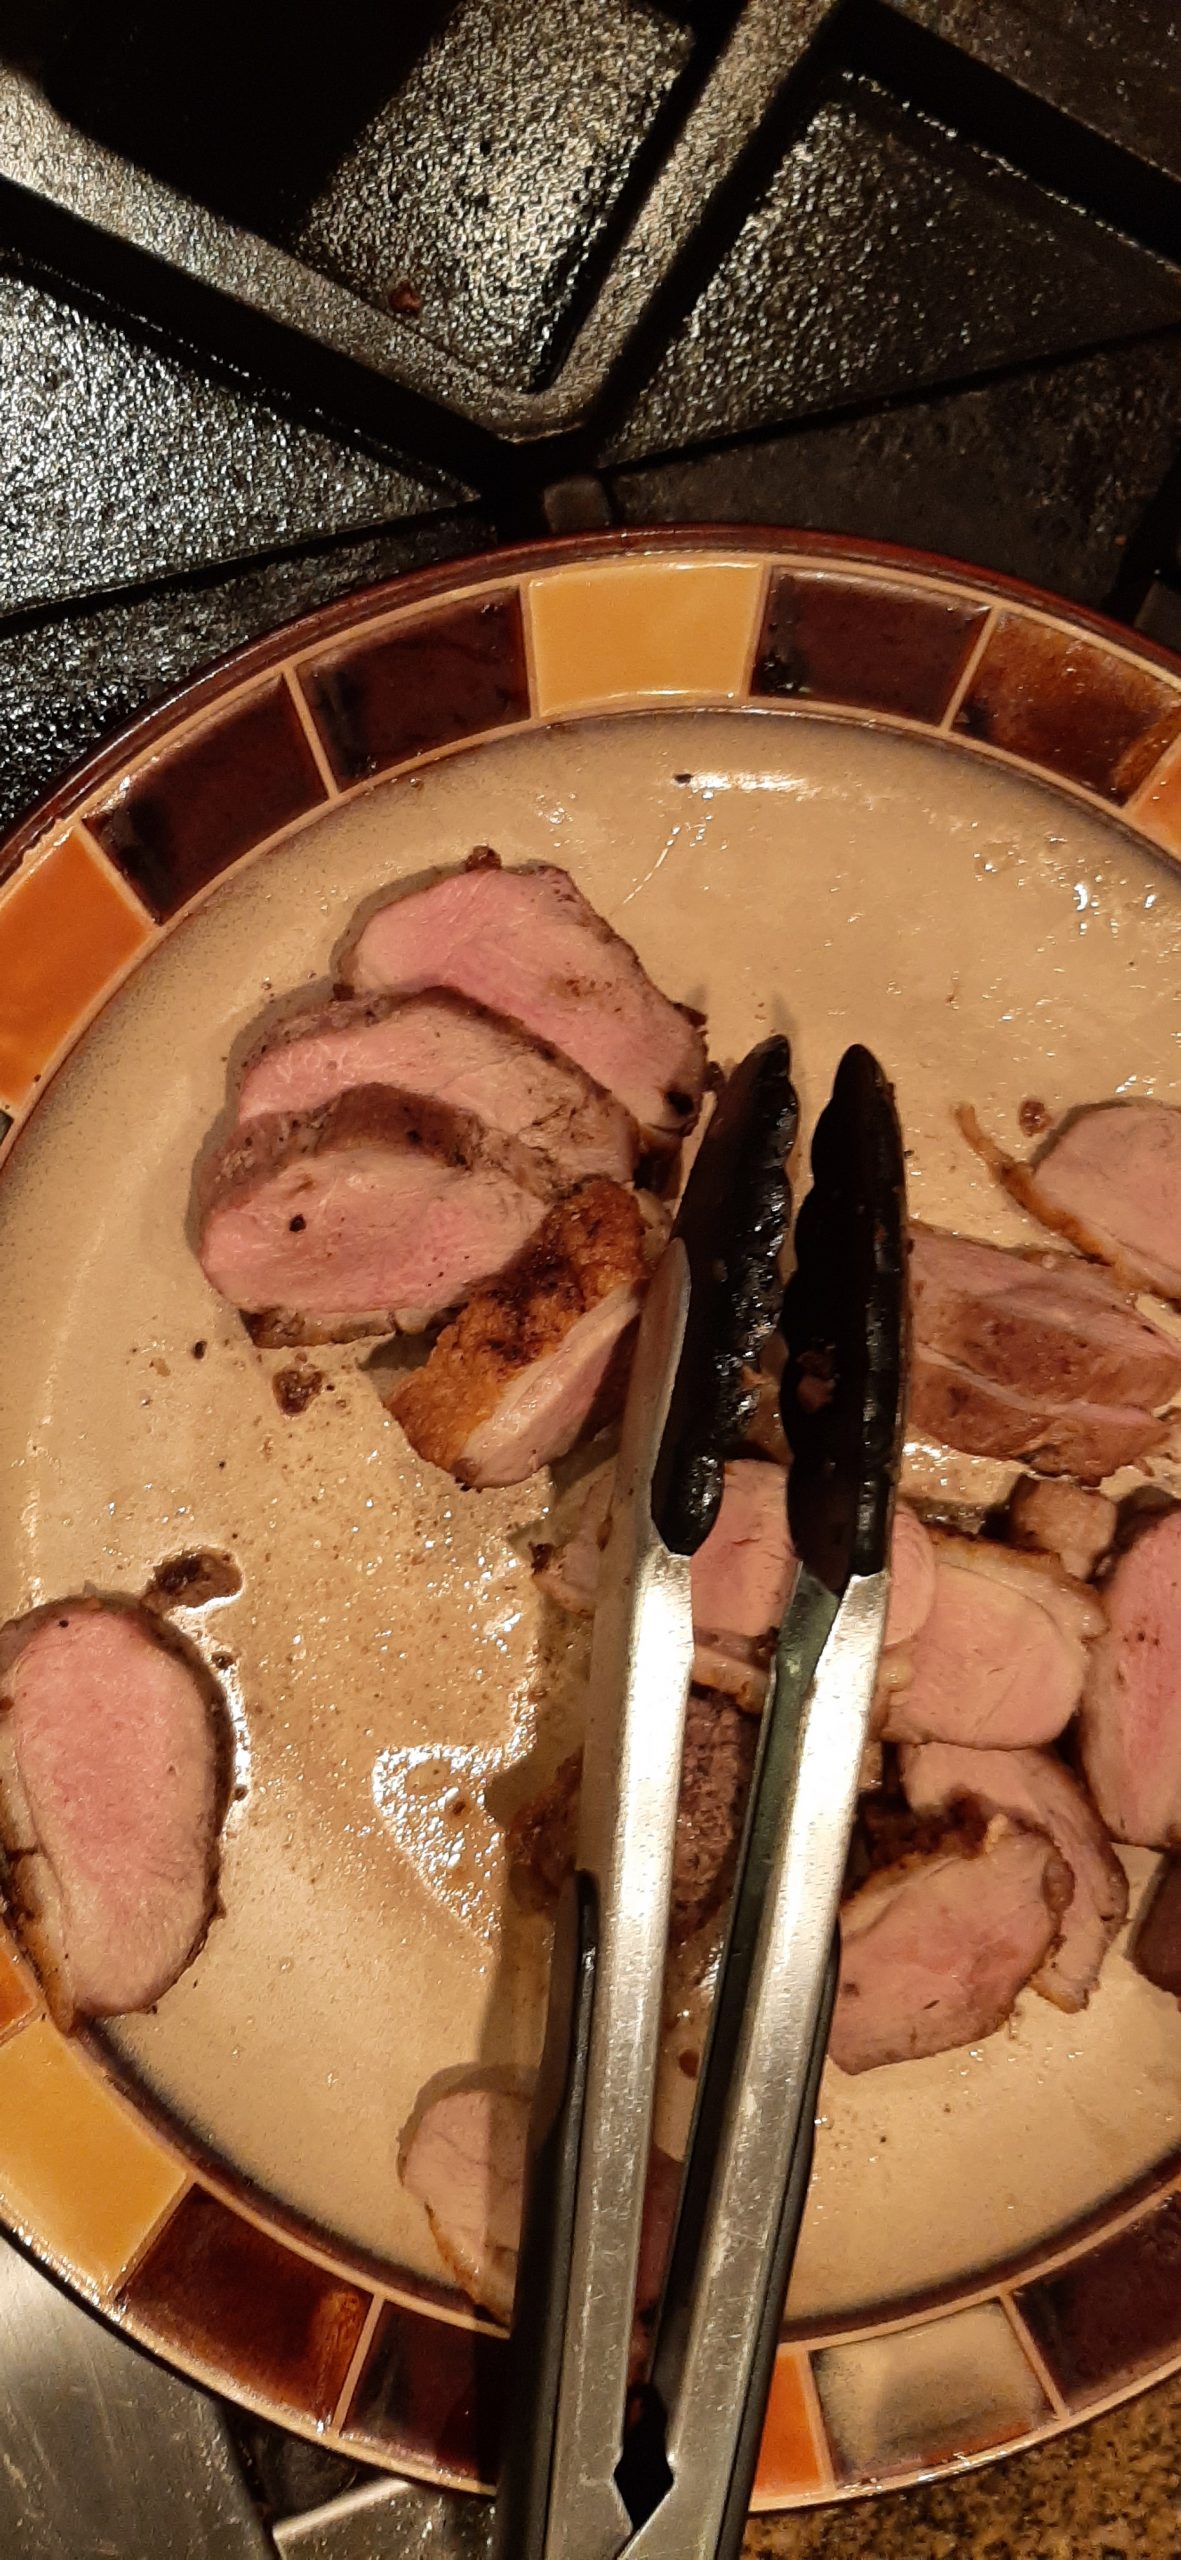
Cooked duck for topping/garnish

As the Beatles sing “I get by with a little help from my friends”. In this case, “a lot of help from my friend”. My friend, this time, being Jim.

It all started with me buying all the meat for cassoulet about a year ago. Then of course, time went by and the ingredients for this classic French dish languished in the freezer portion of our basement refrigerator/freezer. Until one day when Mr. C. asked me for maybe the 4th time when I was going to use the expensive meat I had purchased to try my hand at making cassoulet? Well, I can take a hint! (Especially after 4 “reminders”.) Huh, perhaps I should get my act together and use the meat as planned. So, I called Jim and Margo and invited them to dinner.

My cassoulet was OK, but both Jim and I felt it needed some work. So, Jim suggested we prepare the dish together for our Christmas Eve dinner. What a grand idea! (It actually saved me coming up with a dinner plan. So, I was thrilled on two levels.)

So, the recipe you find below is the result of a joint venture. But I must confess, most of the reason the recipe turned out to be so delicious, is all on Jim. So, we all have Mr. H. to thank.  

Well, that’s it for today. Last night Mr. C. had a gig which I attended. Tonight, we are driving to Seattle to hear “Nearly Dan” (a Steely Dan tribute band) at Jazz Alley. And tomorrow Mr. C. has another gig. (There truly is no rest for the wicked.) Anyway, keeping busy keeps us out of trouble. And that’s always a good thing.

And do try this cassoulet recipe. It contains far fewer ingredients than some and comes together fairly quickly. Not an inexpensive dish to make. Especially since it was originally considered peasant food. But how many people these days have ducks living in their backyard, or back bacon or duck fat, etc., just lying around? Not this couple, that’s for sure. And cannellini beans don’t grow on trees here either. So, many of the ingredients for this recipe must be purchased at a premium.

But for a special occasion, this is just the perfect comfort food to serve your family and friends. On that happy note – peace and love to all.

1 lb. dried cannellini or cassoulet beans, rinsed

chicken stock (preferably homemade – recipe below)

8 garlic cloves, sliced

1 c. diced onion

4 bay leaves

2 duck breasts patted dry with paper towels and the skin scored

6 oz. back bacon (unsmoked if possible) cut into ¾-inch cubes (sometimes referred to as “fat back”)  

2-3 bone-less, skinless chicken thighs

½ lb. garlic sausage like Kielbasa or a French style, unsmoked garlic sausage, cut into 1-inch pieces on the diagonal

duck fat, if needed

kosher salt, if needed

freshly ground black pepper (quite a bit)

Day 1:

In a Dutch oven, cover beans with 1 quart chicken stock. Add the garlic, onion, and bay leaves. Cover and refrigerate overnight.

Day 2:

Remove beans from fridge. Add 2 cups of chicken stock and bring to a boil, reduce heat, and simmer until the beans are tender. (This could take a couple, three hours, so plan ahead.) Keep adding chicken stock as required.

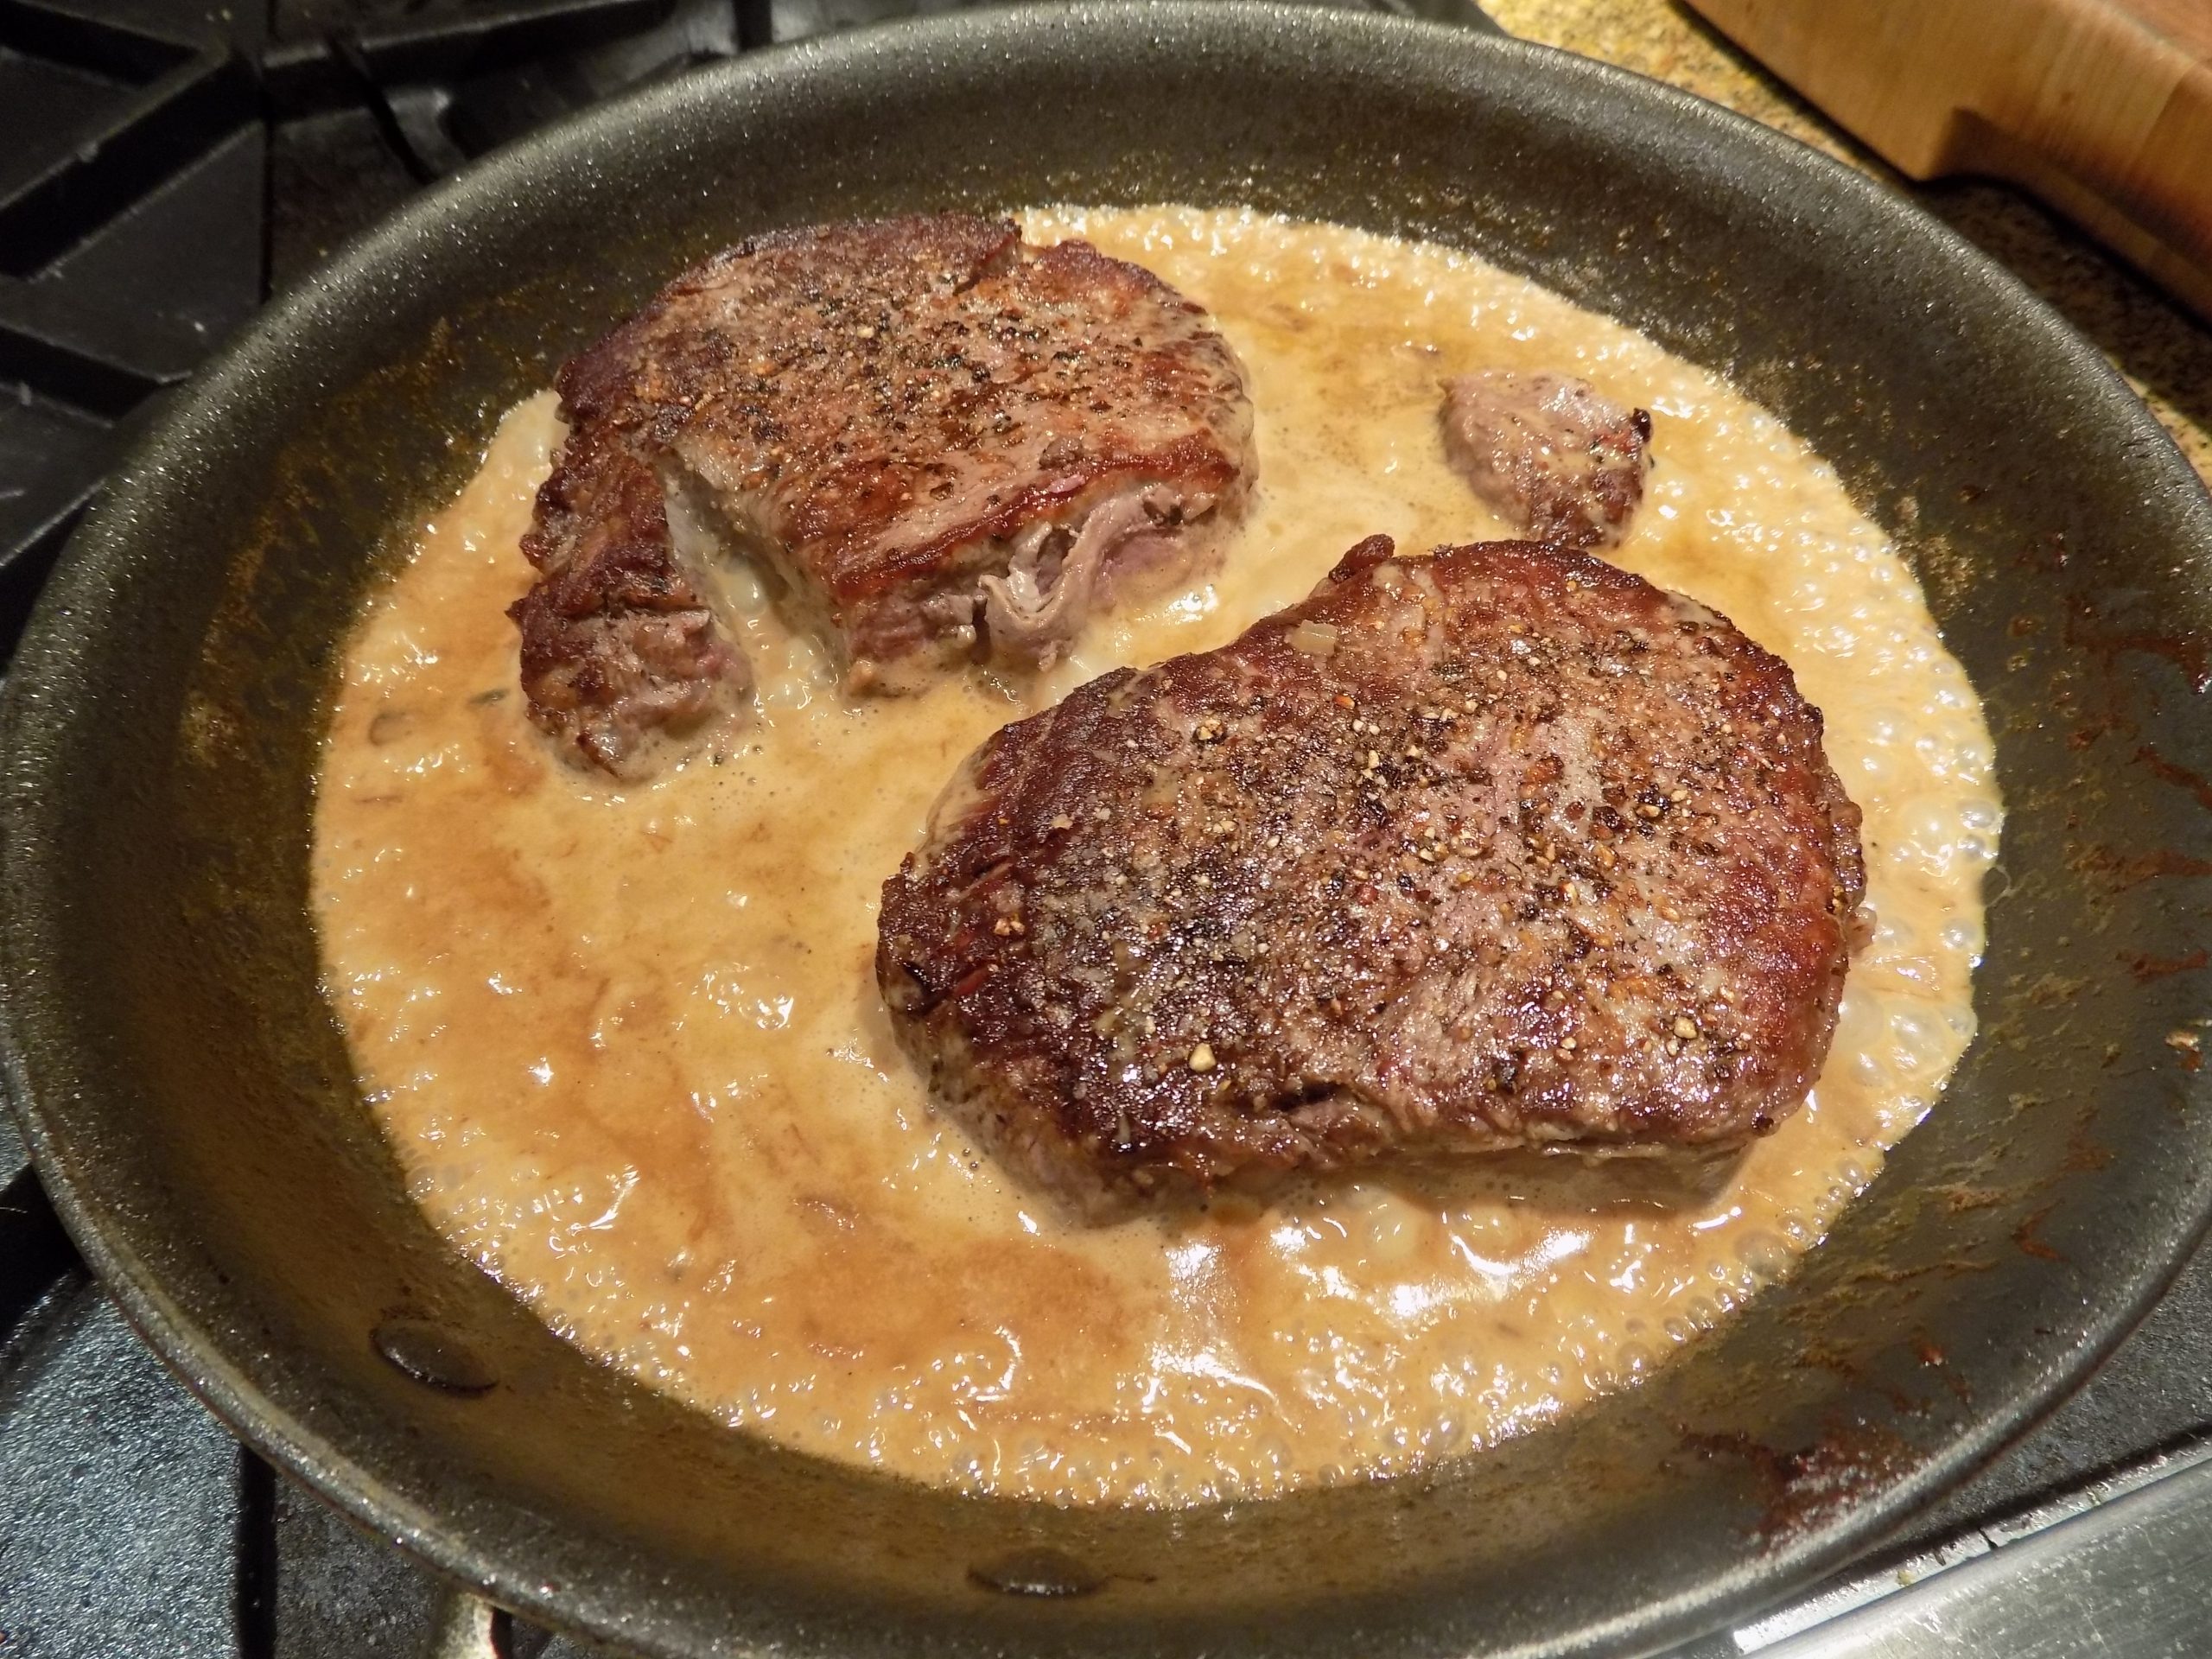
While the beans are cooking, place the duck breasts, skin side down in a cold frying pan. Slowly fry the duck breasts over medium heat until the fat is rendered, and the skin is crispy. Flip and brown the second side. Remove from pan (keeping the pan on your stove) and place the duck breasts in an oven proof pan and bake in a pre-heated 350-degree oven only until the internal temperature reaches 125-degrees. Remove from oven and set aside. Pour any duck fat remaining in pan in with the beans. (You can even deglaze the pan with a bit of chicken stock and throw that in with the beans too. The more flavor base the better.) When cool, slice the duck breasts into thin strips.

While the duck is in the oven, cook the back bacon until crispy in the same pan you used to cook the duck. Remove from pan and set aside.

Add the chicken thighs to the same pan and cook until golden brown on both sides. Remove from pan and set aside. When cool cut into small pieces.

Next brown the sausage, adding more duck fat as needed. When browned, remove from pan. Set aside until needed.

Deglaze the pan with chicken stock and add the liquid plus brown bits to the pot of beans along with all the pieces of meat except the duck. Add stock as needed for desired consistency. Cook until the beans are tender. Taste and add salt if necessary and black pepper.

To serve, scoop the beans and meat into large flat soup bowls. Top with duck, skin side up so that it stays crispy. Serve with garlic bread or any toasted chewy bread.

Please note: This cassoulet can be served as a thick stew or as a soup. It all depends on how much stock you add to tenderize the beans. Either way, you are in for a treat.

CHICKEN OR TURKEY STOCK*

4 lbs. chicken or turkey parts, pieces, giblets, and bones

1 onion, roughly chopped

1 leek, white and green part, roughly chopped

2 carrots, cut into 1-inch sections

2 celery ribs, plus leaves, cut into 1-inch pieces

2 garlic cloves

1 bay leaf

3 T. fresh parsley

1 tsp. dried thyme

6 peppercorns

3 qt. water

Spread the chicken or turkey bones, etc. on one very large or 2 smaller rimmed baking pans. Bake in a pre-heated 400-degree oven for 1 hour or until the chicken or turkey is well browned. Remove from oven and place the meat in a large, covered Dutch oven and pan.

Pour a small amount of water in the pan(s) and let sit for several minutes. Then using a sturdy spatula, lift all the browned bits off the bottom, along with the water, and add to the pot with meat. Then add all the remaining ingredients. Bring to a boil, cover, reduce heat, and simmer for at least 3 hours.  

When ready to use or store for future use, remove from heat and let cool for about 30 minutes. Then strain the liquid into a container. Discard all the meat and veggies. If you aren’t going to use the stock immediately, place covered in your refrigerator. Before using, if desired, remove the fat that has formed on the surface.

Use in any recipe calling for stock or broth**.

*Stock is a rich, savory liquid prepared by simmering bones (and in my recipe – flesh) and vegetables in water for hours with herbs and spices until the flavor is extracted. Stock derives its flavor primarily from protein, not from heavy sodium. As a result, stock is usually healthier than broth and delivers a richer mouth feel and deeper flavor than broth.

**Broth, on the other hand, usually contains flesh (no bones) plus a lot of salt. It can be used any time stock is listed as an ingredient. But be aware that it might be quite salty. So, plan to adjust your recipe accordingly if you are using broth rather than stock.

EASY HOMEMADE PLAIN CROISSANTS AND PAIN AU CHOCOLAT CROISSANTS

Croissants and pain au chocolat
Croissants
View of the flaky interior of a croissant
Up close look at pain au chocolat

Well, once again I stepped out of my comfort zone and made THE BEST croissants I have ever tasted. Of course, it didn’t hurt that the croissants were still warm when I bit into my first one. (And yes, I had two. OK, three. But in my defense, they were small croissants, by plan, I might add.) So, thanks to Bincy at merryboosters.com, I no longer have any reason to pay excruciating prices for my all-time favorite accompaniment to bacon and eggs. And the best part – the darn things were easy to prepare. Really!

First of all, you don’t need a mixer to make the dough. And no kneading required. But granted, it did take most of the day to prepare these delicacies because there is a lot of time the dough is busy rising. But so what?! I had nothing else planned yesterday. And during the time I wasn’t actively involved in the process, I dusted the house and cleaned the bathrooms, posted a recipe, and did research for another recipe I plan to present in the future. So, basically, no time wasted.

But patience required, I will certainly admit to that! Mainly because I could hardly wait to chomp into the final product. And of course, terribly concerned that the final product would not meet my expectations. Because little old me, unschooled baker that I am, actually trying my hand at building croissants and pain au chocolat (for Mr. C.)! How extraordinarily presumptuous of me! But still game enough to at least give it a try. And not only making croissants but pain au chocolat as well. (Frankly I don’t see what all the fuss is about when it comes to pain au chocolat. But Mr. C. is a devoted fan. And when it comes right down to it, I like making him happy.) So, 4 pain au chocolat were made along with 12 regular croissants. And since you are concerned with the disparity in my 12 to his 4, forget it! He loves regular croissants too.

And another thing we both really love, is that all 12 of the croissants and 4 pain au chocolat I made cost less than 2 croissants from our local French bakery. Because really, the only expensive ingredients are the European butter (which I buy at Grocery Outlet for $1.99 for 8-ounces), and the really good dark chocolate (about a third of a 3.5 oz. dark chocolate bar from Libeert (Belgian Chocolate Creators). (Probably about a dollars-worth of chocolate.) The rest of the ingredients, not appreciable.      

So, for those of you who have been afraid of making homemade croissants – let it go! These are so easy to build. And so delicious. Yes, they take time. But boy are they worth the effort.

As always, have fun in your kitchen. Try new recipes because you may never know what amazing new discoveries you might make. And please don’t wait until you’re 77 (like me) to make homemade croissants and pain au chocolat. All I can think right now, is, why in the world did I wait so long? And should I make some more tomorrow, or wait a couple of days?

So, thank you again Bincy for this fabulous recipe. And for helping me keep my reputation as a “well-rounded” cook. (Define well-rounded any way you like!)

Peace and love to all.  

1 c. + 1 tsp. slightly warm whole milk, divided

1 tsp. active dry yeast  

¼ c. granulated sugar

2½ c. unbleached all-purpose flour, fluffed

¼ tsp. fine grained sea salt

¾ c. (1½ sticks) unsalted butter, room temperature (European butter* is best for this recipe or any other laminated** pastry for that matter)

1 tsp. vegetable oil (for coating the dough)

1 egg

semi-sweet chocolate, coarsely chopped (if making pain au chocolat)

Whisk 1 cup of the warm milk, yeast, and sugar together in a large mixing bowl. Let sit for 5 minutes to activate the yeast.

Add the salt and flour, and mix by hand until you have a smooth, evenly hydrated dough. Pour the veggie oil on the dough, and using your hands and a stiff rubber spatula, form the dough into a ball thoroughly coated with oil. Cover with plastic wrap and let the dough sit and rise for 1½ to 2 hours or until the dough doubles in size. (Mine took 2 hours.)

After the dough has doubled in size, punch it down, place it on a lightly floured surface and flatten it into a rectangle. Then roll it into a long log (like you were preparing cinnamon rolls) and divide the dough into 12 equal sized pieces.

Using a rolling pin, shape each piece of dough into a circle approximately 6½ to 7-inches in diameter. Spread the first dough circle liberally with butter, then place on a piece of plastic wrap, butter side up.

Then flatten the next piece of dough and slather with butter and stack, butter side up, directly on top of the first piece. Continue until all the dough circles have been buttered until the last piece. Place dough circle number 12 unbuttered on the top of the pile. Wrap securely with as much plastic wrap as it takes, and place in your freezer for about 35-40 minutes. (The time spent in the freezer will allow the butter to harden a bit, but still be pliable enough to roll the dough into a rectangle, 12×16-inches.)

Place the rectangle with one of the longer sides furthest away from you. Using a pizza cutter*** or knife, cut the long sides into 4 top-to-bottom rectangles, then the short sides into thirds, right to left. This will give you 12 (4×4-inch) equal size squares.  

For Regular Croissants:

Cut each square into two triangles. With your hands, shape the triangle into a long pie shaped piece of dough. Cut a small incision into the triangle in the middle of the larger end. (This small incision helps keep the center of the croissant from becoming too thick.) Then starting at the larger end, gently force the cut apart while you roll the dough towards the thin pointed end, making sure you are rolling the croissant tightly, but without squeezing the dough. Place on a parchment paper lined baking sheet pointed ends down and about 2-inches apart.

Whisk the egg with the remaining 1 teaspoon milk and brush on each croissant. Cover with plastic wrap and allow to rise for 2 hours or until they puff up a little. (And yes, the plastic wrap will stick a bit to the croissants.) Then, gently but liberally brush each croissant again with a bit of the egg wash being careful not to deflate the dough.

Bake in a pre-heated 400-degree oven for 10 minutes, then reduce the temperature to 375-degress and bake for another 7-8 minutes or until the croissants are a deep golden brown and the internal temperature reaches 210-degrees. Don’t under-bake the croissants.

Remove from oven and cool on a wire rack. Store in an air-tight container at room temperature. Re-heat in a 350-degree oven for a few minutes.

For Pain Au Chocolate Croissants:

Do not cut the 4-inch squares. Place about 3 teaspoons of the chopped chocolate about half an inch up from one of the sides. Fold the dough up over the chocolate and continue rolling until you have created a cylindrical shape. Place on a parchment paper lined baking sheet, seam side down about 2-inches apart.

Whisk the egg with the remaining 1 teaspoon milk and brush on each croissant. Cover with plastic wrap and allow to rise for 2 hours or until they puff up a little. Then gently brush each croissant again with the egg wash being careful not to deflate the dough.  

Bake in a pre-heated 400-degree oven for 10 minutes, then reduce the temperature to 375-degress and bake for another 7-8 minutes or until the pain au chocolat croissants are a deep golden brown and the internal temperature reaches 210-degrees. Don’t under-bake.

Remove from oven and cool on a wire rack. Store in an air-tight container at room temperature. Re-heat in a 350-degree oven for a few minutes.

*European-style butter: Excerptfrom an article on thekitchen.com. site “Overall, European-style butters are favored for their rich taste — a direct result of the higher butterfat content. More butterfat also means a softer texture, faster melt, and often, a saturated yellow hue. With less water, European-style butters are often the preferred butter for baking — especially when the flavor of butter is just as important as its function.”

And according to our good friend Keith, who spent many years as a professional baker (and I paraphrase) The best butter for the home baker making croissants, or any pastries, is slow-churned European style butter that contains at least 82% butterfat. This type of butter contains less air and water which makes it more pliable and resistant to being absorbed in dough during lamination**.”

**Lamination: Lamination is the process of folding and rolling butter into dough over and over again, or in the case of this recipe, spreading soft butter over layers of thin dough, to create super-thin layers. These layers, which alternate between butter and dough, are what give croissants their signature honeycomb interior structure and their fabulously flaky texture.

***Pizza cutter: My dear friend Vicki explained to me why she preferred using a pizza cutter rather than a knife when cutting dough. Cutting dough with a pizza cutter makes a nice, thin cut. And unlike using a knife, a pizza cutter doesn’t flatten the dough next to the cut. Plus, it doesn’t stretch the dough as it’s being cut. Thanks Vicki for sharing your experience with all of us.   


STEAK DIANE

And yes, any food blogger worth her or his salt would have cleaned up the plate before taking a picture. Obviously photography is not my passion. Eating is!

HAPPY NEW YEAR

I don’t know about you, but I’m very glad to see the last of 2020. OK, I know, we mostly all feel the same way, but I disdain generalities, so I thought I’d start 2021 on a good footing. And no, it’s not my New Year’s resolution to abstain from making generalities. It’s more of a realization that defining someone or something in general terms rather than being specific to the individual or situation, is ultimately unfair. Am I no longer a vital and contributing member of society because I’m over 75? Am I a better citizen because I’m not in a racial minority? Am I a more learned or intelligent person because I’m a democrat rather than a republican? Heck no to all those questions! So, if I were to come even close to setting myself up for failure by making a New Year’s resolution, it would be to begin each day by simply trying to be a better person. Of course, that would be cheating because I start every day by giving myself a little lecture on that very subject. Some days it works better than others. Some days my good angel wins. But more often than I would like, my little devil (who is terribly cute with his little reptilian tail and pitchfork) wins the day. But I’m still hopeful that the little angel will win out in the end. So, what does all this have to do with Steak Diane? Not a great deal. But enough to make me choose to celebrate 2020 rather than cast it aside without fanfare. And how do I celebrate any special occasion? With wonderful food, of course! Thus, Steak Diane for dinner. BTW, it is believed that the name “Steak Diane” is of Roman origin. After the Roman goddess, Diana or Diane.  

But before we got to dinner, there just had to be appetizers and a drink. So, at around 4:00 pm, that’s how our evening began. (See picture below.)

Starting back left – red onion, capers, lemon zest and juice, salt, and pepper mixed with cream cheese to spread on crackers topped with smoked salmon. Next Bacon Wrapped Water Chestnuts, pitted castelvetrano olives, and Blue Cheese, Cream Cheese, and Date Spread.

Steak Diane didn’t happen until about 8:00 pm. Speaking of which………….

I found this wonderful recipe for Steak Diane on the coctione.com site. The recipe appealed to me instantly because it contained every single ingredient I felt would compliment a beautiful steak. I followed the recipe to a tee. (Something that rarely happens.) And I’m so glad I did. What a fantastic combination of flavors. And simple instructions for a sauce that ends up better than almost anything I ever tasted in a restaurant. And speaking of restaurants, apparently in the 1950s and early 60s, especially in New York city, upscale restaurants prepared this dish table side, with its theatrics arising from the flambéing of the cognac used to make the sauce.

Well, I must tell you, while I was preparing this dish, Mr. C. was enjoying his before dinner Spanish sparkling wine (cava) while observing my every move as I prepared this dish. Even the part where I almost started a conflagration when I set fire to the cognac. (And yes, some of our acquaintances, like our dear friend Jim, can flambé with panache. Me, not so much. But I’m learning. The hard way, of course.) Anyway, Mr. C. found it entertaining. (Got to keep our spouses riveted. But burning down our home might have been a little too riveting. Yah think! But thank God, that didn’t happen.)

Anyway, to make a short story long, the next time you want to celebrate a special occasion, I would recommend preparing this dish. It is really fantastic. We both decided that this dish might just become a New Year’s Eve tradition. It’s just that good!

As always, keep astounding yourself by trying something new. And it doesn’t have to be by preparing a new dish. It could be by learning a new language. Or learning to ski. Or taking up origami. Life is so darn short. Don’t waste it by wondering what if? Just do it! And more than ever – peace and joy and love to all.   

2 T. canola oil

2 1-inch (at least) thick tenderloin or filet mignon steaks

kosher salt

freshly ground black pepper

1½ c. beef stock

2 T. unsalted butter

2 cloves garlic, finely minced

1 sm. shallot, minced

½ c. thinly sliced fresh mushrooms

¼ c. cognac or brandy

¼ c. heavy cream

1 T. Dijon mustard

1 T. Worcestershire sauce

dash hot sauce, such as Bob’s Red Hot

1 T. minced fresh parsley

1 T. minced fresh chives

Heat the oil in a 12″ skillet over medium-high heat. Liberally season the steaks with salt and pepper. Add to skillet. Fry, turning once, until browned on both sides and cooked to desired doneness, about 4 to 5 minutes for medium-rare. (Depending on how “medium-rare” you like your steaks, the internal temperature should read anywhere from 130 -145 degrees.) Transfer steaks to a plate; set aside.

Return skillet to high heat, add stock, and reduce the broth to ½ cup, about 10 minutes. Pour into a bowl and set aside.

Return the skillet to heat, and add butter, garlic, and shallots. Cook, stirring, until soft, about 2 minutes. Add mushrooms, and cook, stirring, until they begin to brown, about 2 minutes. Remove pan from heat.

Add cognac, and light with a match or fire stick to flambée; cook until flame dies down. Please note: The cognac flames will shoot up about 15-16 inches when torched. So be very, very careful.)

Return pan to heat and stir in the reduced stock, cream, mustard, Worcestershire sauce, and hot sauce. Let burble and start to thicken before returning steaks to the skillet.

Steak just returned to the sauce.

Turn the steaks in the sauce until warmed through and the sauce is thickened, about 4 minutes. Transfer steak to serving plates and stir parsley and chives into sauce. Pour sauce over steaks to serve.

I served the steak with creamy mashed potatoes and my Roasted Beets, Candied Pecans, and Feta Cheese Salad with Balsamic Vinegar Dressing. Yum

SHRIMP, SAUTÉED ONION, AND SWISS CHARD QUICHE

I love quiche. I also love shrimp. So yesterday, as I was planning what to cook for dinner, remembering that I had a tiny bit of Swiss chard that needed to be used, and some Swiss cheese that kept yelling at me from the deli drawer of our refrigerator, I put my thinking cap squarely on the top of my head! (But before I go on, don’t you just hate it when ingredients yell at you? And if you respond in kind, your spouse looks at you as if your mind has slipped yet another cog. That of course may be true in my case, but no one likes to be reminded of their incipient mental infirmity.) Anyway, the Swiss cheese won. So what to do with the lovely combination of Swiss chard and Swiss cheese. Of course the solution was evident. Make a French dish. Duh!

Actually there’s a bit more to it than quiche being a French invention. This bit of quiche history from the finedininglovers.com site, is most interesting and enlightening. I’ve edited the original article a bit, but not in any significant way.

“At its most basic, quiche is dough. There are numerable variations, but the most famous is quiche Lorraine. This was the first quiche that Americans learned of, thanks to Julia Child, and so it is the one most likely to come to mind. This specialty comes from the Lorraine region of France.

Alsace and Lorraine hug the border between France and Germany, so that Alsace and Lorraine are both French and German and are also their own unique place. The most ubiquitous dish from Lorraine is quiche. And the specialty quiche from Lorraine features Gruyère cheese, onion, fatty bacon (French lardons), and nutmeg as its primary flavors.

The history of quiche, a dish we think of as quintessentially French, is actually a liminal one, in that the dish is of German origin. The word ‘quiche’ comes from the German word kuchen, meaning cake. Thus quiche is a savory cake, and Lorraine is a rather new name for a region that, under Germanic rule, was called the Kingdom of Lothringen. There are 13th century recipes for egg and cream baked in a dough crust in Italy, so it is difficult to say exactly where such a simple and ubiquitous approach to baking first began. In the 14th century English recipe collection, The Forme of Cury, there is a recipe like this with the unappetizing name – Crustardes of flesh.” But back to this recipe, which I must say is appetizing!

But why a shrimp quiche you might ask?

Well, if you are following my posts, you know that our beloved upright, non-frost-free freezer is coming to the end of its very long and useful life. And because everyone and their cousin are apparently just discovering the joys of storing more than one day’s supply of food in their home since the pandemic, there isn’t an upright freezer to be begged, borrowed, or even stolen in our area. So using up our frozen food ASAP (especially seafood) has been the driving force behind many of the main dishes I have been currently preparing. (I really can make a short story long. Sorry about that!)

Anyway, I glommed this recipe together yesterday, and we were both very pleased with the result. The quiche was very tasty, and it hadn’t been that difficult to prepare. And I had used up some of the ingredients that were either quietly going bad or noisily reminding me of their presence.

So next time you get hungry for quiche, give this recipe a try. But remember, the nice thing about quiche is that it allows you to use almost any ingredient you have on hand. Love mushrooms, add them. Don’t care for shrimp, replace them with small chunks of Black Forrest ham. Matters not. As long as your egg batter is properly proportioned, and your choice of additives are not terribly wet, you’re good to go.

As always, have fun in your kitchen, don’t let your ingredients give you any guff, and keep an open mind. People with open minds (and ears) let new ideas in. They aren’t afraid that their long cherished beliefs just might be misguided. Open minded people welcome facts over feelings, science over skepticism, and experience over egotism.

Peace and love to all.

No-Roll Pie Crust

2 c. unbleached all-purpose flour   

heaping ½ tsp. salt

1 tsp. sugar

scant ¼ tsp. baking powder

7 T. vegetable or canola oil

5 T. cold water  

Whisk the flour, salt, sugar, and baking powder together. Whisk the oil and water together. Pour over the dry ingredients. Stir with a fork until the dough is evenly moistened. Pat the dough across the bottom of a fairly deep pie pan, then up and over the rim. Crimp or mold the pie crust around the edge to make it pretty.

Bake in a pre-heated 400 degree oven for 12 minutes. Remove from oven and set aside until you are ready to assemble the quiche. Reduce oven temperature to 375 degrees.

Shrimp, Sautéed Onion, and Spinach Filling

2 T. extra-virgin olive oil

½ med. yellow onion, diced

2 c. finely chopped Swiss chard or spinach, not packed

1 lb. raw shrimp, cut into small pieces

5 lg. eggs

¾ c. whole milk

¼ c. sour cream

¼ tsp. kosher salt, plus more for shrimp

freshly ground black pepper, plus more for shrimp

pinch ground nutmeg, plus a bit more for sprinkling

tiny pinch cayenne pepper

¾ c. grated mozzarella cheese

¾ c. grated Swiss, Gruyère, or Emmental cheese  

Heat oil in a fry pan over medium-low heat. Add onions and cook, stirring frequently, until the onions start to become a light golden brown, about 20 minutes. (Don’t fry at too high a heat or the onions will start to burn. You do not want that to happen! Onions are bitter when they are burnt.)

Add the Swiss chard and sauté for a couple of minutes, just enough to wilt the chard a bit. Add the shrimp, season with a tiny bit of salt and pepper, and cook just until shrimp are barely done. 

Meanwhile, in a medium bowl whisk the eggs, milk, sour cream, salt, pepper, nutmeg, and cayenne pepper together. Set aside.

Spread the onion, chard, and shrimp mixture on the crust. Sprinkle the cheeses evenly over the shrimp mixture. Pour the egg mixture on top. Sprinkle with nutmeg. 

Bake the quiche until puffed and firm when touched in the center, 40-45 minutes. Remove from oven and allow to cool on a wire rack for 15 minutes before serving. To serve, cut into 6-8 pieces.

SPAGHETTINI A LA PROVENÇALE (TUNA SPAGHETTI)

OK, the first wonderful thing about this simple pasta dish…. Wait, I just broke one of my cardinal rules of etiquette. I wrote a spoiler alert in the first sentence of this post! (I wrote that this was a simple pasta dish.) That kind of information should have been saved for a little later in this write-up. Oh well…………..

But since I already gave away one of the top reasons you should rush into your kitchen and prepare this amazing dish, I might just as well tell you all the other reasons you must treat yourself and your family to this fabulous pasta sooner rather than later. Because if you wait, you’re only going to kick yourself (you know where) for not having built this dish already. Just sayin’. (I speak from experience.)

My dear friend Ellen sent me this recipe a few weeks ago, and for whatever reason I only got around to preparing it a couple nights ago. (What was I waiting for?) Anyway, I changed things up a bit from Ellen’s recipe, because I simply can’t leave well enough alone. It’s just not how I operate. But boy oh boy, what a tasty treat this was for dinner. And the ease of preparation, use of fairly common ingredients that I almost always have on hand, absolutely contributed to the pleasurable dining experience Mr. C. and I shared. I served the pasta with a simple green salad, and life was good. And I wasn’t exhausted. Better and better.

Now don’t be frightened by a whole can of anchovies. Or the capers. If you are not familiar with these two exquisite ingredients, it’s high time you learned how much flavor they can bring to a dish. And canned tuna in a red sauce? I for one had no idea how much I would enjoy the combination.

And yes I know, eating tuna, especially albacore tuna, can be risky. But according to Medical News Today, adults weighing over 150 pounds should not eat tuna more often than every 9 days. Well, for us that is not a problem. We actually rarely eat tuna. But I must say, there are always a couple of cans in our pantry because you just never know when a tuna fish sandwich craving might occur! It definitely has been known to happen at Chez Carr!

So if you are in the mood to create a quick, simple, low fat, and different pasta dish some evening, I highly recommend you give this recipe a try. We loved it. And another nice thing I need to mention before you wander off to your real life – no Parmesan cheese required. It was actually called for in the original recipe, so of course you can add Parmesan if you must. But I really felt it would be superfluous. Plus just more calories we really don’t need!

As always, think healthy, cook healthy, and stay healthy. Peace and love to all.

¼ c. chopped fresh parsley

1 tsp. dried oregano

1 T. capers

3 T. extra virgin olive oil

½ lg. yellow onion, finely chopped

3 garlic cloves, finely minced

1 can (2-oz.) anchovy fillets packed in olive oil (oil discarded)

1 lg. can (28 oz.) plum tomatoes in their own juice (Italian preferred)

1 T. tomato paste

4 oz. sliced pimentos

¼ tsp. kosher salt

freshly ground black pepper

pinch crushed red pepper flakes

1 (6-7 oz.) can tuna, drained and chunked into small pieces (I use Kirkland brand albacore tuna)

8 oz. thin spaghetti, cooked al dente  

Combine the parsley, dried oregano, and capers in a bowl. Set aside.

Heat the olive oil in a large fry pan. Add the onion and cook until soft but not brown. Add the garlic and anchovy fillets and cook for 1 minute. (I break up the anchovy fillets while they cook.)

Stir in the canned tomatoes (juice and all), tomato paste, pimentos, salt, pepper, and crushed red pepper flakes. Let simmer, uncovered, for about 15 minutes. Add the tuna and heat through.

Toss in the al dente pasta and the parsley mixture. Simmer for a minute or two. Serve immediately.  

SALADE DE CAROTTES RÂPÉES (FRENCH GRATED CARROT SALAD)

OLYMPUS DIGITAL CAMERA

This grated carrot salad recipe that I found on Jennifer Segal’s Once Upon a Chef web site is just amazingly delicious. I was looking for a fresh carrot recipe, and I just didn’t want the old carrot with raisins combination. (In truth, I have always found a carrot and raisin salad moistened with a slightly sweet dressing underwhelming, to say the least.) But when I studied the ingredients in Jennifer’s recipe for this French favorite, I was hooked. I mean really, who doesn’t like a fabulous Dijon mustard and fresh lemon juice vinaigrette to begin with? And fresh Italian parsley? (I use fresh parsley as often as possible. And to think people used to use parsley only as a garnish!)

So for yesterday’s JazzVox pre-concert meal, I decided to take a chance and serve this salad. Well, I am here to tell you, it was a success. So much so that several people asked for the recipe. And why wouldn’t they? It’s a very economical salad to prepare and contains a vegetable that is crunchy, tasty, a wonderful color, and highly nutritious. Carrots, as everyone knows, are a very good source of beta-carotene, fiber, vitamin K, potassium, and antioxidants. Carrots are also associated with lowered cholesterol levels, improved eye health, and a reduced risk of cancer. I say everyone knows about carrots, because didn’t all of us have parents that told us that carrots were good for our eye sight? Along with the fact that spinach would help us grow up big and strong! And by the time my children had young children of their own, good old broccoli was also added to the “vegetable manipulation” list. (Broccoli is supposed to make us smarter! Never did me any good in that regard, and George H. W. Bush knows I ate and still eat a lot of this cruciferous vegetable!) But I digress….

So if you want a taste treat that uses some very humble ingredients and is very easy to prepare, this is the recipe for you. And it’s French! What more is there to say?

  • 2 tsp. Dijon mustard
  • 1 T. freshly squeezed lemon juice, or more to taste
  • 3 T. extra virgin olive oil
  • 1 tsp. honey
  • ¼ tsp. kosher salt, or more to taste
  • freshly ground black pepper
  • 1 lb. carrots, both ends removed, washed and dried (peeling not necessary)
  • ¼ c. roughly chopped fresh parsley
  • 2-3 finely chopped green onions

Combine the mustard, lemon juice, olive oil, honey, salt, and pepper in a small jar. (Dressing can be made several days in advance.) Grate the carrots in a food processor or on a hand grater. Dry on a paper towel lined baking sheet for about 20 minutes. Transfer to a large mixing bowl. Add enough dressing to moisten the carrots. Don’t overdress the salad; the carrots should not be swimming in dressing. Stir in the parsley and green onions. Cover the bowl and refrigerate for an hour or two before serving. Add salt and/or lemon juice, if needed, just before serving. 

CHICKEN MARENGO (CHICKEN IN A SAVORY WINE AND TOMATO SAUCE)

OLYMPUS DIGITAL CAMERA

Every once in awhile Mr. C. will be completing the New York Times cross word puzzle, and will run across (or down) an answer that by its clue he knows is a cooking term or dish. And if he doesn’t recognize the term or dish, he asks me to enlighten him since I am the self proclaimed resident expert on all things cuisine. Now sometimes I can answer with assurance, sometimes with a faint idea of what I’m talking about, but more often than not, I haven’t got a clue. So when Mr. C. recently asked me about marengo, I just stared at him and shrugged my shoulders. But of course, later that morning I had to look it up.

I discovered that Marengo is a town in Italy, and that maybe possibly Chicken Marengo was prepared for Napoleon by his personal chef after the French won the battle of Marengo on June 14, 1800. (Myth or legend, who knows?!) What I do know for sure however, is that Melissa d’Arabians recipe for Chicken Marengo, with a couple of minor adaptations on my part, is an absolutely delicious, easy to prepare, and healthy chicken dish. So who cares about the origin of the recipe even though both the French and the Italian claim it as their own creation. (Well of course they do!) And incidentally, there are about as many wildly different ingredients and ways to prepare this dish as there are Carter’s Little Liver Pills! (Actually since 1959 they have simply been called Carter’s Little Pills.) And yes, they are still being made and apparently sold. Or they wouldn’t keep making them, right??? But back to the variety of ingredients possible in a Chicken Marengo.

Some include poached or fried eggs (yikes), crayfish, Cognac, garlic, black olives, thyme, etc. The list is endless. But for my taste, this simple preparation is absolutely perfect. (And no I don’t care if Napoleon would have liked it or not!)

So do yourself a favor. First of all, don’t buy any Carter’s Little Liver Pills (talk about an expired pull date), but do prepare this amazing dish next time you want to feature chicken in a new and exciting way.

  • 2 large boneless, skinless chicken breasts, sliced lengthwise, and then pounded thin
  • kosher salt
  • freshly ground black pepper
  • ¼ c. all-purpose flour
  • 3-4 T. extra virgin olive oil
  • 1 medium sized sweet onion, sliced
  • ½ lb. button mushrooms, sliced
  • 1 yellow bell pepper, seeded and thinly sliced
  • 2 T. tomato paste
  • ½ c. dry white wine
  • ½ c. beef broth (yes, beef broth)
  • 1 (14-oz.) can chopped tomatoes
  • 2 tsp. butter

Season the chicken with salt and pepper and lightly dredge in flour. In a large sauté pan, heat 3 tablespoons of the olive oil over medium-high heat and add the chicken. Brown on both sides, until lightly golden, about 3 minutes per side. Remove from the pan and set aside.

In the same pan, add another tablespoon of the olive oil, if needed, along with the onion, mushrooms, and pepper. Sauté until the veggies are almost soft, about 5 minutes. Stir in the tomato paste and cook for 2 minutes. Turn up the heat, and add the wine and let it reduce by about half. Add the beef broth and chopped tomatoes. Once the mixture begins to burble, reduce the heat, and cook for about 7-8 minutes. Add the reserved chicken and any accumulated juices and cook until the chicken is warmed through, about 2 minutes. Remove from heat and stir in the butter. Serve immediately. Great served over brown rice.


BRUTTI MA BUONI (UGLY BUT GOOD) ITALIAN HAZELNUT COOKIES

OLYMPUS DIGITAL CAMERA

These cookies are outrageously delicious and BTW – GF! With no added oil, fat, butter, etc. to make us feel guilty. (Of course the nuts themselves contain fat, but it’s mostly good fat, so it doesn’t count. Well at least in my mind it doesn’t count.) Plus ladies and gentlemen, these easy to prepare cookies contain only 5 ingredients! Jean Anthelme Brillat-Savarin is widely quoted as saying “The discovery of a new dish does more for human happiness than the discovery of a new star.” I am absolutely convinced he must have had this cookie in mind when he coined this very well known phrase. Because these cookies are unlike any other cookie I have ever had the pleasure of tasting. They possess a wonderfully crisp exterior with an internal texture that is both soft and chewy. They are slightly reminiscent of macaroons, but that’s as close to a comparison of them to any other cookie as I can come.

While I was researching these cookies I visited several sites. Each recipe was quite different from the others. Some had you using granulated sugar, some had you warm egg whites and granulated sugar before beating the heck out of the mixture, most contained flour, and some even contained chocolate. But what captured my fancy was this recipe from Oreste Molinari. His family bakery in Frascati, Lazio, Italy has been selling these cookies using this recipe since the 1800s. So I figured; if the recipe is good enough for the Molinaris, and they are still in business after all this time, it surely must be good enough for me!

So please do not hesitate to build yourself a batch of these little packages of heaven at your earliest convenience. And to those of you who are gluten intolerant, you owe me. (Your debt will be forgiven if you send me your favorite GF recipe(s) so that I can share it/them with others.)

And to Monsieur Brillat-Savarin (wherever you may presently reside), please accept my thanks for some wonderful quotes related to all things culinary. And because it’s my blog and I have nothing more to say about these cookies, I am going to share a couple of my favorite Brillat-Savarin quotes with you.

“A man who was fond of wine was offered some grapes at dessert after dinner. ‘Much obliged’, said he, pushing the plate aside, ‘I am not accustomed to taking my wine in pills’.”

“Whoever receives friends and does not participate in the preparation of their meal does not deserve to have friends.”

“Cooking is one of the oldest arts and one that has rendered us the most important service in civic life.”

And my favorite quote attributed to Brillat-Savarin, which I feel is as true today as it was in his day (1755-1826). “The pleasure of the table belongs to all ages, to all conditions, to all countries, and to all areas; it mingles with all other pleasures, and remains at last to console us for their departure.”

Bon Appétit

  • 8 oz. roasted unsalted hazelnuts* – roughly 1¾ cups (best way to know for sure is to weigh the nuts)
  • 1½ c. powdered sugar
  • pinch of salt
  • 1 lg. room temperature egg white, lightly beaten
  • 2 tsp. pure vanilla extract

*I often use part dry roasted unsalted shelled almonds in these cookies because they are cheaper, more readily available, and considered by some to be slightly more nutritious than hazelnuts (aka filberts). And bottom line, using almonds does not affect the wonderful hazel nutty flavor of the cookies.

Preheat your oven to 400°. Spread the hazelnuts on a large rimmed baking sheet and toast for about 10 minutes or until the nuts are fragrant and the skins blister. (When I use almonds I toast them right along with the hazelnuts.) Transfer the nuts to a kitchen towel, swaddle them tightly, and let cool to room temperature. Then rub them together while still in the towel to remove the skins. (Don’t worry if all the skin doesn’t peel off. Just get as much off as possible. The rest – well its good roughage! And don’t worry about the light brown skin on the almonds either. Just provides a bit more texture to the cookies.)

In a food processor, pulse the hazelnuts with the confectioners’ sugar and salt until finely chopped. Add the egg white and the vanilla and pulse just until the dough is thoroughly combined.

Line the baking sheet with parchment paper. Using a very small ice cream scoop, (one that will contain about a tablespoon of water) drop the blops (a Chez Carr technical kitchen term) of dough onto the parchment paper lined cookie sheet about 1-inch apart. If you don’t have a small ice cream scoop, (and shame on you if you don’t have a couple of these in your kitchen) spoon tablespoon-size mounds of the dough onto the prepared baking sheet, again about 1 inch apart.

Bake the cookies in the center of your oven for about 11-13 minutes or until lightly browned all over. Watch carefully, because the bottom of the cookies can get too brown if baked too long. But the longer you bake them, the crispier on the outside they become. Which BTW, is what you want. So at least for the first batch you prepare, pay extra special attention to your oven temperature and the length of time it takes to bake these little darlings to perfection. Then of course – WRITE DOWN YOUR FINDINGS so that next time (and believe me, there will be a next time), you won’t have to tax your brain as much!

Brutti ma Buoni are best the first day, but will last for about 4 days if kept in an airtight container.


GRUYÈRE CHEESE SOUFFLÉ

OLYMPUS DIGITAL CAMERA

OK, I don’t care what anyone says, soufflés are really cool. But for some unknown reason, they have kind of gone out of fashion. And I don’t have the foggiest idea why that is. They are fairly inexpensive to make and could not be easier to prepare. The kind of cheese you use can be whatever you happen to have on hand, so there’s no reason anyone need even make a special trip to their local cheesery. And eggs, who doesn’t have eggs on hand? So what is preventing cooks from making this light and fluffy delicacy? Well I don’t know about anyone else, but I sure as heck know why I stopped making soufflés for about 10 years! I truly doubt anyone else out there has a similar excuse, but please allow me to tell you my true story about soufflés, a couple of cans of shrimp, my 4 kids, and why I disdained soufflés for such a long time.

When my kids were young, and their father and I were both working at good jobs, but paying a mortgage ($210 a month) that at the time seemed outrageous (remember I’m almost 71, so this was a long time ago), I made dishes like soufflés on a regular basis. Of course I didn’t use imported Gruyère cheese, but even with sharp cheddar cheese or inexpensive Swiss cheese, soufflés were delicious and actually quite inexpensive to prepare. Plus, everyone in my family loved them. So to kind of fancy up my soufflés, I would often make a shrimp sauce to go on top. Well, like I said, we weren’t rich, not technically poor by any means, but with 4 kids, baby sitter expenses, car payments, etc. we kept close tabs on our grocery dollars. And in those days, (the early to mid 70’s) canned shrimp was readily available and cheap, plus you couldn’t just go to your local grocery store and buy fresh shrimp and cook it yourself. Canned shrimp was just about the only way to go. And usually there was no problem with the quality.

But this one time, I made my usual basic sauce, opened a couple cans of shrimp, drained them off, and added them to the pot. We sat down to dinner, and the soufflé was perfect. But the sauce, OMG, there must have been more shell in the cans than there was shrimp. It was absolutely crunchy and absolutely inedible. I was so mad. Here I had made this perfect soufflé, and because of the sauce, the entire meal had to be thrown away. I don’t remember where we went to eat that evening, but it sure wasn’t our dining room! And I truly don’t think I made another soufflé for at least 10 years!

But as I got older and wiser, a) I stopped buying canned shrimp, b) I refrained from covering a perfect soufflé with a sauce, (what was I thinking?) and c) I forgave the soufflé, even though it wasn’t its fault in the first place!

So unless you have a reason as irrefutable as mine for not fixing a soufflé, give this recipe a try at your earliest convenience. You just won’t believe how lovely and creamy this soufflé feels in your mouth. It’s like eating a puffy bite of warm cheese. Just don’t try and dress it up with a fancy sauce. But if you must, just don’t use canned shrimp. Sometimes lessons can be learned at someone else’s expense. And I paid the piper already, so you have a free pass!

  • 5 T. unsalted butter, room temperature, divided
  • 3 T. finely grated Parmesan cheese
  • 4½ T. flour
  • 1½ c. milk (whole milk is best)
  • ¼ tsp. kosher salt
  • freshly ground black pepper (not too much)
  • ¼ tsp. paprika
  • pinch of freshly grated or bottled nutmeg
  • 7 large eggs, room temperature, separated
  • 2 c. grated imported Gruyère cheese (5-6 oz.) or cheese of choice

Grease the inside of a 2 quart casserole dish with 1 tablespoon of the butter. Sprinkle the finely grated Parmesan cheese along the bottom and sides of the dish. Set aside.

Melt the remaining 4 tablespoons of butter in a heavy saucepan. Whisk in the flour. Cook for a couple of minutes. Remove from heat and slowly whisk in the milk. Return pan to heat and bring to a boil. Reduce heat and allow to burble until very thick, stirring constantly. Remove from heat and add the salt, pepper, paprika, and nutmeg. Whisk in the egg yolks one at a time.

Place the egg whites in a mixing bowl and beat to stiff peaks. (Be sure not to get any of the yolk in with the whites when you are separating the eggs or the whites won’t whip up as light and fluffy.)

Fold a third of the yolk sauce and a third of the Gruyère into the egg whites. Do not over-blend. Add the next third of the sauce and cheese into the whites and again fold gently. Add the final third of sauce and cheese into the whites. Scoop the mixture into the prepared casserole. Bake the soufflé in a pre-heated 350 degree oven for 45 minutes or until it has puffed and the top is nicely browned and firm to the touch. (A long skewer inserted into the soufflé should come out fairly clean.) Serve immediately.


FRENCH CHOCOLATE SHORTBREAD COOKIES WITH FLEUR DE SEL

OLYMPUS DIGITAL CAMERA

Pierre Hermé’s sablés au chocolat et à la fleur de sel, also referred to by some as World Peace Cookies, are undoubtedly one of the best chocolate chip cookies ever created.

I stumbled on this recipe when I was looking for a new chocolate cookie recipe. When I found this recipe and realized the author was Dorie Greenspan, I knew the cookie would have to be a winner. (BTW, if you have never tried any of her recipes, you are missing out on the real thing. This woman is a genius, and everything I have tried of hers has been over the top delicious.) Another reason this cookie (sablé) recipe caught my eye was the list of simple ingredients and the ease of preparation. (BTW, sablé is simply the French name for round shortbread cookies.) But back to why I knew I had to try this recipe.

This is how Dorie referred to these cookies in her write-up: “I once said I thought these cookies, the brainchild of the Parisian pastry chef Pierre Hermé, were as important a culinary breakthrough as Toll House cookies, and I’ve never thought better of the statement. These butter-rich, sandy-textured slice-and-bake cookies* are members of the sablé family. But, unlike classic sablés, they are midnight dark — there’s cocoa in the dough — and packed with chunks of hand-chopped bittersweet chocolate**. Perhaps most memorably, they’re salty. Not just a little salty, but remarkably and sensationally salty. It’s the salt — Pierre uses fleur de sel, a moist, off-white sea salt — that surprises, delights and makes the chocolate flavors in the cookies seem preternaturally profound.” She continues, “When I included these in Paris Sweets, they were called Korova Cookies and they instantly won fans, among them my neighbor Richard Gold, who gave them their new name. Richard is convinced that a daily dose of Pierre’s cookies is all that is needed to ensure planetary peace and happiness.”

So to borrow the immortal words of Jimmy Durante when he signed off after each of his television shows with “good night Mrs. Calabash wherever you are” – good night Mr. Gold wherever you are! I truly believe you had it right when you said these cookies could ensure happiness. I know they have brought a lot of happiness to the people who have tried them at my home. As far as planetary peace, well they have never made it out of this house, so I can’t attest to how the rest of the planet would react. But if I were a betting woman, I would bet my 1962 edition of Betty Crocker’s Cook Book, that even aliens would change course for one of these heavenly delights.

*I changed the recipe to make them “scoop” cookies

**I changed the recipe to use semi-sweet mini chocolate chips for ease, convenience, and expense

  • ½ c. (1 stick) plus 3 T. unsalted butter, room temperature (11 T. in all)
  • 2/3 c. packed light brown sugar
  • ¼ c. granulated sugar
  • ½ tsp. fleur de sel or ¼ tsp. fine sea salt
  • 1 tsp. vanilla extract
  • 1¼ c. unbleached all-purpose flour
  • 1/3 c. unsweetened cocoa powder
  • ½ tsp. baking soda
  • generous ¾ c. mini chocolate chips

With an electric mixer, beat the butter until soft and creamy. Add the brown sugar, granulated sugar, salt, and vanilla extract; beat for 2 minutes more. Whisk the flour, cocoa, and baking soda together in a separate bowl. Add to the butter mixture and slowly mix for about 30 seconds or just until the flour disappears into the dough. (The dough will look a bit crumbly.) Add the chocolate chips and mix only to incorporate. Don’t over mix.

Drop by your smallest ice cream scoop onto parchment paper lined baking sheets at least 1-inch apart. (If you don’t own a small ice cream scoop***, use a scant tablespoon of dough.) Lightly press the top of each cookie with the bottom of a glass to make sure the top of the cookie is flat rather than round. Bake the cookies in a pre-heated 325 degree oven from 12-14 minutes or until they start to crack on the surface. They probably won’t look totally done, or feel done, but for this recipe – they are done! Transfer the baking sheet to a wire rack and cool to room temperature. Store in an airtight container.

***If you don’t own any ice cream scoops for use in baking cookies, making muffins, you name it (even scooping ice cream), now is the time to get thee to a kitchen shop. Buy several sizes. They will just save you so much time.

Please note: This dough can be refrigerated for up to 3 days or frozen for up to 2 months.