Category Archives: COOKING CLASS

TUSCAN CANTUCCINI (ITALIAN TWICE-BAKED BISCUITS)

So, we are all familiar with biscotti (pronounced bee-Scott-tee), but probably less familiar with cantuccini (pronounced cantu chee (as in cheese) knee – emphasis on the chee). BTW, one biscotti is a biscotto, and one cantuccini is a cantucci. (Welcome to Italian language school.)

Anyway, cantuccini are a Tuscan twice-baked biscuit often served for dessert with Vin Santo. According to Total Wine, “The sweet dessert wine Vin Santo – “holy wine” – is unique to Italy’s Tuscany region. Traditionally, wine makers dry grapes by hanging the harvested bunches up or arranging them on racks in attics or barns. After three or four months, the semi-dried grapes are full of concentrated sugars and flavors. After pressing, the juice is fermented in small wooden barrels, and  aged for at least three years. The barrels are never completely filled, which exposes the wine to air. They’re also subject to varying temperatures throughout the year.

This treatment, which would wreak havoc on ordinary table wine, can have a delicious effect on Vin Santo. The wine emerges from aging with a characteristic nutty, caramel flavor, a deep golden color and an alcohol content that ranges from 14 to 17 percent. Vin Santo is typically made with Trebbiano and Malvasia grape varieties. A red Vin Santo may also be produced from Sangiovese.”

Me again – The only problem with Vin Santo, is that we have never found a good Vin Santo in the United States. We have brought back Vin Santo in our luggage after trips to Italy, but have never been able to find the real thing here in the states. BTW – If you know of a truly great Vin Santo that can be purchased here, please let me know. I would truly appreciate having that information.)

But back to these cookies/biscuits/type of biscotti/whatever you choose to call them. They are so very delicious. I actually took my old recipe (see Anise Biscotti with Almonds under Biscotti – 6 Ways from Sunday on this site) and adapted it to better resemble the cantuccini we experienced in Tuscany.

So if you want the perfect dessert for an Italian themed dinner, or just want to make a fairly simple cookie for your family to enjoy with breakfast, lunch, or dinner, give this recipe a try. These cantuccini are so much better than anything you can buy in a market or bakery, for about a 6th of the price.

It actually just about kills me when I see a package of 6 biscotti selling for more than it cost me to bake a large batch of these at home. (That’s why I got into home cooking and baking in the first place. I wanted good food without paying an arm and a leg for it. True confession!)

So save your shekels, insure the quality of the ingredients in the biscuits your family will be consuming, provide your family with a tantalizing olfactory experience, and take a break from it all with a lovely cup of coffee or tea and one of these old-world delights. You deserve it! Take care my friends.

  • ½ c. unsalted butter, room temperature 
  • 1 c. sugar
  • 3 eggs
  • 2 tsp. crushed anise seed (not ground) I use my mortar and pestle.
  • 1 tsp. vanilla
  • 3 c. unbleached all-purpose flour
  • 1 T. baking powder
  • ½ tsp. salt
  • 1 c. chopped slivered almonds, toasted

Cream butter and sugar together. Add the eggs, crushed anise seed, and vanilla.

In a separate bowl, whisk together the flour, baking powder, and salt. Combine with butter mixture. Stir in the toasted almonds.

Using your hands liberally greased with butter, divide the dough in half. On a parchment paper lined baking sheet, pat each half into a 12 x 3-inch rectangle.

Bake in a pre-heated 350 degree oven for 30 minutes. Remove from oven. Cool for 13 minutes. Cut each roll diagonally into ½-inch thick slices. Turn the slices cut-side down on the baking sheet. Bake for 13 minutes or until firm. Remove from oven and cool on baking sheet.

Store in an airtight container. 

Note: I suggest baking biscotti with straight oven heat. Convection baking browns them too quickly. These cantuccini are perfect with coffee, tea, or dunked in a glass of Vin Santo.


CHOCOLATE CHIP COOKIES

OLYMPUS DIGITAL CAMERA

Is it ever too late to try a new recipe and find it better than the one you have been using for the last 50 years? In my case, apparently not! Because this recipe produces, hands down, the best “toll house” type chocolate chip cookies I ever tasted. And you have to know that I have baked and tasted a lot of chocolate chip cookies in my day! (Actually, if I had a dollar for every cookie I ever baked, I would not be writing this blog today. I would be sipping Vin Santo and munching on cantuccini (small biscotti) on my balcony overlooking the piazza of a small hill town in Tuscany!)

I don’t know why I decided to look for a new recipe, but I typed “perfect chocolate chip cookies” as my search criteria, and this recipe from Cook’s Illustrated popped up. And when I looked at the recipe, it just made sense. So I gave it a try. And as they say – the rest is history. (Or in this case, my old recipe is history!)

There is just something about the browned butter that lifts the whole flavor of the cookie to a new level. And letting the butter/sugar mixture rest to allow time for the sugars to melt simply makes sense from a scientific point of view. (Like I would know a scientific fact if it walked up and bit me in the posterior!) So believe me when I say I would never have thought to brown the butter and let the dough rest on my own. But I’m sure glad the good folks at Cook’s Illustrated had the genius cells necessary to come up with this concept. Because my good friends; it works! Boy does it work! It even changes the taste of the chocolate.

Yesterday I brought some of these cookies to one of Mr. Cs rehearsals. James, one of the band members, absolutely did not believe me when I told him I had used plain old Nestle’s Toll House Semi-Sweet Chocolate Chips in the cookies. He truly thought I had used a much higher grade of chocolate. I quickly assured him that I don’t usually keep Barry Callebaut* chips in my freezer, so he just had to trust me on this one. (I think the reason the chips tasted so good, was because the browned butter and dark brown sugar had created a more caramel flavored dough. And that dough had brought out the best in the rather très ordinaire chocolate chips I had used.) Whatever the reason, it was decided by one and all, that this was a winner of a cookie.

So next time you bake chocolate chip cookies, give this recipe a try. The dough does take a little longer to prepare because of the recess times. But those are perfect times to perform a little quality control. I mean really, don’t you feel it’s always necessary to sample a couple of the chocolate chips to make sure they haven’t spoiled? And what better time, than during recess?

*According to a taste test performed by the staff of Serious Eats, the following brands were the winners in “The Best Chocolate Chips for Chocolate Chip Cookies” contest:

– Trader Joes (best super market chip) $2.29 for a 12-ounce bag

– Scharffen Berger (best fancypants chips for adults) $6.50 for a 6-ounce bag (yikes)

– Barry Callebaut (pricey but great for children of all ages) $6.95 for a 16-ounce bag

  • 1¾ c. unbleached all-purpose flour
  • ½ tsp. baking soda
  • 1¾ sticks (14 tablespoons) unsalted butter, divided
  • ½ c. granulated sugar
  • ¾ c. packed dark brown sugar
  • 1 tsp. table salt
  • 2 tsp. real vanilla extract
  • 1 lg. egg
  • 1 lg. egg yolk
  • 1½ c. semi-sweet chocolate chips

Whisk the flour and baking soda together in a medium bowl; set aside. Heat 10 tablespoons of the butter in a 10-inch skillet* over medium heat until melted, about 2 minutes. Whisking gently, continue cooking until the butter is a dark golden brown and has a nutty aroma, 5-6 minutes. (Don’t hurry this step. If it takes longer than 6 minutes; so be it! You want the butter brown, not burnt.) Remove skillet from heat and transfer browned butter to the bowl of your mixer. Stir the remaining 4 tablespoons of butter into the browned butter until completely melted. Add both sugars, salt, and vanilla to bowl with butter and beat on medium until fully incorporated. Add egg and yolk and whisk until mixture is smooth with no sugar lumps remaining, about 30 seconds. Let mixture stand 3 minutes, then beat for another 30 seconds. Repeat process of resting and beating 2 more times until mixture is thick, smooth, and shiny. With mixer on a very low speed, add the flour mixture until just combined. Stir in chocolate chips just until evenly disbursed throughout the dough. Do not over-mix. Allow to sit for 5 minutes.

Using an ice cream scoop, shape dough into whatever size cookie you prefer. (Actually the larger the better.) Arrange the balls 2 inches apart on baking sheets that have been lined with parchment paper. Bake 1 tray at a time in a pre-heated 375 degree oven until cookies are golden brown and still puffy, and edges have begun to set but centers are still soft, 10 to 14 minutes, rotating baking sheet halfway through the baking time. Transfer baking sheet to wire rack; cool for about 5 minutes, then remove cookies from pan and let cool completely on rack before serving.

*Avoid using a nonstick skillet to brown the butter; the dark color of the nonstick coating makes it difficult to gauge when the butter is browned.

Please note: You may have noticed that there are no nuts in these cookies. There are two schools of thought on whether or not chocolate chip cookies should contain nuts. I am of the opinion that nuts detract from the overall pleasure of biting into a truly delicious chocolate chip cookie. Now, an oatmeal raisin cookie without nuts – unthinkable! So in essence, everyone needs to choose to include nuts or not. If you simply must have nuts in your chocolate chip cookies, add about ¾ cup chopped and toasted pecans or walnuts at the same time you add the chocolate chips.


LETTUCE TALK SALAD (VINAIGRETTES TOO)

OLYMPUS DIGITAL CAMERA

The other evening I wanted a salad to go with my pasta main dish, but I didn’t want a Caesar or my usual “mixed lettuce and clean out the vegetable bins” either. What my frugal mind wanted was to use up some simple vinaigrette I had prepared earlier in the week. What my mouth wanted was a bit of pizzazz. So I decided to raid my refrigerator shelves and pantry to see what I could do to liven up what often amounts to “the obligatory, good for us so we need to eat it” part of our dinner menu.

First thing I did was pour the already prepared salad dressing into the bottom of a bowl. Then I got out what looked like a nice assortment of tasty ingredients and went to town. The following recipe, which actually turned out to be totally delightful is what I came up with. (I just love ending a sentence with with. It just seems wrong, but I’m told in informal writing, ending a sentence with a preposition is considered de rigueur.) But I digress…

Basically, you can always add taste adventures to your salads by including a variety of ingredients (including a wide variety of greens) that will help lift the overall flavor from mundane to exciting. Some of my favorite “additives” are: nuts and seeds of any kind, dried fruit, olives, minced ginger (an especially healthful ingredient), apple or pear chunks, roasted veggies (especially beets), roasted red pepper (right out of the jar is fine), sliced peperoncini, and of course cheese. By all means use this list as a guide, but don’t limit your choices to just my favorites. Think outside the salad box.

My salad adventure the other evening started with leftover Dijon Mustard and Rice Vinegar Vinaigrette.  And because I don’t really have a favorite dressing, I decided to share several of my easy vinaigrette recipes with you on this post. And do make your own dressings. They are easy to prepare, economical, and truly much more flavorful than what you can purchase in a bottle. You can also control the amount of salt and sugar you are adding to your salads by preparing your own emulsions. So that makes homemade dressings a healthy choice too. So give these dressing a try. All are wonderful ways to make lettuce taste good.

And don’t forget to use kale in your salads. Learn more about this amazing green under the heading Massaged Kale.

  • 3-4 T. salad dressing – your choice
  • 1 c. loosely packed chopped kale
  • kosher salt
  • ½ carrot, cut into julienne strips
  • 1 small celery stick, chopped
  • about ¼ c. thinly sliced red onion
  • ¾ inch piece fresh ginger, finely minced
  • 3 slices of zucchini cut into matchstick sized pieces
  • 2 pickled peperoncini, stemmed, seeded and thinly sliced
  • 2 c. chopped romaine lettuce
  • 1/3 c. slivered almonds

Pour the salad dressing into the bottom of a salad bowl. Add a tiny amount of kosher salt to the chopped kale. Using your fingers, massage the kale* for about 3 minutes or until the leaves darken and feel almost silky. Add to the salad dressing along with all the other salad ingredients, toss lightly and serve immediately.

*Massaged Kale – Kale is a strong flavored, bitter green that can be used other than in the more traditional way, as a wonderful ingredient in soup or stew, if is first treated with a little tender loving care. And as in all things that need a little massaging to render them more acceptable (stubborn personalities for example), kale loses it’s bitter and tough pre-disposition and turns wonderfully silky and sweet when the fibrous ribs have been removed and the leaves have been rubbed (massaged) together with your fingers. (Kale can be massaged either just as is, or by adding just the smallest amount of salt.) The leaves turn darker as the tough cellulose structure breaks down. The leaves actually wilt under the pressure. After this amazing transformation occurs, kale becomes perfect for even the lightest of summer salads.

And don’t even get me started on the nutritional value of kale. Well OK, but just a wee bit of information.

According to the WebMD site, “one cup of chopped kale contains 33 calories and 9% of the daily value of calcium, 206% of vitamin A, 134% of vitamin C, and a whopping 684% of vitamin K. It is also a good source of minerals copper, potassium, iron, manganese, and phosphorus. Kale’s health benefits are primarily linked to the high concentration and excellent source of antioxidant vitamins A, C, and K — and sulphur-containing phytonutrients. Carotenoids and flavonoids are the specific types of antioxidants associated with many of the anti-cancer health benefits. Kale is also rich in the eye-health promoting lutein and zeaxanthin compounds. Beyond antioxidants, the fiber content of cruciferous kale binds bile acids and helps lower blood cholesterol levels and reduce the risk of heart disease, especially when kale is cooked instead of raw.”

My favorite vinaigrettes: 

ASIAN VINAIGRETTE

  • ¼ c. vegetable oil
  • 2 T. sesame oil
  • 4 tsp. white vinegar (the regular old fashioned distilled kind)
  • 1 tsp. fresh lemon juice (the kind that comes from real fruit)
  • 1 tsp. sugar
  • 2 tsp. kosher salt
  • freshly ground black pepper

Whisk together the oils, vinegar, lemon juice, sugar, salt, and pepper.

BASIL VINAIGRETTE

  • ½ c. red wine vinegar
  • 2 T. Dijon mustard
  • 1 T. finely chopped shallots
  • 1 clove garlic, minced
  • 2 T. thinly sliced fresh basil
  • ½ tsp. kosher salt
  • freshly ground black pepper
  • 1½ c. extra virgin olive oil

Whisk all ingredients together.

CAPER VINAIGRETTE

  • 1 T. drained and mashed capers
  • 1 garlic clove, minced
  • 1 T. finely minced shallot
  • 1 T. red wine vinegar
  • 2 T. fresh lemon juice
  • ¾ tsp. seasoned salt
  • freshly ground black pepper
  • 1/3 c. extra virgin olive oil

Whisk all ingredients together.

DIJON MUSTARD AND RICE VINEGAR VINAIGRETTE

  • 2 cloves garlic, finely minced
  • ¼ tsp. sugar
  • ½ tsp. kosher salt
  • freshly ground black pepper
  • 1 T. Dijon mustard
  • ¼ c. rice vinegar
  • 1/3 c. canola oil

Combine all ingredients in a blender and whirl until smooth.

LEMON DIJON VINAIGRETTE

  • 2 T. fresh lemon juice
  • 2 tsp. Dijon mustard
  • ¼ tsp. kosher salt
  • freshly ground black pepper
  • 1 T. minced shallots
  • ½ c. extra virgin olive oil

Whisk together the lemon juice, mustard, salt, pepper, and shallots. Slowly add the olive oil and whisk until emulsified and thickened. Adjust seasoning.

RASPBERRY VINEGAR AND HONEY VINAIGRETTE

  • 3 T. raspberry vinegar
  • 3 T. honey
  • 1/3 c. extra virgin olive oil
  • pinch kosher salt

Whisk all ingredients together.

SPINACH SALAD VINAIGRETTE

  • 2 T. canola oil
  • 1 T. fresh lemon juice
  • 1 T. finely minced shallot
  • 1 garlic clove, finely minced
  • 1 Tsp. Dijon mustard
  • 1 tsp. sugar
  • 1 Tsp. poppy seeds
  • ½ tsp. seasoned salt

Whisk all ingredients together.

SWEET AND SOUR VINAIGRETTE

  • scant 2 T. sherry vinegar
  • 2 tsp. honey
  • 1 tsp. Worcestershire sauce
  • ½ tsp. Dijon mustard
  • 1 garlic clove, finely minced
  • ½ tsp. kosher salt
  • freshly ground black pepper
  • ¼ c. extra virgin olive oil

Whisk together the sherry vinegar, honey, Worcestershire sauce, Dijon mustard, garlic, salt, and pepper. Slowly add the olive oil and whisk until emulsified and thickened. Adjust seasoning.


BREAD BAKING 101

OLYMPUS DIGITAL CAMERAOLYMPUS DIGITAL CAMERA

The first thing you need to know about baking yeast bread is that it is really easy. It does not require a chemistry degree or a diploma from a fancy cooking school. Honest! It just takes time and a few simple, inexpensive ingredients. In fact, I think yeast bread is easier to bake than cake or cookies because it doesn’t contain baking soda or baking powder.

With any type of recipe that requires baking powder or baking soda, you can’t mess around with the ingredients as much as you can when you are using yeast as your leavening agent.  Baking soda (sodium bicarbonate) is alkaline in nature, and when combined with an acid and a liquid like buttermilk, for example, it creates carbon dioxide bubbles, giving rise to the dough. Baking powder, which is basically a blend of an acid like sodium acid pyrophosphate and an alkali (sodium bicarbonate – baking soda), produces the same chemical reaction when added to a liquid. Again, carbon dioxide is the byproduct. The interesting part about baking soda when mixed with an acid liquid, and baking powder when mixed with any liquid, is that in both cases, gases begin to be released immediately. (No waiting time required.) And in the case of double-acting baking powder (which is mostly what you find in your average grocery store), it releases leavening gases on contact with moisture and again during the baking process. A double whammy of leavening action! When a recipe calls for both baking powder and baking soda, the baking powder does most of the leavening. The baking soda is mainly added to neutralize some of the acid and to help ensure a tender crumb. When using baking soda or baking powder, you have to use ingredients in a fairly exact proportion.

Yeast on the other hand, is a living organism that really likes to eat. Active dry yeast (a living microscopic fungus) is activated by giving it a nice warm bath and then something yummy to eat.  Yeast works as the leavening agent in bread dough by eating the sugars (sucrose and fructose) or by converting the starch in flour into sugar. The byproduct of all this sugar being gobbled is CO2. When CO2 is released it is trapped in the bread dough’s elastic web of gluten, in much the same way air is trapped when a balloon is inflated. And although yeasty beasties are hungry little cuties, they can only eat so fast! Thus the time it takes for yeast bread to rise. But unlike other leavening agents, yeasty beasties won’t stop eating until they have metabolized every possible bit of sugar available. So when you are baking bread, if you add a little extra ingredient here and there like extra oil, some dried onion or an herb or two, or need a little more flour than the recipe calls for – no problem. (In fact your little friends the yeasty beasties will love you all the more!) So it is truly pretty darn hard to mess up bread dough.

There are some bread bakers out there who swear by their bread machine. I had one once, and yes there was swearing involved. But in my case the words were aimed at the machine, not to offer it praises. The bread wasn’t bad, it was just boring. Frankly all the bread machine recipes tasted the same. And the texture or crumb was disappointing. Give me a KitchenAid mixer complete with a bread hook attachment any day over a bread machine. And yes, I cheat. I use my mixer because I’m lazy and frankly my hands aren’t as strong as they used to be! But in my defense, I know after 40 some years of using a heavy duty mixer to prepare bread dough that my mixer is never going to do me wrong. But if you enjoy kneading bread by hand, by all means please do so. (More about kneading bread in the Glossary and to follow in the Bread Baking Instructions.)

So in order to help you with your first few loaves of bread, or to help you improve your bread baking technique, I am going to include some recipes for very basic breads and I’m going to tear the recipes apart, bit by bloody bit. (If you are not a novice, please bear with me as I try to help those who are beginners.) And just for the record – no one is born gluten impaired. Everyone can learn to make great bread. There is no such thing as a predisposition to fail when working with gluten!

So have fun baking bread. It truly is not rocket science (although there is some science involved). And if you get stuck, just send me an email and I will help any way I can. apcarr08@wavecable.com

The first recipe we are going to make together is Foccacia. I choose this recipe because at first sight it appears to be terribly complicated with lots and lots of ingredients. But when you stop to really examine the ingredient list and the instructions, they are really quite straight forward and there are only 6 ingredients in the bread itself. 6 ingredients!

But before we go any further, I thought it best for you to become acquainted with the basic ingredients you will be using to bake yeast bread. (Not all breads have all of the ingredients listed below.)

BASIC YEAST BREAD INGREDIENTS:

Eggs – Eggs add richness, color, and wonderful flavor to bread.   

Fats – Oil, butter, and shortening add flavor to bread and make for a tender crumb. (Do not use reduced fat products, whipped butter, or margarine when baking bread because they contain water and the composition of the dough will be weakened and the quality of your bread will be negatively affected.)    

Flour – Flour is the basis of good bread. Be sure to use a good quality flour; one that is untreated with either bleach (powdered bleach belongs in your laundry, not in your bread), or potassium bromate, a suspected carcinogen. The flour you choose for your bread makes a difference in the quality of the final product. If you are a beginning bread baker, I would advise following recipes as written.   

Unbleached all-purpose flour works just fine in most bread recipes.

Bread flour usually makes for a superior loaf, but for rustic bread, unbleached all-purpose flour is your best choice.

Whole grain flours and other types of flour add color, texture, and flavor to breads. These flours don’t usually contain enough gluten to produce a perfect loaf on their own, so usually all purpose or bread flour is added to provide structure.

Cake flour does not work for bread because there isn’t enough protein, or gluten, to withstand the pressure of the gasses created by the metabolizing yeast.

Liquid – When liquid is added to flour, two proteins, glutenin and gliadin, combine to form gluten. Gluten forms a network of proteins that stretch through the bread dough like a web, trapping air bubbles that form as the yeast ferments. This creates the characteristic air holes of perfect bread. The type of liquid you use will change the bread characteristics. Water will make a loaf that has more wheat flavor and a crisper crust. Milk and cream-based breads are richer and possess a finer texture. They also brown more quickly because of the additional sugar and butterfat added to the dough.

Salt – Salt is essential to every bread recipe. It helps add flavor, contribute to good texture, and control yeast development which prevents bread from over rising.

Sweeteners – White sugar, brown sugar, corn syrup, agave, molasses, honey, maple syrup, concentrated fruit syrup are all examples of the type of fuel that is needed by yeast in order to produce carbon dioxide. (Some bread recipes don’t use sugar, but depend on sugars in the flour to provide food for the yeast.)

Yeast – the leavening agent used to make bread dough rise. (I use Active Dry Yeast purchased in bulk (4-oz. jars which equals 16 envelopes) which tends to be fresher and definitely less expensive than buying the individual little packages.  I don’t recommend rapid-rise yeast (unless it is specifically called for in a recipe) because the longer the rise (and fermentation process), the better the flavor.

BREAD RECIPES:

FOCCACIA

OLYMPUS DIGITAL CAMERA

  • 1 1/3 c. warm water
  • 1 T. or 1 pkg. active dry yeast
  • 2 tsp. sugar
  • 1 ½ tsp. kosher salt
  • about 1/2 c. extra virgin olive oil, divided
  • 3 1/2 c. unbleached  all-purpose flour

Pour warm water into a mixing bowl, sprinkle with yeast, and stir in sugar, salt, and ¼ cup of the olive oil. Let rest (proof) for 5-8 minutes. (Refer to Basic Instructions #1 below) Add two and a half cups of the flour and knead (Refer to Basic Instructions #2) for 4-5 minutes adding flour as needed to make a smooth and soft dough. (Refer to Basic Instructions #3)  Round dough up in the bowl, pour a little olive oil over the top, and turn dough with your hands (the best tool in your kitchen, by the way) until the entire surface is coated. (Refer to Basic Instructions #4) Cover with a tea towel and let rest for an hour or until it has doubled in size. (Refer to Basic Instructions #5) Pour about a tablespoon of the remaining olive oil on a rimmed baking sheet. Punch down the dough (Refer to Basic Instructions #6), remove it from the bowl, and place it on the greased baking sheet. Pat dough out until it is about ½-inch thick. (It should not be a perfect rectangle.) Poke deep indentations all over the surface. Slather enough of the remaining olive oil over the dough to completely cover the surface. Sprinkle with salt and pepper and toppings of choice. (see below) Let rest for about 30 minutes. (Refer to Basic Instructions #7), Bake in a pre-heated 425 degree oven for about 15 minutes or until golden brown. Let bread cool on pan for about 5 minutes before transferring to a cooling rack.  Serve warm or at room temperature.

Toppings:

large crystal sea salt or kosher salt, freshly ground black pepper

Vegetable Choice (pick one or more)

chopped onion,coarsely chopped pitted kalamata olive, sun-dried tomato packed in oil, 3-4 garlic cloves, chopped, sliced mushrooms

Cheese Choice (pick one or more)

crumbled feta, shredded parmesan cheese, diced goat cheese, shredded mozzarella cheese, crumbled blue cheese

Herb Choice – 1 tsp. (pick one or more)

rosemary, basil, oregano, thyme, chives

BEER BREAD

OLYMPUS DIGITAL CAMERA

  • 12-oz. bottle of beer (I like Alaskan Amber)
  • ¼ c. water
  • 2 tsp. kosher salt
  • 2 T. sugar
  • 2 T. butter
  • 2 T. yeast (or 2 pkgs.)
  • 5 c. flour
  • cornmeal

Heat beer, water, salt, sugar, and butter until very warm. Pour into the bowl of your stand mixer. Allow to cool to proper temperature for yeast to be added, about 105 degrees F. Add yeast; allow liquid mixture to sit (proof) for about 5 minutes. (Refer to Basic Instructions #1) Add enough flour to make a stiff dough. (almost feels dry to the touch) Knead for about 5 minutes. (Refer to Basic Instructions #2&3) Add a tiny bit of vegetable oil to the bowl and coat the entire surface. (Refer to Basic Instructions #4)  Cover and allow dough to rise until doubled, about 45 minutes; punch down. (Refer to Basic Instructions #5) Let rest 15 minutes. Shape in 2 long rolls on cornmeal covered pan. (Refer to Basic Instructions #8) Let rest another 15 minutes.  Meanwhile, place a pan with 2-3 cups of water on the bottom rack of your oven and preheat the oven to 425 degrees. (Refer to Basic Instructions #9) When the oven is hot and the bread is risen and ready to be baked, place bread pan on a rack in the middle of the oven. Quickly close the oven door to capture the steam.  Bake for about 25 minutes or until loaves are golden brown and sound hollow when lightly tapped. (Refer to Basic Instructions #10) Serve bread warm with lots of lovely, room temperature butter.

LIGHT RYE BREAD

OLYMPUS DIGITAL CAMERA

  • 2 T. or 2 pkgs. active dry yeast
  • 2 1/2 c. warm water
  • 2/3 c. molasses
  • 1 T. kosher salt
  • 1/4 c. vegetable oil
  • 1/4 c. cocoa powder
  • 2 c. rye flour
  • 5 c. bread flour
  • cornmeal

In the bowl of a heavy duty mixer, dissolve the yeast in the warm water; add the molasses. Let proof for about 10 minutes. (Refer to Basic Instructions #1) Add salt, vegetable oil, cocoa powder, 2 cups of the rye flour and 2 cups of the bread flour. Mix until all of the flour is absorbed. Add the remaining 3 cups bread flour until the dough pulls away from the bottom of the bowl and the dough is smooth and elastic. (This step may take more or less than 3 cups of bread flour.) (Refer to Basic Instructions #2) Pour a small amount of vegetable oil over the dough, turning it so it gets coated in the oil. (Refer to Basic Instructions #4) Cover the bowl with plastic wrap. Let rise at room temperature until it has doubled in size, about 90 minutes. After 90 minutes, gently punch down the dough and divide it into 2 equal parts. Shape each half into a torpedo shaped loaf (Refer to Basic Instructions #8) and place both loaves well separated on a greased baking sheet that has been lightly sprinkled with corn meal. Cover with a clean tea towel. Let rise again for about 45 minutes. Just before placing in a pre-heated 350 degree oven, cut 5 shallow diagonal slashes across each loaf. Bake for 40-50 minutes or until the bread sounds hollow when gently tapped. (Refer to Basic Instructions #10)

PICNIC BUNS

OLYMPUS DIGITAL CAMERA

  • ¼ c. warm water
  • 1 T. or 1 pkg. active dry yeast
  • ¾c. warm, scalded milk (not too warm or your yeasty beasties won’t be happy)
  • ¼ c. sugar
  • 1 tsp. salt
  • 1 egg, room temperature
  • ¼ c. Crisco (sometimes I use butter – sorry grandma)
  • 3 ½ c. or more flour
  • vegetable oil

In a large mixing bowl, (I use the bowl of my Kitchen Aid mixer), combine the water, yeast, milk, sugar, salt, egg, and Crisco. Let proof for about 10 minutes. (You’ve got the idea by now!) Add 2 cups of the flour and mix thoroughly. Add enough remaining flour to form a medium stiff dough. (Not sticky when you touch it with your finger, but not dry feeling either.) Pour about a teaspoon of oil over the dough and roll into a ball. When dough ball is completely greased, cover the mixer bowl with a tea towel, let rise for about 90 minutes or until doubled. Punch down and let rise again until doubled, about 30 minutes. Butter a 9×13-inch pan. Punch down dough again and divide into 18 pieces. (I just squeeze off small balls of dough as I place them into the prepared pan.) Cover with a tea towel again, and let rise for 30 minutes or until doubled in size. Bake in a pre-heated 400 degree oven for 12-15 minutes or until a nice golden brown. Serve warm.

BASIC INSTRUCTIONS

1)      The secret to getting your yeast to perform as required is to treat it right. Yeast loves warm liquid and just gets all warm and fuzzy if at the same time it is sitting in the tepid liquid, it is given a little nibble of something on which to munch. In most cases, it’s a wee bit of sugar or honey, but sometimes it’s just some flour. If the yeast is behaving properly, and you haven’t given it too hot a bath or it’s already gone to its happy home in yeasty heaven, after a couple of minutes you will see little bubbles form around the rim of the bowl. Then after a few more minutes it will look like the liquid is alive. This is what you want. You have proven that the yeast is not only happy, it is alive and well. It is safe to go on to the next step in your recipe. BTW, if your liquid doesn’t start to churn, you either used water which was too hot, or your yeast is dead. Pay close attention to the expiration date on your package or container of yeast. If the yeast is past its prime, toss it and start over with a fresh package.

2)      To knead bread dough by hand, place it on a floured surface.  Pick up the far edge of the dough and fold it over the bottom edge. Press down with the heels of your hands, pushing the dough away from you. Turn the dough one quarter turn and repeat the process. Add additional flour as needed. When properly kneaded, bread dough will be smooth and satiny, stretchy and no longer sticky. This process takes anywhere from 5-10 minutes.

To knead bread dough using a heavy duty mixer like a KitchenAid, add most of the flour called for in your recipe. Continue adding the remaining flour in very small increments until all of the dough pulls away from the bottom of the bowl. (It will look like someone cleaned the bowl for you.)

3)      Will look smooth and slightly shiny, almost satiny.

4)      Many recipes will instruct you to get a clean bowl, grease it with shortening, and place the kneaded dough in the new bowl and turn it so all surfaces are greased. Ridiculous! Use the bowl in which you originally mixed your bread ingredients! Pour a little oil down over the bread, and with your hands roll the dough into a ball making sure that every bit of the surfaced is lovingly covered with a thin film of oil.

5)      Tea towels or plastic wrap help keep the dough warm and draft-free while the yeast does its magic. During this time the dough should double in size. To make sure your dough has risen sufficiently, poke it with 2 fingers. If the dough holds the indentation, it’s ready.

6)      We punch dough down after the initial rising for several reasons: to relax the gluten, get rid of some of the carbon dioxide formed by the yeast, and to equalize the temperature. A couple of gentle punches are sufficient. (This is not the time to think of the IRS!)

7)      Allowing the bread dough to rise again just adds volume and makes for a softer crumb.

8)      Use your hands to shape the dough. Divide the dough in half and basically just roll each piece and stretch it in the air with your hands to the desired shape before placing it on prepared baking sheet. (Refer to the picture to see general desired shape.)

9)      In the first few minutes of baking, loaves of bread will rise rapidly as the gases trapped inside expand and the yeast has a final burst of activity. Steaming within this time helps keep the crust soft. This allows the bread to continue expanding freely. The steam that has settled on the surface of the bread also dissolves sugars in the dough. As the bread stops expanding and the steam begins to evaporate, the sugars are left to caramelize and create a glossy crust.

10)      Bread literally sounds like a hollow drum when it is baked. But tap gently, don’t pound on it like you are trying to wake up a teenager by knocking on his or her bedroom door at 11:00 on a Saturday morning.

GLOSSARY

CRUMB – the soft inner portion of a bread (distinguished from crust)

FIRST RISE – This is the initial fermentation when yeast produces carbon dioxide bubbles that leaven the bread. The first rise (fermentation) usually takes about 1 to 1 1/2 hours. After the first rise, the dough is punched down to get rid of some of the carbon dioxide formed by the yeast, to relax the gluten a little, and to equalize the temperature.    

KNEAD – Bread dough is kneaded to distribute the yeast and develop gluten for an even texture or crumb.

To knead bread dough by hand, place it on a floured surface.  Pick up the far edge of the dough and fold it over the bottom edge. Press down with the heels of your hands, pushing the dough away from you. Turn the dough one quarter turn and repeat the process. When properly kneaded, bread dough will be smooth and satiny, stretchy and no longer sticky. This process takes anywhere from 5-10 minutes.

To knead bread dough using a heavy duty mixer like a KitchenAid, add most of the flour called for in your recipe. Continue adding the remaining flour in very small increments until all of the dough pulls away from the bottom of the bowl. (It will look like someone cleaned the bowl for you.)

PROOF – Measure out the yeast and mix it with the water called for in the recipe. Yeast is happiest at about 75°-80°, so the water should feel barely warm or lukewarm to the touch. Add just a pinch of sugar or whatever ingredients are called for in the recipe to give the yeast something on which to munch. Let the yeast and water sit for a few minutes. First, the water will dissolve the dry coating around the granules of yeast, releasing the active yeast inside. The active yeast will go to work on the sugar and a bubbly foam will start to form on the surface from the carbon dioxide being released. This foam is “proof” that the yeast is active, and once you see it, you know the yeast is alive and well and will leaven your dough.

SECOND RISE (PROOFING) -After you’ve punched down the dough, you want to gently knead it again while it is still in the bowl. Then shape the bread according to the recipe instructions and let it rise again until it nearly doubles in size (which will take less time than the first rising). Sometimes bread will not rise as much the second time as the first. Again, it’s important that the bread rise in a warm, draft-free area. To test for doneness, again use the finger test. Poke it with 2 fingers; if it holds the indentation, it’s ready. 

WARM (TEPID) WATER – Yeast needs a warm liquid to wake up. I define the perfect temperature for yeast to be happy as about the same temperature in which you would bathe a new born baby. Lukewarm. Not hot. Not cold. Slightly warm.

YEAST – the leavening agent used to make dough rise. Yeast is actually a living microorganism.  And this darling little critter lives just to convert fermentable sugars into (among other things) carbon dioxide.    


SPICE IT UP! HOW TO USE HERBS & SPICES FOR MAXIMUM FLAVOR IN YOUR PREPARED FOOD

OLYMPUS DIGITAL CAMERAOLYMPUS DIGITAL CAMERA

Before I started writing this segment for my blog, (the above pictures are of my main spice cabinet shown both closed and open, by-the-way) I never gave much thought to whether a seasoning I loved was an herb or a spice. But then I realized that someone might ask me for a definition or if there is a difference, so I thought I better do some research. What I learned was very interesting. In general, there are definite similarities between herbs and spices, but there are also subtle differences. Herbs are obtained from the leaves of herbaceous (non-woody) plants. Spices are obtained from roots, flowers, fruits, seeds, or bark. In some cases both an herb and spice may come from the same plant. Dill is a good example. The seeds from the dill plant are spices, while the soft stems and leaves of the plant are classified as herbs. Another example: cilantro (from the Coriandrum sativum plant) is considered an herb, while the seed (coriander) is categorized as a spice. While both herbs and spices may be used for the purpose of flavoring food, spices are generally stronger in flavor so a smaller quantity is needed for flavoring. Another interesting difference between herbs and spices – herbs can be found all around the world, while spices are more commonly found in the Far East and in tropical countries.

Good cooking is not rocket science. It’s just a matter of knowing what ingredients combine well to taste, smell, and present a pleasing appearance. And the only way to truly become an excellent cook is to practice your craft. A good rule to follow when first working with herbs and spices, is to smell a spice or herb you are considering using with your other ingredients. If it smells like it would taste good in combination, it probably would. For example: you smell tomatoes and oregano together, and your memory of pleasant taste sensations will help you realize that this is a good combination. Add some thyme to the mix, and your nose should tell you that Italian heaven is well within your reach! Now open the ginger container. Does ginger smell like it would go well with oregano, thyme, and tomatoes? Probably not.  So don’t use it. Trust your nose; it should lead you in the right direction.

When you begin experimenting with herbs and spices, start small, like ¼ teaspoon. Some herbs and spices are more robust than others. For example, both rosemary and thyme are very strong flavored. They are two of my favorite herbs, but over the years I have gained a healthy respect for using them in moderation. And until you become accustomed to working with them yourself, have a very light hand.

The following are the basic herbs, spices, and blends I feel every cook should have in their kitchen: Basil (dried leaves) Bay Leaves, Black Peppercorns, Caraway Seed, Cayenne, Chili Powder, Cinnamon (ground), Cloves (ground), Crushed Red Pepper Flakes, Cumin, Curry Powder, Dill Weed, Garlic (granulated), Ginger (ground), Marjoram (leaves) Nutmeg (ground), Onion (both granulated and dehydrated pieces), Oregano (leaves), Paprika, Parsley (dehydrated), Poultry Seasoning, Rosemary (leaves), Sage (ground), Savory (leaves), Seasoned Salt, and Thyme (leaves).

How to buy dried herbs, spices, and blends: IN BULK! Any time you buy spices and herbs in those cute little bottles or cans, you are throwing your money away. I did a cost comparison at our very own island grocery store recently. For 1 pound of McCormick oregano, the cost is $164.90 ($6.39 for a .62 oz. bottle). For 1 pound of oregano in bulk, the cost is $9.19. Buying those darling little glass bottles costs you 1800% more than buying in bulk! I rest my case! For a greater selection of bulk herbs and spices, visit your local food co-op, Winco (if you are lucky enough to have one nearby), or any upscale market like Central Market or Whole Foods (if you are blessed enough to live in the Puget Sound area).

My philosophy regarding the use of herbs and spices has always been – use liberally and often! The proper use of seasonings can make all the difference in the world to the enjoyment of almost any dish you prepare. (Think apple pie without nutmeg or cinnamon!) (Both spices, by the way….)

HERBS, SPICES AND BLENDS:

BASIL

Dried – used in tomato based sauces/soups such as spaghetti sauce or pizza sauce

Fresh – bruschetta, salads, salad dressings or to liven up spaghetti sauce (add just before serving)  

BAY LEAVES

Dried or fresh – used to lend a provocative aroma to stews, soups, Italian sauces of all kinds

BLACK PEPPERCORNS – THE MASTER SPICE

A little history: Pepper is native to the hot jungle lands that are never farther than 20 degrees from the Equator. The names associated with pepper sound like a globe-trotter’s itinerary of India and the Far East. Tellicherry, Alleppey, and Pandjang, for example, have been pepper ports for hundreds, if not thousands, of years. Pepper (Piper nigrum), believed to be native to Malabar on the western coast of India, is a tropical vine that produces both black and white pepper. Though both black and white berries are born on the same vine, there is a difference.  Pepper berries to be used for black pepper are picked just before they are fully ripe. Those that are to be sold as white peppercorns are allowed to ripen completely; this makes the removal of the dark outer covering easier, leaving only the inner, straw colored kernel. Black peppercorns are used leaving the dark outer covering intact. In the United States we use eleven or twelve times as much black pepper as white; in Europe the reverse is true. Source – The Spice Cook Book, copyright 1964.

CARAWAY SEED

Dried – used in rye bread, sauerkraut, and to add flavor to cheese spreads

CAYENNE PEPPER

Dried – a ground hot, red chili pepper used in cheese dishes, creamy sauces, and soups  

CHILI POWDER (BLEND)

Blend of herbs and spices used in chili, soups and sauces  

CINNAMON

Whole (cinnamon stick) or ground – used in desserts, breads, and sauces  

CLOVES

Whole or ground – used in desserts, sauces, and soups      

CRUSHED RED PEPPER FLAKES

Used to give all kinds of dishes a touch of heat

CUMIN          

Dried (whole seed or ground) – used in chili, Indian dishes, soups, and stews  

CURRY POWDER

Spice blend (combination of herbs and spices including, but not limited to: coriander, cumin, fenugreek, cayenne, turmeric, allspice, cardamom, cloves, fennel, ginger, mace, mustard, and black or white pepper)

Used in “curries”, soups, and dips

DILL    

Dried – whole seeds or dried leaves (dill weed)

Fresh – Especially good with sour-cream/Greek yogurt based dressings and sauces with cucumber. Also a major ingredient  in potato salad, fish dishes, tarter sauces, and savory breads.

GINGER

Dried – ground

Used in desserts, cookies, sauces, and meat glazes  

MARJORAM (cousin to oregano but with a much sweeter, more delicate flavor)

Dried or fresh leaves

Used in soups, stews, tomato based sauces, stuffing  

Note: Sometimes listed as “Sweet Marjoram”

NUTMEG (great in both savory and sweet dishes)

Dried – whole seed or ground

Used in desserts such as spice cake.  Essential in Swedish Meatballs. Wonderful freshly grated on coffee drinks. Excellent in cream sauces for veggies such as Swiss chard and spinach.

OREGANO – lusty and assertive flavor, slightly bitter

Dried or fresh leaves

Used in tomato sauces, soups, cheese and egg dishes  

PAPRIKA (CAPSICUM)

Dried ground bell peppers and chili peppers  Used in many Hungarian dishes, soups, stews, salad dressings, and as a garnish.  

PARSLEY

Dried or fresh leaves

Used in almost any savory dish. (Parsley is loaded with nutrition. Like a lot of other green herbs and vegetables, parsley is a good source of vitamin K, vitamin A, vitamin C, potassium, and fiber. Its flavonoid content is substantial, giving it strong antioxidant activity. It also contains some useful iron. So not only does the flavor of parsley compliment other savory herbs and spices, it is very good for you. A sprinkling of chopped parsley adds both color and a nice fresh taste to any savory dish.)

POULTRY SEASONING (BLEND)

Spice blend (combination of herbs and spices including thyme, sage, marjoram, rosemary, black pepper, and nutmeg.     

ROSEMARY    

Dried or fresh leaves

Used in tomato sauces, stews, lamb, beef, and chicken dishes and marinades, to flavor roasted nuts  

SAGE (an ingredient in poultry seasoning)

Dried or fresh leaves

Used in poultry stuffing, chicken dishes  

SAVORY (an ingredient in poultry seasoning)

Dried or fresh leaves

Used to flavor meats, soups, and sauces

SEASONED SALT (BLEND)

Used in many savory dishes or as a replacement for plain salt. See recipe under THIS & THAT.  

THYME           

Dried or fresh leaves

Used in soups, stews, tomato sauces, meat marinades, stuffing, salad dressings, and herb breads.  


SOUP MAKING 101

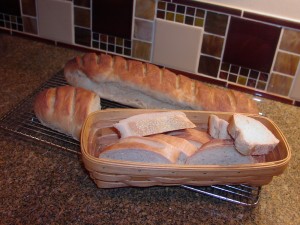
Soup is one of the easiest, most economical and delicious foods you can prepare. I love to serve a small bowl of soup as the first course at a dinner party. On weekends I often start a pot of soup right after breakfast to serve at lunch time. And one of our favorite dinners is a big bowl of hearty soup with a warm sourdough loaf and a nice glass of wine. I never feel that I have stinted my friends or family when I serve soup. I truly believe that good soup is at the heart of excellent cooking.  Because soup is a blend of ingredients that offer layers of flavor and texture, it is important to always use the best and freshest ingredients. It’s that wonderful blend of flavors that make our taste buds sing. Homemade soup is also the best way I know to get children to eat their veggies.

In my opinion, the best way to learn to make great soup is to follow a recipe. This is where you depend on your family and friends. If your Aunt Martha, for example, makes the best stew you have ever tasted, ask her for her recipe. Then follow the recipe. I know that sounds like no fun at all, but believe me following a recipe is the best way to ensure success while you are still in the learning phase. And I don’t mean “kinda/sorta” following the recipe, I mean following it to the letter. After you have mastered a few recipes, then try adding some of your own ingredients. Remember, no one becomes a master craftsperson (and that’s my definition of a good cook) until they do the basics. It’s just the same as the answer to the old question “How do you get to Carnegie Hall?” Answer: Practice, practice, practice! How do you get to be a good cook? Practice, practice, practice!

Since many recipes are not written for someone who’s cooking skills are still rudimentary (my own, for example), I thought I would lay out my own soup making basics. Hopefully they will help you if the recipe you are trying to follow does not include detailed directions. (Trust me, Aunt Martha will only give you the ingredients. If you are really a favorite of hers, she will tell you how much of each ingredient. What she won’t give you however, no matter how much she loves you, is how to make a cream sauce, how long to sauté the vegetables, or when to add each ingredient.)

BASIC GUIDELINE FOR PREPARING DELICIOUS SOUP:

PROPER COOKWARE:

Soup cooks best in a lidded heavy gauge stainless steel pot (like Cuisanart or Bourgeat) or in an enameled cast iron pot like LeCreuset. Most soups need a period of time to simmer. This cooking time allows meat to tenderize, dried beans to rehydrate, vegetables to become tender and flavors to develop. With a heavy duty pan, you can turn the heat to low and feel confident that the bottom of the pan is heating evenly and your precious ingredients are not burning. (That doesn’t mean that you don’t have to give the pot a stir once in awhile.)


GOOD INGREDIENTS:

MEAT – Cut meat into bite size pieces, unless of course you are starting with a ham hock or some other meat on bone product. Beef, lamb, pork, bacon, and some sausages go in at the beginning of the cooking time. Other sausages, like Andouille or Linguica might be added in stages (1/2 at the beginning of the cooking time to flavor the broth and the second half towards the end of the cooking time for a fresh burst of flavor). Some recipes will ask that you brown the meat before adding other ingredients. Browning meat has 2 benefits. First it seals in juices by caramelizing* each piece of meat, and secondly, the wonderful brown bits left on the bottom of the pan provide a lovely base for a rich broth.  *Caramelization is a culinary phenomenon that occurs when carbohydrates like sugar are heated to temperatures of 300°F or higher and when proteins in meat are heated to temperatures of 310°F or higher, causing them to turn brown.


CHICKEN – Most of the time, I add cubed, raw chicken pieces towards the end of the cooking time. I don’t like the texture of chicken that has been cooked for hours. (I call it “string” chicken.) And if you are adding left over chicken or turkey, do so at the last moment. I often buy a rotisserie chicken when I am at Costco. They are delicious, inexpensive, and convenient. The first evening I usually cut up the chicken and let Mr. C. take his pick. (He loves dark meat so I don’t have to worry about him eating the breast.) The second day I use part of the chicken breast to make chicken salad for lunch. Then, the next day I use the last of the chicken for soup. Three meals out of a $6.00 investment, not bad!


VEGETABLES – Cut vegetables smaller than the meat, ideally of similar size. Add vegetables in order of time it takes to become tender (or crisp tender). The following is my usual order for adding vegetable to soup:

–       Broth Vegetables: Onion, shallots, carrot, celery, garlic, and canned tomatoes (i.e. diced, paste, sauce). I usually add these vegetables along with the water or broth. I like the onion and shallot pieces to all but disappear, the carrot to cook completely and lose its’ independent flavor, and the celery and garlic to be reduced to a background texture and flavor.

–       Chunks of potato, red, green, yellow pepper, turnip, fresh green bean pieces, halved or quartered mushrooms, beets, carrot* pieces come towards the end of the cooking time, because they only take 20-30 minutes to cook

–       Broccoli, cauliflower, cabbage, kale take about 10 minutes to come to crisp tender

–       Frozen peas, corn, zucchini slices, spinach just need to be warmed

–       Garnish Vegetables: Sliced green onions, shredded carrots, etc. – add on top of each bowl of soup as a garnish

*Please note, if you want to taste carrot in your soup or stew, add additional carrot pieces at this point. I don’t care for the flavor of cooked carrots, so I only use them as a broth vegetable. They are there for color and vitamin content, but I don’t have to taste them!

LIQUID – I mostly start soup with canned stock/broth*, or water infused with beef, chicken, or vegetable base. (You can find jars of beef, chicken, and vegetable base at any grocery store.) Using broth rather than water starts your soup off with a great base in which to keep layering in additional flavor. Red and white wine, cans of tomato sauce or paste, hot sauce (I prefer Frank’s Red Hot), Worcestershire sauce, lemon juice, and beer, also are great liquids used to enhance the flavor of soup broth.

*Stock: A strained liquid that results from simmering meats, fish, herbs, and vegetables in water. It is usually made by browning bones, vegetables and other ingredients before they are cooked in the liquid for hours.

*Broth: A flavorful, aromatic liquid made by simmering water or stock with meat or vegetables. Generally speaking, stock has a heartier, richer flavor than broth because it is made with browned ingredients including bones. Broth has a more subtle flavor because it is made with meat only, no bones. In most recipes stock and broth can be used interchangeably.

HERBS AND SPICES – I truly believe the best soups include a blend of dried herbs and spices and fresh herbs. I almost always start my soups with what I call my “broth herbs”. These are dried herbs and/or spices that provide a subtle background flavor. Then I often finish the soup with a small garnish of the fresh version of the dried herb I used in the broth.

–       Broth Herbs and Spices:  Dried bay leaves, basil, cayenne, coriander, cumin, curry, marjoram, oregano, parsley, paprika, red pepper flakes, rosemary, sage, savory, and thyme.

Hint about spices – I buy spices in bulk where available (Winco has a nice selection) and the rest in large containers at Cash and Carry. And yes I know “real” cooks would tell you that spices lose their flavor after about a year. To this I say “bologna” (or words to that effect). OK, the ideal would be to use your spices in a timely manner, but I use dried herbs and spices with sheer abandon, and if I bought them in those sweet little mini ounce jars, I would sorely cut into our retirement funds. So I say – buy in bulk, use your spices until they are gone, and replace when needed.

–       Fresh Garnish Herbs: Basil, Marjoram, Oregano, Parsley, Rosemary, and Thyme

FINISHING TOUCHES – Many soups are made even better with a little “something” added on each serving – a drizzle of olive oil, dollop of sour cream, grated cheese, chopped onion, fresh parsley, homemade garlic croutons (recipe to follow),  just to mention a few. Many recipes will provide you with ideas for garnishes. Soup can be a little boring to look at, so a pretty and tasty garnish is a very nice touch.

BASIC GUIDELINE FOR MEAT (HAM HOCK, LAMB, BACON, SAUSAGE OR GROUND BEEF) AND BEAN SOUPS (INCLUDING CHILI):

1)      Place meat in large soup pot (ham hock, sliced sausage, etc.) OR

2)      Fry bacon or brown bulk meats such as Italian sausage or ground beef in 1-2 tablespoons oil (Canola or olive)

3)      Add broth vegetables (some recipes ask you to sauté the vegetables before adding liquid)

4)      Add liquids (water, stock, wine, tomato sauce, etc.)

5)      Add washed beans (or soaked beans)

6)      Add broth herbs, kosher salt (go light), and freshly ground black pepper

7)      Bring to boil, reduce heat, cover and simmer until meat and beans are tender

8)      Add additional vegetables in order of length of cooking time (This ensures even cooking and prevents mishaps like crunchy or mushy potatoes)

9)      Adjust seasoning (salt and pepper)

10)   Stir in heavy cream, sour cream, lemon juice, etc. – do not boil after this addition

11)   Add last minute herbs (parsley, basil, etc.)

12)   Place garnishes such as chopped onion, grated cheese, sour cream, chunks of feta cheeses, etc. on the table

13)   Ladle soup into bowls

14)   Serve

BASIC GUIDELINE FOR CHICKEN OR TURKEY SOUP WITH NOODLES:

1)      If you have the time, place pieces of chicken (with bone and skin) on a rimmed baking sheet. Sprinkle with kosher salt and freshly ground black pepper. Bake at 400 degrees for 45 minutes or until very brown. Allow to cool and cut chicken meat off the bones and set aside. (If you don’t have the time to bake the chicken first, put it in the pot, and begin with step 3. When the chicken is just done, remove from broth and allow to cool. Then cut off the chicken, set aside, and return the bones to the broth.)

2)      Place bones in large soup pot

3)      Add chicken stock

4)      Add broth vegetables

5)      Add broth herbs, kosher salt (go light), and freshly ground black pepper

6)      Bring to boil, reduce heat, cover and simmer for about an hour

7)      Remove bones

8)      Add cooked noodles (Unless recipe specifies that you cook the pasta in the soup, cook pasta separately to al dente in boiling, salted water.)

9)      Add reserved cooked chicken

10)   Adjust seasoning (salt and pepper)

11)   Ladle soup into bowls and garnish with herbs or veggies (parsley, chopped green onion, etc.) BTW – thinly sliced green onion added just before serving has become our ONLY way to eat chicken or turkey soup.

12)   Serve


BASIC GUIDELINE FOR THICKENED SOUP OF STEW:

1)      Place meat in large soup pot (in some cases you will brown the meat first)

2)      Add broth vegetables (some recipes ask you to sauté the vegetables before adding liquid)

3)      Add liquids (water, stock, wine, tomato sauce, etc.)

4)      Add broth herbs, kosher salt (go light), and freshly ground black pepper

5)      Bring to boil, reduce heat, cover and simmer until meat is tender

6)      Add additional vegetables in order of length of cooking time (This ensures even cooking and prevents mishaps like crunchy carrots or mushy potatoes)

7)      Adjust seasoning (salt and pepper)

8)      Depending on how thick you want your soup or stew, place 3 tablespoons water in a small bowl and whisk in 1 tablespoon flour of cornstarch. Then whisk this mixture into broth and bring to boil. If not thick enough, repeat process until you reach desired thickness.

9)      Add last minute herbs (parsley, basil, etc.)

10)     Ladle soup into bowls and garnish with herbs or veggies (parsley, chopped green onion, etc.)

11)   Serve

BASIC GUIDELINE FOR CREAM SOUPS:

1)      Melt butter or oil in heavy pan

2)      Sauté vegetables, if any, according to the recipe

3)      Whisk in thickening agent (flour, cornstarch, etc.) Let burble for a minute or two.

4)      Whisk in liquids (except last minute additions like sour cream, heavy cream or lemon juice)

5)      Add seasonings

6)      Bring to boil, reduce heat, cover and simmer according to recipe

7)      Add additional ingredients liked cooked meat or cooked vegetables

8)      Add final ingredients like sour cream or cognac

9)      Adjust seasoning (salt and pepper)

10)   If cheese is called for, remove soup from heat and stir in cheese

11)   Ladle into bowls and add last minute garnishes like herbs (parsley, basil, etc.) or homemade croutons (my personal favorite) Recipe for Homemade Croutons to follow.

12)   Serve

*Crouton recipe under THIS & THAT