I am always trying (most times not terribly successfully) to remove added sugar from recipes. So, the other evening to accompany Vegetarian Lentil Soup, I decided to develop a sugar-free cornbread recipe. I perused a few sites looking for the perfect recipe, but some had bacon fat, or some other ingredient that just didn’t work for me. So, I cobbled together this recipe. And fortunately, it worked. Boy did it work! I can honestly say I had no feelings of guilt eating this cornbread. Of course, there was butter in the recipe. But the no additional sugar helped me from becoming guilt-ridden. And I really didn’t miss the sweetness that I always find appealing about this wonderful and easy to prepare bread. Of course, the next morning I did serve it drizzled with warm maple syrup for a special breakfast treat. But that’s a story for another time.
Anyway, this cornbread is inexpensive and easy to prepare (only 7 ingredients and no mixer required), and a dish that everyone in your family will love. And of course, if you must, you can gently warm the bread and slather it with butter to further enhance its enjoyment. (I can’t speak from experience on this myself. But I’m sure Mr. C. could attest to the fact if gently coerced.)
So, if you too are trying to avoid added sugar, but still want to enjoy life’s little pleasures like cornbread, give this recipe a try. It’s darn good. That’s all I’ve got to say!
Peace and love to all.
½ c. unbleached all-purpose flour
1½ c. cornmeal
1 tsp. baking soda
½ tsp. kosher salt
5 T. unsalted butter, melted
1¼ c. buttermilk
1 egg
Whisk the flour, cornmeal, baking soda, and salt in a large bowl.
In a microwave safe bowl, melt the butter. Then whisk in the buttermilk and egg until well combined.
Stir the buttermilk mixture into the dry ingredients just until blended.
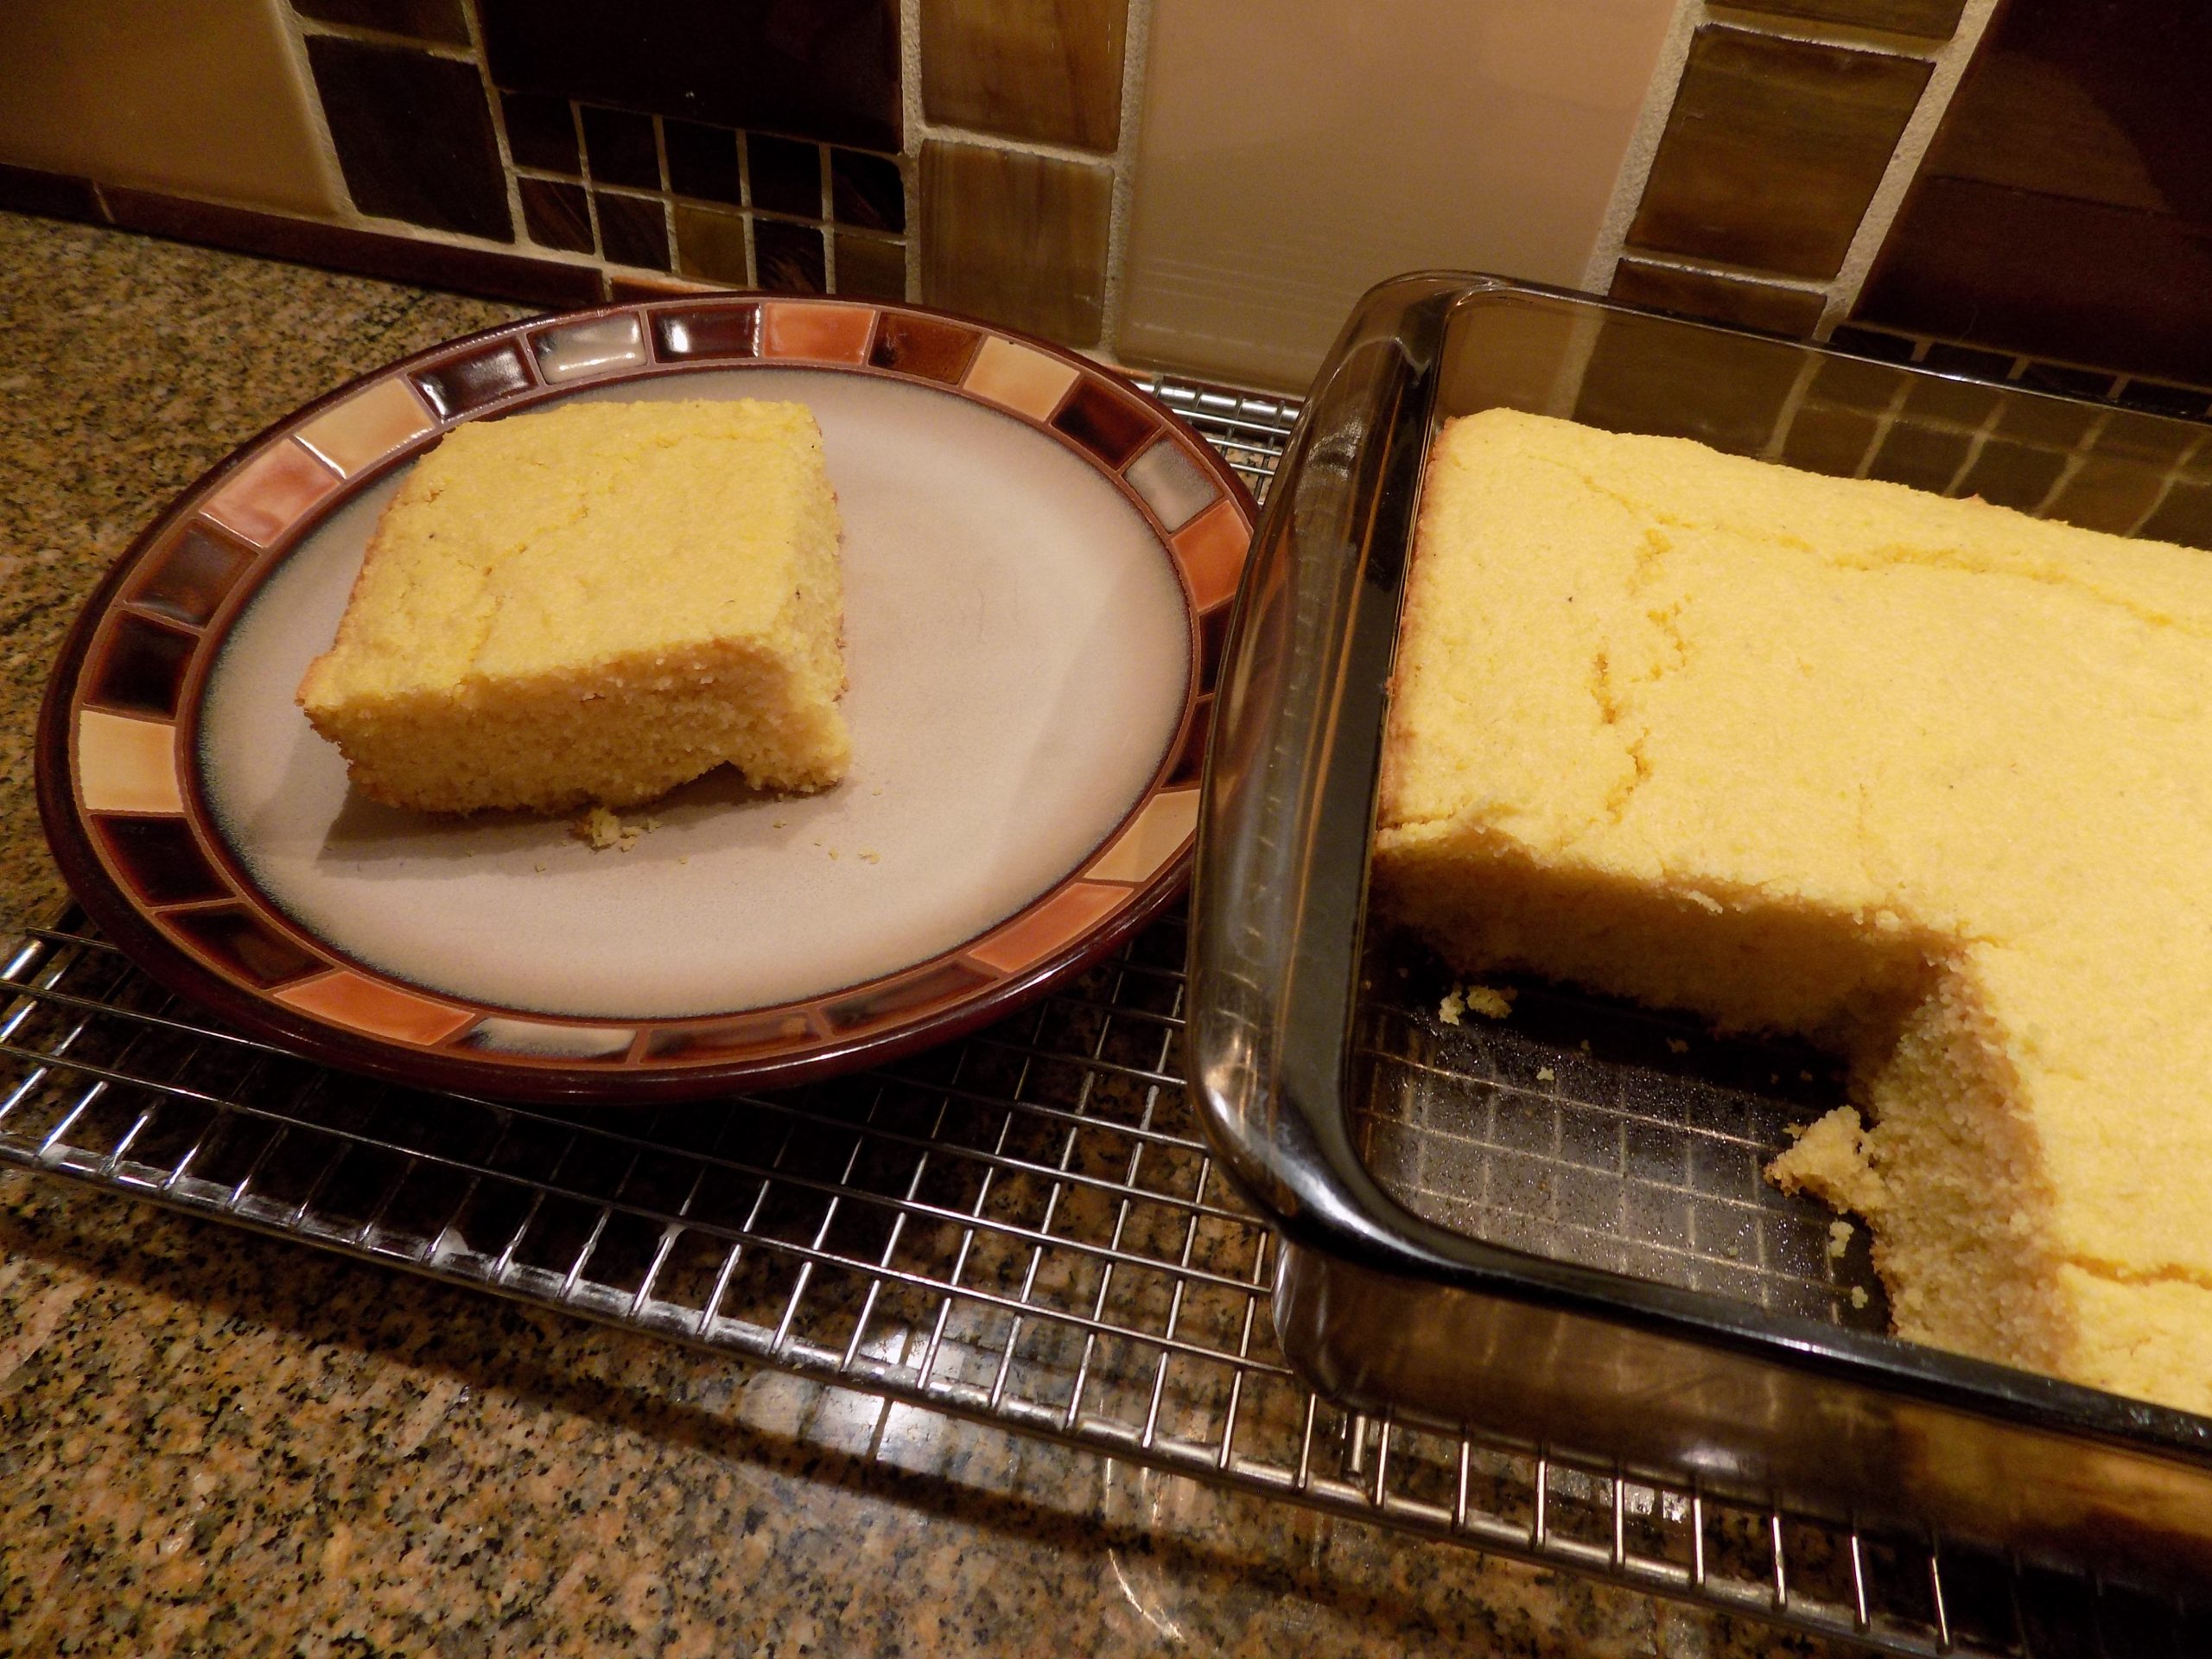
Spoon the batter into a greased 9×9-inch square baking dish, smoothing the top before placing in the oven.
Bake in a pre-heated 400-degree oven for about 20 minutes, or until the edges turn golden brown and a toothpick inserted in the center comes out clean.
Remove from oven and let cool for 5 to 10 minutes before serving.
OK, so this is not a recipe for a low-calorie side dish. But name me a great tasting starchy side dish that doesn’t contain a load of calories. Good luck with that! Even quinoa, which is high in fiber and omega-3 fatty acids, is not low in calories. In fact, it’s about the same as pasta or rice. But I digress.
My point is – if you are going to include a side dish like mashed potatoes, pasta, rice, polenta, quinoa, etc. in your menu, you might as well go for the tastiest option. So, I would like to introduce you to one of our new favorite side dishes, which incidentally, is quick and easy to prepare. And I can’t begin to tell you how amazingly delicious grits can be when fixed this way. And very versatile as a side dish.
And I know what you’re thinking. Where’s the cheese? Because cheezy grits are simply the best! And I have to agree, to a certain extent. There simply are times, when cheezy grits would be over-kill. So, it depends on what other dishes you plan to serve with the grits.
Yesterday I posted my recipe for Chicken Fried Steak. With pan gravy. Absolutely delicious. I knew I wanted to serve the steak with grits. But not cheezy grits. So, instead I prepared this recipe based on a Diana Rattray recipe. (Diana is one of my favorite recipe authors. We share the same passion for Southern cooking. So, of course she is one of my culinary heroes. I would recommend you check out her recipes. She’s the real deal!) And I also recommend you fix these grits at your earliest convenience. They are phenomenal, and a dish I know your entire family will enjoy.
Well, that’s it for today. I’m going to take it easy. I will probably make some more granola because we finished my last batch this morning. Then I’m going to do a bit of research on how to cook rutabagas. (No, I’m not! Just kidding.) But I am going to look for recipes that include Hannah sweet potatoes. (Hannah sweet potatoes are slightly sweet to the taste, with a dense, starchy texture similar to a regular white potato. Both are members of the nightshade family. The flesh of a Hannah sweet potato is even creamy white like a regular potato. And they make a great substitute for a regular potato in the likes of stews and soups.) But there is always more to be learned, and hopefully I can find a few recipes to share with you. Because Hannah sweet potatoes are really, really delicious.
As always, stay safe, stay informed, stay connected, and stay happy.
Peace and love to all.
1¾ c. water (or chicken broth and skip the chicken base)
2 tsp. chicken base (I use Better Than Bouillon)
¼ c. heavy cream
¼ tsp. kosher salt
freshly ground black pepper
2 T. unsalted butter
½ c. quick cooking grits (I use Albers)
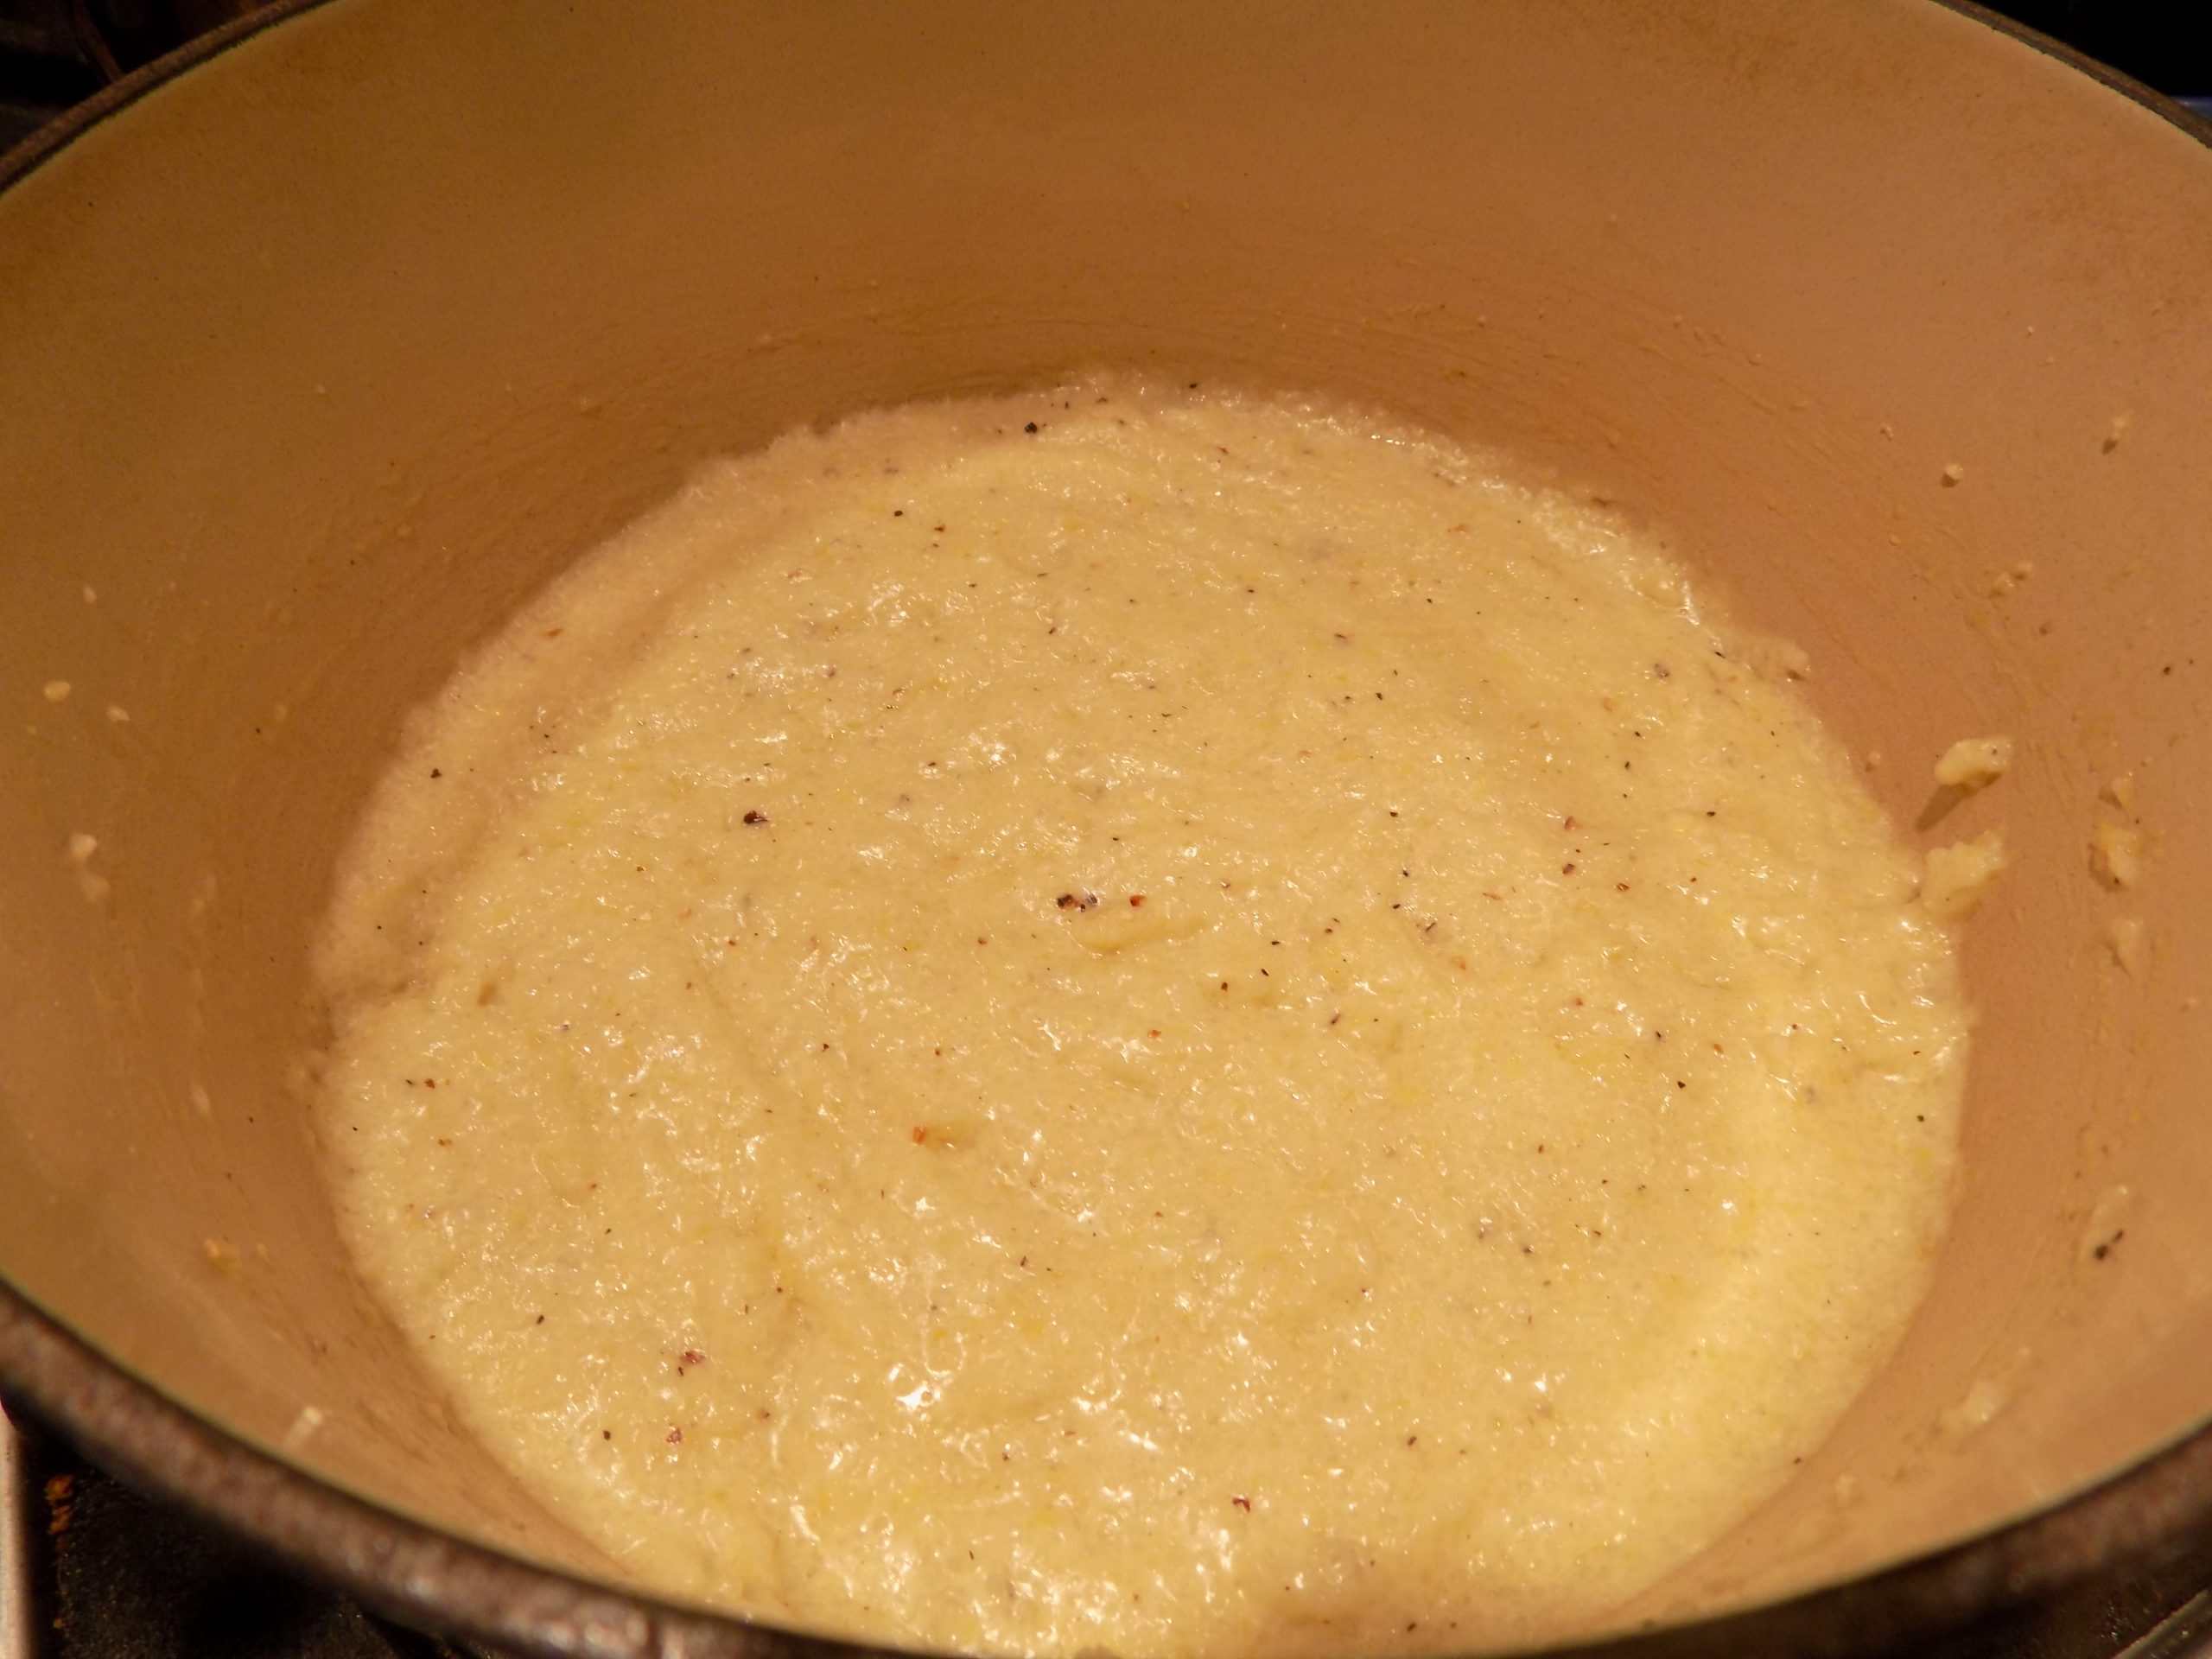
Bring the water, chicken base, and heavy cream to a boil in a medium-sized covered saucepan.
Add the salt, pepper, and butter to the saucepan and slowly whisk in the grits. Reduce the heat to low, and cook covered, stirring frequently, for 6-8 minutes. The grits should be thick and creamy looking. (For creamier, thicker grits, cook longer. For thinner grits, add additional water.)
Taste and add salt and pepper, as needed.
Serve with any of your favorite meat dishes. Nice change from mashed potatoes, rice, or noodles.
This recipe can easily be doubled or tripled. As is, this recipe makes about a cup of grits which feeds 2 nicely.
It’s all my daughter Paula’s fault! I know it’s usually all the mother’s fault, but not this time. My preparing this way too caloric, cholesterol laden, fattening, crazy delicious comfort food dish is all on Paula! And even though I don’t plan to serve chicken fried steak (CFS) very often, I must say thank you to my dear daughter for reminding me of this lovely Southern delicacy. (You might know it better as country-fried steak.) And for those of you with more discerning palates, just consider CFS the poor man’s wiener schnitzel. (Veal and breadcrumbs prepared in a similar manner.) But in my humble opinion, CFS is every bit as delicious. (And a whole lot cheaper to produce!)
It all started with a simple phone conversation. Paula happened to mention that she was making one of her husband’s favorite dishes for dinner that evening. And of course, I had to ask which of Mark’s favorites was she preparing? And as she described how she fixed this dish my mouth started to water. Holy guacamole! I hadn’t eaten CFS for years. And it sounded just so tempting. And as you well know, I give in to culinary temptation way more than is good for me. But hey, if I only eat it once every 10 years, how much can that hurt? (As if I can refrain from making CFS now that I know how wonderful the homemade version can be. I’d never actually fixed it at home before. I’d only had it on a few rare occasions for breakfast when traveling.) But now, who knows how frequently this might appear on our dinner table. I’m only human after all! And it’s still all Paula’s fault!
But in her defense, she doesn’t usually fix gravy to slather on their CFS. Nor does she make sinfully rich grits to go along with the steak. That part is all on me! But I figure, in for a dime, in for a dollar. If I’m going to sin, let it be a big one and then be done with it! So, the following recipe is not a low-calorie wonder. But boy of boy is it delicious. And a dish I guarantee everyone in your family will adore.
I found most of this recipe compliments of the momontimeout.com site. (Great site BTW.) The modifications came from several suggestions Paula shared with me, with a couple thrown in by me for good measure. So, this recipe is definitely a team effort. (Look for my recipe for Creamy and Savory Grits soon to come to your very own computer.)
As always, make every meal special. And while I totally advocate eating healthy nutritious food most of the time, I also believe that there are times when nothing but a big old meal of comfort food helps keep people happy and content. Too much depriving ourselves of food that brings us pleasure just can’t lead to a well-balanced mind. I mean really, who can remain sane when all they can think about is a hamburger and fries? I’m not sure the previous statement speaks well to my mental stability, but never-the-less, it’s how I feel. It’s the old “moderation in all things” thing! And I am a firm believer in “moderation in all things”, in moderation of course! So, to that end, I must also tell you, that along with our CFS, gravy, and grits last evening, I also served plain old steamed fresh green beans. No frills attached.
Peace and love to all.
Chicken Fried Steak
1½ c. all-purpose flour
1 tsp. kosher salt
freshly ground black pepper (quite a bit)
1 tsp. paprika
1 tsp. granulated garlic
1 tsp. granulated onion
½ tsp. baking soda
½ tsp. baking powder
¾ c. buttermilk
1 tsp. hot sauce (I use Frank’s RedHot original cayenne pepper sauce)
1 egg
4 cube steaks
Montreal Seasoning
vegetable oil
In a shallow container (I use an 8-inch cake pan), whisk the flour, salt, black pepper, paprika, granulated garlic, granulated onion, baking soda, and baking powder together. Set aside.
In a separate shallow container (yup, another cake pan), whisk the buttermilk, hot sauce, and egg together. Set aside.
It the cube steaks appear moist, pat them dry with a paper towel, removing as much moisture as possible. Season one side of each cube steak with a sprinkling of Montreal Seasoning. Let sit for 5 minutes.
While the cube steaks are resting, scatter a bit of the flour, the same size as the cube steaks, on a baking sheet.
Dredge the cube steaks in the flour mixture, shaking off excess, then dredge in the buttermilk-egg mixture, letting excess drip off, and then once again in the flour mixture, shaking off excess. (This is a messy process, so plan on washing your hands several times as you coat the steaks.)
Place the breaded cube steaks on the floured areas of your baking sheet. (Having a bit of flour before you set the breaded steaks down, allows the steaks to absorb a bit more flour as they rest. And also, not stick to the baking sheet.) When all 4 steaks have been breaded, press a bit more flour into the top of each one. (Save the remaining flour for use in the gravy.) Let the breaded steaks rest for 10 minutes.
Preheat oven to 225-degrees.
Heat about an eighth inch of vegetable oil in a large heavy skillet over medium high heat. How much oil you need depends on the size of your skillet. And if possible, use a fry pan that will accommodate all 4 steaks. If not, fry 2 at a time.
Test the oil by dropping a bit of the breading into the oil. The oil should sizzle and bubble around the breading. (The oil should glisten, but not be hot enough to start smoking.)
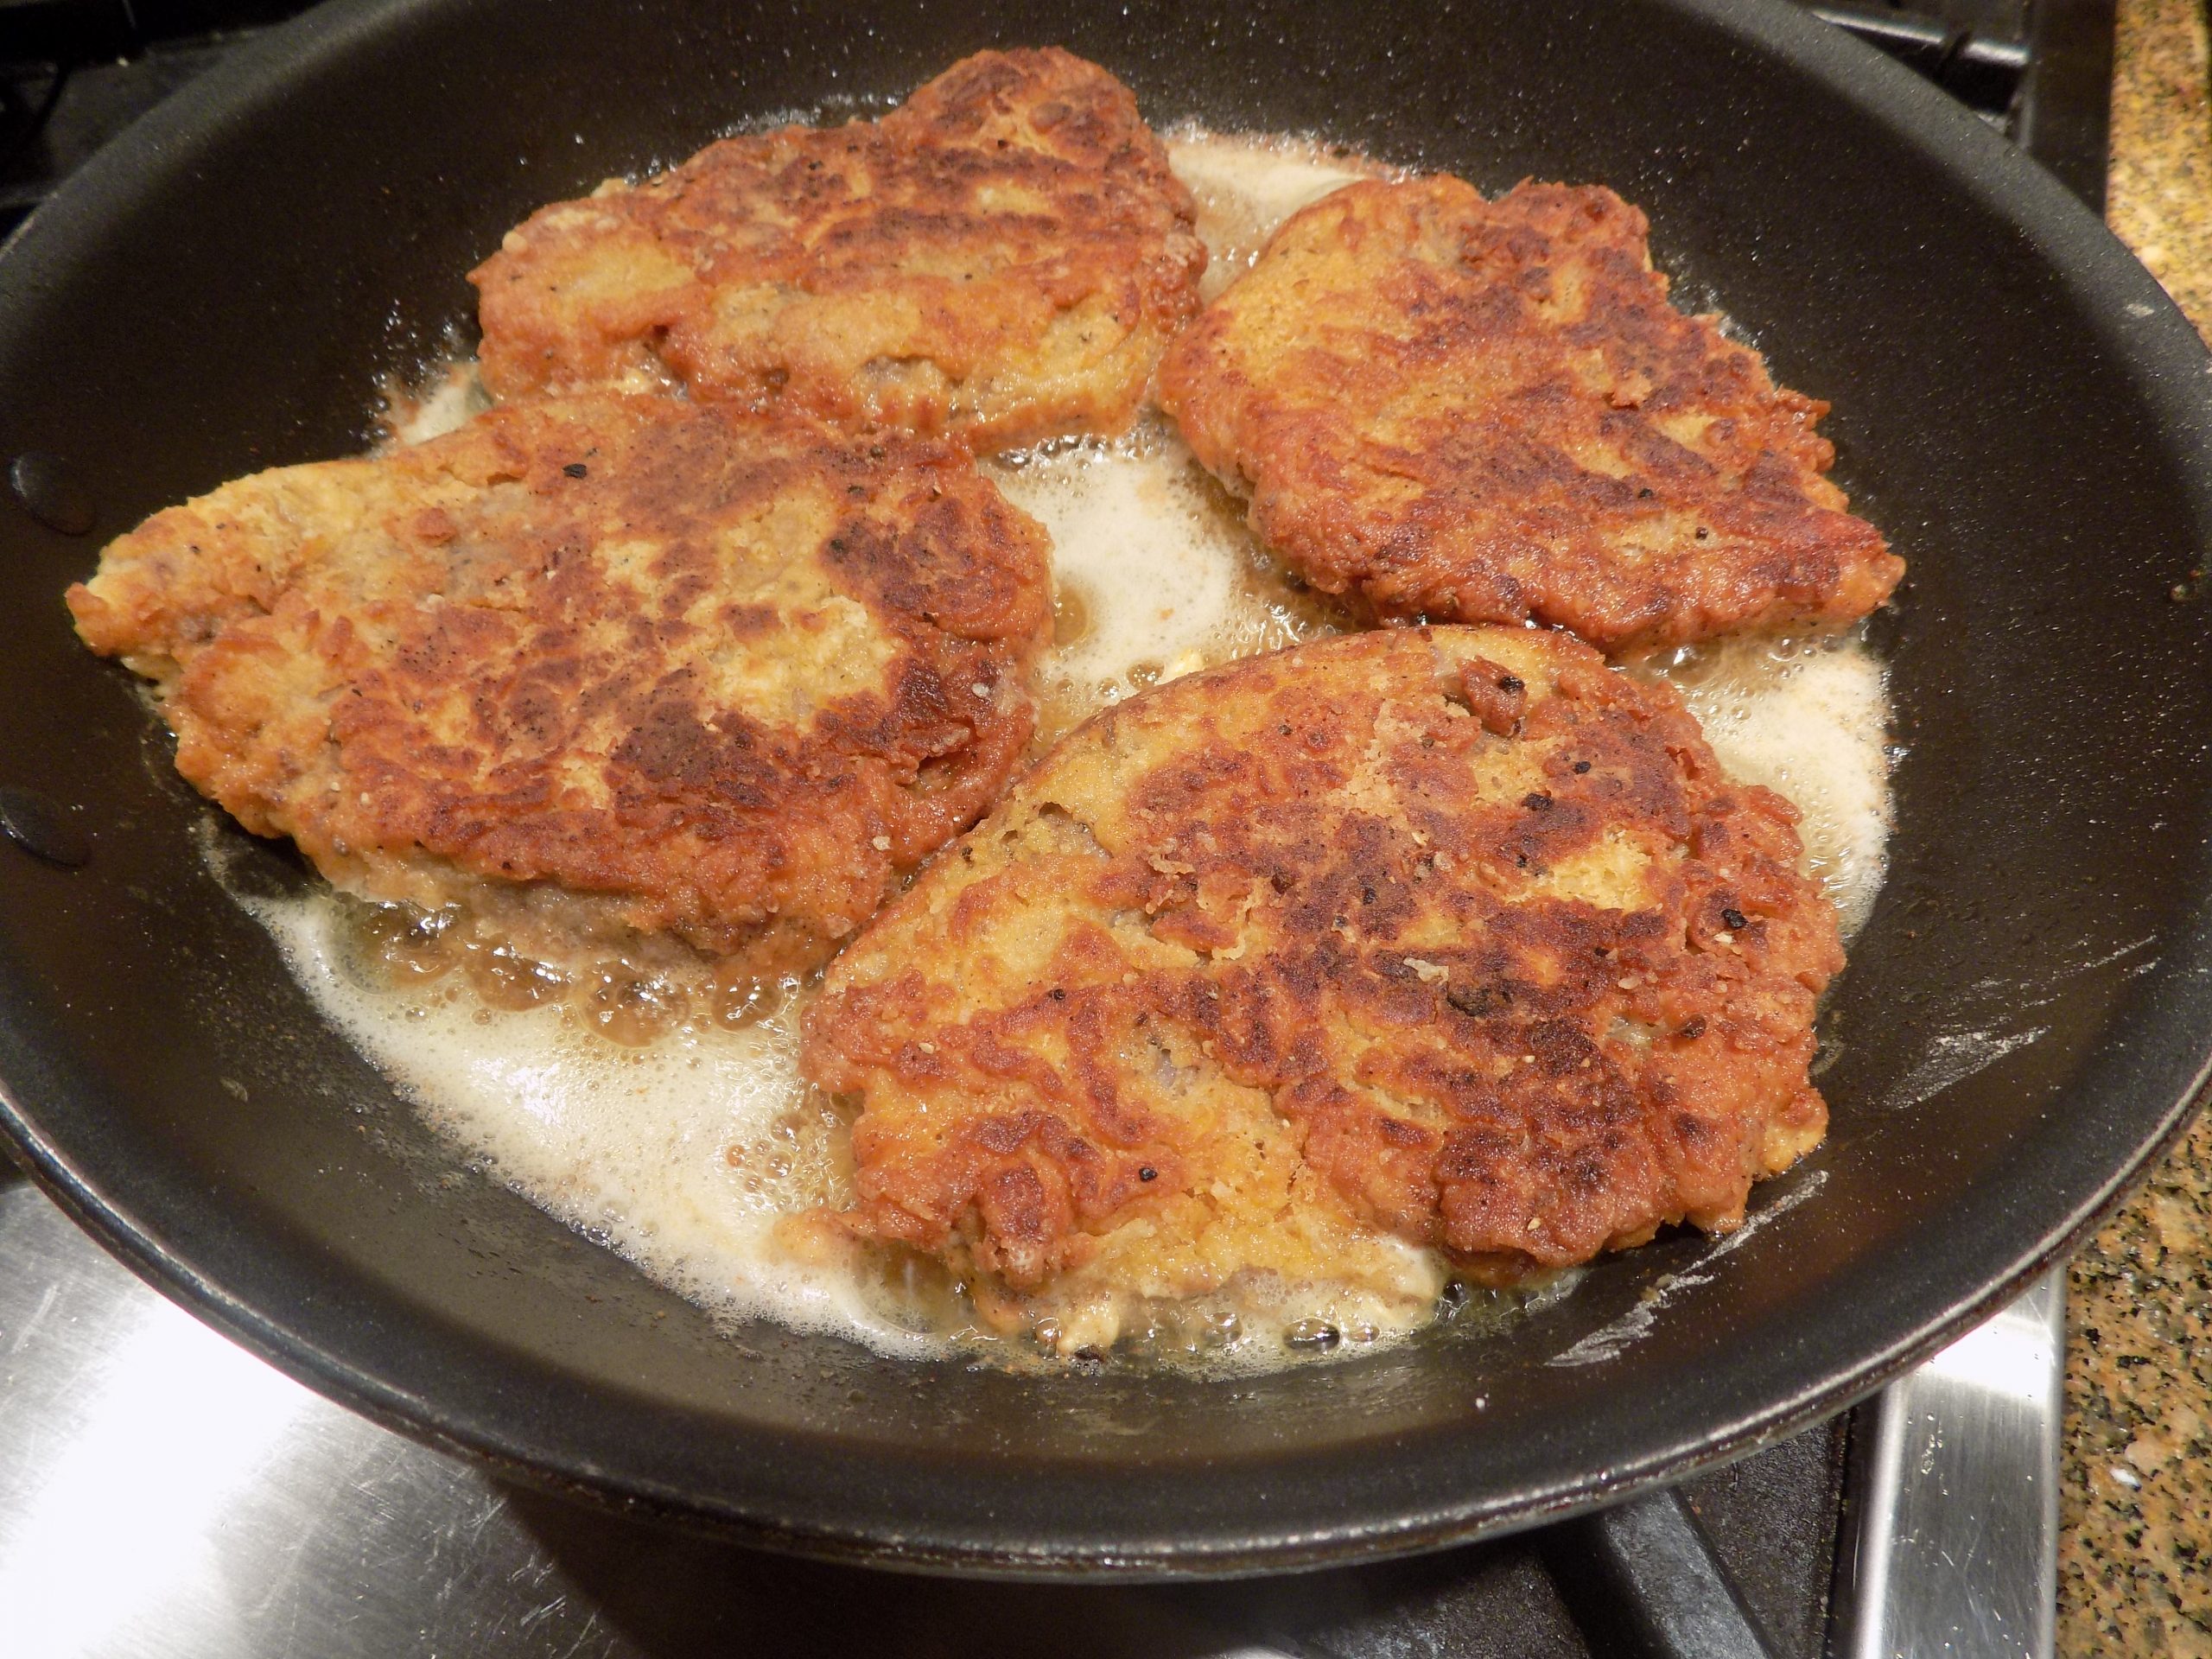
Place the steaks into the pan and fry for 3 to 4 minutes on each side or until golden brown. After the steaks have browned on both sides, carefully flip them back to the first side. Only fry for an additional minute or so.
Remove steaks from pan and drain on paper towels. Place in the preheated oven to stay warm while you make the gravy. (I place the paper towels and fried steaks on the the same baking pan I used to hold the breaded steaks before they were fried. Washed first, of course!)
Pan Gravy
2 T. vegetable oil from frying the steaks
2 T. seasoned flour (from breading the steaks) or if none left, just regular flour
1½ c. whole milk
¼ c. heavy cream
seasoned salt, if more salt is required
freshly ground black pepper
Save about 2 tablespoons of the grease in your pan. Discard the rest. Do NOT scrape the skillet clean. You want all of those brown bits for added flavor in the gravy.
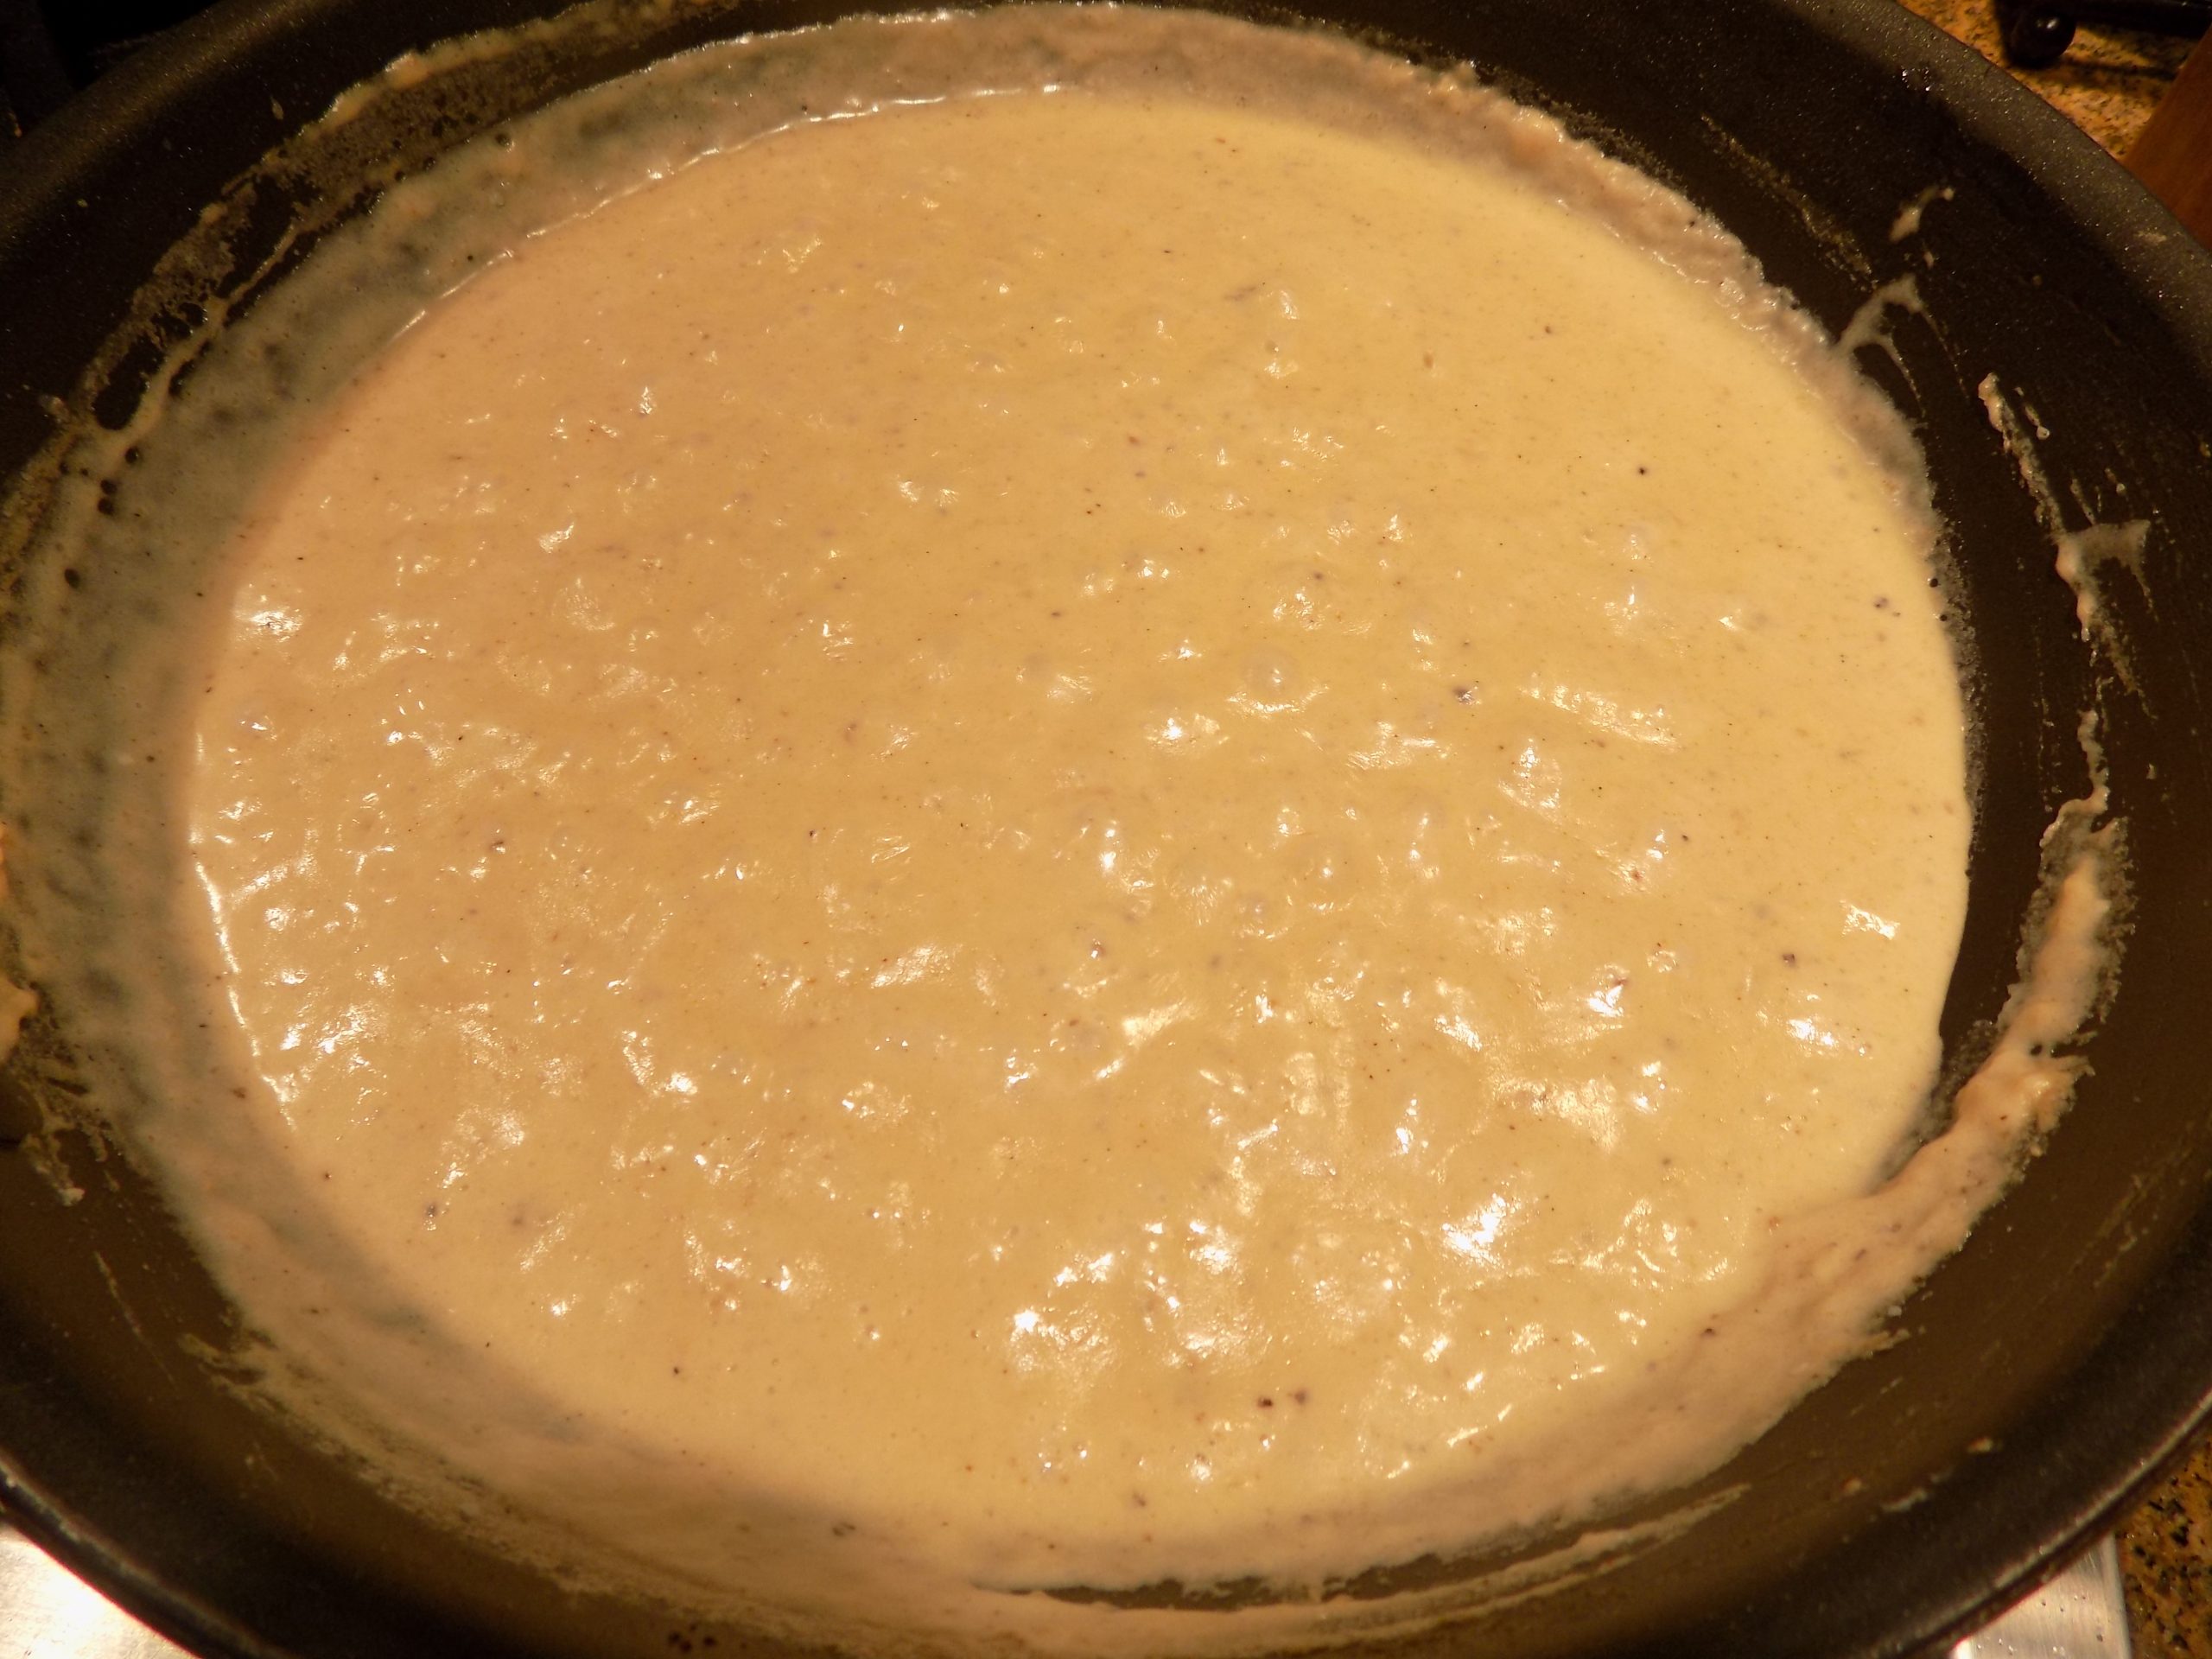
Over medium-low heat, whisk in the seasoned flour and continue whisking for two to three minutes or until the flour is nice and golden brown.
Slowly whisk in the milk and heavy cream and bring gravy to a simmer. Cook until the gravy is smooth and creamy, about 5 to 7 minutes. If the gravy gets too thick, add in a little more milk. Taste and add seasoned salt, if necessary, and lots of fresh ground pepper.
Serve the CFS with a drizzle of gravy and a side of Creamy and Savory Grits (recipe to follow in the next few days) or mashed potatoes. Add your favorite green veggie and dinner is served. A perfect comfort food dinner.
Please note: To re-heat leftover CVS, place on a low-sided baking pan fitted with a wire rack in a pre-heated 400-degree oven and bake for about 20 minutes. Remove from oven and let cool a couple of minutes before serving.
Do not microwave. The breading will get soggy and yicky. (And yes, yicky is a technical term used by culinary experts everywhere!)
And yes I know, most of us over the age of 50 who grew up in Western Washington, did not grow up eating grits. Maybe you had grits if you were a kid growing up in the South, but this gal growing up in Kenmore, Washington, who hated hot grain cereals to begin with, was never offered the choice. Cream of Wheat, oatmeal, Malt-0-Meal, Maypo, and Roman Meal – possibly. I can’t really remember what we had around because as a kid I hated all of them. And still do. Well, almost all. I love grits loaded with lots of cheese, butter, and heavy cream. I willingly and enthusiastically will eat grits as part of any breakfast, lunch, or dinner. (BTW – I love polenta too.)
But grits never entered my culinary realm until we were visiting daughter Eden several years ago, and she served us White Cheddar Cheese Grits (recipe on site) for breakfast one morning. OMG. I was hooked from that very day.
And what an easy side dish to prepare. The only reason I don’t fix grits more often, is because of the fat content. But once in a while, when I can’t help myself, I succumb to my craving and throw a batch together.
And last evening was one of those times. And as much as I love cheddar cheese grits, I wanted to change things up a bit. So I went on line and did some research. And I learned a few things. First of all, never use instant or quick-cooking grits. Stick to stone ground unbleached white or yellow grits. And use the KISS (Keep It Simple Sister) principle. Do a pre-boil of the grits using only water, and in this case a bay leaf. Don’t add salt and don’t use milk or cream for the pre-boil. Cream can easily burn and salt inhibits the dried grits from hydrating properly. Salt, other flavorful additives, butter, cream or milk can all be added later. And don’t over-cook the grits. They are perfect when they are al dente.
So with all that said, give this recipe a try. Grits are truly an effortless side dish to fix. And so, so delicious. And perfect as an accompaniment to simple meat entrees. Or as a base for a variety of different dishes.
As always, keep experimenting in the kitchen. Keep thrilling your family with new and delightful offerings. And most importantly, keep resisting the urge to let down your guard when it comes to covid-19. The bug is still out there, and it’s still going strong. Peace and love to all.
3 c. water
¾ c. stone ground corn grits – not instant or quick-cooking grits (I use Old School Brand Stone Ground White, Unbleached Grits) (Thanks Jim for turning me on to this wonderful product & for fixing grits for us the other evening. You are a kitchen KING!)
1 bay leaf
½ tsp. kosher salt
freshly ground black pepper
tiny pinch crushed red pepper flakes
4 T. (½ stick) unsalted butter
2/3 c. grated Parmesan or Pecorino-Romano cheese (I used a combination)
¼ c. heavy cream
Whisk the water and grits together in a heavy lidded pot. Add the bay leaf and bring the mixture to a boil. As soon as the water starts to boil, remove pot from heat, cover, and set aside until about 20 minutes before you plan to serve. (I did this step about 2 hours before I served dinner. I just let the pot sit on the stove until I was ready for it.)
Uncover the pot, and whisk in the salt, pepper, and crushed red pepper flakes. Return the grits to a boil over medium-high heat. Reduce heat, and cook for 10-20 minutes, whisking regularly to prevent clumping and the grits sticking to the bottom of the pan. The grits are ready when most of the water is absorbed and the grits are al dente (tender with a toothsome bite).
Remove from heat. Discard the bay leaf. Stir in the butter, Parmesan cheese, and heavy cream. Adjust seasoning. Serve immediately or if necessary, cover until ready to serve.
Now, if you too are a fan of Stephen Sondheim and are familiar with the musical Into the Woods, then you’ve heard of another woman (actually a witch) who loves her greens as much as I do. Now I don’t have the power to make life miserable for unsuspecting thieves stealing greens out of my garden. But I do have the power to help you produce a dish of greens that even the most greens phobic person might actually enjoy. And ever so simple to prepare. Actually, the preparation could not be easier. A bit of time is required for chopping veggies, but even the most novice of cooks should have no problem turning out this Southern classic.
And I’m telling you true, this is a vegetable dish that is just chock full of vitamins (such as vitamins A, C, and K and folate) and minerals (such as iron and calcium). Greens are also a great source of fiber. And since our bodies need a little dietary fat to absorb some of the vitamins found in dark green leafy vegetables, the olive oil and small amount of fat from the pork shank do the job nicely. (Of course the shank and olive oil also provide flavor. So a win/win situation.)
So a couple of days ago when I made my pot of greens, it was mainly because I had greens that either needed to be eaten or tossed. And I absolutely hate to toss food. I had a big bunch of beet greens, 2 types of kale (common curly kale from our garden and lacinato kale from our farm box) and a couple handfuls of baby spinach. I already had a recipe for collard greens that I love (Collard Greens with Smocked Pork Hocks). But I wanted to see if I could use a mixture of greens, none of which were collard greens. BTW, collard greens are the most commonly used greens in Southern braises and stews. So I took my collard greens recipe, changed things up a bit, and went from there.
Well, after tasting this mixture of greens, I can’t imagine ever again finding the necessity to stick to just one kind of greens. For me now, it’s bring them all on! The greater variety the better!
So if you too would like to feed your family a vegetable dish that is so darned healthy as to actually make you feel giddy, this is the recipe for you.
However, in all honesty, my children would probably have turned their noses up at this dish if I had tried to feed it to them when they were young. They ate a wide variety of foods, some that even surprised me, but they still were, after all, typical kids. So I can’t promise you that your young children will fall down on their knees thanking you for feeding them this wonderfully healthy and flavorful dish. Quite to the contrary I would suspect. But if your family consists of adults, I say go for it!
As always, stay healthy, cook up a storm, and be the person your dog thinks you are. Peace and love to all.
1 T. extra virgin olive oil
1 c. diced yellow onion
3 cloves garlic, minced
2 c. low-sodium vegetable broth
freshly ground black pepper
¼ tsp. crushed red pepper flakes (or less if semi-spicy is a problem for you)
Heat the olive oil in a large covered Dutch oven or heavy pan. Sauté the onion over medium heat until almost tender. Add the garlic and cook for 1 minute.
Add the vegetable broth, black pepper, and crushed red pepper flakes. Add the smoked shank, bring to a boil, cover, reduce heat, and simmer for an hour.
Add the greens. (They will wilt down as they cook,)
Simmer for 45 minutes. Do not boil. Add more vegetable broth if needed. May need more time, but be sure to check after 45 minutes. When done, greens will be dark green, tender, and will not have a raw taste.
Remove shank from pot, allow to cool, and remove the meat discarding as much fat and sinew as possible. Shred the meat and return it to the pot. Bring the meat and greens back to a boil when ready to serve. Adjust seasoning.
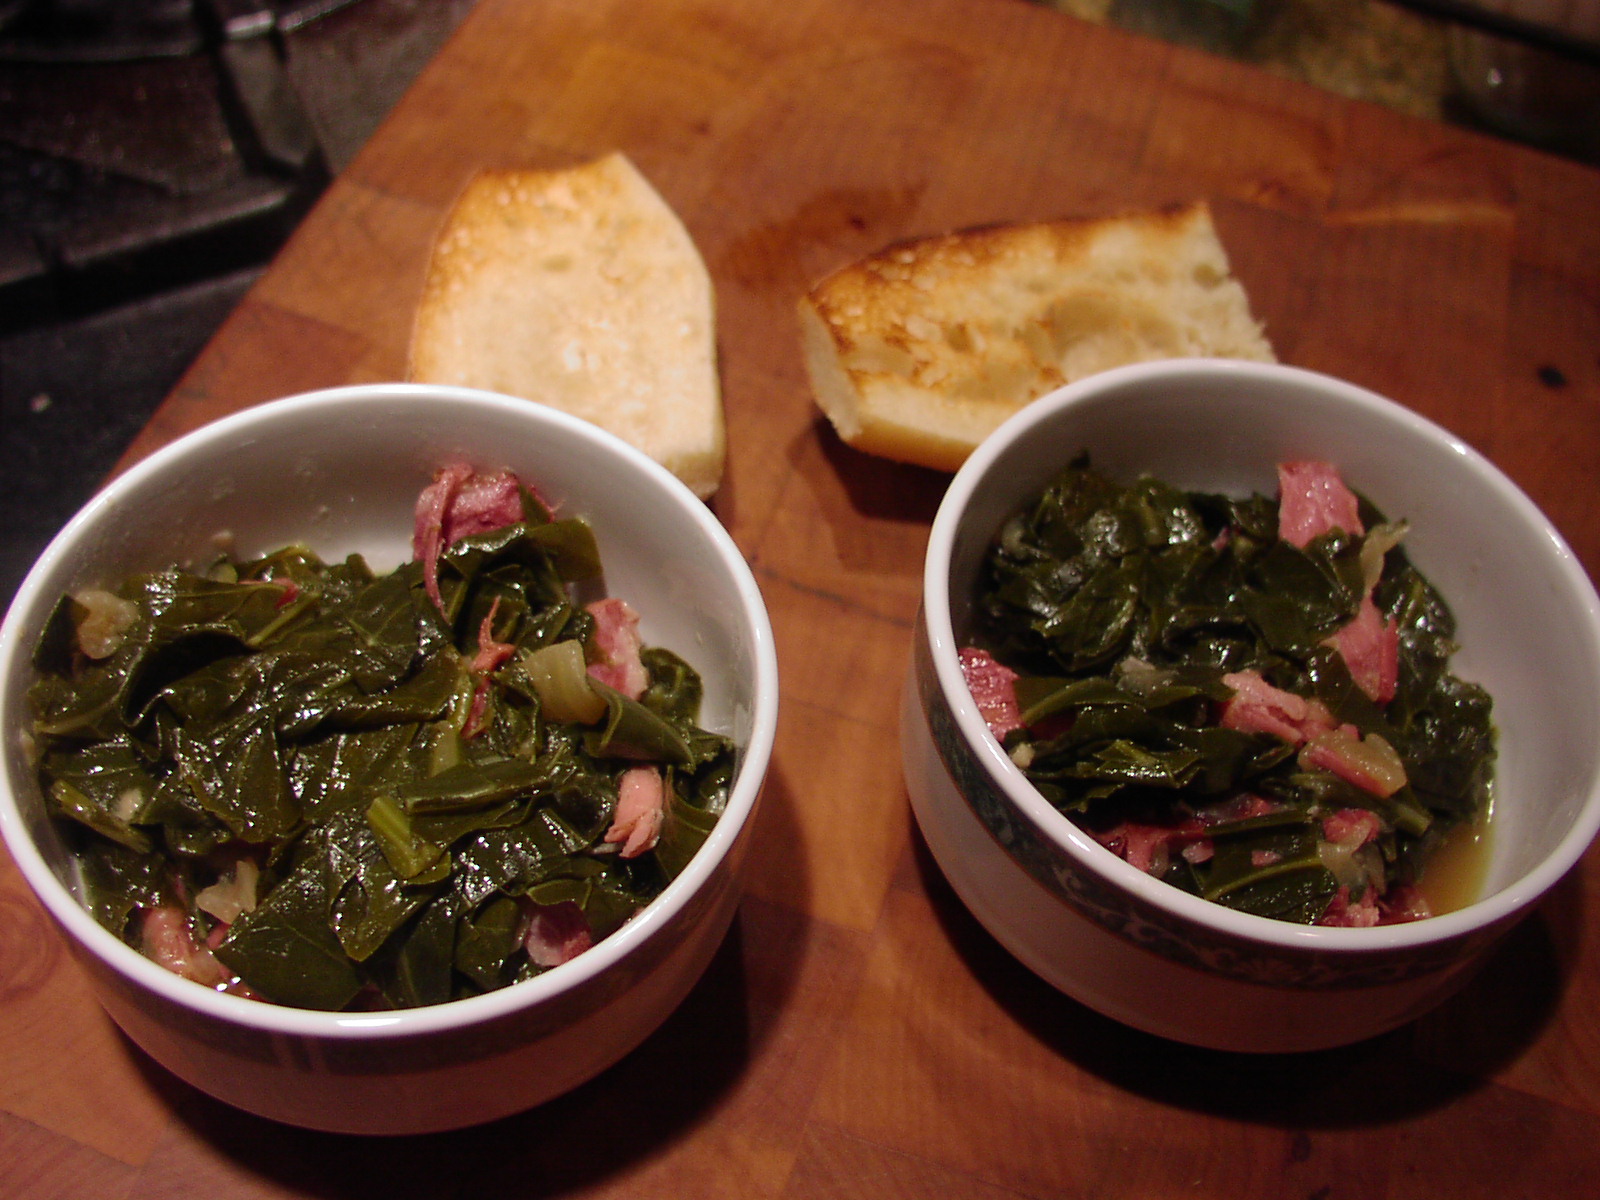
Serve in individual small bowls including some of the liquid. The liquid, often called pot liquor or potlikker, is possibly the best part of this whole wonderful dish. Pass the sherry vinegar.
When
I was asked to bring coleslaw to our friend’s home for Christmas dinner, I
immediately asked Jim – what’s cookin’? And his answer surprised me. He decided
to forego all the standard Christmas entrée choices and go with gumbo. Gumbo,
for Christmas? But, but – no turkey, ham, Beef Wellington, crown rib roast, leg
of lamb? Nope. We were headed South – to New Orleans and beyond. So of course
coleslaw was a perfect side dish. So that’s what I prepared. (Along with Sweet
Potato Pie Bars with Bourbon-Caramel Whipped Cream and Tart Cherry Crumble Bars.
Recipes to follow.)
I
perused my tried and true coleslaw recipes, but decided if the menu was going
to be new to all of us that would be at table Christmas Day, and featured
Southern cuisine, maybe I should prepare a new and Southern style coleslaw for
the occasion. So that’s just what I did.
I
looked and looked for the perfect recipe. But no one recipe called out to me.
So I took bits and pieces from several recipes that called themselves “Southern
or Old Style” and came up with this concoction.
Now
obviously I wouldn’t be boring you with this recipe if I didn’t think it came
out pretty darn good. It has great flavor, a lovely crunch, and it HAS TO BE
MADE AHEAD OF TIME. (Seven little words I always like to see in print.) Almost
as important as the 3 little words every person is longing to hear when he/she
is looking for the perfect mate. (And no – the words aren’t “I love you”, although
they’re nice to hear too. The real words that every person wants to hear before
accepting the invitation to be joined in holy matrimony are “medical and dental”.
(Thank you again Kaetche for your frank definition of “those three little words
we all want to hear”. I love you being so passé and all!)
So next time you want a new and different salad to prepare for your family or friends, give this recipe a try. It’s easy to make, full of every day ingredients, it’s crunchy (and isn’t that always nice), and it can, and should, be made ahead. And as far as having gumbo etc. for Christmas dinner? It was marvelous. You nailed it again Jim. (Was there ever any doubt?)
Peace and medical and dental to all.
½ c. light mayonnaise
1 T. granulated sugar
2 T. white vinegar
¼ tsp. Dijon mustard
1 tsp. celery seeds
½ tsp. dried dill weed
½ tsp. kosher salt
freshly ground black pepper
6 c. shredded green cabbage
2 carrots, grated
2 stalks celery, shredded
2 T. finely minced white onion
In
a small mixing bowl whisk the mayonnaise, sugar, vinegar, mustard, celery
seeds, dill, salt, and pepper together.
Place
the cabbage, carrots, celery, and onion in a salad bowl. Pour the dressing over
the veggies and stir until well combined. Adjust seasoning, cover and chill for
at least 1 hour. Even better made the day ahead.
So, not really having spent much time or in most cases not visited many of the states in the South (Alabama, Arkansas, Florida, Georgia, Kentucky, Louisiana, Maryland*, Mississippi, North Carolina*, Oklahoma, South Carolina, Tennessee, Texas, Virginia, and West Virginia), you would think that I would have no interest in Southern food. There my friends, you would be dead wrong. I love Southern cuisine!
My passion for Southern food really started with our 2001 trip to New Orleans for Mardi Gras with our dear friends Dick and Eloise. We didn’t eat in one restaurant that I wouldn’t want to visit again. Of course we were guided to only amazing restaurants by our hosts John and Carol (son and daughter-in-law of our traveling companions) with whom we stayed for 10 full days. I’m telling you true. If you want to visit New Orleans for Mardi Gras, and for Mr. C and me once was enough, the best way to do it is to have good friends who live there and have a guest room with your name on the reservation! (The only thing that actually saved our sanity, is that we knew we could always escape the Mardi Gras chaos by returning to John and Carol’s home. Had we been staying in a hotel, I fear that the noise and commotion would have led to a serious drinking problem!)
But I will always be grateful for our visit to New Orleans. Not just because of the Mardi Gras experience itself, but more importantly for the time we spent with our dear friends. That stay and the fabulous food we experienced actually served as the catalyst for my passion for Southern cuisine. I absolutely loved the food and I vowed then and there, to learn more about the food that dominated that region of the USA and the other “Southern states”. And I have been studying Cajun, creole, and Southern cooking ever since.
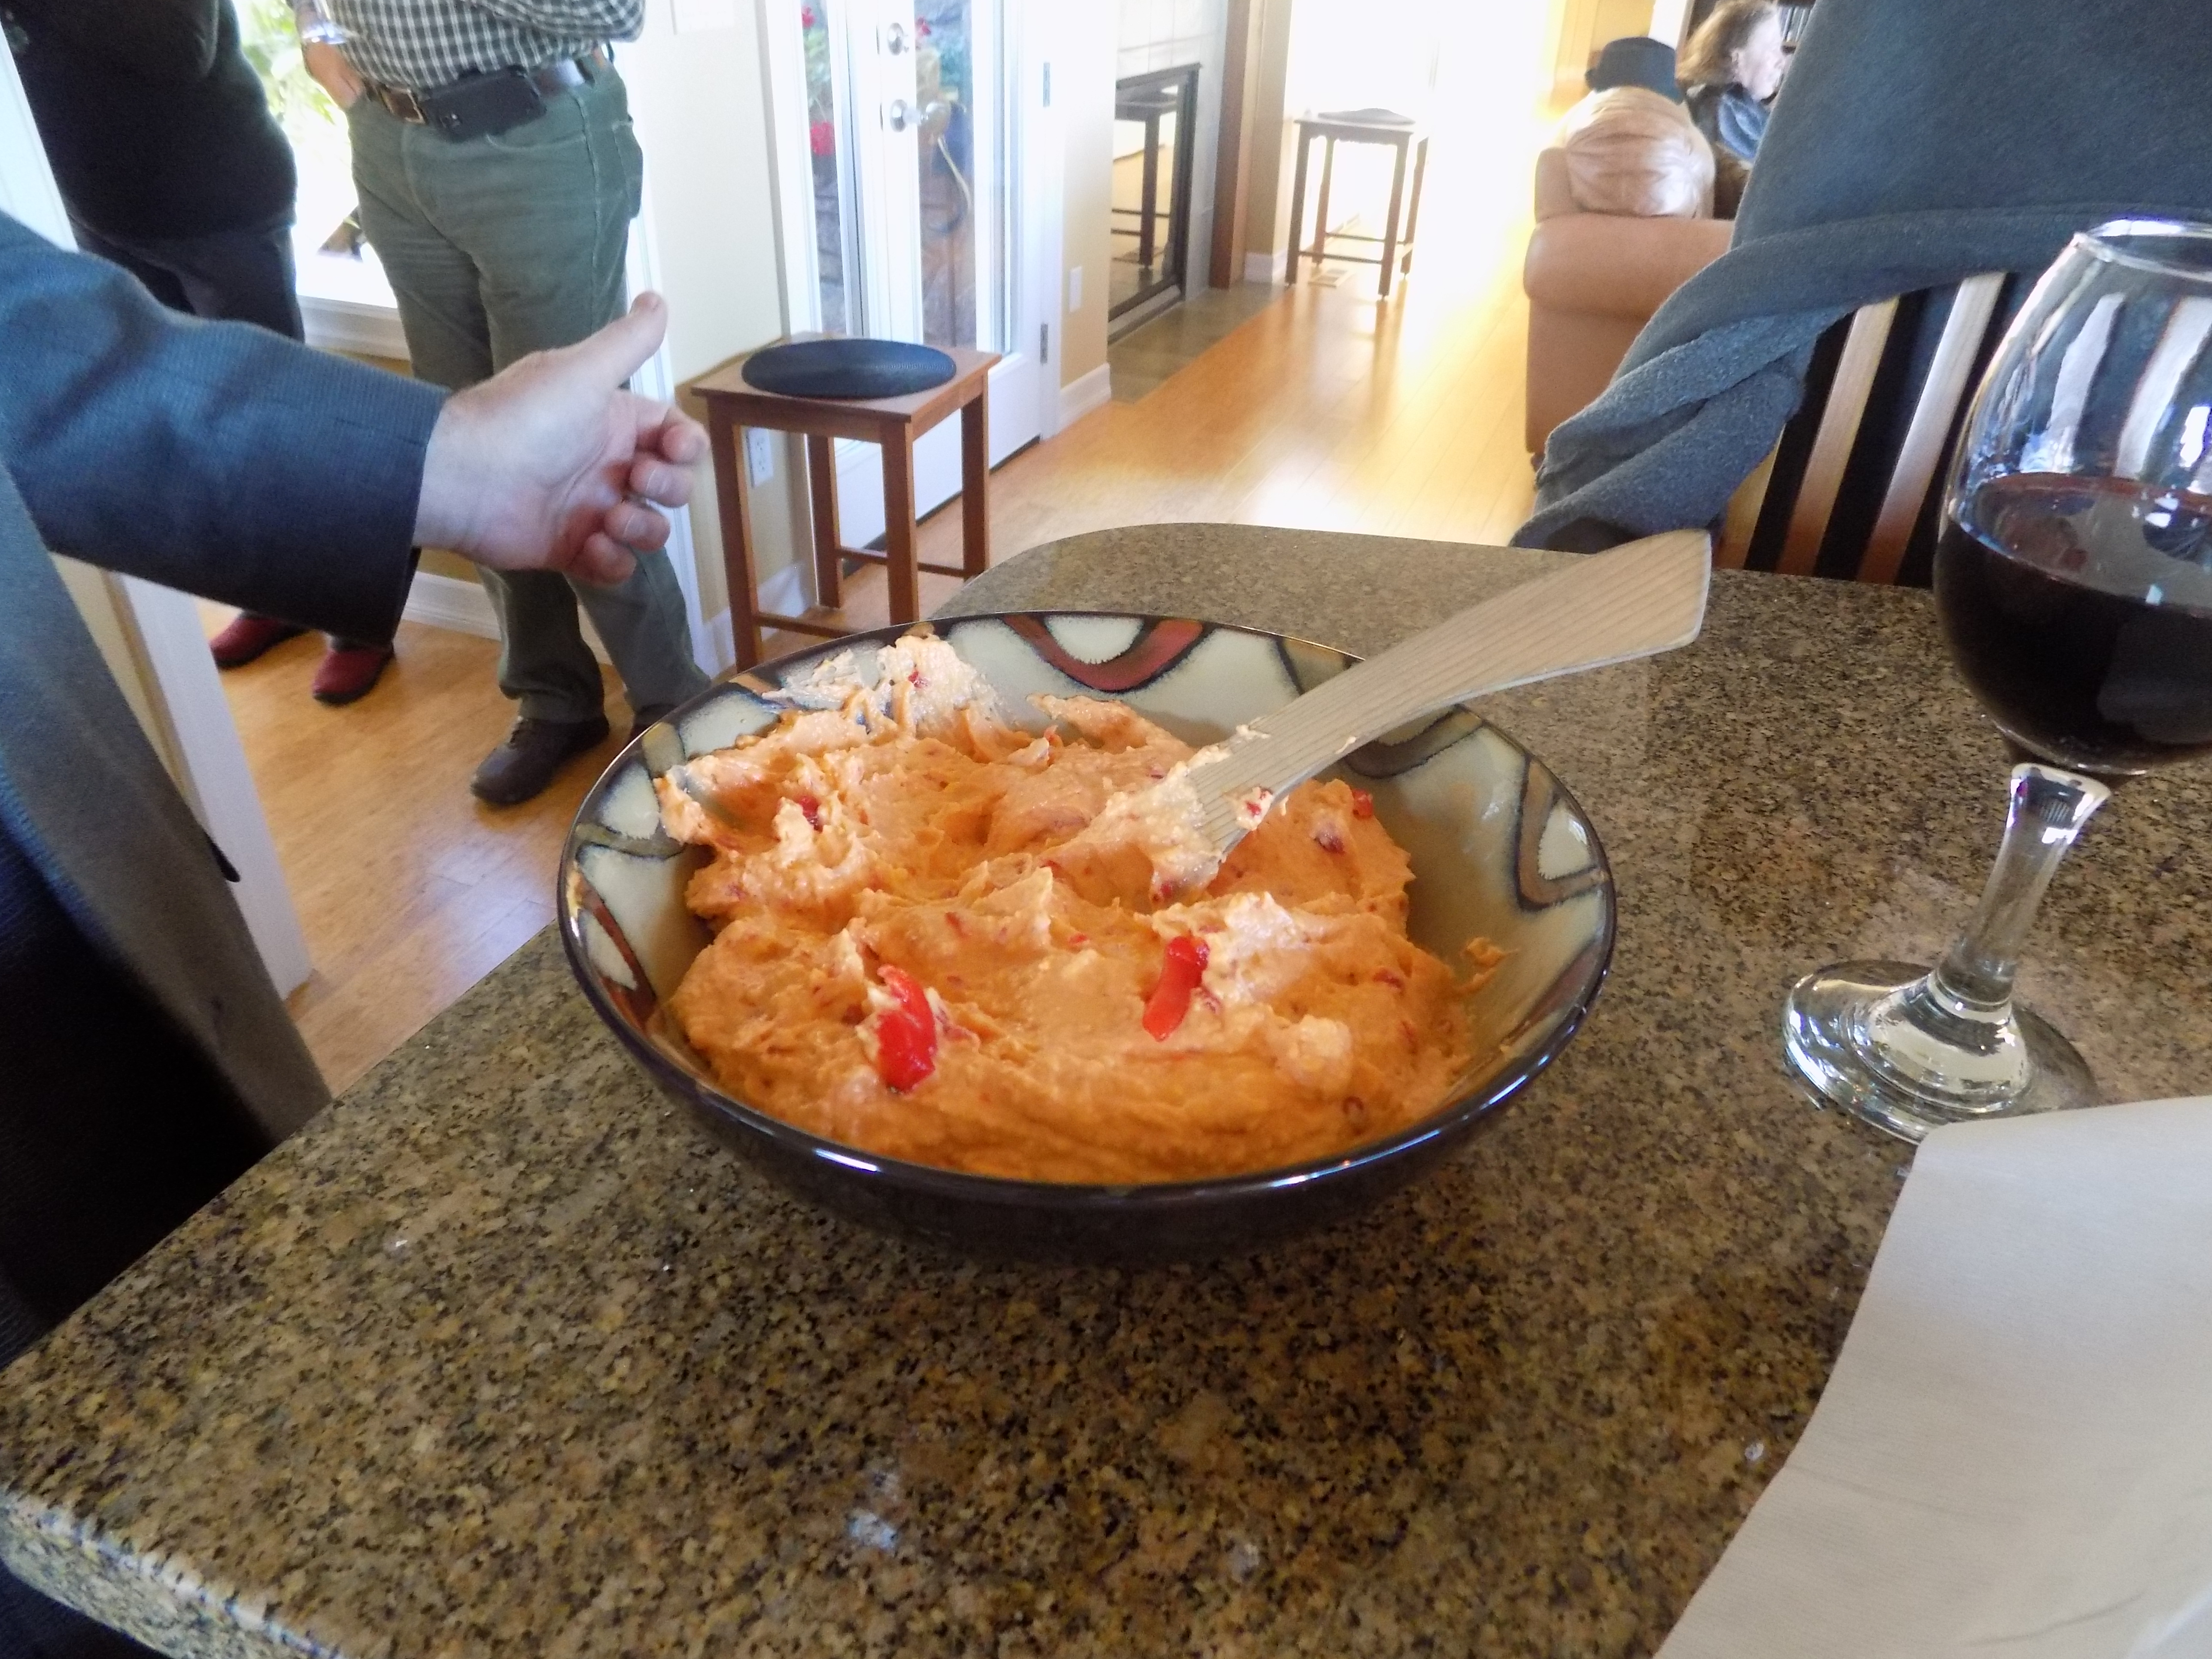
In fact, for one of our recent before concert meals for JazzVox, I made this Southern recipe for the appetizer, along with several other regional favorites. And my guests loved it. They were as entranced with the food as much as I was.
So the next time you need a quick and easy appetizer spread, give this recipe a try. For another great pimento cheese recipe, also give my friend Vicki’s recipe a try. Just another version, but even easier to prepare and just as delicious. Search under Cheese & Pimento Spread on this site. Enjoy all y’all.
And if you would like to know what the furry members of our family do while Mr. C and I are busily working or playing around the house, please see the photos at the bottom of this post.
3 c. grated extra-sharp cheddar cheese
1 pkg. (8-oz.) cream cheese, room temperature
½ c. mayonnaise
freshly ground black pepper (not very much)
¼ tsp. granulated garlic
¼ tsp. onion powder
1/8 tsp. cayenne pepper (optional)
¼ tsp. Worcestershire sauce
¼ tsp. dry mustard
6 oz. diced pimentos, drained (save a small amount for garnish)
Place the cheddar cheese, cream cheese, mayonnaise, pepper, granulated garlic, onion powder, cayenne pepper, Worcestershire sauce, and dry mustard in the bowl of your food processor. Pulse until not quite smooth. (You want some texture, so don’t over process.) Add the pimento and give it one or 2 quick pulses. (You don’t want the pimento too finely chopped or blended either. Little pieces of pimento are desired.) Adjust seasoning.
Scoop into a serving bowl, garnish with the last little bits of pimento, cover with plastic wrap, and allow to rest in your refrigerator for a couple days. Serve at room temperature with buttery crackers.
*I attended son Sven’s graduation from Davidson College in Davidson, NC. Spent only 4 days in the area. No wonderful food to speak of!
And I lived in Newark, Delaware for 2 years while my former husband went to graduate school at the University of Delaware. We drove around Maryland on many occasions, mainly to view the countryside, observe the Amish people, and eat picnic lunches at the many incredible cemeteries that dotted the countryside. (And you thought you knew me well!) But as poor college students, we did not avail ourselves of the local cuisine as much as we would have liked. Just a rare treat of blue crabs straight out of the Chesapeake Bay and the best crab cakes I’ve ever tasted.
Max – one of the twins on daddy’s sweatshirt
Miles – the other twin on his favorite “nest” by the door to the courtyard
Georgia – the family princess on my side of our bed. And why my side of the bed? She barely tolerates me and totally loves her papa. So again I ask. Why my side of the bed?
So I know you are asking yourself, what someone who was not born in the true South could possibly know about cooking collard greens. Well, I must admit that I knew next to nothing about the cuisine of the South until I started doing some serious study on the subject. And over the years I have learned a lot. And I must say, if there is anything finer than WhiteCheddar Cheese Grits (thank you Eden), Shrimp Gumbo or my new recipe for Collard Greens with Smoked Pork Hock, then I do declare, someone step up to the line (the Mason Dixon line of course) and show me the error in my thinking! Until then, I’m tellin’ you true. You can unassailably bet your best corn bread recipe on the fact that I am going to continue researching and publishing recipes that fit the category “all food Southern”. Because all you all, Southern food is the bomb!
So next time you want to fix a big old pot of “good for you” and “really tasty”, get yourself to your local market and buy yourself some collard greens. I am positive you, your family, and your friends are going to thoroughly enjoy this quintessential Southern dish.
1 T. extra virgin olive oil
1 med. onion, diced
3 garlic cloves, finely minced
2 c. chicken broth
1/8 tsp. red pepper flakes (or more to taste)
freshly ground black pepper (not too much)
1 smoked pork hock (I prefer to use Sunny Valley Smoked Pork Hocks obtained in our area at Haggen’s Market)
2-3 bunches collard greens (depending on the size of the bunches)
pinch of sugar, if required
hot sauce on the side, opt.
In a large covered pot, add the olive oil and the chopped onions; sauté until tender. Add the garlic and continue cooking for a minute or until the garlic releases its aroma. Add the chicken broth, red pepper flakes, pepper, and pork hock. Bring to a boil, reduce heat, cover, and simmer gently for about 45-60 minutes. (The simmer time helps the broth take on the delicious, smoky flavor of the meat!)
Meanwhile, remove the center stems of the collard greens by holding the leaf in one hand and stripping the leaf down with your other hand. (Tender young leaves don’t need to be stripped.) Stack 6 to 8 leaves on top of one another, roll up, and slice into ½-inch thick slices. Then cut those slices in half. Wash the collard greens thoroughly, drain and set aside.
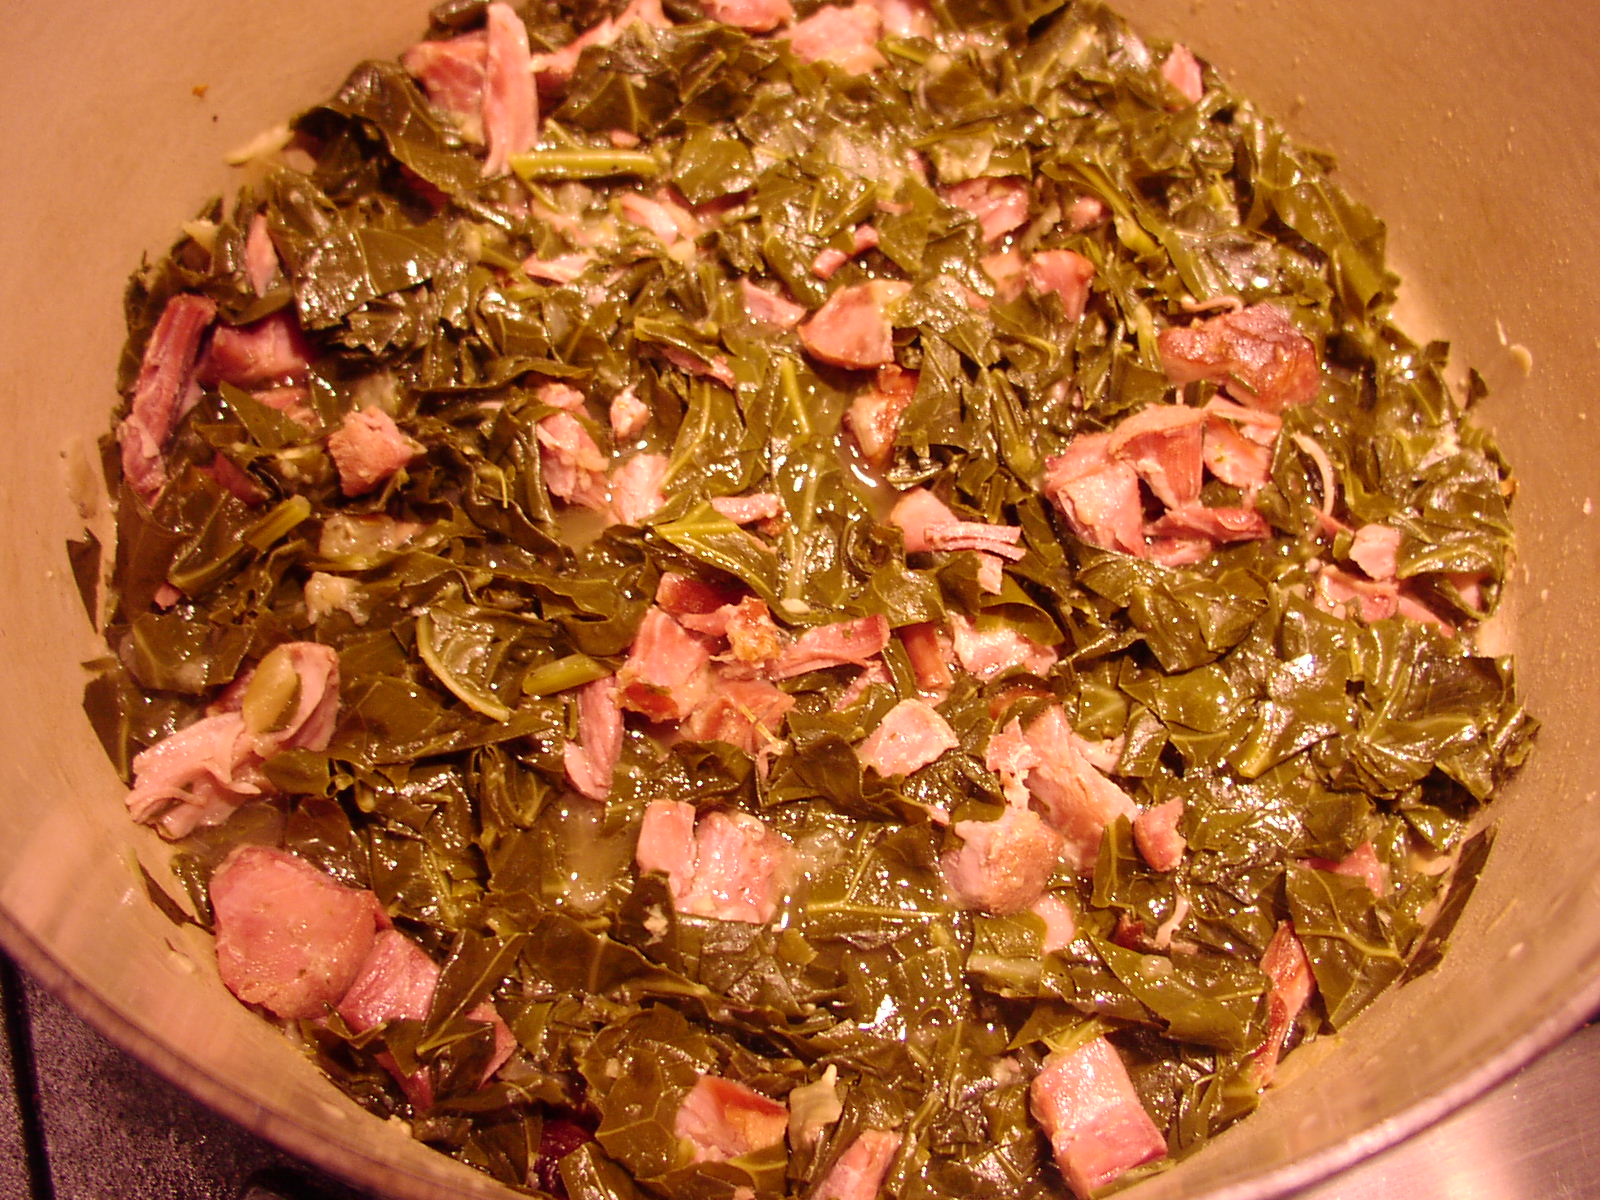
When the broth has finished simmering for about an hour, add the cleaned and sliced collard greens. Cover the pan and cook on med-low heat until the leaves are tender, about an hour and 45 minutes. Stir once or twice during the cooking process. (You basically want to slowly cook the greens in the flavorful broth. They will wilt down as they cook.) After about an hour and 15 minutes, remove the pork hock from the pan and allow it to cool to the point where you can remove the meat from the bones, fatty and connective tissue without burning your fingers. Chop or shred the meat into bite sized pieces and add back to the pot. When the greens are tender, adjust the seasoning (including a pinch of sugar if the greens are particularly bitter) and serve piping hot.
Note: I like to serve the collard greens in individual little bowls so everyone gets their share of the greens and the amazing liquid. I then pass around chunks of nice crusty bread or the more traditional corn bread to mop up the potlikker. The savory broth (or “potlikker” as we from the south like to call it) is an important part of the whole quintessential “collard” experience.
And OK, for those of you who know me, you know that my “south” is really the southern part of Bellevue, Washington where I lived for most of my adult years. That qualifies as “south”, doesn’t it?
Additional Note: Smoked turkey legs or wings can be used in place of the pork hock, but they are terribly hard to find.
For more Southern recipes, please look under the category “Southern Cuisine” on this site.
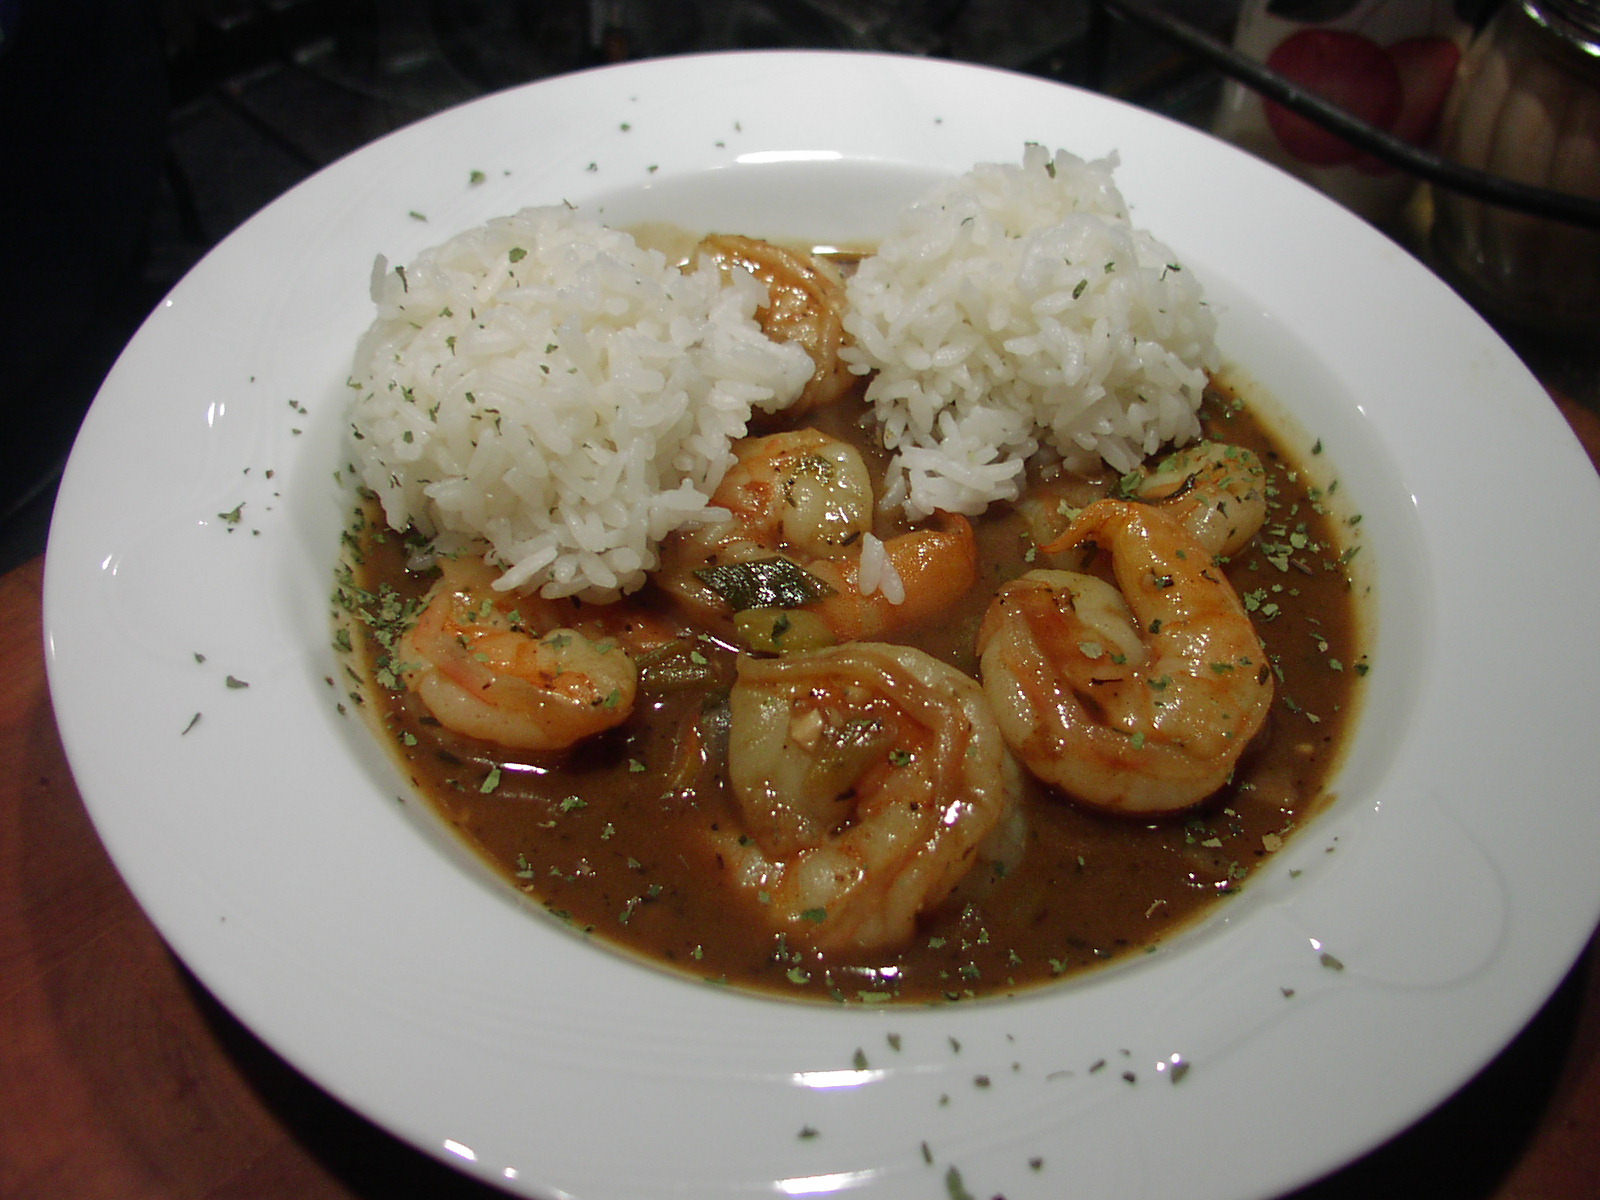
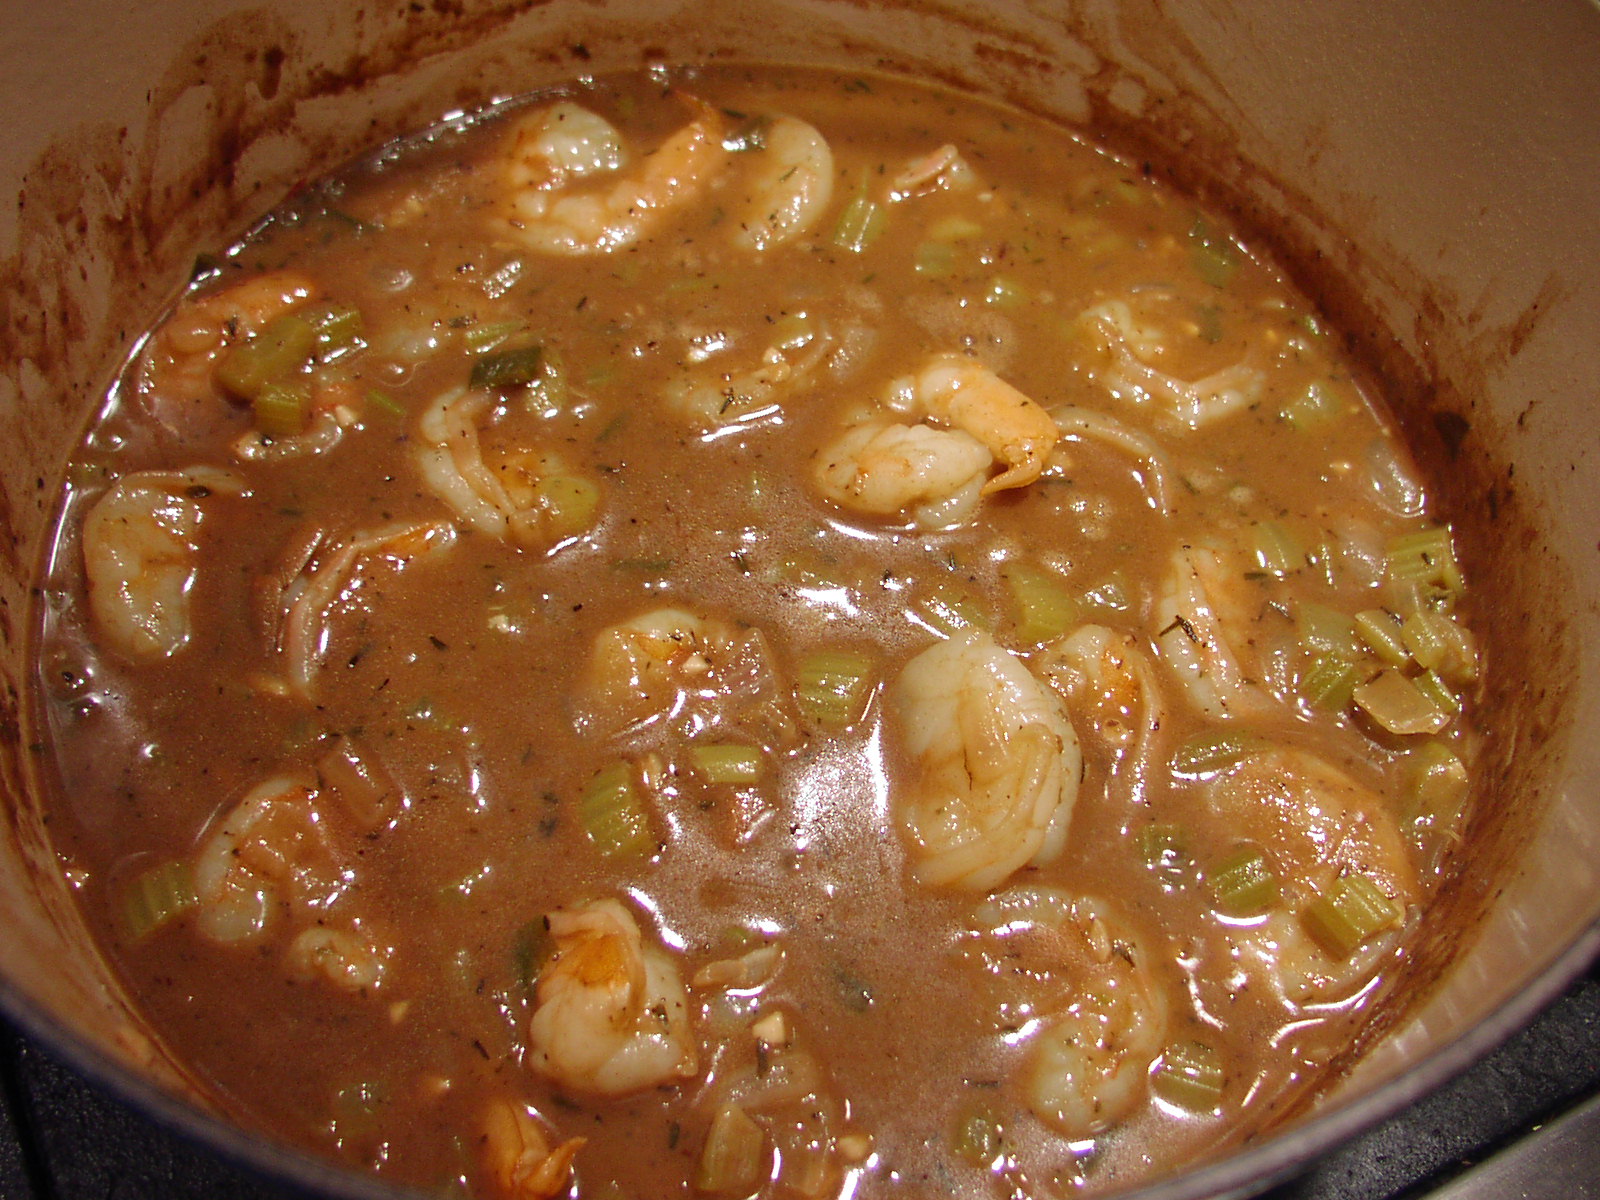
I think many people shy away from Creole and Cajun food because they think it’s going to be too spicy. They hear words like gumbo filé and Creole seasoning and they automatically shy away. And it’s true, some Creole and Cajun dishes can be very spicy, but they don’t have to be. And this recipe, based on a recipe from Marcela’s Creole Cookery in Seattle, contains a bit of heat but only enough to compliment the other ingredients. And that’s good. The last thing you want is a sauce that is so spicy hot that the wonderful taste of your expensive shrimp is completely obliterated. (Along with your taste buds, I might add!)
So figuratively speaking, this sauce is the perfect foil for shrimp. Then all you need is a big old ball or two of cooked rice, and you have a simple and delicious one course meal.
Now like any other stew like dish, there are about as many recipes for gumbo as there are Louisiana residents. And many of them are fabulous. (The stews that is; I don’t know about all the residents!) But we especially like this gumbo recipe because it is fairly mild. (Did I mention that both Mr. C and I are both kind of wusses when it comes to really spicy food?)
So if you are a person unfamiliar with Creole or Cajun food, but consider yourself in possession of a sophisticated and educated uraniscus (palate), step on out of your comfort zone and travel “culinarily speaking” down to the land of Marti Gras, hush puppies, and bread pudding. Make yourself up a batch of this gumbo honey and there will be no turning back.
¼ c. canola oil
¼ c. flour
4 c. chicken stock, heated to almost boiling
½ small onion, chopped
4 chopped green onions
2 lg. stalks celery, chopped
3-4 cloves garlic, minced
1½ tsp. dried thyme
1 tsp. gumbo filé powder
3 bay leaves
freshly ground black pepper
pinch cayenne pepper
½ tsp. commercial Creole seasoning or see recipe for homemade Creole Seasoning below
1 lb. uncooked large shrimp
cooked rice
In a large covered saucepan, cook the oil and flour over medium heat until it is chocolate colored, about 25 minutes, stirring continuously. (If it burns, throw it away and start over!) Carefully whisk in the hot chicken stock, reduce heat, and simmer uncovered for 15 minutes.
Add the onion, green onions, celery, garlic, thyme, gumbo filé powder, bay leaves, pepper, cayenne, and Creole seasoning. Cover the pan and gently simmer for 1½ hours, stirring occasionally. (Add additional chicken stock if needed.) Adjust seasoning (probably will need salt), remove bay leaves, add the shrimp, and simmer until the shrimp are just cooked through.
Serve with cooked rice.
Creole Seasoning:
1/3 c. paprika
3 T. dried oregano
3 T. freshly ground black pepper
2 T. dried basil
2 T. kosher salt
1 T. cayenne pepper
1 T. onion powder
4 tsp. dried thyme
4 tsp. granulated garlic
Combine all ingredients and store in an airtight container. Makes about 1 cup.
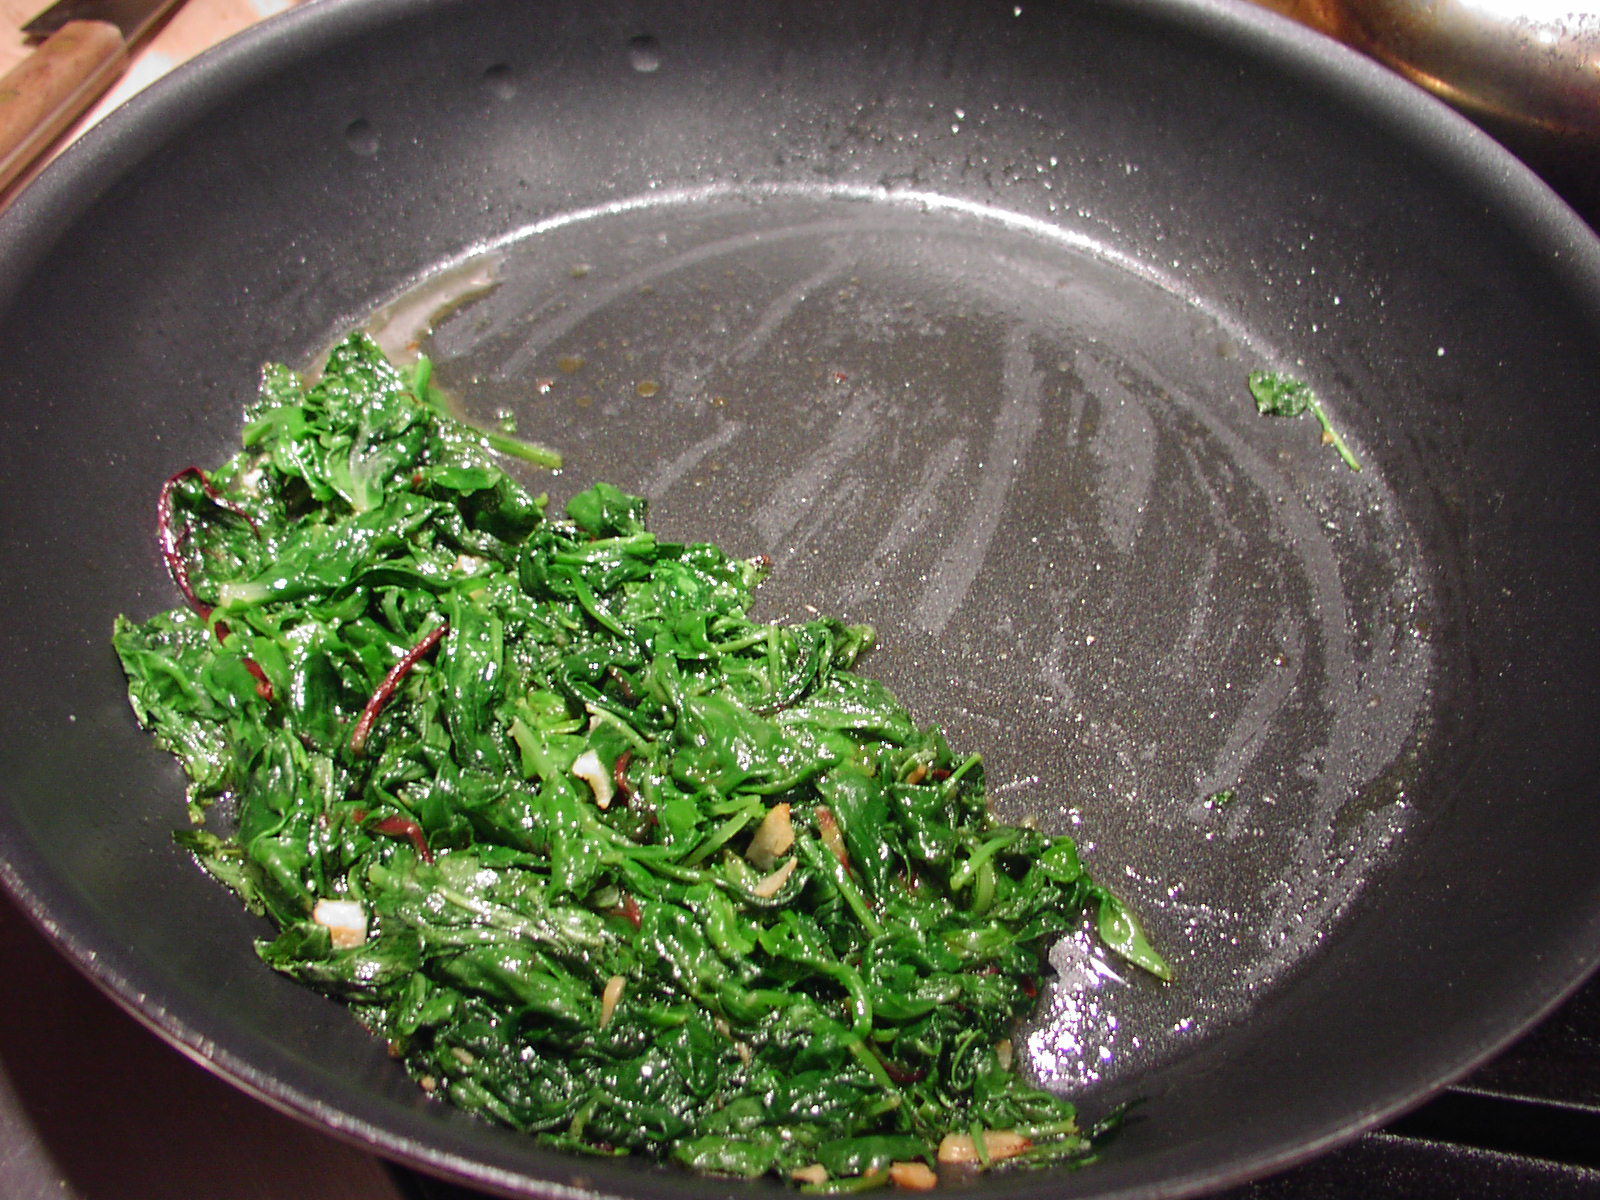
You know how some things are just meant to be; well this recipe from Sunday’s Pacific NW section of the Times was right there when I needed it. I had just gotten back from the grocery store with a big old plastic container of “Super Greens” and no real inspiration for how I was going to use them. When low and behold, I opened the NW section and there was the perfect answer to my dilemma. And when I say perfect, I mean perfect!
Now you need to know that Mr. C and I both love us our greens. But sometimes fixing greens can take time. Not this recipe. It’s almost ready to serve before it’s started! The only change we both agreed would be wonderful was the addition of a few toasted pine nuts. Some might consider pine nuts gilding the lily, but we are both willing to give it a try anyway. (Actually, adding the pine nuts was Mr. Cs idea. He may not know how to cook, but he sure knows how to eat!)
So thank you Vios Café for sharing this wonderful and easy recipe. I can’t think of any other veggie dish that is as delicious and good for us as this lovely way to fix a variety of greens. This recipe is now number one on the Chez Carr cavalcade of edible hits. So give it a try. You will be amazed just how good a few leaves can taste. Michael Pollan* would be so proud!
2 T. + a drizzle of extra virgin olive oil, divided
1 large garlic clove, thinly sliced
pinch of red pepper flakes
10-12 oz. roughly chopped braising greens (red or green chard, mustard greens, tat soi (Spinach mustard), lacinato kale, arugula, spinach, etc.)
kosher salt, to taste
2 T. cold water
fresh lemon juice, to taste
a few toasted pine nuts, opt.
Heat the 2 tablespoons of olive oil to medium in a large covered fry pan. Add the garlic and pepper flakes and sauté for 30 seconds just to infuse the oil with flavor and soften the garlic. Add the greens and sauté until they begin to wilt, about 2 minutes. Season lightly with salt, add the water, stir to mix and cover tightly. Cook until the leaves are tender, about 3 minutes. Remove the lid and continue to cook until all liquid evaporated. Drizzle with a small amount of olive oil and a squeeze of fresh lemon juice. Serve with a few pine nuts sprinkled on top. Serves 2 (barely)
(And yes, the pan in the picture was full when I started. But as we all know, greens shrink when they are cooked.)
*Mr. Pollan is the author of “In Defense of Food” and a great proponent of eating as many leaves as possible.