Category Archives: EAST INDIAN RECIPES

GROUND LAMB MEATBALLS IN A GARAM MASALA SAUCE

We love East Indian food. But until recently there hasn’t been a decent Indian restaurant anywhere near our home. And even though we now have an option, I don’t always like to go out to eat. Most of the time, I just like to fix what I’m hungry for in the privacy of my own kitchen. And of course, sometimes the dishes I prepare turn out pretty good and I share the recipes with you. Sometimes, well let’s just refer to them as colossal failures. Great idea, but not the results I expected and therefore quickly relegated to the never to be seen or heard of again. Or if I think the recipe might be redeemable, I’ll put the recipe in my “try again with changes” folder.

But luckily, this was not one of those recipes. Thank goodness. Because this dish was very easy to prepare. (I really like that!) And very tasty. And the whole house smelled like an Indian restaurant. (Who could ask for anything better than that?)

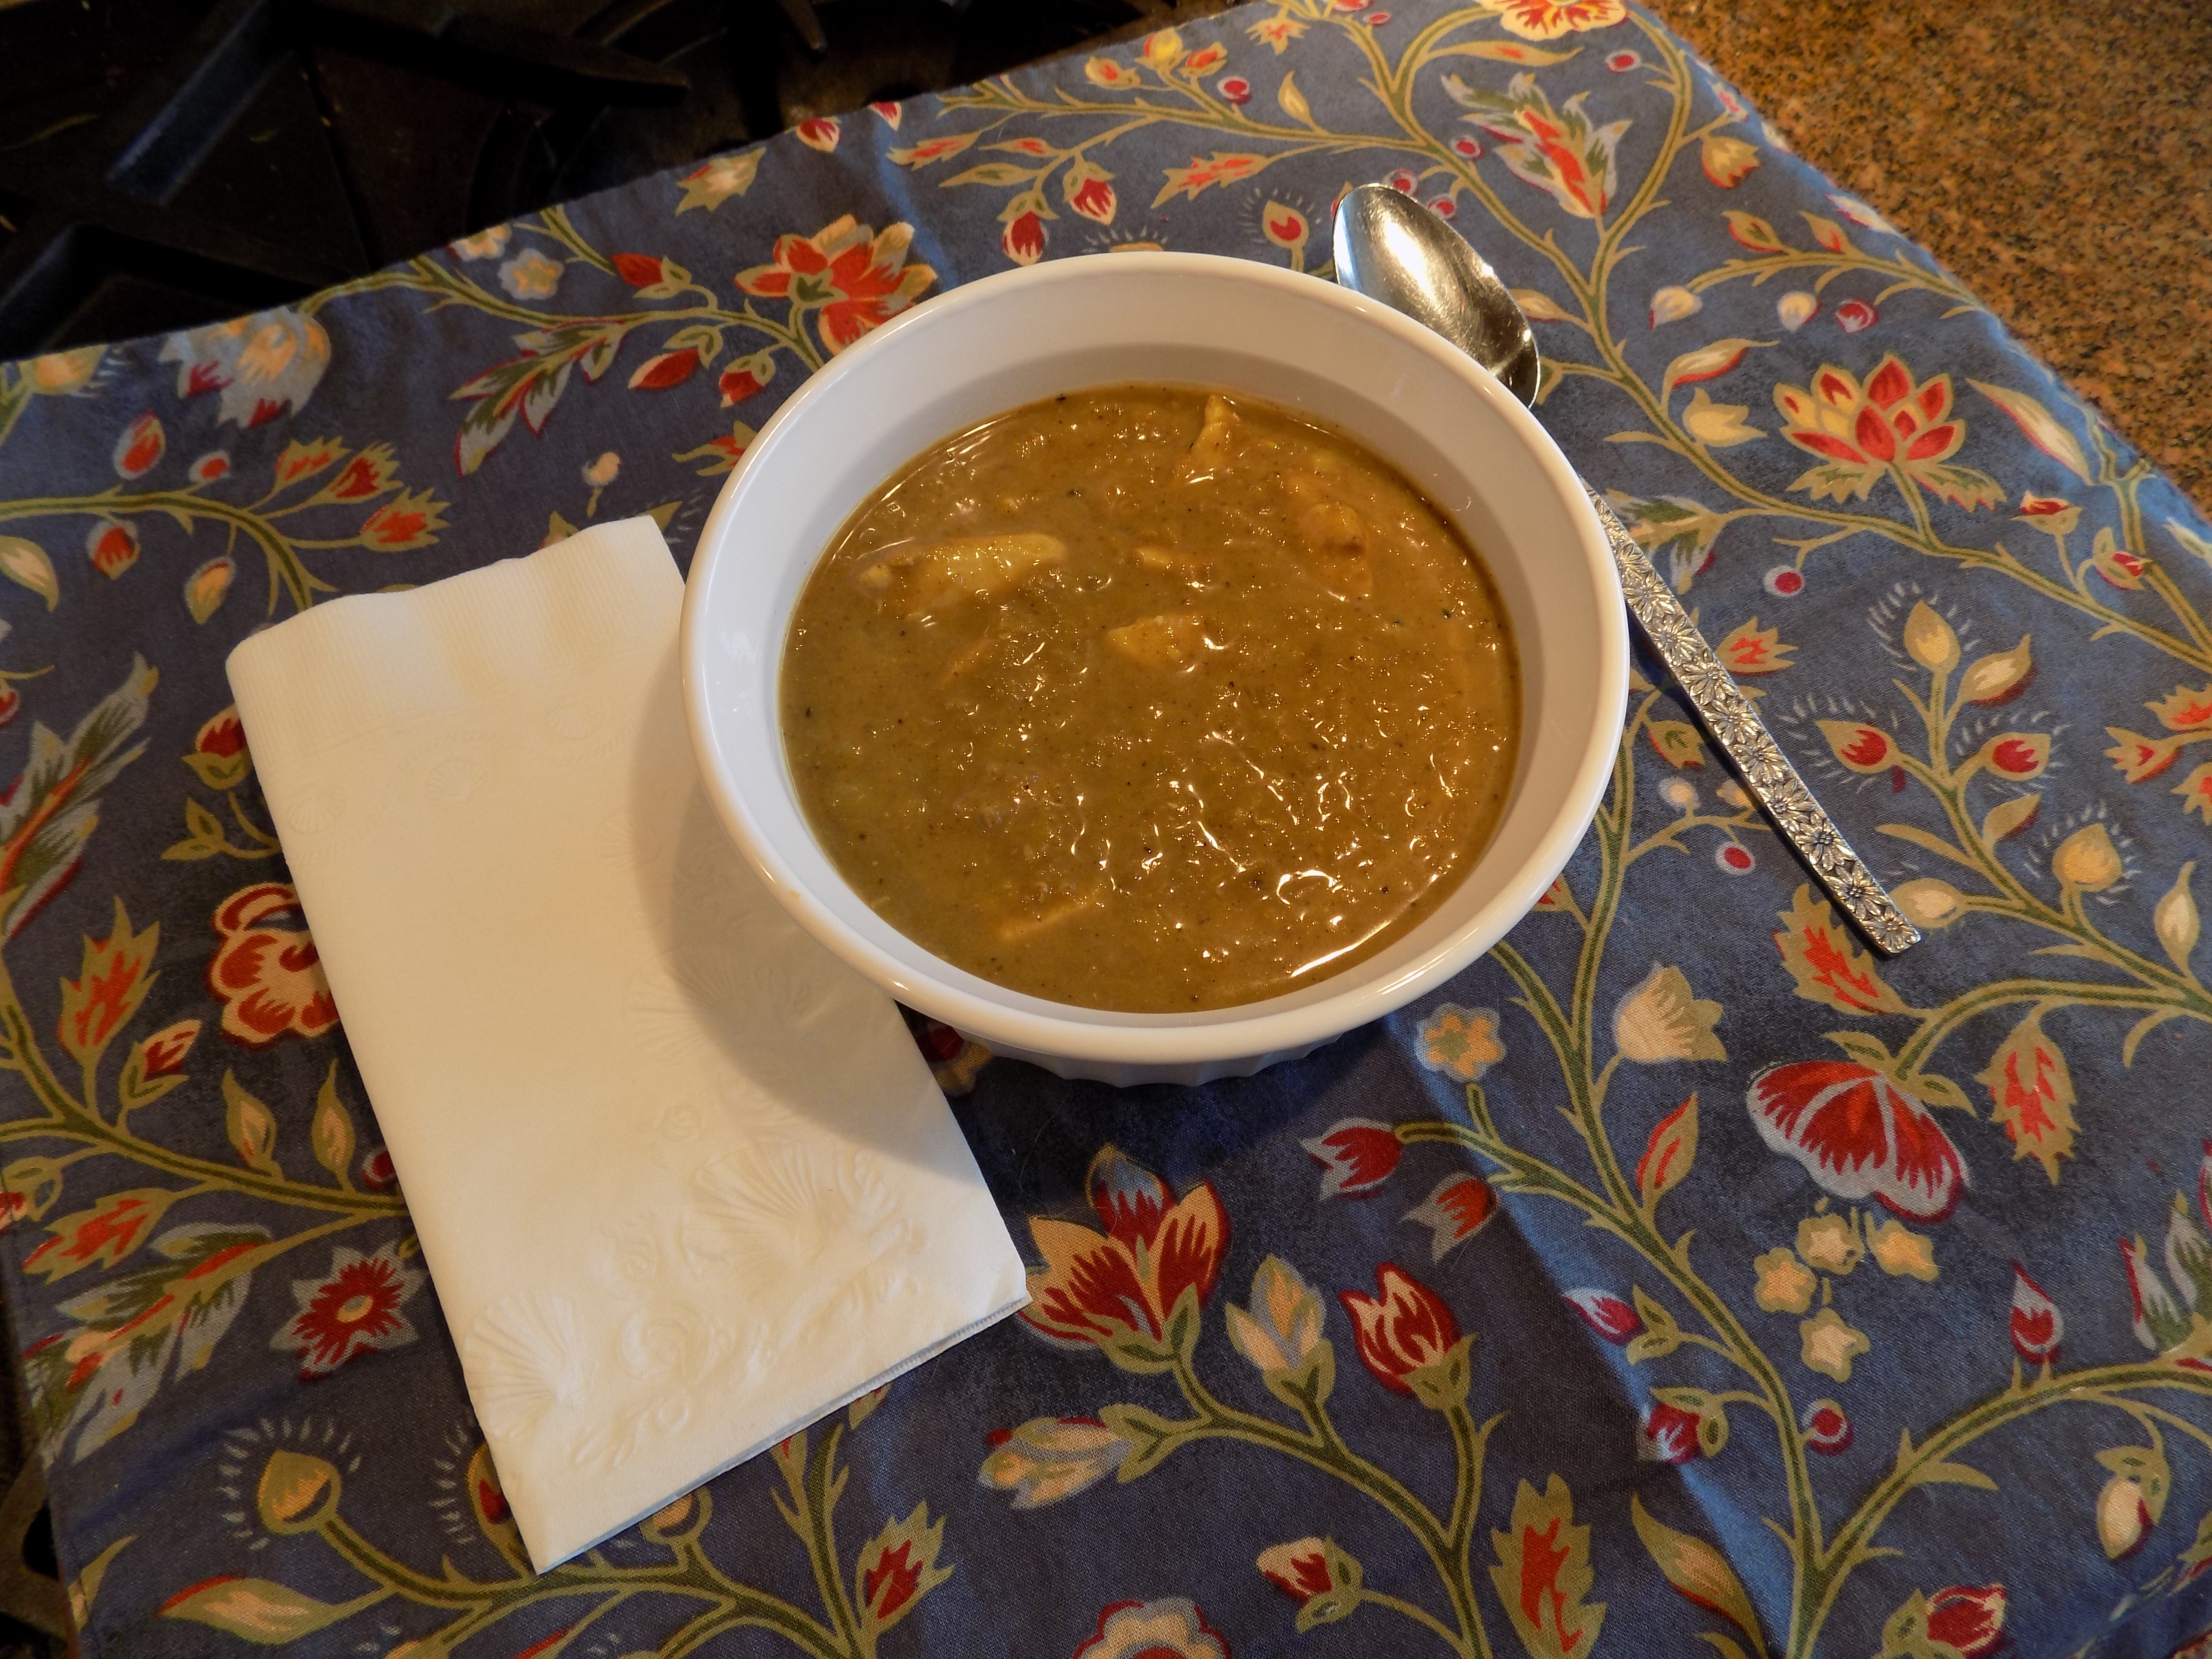
So, if you too love Indian food, give this simple recipe a try. Add a green veggie and dinner is on the table in no time.

As always, stay cool (both literally and figuratively), honor your kitchen by visiting it frequently, and never be discouraged if a recipe you try isn’t as amazing as you expected. Everyone’s tastes are different. So, if you try a dish and it isn’t completely to your liking, don’t make it again. Or try it again with modifications that you feel would improve the final result. Believe me, rarely does the printed recipe I start out with end up pristine. Especially if it’s a recipe I developed myself. Like this one. All the time I was preparing this dish last evening, I was making changes. Might be too much salt, so cut in half. Add chicken stock because the sauce is too thick. Add 2 teaspoons regular curry powder to increase the depth of flavor.

So, please do the same with any of my recipes. Don’t ever hesitate to make a recipe your own. You know what you like, so embrace “modify” as your official culinary mantra. It’s been mine for decades, and it has never steered me wrong.

Peace and love to all. 

4 garlic cloves, finely minced, divided

½ c. + 1 c. chopped onion, divided

kosher salt

freshly ground black pepper

3 tsp. garam masala, divided (see recipe below)

1 lb. ground lamb

1 T. extra-virgin olive oil

2 tsp. minced fresh ginger

2 tsp. curry powder

1 (14.5 oz.) can diced tomatoes

⅓ c. water, or more if sauce is too thick

1 tsp. chicken base (like Better Than Bouillon chicken)

pinch cayenne pepper

½ c. plain Greek yogurt or sour cream

2 T. freshly chopped parsley, opt.

chopped peanuts, opt.

steamed basmati rice (see recipe below)

Combine half of the minced garlic, the ½ cup chopped onion, ¾ teaspoon kosher salt, a few grinds of black pepper, and 1 teaspoon of garam masala in a mixing bowl. Stir in the ground lamb. Form into balls whatever size you prefer. (I use an ice cream scoop to form the balls.)

Heat the olive oil in a large fry pan. Fry the meat balls until they are nicely browned. (They will finish cooking as they briefly simmer in the sauce.) But for now, remove from pan and set aside.

Add the remaining 1 cup chopped onion to the pan and sauté for 4-5 minutes, until softened. Add the other half of the minced garlic and the minced fresh ginger; sauté another 30 seconds.

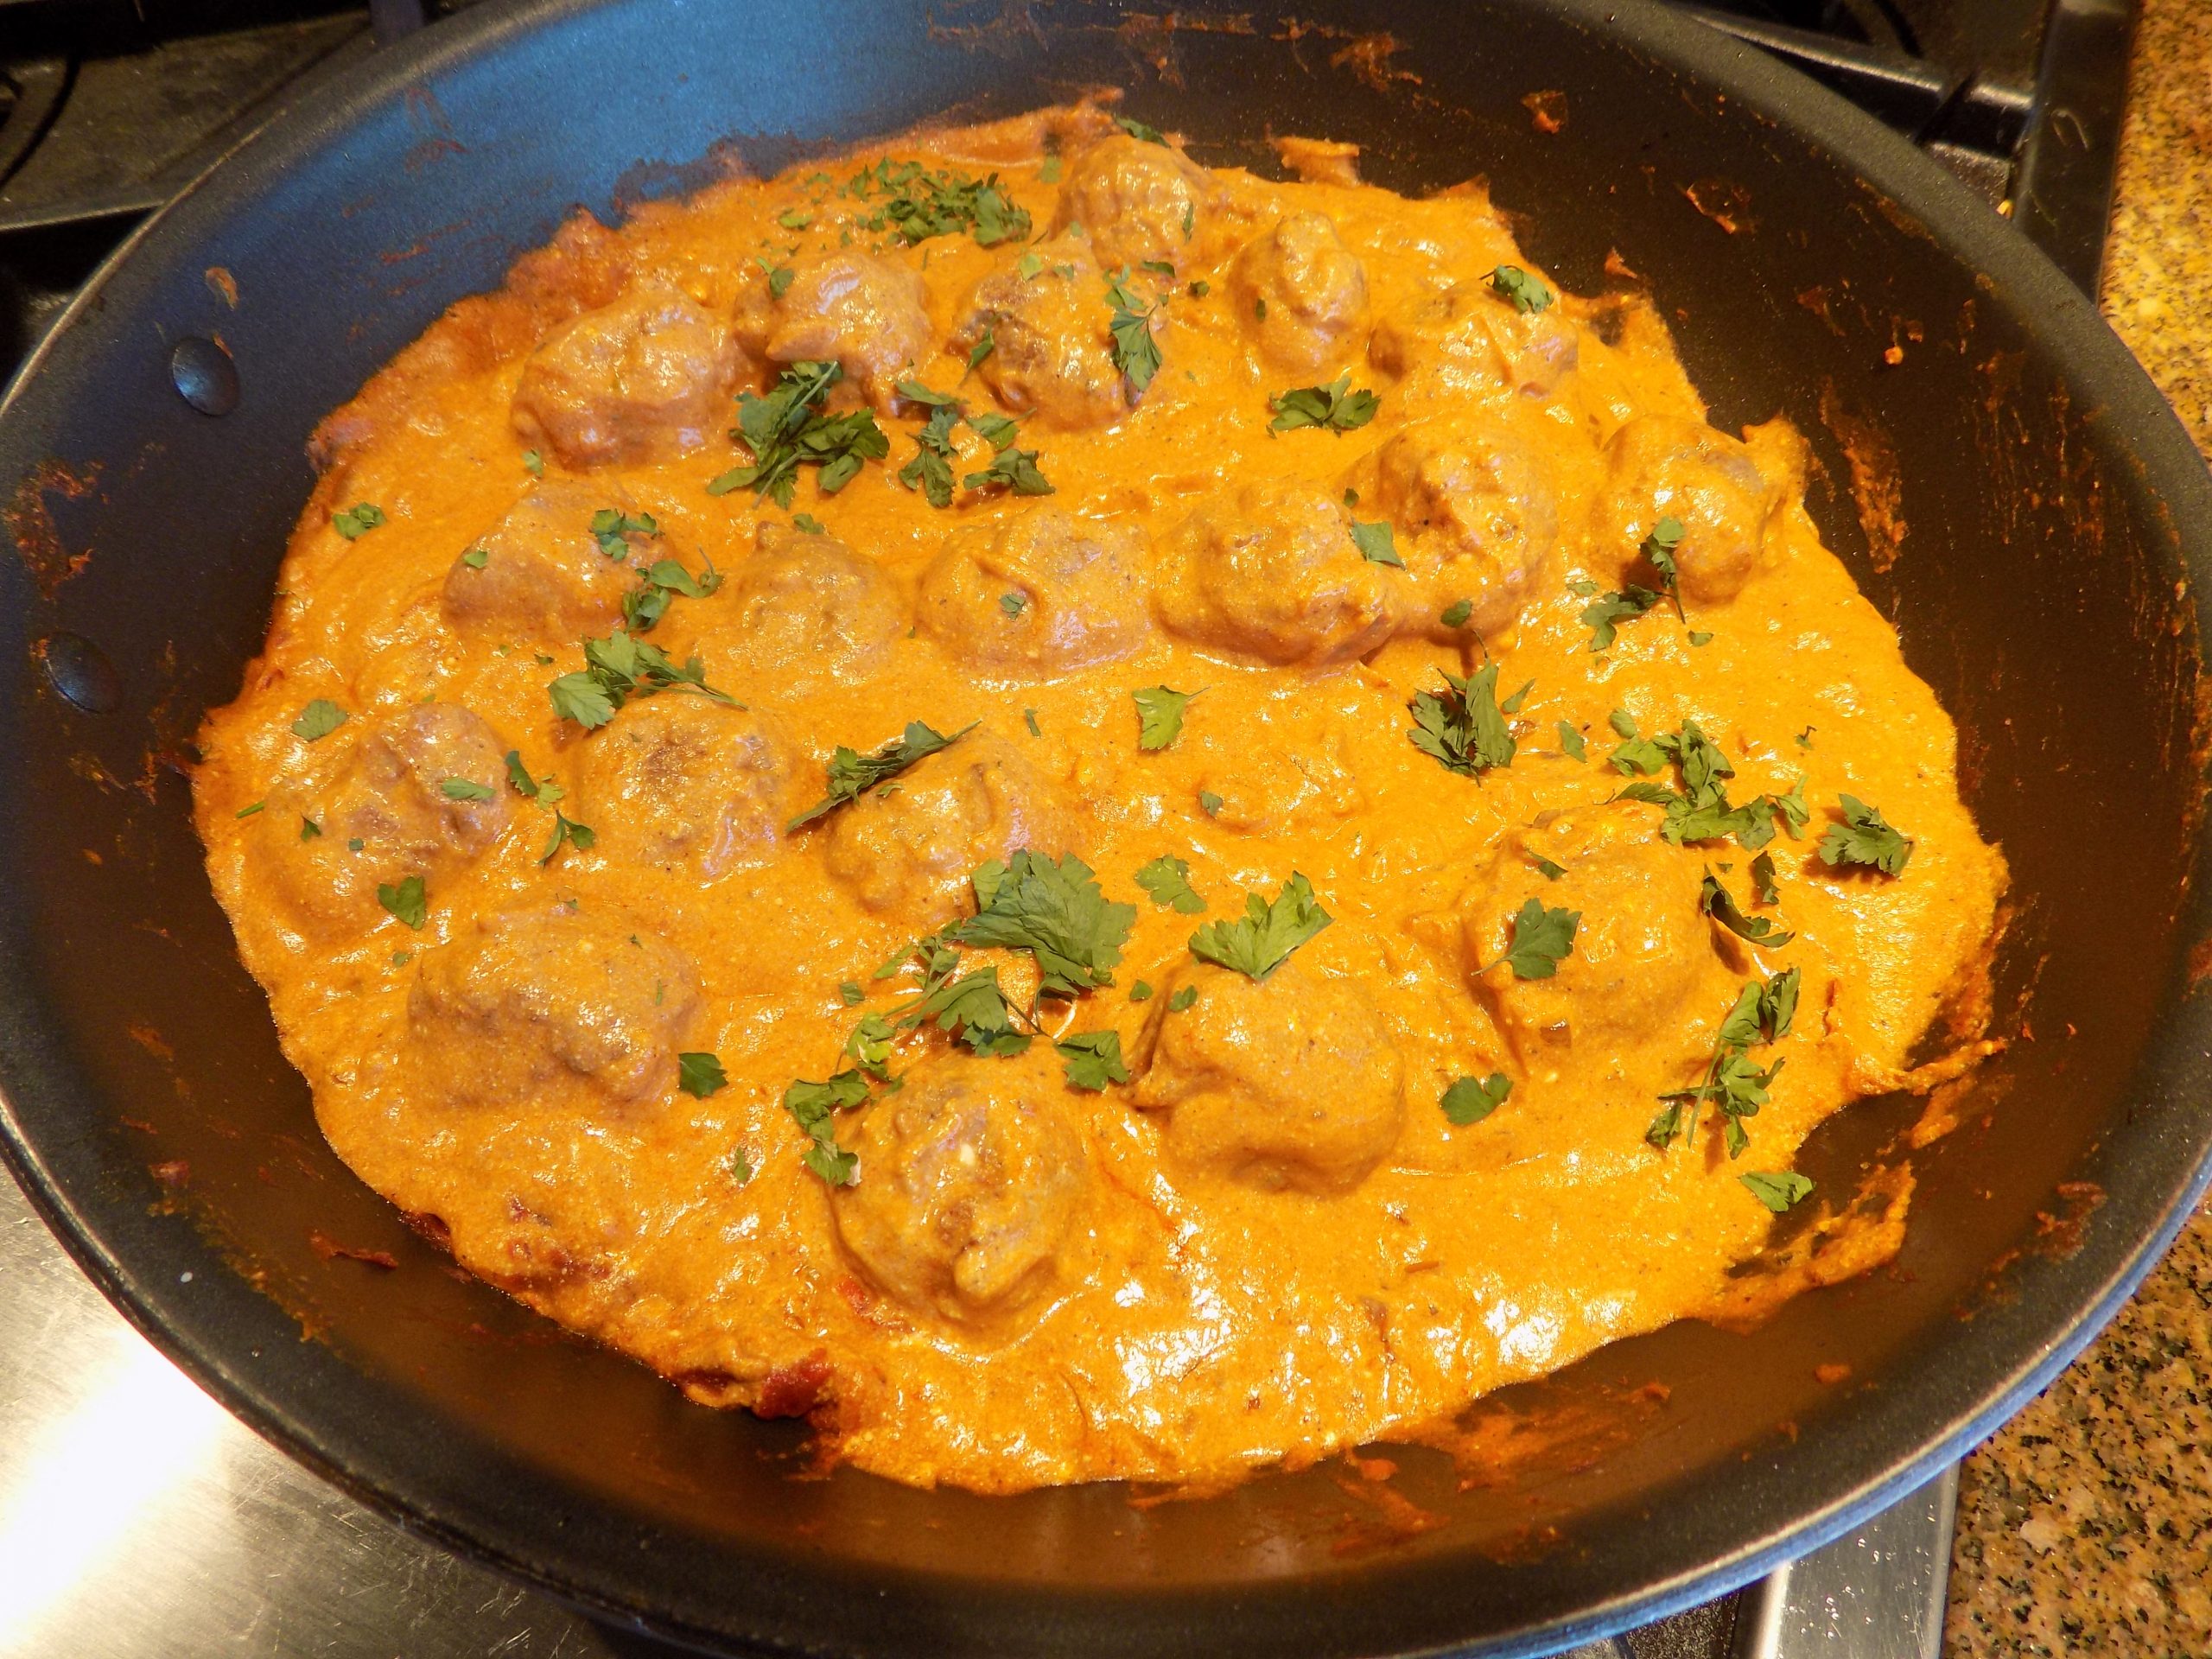
Stir in the remaining 2 teaspoons garam masala, curry powder, diced tomatoes, and chicken broth. Season with salt, black pepper, and cayenne. Bring to a low simmer and cook for about 10 minutes, or until slightly thickened. Stir in the meatballs until warmed through, 1-2 more minutes. Adjust seasoning. Turn off the heat and stir in the Greek yogurt until just combined.

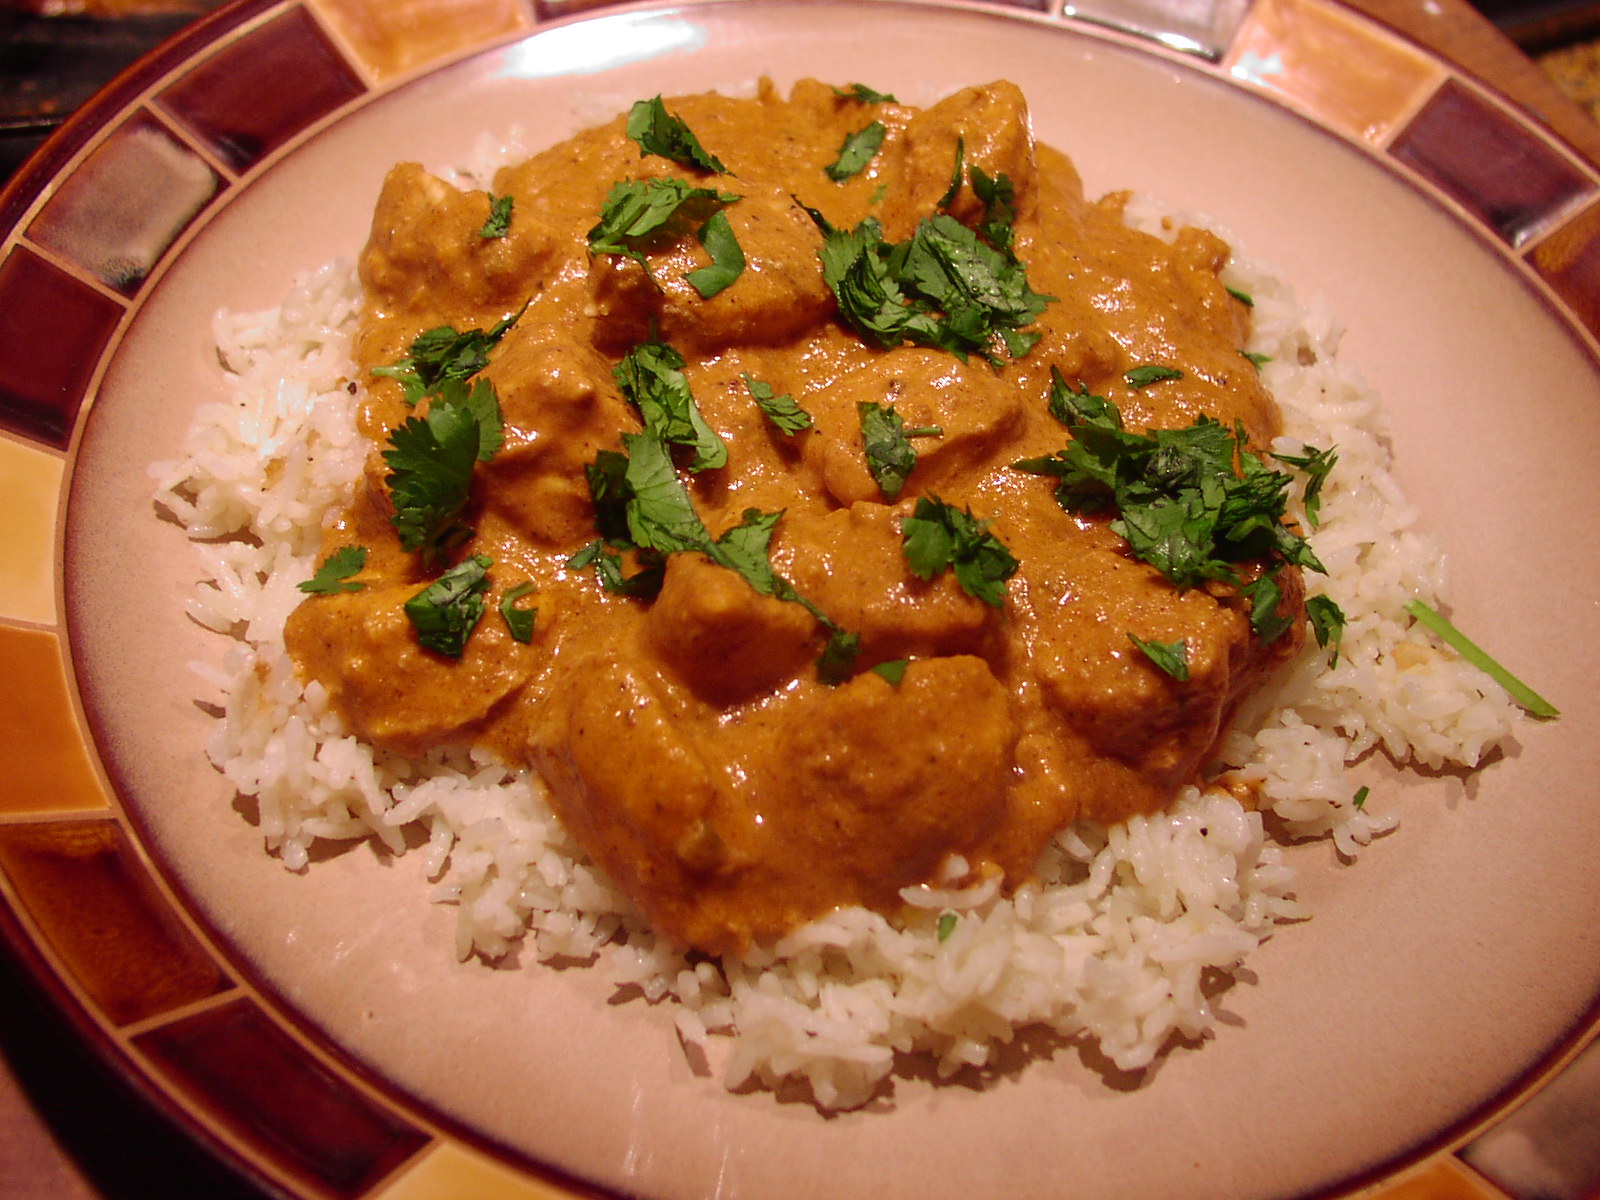
Serve hot over basmati rice (see recipe for perfect basmati rice below) garnished with parsley and chopped peanuts.

STEAMED BASMATI RICE

1 c. basmati rice

1½ c. water

Place rice and water in a medium size saucepan over medium high heat, no lid. Bring to a simmer, then cover, reduce heat to low, and cook for 12 minutes.  DO NOT LIFT THE LID.

After 12 minutes, remove from heat, leave for 10 minutes with the lid on, then uncover, fluff with a fork, and serve immediately.

GARAM MASALA SPICE BLEND

1 T. ground cumin

1½ tsp. ground coriander

1½ tsp. ground cardamom

1½ tsp. ground black pepper

1 tsp. ground cinnamon

½ tsp. ground cloves

½ tsp. ground nutmeg

Combine all the ingredients and store in an airtight container in a cool, dry place.


TURMERIC-BLACK PEPPER CHICKEN WITH ASPARAGUS (OR GREEN BEANS, IF YOU DON’T HAVE ASPARAGUS)

My sister-in-law Katie sent me this recipe that she found in the New York Times. She prepared it with asparagus and she and her husband Rick loved the dish. So, of course I had to make it too. But I didn’t have any asparagus. But I did have green beans. Lots of green beans. In fact we had been eating so many green beans in the last week that I was reluctant to serve them to Mr. C. (again) last evening. (We get a by-weekly veggie and salad box from a local farm. And one of the items in the mix was a pound of beautiful organic green beans. I had also ordered a few extra veggies to be delivered at the same time. And you guessed it. One of the items I had requested was a pound of green beans.) So you see, we were replete with beans.

But I decided to fix the dish anyway. And I am so glad I did. Of course I made a couple very simple changes. I used a bit more veggie oil than directed. I took the chicken out of the pan when it finished cooking, then added it back to the pan just before adding the sauce. And I added a teaspoon of cornstarch to the sauce to thicken it up a bit. But that’s it.

For a dish with so few ingredients, it was absolutely delicious and tasted very complex. And exotic. And loving to cook from world cuisines, this was right up my alley. But to which country or region should I offer my thanks and praise? After a short bit of research and a good dose of guess work, I decided that this dish, or one very similar to it must have its origin in India. But don’t quote me on that. I just love Indian food, so it only made sense to me that it would be just another wonderful Indian dish.

After I made this dish last evening, I went to the source recipe and read some of the reviews. Almost universally, the people who wrote reviews added additional ingredients to the recipe. And yes, I often do that too. In fact I did add a teaspoon of cornstarch. So no offense intended towards anyone who made this dish their own.

But I am going to recommend that you not add any additional spices or veggies or change amounts. Just follow this very simple recipe as written. The flavor is lovely, and part of the charm is in its simplicity. (I didn’t have to slice even one veggie!)

So thank you again Katie for sending me this recipe. It was perfect served with brown rice, as you suggested, and a simple salad.

To all of you who are cooking for yourself or your families, I salute you. As much as I enjoy cooking, it’s still work. I too get tired and I’m only cooking for the two of us.

So stay positive, cook what you like best, and be creative. Try new recipes. And invent recipes using ingredients you have in your pantry or cupboard. As I was drifting off to sleep last night I was thinking about the turmeric I had used in this dish. I realized that the turmeric was at least 20 years old, probably more. Had to be. I remember buying a large bag of it at the Cost Plus World Market in Bellevue when I was working in downtown Bellevue. I obviously haven’t been using a lot of turmeric. But I can tell you after making this dish, I am going to be cooking with it a lot more in the future. Maybe I can even use it up before I go to that big stainless steel kitchen in the sky. (And no, you don’t have to throw dried herbs and spices away after a year. They actually have a shelf life of “indefinitely”! However, you might have to use a little more than listed if your herbs and spices are well aged.)

As always, peace, love, and happy kitchens to all.

¼ c. water

3 T. honey

¾ tsp. freshly ground black pepper, plus more to taste

kosher salt

1 tsp. cornstarch

2 T. all-purpose flour

1½ tsp. ground turmeric

1 lb. boneless, skinless chicken thighs, cut into 1-inch pieces

2 T. canola oil

12 oz. fresh asparagus, trimmed and thinly sliced on an angle or fresh green beans, sliced lengthwise (carefully) and then cut into shorter lengths

1 tsp. unseasoned rice vinegar  

½ lime, cut into wedges, opt.

In a small bowl or measuring cup, stir the water, honey, pepper, ½ teaspoon salt, and cornstarch together. Set aside.

In a medium bowl, whisk the flour, turmeric, and 1 teaspoon of salt together. Add the chicken and toss until coated.

In a medium (10-inch) nonstick skillet, heat the oil over medium high. Add the chicken and cook until the turmeric is fragrant and the chicken is golden brown on both sides, 2 to 3 minutes per side or until the chicken is completely cooked. Remove the chicken to a small bowl.

Add the asparagus, season with salt, stir to combine and cook until crisp tender, 1 to 2 minutes. (If you use beans, the cooking time will be longer. You want beans to be just done.)

Add the cooked chicken to the pan, and then the honey mixture. Cook, stirring, until the sauce has thickened slightly, 2 to 3 minutes.

Remove from heat and stir in the vinegar. Adjust seasoning. Great served with brown rice and fresh lime juice dribbled over the top.

LOWFAT INDIAN CURRY SAUCE

Usually when I make an Indian curry sauce it contains a lot of delectable fat. But we are trying to eat healthier, so I came up with this low-fat version. And it not only tastes wonderful, it’s just as satisfying as my old standard. Well – almost. (My mouth still loves the richness of butter and sour cream. But I’m sure my heart is happier with a bit of veggie oil and fat free yogurt. As of course is my jubilant conscience whenever I make a more “advantageous to my body” decision!)

Anyway, I worked out this recipe mainly to take along with us on our most recent trailer trip. Therefore, I wanted a curry sauce that would freeze well, work well with an assortment of meats or seafood, of course be delicious, and able to assuage our possibly devastating hunger while parked in the wilds of the Canadian Rockies. (I mean seriously. You can get mighty hungry after a long day of looking at beautiful scenery or staying around camp and reading a good book!)

So one evening we feasted in style with this sauce combined with diced and sautéed chicken, ladled over cooked brown rice, then topped with the condiments listed below. A simple salad on the side and life was just about as good as it gets.

So if you too love Indian curry, give this recipe a try. It’s really tasty and a lot healthier than more traditional recipes that call for butter and sour cream.

But if you should happen to want a creamy, old fashioned curry sauce recipe, you should consider preparing my Curry Sauce for Chicken, Shrimp, Beef, or Lamb on this site. It’s amazingly good and I’ve been making it for decades. In fact, it was one of my children’s favorite foods. It even includes cream of mushroom soup. And if that doesn’t make you want to rush into your kitchen and prepare it this instant, I don’t know what would?

And if you have never eaten Indian curry, you are missing out on one of life’s culinary pleasures. Indian food is delicious. So try some soon. Remember – today, tomorrow and all the future days of your life are not dress rehearsal days. This is it! And it’s SHOW TIME! So try a new recipe. Or make an old favorite that you haven’t prepared in a long time. Or learn to play the ukulele if that has always been your dream. Just don’t prepare a recipe while playing a ukulele. Makes for a horrendous mess! Hugs to all.

1 T. vegetable oil

½ yellow onion, finely chopped

½ carrot, finely chopped

2 garlic cloves, finely minced

1 T. minced fresh ginger

2 tsp. curry powder, or more to taste

2 tsp. dried parsley

¼ tsp. kosher salt

1 can (15-oz.) crushed or petite diced tomatoes (Italian preferably)

1 c. fat free plain yogurt

In a large heavy pan, heat the veggie oil. Add the onion and carrot; cook until soft. Add the garlic and ginger and cook for 1 minute. Stir in the curry powder, dried parsley, and salt.

Add the canned tomatoes and yogurt; bring to a simmer and let burble for about 10 minutes. Remove from heat and add whatever cooked meat or seafood takes your fancy. Adjust seasoning. Or before adding meat or seafood, allow the sauce to cool and store in your freezer. Then when you are ready to use, heat over medium heat and add your meat, seafood or veggies of choice. Great for camping trips.

Condiments:

chopped cashew nuts

thinly sliced green onion

mango chutney


MULLIGATAWNY (INDIAN CHICKEN CURRY SOUP)

This recipe came to me via an Epicurious request from a reader. When I saw the recipe I nearly hit my head on the ceiling jumping for joy. Because this was (and still is) my favorite chicken curry soup. And the reason I was so excited? Because, now at long last, I could make my favorite Indian restaurant’s soup anytime my little old heart desired. And that restaurant is Shamiana Restaurant in Houghton (Kirkland) Washington. If you live in the Seattle area and have not had the pleasure of dining at this wonderful restaurant, I suggest you give it a try in the near future. But back to the soup.

This soup is not only easy to make, but once you acquire the spices, fairly economical to prepare. And as I have preached in the preface to many of my recipes, even the spices are economical if you buy them in bulk. And yes, I know – those darling little glass spice jars look so becoming in your kitchen cabinet. But dear readers, once you start using herbs and spices with shear abandon, which incidentally is what I hope you do, you will find that those little jars don’t really hold very much. And unless you are a descendant of the late John D. Rockefeller, and therefore have money to burn, that’s exactly what you are doing when you remove one of those tiny spice jars from the grocery store shelf and place it in your cart. You might as well take a $20 bill out of your wallet and set fire to it right there in the grocery store! But again, back to the soup.

I served this soup, along with three others, at the before concert meal for a recent JazzVox concert. But while I was considering this soup to be one of the available options, I frankly was concerned that Mulligatawny might be just a little bit too exotic for some people’s taste. Well after all these years, I should have known better! By and large, the people who attend our in-home concerts have as great an appetite for unfamiliar and different food as they do for fabulous vocal jazz. So needless to say, despite my uneasiness regarding serving this soup, it was very popular.

So next time you experience a burning desire for chicken soup, but want to challenge the arbitrary boundaries you have set on what constitutes said dish, make a pot of this delicious soup. You will soon learn that there is more to chicken soup than you ever imagined!  

Oh, and BTW – if you do decide to burn your money in a grocery store, please do not tell the authorities that is was because of my suggestion. I greatly appreciate your lack of candor in this regard. Thank you very much.

  • ¼ c. vegetable oil
  • 3-4 chicken breasts, finely diced and seasoned with salt, pepper, and a small amount of turmeric
  • 3 c. chopped onion
  • 1 lg. or 2 small carrots, finely diced
  • 1 celery stalk, finely diced
  • 5 garlic cloves, minced
  • 2-3 T. garam masala
  • 1 T. ground coriander
  • 1 tsp. turmeric
  • ½ tsp. cayenne
  • 2 bay leaves
  • 2 tsp. kosher
  • freshly ground black pepper
  • 1½ c. dried red lentils, washed
  • 8 c. chicken stock
  • 1 c. unsweetened coconut milk
  • 2-3 T. fresh lemon juice
  • 2 c. cooked basmati rice, opt.*
  • lemon wedges

Heat oil in a heavy large covered soup pot over medium heat. Add the chicken and sauté until just done. Remove from pan and set aside. Add onions, carrot, and celery; cook until onion is a light golden brown, about 20-25 minutes. (You want the onions slightly caramelized.) Add garlic and sauté 2 minutes. Add garam masala, coriander, turmeric, cayenne, bay leaves, salt, and pepper; stir for 1 minute. Add lentils; stir until coated. Add chicken broth. Bring to boil, reduce heat, cover and simmer until lentils are very tender, about 30 minutes. Remove bay leaves and add coconut milk, fresh lemon juice, and reserved chicken. Cook for about a minute or until all the ingredients are hot. Adjust seasoning.

If you like rice in your soup, place a small amount in the bottom of a soup bowl. Ladle soup over and squeeze some fresh lemon over top.

*I wrote cooked rice as an optional ingredient, because in our house only one of us likes rice in his Mulligatawny. I prefer my soup without rice. Vive la différence!

Thanks Shamiana for this delightful recipe. And please pardon the changes.  


EAST INDIAN OR THAI CURRIED CHICKEN NOODLE SOUP

OLYMPUS DIGITAL CAMERA

East Indian Curried Chicken Noodle Soup

OLYMPUS DIGITAL CAMERA

Thai Curried Chicken Noodle Soup

I first started making the East Indian version of this soup over 20 years ago using regular old fashioned, available in every grocery store curry powder.  So when Mr. C invited the other 2 members of the Tim-E3 Jazz trio to rehearse at our place on Sunday, I offered to make lunch for the guys since they would be here from 11:00 am till about 3:00 pm. I decided to use Tim and Todd, along with Mr. C of course, as my taste testers (aka Guinea Pigs) to see if using red curry paste would work to create a Thai variation of this soup. So I served the guys a bowl of each and had them decide which they liked better or even if they liked the soups at all? Well, all three of the guys decided both were keepers. So I decided to post both recipes and let you decide which version better suited your taste.

The base ingredients are exactly the same in both soups. But what makes the difference is the curry used. And for people like Mr. C and myself, who BTW are curry “nuts”, we probably like the East Indian curry better. Only because that’s the curry flavor we grew up with. OK, I didn’t actually experience curry until after I was out of my parent’s home. In fact, I doubt either of my parents even knew what curry was until the latter part of their lives. But I started making curry in my early 20s. And since I don’t really feel I achieved adulthood until I was about 28 (some would say I’m still not there!), I feel comfortable saying that I grew up loving curry. But enough about my latent development!

Both soups are very easy to prepare and don’t have to be simmered for hours to achieve a lovely blended flavor. And truly, both are really delicious! Both exotic and down home at the same time. Each would make a really delightful first coarse soup to either an Indian or Thai meal.

So is you too love soup and would like to prepare one, or in this case two, that are both different, easy, and fairly quick to prepare, give either one of these a try. Kripyā bhojan kā ānnaṅd lijīyai (please enjoy your meal) in Hindi and taan hâi a-ròi in Thai.

East Indian:

  • 2 tsp. coconut oil or canola oil
  • 2 c. bite-sized pieces of uncooked chicken
  • ¼ tsp. kosher salt
  • freshly ground black pepper
  • 2 garlic cloves, minced
  • ¼ tsp. crushed red pepper flakes
  • 2 T. regular curry powder (like McCormick)
  • 2½ c. chicken stock
  • 1 can light (reduced fat) coconut milk
  • 4 T. fish sauce
  • 1 T. low sodium Tamari or soy sauce
  • juice of ½ lime or more to taste
  • 6-8 oz. cooked egg noodles (I use Rose brand Chinese Egg Noodles)
  • 4 green onions, thinly sliced, garnish
  • 1 T. chopped fresh cilantro, garnish
  • lime wedges, garnish

Heat the coconut oil in a medium large covered soup pot. Add the chicken, salt, and pepper. Sauté the chicken just until cooked through. Remove from pan and set aside. Add the garlic, crushed red pepper flakes, and curry powder to pan; cook for about one minute. Add the chicken stock, coconut milk, fish sauce, and Tamari. Bring to just under a boil, reduce heat, cover, and cook for 30 minutes. Stir occasionally. Add the reserved chicken and cook for 1 minute or until the chicken pieces are hot. Remove the pot from heat and stir in the lime juice and cooked noodles. Adjust seasonings. Serve hot garnished with green onions, cilantro, and lime wedges.

Thai:

  • 2 tsp. coconut oil or canola oil
  • 2 c. bite-sized pieces of uncooked chicken
  • ¼ tsp. kosher salt
  • freshly ground black pepper
  • 2 garlic cloves, minced
  • ¼ tsp. crushed red pepper flakes
  • 2 T. Red Curry Paste
  • 1 tsp. turmeric
  • 2½ c. chicken stock
  • 1 can light (reduced fat) coconut milk
  • 2-3 T. fish sauce
  • 1 T. low sodium Tamari or soy sauce
  • juice of ½ lime or more to taste
  • 6-8 oz. cooked egg noodles (I use Rose brand Chinese Egg Noodles)
  • 4 green onions, thinly sliced, garnish
  • 1 T. chopped fresh cilantro, garnish

Heat the coconut oil in a medium large covered soup pot. Add the chicken, salt, and pepper. Sauté the chicken just until cooked through. Remove from pan and set aside. Add the garlic, crushed red pepper flakes, curry paste, and turmeric to pan; cook for about one minute. Add the chicken stock, coconut milk, 2 tablespoons of the fish sauce, and Tamari. Bring to just under a boil, reduce heat, cover, and cook for 30 minutes. Stir occasionally. Add the reserved chicken and cook for 1 minute or until the chicken pieces are hot. Remove the pot from heat and stir in the lime juice and cooked noodles. Adjust seasonings. Serve hot garnished with green onions, cilantro, and lime wedges.


CHICKEN, SHRIMP, OR ROASTED VEGETABLES IN A CURRY MASALA SAUCE

OLYMPUS DIGITAL CAMERA

There really isn’t anything about Indian curry that I don’t like. And this curry dish, slightly altered from a recipe provided when I recently purchased a package of Aromatic Curry Masala at the Methow Masala shop in Winthrop, WA, is just about as good as an Indian style curry can get. It’s so delicious, that if I had been served this curry dish in a restaurant, I would have wanted to go back for more at my earliest convenience. The only changes I made to the original recipe were to replace tomato paste for diced tomatoes, use my own curry masala blend (the second time I made it), and add sour cream or yogurt right at the end. (Just makes the sauce a little creamier.)

Now if you happen to live near Winthrop, you can buy the curry blend any old time you want. But for those of us who would have to make a special trip, I went to all the trouble of working out what I believe to be an adequate Aromatic Curry Masala substitute. (BTW, Mr. C. loved both curries I made before writing this post. But he did admit that he liked the curry made with chicken better (curry number 1) than the curry I made with shrimp (curry number 2). No mention of the sauce flavor being any different when I used my own curry blend (curry number 2). Just that he preferred chicken curry over shrimp curry.

Now of course, many of you are not going to go to the bother of making your own curry masala powder. And believe me, if I still had 4 kids at home and worked full time, I wouldn’t be making my own curry powder either! But since my kids are grown and I am retired, I take no greater pleasure than trying my hand at what I call “seasoning blend mixology”. (I have kind of a spice and herb obsession if truth be known!) And if I do say so myself, my recipe below for Curry Masala Powder is darned good. But dear friends, even if you don’t have the time, energy, or interest in making your own curry powder, make this delicious dish anyway. Just use purchased curry powder. (There will be no points subtracted or shame attached to using a commercially produced curry powder. The only shame would be if you didn’t give this recipe a try when next you got a hankering for Indian food!)

So grind yourself up some curry powder (or start with purchased curry powder), steam up some rice (remember, brown rice is healthier for you than white rice), and prepare a chicken, shrimp, or roasted vegetable curry for your family in the near future. They will be delighted to have something new and exciting to eat for dinner. And you will have had a new adventure in the kitchen. And isn’t that the real reason many of us love to cook??

  • 1 tsp. cumin seed
  • 1 tsp. brown mustard seed
  • ¼ c. (½ stick) butter
  • 2 large onions, finely chopped
  • 5 lg. garlic cloves, finely minced
  • 1-inch piece of fresh ginger, finely minced
  • 3-4 T. Aromatic Curry Masala spice blend from Methow Masala or my version of Curry Masala Powder (see recipe below)
  • 1 tsp. kosher salt
  • ¼ c. tomato paste
  • 2-3 med. jalapeño chili peppers, seeds and veins removed, and finely minced
  • 4 c. (1 qt.) chicken or vegetable broth (or use 4 tsp. chicken or vegetable base and 4 c. water)
  • 6-8 boneless, skinless chicken thighs cut in bite sized pieces or 2 lb. large uncooked shrimp, peeled and deveined or 3 cups assorted roasted vegetables
  • ½-¾ c. sour cream or plain yogurt

Toast the cumin seeds and mustard seeds in a dry pan over medium heat until the aroma of the two spices is released. Set aside.

Melt the butter in a heavy covered pan. Add the onions and cook until they start to brown. Add the garlic and ginger and cook for one minute. Add the curry masala powder, salt, toasted cumin and mustard seeds, and the tomato paste. Let the mixture cook for about a minute. Whisk in the jalapeños and chicken broth and simmer uncovered for about 15 minutes. Add the chicken pieces and cook just until the chicken is no longer pink in the middle. If you are using shrimp, cook only until the shrimp turn light pink. If you are using roasted vegetables, add just long enough to heat through. Whisk in the sour cream or yogurt, adjust seasonings, cover, remove from heat, and let sit for 15 minutes. Serve over brown rice. And yes I know brown rice is not usually served with most curry dishes, but it’s healthy and we love it! If you must, you can serve the curry over basmati rice.

Also, since I know many of you are wondering – no this is not a recipe for a really spicy hot curry. The jalapeños truly add more flavor than heat, especially if you carefully remove the seeds and veins. Of course, there is a bit of heat, but I pride myself in not hurting anyone. So if you are super sensitive, you might want to use less jalapeños or none at all.

CURRY MASALA POWDER RECIPE

  • scant ½ c. coriander seeds
  • 2 T. fennel seeds
  • 2 T. cumin seeds
  • 1 T. black or brown mustard seeds
  • 1 tsp. black peppercorns
  • ½ tsp. fenugreek seeds
  • 2 tsp. crushed red pepper flakes
  • 2 tsp. ground cinnamon
  • 2 tsp. turmeric powder
  • 1 tsp. ground ginger
  • 1 tsp. ground cloves
  • 1/8 tsp. ground cardamom

In a small pan over low heat, individually dry roast the coriander seeds, fennel seeds, cumin seeds, mustard seeds, peppercorns, fenugreek seeds, and crushed red pepper until aromatic. Don’t hurry the process.

When each is toasted, remove to a bowl to cool. (And yes, it can be the same bowl.) When all of the spices are room temperature, whirl in a grinder until powdered. (It’s OK if there are still tiny chunks. If the chunks bother you, sieve the mixture before proceeding.) Add the ground cinnamon, turmeric, ginger, cloves, and cardamom. Store in an airtight container. Use in any of your favorite recipes calling for curry powder.

FYI: Internet source for dried herbs and spices www.myspicesage.com

I have always been more than satisfied with the price, delivery method (most of the time free delivery) and products I have received from this company.

GARAM MASALA BAKED CHICKEN

OLYMPUS DIGITAL CAMERA

We love East Indian food. And I know the main reason is because of the spices. And the spice mix – garam masala is one of our favorite spice combinations. So yesterday when I found myself with a couple of small packages of chicken in the freezer that really needed to be used, I thought of making a tandoori chicken or butter chicken for dinner. I went on line and found a couple of great recipes for said dishes. But of course, there always seem to be obstacles to my best laid plans, and this time was no different. Tandoori chicken requires a 24 hour marinating time, and butter chicken requires bite sized pieces of meat, neither of which I had available. So, never being one to let a little problem like time or ingredient get in my way when I am in the mood for a certain type of food, I decided to search under one of the ingredients that was common to both tandoori and butter chicken. (Besides the chicken itself, of course!) And that ingredient was “garam masala”.

After much research and nail biting, I stumbled upon Aida Mollenkamp’s recipe for Garam Masala Chicken with Roasted Vegetables and adjusted it to fit my needs.

So here ladies and gentlemen is my rendition (oops, that’s a musical term) – my take on Aida’s lovely recipe. It is easy to prepare and tastes like a million dollars. And best of all, Mr. C. absolutely loved this chicken at first bite. Love it when a plan comes together!

Recipes for Tandoori Chicken and Murgh Makhani (Butter Chicken) to follow within the next few weeks.

  • ¼ c. canola oil
  • 4 tsp. garam masala spice mix
  • 1 (2-inch) piece ginger, minced
  • 6 medium garlic cloves, minced
  • 2 tsp. kosher salt
  • freshly ground black pepper
  • 8 skinless, bone in pieces of chicken
  • ¼ c. plain yogurt or sour cream

In a medium sized bowl, mix together the canola oil, garam masala, ginger, garlic, salt, and pepper. Add the chicken, stir making sure every piece is thoroughly coated with the marinade. Refrigerate from 1-2 hours. Place the chicken in a 9 x 13-inch baking dish. (Save any marinade that remains in the bowl.) Bake in a pre-heated 400 degree oven for 30 minutes. Meanwhile add the yogurt to the remaining marinade. Set aside. Remove the chicken from the oven and lightly brush each piece with half of the yogurt/marinade mixture. Turn the chicken, and brush with remaining mixture. Bake an additional 15 minutes or until the chicken registers 165 degrees on an instant-read thermometer. (If you have a convection option on your oven, use convection heat for the last 15 minutes of baking time.) Let chicken rest at least 5 minutes before serving.


CHICKEN TIKKA MASALA WITH GARLIC SAFFRON RICE

OLYMPUS DIGITAL CAMERA

Since moving to Camano Island, we have not found a good Indian restaurant in the vicinity. If I didn’t know better, I would think I was living among a bunch of unsophisticated plebeians, but that is simply not the case. My neighbors and others that we have met since moving here are anything but. They are well educated, erudite, and delightful. It isn’t their fault there aren’t any good Indian restaurants in the area. It’s just a matter of economics. You gotta have a customer base, or you ain’t gonna make no moolah! Economics 101!

Now granted, we have a couple of restaurants that tease us with dishes that are what I lovingly refer to as “Indian light”, but none of them have what I call a proper Indian food menu. The closest restaurant we have found that serves decent Indian food is in Anacortes, and that’s an hours’ drive from here.

So, you know me, I have now made it my mission to fill the void created by us moving from an urban area to septic tank, well water, and propane gas  heaven. (And for those of you, who have never had the pleasure of living without all the utility conveniences of urban life, be prepared for the shock of your life if you move into a rural environment. Septic tank, what’s that? Well water – huh? Propane, excuse me, where’s the natural gas hook up?)

But for all the inconveniences of rural life, I would not go back to the city for all the tandoori chicken in the world. So, like I said, I am going to make it my mission in the next few months to learn how to make all the marvelous Indian dishes that Mr. C and I are so terribly missing. And by golly, I’m going to share them with you. So hang tight all you Indian food lovers, I’m on the case!

Marinade for chicken:

  • 1/2 c. plain Greek yogurt  ( I know, Greek isn’t Indian, but I like it!)
  • 1 T. lemon juice
  • 1 tsp. ground cumin
  • ½ tsp. cayenne pepper, or to taste
  • 1 tsp. freshly ground black pepper
  • ½ tsp. cinnamon
  • ½ tsp. kosher salt
  • ½ -inch piece fresh ginger, minced
  • 1 lg. boneless, skinless chicken breast, cubed

Sauce:

  • 3 T. butter , divided
  • 4 garlic cloves, minced
  • 1 jalapeno, minced
  • 4 tsp. ground coriander
  • 2 tsp. ground cumin
  • 2 tsp. paprika
  • 2 tsp. garam masala (buy in Indian market)
  • 1 tsp. kosher salt
  • 2 (8-oz.) cans tomato sauce
  • 2 c. whole milk or half & half
  • 1/4 c. chopped fresh cilantro

Combine marinade ingredients and add chicken. Place in refrigerator for 1 hour. Melt 2 tablespoons butter in a large fry pan over medium heat. Add the chicken and cook just until done. Do not over-cook. Remove from pan; set aside. Add the garlic & jalapeno; cook 1 minute. Stir in the coriander, cumin, paprika, garam masala, salt, and tomato sauce. Simmer 15 minutes. Stir in cream and remaining 1 tablespoon butter and simmer for about 5 minutes or until the sauce starts to thicken. Add chicken and simmer until chicken is hot. Serve over Garlic Saffron Rice (see recipe below) and garnish with cilantro.

GARLIC SAFFRON RICE

  • 1 T. extra virgin olive oil
  • 2 cloves garlic, finely minced
  • 5 threads saffron
  • ½ tsp. kosher salt
  • freshly ground black pepper
  • 1½ c. basmati rice
  • 2¼ c. water

Directions if using a rice cooker:

Heat olive oil in a medium sized fry pan. Add the garlic, saffron, salt, and pepper and sauté for a minute or until the garlic releases its aroma. Add the rice and stir just until the rice is coated with the oil. Scoop into rice cooker, add water, turn on the rice cooker and step away. Rice cookers work best when they are not being supervised.

Stove top directions:

Heat olive oil in a medium sized covered saucepan. Add the garlic, saffron, salt, and pepper and sauté for a minute or until the garlic releases its aroma. Add the rice and stir just until the rice is coated with the oil. Add water and stir. Bring to a boil, stir again, then lower heat, cover the pan and cook for about 15 minutes or until the rice is al dente. Remove from heat and let stand for another 5 minutes. Fluff with a fork and adjust seasoning before serving as the base for Chicken Tikka Masala.   


ROASTED CAULIFLOWER WITH CUMIN AND CURRY

OLYMPUS DIGITAL CAMERA

I happen to love cauliflower. But until I discovered this way of roasting cauliflower, I could only serve it to Mr. C. either drizzled with a lovely rich cheese sauce or with “secret sauce” (mayonnaise flavored with soy sauce). So when I prepared cauliflower this way for the first time I was a little reluctant. I shouldn’t have worried in the least. Mr. C. loves roasted vegetables and both cumin and curry are two of his favorite flavors.

Besides the wonderful flavor of this dish, it is fabulous in that it can be served either hot or at room temperature. So preparing it ahead of time is no problem. Well it’s no problem if you have a safe place to keep it until you are ready to serve! Just don’t make the same mistake I’ve made in the past. Removing the cauliflower from the oven and setting it on a counter believing that there will be any left by dinner or party time is taking a very daring risk. Somehow, a goodly portion of the cauliflower always seems to mysteriously disappear. So if you make it ahead for a party, make plenty! And yes, roasted cauliflower (or any roasted vegetable for that matter) is perfect to serve as an appetizer or hors d’oeuvre. Many people are health conscience and truly appreciate when something delicious and nutritious is served along with the other offerings. (And truth be known, roasted veggies are reasonably inexpensive to serve as appetizers. I’m always trying to look out for your pocketbook.)

So next time you want to serve an old favorite in a new way, think about this cauliflower dish. I think even the discerning palate of a 6 year old could be swayed from the dark side into liking cauliflower when it is prepared this way. If not, there’s always “secret sauce”.

  • 4 T. extra virgin olive oil, divided
  • 1 T. fresh lemon juice
  • 1 tsp. ground cumin
  • ¼ tsp. curry powder
  • 1 tsp. kosher salt
  • freshly ground black pepper
  • 1 lg. cauliflower, cut into small flowerets and dried thoroughly
  • finishing salt*

Combine 3 tablespoons of the olive oil, lemon juice, cumin, curry, salt, and pepper in a medium sized bowl. Gently stir in cauliflower making sure flowerets are completely coated with oil. (It will seem like they are very lightly coated, but that is exactly what you want!) Spread out on a roasting pan and bake in a pre-heated 425 degree oven until cauliflower is starting to get tender and browned, 15-20 minutes. Pour cauliflower out onto a platter, drizzle with remaining 1 tablespoon olive oil and lightly sprinkle with a finishing salt or kosher salt and pepper.

*Finishing salt – my name for the fancy salts that can be added at the last minute to brighten the flavor of everything from veggie dishes to caramel sauce. i.e. fleur de sel (flower of salt in French) or sale di Sicilia con limone (Sicilian salt with lemon), etc.


CURRY SAUCE FOR CHICKEN, SHRIMP, BEEF, OR LAMB

While I understand that many of you are older and don’t have children at home anymore or even had children to begin with.  But since I did, and even after 20 some years of not having hungry children waiting for me when I arrive home from work, I still remember what it was like. So if it seems like many of my recipes are aimed at folks with little time to spare in the kitchen, it is because some of my best recipes were developed during my years of being a working parent. And you know, I still make many of those same recipes today even though Mr. C. and I are happily retired and presumably I have all the time in the world to spend in the kitchen. Don’t get me wrong, I love to while away the hours preparing new dishes. But some evenings, it’s just delightful to serve a favorite old standby that I know we are both going to enjoy. So when I find myself with a bit of leftover meat in the fridge, I often make a curry. I almost always have the other necessary ingredients in my fridge or pantry, so to build a curry sauce is a snap. But before I go any further, a word about curry powder. The curry powder I use in this recipe is based on the spices used in Indian cooking. But In India, there is no such thing as curry powder.  Every Indian dish that requires powdered spices combines a number of individual spices unique to that particular dish. So there is no “one combination curry powder fits all” in an Indian kitchen. An Indian cook will roast and pulverize whole spices or they might use a combination of already ground spices. Much the same way in which we would decide the variety and amount of spice to use while preparing an apple pie. One baker might use only cinnamon and allspice, whereas the next pie maker might swear by a blend of cinnamon, nutmeg, cloves, and allspice.  So how did curry powder, which is a combination of spices including coriander, cumin, fenugreek, cayenne, turmeric, allspice, cardamom, cloves, fennel, ginger, mace, mustard, and black or white pepper, come about? The British, of course! From the early 1600s when Britain had just a scattering of trading posts on the Indian coast until 1947 when India gained its independence from Britain, British citizens living in India were exposed to Indian cuisine. And of course, as British soldiers and other government officials returned home from their stay in India, they wanted a way in which to bring those wonderful flavors home with them. Their solution was curry powder. And why not, it’s easy!  And many of the blends readily available to us today are really good. Instead of having to add multiple spices to an Indian dish that is otherwise quick and easy to prepare, curry powder is usually the only “spice” required. Such a deal! And all you parents out there, don’t be afraid to introduce your kidlets to curry at an early age. Curry was one of dishes all my children loved. They were eating it before they realized they really shouldn’t like it. Being children after all comes with certain responsibilities, like being fussy about what food you will and will not tolerate. Get your little darlings hooked young enough and they won’t know enough to object! And even if you aren’t lucky enough to still have children at home (I can say “lucky” and truly mean it now that my children are all grown) as an excuse to prepare a curry, be brave and give it a try anyway. Remember, you’re never too old for the “three bite” rule!

  • 3 T. butter
  • 1/3 c. julienne cut carrots
  • ½ c. thinly sliced mushrooms, opt.
  • 2 garlic cloves, minced
  • 2 T. vermouth, opt.
  • 1 T. minced fresh or dried parsley
  • 2 T. flour
  • 3-4 tsp. curry powder, or more to taste
  • freshly ground black pepper
  • 1 can cream of mushroom soup
  • ½ c. milk
  • 1 ½ c. sour cream
  • 1 c. cooked chicken (cubed), shrimp, beef (cubed), or lamb (cubed)
  • chopped cashew nuts (opt.)
  • finely chopped green onions (opt.)
  • chutney (opt.)

Melt butter in a medium sized saucepan. Add carrots and sauté for about 5 minutes. Add mushrooms and garlic and cook until garlic is just starting to brown. Deglaze the pan with vermouth. Whisk in the parsley, flour, curry powder, black pepper, cream of mushroom soup, and milk. Bring to a boil, reduce heat and simmer on low for about 5 minutes. Carefully whisk in the sour cream and add your cooked meat of choice. Adjust seasoning. Serve over steamed rice garnished with cashews, green onions, and chutney, or any combination thereof.