I try very hard not to make a pig of myself when I taste something super delicious for the first time. Really, I do. But being only human, I kind of turn into a zombie and simply get lost in the moment. And that’s exactly what happened the first time I tasted this dip.
We were at our good friends Jim and Margo’s home to watch the Super Bowl.
Now, something you should know about me, I could care less about football. I mean really, grown men destroying their bodies just to carry a ball into a designated area established by other men who have probably never been asked to hurt themselves for the entertainment of others. If it were me, I’d say “you want the – – – – ball in the end zone – do it yourself”! Apparently, I just don’t get it!
Anyway, we were invited to join the fun, along with dear friends Tim and Phyllis, for an afternoon of food, drink, and friendship. And coincidentally – football.
So, while the others were glued to the TV, I ate way more than my share of Phyllis’s wonderful dip. (Well, I had to do something to stay occupied!) (Then of course I had to ask for the recipe.)
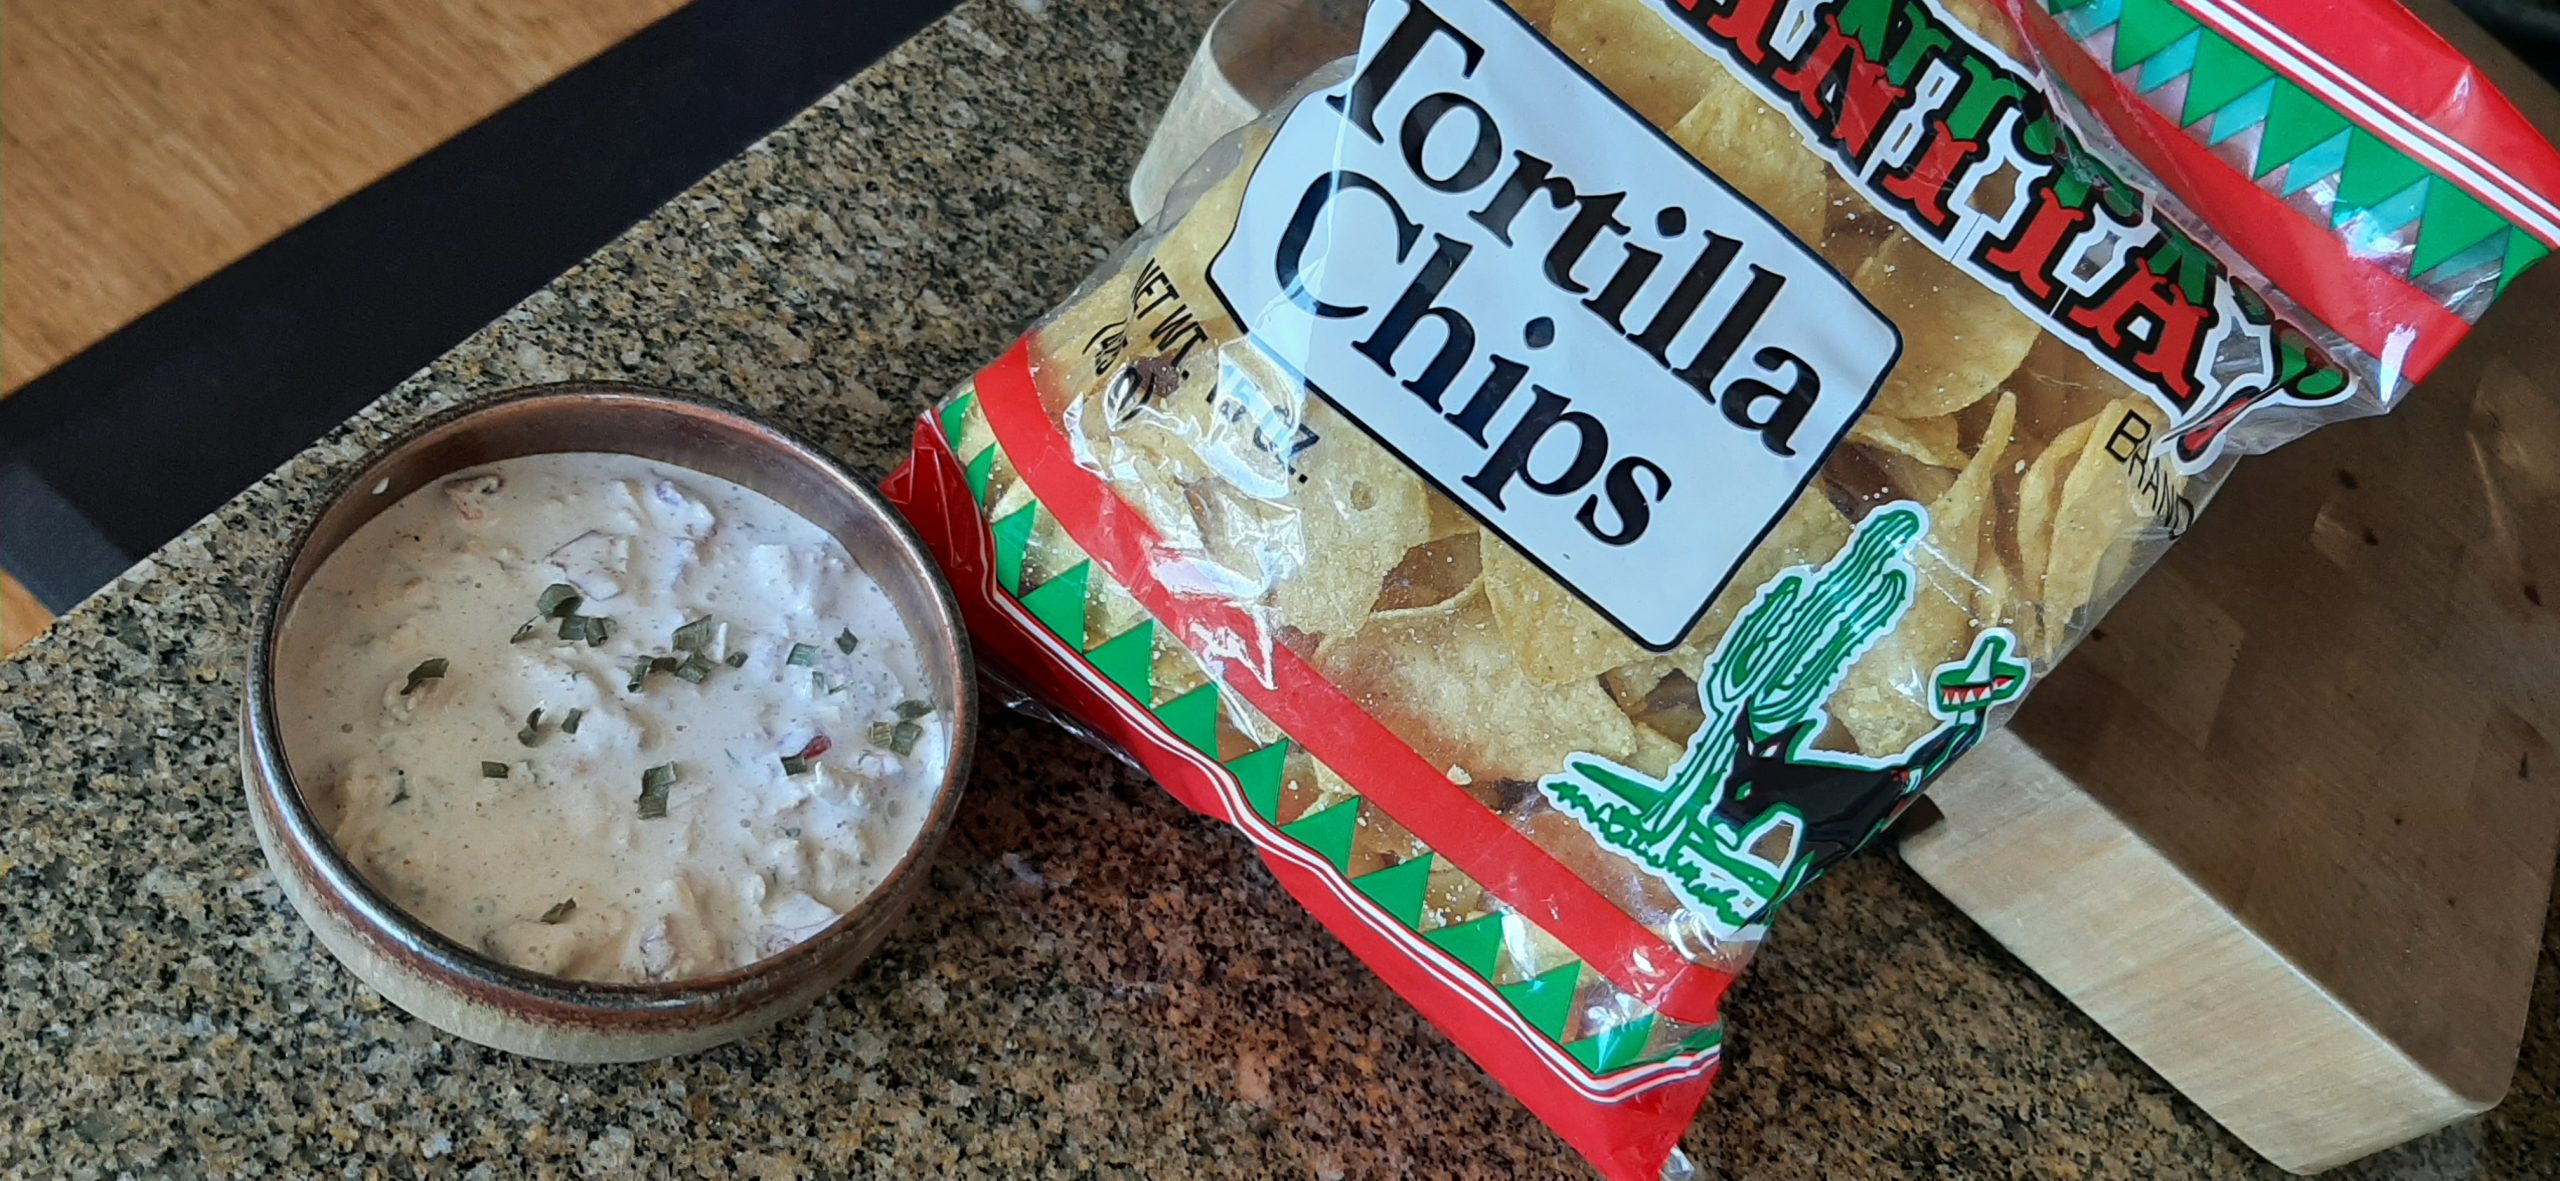
This is not exactly the recipe Phyllis gave me, because I used what I had on hand without having to make a special trip to the grocery store. But all the ingredients from the taco seasoning through black pepper can be replaced by using a package of Fiesta Ranch Dip. Regardless, this is a very simple dip to prepare. And well worth the effort.
So, if you too love a good creamy dip, this is the recipe for you.
Well, that’s it for today. And sorry for trashing football. I know there are millions of you out there that love the sport. Now if we had been watching soccer, that would have been an entirely different story. I love soccer. As the saying goes – to each his (or her) own.
But to all, peace and love from my home to yours.
2 c. sour cream (Mexican sour cream preferably)
1 (10-oz.) can Rotel original (diced tomatoes with green chilies) drained
1 tsp. taco seasoning
1 tsp. dry chives
1 tsp. dried parsley
¼ tsp. granulated garlic
¼ tsp. granulated onion
¼ tsp. seasoned salt
freshly ground black pepper
½ – 1 c. grated sharp cheddar cheese (your choice)
Combine all ingredients. Refrigerate for a couple of hours but bring to room temperature before serving with tortilla chips.
OK, what I like most when I go to a Mexican restaurant are the beans, after the warm tortilla chips and salsa that is! Now I don’t know about you, but to my thinking, a Mexican restaurant is defined by the quality of the beans they serve. Because even in a good Mexican restaurant, most of the enchiladas, tacos, etc. taste pretty much the same. But give me a restaurant that makes good beans, and I’m in heaven.
And believe me, over the years I have tried dozens of times to make really good, refried beans. And I have a couple recipes on this site that are good. But I am still in search of the perfect refried bean recipe.
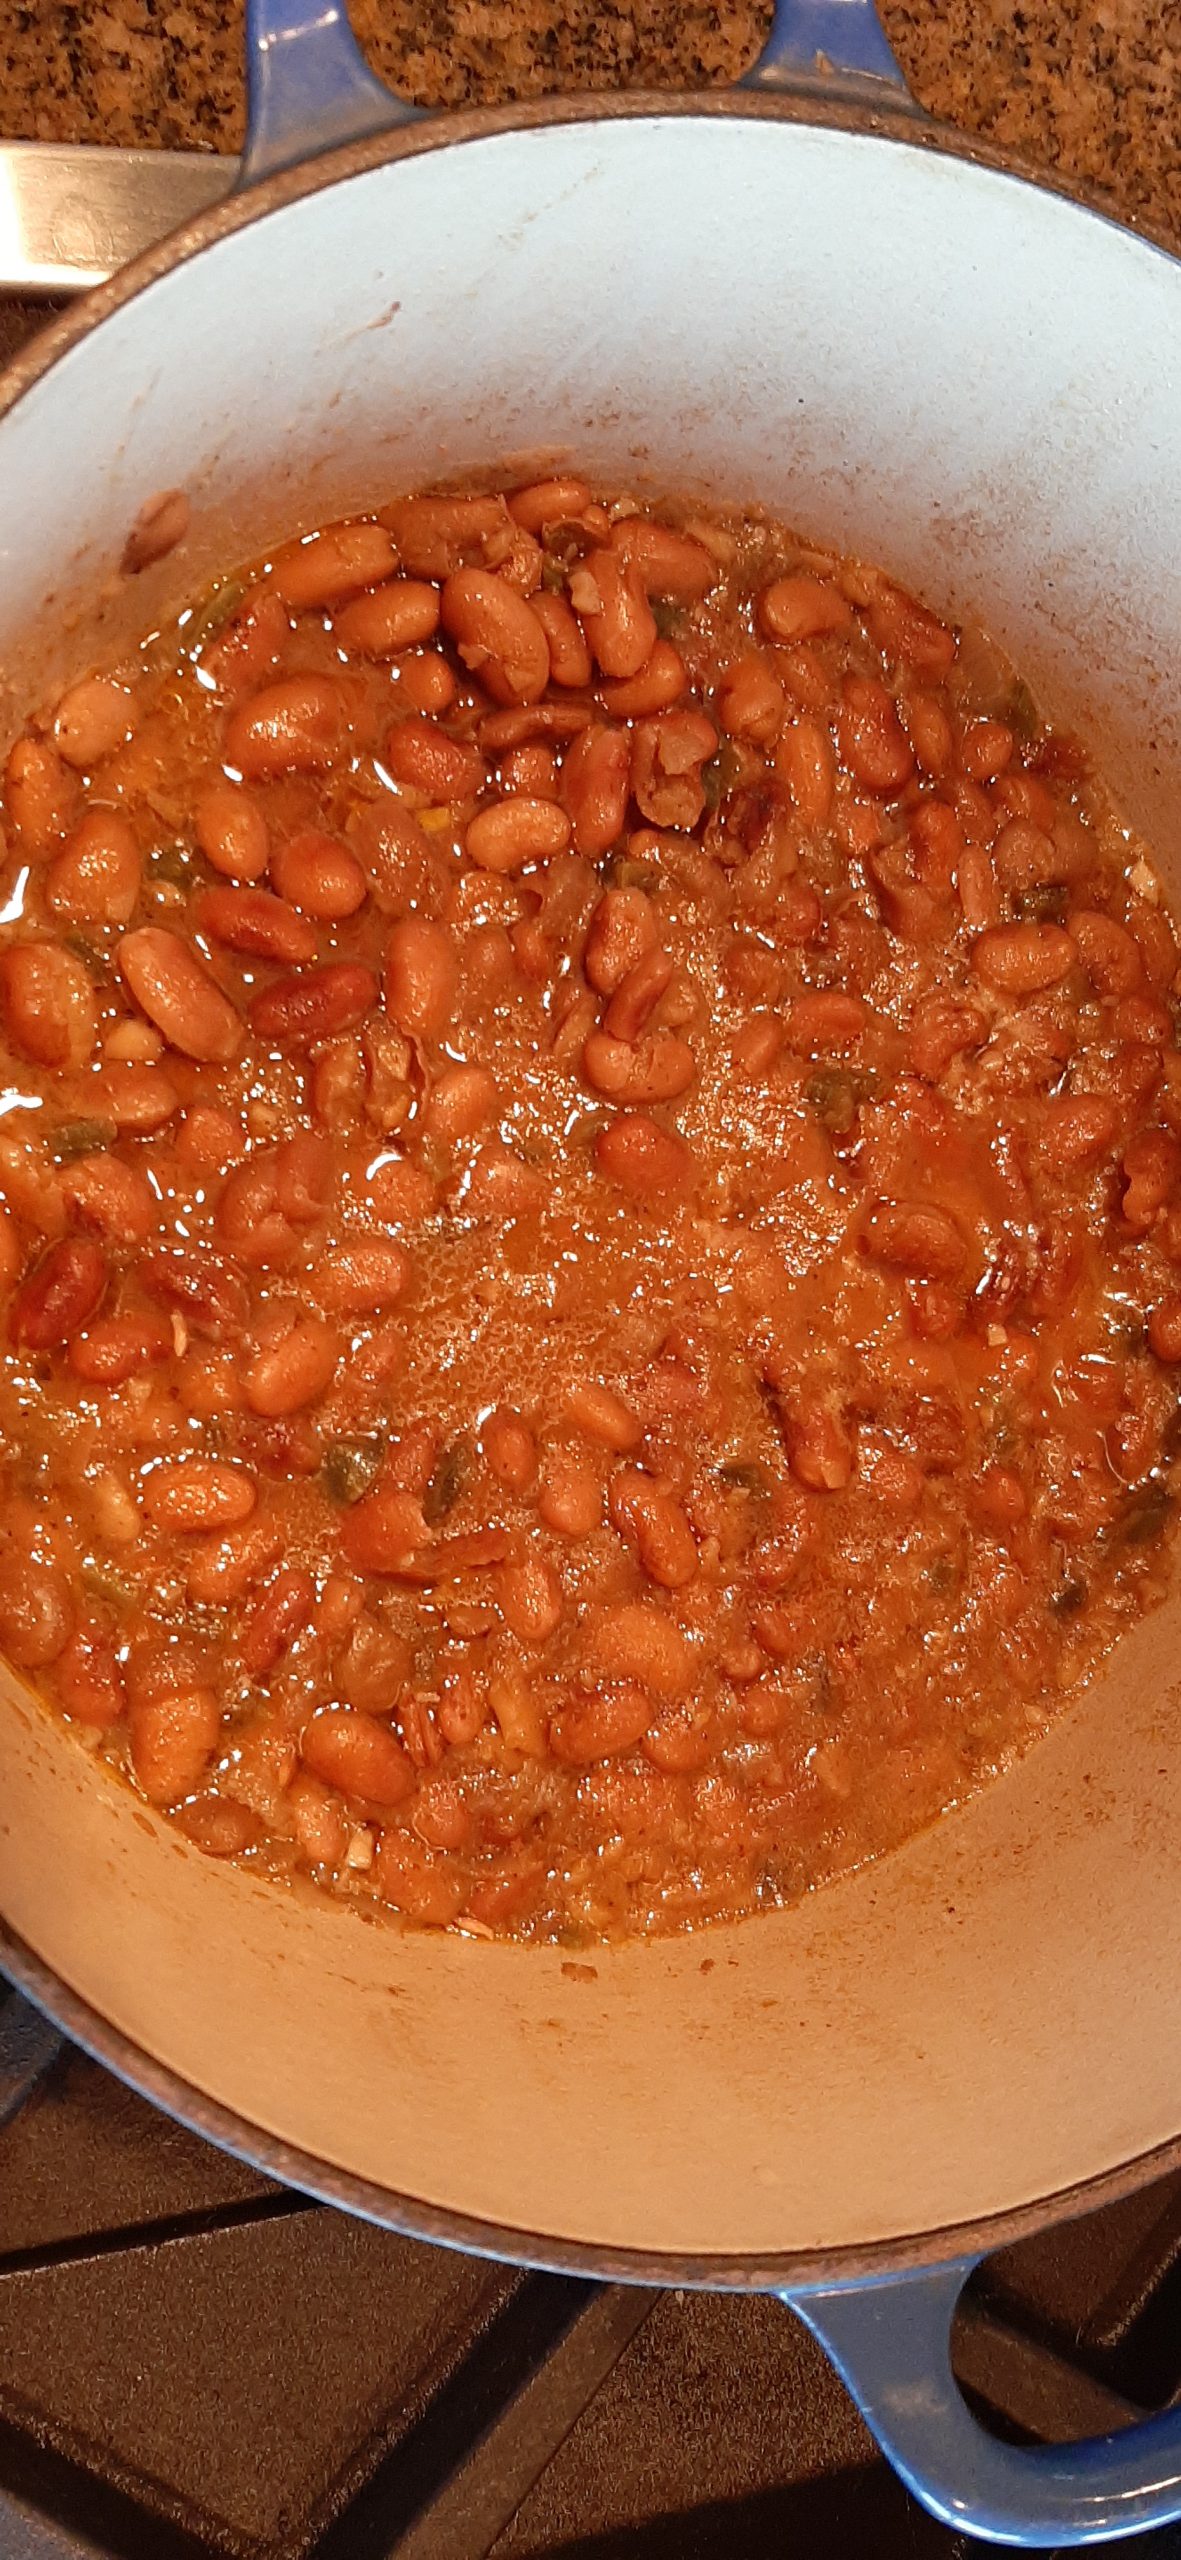
Recently however, some Mexican restaurants have been serving the main dish with a side of beans in a small bowl. Not re-fried or drained whole beans, but rather, saucy beans that require containment. And I have found that I really like beans served this way. Thus, this recipe.
Now, this is not a mild-mannered recipe for beans. These beans come with an attitude. They practically demand to be taken seriously! So, be prepared. And if you don’t like strongly flavored beans, this is not the recipe for you.
But if you like savory dishes with a bit of heat, then by all means proceed on down the page. Because this simple recipe produces some mighty fine tasting beans. Enough said.
Well, it’s the 4th of July. And some of our neighbors, who obviously have very few brain cells left working properly, have been setting off fireworks for several days now. And I for one am tired of the noise. And damn tired of our poor kitties having to hide in our basement hallway to try and get as far away from the booms as possible.
So, when I read this article in todays’ Seattle Times, I thought I would pass it along to you. Because it beautifully states how I feel about the subject. Oh, that I was intuitive and clever enough to have penned this short and poignant article. But alas, it was written by people with greater insight than I possess. Regardless, the fact that it was written and published at all is what really matters!
DON’T SET OFF FIREWORKS — IT’S THE PATRIOTIC THING TO DO – by the Yakima Herald-Republic editorial board.
“Be careful out there with fireworks. Here’s a perspective from Washington’s dry side at the start of wildland fire season.
The warnings go out every year — because every year, the thoughtless among us make the same irresponsible mistakes. Mistakes that can threaten lives, destroy people’s homes, and cost us all money.
So here it is again: Don’t set off illegal fireworks this week.
Yes, the Fourth of July is a great cause for celebration. It’s the anniversary of our nation’s conception — the date we declared our independence from England’s royal rule.
But setting off dangerous and illegal fireworks doesn’t do anything to advance the cause of freedom. It’s just boneheaded behavior that puts bone-dry countryside at risk needlessly.
If the Founding Fathers could’ve seen this coming, maybe they’d have held off on the Declaration of Independence until December or January, when the ground is usually a lot wetter.
This year, after a historically dry spring, local fire authorities have gone a step further than usual, issuing a summerlong burn ban throughout the unincorporated areas of Yakima County. The ban took effect Saturday and stays up through Sept. 30.
The ban, combined with an existing prohibition on fireworks in unincorporated areas, is meant to discourage would-be pyromaniacs from accidentally laying waste to their neighbors’ houses or setting off wildfires that blacken hundreds of acres.
Instead, they’re urging fireworks fans to express their love for the country by attending any of the various community celebrations planned for the Fourth — and by taking in any of the professionally staged fireworks shows that are in the works.
Trust us, you’re doing the patriotic thing here.
Your neighbors will thank you. Your pets will thank you. And perhaps more than anyone else, local fire crews will thank you. Besides, if you really love your country, you don’t want to burn it down, do you?”
On that happy note, have a great 4th of July everyone. And peace and love to all.
¾ c. dry pinto beans, rinsed
1½ c. water
1 T. bacon grease or extra virgin olive oil (if you want vegetarian beans)
¾ c. chopped onion
2 lg. garlic cloves, minced
freshly ground pepper
½ tsp. ground cumin
1-2 T. chopped pickled jalapeño (depends how spicy you like your beans)
2 c. water, or more as needed
2 tsp. vegetable base (I use Better Than Bouillon)
Bring the rinsed pinto beans and 1½ cups of water to a boil in a covered pan. Boil for 2 minutes. Remove from heat, and leave covered for 2 hours. Or soak the beans overnight.
Heat the bacon grease or olive oil in a medium sized heavy pan with a lid. Add the onion and cook until translucent. Add the garlic and cook for 1 minute.
Then add the black pepper, cumin, chopped pickled jalapeño, water, and veggie base to the pot. Drain the soaked beans and add them to the pot.
Bring to a boil, reduce heat, and cover and simmer for about 90 minutes, stirring every so often until the beans are tender. Add more water if needed.
Remove the lid and simmer another 15 minutes or so, until the liquid has evaporated a bit.
As promised, here is another recipe featuring Mexican chorizo. This recipe comes straight from our dear friend Jim. Who, BTW, is an amazing cook. And for anyone who has had the pleasure of dining at Jim and Margo’s home, you know of what I speak. You too are blessed. But enough pontificating. I don’t want Jim to get a swollen head. I just want you to know that I am not responsible for this marvelous recipe. I wish I were, but my mother always told me that honesty is the best policy. (Apparently, a lot of politicians never got that same directive from their mothers, but that’s a story for another time!)
Anyway, this versatile filling recipe is absolutely delicious and super easy to prepare. At first glance it looks like the recipe makes a big batch of filling. And guess what? It does! All’s the better as far as I’m concerned. Because this filling freezes beautifully. Besides, what kind of recipe calls for half a pound of ground meat? Ground meat doesn’t come in half pound packages. At least not in the grocery stores I frequent!
Anyway, just make this fabulous filling. Make stuffed peppers, or use it for terrific burritos or tacos, or any other dish that would profit from a spicy, meaty infusion of southwestern flavor. And lest I forget, this is a fairly healthy filling. Lots of veggie action happening and no starchy ingredients.
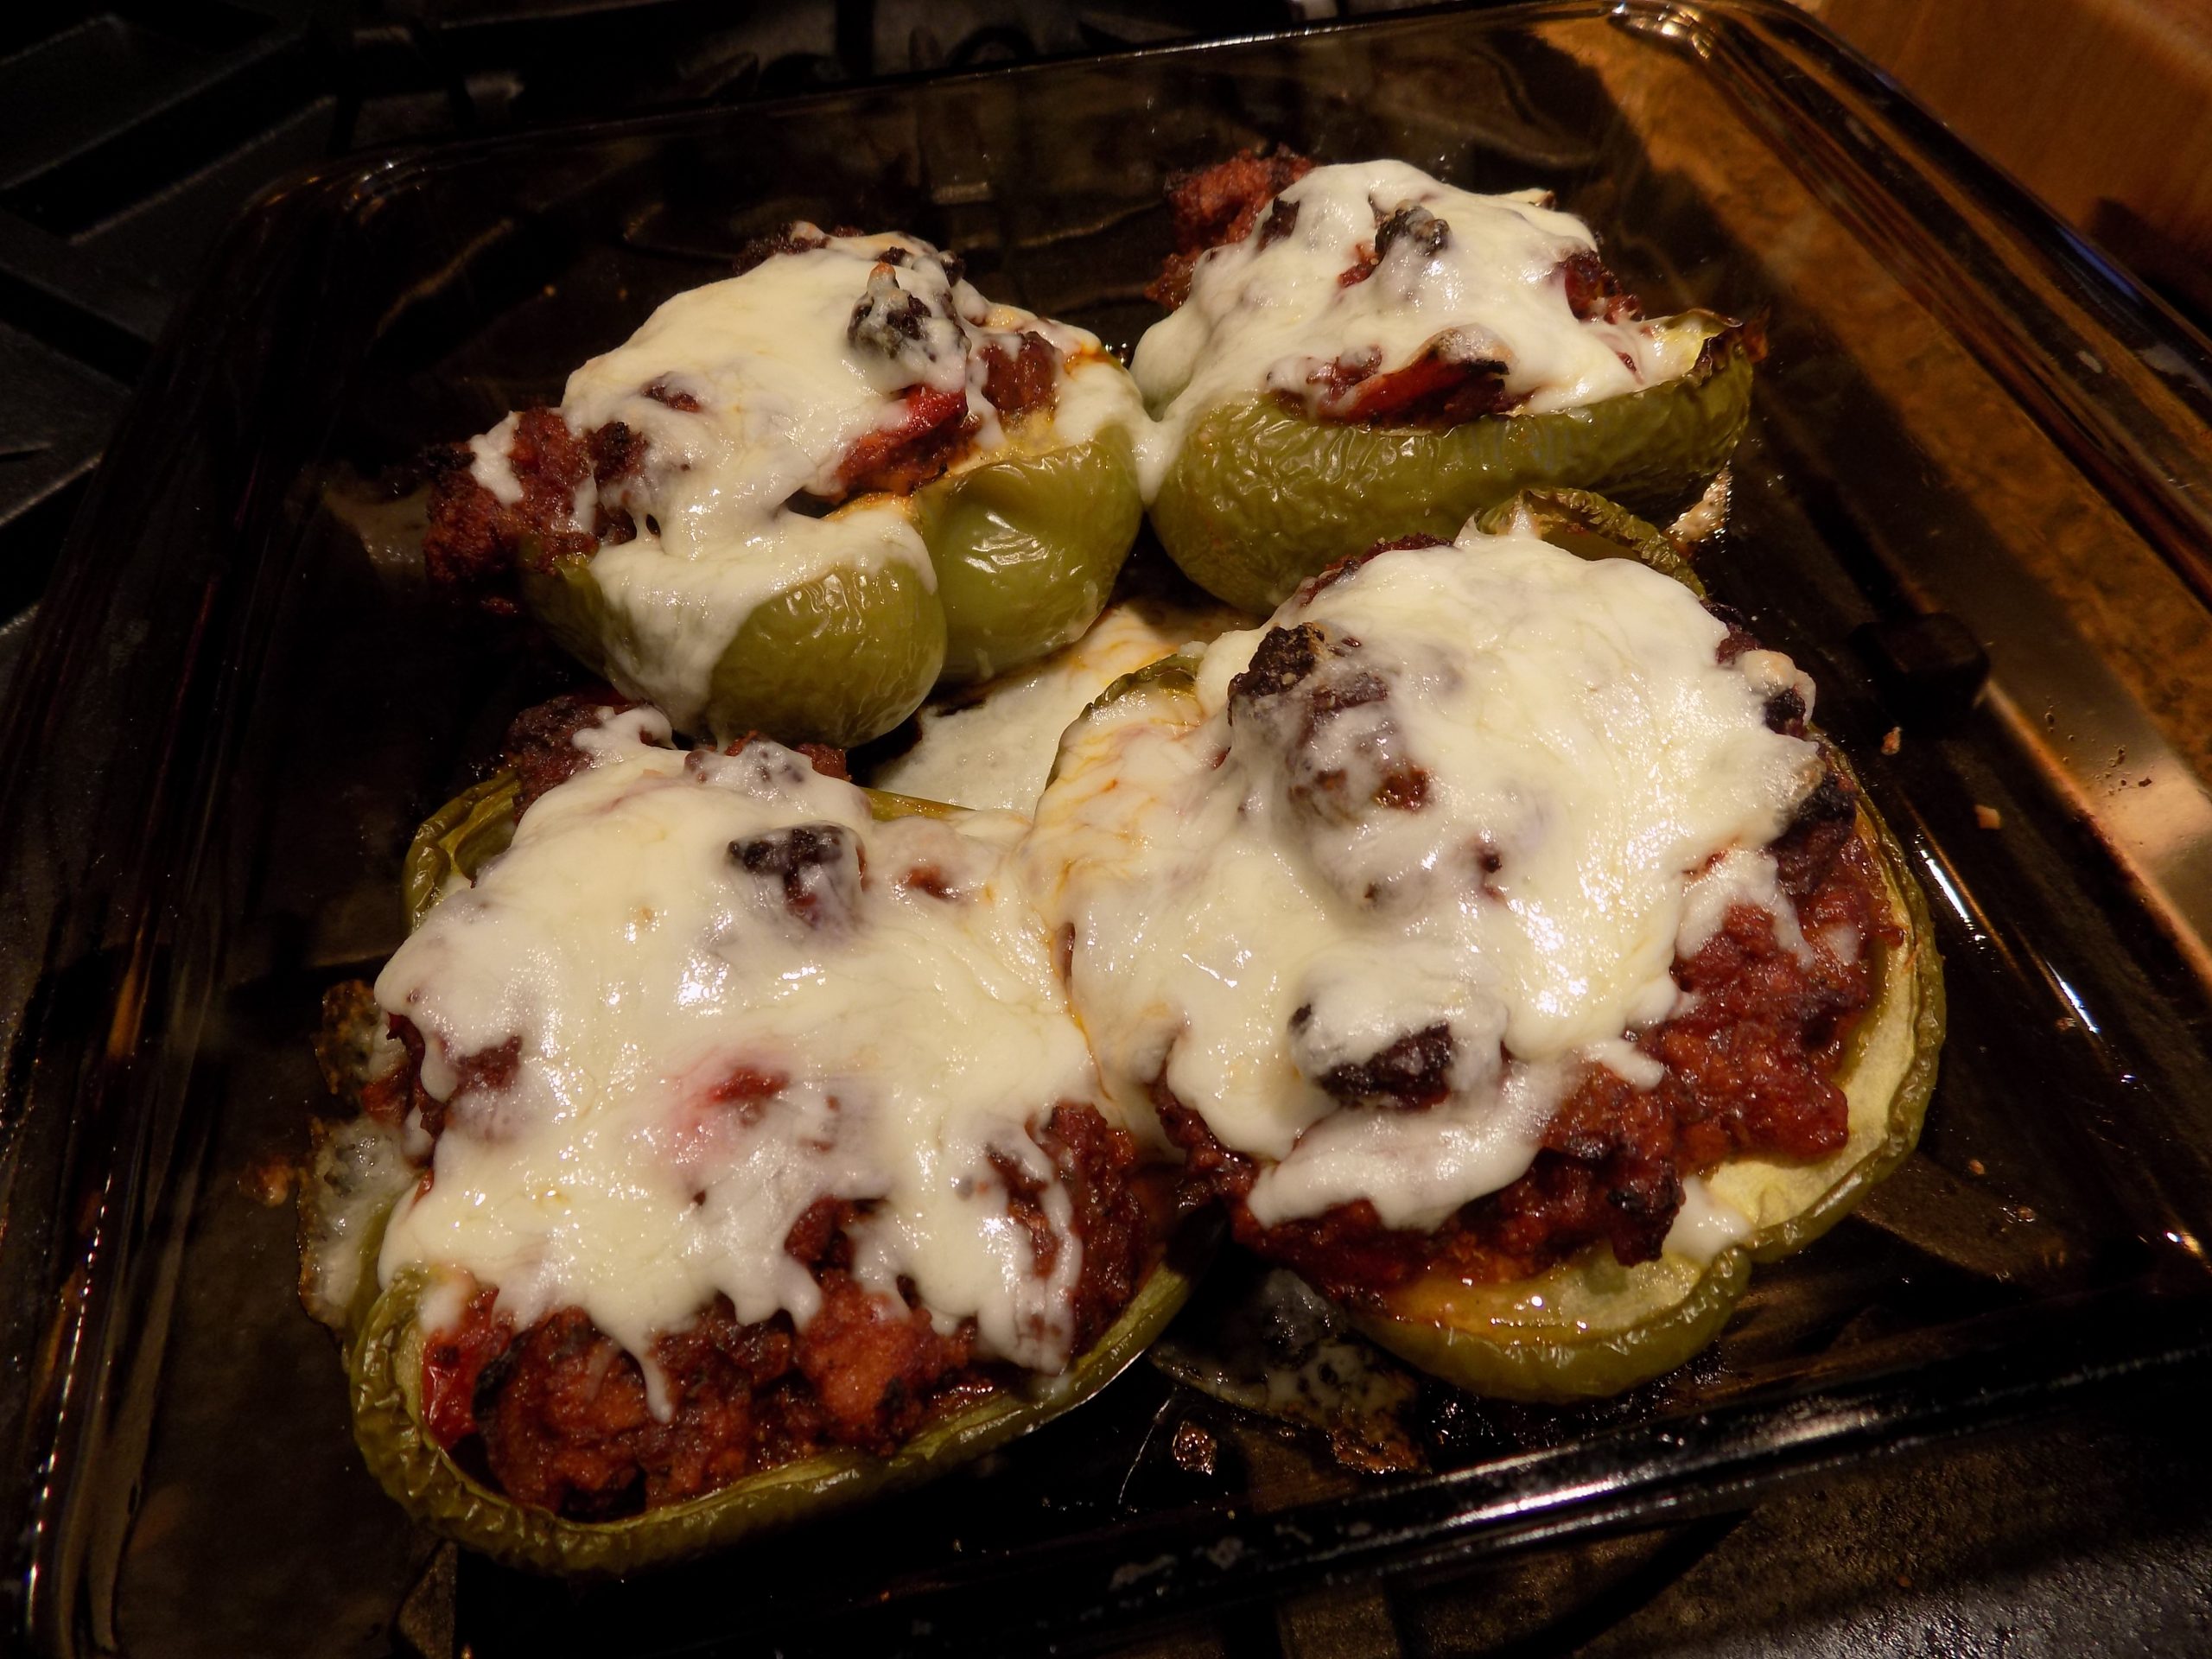
So, again, thank you Jim for this terrific recipe. I made Stuffed Green Peppers last night for dinner, and this morning I made Breakfast Burritos. Absolute culinary bliss my friends.
As always, keep smiling. We aren’t out of the woods yet with covid. But we are moving towards the edge of the woods where the trees are further apart, the sun is breaking through, and that just might be a meadow further down the path.
Peace and love to all.
Ground Turkey and Mexican Chorizo Filling:
2 tsp. extra virgin olive oil
1 lb. ground turkey (part white and dark meat, if possible)
1 lb. bulk Mexican chorizo
1 onion, diced
3-4 celery ribs, diced
1 green pepper, diced
1 red pepper, diced
5-6 garlic cloves, minced
1 (28-oz,) can diced tomatoes (Italian are best)
3-4 T. chili powder
3-4 T. taco seasoning
freshly ground black pepper
¾-1 c. chopped fresh cilantro or 2-3 T. dried cilantro*
Heat the olive oil in a large skillet over medium-high heat. Add the ground turkey and chorizo. Fry the meat until cooked through and browned.
Add the onion, celery, green pepper, and red pepper. Cook until the veggies are softened, about 8 minutes. Stir in the garlic and cook for 1 minute.
Add the diced tomatoes, chili powder, taco seasoning, and black pepper. Cook, uncovered, for about 30 minutes to blend flavors and reduce the liquid. Remove from heat and add the cilantro. Taste and adjust seasoning.
*Dried cilantro doesn’t taste like fresh cilantro. Fresh cilantro has a strong lemony and slightly peppery flavor, which some people (like me) find to taste kind of soapy. In other words, fresh cilantro is not my favorite ingredient. I much prefer dried cilantro which has a weak cilantro flavor and is perfect in soups, stews, or any recipe that requires a bit of cooking time to blend flavors.
STUFFED GREEN PEPPERS
4 green peppers (or however many you need)
Ground Turkey and Mexican Chorizo filling
grated cheese (I use sharp cheddar or mozzarella)
Slice the green peppers in half, top to bottom. Carefully cut out the stem, then remove the membranes and seeds.
Lightly grease a baking pan. Place the half peppers, cut side up in the pan and fill with the meat mixture. You will have extra filling. I suggest freezing it for tacos or burritos. (See recipes below.)
Bake the peppers in a pre-heated 375-degree oven for 75-90 minutes or until the pepper are soft and starting to brown. (If the filling gets too brown during the baking process, cover with aluminum foil.) About 5 minutes before removing the peppers from the oven, liberally cover the tops with grated cheese.
Remove from oven and serve immediately.
BURRITOS*
tortillas (whole wheat or regular)
Ground Turkey and Mexican Chorizo filling
grated cheese
refried or whole pinto beans, opt.
shredded lettuce
finely diced tomato
sour cream
diced avocado
Stuff lightly warmed tortillas with filling, grated cheese, and a tiny bit of refried beans. Wrap and heat on high for 1 minute in your microwave. Serve lettuce, diced tomato, sour cream, and diced avocado on the side.
Note: I warm the tortillas just before wrapping because warming them makes them more pliable.
BREAKFAST BURRITOS*
tortillas (whole wheat or regular)
Ground Turkey and Mexican Chorizo filling
scrambled eggs
grated sharp cheddar cheese
chopped green onions
Stuff lightly warmed tortillas with filling, scrambled eggs, grated cheese, and chopped green onion. Wrap and heat on high for 1 minute in your microwave. Serve sprinkled with a bit more grated cheese and sour cream on the side.
Note: I warm the tortillas just before wrapping because warming them makes them more pliable.
TACOS*
taco shells
Ground Turkey and Mexican Chorizo filling
refried or whole pinto beans, opt.
grated cheese
shredded lettuce
finely diced tomato
diced avocado
sour cream
Place hot filling in shells. Serve with a variety of additives including refried beans, grated cheese, shredded lettuce, diced tomatoes, diced avocados, and sour cream.
*In my opinion, there is no need for salsa with these dishes. The salsa would just get in the way of the lovely flavor of the Ground Turkey and Mexican Chorizo filling.
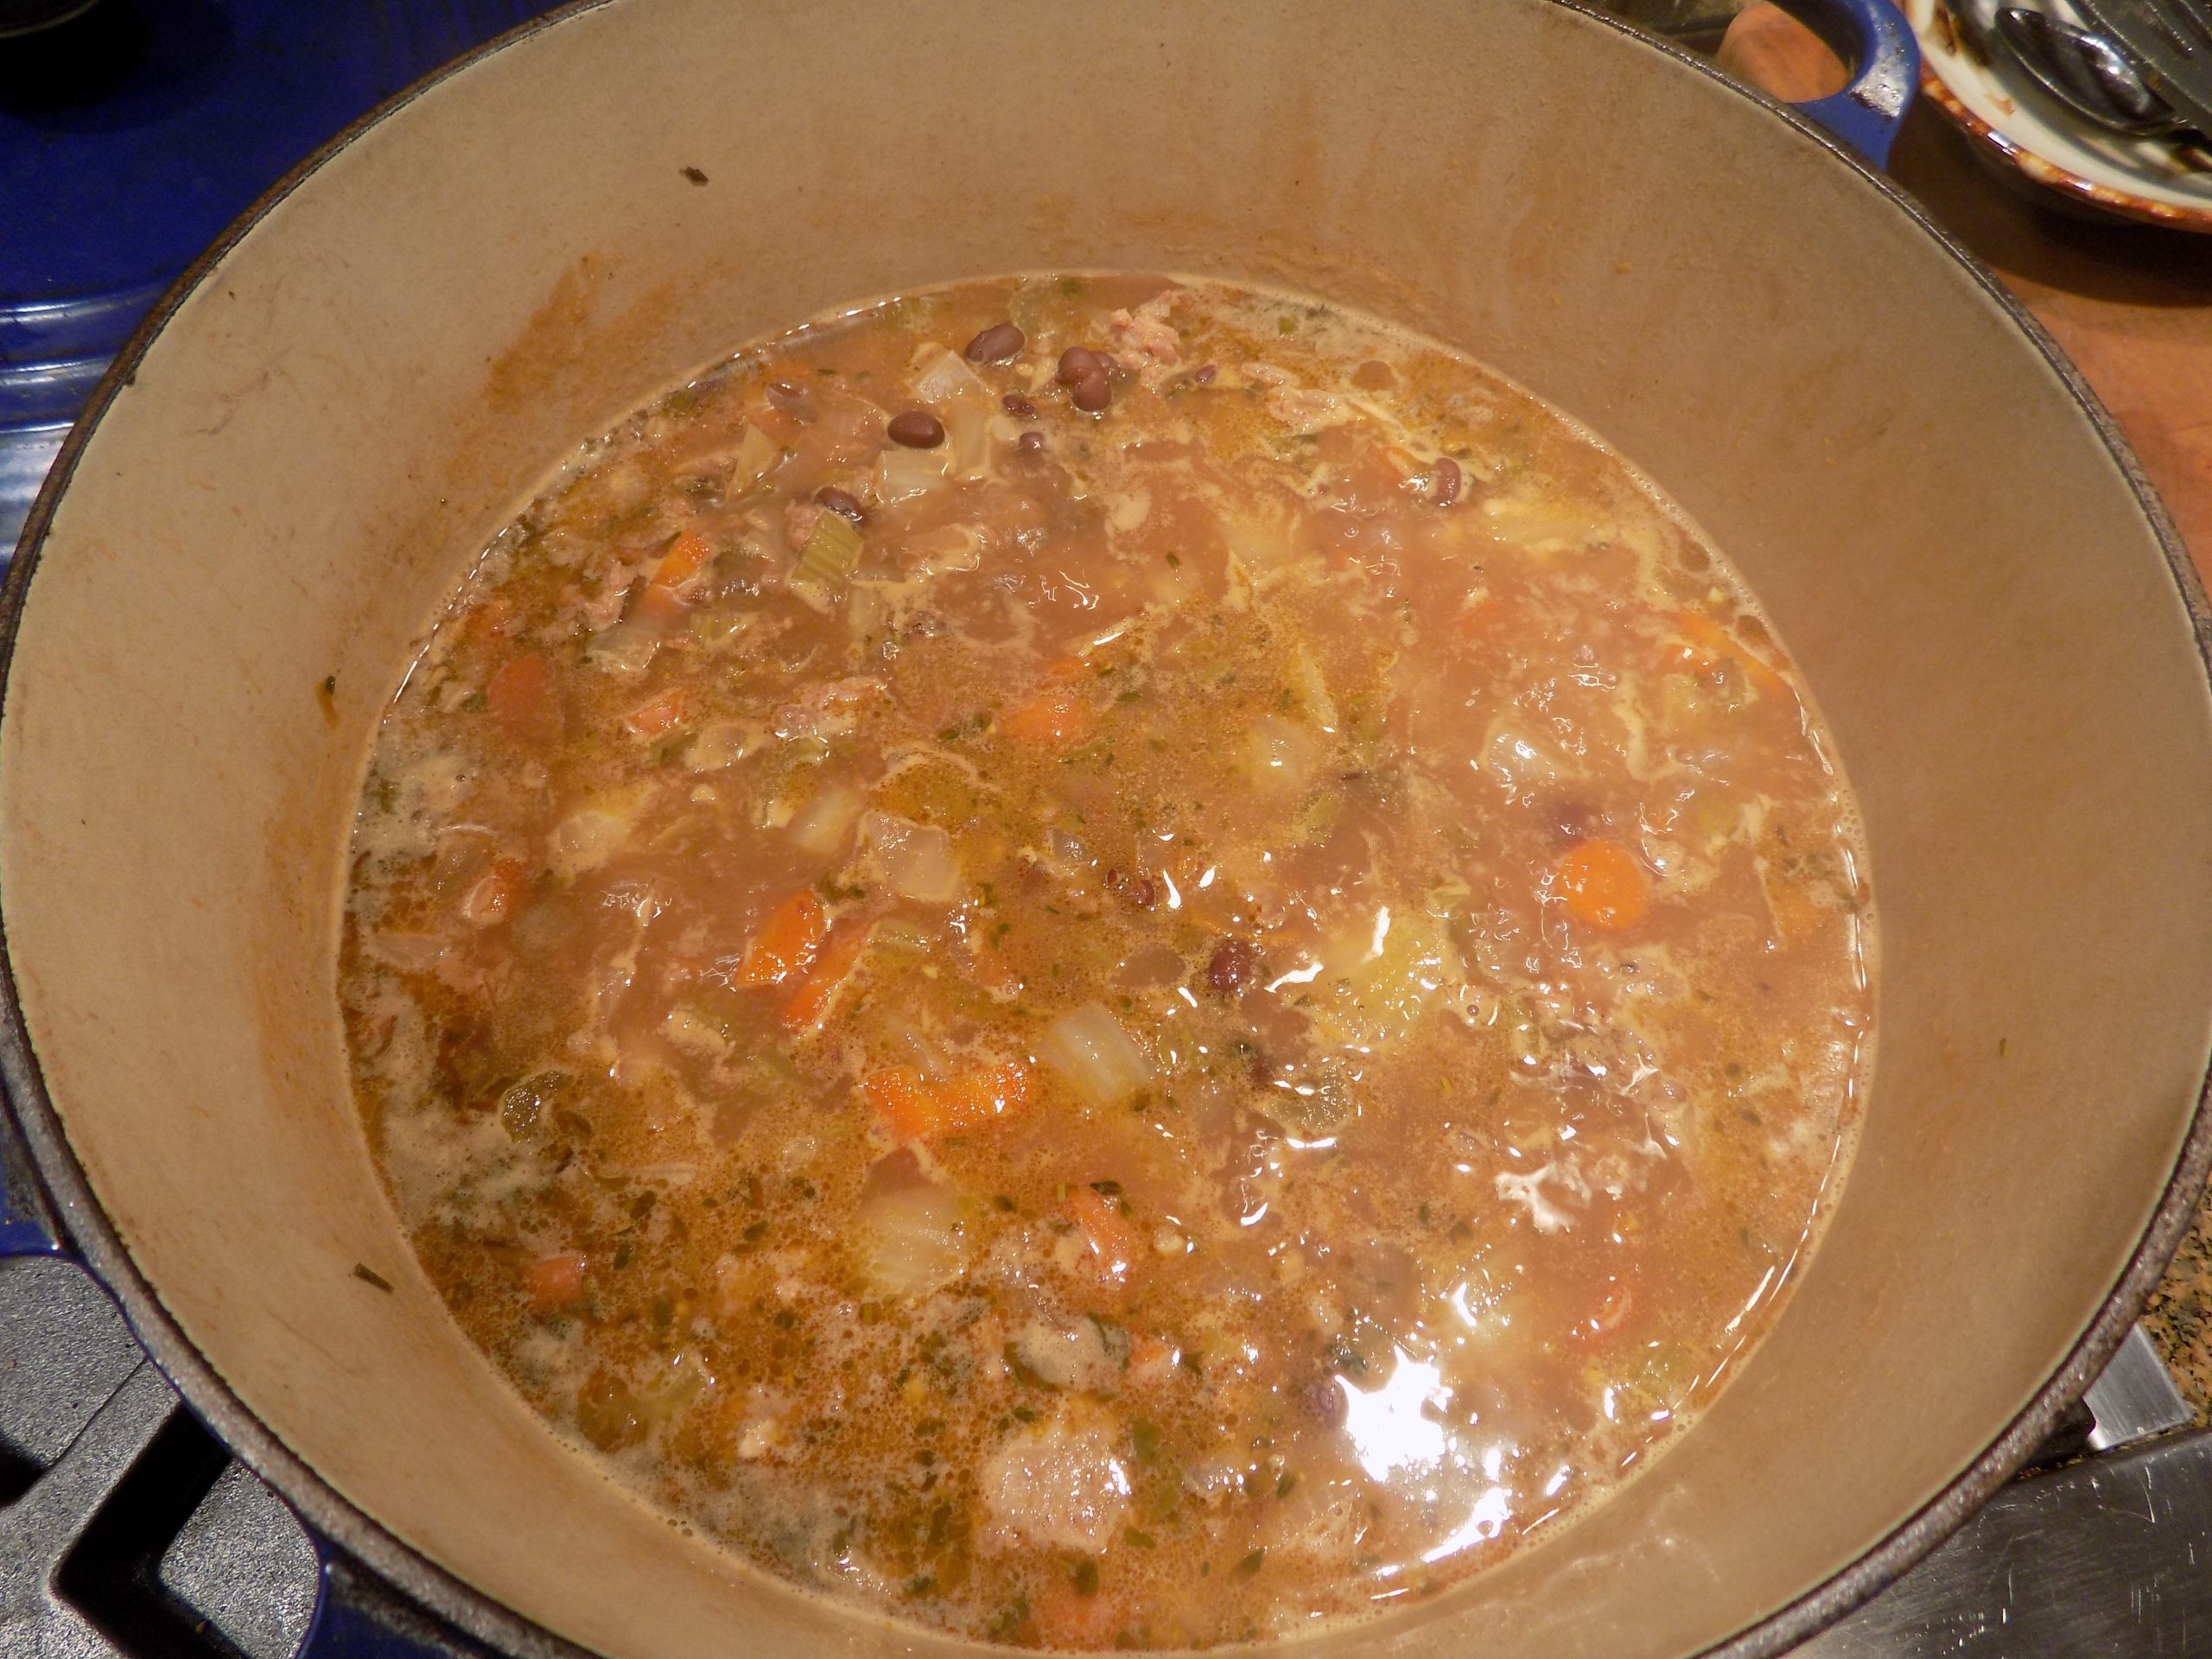
I don’t know if all grocery stores carry bulk chorizo sausage, but our local IGA does, house made, and really tasty. But I must confess. I am brand new at using chorizo as an ingredient. And for the life of me, after making this soup, I have no idea what I was waiting for. An engraved invitation from the chorizo growers of America? Or divine inspiration from heaven? Whatever!! But I’m darn sure you will be seeing more recipes in the near future containing chorizo. And it all started with Mr. C.
Since the beginning of the covid scare, Mr. C. has been doing 99% of our provisioning. And some time ago, apparently, he came home with a package of bulk chorizo sausage. Since he is also the member of our family who does most of the retrieving from our freezer, I never even knew this package of chorizo existed. (Well, maybe he mentioned it to me. But I have as much of a selected hearing problem as the next person.) So, when he recently asked me when I planned to use the chorizo, I gave him one of my “deer in the headlights” look. He immediately understood that I had no idea what in the heck he was talking about. So, after a bit of discussion, it was decided that I would figure out a way to use this ingredient in the near future. So, based on a chorizo and white bean soup recipe I found on the Curtis Stone site, please allow me to introduce you to a really great use for chorizo.
This soup is easy to prepare and absolutely delicious. With lots of vegetable action happening. And isn’t that great. Veggies are so darn good for us. Which reminds me.
The other day as I was chopping up carrot, onion, and celery (mirepoix), I thought about how often I use this vegetative trio. In truth, at least twice a week. Especially during fall and winter. And I end up chopping fresh garlic at least 4 times a week. At least! But that’s just fine with me. Because these ingredients make such a great flavor base for so many tasty dishes. So, hats off to onions, carrots, celery, and garlic.
Well, that’s it for today. I believe I have always told you that I am one lucky lady. And today is another proof positive. The guys from Seabreeze are rehearsing in our living room. Live jazz. Right here. In my very own living room. Life just doesn’t get much finer than listening to great music performed in your own home.
Peace and love to all.
2 T. extra virgin olive oil, plus more for drizzling
1 lb. Mexican* chorizo sausage
1 onion, finely chopped
2 carrots, cut in half, then into thin slices
2 celery ribs, cut into ¼-inch-thick slices
2 sm. or 1 lg. fennel bulb, trimmed and cut into small pieces
4 garlic cloves, finely minced
2 tsp. finely chopped fresh thyme
1 tsp. finely chopped fresh rosemary
1 tsp. smoked paprika
½ tsp. ground cumin
¾ c. dry white wine
6 c. chicken broth
freshly ground black pepper
1 (15 to 19-oz.) can black beans, drained and rinsed (I use Cento brand black beans)
Heat a large, heavy, covered soup pot over medium heat. Add the olive oil, then add the chorizo and cook, stirring occasionally until the meat is nicely browned. Using a slotted spoon, remove the chorizo to a small bowl. Set aside.
Add the onion, carrots, celery, and fennel; cook, stirring occasionally, for about 5 minutes, or until the vegetables begin to soften. Add the garlic, thyme, rosemary, smoked paprika, and cumin and cook for 1 minute.
Add the wine and cook until the liquid has evaporated. Add the broth and pepper. Bring to a boil, then reduce the heat to medium-low, and simmer, covered, for about 20 minutes, or until the vegetables are tender.
Stir in the beans and cooked chorizo. Taste and adjust seasoning. Simmer gently for about 10 minutes to blend flavors.
Ladle the soup into soup bowls. Drizzle with extra-virgin olive oil.
Great served with crostini. (See recipe below.)
CROSTINI
crusty French or Italian bread
extra-virgin olive oil
flaky or fine sea salt, to taste
Pre-heat your oven to 450-degrees. Line a rimmed baking sheet with parchment paper.
Slice the baguette on the diagonal into pieces no wider than ½-inch. Lightly brush both sides of each slice with olive oil.
Place the slices in a single layer on your prepared baking sheet. Bake them on the middle rack for 6 to 9 minutes, or until they are crisp and nicely golden on top. Remove from oven and sprinkle lightly with salt. Serve immediately.
*The difference between Mexican and Spanish chorizo
Chorizo is a highly seasoned chopped or ground pork sausage used in Spanish and Mexican cuisine. Mexican chorizo is made with fresh (raw, uncooked) pork (and needs to be cooked), while the Spanish version is usually smoked. (Can be eaten like any other salami or sausage.)
According to The Spruce Eats “Spanish chorizo is a cured, or hard, sausage made from coarsely chopped pork. The red color of Spanish chorizo is due to the heavy amounts of paprika in the spice mix. Depending on the type of paprika used, Spanish chorizo can be either spicy or sweet. The paprika used in Spanish chorizo is almost always smoked, which gives the sausage a deep, smoky flavor. Other ingredients are herbs, garlic, and white wine, and the links can range from short to very long.
Because the sausage has been cured, meaning it has been aged for several weeks, it can be eaten without cooking and is often served sliced as part of a meat tray or tapas assortment. Spanish chorizo is also used to add flavor to cooked dishes like stews or paella, and even for special occasions. In general, fattier Spanish chorizos are used for cooking, whereas leaner chorizos are sliced and eaten without cooking. For both, the casings are edible.
Mexican chorizo is quite different from Spanish chorizo. The meat is usually ground, rather than chopped, and the sausage is fresh rather than cured. The red color of Mexican chorizo usually comes from spicy red pepper rather than the smoked paprika you find in Spanish chorizo. Pork fat is often added to the meat mixture, along with other spices and vinegar. The links are short, and air dried for one day to a week.
Mexican chorizo is sold raw and must be cooked prior to eating. It can be cooked either in its casings or removed from the casing and cooked like ground meat. Mexican chorizo is a popular grill item but is also used in place of ground beef in tacos, burritos, chili, burgers, soups, and even egg dishes.”
Mr. C. at pianoGrant on drums, Walt on bass, and Jerry on flugelhorn And last but not least, the amazing Mr. Dave K. on trombone
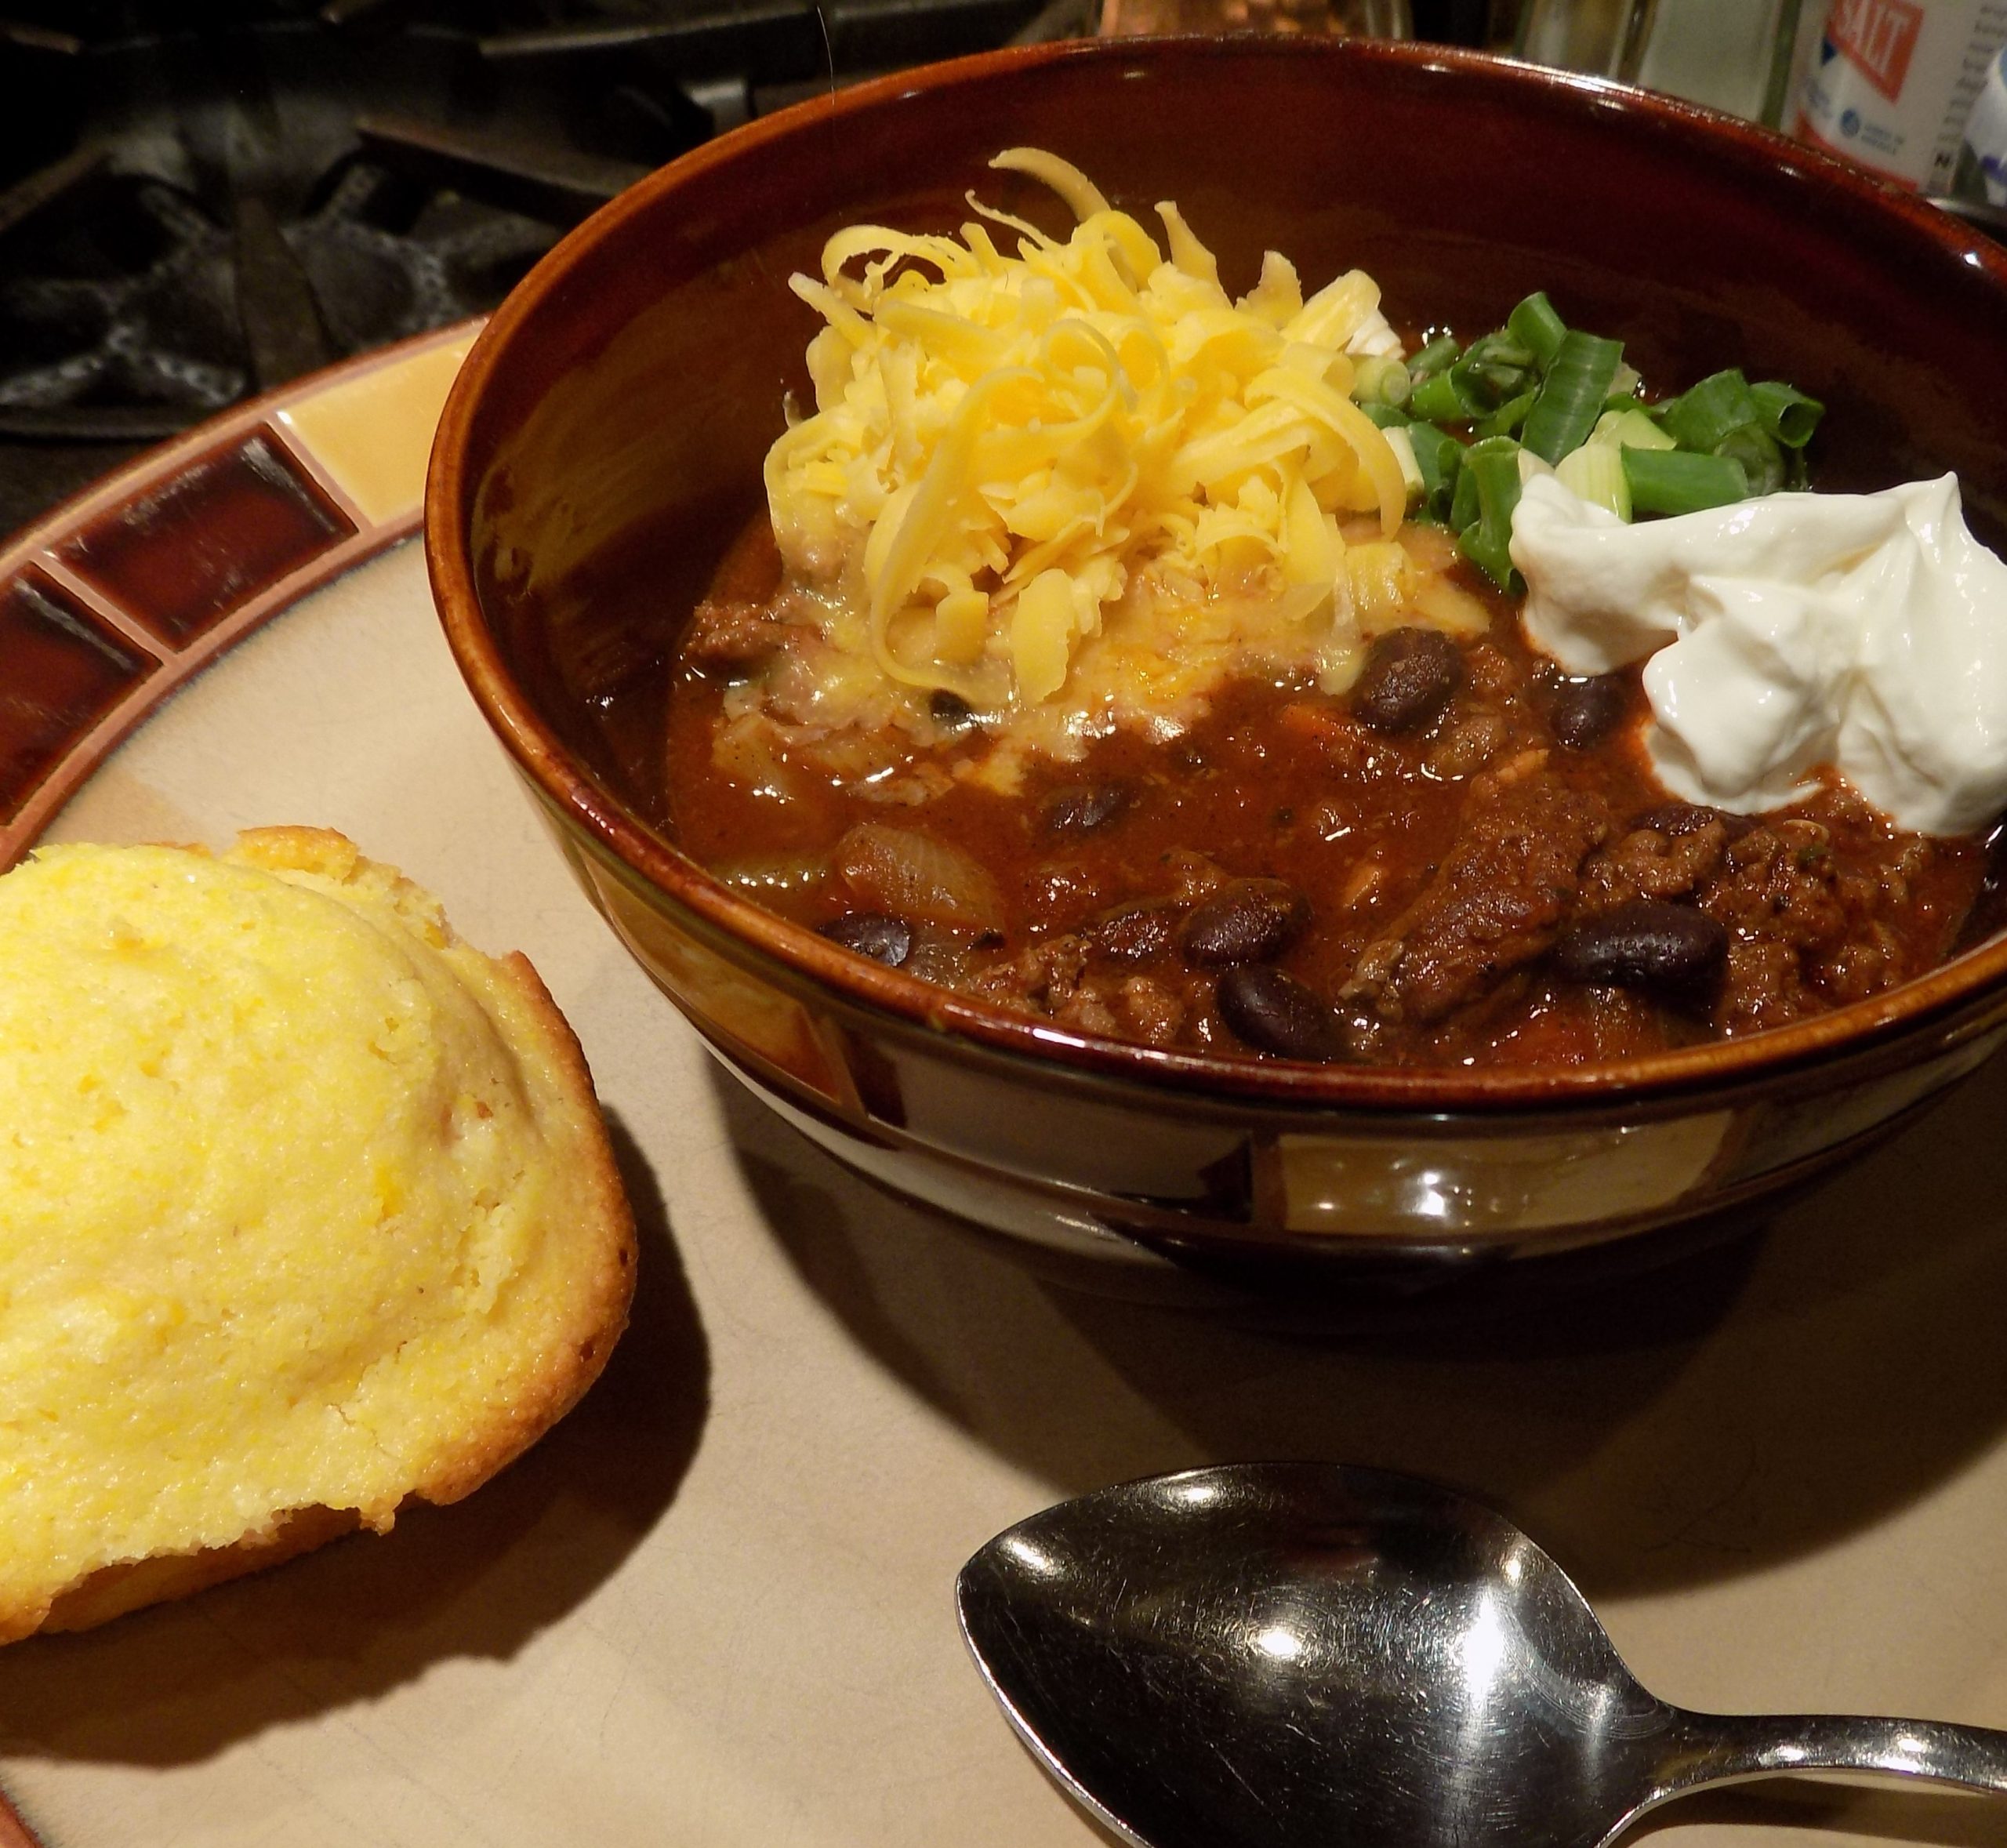
OK, I know, everyone already has their favorite recipe for chili, and I actually already have several recipes on this site that I dearly love too. So, what made me go online and look for another chili recipe is anyone’s guess. And why black beans? Well, that’s easy. I was too lazy to cook kidney beans from scratch and all I had in the pantry was a lone can of black beans. So, I thought – what the heck. Go online and see how other cooks make their chili using black beans. And I stumbled on to the juliasalbum.com site. As I perused the ingredients, it looked like the perfect chili recipe to me. Of course, I added a couple of ingredients and played fast and loose with some of the spice amounts, but other than that, this fabulous and easy to prepare chili recipe is compliments of Julia.
So, what makes this chili special? Well for one thing, it contains more vegetables than you usually find in chili. (That’s a plus BTW.) And 5 cloves of garlic. That’s more garlic than you find in most chili recipes. The spices are not uncommon, but the cup of beef broth is. And beef broth is such a wonderful ingredient to bring extra richness to any dish. So, basically, this is just a good basic recipe for a fabulous bowl of chili. And in my book, there is just nothing finer. Served with a nice cornbread muffin, life is good.
As always, have fun in your kitchen. And remember, some of the best food in the world is often very simple to prepare and has been a family favorite for decades. But that doesn’t mean the dish can’t be “revised” periodically. Hope you enjoy this “revision”.
Peace and love to all.
1 T. extra virgin olive oil
1 lb. ground beef
1 onion, chopped
1 med. carrot, finely chopped
1 celery stalk, finely diced
¼ c. chopped Hatch chili or ½ c. chopped green bell pepper
5 garlic cloves, chopped
3 T. chili powder
4 tsp. paprika
4 tsp. Italian seasoning
2 tsp. cumin
½ tsp. kosher salt
freshly ground black pepper
1 (28-oz) can whole or diced tomatoes, plus juice (Italian tomatoes, if possible)
1 c. beef broth
1 (15-oz.) can black beans, rinsed and drained
grated sharp cheddar cheese, garnish
thinly sliced green onions, garnish
sour cream, garnish
Heat olive oil in a large Dutch oven or heavy covered pan. Add ground beef and cook until browned. Add the onion, carrot, Hatch chili or bell pepper, and celery; stir well and continue cooking for about 2 more minutes. Add the garlic and cook for one minute.
Stir in the chili powder, paprika, Italian seasoning, cumin, salt, and black pepper. Add the canned tomatoes with juices and the beef broth. Bring mixture to a boil, reduce heat, cover, and simmer gently for 1 hour. Taste and adjust seasoning.
Add the black beans and cook for another 20 minutes or so.
To serve, pass the grated cheddar cheese, sliced green onions, and sour cream.
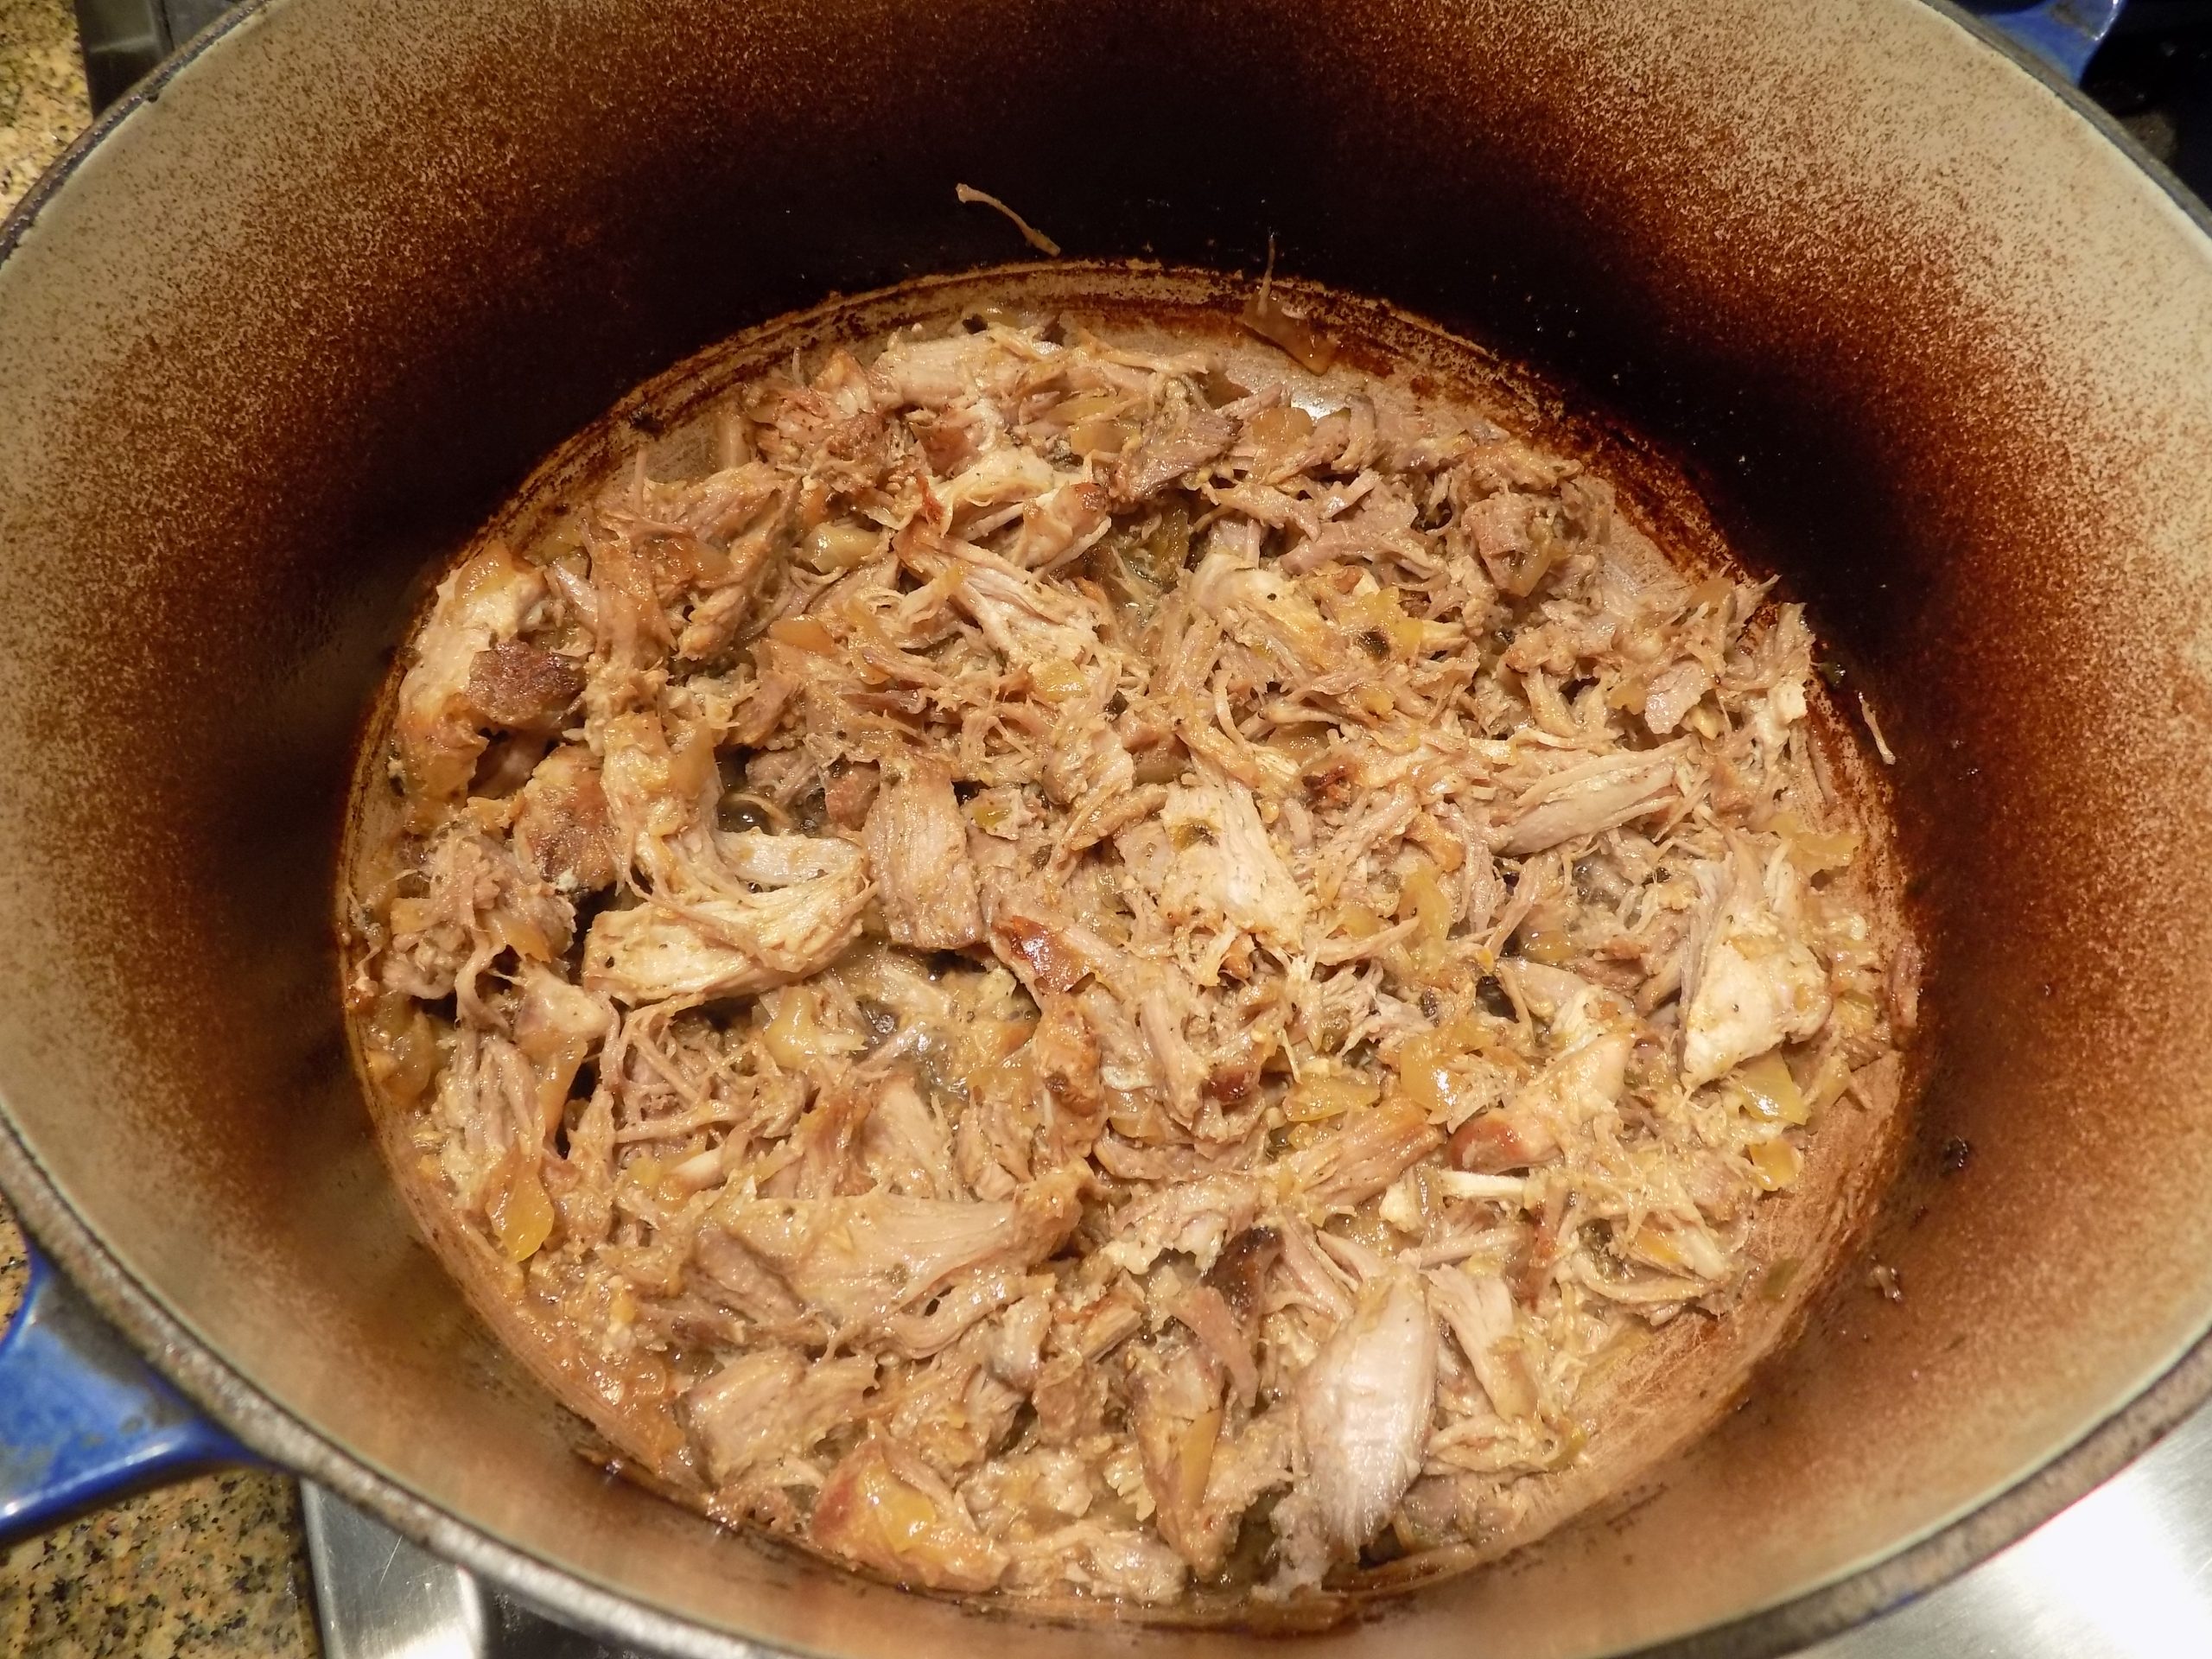
OK, I admit, the picture does not do the carnitas justice. But if there were any real justice anyway, someone would take my camera away from me. I give the whole “photography thing” a bad name!
For whatever reason, I had never made carnitas before yesterday. I had prepared pulled pork, but never pork carnitas. And I must say, I much prefer carnitas. Because unlike pulled pork, the meat is finished by roasting uncovered in the oven until all tender and brown with lovely crispy bits. Then removed from the pan, allowed to cool a bit, and shredded. Then returned to the pot and stirred into the remaining juice. So, in the end you have, tender, partially crisp, and very flavorful meat in sauce to use in any of your favorite Mexican recipes. Tacos, burritos, tamales, to name a few.
Last evening, I simply warmed some corn tortillas to hold the pork carnitas meat, then laid out homemade refried beans, diced avocado, finely chopped tomato, shredded cheese, sour cream, and a mild red salsa. Yum! And the beautiful part, I had spent hardly any prep time on this fabulous way to use a fairly inexpensive cut of pork. Well, the prep time was insignificant, but the time in the oven would preclude this being a great weekday recipe for any person getting home after 2:00 in the afternoon. Because the total time in the oven is at least 3 hours.
However, the good news is that the cook doesn’t have to babysit the pork while it’s in the oven. So, this is a great recipe for a Saturday or Sunday evening, or whatever day of the week you are off work.
And oh my gosh, pork is so delicious fixed this way. The smell alone emanating from your oven is worth any effort expended on this dish. And while the pork is braising/roasting away, all you wonderful cooks out there will be free to attend to other household duties. Such as cleaning your house, doing loads of laundry, hunting and gathering groceries, providing assistance with your kid’s homework, gardening, and my personal favorite – chauffeuring your kidlets all over God’s creation! (And yes, I still have vague memories of weekends when my kids were young. But a lot of my time spent being a mommy to young children and keeping a household running remain a blur, which I fervently hope will solidify as I get old. OK, get even older! Because I would really like to remember a bit more about those very busy years of my life!) (And I know, be careful what you wish for!)
Anyway, take it from me, this dish from the recipetineats.com site is one you most assuredly should make at your earliest convenience. Your family will love it. And it’s absolutely guest worthy. Perfect for a taco party. (When we can once again welcome guests into our homes, that is!)
So, as always, be adventurous in your kitchen, laugh out loud whenever the mood strikes, and cherish the time you spend with your family. They may drive you bat poop crazy some days, but those days will be long gone sooner than you can even begin to imagine.
Peace and love to all.
2 tsp. extra virgin olive oil
1 tsp. kosher salt
freshly ground black pepper
2 tsp. dried oregano
1 tsp. ground cumin
2½ lb. boneless, skinless pork shoulder, trimmed of as much fat as possible
½ onion , chopped
½ jalapeño, seeded, deveined and finely chopped
2 cloves garlic, minced
½ c. orange juice
1½ c. water
Combine the olive oil, salt, pepper, oregano, and cumin. Rinse and dry the pork, then rub all over with olive oil mixture.
Place the pork in a Dutch oven or covered roasting pan. Surround the meat with the onion, jalapeño, minced garlic, orange juice, and water.
Cover and braise the meat in a pre-heated 325-degree oven for 2 hours. Uncover and continue roasting for another 60-90 minutes. During this time, the liquid will reduce considerably, and the meat will become brown and crisp. (Check after 60 minutes.) Add additional water if required. (You want to end up with very tender, partially crispy brown meat, and a scant cup of liquid.)
Remove meat to a platter, let cool slightly, then shred using two forks. Discard any fat. Add the meat back to the pot and stir to combine with the remaining liquid. Use in any of your favorite recipes.
Easy way to warm corn tortillas:
Wrap a stack of tortillas (five or fewer) in aluminum foil and heat at 350-degrees for 15 to 20 minutes.
I wish the pink in this picture of the evening sky was as vivid as what we experienced first hand the other evening. It still amazes me after living on Camano Island for 12 plus years, to see masses of clouds over the mainland. And clear skies overhead and to the West. So the setting sun often brightens up the clouds like this. It’s a wonderful world folks. And watching the beauty of nature is a gift we can all share.
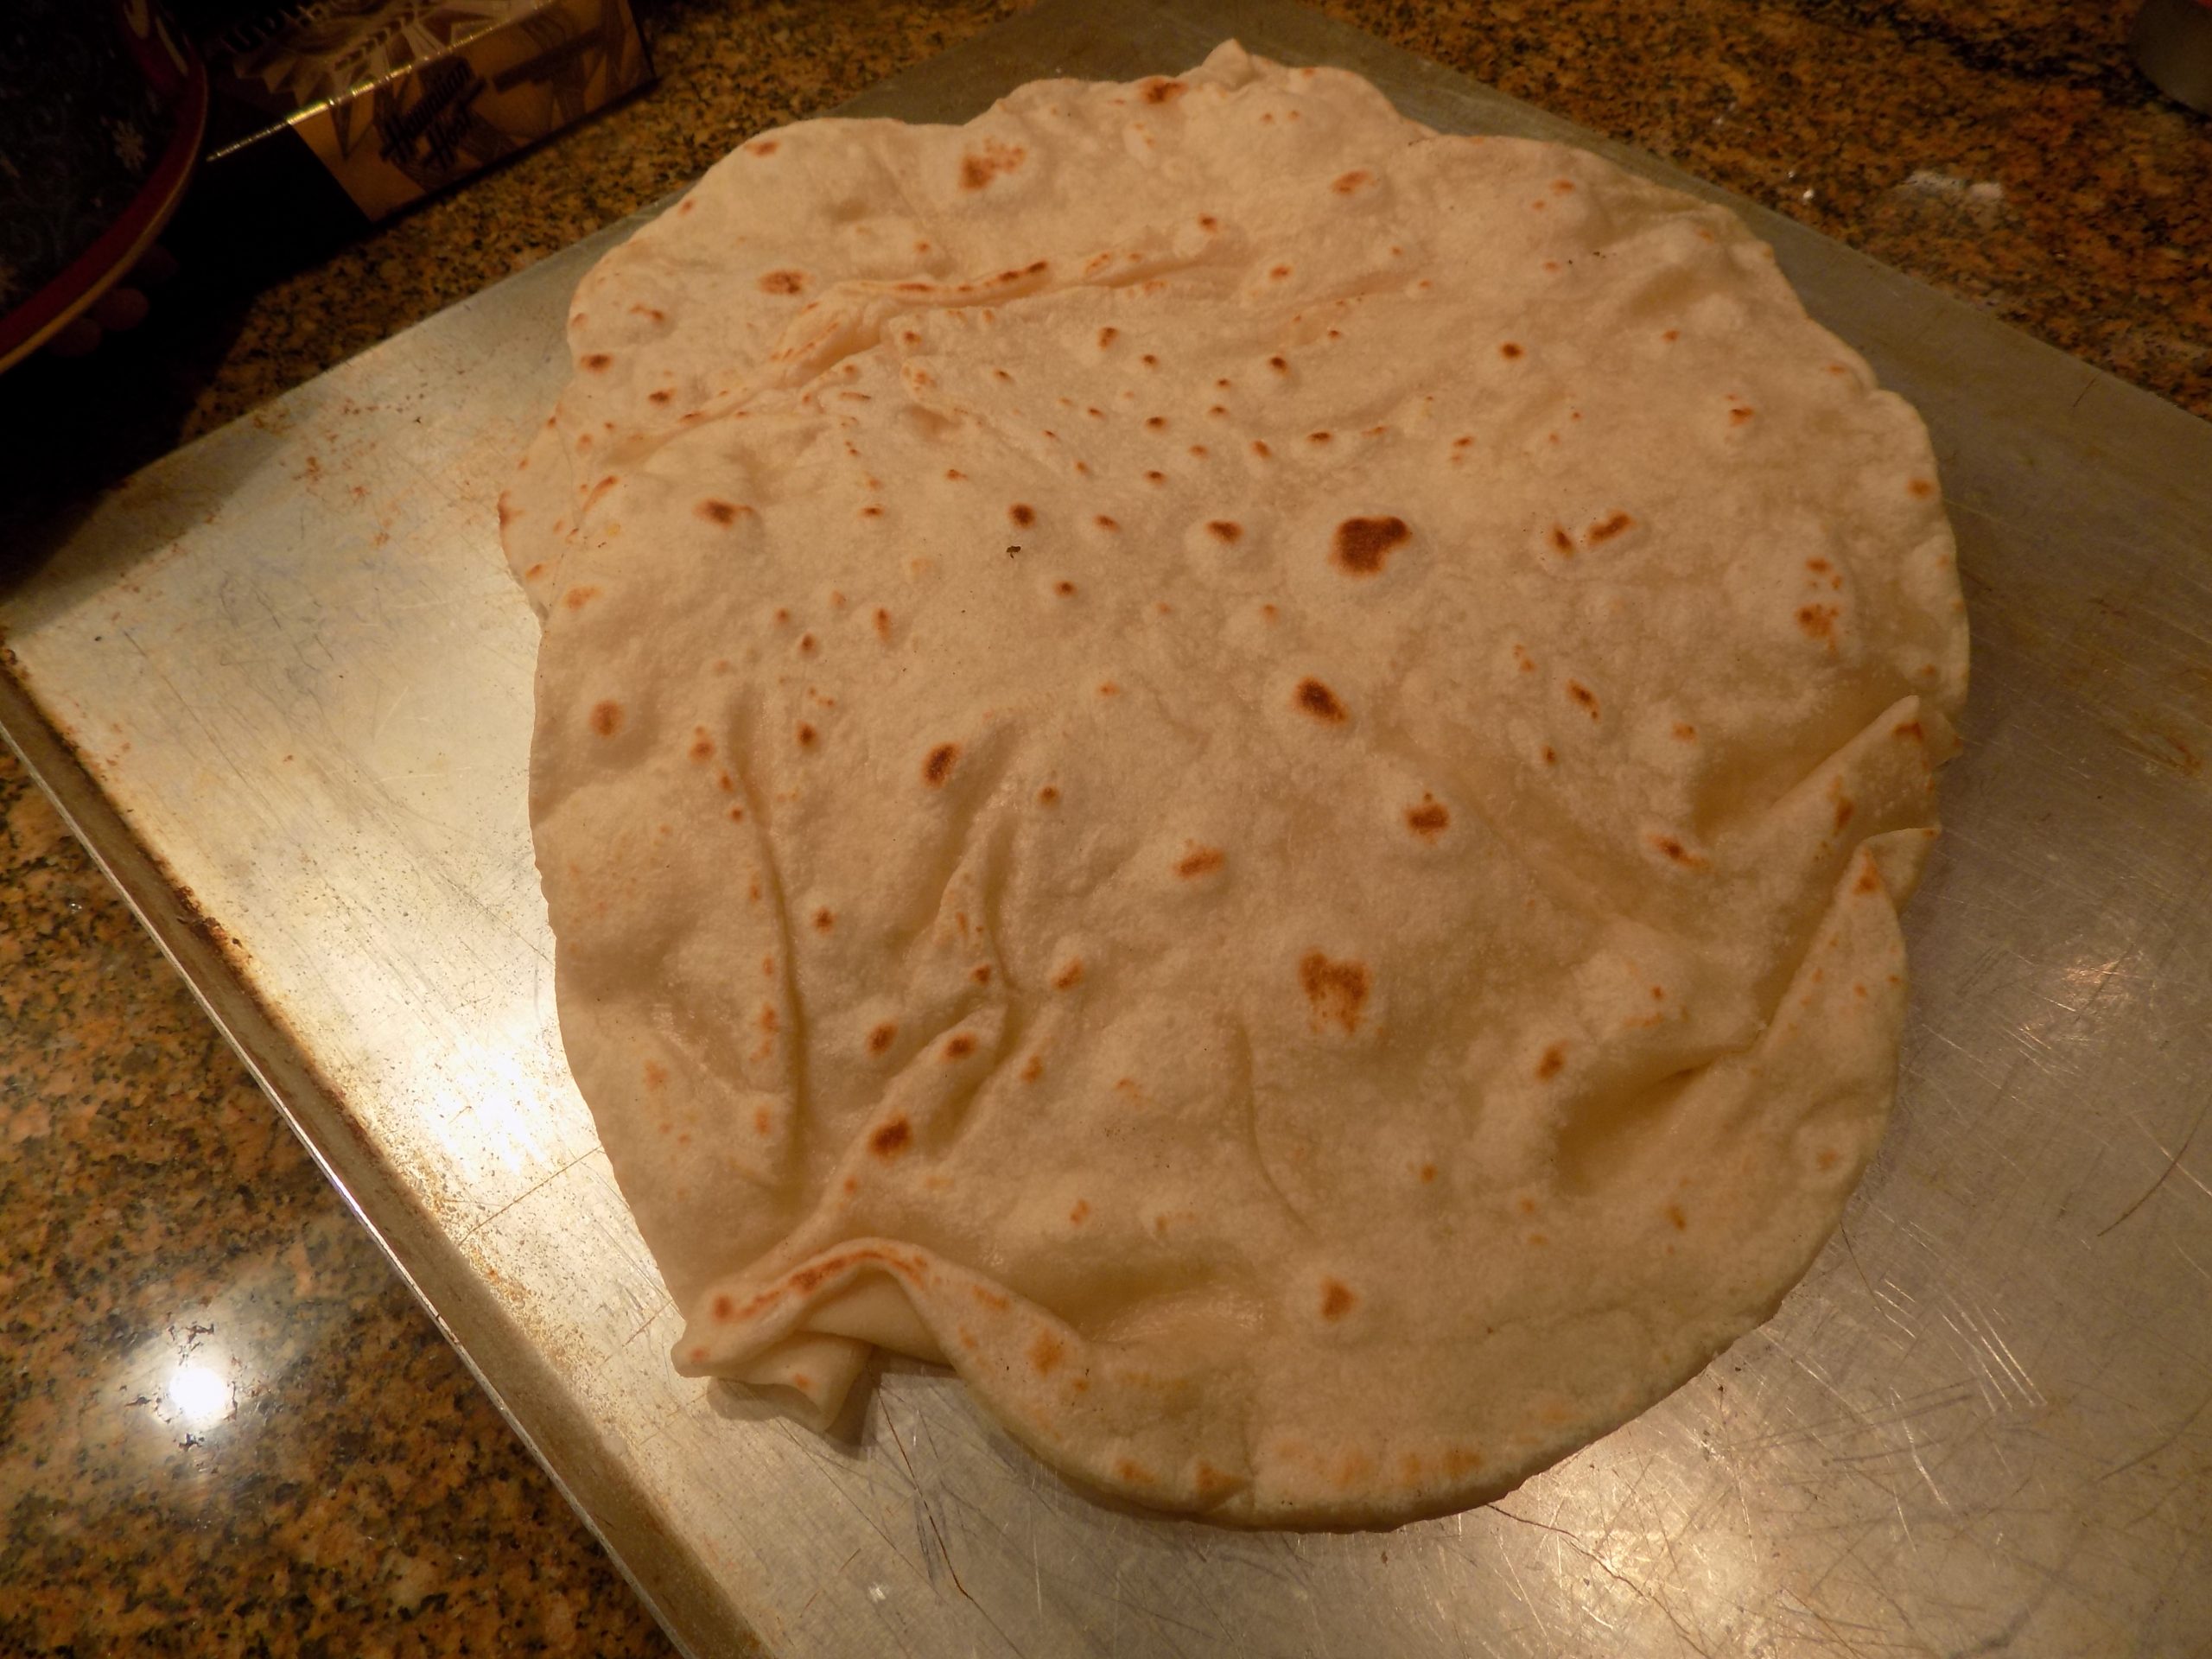
As you can see, my rolling out the dough technique was fine. My getting the rolled dough to the griddle, not so much! Hopefully I will have many more years to get it right. And even if they never look pretty, they will always taste divine.
And to think I have been buying flour tortillas all these years. What could I possibly have been thinking? OK, obviously I wasn’t thinking! Even after purchasing un-baked flour tortillas at Costco for years that always tasted better and fresher than any flour tortillas I could find at a regular grocery store. The reason of course being that they were frozen raw and only baked at home just before being served. So, in essence, these un-baked tortillas were fresh. And yet, it never occurred to me to make my own dough?!?! As if it could possibly be terribly difficult to build? Which, BTW, it is not! 5 simple ingredients combined in a stand mixer using a dough hook. Then “baked” (kind of like a pancake) for a couple of minutes. So – incredibly – easy!
So, now that I’ve made my own flour tortillas, I plan to never go back to buying them either from Costco (I don’t even know if they sell frozen raw tortillas anymore) or from our local grocery store. Purchased tortillas are simply not as delicious as the ones I made a couple of evenings ago. Plus, making my own means I have control over the quality of the ingredients. And there are no unpronounceable ingredients for me to ponder. That too is very important to me.
It all started two mornings ago with me wanting to use 2 ripe avocadoes for guacamole. So, I thought burritos would be fun to serve too. But I didn’t have either flour or corn tortillas on hand. And I really didn’t want Mr. C. to make an unnecessary trip to the grocery store for 1 item. (Pandemic aside, we try to limit our shopping excursions to times when we need products from several stores and can hunt and gather all in one trip.) So, one item, one shop was out of the question. Now, never one to have a menu plan thwarted by a problem so menial as a missing gluten product, I went on-line to see what I could find.
When I discovered this recipe on thecafesucrefarine.com site, I was thrilled. It looked perfect. And I was right. This fabulous recipe produced the most tender and delectable flour tortillas. I wrapped the baked tortillas around seasoned ground beef, re-fried beans, and shredded sharp cheddar cheese. Then just before I served them, I put a small amount of veggie oil in a pan and browned the burritos so that the tortilla shell would be a bit crunchy. Then I served them with several condiments – sour cream, salsa, chopped tomatoes, chopped lettuce, finely minced red onion, and black olives. Yum! As far as the guacamole part, suffice it to say that when I cut the 2 beautiful avocados open, the flesh was filled with streaky black veins throughout. Yuck! I hate it when that happens. So, into the yard waste container they went. Grrrrrrr So, there was no guacamole on our plates that evening. But the wonderful burritos made up for it. Well, almost!
So, as always – think outside the box. If someone else can build a “culinary something”, you undoubtedly can too. Or at least you can give it that old college try! If you learn nothing else from me, let it be that regardless of whether you’re a novice in the kitchen or an accomplished cook, if you can read and follow directions, you most certainly will amaze yourself and your family with what you can accomplish. And like anything else, the more you practice your craft, the easier it becomes and the more fun you will have doing it. It’s like that famous old joke. “A fellow goes to New York to attend a concert but gets lost. He spots another fellow who’s carrying a violin case. “Sir, can you tell me how to get to Carnegie Hall?” The musician smiles and says, “Practice, practice, practice.” So, happy cooking everyone. Salud!
Peace and love to all.
3 c. unbleached all-purpose flour, fluffed
1 tsp. kosher salt
1 tsp. baking powder
⅓ c. vegetable oil
1 c. warm water
Combine flour, salt, and baking powder in the bowl of your stand mixer. Using the dough hook, mix dry ingredients until well combined.
Add oil and water with mixer running at a low speed. After about 1 minute, or when mixture comes together and begins to form a ball, continue to mix for 1 minute more or until the dough is smooth.
Transfer dough to a lightly floured work surface. Divide into 8-10 equal portions. Turn each piece to coat with flour. Form each piece into a ball and flatten with the palm of your hand. Cover flattened balls of dough with a clean kitchen towel and allow to rest for at least 30 minutes (or as much as 2 hours) before proceeding.
After the rest period, heat a large non-stick pan or griddle over medium heat. Roll a dough piece into a very thin rough circle, about 6-7 inches in diameter, while keeping the work surface and rolling pin lightly floured. When the pan is hot, place the dough circle into or onto the pan and allow to cook 45 seconds to 1 minute or until the bottom surface has a few pale brown spots and the uncooked surface is bubbly. If browning too fast, reduce the heat a bit. If it’s taking longer than a minute to see a few pale golden-brown spots on the underside of tortillas, increase the heat a bit. Using a spatula, flip to other side and cook for 15-20 seconds. The tortillas should be nice and soft but have a few small brown spots on the surface. While the first tortilla bakes, roll out the second so it is ready to bake when the first one is done. Then proceed the same way until all the tortillas are baked.
Note: Don’t be tempted to roll out all the tortillas before starting to bake them. Or if you do, stack the uncooked tortillas separated by parchment paper or you will never get them apart.
Remove the baked tortilla from pan and stack to help keep the tortillas soft. Promptly place the next tortilla on the pan and let it bake as you roll out the next.
Serve warm or allow to cool for later use. When ready to use, place a slightly damp paper towel in the bottom of a microwave-safe container (with a cover) that will hold the stacked tortillas. Microwave uncovered for 15-30 seconds (start with 15) or until warm, then keep covered to hold heat while serving.
Store in an airtight container or zippered bag at room temperature for 24 hours or refrigerate for up to 1 week. To freeze, separate tortillas with waxed paper and place in a zippered bag before placing in the freezer.
OK, I thought I was done using my Instant Pot because the last time I tried preparing dried beans this way, the darned things never got soft. Even though I added a bunch of extra time, they were still too hard. I assumed there was simply something wrong with my Instant Pot. Nope. The problem was not the pressure cooker. The problem had to do with the age of the beans I was trying to cook.
If you are anywhere around my age (older than dirt), then you grew up with parents who had either lived during the depression or shortly thereafter. And those of us who then grew up to be the cooks for our own families, remembered the lessons from our youth. Don’t waste food. Keep a stock of your favorite ingredients on hand. (Replacement Shop.) And save money any way possible.
We soon discovered that buying in bulk was a good way to stretch the food dollars. That meant, that buying a 5 pound bag of pinto or navy beans, for example, was much more cost effective than buying 5 – 1 pound packages. Because, dried beans last forever. Right?! Wrong!!
Fact: Dried beans that are several years old (some say even two years old) may not soften no matter how long you cook them. Who knew? I sure as heck didn’t. I just always figured that because the beans were dried, they could happily sit in my pantry for years with no ill effects. Kind of like Twinkies. But in reality, beans are merely dried to extend their shelf-life. They were never meant to last a lifetime! Or even several years.
Now I know what you’re thinking. Does Patti really expect me to go through my pantry and throw away all those wonderful dried beans I‘ve been hoarding all these years? No, that is not what I’m telling you to do. But I’ve got to be honest with you. That’s what I’m going to do. Because frankly, some of my beans may have moved with us from our Bellevue home 12 years ago. Well maybe not, but darned close! And as much as it’s going to kill me to buy dried beans in small packages or small amounts of bulk beans, and forgo my inherent inclination to sock away masses of dried beans in case there’s a zombie apocalypse or devastating earthquake, that’s my plan from here on out. Because there truly is a difference between a one year old dried bean and a 5 year old dried bean. So on that happy note, I’m going to tell you all about this recipe.
I have been trying all of my adult life to build refried beans that had enough wonderful flavor on their own as not to require any type of embellishment or garnish. No added cheese, raw onion, sour cream, salsa, etc. Nada! And I finally reached my goal the other evening after only 56 years of trying. (Persistence is its own reward.) Anyway, this combination of ingredients really worked for us. And using recently purchased dried pinto beans, adding a wee bit of fat, and a lot of flavorful additives, these beans can be served as is. And proudly take their place alongside any other flavor packed Mexican dish. In other words – they are truly yummy. And creamy. And healthy. And very easy to prepare. Your Instant Pot does all the hard work. You just need to feed it a few ingredients, turn the thing on GO, then walk away and let the pot do its magic. Piece of cake. (And no, I am not naïve enough to believe that all dried beans on my grocery store shelves are not as old as the ones in my pantry. But it’s the best I can do to alleviate the problem of dried beans that will not get soft! Well that and cross my fingers.)
So believe me, I am really glad I gave my Instant Pot another chance. And yes I have apologized to it for any unfair comments I may have issued out of ignorance. And to the Instant Pots credit, I have graciously been forgiven.
As always, be kind, be forgiving, give others the benefit of the doubt, and be that person that everyone considers a good friend. Good friends are like stars. You can’t always see them, but you know they are there. Peace and love to all.
1 c. dried pinto beans
2 tsp. extra virgin olive oil
½ sm. yellow onion, chopped
2 cloves garlic, minced
1 can (4-oz.) diced green chiles (I use mild hatch green chiles)
1/8 tsp. dried jalapeño*
2 c. vegetable broth (I use Better Than Bouillon Vegetable base)
1 c. water
1 sm. bay leaf
1 tsp. kosher salt
freshly ground black pepper
1 tsp. chili powder
1 tsp. dried oregano (Mexican oregano is the best)
1 T. unsalted butter
Thoroughly wash and pick over the pinto beans. Place in the instant pot. Heat the olive oil in a small frying pan. Add the onion and sauté until tender. Add the garlic and cook for 1 minute. Pour the onion and garlic into the pot. (Or you can use the sauté function on your Instant Pot.)
Add the diced green chiles, dried jalapeño, broth, water, bay leaf, salt, chili powder, and oregano. Stir to combine.
Cook on High or Beans for 50 minutes. When the 50 minutes are over, let the pressure release naturally for 40 minutes. Carefully open the lid.
Discard the bay leaf. Drain the beans reserving about a cup of water. (You probably won’t use that much additional liquid, but it’s better to be safe than sorry.) Using your immersion blender or potato masher, mush the beans until they reach your desired consistency, adding reserved liquid as needed. Stir in the butter, taste, and adjust seasoning. (You will probably need a bit more kosher salt at this point.) Serve warm as a side dish or as a glorious bean dip.
Can be prepared ahead of time and re-heated just before serving.
*I use dried powdered jalapeño quite a bit because I rarely have a fresh jalapeño on hand. The brand I use is Badia ground jalapeño. (You can purchase it through Amazon.)
I don’t know what the weather is like in your part of the world right now, but here on Camano Island its misty moisty and fluctuating around 65 degrees. Not offshore misty, but rather rainy misty. And not really cold, but not warm either. So to my thinking, it’s still soup and chili weather. So I thought about it for a while yesterday morning and decided to serve chili last evening for dinner.
Now just because I wanted chili for dinner, didn’t mean that I wouldn’t appreciate a new take on an old favorite. And one type of chili I had never made before was a chili containing chicken rather than beef or pork. I like chicken. I’ve got chicken in the freezer. So chicken chili it is! Only one problem. I don’t quite know where to begin. So to the internet I proceeded.
And based on the white chicken chili recipe I found on the cookingclassy.com site (with my own adaptations of course), I prepared this really delicious and comforting dish for supper last evening. It was easy to prepare, contained ingredients I had on hand, and was basically a one dish meal. I like one dish meals. But I decided to fancy up the meal a bit, so I made a small plate of nachos to go with the chili. Simple really. Just a layer of tortilla chips, a bit of both sharp cheddar and mozzarella cheese, and a smattering of pickled jalapeño. Bake for 4-5 minutes in a 400 degree oven, and Bob’s your uncle! (And no, I don’t usually use mozzarella cheese in either chili or on nachos. But I didn’t have any Monterey Jack, so I used what I had on hand.)
So if you too would like to serve chili for dinner some evening, but a chili that’s a bit different, give this recipe a try. Want more heat? Add some fresh jalapeño. Don’t have any cannellini beans on hand, use canned chili beans in a sauce like I did last evening. Don’t like beans, leave them out. Don’t like chicken, leave it out too. Wouldn’t matter. The chili would still be delicious.
In any event, stay happy, stay healthy, and keep trying new recipes. I think one of the reasons I am weathering this coronavirus pandemic with all of its ramifications as well as I am, is because I get to try out new recipes, write about my triumphs, and share them with you. You simply don’t know how much it means to me to be able to include you in my life in this very simple way. Peace and love to all.
1 T. extra virgin olive oil
¾-1 lb. boneless, skinless chicken breasts or thighs, cut into bite sized chunks
seasoned salt
freshly ground black pepper
½ c. diced onion
2 garlic cloves, finely minced
2 c. chicken broth
1 (4 oz.) can diced green chilies
¾ tsp. cumin
½ tsp. paprika
½ tsp. dried oregano
½ tsp. ground coriander
pinch cayenne pepper
1 c. cooked cannellini beans or 1 can beans of choice
1 c. corn (frozen, canned, or fresh)
2 oz. (¼ pkg.) cream cheese
1 c. grated mozzarella, Monterey Jack, or other melty white cheese
2-3 green onions, thinly sliced
2 tsp. fresh lime juice, or more to taste
tortilla chips
sliced avocado
Heat olive oil in a large pot. Add the chicken. Sprinkle with seasoned salt and pepper. Cook the chicken just until it’s done. Remove from pan and set aside.
Add the onion and sauté until soft. Add garlic; cook for one minute.
Add the chicken broth, green chilies, cumin, paprika, oregano, coriander, and cayenne pepper. Bring mixture just to a boil then reduce heat to medium-low and simmer 15 minutes.
Add the beans, corn, and cooked chicken. Bring just to a boil. Remove from heat and stir in the cream cheese, mozzarella cheese, green onions, and lime juice. Adjust seasoning.
Serve in soup bowls with tortilla chips and avocado passed at table.
Note: If you have leftover chicken, by all means use it in this dish. Add it along with the beans and corn as instructed in the recipe.
It all started with me wanting to try out a recipe for sourdough cornbread. (And I know, sourdough and I appear to be joined at the hip these days. But I love everything sourdough, so why not a sourdough cornbread? After all, many cornbread recipes include buttermilk. Which is also sour. So logic dictates that sourdough cornbread should be delicious. And BTW – it is! Recipe to follow in the next couple of days.)
Anyway, I wanted to try out my recipe for sourdough cornbread yesterday so that I could serve it last evening. So I got to thinking about what to serve with the cornbread? Mr. C. and I love chili. We also love Italian food. So why not a chili that smacks of Italy, with a bit of Southwestern flavor thrown in for good measure. (And authenticity.)
So yesterday, I went on line looking for a chili recipe containing Italian sausage and cannellini beans. And there it was on the reneeskitchenadventures.com site. Of course I messed with the recipe, but I am pleased to give credit to Renee for the bones of this delightful dish.
Now, who knew Italian and Southwestern flavors would mix so well? But OMG, this was one of the best pots of chili I have ever produced, much less tasted. And ever so easy to prepare. But Italian seasoning and diced green chilies in the same recipe? Radical to say the least. But isn’t that fun! And what cooking should be all about! Coaxing the best out of every single ingredient you use. Sometimes it feels like magic to me. How a smattering of this and a dash of that can make such a difference to the final product. Of course there is one combination of ingredients I know I will never prepare. But none the less, it’s fun to imagine. For your reading pleasure: The well-known incantation of the Three Witches in Shakespeare’s Macbeth.
Double, double toil and trouble; Fire burn and cauldron bubble. Fillet of a fenny snake, In the cauldron boil and bake; Eye of newt, and toe of frog, Wool of bat, and tongue of dog, Adder’s fork, and blind-worm’s sting, Lizard’s leg, and howlet’s wing, For a charm of powerful trouble, Like a hell-broth boil and bubble.
As always dear friends and far-flung readers – stay safe, stay inspired, stay positive, and keep smiling. (Even if no one can tell you’re smiling under your mask!) Oh – and make this chili. It’s really great!
1 T. extra virgin olive oil, plus more for drizzling
1 lb. bulk Italian pork sausage (I use sweet Italian sausage from our IGA on Camano Island)
1 med. onion, chopped
1½ c. diced bell pepper (red, orange, yellow, green – or a combination)
3 cloves garlic, minced
2 tsp. ground cumin
2 tsp. Italian seasoning
1 tsp. fennel seeds
1 tsp. dried oregano (preferably Mexican)
¼ tsp. kosher salt
1/8 tsp. crushed red pepper flakes, opt.
freshly ground black pepper
14 oz. can diced tomatoes (preferably Italian)
4 oz. can diced green chilies
2½ c. vegetable stock
2 c. cooked cannellini beans*
Heat the olive oil in a large, covered Dutch oven. Add the meat, breaking it into small pieces as it browns. Remove the cooked sausage and set aside.
Add the onion and peppers to the Dutch oven. Cook until the onion begin to soften. Add the garlic; cook for one minute.
Stir in the cumin, Italian seasoning, fennel seeds, oregano, salt, crushed red pepper flakes, and black pepper.
Add the canned tomatoes with juices, green chilies, and vegetable stock. Bring to boil, reduce heat, cover, and simmer for a good hour.
Just before ready to serve, add the reserved meat and the cooked cannellini beans and bring back to a boil. Adjust seasoning.
Serve in soup bowls. Pass the extra virgin olive oil. A small drizzle on top of the soup tastes mighty fine. And corn bread is perfect on the side.
Note: And while I know you are wondering why I don’t just leave the cooked Italian sausage in the pot the whole time, I believe my reasoning not to do so is sound. Unlike ground beef, which is inherently fairly uninspired tasting, Italian sausage is replete with flavor. (The spices bring a lot of the flavor to the mix.) If you leave the cooked sausage in the broth for too long, all that yummy concentrated flavor will be leached away. Yes the flavor will still be in the saucy part. But it’s really nice to bite into a piece of Italian sausage that still tastes like Italian sausage!
*You can use canned cannellini beans, but I prefer to cook the beans myself. And no, you don’t have to soak the beans overnight or cook them in an instant pot. When I’m in a hurry, I simply wash the dried beans, place them in a covered pot, add lots of water, bring the water to a boil, reduce the heat, cover the pot, and let the beans gently simmer until they are tender. I check the pot every 30 minutes or so. When the beans are getting close to being done, I add salt to the water.
When the beans are finished cooking, I take the pot off heat and just let the beans sit in the water until I’m ready to add them to the chili.
(I realize my way of cooking beans goes against convention. Soak the beans the night before, etc. But most of the time, I am not efficient enough to know the day before what I am going to serve for dinner the next evening. That takes planning. I just happen to take a much more relaxed approach to the whole undertaking.)