Category Archives: DRY RUBS AND SEASONING BLENDS

CHICKEN, SHRIMP, OR ROASTED VEGETABLES IN A CURRY MASALA SAUCE

OLYMPUS DIGITAL CAMERA

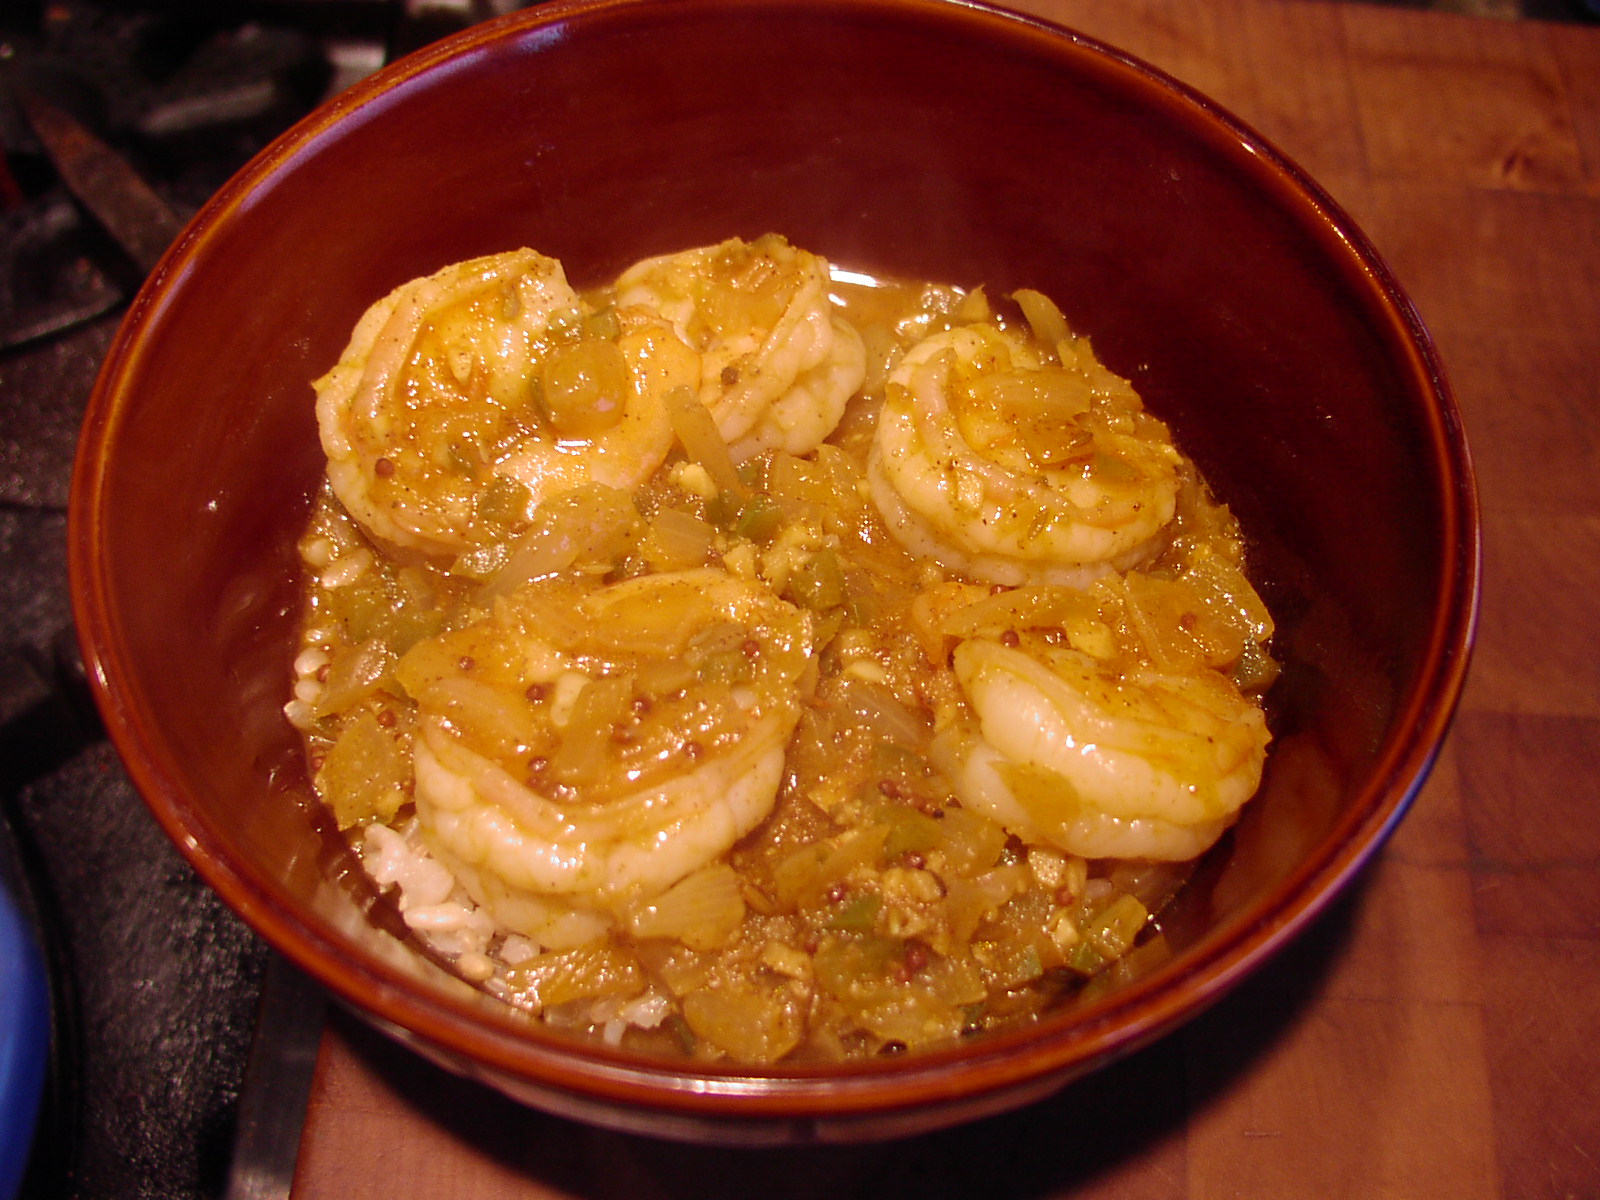
There really isn’t anything about Indian curry that I don’t like. And this curry dish, slightly altered from a recipe provided when I recently purchased a package of Aromatic Curry Masala at the Methow Masala shop in Winthrop, WA, is just about as good as an Indian style curry can get. It’s so delicious, that if I had been served this curry dish in a restaurant, I would have wanted to go back for more at my earliest convenience. The only changes I made to the original recipe were to replace tomato paste for diced tomatoes, use my own curry masala blend (the second time I made it), and add sour cream or yogurt right at the end. (Just makes the sauce a little creamier.)

Now if you happen to live near Winthrop, you can buy the curry blend any old time you want. But for those of us who would have to make a special trip, I went to all the trouble of working out what I believe to be an adequate Aromatic Curry Masala substitute. (BTW, Mr. C. loved both curries I made before writing this post. But he did admit that he liked the curry made with chicken better (curry number 1) than the curry I made with shrimp (curry number 2). No mention of the sauce flavor being any different when I used my own curry blend (curry number 2). Just that he preferred chicken curry over shrimp curry.

Now of course, many of you are not going to go to the bother of making your own curry masala powder. And believe me, if I still had 4 kids at home and worked full time, I wouldn’t be making my own curry powder either! But since my kids are grown and I am retired, I take no greater pleasure than trying my hand at what I call “seasoning blend mixology”. (I have kind of a spice and herb obsession if truth be known!) And if I do say so myself, my recipe below for Curry Masala Powder is darned good. But dear friends, even if you don’t have the time, energy, or interest in making your own curry powder, make this delicious dish anyway. Just use purchased curry powder. (There will be no points subtracted or shame attached to using a commercially produced curry powder. The only shame would be if you didn’t give this recipe a try when next you got a hankering for Indian food!)

So grind yourself up some curry powder (or start with purchased curry powder), steam up some rice (remember, brown rice is healthier for you than white rice), and prepare a chicken, shrimp, or roasted vegetable curry for your family in the near future. They will be delighted to have something new and exciting to eat for dinner. And you will have had a new adventure in the kitchen. And isn’t that the real reason many of us love to cook??

  • 1 tsp. cumin seed
  • 1 tsp. brown mustard seed
  • ¼ c. (½ stick) butter
  • 2 large onions, finely chopped
  • 5 lg. garlic cloves, finely minced
  • 1-inch piece of fresh ginger, finely minced
  • 3-4 T. Aromatic Curry Masala spice blend from Methow Masala or my version of Curry Masala Powder (see recipe below)
  • 1 tsp. kosher salt
  • ¼ c. tomato paste
  • 2-3 med. jalapeño chili peppers, seeds and veins removed, and finely minced
  • 4 c. (1 qt.) chicken or vegetable broth (or use 4 tsp. chicken or vegetable base and 4 c. water)
  • 6-8 boneless, skinless chicken thighs cut in bite sized pieces or 2 lb. large uncooked shrimp, peeled and deveined or 3 cups assorted roasted vegetables
  • ½-¾ c. sour cream or plain yogurt

Toast the cumin seeds and mustard seeds in a dry pan over medium heat until the aroma of the two spices is released. Set aside.

Melt the butter in a heavy covered pan. Add the onions and cook until they start to brown. Add the garlic and ginger and cook for one minute. Add the curry masala powder, salt, toasted cumin and mustard seeds, and the tomato paste. Let the mixture cook for about a minute. Whisk in the jalapeños and chicken broth and simmer uncovered for about 15 minutes. Add the chicken pieces and cook just until the chicken is no longer pink in the middle. If you are using shrimp, cook only until the shrimp turn light pink. If you are using roasted vegetables, add just long enough to heat through. Whisk in the sour cream or yogurt, adjust seasonings, cover, remove from heat, and let sit for 15 minutes. Serve over brown rice. And yes I know brown rice is not usually served with most curry dishes, but it’s healthy and we love it! If you must, you can serve the curry over basmati rice.

Also, since I know many of you are wondering – no this is not a recipe for a really spicy hot curry. The jalapeños truly add more flavor than heat, especially if you carefully remove the seeds and veins. Of course, there is a bit of heat, but I pride myself in not hurting anyone. So if you are super sensitive, you might want to use less jalapeños or none at all.

CURRY MASALA POWDER RECIPE

  • scant ½ c. coriander seeds
  • 2 T. fennel seeds
  • 2 T. cumin seeds
  • 1 T. black or brown mustard seeds
  • 1 tsp. black peppercorns
  • ½ tsp. fenugreek seeds
  • 2 tsp. crushed red pepper flakes
  • 2 tsp. ground cinnamon
  • 2 tsp. turmeric powder
  • 1 tsp. ground ginger
  • 1 tsp. ground cloves
  • 1/8 tsp. ground cardamom

In a small pan over low heat, individually dry roast the coriander seeds, fennel seeds, cumin seeds, mustard seeds, peppercorns, fenugreek seeds, and crushed red pepper until aromatic. Don’t hurry the process.

When each is toasted, remove to a bowl to cool. (And yes, it can be the same bowl.) When all of the spices are room temperature, whirl in a grinder until powdered. (It’s OK if there are still tiny chunks. If the chunks bother you, sieve the mixture before proceeding.) Add the ground cinnamon, turmeric, ginger, cloves, and cardamom. Store in an airtight container. Use in any of your favorite recipes calling for curry powder.

FYI: Internet source for dried herbs and spices www.myspicesage.com

I have always been more than satisfied with the price, delivery method (most of the time free delivery) and products I have received from this company.

ADOBO SEASONED GRILLED FLAT IRON OR SKIRT STEAK

OLYMPUS DIGITAL CAMERA

Flat iron and skirt steaks are two of the best cuts of beef available for grilling. They are rich in flavor, extremely juicy, and just amazingly succulent and tender if not cooked to death. Both are perfect when served medium rare. Any more done and you might as well eat shoe leather! So if you are one of those people who want your steak cooked till no semblance of beef flavor remains and you basically have to use a hack saw to cut the pieces into bite size; please move on to another recipe. (I said please, so that makes it OK!) And since I know many of you like your steak really rare, I will give you the same advice I received from a waiter at the now closed Buenos Aires Grill in downtown Seattle. I ordered entraña (grilled skirt steak) rare. The waiter informed me that for cuts of meat like skirt and flat iron, they are at their best when cooked medium rare. I followed his advice and I have never looked back. I now order or cook steaks medium rare regardless of the cut.

Although flat iron and skirt steaks are good when seasoned only with salt and pepper, I think using Adobo Seasoning is absolutely the best way to enhance the natural flavor of the meat. So give this blend of spices and herbs a try. And for heavens’ sake, if you don’t have one or more of the listed herbs or spices at home, don’t buy one of those cute little spice jars or cans at your local grocery store that cost an arm and a leg. Winco, your local food co-op, IGA, Haggen Foods, Central Market and many other grocery stores carry herbs and spices in bulk including the ones used in this Adobo Seasoning blend. And trust me; you will save an incredible amount of money if you buy in bulk. And that doesn’t mean that you have to buy a great deal of product. You can actually scoop out as much or as little into a bag as you need. Just don’t be surprised at how little the bulk spice or herb actually costs.

A few years ago I conducted an experiment when I was writing Spice it Up! I performed a cost comparison at our very own Camano Island IGA. For 1 pound of McCormick oregano, the cost would have been $164.90 ($6.39 for each .62 oz. bottle). For 1 pound of oregano in bulk, the cost would have been $9.19. Buying oregano in darling little glass bottles would cost 1800% more than buying in bulk! Now as I said, this cost comparison was done a few years ago so both the bottled oregano and bulk price have undoubtedly gone up. But I’m sure the price ratio difference is still about the same. Don’t believe me? Put about a half cup of bulk oregano in a bag and pay for it along with your other groceries. If it costs more than a buck fifty, I’ll send you the difference!

But for those times when I need dried herbs or spices that are unavailable at my local grocery stores, or I simply want the luxury of ordering them over the internet, I use www.myspicesage.com. I have always been more than satisfied with the price, delivery method (most of the time free delivery) and products I have received from this company. So basically what I am saying is this. Don’t give me any lame excuse about the cost of dried herbs and spices or how expensive it is to prepare your own herb and spice blends! Because my dears, your own homemade blends are always going to be less expensive to prepare (if you buy in bulk), taste fresher, and not coincidentally be generally healthier for you. Now granted, they won’t contain the likes of cottonseed oil or silicone dioxide, but I’m sure you’ll get over their absence in time!

So if you want to serve your family and friends a steak that will knock their socks off, get yourself to the store and buy a flat iron or skirt steak. Then mix up some Adobe Seasoning, fire up the BBQ, and prepare for a taste treat even an Argentinean would take pride in serving. If you want to send this steak over the top, serve with Chimichurri Sauce. (See recipe below)

  • 1½ lbs. flat iron or skirt steak, room temperature, trimmed of silver skin if necessary (skirt steak), cut into 2½-inch wide pieces – basically in half lengthwise (flat iron steak)
  • extra virgin olive oil
  • Adobo Seasoning (see recipe below)

Lay the steak on a baking pan and lightly coat with olive oil. Sprinkle on enough adobo seasoning to almost cover up the meat. (Don’t go hog wild, but don’t be too shy either. You should have over half of the amount from the recipe below left after you are finished decorating the steak on both sides.) Grill over a very hot fire, but don’t cook past medium rare. (With my grill, that’s about 4 minutes on the first side and about 1 minute on the second.) Let rest about 4 minutes before slicing into 1-inch diagonal strips. Use the remaining adobo on any meat, poultry, or fish dish. Or after trying this recipe, use it the following week when your family begs you for more of that wonderful steak!

ADOBO SEASONING

OLYMPUS DIGITAL CAMERA

  • 2 T. kosher salt
  • 2 tsp. regular paprika
  • 1½ tsp. onion powder
  • 1½ tsp. dried oregano (preferably Mexican)
  • 1½ tsp. ground cumin
  • 1 tsp. smoked paprika
  • 1 tsp. granulated garlic
  • 1 tsp. chili powder
  • freshly ground black pepper

Whisk all the ingredients together in a bowl. Store in an air tight container in a cool, dry place.

CHIMICHURRI SAUCE 

  • 2 T. drained capers
  • 2 garlic cloves, rough chopped
  • 1 bunch Italian parsley
  • ½ bunch cilantro
  • 2 T. red wine vinegar
  • 1 tsp. kosher salt
  • freshly ground black pepper
  • ½ tsp. dried oregano (Mexican is best)
  • ¼ tsp. crushed red pepper flakes
  • ½ c. extra virgin olive oil

Place capers and garlic in the bowl of a food processor. Whirl until finely chopped. Add the parsley and cilantro and pulse 4-6 times to rough chop the leaves. (Don’t over process.) Transfer to a bowl. Stir in the vinegar, salt, pepper, oregano, crushed red pepper flakes, and olive oil. Taste and adjust the salt and pepper as needed.

Refrigerate until ready to use (preferably the same day).


BBQ CHICKEN WITH BOURBON BBQ SAUCE

OLYMPUS DIGITAL CAMERA

Ok, once you take a look at this recipe you are going to wonder if I have lost my mind thinking you would ever consider going through all the steps listed below just to prepare a simple thing like BBQ’d chicken. (You might even be wondering why I would ever construct a sentance like the one I just did!) In fact I would go so far as to say, you might even be calling me a lunatic right this very minute! (Wouldn’t be the first time, I’m sure!) But – if you did take the time and effort to make this wonderful chicken, you might actually forgive me both the recipe and the sentance structure. Because, if I do say so myself, this is just darn fine BBQ chicken. And yes I know, there are 4 steps (well 5 if you count making the BBQ sauce) and I understand that it looks like an all day process. But actually it’s not that bad, especially if you make the Dry Rub for Chicken and the Bourbon BBQ Sauce ahead of time. And really, the brine goes together in about 3 minutes.

Now granted, skinning the chicken pieces is about as much fun as cleaning the gutters of your home. But removing all those unnecessary fat calories should make you feel super virtuous. So take one for the team, give yourself some points for protecting your own and your loved ones arteries, and prepare to be amazed at how much skin and fat are actually on your average piece of chicken. It’s enough to almost put you off visiting Ezells or Colonel Chicken ever again! Almost! And yes, I know. You can simply buy boneless, skinless chicken pieces and call it good. But I truly believe that chicken pieces which still contain the bones God gave them at birth, remain juicier longer during their arduous adventure with heat, which in turn helps create a better finished product. (Good grief! Where are these sentences coming from today? Sometimes I even scare myself! Perhaps it was the BBQ chicken I ate yesterday?)

Anyway, don’t worry about me. Just have some fun and  invite your friends over for a BBQ. Serve them this chicken, along with a side of Old Fashioned Potato Salad, Vegetarian Baked Beans, some chunks of cold watermelon, and my Mocha Chocolate Cake with Sour Cream Frosting and you will have a happy crowd on your hands.

And in case you can’t figure out what constitutes the 5 steps mentioned above, allow me to list them for you:

1)      Brine the chicken pieces

2)      Dry rub the chicken pieces

3)      Bake the chicken pieces

4)      BBQ the chicken pieces

5)      Serve the chicken pieces with BBQ sauce

6)      Devour the chicken pieces (Oops. I guess there are actually 6 steps. And I a retired banker. Shame on me!)

Brine Ingredients:

  • 4 c. water
  • 1/3 c. white vinegar
  • 1/3 c. kosher salt
  • 1/3 c. brown sugar

16 or so pieces of chicken (I start with bone-in, skin-on chicken pieces – 3 breast halves – skinned and cut in two, 6 thighs – skin removed, and 4 drumsticks, most of the skin removed)

Brining Directions:

In a large plastic or glass container, whisk together the water, vinegar, salt, and brown sugar. Add the chicken and refrigerate for 1½ to 2 hours, but no longer.

Please note: If you don’t own a large glass or plastic container, line a metal pan with a garbage bag and pour the liquid in the bag along with the chicken pieces. Also, buy reasonably small pieces of chicken if at all possible. The smaller the pieces, the more delicious the final product.

Dry Rub for Chicken Ingredients:

  • 6 T. packed dark brown sugar
  • 2 T. regular paprika
  • 2 T. chili powder
  • 2 T. kosher salt
  • 1 T. smoked paprika
  • 1 T. granulated garlic
  • 1 T. onion powder
  • ½ tsp. dried thyme
  • coarsely ground black pepper

Dry Rub Directions:

Mix all ingredients together and store in an airtight container.

Putting it All Together:

Drain the chicken pieces and pat dry with paper towels. Place the pieces on sided baking sheets liberally coated with cooking spray. Generously coat each piece with the dry rub. Loosely tent the pan(s) with a piece or pieces of aluminum foil. Bake the chicken for 30-35 minutes in a pre-heated 350 degree oven or until the internal temperature of each piece reaches 160 degrees. Remove from oven and place pieces on your BBQ set at a fairly low temperature. BBQ each piece for about 3 minutes on each side. (Remember, the chicken is already done. All you are doing at this point is adding a little bit of smoky flavor and a couple of grill marks to each piece.) And lest you think I forgot about the BBQ sauce, I don’t add sauce while the pieces are on the grill. I have found that some people prefer just the flavor of the rub and don’t bother with the sauce, so I serve the sauce on the side. Once all the pieces have finished their short acquaintance with the grill, place them on a platter, loosely cover with foil, and serve them either warm or at room temperature.

Please note: if you don’t have a BBQ or just don’t want to go to the bother and mess, just serve the pieces straight out of the oven. You might want to remove the foil for the last few minutes to allow the spice rub to dry out a bit.

BOURBON BBQ SAUCE

  • ¼ c. butter
  • ¼ c. minced onion
  • 3 cloves garlic, minced
  • ¼ c. brown sugar
  • 2 tsp. whole grain mustard
  • 1 c. ketchup
  • 1/3 c. Worcestershire sauce
  • ¼ c. fresh lemon juice
  • ¼ tsp. hot sauce, or to taste
  • ¼ tsp. cayenne
  • 2 T. bourbon

Melt butter in a medium sized covered saucepan. Sauté onion until translucent; add garlic and cook until garlic releases its aroma, about 1 minute. Add remaining ingredients, bring to a boil, reduce heat, cover pan, and simmer gently for at least 30 minutes, stirring occasionally. Sauce should thicken some during cooking. Serve warm or at room temperature.

This recipe (at least the brining, dry rubbing, and baking part) is loosely based on the BBQ chicken recipe found on the Smitten Kitchen web site. (Great blog BTW.)


HERB SALTED TURKEY WITH COGNAC GRAVY

OK, you got to know that I have roasted a lot of turkeys in my day. From my first days of roasting turkeys until about 15 years ago I baked my Thanksgiving and Christmas turkeys in a brown paper bag. Many a great turkey was roasted this way, by-the-way.  (I even tried this method one year at our cabin. Suffice it to say that it is not a good idea to use a brown PAPER bag in the oven of a wood burning stove! Duh!) But that’s a story for another time…………

Then a few years ago brining turkeys became the rage. And of course I had to give that method a try. And yes indeed, brining a turkey creates a flavorful, tender and succulent bird. Absolutely no doubt about it. And that’s how I prepared my turkeys for the next several years. But brining a turkey is a pain in the bucket. So when I found this recipe in the November 2008 issue of Bon Appétit, I decided what the heck, if it’s good enough for Bon Appétit, it should be good enough for me and mine!

Well boy howdy, I about flipped when I tasted the melt-in-your-mouth meat. And the gravy! Now I pride myself on being able to make good gravy (my friend Jim says it’s because of the grandma gene), but my old standby recipe went into overdrive when I used the juices and fat from the herb salted bird. It simply was the best turkey gravy I had ever prepared, let alone tasted!

And salting a bird, rather than surrounding it in brine is so very easy. And the effect is the same – juicy, flavorful meat. Can you ask for more than that? Well yes you can. Gravy from heaven! And I am here to help you with just that very thing.

So fasten your seat belts and prepare to read about making sensational and easy turkey and gravy for your family and friends. And if you decide to give it a try, I am confident you will not be disappointed. Happy Thanksgiving.

Herbed Salt Ingredients:

  • 1/3 c. + 1 T. kosher salt
  • 1 ½ tsp. dried rosemary
  • 1 ½ tsp. dried sage
  • 1 ½ tsp. dried thyme
  • 1 tsp. black peppercorns, crushed
  • 3 bay leaves, coarsely chopped
  • 1 lemon

Turkey Ingredients:

  • 14-16 lb. fresh turkey (there really is a difference)
  • 1 lg. onion, chopped
  • 1 celery stalk, chopped
  • 1 tsp. dried rosemary
  • 1 tsp. dried sage
  • 1 tsp. dried thyme
  • ½ c. melted butter
  • 2 c. chicken stock
  • 3 c. turkey stock, or more if needed (recipe below)

Turkey Stock Ingredients:

  • 1 turkey drumstick or 2 to 3 turkey thighs (get yours early and freeze, because it’s darn near impossible to find these just before Thanksgiving)
  • reserved neck and giblets
  • 2 qt. chicken stock
  • 2 qt. water
  • 1 onion, rough chopped
  • 2 carrots, cut into large chunks
  • 2 garlic cloves
  • 3 stalks celery, cut into big chunks (don’t use the leaves – you want them for the dressing)
  • 2 bay leaves
  • 3 T. dried parsley
  • 1 tsp. dried thyme
  • 6 peppercorns
  • 1 tsp. kosher salt

Herbed Salt Directions: Combine salt, rosemary, sage, thyme, peppercorns, bay leaves, and zest from lemon. (Chop the rest of the lemon and refrigerate until ready to bake the turkey.) Rinse the turkey but don’t pat dry. (Save the neck and giblets for the Turkey Stock you are going to make Thanksgiving morning.)  Sprinkle herbed salt on the inside and outside of the turkey. Place in two small garbage bags, set inside a container and refrigerate 18-20 hours.

Roasting the Turkey Directions: Just before baking, wash the bird and pat dry. In a small bowl, combine the onion, celery, rosemary, sage, thyme, and reserved chopped lemon and stuff into the cavity of the bird. Place the turkey on a rack inside a large roasting pan. Slather with some of the butter. Pour 2 cups of chicken stock in the bottom of the pan and bake for 45 minutes in a pre-heated 325 degree oven. Baste the bird with more butter and add turkey stock (by this time you can use your own homemade stock) to the bottom of the pan. (The pan should not be allowed to go completely dry.) Continue basting the bird and adding stock to the pan every 30-45 minutes or so until the turkey thigh reaches an internal temperature of about 170 degrees. This should take about 4-4 ½ hours. (If the bird gets too brown after a couple of hours, cover with aluminum foil for the remainder of the baking time.) Carefully remove the turkey from oven when done, remove to a platter, cover with aluminum foil, and allow to cool at least 45 minutes before slicing. Make gravy (see below) while the bird is resting.

Turkey Stock Directions: If you have a second oven, or make your stock ahead of time, spread the turkey parts out on a rimmed baking pan. Bake in a 400 degree oven for 1 hour or until the meat is well browned. (If you don’t have a 2nd oven, place the raw turkey parts in the bottom of a large soup pot.) When the bones are out of the oven, place them in the bottom of a large soup pot. Pour a little water onto the baking pan, and allow to sit and cool for a few minutes. Then carefully pour the water and as much of the brown stuff that was stuck to the bottom of the pan on top of the meat. Add all the remaining ingredients, bring to a boil, reduce heat, cover pan and let simmer gently while your turkey bakes. Use as needed for baking the turkey. Use remaining turkey stock for gravy.

TURKEY COGNAC GRAVY:

All is fair when it comes to making gravy. And truly great gravy starts with the pan drippings left in the bottom of the roasting pan after the turkey has been removed to cool. (And yes, we are talking cholesterol city here, but once or twice a year, leave your worries behind and travel to the dark side!)

  • pan drippings from roasted turkey
  • flour
  • turkey or chicken stock
  • 2 tsp. Kitchen Bouquet
  • freshly ground black pepper
  • 2-3 turkey gravy mixes (just in case)
  • 2-3 tsp. cognac

Place the roasting pan on the stove after the turkey has been removed. Turn the heat to very low and begin making your gravy immediately. (Good gravy flavor and consistency require time to develop.) Do not remove any fat from the pan, do not strain the liquid, do not do any of the things most cook book writers tell you to do to make good gravy (except me, that is!).

Whisk in enough flour to absorb the fat. Let burble for a couple of minutes. (This process takes time, so be patient.) Slowly whisk in turkey or chicken stock until the gravy reaches the desired thickness you like. Add the Kitchen Bouquet (gives the gravy great color) and some freshly ground black pepper. No salt! Taste the gravy. If you think it needs more depth of flavor, begin by adding one of the gravy mixes and a small amount of turkey stock. Let it simmer for a couple of minutes and taste again. Repeat if needed.

Turn heat as low as possible and let the gravy simmer away for the next 30 minutes or so, whisking periodically. (You will probably need to add more stock during this time.) Also, after the turkey is sliced and plated, don’t forget to add the juices that have accumulated to the gravy.

Just before serving (and gravy should be the last item plated), taste the gravy and make any final adjustments to the seasoning. Stir in the cognac and serve piping hot.

Note: if the gravy seems a little salty, you might try adding a teaspoon or two of fresh lemon juice.


GRILLED RUBBED CHICKEN

I grew up on a farm. My grandfather sold eggs for a living, so we had eggs coming out of our ears. And who knows which came first, the chicken or the egg, but along with the eggs, we had chickens. Funny how that works! And every Sunday after church, my mom (we lived in a separate home on the farm property) would fix the side dishes, and my grandmother, after first killing, de-feathering, and butchering some unlucky rooster or hen (and I refuse to go into the details of how this was accomplished) would prepare the fried chicken. Now I know I’ve told you that my grandma was not a good cook, but boy could she fry chicken! So at about 2:00 p.m. every Sunday we would sit down to a dinner of fried chicken with all the trimmings. Not a bad way to spend a Sunday afternoon! Then long about 7:00 p.m. we would have a late supper. Often it was as simple as a Spanish omelet (like I said, we had eggs in abundance) and toast. Lovely in its simplicity.

Now logically you would think that as an adult I would hate eggs and chicken. But I still have an egg every morning for breakfast. Love them. And as far as enjoying the taste of chicken, well, in all probability, if I had to choose just one meat to eat for the rest of my life, it would be the delectable Gallus gallus domesticus. And after having grown up on a chicken farm, as far as I’m concerned, the only good chicken is a dead chicken anyway! Chickens are mean critters. They will literally peck one of their fellow chickens to death if the poor thing happens to have even a tiny scratch or scrape. And as a small girl trying to help her grandfather gather eggs, well those old biddies were unmerciful! So like I said, better dead is a Rhode Island Red, or however that cold war saying goes!

So for me, a lovely piece of chicken that has been rubbed with spices, spent a few hours of well deserved incarceration in the refrigerator, then cooked over low heat on a BBQ and slathered with BBQ sauce; well life just doesn’t get much better. Actually, the only thing I can think of that would be better, is if I could fry chicken like my grandmother. But to do that, I would have to raise my own chickens (not out of the question) and then slaughter them (satisfying but completely out of the question), churn my own butter from my own dreamy eyed cow (I believe we have a covenant in our development that expressly states that cows are prohibited), and own a well seasoned cast iron frying pan! Well I’ve got the pan, but as for the rest, not going to happen, so I will just have to cherish my memories. If I am lucky enough to end up in heaven with my grandmother, I know she will be waiting for me with a plate of her fried chicken. In the mean time, I will gladly content myself with this BBQ’d chicken. Hope you enjoy it too.

chicken pieces, any type or number of pieces you need

Dry Rub for Chicken:

  • 5 T. kosher salt
  • 1 T. freshly ground black pepper
  • 3 T. granulated garlic
  • 3 T. onion powder
  • 1 T. dried thyme
  • 1 T. ground sage
  • 1 T. paprika
  • 1 tsp. ground savory

Mix all dry rub ingredients together. Wash and dry the chicken pieces. Thoroughly rub each chicken piece with the dry rub. (Store any unused portion of the dry rub in an airtight container at room temperature.) Place chicken in a zip lock bag and refrigerate for up to 12 hours. Grill over medium low heat and serve with Bourbon BBQ Sauce (under This & That Recipes)


SMOKED DRY-RUBBED RIBS

I like to get messy. I love to work in the dirt, play with grout when I make one of my mosaic pieces, mix meatloaf ingredients with my hands (sans wedding ring), and eat BBQ until my fingers are so sticky I can’t pry them apart. No dainty knife and fork action for me when I’m eating BBQ. I want the full BBQ experience, sticky hands that adhere to my napkin(s), BBQ sauce on at least one of my ears; the full meal deal! And eating these ribs dipped in Bourbon BBQ Sauce is guaranteed to make you just about as messy as it gets. A little information about BBQ sauce: There are many styles of BBQ sauce, but basically they all fall into 4 “general” types. Style number 1 (going back literally hundreds of years) is very simply a combination of vinegar and pepper (maybe a little brown sugar). The 2nd type is a mustard based sauce, commonly served in South Carolina. Not a bit of tomato to be found. Type number 3 is referred to as a light tomato sauce (basically tomato ketchup with vinegar and pepper). And number 4, the most common sauce of all – heavy slightly sweet tomato sauce. (BTW – Bourbon BBQ Sauce under This & That Recipes definitely lives behind door number 4!)

Now, you may be wondering why I am telling you about different BBQ sauces on a recipe for ribs, but there is a method to my madness. These ribs are absolutely fantastic with nary a sauce in site. And many people prefer to eat their ribs with no embellishment. I personally don’t understand why anyone would eat naked ribs, but who am I to question other peoples’ food choices. All I can say is that (A) these ribs + (B) Bourbon BBQ Sauce = (C) Heaven. Now that’s my idea of a perfect standard form linear equation! 

2-3 racks baby back or spareribs (we prefer baby back)

Dry Rib Rub:

  • 2 T. paprika
  • 2 tsp. freshly ground black pepper
  • 2 T. kosher salt
  • 2 tsp. granulated garlic
  • 1 tsp. cayenne
  • 1 tsp. ancho chili powder (found in most upscale grocery stores in bulk)
  • 2 tsp. dried oregano
  • 2 tsp. dried thyme

Combine all Rib Rub ingredients. Spread the rub liberally over the meaty side of the ribs. Then either wrap or cover the meat and refrigerate overnight.

The next day place the ribs in a smoker with hickory or alder wood chips on low heat for about 3½ hours. (If your smoker only has two temperatures (on or off), no problem. You are not cooking the meat; you are merely adding a lovely smoky flavor.) (Of course, if you have a Traeger or similar fancy  outdoor appliance for both smoking and cooking the meat, knock yourself out. Just make sure the internal temperature of the meat reaches 190-degrees before it goes on the grill.) But for those of us with less exotic equipment, after the meat smokes, bake the ribs in a covered pan* at 275-degrees for a couple of hours, or until the internal temperature of the meat reaches 190-degrees. (Check after an hour.) Why 190-degrees? Because 190 is the temperature at which the fat and collagen start to melt, making for a tender and better tasting rib.

*Use a high sided pan when you bake the ribs because there will be a considerable amount of liquid accumulated in the pan while they bake. Remove from oven. At this point, the ribs can be set aside until needed.

When ready to serve, heat your grill to 400-degrees. Cut the meat into individual ribs, and heat on the grill for 4 minutes on each cut side. Serve with Bourbon BBQ Sauce.

BOURBON BBQ SAUCE

¼ c. unsalted butter

¼ c. minced onion

3 cloves garlic, minced

¼ c. brown sugar

2 tsp. whole grain mustard

1 c. ketchup

1/3 c. Worcestershire sauce

¼ c. fresh lemon juice

¼ tsp. hot sauce, or to taste

¼ tsp. cayenne

2 T. bourbon

Melt butter in a medium sized covered saucepan. Sauté onion until translucent; add garlic and cook until garlic releases its aroma, about 1 minute. Add remaining ingredients, bring to a boil, reduce heat, cover pan, and simmer gently for 30 to 60 minutes, stirring occasionally. Basically, cook the sauce until you it reaches your desired thickness. (Sauce will thicken as it simmers. If the sauce is still too thin after 60 minutes, remove the lid. But be warned – simmer at a very low temperature or you will have BBQ sauce all over you and your kitchen!) Serve sauce warm or at room temperature.