Category Archives: BBQ & PICNIC RECIPES

DARK RUM BAKED BEANS WITH BACON  

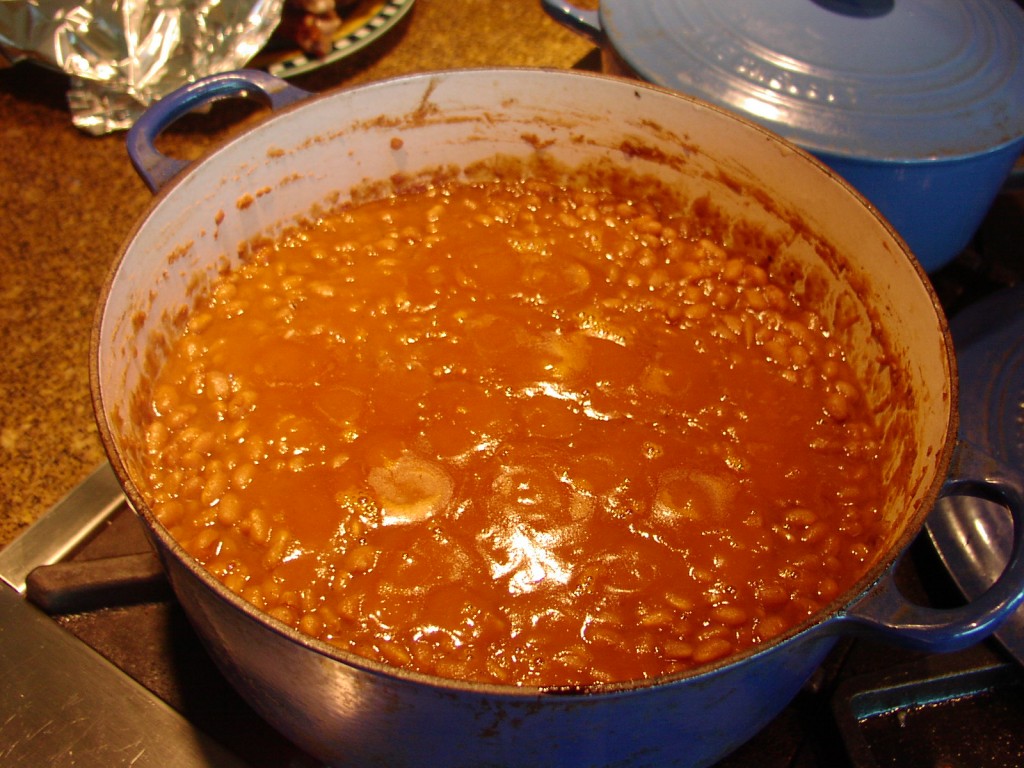
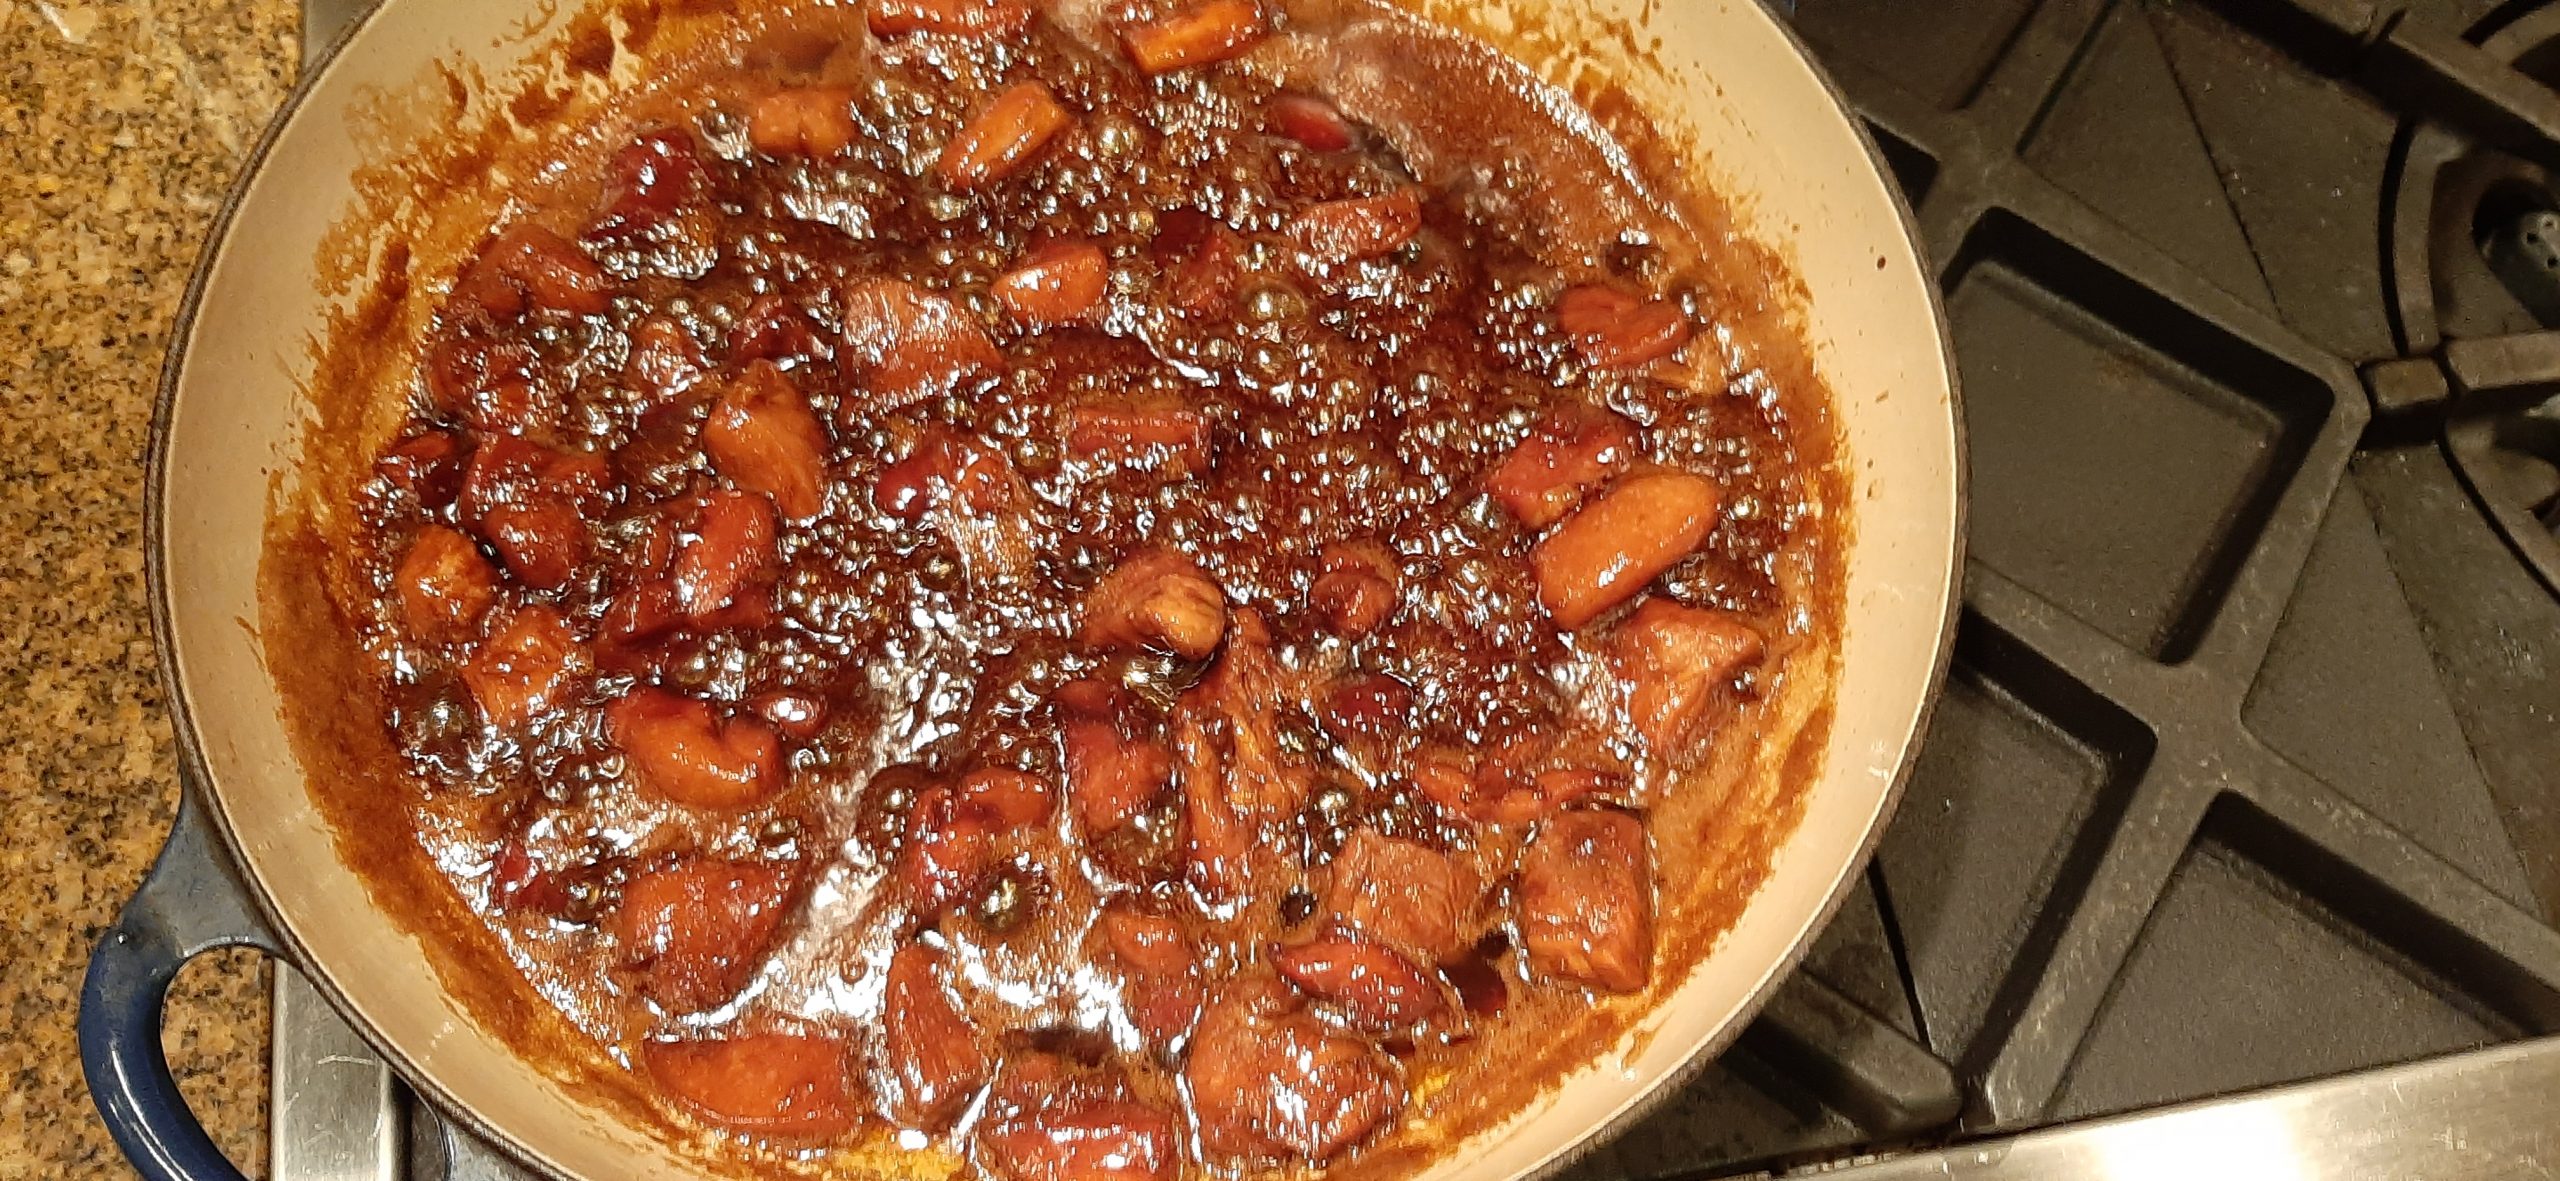
This is my second posting for these beans. The first post was published on New Year’s Eve. Then a few days later I deleted the recipe. Because I had baked the beans in a Corning Ware covered casserole dish, (for a pretty presentation), but the beans never got tender. After several hours in the oven. So, I took this recipe off my blog. Even though I had made these beans successfully for decades. Then I realized (after the fact) that the type of casserole dish I used does not hold the heat like a Dutch oven. Either the old-fashioned kind or like a Le Creuset enamel coated cast iron pot. Duh. Then my dear friend Vicki said she looked for my recipe because she liked the beans so much. So, I am re-posting this recipe. But please note: Either use a heavy cast iron pot (as shown in the picture) or cook the beans part of the time on your stove top so they can get really hot and tenderize completely.

Original post: OK, this is a recipe for old fashioned, starting from scratch, no fancy equipment required, baked beans. The kind you find in great BBQ joints – if you’re lucky. And the kind of delicious baked beans that take hours of time in your oven. I’m serious. Great baked beans need to spend several hours in a low and slow oven. But OMG is it worth the time. And patience. Because if there is anything better than baked beans, I have yet to discover what dish that could be! And all thanks go to my father – Albert Merz. Smart, educated, never said a mean word about anyone, Swiss-French musical genius. Not a perfect man, but the one who taught me to be happy and love life.

Now, my dad could build baked beans. But his baked beans did not contain dark rum. That was my addition. And a fine one if I may be so bold. And several of the other additives like Worcestershire sauce, thyme, and savory are all on me. But if he were still alive, I’m sure he would approve. But molasses and brown sugar – oh yah. He would add them in large quantities. Because really, baked beans are meant to be sweet. Or at least, in my opinion, great baked beans are sweet. Other types of bean dishes, not so much. But baked beans – go on over to the dark side and add brown sugar like it was going out of style! And bacon.

And yes, I do have a recipe for Vegetarian Baked Beans that is really very nice. But nothing beats this recipe when you want to go all out. I also have a recipe for Instant Pot and Oven old Fashioned Baked Beans that is lovely. (If you happen to have an instant pot, that is.) (I did but gave it back to daughter Paula because I never used it.) Call me old fashioned, but I like to soak beans and go from there. But the result is very much the same.

But regardless of what recipe you use, homemade baked beans are one of the reasons life is worth living. And because life is too short to eat mediocre food, go the extra mile and fix baked beans from scratch. And yes, I have doctored canned baked beans before to good result. Because once upon a time I too was a working mother and time was of the essence. But now, being a retired person with a bit more time on my hands, I wouldn’t think of paying good money for a small can of baked beans when I could build the whole mess from ingredients I almost always have on hand. So, consider this recipe next time you throw a BBQ party, or your family has requested a ribs, baked beans, and potato salad meal. But please, if you are in the area, let me know. I’ll bring dessert.

Well, that’s it for now. It’s New Years Eve and we are off to a potluck dinner at our neighbors Andy and Amy’s home. And guess what I’m bringing. Got it in one. Baked Beans.

So, to all – HAPPY NEW YEAR.

And as always, peace and love to all.

3 c. dry Navy beans (about 1½ lbs.) picked over and washed 

¾ lb. meaty bacon, cut into ½-inch pieces 

1 lg. yellow onion, chopped

3 garlic cloves, chopped

2 c. water, plus more if needed

2/3 c. molasses (not blackstrap – too strong)

1½ c. ketchup

½ dark rum, opt. (but why?)

2 T. Worcestershire sauce

2 tsp. paprika

½ tsp. seasoned salt

½ tsp. dried thyme leaves

½ tsp. dried savory

tiny pinch ground cloves

freshly ground black pepper

¼ c. Dijon mustard

1½ c. brown sugar, or more to taste

Day 1:

Place the washed dry beans in a bowl. Cover with 2 to 3-inches of cold water and set the bowl on your counter overnight. If it’s very warm in your kitchen, place the beans in your refrigerator. Drain and rinse the beans before using.

Day 2:

Fry the bacon till most of the fat has been rendered in a large covered Dutch Oven. (And no, you don’t drain off the bacon fat unless there is quite a bit. But with lean bacon you shouldn’t have too much.)  Add the onion and sauté just until translucent. Add the garlic and cook for one minute.

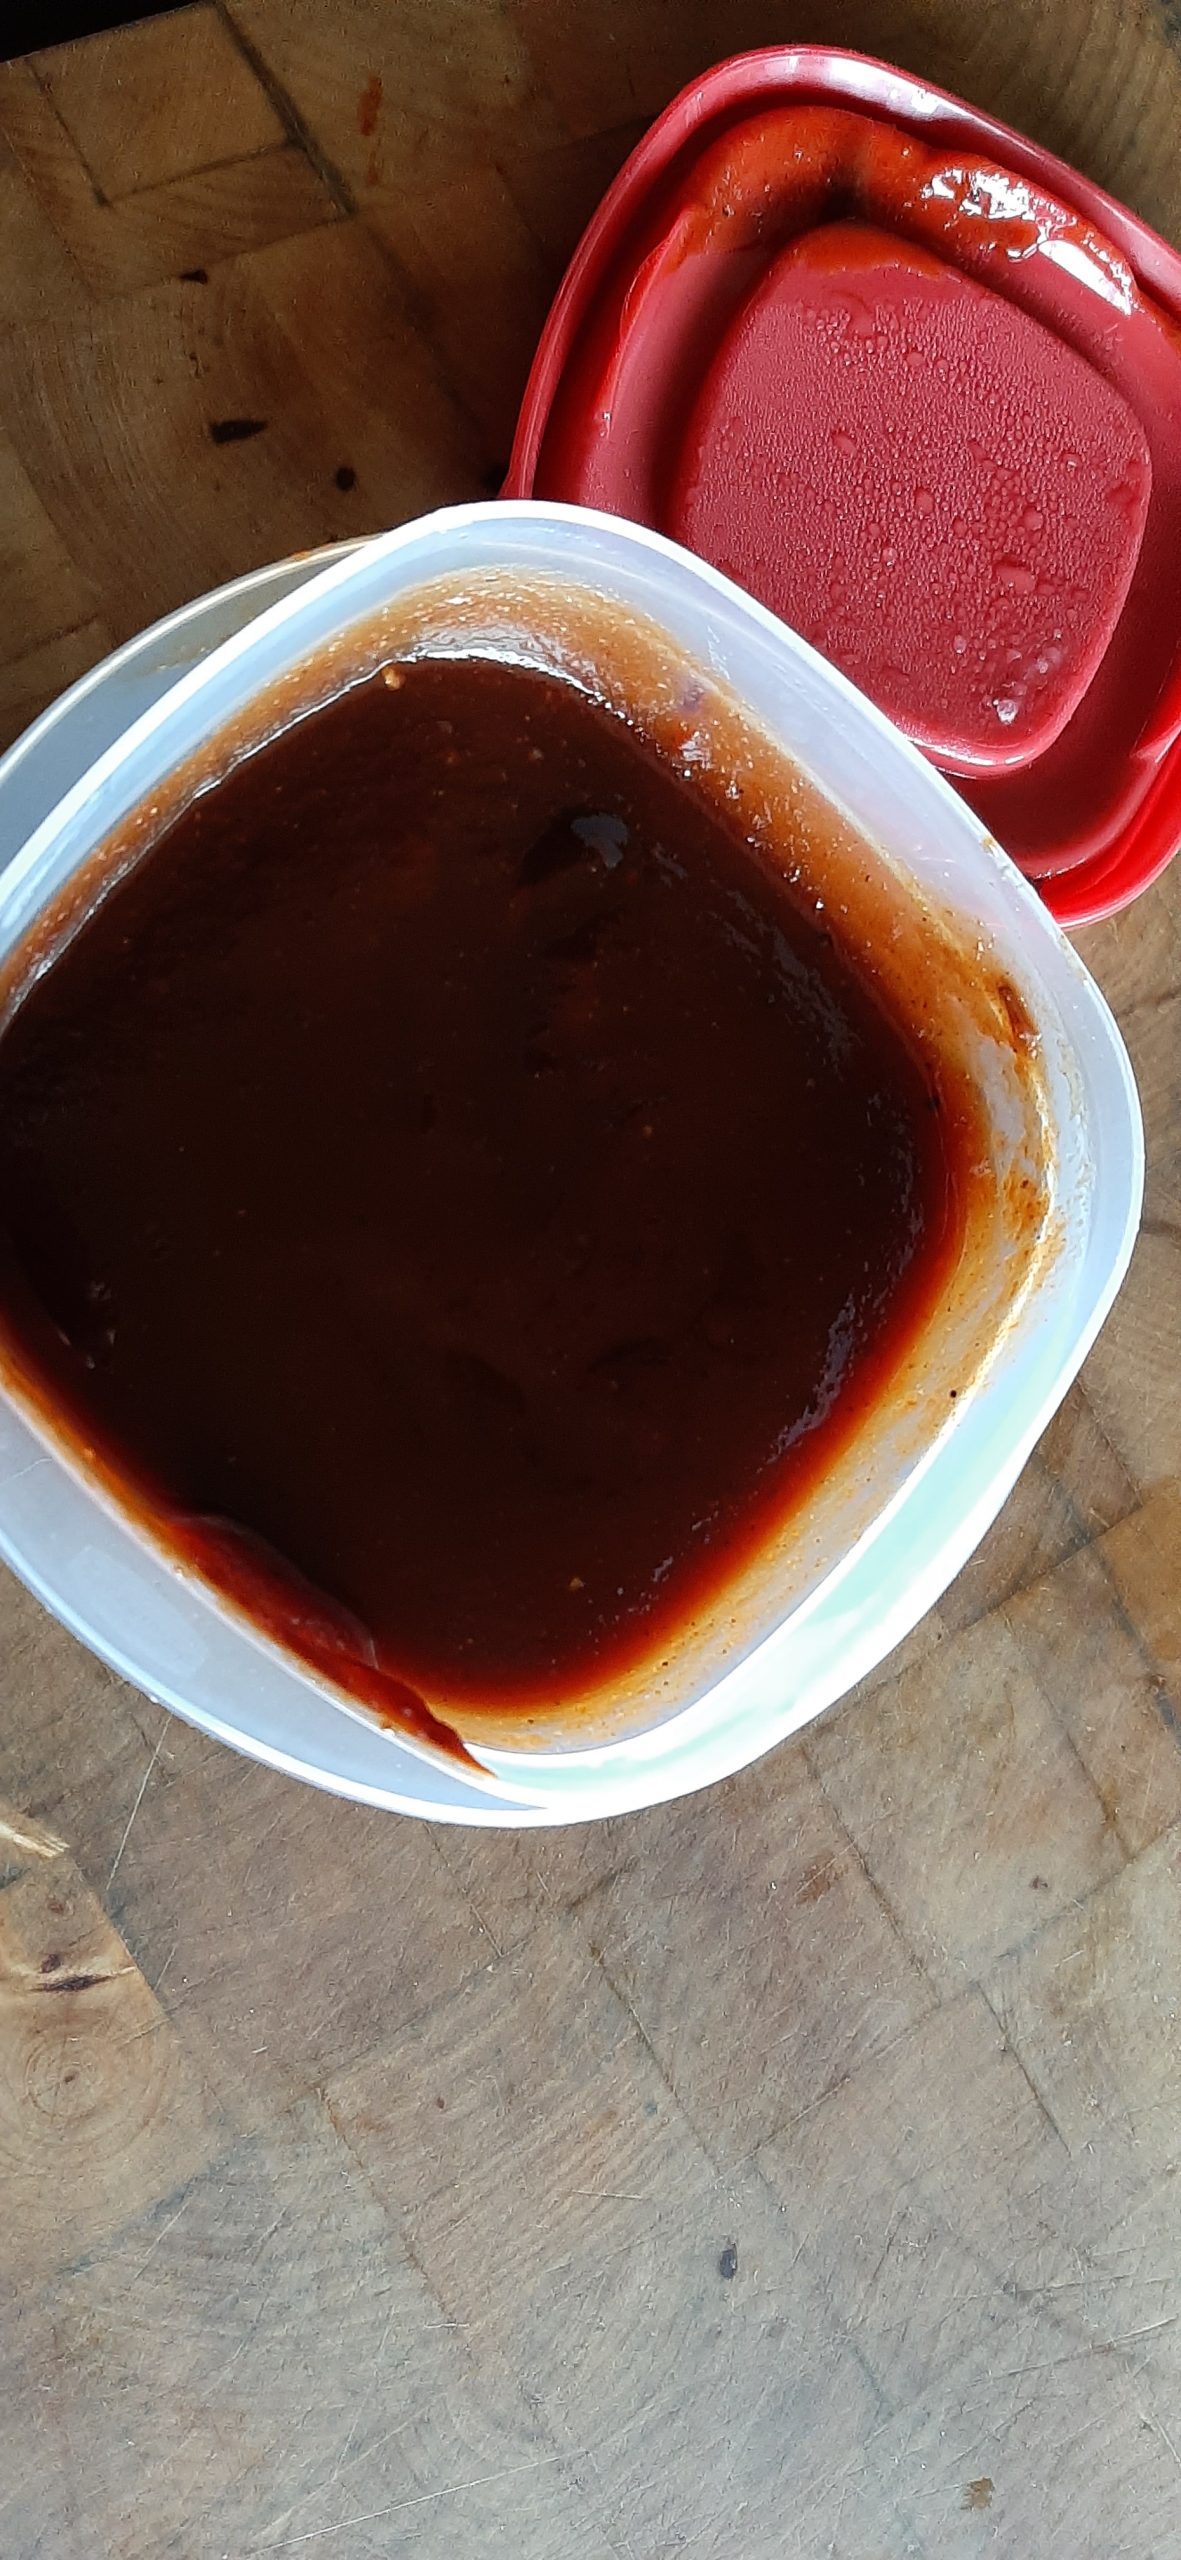
Stir in the drained, soaked beans, water, molasses, ketchup, rum, Worcestershire sauce, paprika, seasoned salt, thyme, savory, cloves, black pepper, Dijon mustard, and brown sugar. Taste the sauce and adjust seasoning and brown sugar as desired.

Cover and bake in a pre-heated 300-degree oven for about 7 hours. Remove the lid and continue baking for another hour so that the top can brown nicely. (During the covered baking time, check the beans periodically to make sure they aren’t drying out too much. You can even give them a stir. Add water as needed. Or salt if required.)

Remove from oven and serve warm.

Can be made ahead, refrigerated, and warmed just before serving.

KANSAS CITY STYLE BBQ SAUCE

Although I have 2 other BBQ sauces on this site, I decided last evening to look for a Kansas City style BBQ sauce recipe. Our good friends Jim and Margo swear by bottled KC Masterpiece BBQ Sauce. But it is not available at our local grocery store. So, I went online looking for a knock-off recipe. What I found was this recipe from heygrillhey.com. I changed a couple of the amounts because of personal preference, but the rest is straight off the site.

Now you may be wondering why I didn’t just make one of my regular recipes. Well, if truth be told, I was not in the mood to cook. I know. Doesn’t happen very often. But I was tired from trying to book our trailer trip in May and finding many of our favorite campgrounds already booked up solid. Grrrrr

So, I wanted a BBQ sauce where I didn’t have to chop a darn thing. Because in my current frustrated condition, I might have chopped off a finger. And not even realized it was gone! So, with this recipe, the hardest thing I had to do was get my small Le Creuset cast iron pan out of the drawer where it lives. After that it was all downhill.

And I am so glad I made this sauce. It is delicious and ever so simple to make. And it was perfect with the ribs I served. (Also stinkin’ easy to make.) (Savory Oven Baked Pork Loin Back Ribs.) I also served half a baked sweet potato to each of us along with some left-over baked beans. A fine meal if I do say so myself. (And so little time spent.)

So, if you too ever find yourself with limited energy but a desperate need for BBQ sauce, this is the recipe for you. (Even if you have all the energy in the world, this is still the recipe for you.)

Well, that’s it for today. I still have a few days to book for our May adventure, and it’s too early to start drinking. So, I better sign off and get back to work.

As always, peace and love to all.   

8 oz. can tomato sauce

½ c. ketchup

6 T. brown sugar

¼ c. apple cider vinegar

¼ c. molasses

1½ tsp. smoked paprika

1 tsp. kosher salt, or more to taste

freshly ground black pepper 

½ tsp. chili powder

½ tsp. granulated garlic  

½ tsp. granulated onion  

¼ tsp. dried mustard

⅛ tsp. crushed red pepper flakes, or more to taste

Whisk all ingredients together in a saucepan. Bring to a boil over medium heat, reduce heat, and gently simmer uncovered for 30 minutes.

Remove from heat and allow to cool completely before transferring to an airtight container. Store in your refrigerator.

This sauce can be used immediately, but best when made ahead. Can be served warm or at room temperature. Great with ribs.

OVEN BARBEQUED FLANKEN-STYLE SHORT RIBS

So, Mr. C. brought a package of flanken-style ribs (I thought he said “Frankenstein”) (my hearing just isn’t what it used to be) home after a provisioning trip to one of our local butcher shops. As he was rattling off all the meat products he had procured, including the ribs, I promptly forgot everything he said and went on with what I was doing. (I was probably deep into researching a recipe, and not paying Mr. C. the attention he should have been accorded. My bad!) Anyway, jump forward a couple of months, and he casually asks me when I plan to use the ribs? Well, of course I said, “how about tomorrow night”? OK then. Bring them on up from the freezer and let them thaw overnight so I can throw some rib rub on them before you place them in the smoker for a couple of hours and finish them off with a quick fling on the grill. I mean really, isn’t that how I like to fix ribs? Well, when he brought up the package, these ribs didn’t look like anything I had ever seen, much less cooked before. And they weren’t Frankenstein ribs, they were flanken-style ribs. So, how to cook these babies?

Basically, flanken-style ribs are pieces of meat thinly sliced across the rib section of beef bones. Each piece consists of 3-4 small pieces of bone, between sections of flavorful meat. They are marbled with fat and connective tissues and are super tender after being marinated for a short time or as in this recipe, baked after being sprinkled with a dry rub. And then finished off with BBQ sauce.

Another tidbit that you might already know, but I never stopped to consider. Short ribs are beef. The pork equivalent of beef short ribs are spareribs, and are not typically referred to as short ribs. (Why am I only learning this after 57 years of being chief cook and bottle washer in my own home!) Anyway, now I know! But back to this recipe.

For a nice change from a regular “English” cut short rib, give this ridiculously easy to prepare, tender, and delicious short rib recipe a try. Really yummy.

And if you live in the Stanwood/Camano Island area, Del Fox Custom Meats carry “Frankenstein” cut short ribs. Tell them Victor sent you.

Peace and love to all.

Rib Rub:

2 T. paprika

2 tsp. freshly ground black pepper

2 T. kosher salt

2 tsp. granulated garlic

1 tsp. cayenne

1 tsp. ancho chili powder (found in most upscale grocery stores in bulk)

2 tsp. dried oregano

2 tsp. dried thyme

Combine all ingredients together. Store in an airtight container.

Ribs:

4-8 bone-in flanken-style short ribs

dry rub

BBQ sauce (see recipe for my favorite BBQ sauce below)

Cover a sheet tray with aluminum foil and a generous amount of nonstick cooking spray. Place the ribs, evenly spaced, on the tray. Coat one side of each rib with a half teaspoon of the dry rub mixture. Flip, and coat the other side with a half teaspoon more of the Rib Rub. Place the ribs in a pre-heated 275-degree oven for 1 hour.

After one hour, remove the ribs from the oven and using tongs, flip them over. Place back in the oven for 1 hour, or until nicely browned.

After the second hour has passed, remove the ribs from the oven and turn the oven temperature up to 450-degrees. Generously coat each side of the ribs with barbecue sauce. Once the oven has reached 450-degrees, place the ribs back into the oven for 2-3 minutes, or until they are crisp on the outside. Serve immediately.   

BOURBON BBQ SAUCE

¼ c. unsalted butter

¼ c. minced onion

3 cloves garlic, minced

¼ c. brown sugar

2 tsp. whole grain mustard

1 c. ketchup

1/3 c. Worcestershire sauce

¼ c. fresh lemon juice

¼ tsp. hot sauce, or to taste

¼ tsp. cayenne

2 T. bourbon

Melt butter in a medium sized covered saucepan. Sauté onion until translucent; add garlic and cook until garlic releases its aroma, about 1 minute. Add remaining ingredients, bring to a boil, reduce heat, cover pan, and simmer gently for 30 to 60 minutes, stirring occasionally. Basically, cook the sauce until it reaches your desired thickness. (Sauce will thicken as it simmers. If the sauce is still too thin after 60 minutes, remove the lid. But be warned – simmer at a very low temperature or you will have BBQ sauce all over you and your kitchen!) Serve sauce warm or at room temperature.


OVEN BAKED BONELESS BEEF COUNTRY STYLE SHORT RIBS

This is another one of those recipes that takes very little time to prepare and tastes like you have been slaving in the kitchen all day. (My favorite kind of recipe.) When in reality, combined with a baked russet or sweet potato and a simple steamed veggie, you are in and out of the kitchen before you can remember why you didn’t feel like cooking in the first place! (This is happening to me more and more as I grow older.)

Don’t get me wrong, I still love to cook. But sometimes a quick and easy dinner is the solution to making life a little easier for me. And as it turns out, possibly easier for you as well.

First thing you should know. This is not a weeknight meal for working people. This dish takes time to bake in a slow oven. But as a weekend dish, it would be perfect. Put it in the oven while you tend to all the other chores you have to accomplish before Monday morning rolls around. (Believe me, I remember those days only too well!) And why does it go together so easily? Well first of all, there are no veggies to cut for the sauce. (I must admit that I was a little skeptical when I first read this recipe from Jenn Segal’s Once Upon a Chef site. (I did mess a bit with her recipe, but basically it’s another wonderful recipe from this gifted chef.) But then I considered the source, and went for it! And I’m so glad I did.

The meat was perfectly seasoned. The sauce was great. And I spent less time on this dish than I usually do just preparing salad dressing!

So if you too want to serve a quick and easy dish that your entire family will love, this is the recipe for you. I served it last evening with a baked sweet potato and steamed green beans. If I had been serving the ribs to children, I would have whipped up some mashed potatoes, because I never met a kid that didn’t like mashed potatoes. And for the veggie, I would probably have steamed some broccoli to crisp tender, then served it with “Secret Sauce” (recipe below). My kids would eat just about anything if it could be dolloped with a bit of this sauce. Works for Mr. C. too!

So next time you are too tired to cook, give this simple recipe a try. Put the ribs in to bake, prep whatever else you plan to serve, then sit down with a good book while your oven does its magic. Permission to relax and take it easy has just been granted.   

2 lbs. boneless beef country style short ribs

1 tsp. kosher salt

freshly ground black pepper

¾ c. ketchup

½ c. dark brown sugar

1 T. apple cider vinegar

1 T. Worcestershire sauce

1 T. Dijon mustard

1 tsp. chili powder

½ tsp. granulated garlic

½ tsp. onion powder

pinch cayenne pepper

Season the ribs all over with salt and pepper, then arrange closely together in an 8-inch baking dish.

Combine all of the ingredients for the BBQ sauce in a small sauce pan and stir until smooth.

Pour 1/3 of the sauce over the ribs. Using tongs, flip the ribs over and spoon another 1/3 of the sauce over top. Reserve the remaining BBQ sauce to spoon over the cooked ribs. Heat the remaining sauce just before serving.

Cover the baking dish with aluminum foil and bake in a pre-heated 300 degree oven for 2½ hours. Remove the foil and remove about 2/3rds of the cooking liquid. Discard the liquid. Bake the ribs uncovered for 30 minutes more, or until the meat is tender and browned. Serve the ribs with remaining warm sauce.

Secret Sauce

3 parts low fat mayonnaise

1 part low sodium soy sauce, or more to taste

Stir together and serve with any veggie that your kids (or spouse) won’t eat all by itself.

INSTANT POT AND OVEN OLD FASHIONED BAKED BEANS

before the beans went in the oven

So call me old-fashioned, but I don’t think a BBQ picnic is complete without baked beans. And not the kind of baked beans containing fancy new ingredients like quinoa, agave nectar, or stevia. I’m talking about the kind of baked beans I’ve been preparing since my early 20s. Dry beans rehydrated with lots of ketchup, brown sugar, bacon, onion, rum, Dijon mustard, etc. (OK, I didn’t use rum or Dijon mustard when I first started making baked beans. But a few concessions for the sake of flavor simply had to be made as I developed as a cook. And I’m sure my father, the baked bean maker in our family would agree with each of my respective inclusions.)

So, because I consider myself to be am open minded person, and my daughter Paula just happened to have gifted me with an Instant Pot a couple of Christmas’s ago, I decided to make this recipe for baked beans a generational mash up.

First and foremost, baked beans have to be made from scratch. (And yes I have cheated over the years and purchased a big old can of baked beans and doctored them up to my liking. But in my defense, that was when I was much younger, still working, and had kidlets littered about the house. However, now that I am retired with virtually nothing stopping me from spending hours in the kitchen, I no longer go that route.)

Anyway, this recipe contains all of the ingredients I used when I began preparing baked beans decades ago, except for of course the aforementioned rum and Dijon mustard.

So if you too love baked beans, give this recipe a try. And yes it still takes a good deal of time to bake beans from scratch. But most of the time you are free to pursue other activities. Very little prep time is involved. The rest of the time your Instant Pot and oven are doing the heavy work.   

So host a picnic before the summer is over. There is just no better way to spend quality time with your family and friends than by getting your faces totally smeared with BBQ sauce, or having your arms and elbows become sodden from the juices dripping out of a luscious hamburger. Good times my friends. Good times!

And for a recipe for Vegetarian Baked Beans – check out the recipe already on this site.

2 lbs. Great Northern beans, picked over and washed (about 4½ cups dry beans)

8 c. water, plus more as needed

1 lg. yellow onion, chopped, divided

2 tsp. paprika

3 garlic cloves, chopped

2 bay leaves

¾ lb. lean thick-cut bacon, cut into small pieces

2/3 c. molasses (not blackstrap – too strong)

2 c. ketchup, or more to taste

½ dark rum, opt.

2 T. Worcestershire sauce

2 T. dried parsley

½ tsp. dried thyme leaves

½ tsp. dried savory

1-2 tsp. seasoned salt

freshly ground black pepper

¼ c. Dijon mustard

1½ c. brown sugar

Place half of the beans, water, half of the chopped onion, paprika, garlic, and bay leaves in the Instant Pot. Note the water level for future reference. Set on high and cook for 35 minutes. (See guide below if not using Great Northern dry beans.) Once machine is done cooking, allow it to naturally release pressure for about 20 minutes. Manually release the remaining pressure and carefully remove the lid. Using a large slotted spoon, lift the beans into a container. Save the water.

Add the remaining half of the dry beans and enough water to bring the level in the pot up to where it was for the first set of beans.

Please note: If you have a large Instant Pot, you may be able to pressure cook all the dry beans at once. If so, lucky you! I only have a 6 quart pot so I had to cook the beans in 2 batches.

While the beans are cooking, fry the bacon in a large fry-pan until crisp. Add the remaining onion and sauté just until translucent. (And no, you don’t drain off the bacon fat unless there is quite a bit. But with lean bacon you shouldn’t have too much.) Remove pan from heat and stir in the molasses, ketchup, rum, Worcestershire sauce, parsley, thyme, savory, salt, pepper, Dijon mustard, and brown sugar.

When the beans are all cooked, drain off all the water. (Save a couple cups of the water just in case additional liquid is needed during the baking process.) After the beans are drained, add them to the fry pan. Taste the sauce and adjust seasoning as required.

Pour into an oven proof covered casserole. Cover and bake in a pre-heated 275 degree oven for about 2 hours. Remove the lid and continue baking for another hour so that the top can brown nicely. (During the baking time, check the beans periodically to make sure they aren’t drying out too much. Add reserved Instant Pot water as needed.)

Remove from oven and serve warm.

Can be made ahead, refrigerated, and warmed just before serving.  

Instant Pot Cooking Time for Dried Beans:

Black Beans–30 Minutes on High Pressure

Chickpeas–40 Minutes on High Pressure

Kidney Beans–35 Minutes on High Pressure

Pinto Beans–25 Minutes on High Pressure

Navy Beans–30 Minutes on High Pressure

CHOCOLATE OLIVE OIL CUPCAKES WITH CREAMY CHOCOLATE FROSTING

So here’s how it all started. My dear friend Vicki gifted me with a bottle of chocolate olive oil. And since I have never been impressed with flavored olive oil, I was naturally suspicious. Especially since it was chocolate and olive oil mixed together. Obviously too foreign a concept to resonate clearly in my brain! So therefore the bottle sat in my pantry for a good couple of years. It may have been hidden, but I never forgot that it was in there.

So one day last week I remembered the poor lonely bottle being ignored in my pantry and sought out recipes for this frankly intimidating ingredient. And oh my! I found this recipe on the Queen Creek Olive Mill site, but added espresso powder and used my own frosting recipe.

Well I’m here to tell you, this recipe makes possibly the best chocolate cupcakes I have ever had the pleasure of putting in my mouth. They turned out super moist, super chocolaty, and absolutely delightful. So much so, that I have spent about 6 hours now looking at other recipes that contain chocolate olive oil, because I know that olive oil is a lot healthier for me than either butter or vegetable oil. Actually I’m looking at sweet recipes that use regular olive oil too. (And yes, you can make this recipe with regular olive oil, as long as it isn’t too herby or bitter.)  

And why the espresso powder in both the cake and frosting recipes you might ask. Well, it’s because coffee is a great way to enhance the flavor of cocoa powder, resulting in a chocolatier flavor. And even if you don’t like the flavor of coffee, you poor deprived person, you won’t notice the coffee flavor. So not to worry.

So next time you want to make cupcakes that will knock the socks off whomever you are gracing with your baked goods, mix up a batch of these little darlings. They truly are out of this world. Thanks again Vicki for your fun gift. Actually, I found a recipe for preparing homemade chocolate olive oil. If it tastes as wonderful as it appears, I will be sharing the recipe with you in the near future. That and a couple of other homemade recipes for fabulous products introduced to me by my sister-in-law Katie – preserved lemons and black garlic. Thanks again Katie.

(And yes I know you can buy preserved lemons and black garlic in upscale markets or over the internet, so I will be posting recipes that include these 2 fantastic taste treats in the next couple of weeks. But because I’m cheap frugal, I’m going to show you how to make them at home too. That is, after I learn how first. Stand by!)

  • 1¾ c. unbleached all-purpose flour
  • 2 c. sugar
  • ¾ c. cocoa powder (I use Ghirardelli Majestic Premium Cocoa Powder from Cash & Carry)
  • 1½ tsp. baking powder
  • 1½ tsp. baking soda
  • 1 tsp. salt
  • ½ tsp. instant espresso coffee (I use Medaglia D’oro)
  • 2 eggs
  • 2 tsp. vanilla
  • ½ c. chocolate olive oil or “light” regular olive oil
  • 1 c. whole milk
  • 1 c. boiling water

Using a regular whisk, mix the flour, sugar, cocoa, baking powder, baking soda, salt, and espresso together in the bowl of your mixer. (You can also pour the ingredients into the mixer bowl through a fine mesh strainer.) You just want to eliminate any possible lumps.

Using the beater, add in the eggs, vanilla, and chocolate flavored olive oil. Add the milk and beat to blend. Add the boiling water. Continue to beat at low speed until well blended.

Pour the thin batter into cupcake paper lined cupcake pans and bake in a preheated 325 degree oven for 20 to 25 minutes. Cupcakes are done when a toothpick inserted into the center comes out clean.

Cool in pan for 10 minutes then remove to wire rack to finish cooling. Top with frosting.

Hint: Because the batter is so thin, I pour it into a glass measuring cup to fill the cupcake papers ¾ full. Don’t fill them any higher because the batter is going to expand a great deal. Should make 24 cupcakes.

Creamy Chocolate Frosting:

  • 3 c. powdered sugar, or more as needed
  • 7 T. unsweetened cocoa powder
  • ½ tsp. instant espresso coffee
  • 1/8 tsp. salt
  • 6 T. unsalted butter, room temperature
  • 1 tsp. vanilla extract
  • 5 T. half & half or heavy cream, or more as needed

In a medium bowl, sift the confectioners’ sugar, cocoa, instant espresso powder, and salt or press through a fine mesh strainer; set aside. (You just want to break up any lumps.)

In a large bowl, beat butter and vanilla together until smooth and creamy. Gradually beat in sugar mixture alternately with half & half. Beat until very light and fluffy. If necessary, adjust consistency with more half & half or powdered sugar.


GRILLED SOY SAUCE MARINATED PORK TENDERLOIN

When we were in Salt Lake City recently to visit my son and his family, I came up with this recipe for our father’s day celebration meal. Everyone liked it, so when we returned home I made it again for just Mr. C. and me. Still tasted good, so here goes with yet another recipe for pork tenderloin. (In the next couple of days I will publish my recipes for Grilled Pork Tenderloin and Noodle Casserole and Asian Salad with Grilled Pork Tenderloin Slices to help you figure out what to do with all the pork tenderloin you have left-over from the many pork tenderloin recipes on this site!)

Anyway, this is my take on a soy sauce based marinated tenderloin. It’s ever so flavorful without beating you over the head with its Asian goodness. One might even say it produces a subtle Asian inspired flavor. But anyone who has ever met me knows that I am absolutely unable to do anything with subtlety, so you’ll have to be the judge on this one.

So give it a try while it’s still officially grilling season. It’s easy to prepare and feeds several people, unless of course you are feeding teenagers, then my advice to you is to double the recipe. Happy grilling!

And don’t forget to garnish the sliced pork with sliced green onions. Right kids!?!?

  • ¼ c. extra virgin olive oil
  • 1/3 c. soy sauce (if you use low sodium soy sauce, add an additional ½ teaspoon sea salt)
  • 6 garlic cloves, finely chopped
  • 2-3 T. finely minced fresh ginger
  • ¼ tsp. crushed red pepper flakes
  • ½ tsp. sea salt (sea salt contains minerals that add to the marinade flavor)
  • freshly ground black pepper (not too much)
  • 2 pork tenderloin, trimmed of silver skin and excess fat
  • 2-4 thinly sliced green onions, opt.

Combine the olive oil, soy sauce, garlic, ginger, red pepper flakes, sea salt, and pepper in a shallow dish or zipped plastic freezer bag. Add the tenderloin and turn in the marinade until all surfaces are introduced to the liquid.

Place in a cool place for at least 5-6 hours. If marinating longer, like overnight, place in the refrigerator. Bring meat to room temperature before placing on the grill.

Heat your grill to about 300 degrees. (And yes I know, every other recipe you read will say to grill pork tenderloin at about 500 degrees. I totally disagree. I find 300 on my Weber gas grill to be perfect for this recipe.)

Place room temperature marinated tenderloins on grill surface. (Do not rinse off the marinade. Just hold it out of the marinade for 5 seconds or so before placing on the grill.) Close lid, and walk away for 7 minutes. Flip the meat, close the lid again, and walk away for another 10 minutes or so. Using a thermometer (instant is the easiest), grill until the internal temperature reaches 140 degrees.

Remove from grill and tent with aluminum foil for at least 8 minutes. Then thinly slice on the diagonal and place on a serving dish. Garnish with green onions and serve immediately.    


GRILLED PORK TENDERLOIN WITH BOURBON BBQ SAUCE

So – let’s talk pork tenderloin. I know I have said it before, but for the greatest bang for your buck, you really can’t beat pork tenderloin. And I’m sure most of you already know that it is no longer necessary to cook the pickles out of pork to insure against contracting trichinosis. So pork tenderloin prepared carefully, need no longer resemble and taste like dried shoe leather. The secret – don’t over-cook the meat! And then, regardless if you brine, marinate, rub, sauce, etc. the pork, it will turn out tender and juicy. And seriously, don’t hesitate to cook your pork with a little pink still showing.  

So, about this recipe. The pork preparation part is from the Dr. Dan 101 cooking for two site (The best grilled pork tenderloin – Memphis style). And yes, I made a few deviations from the original recipe, but I don’t feel anything was lost in the translation. The BBQ sauce – well let’s just say I’ve been making a version of this recipe for about 40 years.

This recipe for pork tenderloin takes advantage of both a simple brine and a dry rub. Sounds onerous, but really both the brine and rub are easy and fast to throw together. And the result is nothing less than delicious. And exceedingly tender and juicy. Pretty much perfect in every regard.

So do yourself a huge favor, and serve this pork and BBQ sauce to your family and friends while the true grilling season is upon us. (And yes I know you can grill any time of year. But who likes to don a parka just to cook a piece of meat when it’s cold and possibly raining or snowing outside. Not this girl, that’s for sure.)

An interesting note about terminology: Our dear friend Jim enlightened us last evening on the proper usage of the terms “grilling” and “barbecuing”. Simply put, and if I understand correctly, when you barbecue meat, you cook it low and slow using slowly circumvented hot air or smoke from wood chips, with the grill lid closed. When you grill, the lid is mostly up, with direct, fairly high heat coming from under the meat/veggies/fruit, etc. For example you would probably grill chicken breasts, but you would most likely barbecue a pork butt. Actually, most large grills are equipped to both grill and barbecue. And as is the case with many foods cooked on a grill, a little bit of “grilling” and “barbecuing” actually occurs in the quest for a delicious finished product. To prove my point, this recipe includes both grilling and barbecuing techniques. Happy summer and happy outdoor cooking.

  • 4 c. water
  • 4 T. kosher salt
  • 5 T. brown sugar, divided
  • 2 pork tenderloin, trimmed of excess fat and silver skin
  • 2 T. paprika
  • freshly ground black pepper
  • ½ tsp. chili powder
  • ½ tsp. dry mustard
  • ½ tsp. granulated garlic
  • ½ tsp. onion powder
  • lg. pinch cayenne pepper
  • vegetable oil
  • thinly sliced green onions, garnish, opt.

Combine water, salt, and 3 tablespoons of the brown sugar together in a one-gallon food storage bag or a shallow glass container. Add the tenderloin to the brine and refrigerate for 2 to 4 hours.

Meanwhile combine the paprika, remaining 2 tablespoons brown sugar, black pepper, chili powder, cayenne, dry mustard, granulated garlic, and onion powder.

When the tenderloins have finished their time in the salt water bath, rinse well under running water and pat dry with paper towels.  

Place the tenderloins on a small shallow baking pan. Sprinkle all over with the rub. Cover with plastic wrap and set in a cool place (not the refrigerator) for a couple of hours. 

Meanwhile, heat your grill. If you have a large enough grill, heat 1 section to 450-500 degrees. Heat another section to about 300 degrees.  Oil both parts of the grill with the vegetable oil.  

Grill each tenderloin for about 3 minutes per side on the hotter part of the grill with the lid up. Immediately transfer to the cooler section, close the lid, and grill/barbecue each side again until the internal temperature reaches 140 degrees at the thickest point. (I use my instant read thermometer.)  Remove from grill and tent with aluminum foil for at least 15 minutes before thinly slicing on the diagonal. Garnish with sliced green onions and pass the Bourbon BBQ Sauce.

BOURBON BBQ SAUCE

  • ¼ c. unsalted butter
  • ¼ c. minced onion
  • 3 cloves garlic, minced
  • ¼ c. brown sugar
  • 2 tsp. whole grain mustard
  • 1 c. ketchup
  • 1/3 c. Worcestershire sauce
  • ¼ c. fresh lemon juice
  • ¼ tsp. hot sauce, or to taste
  • ¼ tsp. cayenne
  • 2 T. bourbon

Melt butter in a medium sized covered saucepan. Sauté onion until translucent; add garlic and cook until garlic releases its aroma, about 1 minute. Add remaining ingredients, bring to a boil, reduce heat, cover pan, and simmer gently for 30 to 60 minutes, stirring occasionally. Basically cook the sauce until you reach desired thickness. (Sauce will thicken as it simmers. If the sauce is still too thin after 60 minutes, remove the lid. But be warned – simmer at a low temperature or you will have BBQ sauce all over you and your kitchen!) Serve sauce warm or at room temperature.


OLD FASHIONED POTATO SALAD

en theOLYMPUS DIGITAL CAMERA

If you want a potato salad recipe that is healthy, light in calories, contains new and exciting ingredients, and could be featured in any magazine worth its salt in tofu, go no further. This is not the recipe for you! This is a recipe for good old fashioned potato salad that you might indulge in once a year, say, at your family’s annual picnic. (At least, I only let myself indulge in this potato salad on very rare occasions.) Because this is one of those comfort foods that once you take a bite, there is simply no going back (except for seconds of course!) This is the potato salad my children grew up with, and enjoyed every time it was prepared.

So I suppose by now you have glanced down at the list of ingredients. The first one is a beaut, ain’t it? But before you completely panic, let me tell you I use Best Foods “light” mayonnaise (Hellmann’s east of the Rockies) so it’s not quite as bad as it seems. From there on down it actually could be worse. For example, my son-in-law Marks mother made a similar potato salad but added cooked bacon and the bacon grease! So like I said, it actually could be worse. (BTW, crisp bacon in potato salad is amazing. I just can’t go that far however. I must draw the calorie line somewhere, and adding bacon is just too over the line for me!)

Once you’ve gotten over the shock of the 2 cups of mayonnaise, your reaction to the recipe should level off a bit. Of course there are potatoes in the recipe. Duh! (Not the best carb you could ask for.) But there’s celery, onion, and dill pickles. They’re veggies at least. And eggs are a great protein source. So all in all, not the worst thing you could eat. (That distinction belongs to any food deep fat fried according to the “how stuff works” web site.) In fact, potato salad isn’t even listed as one of the top 10 villainous foods. I was surprised however at some of the foods that made the list. For your viewing pleasure, I have included the other 9 culprits:

Bacon (no surprise), sodas (duh), artificial sweeteners (never have trusted them), shelf-stable condiments like ketchup, mustard, pickle relish, etc. (big surprise), swordfish and some tuna (high levels of mercury), processed meats (no surprise), microwave popcorn (what??), bagels (at least bagels made with only refined white flour), and dairy (big surprise). For more information about why these items are bad boys, visit science.howstuffworks.com. But back to this recipe…..

This is a spinoff of a recipe first published in Sunset Magazine back in the 70s. It is simple to prepare, delicious, and slightly piquant from the vinegar and dill pickles. So someday soon treat yourself, your family, and friends to a dish from a bygone era. And yes, I do enjoy some of the new and healthy ways to prepare potato salad. But when I want to embrace my roots, (or should I say – embrace my tubers) and fix a dish that I know everyone is going to enjoy, I boil up some potatoes, and slather them in one of the tastiest dressings I know how to prepare.

So have fun this summer, cook up a storm, and invite the gang over for a good old fashioned BBQ. For more wonderful summer recipes, search this site under BBQ & Picnic Recipes. Cheers!

  • 2 c. mayonnaise
  • 2 tsp. dill weed
  • 2 tsp. sugar
  • 2 T. prepared mustard (not Dijon – the old fashioned yellow kind)
  • 2 T. white vinegar (plain old fashioned vinegar – none of this white wine or fancy vinegar)
  • 1 tsp. celery seeds
  • 2-3 tsp. salt (if you salted the cooking water for the potatoes, start with 2 teaspoons of salt)
  • freshly ground black pepper
  • 3 stalks celery, finely chopped
  • 1 small onion, finely chopped
  • 3 large dill pickles, finely chopped
  • 10 medium potatoes, cooked* (I use russet or Yukon Gold)
  • 8-10 hard boiled eggs 
  • paprika, garnish, opt.

Combine mayonnaise, dill weed, sugar, mustard, vinegar, celery seed, salt, and pepper in a mixing bowl. Set aside.

In a large mixing bowl, combine the celery, onion, and chopped dill pickles. When the potatoes have sat draining for about 10 minutes, scoop them into the mixing bowl over the celery, etc.. Let the potatoes continue to cool a bit while you peel and grate the hard boiled eggs.

Carefully stir in the dressing. Try not to break the potato chunks as you combine the ingredients. Then stir in the grated eggs. If the salad seems a bit dry, whisk a bit more mayonnaise, vinegar, and mustard together and stir into the salad. Taste and adjust seasoning. Scoop into a salad bowl, cover, and refrigerate until chilled. Can be prepared a day ahead.

*How to cook perfect potatoes for your salad:

Peel, rinse, and cut the potatoes into between ¾ & 1-inch pieces

Place cut potatoes in a large pot. Cover with water (water level should come about 1-inch above potatoes), and season the water with 1 tablespoon of kosher salt.

Bring to a boil over medium-high heat, then reduce heat to medium-low, cover, and simmer until potatoes are just tender all the way through, about 8-12 minutes. Test after 7 minutes. (Don’t over-cook the potatoes). A paring knife should slide in and out of a potato chunk fairly easily when the potatoes are done.

Drain the potatoes into a colander and let sit for about 10 minutes. Then transfer to the mixing bowl with the celery, onion, and chopped dill pickles and proceed with the recipe as written above. 

This recipe was updated on 7/18/2021

VEGETARIAN BAKED BEANS

OLYMPUS DIGITAL CAMERA

So, I have to tell you, starting a pot of baked beans without first frying up about a half pound of bacon just felt sick and wrong. I mean really, how could baked beans taste right without this quintessential ingredient? But I wanted a vegetarian side dish that could, if need be, stand in as the compulsory protein if one of my guests didn’t eat meat. So I took my standard recipe and simply left out the first ingredient.  

So if you too would like to step over to the dark side, I suggest you give this recipe a try as written. It produces absolutely lovely baked beans and I promise you will not miss the bacon in the slightest. Even Mr. C, whose middle name actually should have been “bacon” loved the beans and didn’t miss it in the least.

So next time you invite the gang over for a backyard BBQ, include these beans in your menu planning. They are perfectly delicious and the best part – they are truly at their finest when they have had a day or two to mellow out in the refrigerator. So, for you, that means one less dish to prepare on the day of the event. (As you know, I am just crazy about dishes that can and really should be prepared ahead of time.)

For additional recipes that are fun to serve at a picnic/BBQ, search under the heading BBQ & PICNIC RECIPES. Cheers to the lazy, hazy, crazy days of summer!

And for a sad story about baked beans, see my story below. Sigh…… 

  • 1 lb. small navy beans
  • water
  • ¼ c. maple syrup (the real stuff!)
  • 1 c. brown sugar
  • ½ c. molasses, or more to taste (regular or part black strap)
  • 1 small can tomato paste
  • 1 24-oz. bottle of ketchup
  • ¼ c. yellow mustard
  • ¼ c. Worcestershire sauce
  • 1 T. kosher salt, or more to taste
  • freshly ground black pepper
  • 1 yellow onion, chopped

Carefully wash the beans removing any matter that doesn’t look like a healthy, fat dried bean. Place in a large bowl and cover with water by about 3 inches.  Place in refrigerator overnight. Next day, rinse and drain the beans.

Place in a covered pot with enough water to cover the beans by about 3 inches. Bring to a boil, reduce heat, and simmer gently until the beans are tender, about 40-45 minutes. (Do not worry that the beans will become mush while they are spending their time in a low oven. They will be just fine!)

Drain the cooked beans and place in a Dutch oven. (The main thing here is that the beans must be covered as they bake. If you don’t have a Dutch oven, you can bake them in any kind of pan, as long as the pan is covered, even if it’s covered with aluminum foil. However, it may take a longer baking time if you use aluminum foil rather than a tight cover. Sad story to follow.)

In a medium sized bowl whisk together the maple syrup, brown sugar, tomato paste, ketchup, yellow mustard, Worcestershire sauce, salt, and pepper. Add the mixture to the beans along with the chopped onion. (I usually rinse out the ketchup bottle with a little water and then throw the liquid in with the other ingredients.)

Bring to a boil, cover, and bake in a pre-heated 225 degree oven for 3-4 hours. (Check the beans periodically to make certain they are not getting too dry. While you have the lid off, give them a little stir. Add water as needed.) Uncover the beans the last hour to brown them up a bit. Best made the day ahead and either re-warmed or served at room temperature.

Sad story:

So here it is, 3 days before I plan to serve baked beans to our home concert (JazzVox) guests, and I place 4 pounds of beans to soak. (quadruple recipe) Next day I cook the beans in water for a short time, but not long enough. Then I throw the rest of the recipe together in a large pan and cover the whole mess with aluminum foil. Seven (7) flippin’ hours later the beans are still in the oven and they are still crunchy! There is obviously no hope for these beans. So I did what any self-respecting cook would do. I tossed the whole shebang into the yard waste barrel, sent a little invocation to the Gods of yard waste asking for their help with the next batch, and started all over again. Sad, right?

And just to prove that this girl obviously can’t learn from her mistakes or that the Gods were watching the World Cup while I was requesting assistance, the second batch of beans still didn’t have that wonderful creamy mouth feel that should be the hallmark of really good baked beans. Once again, I simply didn’t cook the beans long enough on the stove top before adding the other ingredients. So once again, the beans were in the oven about 7 hours. OK, this time they weren’t crunchy. They tasted fine, but I knew they could be better.

So the moral of my sad story is to cook your beans until they are tender. Not over cooked, but perfect. And when you figure out how to do that, would you please let me know!