In my quest to make bread baking easier for myself and of course for you too, I recently posted a fabulous recipe for Easy Overnight Chewy Bread (No Knead). And I love that bread. But there are just those times when instead of a boule (round loaf) you want individual rolls. So, I came up with this recipe that could not be easier to make. Thus, the title. But it is still a two-day process. Consider yourself warned.
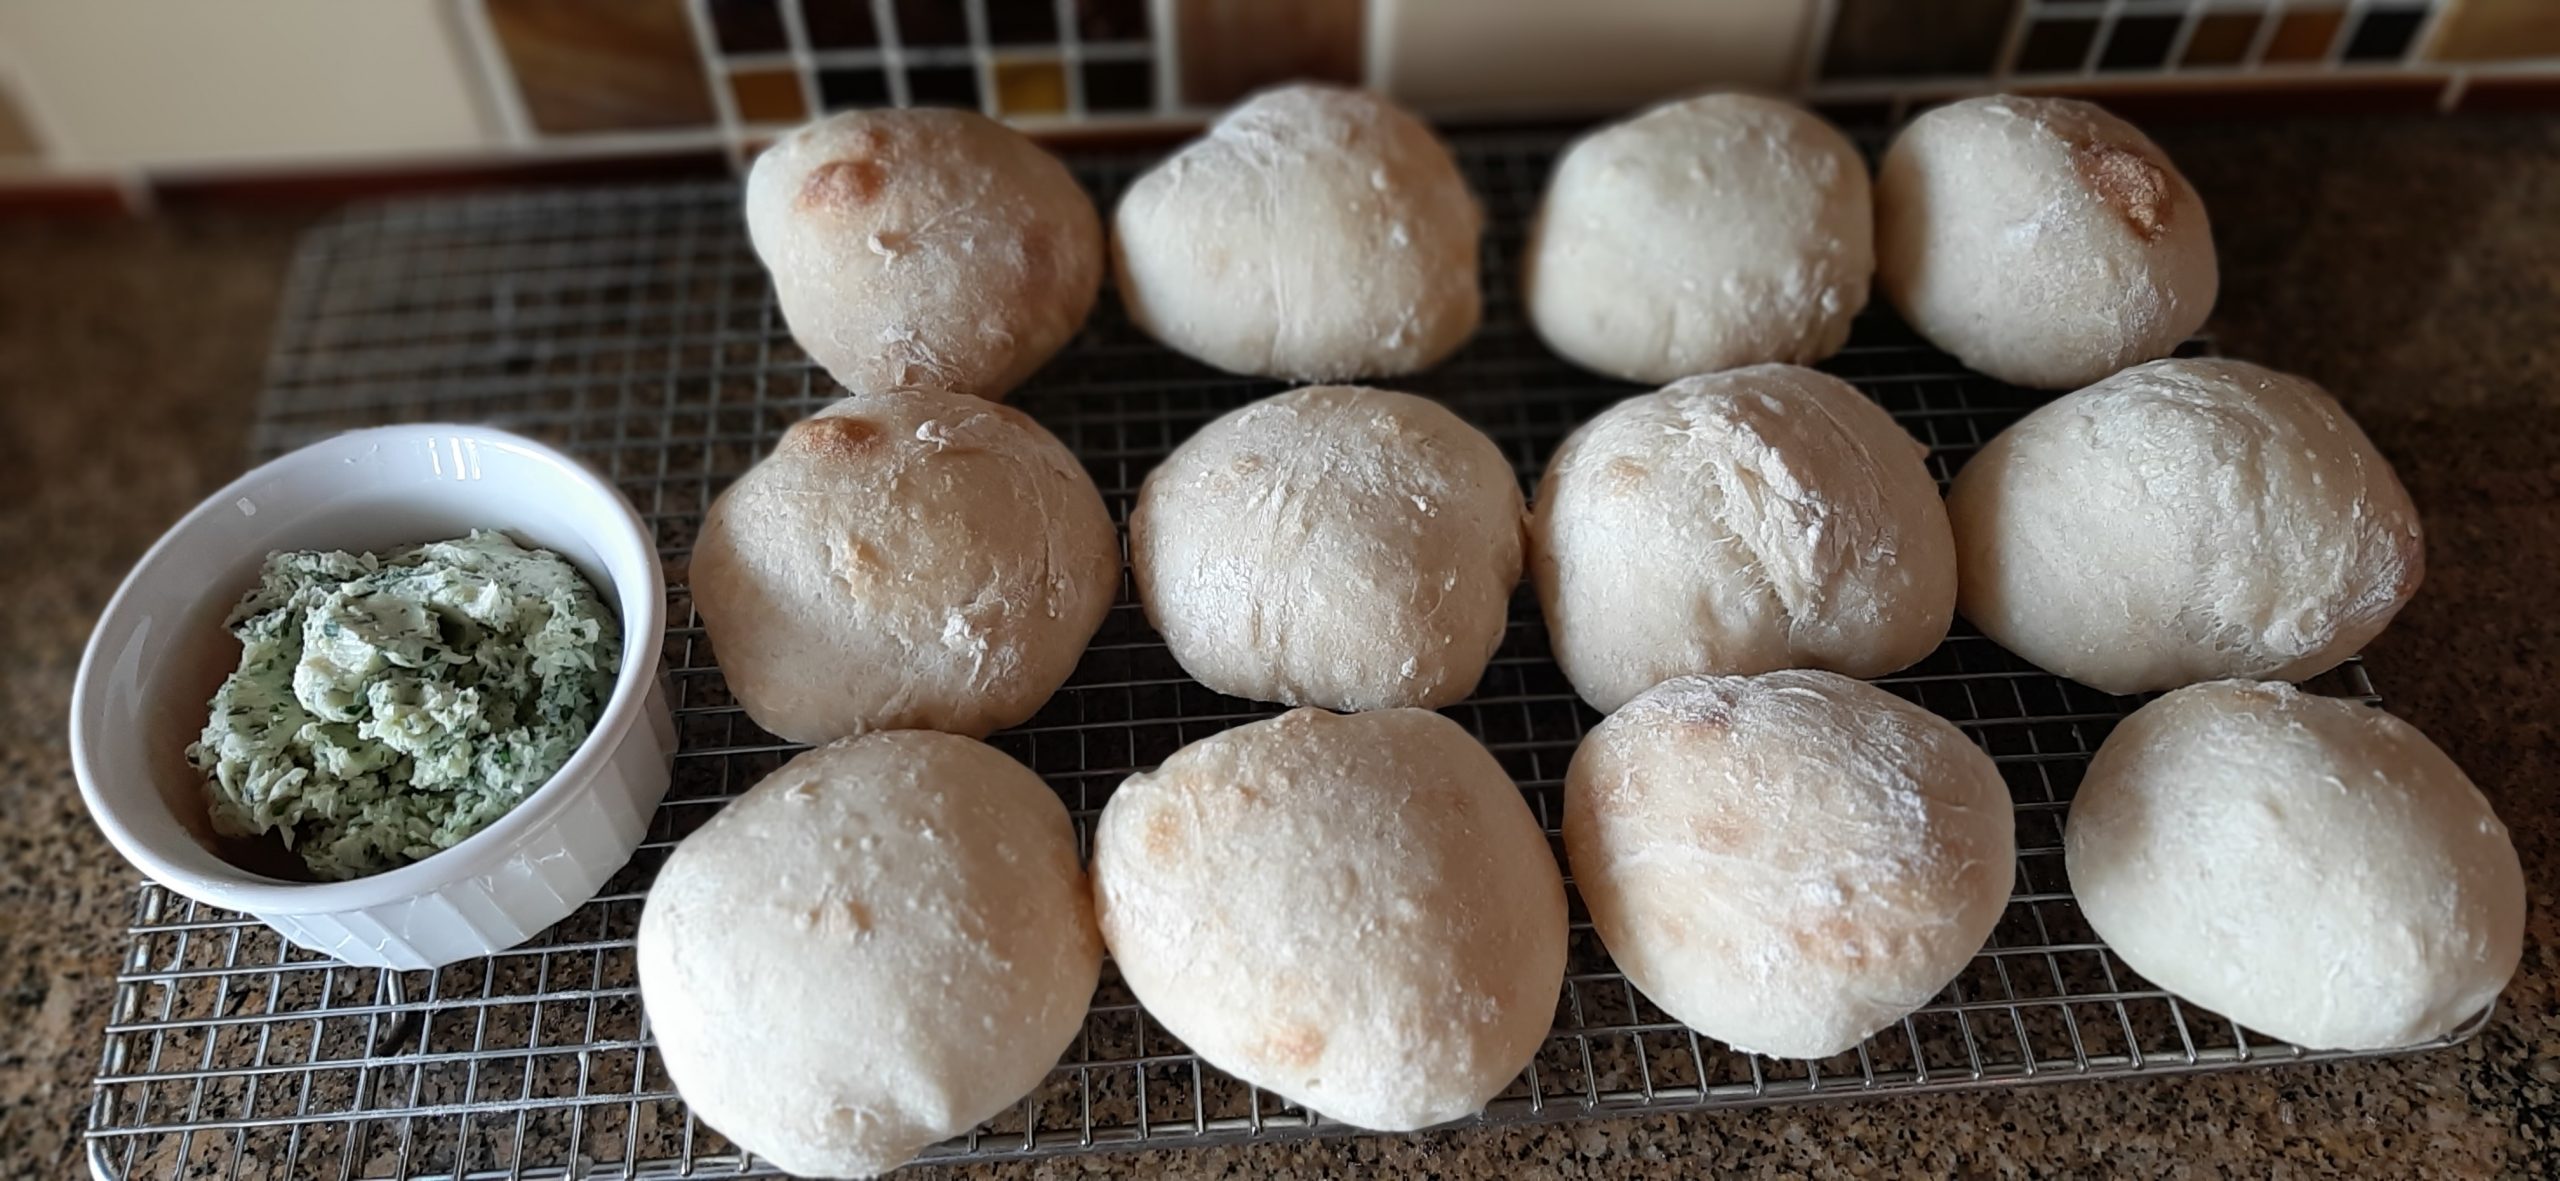
But boy are these rolls delicious. Chewy and flavorful, especially when slathered with Garlic Herb Butter. (See recipe below.) And perfect for a beginning bread baker.
No kneading. No guessing how much flour to use. You don’t even need to worry about warming the water. Water right out of the tap is fine. You simply need to follow the simple instructions and prepare yourself for all the rave reviews you will receive from your family and friends. (Remember to remain humble.) (Good cooks are always humble.) (That’s the rule!)
So, if you too ever find yourself needing great dinner rolls with little time to spend on the effort, this is the recipe for you.
That being said, my work here is done.
Peace and love to all. And happy bread baking.
4 c. bread flour, fluffed, plus more for shaping the dough
2 tsp. kosher salt
1 tsp. instant dry yeast
2 c. room-temperature water
In a large bowl, stir the bread flour, salt, and yeast together. Add the water and mix with a sturdy rubber spatula until all the flour is incorporated. The dough will be wet and sticky. Cover the bowl with plastic wrap and leave on your counter overnight. The following day the dough will have risen somewhat but will not look like other risen bread dough.
Line a baking sheet with parchment paper. Preheat oven to 425-degrees.
Spread a generous amount of flour on a work surface or pastry cloth. Using a stiff spatula remove the dough from the bowl to the floured surface and turn the dough several times to coat it with flour.
Coating your hands with flour, divide the dough into about 12 equal portions, turning each piece in the flour to coat. Shape each piece into a ball, pulling edges under and pinching together to make a smooth top. Place the balls on prepared pan a couple inches apart. Let the shaped rolls rise for 20 minutes. (The rolls will not rise a lot during this 20-minute rest.)
Bake for about 15 minutes or until the internal temperature reaches at least 205-degrees. They will not brown very much. That is just fine.
Remove from oven and transfer rolls to a wire rack to cool completely.
To serve, heat them for about 45 seconds in your microwave. Great served with Garlic Herb Butter. See recipe below.
GARLIC HERB BUTTER
½ c. unsalted butter, room temperature
1 scant T. fresh finely chopped parsley
1½ tsp. fresh finely chopped thyme leaves
1/8 tsp. granulated onion
1/8 tsp. granulated garlic
¼ tsp. kosher salt, or more to taste
freshly ground black pepper
Combine all ingredients. Store covered in your fridge but serve at room temperature.
I can’t help myself when it comes to trying easy bread recipes. Especially recipes that contain only the 4 basic ingredients (flour, salt, yeast, and water) you find in any yeast bread recipe, no matter how many other items might be included in the list of ingredients. After all my years of baking bread, I finally realized that you only need these 4 essential ingredients to make unimaginably delicious bread. And for just pennies, rather than several dollars spent when purchasing the same type of bread at your local grocery store or bakery. And this recipe from the ciaoflorentina.com site could not be easier.
I did change the baking directions on Florentina’s recipe however, because I really like to bake a simple bread like this one in a Dutch oven* or cloche** (clay bread baker). And Florentina’s recipe called for baking the bread on a pizza stone.
Because another important thing I have learned from years of baking bread – I CAN NOT TURN OUT HOMEMADE BREAD QUITE AS PERFECT AS BREAD BAKED IN A COMMERCIAL OVEN***. However, when I use a Dutch oven (regular cast iron or Le Creuset) or clay cloche, I can come pretty darn close. And for my pennies spent, close is good enough. And in most cases, better than just good enough. Wonderful, to be exact.
So, if you too are into baking bread, give this amazing recipe a try. Just be prepared and have soft butter available. But try to let the freshly baked bread cool before diving into it. I know, I’m asking a lot of you. But trust me, as soon as the bread is cool, slice off a big hunk and liberally spread it with butter. After all, who deserves a treat more than you?!
And on that happy note I wish you, as always, peace and love. And happy baking.
3½ c. unbleached all-purpose flour, plus more for dusting
1 tsp. fine sea salt
2 tsp. instant yeast
1½ c. warm water
In the bowl or your stand mixer, combine the flour, salt, and yeast with the paddle attachment.
Add the warm water and mix until a soft dough has formed. Cover the bowl loosely with plastic wrap and a tea towel. Allow the dough to rise at room temperature for about 3 hours or until doubled in size.
Place a bit of flour on a pastry cloth or clean kitchen counter. Transfer the bread dough onto the floured surface using a stiff spatula. Then flour your hands and form the dough into a boule (ball shape). (Do not knead the dough or handle it more than necessary.)
Place the formed bread dough on top of parchment paper and using a serrated knife, gently carve an X on top. Rest the formed dough while you place a Dutch oven or cloche on the middle rack of your oven and turn the temperature dial to 450-degrees.
Once the oven has come to temperature, carefully remove the hot Dutch oven, and gently place the boule and parchment paper inside the Dutch oven.
Cover and bake the bread for 25 minutes. Remove the lid and bake another 10 minutes or until golden brown on top and the internal temperature reaches 205-degrees.
Remove from oven and transfer to a wire rack to cool completely before slicing.
*Using a Dutch oven helps to mimic the environment of a commercial oven. That being a moisture-sealed chamber with intense and (mostly) even radiative heat. Dutch ovens offer ample thermal mass to ensure a temperature-stable baking environment with their thick cast iron walls.
**A cloche is designed to support bread dough while it bakes creating a perfect rise. Cloches should have tight-fitting lids that trap steam, giving the bread a lovely crispy golden-brown crust. A good cloche also comes with a heavy-duty bottom that also ensures a thick, crispy, golden base.
***Commercial ovens provide heat from both below and above. They can also inject steam into the baking chambers.
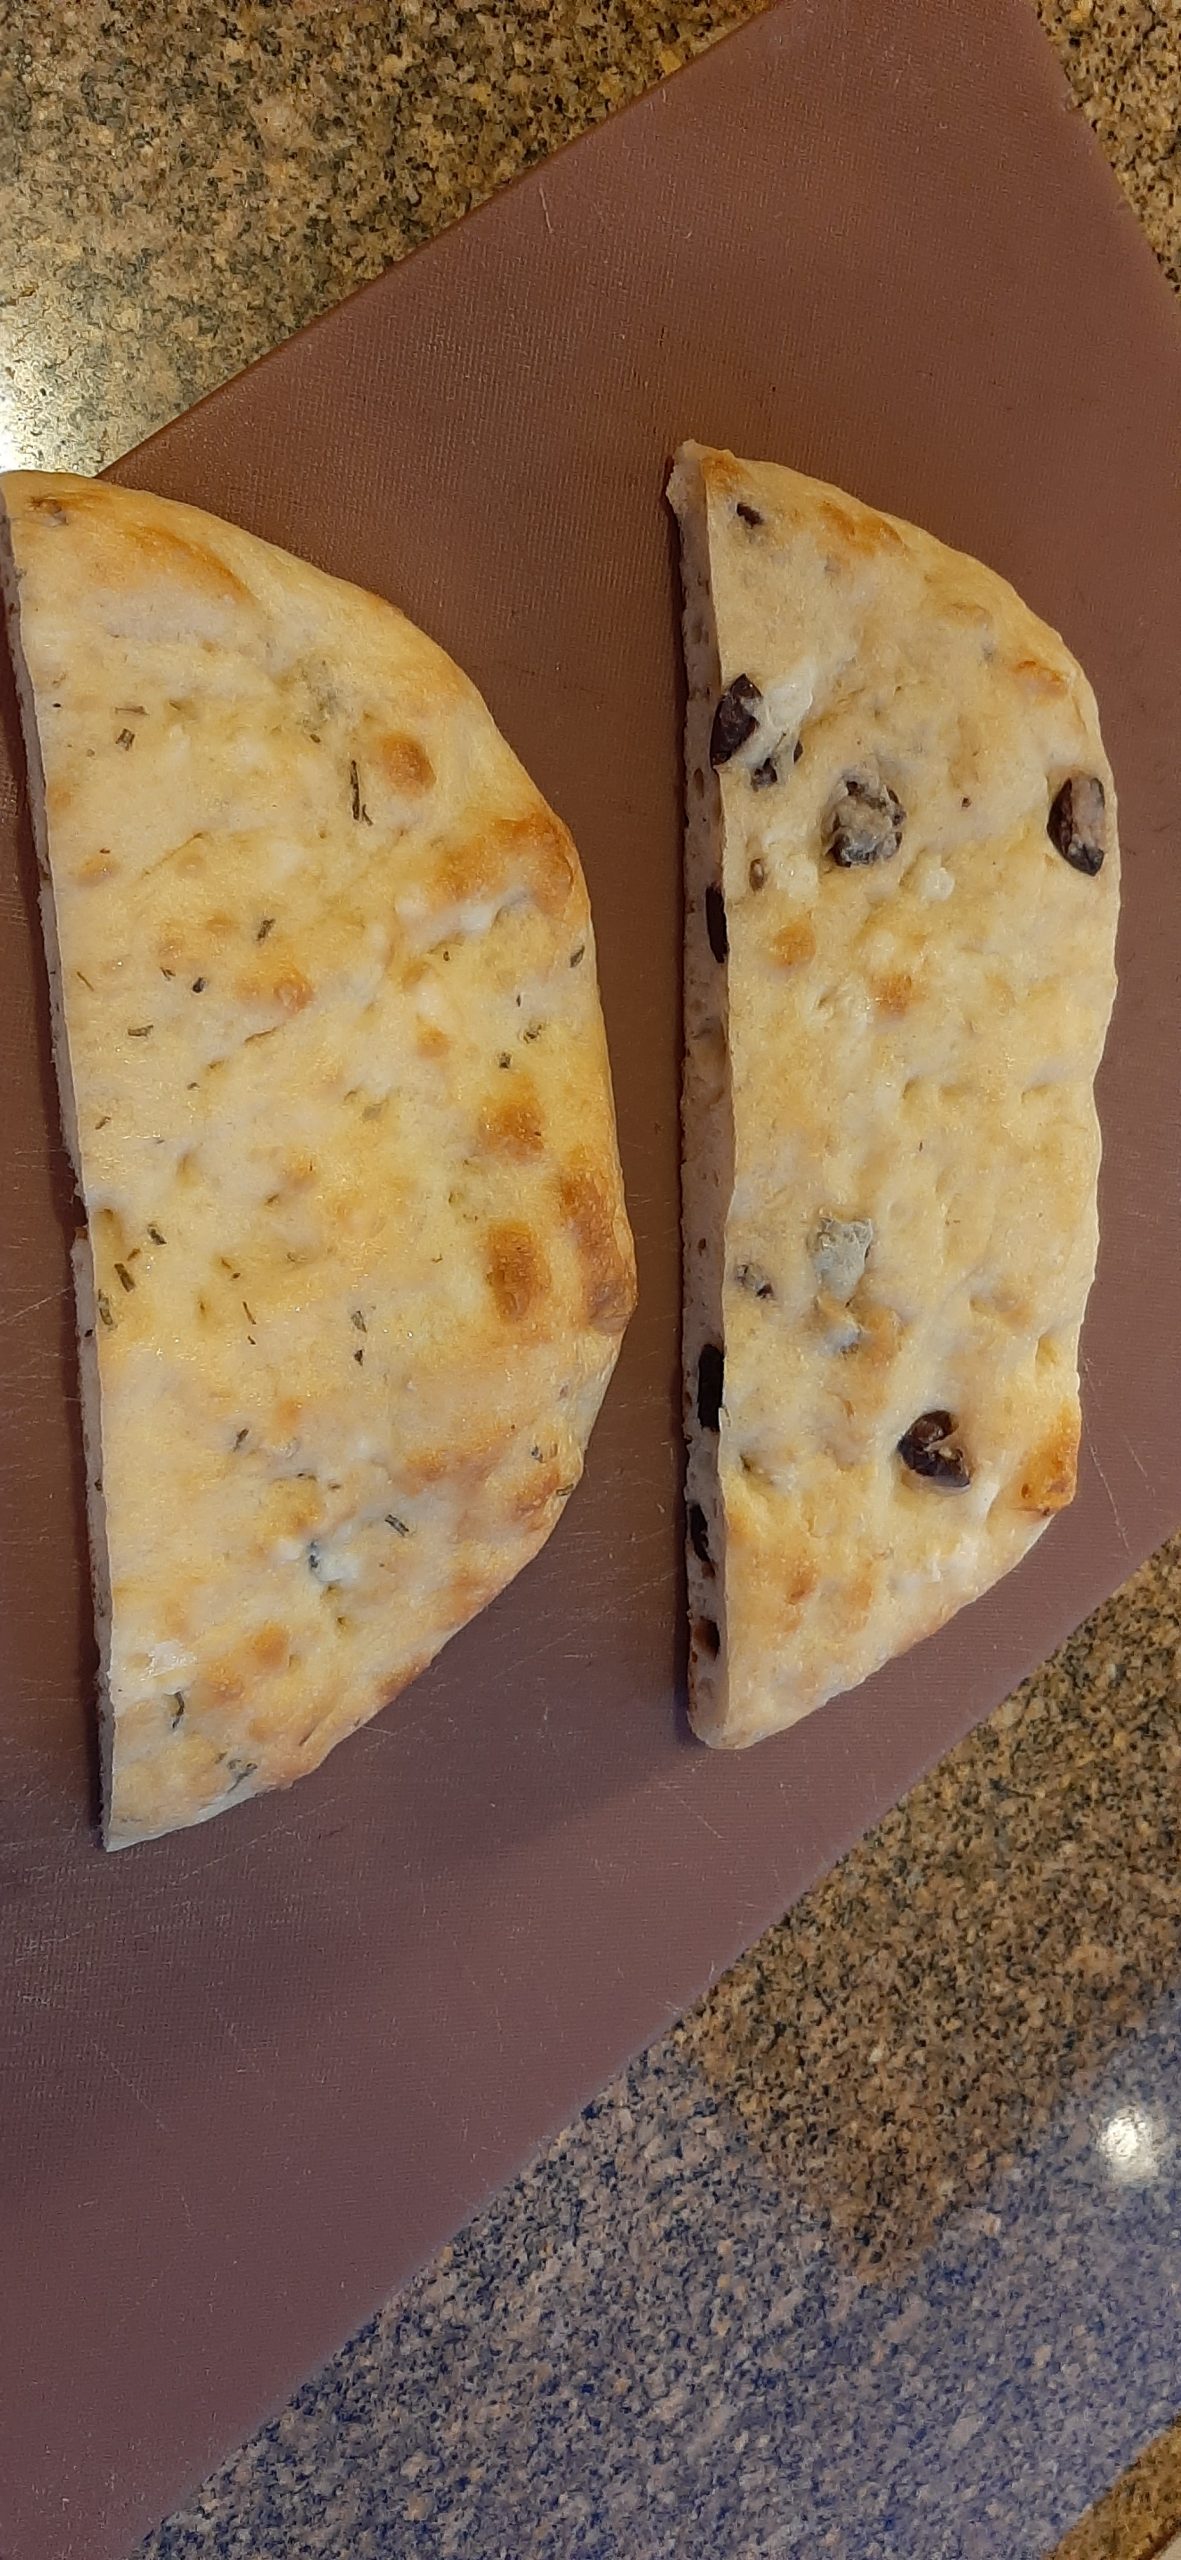
Rosemary Focaccia on the left. Kalamata and Roasted Garlic Focaccia on the right.
Well, this was easy bread to build. Almost too easy to be real. But guess what? This is the best focaccia imaginable. Chewy and UNBELIEVABLY delicious. And did I mention this focaccia is ever so easy to prepare. Yes, I did. But I feel duty bound to state it again. And we all have Ali of alexandracooks.com to thank for this amazing recipe.
But to be truthful, I don’t follow Ali’s instructions to a tee. Ali often adds flavorings on top of her focaccias, but I worry about ingredients either burning, or getting too well cooked her way. So, I put additions in the dough itself. Just a personal preference. So, feel free to go wild and do whatever you want when it comes to additives or toppings when you make your focaccia. But the one thing you must do, especially if you are new to baking bread, is just do it. Make – this – bread. It is marvelous. And fool proof. (Not that you’re a fool, I’m not saying that. Well, yes, I guess I might be saying that if you don’t make this focaccia!) Anyway, just make the darn bread and be done with it!
Well, this is my second post for today. Mr. C. is in Seattle making beautiful music with some other gifted musicians for an upcoming concert, so I don’t have him to bug. The house is clean. The laundry is done, and I don’t have to make dinner tonight. So, I think I’ll just post this recipe and get back to trying to help my poor protagonist in the book I’m reading figure out who done it. I actually can’t imagine a better way to spend a winter afternoon than by turning pages in a book.
May you too have afternoons spent doing anything you darn well please.
Peace and love to all.
ROSEMARY FOCACCIA
3 c. bread flour
1½ tsp. kosher salt
1½ tsp. instant yeast
1 T. finely minced fresh rosemary
1½ c. lukewarm water
extra virgin olive oil
flaky sea salt
In a medium sized bowl, whisk the flour, salt, instant yeast, and rosemary together. Add warm water. Using a rubber spatula, mix until the liquid is absorbed, and the ingredients form a sticky dough ball. Rub the surface of the dough with olive oil. (Use enough that the dough won’t dry out as it sits in the refrigerator.)
Cover the bowl with plastic wrap and place in the refrigerator immediately for at least 12 hours or for as long as three days.
Pour about 3 tablespoons of olive oil into a 9×13-inch baking pan. Remove the dough from fridge and using a stiff spatula, transfer the dough to the baking pan and form it into a rough ball. Roll the dough ball in the oil to coat it all over, again forming a rough ball.
Let the dough rest uncovered for 3 to 4 hours or until it looks about doubled in size.
Set a rack in the middle of the oven and preheat the oven to 425-degrees. Pour about 2 more tablespoons of olive oil over the dough. Rub your hands lightly in the oil to coat, then, using your fingers, press straight down to create deep dimples. The dough probably won’t fill the pan. No matter. Just press the dough as much as possible into an even thickness. Sprinkle with flaky sea salt all over. (Be generous.)
Transfer the pan to the middle rack of your pre-heated 425-degree oven and bake for about 25 minutes, or until the underside is golden and crisp and the internal temperature of the bread reaches at least 200-degrees.
Remove the pan from the oven and transfer the focaccia to a cooling rack. Let it cool before cutting into small squares.
KALAMATA OLIVE AND ROASTED GARLIC FOCACCIA
3 c. bread flour
1½ tsp. kosher salt
1½ tsp. instant yeast
8-10 cloves roasted garlic, smashed (see recipe for roasted garlic below)
½ c. chopped kalamata olives
1½ c. lukewarm water
extra virgin olive oil
flaky sea salt
In a medium sized bowl, mix the flour, salt, instant yeast, roasted garlic, and kalamata olives together. Add warm water. Using a rubber spatula, mix until the liquid is absorbed, and the ingredients form a sticky dough ball. Rub the surface of the dough with olive oil. (Use enough that the dough won’t dry out as it sits in the refrigerator.)
Cover the bowl with plastic wrap and place in the refrigerator immediately for at least 12 hours or for as long as three days.
Pour about 3 tablespoons of olive oil into a 9×13-inch baking pan. Remove the dough from fridge and using a stiff spatula, transfer the dough to the baking pan and form it into a rough ball. Roll the dough ball in the oil to coat it all over, again forming a rough ball.
Let the dough rest uncovered for 3 to 4 hours or until it looks about doubled in size.
Set a rack in the middle of the oven and preheat it to 425-degrees. Pour about 2 more tablespoons of olive oil over the dough. Rub your hands lightly in the oil to coat, then, using your fingers, press straight down to create deep dimples. The dough probably will not completely fill the pan. No matter. Just press the dough as much as possible into an even thickness. Sprinkle with flaky sea salt all over. (Be generous.)
Transfer the pan to the middle rack of your pre-heated 425-degree oven and bake for about 25 minutes, or until the underside is golden and crisp and the internal temperature of the bread reaches at least 200-degrees.
Remove the pan from the oven and transfer the focaccia to a cooling rack. Let it cool before cutting into small squares.
How to roast garlic
Using a sharp knife, slice ¼ to ⅓ -inch off the top of the garlic bulb exposing the individual cloves. Remove any loose papery skin.
Place the garlic cut side up in the center of a piece of foil large enough to envelope the bulb. Drizzle with 1 tablespoon olive oil and sprinkle with salt and pepper. Fold the foil around the garlic.
Place in a small baking dish or ramekin and bake in a pre-heated 400-degree oven until the cloves inside the packet are light brown and soft, 40 to 70 minutes. Check on the garlic after about 50 minutes. Continue baking if necessary. Remove from oven, carefully open the foil, and let the garlic cool until it’s easy to handle but still warm. Press on the uncut base of the bulb to squeeze the cloves out. Allow the cloves to cool completely before using in any of your favorite dishes.
I am not an expert on gluten-free anything. Except of course, if the dish is naturally gluten free like mashed potatoes. On these dishes I do OK. But I was recently put to a gluten-free test. I needed an Italian main dish containing meat that was not only gluten-free, but also dairy free and didn’t contain red meat. What first came to mind was chicken meatballs. No problem. I’ll just make chicken meatballs smothered in sauce. But then I looked at my recipe for Spaghetti with Turkey or Chicken Meatballs in Marinara Sauce. That would do, except the other main dish I had planned contained marinara sauce. So, the second dish needed to be “marinara free”. Plus, the meatballs for the recipe referenced above included either breadcrumbs or oats* and Parmesan cheese. So, that was not going to work. So, back to the drawing board to develop a more “Italian” flavored meatball that would be served in a gluten-free sauce. (Recipe to be posted soon.)
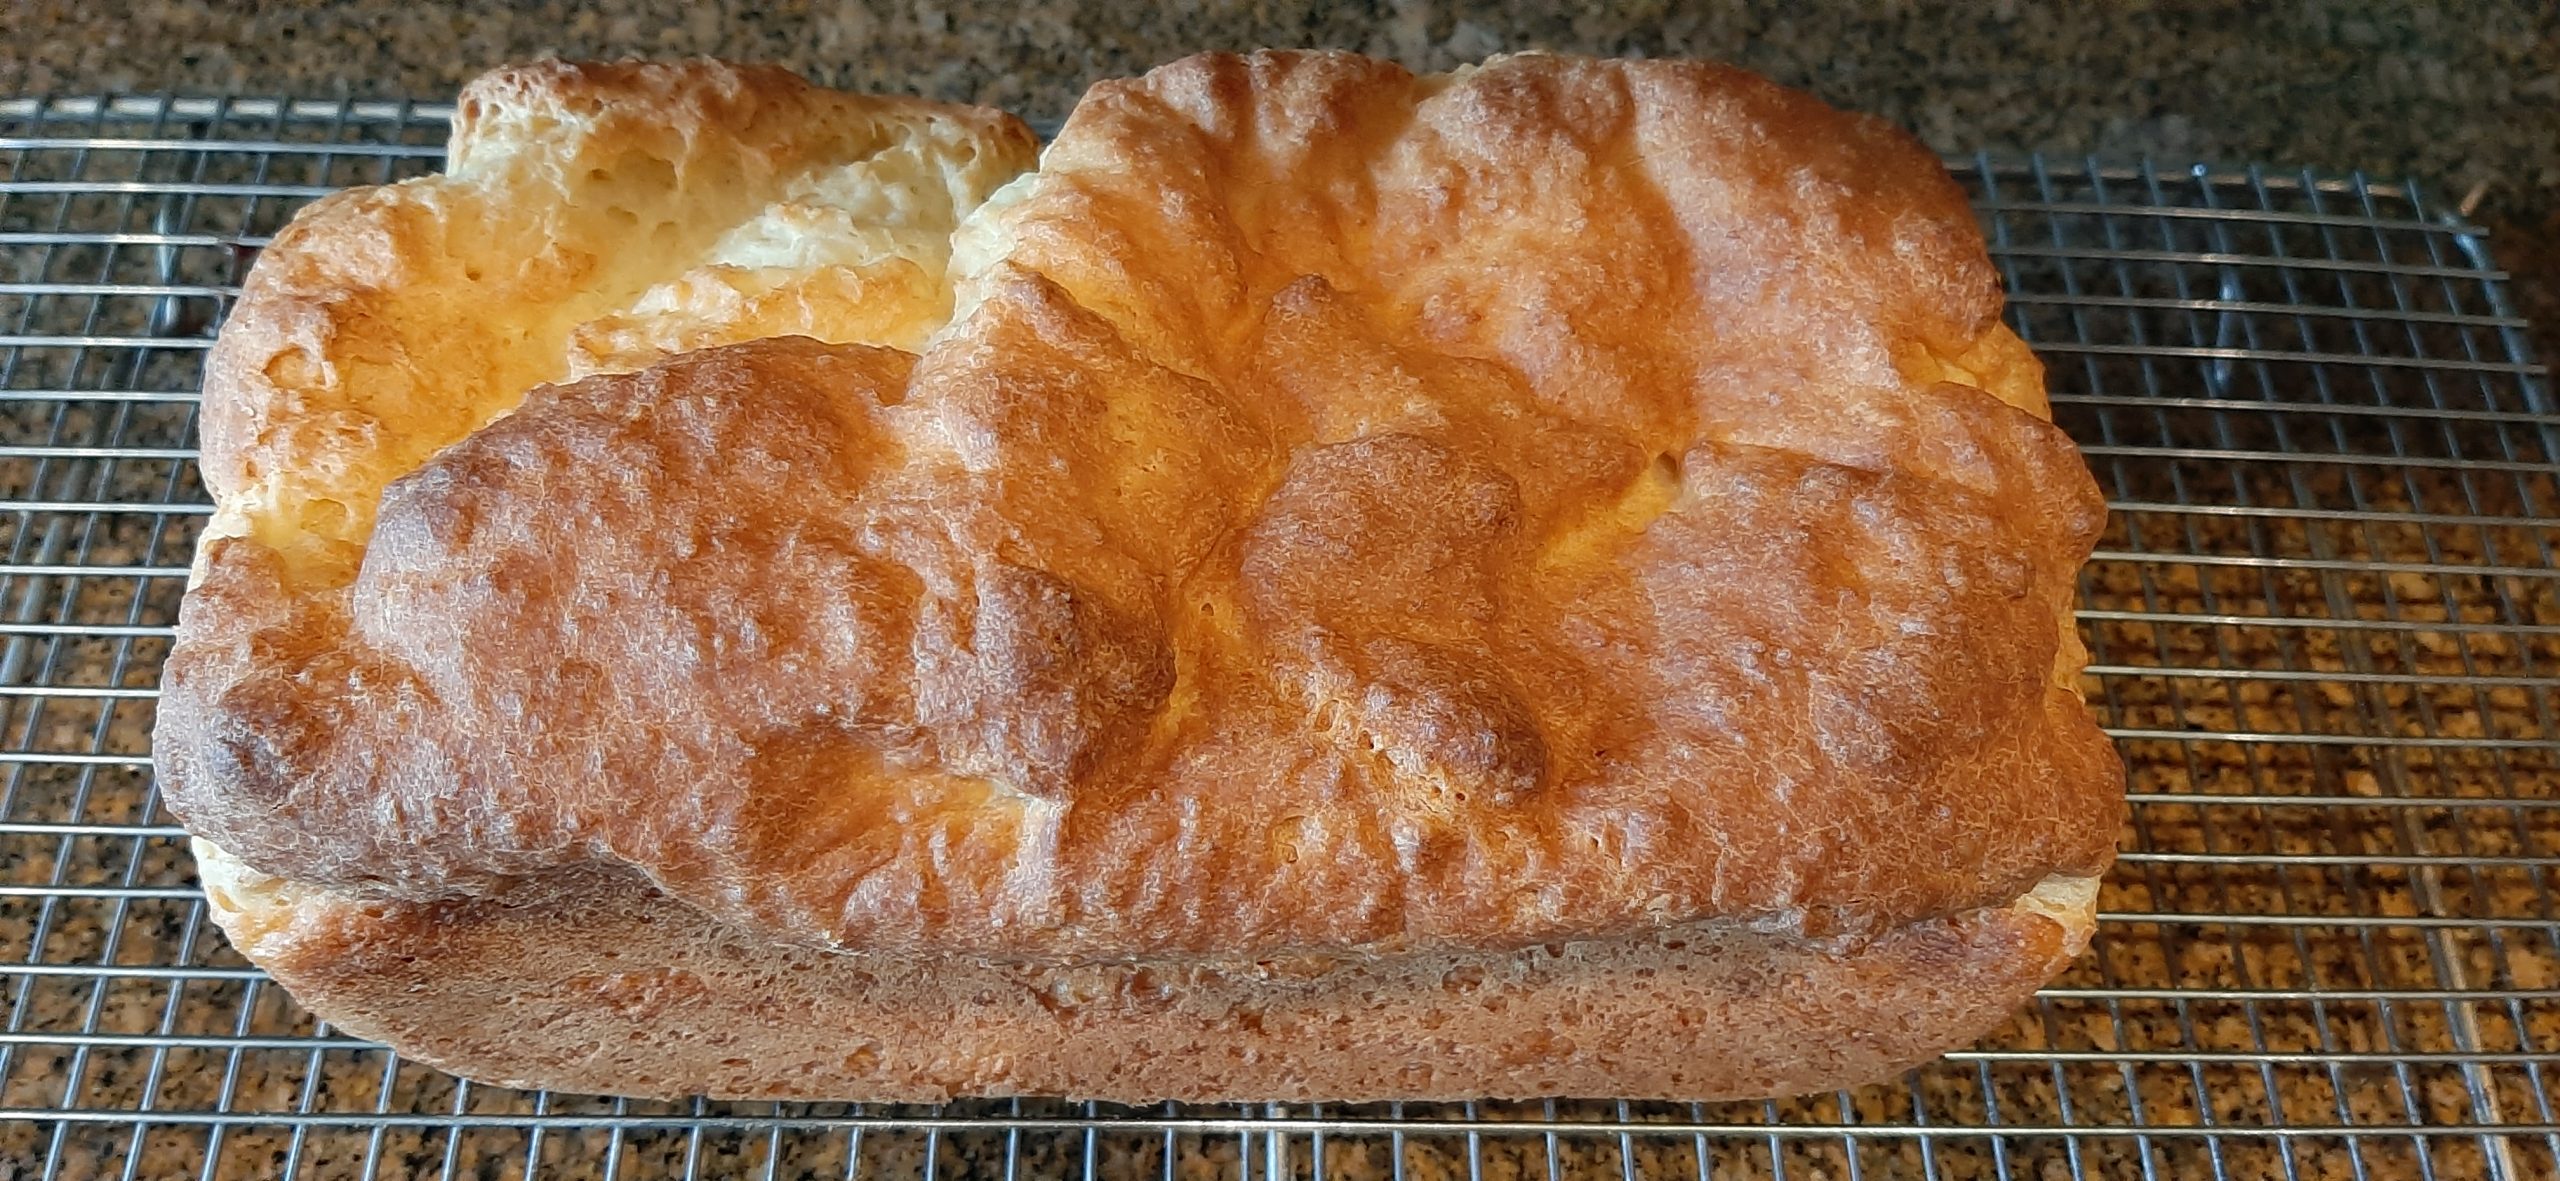
A few years ago, I tried my hand at gluten-free baking. So, recalling this adventurous time in my life, I went to my pantry and there on a back shelf I found a partial package of Cup 4 Cup gluten-free flour. Of course, the expiration date was some time in 2016, so I threw that package away and quickly ordered a new 3 lb. package from Amazon. Came the next day, made the bread, and the bread turned out just fine. Actually, it was better than just fine, it was delicious. (Thank you dishbydish.net for this recipe.)
What I failed to do was read the label on the package before ordering the flour or making both the bread to use in the meatballs and the sauce for the meatballs. Then, for whatever reason, I started to wonder what grains were used in the making of this gluten-free flour. And there in white on a blue background appeared an ingredient I would never have expected to see in a “flour” mix. MILK POWDER. What? Wait! That’s not fair! Because many people who can’t digest gluten also have problems with dairy products. At which point I threw my hands up in the air.
When it came time to serve our guests, I had to confess that although the meat ball dish was indeed gluten-free, it was not dairy free.
So, the moral of the story is – no good deed goes unpunished? No! Luckily in this case, the person I built the meatballs for was not allergic to dairy, but rather refrained from enjoying dairy products on a regular basis. It was by choice, not from an uncomfortable or allergic reaction to the corpse of milk, etc. Thank God.
But all kidding aside, the real moral of this story is that a cook should always read the label of any mix of ingredients used in cooking. Especially, if you are feeding someone who has trouble digesting, or is allergic to an ingredient or ingredients. And what someone’s system can gladly accept at one point in their life, can change dramatically with age or illness. That also must be a consideration. I know, with me, I used to be able to drink wine. I love wine. But now if I drink even a half glass, I suffer for the indulgence. I can still cook with wine, so that hasn’t changed. But sit down with a nice glass of wine. Absolutely not!
So, to all you wonderful people out there who build food for your family and friends, and occasionally have an experience like mine where I truly wanted to just walk out of the kitchen and never look back, hang in there. We all make mistakes. But we can also learn from our mistakes.
And one “oops” I plan to never make again is not reading the label on gluten-free flours. And even if it sounds like I am trashing the makers of Cup 4 Cup, I think they make a wonderful gluten-free baked goods product. But used for thickening sauces, not so much. Learn more about my trials and tribulations with sauce making in my upcoming post entitled Gluten-Free Chicken Meatballs in White Wine Sauce.
Well, that’s it for today. I am in “recovery mode”. Hosted a JazzVox concert here on Sunday. Yesterday (Monday) had two couples over for leftovers. Today I’m doing good to have cooked breakfast and found my way into our den to check e-mail, read the paper, and write up this post. So, that’s it for now.
But as always, peace and love to all.
2½ c. gluten-free all-purpose flour, fluffed (I use Cup 4 Cup)
1 tsp. xanthan gum (even though Cup 4 Cup includes xanthan gum)
1 tsp. baking powder (gluten-free)
2¼ tsp. instant yeast
2 T. granulated sugar
1 tsp. kosher salt
⅓ c. vegetable oil
1 tsp. apple cider vinegar
1½ c. warm water
2 lg. eggs, beaten, room temperature
Grease a 9×5-inch loaf pan with cooking spray. (Or use two smaller loaf pans.)
In the bowl of your stand mixer, using the paddle attachment, mix the gluten free flour, xanthan gum, baking powder, instant yeast, sugar, and salt together.
In a separate bowl, whisk the vegetable oil, apple cider vinegar, warm water, and eggs together. Pour into the bowl with the flour and mix until the dough resembles thick cake batter. (The dough will not look at all like bread dough made with wheat flour. It will look wet and sticky. That’s what you want.)
Transfer the dough to the prepared loaf pan and smooth the top as much as possible.
Cover the dough with a tea towel and let rise for 45-50 minutes or until it has roughly doubled in size.
Bake on the middle rack of a pre-heated 350-degree oven for about 40 minutes, or until the top is golden brown and the internal temperature reaches at least 205-degrees. Check after about 25 minutes. If the top is already brown, cover lightly with a piece of aluminum foil.
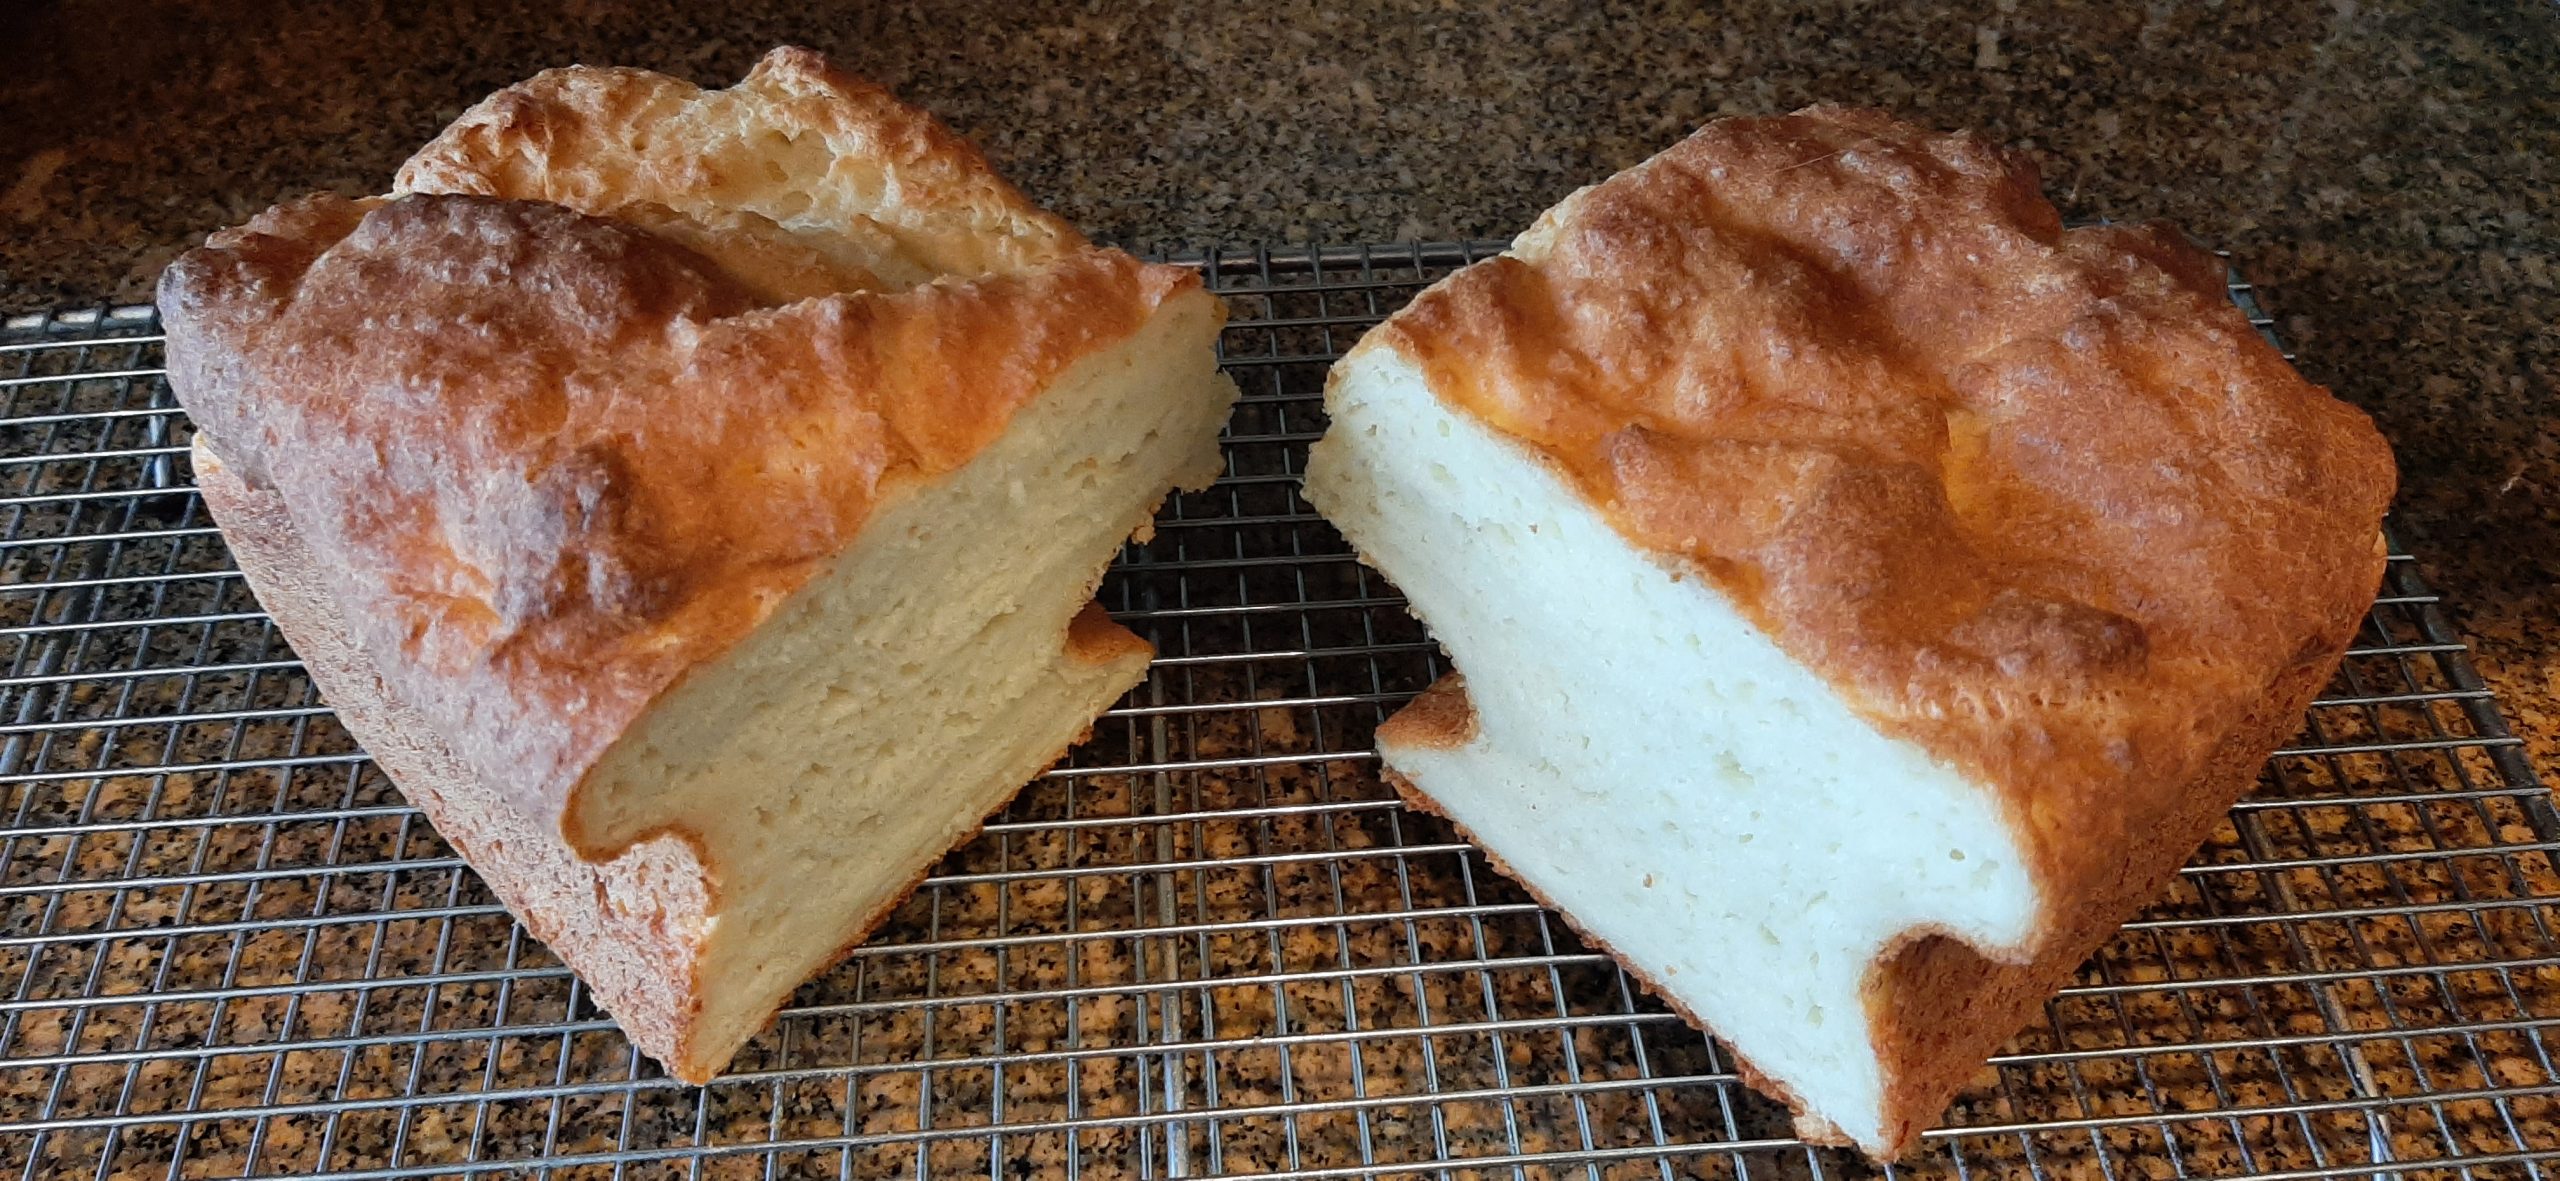
Remove from the oven and turn the loaf out on a wire rack to cool completely before slicing or using in any of your favorite gluten-free recipes.
*Oats to be considered “gluten-free” depends on the oats. The packaging must be labeled gluten-free before you can be certain. If there is no reference to “gluten-free” on the package, the oats may be processed in the same mill as flour or in some other way disqualify the product from being gluten-free.
I know, I know! Another bread recipe. But as much as I think I have every base covered with bread types, something comes up that causes me to go online and search for exactly what I need. Then invariably, I change the recipe anyway. Which is exactly what I did with this recipe. So much so, that no one could possibly recognize this recipe as their own inspiration. Unless of course, they had the same type of bread in mind. Then all bets are off.
What I wanted was a quick and easy bread to build, that was tasty, and came with a soft crumb. And believe it or not, that’s exactly what I achieved. When the moon is in the seventh house and Jupiter aligns with Mars. Let’s just say it was a 5th Dimension “Aquarius” kind of moment. And I shall now always believe in harmony, understanding, sympathy, and trust abounding. Let the sunshine in!
So, if you too want to build a bread that is just amazingly easy to make, tastes like a million dollars, and can be used in multiple ways, may I recommend this recipe. It is so stinkin’ delicious as to be almost unbelievable. And – it’s inexpensive to make.
So, without further ado, let the baking begin. And while you hurry to your kitchen to bake this bread, I’m going to start a new book. Some people believe in eating an apple a day. While we too love apples, Mr. C. and I get more nourishment from reading a book a day. Or if we are really busy, a book every two or three days.
So, from this, you may ascertain, and rightly so, that we spend a great deal of our time reading books. (Enough so that our TV has disowned us.) So, I was pleased to learn a new word that explains why time often slips away unnoticed when our noses are buried in a good book. It might also help you understand more about yourself if you too are an avid reader. The word is Book.clipse, pronounced boo-klips. Definition – a phenomenon in which a book is so engrossing that it completely obscures one’s perception of time. So, as you can clearly see, since there is now a word to describe our condition, we are not alone. And isn’t that nice to know.
And for those of you who aren’t into books, a few things to consider. Batteries are not required. Books don’t have to be plugged in at night. And you can borrow them from a library (free of charge). And best of all – you can learn about other cultures, places, and how people live in books. While simultaneously improving your ability to empathize, gain valuable knowledge, exercise your brain, while being entertained commercial free.
On that happy note, peace and love to all. And happy reading.
2 tsp. instant yeast or 2½ tsp. regular dry yeast
1 tsp. granulated sugar
1 c. warm water
2½ c. bread flour
2 T. extra virgin olive oil, plus more for greasing the dough
1 tsp. kosher salt
In the bowl of your stand mixer, combine the yeast, sugar, and warm water with your dough hook. Let stand for 5 to 10 minutes or until yeast is foamy.
Add 2 cups flour, olive oil, and salt. Stir on low speed until a shaggy dough forms. Increase the speed to medium and knead the dough for about 5 minutes, adding just enough of the remaining flour to form a soft, smooth and elastic dough. (Just a bit of the dough will stick to the bottom of the bowl, but the sides will be clean.)
Pour a bit of olive oil in the bowl, and using your hands and a stiff spatula, form the dough into a greased ball. Cover bowl with plastic wrap and let dough rise 60 to 70-minutes or until doubled in size.
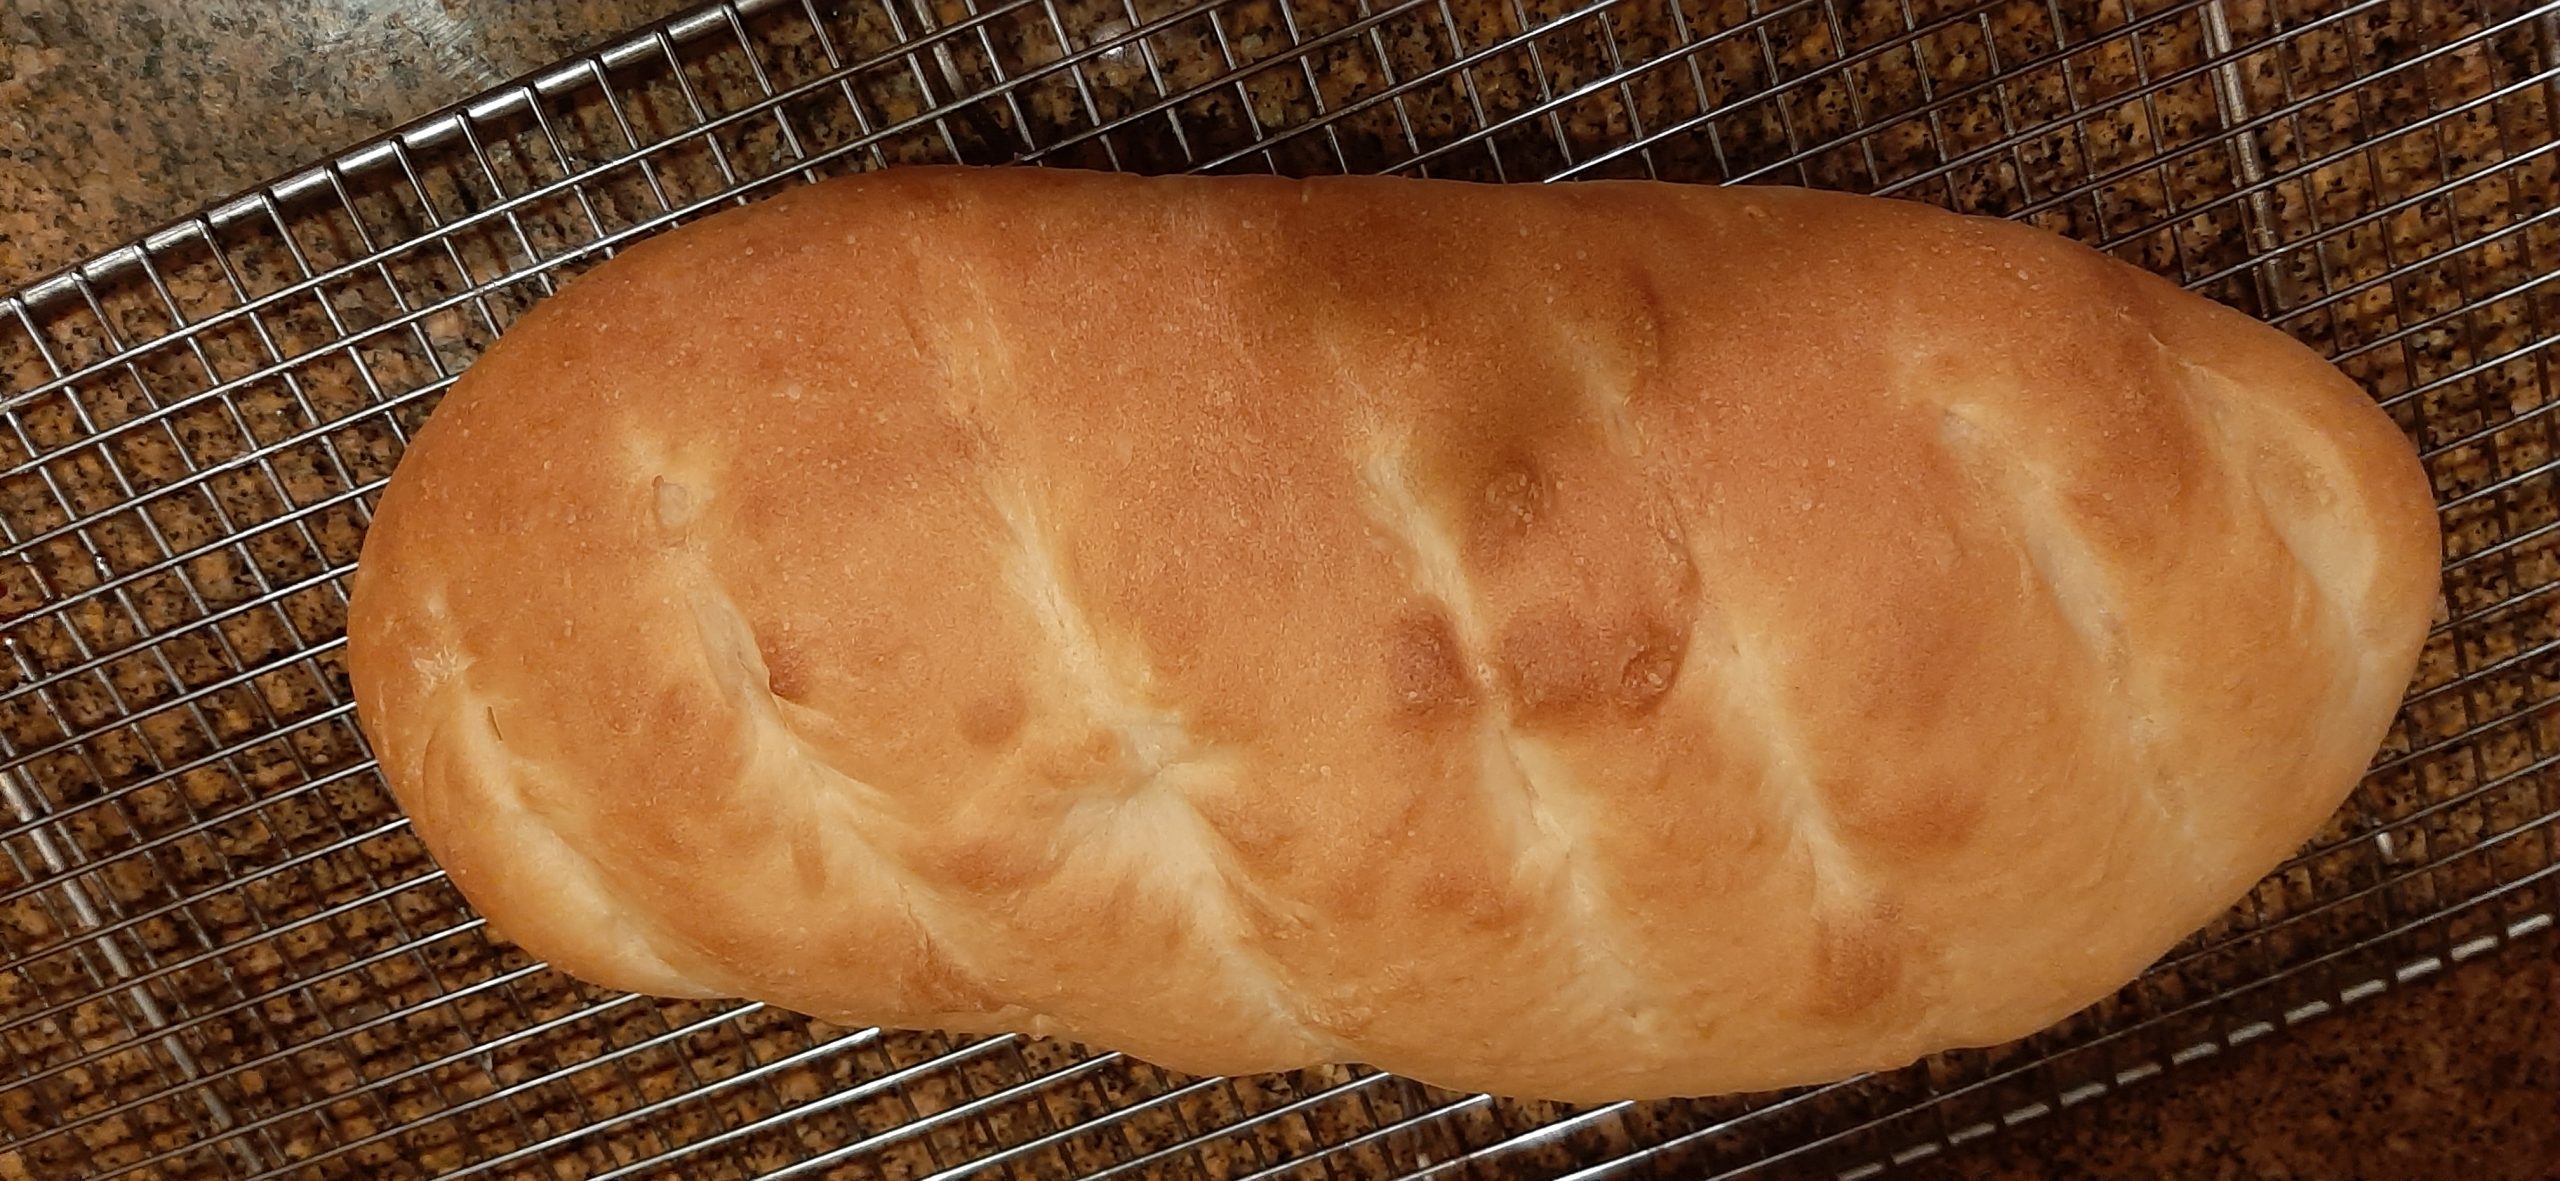
Line a baking sheet with parchment paper. Punch down the dough and shape it into about a 12-inch rounded ends football shape (bâtard). Place on prepared baking sheet. Cover with plastic wrap that has been lightly coated with a bit of cooking spray (greased side down) and let rise another 35-45 minutes until puffy. Gently use a serrated knife to make a few ¼-inch deep slits in the surface of the loaf just before placing in the oven.
About 20 minutes before the dough is ready to bake, place a pan of water* on the bottom rack while you pre-heat your oven to 400-degrees.
When the oven is up to heat, bake the bread for about 20 minutes or until golden brown and the internal temperature reaches at least 200-degrees.
Remove from oven and place on a wire rack until completely cool before slicing.
*When I pre-heat my oven for this bread (and many others for that matter) I place a 9-inch cake pan filled with water on the bottom rack and bake the bread on the middle rack.
Adding steam to the oven when baking bread makes a huge difference to the final product. When the dough is fully risen and ready to go in the oven, it still has some potential to rise further in the heat of the oven. This is referred to as “oven spring”. The carbon dioxide trapped within the gluten expands in the heat of the oven and causes the air bubbles to expand and the loaf to grow larger. So, to achieve maximum “oven spring”, the dough requires a steamy atmosphere. If you place the dough into a hot, dry oven, the crust will very quickly dry out and harden. And once it has hardened it won’t be able to expand as easily. Steam will also help improve the color of the crust by gelatinizing the sugars on the exterior of the loaf, resulting in better browning, and a shinier, thinner, and crispier crust.
I have been enjoying a variation of this bread since I was a child. Every Christmas, our close family friend Charlotte always made a similar bread, and I routinely made a pig of myself. It was just so amazingly delicious.
So, when I started making bread in my early twenties, I found this recipe which was very like Charlottes, but also included a small amount of candied citron and candied cherries. And I liked it even better. (Some days an angel really does land on your shoulder.) Well, as you might have guessed, I have been making this bread ever since.
One of the fun Christmas events when my kids were young was to have an open house. All kinds of goodies were served including this Christmas bread. It was a way to share Christmas with our friends. And to teach the kids the enjoyment that can come from hosting. Other years we would deliver goodies to friends and family. The picture you see below was taken I believe in 1974. Ursala on the left and Paula on the right.
I didn’t bake this bread every year because there are just so many incredible breads out there that make wonderful Christmas treats. Like cinnamon rolls (several recipes on site), Christmas Berliner Stollen, Krendl (Russian Christmas Bread), Dried Cranberry and Almond Braided Danish, Bread Pudding with Spiced Rum Sauce, Baba Au Rhum, and Cream Cheese Danish. To name a few.
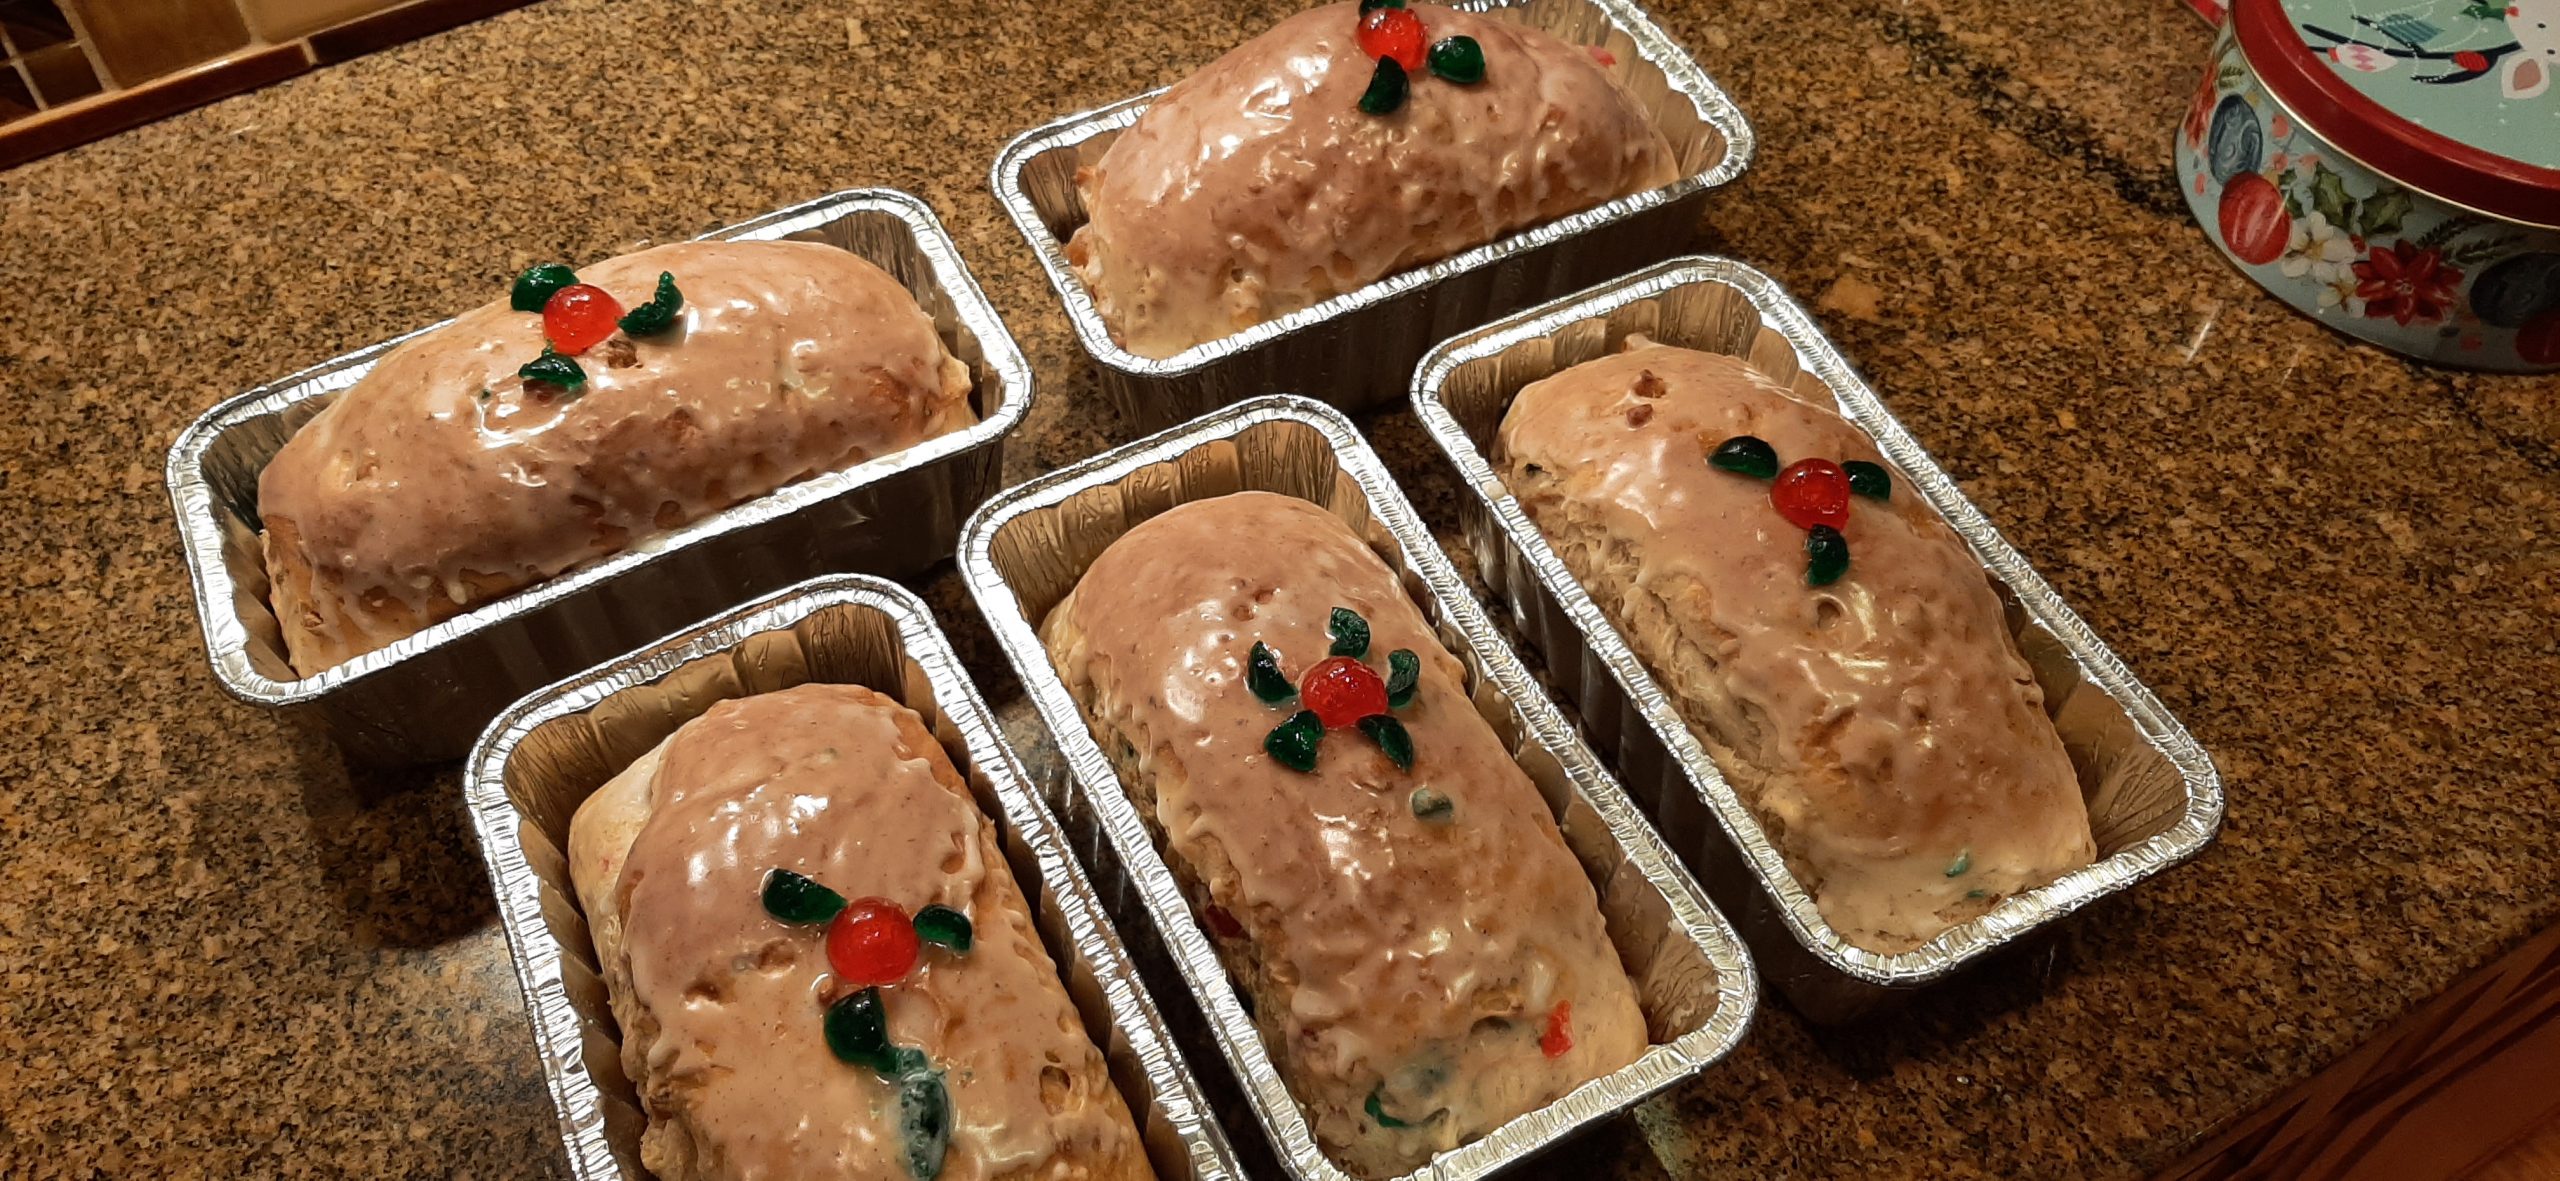
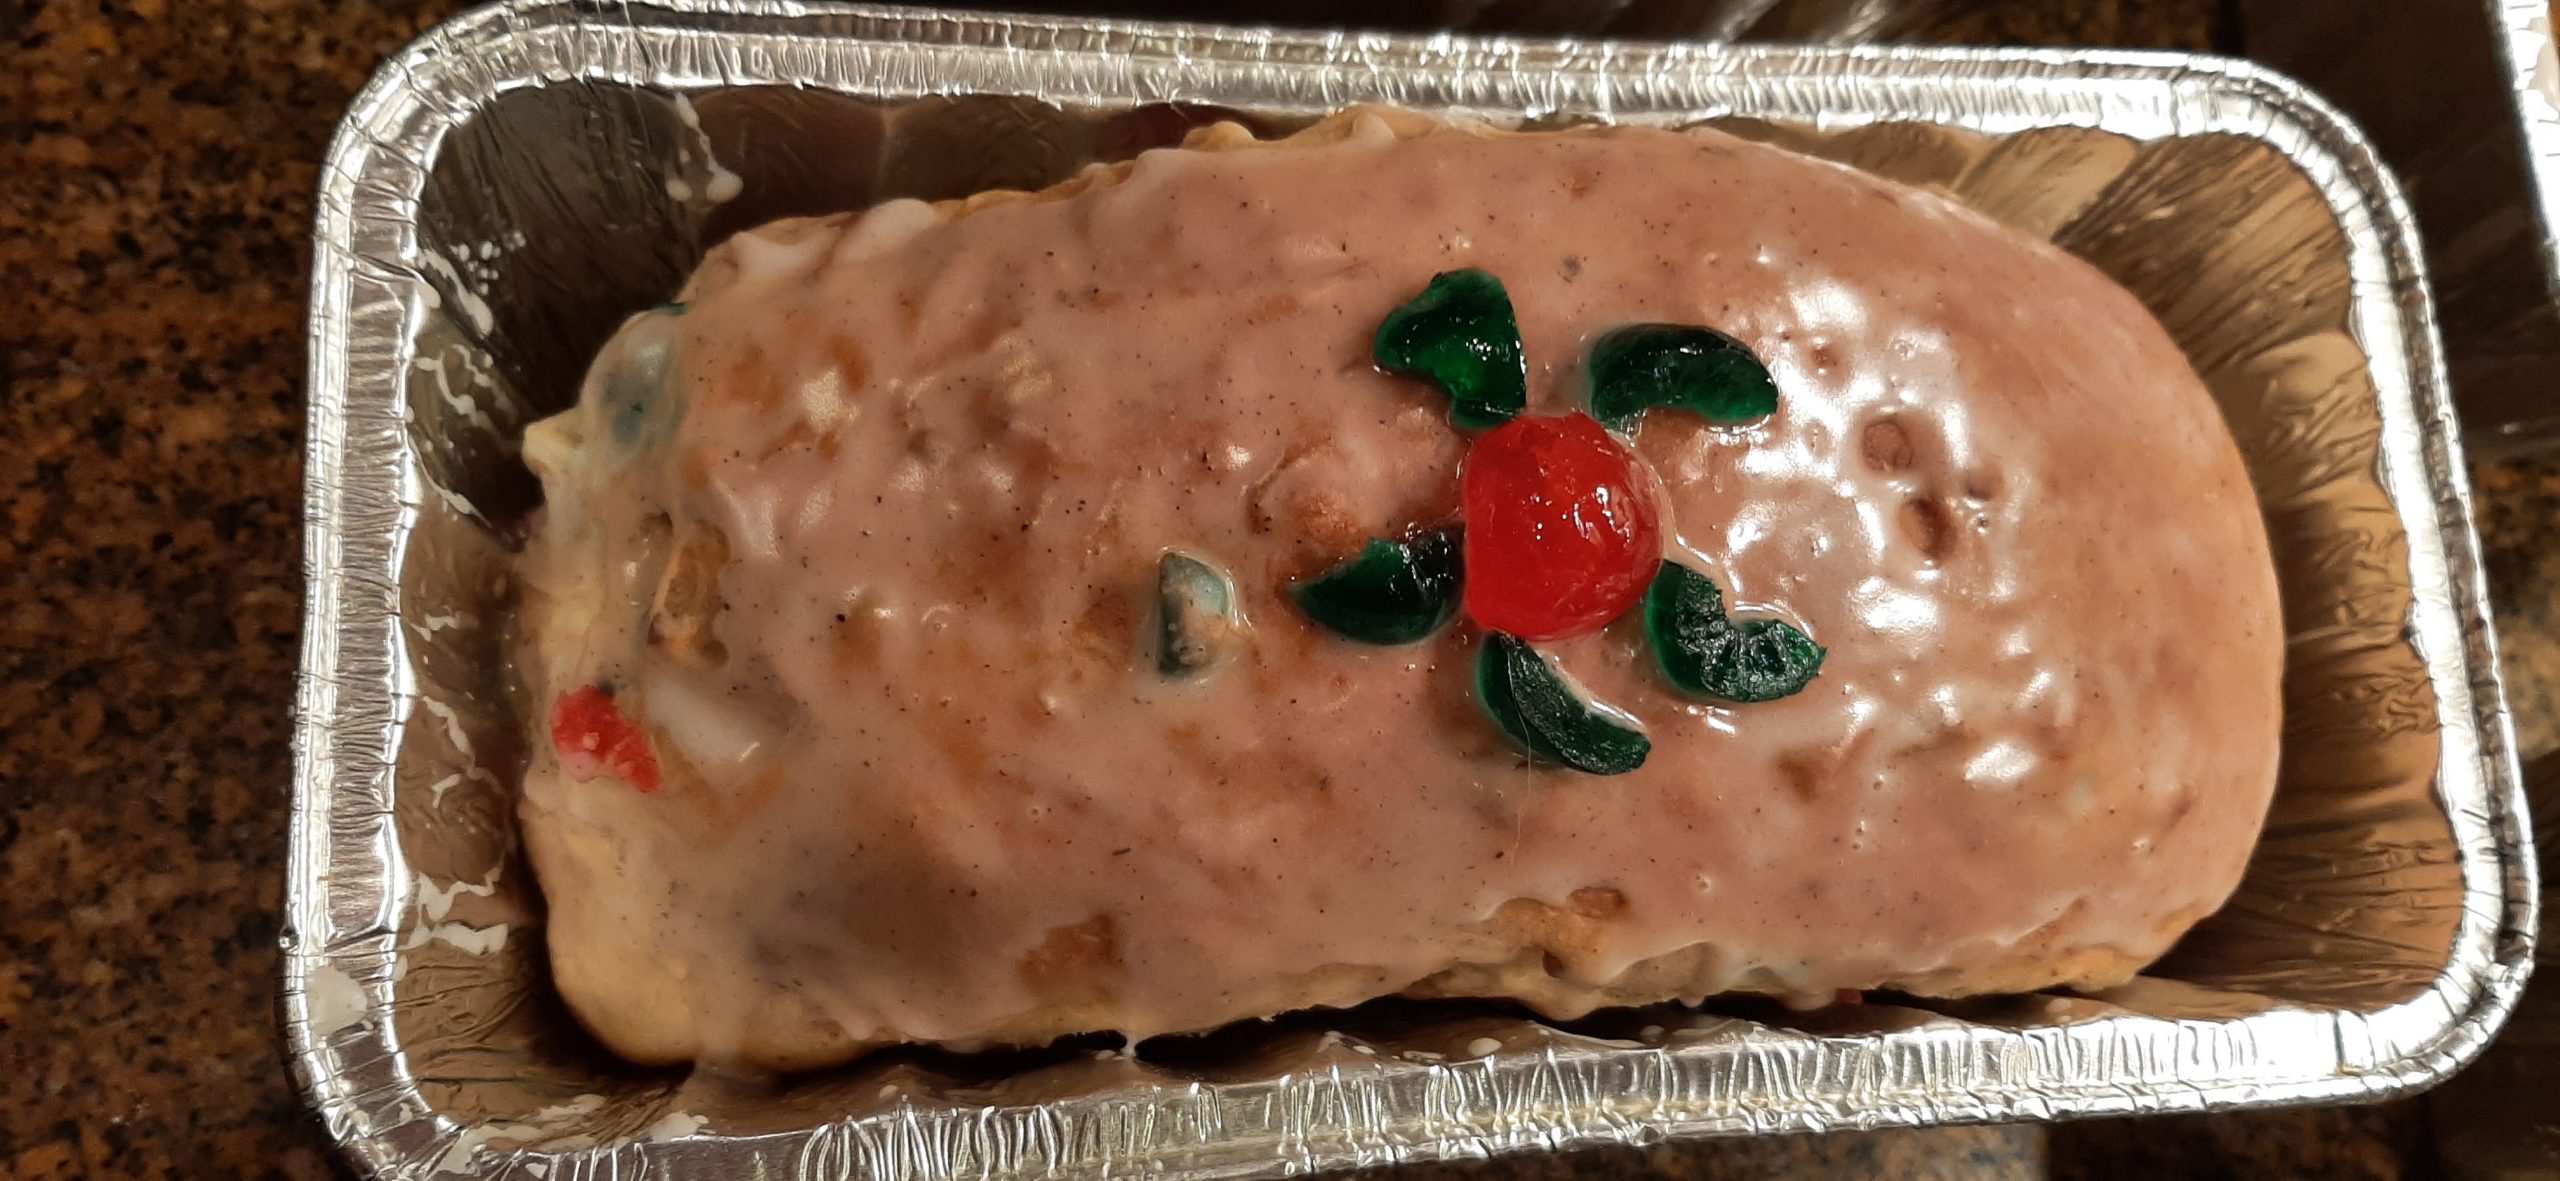
But as with other favorite recipes of mine, I just make them and assume the recipe has already been posted on this site. Silly me. So, I apologize for not getting this braided yeast bread recipe posted sooner. (Like in time for Christmas 2023.) Also, this year, I changed things up a bit. Shape wise that is. I decided to make 5 small loaves instead of three braided breads. Every year I give 4 of our neighbors a small loaf of some type of sweet bread for Christmas. This year, as you can see from the picture above, it was a loaf of this delightful bread. (And yes, the fifth loaf stayed here and was gobbled up very quickly.)
So, if you too are a bread lover, and want to make something special for Christmas (or any other day of the year for that matter), this is a bread I am sure you will enjoy as much as I do. If you aren’t a candied fruit lover, just leave it out. Or change the type of candied fruit. Or add more nuts. Whatever appeals. Just don’t forget the glaze. It is just so wonderful. Not too sweet – just perfect. And if you have never used vanilla paste, get some at your earliest convenience. It is tantamount to heaven in a jar.
Well, it’s still raining here in NW Washington. But at least we aren’t having the same terrible snowstorms that are battering the East Coast and California. But there is a small chance of snow this weekend. And I say – bring it on! I love snow. Especially when there is nothing on our calendar. And for more weeks than I care to count, our weekend is free. And to that I say – HALLELUJAH! Let it snow, let it snow, let it snow.
And as always, peace and love to all.
2 c. whole milk, scalded
½ c. (1 stick) unsalted butter, room temp.
2/3 c. granulated sugar
2 tsp. kosher salt
¼ tsp. crushed cardamon seed
1 tsp. ground cinnamon
scant 2 T. active dry yeast
¼ c. lukewarm water
2 lg. eggs
8 c. unbleached all-purpose flour
1½ c. chopped walnuts
1 c. diced citron
1 c. chopped candied red and green maraschino cherries, plus more for decoration
veggie oil
½ c. powdered sugar
1 tsp. vanilla paste or vanilla extract
milk
Combine the scalded milk, butter, salt, crushed cardamon seeds, and cinnamon in the bowl of your stand mixer. Cool to lukewarm
Add the yeast softened in water. Add eggs. Mix well. Add 4 cups of the flour and beat well. Add the nuts, citron, chopped candied cherries, and enough remaining flour to form a firm dough (dough will be sticky).
Pour a bit of veggie oil in the bowl, and using your hands and a stiff spatula, form the dough into a lightly greased ball. Cover with plastic wrap and place in a warm place until doubled in bulk, about 60 minutes. Punch down the dough.
For three braided loaves:
Turn onto a lightly floured surface; divide into thirds. Divide each portion into thirds again. Shape each into a 14-in. rope. Place 3 ropes on parchment paper or a greased baking pan and braid; pinch ends to seal and tuck under. Repeat with remaining dough. Cover and let rise for 40-50 minutes or until doubled in size. Bake in a pre-heated 350-degree oven for about 20-25 minutes or until the internal temperature reaches at least 195-degrees.
Remove from oven and place on wire racks. Make the glaze by whisking the powdered sugar and vanilla bean paste together with enough milk to make a thin consistency. Using a pastry brush, coat the braids with a thin layer of icing. Decorate with holly leaves and additional red and green candied maraschino cherries.
For 5 small loaves:
Turn onto a lightly floured surface; divide into 5 equal sized pieces. Shape into footballs and place in small, lightly greased loaf pans.
Cover and let rise for 40-50 minutes or until doubled in size. Bake in a pre-heated 350-degree oven for 25-30 minutes or until the internal temperature reaches at least 195-degrees.
Remove from oven and place on wire racks. (If you have baked the loaves in aluminum foil pans, let the bread cool in the same pans. If not, remove from pans. Make the glaze by whisking the powdered sugar and vanilla bean paste together with enough milk to make a thin consistency. Using a pastry brush, coat the braids with a thin layer of icing. Decorate with holly leaves and additional red and green candied maraschino cherries.
There are just those times when we as bakers desire to make a special occasion pastry, but don’t want to go to a lot of expense or effort. Well then, if you ever find yourself in that head space, this is the recipe for you.
When my kids were young, I made this pastry quite often at Christmas time. My daughter Paula especially adored this treat. And to this day, I totally love it too. And one of the main reasons is that it is delicious and ever so easy to make. And pretty, too.
And I know, I should have posted this recipe before Christmas, but I too was super busy. Why every year I add more things to my Christmas to-do list is a question best left for a trained counselor to determine. But the fact remains. Every year I think up at least one more goody to prepare for family and friends. So, basically, I’ve never had the time in December for even a quick trip to a trained professional to determine if there is any hope for people like me who suffer with MSS (Martha Stewart Syndrome). And it’s too bad. I seem to have a flaming case of this misunderstood but authentic condition, and I know plenty of others who also “yust go nuts at Christmas”. (Thank you, Stan Boreson.) The rest of the year, I seem to be able to contain my zest for producing prodigious amounts of goodies. So, who needs a counselor then? (For me it’s just a seasonal disorder. And maybe some time in the future, it will disappear just like my ability to drink wine has gone the way of the dinosaurs.) Grrrrrr
So, even though you may think you don’t really need this recipe until next Christmas, don’t forget about Easter morning, or for a Sunday brunch, or for a special Valentine’s Day breakfast for your honey. There are lots of occasions when this pastry would be a welcome addition to your menu.
And you can decorate this pastry any way you want. Valentines Day it would be fun to top the pastry with pink glaze and sprinkles. For Easter, pink glaze, pink coconut, and Cadbury mini eggs. The decorating choices are endless.
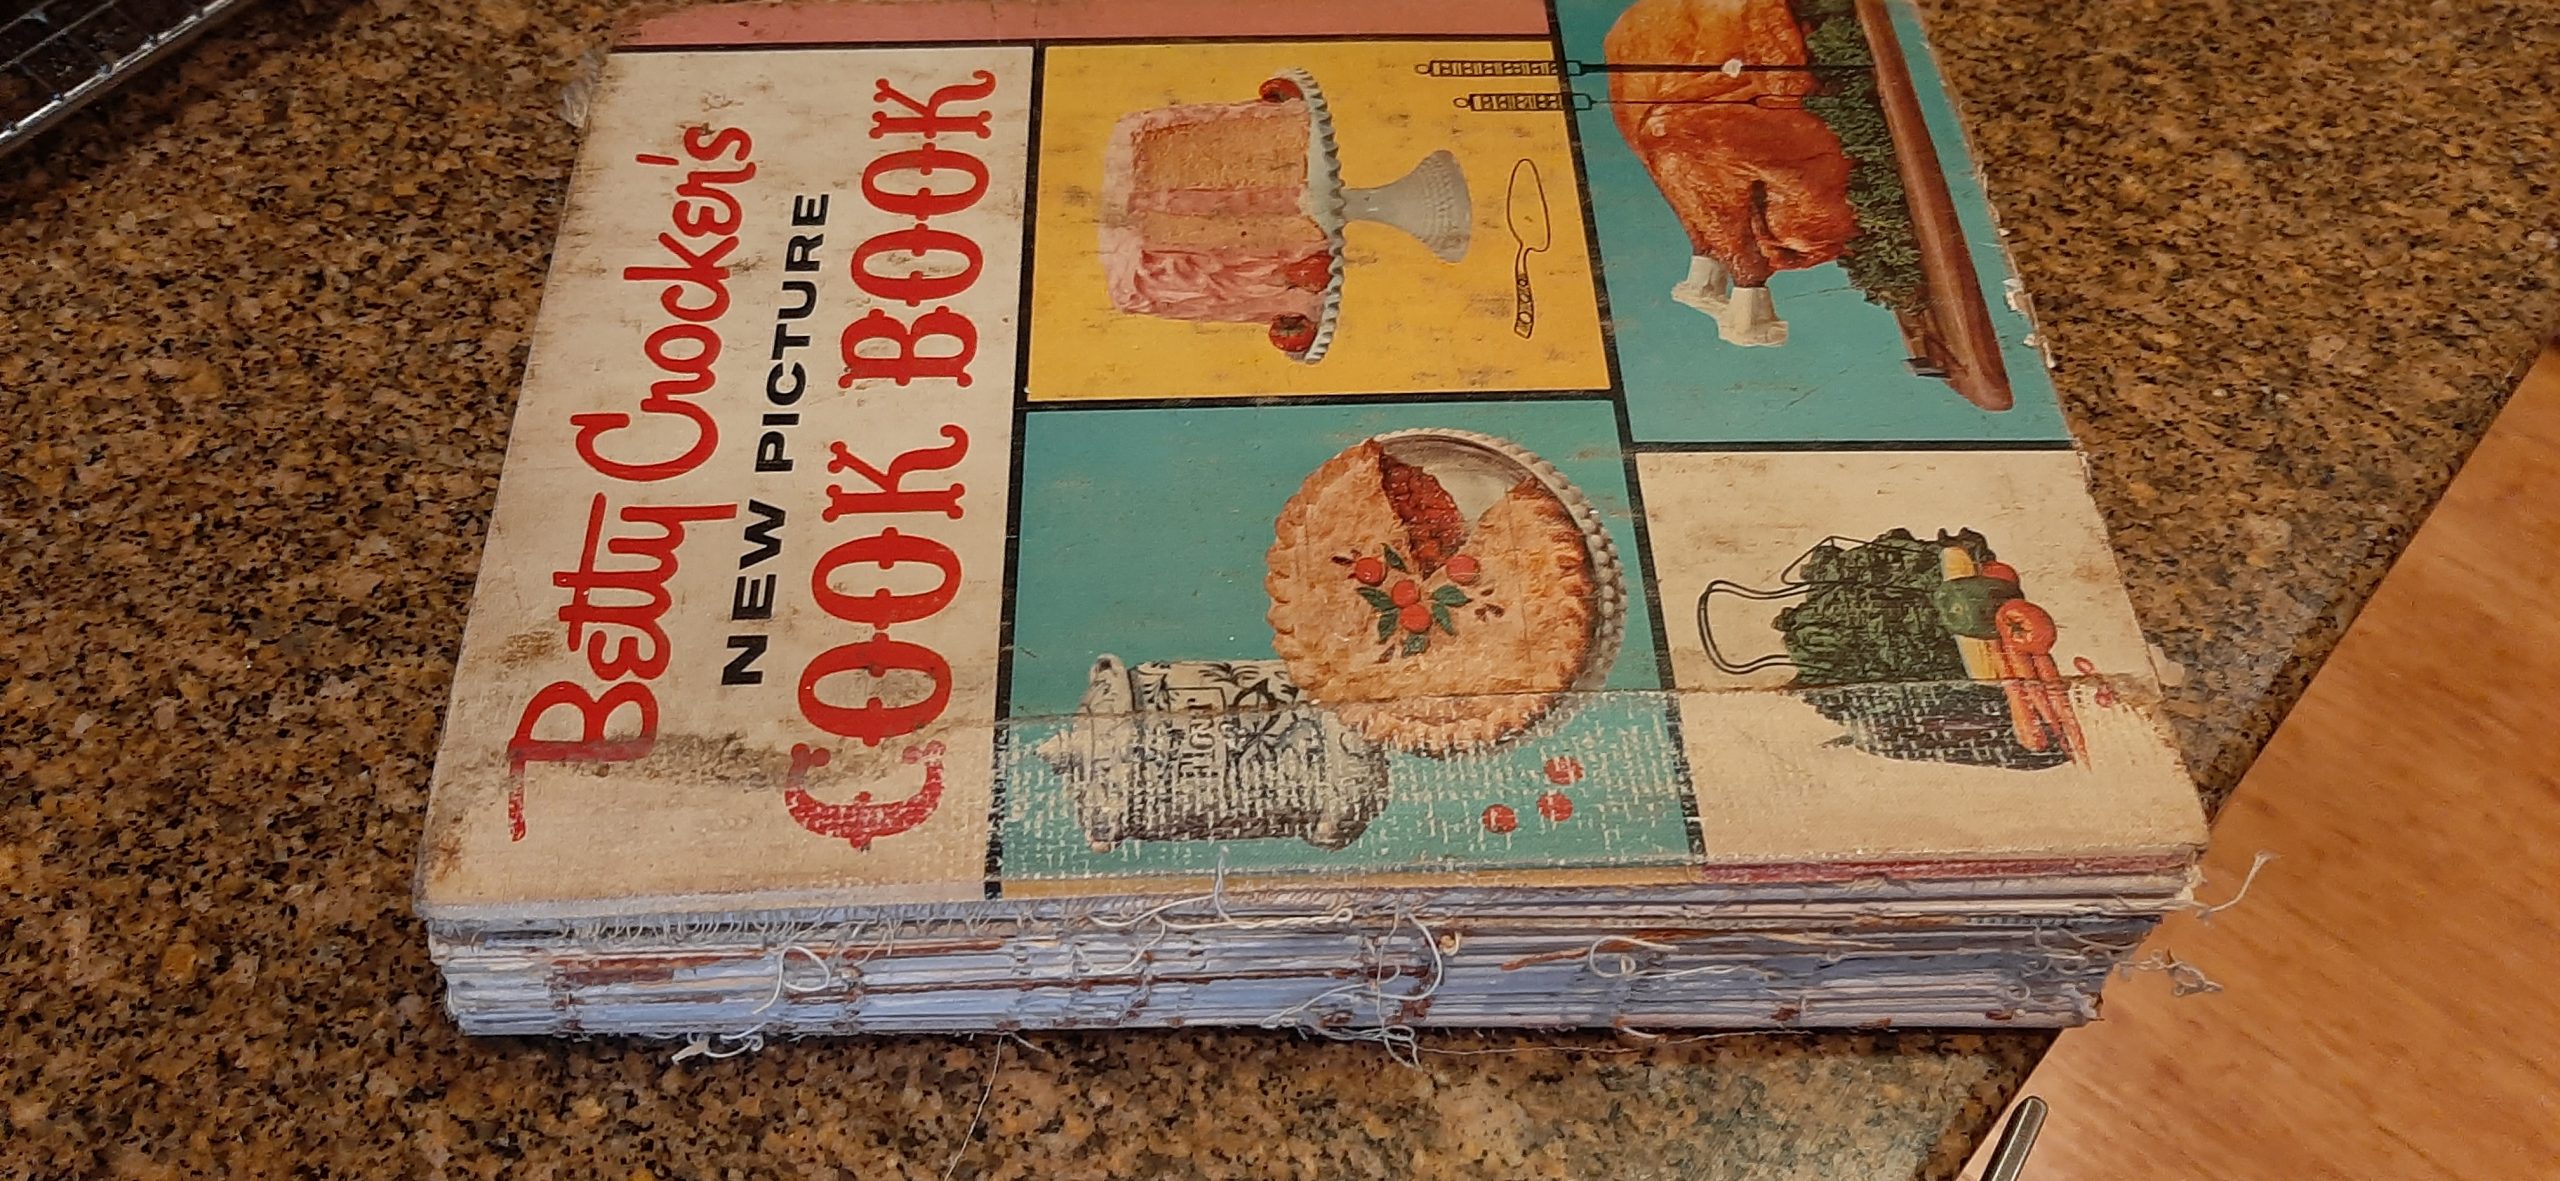
So, remember this recipe the next time you need to make something special for your family or friends. Think of this recipe as a gift from Betty Crocker. But who was Betty Crocker?
Well, according to bettycrocker.com “We got our start in 1921 — and thank you, we do look good for our age. Who could have guessed that a simple contest by The Washburn-Crosby Company would give birth to an icon? The contest called on home cooks to solve a jigsaw puzzle for the chance to win a pincushion in the shape of a bag of Gold Medal Flour (cute). Washburn, a flour-milling company and predecessor of General Mills, Inc., was surprised to find themselves suddenly inundated with questions from home cooks who used the competition as an opportunity to ask for expert baking advice.
But who could offer the public the spoonfuls of wisdom American cooks were so hungry for? Enter, Betty Crocker. Now, Betty was not a single person. The name was created as a way to personalize responses to questions, and if you guessed that the name has meaning behind it, you’re right. “Crocker” was chosen in honor of a popular company director, and “Betty” was selected because… well, she sounded friendly. We love a little history moment.
But there was one final element needed to bring Betty to life. The Washburn-Crosby Company invited their female employees to try their hand at a Betty Crocker signature. A distinctive winner was chosen and is still used today. Talk about an icon in iconography!”
My Betty Crocker cookbook (1961 First Edition, Third Printing) given to me in 1964 by my Aunt Ruth along with several baking pans and cookie sheets. I still have all the bake ware, but I’d rather still have my aunt. She lived to be 90, but I still miss her. She was a great woman and a true friend.
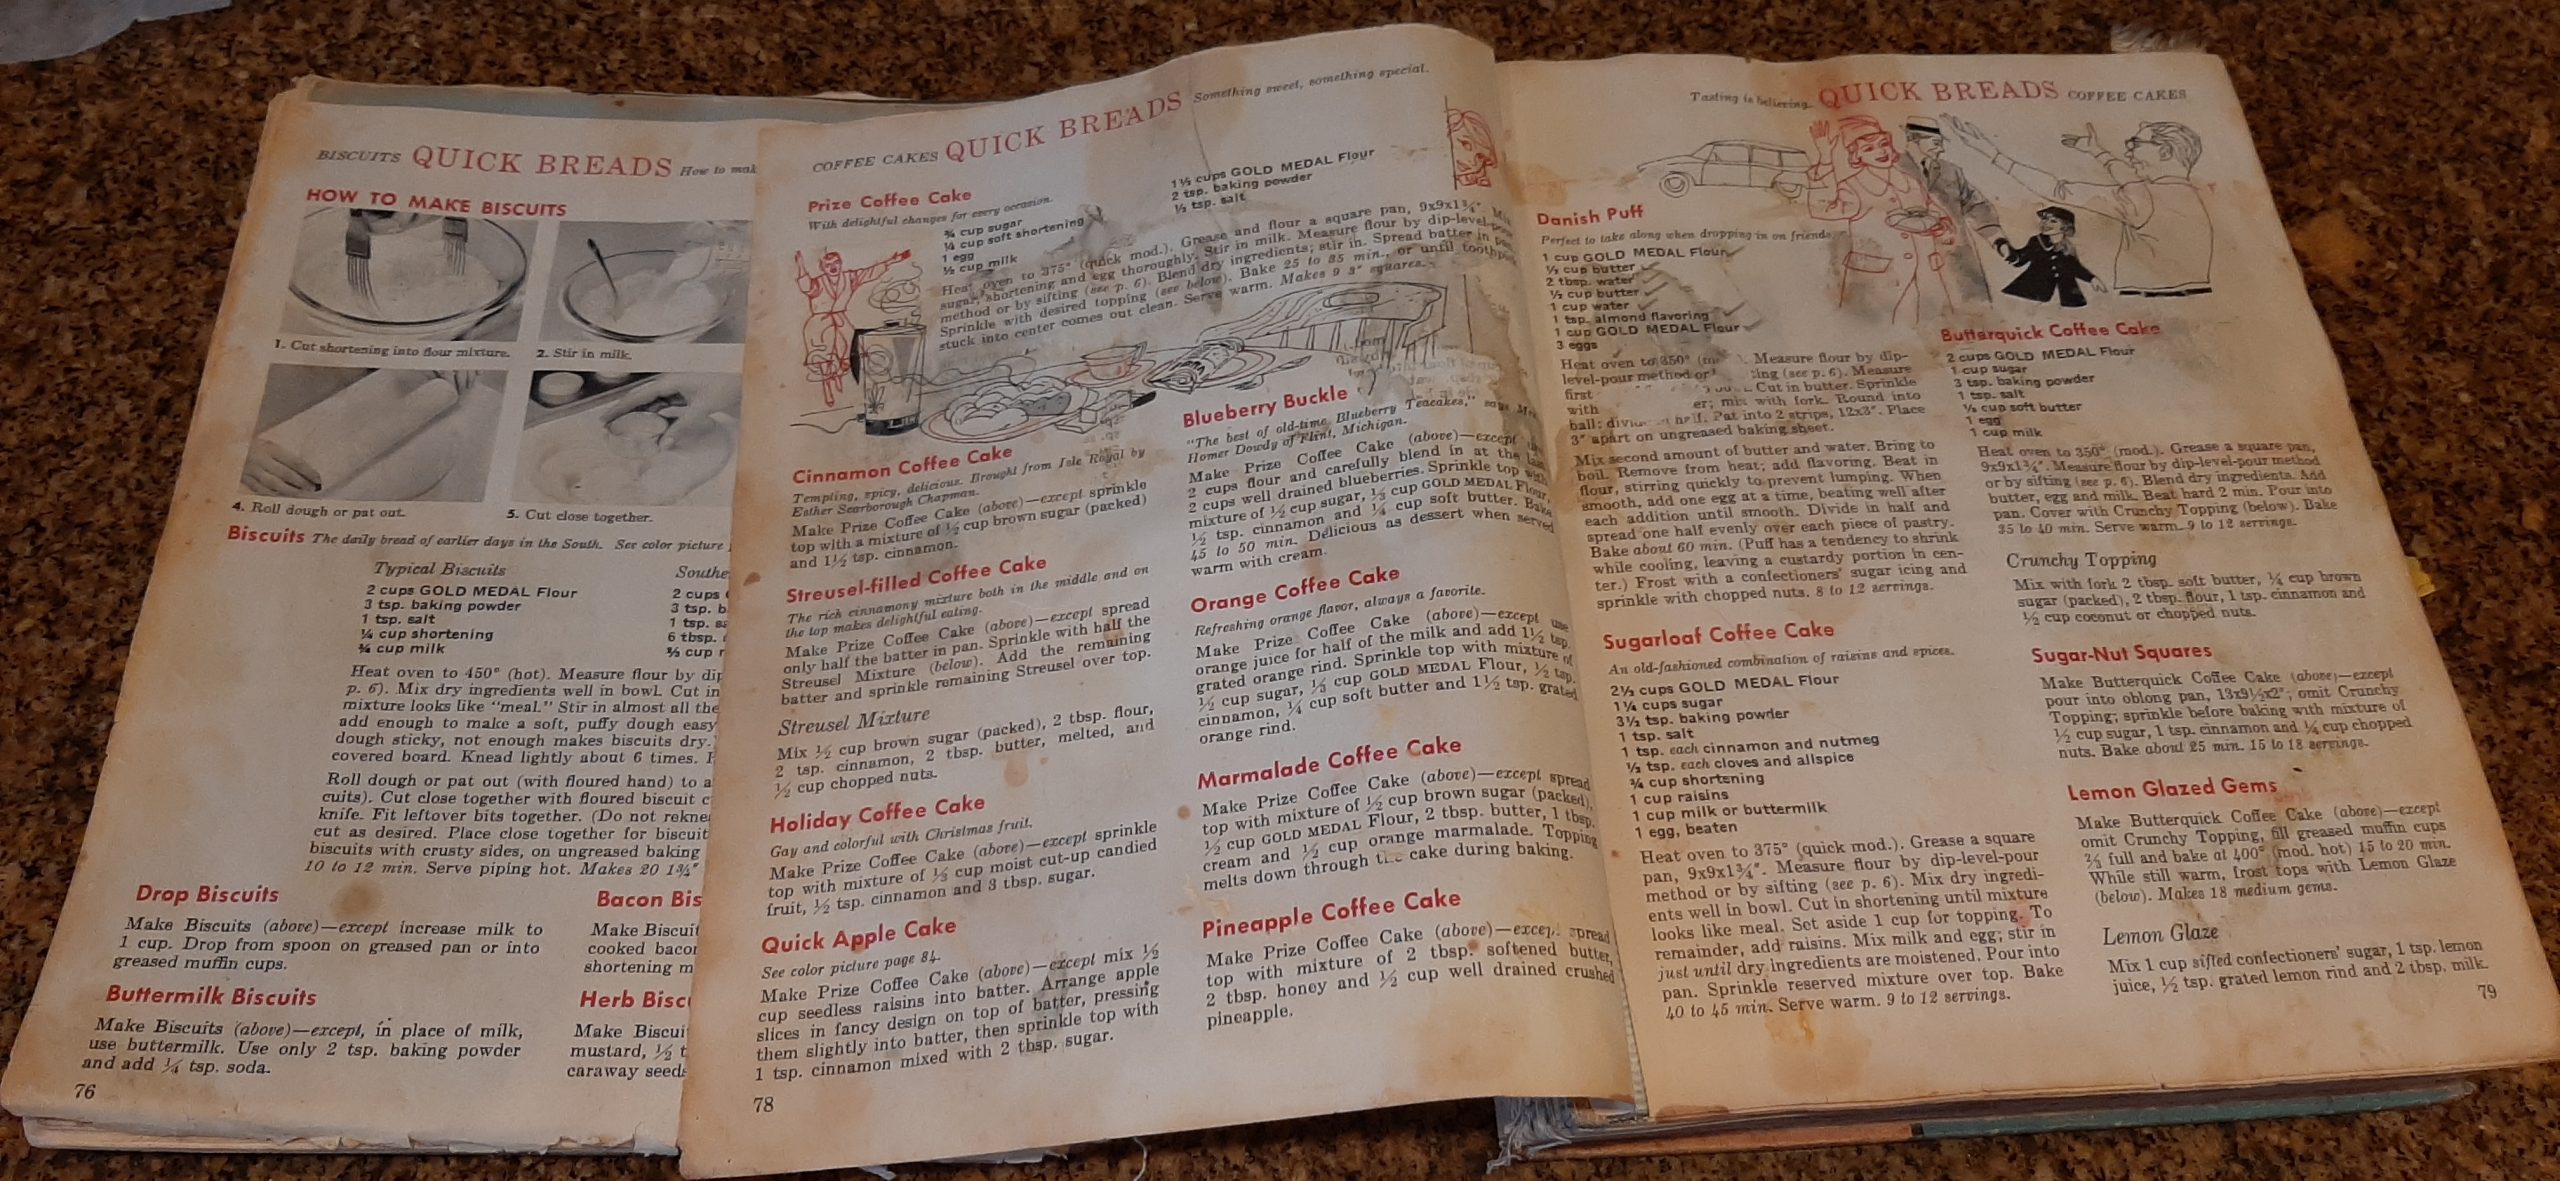
As you can see, the book is now in two parts. And if you look closely at the top left recipe on the right page, you will find the recipe for Danish Puff. As you can also see, this cookbook was very well used/loved. (Battered and bruised might be a better description.) And yes, I still consult it periodically. Old habits die hard.
So, to all of you who also learned to cook from reading a Betty Crocker cookbook (or any other cookbook for that matter) from cover to cover several times a year, congratulations. We did it. We read recipes, we made casseroles and soups and cookies, and were inspired to feed our family and friends both nutritious and delicious dishes. And has there ever been a better way to show our love. I think not! Keep up the good work everyone! Happy New Year.
And as always, peace and love to all.
Pastry:
1 c. unbleached all-purpose flour, fluffed
pinch fine sea salt
½ c. (1 stick) unsalted butter, room temp.
2 T. water
Place the flour and salt in the bowl of your food processor. Pulse a few times until the pieces are the size of coarse crumbs. Mix in the water.
Or in a medium sized mixing bowl, cut the softened butter into the flour mixture using a pastry blender or pulling 2 table knives through ingredients in opposite directions, until pieces are the size of coarse crumbs. Mix in the water.
Gather the pastry into a ball; divide in half. Pat each half into a 12×3-inch rectangle, about 3-inches apart, on an ungreased cookie sheet.
Topping:
½ c. (1 stick) unsalted butter
1 c. water
1 tsp. almond extract
1 c. unbleached all-purpose flour, fluffed
3 eggs
In a heavy 2-quart saucepan, heat the butter and water to a rolling boil; remove from heat. Quickly stir in almond extract and the 1 cup flour. (Stir as quickly as possible to prevent lumping.) When smooth, drop in 1 egg at a time, beating well after each addition. When smooth, spread half of the topping over each rectangle.
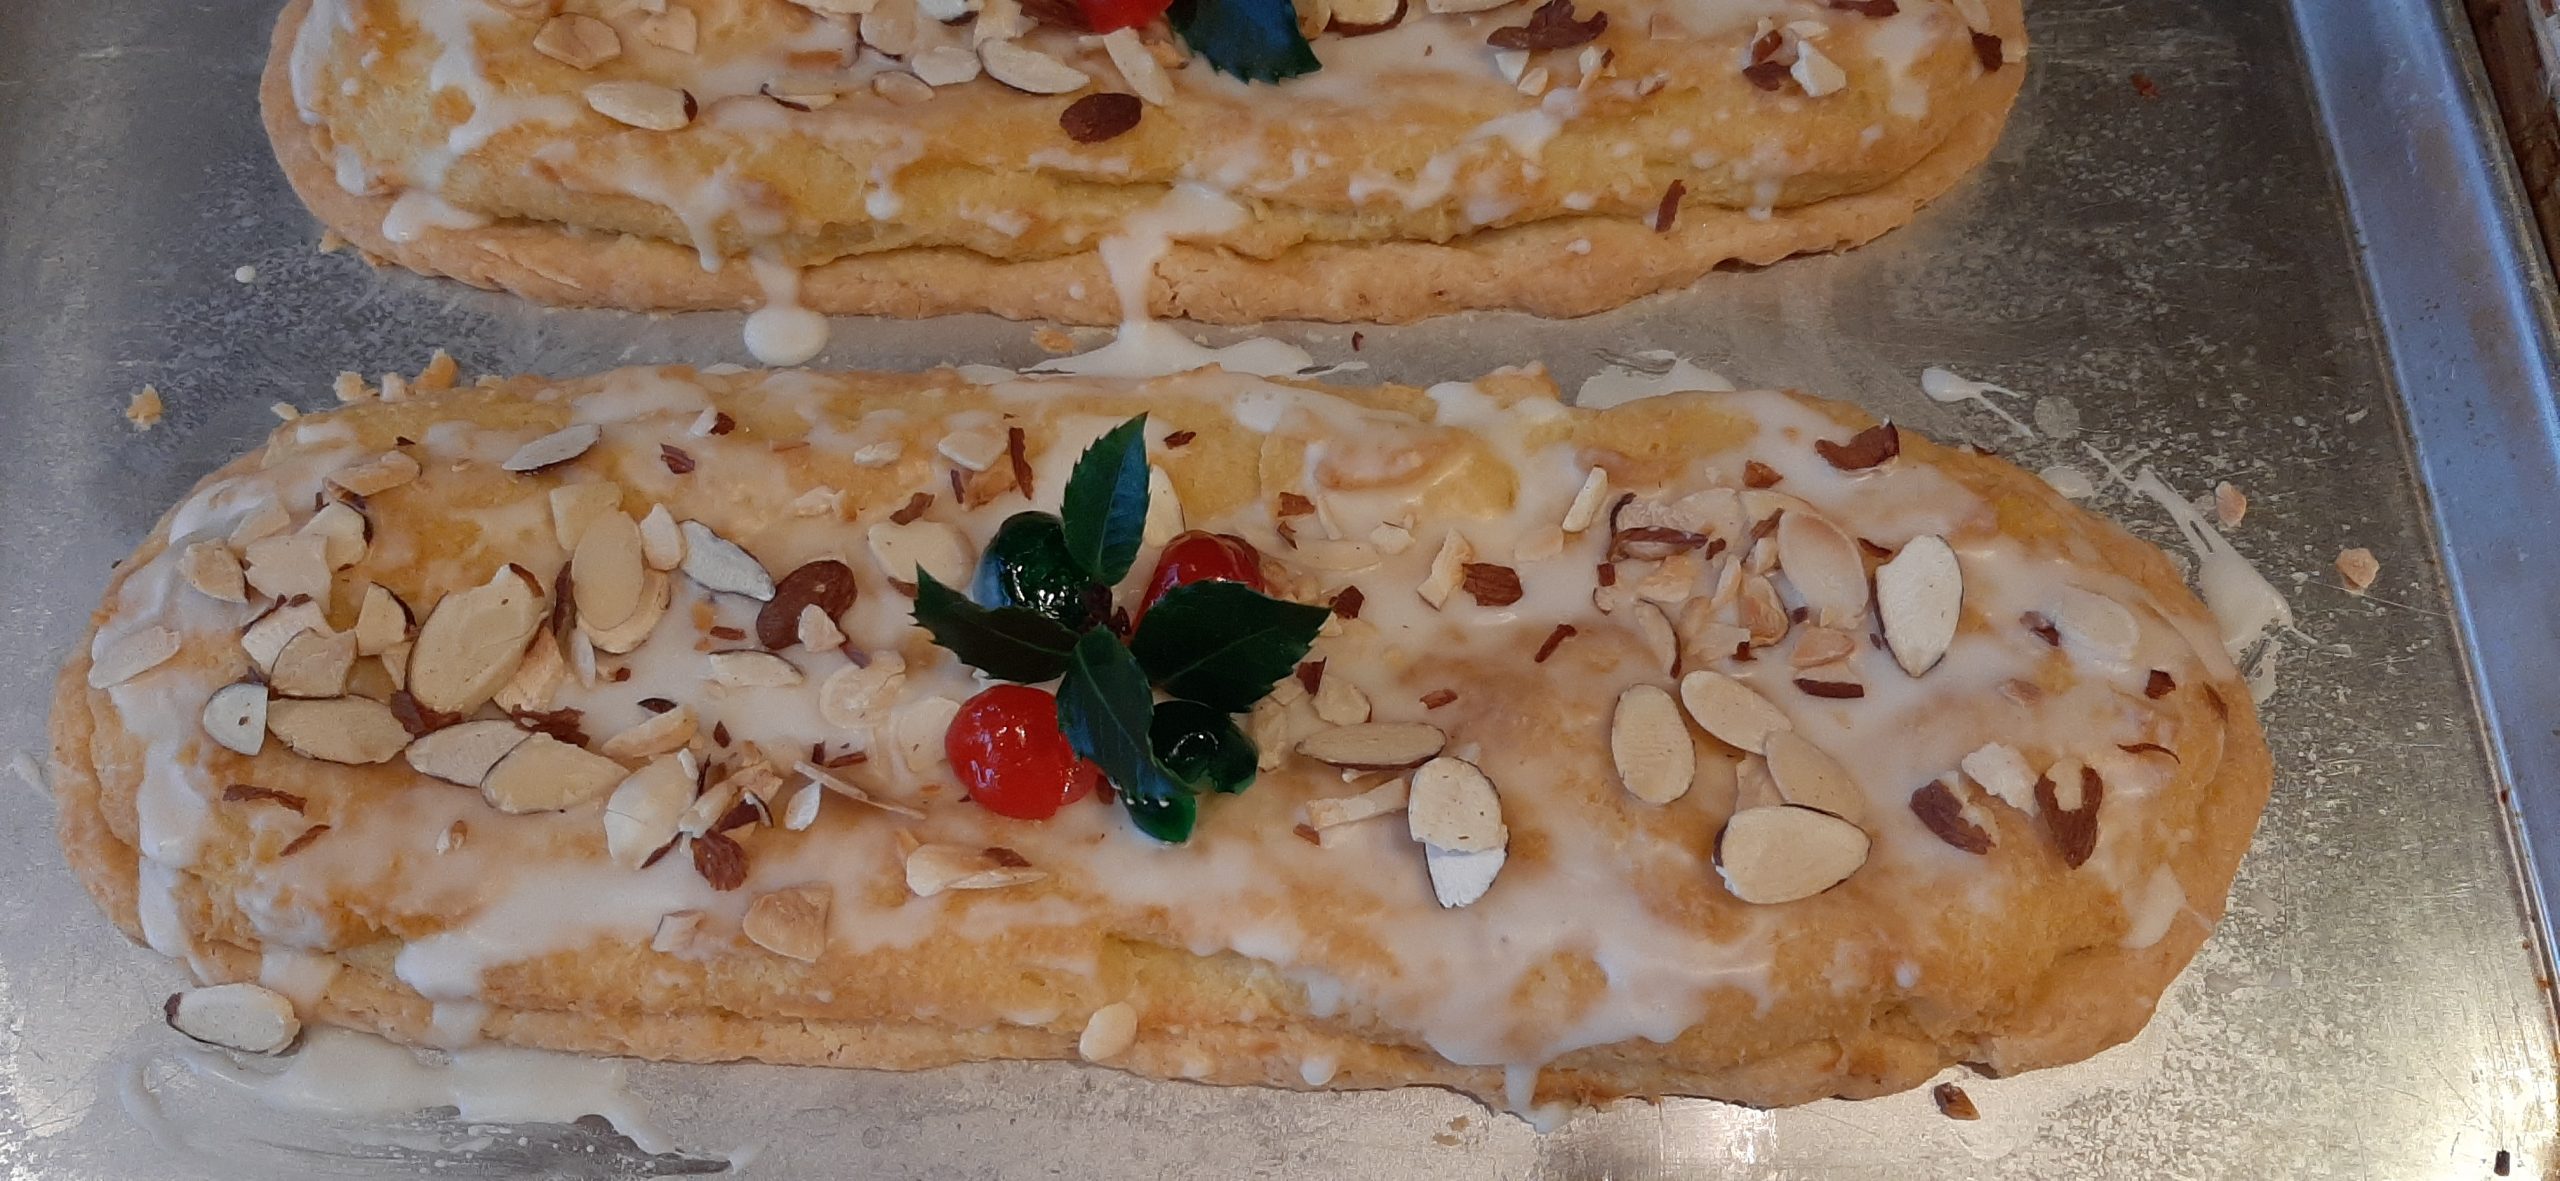
Bake in a pre-heated 350-degree oven for 50-60 minutes or until topping is crisp and a nice, light brown.
Remove from oven and transfer to a wire rack to cool completely before drizzling with glaze and garnishing with sliced almonds and maraschino cherries.
Vanilla Glaze:
½ c. powdered sugar
¼ tsp. almond extract
1-2 T. milk
In a small mixing bowl, whisk together the powdered sugar, almond extract, and enough milk to make a thin icing.
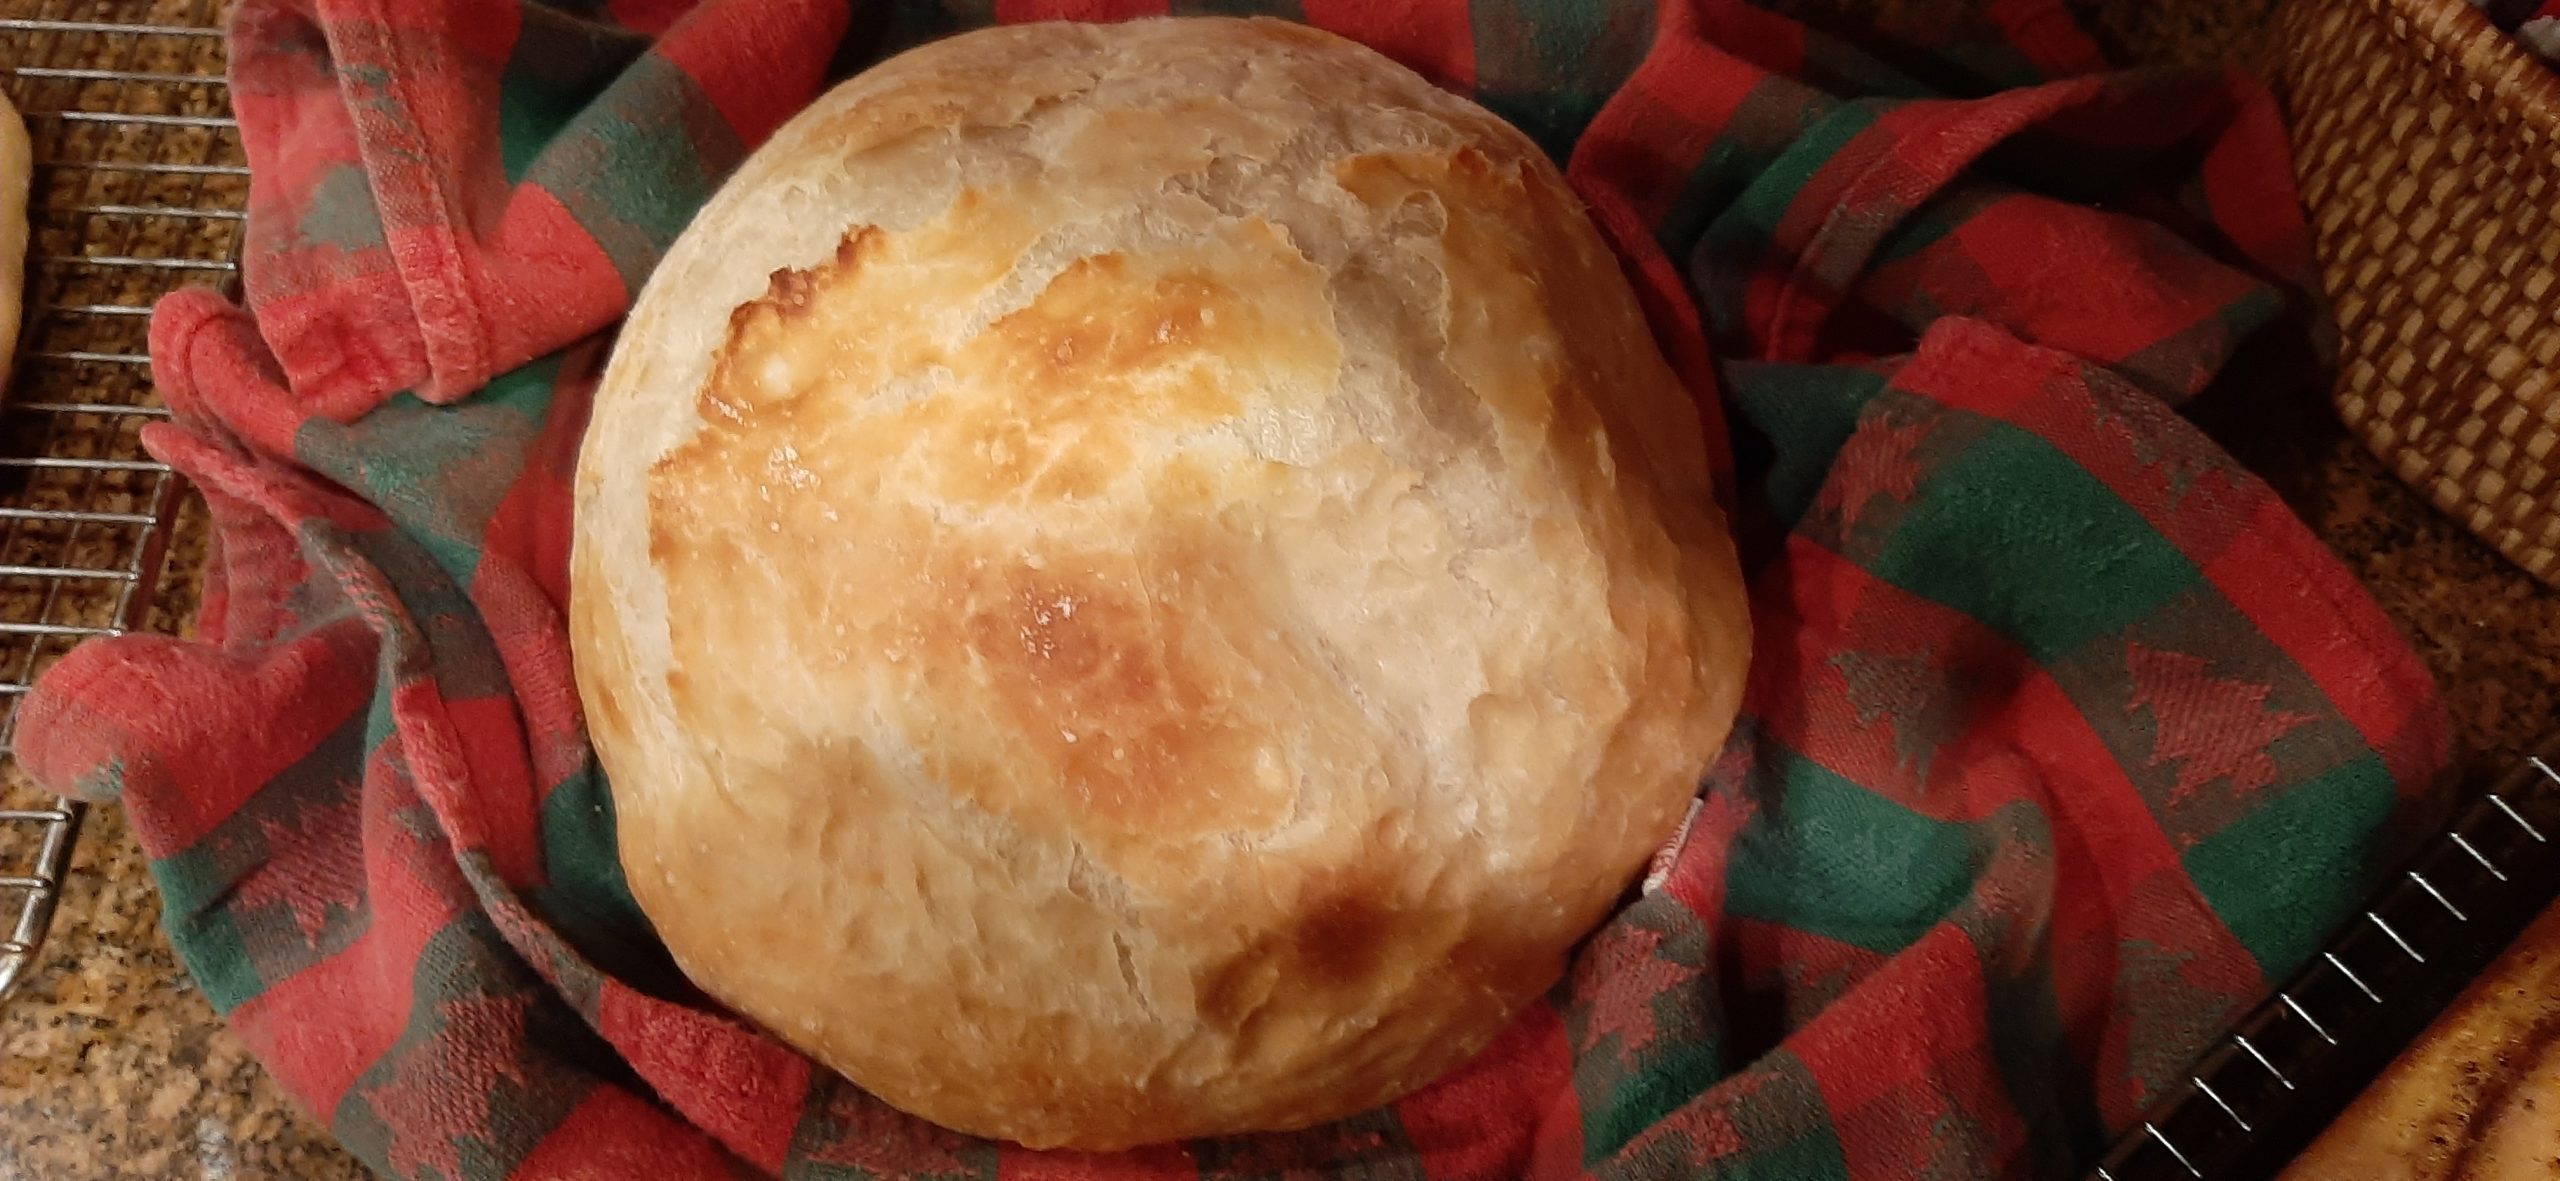
OK, I recently posted a recipe for Baked English Muffins, the easiest English muffins I have ever made. And now, I am posting a recipe for the easiest yeast bread I’ve ever had the pleasure to build. And if you also choose to make it, the easiest bread I believe you too will ever prepare. The bread, because of its round shape, should be referred to as a boule. That is if you are French and want to be fancy about it! And since I am and I do, this recipe results in a chewy and delicious boule. Which seems a bit too fancy for this bread because of the ease of preparation. But I’m going with it anyway because this bread is just that good! Such a small amount of effort involved as to be almost too good to be true. But please believe me, this is the bread recipe you need in your life if a) you hate to bake bread, b) you have no time to bake bread, c) you don’t even have enough time to go to the grocery store. Because bottom line, you can get the dough mixed in a shorter time than you can get your car out of your garage and down your driveway. Don’t believe me. Then stop reading this preface and look at the recipe itself.
Good – your back. I always miss you when you’re gone. Anyway – I used this bread the other evening to make garlic bread. And it was perfect. Nice and chewy and very much like the expensive chewy Italian bread we all adore. And the whole loaf (boule) only cost me a few pennies to make. (Aren’t I the thrifty one!)
So, don’t hesitate. Even if you’ve been baking bread for decades like I have, we all need a break occasionally. No one needs to know how easy this bread is to make. That can remain our little secret.
And as always, peace and love to all. And Happy, Happy New Year.
3 c. bread flour, fluffed, plus more for dusting
½ tsp. instant yeast
1¼ tsp. kosher salt
1½ c. warm water (about 110 degrees)
In a large bowl combine flour, yeast, and salt. Stir in the water. The dough will look like it needs more flour. Resist the temptation. Cover the bowl with plastic wrap. Let the dough rest at least 12 hours, preferably a few hours longer, at room temperature. (After a few hours the dough will look kind of caved in. That’s exactly what you want.)
After the dough has rested, place a piece of parchment paper in a medium sized bowl. Then, generously flour a work surface. (I use a floured pastry cloth on my kitchen counter.) Scoop the dough onto the floured surface. Sprinkle with a little flour and gently shape the floured dough into a ball. Then place the ball in the parchment paper lined bowl. Cover with a tea towel and let rest for at least 30 minutes.
While the dough is resting, place a covered Dutch oven (cast iron or enameled) or clay baker in your cold oven and set the temperature to 450-degrees. (You want your baking pan to get hot right along with your oven.)
After the dough has rested, carefully remove the pot from oven. Carefully take off lid. Pick up parchment paper with dough and place directly in pot. Cover with lid and bake 25 minutes with the lid on. Then remove the lid and bake another 12-15 minutes, or until the loaf is golden brown and the internal temperature reaches between 195 and 205-degrees.
Remove from oven and allow to cool before slicing. Great for garlic bread or sliced, toasted, and slathered with butter and jam.
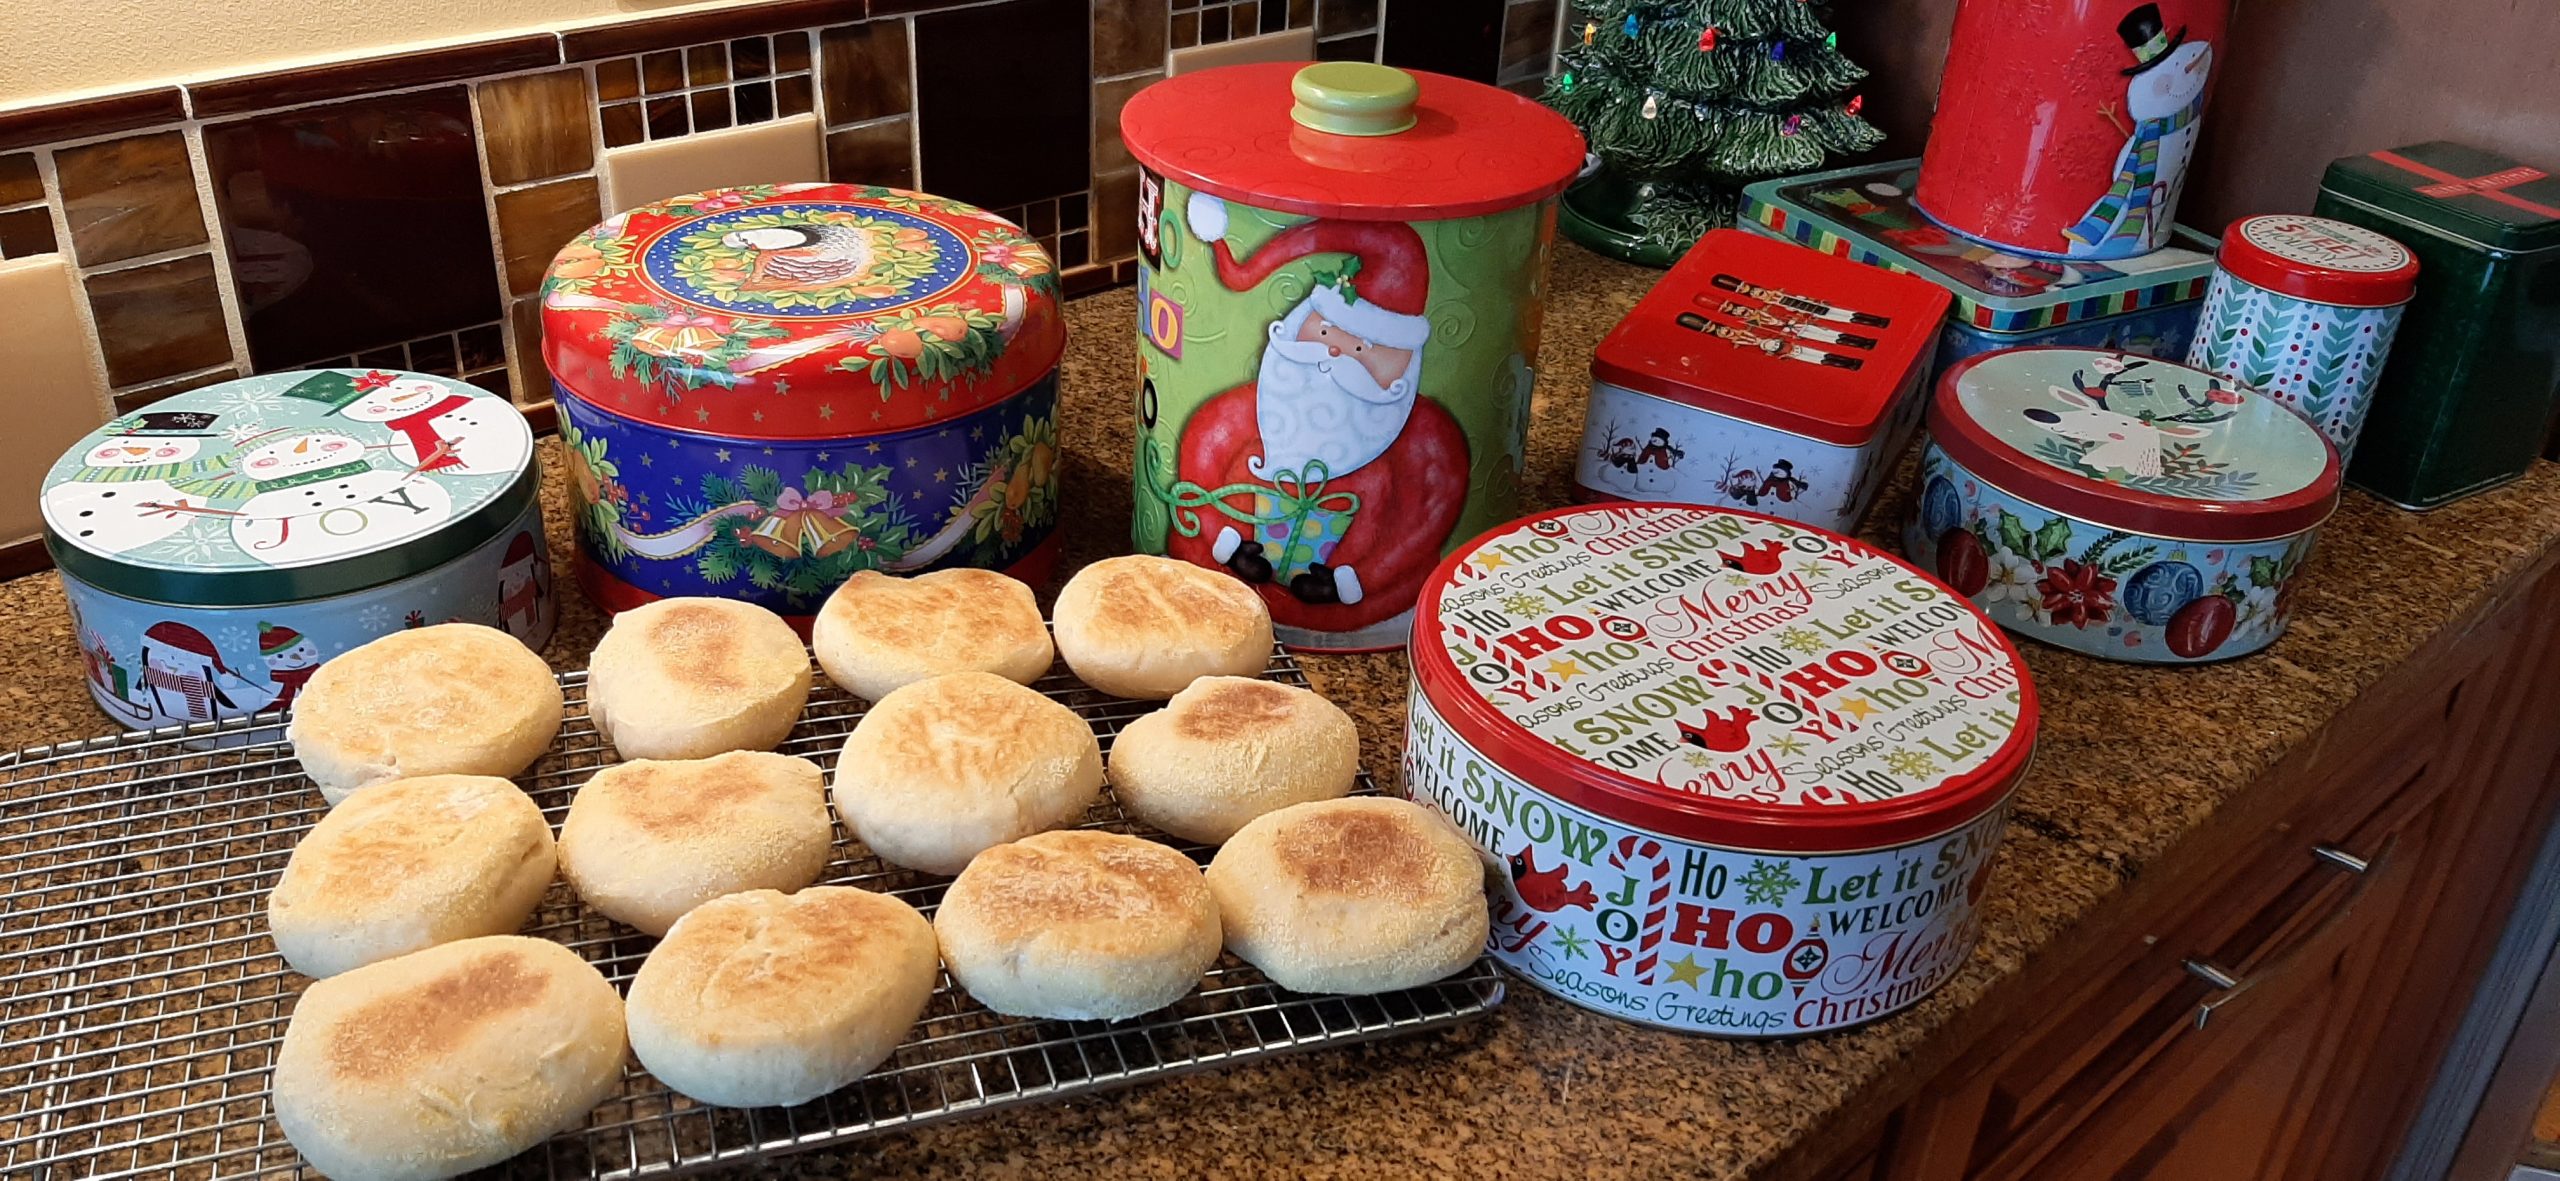
It must be Christmas at the Carr’s. Why else would there be all those cookie tins on the counter? And fresh English muffins.
OK, these have to be the easiest and tastiest English muffins I have ever made. And all the credit goes to DrDan from 101cookingfortwo.com.
It all started with me wanting to make something new for Christmas morning – Black Forest Ham Breakfast Casserole Topped with Blender Hollandaise. (Basically, the lazy man’s (in this case woman’s) answer to Eggs Benedict.) To go along with Light and Fluffy Cinnamon Rolls with Rum Raisin Cream Cheese Frosting. (recipe on site) (And yes, of course, there must be cinnamon rolls for Christmas morning! At least at our house.)
And I know. A bread-based casserole and cinnamon rolls. How can you possibly justify making two breakfast dishes with that much gluten, Patricia Ann? Well, you must remember – the two dishes are for Christmas morning. No further justification required!
Anyway, since I have never made the breakfast casserole, and although I hope it will be delightfully delicious, there is always the possibility that it won’t. But I decided I couldn’t go too far wrong if I started with homemade English muffins.
And I have a positive feeling about this casserole. I just know it’s going to be delicious. Anything slathered with my homemade Blender Hollandaise (recipe on site) is just bound to be tasty. Even shoe leather would taste fantastic topped with this creamy, buttery lemon sauce. (It is truly delicious and ever so easy to make.) But back to this recipe.
Easy, easy, EASY! No mixer required. But the dough must rest overnight. And I think it’s best if you have a set of English Muffin Rings*. I got mine in one day with Amazon Prime. The rings make the process almost foolproof.
And I can’t begin to tell you how delicious these muffins are. OMG – never will I buy English muffins again. They are just so good and so inexpensive to build.
And if the breakfast casserole turns out to be delicious, I promise to share the recipe with you. (Well, of course I will!)
That’s it for today. Mr. C. has a big band concert this evening in Anacortes. And of course, I am going along, even though I have heard the concert twice already. But can you ever get too much jingle jazz? I think not! Just like you can’t make too many cookies or too much candy for Christmas. Just isn’t possible.
So, happy holidays to all. Even though I might not personally know you, I still consider you a friend. A friend who shares my love of cooking. And isn’t that a great way to start any relationship. With a shared passion. So, thank you for your friendship, and may it continue for years to come.
And as always, peace and love to all.
1½ c. whole milk
2 T. unsalted butter, melted
4½ tsp. granulated sugar
4½ tsp. rapid rise or quick dry yeast
¾ tsp. kosher salt
3¾ c. unbleached all-purpose flour, fluffed
cornmeal
Warm the milk in a large glass mixing bowl in your microwave to about 105-degrees.
Stir the warmed milk, melted butter, granulated sugar, and yeast together. Mix well and allow the yeast to proof for about 5 minutes or until starting to foam. Add the flour and salt to the yeast mixture. Mix well, scraping the sides of the bowl to make a shaggy dough.
Cover the dough with plastic wrap. Allow it to sit overnight at room temperature. The dough will sink a bit rather than keep rising. (This is what you want!)
Lightly grease the inside of a dozen 3-inch baking rings* and set them on a large parchment paper lined baking sheet.
After sitting overnight on your counter, turn the dough onto a floured work surface, gently roll into a ball, and then cut into 12 equal pie shaped pieces. (First, I cut the ball in half, then in half again. Then with each quarter, I cut 3 equal (or as close as possible to equal) sized pie shaped pieces. (Be gentle with the dough. Do not work it too much.)
Place a small bit of cornmeal in a shallow bowl. Gently form each piece of dough into a rough ball and coat with cornmeal.
Place the cornmeal coated balls into the prepared rings and flatten each one gently to fill the ring. Then using a finger, “dimple” the center in about a quarter of an inch. This will help the muffins bake flatter. Allow the muffins to rest for about 30 minutes while you pre-heat your oven to 400-degrees with another parchment paper lined large baking pan heating along with the oven.
Remove the preheated baking sheet from the oven. Carefully remove the muffins from the rings and place them on the hot baking sheet. Sprinkle each muffin with a bit more cornmeal.
Bake for 10 minutes. Flip the muffins. Bake another 8 minutes or until the color is golden brown, and the internal temperature reaches at least 200-degrees.
Remove from oven and cool completely before storing in an airtight container in your refrigerator.
*I purchased Lyellfe – 20-piece English Muffin Rings from Amazon. $19.99. And I like them very much. I figure I will recover the cost of the rings after the next batch of muffins I make because they are so inexpensive to make and so expensive to buy.
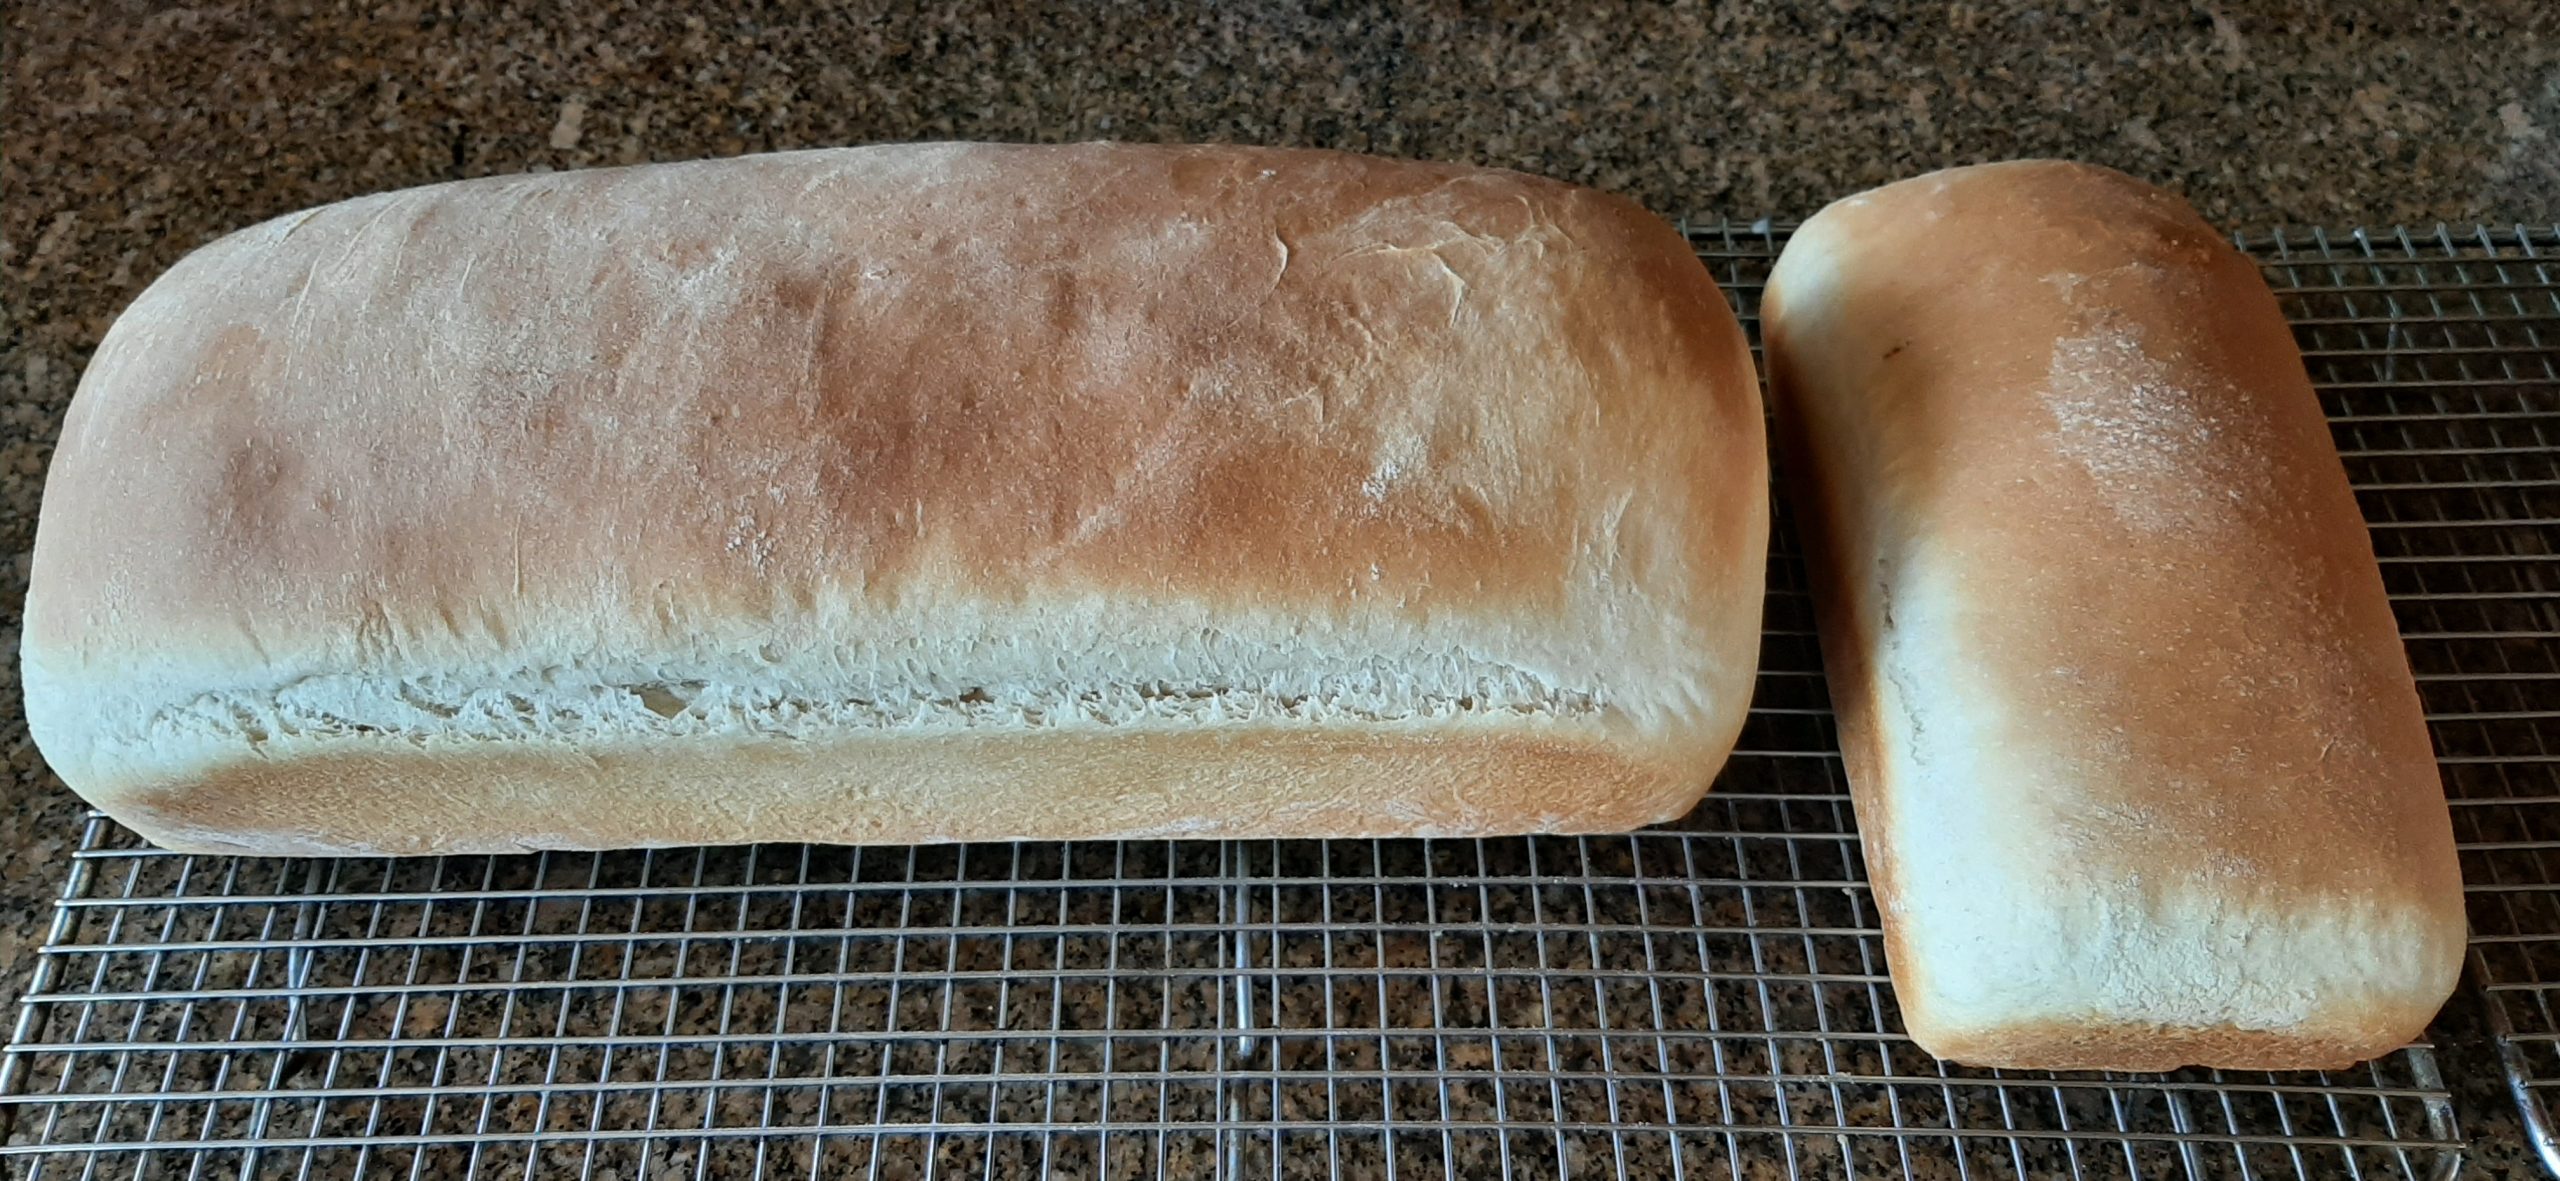
If you ever wanted to bake a simple white sandwich or part whole wheat sandwich bread for a gathering, then these two recipes would work well for you. They are both easy to prepare, taste terrific, and feed lots of people. Or as I am going to do with the leftover bread from yesterday’s JazzVox home concert, where I served 35 people Sloppy Joes (recipe on site) over toasted slices of both of these breads, use the leftovers for the dressing I am making this Thursday (Thanksgiving). So, kill two birds with one stone, or as in this case use the same breads for two meals, WHY THE HECK NOT? And hurray!
Not only did I save a great deal of money by making my own base for Sloppy Joes, but it is also now completely unnecessary for me to pay an exorbitant amount of money for dried bread cubes at the grocery store. And that brings up a good point.
Even if you don’t make your own bread, you can still buy a cheap loaf of white or whole wheat bread and simply cut the bread (crusts and all) into small cubes and dry them at a very low temperature in your oven. Why the people who package cut up days old bread charge such ridiculous prices (Brownberry Premium Unseasoned Cubed Stuffing 12 oz. for $12.25) and get away with it is beyond my comprehension! So, even if you don’t want to bake your own bread, just buy a loaf of Wonder Bread (a 20-oz. loaf of white sandwich bread from Walmart $2.92) and make the dried cubes yourself! OK, I’m done pontificating!
Anyway, both of these recipes make for very simple, but tasty and inexpensive sandwich bread. I hope you enjoy both the recipes.
And for all of you who are hosting Thanksgiving dinner, I’ve included my favorite recipe for Turkey Dressing at the bottom of this post. The dressing is savory and just a perfect base for Turkey Gravy with Cognac. (You can find that recipe on this site.)
So, to all of you who are hosting Thanksgiving dinner, bless you for all your hard work. And all of you attending Thanksgiving in someone else’s home, be sure and thank your host and hostess. They have put in a lot of work on behalf of you and all the others that participated in the dinner.
And for all of you who read my blog, thank you for being a part of my life. It remains a great joy for me to be able to share my love of cooking with each and every one of you. And for me to share with you my hopes for a better world for everyone, everywhere.
I leave you with the lyrics to What the World Needs Now by Hal David (lyricist) and music composed by Burt Bacharach.
What the world needs now is love, sweet love It’s the only thing that there’s just too little of What the world needs now is love, sweet love No not just for some, but for everyone
Lord, we don’t need another mountain There are mountains and hillsides enough to climb There are oceans and rivers enough to cross Enough to last ’til the end of time
What the world needs now is love, sweet love It’s the only thing that there’s just too little of What the world needs now is love, sweet love No, not just for some, but for everyone
Lord, we don’t need another meadow There are cornfields and wheatfields enough to grow There are sunbeams and moonbeams enough to shine Oh listen, Lord, if you want to know
What the world needs now is love, sweet love It’s the only thing that there’s just too little of What the world needs now is love, sweet love No, not just for some, oh, but just for every, every, everyone
PEACE AND LOVE TO ALL AND HAPPY THANKSGIVING
WHITE SANDWICH BREAD
2½ c. slightly warm milk
1 T. active dry or instant yeast
1 T. granulated sugar
6 – 6½ c. unbleached all-purpose flour
2 tsp. kosher salt
¼ c. (½ stick) unsalted butter, room temperature
veggie oil
Pour the warm milk into the bowl of your stand mixer and stir in the yeast and sugar. Let sit for 5 minutes, or until foamy.
Add about half of the flour. Stir until well blended. Add another couple cups of the flour, salt, and butter and knead for about 8 minutes or until the dough is smooth and elastic. Add enough more flour as needed.
Pour a bit of veggie oil in the bowl, and using your hands and a stiff spatula, form the dough into a lightly greased ball. Cover with plastic wrap and let sit for 1 – 1½-hours or until doubled in size. Lightly grease a 13×5-inch loaf pan and a 9×5-inch loaf pan and set aside. Or 3 9×5-inch loaf pans.
Turn the dough out onto a lightly floured surface. Punch it down and roll it into a rectangle about 20-inches long. Fold the long side of the rectangle toward the center, press to seal the edge. Fold the bottom of the rectangle to the top to make a cylinder. Cut a third of the loaf off. Place the longer piece in the 13-5-inch pan and the shorter piece in the smaller pan. Or if you are using 3 9×5-inch pans, divided the long piece in thirds. Place the dough in the prepared pans seam side down, tucking the ends in and pressing the dough into a flat piece of dough in each pan.
Cover with plastic wrap and leave for an hour, or until the dough almost doubles. As the dough rises, pre-heat the oven to 375-degrees with the rack in the middle of the oven.
Bake for 30-32 minutes or until the internal temperature reaches at least 190-degrees. Remove from oven and turn the loaves out of the pan onto a rack to cool.
Store covered at room temperature.
WHOLE WHEAT SANDWICH BREAD
2 c. whole milk ¼ c. honey 4 tsp. active dry yeast
4 T. (½ stick) unsalted butter, room temp.
2 tsp. kosher salt 3 c. whole wheat flour
3 T. vital wheat gluten, opt. (but recommended) 1½ to 2 c. bread flour extra virgin olive oil
Heat the milk slightly (about 105 degrees). Pour into the bowl of a stand mixer and add the honey and yeast. Let stand for about 5 minutes until the yeast bubbles.
Add the butter, salt, whole wheat flour, vital wheat gluten, and ½ of the bread flour. Mix until combined.
Cover and let stand for 15 minutes. Add in the remaining bread flour and with a mixer fitted with a dough hook, knead the dough on medium speed until the dough is smooth and springy. (about 6 minutes)
Pour a bit of olive oil in the bowl, and using your hands and a stiff spatula, form the dough into a lightly greased ball. Cover with plastic wrap and let double in volume (about 60 to 75 minutes).
Lightly grease a 13×5-inch loaf pan or 2 9×5-inch loaf pans. Set aside.
Turn the dough out onto a lightly floured surface. Punch it down and roll it into a 13-inch-long rectangle. Fold the top of the rectangle toward the center, press to seal the edge. Fold the bottom of the rectangle to the top to make a cylinder. Place the dough in the longer pan seam side down. (If you are making 2 loaves, cut the dough into 2 equal size pieces before placing in the pans.)
Cover with plastic wrap and let the dough rise for about 60 minutes.
Bake in a pre-heated 400-degree oven for about 25-30 minutes or until golden and the internal temperature reaches at least 190-degrees.
Remove from oven and immediately turn the loaf or loaves out of the pan(s) onto a cooling rack and let cool thoroughly before slicing.
TURKEY DRESSING (with or without cooked breakfast sausage)
1 c. butter
1½ c. chopped celery (stalks and leaves)
2 med. onions, finely chopped
12 to 14 lg. button mushrooms, chopped
1 c. chopped fresh Italian parsley
2 cloves garlic, finely minced
1 T. minced fresh sage
1 T. dried thyme leaves
2 T. poultry seasoning, or more to taste
1 tsp. savory, either powdered or dried leaves
2 tsp. kosher salt
freshly ground black pepper
16-20 c. dry bread cubes
1 lb. cooked breakfast or Italian sausage, opt.
3 eggs
5-7 c. turkey or chicken stock
In a large sauté pan, melt butter and add celery, onions, and mushrooms. Cook for about 5 minutes. Add the parsley, garlic, sage, thyme, poultry seasoning, savory, salt, and pepper. Remove from heat. Place dried bread cubes in a very large mixing bowl. Stir in the cooked sausage. Add the sautéed vegetables; mix thoroughly.
Beat eggs in a separate medium sized bowl. If you are using stock that is simmering happily on your stove, vigorously whisk 5 cups of the broth into the eggs. (The hot stock will scramble the eggs if you don’t stir vigorously.) Pour the hot liquid over the bread cubes and gently stir. Add more stock if the dressing is dry. (Remember, this is dressing, not stuffing and therefore is not going into the cavity of the turkey. So, any moisture needs to be added while it is being prepared.) Taste the dressing and add additional poultry seasoning and/or salt if needed.
Place dressing in a buttered casserole dish, cover and refrigerate until ready to bake in a pre-heated 350-degree oven for 45 minutes or until hot. (I put mine in the oven when the turkey comes out.)