
And you’re correct, I already have a recipe for Pain de Campagne on this site. And it too makes for wonderful eating. But it’s not a recipe for overnight bread. And sometimes what I require is for the dough and first rise to happen one day, and the baking of said dough to occur the next day. Because somewhere along the line we have become super busy. And our social life recently seems to have spun a bit out of control. Now do not get me wrong. I love being involved with Andy’s musical events and get-togethers with friends. But our bustling schedule often leaves me with time constraints. And who doesn’t have time issues if they are busy living a full and rich life? So, concessions must be made. And preparing the bread dough on day 1 and baking the bread the next day is an allowance I am gladly willing to make if it results in homemade bread. So, you will undoubtedly be seeing more recipes from me that feature 2 day breads.
There are excellent articles provided by the fine people at the King Arthur Baking Company that explain the how and why of making bread in more than one day. Two articles that I was lucky enough to find were most beneficial. “Why multiday breads are actually the easiest breads of all” and “Can I refrigerate my bread dough and bake it later?” I suggest you read these two articles if you also find yourself in the position of not having a chunk of time long enough to devote to baking bread. I learned a lot from these two articles, and plan to use my newfound knowledge with some of my favorite same day bread recipes.
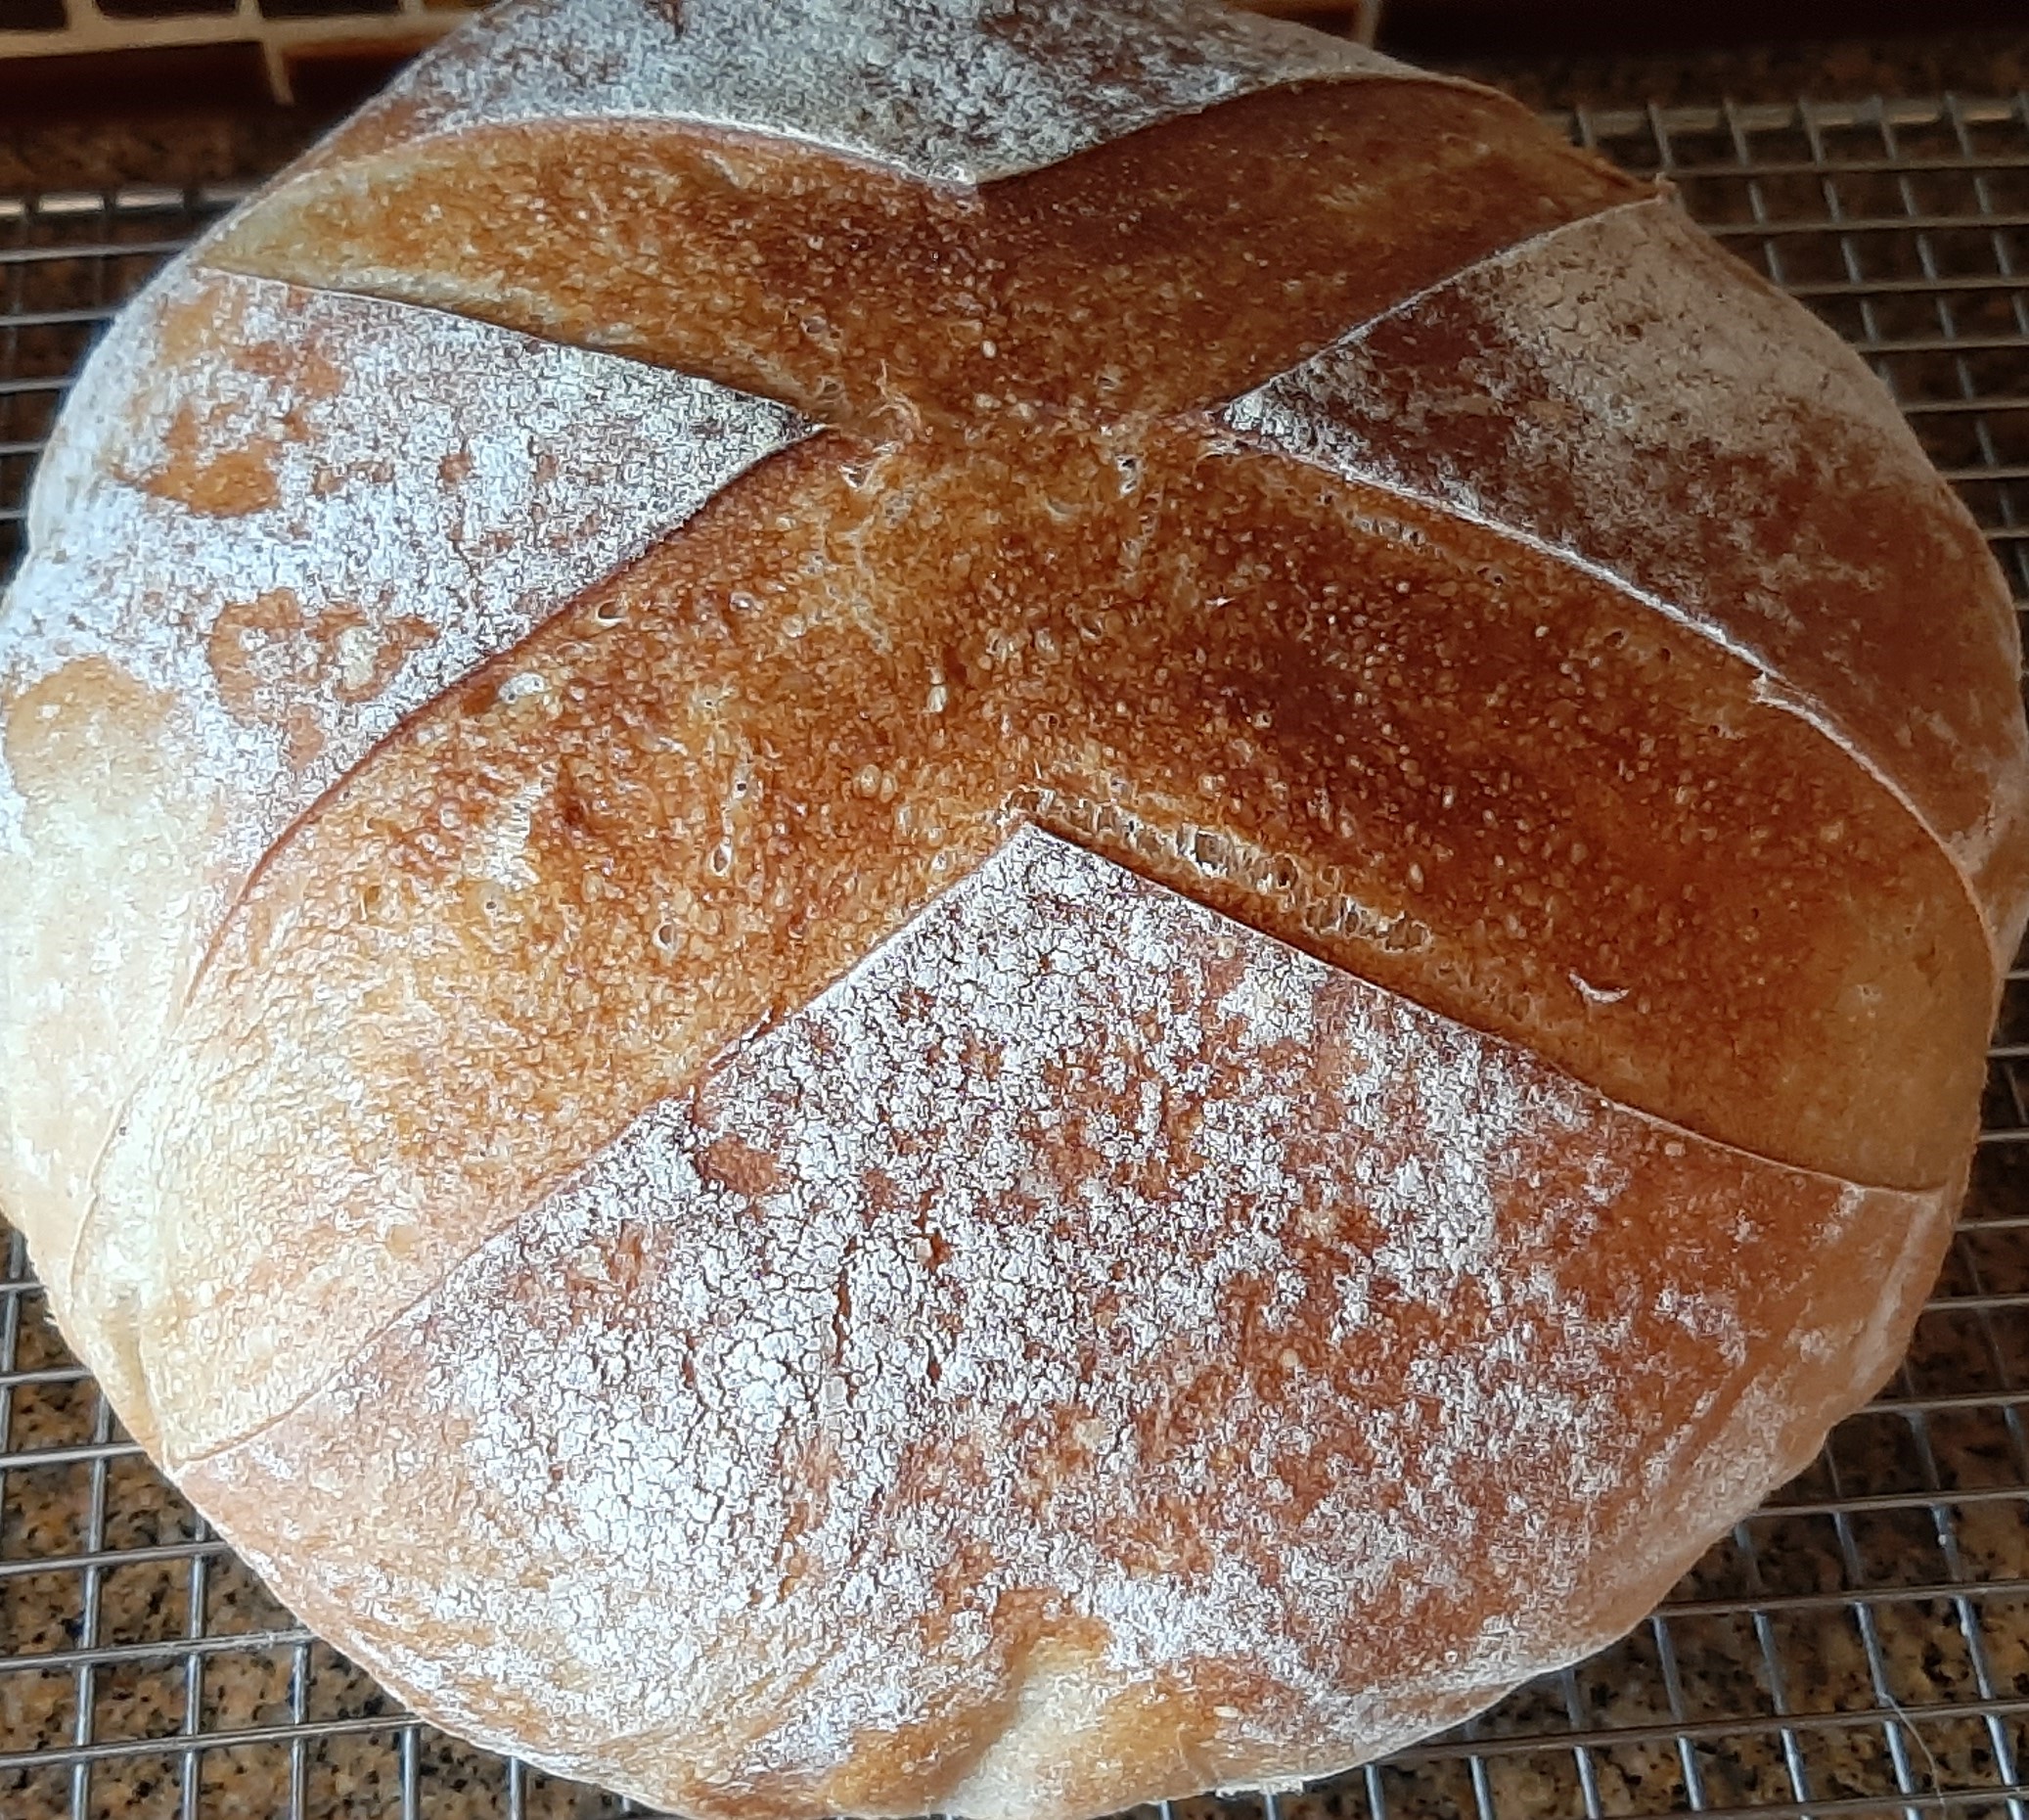
Now about this bread. It’s really good. It possesses enough flavor from the small amounts of rye and whole wheat flavor to be interesting. The texture is a bit chewy and perfect for wiping up any gravy or sauce on your plate that might happen to require mopping up. (So much more dignified than licking your plate or bowl.)
So, if you too are a bread lover, give this recipe a try. And if you do bake bread routinely and have yet to bake a loaf in a cast-iron Dutch oven* or clay baker*, then I encourage you to seek out a cast-iron Dutch oven at your earliest convenience. And if you happen to already own a 5.5 to 6-quart cast-iron Dutch oven, you are set to go. If not, a garage sale, Good Will, your local thrift store, or brand new from William-Sonoma purchase would suit just fine. Plus, you can always use your Dutch oven to make stew and other delectable dishes. So, a very versatile kitchen tool to own.
And baking bread is an easy and cost effective way to ensure your kitchen smells wonderful. Because I’m telling you the truth, nothing smells better than bread in the oven. If I go to heaven, and that’s a big “if”, you realize, I want my room to smell like baking bread 24/7. I mean really, what could be more heavenly!?
As always dear friends, peace and love to all.
1¼ c. warm water
1 c. sourdough starter discard
1½ tsp. active dry yeast
1½ tsp. kosher salt
2 T. rye flour
6 T. whole wheat flour
1 T. vital wheat gluten flour
3 c. bread flour, more or less
extra virgin olive oil
Place the warm water, sourdough starter, and yeast in the bowl of your stand mixer. Let sit for 5 minutes. Add the salt, rye flour, wheat flour, vital wheat gluten flour, and 1 cup of the bread flour. Mix together with your bread hook. Let sit for 5 minutes.
Add enough remaining bread flour to make a soft, elastic dough. Dough should ball up around the bread hook, leaving just a bit stuck to the bottom of the bowl. The dough should be a bit sticky, but not tacky. Pour a bit of oil in the bowl and using your hands and a stiff rubber spatula, form the dough into a ball, completely greased with the oil.
Cover with plastic wrap and allow to rise until doubled in volume, about 90 minutes. Punch down once during this rising.
Cover a small cookie sheet with a rectangle of parchment paper. (Use a large enough piece of parchment paper to allow for lifting the dough into a Dutch oven or clay baker.) Gently shape the dough into a ball. Place the dough ball on the parchment paper. Dust with a bit of flour and place in refrigerator overnight. (No need to cover the dough.)
Remove the dough the next day and slash an “X” on the top. Allow the dough to sit on the counter for about an hour while you pre-heat your oven to 500-degrees. If you are using a Dutch oven or clay baker, place it along with the lid on the middle rack of the oven at the same time you start your oven pre-heating. You want your clay baker or Dutch oven to get hot right along with the oven.
Remove the Dutch oven or clay baker from the oven being very careful not to burn yourself. Carefully, using the sides of the parchment paper, lower the dough into the hot Dutch oven or onto the base of the clay baker. Cover and carefully return to the oven. If you are using a baking sheet, just place the baking pan in the oven.
If you are using a Dutch oven or clay baker, bake covered for 30 minutes, then uncover and allow to finish baking. Total baking time is about 40-minutes. The top should be a lovely golden brown. The internal temperature should reach at least 205 degrees. If using a baking pan, check if your bread is done after 40 minutes.
Remove from oven and carefully lift the parchment paper and bread out of the clay baker or Dutch oven onto a wire rack to cool. Cool completely before slicing.
*The high heat inside the Dutch oven or clay baker allows the water inside the dough to evaporate. Because you have the lid on top, the steam is trapped inside and creates a hot and steamy environment. This helps your bread to stay moist and flexible so it can rise and expand easily. The humid environment also promotes a crispy and shiny crust.