
As I indicated in one of my previous posts, I am on a mission to serve seafood at least once a week. And having already made a dish with the frozen shrimp that I almost always have on hand, I was left with only one option. Canned tuna fish. Which BTW, we both love. We try not to eat it too often although it is rich in protein and contains many vitamins and minerals such as B-Complex vitamins, Vitamins A and D as well as iron, selenium and phosphorus. Tuna also contains healthy omega 3 essential fatty acids DHA and EPA. But tuna, even though it is very nutritious, is also high in mercury compared to most other fish. So, we confine ourselves to only eating tuna once in a while.
But since we are currently confined to quarters because of illness, going to the grocery store is out of the question. So, canned tuna it is! But then, what to make with a can of tuna that will be delicious, different, and of course a culinary challenge. (Because after all, I’ve got to experience some stimulation while I’m being sequestered. And coming up with new recipes has always lifted my spirits.)
So, why not one of the all-time comfort foods – pot pie? But of course! Tuna pot pie. (Why hadn’t I thought to make one before?) So, modifying Diana Ratray’s Tuna Potpie recipe for the filling as a starting point, I came up with this recipe.
And of course, I wouldn’t be passing this recipe on to you if we both hadn’t very much enjoyed our individual pot pies last evening. As often happens, we discussed the pot pies this morning over breakfast. I made a few tweaks to the recipe based on our conversation, but nothing of real significance.
So, I hope you enjoy this recipe. The pot pies were fun to make, and really didn’t take nearly as much time as I thought they would. Not even the crust. I’ve said it before but will gladly repeat myself. Good tools in the kitchen are a must. And food processors are unequivocally one of best tools to help weary cooks. (And those of us who are getting a little older and need a bit of extra help when it comes to shredding, hacking, slashing, kneading, dicing, grinding, and blending.) So, making the pie crust in my food processor was a snap. Along with my KitchenAid stand mixer and my small (.75 qt.) Waring Pro Prep commercial chopper grinder, I can still accomplish almost any required task.
But, for how much longer I can continue to lift my Le Creuset pots? That’s another story!
Peace and love to all.
For the Filling:
¼ c. (½ stick) unsalted butter
½ c. chopped onion
1 med. carrot, finely diced
½ c. diced celery (including the leaves)
2 garlic cloves, finely minced
2 tsp. chopped fresh parsley
⅓ c. unbleached all-purpose flour
1 tsp. seasoned salt
freshly ground black pepper
¼ tsp. paprika
pinch dried thyme
2 c. whole milk
1 (6 to 7-oz.) can water packed Albacore tuna, drained and flaked
1½ c. frozen uncooked petite peas (or other veggies of choice)
1½ c. grated sharp cheddar cheese
pie pastry (see recipe below)
Part 1 – Filling
Melt the butter in a large saucepan. Add the onion, carrot, and celery. Sauté over medium-low heat until the onion is tender. Add the garlic and parsley; cook for 1 minute.
Stir in the flour, seasoned salt, pepper, paprika, and thyme.
Gradually add the milk, stirring constantly. Cook until the mixture starts to bubble and gets thick. Remove from heat and stir in the tuna, peas, and cheese. Taste, and add more salt and seasoning if necessary.
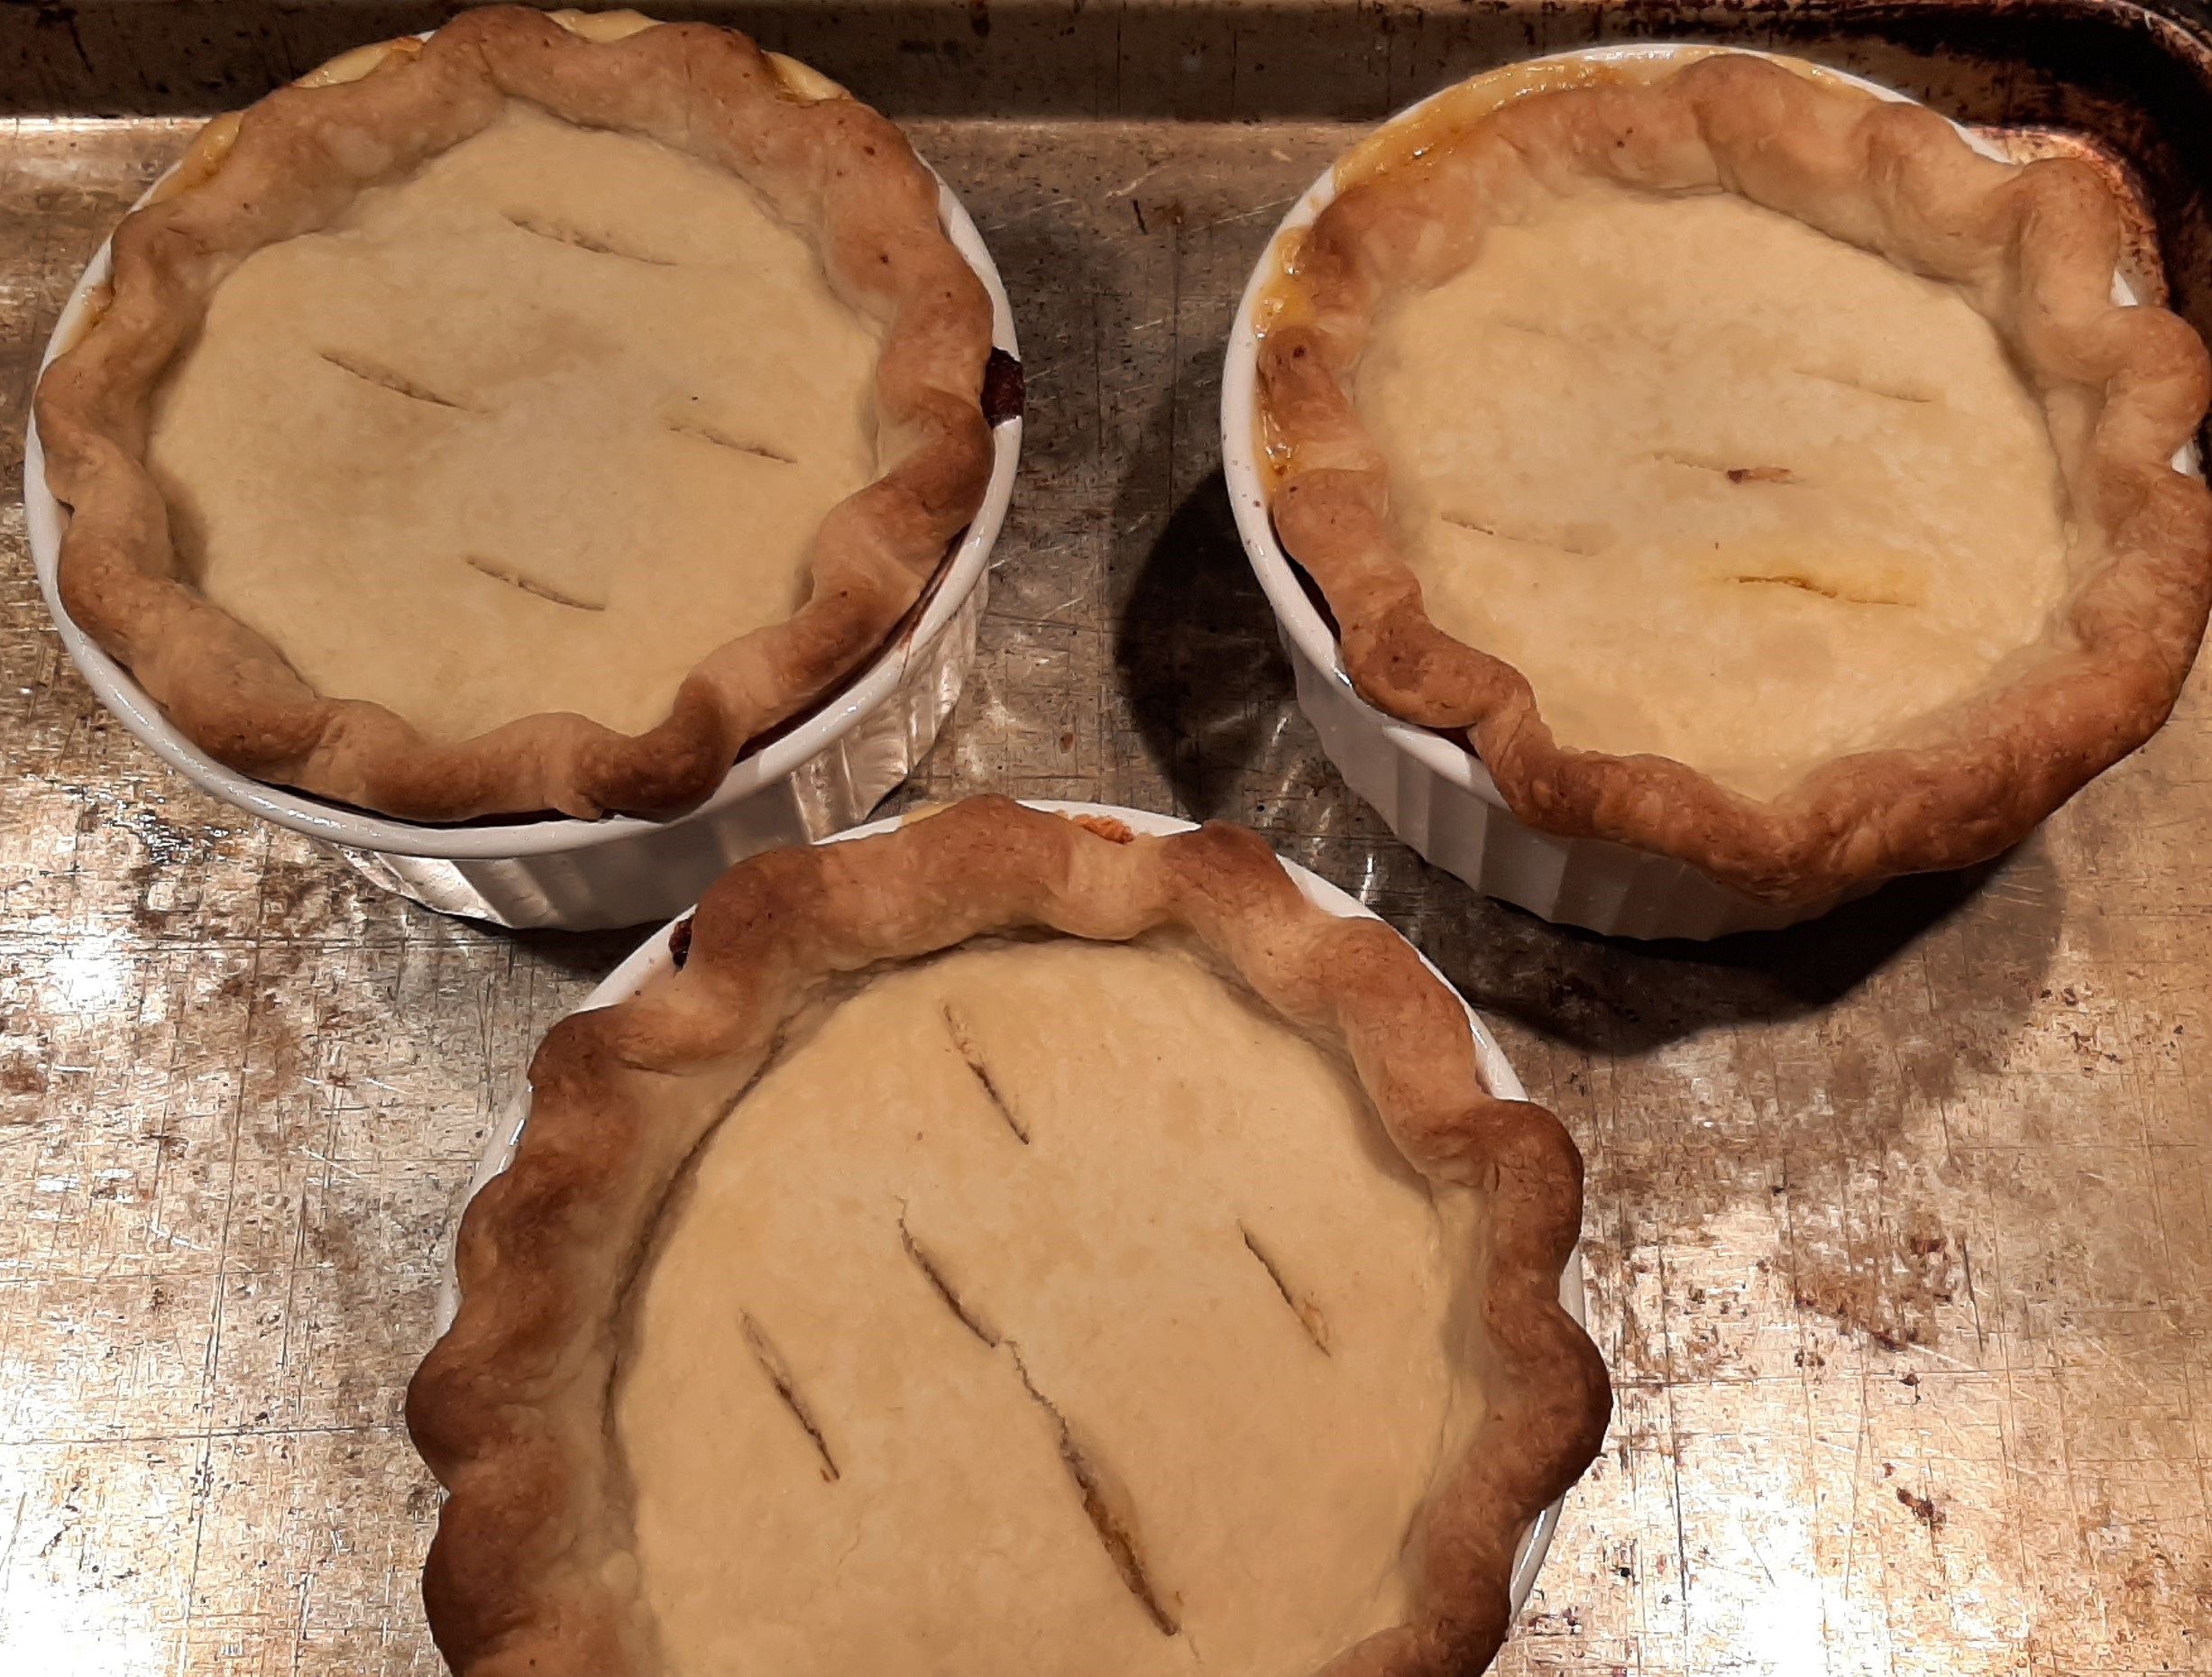
Fill 3 (5-inch wide and 2½-inch deep) Corning Ware French White casserole dishes with the tuna mixture. Or use whatever oven proof containers you have.
Part 2 – Crust
Make the crust as directed below.
Turn the dough out onto a lightly floured surface. Divide dough into thirds. Roll out each piece of dough into about a 6½ -inch circle or circles about 1½-inches wider than the top of the baking dishes you will be using. (This will allow dough to hang over the sides of the baking dish).
Place the pie crusts on top of the filled dishes and cut at least 4 slits in the pastry. (Make sure the slits go completely through the pastry allowing steam to escape.) Crimp the edges of the crusts to make the pies pretty. Place the baking dishes on a baking sheet. (In case any of the filling manages to escape!)
Bake the potpies in a preheated 425-degree oven for 35 to 40 minutes or until the filling bubbles and the crust edges turn golden. (If you take a look at the pot pies about 20 minutes into the baking time and find that the crimped edges are getting too dark, cover them with thin strips of aluminum foil for the last part of the baking.) (I didn’t check when I baked mine, but I certainly will next time!)
For the Crust:
1¼ c. unbleached all-purpose flour, fluffed
½ tsp. kosher salt
½ c. (1 stick) cold unsalted butter, diced
2-4 tablespoons ice water (I used 3 tablespoons)
Combine the flour and salt in your food processor. Pulse once to mix. Add the butter and process until it resembles coarse crumbs. Add 2 tablespoons of water and pulse the mixture for a few seconds. If you find your mixture is too dry, you can add more water, one teaspoon at a time. Proceed to Part 2 – Crust above.