

Well, once again I stepped out of my comfort zone and made THE BEST croissants I have ever tasted. Of course, it didn’t hurt that the croissants were still warm when I bit into my first one. (And yes, I had two. OK, three. But in my defense, they were small croissants, by plan, I might add.) So, thanks to Bincy at merryboosters.com, I no longer have any reason to pay excruciating prices for my all-time favorite accompaniment to bacon and eggs. And the best part – the darn things were easy to prepare. Really!
First of all, you don’t need a mixer to make the dough. And no kneading required. But granted, it did take most of the day to prepare these delicacies because there is a lot of time the dough is busy rising. But so what?! I had nothing else planned yesterday. And during the time I wasn’t actively involved in the process, I dusted the house and cleaned the bathrooms, posted a recipe, and did research for another recipe I plan to present in the future. So, basically, no time wasted.
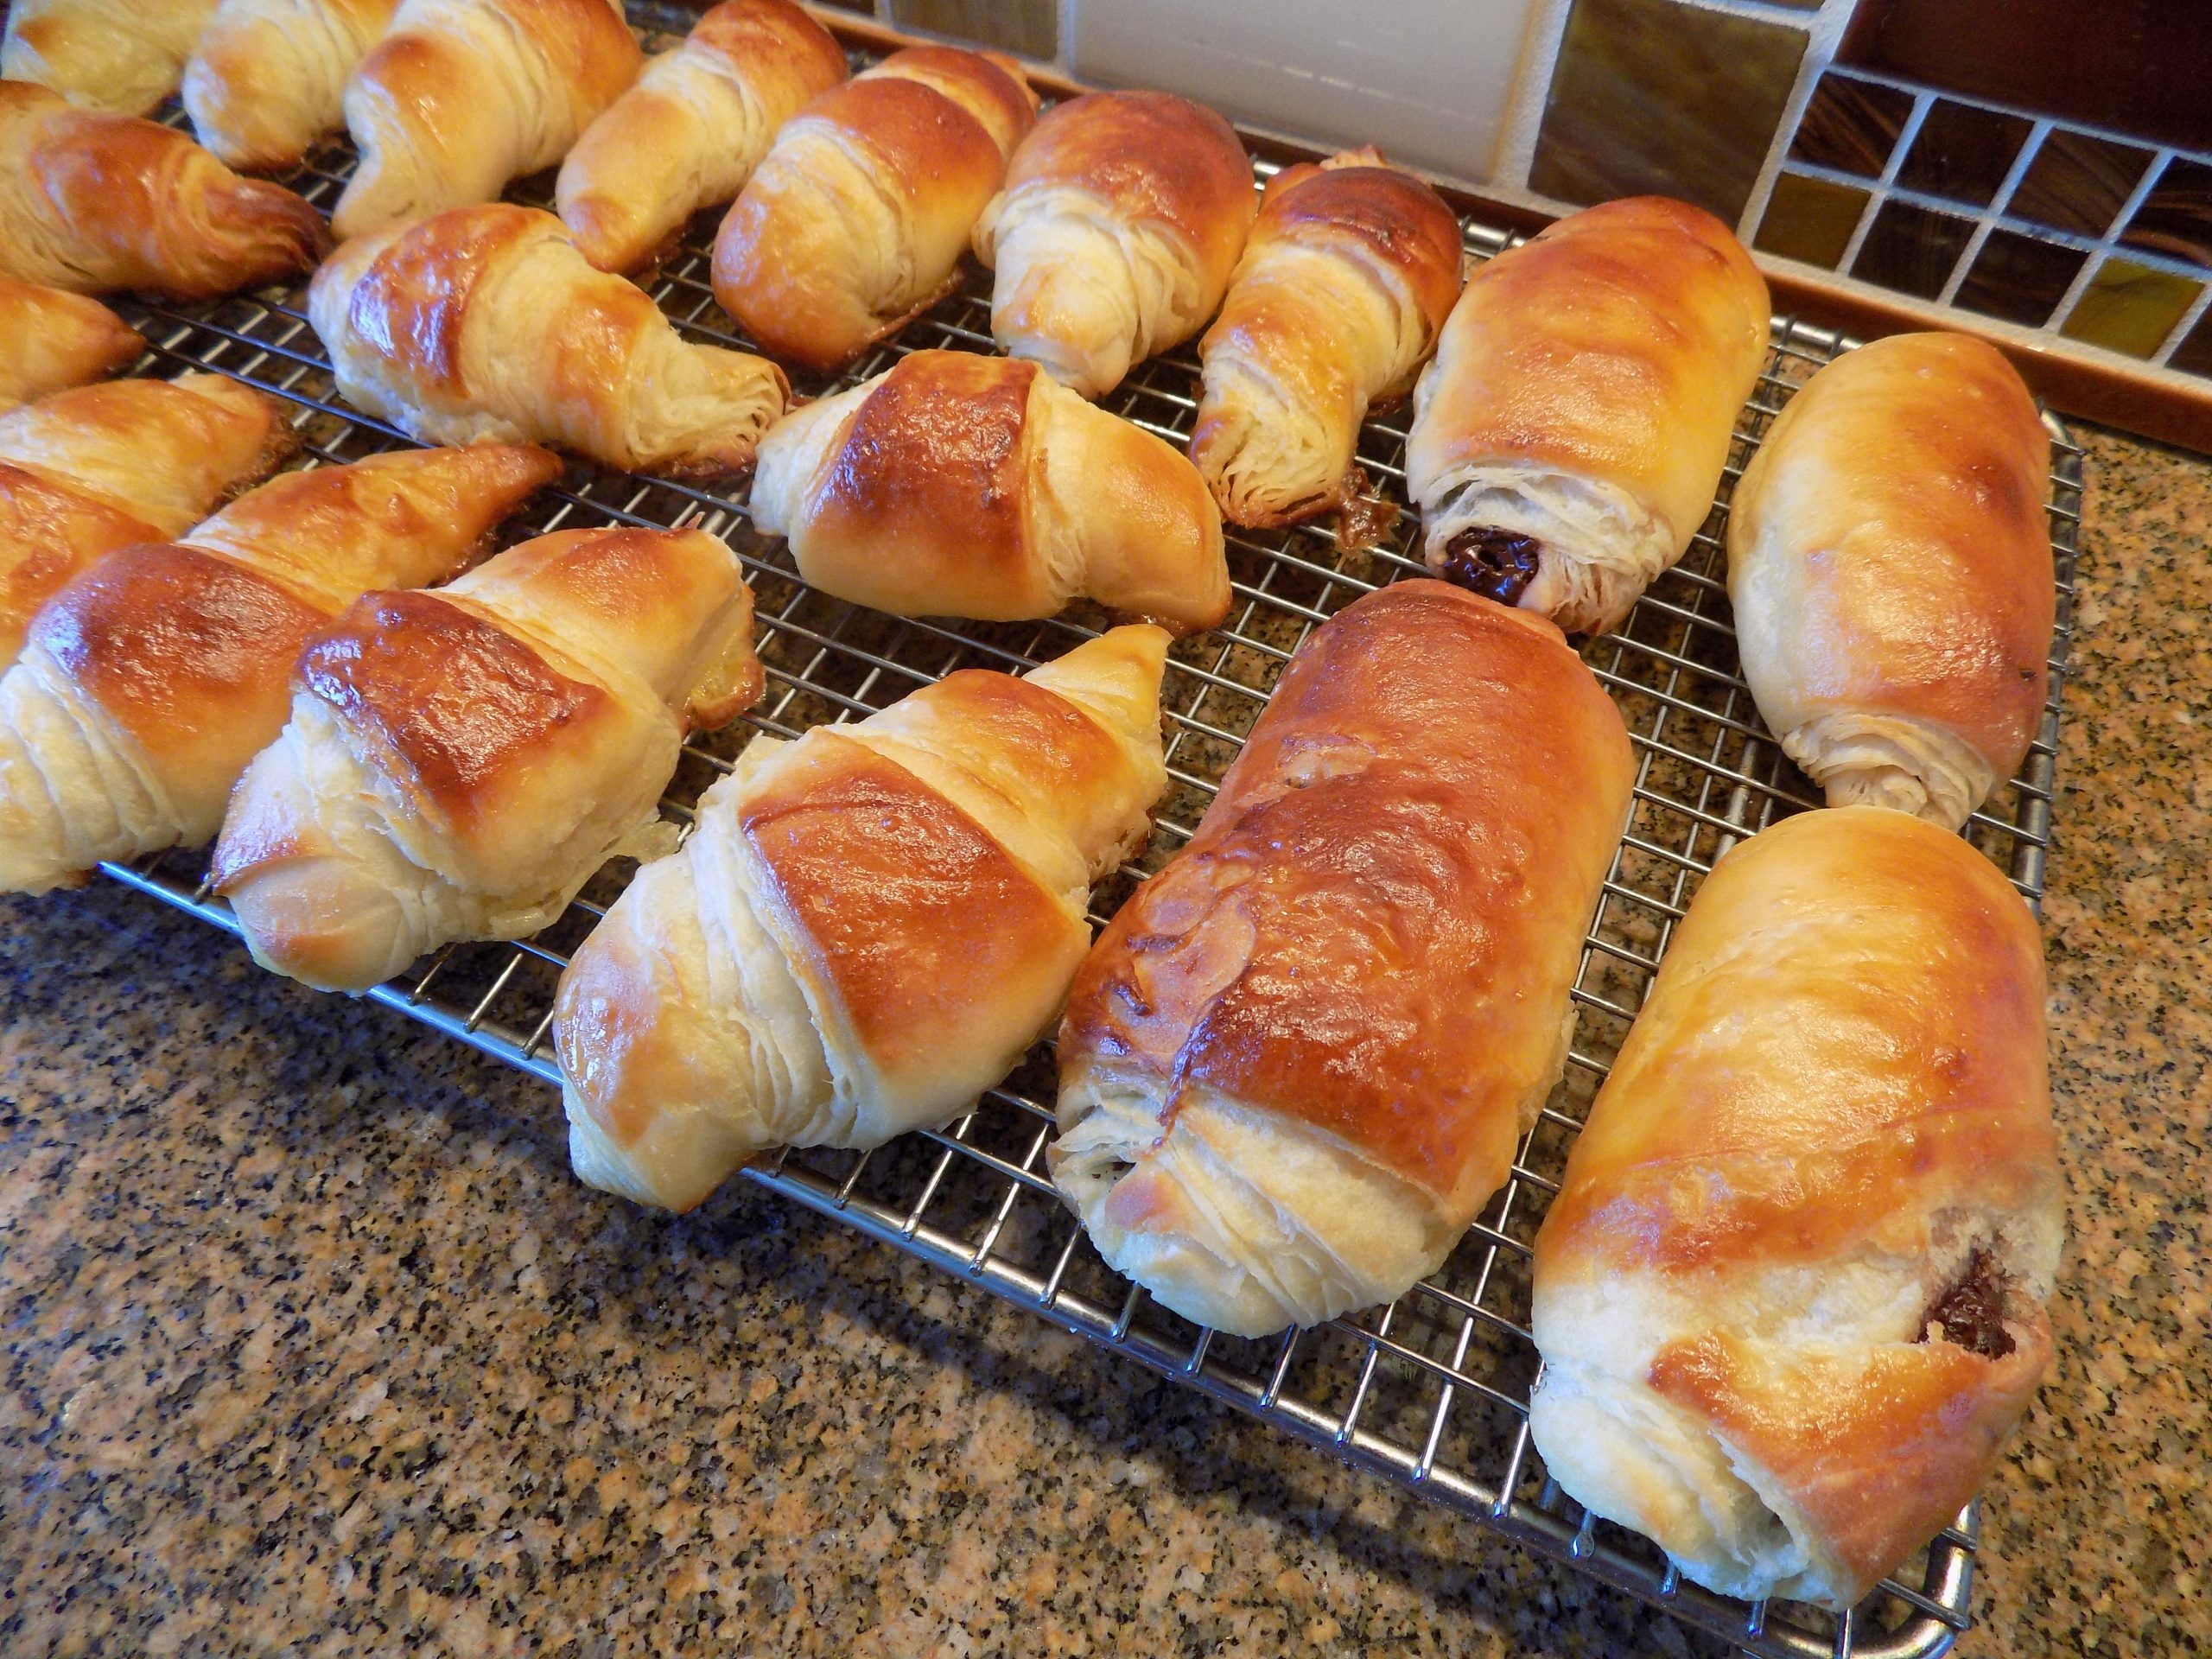
But patience required, I will certainly admit to that! Mainly because I could hardly wait to chomp into the final product. And of course, terribly concerned that the final product would not meet my expectations. Because little old me, unschooled baker that I am, actually trying my hand at building croissants and pain au chocolat (for Mr. C.)! How extraordinarily presumptuous of me! But still game enough to at least give it a try. And not only making croissants but pain au chocolat as well. (Frankly I don’t see what all the fuss is about when it comes to pain au chocolat. But Mr. C. is a devoted fan. And when it comes right down to it, I like making him happy.) So, 4 pain au chocolat were made along with 12 regular croissants. And since you are concerned with the disparity in my 12 to his 4, forget it! He loves regular croissants too.
And another thing we both really love, is that all 12 of the croissants and 4 pain au chocolat I made cost less than 2 croissants from our local French bakery. Because really, the only expensive ingredients are the European butter (which I buy at Grocery Outlet for $1.99 for 8-ounces), and the really good dark chocolate (about a third of a 3.5 oz. dark chocolate bar from Libeert (Belgian Chocolate Creators). (Probably about a dollars-worth of chocolate.) The rest of the ingredients, not appreciable.
So, for those of you who have been afraid of making homemade croissants – let it go! These are so easy to build. And so delicious. Yes, they take time. But boy are they worth the effort.
As always, have fun in your kitchen. Try new recipes because you may never know what amazing new discoveries you might make. And please don’t wait until you’re 77 (like me) to make homemade croissants and pain au chocolat. All I can think right now, is, why in the world did I wait so long? And should I make some more tomorrow, or wait a couple of days?
So, thank you again Bincy for this fabulous recipe. And for helping me keep my reputation as a “well-rounded” cook. (Define well-rounded any way you like!)
Peace and love to all.
1 c. + 1 tsp. slightly warm whole milk, divided
1 tsp. active dry yeast
¼ c. granulated sugar
2½ c. unbleached all-purpose flour, fluffed
¼ tsp. fine grained sea salt
¾ c. (1½ sticks) unsalted butter, room temperature (European butter* is best for this recipe or any other laminated** pastry for that matter)
1 tsp. vegetable oil (for coating the dough)
1 egg
semi-sweet chocolate, coarsely chopped (if making pain au chocolat)
Whisk 1 cup of the warm milk, yeast, and sugar together in a large mixing bowl. Let sit for 5 minutes to activate the yeast.
Add the salt and flour, and mix by hand until you have a smooth, evenly hydrated dough. Pour the veggie oil on the dough, and using your hands and a stiff rubber spatula, form the dough into a ball thoroughly coated with oil. Cover with plastic wrap and let the dough sit and rise for 1½ to 2 hours or until the dough doubles in size. (Mine took 2 hours.)
After the dough has doubled in size, punch it down, place it on a lightly floured surface and flatten it into a rectangle. Then roll it into a long log (like you were preparing cinnamon rolls) and divide the dough into 12 equal sized pieces.
Using a rolling pin, shape each piece of dough into a circle approximately 6½ to 7-inches in diameter. Spread the first dough circle liberally with butter, then place on a piece of plastic wrap, butter side up.
Then flatten the next piece of dough and slather with butter and stack, butter side up, directly on top of the first piece. Continue until all the dough circles have been buttered until the last piece. Place dough circle number 12 unbuttered on the top of the pile. Wrap securely with as much plastic wrap as it takes, and place in your freezer for about 35-40 minutes. (The time spent in the freezer will allow the butter to harden a bit, but still be pliable enough to roll the dough into a rectangle, 12×16-inches.)
Place the rectangle with one of the longer sides furthest away from you. Using a pizza cutter*** or knife, cut the long sides into 4 top-to-bottom rectangles, then the short sides into thirds, right to left. This will give you 12 (4×4-inch) equal size squares.
For Regular Croissants:
Cut each square into two triangles. With your hands, shape the triangle into a long pie shaped piece of dough. Cut a small incision into the triangle in the middle of the larger end. (This small incision helps keep the center of the croissant from becoming too thick.) Then starting at the larger end, gently force the cut apart while you roll the dough towards the thin pointed end, making sure you are rolling the croissant tightly, but without squeezing the dough. Place on a parchment paper lined baking sheet pointed ends down and about 2-inches apart.
Whisk the egg with the remaining 1 teaspoon milk and brush on each croissant. Cover with plastic wrap and allow to rise for 2 hours or until they puff up a little. (And yes, the plastic wrap will stick a bit to the croissants.) Then, gently but liberally brush each croissant again with a bit of the egg wash being careful not to deflate the dough.
Bake in a pre-heated 400-degree oven for 10 minutes, then reduce the temperature to 375-degress and bake for another 7-8 minutes or until the croissants are a deep golden brown and the internal temperature reaches 210-degrees. Don’t under-bake the croissants.
Remove from oven and cool on a wire rack. Store in an air-tight container at room temperature. Re-heat in a 350-degree oven for a few minutes.
For Pain Au Chocolate Croissants:
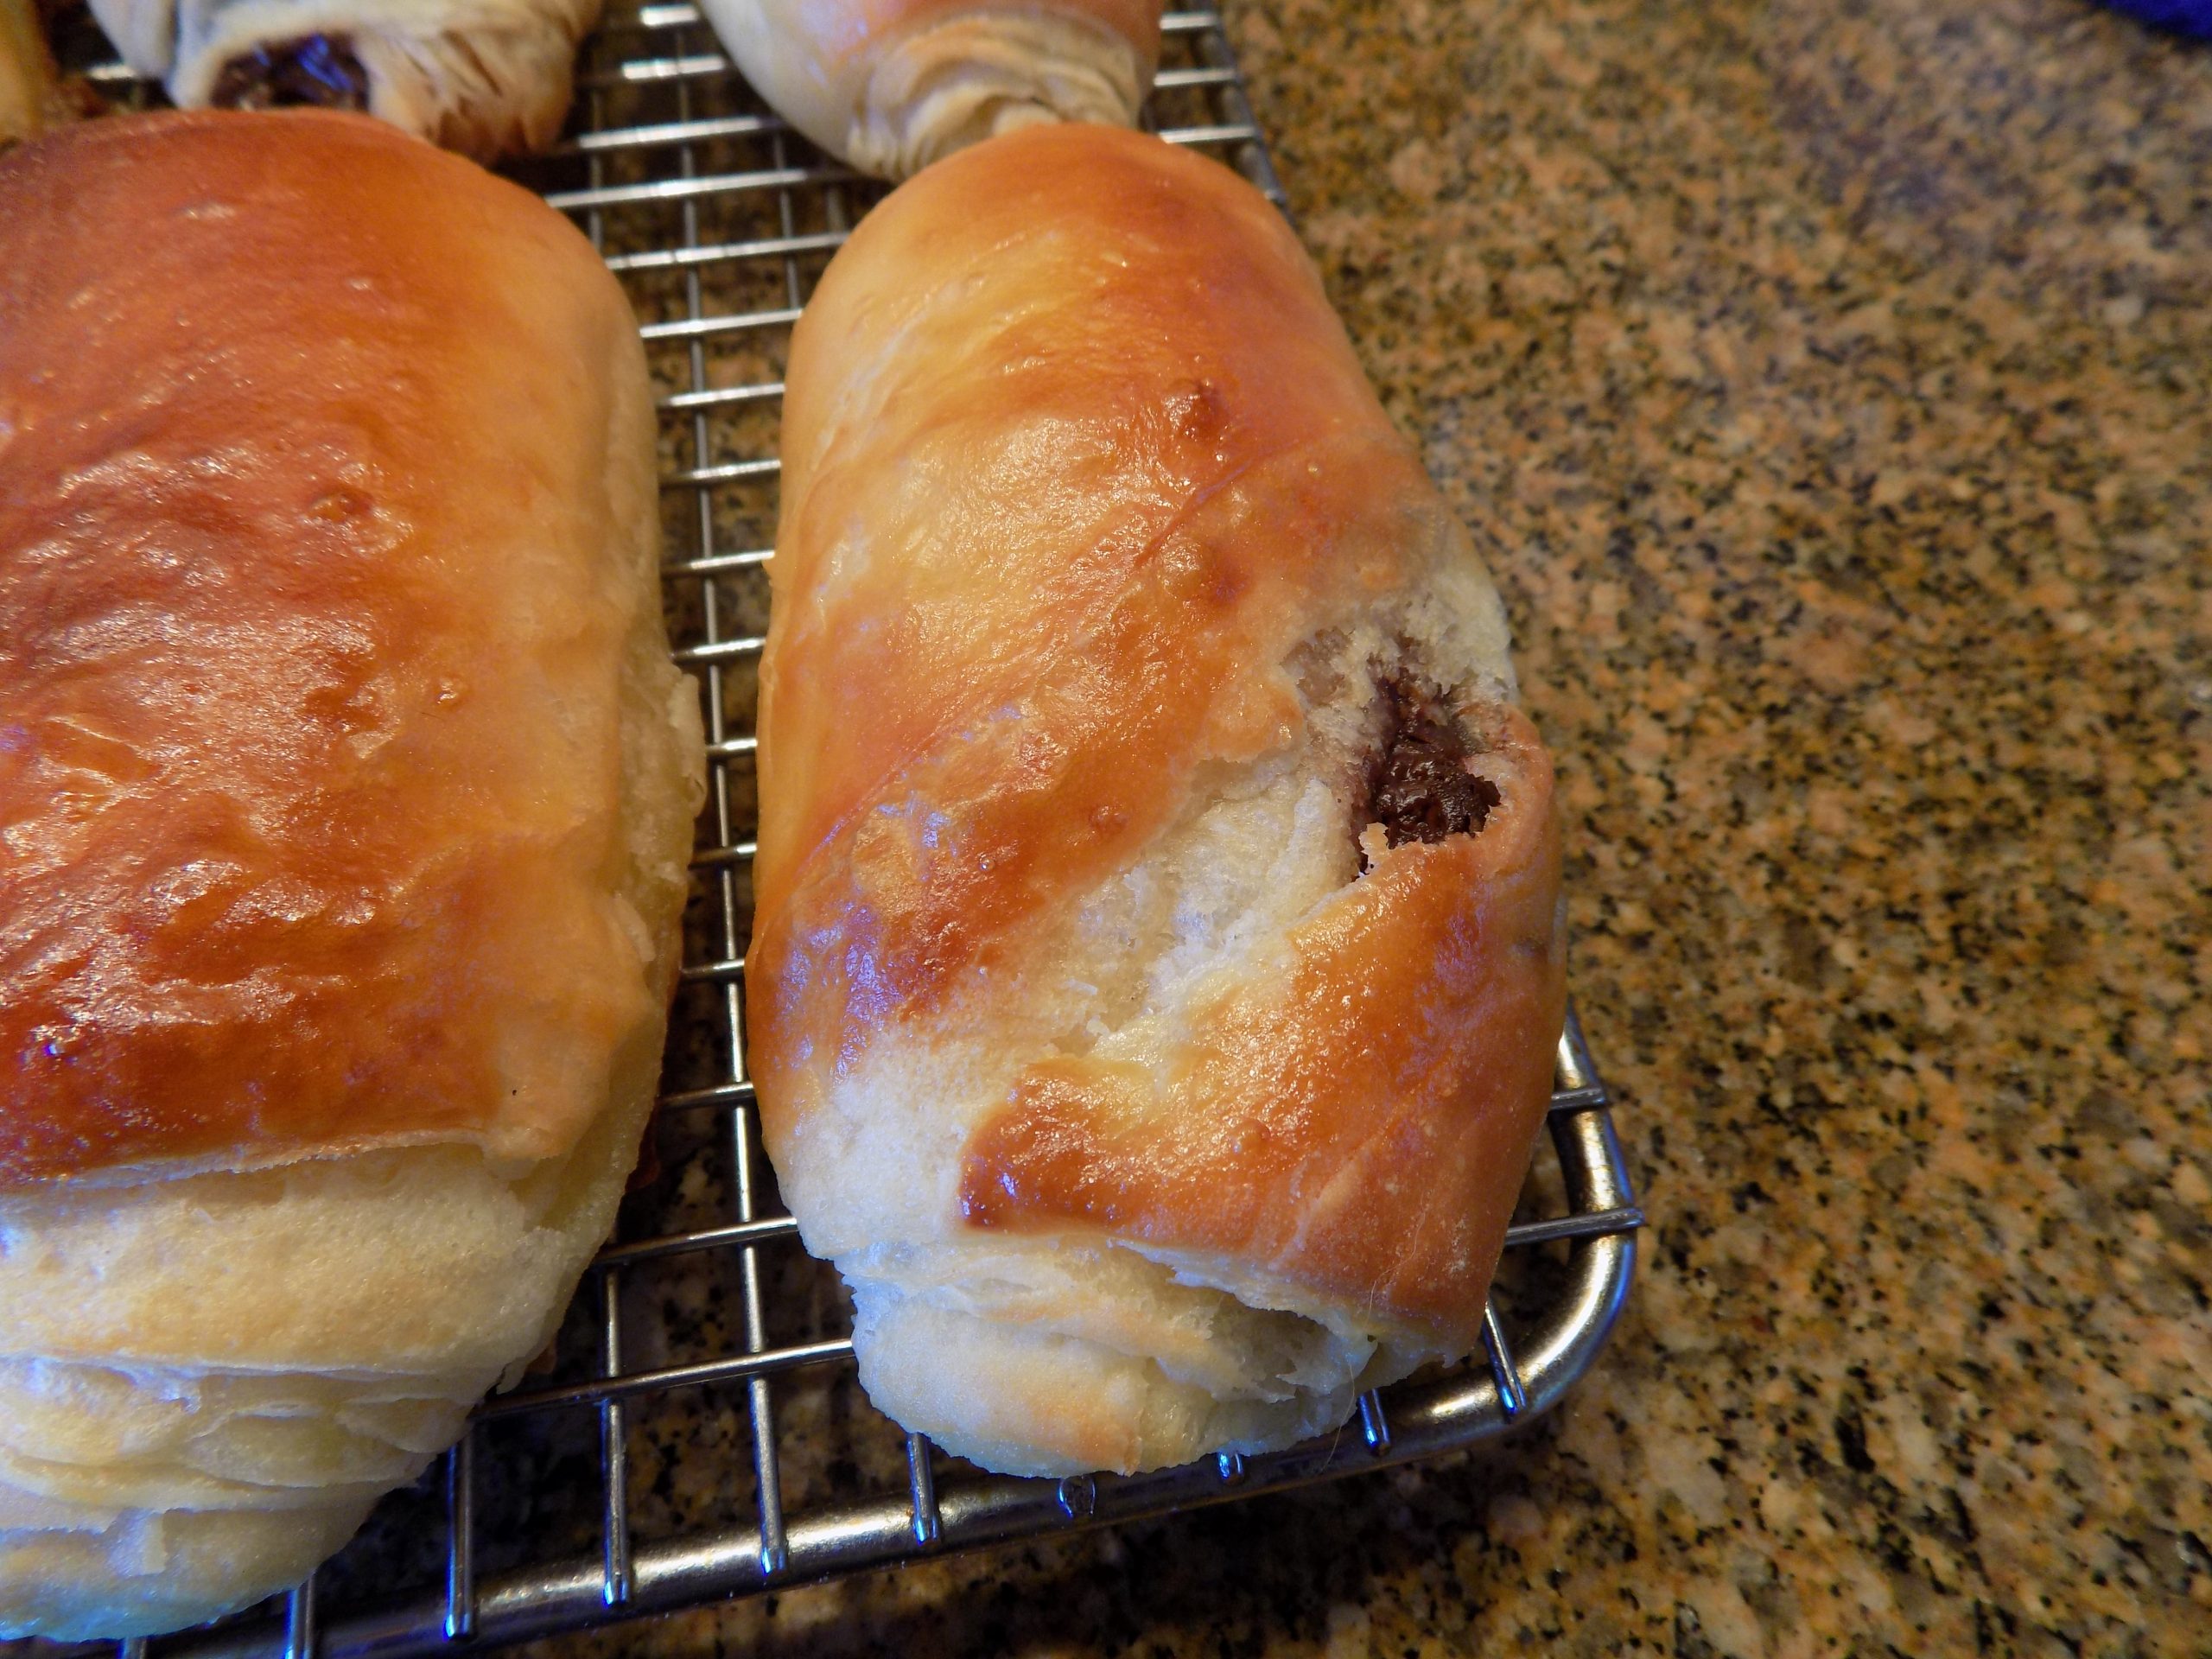
Do not cut the 4-inch squares. Place about 3 teaspoons of the chopped chocolate about half an inch up from one of the sides. Fold the dough up over the chocolate and continue rolling until you have created a cylindrical shape. Place on a parchment paper lined baking sheet, seam side down about 2-inches apart.
Whisk the egg with the remaining 1 teaspoon milk and brush on each croissant. Cover with plastic wrap and allow to rise for 2 hours or until they puff up a little. Then gently brush each croissant again with the egg wash being careful not to deflate the dough.
Bake in a pre-heated 400-degree oven for 10 minutes, then reduce the temperature to 375-degress and bake for another 7-8 minutes or until the pain au chocolat croissants are a deep golden brown and the internal temperature reaches 210-degrees. Don’t under-bake.
Remove from oven and cool on a wire rack. Store in an air-tight container at room temperature. Re-heat in a 350-degree oven for a few minutes.
*European-style butter: Excerptfrom an article on thekitchen.com. site “Overall, European-style butters are favored for their rich taste — a direct result of the higher butterfat content. More butterfat also means a softer texture, faster melt, and often, a saturated yellow hue. With less water, European-style butters are often the preferred butter for baking — especially when the flavor of butter is just as important as its function.”
And according to our good friend Keith, who spent many years as a professional baker (and I paraphrase) – “The best butter for the home baker making croissants, or any pastries, is slow-churned European style butter that contains at least 82% butterfat. This type of butter contains less air and water which makes it more pliable and resistant to being absorbed in dough during lamination**.”
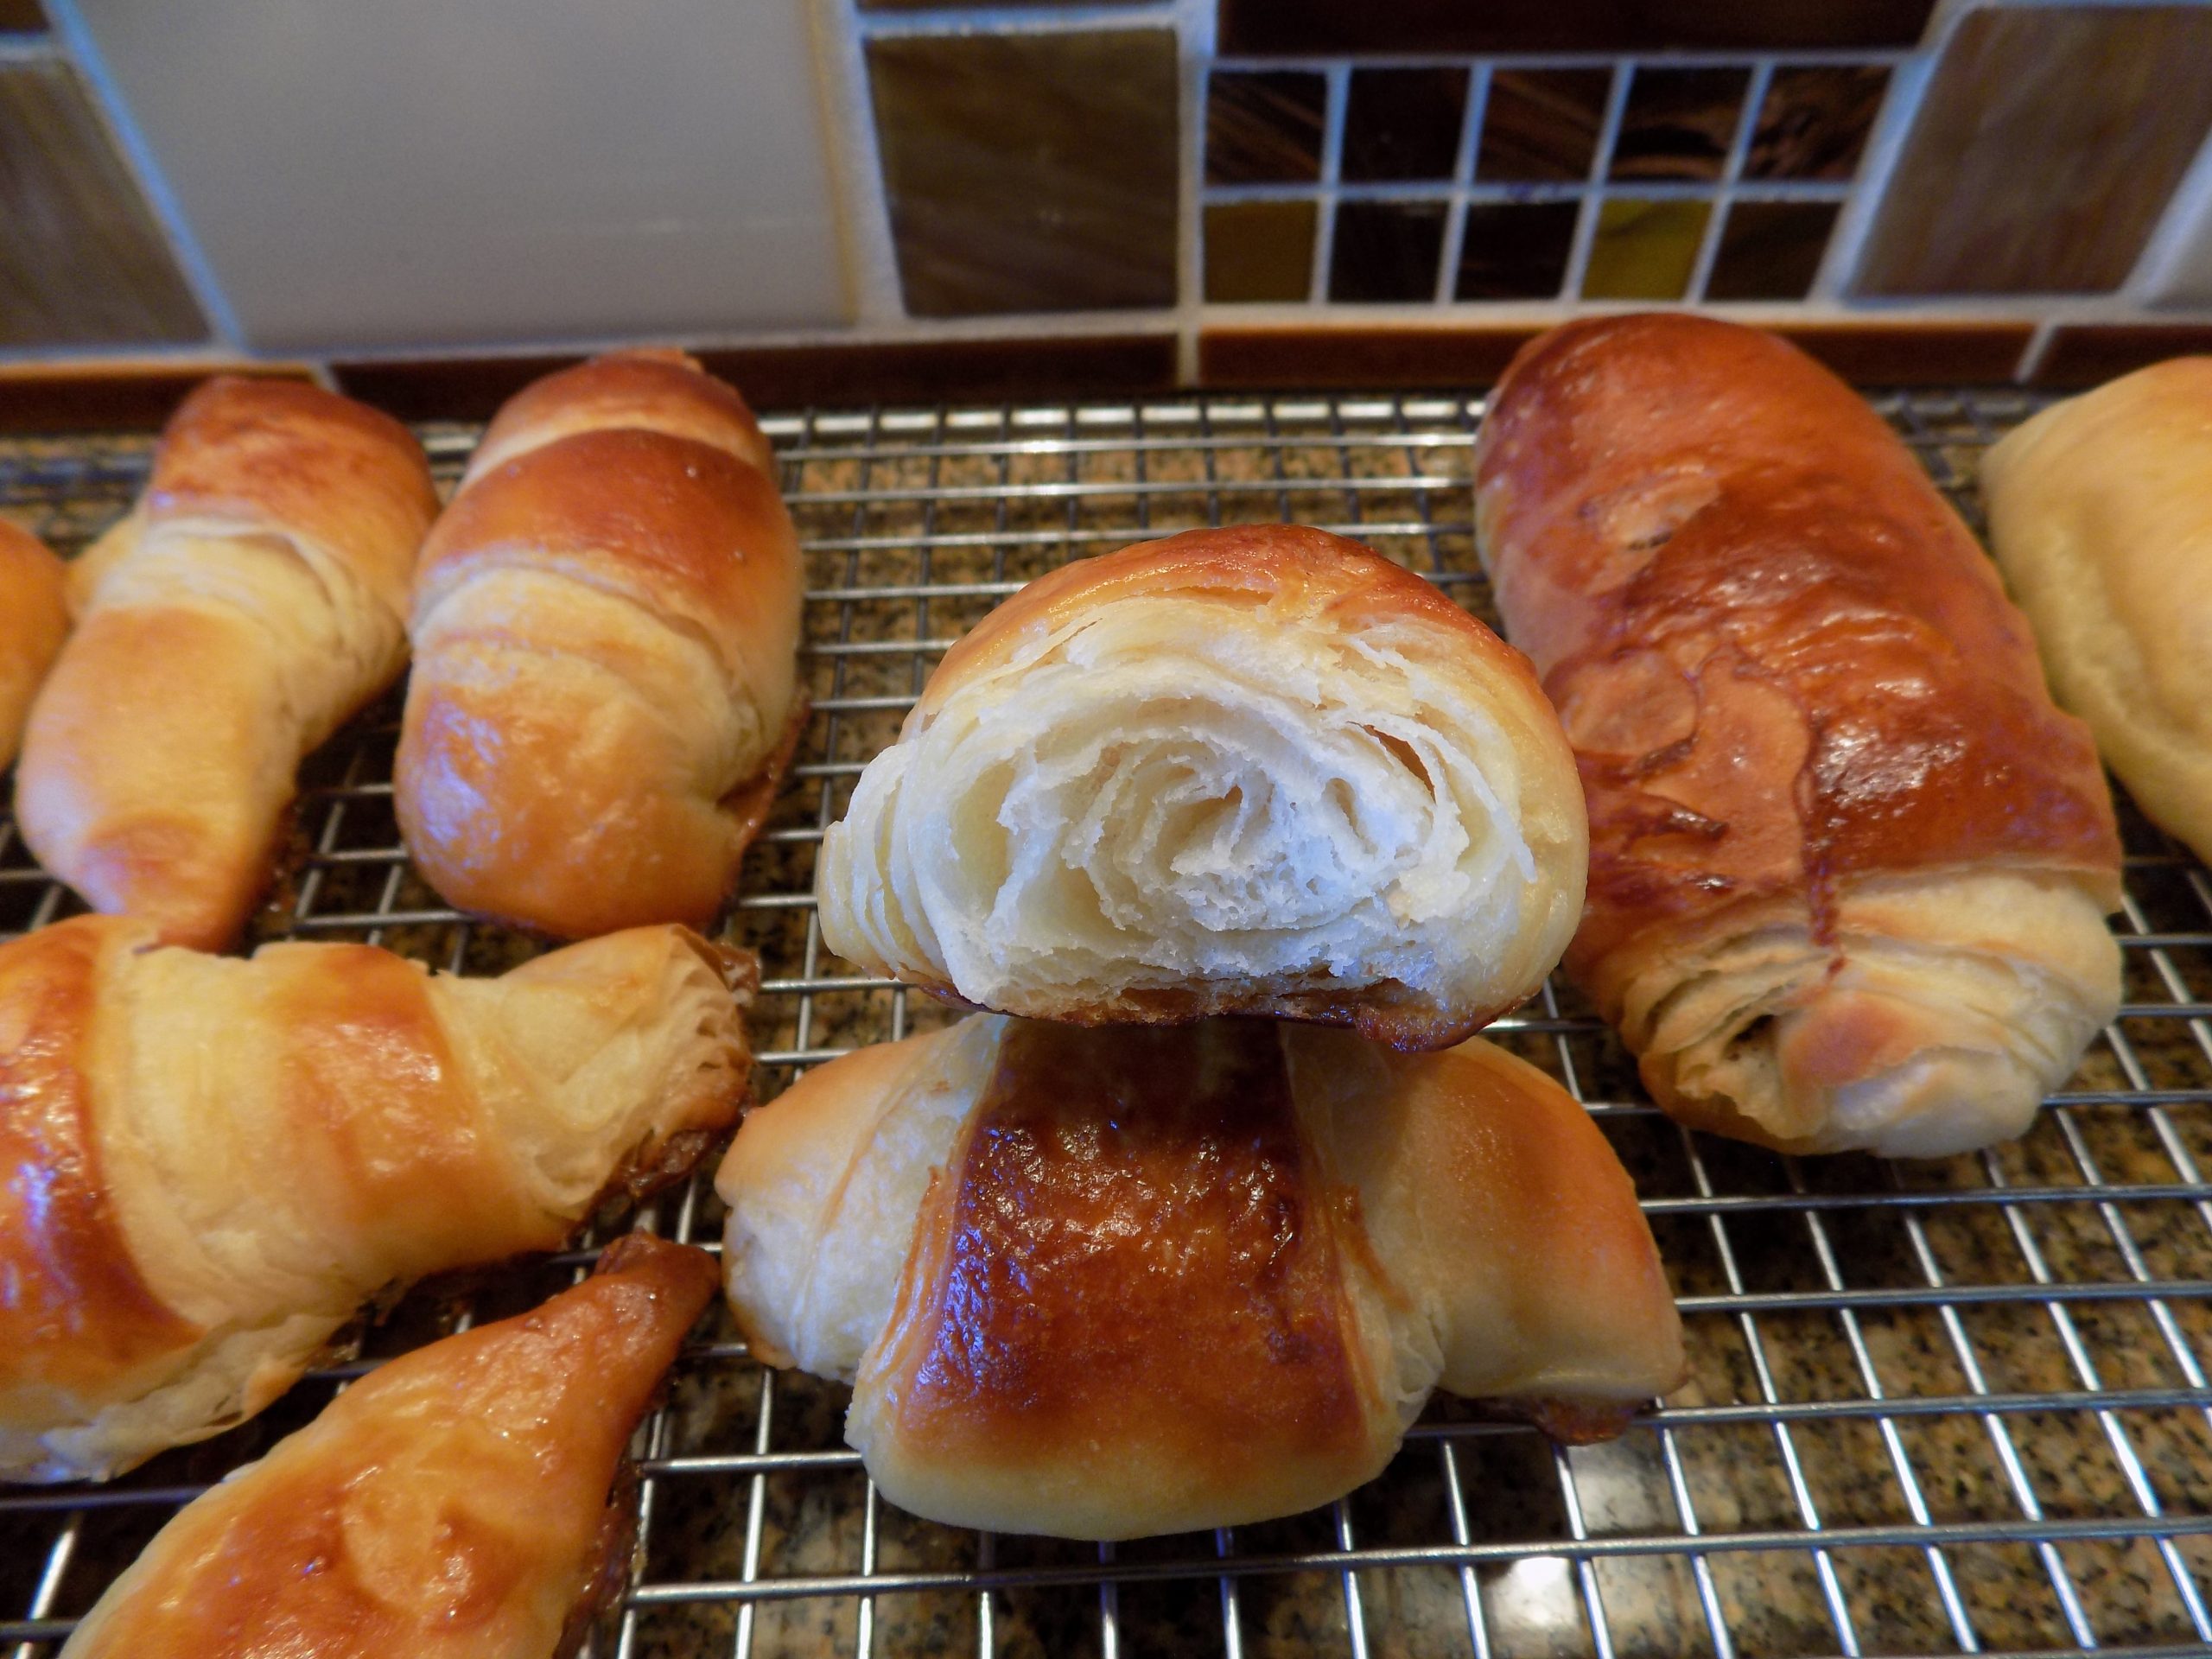
**Lamination: Lamination is the process of folding and rolling butter into dough over and over again, or in the case of this recipe, spreading soft butter over layers of thin dough, to create super-thin layers. These layers, which alternate between butter and dough, are what give croissants their signature honeycomb interior structure and their fabulously flaky texture.
***Pizza cutter: My dear friend Vicki explained to me why she preferred using a pizza cutter rather than a knife when cutting dough. Cutting dough with a pizza cutter makes a nice, thin cut. And unlike using a knife, a pizza cutter doesn’t flatten the dough next to the cut. Plus, it doesn’t stretch the dough as it’s being cut. Thanks Vicki for sharing your experience with all of us.