Category Archives: THANKSGIVING DINNER RECIPES

REFRIGERATOR DILL PICKLES

OLYMPUS DIGITAL CAMERA

OLYMPUS DIGITAL CAMERA

I love dill pickles with a passion. No wait – let me re-state that. I love truly good dill pickles with a passion. And for decades, come cucumber time I would make my mother’s dearest friend Charlotte’s dill pickles. They are simply beyond belief good. So for all you purists out there, I have included Charlotte’s recipe at the end of this post.

But for all of you who happen to be like me – too lazy or too busy to get your canning act together, I offer this recipe for quick and easy dill pickles that I found on the “Once upon a Chef” website. (Great site BTW)

And talk about instant (well almost instant) gratification! No more waiting for several months to finally be able to open a jar. These babies are ready in about 48 hours. (The original recipe states that they are ready in 24 hours, but I found that they needed another day to reach their full potential.)

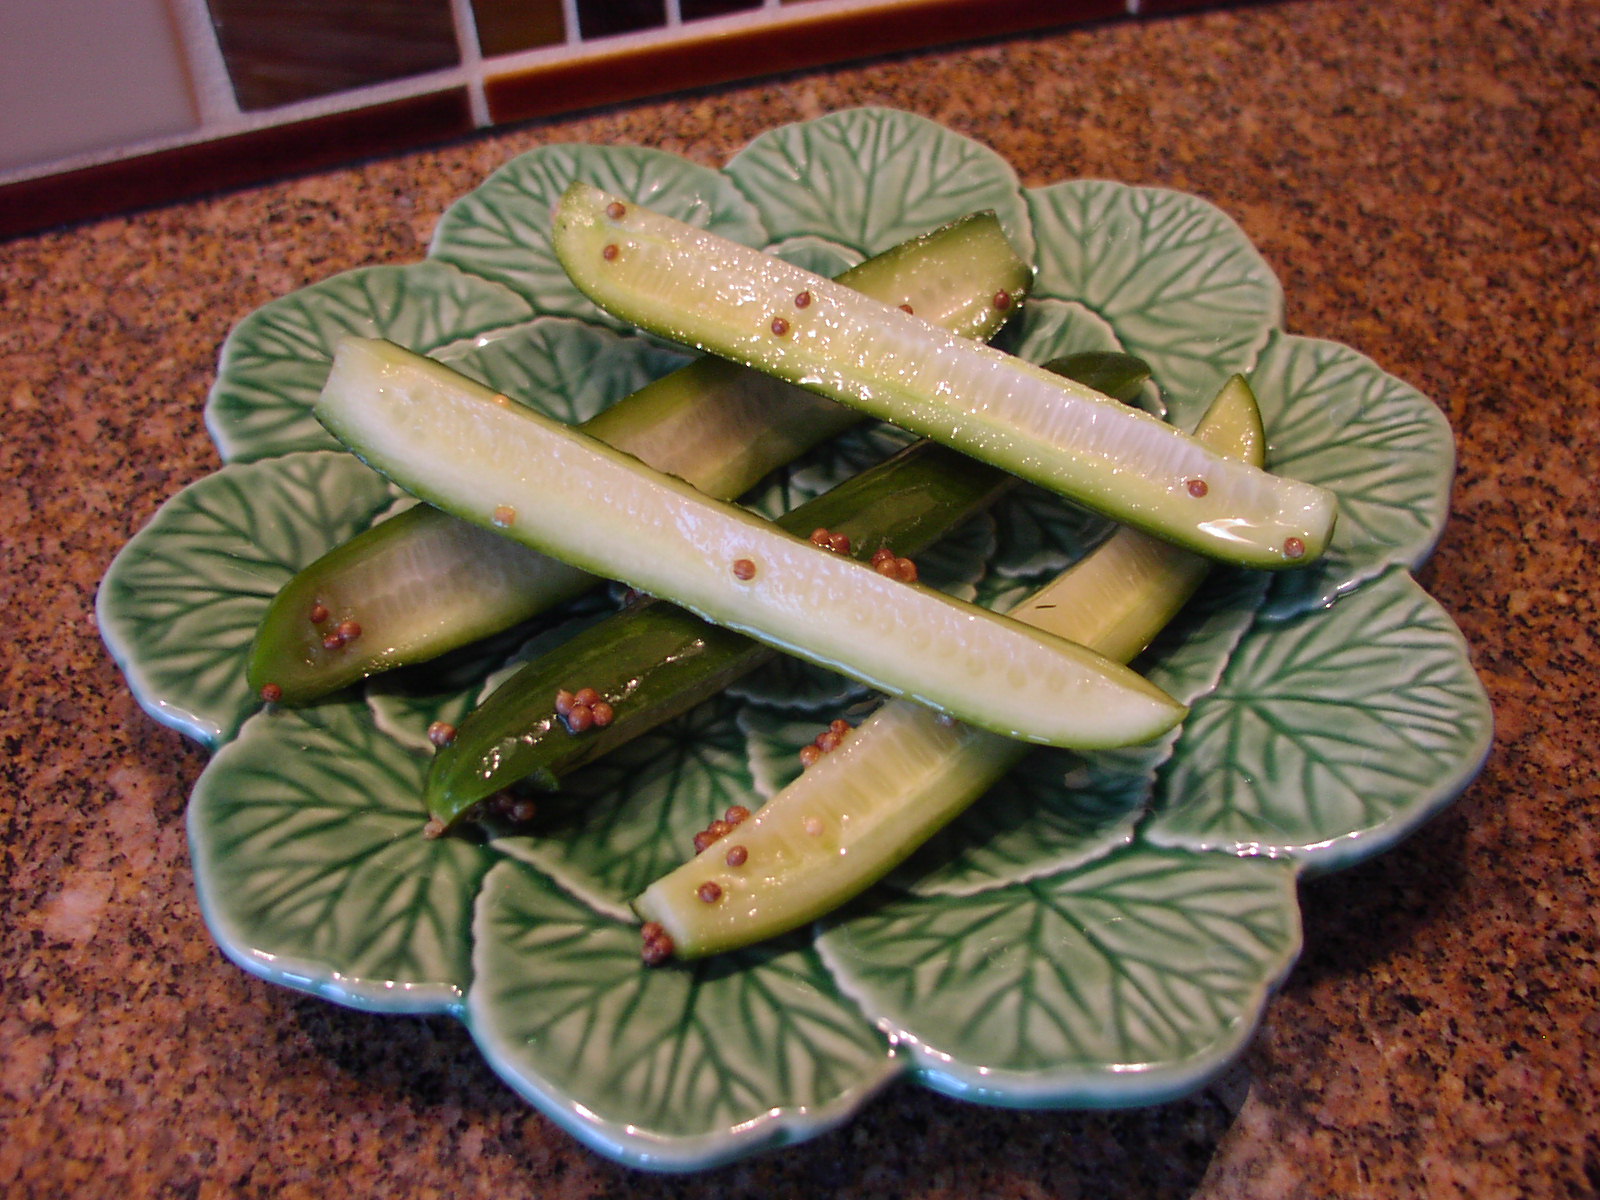
And guess what? You can make these pickles year round. No waiting for that 2 or 3 week window when pickling cucumbers are at their peak and you have vacation plans. Now, whenever the mood hits you, you can make up a batch and within 48 hours be crunching on a slender spear of heavenliness. (I’m not sure that’s a word, but I’m going to use it anyway!)

Of course if you don’t like super crunchy dill pickles, with a nice vinegary, garlicky, and slightly hot (from the crushed red pepper flakes) bite, you are not going to like these pickles in the least. You might as well leave this post right now and not waste your time reading any further. (It’s only going to be more pickle information and effusive plaudits for my recipe find of the decade!) But for those of you who, like me, worship the ground that cucumbers are raised on, please continue reading.

The only problem you might find with this recipe is locating the right cucumbers for these pickles. You really can’t use regular American slicing or English cucumbers. They won’t stay crisp. You need to use Kirby, Persian, or small pickling cucumbers for this recipe. During late summer your best bet for finding pickling cucumbers is your local farmer’s market or fruit stand. During the rest of the year, Trader Joe’s, Whole Foods, and Central Market (here in the Seattle area) usually carry at least the Persian variety.

So have fun with this recipe. If you also enjoy Bread and Butter Pickles, check out my quick and easy recipe also on this site.

  • 1¼ c. white vinegar
  • 3 T. kosher salt
  • 2 T. granulated sugar
  • 2 c. cold water
  • 2 lbs. Kirby, Persian, or mini cucumbers, blossom/stem end cut off, then cut into spears
  • 2 T. coriander seeds
  • 6 large garlic cloves, peeled and halved
  • 1 tsp. mustard seeds
  • 1 tsp. dill seeds, opt.
  • ¼ tsp. crushed red pepper flakes
  • 16 dill sprigs (2-oz. pkg.)

Combine the vinegar, salt, and sugar in a small non-reactive saucepan over high heat. Whisk until the salt and sugar are dissolved. Transfer the liquid into a bowl and whisk in the cold water. Refrigerate brine until ready to use.

Stuff the cucumber spears into two clean 1-quart jars. Add the coriander seeds, garlic cloves, mustard seeds, dill seeds, red pepper flakes, dill sprigs, and chilled brine into jars, dividing evenly. If necessary, add a bit of cold water to the jars until the brine covers the cucumbers. Cover and refrigerate for at least 48 hours, then serve. Pickles will keep in the refrigerator for a month or more. (But good luck keeping them that long!)

DILL PICKLES (CHARLOTTE’S)

  • 12-14 sterilized wide mouth qt. jars and lids (I sterilize the jars in the dishwasher. I boil the lids on the stove.)
  • 12 lbs. pickling cucumbers, 3-4 inches long
  • 2 to 2½ tsp. alum
  • 12-14 garlic cloves
  • 12-14 small dried hot red pepper pods
  • 1 bunch fresh dill, cut in 4-inch lengths
  • 2 qt. white vinegar
  • 6 qt. water
  • 2 c. pickling or kosher salt

Thoroughly scrub the cucumbers. Lightly pack in jars. To each jar add 1/8 teaspoon alum, 1 clove garlic, 1 small dry red pepper, and a lot of dill, stems and all. Meanwhile bring vinegar, water, and salt to a boil. Pour hot brine over pickles. Gently tap the jars against the counter a few times to remove all the air bubbles. Top off with more pickling brine if necessary. Seal as quickly and as tightly as possible. Store for at least 3 months before eating.

Please Note: If any of the lids don’t seal properly, store the jars in your refrigerator.


CAMBOZOLA CHEESE APPETIZER WITH HONEY, ROSEMARY, AND BLACK PEPPER

OLYMPUS DIGITAL CAMERA

And I know what you’re thinking. How can you improve on Cambozola cheese right out of the package? And why would you even want to mess with an already perfect delicacy? Well the answers to your questions are as follows: a touch of sweetness from the honey, a bit of savory from the fresh rosemary, and a touch of heat from the black pepper work perfectly with the richness of the cheese. And why mess with Cambozola in the first place? Well, because it was in my refrigerator and that’s what I do!

So last weekend for our cooking club dinner, I served this recipe that I found on the Reluctant Entertainer web site. I added a sprinkle of black pepper to the original recipe because I thought it was needed to complete the whole slightly bitter (Cambozolo), sweet (honey), savory (rosemary), and heat (black pepper) flavor package. And I believe I was right, because everyone, except Ken who doesn’t care for the blues (cheese that is), thought it was wonderful.

So if you too like to mess with a good thing, give this recipe a try next time you need a quick and easy appetizer. It is just ever so delicious.   

  • 1 wedge Cambozola cheese, room temperature
  • 1 T. honey, or more to taste
  • 1 tsp. finely chopped fresh rosemary
  • freshly ground black pepper

Slice wedge in half lengthwise and place on a serving plate. Allow to come to room temperature. (You want it very soft.) Just before serving, drizzle with honey, sprinkle with rosemary, and dust lightly with black pepper. Serve with toasted baguette slices and crackers.


BOURBON PECAN BARS

OLYMPUS DIGITAL CAMERA

Some of us, at least my husband and I, love pecan pie. And pecan pie is always welcome on Thanksgiving and Christmas, at least with our extended family. But invariably, on these occasions, there are several other wonderful desserts from which to choose. (Not complaining here you understand!) So a few years ago I decided that bar cookies that basically contained the same ingredients as our favorite pies was the way to go. First of all, bar cookies are much easier to make. But the main reason I thought about preparing them was that then I could sample all the desserts if I could have just a small portion of each. (Remember, it’s really just all about me!) And if you have ever tried to cut a pie into 14 pieces, you know that it is darned near impossible. The likelihood of placing anything that even remotely resembles a slice of pie onto someone’s plate after you have basically cut the pie to ribbons is highly unlikely. But a cute little 1-inch square of a bar cookie is fairly easy to manage. Plus it’s just darling to look at. (Remember, points for presentation!)

Now I am not saying that you should give up baking pies. That after all would border on sacrilege! And I have to admit, some types of pie are easier to cut into tiny slices than others. Pumpkin pie, for example, is fairly easy to cut into thin wedges. Apple pie, not so much.

So this Thanksgiving, I decided to try a new pecan bar recipe instead of preparing my regular pecan pie bar recipe that is already on this site. (Chewy Pecan Cookie Bars) Both are delicious, and absolutely perfect for the holidays.

So while you are thinking about what desserts to serve on Christmas Eve, Christmas day, or for New Year’s, consider a pie bar instead of a regular pie. You will be very surprised how well they are received by your friends and family.

Other bar cookie recipes on this site include Pumpkin Pie Bars with Bourbon-Caramel Whipped Cream, Apple Pie Bars, Mincemeat Bars with Brandy Whipped Cream, and Chocolate and Pecan Toffee Bars. They too are delicious and can be cut into almost bite size pieces.

Other desserts on this site that are also perfect for the holidays – Nantucket Cranberry Cake, Flourless Orange Chocolate Cake, Baba Au Rhum, Dried Cranberry and Almond Braided Danish, and Eggnog Bundt Cake.

Whatever you prepare, have fun doing so. And remember – if the dessert comes from your kitchen, or from the kitchen of one of your family members or friends, it is sure to be better than anything you can buy. After all, it was made with love. And isn’t that really what the holidays are all about? Peace to all this holiday season and happy baking.

Crust:

  • 1 c. unbleached all-purpose flour
  • 1/3 c. packed light brown sugar
  • ¼ c. toasted pecans, coarsely chopped
  • 1 tsp. kosher salt
  • ¼ tsp. baking powder
  • 6 T. unsalted butter, cut into ½‑inch pieces and chilled

Filling:

  • ½ c. packed dark or light brown sugar
  • 1/3 c. light corn syrup
  • 4 T. unsalted butter, melted and cooled
  • 1 T. bourbon
  • 2 tsp. vanilla extract
  • ½ tsp. kosher salt
  • 1 lg. egg, room temperature
  • 1¾ c. toasted pecans, coarsely chopped

Crust instructions:

Process flour, sugar, pecans, salt, and baking powder together in food processor until combined, about five pulses. Sprinkle butter over top and pulse until mixture is pale yellow and resembles coarse cornmeal, about eight pulses. Lightly butter an 8×8-inch pan (glass preferably). Pour mixture into prepared pan and press into even layer with your fingers. Bake crust in a pre-heated 325 degree oven (for glass), 350 degrees (for metal) until fragrant and beginning to brown, 20 to 25 minutes. Remove from oven and spread filling evenly over crust and sprinkle with pecans. Bake bars until top is  golden brown and cracks start to form across surface, 25 to 30 minutes, rotating pan halfway through baking.

Set pan on wire rack and let bars cool completely, about two hours. Cut into desired size pieces.

Filling Directions:

While the crust is baking, whisk sugar, corn syrup, melted butter, bourbon, vanilla, and salt together in large bowl until sugar dissolves. Whisk in egg until combined. Pour over baked crust.

Thank you Americas Test Kitchen for this wonderful recipe.

OVERNIGHT BRIOCHE ROLLS

OLYMPUS DIGITAL CAMERA

OK, I know what those of you who don’t bake bread are thinking – not another stinkin’ bread recipe from Patti! Has she nothing better to do than bake bread? Well, I guess realistically speaking – no, I don’t have anything better to do with my time. And furthermore, I actually love to bake bread. It is just so satisfying watching little yeasty beasties enjoying themselves and getting high, so to speak. And then of course, there is the joy of biting into a perfect piece of bread, knowing full well exactly what ingredients are in, and more importantly, not in each loaf I build. And of course there is always the pleasure I get from watching others enjoy the fruits of my labor.

So a couple of Sundays ago it was our turn to host our dinner club.

OLYMPUS DIGITAL CAMERAOLYMPUS DIGITAL CAMERA

OLYMPUS DIGITAL CAMERA

(As you can see, we not only eat well, we have a great deal of fun together. Cheers to my dear friends!)

I knew I wanted to fix pork tenderloin, a soufflé, and some type of dinner roll as our contribution. But what I envisioned to go with the pork and soufflé, was a really light yet rich dinner roll. The first thing that came to mind was brioche. I had been making brioche for years, but always before in the form of a loaf. What I wanted was a perfect little piece of bread that came tidily in its own little package. So of course I went on-line to see what others had concocted before me. (Believe me, there is no new recipe under the sun. If I’ve thought of it, hundreds have already been there before me!) And isn’t that a blessing! I don’t think there could be a better age to live in if you are a serious cook. Anything you want to know about food, or cooking, or cooking tools, or a particular chef is right there on the internet. It’s fantastic! But I digress…

Anyway, this recipe is loosely based on a recipe featured in Cooking Light magazine. The rolls are light and airy and just perfect for a dinner party. And, the dough is made the day before, which you know always makes me happy.

So next time you want to serve light and delicious rolls to your dinner guests, bake up a batch of these small brioche babies. And if you are of the ilk who strongly believes that serving dinner rolls is déclassé, I don’t want to even think about that ever happening. And I definitely don’t want to hear about it, even if you feel duty bound to share with me your feelings on the subject! (covering my ears – la, la, la – can’t hear you……)

  • 1½ tsp. active dry yeast
  • 3 T. warm milk
  • 2 T. sugar
  • ½ tsp. kosher salt, plus more for sprinkling
  • 1 c. bread flour
  • ¾ c. unbleached all-purpose flour
  • 2 lg. eggs, room temperature
  • 4 T. plus 2 tsp. unsalted butter, room temperature, divided, plus more for buttering the muffin cups
  • vegetable oil
  • 1½ tsp. water
  • 1 small egg, white only

Dissolve yeast in warm milk in the bowl of a stand mixer fitted with the paddle attachment. Add sugar and let stand until yeast dissolves and mixture is slightly bubbly, about 10 minutes. Add salt, flours, and eggs to yeast mixture; beat on low speed until smooth, scraping down sides of bowl as needed. Cut the 4 tablespoons butter into small cubes. Add half the butter to dough, mixing at medium speed to incorporate. Add the remaining butter cubes and beat until well blended. Continue beating another 4 minutes or until the dough is shiny, soft, and smooth.

Pour a tiny bit of vegetable oil over the dough and using your hands, turn the dough until all sides are lightly greased and shaped into a ball. Cover the bowl with plastic wrap and let the dough rise in a warm place for about 1 hour, then give it the old “poke it with your finger” test. After you have withdrawn your finger, the dough should push back very slowly. In fact, it should barely push or spring back at all. Punch dough down; form back into a ball, cover with plastic wrap, and refrigerate at least 8 hours or better yet, overnight.

The next day, uncover the dough and let it stand for 2 hours or until the dough reaches room temperature. Divide the dough into 2 equal portions. Then cut each portion in half again and divide that half into three pieces. Roll each piece into a rough ball and place in a muffin cup lightly greased with butter. (You should have 12 rolls total.) Cover the pan and let rolls rise for 45 minutes or until almost doubled in size.

OLYMPUS DIGITAL CAMERA

(Rolls just put in the pan.)

OLYMPUS DIGITAL CAMERA

(“Weapons” to cut the dough)

OLYMPUS DIGITAL CAMERA

(Rolls ready to bake)

Combine the 1½ teaspoons water and egg white; whisk until light and fluffy. Gently brush rolls with egg mixture. Bake in a pre-heated 350 degree oven for 14 minutes or until golden brown. Place pans on wire racks to cool. Place the remaining 2 teaspoons of butter in a microwave-safe bowl; microwave gently until the butter melts. Gently brush butter onto hot rolls. After about 10 minutes, remove the rolls from the pan and serve slightly warm or at room temperature. This recipe doubles, triples, etc. beautifully.

ROSEMARY, LEMON, AND GARLIC ROASTED CORNISH GAME HENS

OLYMPUS DIGITAL CAMERA

In my humble opinion, the pairing* of lemon, rosemary, and garlic is one of the best smelling combinations when cooked together. If they don’t evoke the smell of the Mediterranean and send your olfactory organs to their happy place, I can’t imagine what would! (OK, maybe onions and bacon cooking together, or chocolate chip cookies baking; but you know what I mean. There are just some aromas that make you glad to be alive.)

And when you use this dynamic trio together with tasty, tender little game hens (or henlets as they are lovingly referred to at Chez Carr), you are bound to end up as happy and very contented diners.

So last evening I served these little darlings for the first time. I had been looking for a new way to bake “henlets” when I came across the gist of this recipe on the Allrecipes.com website. I of course changed a few things, but the main theme of the recipe remains the same.

So if you too need a new and delicious way to serve game hens, please give this recipe a try. Or if you happen to be a real estate agent, bake these in the oven at your next open house. There’s not a person alive that wouldn’t buy the house right there on the spot just for the wonderful smells alone!

*and yes I know that 3 items do not a pairing make. But the word “pairings” is just such the rage right now, I chose to use it anyway. So all you English teachers out there, save your key strokes. I really do know better. Honest!

  • 2 Cornish game hens, washed and thoroughly dried
  • kosher salt
  • freshly ground black pepper
  • 2 lemons, each cut into 4 wedges
  • 4 (6-inch) sprigs fresh rosemary, divided
  • 2 tablespoons olive oil, divided
  • 12 garlic cloves, peeled
  • 2/3 c. white wine, divided
  • 2/3 c. chicken broth, divided
  • 1-2 T. flour, opt.

Preheat oven to 450 degrees.

Liberally sprinkle the inside of each hen with salt and pepper. Squeeze 2 lemon wedges into each cavity; then add the squeezed lemon pieces, 1 sprig of rosemary bent in half, and 1 garlic clove. Rub the outside of the hens with 1 tablespoon of the olive oil and sprinkle with salt and pepper.

Arrange the hens in a roasting pan, (I use an old 9×13 metal baking pan) and place the remaining garlic cloves, lemon wedges, and rosemary sprigs around the hens. Add 1/3 cup of the white wine, and 1/3 cup of the chicken broth.

OLYMPUS DIGITAL CAMERA

Roast in the preheated 450 degree oven for 35 minutes. (Check after about 20 minutes to make sure there is still liquid in the bottom of the pan. If not, add about half of the liquid mixture referenced in the next paragraph.)

Meanwhile whisk together the remaining 1/3 cup wine, 1/3 cup chicken broth, and 1 tablespoon of oil. After the 35 minute baking time at 450 degrees, reduce the oven temperature to 350 degrees, remove the hens from the oven and bathe them with the wine/broth mixture. Place back in the oven and continue roasting for about 30-40 minutes longer, or until the hens are golden brown and the juices run clear. Baste with pan juices every 15 minutes.

When the hens are finished baking transfer them to a platter. Pour any cavity juices into the roasting pan. Tent hens with aluminum foil to keep warm.

Meanwhile pour the pan juices into a sauté pan, remove the lemon wedges and rosemary twigs, mash the roasted garlic cloves, and bring to a boil. Reduce heat and simmer until the liquid is reduced to a sauce consistency. (If the sauce appears greasy, whisk in the flour and about a half cup water to bring the sauce to desired consistency.) Adjust seasonings. Serve as a delicious drizzle over mashed or oven roasted potatoes.

OLYMPUS DIGITAL CAMERA


OVERNIGHT SOFT HERB ROLLS

OLYMPUS DIGITAL CAMERA

I love homemade bread straight out of the oven. Who doesn’t, right? So when I can build bread dough and shape it one day and bake it off the next, I call that a jolly good thing! And when the bread tastes as good as my slightly modified version of Bradley Ogden’s recipe for herb rolls that I found in Sunset Magazine a few years back, I am just one happy camper. You see, I am a proponent of doing as much prep work ahead of time as possible. And this bread, which truly benefits from some down time in the refrigerator, fits my style perfectly. Because you see, I consider myself a fairly good practitioner of the ancient French art of mise en place. (In fact, if they gave out belts in mise en place the way they do in karate I’m sure I would be at least a red belt!)

Now I know at least some of you are wondering what the heck I am talking about. And even though you may not know the term mise en place, many of you are already experts in the field. All mise en place means is that you have all your ingredients prepared and ready to go before you start to cook. And because I entertain large groups of people on a regular basis, I take the concept one step further. I prepare as many dishes and do as much prep work as possible before the day of the dinner party. (And yes, some would say I’m just lazy and don’t want to get up at o-dark-thirty on the day of the gathering. Well of course, that is absolutely true! But I prefer to think of all my hard “pre-day of party work” as the logical and intelligent way to help prevent a fiasco!)

So if you too would like to exude a fascinating aura of mystique at your next dinner party, do as much kitchen work as possible ahead of time. And these delicious rolls should help you with that mission. Then when your guests arrive, greet them at the door as if they were entering a 5 star restaurant, with you being the executive chef. After all, that’s what you are! (Of course you’re probably also the prep chef and the soux chef, but you don’t have to go into that with your guests.)

  • ¼ c. slightly warm water
  • 1 T. or 1 pkg. active dry yeast
  • 2 T. sugar
  • 1 tsp. kosher salt
  • 1 T. minced Italian parsley
  • 1 T. minced fresh dill
  • 1 T. minced fresh chives
  • 1 T. minced fresh rosemary
  • 2 T. soft unsalted butter
  • 2 lg. eggs, divided
  • 1 c. half-and-half
  • 3½ c. un-bleached all-purpose flour or more as kneaded (sorry, couldn’t resist!)
  • coarse salt for sprinkling (I use course kosher salt)

In the bowl of your mixer combine the water, yeast, and sugar. Let stand for about 5 minutes or until the yeast starts to foam. Add the 1 teaspoon salt, herbs, butter, one of the eggs, half-and-half, and most of the flour. Knead dough on medium speed, adding more flour as necessary until the dough is smooth and soft, but no longer sticky to the touch. Shape into 24 small balls and place in a well greased 9×13-inch pan.

OLYMPUS DIGITAL CAMERA

Cover with plastic wrap (do not let rise) and refrigerate overnight. Remove from refrigerator about 2 hours before you want to bake the rolls. Replace the plastic wrap with a tea towel and let rise in a warm, draft free place.

Pre-heat the oven to 350 degrees. Whisk the remaining egg and brush the rolls evenly just before sprinkling lightly with coarse salt. Bake for 25-30 minutes or until a lovely golden brown. Serve the rolls hot, warm, or at room temperature. Best served the day they are baked.


ROASTED CARROTS WITH A HONEY BOURBON GLAZE

OLYMPUS DIGITAL CAMERA

I don’t like cooked carrots. Never have. Yet I cook with carrots all the time when I make the likes of soup, stew, or pot roast and thoroughly enjoy the experience. I just don’t like cooked carrots when they are simply steamed and served on the naked side. (You know, with just a thin covering of butter, salt, and pepper.)

But yesterday, I needed a simple veggie dish that had some color. And if for no other reason than the color itself, carrots are a Godsend when it comes to presentation. Of course, the fact that they also happen to be good for us and dirt (organic dirt of course) cheap doesn’t hurt!

What I wasn’t prepared for yesterday when I tasted one of these babies was my own culinary reaction. I liked them! What? How could this be? Well first of all, they were oven roasted. And what veggie doesn’t profit from being slathered in olive oil and baked in an oven at a high temperature? The outside caramelizes and the inside becomes tender and sweet. Then to take the lowly roasted Daucus carota and introduce it to a glaze made with butter, honey, and bourbon – well simple words do not do justice to the end result.

All I can say is, if you are already a carrot lover, good for you and enjoy the recipe. If however, cooked carrots have never rocked your universe, do yourself a favor and give this recipe a try. Roasted carrots will never replace Mocha Chocolate Cake (my next recipe to be posted) as the sweetest treat around, but I can promise you that these carrots have about as much in common with a steamed carrot as Spam has with Black Forrest ham!

  • 2 lbs. baby carrots (cut larger pieces in half lengthwise) or 2 lbs. peeled carrots cut about ½ inch thick on the diagonal
  • 2-3 tsp. extra virgin olive oil
  • 1 tsp. kosher salt
  • freshly ground black pepper
  • 2 T. unsalted butter
  • 2 T. bourbon
  • 2 T. honey
  • 1 T. water
  • 1 T. minced fresh parsley, garnish, opt.

Place carrots in a bowl. Stir in the olive oil, salt, and pepper. Toss well to coat. Place in a single layer on a foil lined baking pan and bake in a pre-heated 450 degree oven for about 20 minutes or until the carrots are crisp tender. Meanwhile, melt the butter in a small saucepan over medium-high heat. Remove from heat, and stir in the bourbon, honey, and water. Return to heat, and bring to a boil, stirring occasionally. Reduce heat to medium, and cook for about 5 minutes or until mixture is syrupy. After carrots have baked for 20 minutes, remove the pan from the oven, and pour the honey syrup over all. Toss gently to coat. Return to oven and bake for an additional 7-10 minutes or until the carrots are tender. Remove from oven, taste one, and add a sprinkle of kosher salt (if necessary) and the minced parsley for pretty. Serve hot or at room temperature.


BRUSSELS SPROUTS IN A BACON AND BALSAMIC VINEGAR GLAZE

OLYMPUS DIGITAL CAMERA

I have to admit, Brussels sprouts have never been Mr. Cs favorite veggie, in fact, quite the opposite. But there is one sure way I know of to dress up an otherwise healthy and unpalatable vegetable (Mr. Cs description), and that my dear friends is by adding bacon. Bacon is the universal food group that makes just about anything taste better. (I call it a food group, because in my opinion it deserves its own place in the food spectrum!)

So when I stumbled on this recipe from Paula Deen, I just had to give it a try. Well, boy howdy, what a little bacon, balsamic vinegar, and a few other ingredients can do for the lowly Brussels sprout is nothing less than magical. (We actually had Brussels sprouts at our good friends Ken and Christine’s place on Thanksgiving which prompted me to go on line in search of Brussels sprout recipes that I thought Mr. C would appreciate). Thanks dear friends for the push in the right direction.

So if you too are a little apprehensive about presenting your family and friends with lovely little Brassica oleracea var. gemmifera, give this recipe a try. I’m telling you, it has made a believer out of both Mr. C. and me. Thank you Paula Deen!

  • 5 slices lean thick sliced bacon, chopped
  • 1½ lb. Brussels sprouts, quartered
  • 1 T. extra virgin olive oil
  • ½ tsp. kosher salt
  • freshly ground black pepper
  • ¼ c. balsamic vinegar
  • 1 T. firmly-packed brown sugar
  • ½ tsp. Dijon mustard

Cook the bacon until crisp in a large skillet. Remove the bacon and drain on paper towels. Keep the bacon fat. Meanwhile, combine the Brussels sprouts, olive oil, salt, and pepper in a large bowl. Place on an aluminum foil covered baking sheet and bake in a pre-heated 400 degree oven until tender, about 20 minutes.

While the Brussels sprouts are baking, add the vinegar, brown sugar, and mustard to the reserved bacon drippings in the skillet. Cook over medium-high heat, stirring frequently, until the mixture is reduced by about a half, about 6 minutes. When the Brussels sprouts come out of the oven, add them to the vinegar mixture. Toss gently to coat. Add the reserved bacon. Serve immediately.


BUTTERNUT SQUASH, BLUE CHEESE, AND WALNUT TART

OLYMPUS DIGITAL CAMERA

I don’t know why I have such a fascination with savory tarts, except for the fact that they are just bloody delicious. After all, what do you see in the list of ingredients below that doesn’t reach right off the page (or your screen to be more precise) and grab you by your taste buds? Nothing, right??

Well for me this tart is the perfect combination of flakey (the crust), savory (the rosemary infused butternut squash purée), cheesy (the sharp flavored and salty blue cheese) and crunchy (the toasted walnuts).

I have actually been trying to re-create this dish since we enjoyed its culinary prototype at la medusa restaurant in Seattle’s Columbia City neighborhood several years ago. And I know any resemblance to my recipe and my fading memory of the “real” thing is purely unadulterated sheer good luck. Regardless, this is still a pretty darned good tart in its own right!

So next time you need a wonderful first course nibble or a bite size piece of heaven to serve as an appetizer, give this recipe a try. And even if by some stroke of unfortunate fate you or your family aren’t butternut squash lovers, the other ingredients will redeem the squash so beautifully that you and yours will never again cast aspersion on this lowly bit of vegetative matter. In fact, you will all be left to wonder why you hadn’t recognized butternut squash as one of God’s perfect foods from the onset. (I have witnessed this revelation with my own eyes, so I know of what I speak.) So may Betty Crocker, the spirit of Julia Child, and the precocious Ratatouille be with you on your journey to enlightenment.

  • 2¼ c. unbleached all-purpose flour
  • 1½ tsp. kosher salt, divided
  • 1½ tsp. sugar
  • slightly rounded ¼ tsp. baking powder
  • scant ½ c. extra virgin olive oil
  • 6 T. milk
  • 1 T. butter
  • 1 lg. shallot, chopped or ¼ c. finely minced onion
  • 1 garlic clove, minced
  • 2 c. puréed fresh butternut squash (I peel the squash, cut it into small cubes, steam it until tender, and process it in my food processor)
  • tiny pinch ground nutmeg
  • fresh ground black pepper
  • ¼ tsp. very finely minced fresh rosemary
  • 6-8-oz. crumbled blue cheese (depending on much you like blue cheese)
  • 1 c. chopped walnuts, lightly toasted

Whisk together the flour, the 1 teaspoon salt, sugar, and baking powder in a medium bowl. Whisk together the olive oil and milk in another bowl, then pour over the dry ingredients. Stir with a table knife until the dough is evenly moistened and no loose flour remains. Using your fingers, press the crust into a 9×13-inch glass baking dish, beginning with the bottom; then press a tiny bit up the sides of the pan. (Make sure there are no holes or cracks in the crust.) Bake for 12 minutes in a pre-heated 375 degree oven. Remove crust from oven and increase oven temperature to 425 degrees.

Meanwhile, heat the butter in a medium sized sauté pan over medium-high heat. Cook the shallots for about 2 minutes or until translucent. Add the garlic and cook for an addition minute. Mix in the squash, nutmeg, remaining ½ teaspoon salt, pepper, and rosemary. Remove from heat and set aside to cool.

When ready to bake, spread the butternut squash mixture evenly over the partially baked crust. Add the crumbled blue cheese, but not the walnuts. (You are going to add the walnuts after the tart has finished baking.)

Bake the tart in the pre-heated 425 degree oven for about 13-15 minutes or until the crust is a lovely light golden brown. Remove from the oven and scatter the walnut pieces over the top. Taking a table fork, gently press the walnut pieces into the cheese. Place pan on a rack to cool. When ready to serve, cut into desired sized pieces. Serve warm or at room temperature.


DRIED CORN CASSEROLE

OLYMPUS DIGITAL CAMERA

This recipe comes from my maternal grandmother. It was always one of the “sacred side dishes” served for both Thanksgiving and Christmas dinner when I was growing up. And as a young adult starting my own traditions, I always served this dish or carried it with me if I was not the hostess. For one thing, the taste is completely unique. (I like that!) And truly, what’s not to like when you glance at the ingredients? And you’re right. My grandmother didn’t use Italian bread crumbs. But you know that most of the time I simply can’t leave a recipe alone, even if said recipe is a hand down from my own grandmother! (Doesn’t speak too highly of my character, now does it?) Anyway, character flaws aside, please trust me when I say that this corn dish is really, really tasty.

Drying the corn imparts a rich, nutty flavor to the corn. In essence, this casserole is a corn pudding. Easy to prepare and serve. Over the years I have made a couple of changes that I feel even make the casserole more appealing. I prepare the dish and then set it aside for a couple of hours to allow the corn to reconstitute a bit. This results in a more tender corn kernel and an overall softer finished product. I also don’t add extra salt to the dish. There is plenty enough salt in the bread crumbs and of course in the cheese.

Although the prep time on this dish is low, it’s best to dry the corn well ahead of when you will actually need it. Then all that’s left is a little cheese grating action and your casserole is assembled in no time flat. Set it aside, then bake it off, and you have yourself a delicious and totally different take on corn pudding. Thank you grandma Kléber for this recipe and for all the love you gave me as a child. (And yes, I know grandma can hear me even as I think about what I’m going to write. She almost always knew what thoughts were percolating in my brain before I did! Why should it be any different now just because she’s in heaven?)

  • dried corn (see drying instructions below)
  • ½ c. dried bread crumbs (I use Italian dried bread crumbs)
  • 2 c. grated sharp cheddar cheese
  • roughly 3½ c. milk (your choice)
  • dried parsley
  • 1 T. butter

Lightly butter a 2-3 quart covered casserole dish. Pour half the dried corn in bottom of dish. Cover with half the bread crumbs and half the cheese. Layer remaining corn, bread crumbs, and cheese in same order. Pour in enough milk to cover all the contents. Sprinkle lightly with parsley and dot with butter.

OLYMPUS DIGITAL CAMERA

Cover and allow to sit for about 2 hours before baking in a pre-heated 350 degree oven for 30 minutes. Remove cover and bake for an additional 30 minutes. Serve warm.

Dried corn:

OLYMPUS DIGITAL CAMERA

Place 2 lbs. frozen corn kernels on 1 large or 2 small baking sheets (the kind with a rim) in a single layer. Dry the corn by baking it in the oven on the lowest temperature setting until there is no moisture left in the kernels. Turn occasionally. (It could take as many as 16 hours to dry out the corn completely.) When dry, the corn kernels should resemble grape nuts. (Different color, but you get the picture.) Store the dried corn in an airtight container. No need to refrigerate or freeze.