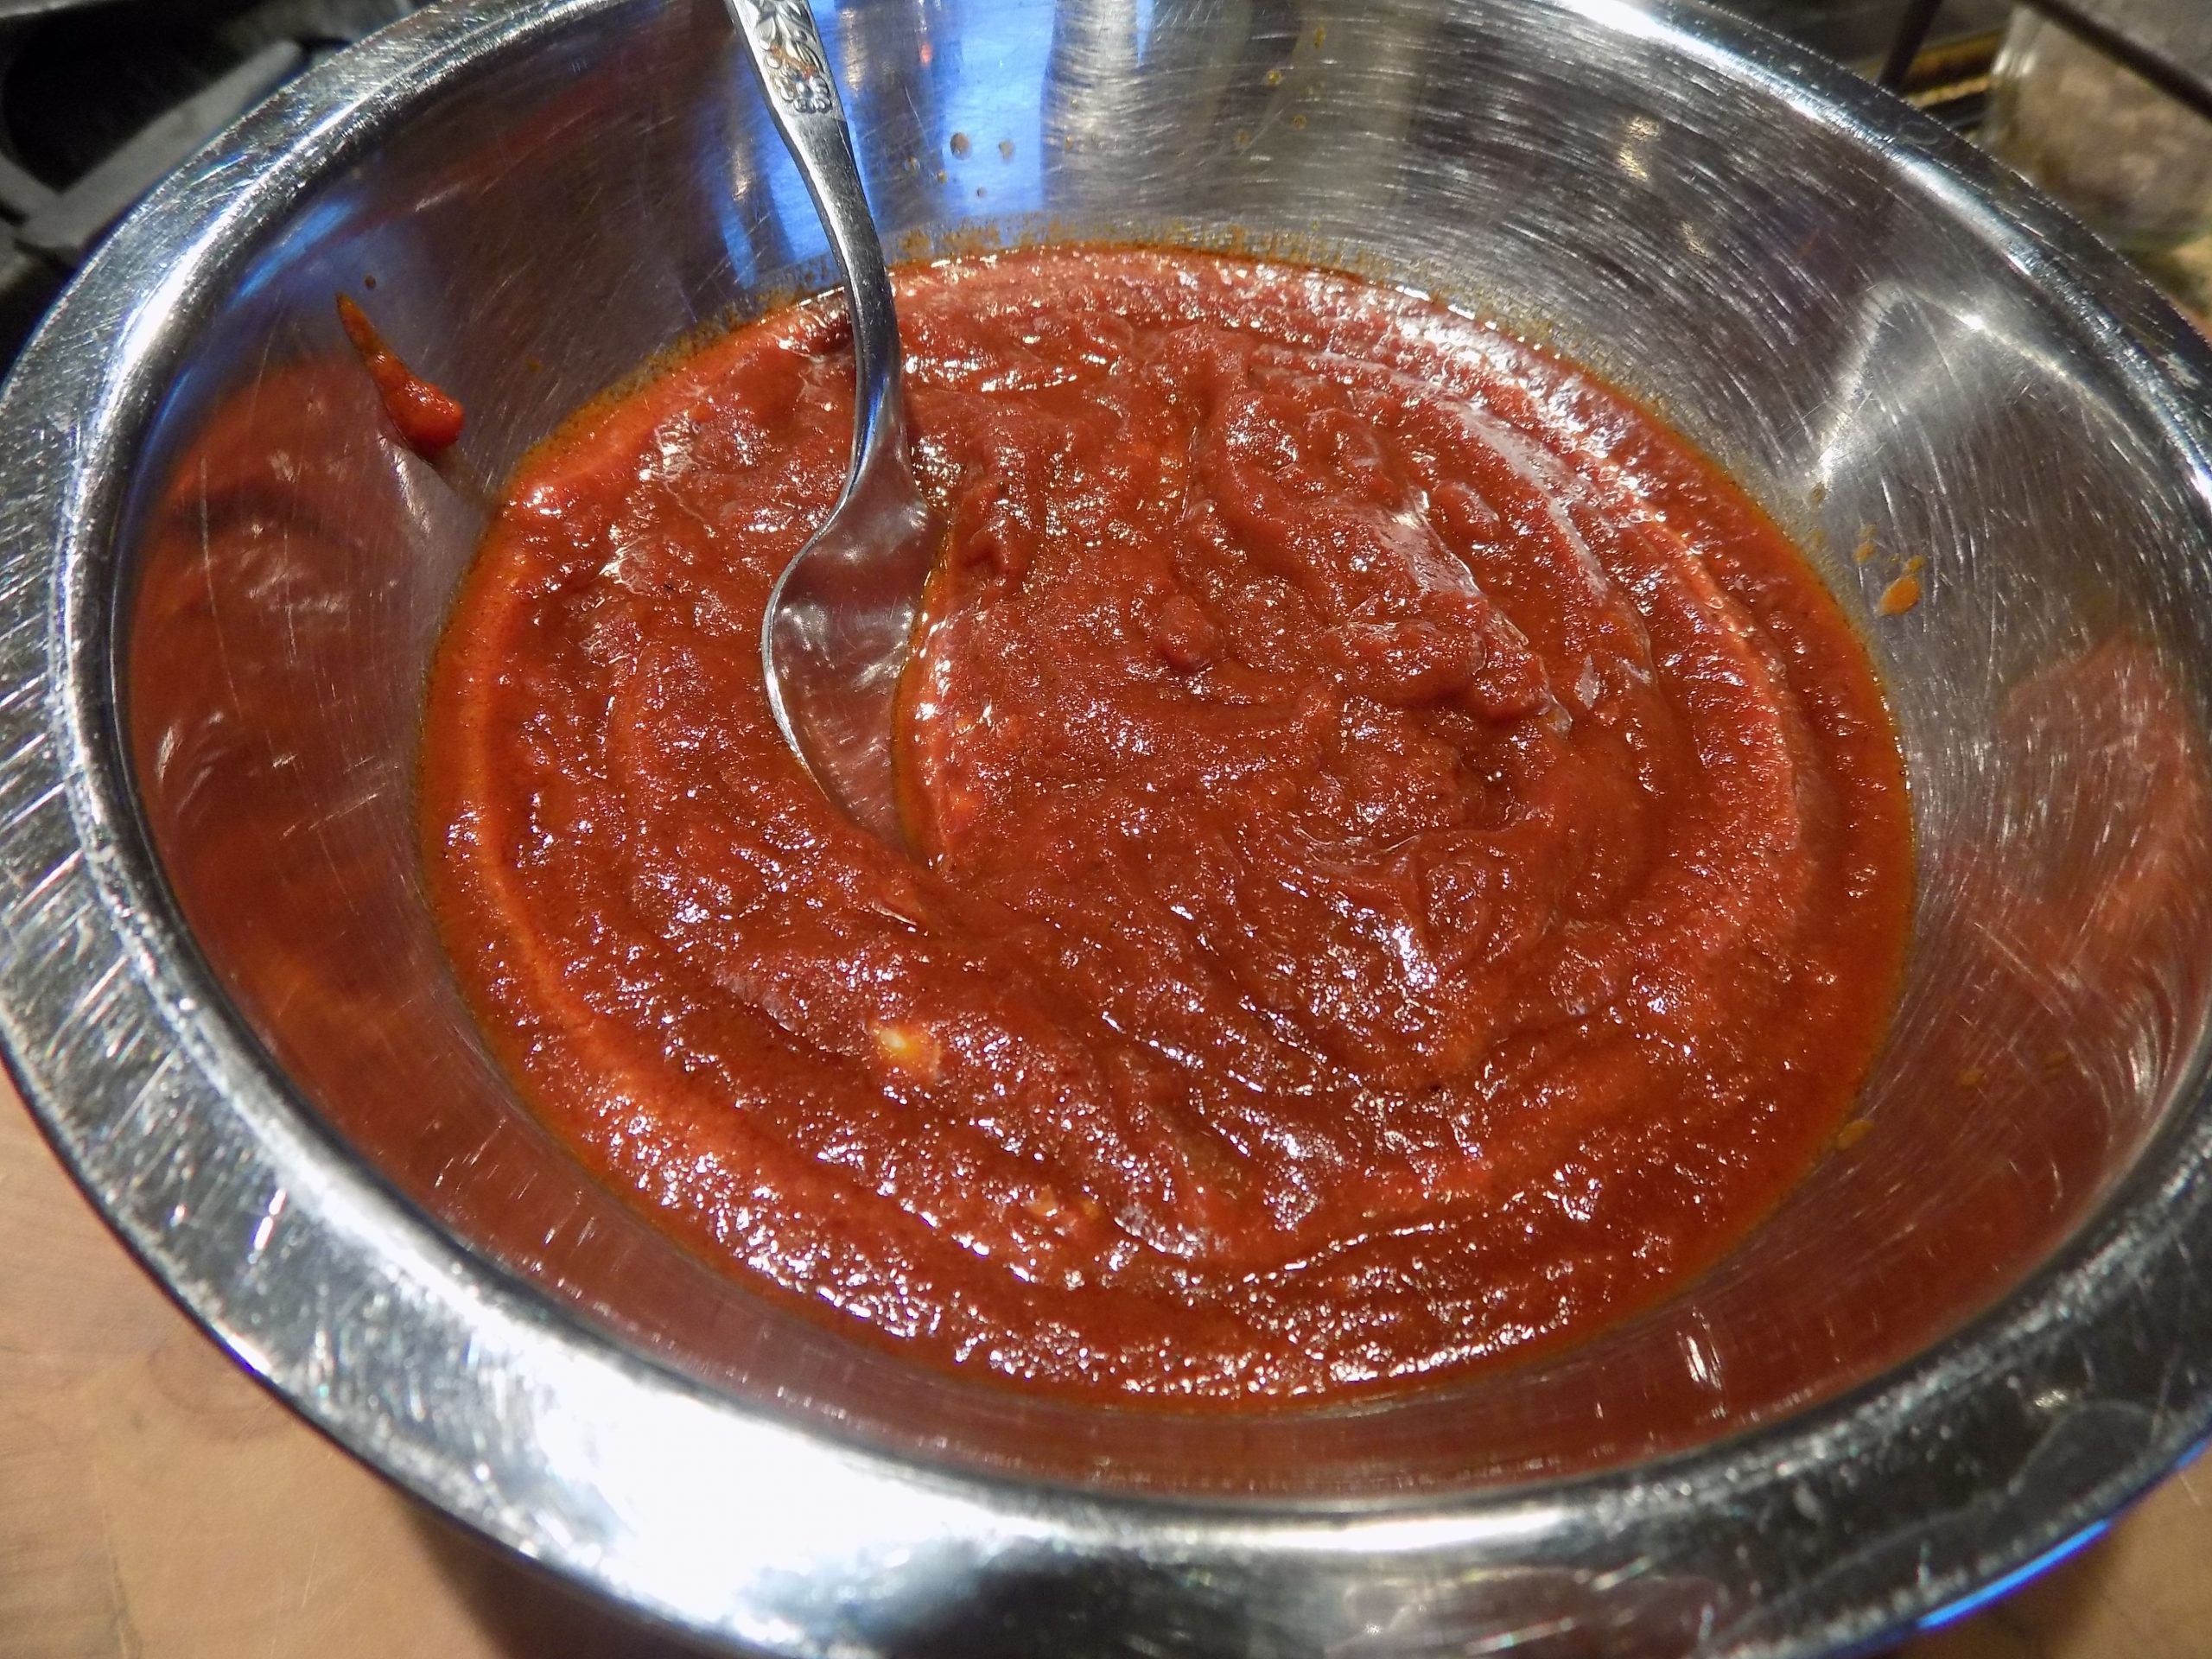
There are just those times when the only thing that will do is some good old fashioned BBQ sauce. Like with ribs for example. But most BBQ sauces have sugar in them. At least the good ones do! Like my Bourbon BBQ Sauce, for example. But with my new regimen, I really need to stay away from sugar as much as possible. So, that means – build your own or go without! And I refuse to go without!
So, when I recently served ribs, I made this sauce. It was very tasty. And even though I was using monk fruit sweetener which contains no sugar, I still only used 1 tablespoon.
After our rib dinner I had a bit of BBQ sauce left. So, when I made 2 small meatloaves to take with us on our recent trailer trip, instead of topping the meatloaves with my usual combination of brown sugar and ketchup, I used the leftover sauce. Wonderful. Didn’t miss the usual topping in the least.
If you too are trying to stay away from sugar, I suggest you give this recipe a try. Easy to build and no special ingredients required. And really, what kind of life would it be without BBQ sauce?
As always, peace and love to all.
2 T. extra virgin olive oil
½ c. finely chopped onion
3 garlic cloves, finely minced
1 (6 oz.) can tomato paste
¾ c. water
1 T. monk fruit sweetener (I use the “golden” variety)
1 T. apple cider vinegar, or more to taste
3 T. Worcestershire Sauce
¼ tsp. hot sauce, or to taste (I use Frank’s RedHot)
1 tsp. smoked paprika
½ tsp. seasoned salt (I use my homemade version – see recipe below)
freshly ground black pepper
tiny pinch cayenne pepper
tiny pinch ground cloves
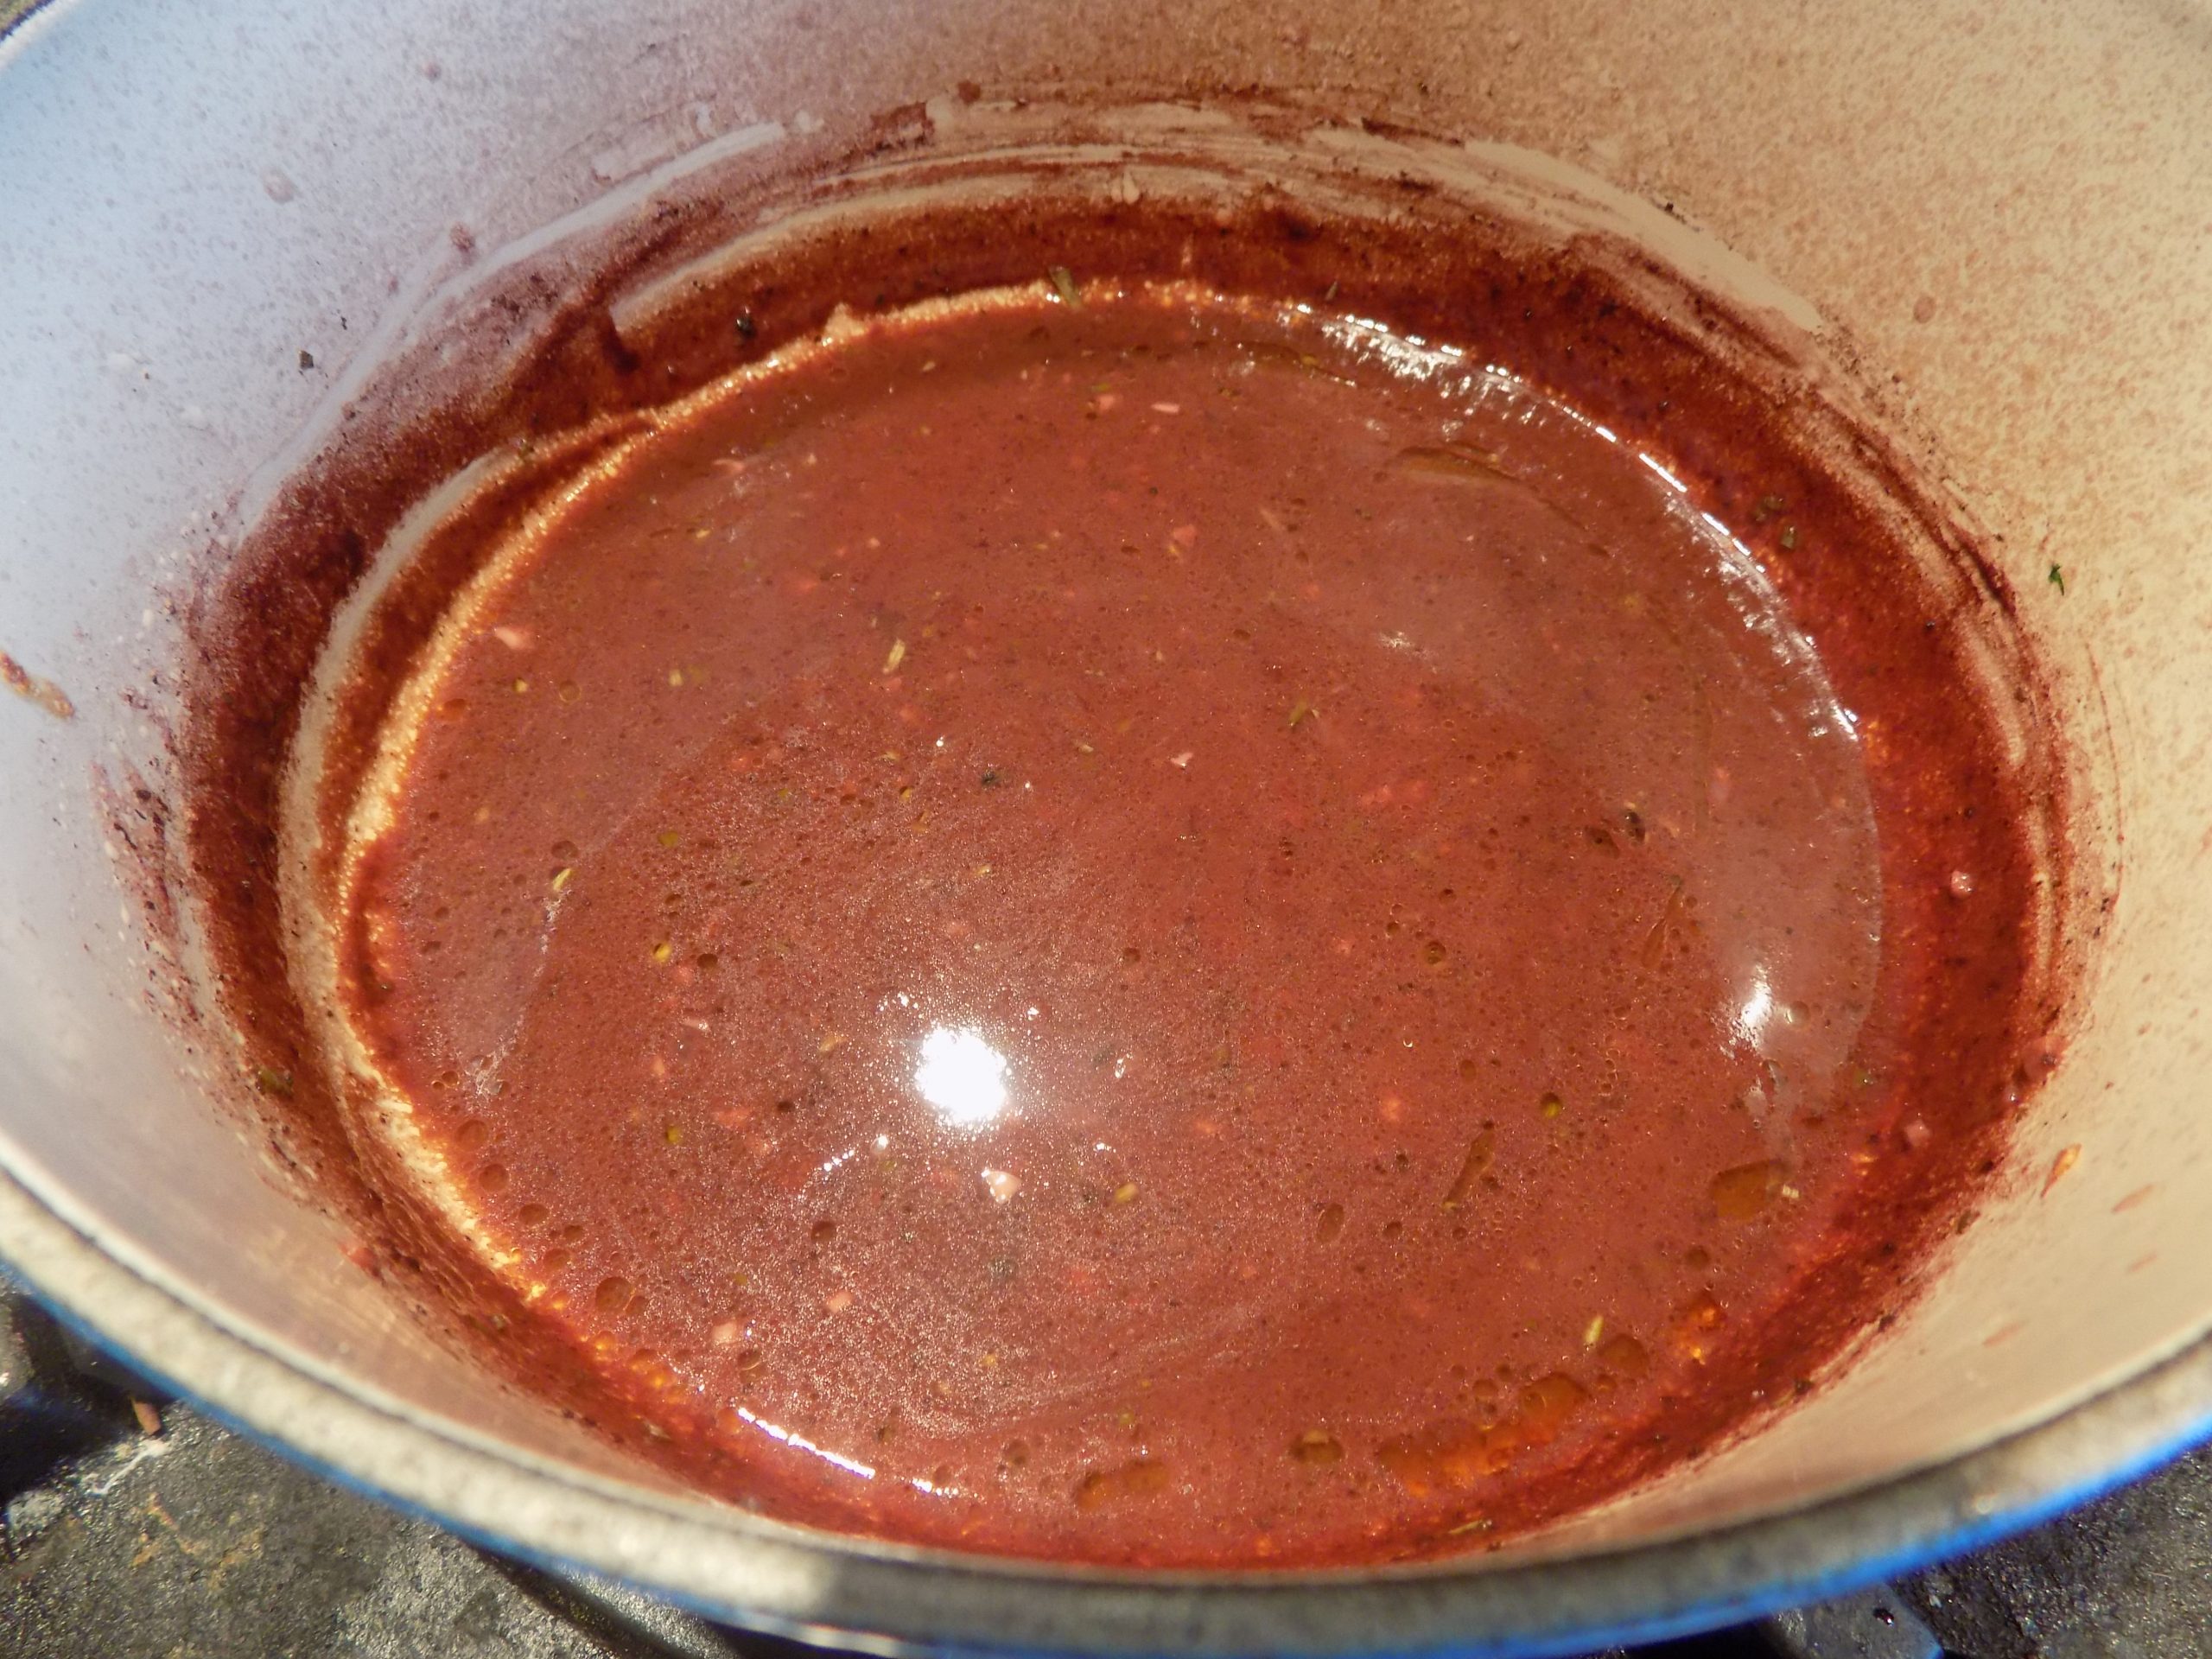
Heat the olive oil in a small, covered saucepan. Sauté the onion until translucent. Add the garlic and cook for 1 minute. Add the remaining ingredients. Bring to a boil, reduce heat, cover, and simmer for 30 minutes. Taste and adjust seasoning.
SEASONED SALT
½ c. kosher salt, run through a spice grinder to break down the crystals a bit
4 tsp. finely ground black pepper (I buy cheap finely ground black pepper just for this recipe)
4 tsp. paprika
4 tsp. granulated garlic
4 tsp. granulated onion
½ tsp. chili powder
½ tsp. celery salt
½ tsp. granulated sugar
tiny pinch cayenne pepper
tiny pinch ground cinnamon
Whisk all together and store in an airtight container.
Hi there, it’s me again. Sorry to be gone for so long, but what can I say – life happens. In my case, my rheumatologist and I decided, for various health reasons, it was time to get me off prednisone.
Now, if you have ever taken this miracle drug, you know weaning yourself off this product is not easy. While at the same time adding other drugs as replacements, my body strenuously objected. Well, the result was that I basically felt terrible. No energy. General fatigue. Unaccustomed pain. No appetite! (Inconceivable!) The whole 10 yards.
By the time we were ready for our annual spring trailer trip I was feeling better. But still not myself. And as of this writing, I finally feel like I am on the mend. Not perfect but improving daily. Anyway, I’m finally feeling well enough to once again look forward to trying new recipes, sharing the good ones with you, and burdening you all with my various exposés on matters best left unsaid! In other words – I’m back! (I hope.)
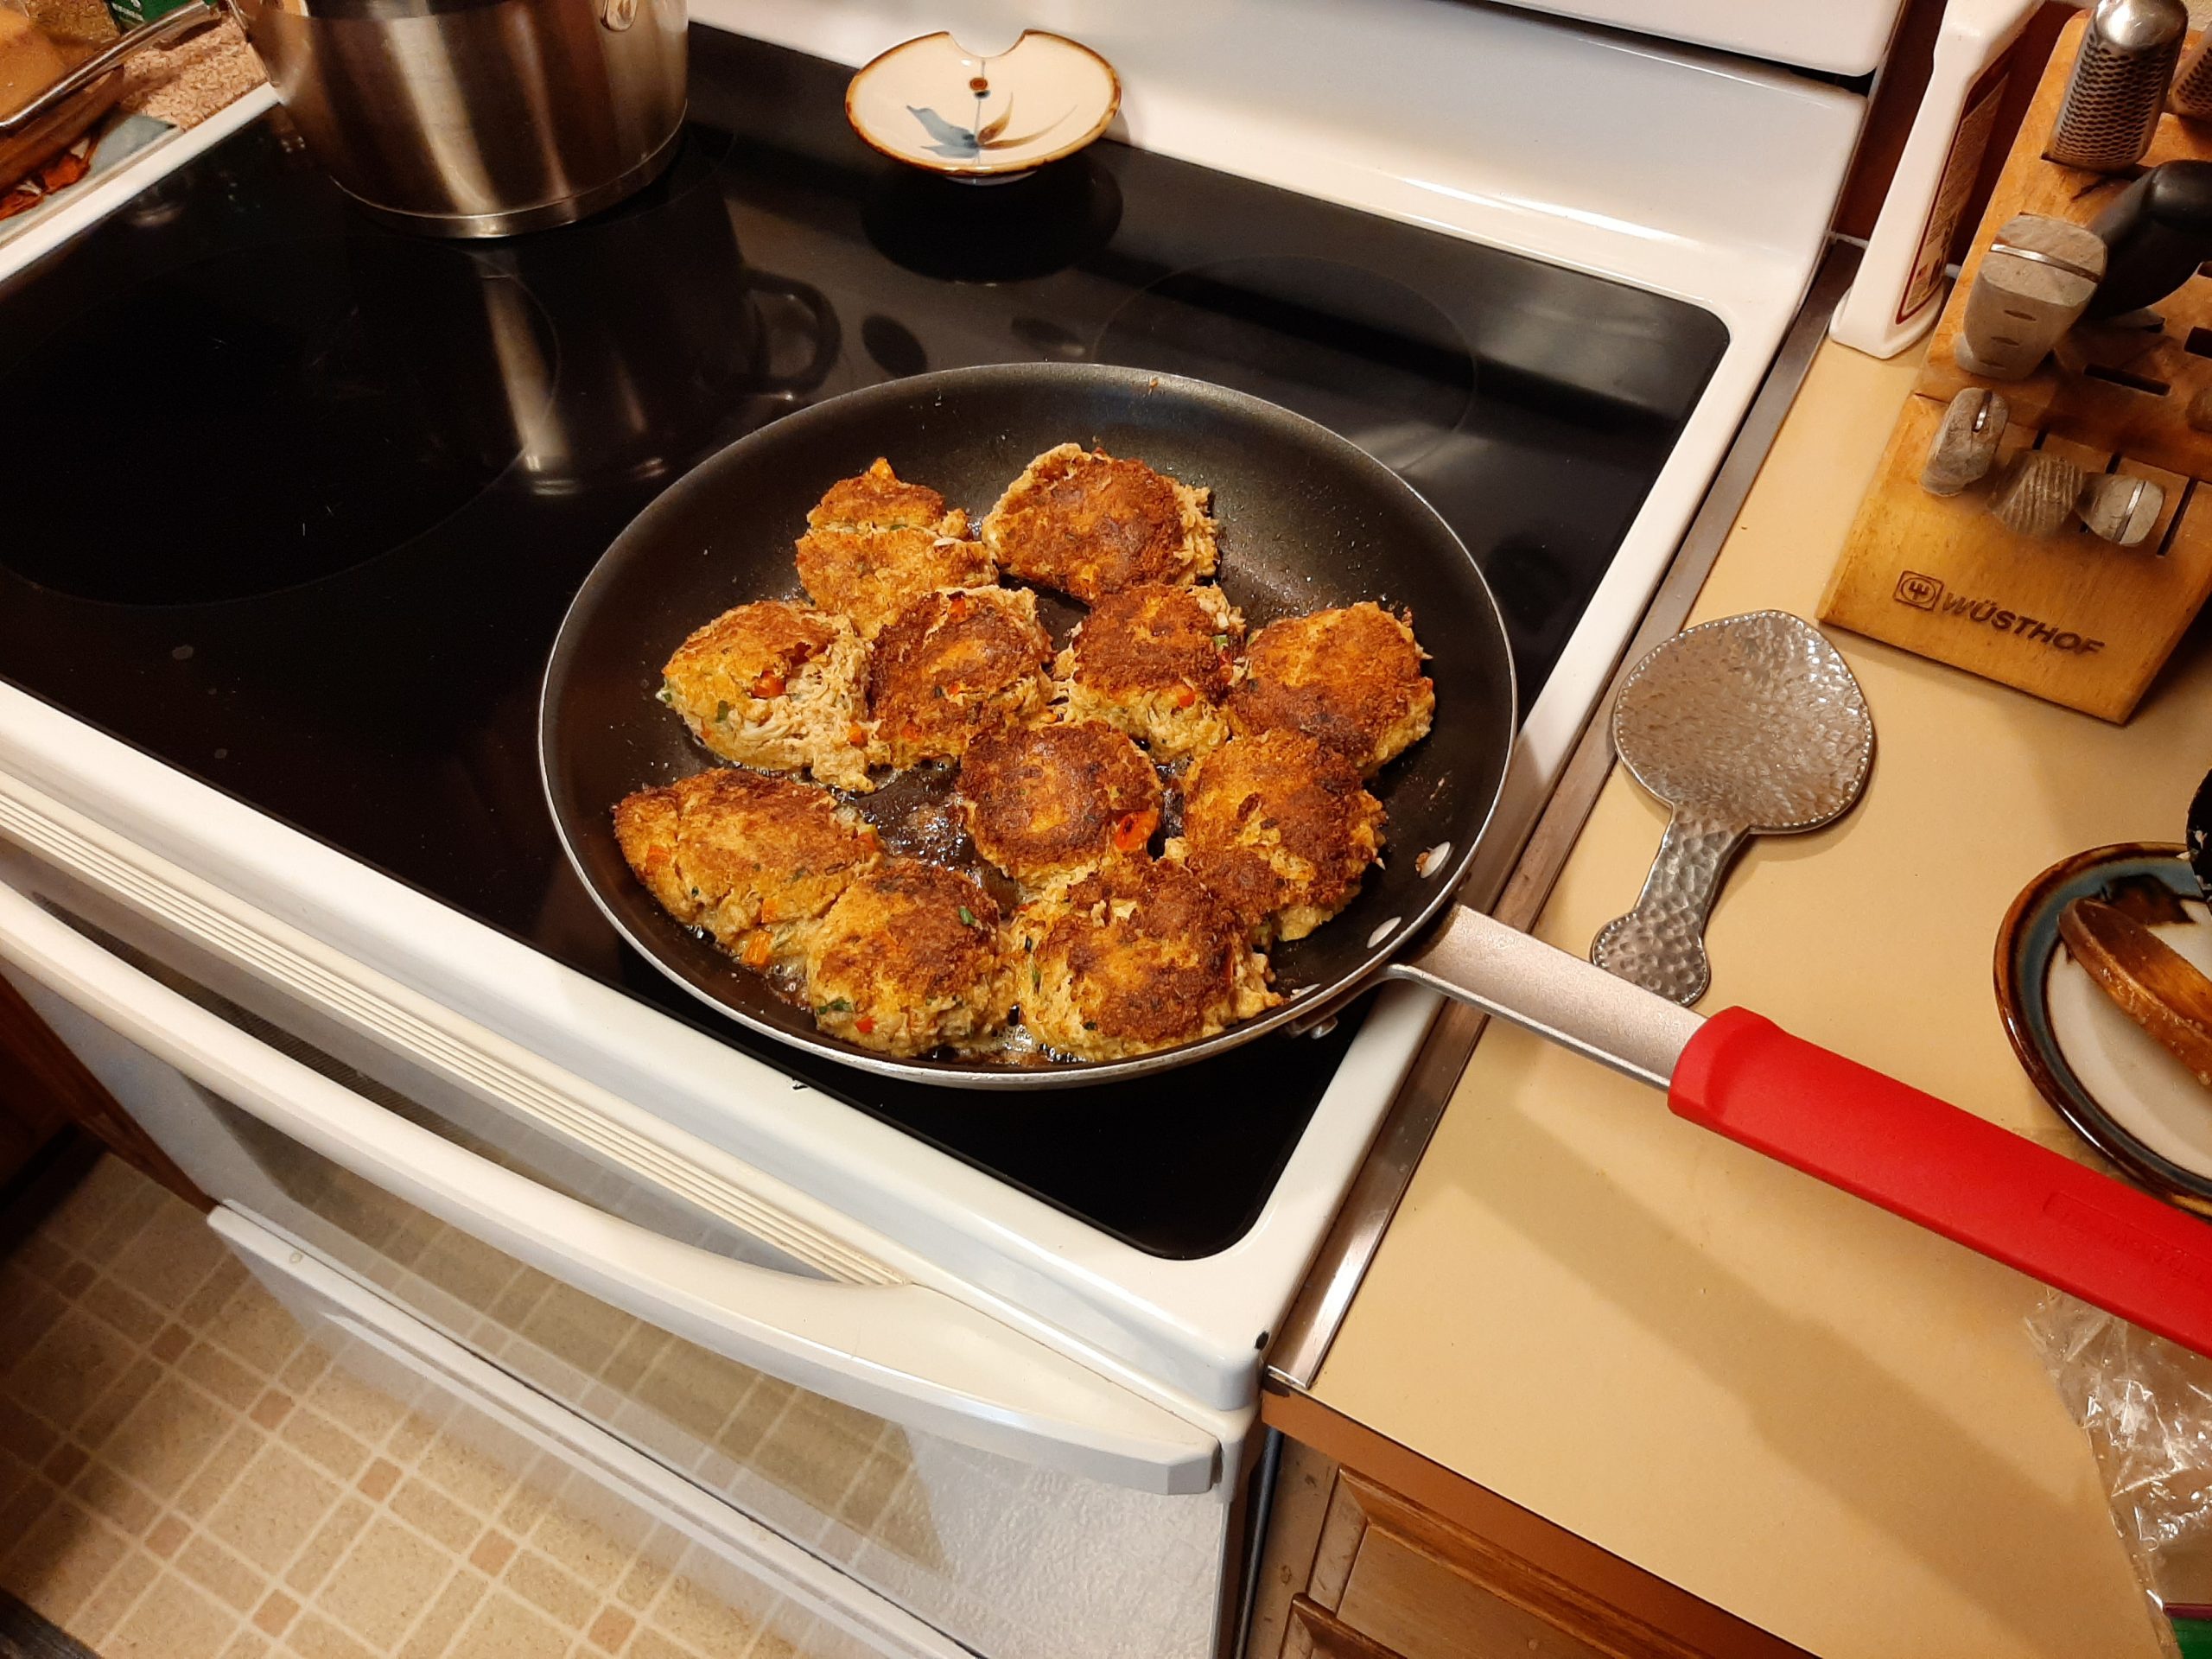
While we were on vacation, I had the opportunity to make crab cakes. Since I am trying to eliminate white flour from my diet, I substituted finely ground almond flour for the saltine crackers in my old standby crab cake recipe. It worked great! So, the recipe you find below is GF and mighty tasty. Of course, the wonderful and simple aioli doesn’t hurt. I mean really, when is aioli or a great tartar sauce ever a burden?
So, I hope you enjoy these recipes.
It was such a joy to see daughter Ursala and her husband Soroush while we were on vacation. And to travel for most of our vacation with Mr. C’s sister Katie and her husband Rick. Along the way we also got to spend time with some of Rick and Katie’s family and dear friends. Fabulous times with all.
It was so wonderful to once again spend time with friends and family. To be able to fill our souls with joy only treasured friendships can provide. So, Rick, Katie, Chip, Linda, Jim, and Margo – I’ve said it before, but can it ever be said too often? I love you all!
Peace and love to all.
1 lg. shallot, finely diced
¼ c. finely chopped green onion
½ c. finely diced red bell pepper
2 tsp. finely chopped parsley
2 eggs
¼ c. mayonnaise
4 tsp. Old Bay seasoning
2 T. Worcestershire sauce
1 tsp. seasoned salt
freshly ground black pepper
1 c. finely ground almond flour, plus more for coating the crab cakes
1 lb. lump, canned or fresh crab meat
extra virgin olive oil (for frying)
In a large mixing bowl, mix the shallot, green onion, red bell pepper, parsley, eggs, mayonnaise, Old Bay seasoning, Worcestershire sauce, seasoned salt, pepper, and 1 cup almond flour together. Gently stir in the crab.
Form the mixture into 8 small cakes and place on a plate lined with almond flour sprinkled wax paper. Then sprinkle a small amount of almond flour on the top of the patties. Chill in your refrigerator for at least 45 minutes.
When ready to cook, heat a thin layer of olive oil to medium heat in a large frying pan. Add the cakes and fry for about 5 minutes per side or until they are cooked through and golden brown on each side. Serve immediately. Great with Lemon Garlic Aioli or your favorite tartar sauce.
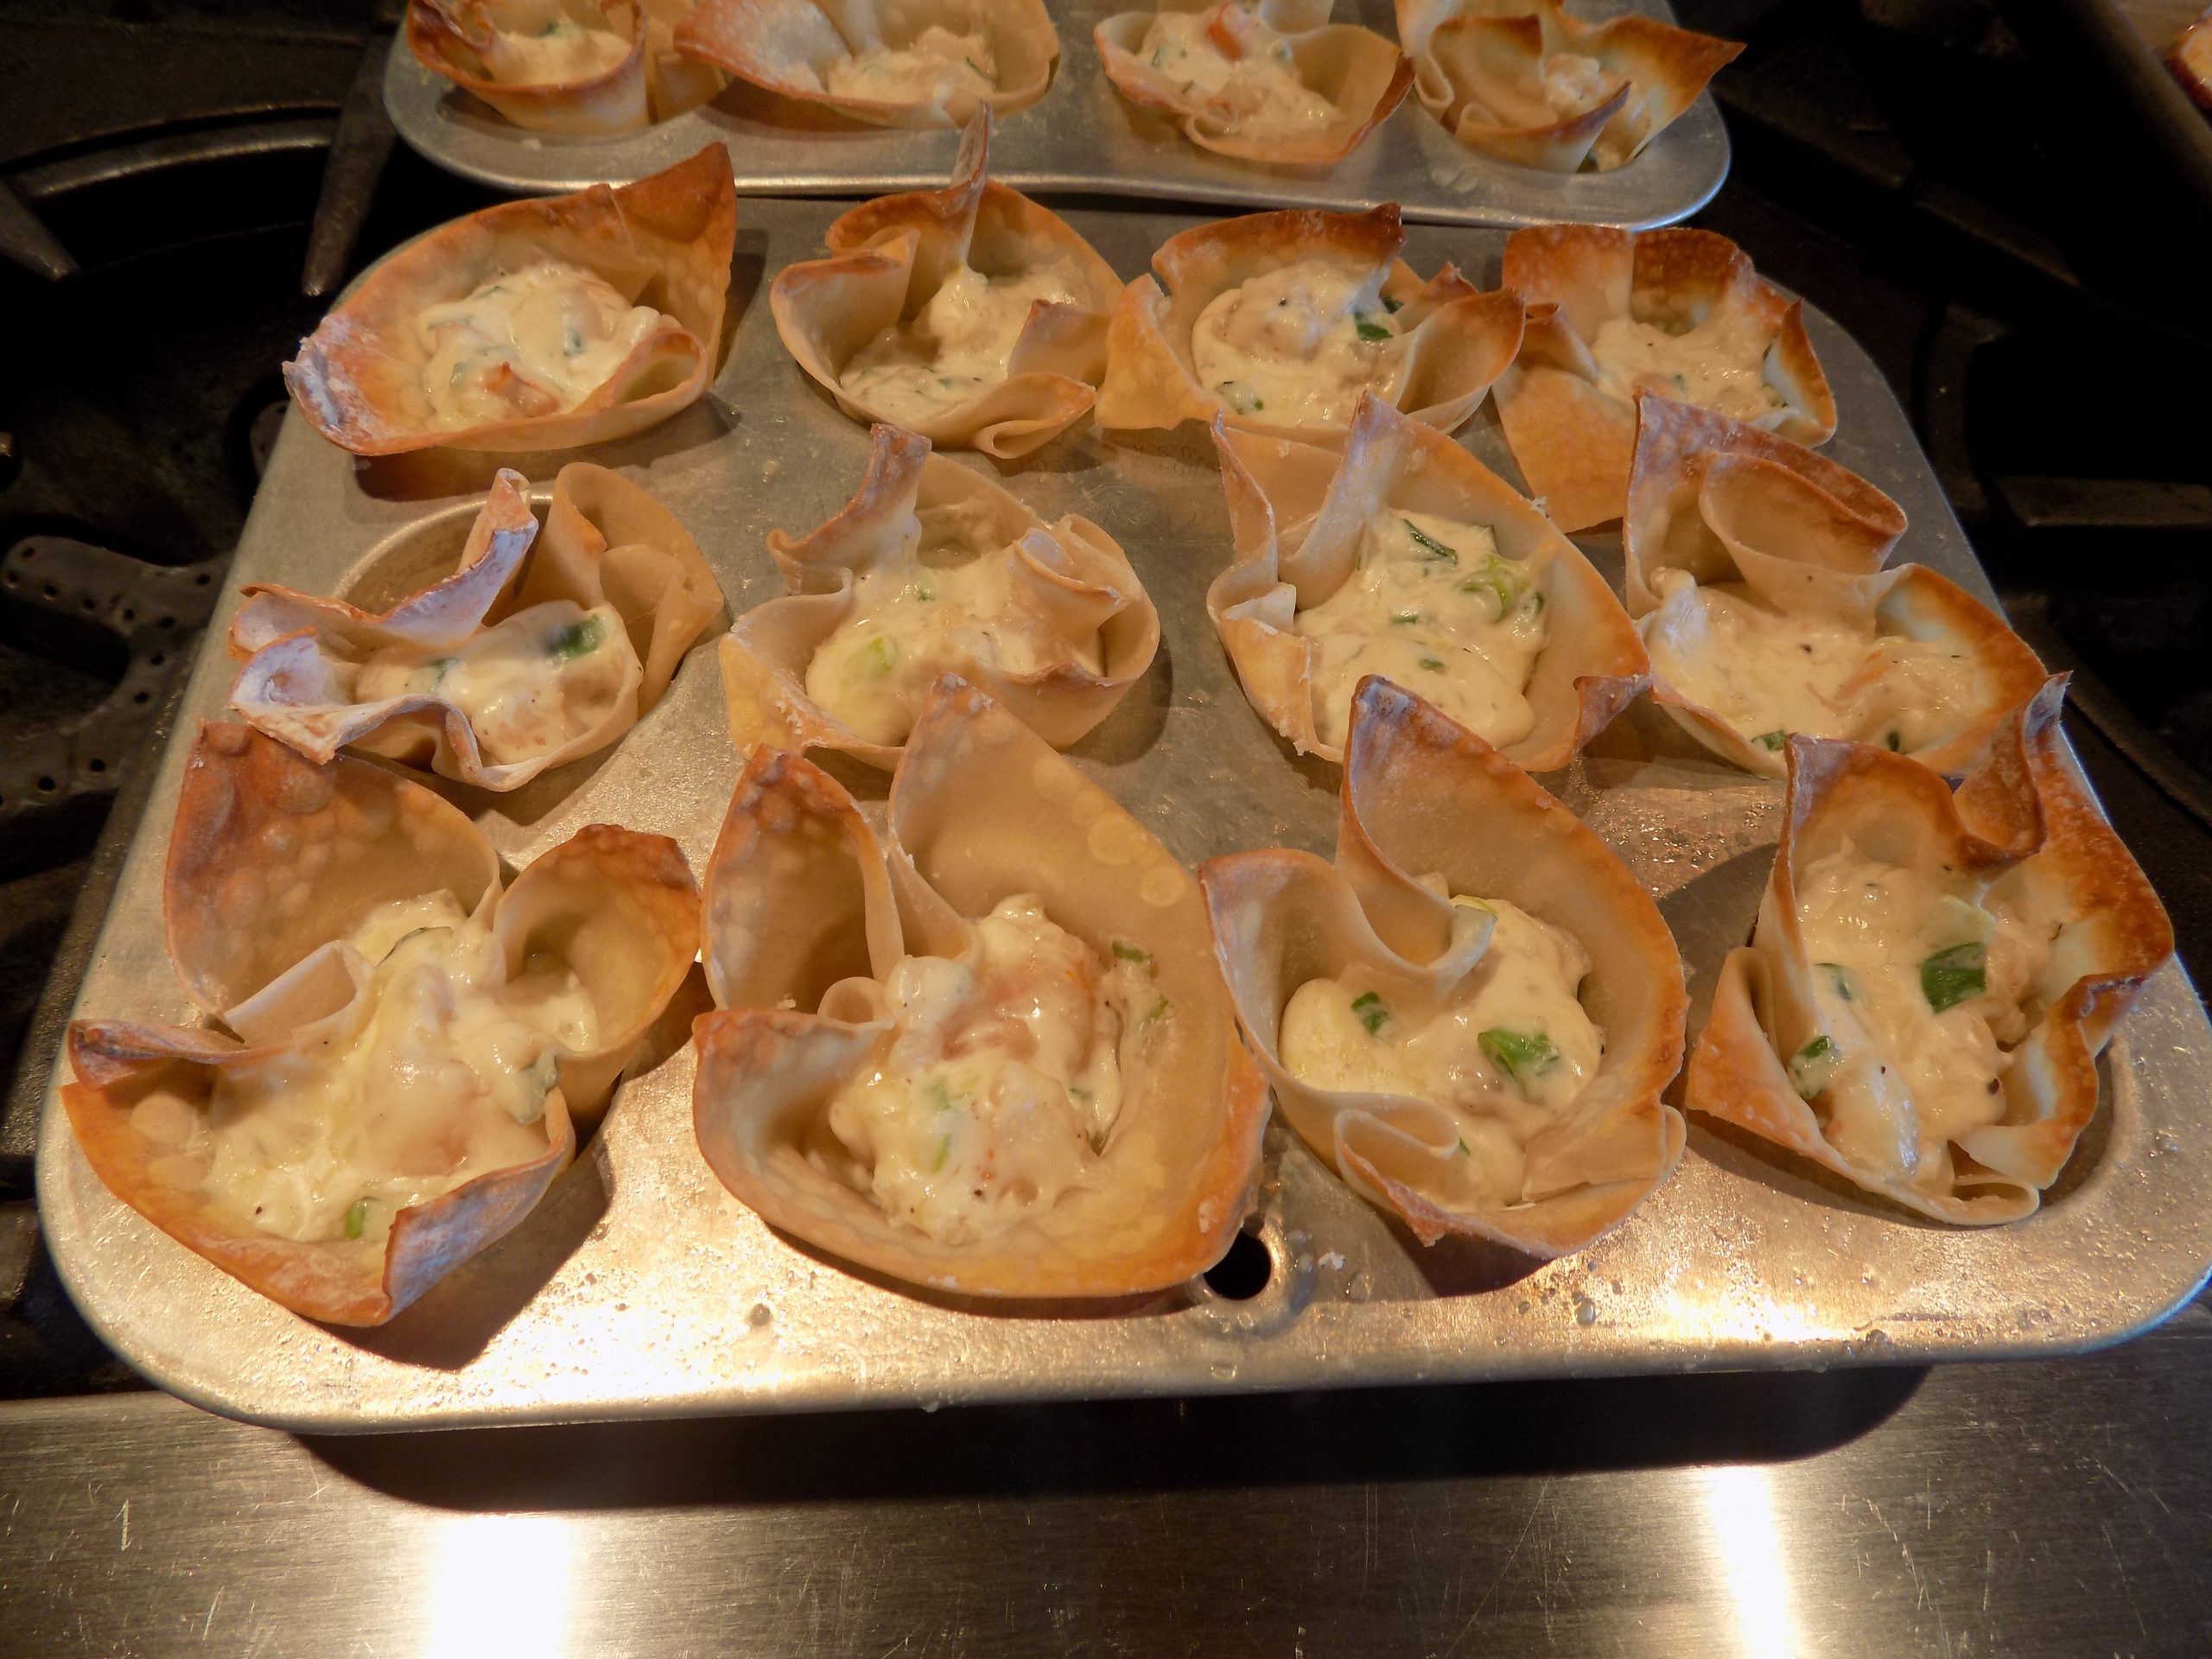
I have this tendency (a holdover from earlier years spent carefully watching my bank account balance), to see a leftover ingredient in my refrigerator and build a new dish around that ingredient. So, after making Baked Crab Rangoon with Sweet and Sour Sauce (recipe on site) a couple days before and having both leftover wonton wrappers and Sweet and Sour Sauce, I decided to try my hand at shrimp wonton cups. And boy am I glad I did!
I started with a recipe for wonton cups I found on the anerdcooks.com site. Then of course, I played with the recipe because I simply can’t help myself. But the result was terrific, so as in many cases, asking for forgiveness is so much easier than asking for permission. But Lauren, I do apologize for the changes I made to your perfectly fine recipe without your permission.
Anyway, the result was much better than expected. And even though there are still unused wonton wrappers in my refrigerator, I have reduced their number by 24. Of course, I have also used a half pound of large shrimp, 4 ounces of cream cheese, a bit of sour cream, and some grated mozzarella in the process. But I already had them in stock, so no visit to the grocery store was required to prepare this treat. (I still have left over Sweet and Sour Sauce too. But I have decided to let it go. There is a line over which even I refuse to cross!)
So, if you too love shrimp wonton cups with a truly delicious sauce, then I recommend these easy to prepare recipes. Perfect as an appetizer or accompaniment to other Chinese dishes.
As always, keep smiling. And keep your family and friends smiling too by preparing great food and serving it in beautiful serving dishes and on lovely dinnerware.
I don’t know about you, but food served on nice plates always seems more appealing. So, don’t save your good dishes for Thanksgiving or Christmas. Use them whenever you get the urge. Sure, a piece could get broken. It happens. But while the pieces are still around, they should be made to earn their keep, not tucked away for your inheritors to dispose of. Because realistically, your kids tastes and yours, when it comes to fine china that is, are probably quite different. So, enjoy them while you can. (That goes for the kids too!)
Peace and love to all.
2 tsp. unsalted butter
½ lb. lg. raw shrimp, shelled, deveined, and tails removed
freshly ground black pepper (just a bit)
24 square wonton wrappers
4 oz. (½ lg. pkg.) cream cheese, room temp.
2 T. sour cream
1 garlic clove, finely minced
½ tsp. Worcestershire sauce
2 green onions, finely chopped
½ c. grated mozzarella cheese
Heat the butter in a small frying pan. Cut the large shrimp into very small pieces. Add the shrimp, lightly sprinkled with black pepper to the frying pan and cook just until done. Remove from heat and set aside. Preheat oven to 350-degrees.
Lightly spray mini-muffin pans with nonstick cooking spray. Carefully press wonton wrappers into wells of pan. Lightly spray the wonton wrappers in the pan. Bake 7-8 minutes or until edges start to turn golden brown. Remove pan from oven.
Meanwhile, stir the cream cheese, garlic, and Worcestershire sauce together in a mixing bowl until well blended. Stir in the cooked shrimp, green onions, and mozzarella cheese; mix well. Using a #100 (2 teaspoons) ice cream scoop, plop the shrimp mixture into each wonton cup.
Bake for about 10 minutes or until wontons are golden brown and the filling is starting to bubble.
Serve hot, warm, or at room temperature. Great dunked in Sweet and Sour Sauce.
SWEET AND SOUR SAUCE
¼ c. lightly packed brown sugar
¼ tsp. kosher salt
2 T. ketchup
1 T. soy sauce
3 T. plain rice vinegar (not seasoned rice vinegar)
½ c. water
2 tsp. cornstarch dissolved in 2 tablespoons water
Combine the sugar, salt, ketchup, soy sauce, vinegar, and water in a small saucepan. Bring to a near boil over medium heat, stirring occasionally to dissolve the sugar. Give the cornstarch a stir and then add it to the pan. Continue cooking, stirring, for about 15 seconds, or until the sauce comes to full boil and thickens.
Remove from the heat. Serve warm or at room temperature. Can be made ahead.
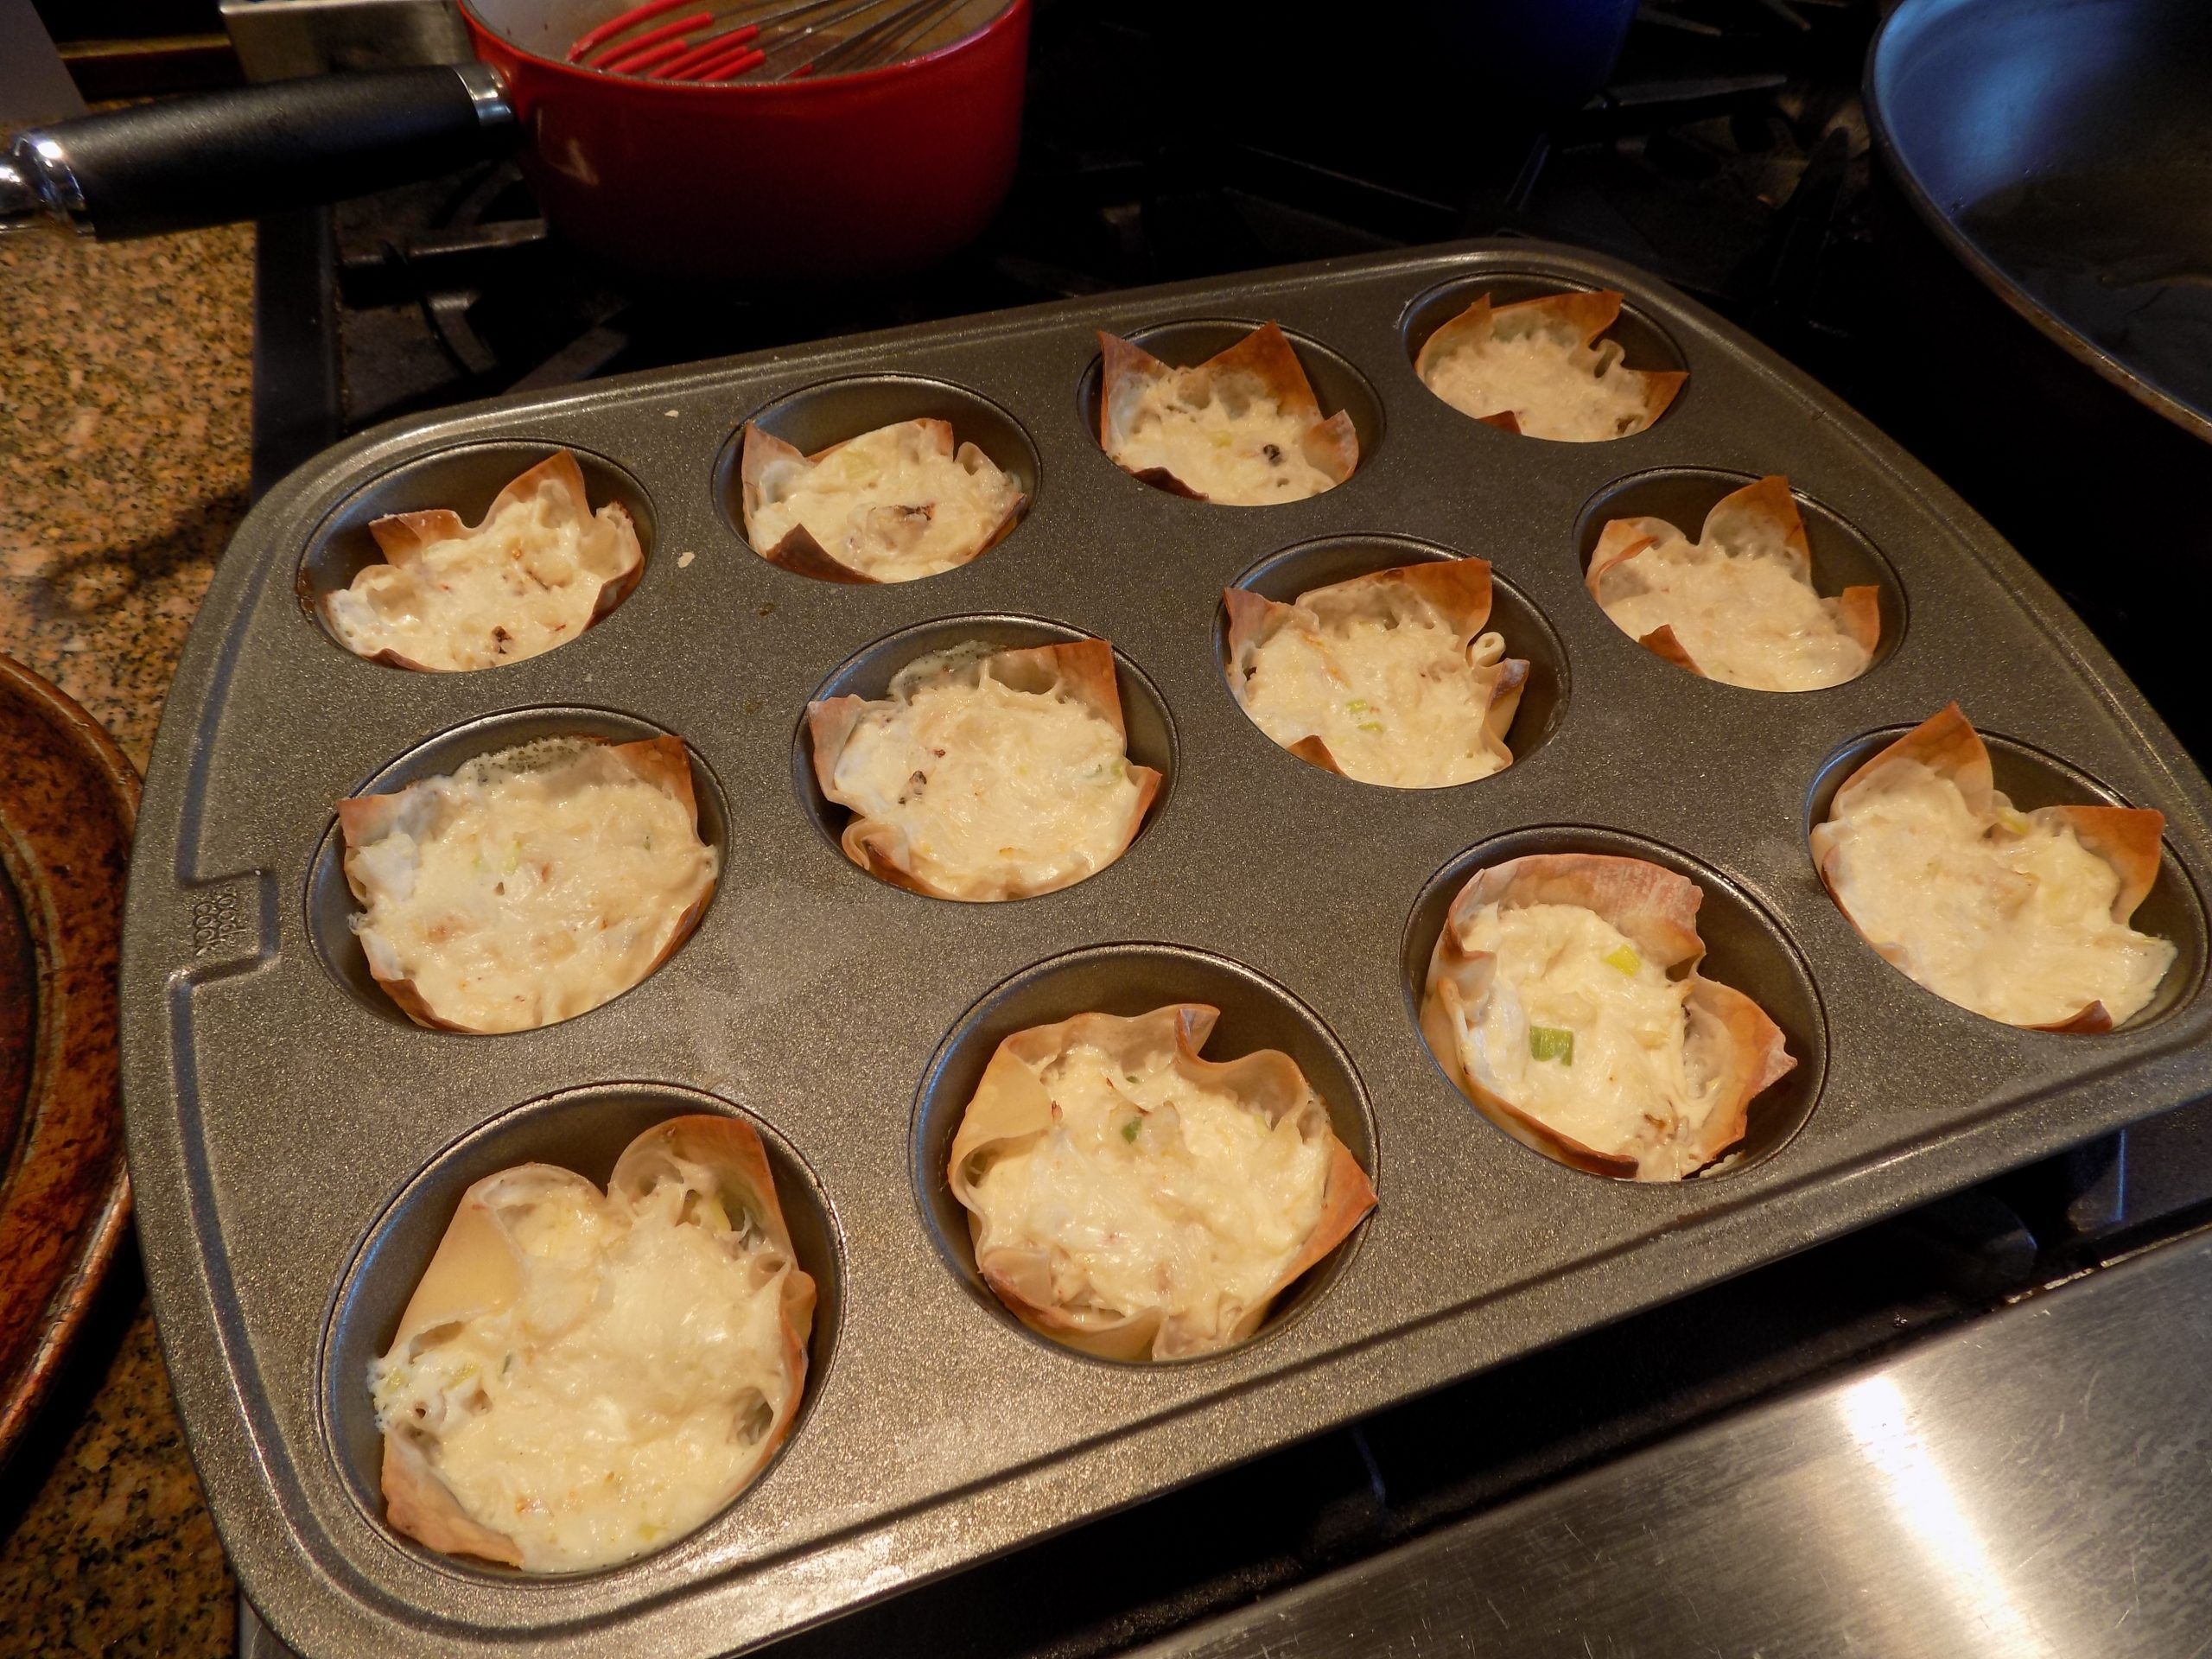
The last time I ordered crab Rangoon in a restaurant I was terribly disappointed. (And yes Rangoon should be capitalized because it is from the city Yangon, also called Rangoon, the former capital of Burma, which is now Myanmar.) Anyway, the crab used in the making of the Rangoon at this otherwise fine Chinese cuisine dining establishment, was very sparingly used, to say the least. In fact, if there was any crab in the mix, I would be very surprised. If anything, there might have been a bit of surimi (fake crab) in the filling. And that not only scares me; it makes me madder than a wet hen! I hate fake crab! And everything about it! For interesting facts about imitation crab, skip to the bottom of this post. But back to this recipe.
The other day when I got a hankering for Chinese food, I decided to pull out my old recipe and build me some crab Rangoon with what I consider to contain the requisite amount of crab. And since I abhor deep fat frying anything, even something as delightful as crab Rangoon, my old standby recipe for baking the Rangoon seemed perfect for the occasion.
And there was much rejoicing at table that evening. Not only was the Rangoon terrific; the sauce was over the top delicious. And nary a spattering of hot fat to be seen on either me or the immediate vicinity around the stove!
So, the next time you are looking for just the perfect appetizer, please give this baked Rangoon recipe a try. And don’t even think about serving the Rangoon without the Sweet and Sour Sauce. Not only is this sauce perfect with Rangoon, it’s equally great with the next recipe I am going to post – Shrimp Wonton Cups with Sweet and Sour Sauce. Plus, this sauce is terrific with my recipes for Char Siu (Chinese BBQ Pork), Easy Chinese Dumplings/Potstickers, baked eggrolls (still working on the recipe), or as a glaze for grilled chicken or seafood. Plus both the recipe for the Rangoon and the sauce are very easy to prepare.
So, as always, have fun in your kitchen. We all must eat to stay alive. And eating can be such a pleasure. As cooks we can make this happen.
And believe me, I know there are times when even the thought of cooking one more meal is overwhelming. But cooking is a lot like exercising. Once you get started, the effort initiates a biological cascade of events that results in the release of endorphins — those chemicals that make you happy! So, stay happy. Keep cooking!
Peace and love to all.
8 oz. cream cheese, room temp.
1 clove garlic, very finely minced
1 green onion, finely diced
¼ tsp. Worcestershire sauce
1/8 tsp. sugar
pinch white pepper
8 oz. crabmeat (canned real crab is fine for this recipe)
¼ tsp. kosher salt, if needed
square wonton wrappers
Mix the cream cheese, garlic, green onion, Worcestershire sauce, sugar, and pepper together. Taste the crab meat. If it isn’t terribly salty, add the ¼ teaspoon salt to the cream cheese mixture. Then gently stir in the crab.
Grease 12-16 muffin cups with cooking spray. Gently place 1 won ton wrapper in each cup. Fill evenly with crabmeat mixture.
Bake in a pre-heated 350-degree oven for 15 to 18 minutes or until edges of wonton wrappers are golden brown and the filling is heated through.
Serve warm with Sweet and Sour Sauce.
SWEET AND SOUR SAUCE
¼ c. lightly packed brown sugar
¼ tsp. kosher salt
2 T. ketchup
1 T. soy sauce
3 T. plain rice vinegar (not seasoned rice vinegar)
½ c. water
2 tsp. cornstarch dissolved in 2 tablespoons water
Combine the sugar, salt, ketchup, soy sauce, vinegar, and water in a small saucepan. Bring to a near boil over medium heat, stirring occasionally to dissolve the sugar. Give the cornstarch a stir and then add it to the pan. Continue cooking, stirring, for about 15 seconds, or until the sauce comes to full boil and thickens.
Remove from the heat. Serve warm or at room temperature. Can be made ahead.
Imitation Crab (From webmd.com)
“Imitation crab is made with surimi, a paste made out of finely shredded or pulverized fish. After the fish is minced, it is heated and pressed into shapes that resemble meat from a crab leg. The resulting imitation crab looks similar to the original crab in its coloring and texture.
Binding agents, like egg white, starch, vegetable oil, or sugar, are added to the surimi paste to make the meat stick together. Occasionally, monosodium glutamate (MSG) is added to the surimi. Orange or red coloring is the key ingredient added to make the mixture resemble shellfish meat. For the preservation of the product, the makers vacuum seal and pasteurize the imitation crab meat.
Real crab has significantly higher nutrient levels than imitation crab. For example, imitation crab derives most of its calories from added carbs. The calories in an Alaskan king crab are derived from proteins, not from carbs. If you’re on a keto or low-carb diet and are trying to cut your carb intake, real crab would be the better choice.
Real crab provides a higher amount of vitamins and minerals. It’s a good source of vitamin B12, selenium, and zinc. When making surimi, these nutrients are lost during washing and processing when the fish meat is exposed to heat. Real crab also has a higher amount of omega-3 fatty acids than its mock substitute. Some packages of imitation crab may have added omega-3, but this isn’t always the case.
Imitation crab contains several processed ingredients. The largest component of the imitation crab product is surimi. It contributes 35% to 50% of the product’s weight. The other 50% to 65% that makes up imitation crab contains:
– Starches like wheat, potato, or tapioca starch make the surimi firm and freezable.
– Salt (sodium chloride) adds flavor and helps turn the minced meat into a sturdy gel. Sometimes, potassium chloride is used.
– Vegetable oil enhances texture, shelf life, and white coloring.
– Sugar and sorbitol add some sweetness and help imitation crab to freeze and thaw with ease.
– Egg whites or soy are often added for a boost of protein and to improve texture, color, and glossiness.
– Water takes up the biggest percentage of all the extra ingredients. It helps create the right texture.”
Sometimes I amaze myself! And this sauce is one of those times! (Doesn’t happen as often as I’d like, but when it does, I feel like walking out on our deck and proclaiming to the world, at the top of my lungs, that – I – basically – rock!) Because, if ever there was a sauce that I would like to bottle and sell for $2 an ounce, this – is – it! And it had been oh, so simple to prepare.
Monday was Mr. C’s birthday. And usually, we celebrate our birthdays with lovely dinners at our favorite restaurants. But since our favorite restaurants aren’t open yet, and even if they were, we are still a bit leery of showing our faces in public places, my only option was to make him his favorite food at home.
Now something you should know. Mr. C. loves good food. And he is the least picky eater I know. (As long as the food is truly delicious and there isn’t too much cruciferous action going on!) And I’m no dummy. After all these years, I darn well aught to know his favorites. So, when I mentioned rack of lamb (and we happened to have one in the freezer), his eyes lit up and a big old smile spread from ear to ear. So, rack of lamb it had to be! And our favorite way to eat “lambie pie lollypops”, is using my recipe (on this site BTW) for Rack of Lamb with Kalamata-Rosemary Crust. But dang, the sauce in that recipe calls for 1 cup of demi-glace. And just between you and me, I haven’t made homemade demi-glace since I turned 70. I simply don’t have the energy any longer. (But please don’t let that stop you. Because Demi-Glace is one of Gods gifts to us mere mortals. And of course, I have a wonderful recipe on this site!)
So, being the inventive gal that I am, I glommed together a quick and dirty version of the original sauce recipe. And it worked. Boy did it work! And it would be so perfect for other dishes too. A beautiful sauce to drizzle on a perfectly cooked steak or roast. Or on ground beef or lamb patties. Or on a slab of your favorite meatloaf. I mean really. The numerous uses absolutely boggles the mind! So, I hope you give this easy to prepare sauce a try. And the rack of lamb recipe too. It’s incredible.
As always, stay happy, stay healthy, and stay the course! (Whatever in the heck that means!!)
Peace and love to all.
4 T. unsalted butter, divided
1 lg. shallot, finely chopped
2 garlic cloves, finely minced
1 c. dry red wine
1½ c. water
2 tsp. beef base (I use Better Than Bouillon Roasted Beef Base)
1 bay leaf
¾ tsp. finely chopped fresh rosemary, or more to taste
freshly ground black pepper
¼ tsp. granulated sugar
1 T. all-purpose flour
Melt 3 tablespoons of the butter in a medium sized saucepan. Add the shallots and slowly cook until soft and translucent. Add the garlic and cook for 1 minute. Add the wine, water, beef base, bay leaf, rosemary, black pepper, and sugar. Bring to a boil. Cook over medium heat, uncovered, for about 25 minutes, or until the liquid is reduced by about half.
While the liquid is reducing, mash the remaining tablespoon of butter with the flour to make a smooth paste. (Helps immensely if the butter is at room temperature.)
Once the wine mixture is reduced, whisk the flour paste, a teaspoonful at a time, into the simmering liquid. Cook for a few minutes or until the sauce is nicely thickened. Taste and adjust seasoning.
(And no, there is no salt in the list of ingredients. Beef base usually contains more salt than I would prefer. So, I’ve found, that it’s much easier to add salt if needed, than getting rid of the extra salt! Just saying!)
It’s all my daughter Paula’s fault! I know it’s usually all the mother’s fault, but not this time. My preparing this way too caloric, cholesterol laden, fattening, crazy delicious comfort food dish is all on Paula! And even though I don’t plan to serve chicken fried steak (CFS) very often, I must say thank you to my dear daughter for reminding me of this lovely Southern delicacy. (You might know it better as country-fried steak.) And for those of you with more discerning palates, just consider CFS the poor man’s wiener schnitzel. (Veal and breadcrumbs prepared in a similar manner.) But in my humble opinion, CFS is every bit as delicious. (And a whole lot cheaper to produce!)
It all started with a simple phone conversation. Paula happened to mention that she was making one of her husband’s favorite dishes for dinner that evening. And of course, I had to ask which of Mark’s favorites was she preparing? And as she described how she fixed this dish my mouth started to water. Holy guacamole! I hadn’t eaten CFS for years. And it sounded just so tempting. And as you well know, I give in to culinary temptation way more than is good for me. But hey, if I only eat it once every 10 years, how much can that hurt? (As if I can refrain from making CFS now that I know how wonderful the homemade version can be. I’d never actually fixed it at home before. I’d only had it on a few rare occasions for breakfast when traveling.) But now, who knows how frequently this might appear on our dinner table. I’m only human after all! And it’s still all Paula’s fault!
But in her defense, she doesn’t usually fix gravy to slather on their CFS. Nor does she make sinfully rich grits to go along with the steak. That part is all on me! But I figure, in for a dime, in for a dollar. If I’m going to sin, let it be a big one and then be done with it! So, the following recipe is not a low-calorie wonder. But boy of boy is it delicious. And a dish I guarantee everyone in your family will adore.
I found most of this recipe compliments of the momontimeout.com site. (Great site BTW.) The modifications came from several suggestions Paula shared with me, with a couple thrown in by me for good measure. So, this recipe is definitely a team effort. (Look for my recipe for Creamy and Savory Grits soon to come to your very own computer.)
As always, make every meal special. And while I totally advocate eating healthy nutritious food most of the time, I also believe that there are times when nothing but a big old meal of comfort food helps keep people happy and content. Too much depriving ourselves of food that brings us pleasure just can’t lead to a well-balanced mind. I mean really, who can remain sane when all they can think about is a hamburger and fries? I’m not sure the previous statement speaks well to my mental stability, but never-the-less, it’s how I feel. It’s the old “moderation in all things” thing! And I am a firm believer in “moderation in all things”, in moderation of course! So, to that end, I must also tell you, that along with our CFS, gravy, and grits last evening, I also served plain old steamed fresh green beans. No frills attached.
Peace and love to all.
Chicken Fried Steak
1½ c. all-purpose flour
1 tsp. kosher salt
freshly ground black pepper (quite a bit)
1 tsp. paprika
1 tsp. granulated garlic
1 tsp. granulated onion
½ tsp. baking soda
½ tsp. baking powder
¾ c. buttermilk
1 tsp. hot sauce (I use Frank’s RedHot original cayenne pepper sauce)
1 egg
4 cube steaks
Montreal Seasoning
vegetable oil
In a shallow container (I use an 8-inch cake pan), whisk the flour, salt, black pepper, paprika, granulated garlic, granulated onion, baking soda, and baking powder together. Set aside.
In a separate shallow container (yup, another cake pan), whisk the buttermilk, hot sauce, and egg together. Set aside.
It the cube steaks appear moist, pat them dry with a paper towel, removing as much moisture as possible. Season one side of each cube steak with a sprinkling of Montreal Seasoning. Let sit for 5 minutes.
While the cube steaks are resting, scatter a bit of the flour, the same size as the cube steaks, on a baking sheet.
Dredge the cube steaks in the flour mixture, shaking off excess, then dredge in the buttermilk-egg mixture, letting excess drip off, and then once again in the flour mixture, shaking off excess. (This is a messy process, so plan on washing your hands several times as you coat the steaks.)
Place the breaded cube steaks on the floured areas of your baking sheet. (Having a bit of flour before you set the breaded steaks down, allows the steaks to absorb a bit more flour as they rest. And also, not stick to the baking sheet.) When all 4 steaks have been breaded, press a bit more flour into the top of each one. (Save the remaining flour for use in the gravy.) Let the breaded steaks rest for 10 minutes.
Preheat oven to 225-degrees.
Heat about an eighth inch of vegetable oil in a large heavy skillet over medium high heat. How much oil you need depends on the size of your skillet. And if possible, use a fry pan that will accommodate all 4 steaks. If not, fry 2 at a time.
Test the oil by dropping a bit of the breading into the oil. The oil should sizzle and bubble around the breading. (The oil should glisten, but not be hot enough to start smoking.)
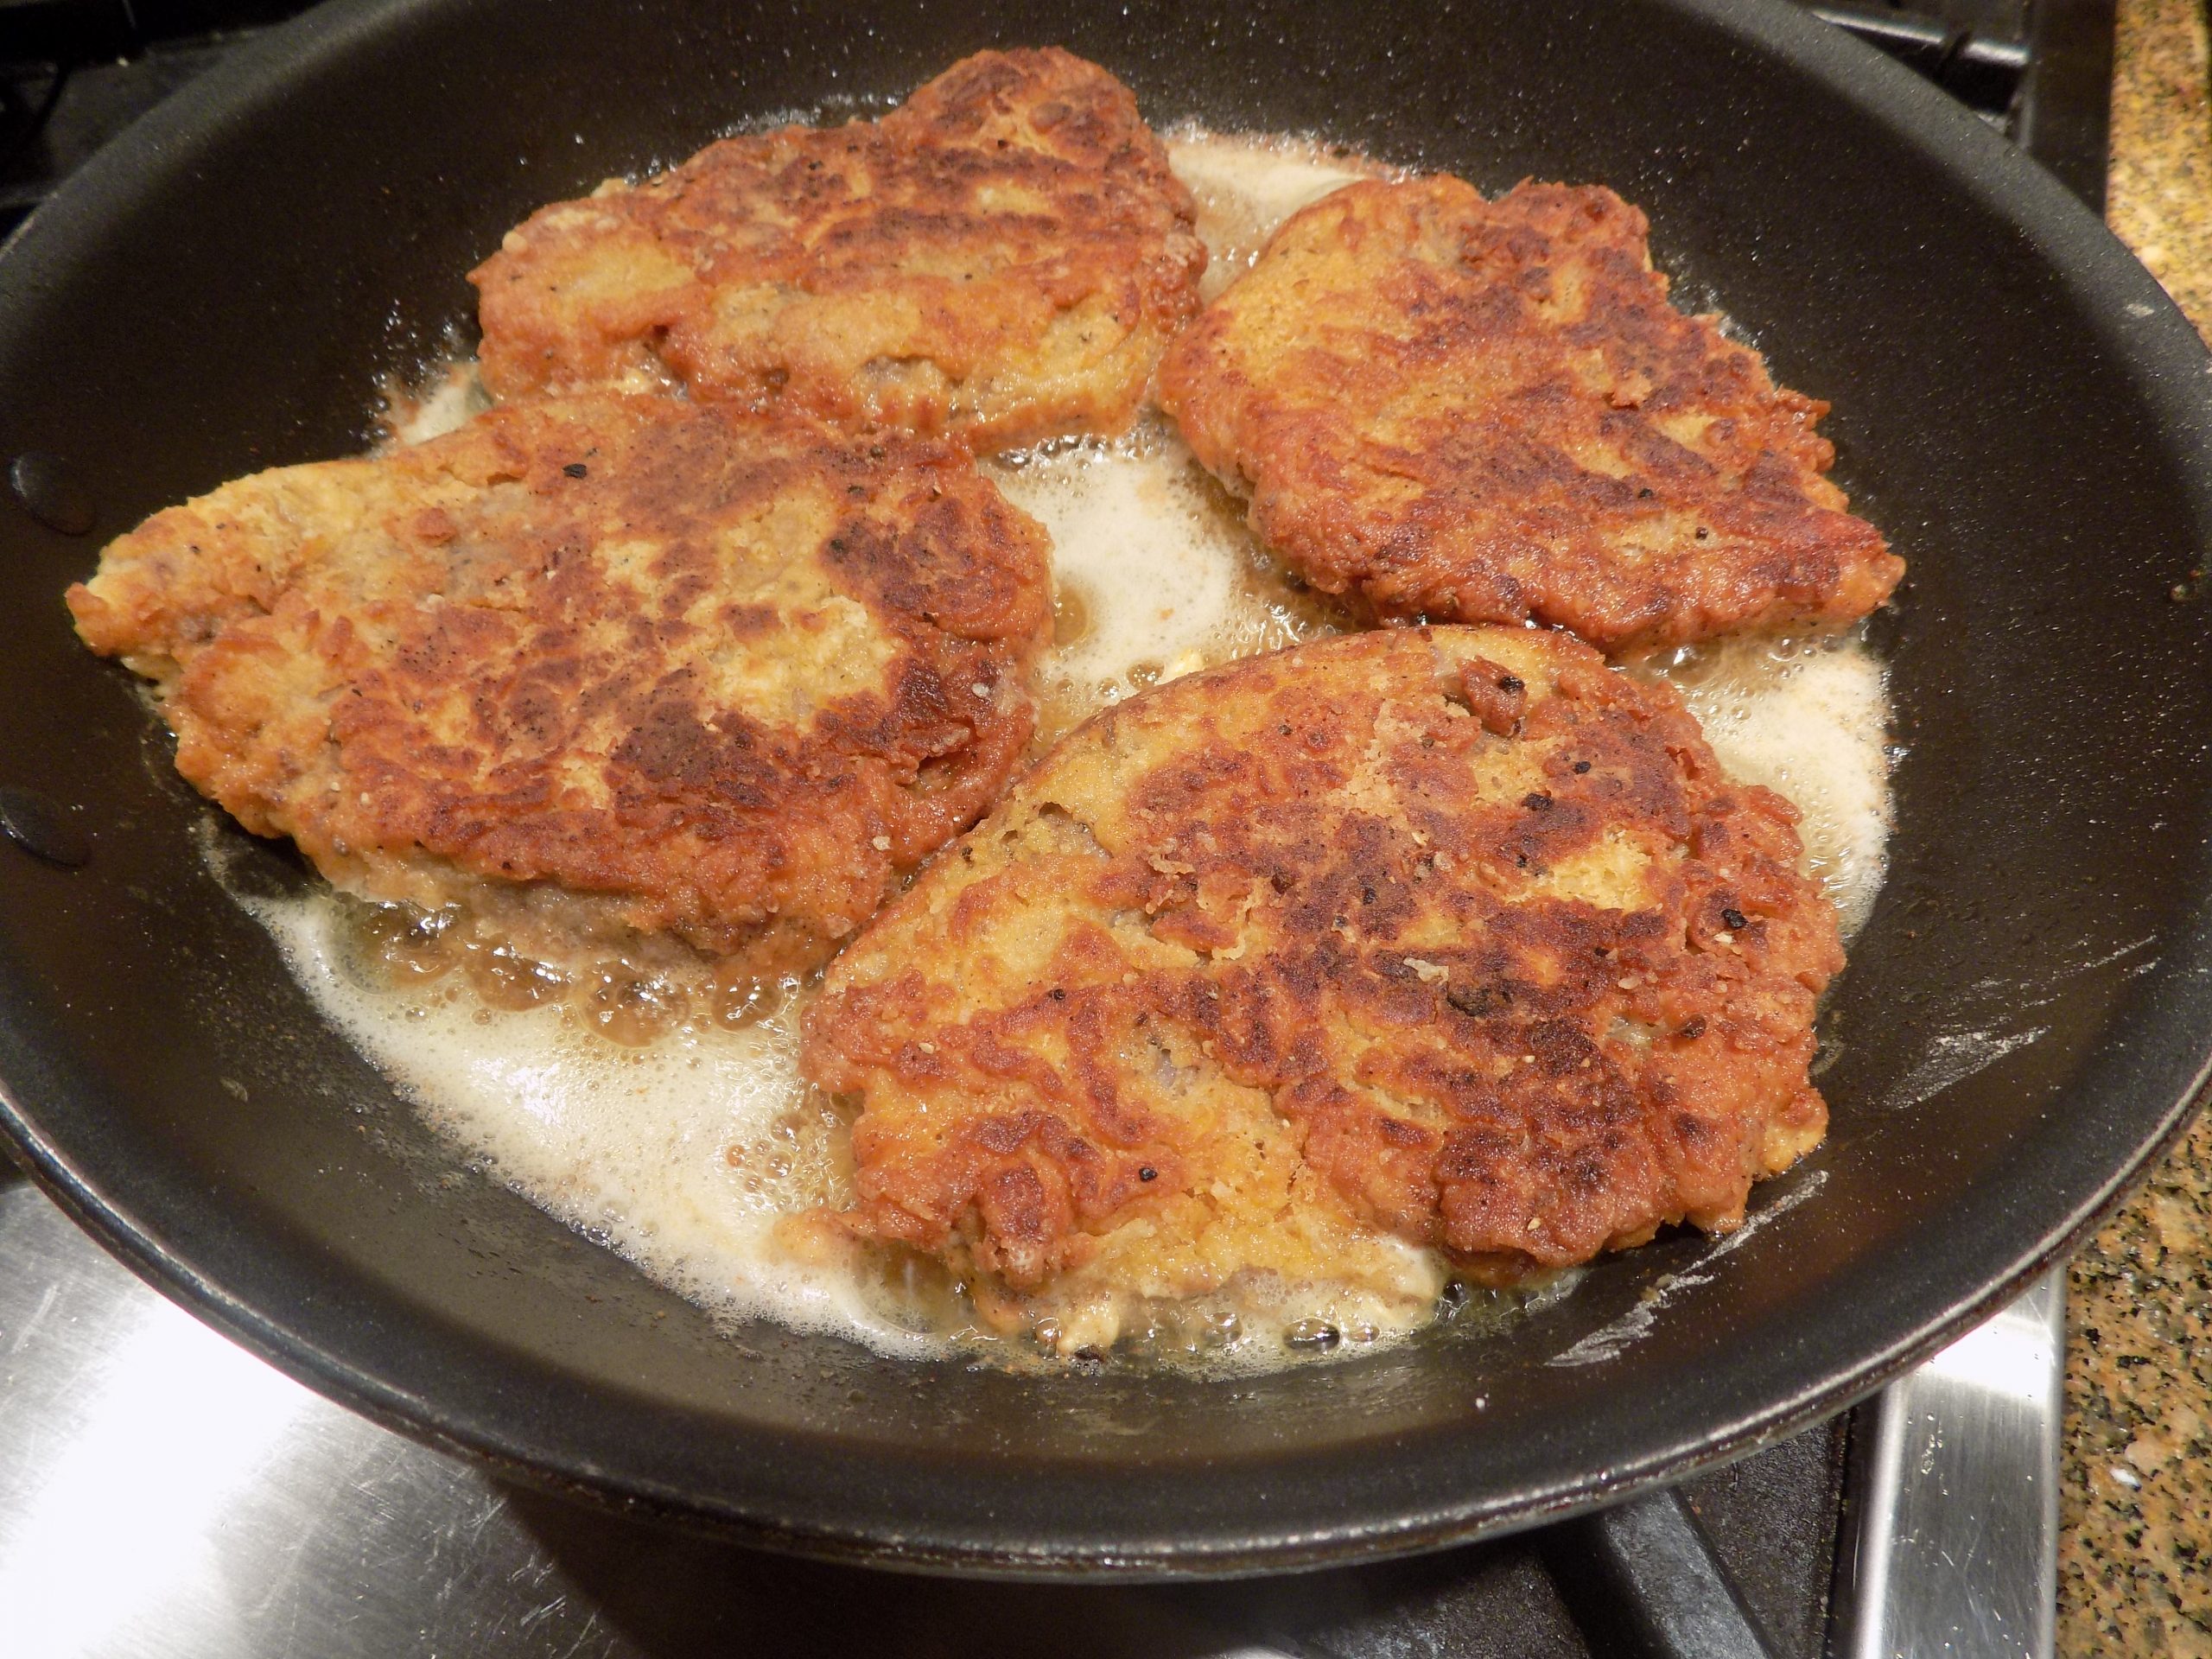
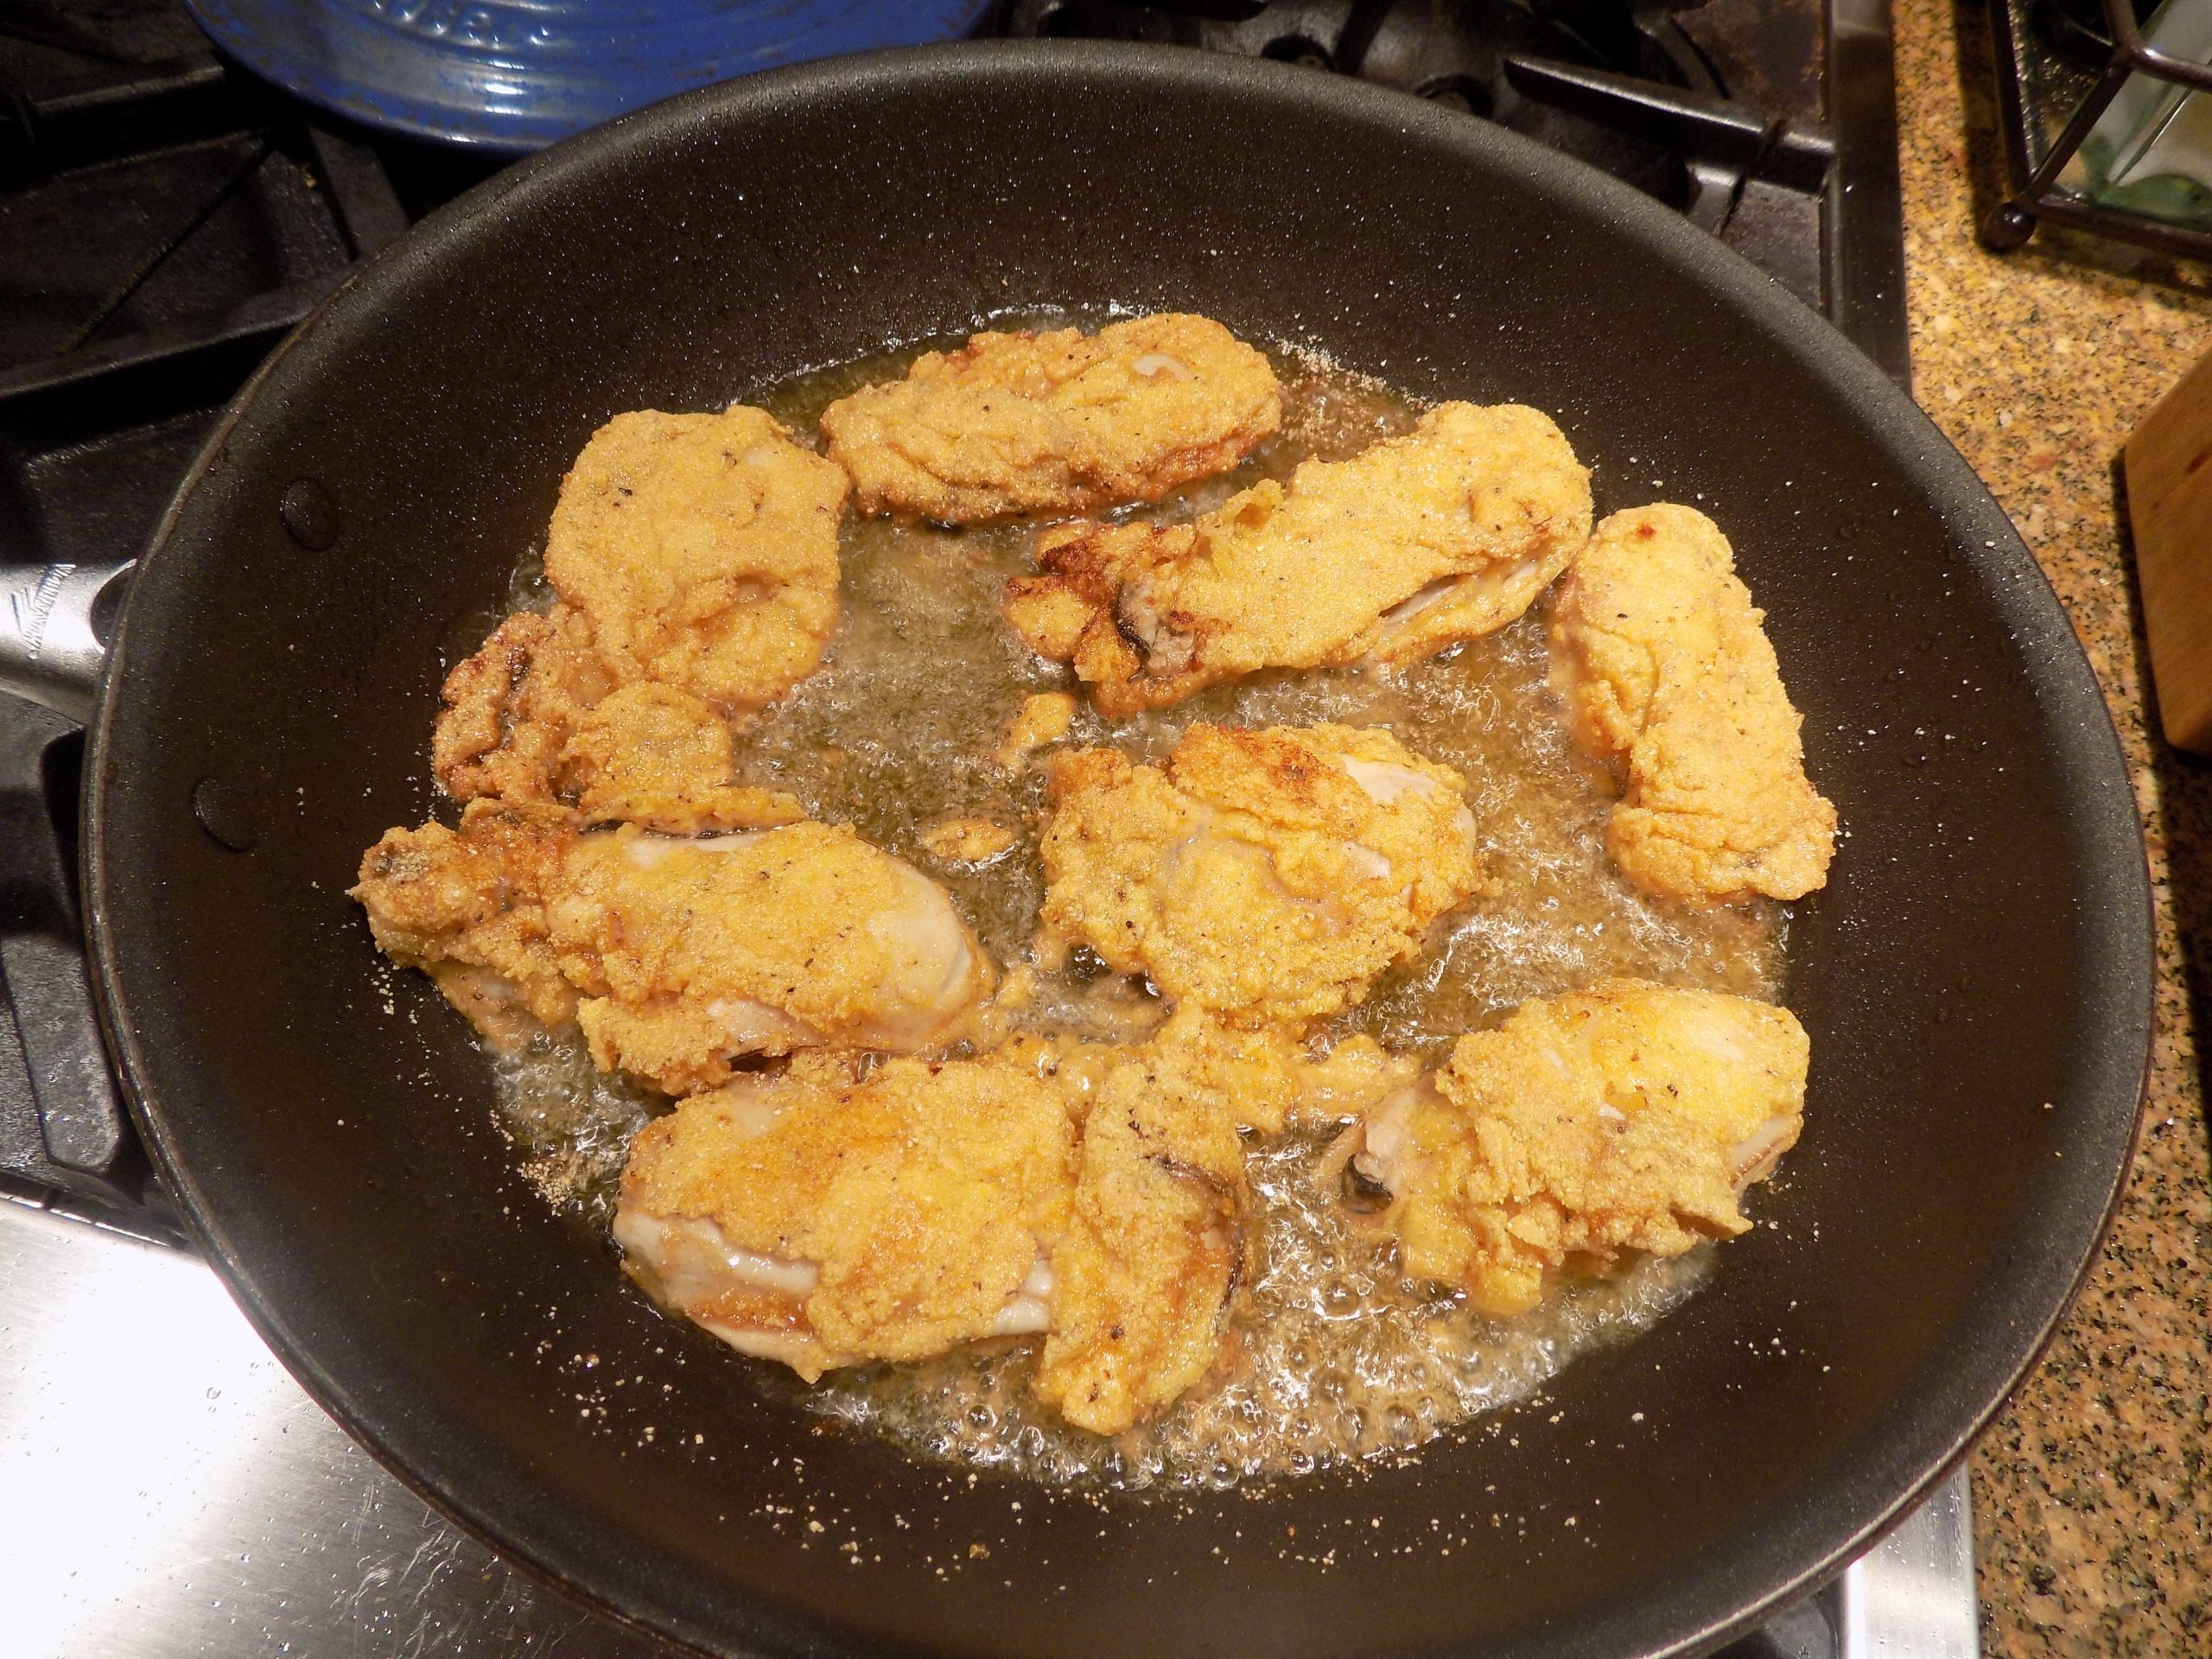
Place the steaks into the pan and fry for 3 to 4 minutes on each side or until golden brown. After the steaks have browned on both sides, carefully flip them back to the first side. Only fry for an additional minute or so.
Remove steaks from pan and drain on paper towels. Place in the preheated oven to stay warm while you make the gravy. (I place the paper towels and fried steaks on the the same baking pan I used to hold the breaded steaks before they were fried. Washed first, of course!)
Pan Gravy
2 T. vegetable oil from frying the steaks
2 T. seasoned flour (from breading the steaks) or if none left, just regular flour
1½ c. whole milk
¼ c. heavy cream
seasoned salt, if more salt is required
freshly ground black pepper
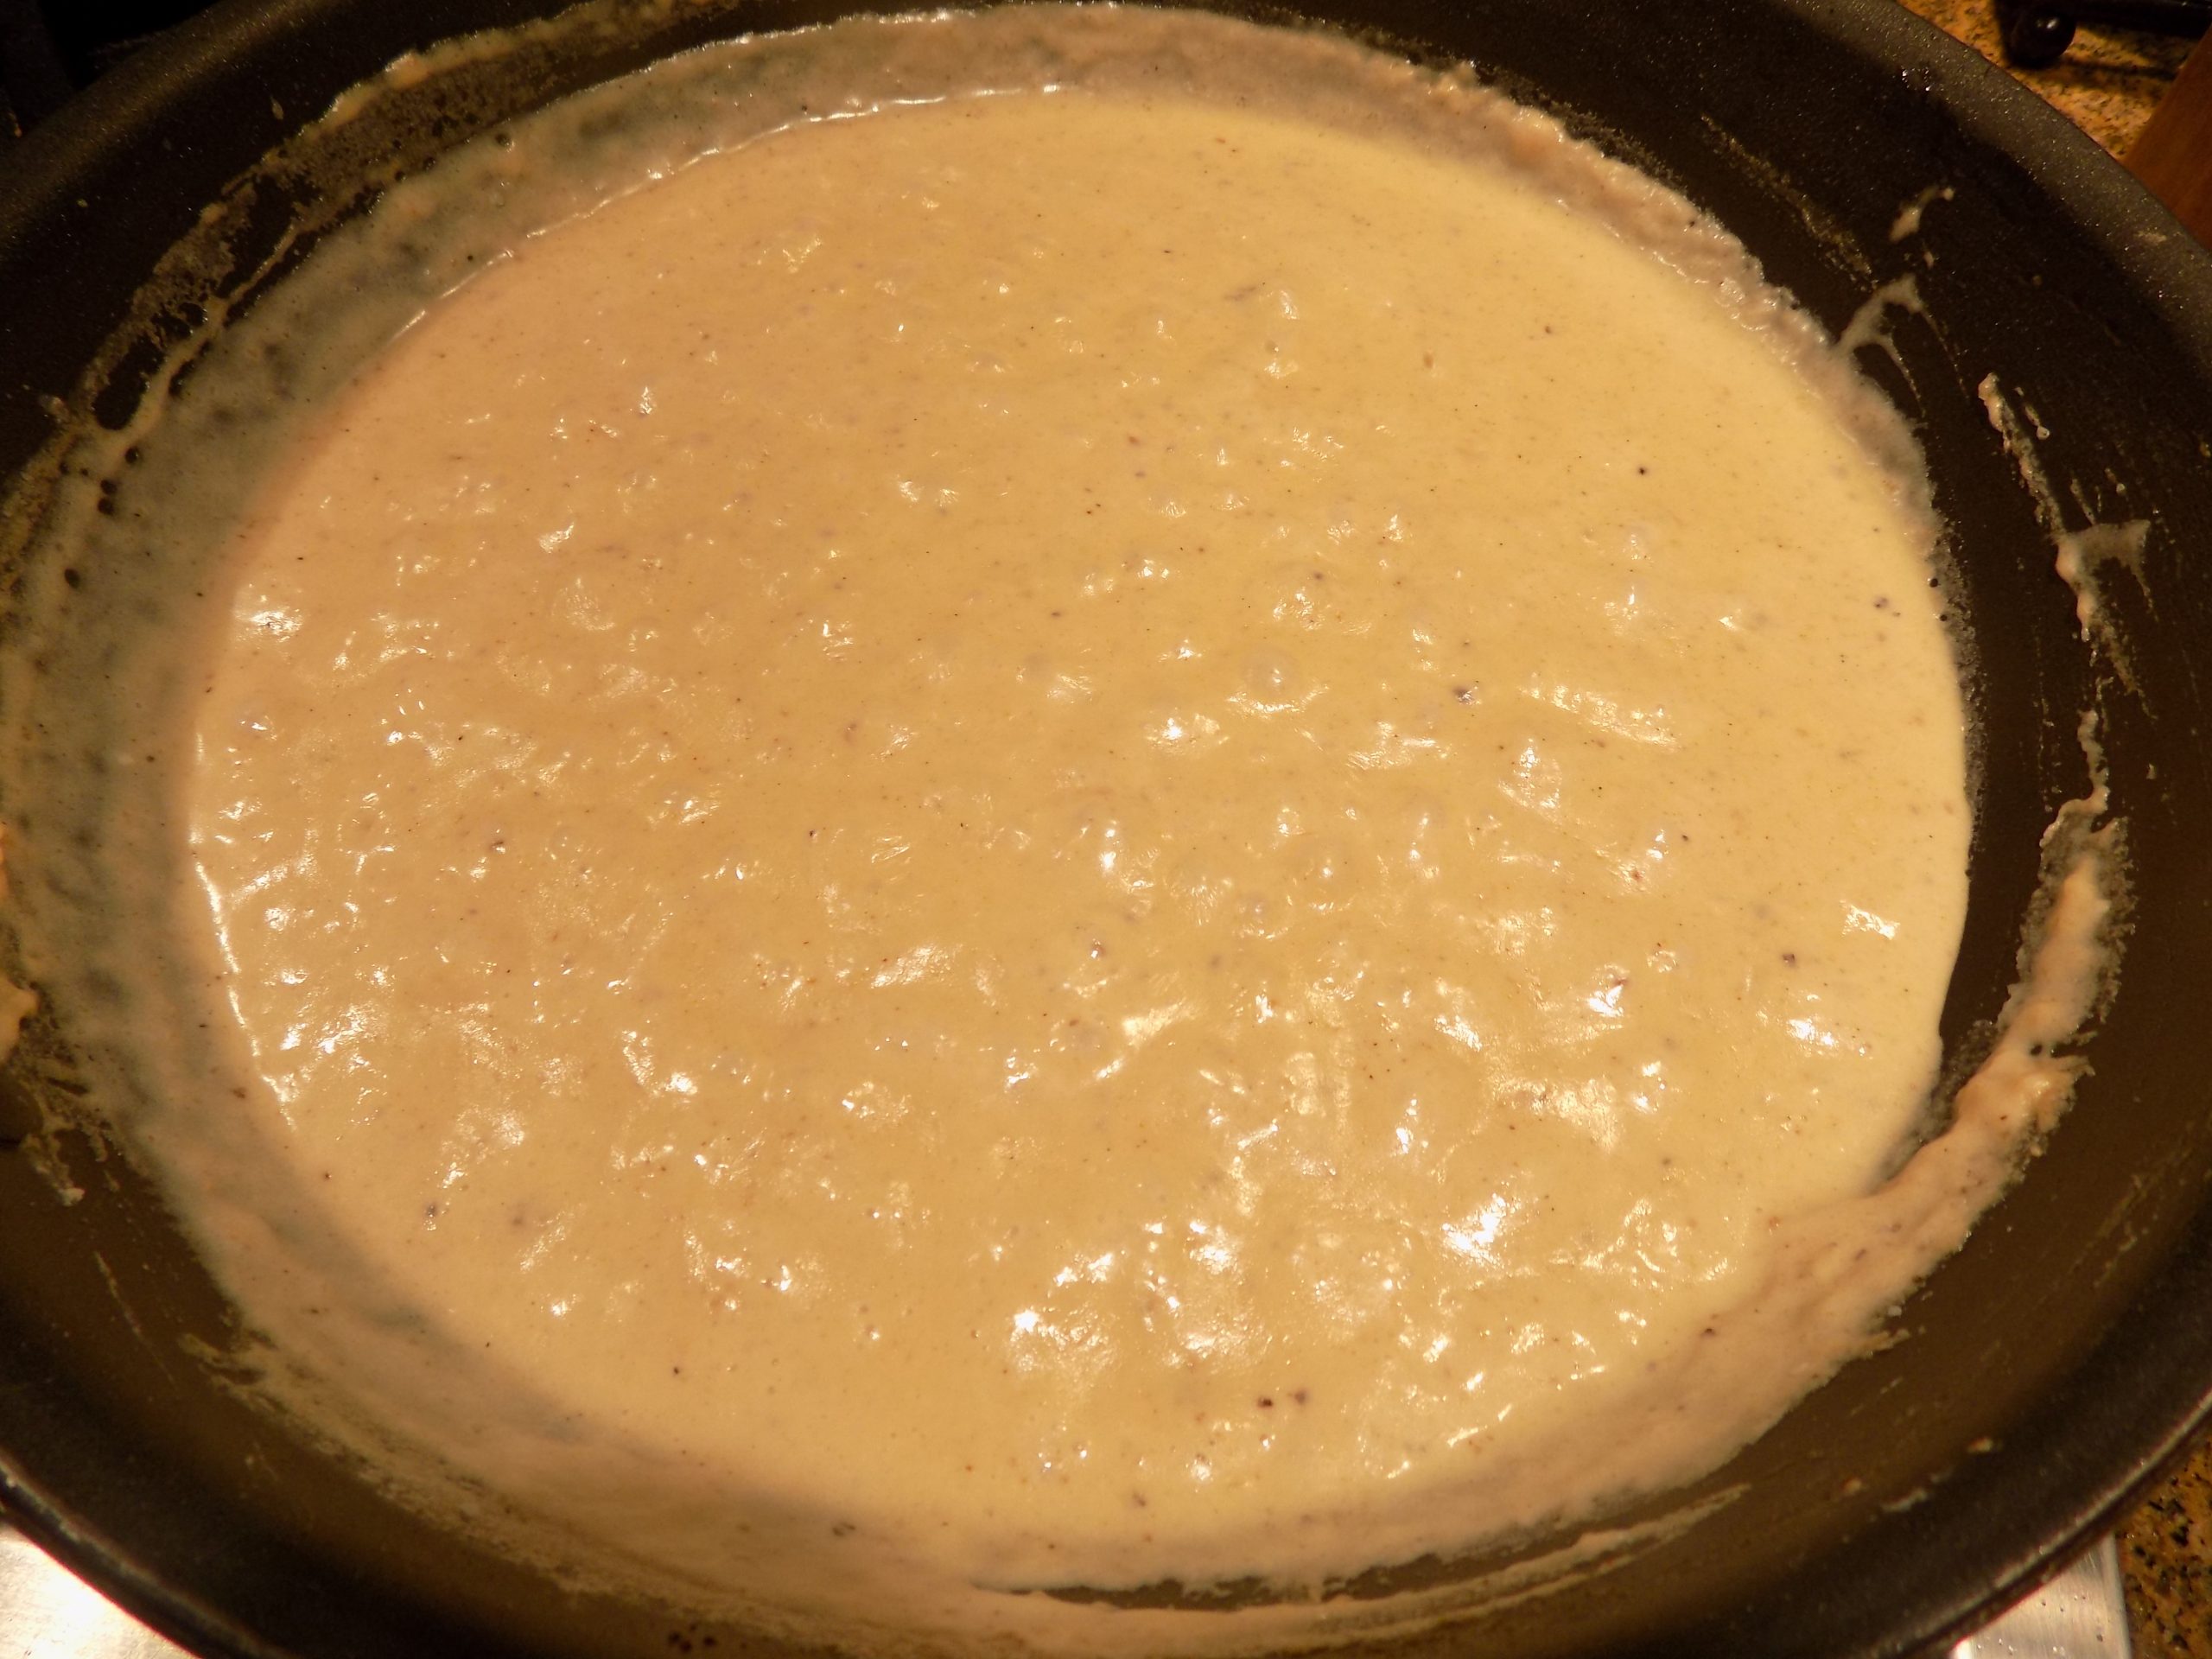
Save about 2 tablespoons of the grease in your pan. Discard the rest. Do NOT scrape the skillet clean. You want all of those brown bits for added flavor in the gravy.
Over medium-low heat, whisk in the seasoned flour and continue whisking for two to three minutes or until the flour is nice and golden brown.
Slowly whisk in the milk and heavy cream and bring gravy to a simmer. Cook until the gravy is smooth and creamy, about 5 to 7 minutes. If the gravy gets too thick, add in a little more milk. Taste and add seasoned salt, if necessary, and lots of fresh ground pepper.
Serve the CFS with a drizzle of gravy and a side of Creamy and Savory Grits (recipe to follow in the next few days) or mashed potatoes. Add your favorite green veggie and dinner is served. A perfect comfort food dinner.
Please note: To re-heat leftover CVS, place on a low-sided baking pan fitted with a wire rack in a pre-heated 400-degree oven and bake for about 20 minutes. Remove from oven and let cool a couple of minutes before serving.
Do not microwave. The breading will get soggy and yicky. (And yes, yicky is a technical term used by culinary experts everywhere!)
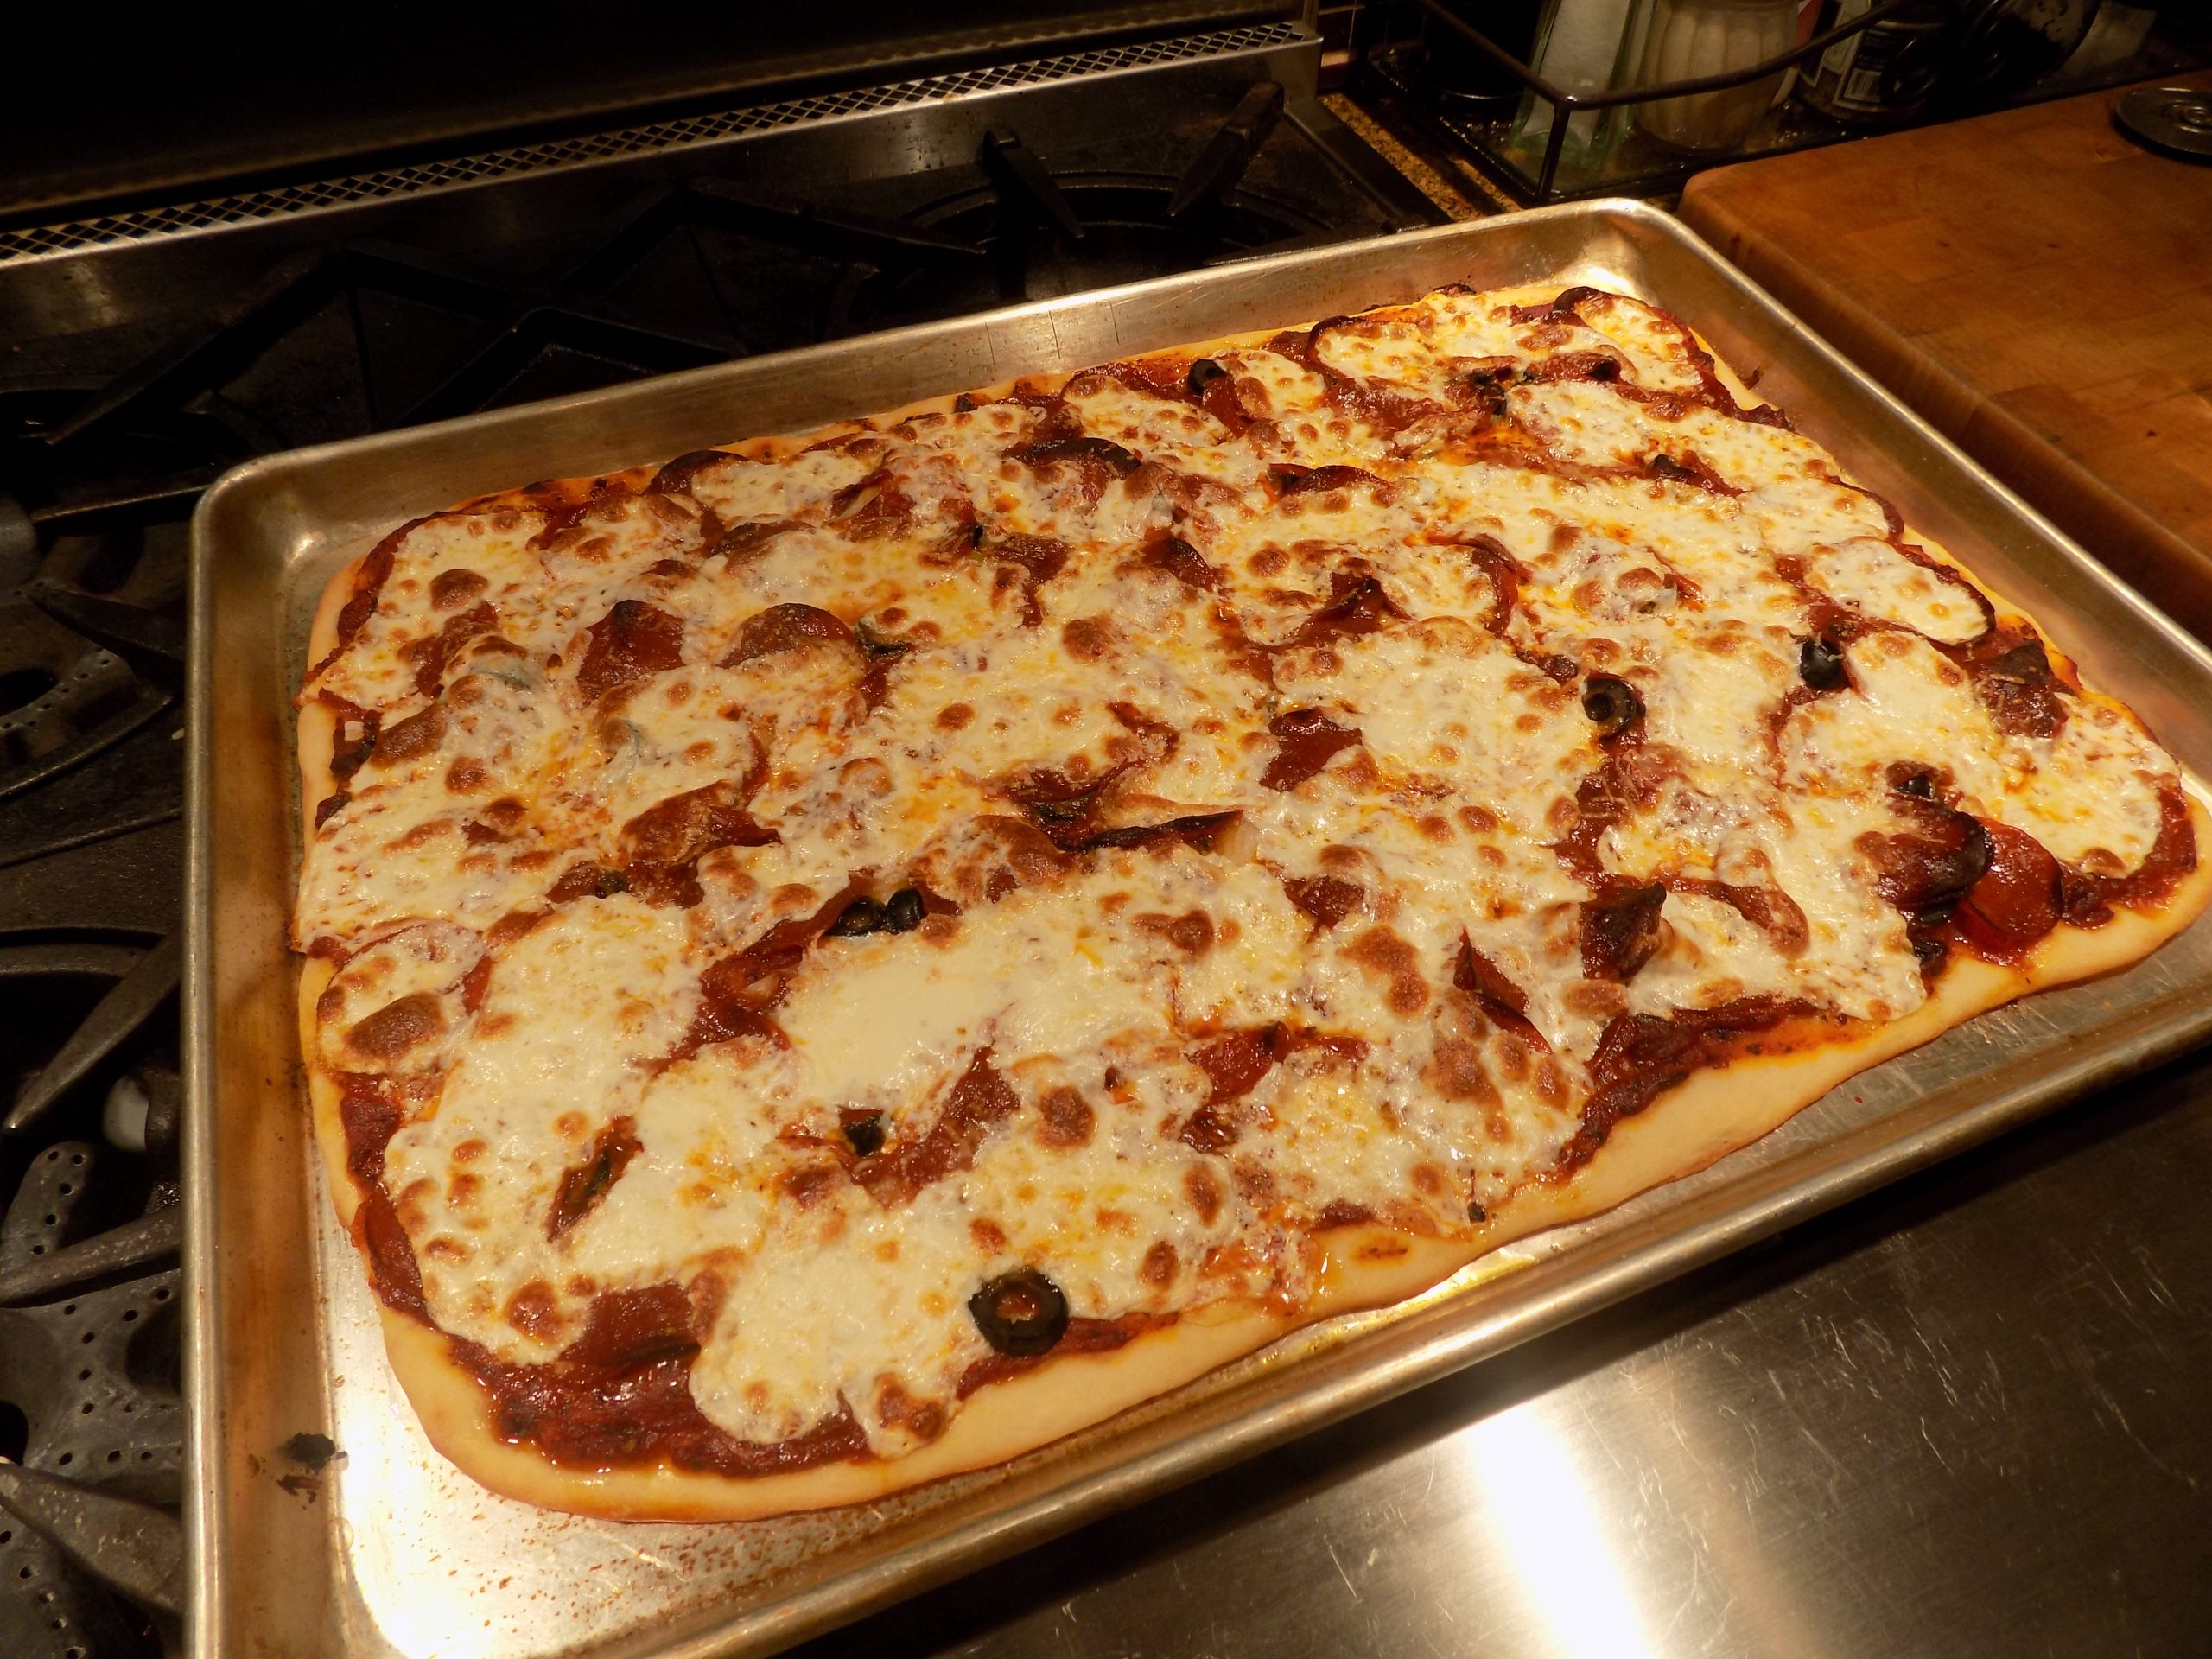
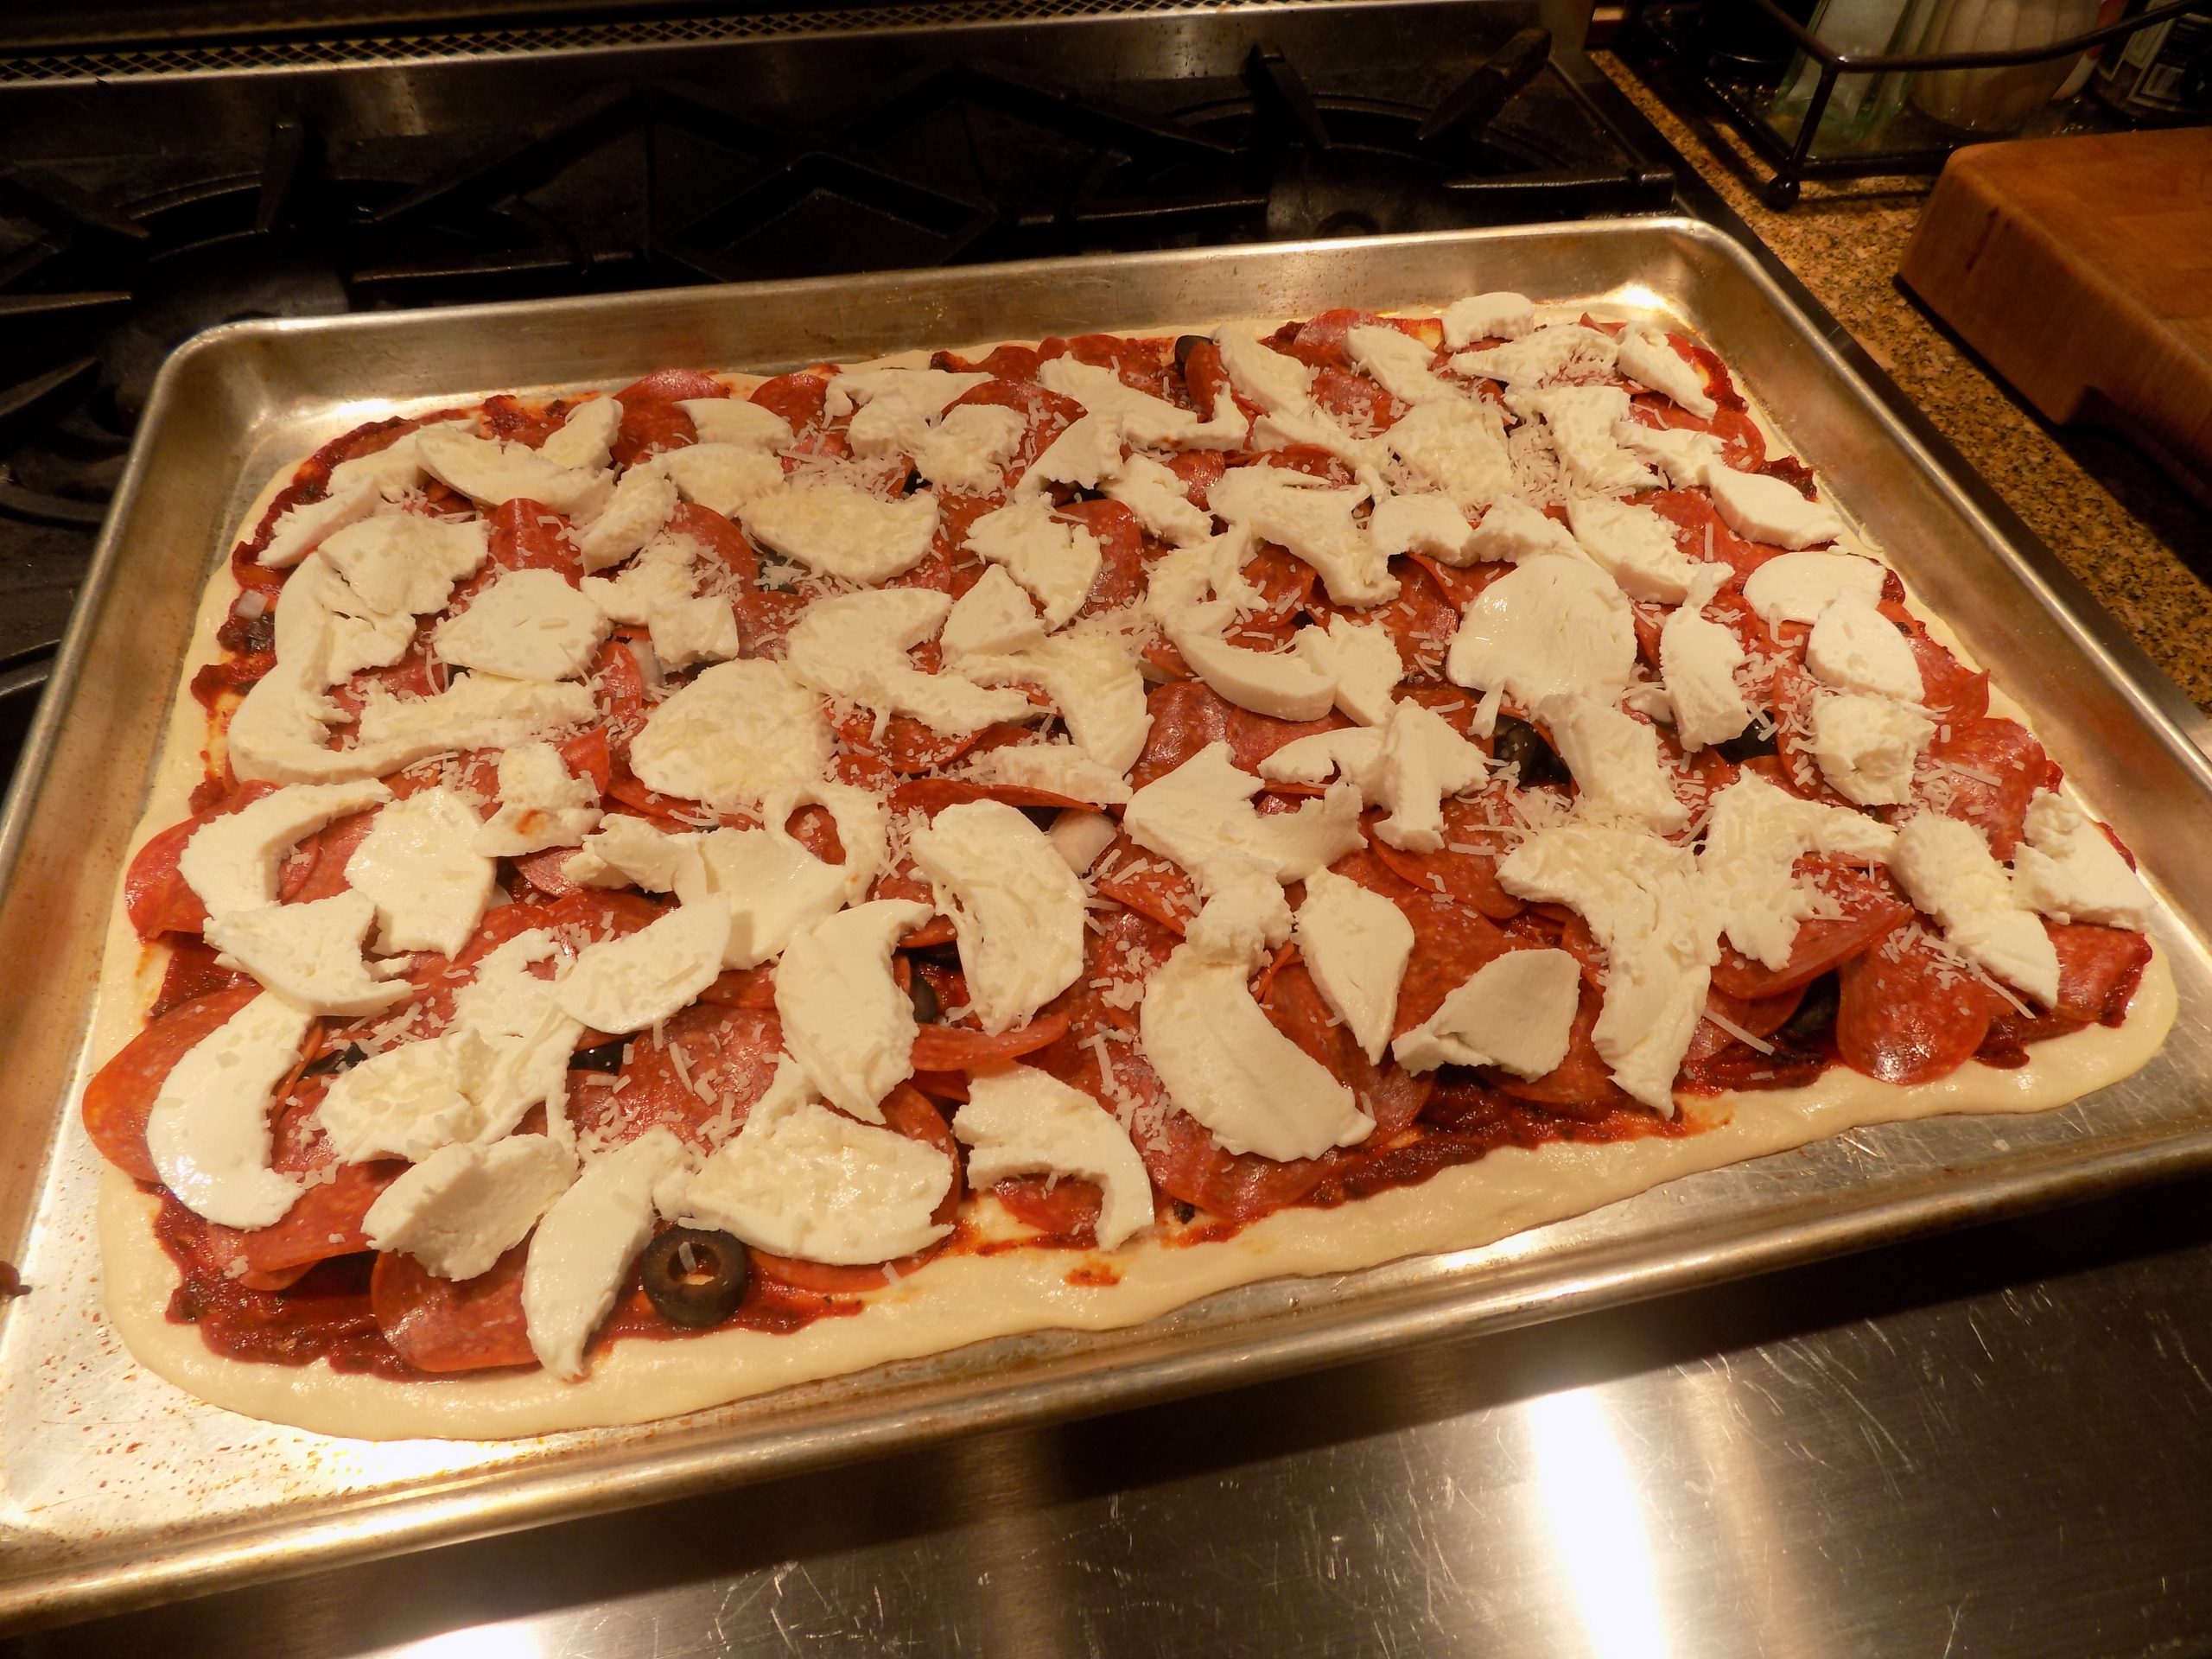
This time I topped our pizza with the pizza sauce recipe found below, 6-oz. pepperoni, 1 pound fresh mozzarella, 1/4 cup chopped onion, 3/4 can of sliced black olives, and a sprinkling of Parmesan cheese. Before the pizza was baked.
In my never-ending quest to develop the best homemade pizza crust imaginable, I once again succumbed to the siren call of the internet and found this basic recipe on the bobsredmill.com site. OK, I changed things up a bit by adding vital wheat gluten and made a huge change to the preparation instructions. So, I know what you’re thinking. “Patti, if you’re going to basically change a recipe, even not radically, why bother giving the original post any credit at all?” There are two reasons in this case. First, the bones of this recipe are not mine. And because I basically have a great deal of respect for this employee-owned American company. I purchase their products whenever possible. So, I would not cheat them out of any credit they so richly deserve, even if I have, in all good conscience, improved their original recipe! (Which I believe I have in this case.) Of course, they might object to my assessment. But all I can say to that is – tough noogies! (I’ve always wanted to write that!) But no disrespect for Bob’s Red Mill intended!
Anyway, this turned out to be a perfect pizza crust. Tender, chewy, tasty, easily worked – in all, everything you want in a pizza crust. OK, if you are a lover of thick crust, this probably isn’t the crust for you. But I am firmly in the thin crust camp. So be off with you if you like a thick, gooey, starchy, incredibly caloric base for your delicious sauce and toppings. This recipe is simply not the right one for you! But see you next time. I’m sure I have lots of other recipes on which we can establish common ground.
But back to this recipe. And, speaking of sauce, please check out my new (thanks to the simplyscratch.com site), Sun Dried Tomato Pizza Sauce recipe. (See recipe below.) This sauce is so incredibly delicious. But be warned. This is not a wimpy pizza sauce. This is a sauce with authority! So, spread lightly. The rest of course can happily reside in your freezer until the net time you get a hankering for homemade pizza. Just give it a try. Easy to prepare and the taste is unapparelled.
So, as always – keep preparing nutritious and delicious food for yourself and your family. And if you are a parent with children still at home, and not already doing so, find ways to engage your kids with cooking and baking projects. Most kids jump at the chance to help make cookies, for example. I know that’s how I first started becoming interested in culinary endeavors. And no, setting the table, clearing the table, loading and unloading the dish washer, that type of thing, is not going to pique their interest! Quite to the contrary, unfortunately. Kids need to help measure or stir something, or at the very least, lick the spoon. Whatever it takes to get them excited about being in the kitchen with you. Plus, it’s a great way to stay well connected with your kids. You never know what they might reveal as they are helping you build a cake. It’s such an unthreatening and intimate time together, that most of their kiddie defenses are down. Of course, you might learn something that you would rather not know. But you’re an adult. You can take it. And it’s always better to know, than not to know! (I think.) So, stay strong.
I’ve always told everyone that being a mother was the hardest job I ever held. But the job for which I will always feel the most pride. And even now, after decades of not being “mommy”, I still cherish the time I spent with my kids as they were evolving into wonderful adult human beings. (Sometimes my blessings overwhelm me. Today is one of those days.) Peace and love to all.
¾ c. warm water
1 tsp. active dry yeast
1½ tsp. kosher salt
1 tsp. vital wheat gluten flour
2 c. bread flour
extra virgin olive oil
Combine the water and yeast in the bowl of your stand mixer. Let sit for 5 minutes. Add the salt, gluten flour, and most of the bread flour.
Using your dough hook, mix/knead until the dough is smooth and elastic using as much flour as required. Pour a bit of oil in the bowl. Using your fingers and a stiff rubber spatula, form the dough into a ball. Make sure the entire ball is coated in oil. Cover and let rise until doubled in size, about 1 hour. Dough can be used immediately or refrigerated for up to 3 days.
Oil two 10-inch pizza pans or 1 large baking sheet. (I use my roughly 17½ x 13-inch half sheet pan.) Press the dough gently to stretch it into ¼-inch thick rounds or the 1 large, prepared pan. Top with favorite sauce and toppings. (See my recipe for Sun Dried Tomato Pizza Sauce below.)
Bake for 14-15 minutes in a pre-heated 500-degree oven or until the crust is golden-brown. Remove from oven and cool for 5 minutes.
SUN DRIED TOMATO PIZZA SAUCE
1 T. extra virgin olive oil
½ c. finely chopped onion
¼ tsp. kosher salt
freshly ground black pepper
pinch crushed red pepper flakes
2 cloves garlic, finely minced
2 T. finely chopped dried sun-dried tomatoes
2 tsp. dried oregano
1½ tsp. dried basil
2 T. dry white wine (like Pinot Grigio or Sauvignon Blanc)
1 (6-oz.) can tomato paste (preferably Italian)
¼ tsp. sugar
1 c. water
Heat a 10-inch skillet over moderate heat. When hot, add the olive oil, minced onion, salt, black pepper, and crushed red pepper flakes. Sauté until the onion is soft. Add the garlic, cook for 1 minute.
Stir in the sun-dried tomatoes, dried oregano, and dried basil. Cook for 1 minute. Add the white wine and simmer until absorbed. Whisk in the tomato paste, sugar, and the water. Reduce heat to medium-low and simmer the sauce for 10 to 15 minutes. Taste and adjust seasoning.
And yes, these are jumbo oysters. The jars were labeled “small”. They lied. But the oysters were still delicious!
And yes, I know. I already have a great recipe for fried oysters (Southern Fried Oysters) on this site. But really, can you ever have too many great recipes for fried oysters? In my humble opinion, no, you can’t! It’s like having too many fabulous cookie recipes. That’s not possible either!
So, the other evening when we were hankering after some fried oysters, I came up with this recipe for fried oysters and a yummy new tartar sauce to serve alongside. (I was on a roll.) And we enjoyed the heck out of the briny little darlings dipped in this lovely piquant sauce.
Now I know, not everyone enjoys the taste or texture of oysters. Good, that means there’s more for us to enjoy! Because we feel that oysters are one of the greatest ways to celebrate living in the Pacific NW. Their taste is unrivaled. And thankfully, so is the nutritional value of these succulent little bivalves. They come straight from the sea chock full of essential vitamins, minerals, and organic compounds. They are an excellent source of protein, vitamin D, zinc, iron, and copper. They also contain high levels of Vitamin C, phosphorus, niacin, and riboflavin.
Now please realize, I’m not trying to talk you into becoming a fan of oysters if you are firmly in the “I hate oysters” camp. But, if you love oysters as much as we do, then I would love to have you try fixing them this way.
For years I just dipped the raw oysters in egg and then cornmeal, with a sprinkle of salt and pepper while they were sizzling away in veggie oil. Yes, they were good. But I was not allowing them to live up to their full potential. With just a few additional ingredients, oysters can jump from good to awesome.
And yes, for you purists out there, we too enjoy eating tiny, raw oysters. But they need to be super fresh. So, the oysters we get in jars from our local grocery store are fine for frying. But I wouldn’t consider eating them raw. I save that fabulous experience for dining in reputable restaurants.
As always, keep working at improving your cooking technique. Keep finding new and interesting ways to present food to your family. And keep trying new and different recipes. Life is simply too short to eat the same food, fixed the same way, meal after meal. Of course, there are people like my husband for whom a little less variety might be desirable. (That’s the curse of being married to a recipe developer/food blogger.) But the lovely man never complains. And bless him for that. Stay safe everyone.
Peace and love to all.
½ c. buttermilk
¾ tsp. granulated garlic
¾ tsp. paprika
1 tsp. hot sauce (I use Franks RedHot Sauce)
2 10-oz. jars fresh oysters (enough for 2 people)
½ c. cornmeal
½ c. unbleached all-purpose flour
½ tsp. kosher salt
freshly ground black pepper
veggie oil
Whisk together the buttermilk, granulated garlic, paprika, and hot sauce in a small bowl.
Whisk together the flour, cornmeal, salt, and pepper together in a separate shallow dish.
Add the oysters to the buttermilk and let soak. Then remove, letting the excess drip off, and dredge through the cornmeal mixture, tapping off the excess.
Heat the oil in a large fry pan. Fry the oysters until golden and crisp, about 2 minutes. Remove to a paper towel-lined plate and serve with Lemon Dill Tartar (see recipe below) or your favorite tartar sauce.
Lemon-Dill Tartar Sauce
¼ c. mayonnaise
¼ c. sour cream
1 tsp. Dijon mustard
1 T. fresh lemon juice
¼ tsp. kosher salt
freshly ground black pepper
1 T. dill pickle relish (or finely chopped dill pickle)
2 tsp. finely chopped red onion
Combine all the ingredients. Refrigerate until served. Can be made ahead.
I have no idea what is happening to me lately, but I have been craving hot dogs. Now the last time that happened, I was pregnant with my daughter Paula. And no, this 76 year old lady is definitely not pregnant. And frankly, even if it were still possible, I’d slit my throat if that was the case! (No offence Paula.) The ability to get into that condition left the realm of possibility about 35 years ago. Thank God! (Again, no offence intended.)
So that leaves me with this quandary. Why in the name of all things gourmet, would I be craving a hot dog? Am I not getting enough saturated fats, preservatives, and nitrates in my diet? Am I feeling salt depleted? What could be happening to my body that would cause this unhealthy craving? So I decided to think on the subject. Which I did. And I came up with a most logical and reasonable conclusion. Hot dogs taste good. They are simply really, really yummy.
Now I am not so far gone as to eat just any old hot dog. Even I can show restraint when forced to face the facts. And the fact of the matter is – not all hot dogs are created equal. Some are just healthier than others. For example, Organic Valley Beef Hot Dogs, Hebrew National 97% Fat Free Beef Franks, Applegate Natural Stadium Beef and Pork Hot Dogs, and our favorite – Painted Hills Natural Beef Uncured Beef Hot Dogs are far better for us, and much tastier than their cheaper contemporaries. So although a lean piece of baked chicken would ultimately be much better for me than a hot dog, it’s too late in the game for me to begin denying myself some of the simpler pleasures in life.
So, with that in mind, I made hot dogs in a blanket last evening for dinner. And I have to tell you, I was in comfort food heaven. Warm out of the oven, then dunked in Sriracha Dipping Sauce (see recipe below) and creamy Dijon mustard, I was one happy lady at dinner. And to go along with the hot dog, a Spicy and Savory Hasselback Potato. (Recipe coming soon.) Altogether a very satisfying meal.
And I have to say, the “blanket” was one of the main reasons I enjoyed the hot dog so much. The dough was terribly simple to prepare, and took only about 90 minutes from beginning to end. Of course, most of that time was hands free so I could accomplish other things while the dough was rising. So last evening, instead of eating hot dogs wrapped in large, fluffy, boring grocery store buns, our dogs were lovingly encased in soft and flavorful homemade cheese bread.
I truly hope you give this recipe a try. I’m sure your entire family will enjoy this delicious way to raise the simple hot dog to a new level of excellence. And remember, not all hot dogs are terribly bad for us. Granted, health food they’re not. But once in a while, a real comforting treat.
As always, try and remain safe and sane through all the political turbulence going on right now, the increase in covid-19 cases, and the approaching holidays. If there ever was a year that I would not especially want to repeat, it’s 2020. But even with all the stress this year has brought with it, I still wake up in the morning looking forward to spending another day with Mr. C., playing in my kitchen, talking or social distancing with family and friends, and closing my day by reading a few chapters in a good book. And every night as I drift off to sleep, I give thanks for all the joy I have in my life. May you too find joy in every day pleasures. Peace and love to all.
2 tsp. quick-rise yeast
½ c. warm water
1 tsp. granulated sugar
1 T. extra virgin olive oil, plus more for oiling the bowl
¼ tsp. kosher salt
scant ¼ tsp. granulated onion
¼ c. grated sharp cheddar cheese
1¼ c. unbleached all-purpose flour, or more as needed
6 hot dogs or sausages of choice
1 egg
2 tsp. milk
sesame seeds
Combine the yeast, water, and sugar in the bowl of your stand mixer using your bread hook. Let sit for 3-4 minutes. Add the olive oil, salt, granulated onion, cheese, and 1 cup of the flour. Mix on low until a soft dough forms. Knead, adding additional flour as required, until the dough sticks to the bottom of the bowl but not to the sides. The dough should still feel slightly sticky.
Pour a bit of olive oil into the bowl, and using your hands and a stiff rubber spatula, form the dough into a ball. Cover and let rise for one hour or until doubled in size.
Punch the dough down and divide into 2 pieces. Roll each piece into a 10-inch circle on a well-floured surface. Then using a pizza cutter or sharp knife, cut each circle into thirds. Starting with the wide end of the triangle, wrap the dough tightly around each hot dog. Place narrow point down on a parchment paper lined baking sheet.
Whisk the egg and milk together and brush the top of each dough wrapped hot dog. Sprinkle with sesame seeds. Let sit while you pre-heat your oven to 400 degrees.
Bake for about 15 minutes, or until golden brown. Serve warm.
SRIRACHA DIPPING SAUCE
¼ c. mayonnaise
¼ c. sour cream or Greek yogurt
1½ tsp. Sriracha, or more to taste
Stir until well combined. This simple sauce truly is crazy good.
You have to know, that if I were a descendant of the Rockefellers, I would eat fresh crab at least once a week. I’d pick up a half pound of it, just for me, (I’ll explain why later) and eat it straight out of the container. No lemon, no tartar, no drawn butter, no nothin’! Just straight from the container to my mouth.
But we were not blessed with wealthy parents. Actually, maybe we were extremely blessed not to be raised with our every little wish fulfilled. It could go either way! Regardless (and no, I don’t care if it’s now OK to say irregardless, I ain’t gonna murder the English language even for the sake of being well informed), I’m just not predisposed to frequently spend that much of our hard earned money on fresh crab just for myself! And so that you won’t think too ill of me for buying fresh crab just for myself, allow me to explain. I don’t think Mr. C. would give a flying fig if I never again served him another crab dish. Well, with two wonderful exceptions – Crab Bisque (the best first course tomato soup you could ever imagine passing over your taste buds and sliding down your throat) and these crab cakes. That’s it. Well as far as I know, that’s it! There could be another dish just waiting to be discovered that he might enjoy. But if there is, I sure haven’t found it yet! (And yes, the Crab Bisque recipe is on this site.) Anyway, we both love these crab cakes. They are easy to prepare, and guess what, you can actually taste the crab. So that leads me to my next comment.
If you want to experience a really good crab cake, then bite the bullet and buy good crab. It certainly can be canned crab, but not the cheap brands that contain what I call fuzzy crab. Treat yourself. Pay the money for a good product. Then add the few simple ingredients listed below, and you will have the pleasure of dining on a truly delicious way to eat this lovely crustacean. After all, the recipe comes with Mr. Cs seal of approval.
And crab cakes are very versatile. They make a delightful first course if you make them tiny and serve a couple on a bed of lettuce with a bit of sauce dribbled all around. And of course, they are a great entrée when accompanied by a creamy risotto and a crunchy cabbage slaw, for example. However you choose to serve these babies, they are sure to be loved.
So as always, don’t forget to treat yourself once in a while. After all, life is short and we all need a bit of pampering to keep us going. Even all of us who are the primary cooks in our family. Most of us tend to put our spouse or our kidlets first. And most of the time, that’s fine. But every so often, we should go crazy and think of ourselves first. So if you’ll excuse me, I’m going to go add a half pound of crab to our grocery shopping list. Then I’m going to eat it all by myself! (And not feel guilty!)
Peace and love to all.
1 lg. egg
¼ c. mayonnaise
1 tsp. Dijon mustard
1 tsp. Worcestershire sauce
dash hot sauce
freshly ground black pepper
1½ tsp. Old Bay Seasoning
1 T. finely minced fresh parsley
10 finely crushed saltine crackers
1 lb. lump crab meat
½ – ¾ c. plain dry bread crumbs
1 -2 T. unsalted butter
Whisk the egg, mayonnaise, Dijon mustard, Worcestershire sauce, hot sauce, black pepper, Old Bay Seasoning, and parsley together in a mixing bowl. Fold in the cracker crumbs and crab. (Be gentle, you don’t want to break up the crab meat.) Mixture will be very wet and messy at this point. Not to worry, the cakes will firm up nicely as they cook.
Spread the bread crumbs in a small shallow container. (I use an 8-inch cake pan.) Using a #10 (3/8 cup) ice cream scoop, carefully plop balls of the crab mixture on top of the bread crumbs, a couple at a time. Carefully roll the balls in the bread crumbs and place on a wax paper lined plate. Press lightly to smush them down a bit. Cover and refrigerate for at least 2 hours before frying.
When ready to serve, heat butter in a large heavy skillet. Fry cakes over medium heat until dark golden brown and heated through, about 4 minutes per side. Serve with Spicy Seafood Sauce, Lemon Garlic Aioli, or sauce/aioli of choice. (See highlighted recipes below.)
SPICY SEAFOOD SAUCE
½ c. mayonnaise
1 tsp. fresh lemon juice
¼ tsp. Old Bay Seasoning
freshly ground black pepper
1 T. finely minced fresh parsley
1 T. finely chopped fresh chives
Whisk mayonnaise, lemon juice, Old Bay Seasoning, and pepper together in a small bowl. Fold in the parsley and chives.