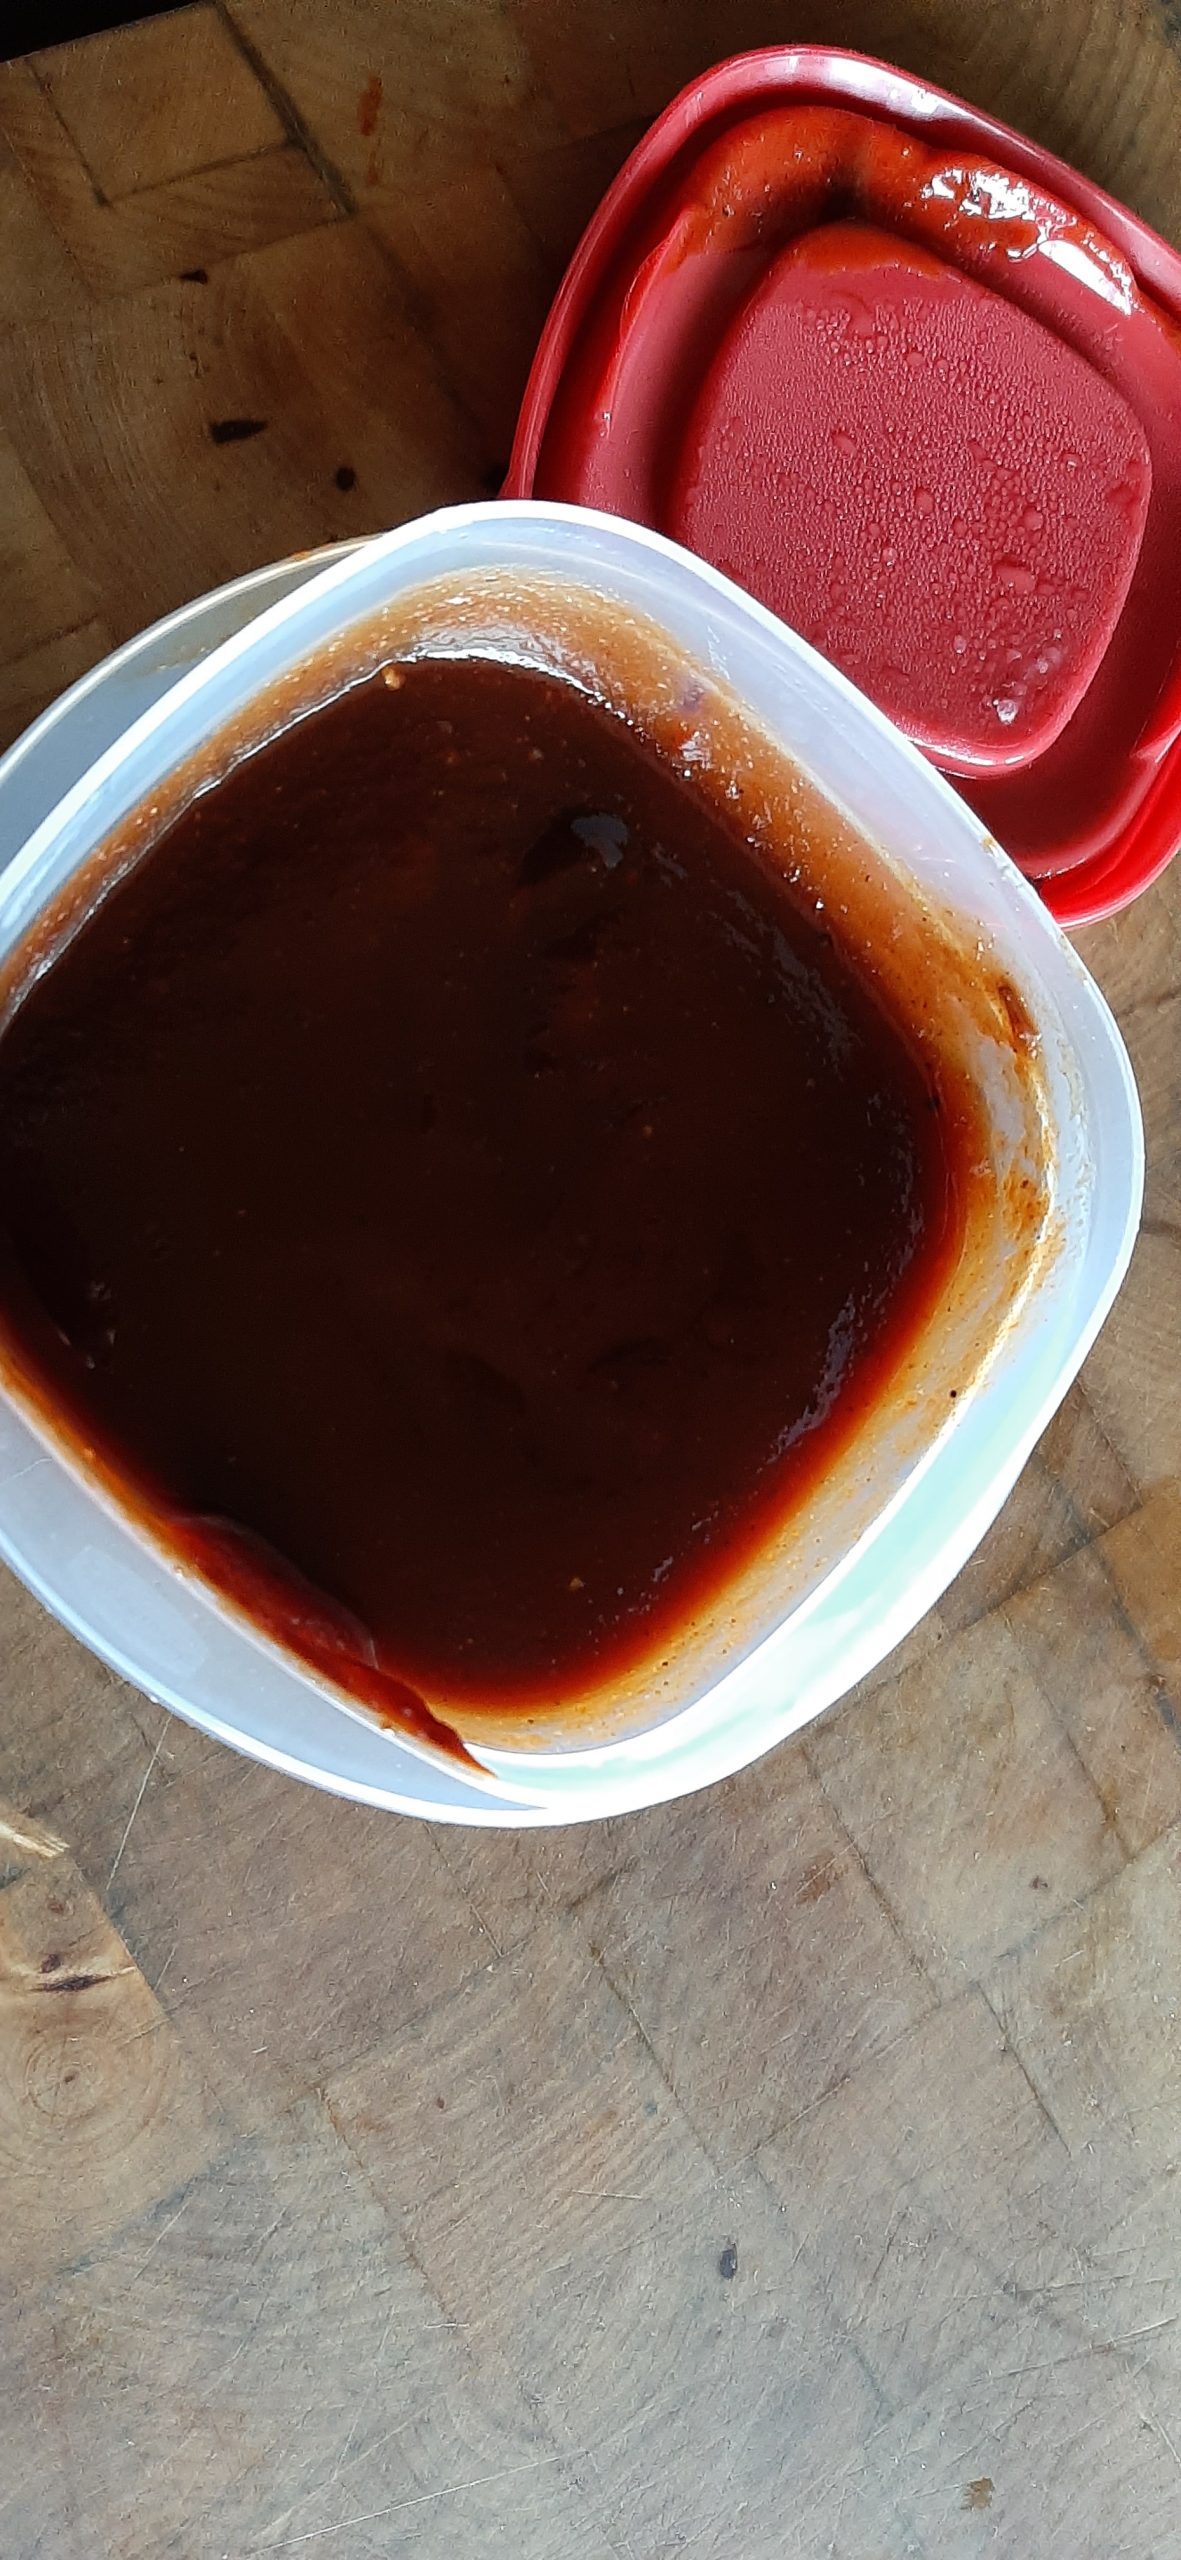
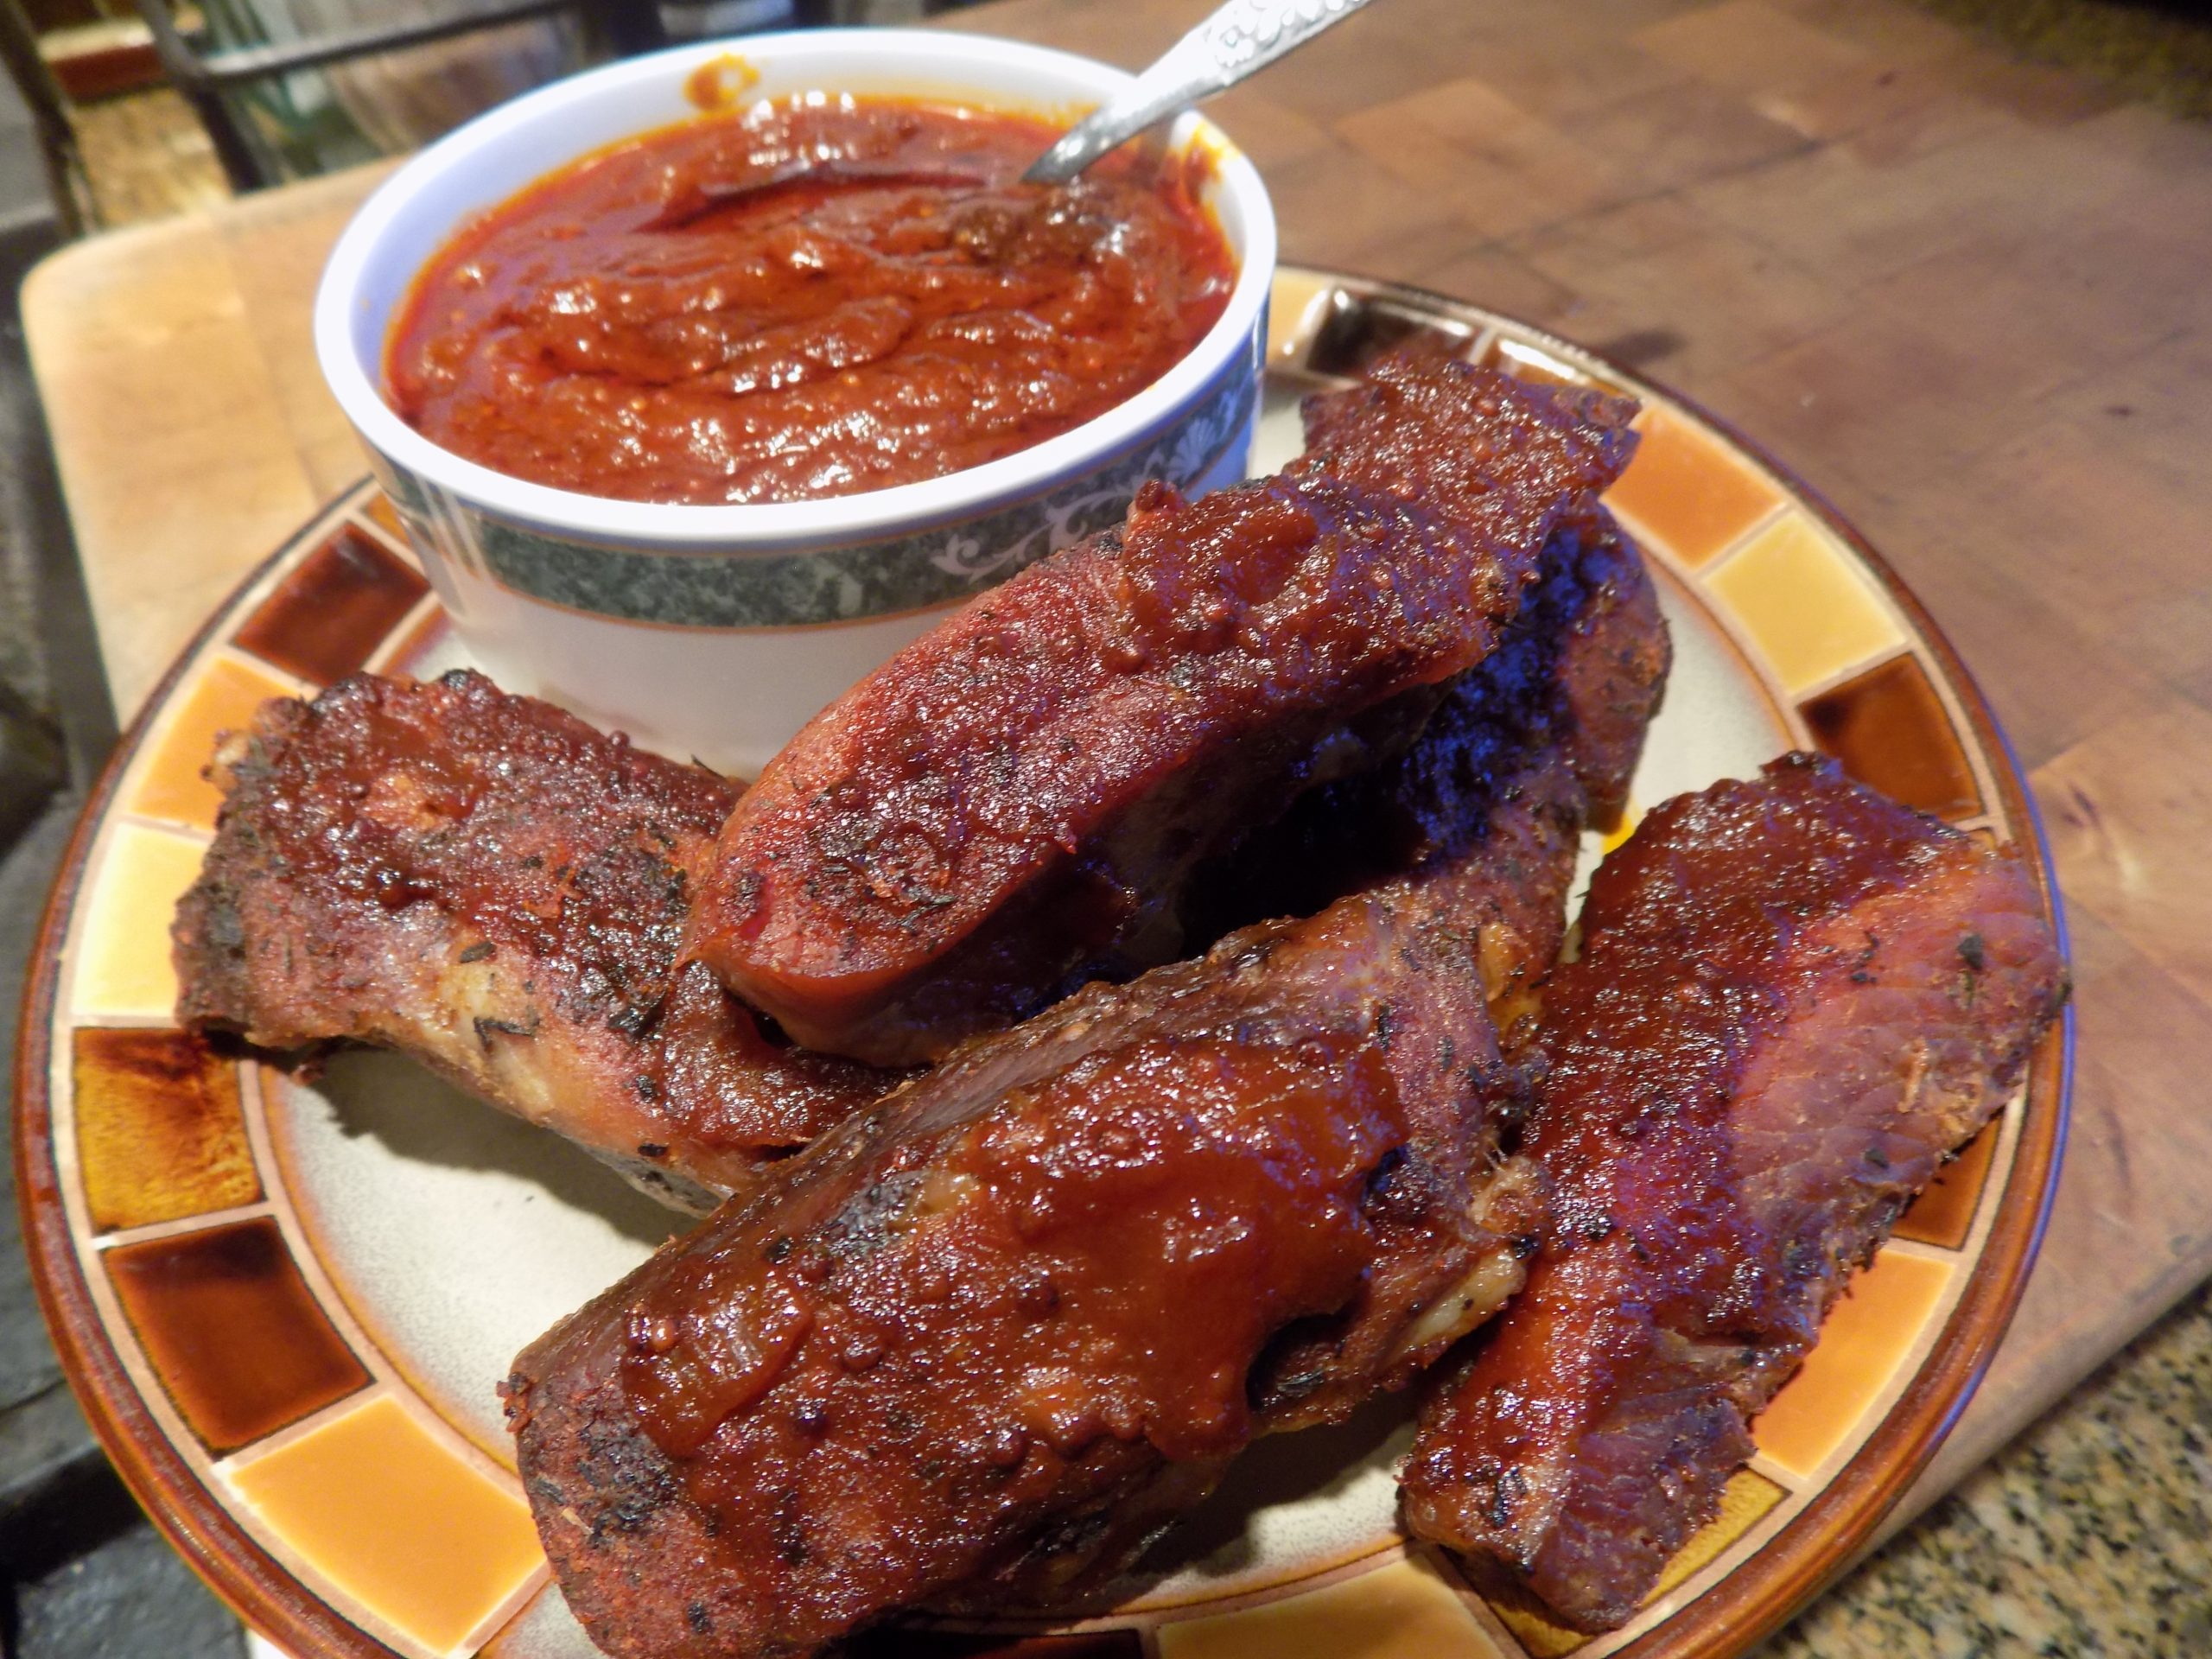
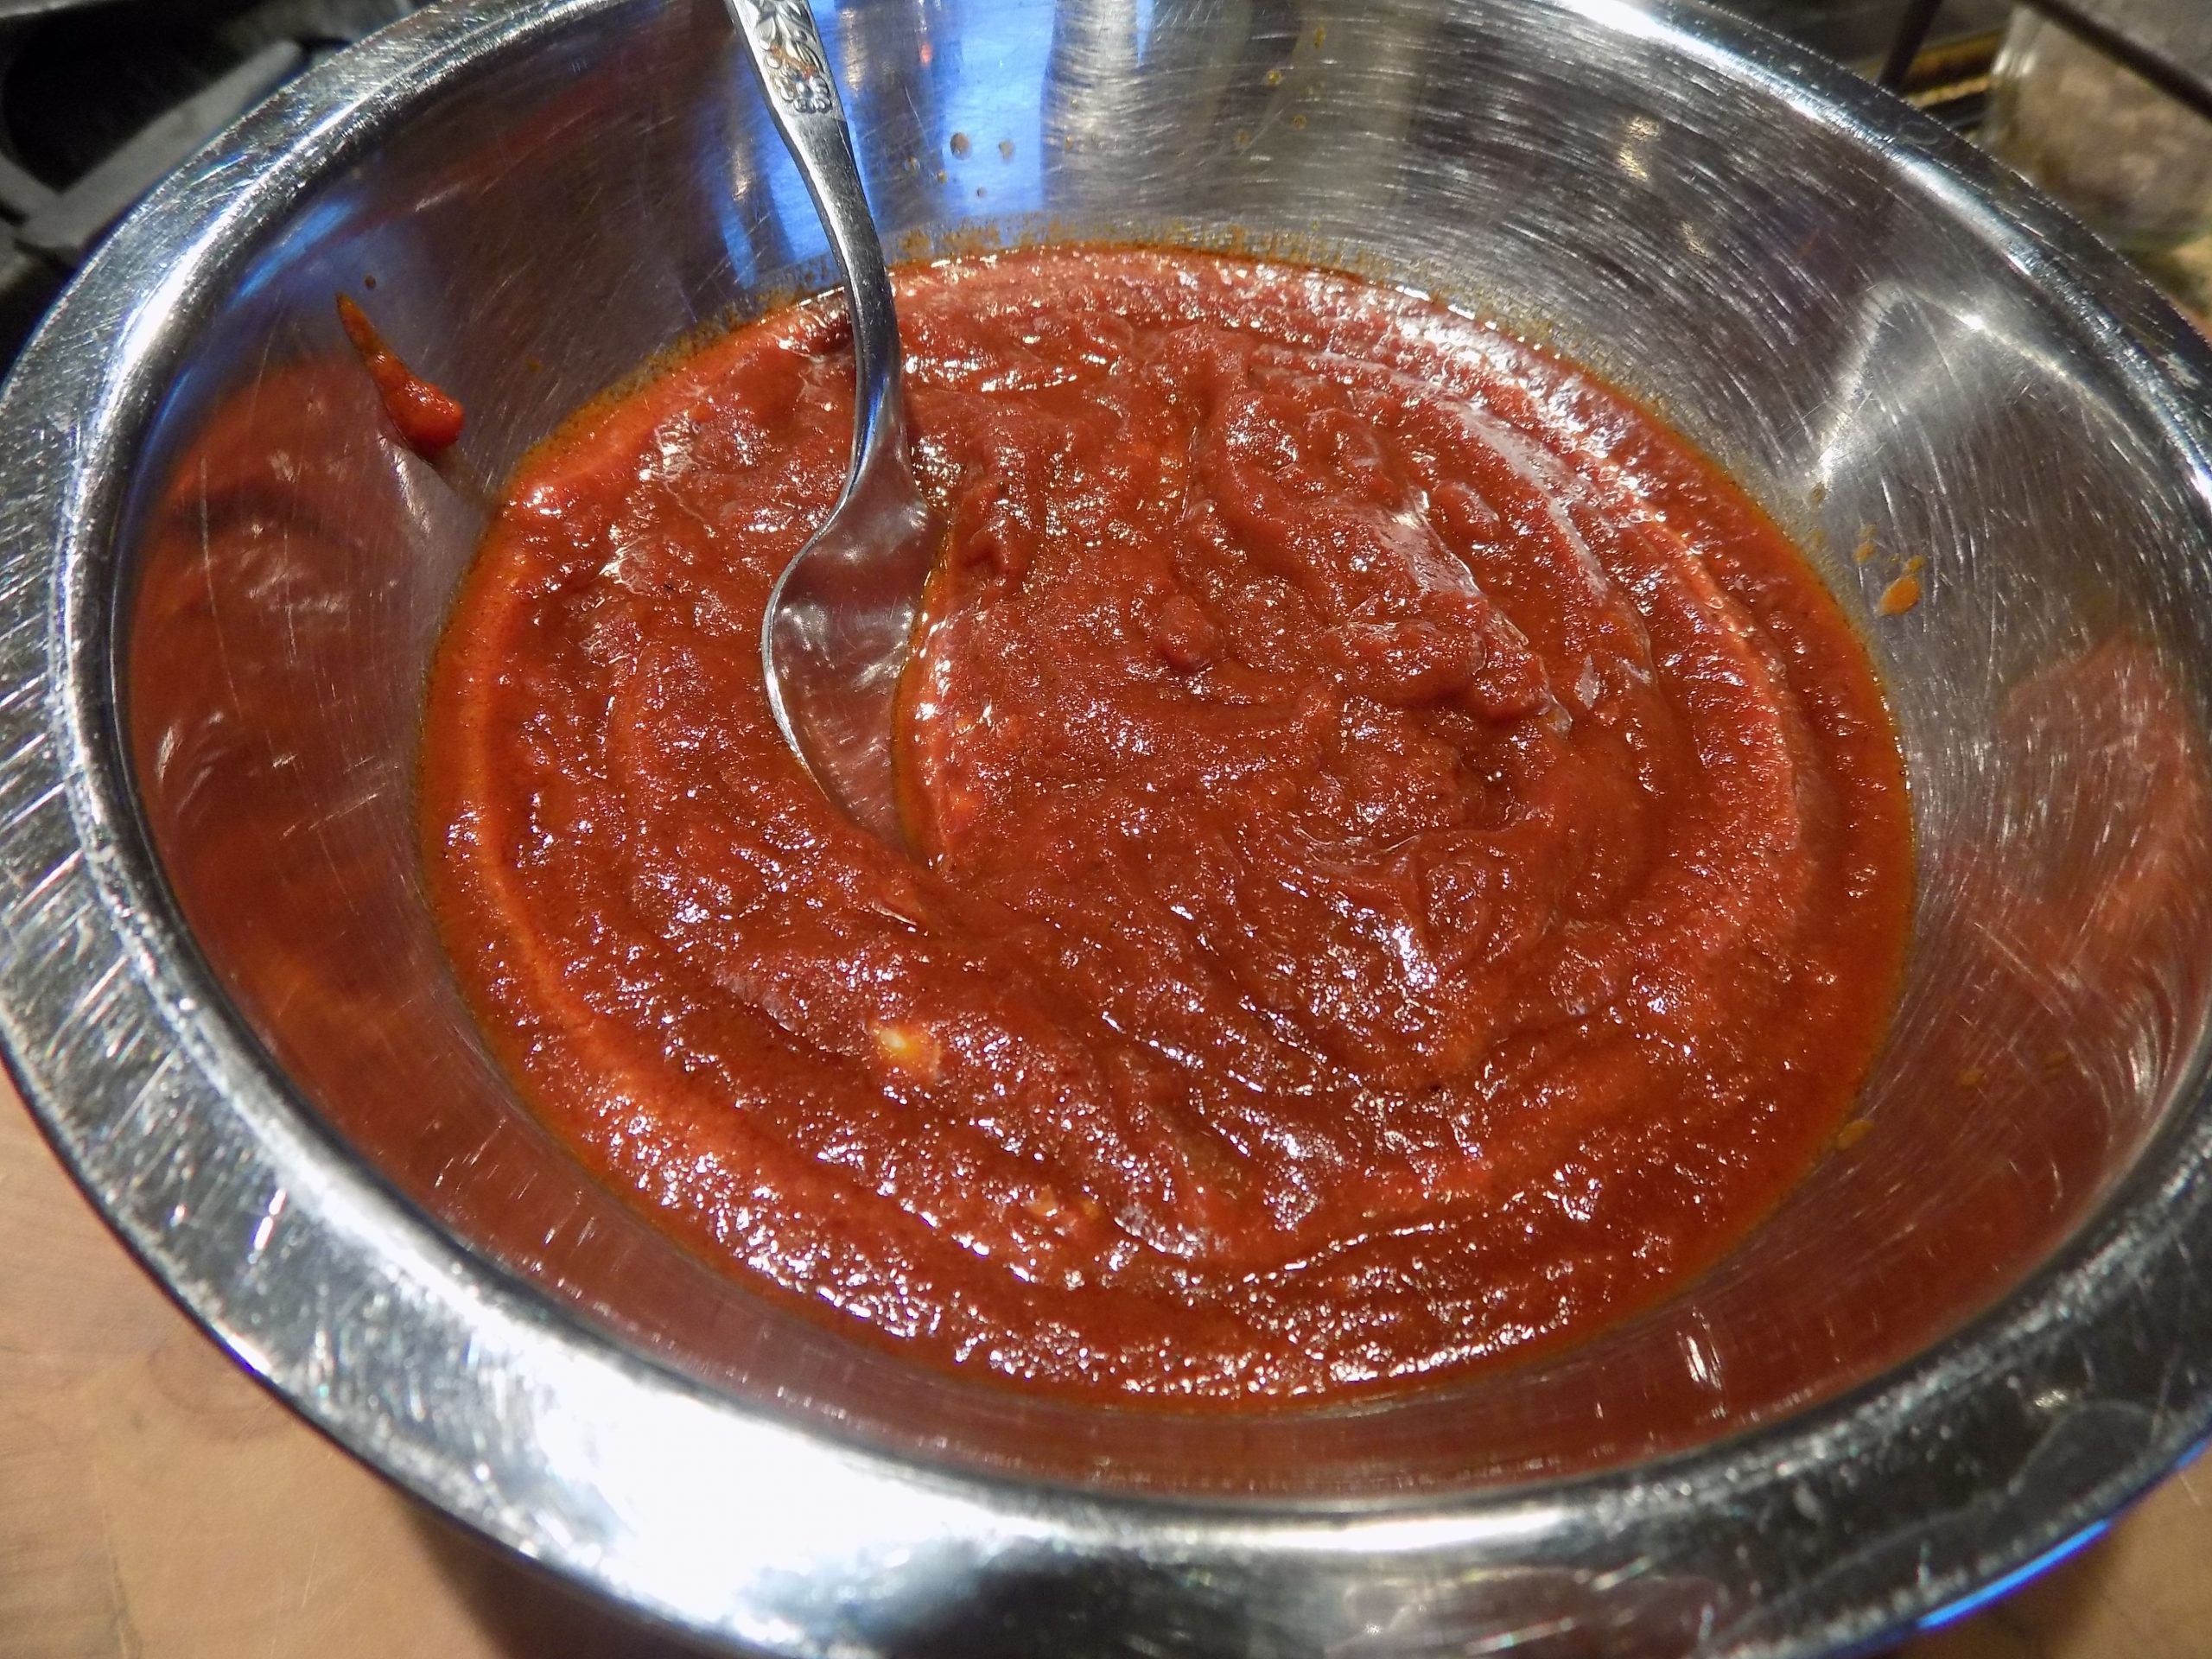
Although I have 2 other BBQ sauces on this site, I decided last evening to look for a Kansas City style BBQ sauce recipe. Our good friends Jim and Margo swear by bottled KC Masterpiece BBQ Sauce. But it is not available at our local grocery store. So, I went online looking for a knock-off recipe. What I found was this recipe from heygrillhey.com. I changed a couple of the amounts because of personal preference, but the rest is straight off the site.
Now you may be wondering why I didn’t just make one of my regular recipes. Well, if truth be told, I was not in the mood to cook. I know. Doesn’t happen very often. But I was tired from trying to book our trailer trip in May and finding many of our favorite campgrounds already booked up solid. Grrrrr
So, I wanted a BBQ sauce where I didn’t have to chop a darn thing. Because in my current frustrated condition, I might have chopped off a finger. And not even realized it was gone! So, with this recipe, the hardest thing I had to do was get my small Le Creuset cast iron pan out of the drawer where it lives. After that it was all downhill.
And I am so glad I made this sauce. It is delicious and ever so simple to make. And it was perfect with the ribs I served. (Also stinkin’ easy to make.) (Savory Oven Baked Pork Loin Back Ribs.) I also served half a baked sweet potato to each of us along with some left-over baked beans. A fine meal if I do say so myself. (And so little time spent.)
So, if you too ever find yourself with limited energy but a desperate need for BBQ sauce, this is the recipe for you. (Even if you have all the energy in the world, this is still the recipe for you.)
Well, that’s it for today. I still have a few days to book for our May adventure, and it’s too early to start drinking. So, I better sign off and get back to work.
As always, peace and love to all.
8 oz. can tomato sauce
½ c. ketchup
6 T. brown sugar
¼ c. apple cider vinegar
¼ c. molasses
1½ tsp. smoked paprika
1 tsp. kosher salt, or more to taste
freshly ground black pepper
½ tsp. chili powder
½ tsp. granulated garlic
½ tsp. granulated onion
¼ tsp. dried mustard
⅛ tsp. crushed red pepper flakes, or more to taste
Whisk all ingredients together in a saucepan. Bring to a boil over medium heat, reduce heat, and gently simmer uncovered for 30 minutes.
Remove from heat and allow to cool completely before transferring to an airtight container. Store in your refrigerator.
This sauce can be used immediately, but best when made ahead. Can be served warm or at room temperature. Great with ribs.
OK all you bread bakers, have I got a quick and easy bread recipe for you where the dough positively MUST SPEND THE NIGHT IN YOUR REFRIGERATOR! I know, gasp! Must be refrigerated? Well, OK, I confess I haven’t tried to let it rise the usual way – 60 to 90-minutes on the counter. But to develop the lovely flavor I obtained by refrigerating the dough, you just need to trust me and put the darn dough in your refrigerator and walk away until the next day. Which for many of us who entertain over 4 people on a regular basis, is a God send.
Because all that needs to be done on the day of the event is to take the formed dough out of the refrigerator. Then allow it sit for a while on your counter and contemplate its very existence. Then heat your oven, make a few slits on top of each loaf, and pop the loaves in the oven.
While the oven is doing the hard work of turning raw dough into a work of art, you can be preparing every other dish you plan to serve while totally stressed to the max. (No wait, that might not be your situation. You might be the kind of person who has everything under control.) (I hate you BTW if that’s the case. Just kidding!) (Well, kind of kidding!)
But for me, one less menu item to worry about (on the day guests will be in my home at any minute) is ONE LESS MENU ITEM TO WORRY ABOUT! (And yes, I am a charter member of the Department of Redundancy Department. And proud as punch to be one too!)
Anyway, I came up with this recipe the other day when in late afternoon I invited our dear friends Jim and Margo over for dinner the next evening. Without any kind of idea what I was going to serve these fine people, I figured a nice bread would surely come in handy at some point. So, to the kitchen I proceeded with nary a recipe in hand. I just kind of winged it as I proceeded, writing down the recipe as I went along. Which BTW, brings me to a very good point.
Always, always, always WRITE DOWN YOUR LIST OF INGREDIENTS AND HOW MUCH OF SAID INGREDIENT YOU USED AS YOU INVENT A NEW DISH. Because, if the dish turns out to be the best stew, soup, casserole, bread etc. etc. you ever made, you are going to hate yourself if you didn’t write down how you created this masterpiece. Believe me, when you go to replicate the dish 6 months later because your family has been begging you for months to make it again, and you don’t remember what you did, YOU ARE GOING TO FEEL QUITE THE FOOL FOR NOT LISTENING TO MY WARNING/ADVICE.
Well, I’ve taken up enough of your time today. And I have been rather snarky, which really is unusual for me. (Right, Patti!) Anyway, you know that I love you all and only want the best for each and every one of you. And sometimes tough love is what’s required. My job therefore is done for the day.
Peace and love to all.
1¾ c. warm water
1 T. granulated sugar
2½ tsp. instant yeast
2 tsp. kosher salt
2 T. extra virgin olive oil, plus more for oiling the dough
1 T. unsalted butter, room temp.
5 c. unbleached all-purpose flour
2 T. cornmeal
Combine warm water, sugar, and yeast. Allow to sit for 10 minutes until the yeast foams. Add salt, olive oil, butter, and 4 cups of flour. Knead in your stand mixer using the dough hook, adding more flour as necessary to make a smooth, silky dough.
Form into 2 rectangles and roll into long loaves. Place on a baking sheet that has been sprinkled with corn meal. Oil the tops and place plastic wrap on top. Refrigerate overnight.
Remove from refrigerator and allow to rise on your counter for 1½ to 2 hours.
Pre-heat your oven to 425-degrees with a pan of hot water on the bottom rack. Just before placing the loaves in your oven, make 4-5 slits on the top of each loaf.
Bake for about 20 minutes or until the internal temperature reaches at least 210-degrees.
Remove from oven and allow to cool completely before slicing. Serve as is or dipped in OLIVE OIL AND BALSAMIC VINEGAR BREAD DIPPING SAUCE or sliced and toasted for CROSTINI. (See how to make both below.)
OLIVE OIL AND BALSAMIC VINEGAR BREAD DIPPING SAUCE
¼ c. extra virgin olive oil
1 sm. garlic clove (finely minced)
¼ tsp. dried basil
¼ tsp. dried oregano (Mexican oregano preferably)
2-3 crushed red pepper flakes – more if you are so inclined
pinch of kosher salt
freshly ground black pepper
2-3 tsp. balsamic glaze or good balsamic vinegar
Whisk the olive oil, garlic, dried basil, dried oregano, crushed red pepper flakes, salt, and pepper together in a small serving bowl. Let the mixture sit for a bit.
When ready to serve with Italian bread, drizzle 2 -3 teaspoons of balsamic glaze or balsamic vinegar over the olive oil mixture.
CROSTINI
Italian Bread
extra-virgin olive oil
flaky or fine sea salt, to taste
Pre-heat your oven to 450-degrees. Line a rimmed baking sheet with parchment paper for easy clean-up.
Slice the bread on the diagonal into pieces no wider than ½-inch. Lightly brush both sides of each slice with olive oil.
Place the slices in a single layer on your prepared baking sheet and bake them on the middle rack for about 9 minutes, or until they are crisp and nicely golden on top. Remove from oven and sprinkle lightly with salt. Serve immediately.
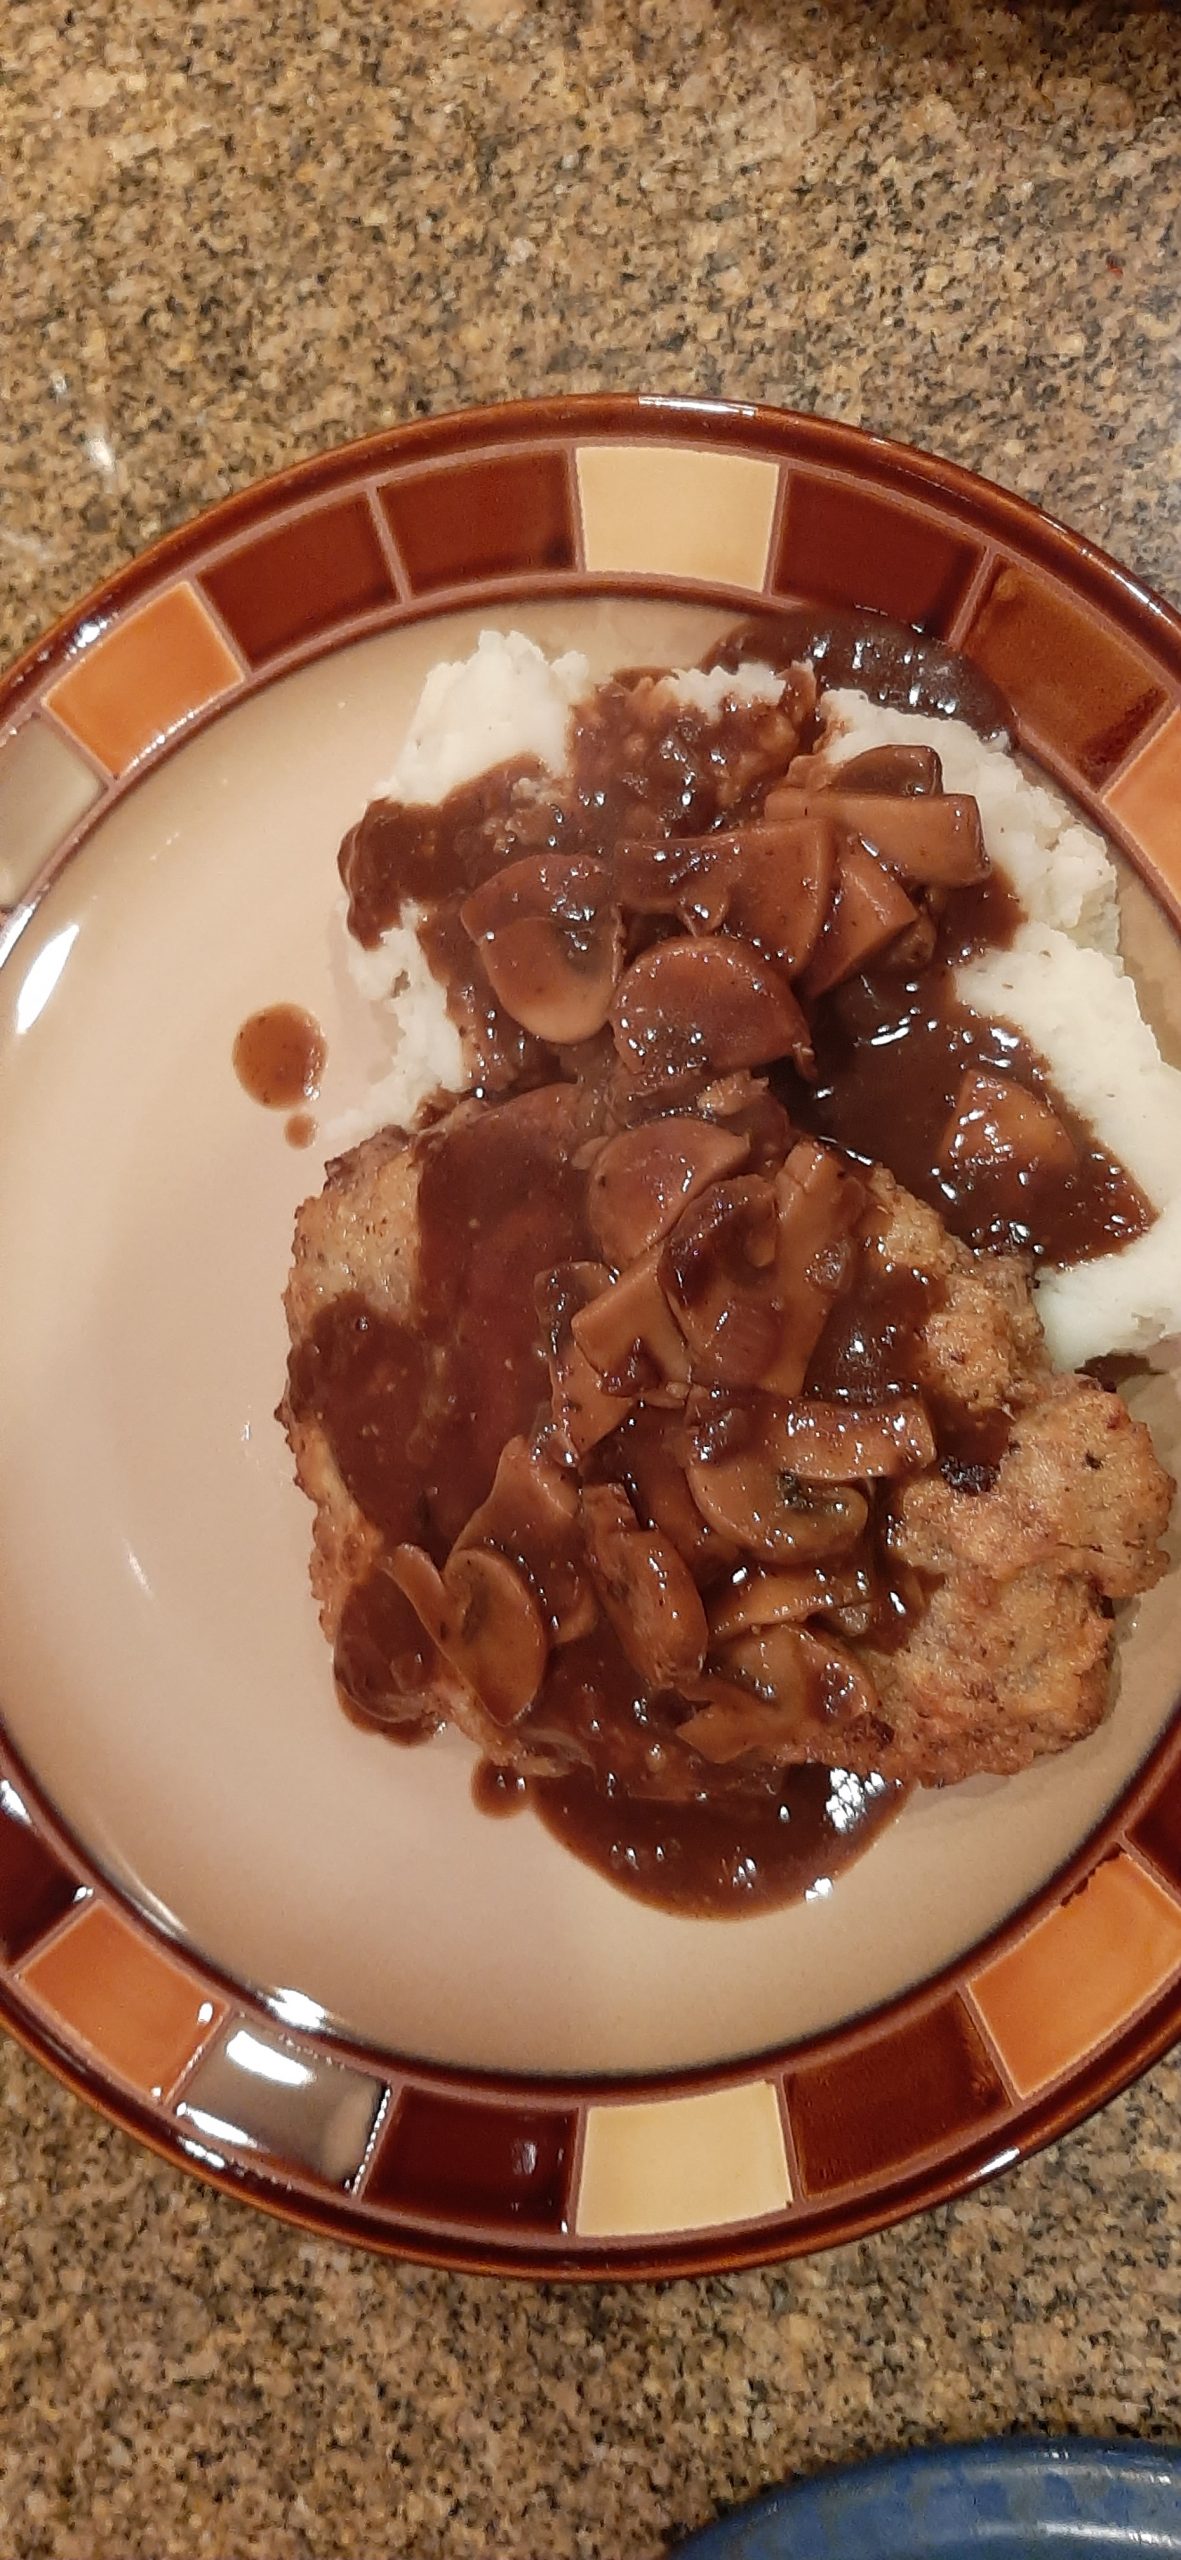
There are just those times when a bit of gravy would be nice. But you don’t happen to have any gravy happily residing in your refrigerator. As happened to me the other evening when I wanted to serve chicken fried steak over mashed potatoes smothered in gravy. (It is after all comfort food season.) So, now what to do? Plus, I had some mushrooms that really needed to be used or added to the yard waste receptacle. And who wants to do that when given a choice? So, mushroom gravy came to mind. But, how to make a beefy mushroom gravy without dripping from a beef roast?
After much deliberation, I decided to wing it. And what I came up with is the recipe you find below.
Now, my recipe for “wing it” beef gravy will never be as delicious and have the same depth of flavor as a gravy starting with roast beef drippings. I’m not a magician after all! But, when desperate, and you still want to serve beef gravy, this recipe might possibly also work for you. Because it sure as heck worked for us.
So dear readers, I offer this recipe as a quick and easy substitute for the real thing.
Speaking of real things, Thanksgiving is just around the corner. And if there was ever a time to offer thanks, it is now.
Most of us live in this country where, yes, bad things happen. But at least in the USA we are not being bombed. Women can still take advantage of educational opportunities, and everyone who is eligible can cast a vote for the future of our country. These are precious advantages that should be the norm for every living being. But they are not. There are just so many people living with hardships that are unimaginable to most of us. Innocent men, women, and children we are powerless to help.
So, I invite you to share your wonderful life with others. Host Thanksgiving dinner. Or get together with friends and family at someone else’s home or at a restaurant. Take a pie or some cookies to a neighbor who might not be able to celebrate with family or friends. Or just smile and say hello to a stranger. We can make a difference. By our example, if nothing else.
Happy Thanksgiving to all. And as always, peace and love.
2 T. unsalted butter
½ c. finely chopped onion
8-12 sliced mushrooms
2 T. dry sherry
1 tsp. Kitchen Bouquet*
1 tsp. Dried Mushroom Powder Seasoning, opt. (see recipe below) or Wild Mushroom Seasoning Salt
pinch dried thyme leaves
freshly ground black pepper
2 T. all-purpose flour
1½ – 2 c. water
2 heaping tsp. beef base (I use Better Than Bouillon Roasted Beef Base)
Melt the butter over medium heat and add the onion. Sauté until the onion is almost tender. Add the mushrooms and cook until they are brown. Gradually pour in the sherry. Add the Kitchen Bouquet, mushroom seasoning, thyme, and black pepper. Then stir in the flour and let it cook for a good 3 minutes, stirring all the while.
Starting with 1½ cups water, gradually add the water and beef base stirring for as long as it takes to make a smooth consistency. Let it cook for about 20 minutes, stirring periodically. If you prefer a thinner gravy, add a bit more water. Taste and adjust seasoning.
Serve drizzled over anything that might benefit from a bit of gravy.
*Kitchen Bouquet is a browning and seasoning sauce primarily composed of caramel with vegetable flavorings. It has been used as a flavoring addition for gravies and other foods since the late 19th century. And by me since the early seventies in every turkey gravy I have ever made. Also, in beef stew or any time my gravy, savory sauce, or soup needs a bit of a flavor boost. It is truly a wonderful ingredient.
DRIED MUSHROOM POWDER SEASONING
3 T. ground dried mushrooms** (cremini, shiitake, porcini, etc.)
1 T. granulated onion
1 T. kosher salt
1 T. freshly ground black pepper
2 tsp. dried thyme
2 tsp. dry mustard
1 tsp. granulated garlic
**Place any combination of dried mushrooms (about 9 tablespoons) in a spice grinder. (I use a coffee grinder dedicated to spices and herbs.) Whirl until the mushrooms are powdered.
Then mix with the other ingredients. Store in an airtight container.
This seasoning is wonderful any time an extra bit of flavor would be welcome. Great in stews, soups, sauces, gravies, and broth. (And yes Mark, this is the seasoning I gave you for Christmas a couple of years ago.)
WILD MUSHROOM SEASONING SALT
3 T. dried thyme
1 T. black peppercorns
2/3 c. coarse salt
pinch cayenne pepper
3 T. granulated onion
1 T. granulated garlic
1/3 c. powdered dry mushrooms (I used dried shiitake mushrooms)
Whirl the thyme, black peppercorns, and salt together in a spice grinder until finely ground. Stir into a bowl containing the cayenne, granulated onion, granulated garlic, and powdered dry mushrooms. Whisk well to combine.
The once great and powerful food wizard of France, Auguste Escoffier (1846–1935) was a French chef, restaurateur, and culinary writer who popularized and updated traditional French cooking methods. As well as being considered by many to be the father of haute cuisine. And as such, Escoffier stated that there were five mother sauces that he felt typified French cuisine. The five mother sauces being béchamel (basic white sauce),velouté (uses bone broth instead of milk), hollandaise (emulsified egg yolks, lemon juice, and butter), sauce tomat (precursor to our modern tomato-based pasta sauces), and espagnole (brown stock, tomato puree, and flavorful herbs).
Well, being of French heritage myself, I have decided there should be one more sauce that can bring all kinds of dishes to a new level of excellence. Teriyaki Sauce.
OK, I will unequivocally agree that teriyaki sauce is in no way associated with French cuisine. But I would dare anyone to tell me that teriyaki sauce is less relevant to today’s culinary tastes than any of the sauces listed above. (Even if they are “French”!) And especially if the teriyaki sauce in question is as quick and easy to build and as delicious as this one!
So, even though Monsieur Escoffier may be rolling over in his grave, I am going to stick to my premise that a great sauce, regardless of its origin, should qualify as a “mother sauce”! Because along with being extremely flavorful, a mother sauce should be adaptable. And this sauce absolutely fits that definition. For example, added to a veggie stir fry, or sautéed thinly sliced chicken, beef, or pork, or even stirred into simple steamed rice, this sauce takes basic ingredients to a new level of delicious. And who doesn’t welcome that at their table! And as an added benefit of this sauce, it is a whole hell of a lot easier to prepare than any of M. Escoffier’s sauces! Take that buddy!
So, next time you feel the urge to build a simple sauce that will complement a meat or fish dish or ramp up the flavor of stir-fried or steamed veggies, give this simple recipe a try. I believe with all my heart that you will eventually get around to thanking me.
In the meantime, peace and love to all.
½ c. tamari (yes, I recommend tamari over regular soy sauce)
6 T. water, divided (tap water is just fine)
2 T. mirin
2 tsp. toasted sesame oil
½ c. brown sugar, packed
2 garlic cloves, finely minced
2 tsp. finely minced fresh ginger
1 T. cornstarch
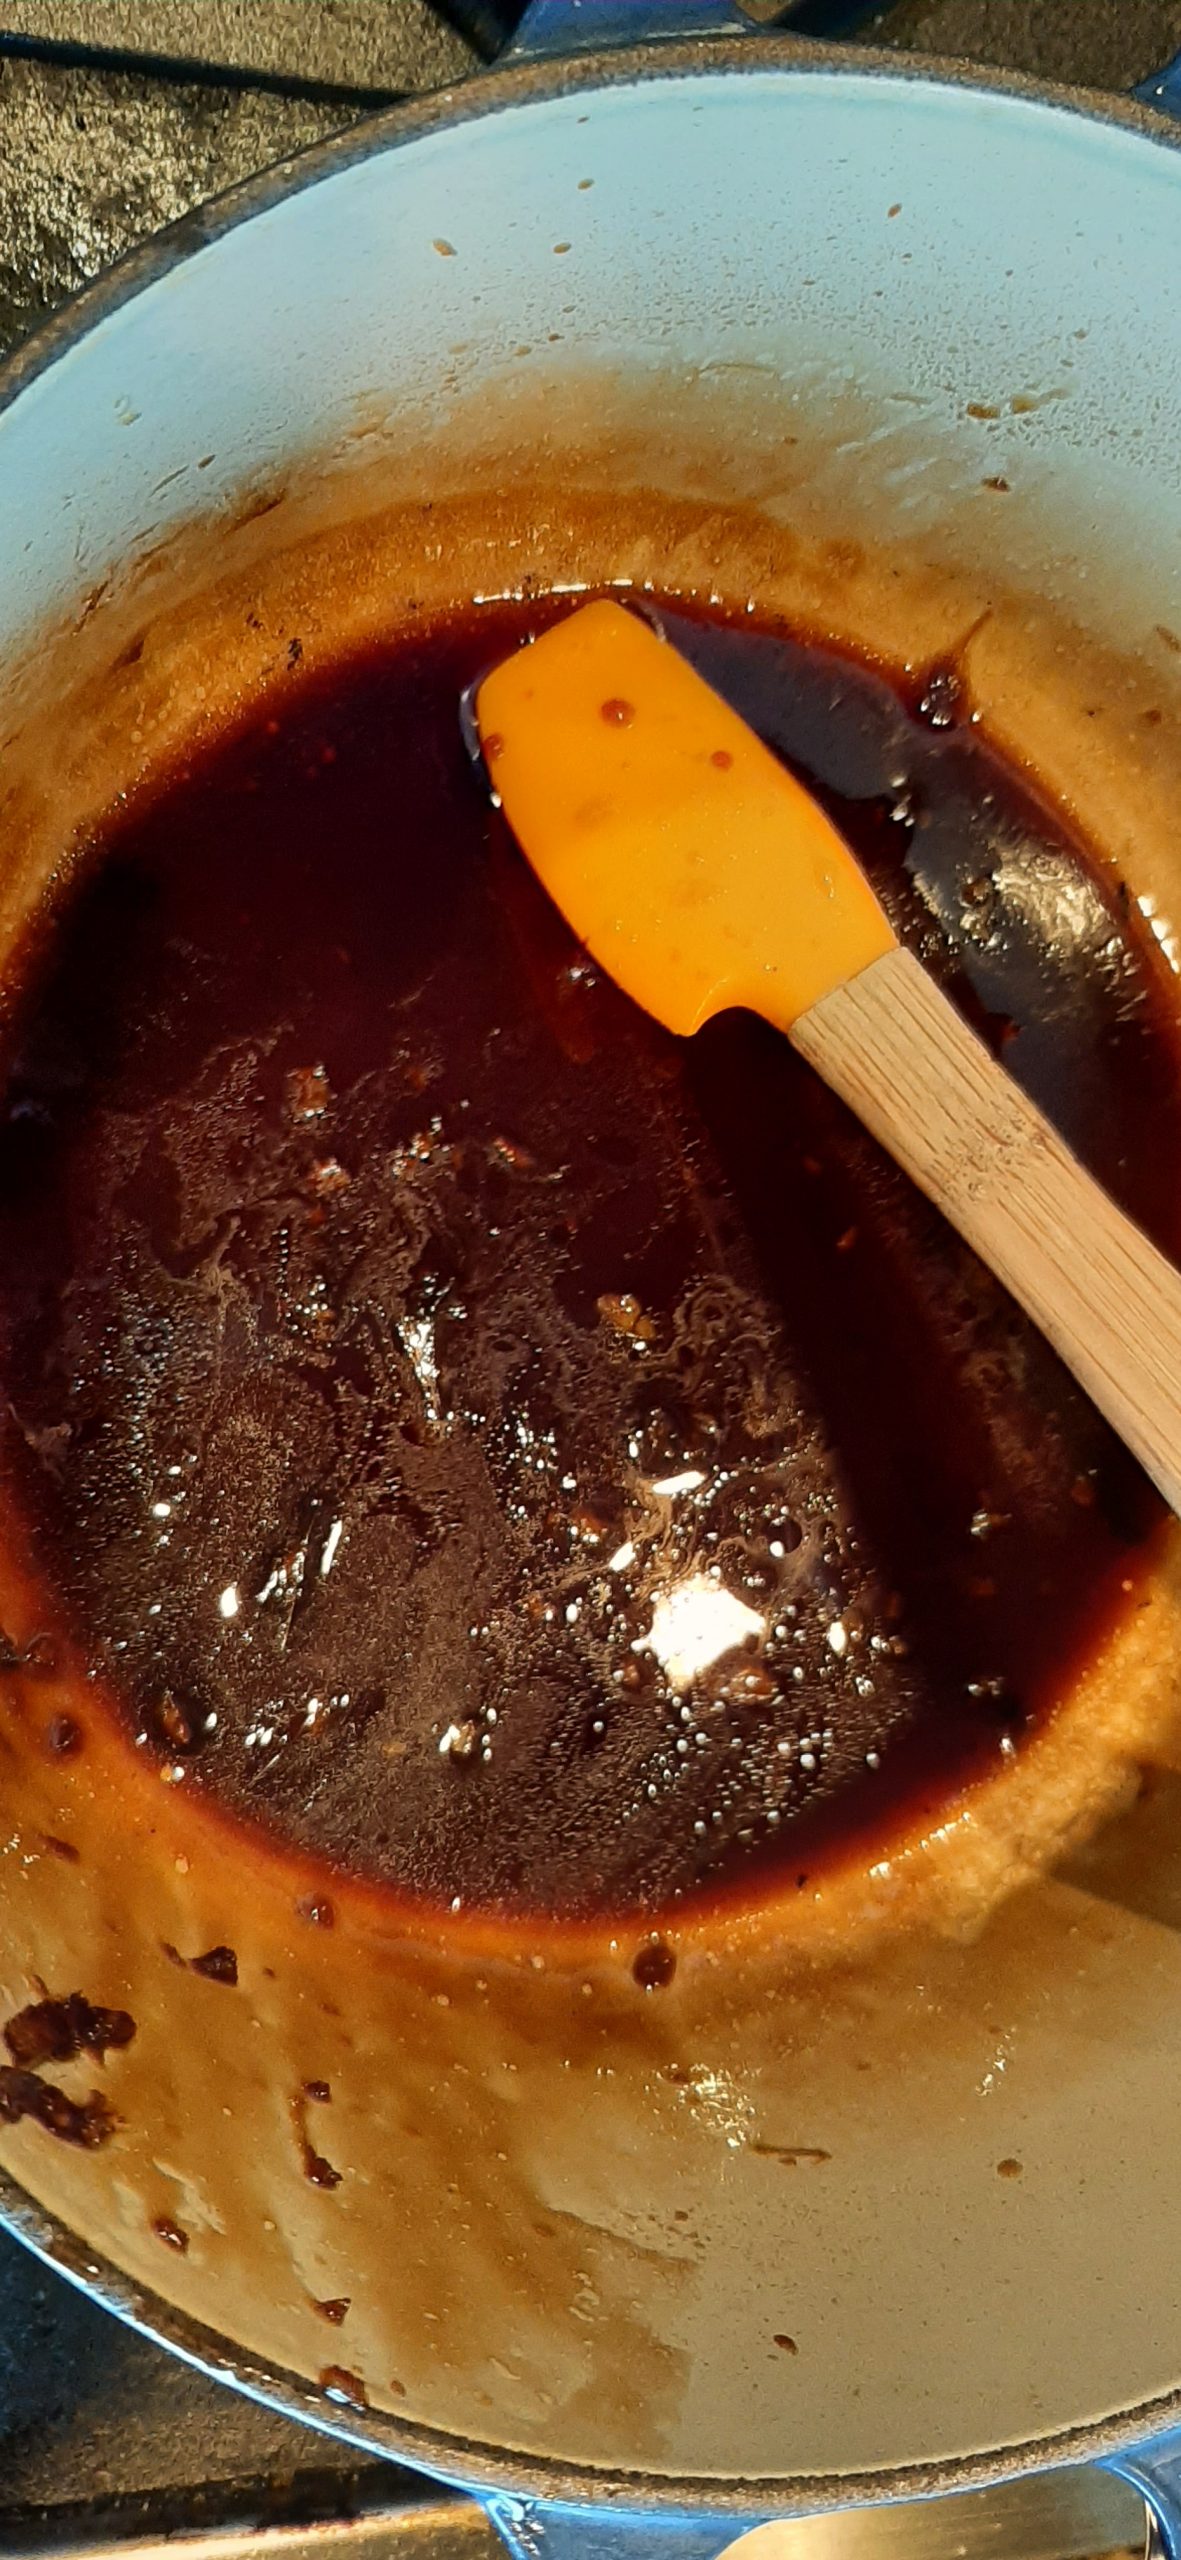
In a small saucepan, whisk the tamari, 4 tablespoons of the water, mirin, toasted sesame oil, brown sugar, garlic, and ginger together.
Bring the mixture to a boil, reduce heat, and simmer uncovered for 3-4 minutes.
In a small bowl, whisk the cornstarch and the remaining 2 tablespoons of water together.
Slowly whisk the cornstarch mixture into the simmering tamari mixture and cook for 1 minute. Remove from heat and use in any of your favorite dishes that call for teriyaki sauce.
And yes, this recipe can be doubled or tripled. But be advised, the flavor is very potent, so use sparingly.
Strawberry shortcake is one of my all-time favorite desserts. I know, terribly plebian of me, but never-the-less, it’s the truth. And when made with either this GF cake or my Cream Cheese Pound Cake (recipe on site), I defy anyone to come up with a finer dessert! Or to find an easier cake to prepare than this amazing almond cake recipe from bobsredmill.com. (My Cream Cheese Pound Cake, not as quick and easy to build. But absolutely scrumptious! And definitely worth the effort.)
Anyway, whether you are trying to eat less wheat flour or just have a desire to produce a moist, delicious cake that everyone in your family can enjoy (except those who are allergic to nuts, of course), this cake recipe is an absolute winner. Even if you choose to eat this cake without any type of topping, you are in for a treat. It absolutely melts in your mouth. And the flavor is amazing.
As far as the strawberry sauce and whipped cream are concerned, you have only my word that they are both delicious and easy to prepare. And of course, can be used with other wonderful culinary offerings. (Think Sunday morning waffles decorated with strawberry sauce and whipped cream.) Yum!
So, while fresh strawberries are just coming into season, plus almost always available year-round, I suggest you make this dessert for your family and friends any time a tasty treat would make life better. I promise you this strawberry shortcake will be very well received. And just imagine how much joy this delicious combination would bring in say, February, when it’s been raining buckets for 9 straight days. And the wind is howling like a pack of coyotes. And just walking from your car to the door of your grocery store is less desirable than cleaning toilets!
I can only speculate that this dessert might save your sanity. And that of your loved ones. I know it would definitely make me an easier person to live with under similar circumstances!
Peace and love to all.
Almond Cake:
6 T. (¾ stick) unsalted butter, room temp.
½ c. granulated sugar
2 lg. eggs. room temp.
¼ c. whole milk
½ tsp. vanilla extract
1/8 tsp. good almond extract
¾ c. almond flour
¼ c. organic coconut flour
1 tsp. baking powder
1/8 tsp. fine sea salt
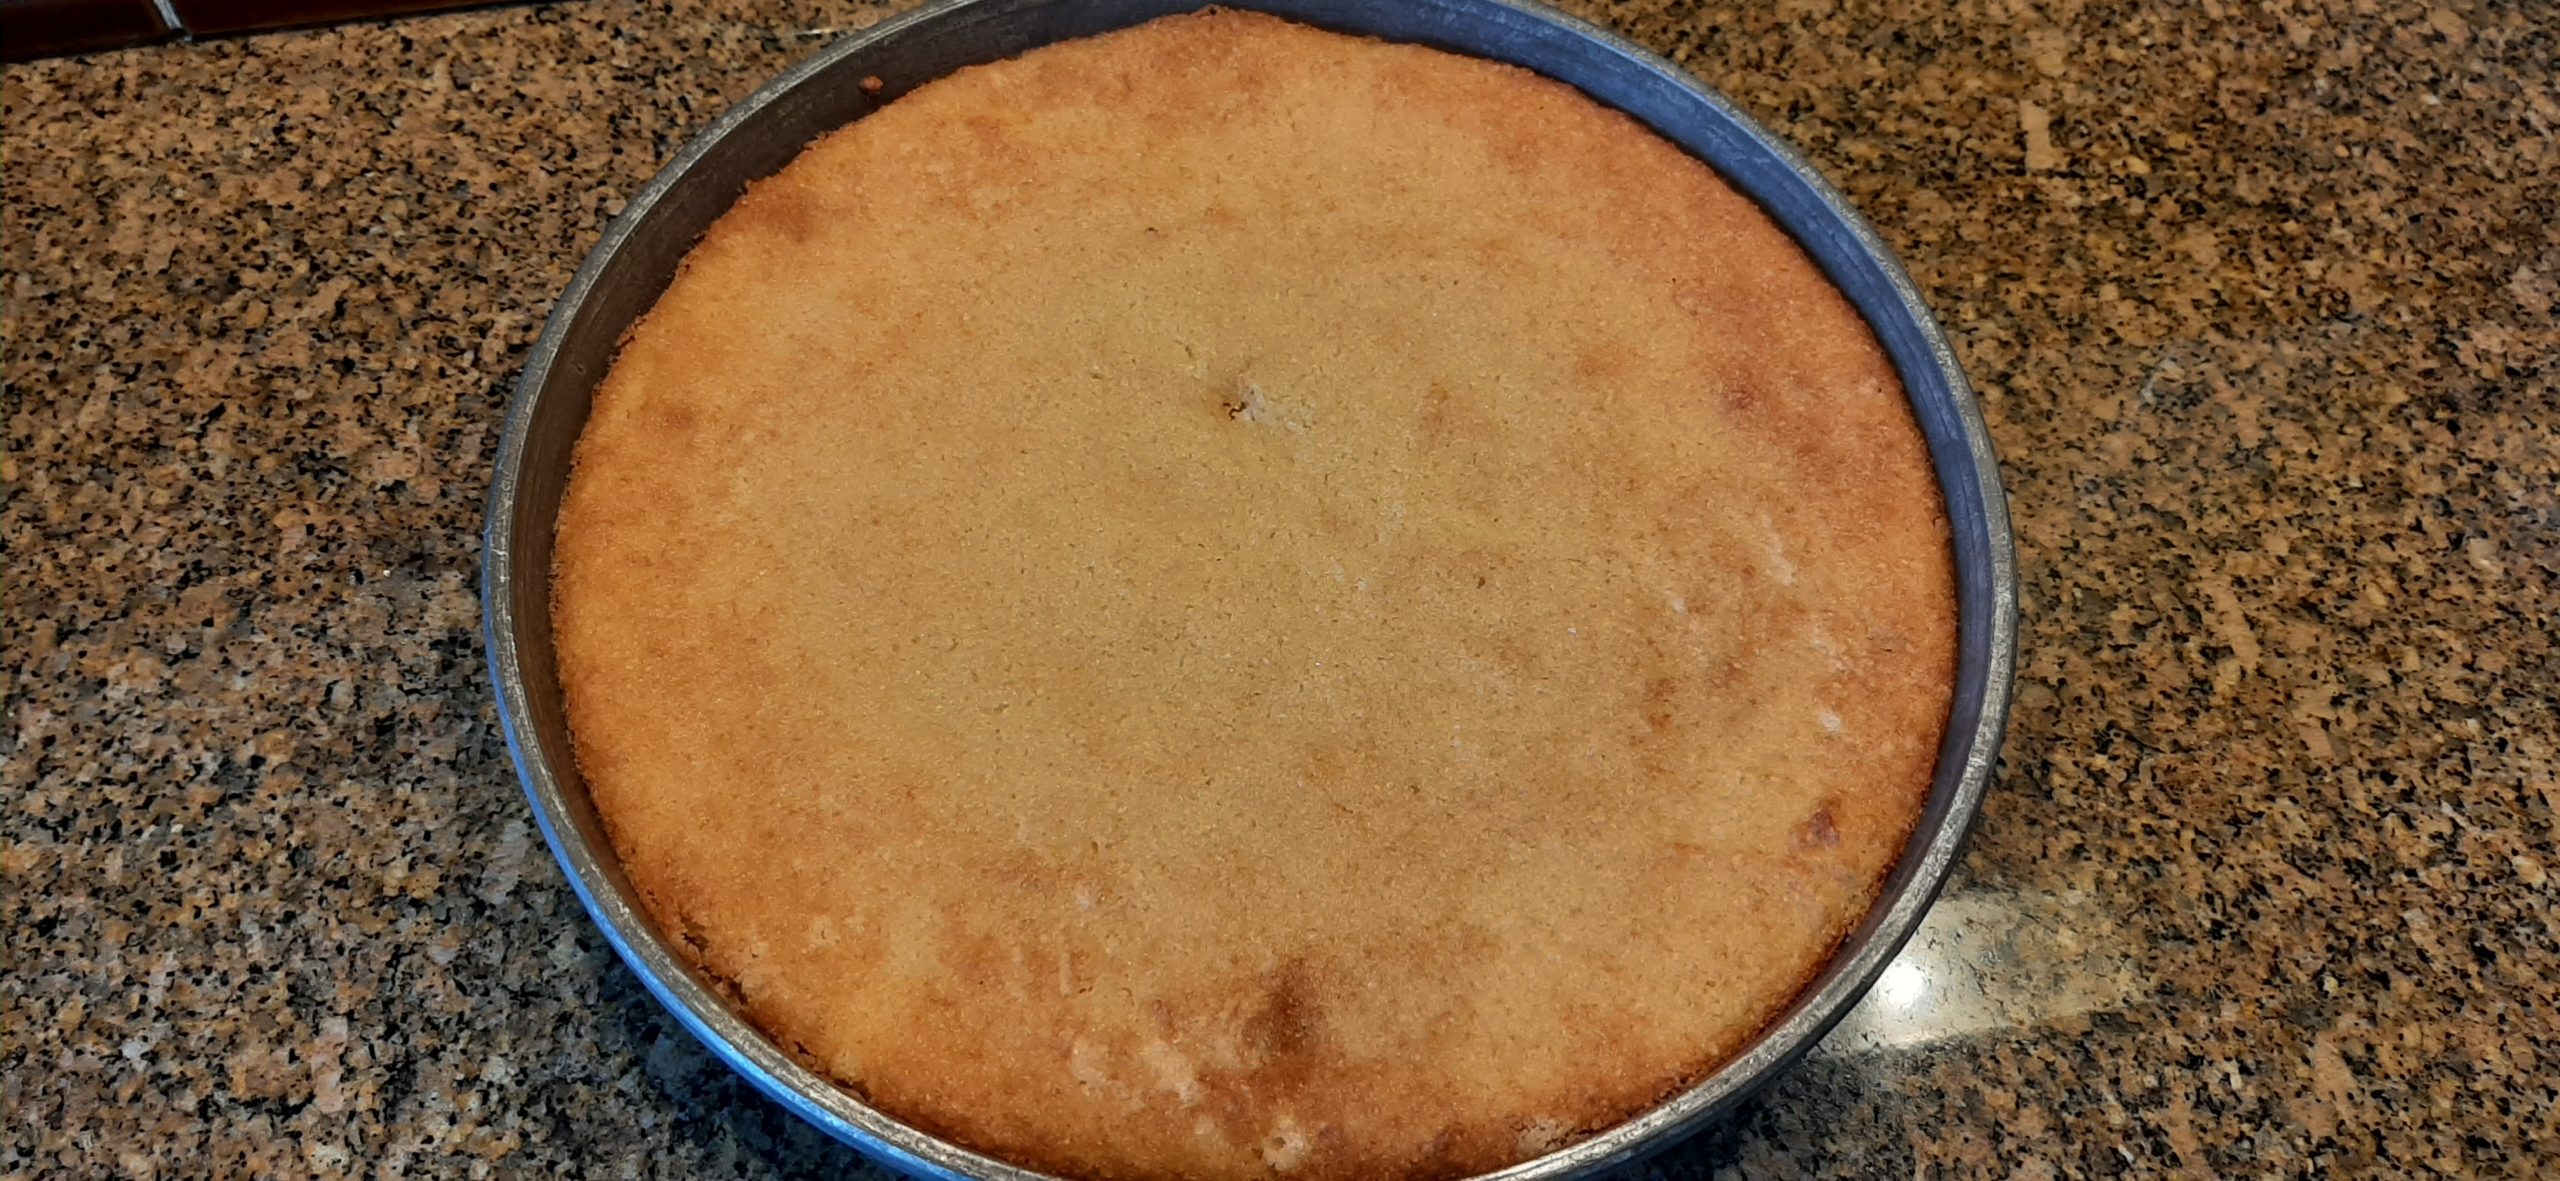
Grease an 8×8-inch baking pan with cooking spray. Set aside. (If you double this recipe, use 2 8×8-inch pans or 1 9×23-inch pan.) (And yes, next time I make this cake I will double the recipe. The cake is just so very, very good!)
Cream butter and sugar until very light and fluffy. Add the eggs and beat until completely blended. Add the milk and extracts and mix until combined.
In a separate bowl, whisk the almond flour, coconut flour, baking powder, and fine sea salt together. Add the flour mixture to the butter mixture and beat until creamy.
Pour batter into prepared cake pan and smooth top.
Bake in a pre-heated 350-degree oven for 27-30 minutes. Do not over-bake.
Remove from oven and allow to cool completely before serving with Strawberry Sauce and Vanilla Bean Paste Whipped Cream. See recipes below.
Strawberry Sauce
1 lb. strawberries, rinsed, hulled, and thickly sliced
⅓ c. granulated sugar
1 T. fresh lemon juice
In a medium saucepan, combine the sliced strawberries, sugar, and lemon juice. Place over medium heat and bring to a boil, stirring occasionally.
Reduce heat and simmer about 15 minutes or until sauce has thickened a bit, stirring occasionally. Remove from heat and cool to room temperature. Refrigerate until needed.
Vanilla Bean Paste Whipped Cream
1 c. heavy whipping cream
½ tsp. vanilla bean paste* or vanilla extract, or more to taste
2 T. powdered sugar
Whip the cream to hard peaks. Add the vanilla bean paste and powdered sugar. Whip until blended.
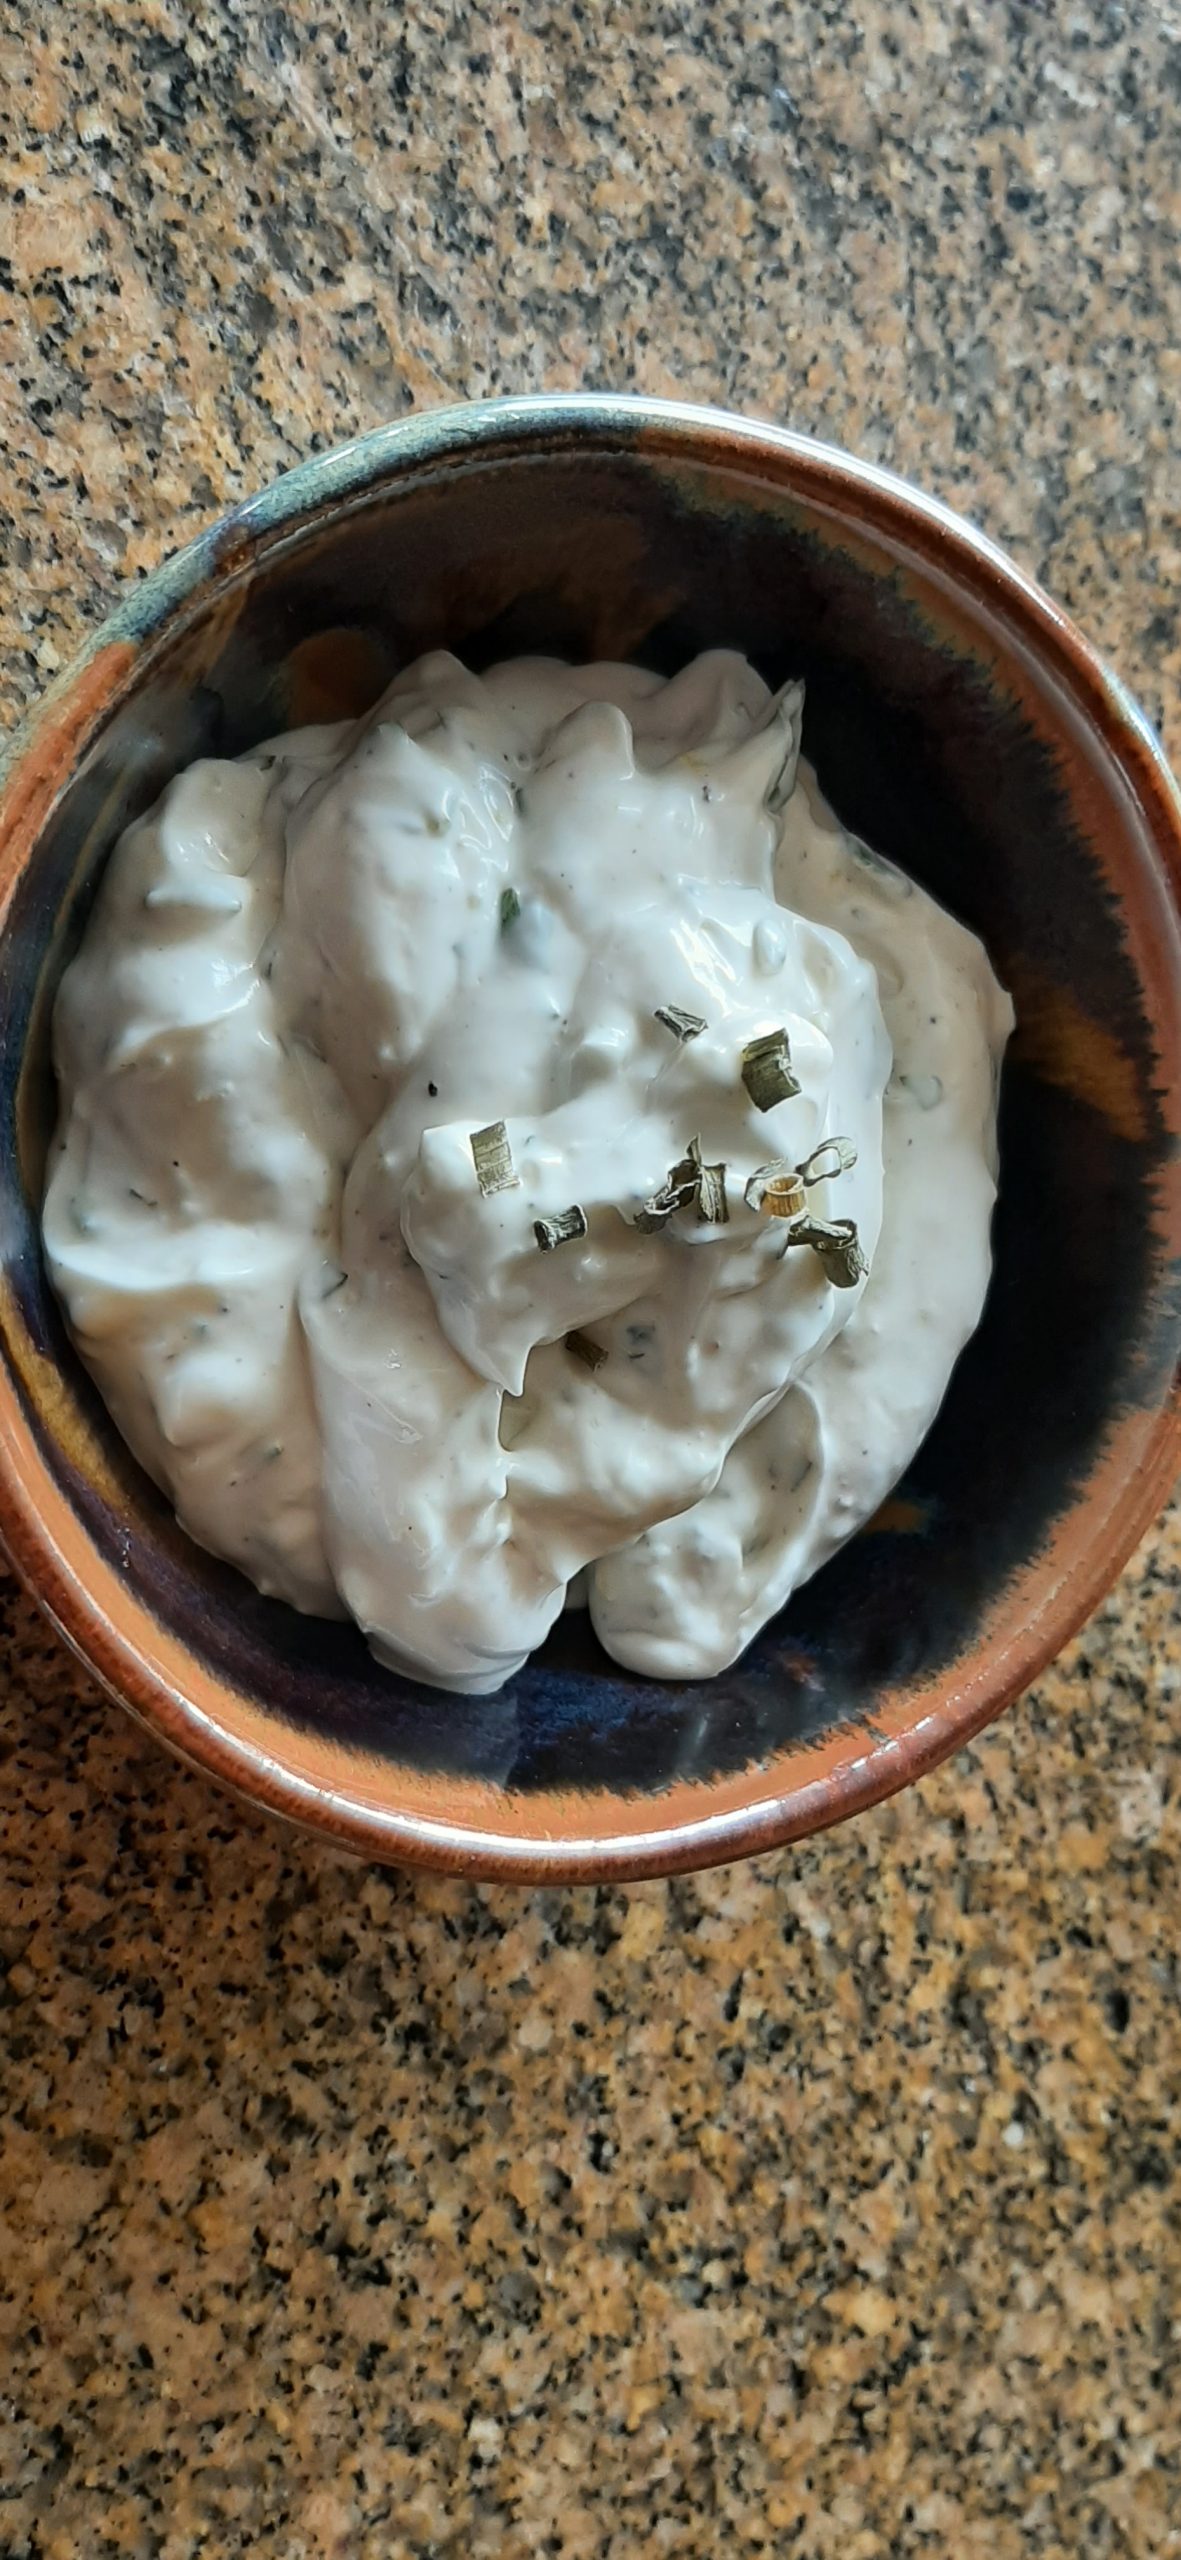
I made a promise to myself earlier this year (and no it was not a New Years resolution because I can never keep those) to serve fish at least once a week. And so far, I have been able to almost keep to the plan. But I would not be able to serve fish to Mr. C. as consistently as I have been without a little help from either tartar sauce or aioli. Because, let’s face it, some fish can be quite bland. And a terrific sauce can make all the difference. Especially since I like to prepare fish in as healthy a way as possible.
Now some might argue that even if I bake the fish, serving it with a side of tartar or aioli defeats the whole “healthy” purpose of the dish. Pish posh! Without the sauce the fish would not be eaten at all! So, a simple concession must not only be anticipated, but delivered.
The other day when it was deemed the perfect day for our weekly fish fix, Mr. C. stopped at our local Haggen grocery store, and brought home some fresh cod. Which BTW we both love. I fried it up (just a bit of oil in the pan and a simple coating) and served it with this aioli and life was good. Because this wonderful creamy sauce from Christina Tabaretti on the allrecipes.com site, proved to be absolutely fantastic! In fact, I could have eaten the whole bowlful before I ever placed it on the table. (Luckily for Andy I didn’t. But I could have!)
Anyway, if you want to totally over-achieve at serving a fantastic seafood dinner to your family or friends, I suggest you make this sauce. It is simply amazing. And very quick and easy to prepare.
Well, that’s all for today. I have a doctor’s appointment this afternoon in Seattle and Mr. C. has a gig at the Rockfish Grill in Anacortes this evening. So, we will be like ships passing in the night. Maybe we should throw out hooks and see if we catch anything?
Peace and love to all.
¼ tsp. dry mustard
¼ tsp. kosher salt
freshly ground black pepper
½ c. sour cream
½ c. mayonnaise
1 lemon, zested and juiced
1 T. olive oil
1 T. finely chopped fresh parsley
1 T. finely chopped chives
1 sm. clove garlic, finely minced
Place dry mustard, salt, and pepper in a small bowl. Add a bit of the sour cream and whisk until the mixture is a smooth paste. (Dry mustard tends to stay in lumps if added with all the other ingredients.) Add the remaining sour cream and all the rest of the ingredients. Whisk until well blended. Taste and adjust seasoning.
Refrigerate until ready to serve. Perfect with fried fish.
You know you are getting old when…., but wait, I better start at the beginning.
The other evening, I served French dip ground beef sandwiches made with Easy French Baguettes (recipe to be posted in the next couple of days), Caramelized Onions (recipe below), and Homemade Au Jus (recipe below). And there was much rejoicing at our dinner table. Because every part of the sandwich was delicious.
Earlier that day I realized that I didn’t have a bottle of Johnny’s French Dip Au Jus Sauce in my pantry. I asked Mr. C. if he would mind running to the store, and had received an affirmative answer to my request. Then it dawned on me. Wait! I make homemade salad dressings, spice blends, gravies, and other sauces of every imaginable variety, why have I never thought to make a homemade au jus? Well to be honest, I do make homemade au jus when I am making a true French dip sandwich. The kind that begins by roasting a hunk of beef and then using the drippings to make the au jus. But that recipe I had never gotten around to posting. But after researching homemade au jus recipes online, making the au jus, serving the au jus, and writing up most of this preface, I remembered that I already had a recipe for homemade au jus on this site.
Now granted, in self-publishing 2 cookbooks each containing over 400 recipes and having posted about 1,350 recipes on this blog, I should be able to forgive myself for forgetting about just one measly recipe. But why hadn’t I searched my own blog first in my desperate attempt to ferret out the secret to making homemade au jus? Thus, the realization that I am indeed getting old. And forgetful. And that maybe I should check my own recipes before automatically jumping on the internet for inspiration?! Grrrrrr!
But since the au jus I made the other evening (based on a mamalovesfood.com recipe I found on line) was so darn delicious, I decided to post this recipe too. It is very similar to the one already posted (Hamburger Dip Sandwiches with Onion and Dry Sherry Au Jus), but just enough different to give us all a choice. (If of course I remember to check my own site next time I want to make French dip sandwiches using hamburger instead of thinly sliced prime rib.) (I don’t hold out much hope!)
Anyway, I have forgiven myself and plan to just get on with life. Which means getting back to my current read – A Gentleman in Moscow by Amor Towles.
Thankfully I am only a little over half way through the book, because I don’t want this book to end. It is one of the best written and charming stories I have ever had the pleasure to read.
So, before I let you go, I am going to give you a short sample of Mr. Towles’s artistry.
(Paraphrased a tiny bit by me just for clarification.)
Mr. Towles description of jazz – “Jazz is a fistful of notes crammed higgledy-piggledy into thirty measures. And yet the art form can grow on a person. Jazz seems a naturally gregarious force – one that is a little unruly and prone to say the first thing that pops into its head. But generally, of good humor and friendly intent. In addition, jazz seems decidedly unconcerned with where it has been or where it is going. Exhibiting somehow simultaneously the confidence of the master and the inexperience of the apprentice. Was there any wonder that such an art had failed to originate in Europe?”
Every page of this book is filled with this kind of delightful prose. Exquisitely crafted, elegant, old-fashioned, and irresistible. A must read if there ever was one!
As always, peace and love to all.
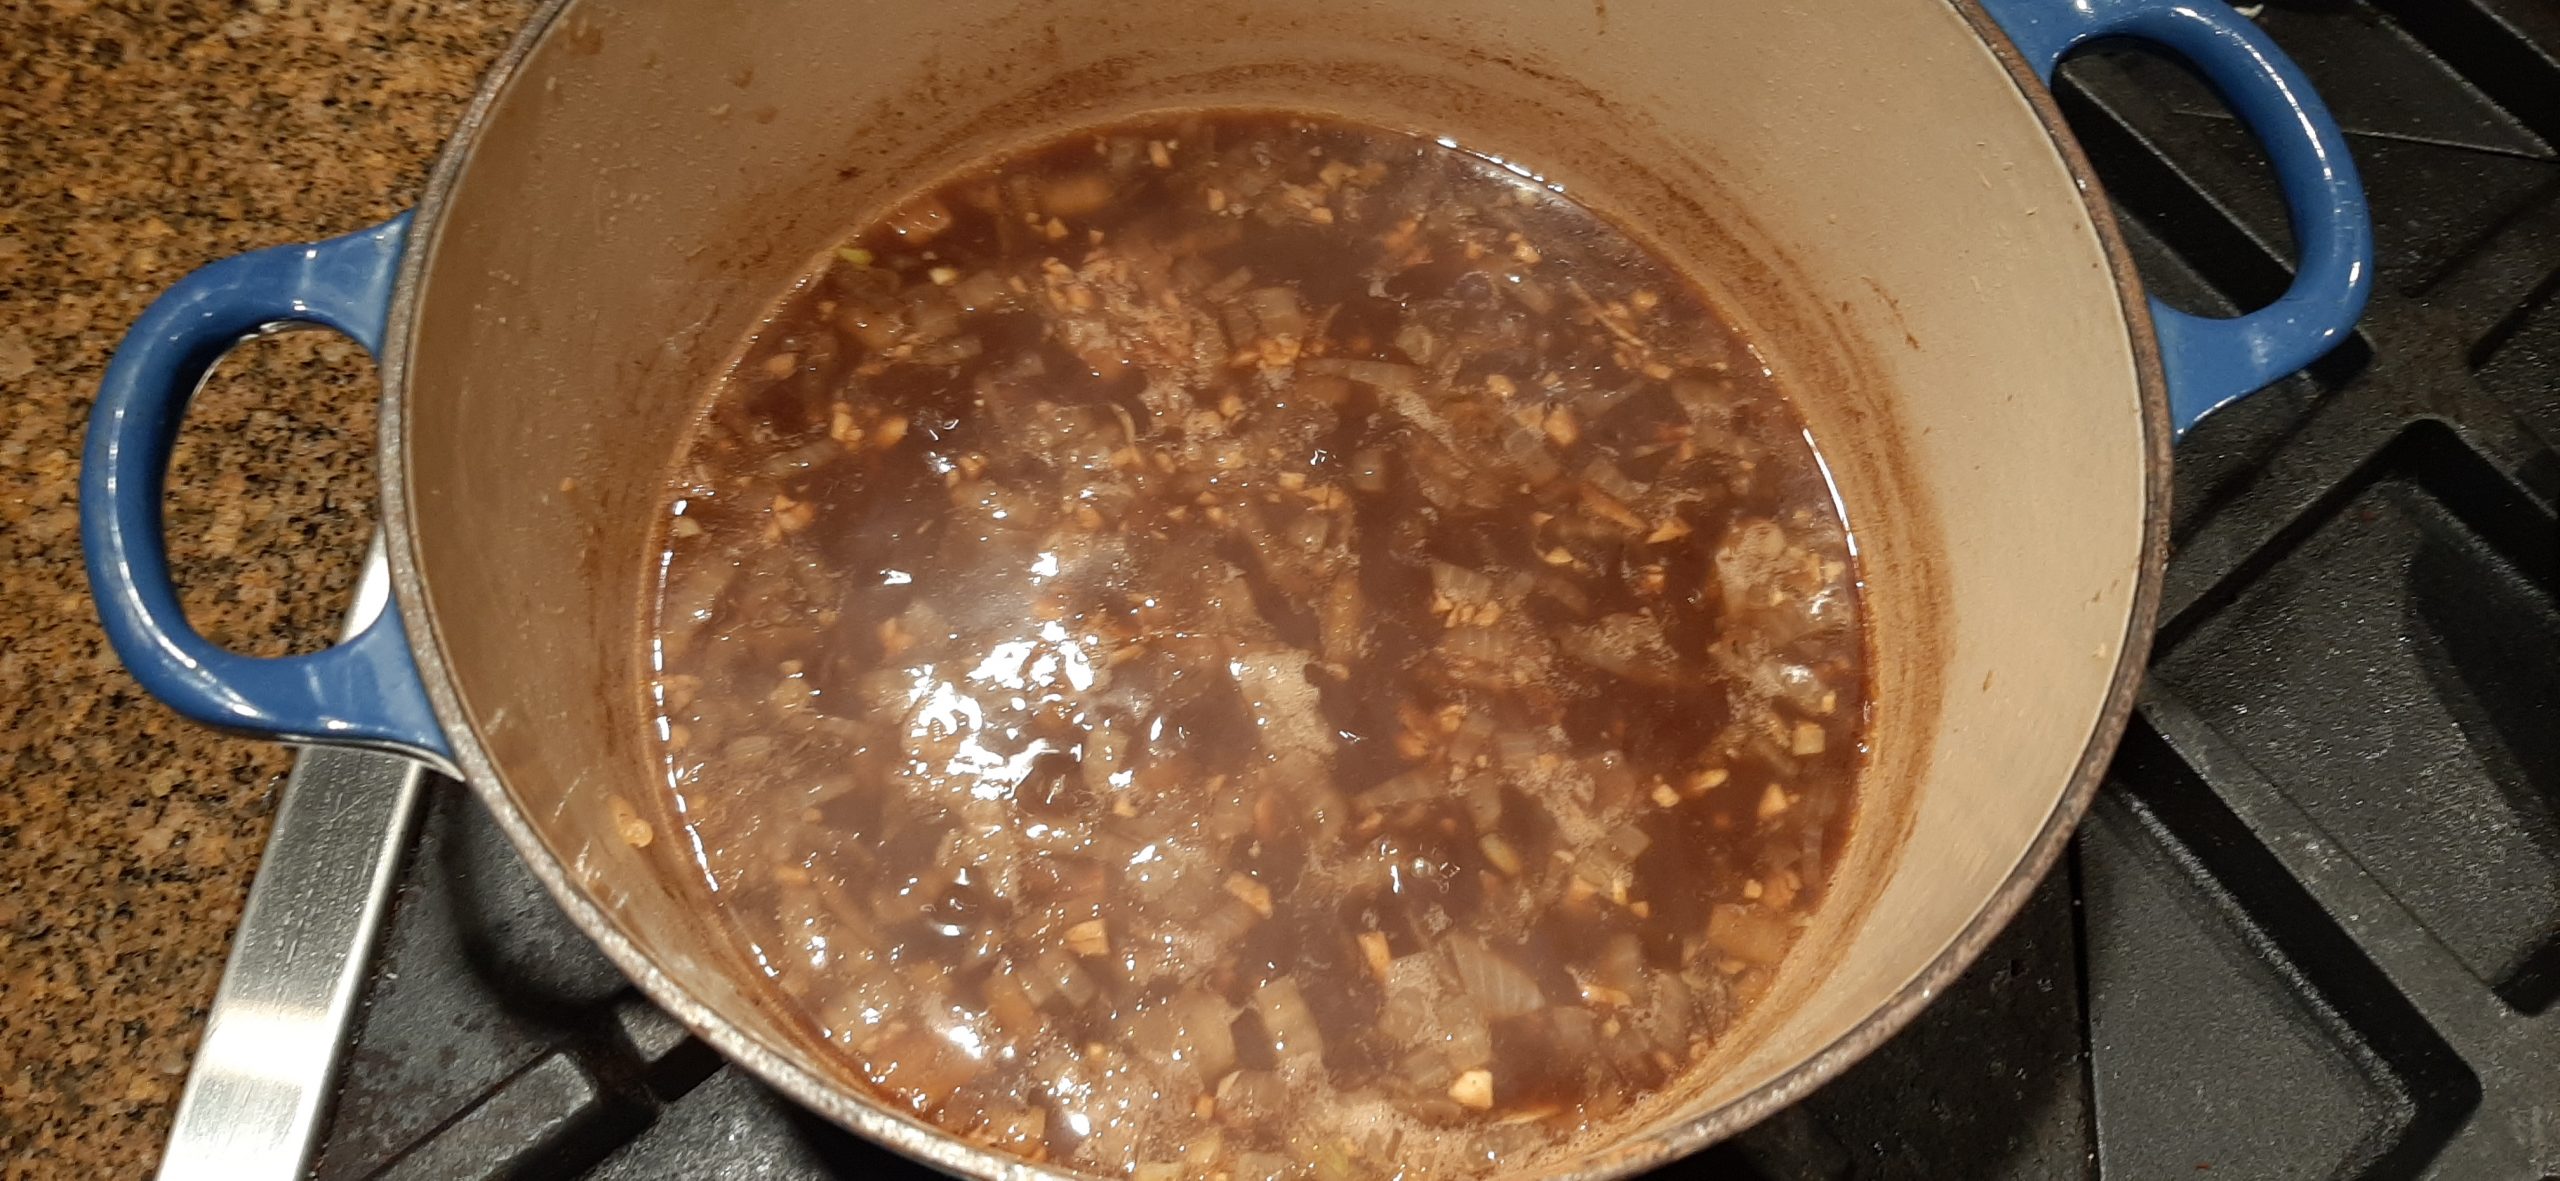
HOMEMADE AU JUS
1 T. extra virgin olive oil
½ c. chopped onion
2 garlic cloves, finely minced
¼ c. dry red or white wine (I’ve used both, and either one is great)
2 T. Worcestershire sauce
½ tsp. Kitchen Bouquet, or more to taste
freshly ground black pepper
4 c. water
2 T. Better Than Bouillon Beef base, or more to taste
Heat the olive oil in a heavy saucepan. Add the onion and cook until soft. Add the garlic and cook for a minute or two more.
Deglaze the pan with wine, then add the Worcestershire sauce, Kitchen Bouquet, and black pepper. Cook for another minute, stirring constantly.
Add water and beef base; bring to a light boil. Reduce heat and simmer uncovered for about 30 minutes.
Can be made ahead and warmed just before serving.
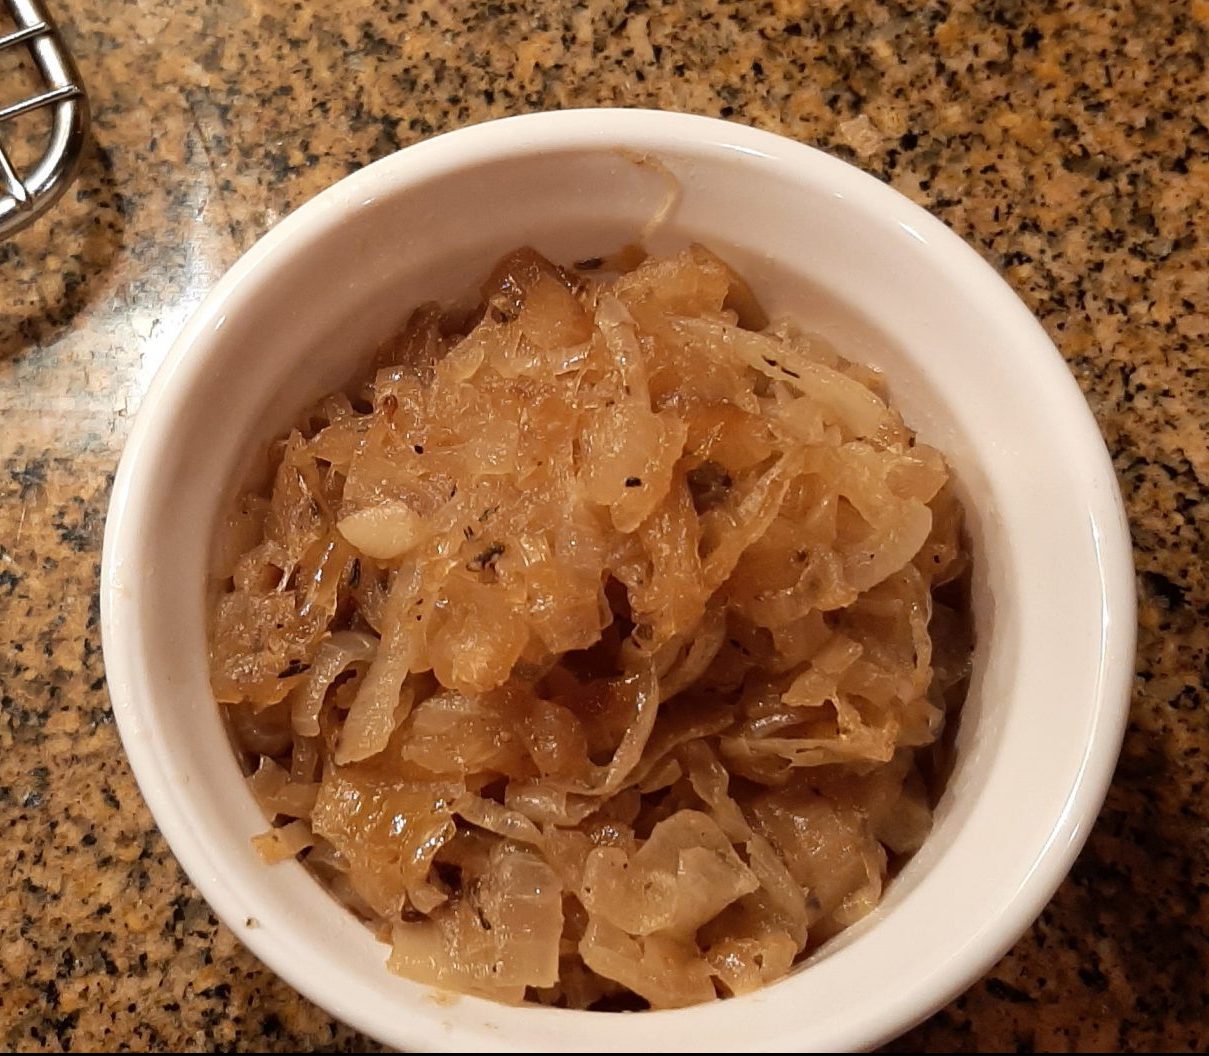
CARAMELIZED ONIONS
1 T. extra virgin olive oil
1 T. unsalted butter
1 lg. yellow onion, halved and thinly sliced
pinch kosher salt
freshly ground black pepper
pinch dried thyme leaves
Heat the olive oil and butter in a heavy saucepan over medium heat. Add the onion and cook, stirring occasionally, until soft and caramelized, about 30 minutes. Season with salt, pepper, and thyme and continue to cook for 3 minutes.
Caramelized onions can be made ahead and refrigerated. Warm before serving.
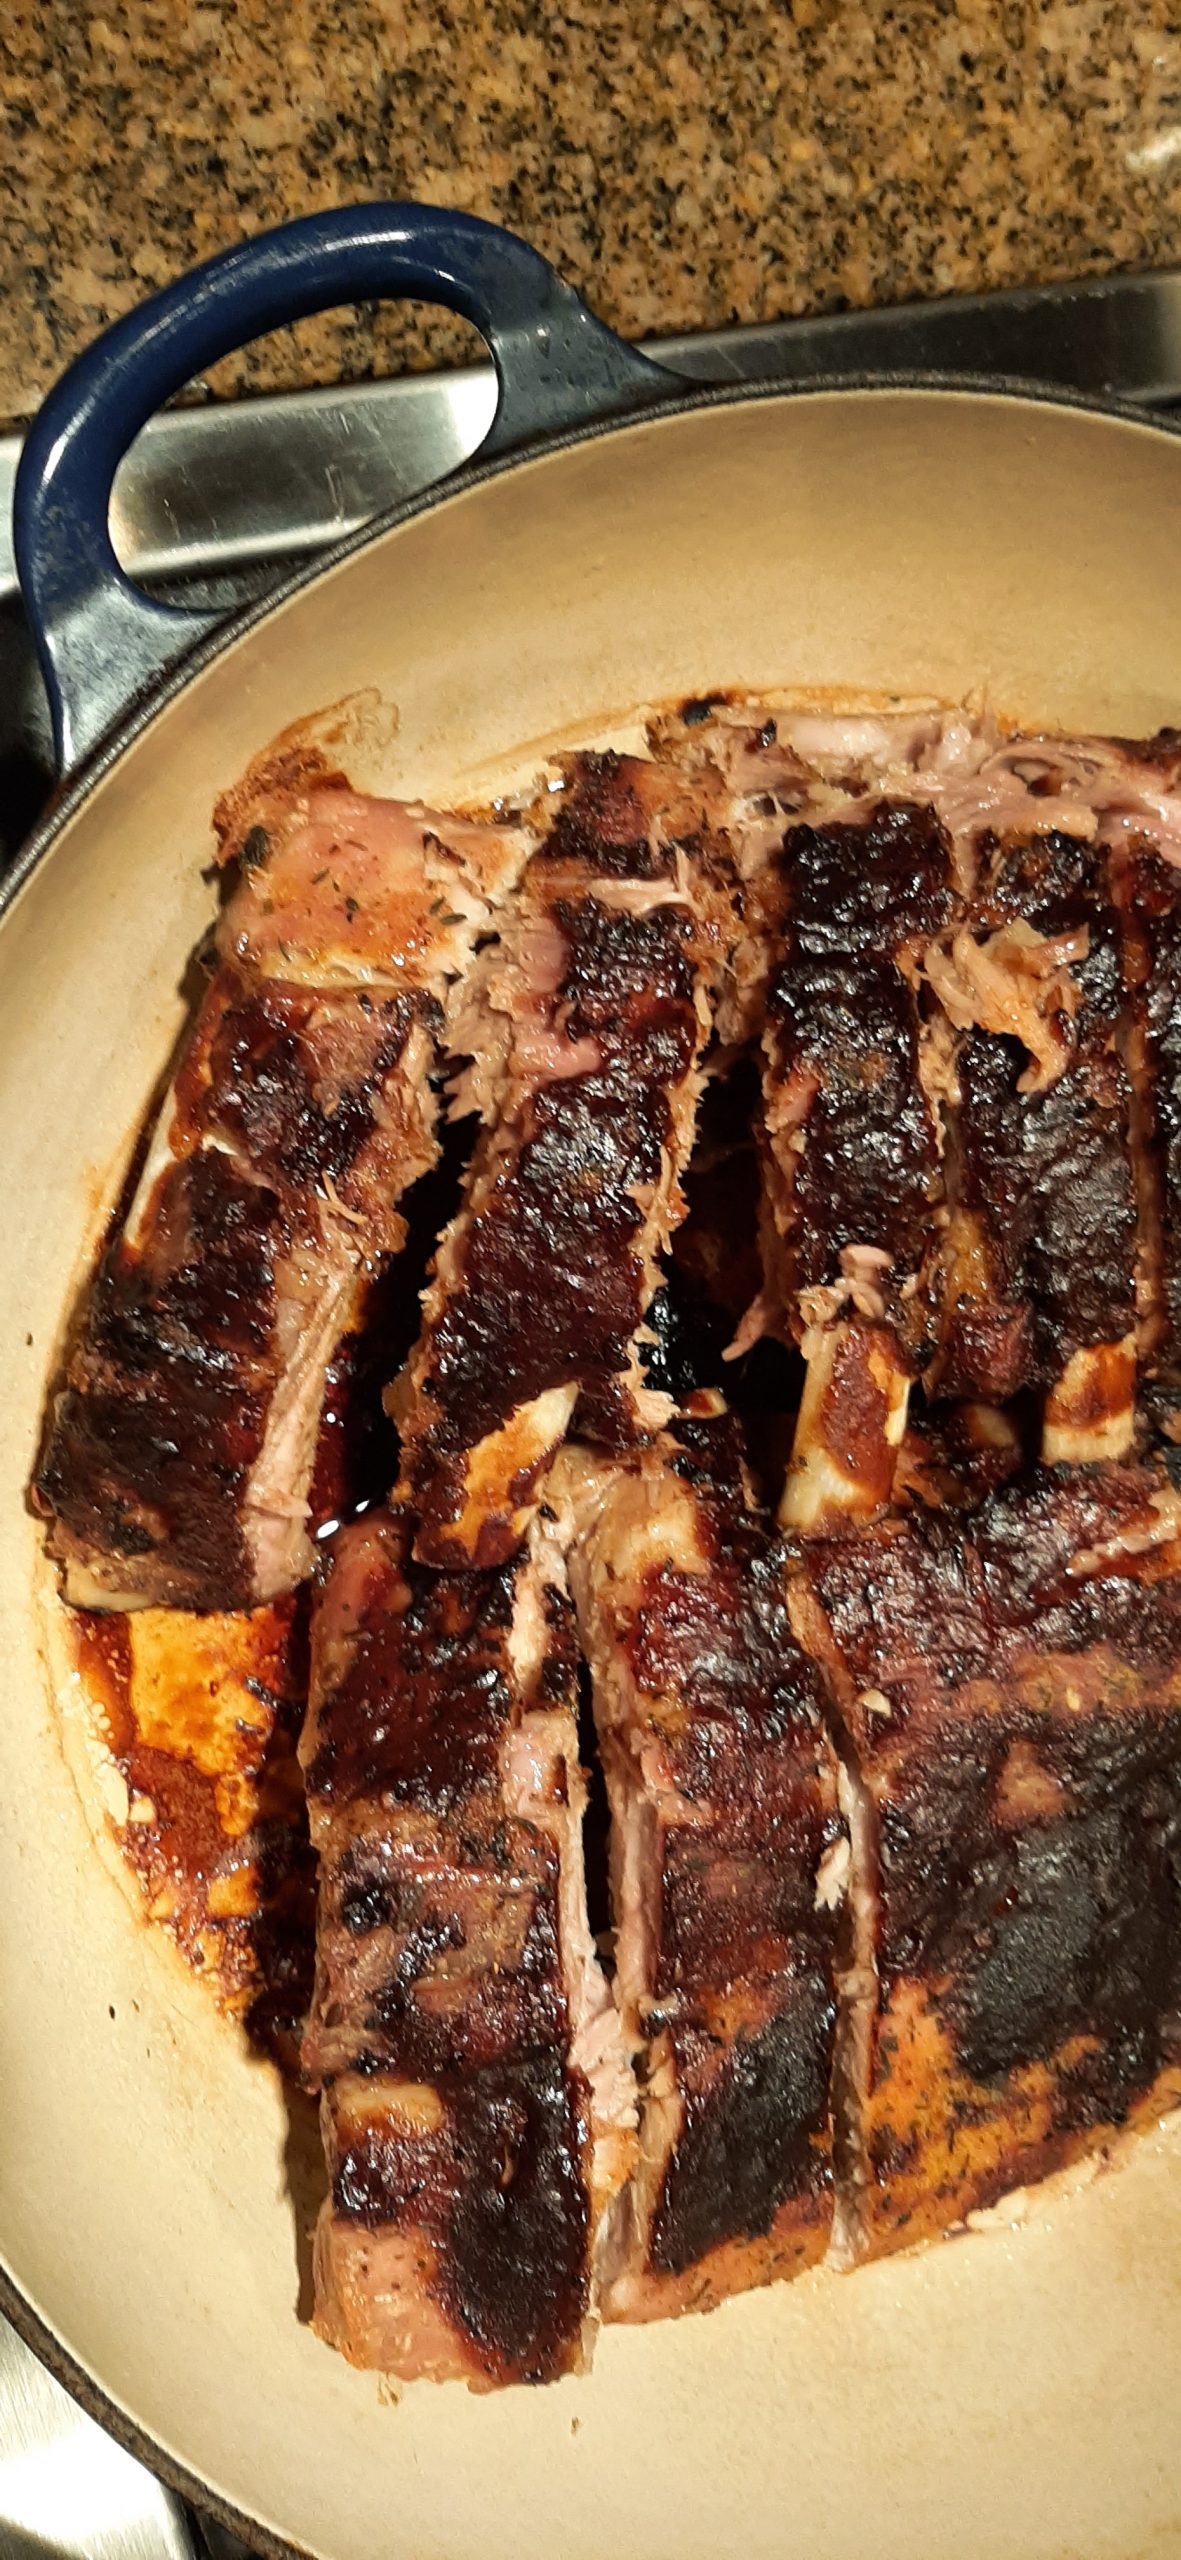
Sometimes, there is just nothin’ will do except some BBQ’d ribs. But it is winter, and it is cold outside, and I really didn’t want Mr. C. to have to get the smoker going or fire up the barbeque. Even though both the smoker and the barbecue are under cover, it’s still not pleasant being outside.
So, I came up with this recipe and darn, the ribs were really delicious. The meat literally fell off the bones, and was juicy, tender, and ever so succulent. And this way to bake ribs had been super easy. No fuss, no muss, and just good eating.
So, if you too love ribs but aren’t excited about spending a lot of time in the making, give this recipe a try. The ribs are seriously yum.
Now if you do have time, I suggest you make your own BBQ sauce. Because, well, there is nothing on the market better than a really good homemade BBQ sauce. And because I am feeling charitable today, I’m going to provide you with my 2 favorite recipes. Please note, if you are trying to stay away from sugar, the second recipe BBQ Sauce with Monk Fruit Sweetener is sugar free.
Well, it’s kind of pretty outside right now. Lots of clouds, but the sun is setting so there is some pink in the sky too. Perhaps since it’s getting on to dinner time, I should think about making like a cook. I’m pretty sure Mr. C. would agree wholeheartedly. So, bye for now.
Peace and love to all.
1 (3 lb.) rack of pork loin back ribs* or spareribs
1 T. rib rub (see recipe below)
2 tsp. Montreal Steak Seasoning
1 tsp. granulated garlic
BBQ sauce
Place ribs meaty side up in a covered baking pan. (Or use aluminum foil.) (I use my Le Creuset Braiser.)
If the rack is too long for your pan, cut the rack in half. Evenly sprinkle the meat with the rib rub, Montreal Steak Seasoning, and granulated garlic.
Cover the pan and bake in a pre-heated 300-degree oven for 2 hours. After 2 hours, check to see if the meat is tender and falling off the bones. If not, bake for another half hour.
When the meat is tender, raise the temperature to 350-degrees, remove the lid or foil and baste with barbecue sauce and place in oven for 20 minutes.
Remove from oven, cut the ribs between the bones, and serve with additional BBQ sauce.
*Pork loin back ribs are cut from the top part of the pig’s rib cage, just below the loin muscle. These ribs have meat both in between and on top of the rib bones, making them meatier than spareribs.
RIB RUB:
2 T. paprika
2 tsp. freshly ground black pepper
2 T. kosher salt
2 tsp. granulated garlic
1 tsp. cayenne
1 tsp. ancho chili powder (found in most upscale grocery stores in bulk)
2 tsp. dried oregano
2 tsp. dried thyme
Combine all ingredients in an airtight container. Store at room temperature.
BOURBON BBQ SAUCE
¼ c. unsalted butter
¼ c. minced onion
3 cloves garlic, minced
¼ c. brown sugar
2 tsp. whole grain mustard
1 c. ketchup
1/3 c. Worcestershire sauce
¼ c. fresh lemon juice
¼ tsp. hot sauce, or to taste
¼ tsp. cayenne
2 T. bourbon
Melt butter in a medium sized covered saucepan. Sauté onion until translucent; add garlic and cook until garlic releases its aroma, about 1 minute. Add remaining ingredients, bring to a boil, reduce heat, cover pan, and simmer gently for 30 to 60 minutes, stirring occasionally. Basically, cook the sauce until you reach desired thickness. (Sauce will thicken as it simmers. If the sauce is still too thin after 60 minutes, remove the lid. But be warned – simmer at a low temperature or you will have BBQ sauce all over you and your kitchen!) Serve sauce warm or at room temperature.
BBQ SAUCE WITH MONK FRUIT SWEETENER
2 T. extra virgin olive oil
½ c. finely chopped onion
3 garlic cloves, finely minced
1 (6 oz.) can tomato paste
¾ c. water
1 T. monk fruit sweetener (I use the “golden” variety)
1 T. apple cider vinegar, or more to taste
3 T. Worcestershire Sauce
¼ tsp. hot sauce, or to taste (I use Frank’s RedHot)
1 tsp. smoked paprika
½ tsp. seasoned salt
freshly ground black pepper
tiny pinch cayenne pepper
tiny pinch ground cloves
Heat the olive oil in a small, covered saucepan. Sauté the onion until translucent. Add the garlic and cook for 1 minute. Add the remaining ingredients. Bring to a boil, reduce heat, cover, and simmer for 30 minutes. Taste and adjust seasoning.
So, as they say, luck favors the prepared. And yesterday I was half-way prepared to make these ribs because I had leftover rib rub. Of course, I still needed to make the BBQ sauce, but it really goes together quickly. And when you consider how stinkin’ easy these ribs are to build from start to finish, well, it left me plenty of time (and energy) to make the other components of a dinner for four. And seriously, if you have a bottled BBQ sauce that sends your taste buds to their happy place, use it. Same with a rib rub. If there is a commercial product that you adore, I say use whatever works. However, I really love the fairly healthy BBQ sauce I make myself. (Less sugar than most.) (Find recipe below.) And I love this rib rub (recipe below too) because, well, it brings a whole lot of savory to the rather bland flavor of the pork. Plus, it works perfectly with this BBQ sauce. Who could ask for anything more? Who could ask – for – anything more! (Thank you George and Ira Gershwin, you exciting melody, lyric, and “rhythm” geniuses that you were.)
Now, this is not a dish to whip together after a long day at work. Not if you have a hungry family asking every 5 minutes what’s for dinner and proclaiming that starvation is imminent. This is a Saturday or Sunday evening feast for those of you who get home from work after 3:00 pm. Because there is a long, slow roast required to tenderize and season the meat.
But for a weekend, these ribs are as easy as it gets. Throw however many potatoes you need to feed your starving hoard right in the oven with the ribs, cut up some lettuce for a salad, and you have dinner on the table that will please even your pickiest of eaters. Because really, who doesn’t love ribs? And baked potatoes? And salad? Well, maybe your kidlets won’t be as excited about the salad part, but the rest they will love. (And please don’t worry too much about the salad part. By the time they’re adults, they’ll be enjoying salad too.)
Anyway, this is a simple recipe for a really delicious entrée featuring boneless country style pork ribs. Which BTW, are fairly inexpensive for the amount of lean protein packed into such a delicious package. So, I do hope you enjoy these ribs as much as we do.
And as always, stay happy, stay healthy, and have fun in your kitchen.
Peace and love to all.
1 T. extra virgin olive oil
1 T. Ancho Chili Rib Rub (see recipe below)
3-4 lbs. boneless country-style pork ribs
½ c. Savory Bourbon BBQ Sauce (see recipe below)
Preheat oven to 325-degrees. Coat bottom of a sided sheet pan with olive oil. Lightly sprinkle all sides of ribs with rib rub, and place ribs in a single layer on prepared sheet pan. Cover tightly with aluminum foil and bake in preheated oven until ribs are tender and can be pulled apart with a fork, about 2½ hours.
Remove ribs from oven and increase oven temperature to 450-degrees. Uncover ribs, and drain any accumulated juices from sheet pan. Baste ribs with about ½ of the BBQ sauce.
Bake ribs uncovered, until ribs are very tender, and the sauce has become sticky and slightly glazed on ribs, about 15 minutes. Serve with the rest of the sauce.
ANCHO CHILI RIB RUB
2 T. paprika
2 T. kosher salt
2 tsp. freshly ground black pepper
2 tsp. granulated garlic
2 tsp. dried oregano
2 tsp. dried thyme
1 tsp. granulated onion
1 tsp. ancho chili powder
½ tsp. cayenne
Combine all ingredients. Store in an airtight container
SAVORY BOURBON BBQ SAUCE
½ c. (1 stick) unsalted butter
1 c. minced onion
6 cloves garlic, minced
¼ c. brown sugar
4 tsp. whole grain Dijon mustard
2 (8-oz.) cans tomato sauce
½ c. Worcestershire sauce
½ c. fresh lemon juice
1 tsp. hot sauce (I use Frank’s RedHot)
¼ c. bourbon
kosher salt, if needed
Melt butter in a medium sized covered saucepan. Sauté onion until translucent; add garlic and cook until garlic releases its aroma, about 1 minute. Add remaining ingredients, bring to a boil, reduce heat, cover pan, and simmer gently for 60 minutes, stirring occasionally. Basically, cook the sauce until it reaches desired thickness. (Sauce will thicken as it simmers. If the sauce is still too thin after 60 minutes, remove the lid. But be warned – simmer at a very low temperature or you will have BBQ sauce all over you and your kitchen! Add salt if required.)
There are just those times when the only thing that will do is some good old fashioned BBQ sauce. Like with ribs for example. But most BBQ sauces have sugar in them. At least the good ones do! Like my Bourbon BBQ Sauce, for example. But with my new regimen, I really need to stay away from sugar as much as possible. So, that means – build your own or go without! And I refuse to go without!
So, when I recently served ribs, I made this sauce. It was very tasty. And even though I was using monk fruit sweetener which contains no sugar, I still only used 1 tablespoon.
After our rib dinner I had a bit of BBQ sauce left. So, when I made 2 small meatloaves to take with us on our recent trailer trip, instead of topping the meatloaves with my usual combination of brown sugar and ketchup, I used the leftover sauce. Wonderful. Didn’t miss the usual topping in the least.
If you too are trying to stay away from sugar, I suggest you give this recipe a try. Easy to build and no special ingredients required. And really, what kind of life would it be without BBQ sauce?
As always, peace and love to all.
2 T. extra virgin olive oil
½ c. finely chopped onion
3 garlic cloves, finely minced
1 (6 oz.) can tomato paste
¾ c. water
1 T. monk fruit sweetener (I use the “golden” variety)
1 T. apple cider vinegar, or more to taste
3 T. Worcestershire Sauce
¼ tsp. hot sauce, or to taste (I use Frank’s RedHot)
1 tsp. smoked paprika
½ tsp. seasoned salt (I use my homemade version – see recipe below)
freshly ground black pepper
tiny pinch cayenne pepper
tiny pinch ground cloves
Heat the olive oil in a small, covered saucepan. Sauté the onion until translucent. Add the garlic and cook for 1 minute. Add the remaining ingredients. Bring to a boil, reduce heat, cover, and simmer for 30 minutes. Taste and adjust seasoning.
SEASONED SALT
½ c. kosher salt, run through a spice grinder to break down the crystals a bit
4 tsp. finely ground black pepper (I buy cheap finely ground black pepper just for this recipe)
4 tsp. paprika
4 tsp. granulated garlic
4 tsp. granulated onion
½ tsp. chili powder
½ tsp. celery salt
½ tsp. granulated sugar
tiny pinch cayenne pepper
tiny pinch ground cinnamon
Whisk all together and store in an airtight container.