Category Archives: ITALIAN CUISINE

PERFECTLY SEASONED SPAGHETTI (OR PASTA SHAPE OF CHOICE)

So, this is not a low-fat, low calorie pasta recipe. This is an in-your-face, decadent, and indulgent way to appreciate one of the greatest culinary gifts ever presented to mankind. Pasta.

What you perhaps don’t know about me, is that I am a devoted fan of all things pasta. And although I mainly try to keep my recipes as low-fat and low-calorie as reasonable, this is not one of  them. This is the brain child of our dear friend Jim. Who BTW is a wonderful cook and could probably make the rusted bumper of a 1954 chevy taste good. Not kidding!

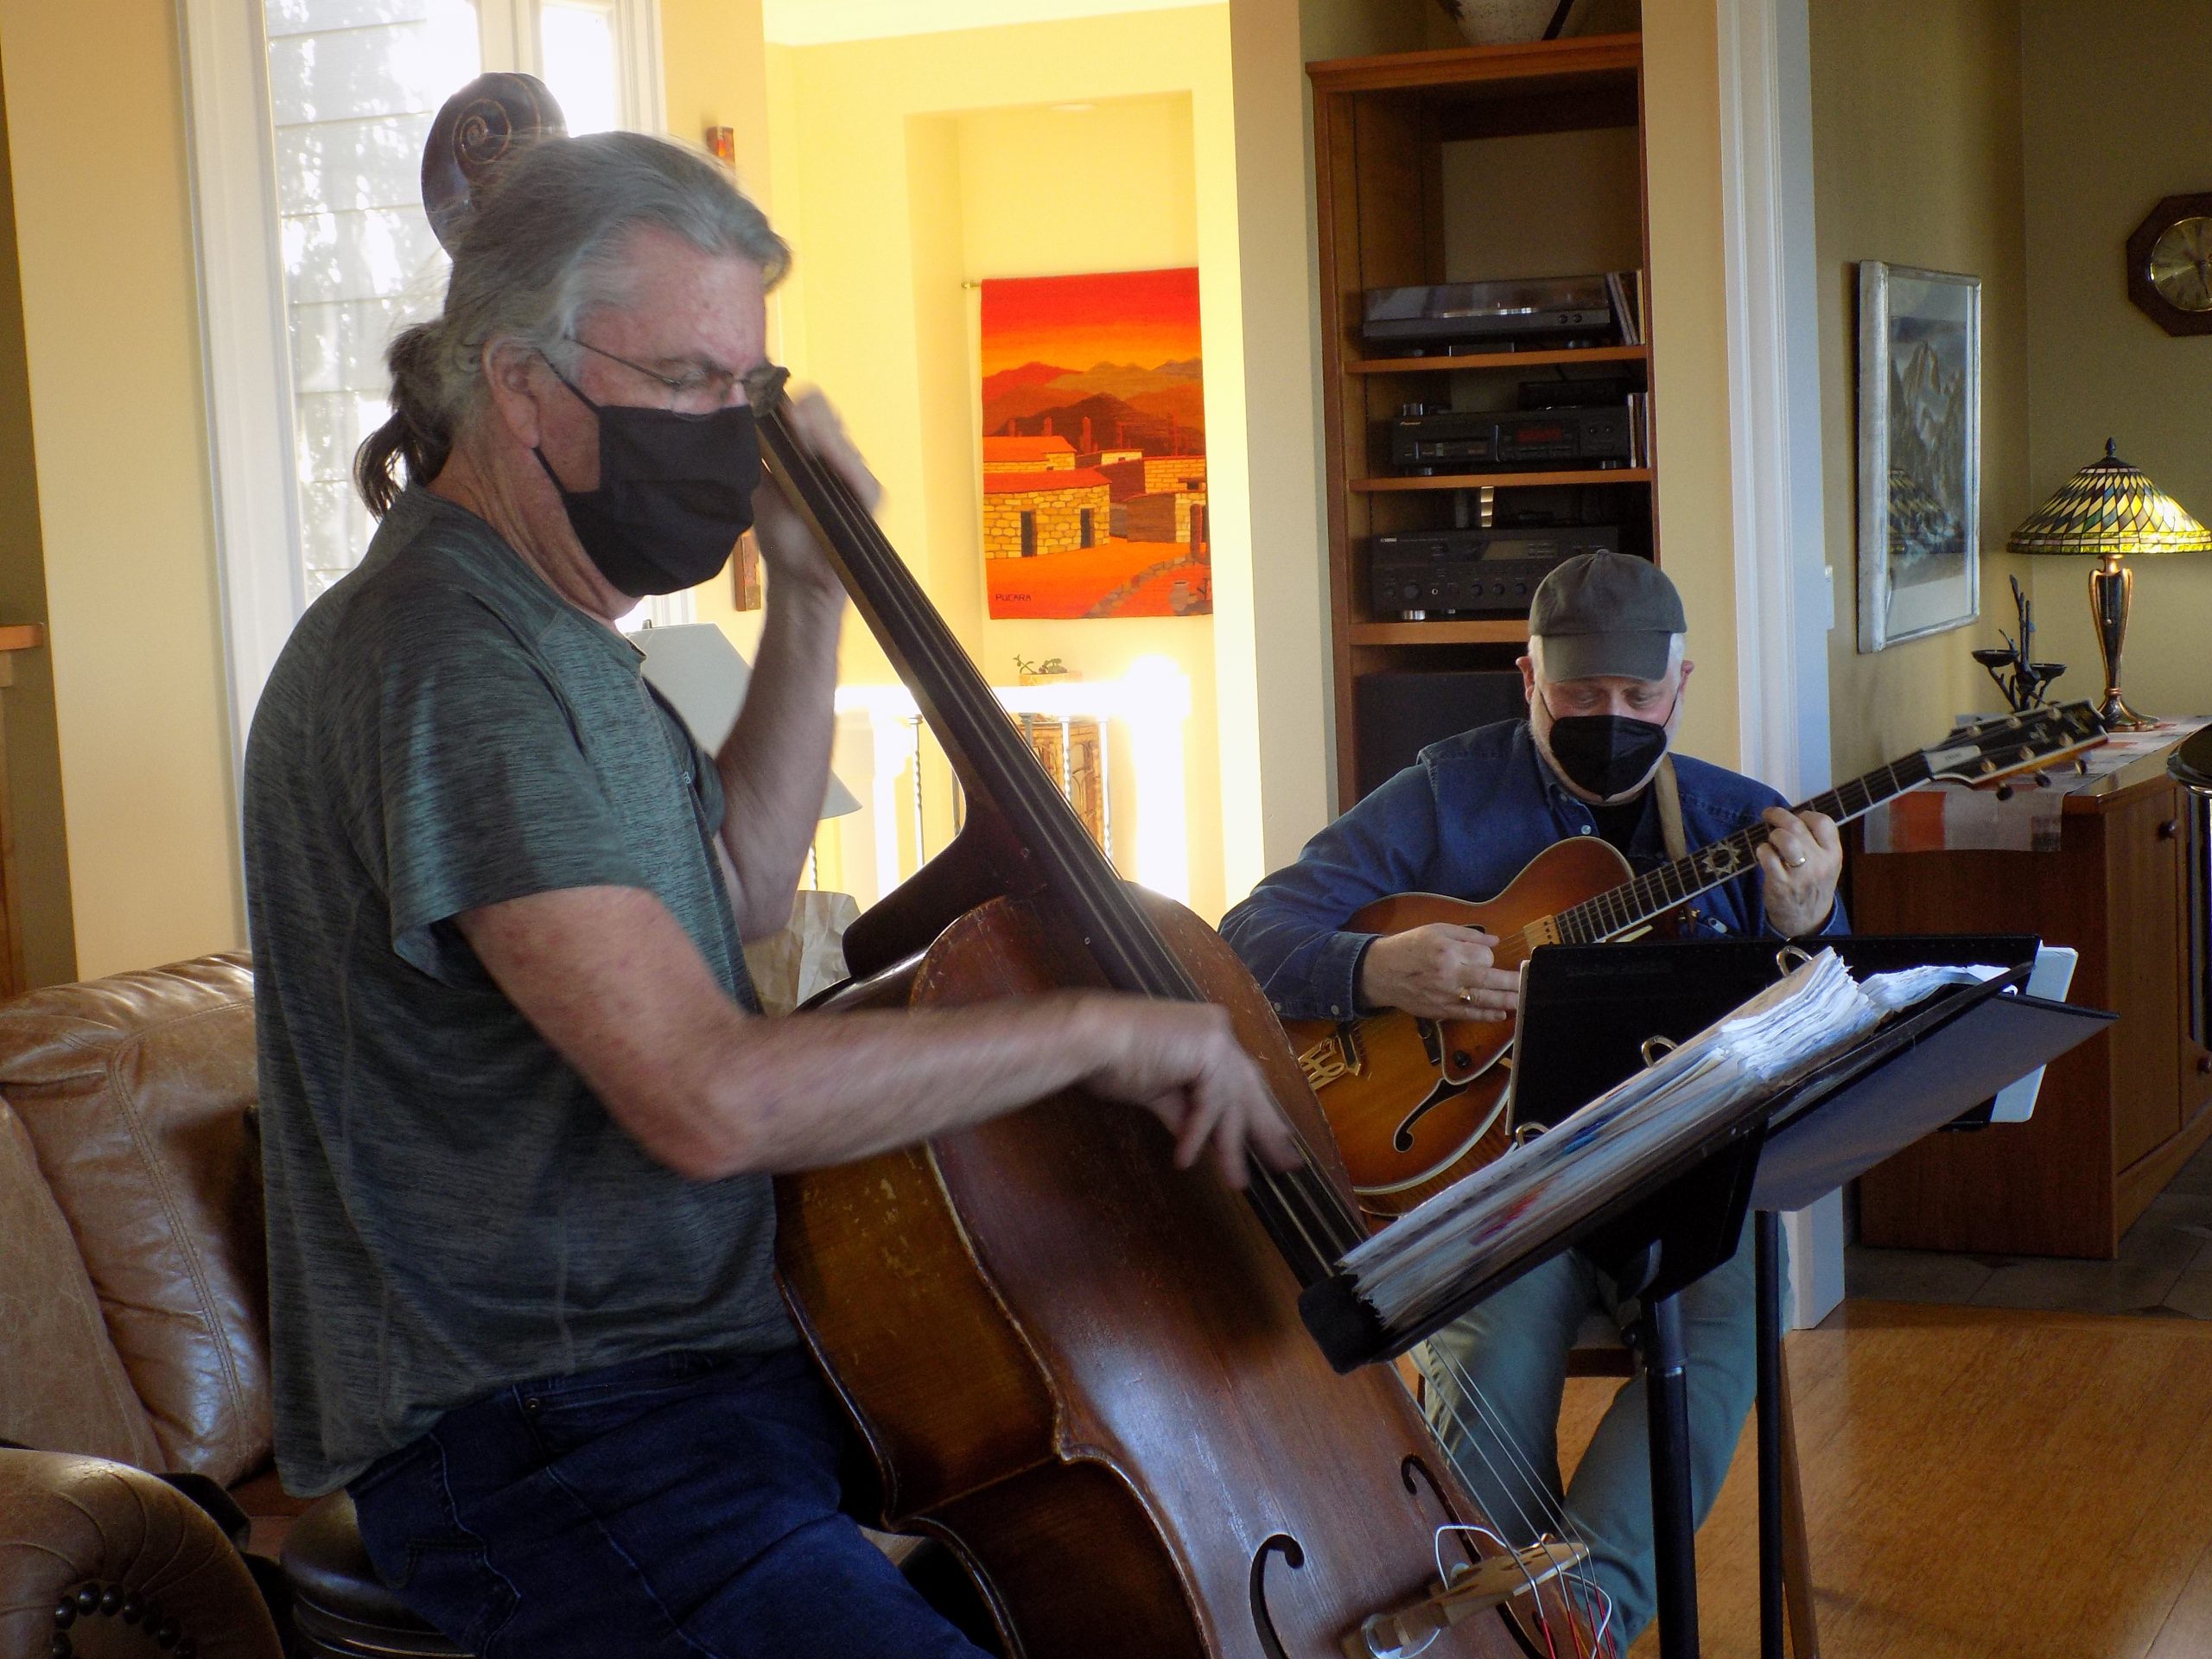
The other evening, Mr. C. and I had the opportunity to help out in Jim and Margo’s kitchen for an impromptu dinner where all 4 of us (Jim, Margo, Mr. C., and I) were assigned drink and food preparation tasks. (BTW, this was a fun way to get dinner on the table.)

Under Jim’s direction, I was put in charge of the pasta. And I must say, I was a bit aghast at the ingredient list. Wait! That’s a lot of butter and olive oil you’re telling me to throw in the al dente pasta. And 2 tablespoons of granulated garlic? Holy cow!

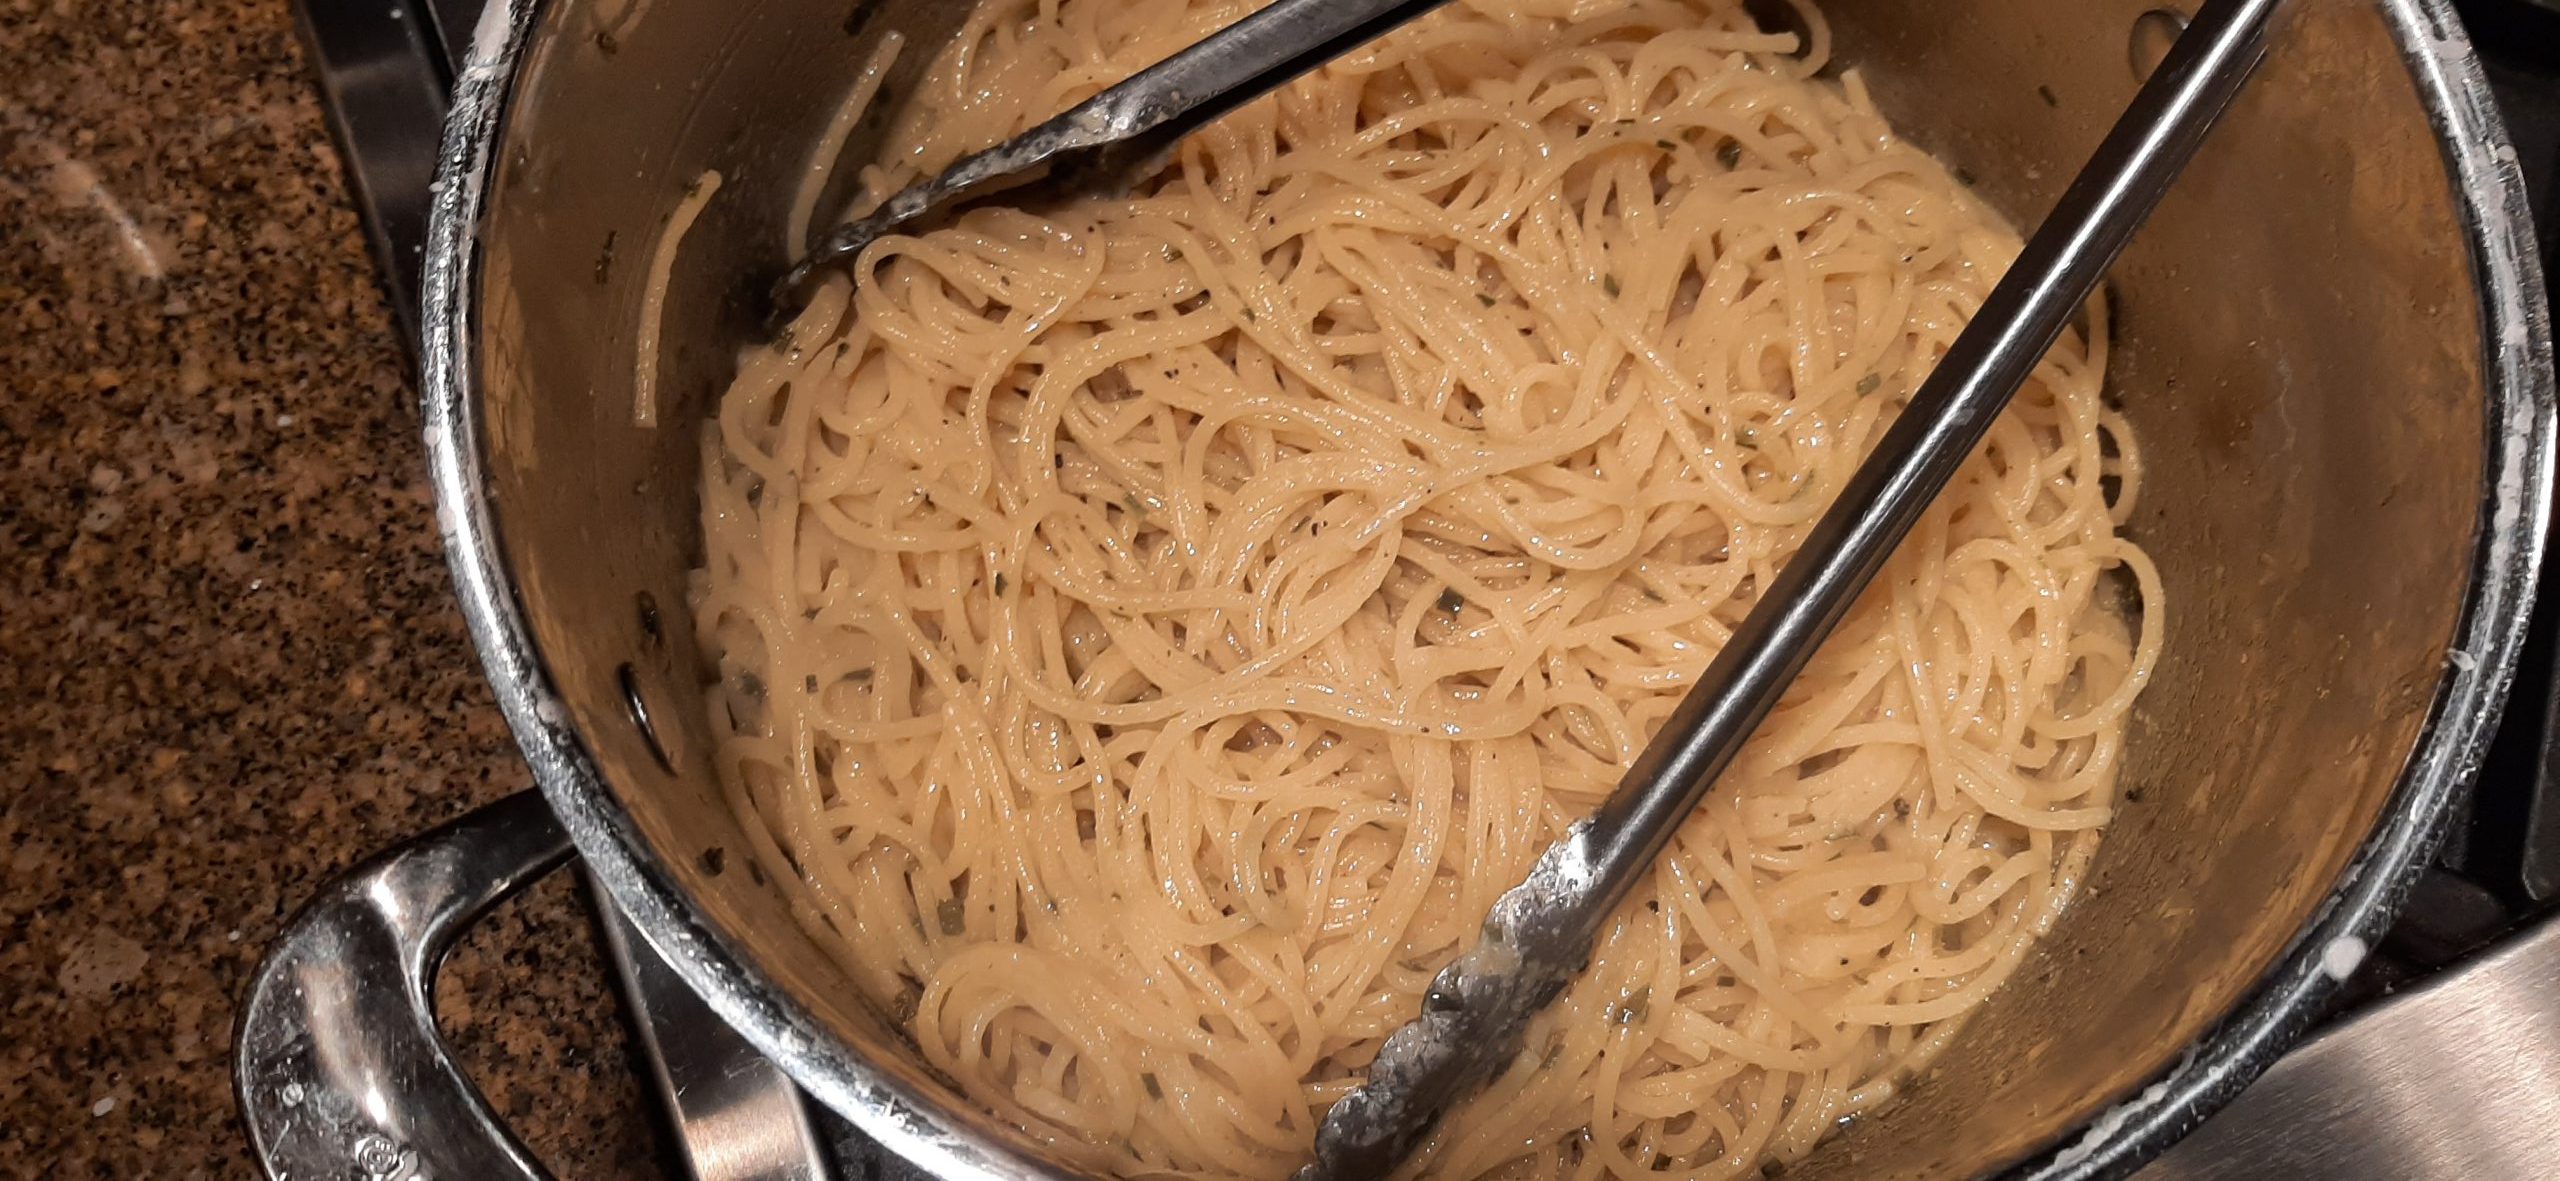
But being the good little minion that I am, I followed his instructions to a tee. And the result? Amazing pasta. Not only did I love the pasta with sauce on it, but I went back for seconds for just the pasta alone. It was just that delicious.

Now of course, it helped that the pasta used for this dish was made in Italy. Italian pasta typically has strict governmental quality and control standards. And it is made with 100% durum wheat (semolina flour), a hard grain. Hard grain contains much more fiber, more protein and also carotenoids (recognized by the fact that it is more yellow than other grains). Durum wheat also retains more starch during cooking which is essential for producing excellent al dente pasta. If the pasta releases starch too easily, it quickly becomes a sticky mess. So, pasta made in Italy is not only higher in protein, but it stands up better to submersion in boiling water.

So, whenever possible, bring home pasta made in Italy. And never, ever cook pasta more than al dente. According to Barilla, “Cooking pasta perfectly ‘al dente’ (still slightly firm) allows you to reap the full benefits of pasta’s already strong ability to increase satiety, delaying hunger pangs and providing fuel for working muscles long after meals.” “Plus, al dente pasta just plain tastes better.” (That quote is attributed to Patti Carr!) And as written up in the health section of U.S. News, “Prepare your pasta like they do in the Mediterranean – al dente, which means neither too hard nor too soft. When cooked correctly, pasta will have a lower glycemic index than when it’s cooked to be soft or mushy. The average GI of al dente penne pasta is 50, which is even lower than the GI of oatmeal or many whole-grain breakfast cereals. A lower GI can help keep blood sugar levels stable so you will stay fuller longer.”

Well, I’ve said all I’m going to say about pasta and this recipe. If you can’t conclude for yourself that pasta prepared this way is a treat, then I won’t bother you any further with additional information.

And as always, thank you Jim and Margo for your friendship and love, and for all the wonderful food we have shared together throughout the many years we have known each other. May there be many more good times to come.

And as always, peace and love to all.

1 lb. spaghetti (preferably made in Italy with 100% durum wheat semolina – organic Garofalo brand from Costco is fabulous)

2 T. kosher or coarse sea salt

¼ c. (½ stick) unsalted butter

¼ c. extra virgin olive oil

1-2 T. granulated garlic (I used a scant 2 tablespoons last evening)

2 T. freeze dried chives

1 c. pasta cooking water, or more as needed (I used about a cup and a half)

freshly ground black pepper, if desired

Bring a pot of water to a boil. Not too much water. Add the salt and pasta. Cook the spaghetti at a low boil, stirring periodically with a pair of tongs, until almost to the al dente stage. (Err on the side of not enough cooking time rather than too much.)

Drain the pasta, keeping at least 2 cups of pasta water in reserve.

Add the drained spaghetti back to the pot. Turn the burner on low and stir in the butter, olive oil, granulated garlic, and dried chives. Cook until the butter is melted. Then add a cup of the pasta water and cook until most of the water is gone. Taste the pasta. It should now be at a perfect al dente. If you prefer a moister pasta, add more pasta cooking water, a couple of tablespoons at a time.  

Please note: No additional salt should be required because of the amount of salted water in which the pasta was cooked. If you are a black pepper fan, go ahead and add as much as you like.

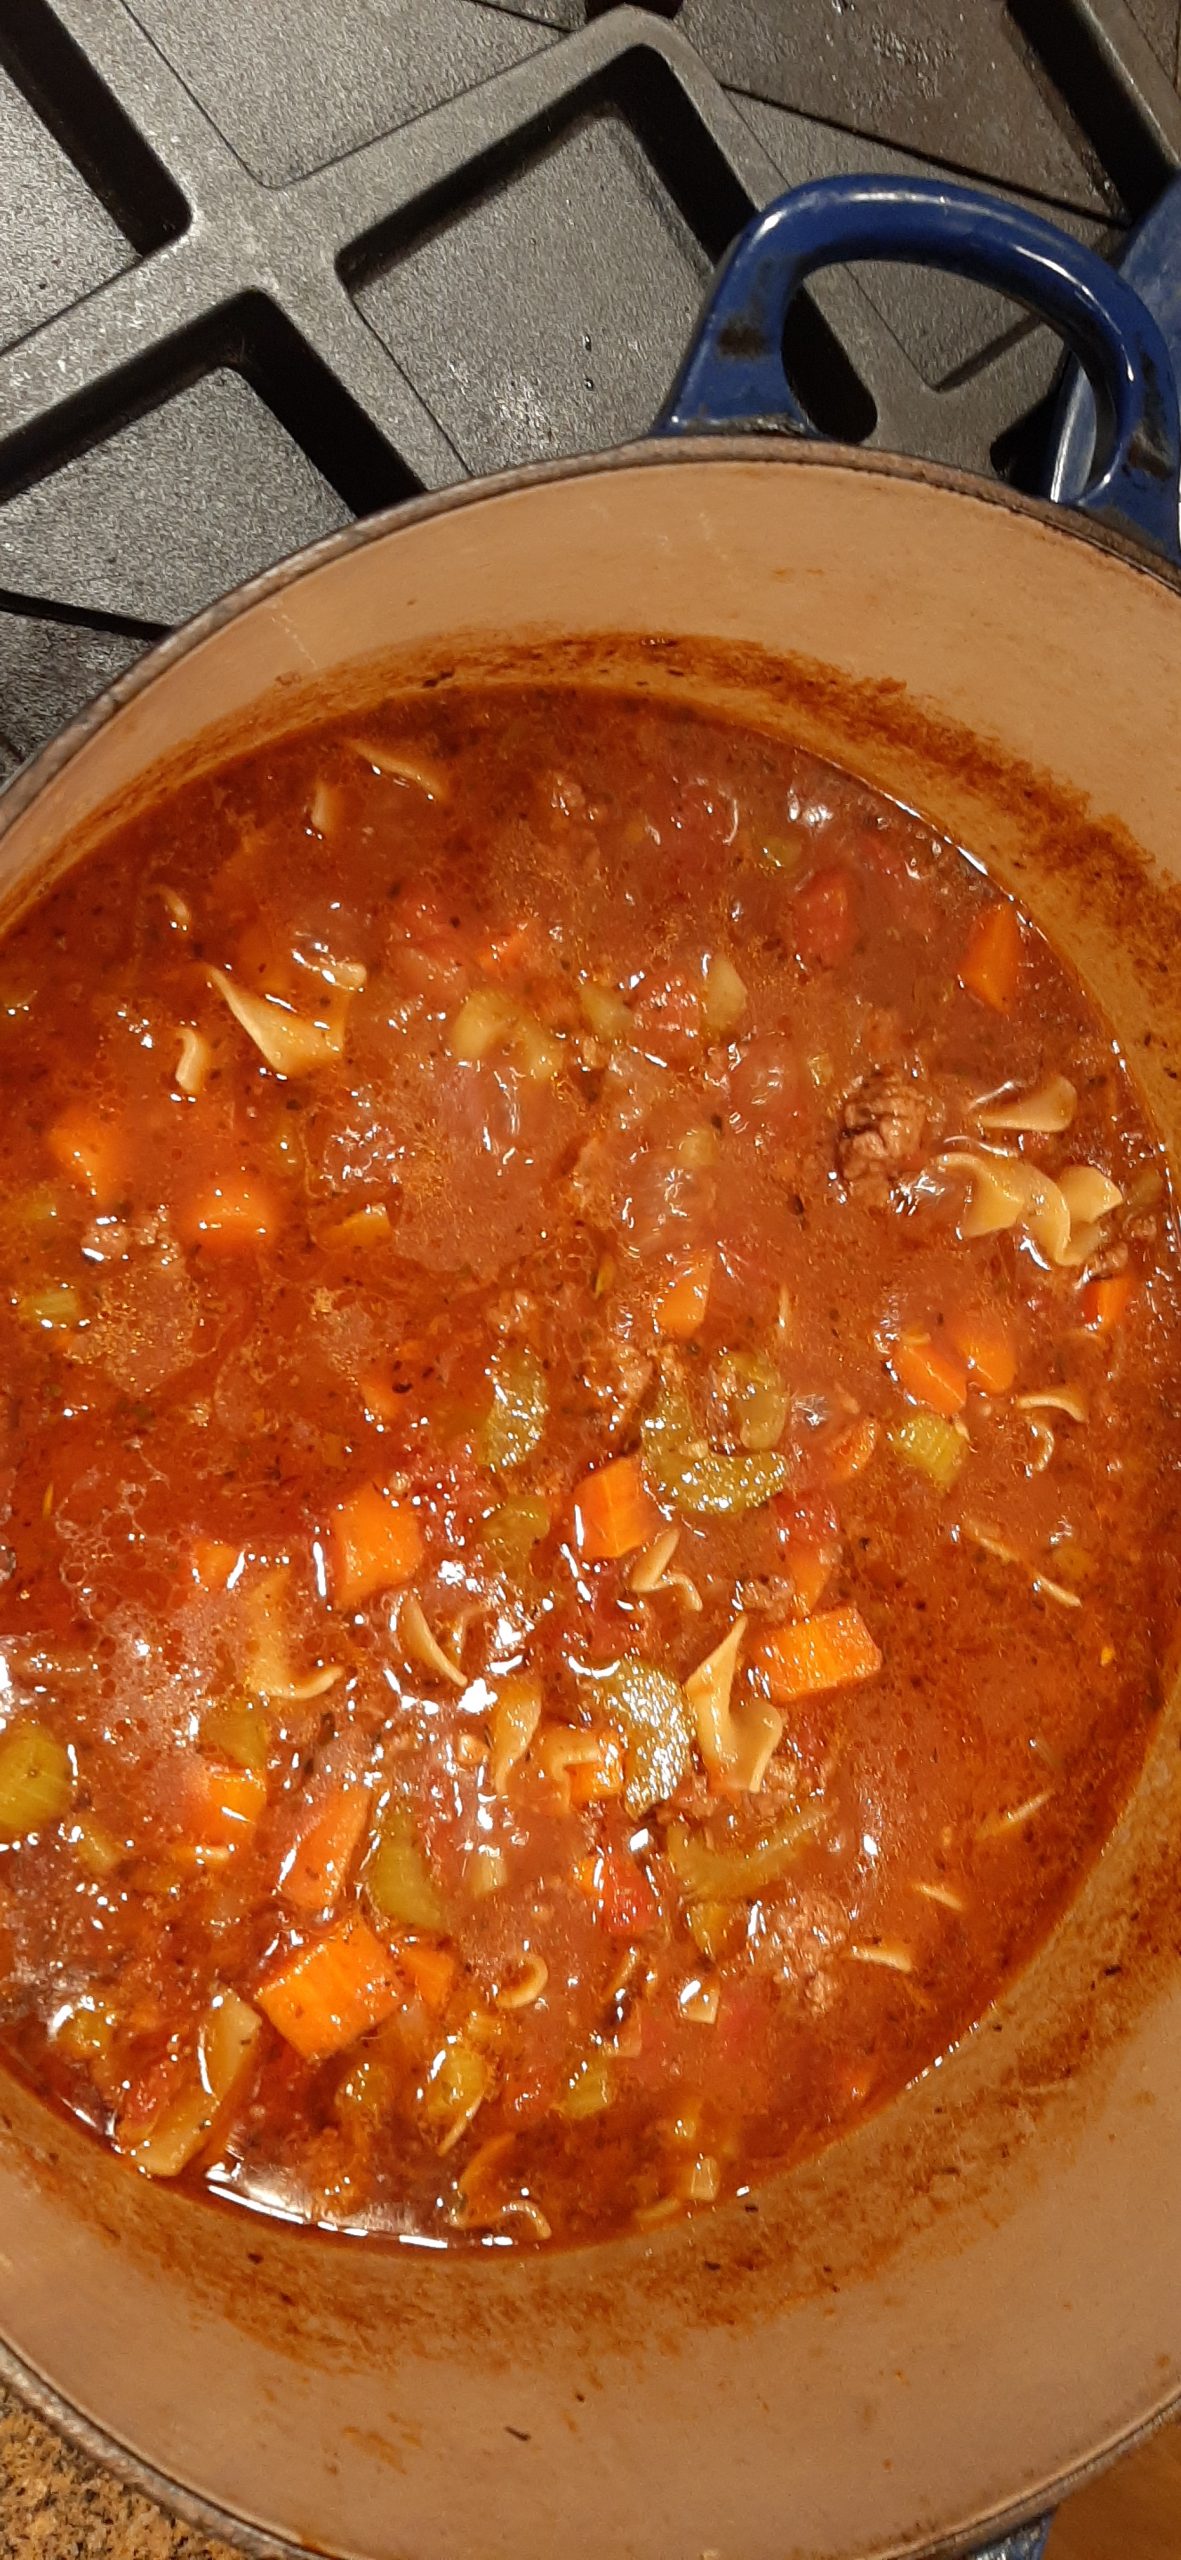
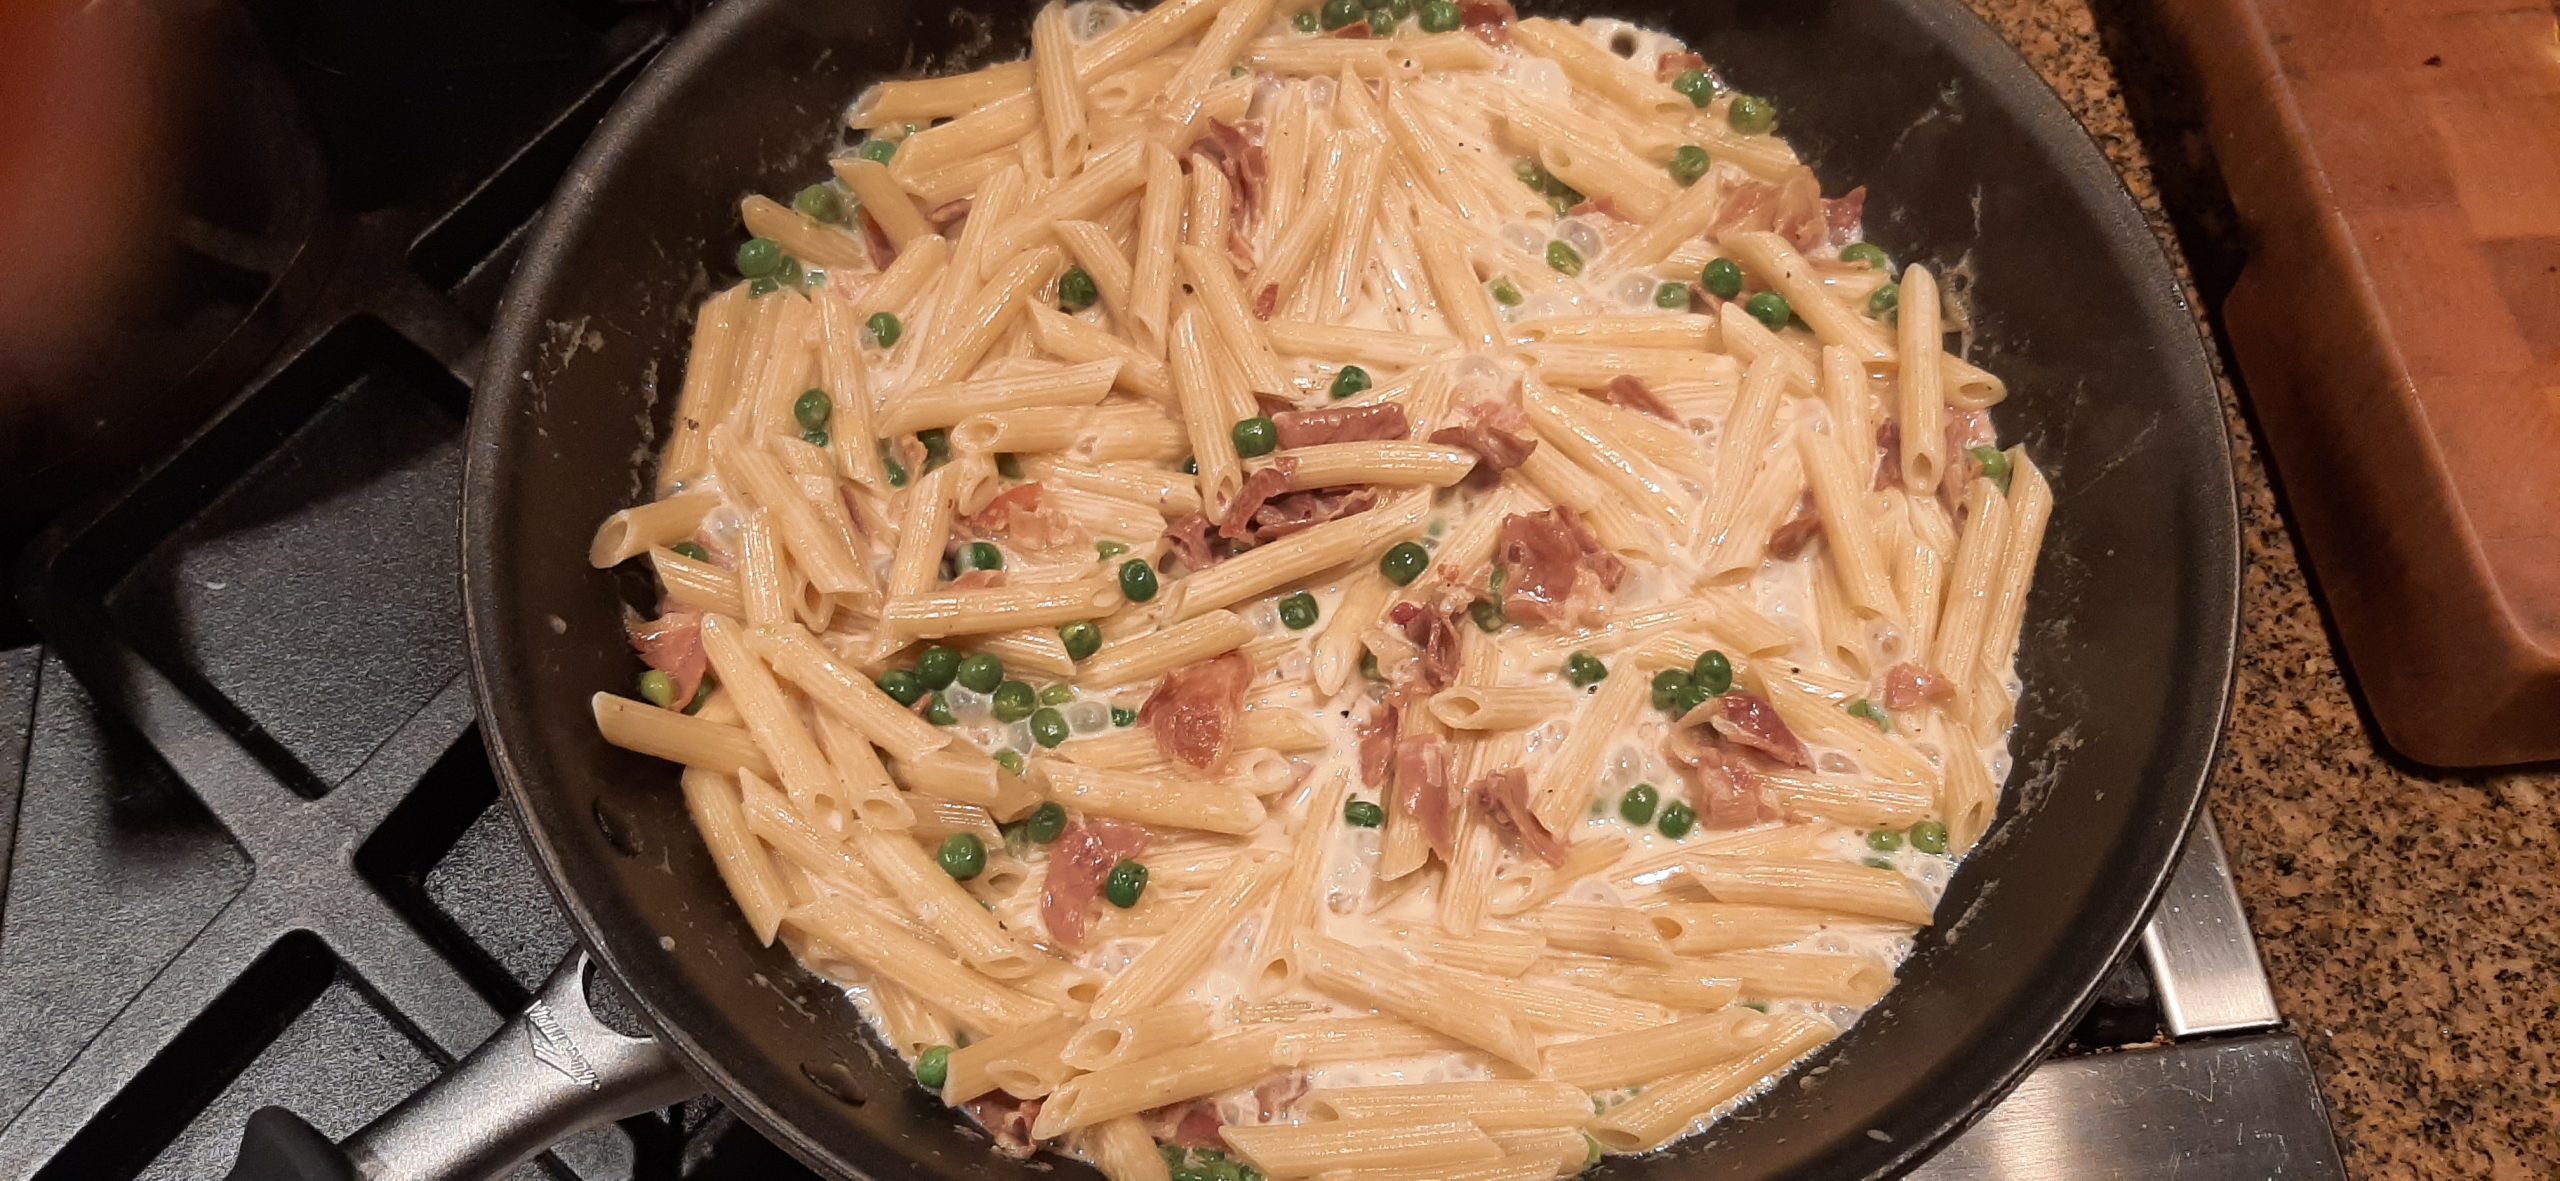
This pasta can be served as a stand-alone side dish (passing grated Greek mizithra, pecorino-Romano, or Parmigiano-Reggiano at table), or with inclusions such as thinly sliced prosciutto or petite green peas, or as a base for any of your favorite pasta sauces.

Leftovers can be stored in either the refrigerator or for longer storage, your freezer. If your pasta has been frozen, bring to room temp. before re-heating.

To re-heat your cooked pasta, coat the bottom of a frypan with water. Add the pasta and periodically give it a stir. Leave on heat only until the pasta is hot. Serve any way you wish.     

ITALIAN HAMBURGER SOUP WITH VEGGIES AND PASTA

The other evening, I was hungry for soup. (Actually, when do I not have a strong craving for soup would be a more accurate statement.) Anyway, I wanted soup for dinner. But I didn’t want a soup that would take a great deal of time to prepare or need to burble on the stove for hours. I wanted a quick, easy, yummy Italian flavored soup that contained pasta. Normally a veggie soup would contain chunks of potato. But I happen to be married to a guy who does not appreciate boiled potatoes. French fries, baked potatoes, and mashed potatoes are OK occasionally. But cut up potatoes in soup or chowder does not in any way, shape, or form appeal to this guy. But pasta? Absolutely!

For the soup, this time, I used extra wide egg noodles because I had just the right amount left in a big old bag that I really wanted to use up. I wanted it gone from my pantry. (One of my New Year’s projects is to clean out my pantry. This was a good beginning.) But next time I make this soup, I will be using a sturdier pasta.

And of course, because this was a beef vegetable soup, I began with a mirepoix (onion, carrot, and celery sautéed in oil). Then I added garlic and many of the other usual suspects you would find in any beef and veggie soup. A pretty simple preparation, but hearty and very tasty. You of course, could choose to add more veggies. But I found this to be the ideal balance of veggies, meat, and pasta.

I chose to serve the soup liberally sprinkled with pecorino-Romano cheese. We love this hard, salty Italian cheese made from sheep’s milk. It was the perfect complement to this brothy Italian soup, being an Italian cheese after all!

So, if you too would like to serve a soup that I feel everyone in your family would enjoy, this is probably the recipe for you. Simple, savory, and satisfying.

As always, peace and love to all.  

2 T. extra virgin olive oil 

¾ c. chopped onion

2 sm. carrots, thinly sliced

2 celery stalks, thinly sliced

3 garlic cloves, finely minced

1 lb. lean ground beef

1½ tsp. Italian seasoning

1 bay leaf

½ tsp. seasoned salt, or more to taste  

freshly ground black pepper   

4 c. beef broth

1 (15 oz.) container tomato sauce or diced tomatoes (Italian preferably)

1-2 T. tomato paste

1 tsp. Kitchen Bouquet, opt.   

1 c. dry pasta (I think Fusilli, Rotini, or penne are best)

grated pecorino-Romano cheese, opt. (for serving) (Parmesan in a pinch)

Heat olive oil in a large soup pot or Dutch oven. Add onion, carrots, and celery. Cook until the veggies are crisp tender. Add the garlic and cook until very fragrant, 1-2 minutes. Add the ground beef, Italian seasoning, bay leaf, seasoned salt, and pepper, breaking up the meat as it cooks.

When the meat is cooked, add the beef broth, tomato sauce, tomato paste, and Kitchen Bouquet. Bring soup to a boil, reduce heat, cover the pot, and allow to simmer for 30-40 minutes or until the carrot pieces are tender. Stir occasionally. Add more beef broth if you prefer a more brothy soup.  

Bring the soup to a boil and add the dry pasta. Cook until the pasta is al dente. Remove bay leaf, taste, and adjust seasoning. Serve piping hot. Pass the pecorino-Romano cheese.  


CREAMY LEMON PASTA WITH PROSCIUTTO AND PEAS

Please note: I would have posted this recipe yesterday, but my site was still causing me some problems. And frankly, I’m too lazy to re-write this preface. But since I’m sure you would want to know, Mr. C. never made it home after his afternoon rehearsal in Seattle because of a 4-hour traffic delay in Everett. So, he went straight to rehearsal in Mt. Vernon, missing dinner of course, but enjoyed a big old bowl of avgolemono when he got home around 10:00 pm. And yes, the poor guy was totally pooped after his ordeal. But very glad to be home where he was greeted by Miles, Max, and his adoring wife. (Miles and Max are our cats.)

The older I get, the less time I want to spend in the kitchen. I know that sounds just plain wrong coming from someone who has always enjoyed cooking and sharing her recipes. But I’m not as young as I used to be. Well, none of us are, but you know what I mean. But, and here’s the real killer, I still love to eat and share great food with Mr. C. and others. And I still look forward to posting recipes. So, that leaves me trying new recipes that have fewer ingredients and take just a reasonable amount of time to prepare.

So, the other evening I had a package of prosciutto that really needed to be eaten and a couple of lemons that had seen better days. And over the years I have made plenty of quick and easy pasta recipes, because frankly, pasta of any kind is just about my favorite food. Well, that and any bread product you care to mention.

So, using what I had on hand, I formulated this recipe. And it made for one heck of a good entree. We both absolutely loved this pasta dish. And it was simple and fast to prepare. Yeah! I served the pasta with a simple green salad, which was the perfect accompaniment.

So, if you too love a tasty pasta dish, but do not want to spend a great deal of time in its preparation, this is the recipe for you. And it is a recipe that could easily be adapted. You could use small cubes of pancetta instead of prosciutto, regular onion in lieu of shallots, whole milk in place of heavy cream, and whatever style of pasta you prefer. The only thing I will haunt you about is if you use some kind of bottled lemon juice in place of the real thing. Unacceptable. On oh so many levels.

Well, it’s dismal outside today. But it’s warm and cozy inside our home. Our cat Miles is nestled into the kitty bed on Andy’s desk. His brother is napping on our bed. Mr. C. is down in Seattle taking a piano lesson, then rehearsing with our dear friend Vivianna for one of her upcoming recitals for her PhD in music. This evening Andy has a rehearsal in Mt. Vernon. He is one very busy guy. But I love that he is getting to play music as much as he does. And I go with him to as many of his gigs as I can. I just love being married to such a talented musician. And a fabulous person to boot!

So, with his very tight schedule in mind, I am going to make one of his favorite soups for dinner. Avgolemono. Which in case you don’t know is a Greek lemon rice soup. And you can bet your bottom dollar I will be using fresh lemon juice. Because Mr. C. deserves the best! As do each of you.

Peace and love to all.  

1 tsp. extra virgin olive oil

1 (3-oz.) pkg. prosciutto, chopped into small pieces

2 T. unsalted butter

3 T. finely chopped shallots

¾ c. chicken broth

¾ c. heavy cream

zest from ½ lemon

1 T. fresh lemon juice

¼ tsp. kosher salt

freshly ground black pepper

1 c. frozen peas

10 oz. penne rigate, cooked al dente (save some of the water)

grated Parmigiano-Reggiano, for serving

Heat the olive oil in a small skillet. Add the prosciutto and brown for 4-5 minutes or until crisp. Remove from heat and set aside.

Melt the butter in a large nonstick skillet over medium heat. Add the shallots and sauté until soft, about 4 minutes.

Add the broth and simmer over medium high heat until mixture is somewhat reduced, about 2 minutes.

Add the cream, lemon zest, lemon juice, salt, and pepper. Simmer until sauce thickens slightly, about 3 minutes.

Add the frozen peas and then simmer just until the peas are heated through. (You really do not need to cook them. They just need to be warm.) Add the al dente pasta and browned prosciutto. Toss pasta with sauce until coated. If sauce is too thick, add a bit of pasta water. Taste and adjust seasoning.

Serve immediately. Pass the Parmigiano-Reggiano.

GLAZED EGGNOG FLAVORED BISCOTTI    

Since eggnog is a favorite of my husbands, and for him Christmas just isn’t the same without a bottle of the stuff in our refrigerator starting around Thanksgiving, I thought an eggnog flavored biscotti might just be a perfect treat for him. So, I went online to find a recipe. What I found were recipes that contained eggnog as an ingredient. And I thought to myself, what a waste of good eggnog when all the flavors of eggnog can so easily be duplicated by ingredients I always have on hand. Plus, then if he wanted eggnog biscotti in July for example, I wouldn’t have to build some homemade eggnog just for this recipe. I could basically make these delightful biscotti any old time I chose. (Or Mr. C. ever so nicely requested.)

So, the recipe below is what I came up with. And if I do say so myself, the biscotti were (they’re all gone now) delicious. And quite different from all the other biscotti I make. And yes, we love biscotti, so you will find several recipes on this site. They are all fabulous, and very easy to make.

Well, that’s all for today. Mr. C. has a rehearsal this evening, so dinner needs to be on the table by 5:30, which is much earlier than when he doesn’t have a rehearsal or gig. Usually, we get around to eating dinner around 7:00 pm. Then it’s reading time for me and reading and/or practicing the piano for Andy. In other words, very sedentary after dinner pursuits, which are not only consistent with our ages but also our inclinations. And doesn’t that make us lucky people.

May you also be able to follow your inclinations and enjoy some quality down time each and every day.

And as always, peace and love to all.  

For the biscotti:

½ c. (1 stick) unsalted butter, room temp.

1 c. granulated sugar

2 eggs

½ c. whole milk

1 tsp. dark rum

1 tsp. cognac

1 tsp. vanilla paste or extract

3½ c. unbleached all-purpose flour, fluffed

2 tsp. baking powder

2 tsp. ground nutmeg

½ tsp. ground cinnamon

½ tsp. kosher salt

Line a large baking sheet with parchment paper.

In the bowl of your stand mixer, combine butter, sugar, and eggs until well blended. Mix in milk, rum, cognac, and vanilla bean paste.   

In a separate bowl, whisk the flour, baking powder, nutmeg, cinnamon, and salt together. Mix the flour mixture into the butter mixture until well blended.

Roughly divide dough in half. Using buttered hands, shape each dough half into a long roll, approximately 14″ long. Carefully place rolls on prepared baking sheet, about 3-inches apart. With your fingers, lightly flatten each roll so that they are approximately ¾-inch thick.

Bake in a pre-heated 350-degree oven for 25 minutes or until golden brown. Remove from oven and place pan on wire rack for about 15 minutes. Carefully move the logs to a cutting board and cut diagonal slices (approximately ¾-inch thick).

Place slices, cut side down, back on original baking sheet. Bake for 10 minutes. Turn slices over and return to oven to bake for another 10 minutes or until firm to the touch and lightly browned. Remove from oven and transfer to wire racks to cool completely before glazing.

For the glaze:

1 c. powdered sugar

1 tsp. rum

tiny pinch cinnamon

tiny pinch nutmeg  

2–3 T. whole milk

In a small bowl, whisk the powdered sugar, rum, cinnamon, nutmeg, and 2 tablespoons milk together. If needed, add more milk to achieve desired consistency.  

Place completely cooled biscotti pieces, top side up, about a half inch apart on your large baking sheet. Drizzle the glaze over the biscotti. (You may not use it all. That’s OK.) Allow glaze to harden before storing biscotti in an airtight container.  


DOUBLE CHOCOLATE ESPRESSO BISCOTTI

I had so much fun this past December making biscotti to give to relatives and friends for Christmas. And if truth be known, biscotti is so darned easy to make, I felt a bit guilty not spending more time on these edible gifts. I quickly got over any remorse. Because dunking a biscotti in your morning coffee or tea or softening one of these Italian cookies in Vin Santo* as an after dinner or late evening treat, is just about as close to actually being in Italy as you can get. And isn’t even a temporary reminder of the joy associated with visiting Italy one of the greatest feelings on earth. At least it is for us.

So, being able to share these twice baked treasures with our friends and family helped make the holidays extra special for me.

Now, something you should know. These are very flavorful cookies. Nothing bland or quiet about their flavor. And probably a cookie your children would not appreciate. But for a chocolate lover, these are perfect.

So, next time you need an easy to prepare cookie that will make you shout yum, this is the recipe for you. I found the recipe on the cooking.nytimes.com site. I did make a couple of changes, but the inspiration was all on the Union Square Café’s Chocolate Biscotti via Alex Witchel.

Well, it’s rainy here in NW Washington. But we really have nothing to complain about. California is being hit with horrendous weather, as are other parts of the country. So, a bit of inconvenient rain is just an accepted consequence of living in this natural paradise. I can still see Barnum Point (here on the island), Port Susan Bay, and the low foothills as I write. But the snowcapped mountains are hidden under low hanging clouds. Hopefully the cloud covering is dumping snow all over the Cascades. Our state can use all the water reserves we can get.

As always, peace and love to all.

2 c. unbleached all-purpose flour, fluffed

¾ c. plus 2 T. good cocoa powder

1 tsp. fine sea salt

1 tsp. baking soda

1 tsp. espresso powder (I use Medaglia D’oro instant espresso)

4 T. (½ stick) unsalted butter, room temperature

1¾ c. lightly packed brown sugar

⅓ c. granulated sugar

1 T. vanilla extract

4 lg. eggs, divided

1 rounded c. mini chocolate chips

1 T. water, for egg wash

2 T. raw sugar

Line a large baking sheet with parchment paper.

In a mixing bowl, whisk the flour, cocoa powder, salt, baking soda, and espresso powder together; set aside.

Using a heavy-duty electric mixer, cream the butter, brown sugar, and granulated sugar together for 3 to 5 minutes at medium speed. Add the vanilla extract. Mix for 10 seconds. Add 3 of the eggs, one at a time, mixing well after each addition. Add the flour mixture and mix at low speed until dough comes together, 1 to 2 minutes. Add the mini chocolate chips and mix just until chips are evenly incorporated.

Using buttered hands, shape half of the dough into a log roughly 1½ to 2 inches wide. Place log on prepared baking sheet and flatten slightly. Form the second half of the dough the same way and place on the baking sheet about 3-inches away from the first log. Brush tops of logs with egg wash made from whisking the remaining egg with the water. Then, sprinkle each log with 1 tablespoon raw sugar.

Bake in a pre-heated 350-degree oven until the biscotti have spread and bounce back slightly when pressed with fingertips, about 30 minutes. Remove from oven and let cool completely, about 1½ hours.

Preheat oven to 325-degrees. Using a sharp serrated knife, cut logs into ½-inch diagonal slices. Place each slice, cut side down on the same parchment paper lined baking sheet. Bake until firm, crisp and slightly dry, about 15 minutes.

Remove from oven and allow to cool completely before storing in an airtight container at room temperature or in your freezer for up to three months.

*According to winefolly.com “Vin Santo (or Vino Santo) is a viscous, typically sweet dessert wine made in Italy, predominantly in Tuscany. The wine is loved for its intense flavors of hazelnut and caramel. When paired with biscotti, Vin Santo becomes “Cantucci e Vin Santo” which is inarguably Italy’s most famous welcoming tradition. What makes Vin Santo truly special is the natural winemaking process which gives it a unique taste.”

CREAMY POLENTA WITH CREAM CHEESE

Sometimes, what you really need for a main dish that is plenty flavorful, but really needs to be served on a bed of something fairly innocuous, is a dish like this creamy polenta. So, this is possibly the recipe you have needed all your life too without knowing how much you needed it! That is, if you are anything like me.

Because, until recently, I tended to be the kind of cook who often got carried away with too much flavor or richness. Fortunately, I have realized the error of my ways, even if it has come a bit late in my cooking career. Take last night for an example of holding back on flavor and richness for the betterment of the finished product.

Jim and Margo were coming to dinner to help us celebrate the 14th anniversary of moving into our home here on Camano Island. And because they had been with us all that move-in day, Jim cooking dinner, and Margo helping daughter Paula put things away in the kitchen, I decided that fixing dinner for them was absolutely called for. Plus, we wanted to see them anyway.

As I was planning the menu, I realized that Parmesan cheese was already going to be used in both the salad (Italian Salad) and as a garnish for the Chicken Cacciatore with Parmesan Polenta. So, to prove an old cook can learn new tricks, I decided not to use Parmesan in the polenta. But how to make it flavorful enough, while possibly skimming off a few calories, but still providing a creamy, tasty base for the chicken.

I had read somewhere that cream cheese would work well in polenta. So, I took my regular recipe, used water instead of milk, lowered the butter by 1 tablespoon, and used half a package of cream cheese in place of the Parmesan. And I was really pleased with the result. Creamy to the max. And delicious without adding more richness or flavor to the already very savory sauce that surrounds the chicken pieces. So, all in all a screaming success if I say so myself!

So, next time you are in a quandary about what to use for a base or side dish instead of pasta or mashed potatoes, give this simple to prepare polenta recipe a try.

Well, it’s sunny and beautiful here in the northwestern part of Washington. Mt. Baker appears to be happily basking in the sun surrounded by a few puffy white clouds who have obviously come to show their respect for this most glorious stratovolcano. Port Susan Bay is so calm it looks like a sheet of light blue glass. Our yard is full of happy looking plants, many of which are in bloom, and I have leftovers to serve for dinner tonight. This is what I define as a perfect day.

May you too have a perfect day. And as always, peace and love to all.

4 c. water

1 tsp. kosher salt

tiny pinch white pepper or freshly ground black pepper

1 c. yellow polenta (not instant) 

2 T. unsalted butter

4 oz. (½ pkg.) low fat, Neufchatel, or regular cream cheese

Heat salted water to a boil in a heavy, covered 2 or 3-quart pan. Slowly whisk the polenta into the boiling water to prevent any lumps from forming.

Lower the heat to a very low simmer and add the pepper. Continue to whisk the polenta until it starts to thicken. Then cover the pan and let the polenta cook for 25 minutes. Stir occasionally with a wooden spoon so that the polenta doesn’t stick to the bottom of the pan. The polenta should be soft and tender when done. If not, let it cook a little longer.

Stir in the butter and cream cheese. Taste and add more salt if necessary.

LASAGNE SOUP

Of course, I know it’s technically summer. And finally, and I do mean FINALLY it appears that summer has landed here in the beautiful northwestern part of the great state of Washington. The fact of which I am quite sure my outdoor potted plants will readily attest. (They were really thirsty when I watered them yesterday morning. To the extent that a couple were drooping from lack of turgor pressure.)

Your botany lesson (reminder) for today:  Turgor pressure – the pressure exerted by fluid in a cell that presses the cell membrane against the cell wall. Turgor is what makes living plant tissue rigid. Loss of turgor, resulting from the loss of water from plant cells, causes flowers and leaves to wilt. (Actually, turgor pressure is one of the only things I remember from the college freshman botany class I took in 1962. That and the difference between herbaceous and woody plants. And only then because my lab partner and I gave each other the nicknames “Herby” and “Woody”. But I digress….

Anyway, I served this terrific soup last evening for dinner. Even though the temperature had been in the mid-eighties. Because, basically, I enjoy a good soup year-round. And this, dear friends, is a very good soup. And let me tell you right here and now, that compared with making lasagna from scratch, this dish is a snap to prepare.

I can’t tell you how many times over the years, I have finished making lasagna and swearing never to do it again. And then several months later, forgetting the time involved, end up vowing to not make the same mistake again. Basically, I have been repeating this process for decades now. And yes, you would think the girl could learn. But apparently not! (At least now, I have a reasonable alternative that tastes divine and only takes about a fourth of the time to assemble.)

Now don’t get me wrong. I still love lasagna in all it’s iterations. And because I do love this quint essential Italian dish, I plan to develop other soups that include the basic ingredients from my favorite lasagna recipes. (Roasted Mushroom Lasagna with Béchamel Sauce immediately comes to mind.)

So, a big thank you to Lauren from the tastsbetterfromscratch.com site for the bones of this recipe. I changed her recipe dramatically, but the basic premise is all Laurens.

Well, that’s it for today. You’ve had your botany lesson for today and been provided with a simple recipe for a great soup that I know your entire family will enjoy. Hopefully your day will be wonderful, productive, and bring you pleasure.

If you are like most people, life can get in the way of taking care of yourself. This is something I have only come to realize as I’ve gotten older. Before it was rush, rush, rush to make everyone’s life around me perfect. Nothing is perfect, no matter how hard we as cooks and care givers try to make it so. But when we take good care of ourselves, we have a basis for taking good care of others. Taking care of ourselves should always be a top priority. (Well, that and having fun in our kitchens.)  

Peace and love to all.

1 c. cottage cheese (run through your food processor to make it smooth)

1 c. grated mozzarella cheese

¾ c. freshly grated Parmesan cheese

½ c. roughly chopped fresh basil

1 lb. lean ground beef

1 lb. bulk Italian sausage

1 lg. yellow onion, chopped

5 garlic cloves, finely minced

1 (28-oz.) can tomatoes (preferably Italian)

2 T. tomato paste

6 c. water

1 T. beef base (I use Better Than Bouillon Beef base)  

½ tsp. kosher salt

freshly ground black pepper

2 bay leaves

¼ tsp. crushed red pepper flakes

1 tsp. Italian seasoning 

2 tsp. dried oregano leaves

1 tsp. dried basil

1 tsp. fennel seed

1-2 Parmesan rinds, opt.

4-6 lasagna noodles, broken into small bite sized pieces

3 c. roughly chopped baby spinach leaves 

In a small bowl, stir the processed cottage cheese, mozzarella, Parmesan, and basil together. Set aside.

In a large heavy covered pot over medium-high heat, cook ground beef and sausage until browned. Remove meat from the pot and drain as much grease off as possible. Set meat aside.

In the same pot, add the diced onion and sauté for about 5 minutes, stirring occasionally. Add the minced garlic and cook for another minute.

Stir in the canned tomatoes (plus juice), tomato paste, water, beef base, salt, pepper, bay leaves, crushed red pepper flakes, Italian seasoning, oregano, dried basil, fennel seed, and Parmesan rinds.

Bring to boil, then reduce heat, cover and simmer gently for about 40 minutes. Stir occasionally. After about 40 minutes, remove the bay leaves and Parmesan rind(s), taste and adjust seasoning before increasing heat and adding the broken lasagna noodles. Cook, stirring occasionally, until noodles are al dente.  

Add the spinach and cooked meat. Cook for about 2 minutes, or until the spinach is wilted and the meat is hot.

Ladle the hot soup into bowls and dollop a scoop of the cheese mixture on top.  

BAKED ITALIAN SAUSAGE MEATBALLS

Yesterday when I asked Mr. C. what he would like for dinner, he gave not a moment’s hesitation before uttering those three little words I love to hear. Spaghetti and meatballs. Now you have to admit, those are three words that can almost always elicit a positive response from everyone. Because who doesn’t love spaghetti and meatballs? Right?? So, with no hesitation on my part, I said – “your wish is my command, or words to that effect”. Anyway, I got right on it.

But always being one to change things up a bit, I decided to make the meatballs using only bulk Italian sausage rather than my usual half and half ground beef and sausage. But stay with my no fail, always delicious, stinkin’ easy to build, why mess with perfection, favorite Marinara Sauce recipe. (See recipe below.) So, that’s just what I did. And there was much rejoicing at our dinner table last evening.

So, it you too are a spaghetti and meatballs fan, and who in their right mind isn’t, give this quick and easy recipe a try. No fancy ingredients, not a lot of fuss and bother to prepare, and a dish that is sure to please everyone in your family.

Well, today is the 4th of July. And I wish I could say that I was looking forward to all the fireworks. But I just can’t get into a celebratory mood this year. I guess I am finally coming to the realization that as a liberal, I am quickly becoming part of the minority. Or so it seems. And even if liberal leaning is still embraced by the majority of our citizens, some conservative politicians and their followers/appointees are making changes regardless of who or what gets hurt in the process. Women’s rights, our environment, deaths by unlimited numbers and types of guns, etc. etc.

So, I am staying home tonight and celebrating in my own way. I’m going to think about the wonderful life I have been blessed with thus far. I am going to remember the friends and family members who are no longer living. And I am going to pray that our nation can once again be represented by people who uphold the constitution and everything it has always stood for. Imperfections notwithstanding!

And lest any of us have forgotten why we even have a constitution, and why we should fight diligently to keep our constitution alive, I will leave you with our constitutions Preamble:

“We the People of the United States, in Order to form a more perfect Union, establish Justice, insure domestic Tranquility, provide for the common defence, promote the general Welfare, and secure the Blessings of Liberty to ourselves and our Posterity, do ordain and establish this Constitution for the United States of America.”

Peace and love to all.

1 lg. egg

1 T. milk

1 lg. clove garlic, finely minced

¼ tsp. fennel seed

tiny pinch crushed red pepper flakes

freshly ground black pepper

¼ c. rolled oats

½ c. finely grated Parmesan cheese

1 lb. bulk Italian sausage

Lightly grease a low sided baking sheet.

In a large bowl stir the egg, milk, garlic, fennel seed, crushed red pepper flakes, and black pepper together. Add the rolled oats and Parmesan cheese. Mix well. Add the sausage and mix until well blended. 

Using a #60 (1 tablespoon) ice cream scoop, plop the meatballs onto the prepared baking sheet. If you don’t have an ice cream scoop, use your hands to form balls.    

Bake in a pre-heated 400-degree oven for 15 minutes. Remove from oven and drop into your favorite marinara sauce or soup just before serving. If you don’t have a favorite marinara sauce or Italian meatball soup recipe, my recipes for both are provided below.     

MARINARA SAUCE

3 T. extra-virgin olive oil

1 c. chopped onion

4 cloves garlic, chopped

2 (28-oz.) cans chopped, whole, or diced tomatoes (Italian tomatoes preferably)

2 bay leaves

pinch crushed red pepper flakes

2 tsp. dried oregano (I use Mexican dried oregano)

1 tsp. kosher salt

freshly ground black pepper

½ c. loosely packed chopped fresh basil leaves

1-2 T. butter, opt.

In a large, covered saucepan, heat the oil over medium heat. Add the onion and sauté until soft and translucent, about 6 minutes. Stir in the garlic and cook for an additional minute. Add the tomatoes, bay leaves, red pepper flakes, oregano, salt, and pepper. Stir to combine ingredients.

Bring to a boil, reduce heat, cover, and simmer for about 30 minutes. (Take the lid off part way if the sauce is thinner than you prefer. As the sauce gently burbles away, it will thicken quickly. So, keep a close eye on it as it reaches your desired thickness.)

Remove from heat, discard bay leaves, add the basil, and adjust seasoning. If the sauce tastes acidic, add butter 1 tablespoon at a time to round out the flavor.  

ITALIAN MEATBALL SOUP

2 tsp. extra virgin olive oil

½ c. diced onion   

2 carrots, thinly sliced

2 stalks celery, thinly sliced

2 garlic cloves, finely minced

½ c. dry red wine (I use Gallo Hearty Burgundy)

4 c. beef broth, or more if the soup appears too thick      

¼ tsp. kosher salt

freshly ground black pepper

1 bay leaf

1 tsp. dried Italian seasoning

½ tsp. dried basil

pinch crushed red pepper flakes

1 tsp. Worcestershire sauce

1 (14.5 oz.) can diced tomatoes (preferably Italian)  

4 T. tomato paste, again preferably Italian

meatballs

1 c. dry macaroni

2 T. chopped parsley

grated Parmesan cheese, for serving (or Pecorino Romano or Asiago)

Heat oil in a medium sized covered pan. Add the onion, carrots, and celery. Cook until the onion is translucent. Add the garlic and cook for 1 minute. Pour in the red wine and cook until almost all the liquid is evaporated. Add the beef broth, salt, pepper, bay leaf, Italian seasoning, dried basil, crushed red pepper flakes, Worcestershire sauce, canned tomatoes (don’t drain), and tomato paste.

Bring to a boil, reduce heat, cover pan, and simmer gently for 30 minutes. Stir periodically. After the soup has simmered for 30 minutes, taste and adjust seasoning (may need more salt).

Add meatballs and dry pasta, and simmer for about 10 minutes or until the macaroni is al dente. Add parsley. Serve piping hot. Pass the grated Parmesan cheese.  


CROSTINI

OK, this is going to be the easiest recipe I ever shared with you. But this may be one of the best recipes I ever shared with you. And why is that you might ask? Well, for several reasons. Not only is crostini easy to prepare and delicious, it’s crunchy. And who doesn’t love crunchy! Crostini (meaning “little crusts” in Italian; singular crostino (but who could ever eat just one) are simply that much needed crunch so often missing in a meal of soup or stew and bread. And we all know how wonderful soup and stew are when served with a nice soft roll or baguette slices. But with crostini, you have the lovely bread, but also the delightful crunch.

So, what types of bread make the best crostini? Glad you asked. Rustic peasant bread, ciabatta, and different types of baguettes all work great. If you are into baking your own bread, I would recommend Chewy Sourdough Baguettes, Thin Sourdough Baguettes, Overnight Sourdough Baguettes, Soft French Baguettes, or Classic Italian Baguettes. All found on this site.

And then guess what else is great about crostini? You can top the little darlings with any old thing you want. For example – Kalamata Olive Spread, Creamy Feta Cheese Dip, Mushroom Pâté, Herbed Cream Cheese with Black Pepper Spread, and of course bruschetta. (See recipe below.) Or provide a variety of different toppings for family and friends to smear on crostini all by themselves. (Sounds like a party to me.)

Speaking of parties, I’ve had the pleasure of listening to the Whistle Lake Jazz Quartet rehearse in our living room. Furniture scattered to the four winds. Beer glasses everywhere, and happy, wonderful guys truly enjoying themselves making beautiful music. I feel like I’m in heaven. Just sitting in our den, writing up this recipe, it feels like magic happening all around me. There is simply nothing better than live music. And when it’s in your own living room – well, nothing compares. For pictures of the quartet practicing, see the bottom of the post.

So, as always, bring a little magic into your life. Be it listening to beautiful music, looking at fabulous art, reading good books, playing with your children, making someone else’s life a little bit better, or whatever feeds your soul. If it makes you smile, then it’s worth the effort.

Peace and love to all.

baguette

extra-virgin olive oil

flaky or fine sea salt, to taste

Pre-heat your oven to 450-degrees. Line a rimmed baking sheet with parchment paper for easy clean-up. 

Slice the baguette on the diagonal into pieces no wider than ½-inch. Lightly brush both sides of each slice with olive oil.

Place the slices in a single layer on your prepared baking sheet and bake them on the middle rack for about 9 minutes, until they are crisp and nicely golden on top. Remove from oven and sprinkle lightly with salt. Serve immediately.

Bruschetta

crostini – just out of the oven

1 garlic clove

extra virgin olive oil

chopped fresh basil

chopped tomato

freshly ground black pepper

Scrape the warm crostini with a garlic clove. Drizzle on a bit of olive oil, then top with diced tomato, chopped fresh basil, kosher salt, and freshly ground black pepper. Serve to only those who deserve the best.

Mr. C. on piano

Mr. C. and Todd on drums
Tim on bass and Jamie on guitar
All together now, all together now……..


OVERNIGHT SOURDOUGH DISCARD BÂTARD (added yeast)  

Bread made into crostini

For those of you for whom French is not your first, second, or even third language, a “bâtard” is essentially just an oval shaped loaf of bread. It just sounds so much more sophisticated to call it a bâtard rather than referring to it as just an oval loaf of bread. And you know, I am nothing if not the very essence of sophistication. Yah right?!?!

But when it comes to bread, I can get quite high on my horse about it. Especially good homemade bread. Because, frankly, there is nothing more delicious. And this bread is a perfect example of really good bread. Absolutely perfect for toast in the morning and especially fabulous when served as crostini. (See recipe below.)

It is however, a bit of a pain in the patootie to make. And probably not a good bread for a beginner to tackle. Unless of course, you are one of those people who overachieves at everything you have ever tried. On the first try! Then go for it. For the rest of us, I would say a bit of bread baking experience would be wise.

I found this recipe, much changed by me, on the King Arthur baking site. The instructions from the good folks at King Arthur would have me start the process with “fed” sourdough starter. For me, that would make it a three-day process. I simply don’t think that far in advance. As it is, even with my changes, it takes two-days to produce this lovely loaf. That much I can handle. And totally worth the effort.

But my way does require the addition of a small amount of active dry yeast. And even though not called for in the original recipe, I managed to slip in a bit of olive oil action too. (I love olive oil with this type of bread.)

So, in conclusion, if you have the time, discipline, and fortitude, please give this bread recipe a try.

As with everything, you will never achieve if you don’t first try. It always amazes me when people can’t believe I made the bread they are enjoying. When actually, homemade bread is one of the easiest and most forgiving baked good you can produce. But then, if you don’t try, you don’t know. So, try things folks. We are only on this planet for a very short time. Who knows, you might find that collecting the elusive chanterelle mushroom from its hiding place under a Douglas fir to be the best and most rewarding fun you ever had. Or learning to play the ukulele or the joys of down hill skiing in your mid 40’s. There are an infinite number of possibilities. But each require that first step. And with first steps, as in first steps taken by babies, you might fall on your face. Pick yourself up, dust yourself off, and start all over again. It’s called life. And life is meant to be lived! And cherished. Baby steps, successes, failures, and everything in between!

Peace and love to all.

1 c. sourdough starter discard, room temperature

1½ c. lukewarm water

½ tsp. active dry yeast

2½ tsp. kosher salt

5 c. unbleached all-purpose flour, plus more if needed

extra virgin olive oil

In the bowl of your stand mixer, stir together the starter, water, yeast, and 3 cups of the flour. Beat vigorously for 1 minute. (I use my paddle attachment for this rather than my dough hook.)

Cover and let rest at room temperature for 3 hours. Refrigerate overnight, or for at least 12 hours. (The dough will expand some during it’s time in your refrigerator.)  

The next day, add the salt and enough flour to form, with your bread hook, a smooth firm dough. For me, this took the full 5 cups of flour, and then some. Just be sure to touch the dough. Because, when I first started adding additional flour, 5 cups looked like too much. But when I actually touched the dough after 4½ cups, I quickly realized that the look of this dough is deceiving. It looked like it had enough flour, pulled away from the bottom of the mixer bowl like it had enough flour, but when I poked the dough and actually felt its density, in no way would it have held its shape. Simply not enough flour. So, I added enough more flour to create the dough required to hold a shape.   

When your dough is nicely kneaded and ready for the next rise, pour a bit of olive oil in the bowl, and using your hands and a stiff rubber spatula, work the dough into a ball entirely coated with the oil.

Cover the bowl with plastic wrap and allow the dough to rise until it’s light and airy, with visible gas bubbles. Depending on the starter you use and the temperature of your kitchen, this may take 4 to 5 hours. (Mine took 4 hours.) For best results, gently deflate the dough once an hour.   

Cover a large baking sheet with parchment paper. Then pour a bit of olive oil in a small container and lightly grease your hands. (Take your rings off first. Don’t forget where you left them!) Gently pat the dough to deflate it slightly and remove any large bubbles. Divide the dough in half, right in the bowl. Form each half into a loose ball, then gently stretch the dough while tucking the dough under itself as you form an oval. (I know there are fancy ways to shape a Bâtard, but frankly, I don’t have time or the inclination for fancy-schmancy loaves of bread. I just shape the loaves as best I can in my hands, then plop the darn things on the prepared pan! If they look a little misshapen, I mess with them a bit more on the baking sheet.) (If you have any leftover olive oil gently smear it on the loaves.)    

Cover and let rise until very puffy, about 2 hours. Don’t worry if the loaves spread more than they rise; they’ll pick up once they hit the oven’s heat. Toward the end of the rising time, preheat the oven to 425-degrees. While the oven heats, place a pan of water on the bottom rack. I use a 9-inch cake pan half full of water.

Spray the bâtards with lukewarm water; this will help them rise in the oven by initially keeping their crusts soft and pliable. 

Slash the bâtards. Try one slash down the length of the loaf, two diagonal slashes, or another symmetrical pattern of your choice. Make the slashes fairly deep; a serrated bread knife or lame, wielded firmly, works very well. 

Bake the bâtards for 25 to 30 minutes or until they are a nice golden brown and  the internal temperature reaches 208-degrees. Remove from oven and cool on a rack before slicing. 

Store bâtards, loosely wrapped, for several days at room temperature. Freeze for longer storage.

This bread makes great crostini. (See recipe below.)

CROSTINI

crusty bâtard (like this one) or a French baguette

extra-virgin olive oil

flaky or fine sea salt

Pre-heat oven to 450-degrees. Line a rimmed baking sheet with parchment paper.  

Slice the bread on the diagonal into pieces no wider than ½-inch. Lightly brush both sides of each slice with olive oil.

Place the slices in a single layer on your prepared baking sheet and bake them on the middle rack for about 9-11 minutes, or until they are crisp and nicely golden on top. Remove from oven and sprinkle lightly with salt. Serve immediately.