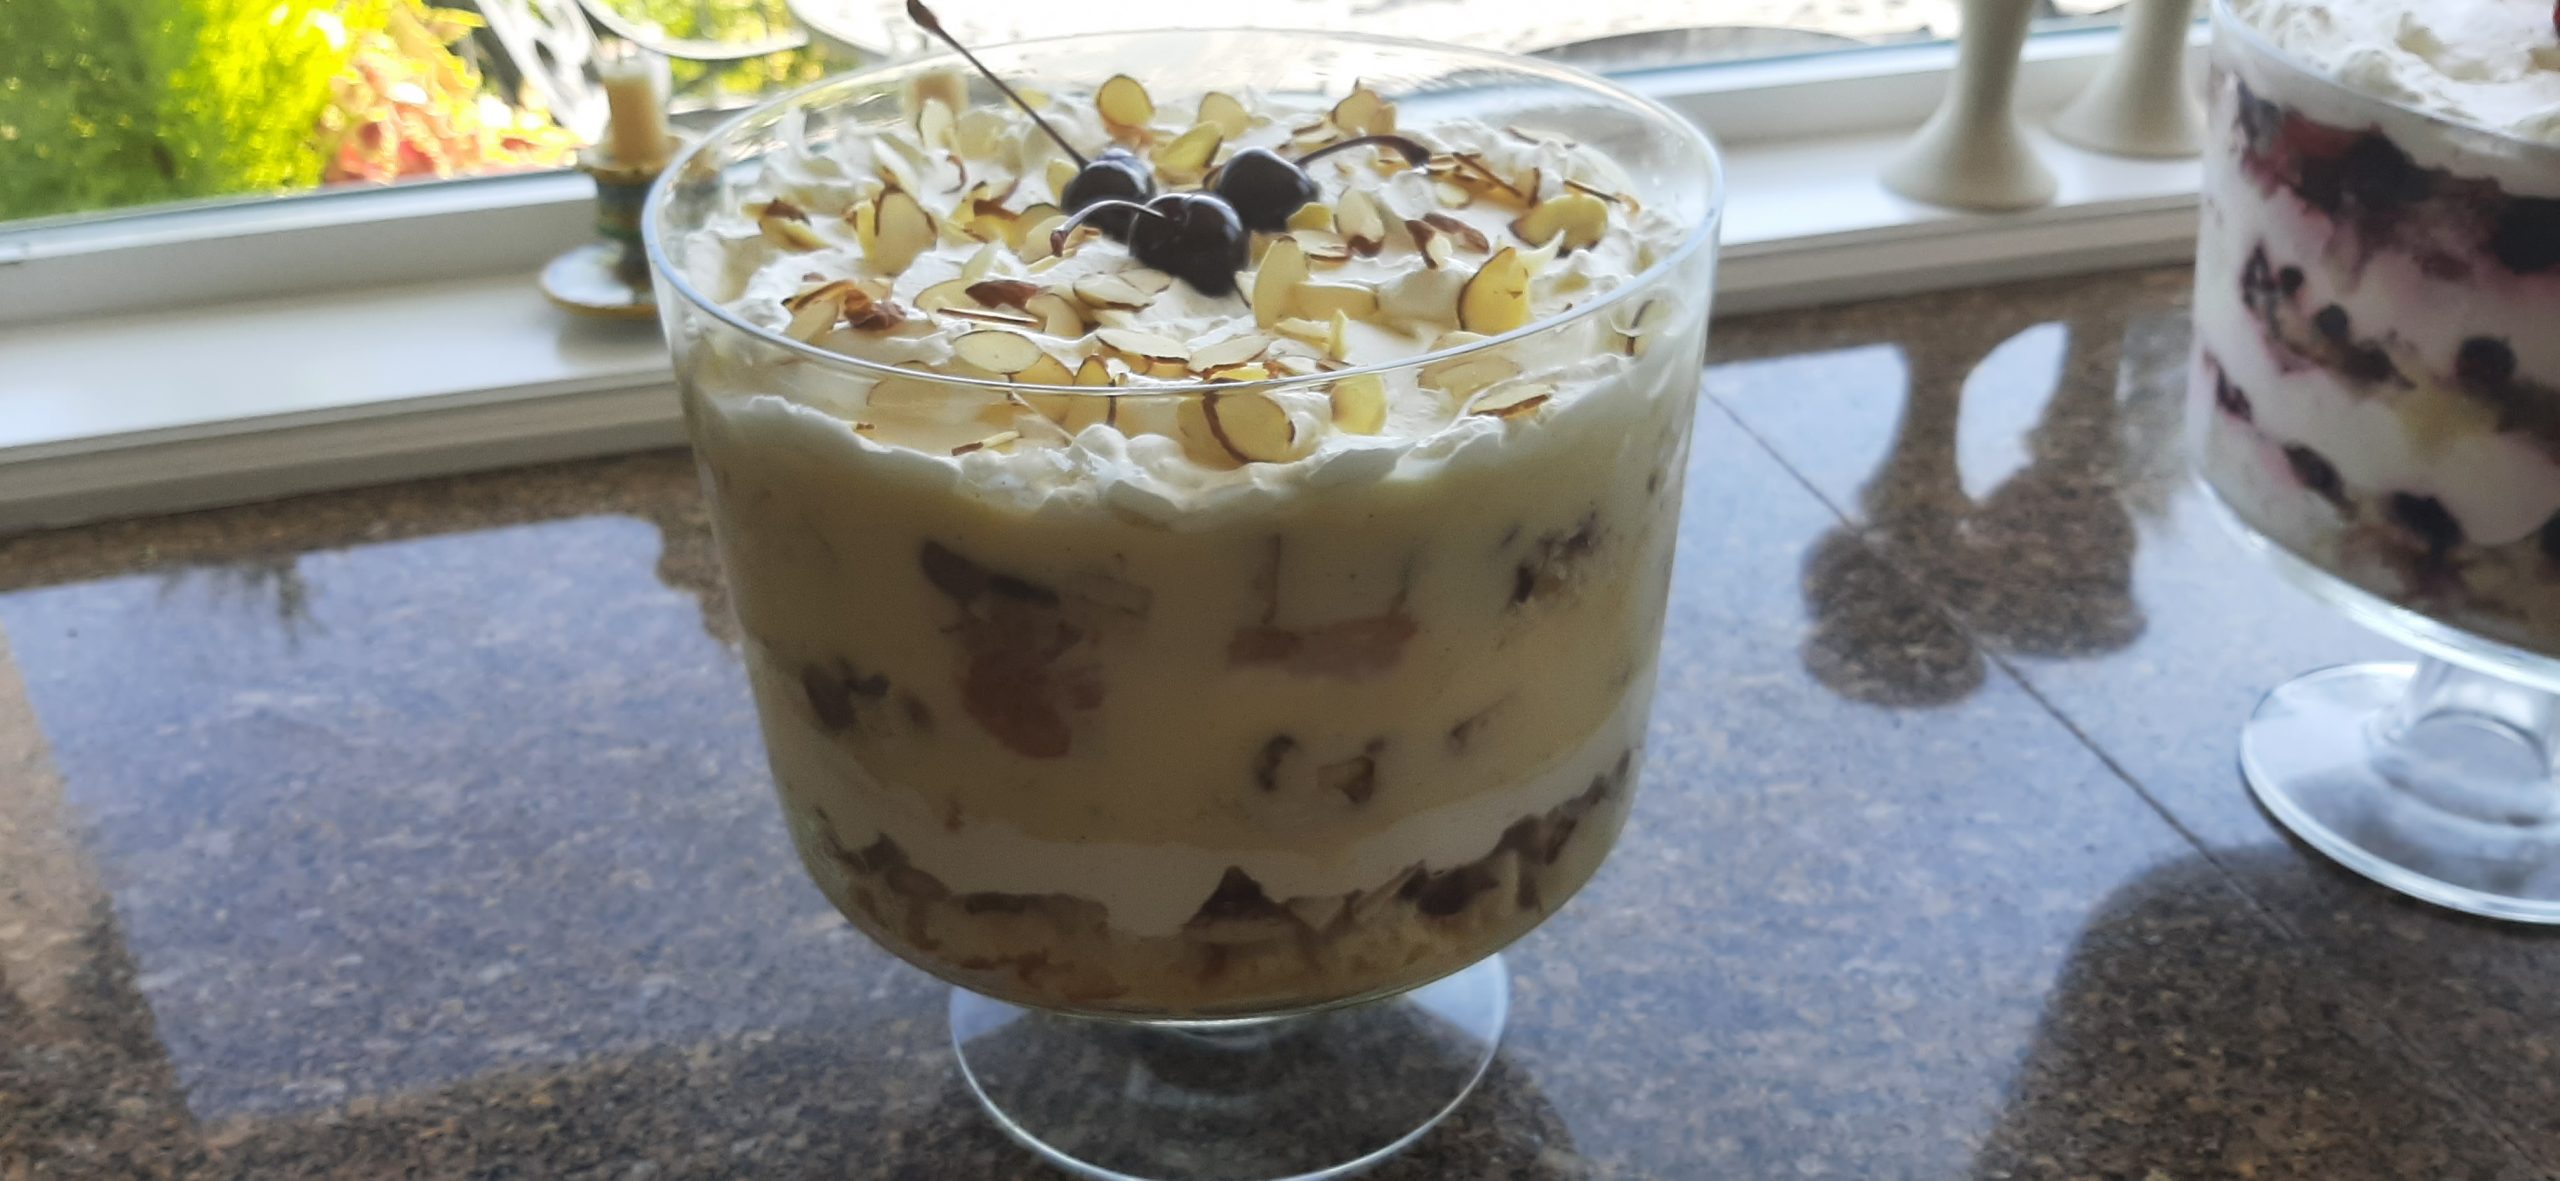
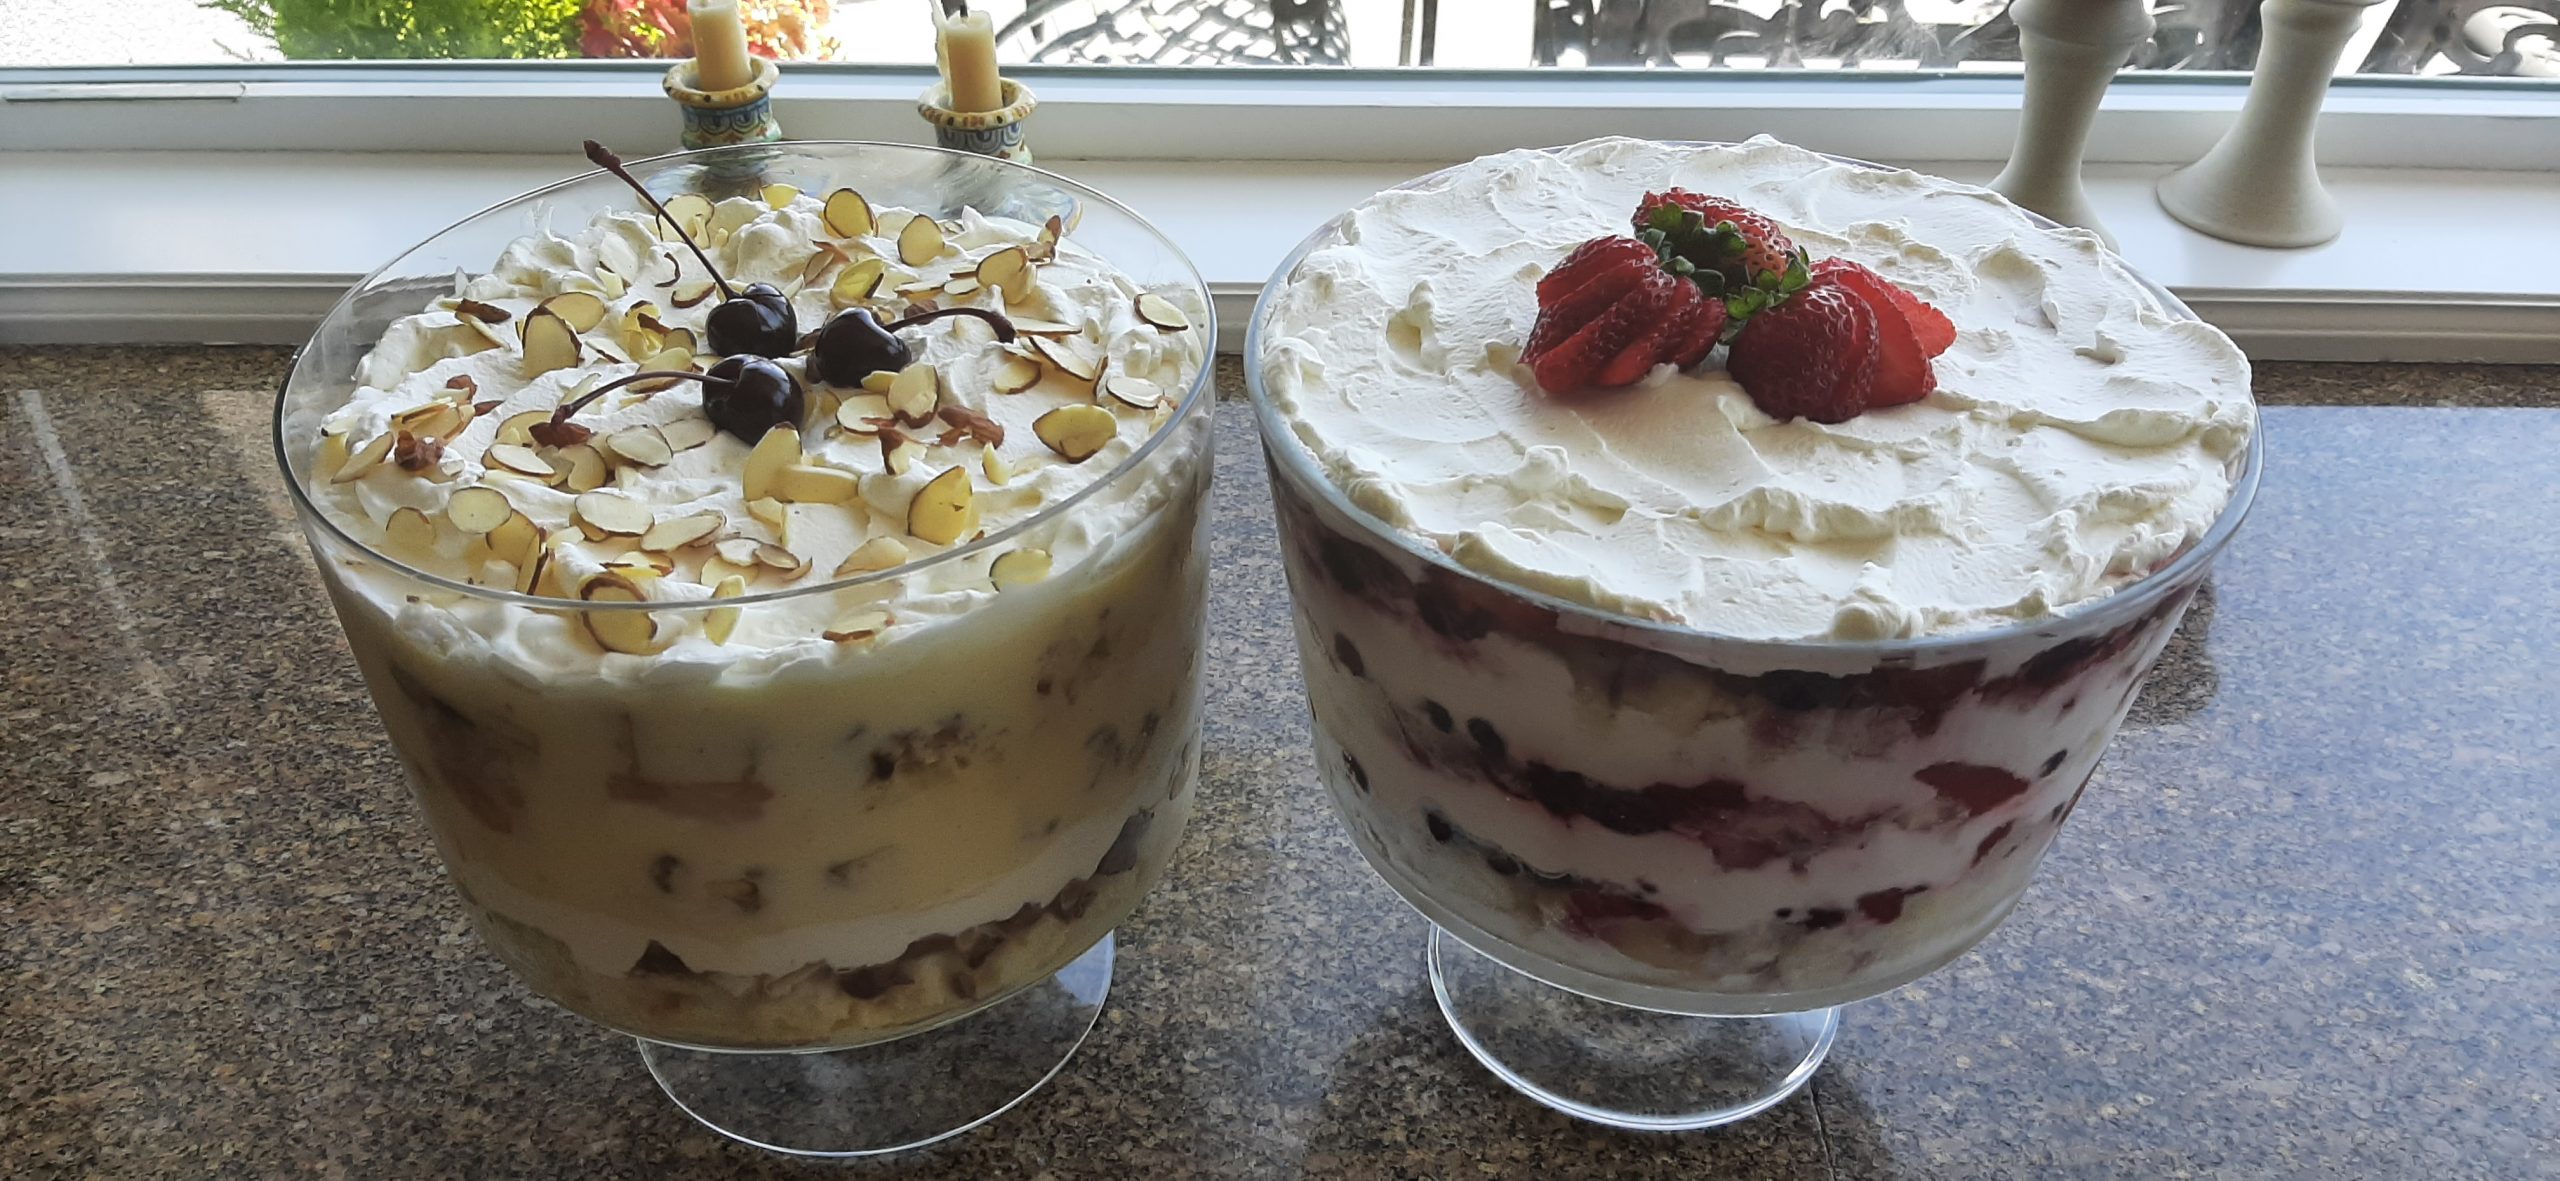
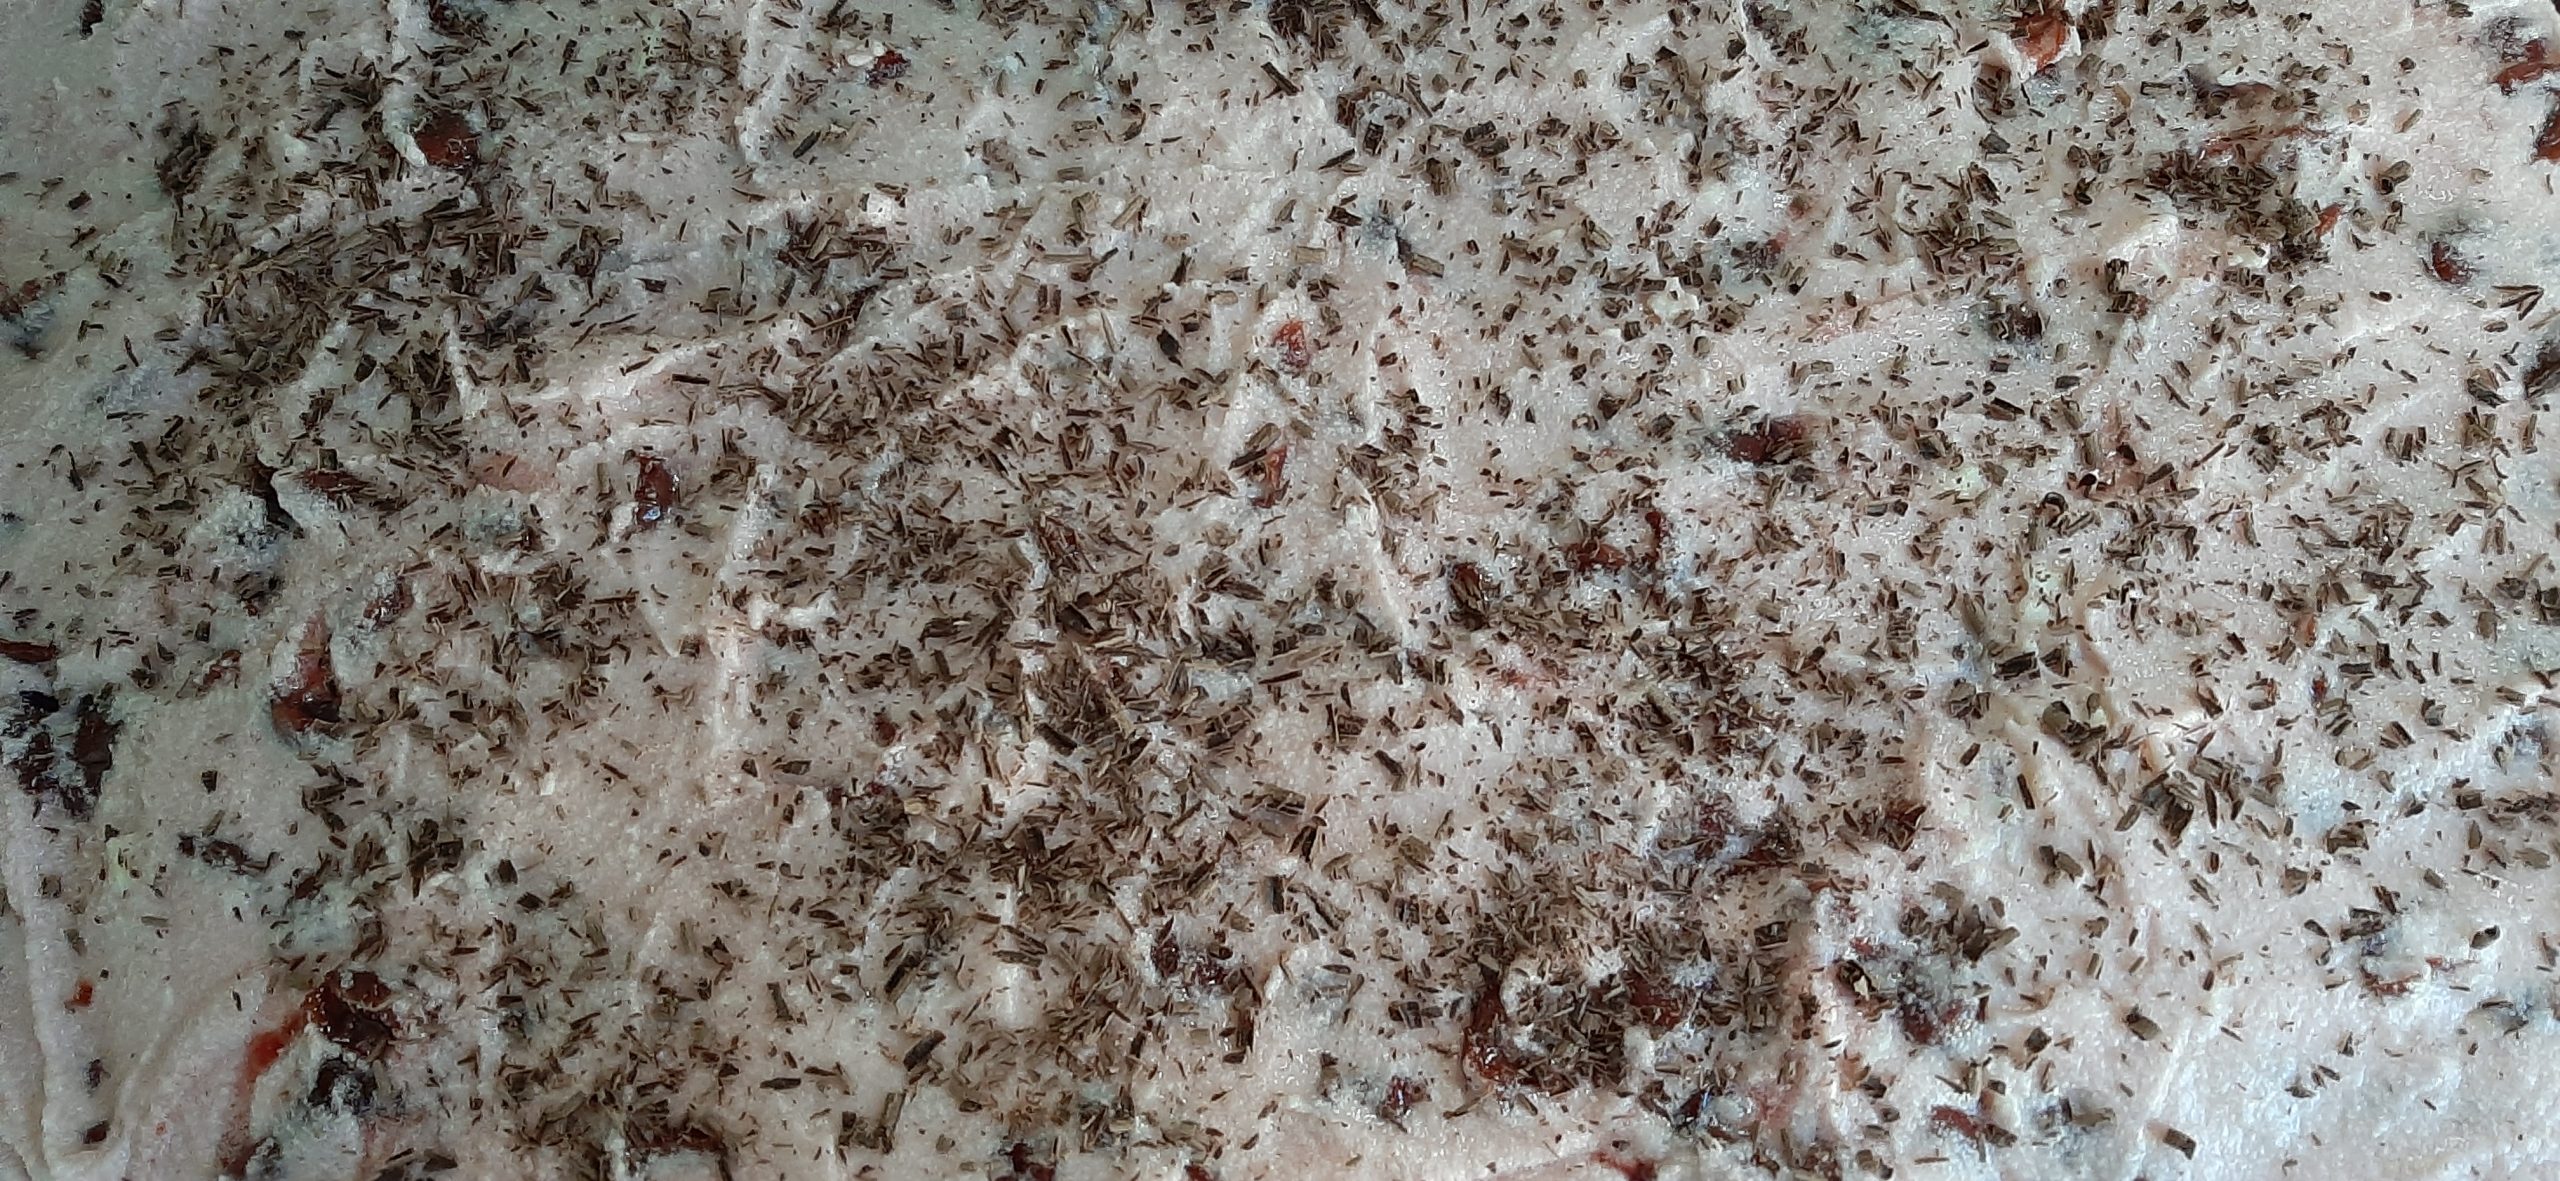
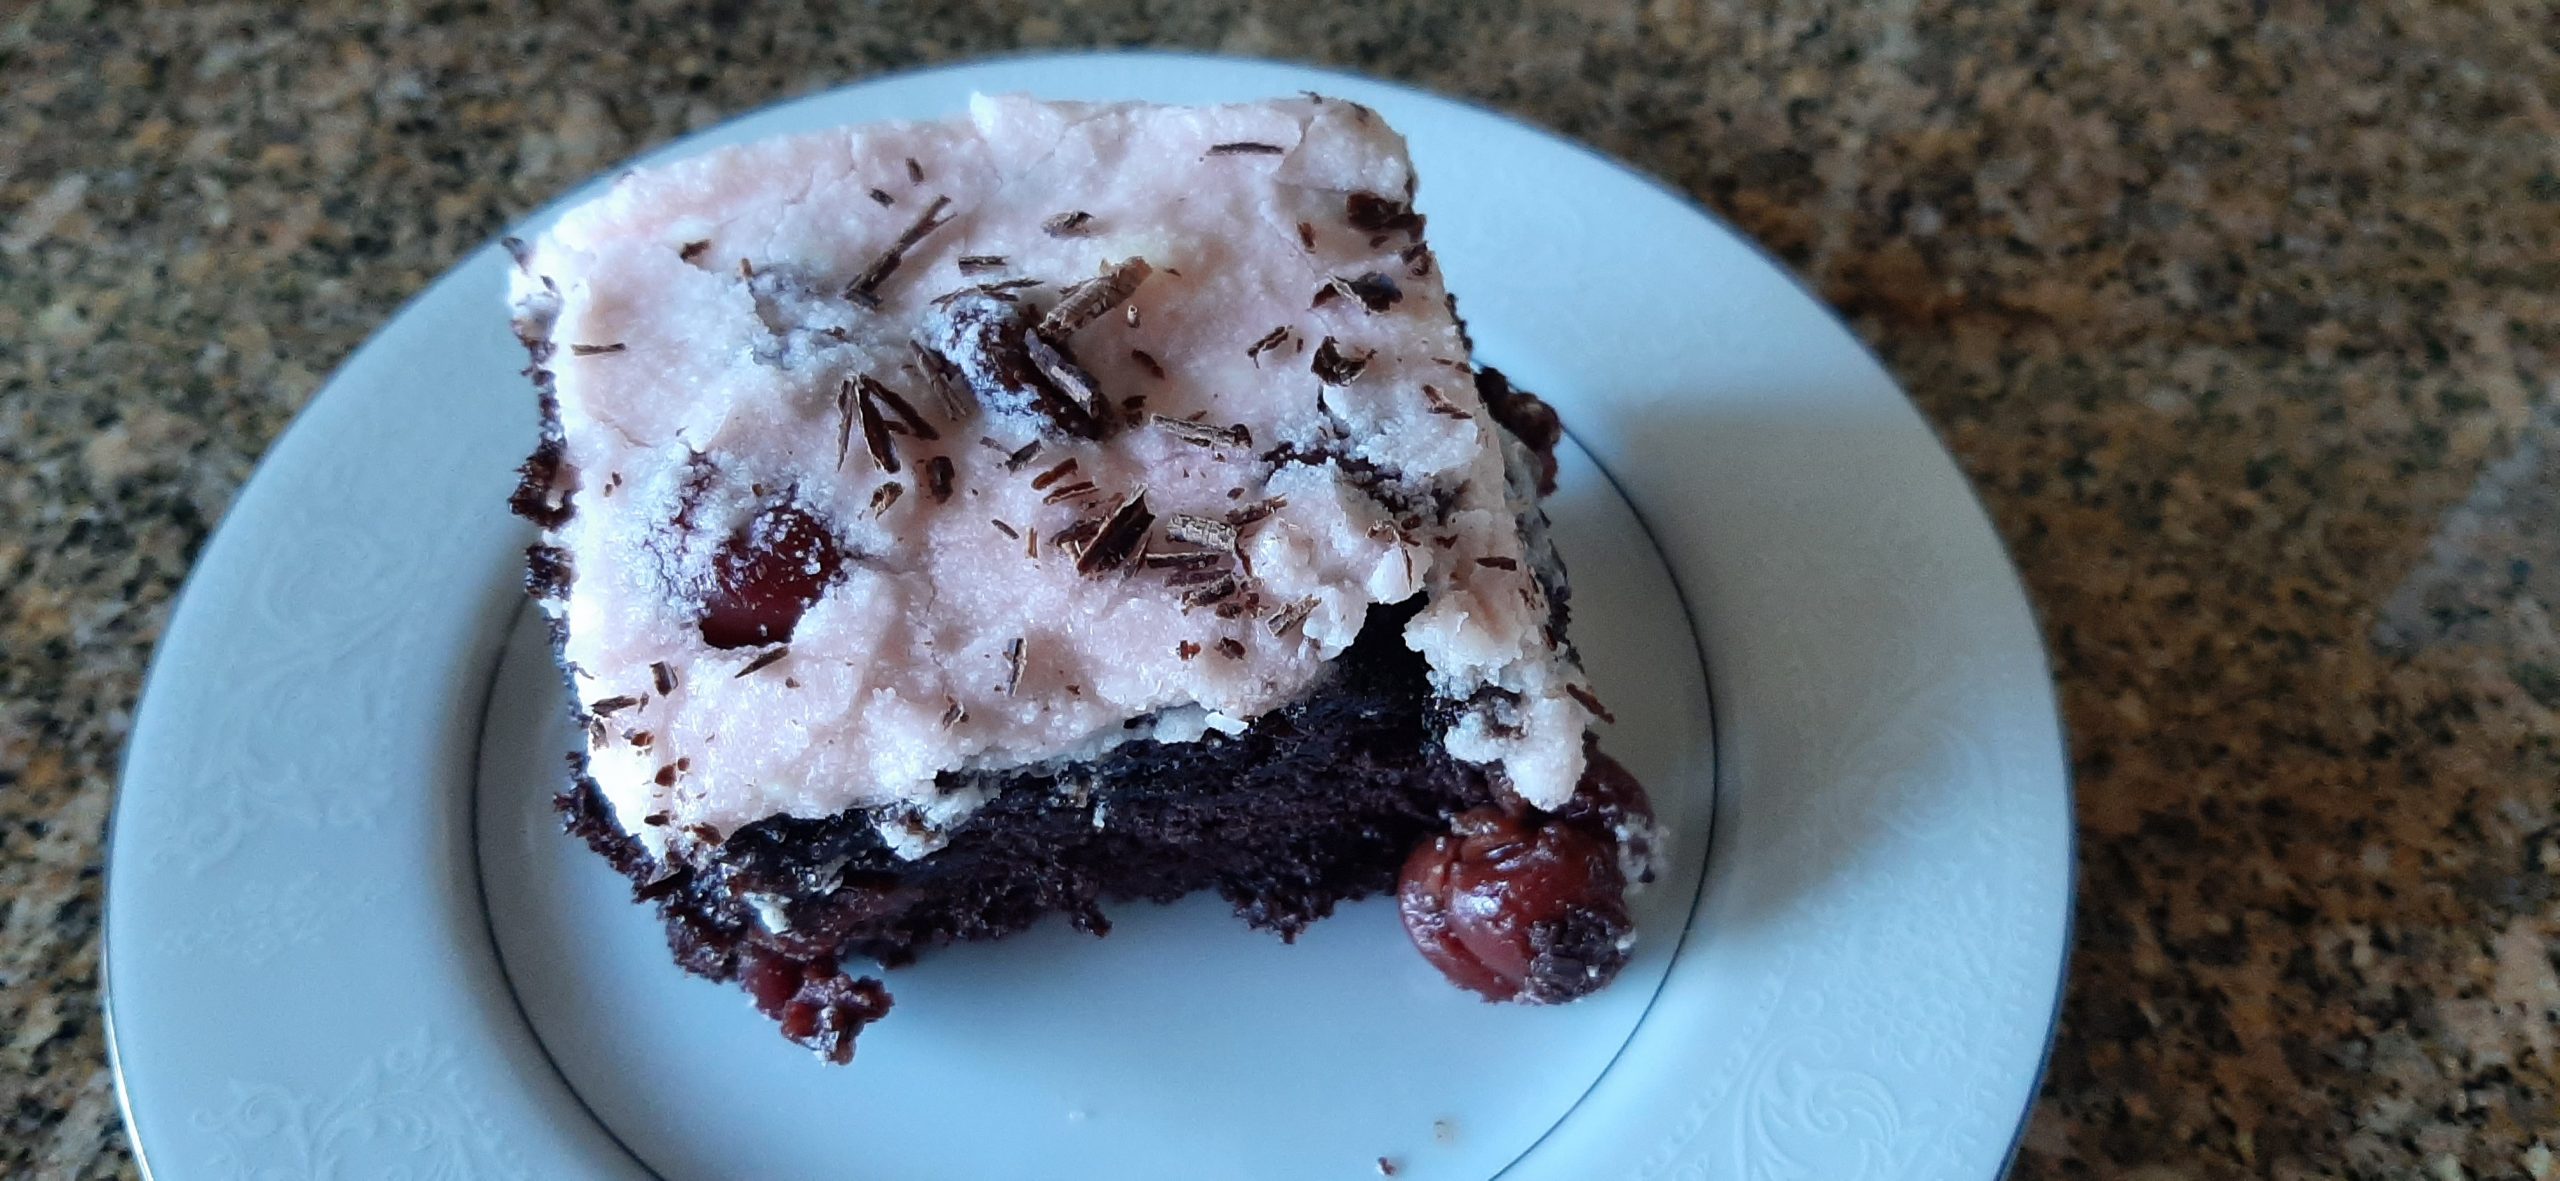
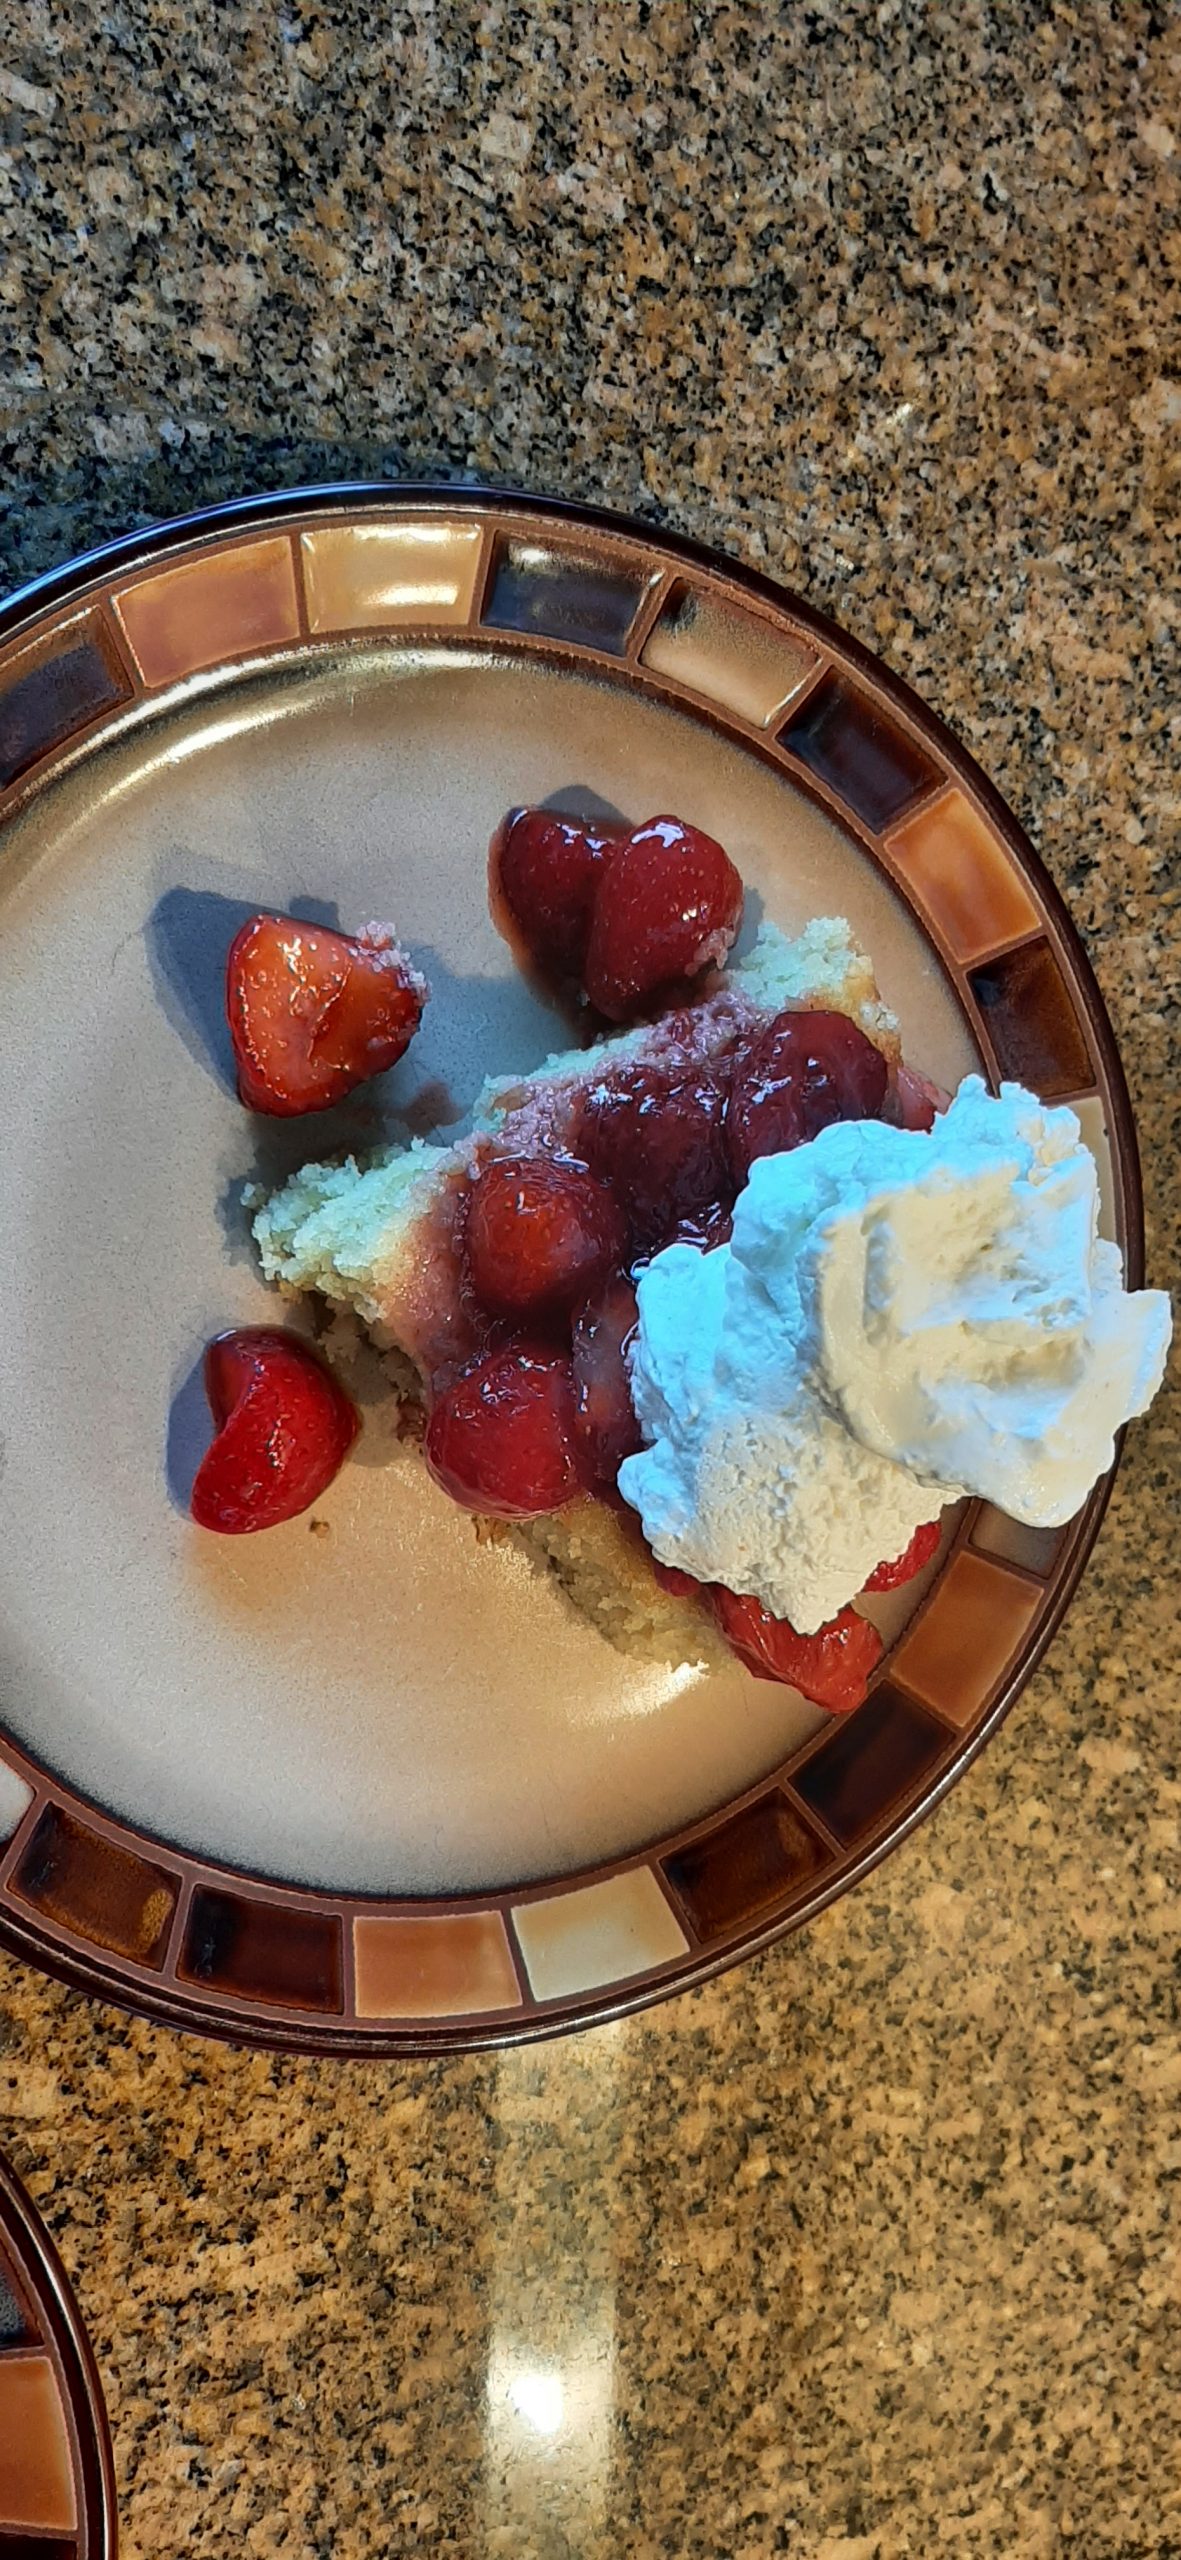
Category Archives: DESSERT RECIPES

BLACK FOREST SHEET CAKE

How the top looks

A cut piece of cake

This Black Forest Cake can be made 2 ways. My way or my other way. Allow me to explain.

I needed a large sheet cake to serve roughly 40 people. I knew I wanted to make a Black Forest Cake because I was serving Octoberfest food. But making food for that many people requires planning. And refrigerator space.

So, I decided as the top layer of my Black Forest sheet cake, I would use frosting rather than whipped cream. Made sense at the time. (I would have to refrigerate this huge sheet cake if I used whipped cream. Whereas frosting would be fine sitting on top of the cake at room temperature for a few hours.)

So, as planned, I served this cake to 36 people yesterday. And not one of them told me they never wanted me to serve this dessert again. In fact, the guests I heard from proclaimed it a winner. And to top things off, my dear friend Margo requested this cake for her upcoming birthday. So, there you go.  

What I told a few of our guests, and now I am telling you, was that I glommed this recipe together using my all-time favorite chocolate cake recipe. Then for the sauce, I agonized over whether to use some kind of cherry liqueur or cherry flavored brandy (think Kirschwasser) in the sauce. But finally, I chose to use bourbon, my favorite liquor to flavor everything from caramel sauce to BBQ sauce. And I think I made the right decision. Because bourbon lends such a lovely sweetness to all kinds of dishes, and it didn’t fail me in the cheery sauce either.

Since I was under cooking/baking time restraints, not to mention refrigerator space limitations, I made the cake on Wednesday and froze it. Then I made the cherry sauce on Thursday and refrigerated it. I left making the frosting until Sunday morning, the day of the home concert. And using frosting rather than whipped cream topping on the cake, I could leave the cake on a counter until needed.

At 5:00 am Sunday morning I woke up in a panic. How in the wide world of sports was I going to spread frosting over a sauce? (And why hadn’t I considered this aspect of putting the cake together a bit earlier?) But here I was on Sunday morning with 36 hungry mouths to feed (including Andy and me) and our guests due to arrive at 1:00 pm. And of course, with a lot of other last-minute food details that needed my attention.

So, Mr. C. took the cake out of the freezer when he first got up Sunday morning. A little while later I slathered on the cherry sauce, and then the fun began. (Just as I had predicted would happen at 5:00 am.)

Frosting absolutely does not like being spread over sauce. In fact, it rebels at the very thought of being accommodating to the poor cook who failed to take this fact of nature into consideration. But I won in the end. As will you if you decide to make this cake and use frosting instead of at the last-minute slathering on a thick coating of whipped cream. But truly, either using a butter cream frosting or a lovely cherry flavored whipped cream, it matters not. Both are going to make for one darn good piece of cake. And perfect for this time of year.

Well, that’s it for today. If you want to know how I made it work (spreading frosting over a sauce) you’ll just have to read the directions below. And yes, I made a double batch of the cake batter, cherry sauce, and the frosting to feed my guests. A bit left, but then that’s a win for Mr. C. and me!

And with that, as always, I wish you peace and love.

CHOCOLATE CAKE:  

1 c. unsalted butter, room temperature

3 c. packed brown sugar

4 eggs, room temperature

1 T. vanilla extract

3 c. unbleached all-purpose flour. fluffed

¾ c. cocoa powder

1 T. baking soda

½ tsp. salt

1 rounded tsp. instant espresso powder

1½ c. water

1-1/3 c. sour cream

Cream the butter and brown sugar together. Add the eggs, one at a time, beating well after each addition. Beat in the vanilla. Whisk together the flour, cocoa powder, baking soda, salt, and espresso powder. Add to creamed mixture alternately with water and sour cream, beating well after each addition.

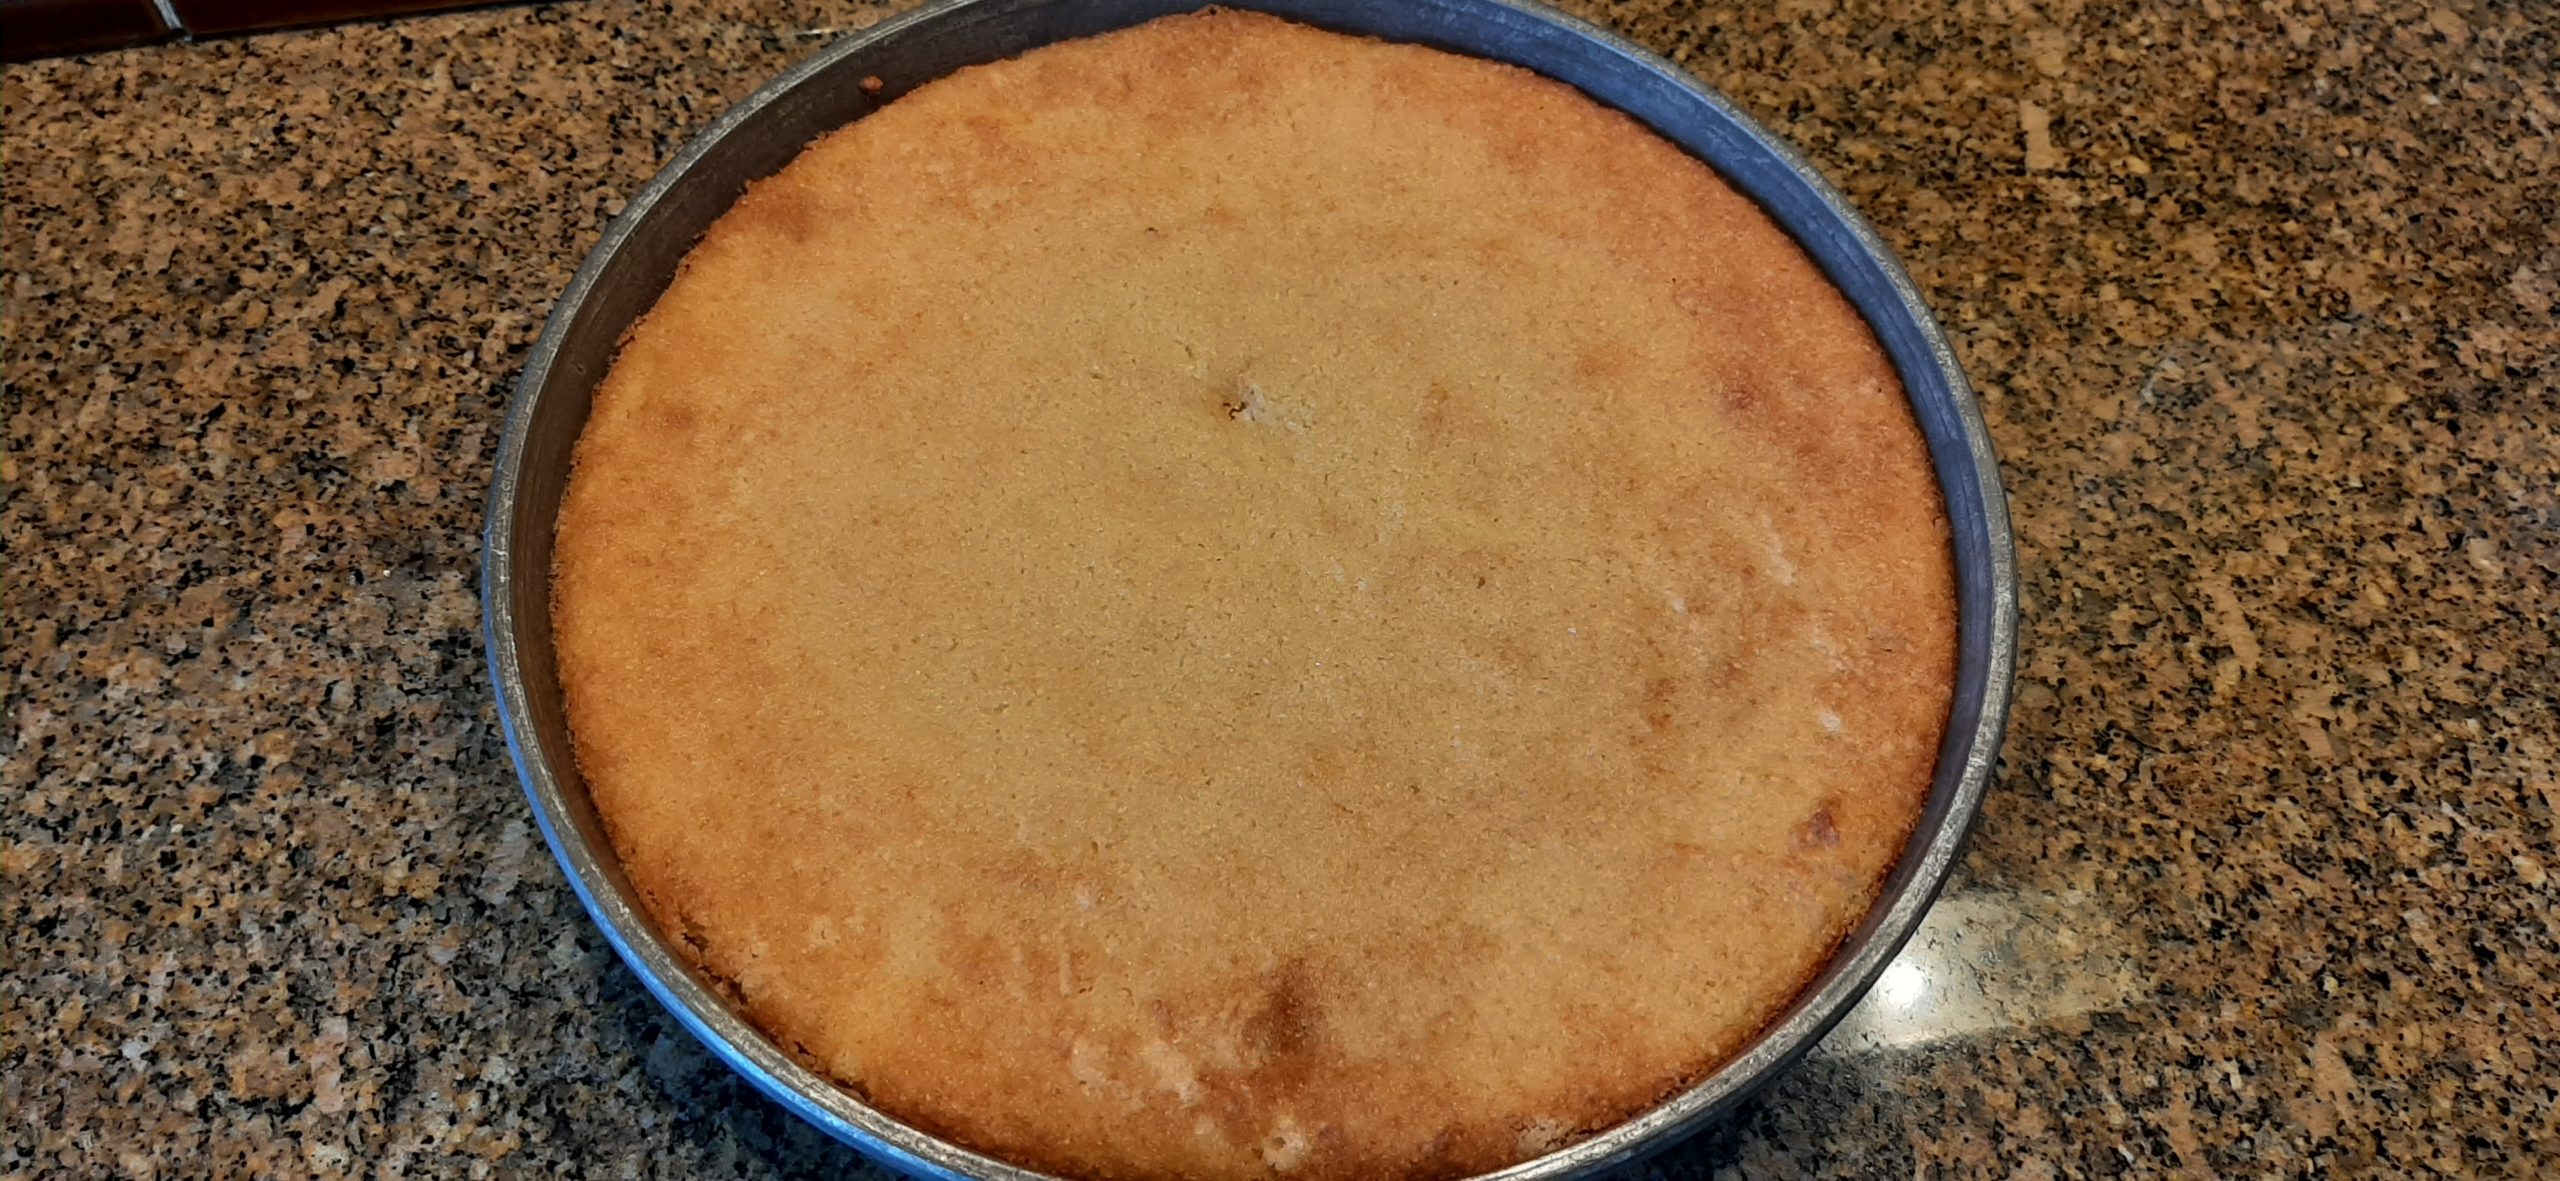
Pour into a greased and lightly floured 10×16-inch cake pan, or 1 9×13-inch cake pan and 1 8×8-inch cake pan. Bake in a pre-heated 350-degree oven for 25-35 minutes or until a toothpick inserted near the center comes out clean. Don’t over-bake! Remove from oven and place pan on a wire rack to cool completely. Or freeze until needed.  

TART CHERRY SAUCE WITH BOURBON:  

2 lbs. frozen pitted tart cherries, halved

¼ c. bourbon

6 T. cherry juice (from defrosted cherries)

2 T. cornstarch

¾ c. granulated sugar

Place the frozen cherries in a colander set over a bowl. Allow the cherries to thaw. (This takes several hours.) Save the juice for this recipe and for the buttercream frosting or whipped cream topping.

Whisk the bourbon, cherry juice, and cornstarch together in a large heavy pot. Add the sugar and defrosted cherries. Bring to a boil, stirring to avoid burning.  

Once the sauce thickens up a bit, remove from heat, cool, and refrigerate until needed. (It will thicken up more as it cools.)

BUTTERCREAM FROSTING

½ c. unsalted butter, room temperature

1 tsp. vanilla extract

3 T. cherry juice (from thawing the frozen cherries), or more if needed

tiny pinch of kosher salt

4 c. powdered sugar, or more as needed

whole milk or heavy cream, if needed

Beat the butter until soft and fluffy. Add the vanilla, cherry juice, and kosher salt, mixing until thoroughly combined.

Add the powdered sugar on low speed. Add more cherry juice or milk or cream a few teaspoons at a time until the frosting is light and fluffy and to your desired consistency. (The frosting needs to be very soft to spread over the cherry sauce.) (And I use the term “spread” very lightly!)

WHIPPED CREAM TOPPING

2 c. (1 pint) heavy whipping cream, or more if you like lots of whipped cream

½ tsp. vanilla bean paste or vanilla extract, or more to taste

2 tsp. cherry juice, or more to taste

6 T. powdered sugar, or more to taste

Whip the cream to hard peaks. Add the vanilla bean paste, cherry juice, and powdered sugar. Whip until blended.

ASSEMBLE THE CAKE:

chocolate shavings

Top with Frosting:

Spread the cherry filling over the cooled cake with an offset spatula. Place the cake in your freezer and chill for 30 minutes to set.

Taking small dollops of frosting at a time, gently spread the frosting over cherry filling with an offset spatula. The sauce will come through during this process, but it looks nice and tastes wonderful. Top with chocolate shavings.

The cake can sit at room temperature for several hours.

Top with Whipped Cream:

Carefully spread the whipped cream evenly over the cherry sauce. Top with chocolate shavings. Serve immediately or refrigerate until ready to serve, but not more than 2-3 hours.   

BANANA SPLIT TRIFLE WITH FRENCH VANILLA PUDDING, POUND CAKE, AND CHOCOLATE CHUNKS

Banana Split Trifle

Banana Split Trifle on the left, Mixed Berry Trifle on the right

There are several meanings for the word “trifle”. A thing of little importance or value. To treat someone or something without seriousness or respect. Or my personal favorite – a layered dessert of English origin. The usual ingredients being a thin layer of sponge fingers or sponge cake soaked in sherry or another fortified wine, a fruit element, custard, and whipped cream layered in that order in a glass dish.

However, I do things a little differently when I make trifles. (Of course, I do!)

I use cream cheese pound cake rather than sponge cake for both this trifle and for my Mixed Berry Trifle. And I use pudding rather than custard if I use it at all. (My Mixed Berry Trifle doesn’t call for any pudding or custard.) For my Fudgy Brownie, Chocolate Mousse, and Raspberry Trifle, I use brownies instead of sponge cake and chocolate mousse instead of custard. So, like I said, I change things up a bit when I make trifles. But the basic idea is still the same. And since I’m sure you were wondering what the difference is between custard, pudding, and mousse – allow me to elucidate.

Most custard and pudding recipes contain eggs. After that, the main difference is that pudding uses starch for thickening, while in most instances, custard is thickened just by the eggs themselves. And the texture of custard tends to be firmer than pudding. But both pudding and custard get their thick consistency from being cooked. Mousse, on the other hand, never experiences any heat. Also, with mousse, the incorporation of air into the mixture leads to its fluffier consistency. Final analysis – both pudding and custard are semisolid and denser, while mousse offers a lighter, airier texture. But enough about puddings etc. and back to this recipe.

When I was a child, my grandmother used to make a banana cream pie which included chunks of chocolate and sliced almonds on top. She called it a banana split pie. I loved that pie. So, when I was deciding what to serve for a recent get-together, I decided to try my hand at making a banana split trifle. And the recipe below is what I came up with.

And since you might be wondering why I didn’t just make banana pudding, the answer is simple. Banana trifle is like banana pudding on steroids. Need I say more?

A huge consideration when planning a dinner party is time. Especially the couple of hours or so before guests are due to arrive. So, if I can do most of the prep work ahead of time, my anxiety level actually stays in the “safe” zone rather than spiking off the chart. So, one of the best things about serving trifle is that this delicious dessert must be made ahead. So, if I am hosting a large number of people, trifle is the perfect dessert. I can make the pound cake ahead and freeze it. I can also make the pudding ahead and let it sit in the fridge. Then two days before I plan to serve the trifle, I put the whole thing together, place it in the fridge, and walk away. I usually add a bit more whipped cream and decoration to the top of the trifle the same day I plan to serve it, but even that is an option.

So, yes it takes time to make a trifle. But it’s all done ahead so that I can concentrate on the other elements of the feast that require last-minute attention.

And I don’t plate trifle. I let my guests serve themselves. Fun for them, and less work for me. Because by dessert time, I’m usually wiped out. 20 years ago, I would have still had energy to burn. These days, after a gathering at our home and all the guests have taken their leave, I’m lucky to get my shoes off before I’m sound asleep!

But I still love every minute of being a hostess. And the main reason is that Mr. C. is like my silent entertaining partner. He does all the behind-the-scenes work. He does most of the grocery shopping. He brings dishes, pans, silverware, special equipment, etc. up from our downstairs storage room. He then sets up the tables and the bar and quietly does a hundred little things that make my part easier. And after everyone has left, he turns into the clean-up king. I am truly a very lucky lady. I only hope you are as lucky.

So, as always, from my kitchen to yours – peace and love to all.

For the French Vanilla Pudding:

3 c. whole milk, divided

3 T. cornstarch

pinch of salt

¾ c. granulated sugar

3 lg. egg yolks

1 T. unsalted butter

1 tsp. vanilla bean paste or pure vanilla extract

In a small bowl, whisk together ¼ cup of the milk with the cornstarch. Set aside.

In a medium saucepan, whisk together the remaining milk, salt, and sugar. Allow the mixture to heat over medium heat until it is steaming; do not let it boil.

While the milk heats, whisk the egg yolks in a separate small bowl. Once the milk is steaming, slowly stream 1½ cups of the hot milk mixture into the egg yolks, whisking constantly. Slowly add the egg yolk mixture back to the pot, followed by the cornstarch mixture. Continue to cook over medium heat, whisking constantly, until the mixture starts to simmer and has thickened.

Remove from the heat and whisk in the butter and vanilla. Allow it to cool completely. Then transfer the cooled pudding into a small bowl. Top with plastic wrap touching the top of the pudding to prevent a skin from forming and allow to chill for several hours before putting the trifle together.

For the Pound Cake:

½ c. unsalted butter, room temperature

4-oz. (½ pkg.) cream cheese, room temperature

1½ c. granulated sugar

½ tsp. salt

3 lg. eggs, room temperature

2 tsp. vanilla

1½ c. unbleached all-purpose flour

Cream the butter and cream cheese together in a large mixing bowl. Add the sugar and salt and whip until mixture is light and fluffy, about 5 minutes. Add eggs one at a time. Beat in vanilla. Add flour at low speed until well incorporated, but do not overbeat. Transfer batter to a buttered 9-inch baking pan. 

Place pan in cold oven. Set temperature to 200-degrees; bake for 20 minutes. Increase temperature to 250-degrees; bake 20 minutes. Increase to 275; bake for 10 minutes. Increase temperature to 300 degrees and bake for 25 to 30-minutes or until a toothpick inserted near the middle of the cake comes out clean.  

Remove from oven and cool on a rack before cutting into small chunks just before assembling the trifle. (Can be made ahead and frozen until needed.)

For the Whipped Cream:

1 c. heavy whipping cream

1 T. powdered sugar

¼ tsp. vanilla bean paste or vanilla extract

Whip the cream to stiff peaks. Add the powdered sugar and vanilla bean paste. Whip some more until well blended.

For the “banana split layers” and topping garnish:

5 bananas, cut into small chunks

¾ c. milk, semi-sweet, or dark chocolate chips, chopped

½ c. sliced almond

½ c. heavy cream

2 tsp. powdered sugar

3-5 maraschino cherries (I use Bada Bing cherries)

When ready to assemble, spread just about ½-¾ cup of the pudding in the bottom of the container. Then place ⅓rd of the cake chunks over the pudding in the bottom of a trifle bowl (straight sided glass bowl). (Actually, any glass bowl will work, but for the best presentation, a straight sided bowl is best.)

Spoon ⅓rd of the remaining pudding over the cake cubes. Place ⅓rd of the banana chunks on the pudding. Sprinkle ⅓rd of the chocolate chunks over the banana chunks and spread ⅓rd of the whipped cream over the chocolate chunks.

Add another ⅓rd of the cake, pressing down lightly to remove any air pockets in the layers below. Then repeat as directed above. Always press down a bit on the cake chunks as you assemble the dessert. After adding the last layer of whipped cream, smooth the surface with an offset spatula.

Cover with plastic wrap and refrigerate for at least 24 hours and up to two days.

Remove from refrigerator about an hour before serving. Garnish with additional whipped cream, sliced almonds, and 3 or 5 maraschino cherries.  

CHEWY WHITE CHOCOLATE MACADAMIA COOKIES  

Well, the way I see it, if Subway can do it, so can I! Starting yesterday, I too can now make a mean white chocolate chip macadamia cookie. And it is all because of our good friends Jim and Margo.

These dear friends love white chocolate macadamia cookies. But they aren’t as fond of baking as I am. Jim, who does most of the cooking in their household, even goes so far as to profess the lack of the “gluten” gene. (He also states that he is also lacking the “grandmother” gene, which is why I can make really good gravy. But that’s a story for another time!) (Actually, he too can make great gravy. Even if he doesn’t possess the “grandmother” gene.) But I can’t really argue with his belief about gluten genes since I’m pretty sure I came with several extra “gluten” genes. (Thanks mom and dad.)

So, although this wonderful couple will undoubtedly continue buying these marvelous cookies at Subway, especially when they are on RV trips, I can at least do my part and build them my homemade version whenever the spirit moves.

So, if you too love a chewy white chocolate macadamia cookie, may I recommend this recipe. It is an extremely easy cookie to build. Except there is one part that is always a challenge. (As with other truly perfect cookies.) It’s the wait time.

Because, if you really want to bake the best cookies ever, the colder your dough is before it heads into the oven, the less the cookies will spread during baking. The time spent in the fridge gives the flour in your dough time to hydrate. This translates into cookies that are more chewy than cakey. And who doesn’t love a good and chewy cookie?!

And to take this whole cookie baking revelation one step further, and completely shatter your world, making cookie dough one day and baking it off the next day is pretty much the recommended practice by leading authorities if you want to bake truly wonderful cookies. And yes, that means you must plan ahead. And yes, I now am a strict adherent to this thinking. And yes, it has made a big difference in the quality of the cookies I bake.

So, if I can manage this change of thinking, so can you. Believe me, it just becomes a habit after a while. But I promise you will see a positive difference in just about every cookie you bake by giving the dough some time in a cold and dark environment before it is introduced into a hot oven.

So, cooking lesson for the day. Done. New cookie recipe for you to make for your family and friends. Done. Now, for me, it’s on to making pound cake for the trifles I’m serving at our home this next Sunday. So, if I don’t have time to post any new recipes for the next several days, know that I am doing what I love to do best. Making food for friends.

May you too take pleasure in offering hospitality. Because hospitality is a win/win situation for everyone involved. If you are the one providing the hospitality, it makes you feel good to welcome family or friends into your home. If you are the recipient, it just feels good to know that someone cares for you enough to want to entertain you in their home. And if there is food involved in the hospitality, it is even more of a win for all concerned.

So, offer hospitality whenever you can.

And as always, peace and love to all.

¾ c. (1½ sticks) cold unsalted butter

½ c. granulated sugar

1 c. light brown sugar, packed

2 tsp. pure vanilla extract

2 lg. eggs 

2⅔ c. unbleached all-purpose flour, fluffed

rounded ½ tsp. kosher salt

1 tsp. baking soda

1⅓ c. white chocolate chips/callets (I use Callebaut White Chocolate Callets)

1⅓ c. roasted salted macadamia nuts, chopped

In the bowl of your stand mixer, beat the butter until no lumps remain. Then add the granulated sugar and brown sugar. Mix until well combined. Add the vanilla and eggs, one at a time, until well blended.

In a large mixing bowl, whisk the flour, salt, and baking soda together and add to the butter mixture. Mix until just blended. Do not over mix.

Stir in the nuts and white chocolate chips.  

Using a #30 (2 tablespoons) ice cream or cookie scoop, drop balls of dough close together on a small parchment paper lined baking sheet. Place in your fridge for several hours to overnight. (Best overnight)

When ready to bake, place cookie balls about 1½-inches apart on a parchment paper lined baking sheet.

Bake in a pre-heated 325-degree oven for 12-13 minutes. The cookies should be a light golden brown around the bottom edges and the centers should not look shiny or doughy. Do not overbake. 

Remove from oven and allow the cookies to rest on the baking sheet for a couple of minutes before transferring to a wire rack to cool completely.  

Store in an airtight container. I got 28 cookies.

STRAWBERRY BUCKLE

A buckle is an old-fashioned dessert very much like a coffeecake, but much denser. (Almost as dense as bread pudding.) And topped with a fabulous streusel topping that I mainly associate with a great crumble or crisp.   

A buckle is also similar to a cobbler, in that it is basically a berry or fruit concoction with a top layer. But instead of the fruit or berries being the bottom layer with some type of baked cake, biscuit, or crust sitting on top of the fruit, the berries or fruit are mixed right into a rich cake batter. Then the batter is spread in a pan and sprinkled with a crunchy streusel topping.

Buckle apparently got its name, because after it comes out of the oven and sits for a few minutes, part of the top starts to sink in on itself giving the whole dessert a “buckled,” or indented appearance.   

And unlike regular cakes, buckles are usually served warm. Plus, buckle aficionados usually serve generous pieces of buckle topped with vanilla ice cream or whipped cream. And OMG, does that make for one delicious, decadent dessert.

Now, of course you can use other berries or fruits to make a buckle. Using blueberries, you have a blue buckle. Using peaches, a peachy buckle. With huckleberries, (according to my brother-in-law Rick) you have a huckle buckle.

Regardless of how you might choose to refer to your buckle, you are sure to please everyone who is lucky enough to get even a taste of this all but forgotten delicacy.

When I was recently asked by our good friends Marty and Jeanette what I knew about buckles, I kind of looked at them and said, huh? Although I remembered hearing the word, I only had a vague idea what constituted a buckle if it didn’t come with a belt. But now that I have made and tasted one, there are sure to be many more buckles in our future!

So, buckle up ladies and gentlemen! We are going to buckle like there is no tomorrow! Because I’m absolutely sure that once you too learn how easy a buckle is to make, and how delicious it is to eat, you are going to want to buckle down and make them at every opportunity! And since it’s fresh berry and fruit season, why the buckle not give one of these babies a try?!

So, without further ado, I give you Strawberry Buckle. May the force be with you!

And thank you Marty and Jeanette for bringing buckles to my attention. What fun I’m going to have bringing buckles back into the limelight! But why they were ever semi-forgotten will forever remain a mystery to me. It’s kind of like if chocolate became a forgotten commodity. (Like that could EVER happen!) But you catch my drift!

So, as always, peace, love, and chocolate to all. (Buckles too!)

½ c. (1 stick) unsalted butter, divided

¾ c. granulated sugar

1 lg. egg

½ tsp. vanilla extract

½ c. whole milk

2 c. + ⅓ c. unbleached all-purpose flour, fluffed, divided

2 tsp. baking powder

½ tsp. kosher salt

2 c. sliced fresh strawberries, or berries or fruit of choice

½ c. brown sugar, packed

½ tsp. cinnamon

In the bowl of your stand mixer, cream half of the butter and the granulated sugar together until light and fluffy. Add the egg and vanilla, then add the milk. Mix until thoroughly combined.

In a separate bowl, whisk 2 cups of the flour, baking powder, and salt together. Mix into the butter mixture just until combined. Fold in the sliced strawberries (or fruit of choice).

Spread the thick batter in a lightly greased, 9×9-inch baking pan. Don’t clean the mixing bowl. You will be using it again.

In the same mixing bowl, cream the remaining quarter cup butter and brown sugar together. Mix in the remaining third cup of flour and cinnamon. Sprinkle clumps of the topping over the batter and bake in a pre-heated 375-degree oven for 32-35 minutes just until the center is set, and a toothpick comes out clean. Do not overbake. Remove from oven and set aside to cool.

Serve warm with vanilla ice cream or sweetened whipped cream.

And of course, any ripe, juicy fruit can be used in a buckle. So, blackberries, blueberries, raspberries, peaches, nectarines, apricots, or plums (or a mix of the above) would also be perfect.

FUDGY ESPRESSO WALNUT COOKIES  

OK, this is the best chocolate nut cookie I have ever tasted. And these fudgy cookies are so very easy to make. But then, when it comes right down to it, most cookies are easy to build. But not all cookies taste as good as these cookies. Not even in the same ballpark!

These fantastic cookies are fudgy, soft, chewy, and crunchy all at the same time! And we all have Krista from livingoncookies.com to thank for this amazing recipe. I made a couple of slight modifications, but the rest is all on Krista.

It all started the other day when I decided to find a recipe for a mocha flavored chewy cookie. (Kind of like a soft and chewy ginger cookie, but not a ginger cookie. A chocolate cookie with lots of coffee overtones.) And I happened to mention to Mr. C. what I was up to. Which led to a confession on his part.

It turns out that when Mr. C. has a lot of stops to make while shopping for various and sundry provisions, he often treats himself to a mocha walnut cookie from The Cookie Mill bakery in Stanwood. This ginormous cookie then provides him with the strength to complete his tasks without wasting away from hunger. (Right???) (No, I didn’t buy his story either.) (But he is a cookie monster. That I get!)

Anyway, he bought a mocha walnut cookie while he was out that day so I could taste for myself what all the fuss was about. And OK, the cookie was pretty good. But not nearly as good as these cookies. But then, the bakery cookie didn’t have the depth of chocolate mocha flavor these cookies possess. Plus, I couldn’t find as much as a hint of walnut in the couple of bites I tasted.    

But you know what they say, to each his own. So, although I have no doubt Mr. C. will continue to purchase a mocha walnut cookie for himself as a reward for being the primary in-store shopper for our household, he really likes these cookies too. (Of course, he does! What’s not to like?)

So, if you too ever get a hankering for a deeply chocolate mocha cookie that is almost a religious experience at first bite, this is the cookie for you. It may not be a good choice for a toddler, but for any adult with a discerning palette, you are sure to earn points. But only if you decide to do the right thing and share the cookies with your family or friends. Just sayin’!

And even if you decide not to share, peace and love to you anyway. Because these cookies are so good that they might even transcend civility.  

1 c. cold unsalted butter

1 c. granulated sugar

1 c. brown sugar, packed

2 eggs

1 tsp. vanilla bean paste or vanilla extract

2 c. unbleached all-purpose flour, fluffed

1¼ c. good unsweetened cocoa powder

2 tsp. baking soda

2 T. instant espresso (I use Medaglia D’Oro)

½ tsp. kosher salt

1 c. mini chocolate chips

1 c. chopped walnuts

In the bowl of your stand mixer, beat the cold butter, granulated sugar, and brown sugar together until light and fluffy. Add the eggs and vanilla extract and beat until combined.

In a medium-sized mixing bowl, whisk the flour, cocoa powder, baking soda, espresso powder, and salt together. Gradually add flour mixture to butter mixture and beat on low speed just until combined. Add the mini chocolate chips and chopped walnuts.

Line a baking sheet (needs to fit in your fridge) with parchment paper. Using a #40 ice cream scoop (1½ tablespoons of dough), plop balls of dough close together on the prepared pan. Refrigerate for several hours or overnight.

Line baking sheets with parchment paper. Place the cold dough balls on baking sheets leaving a 1½-inch space between cookies.

Bake in a pre-heated 350-degree oven for about 9 minutes. They will be done when thin cracks appear on the surface of the cookies. Do not overbake.

Remove from oven and allow the cookies to rest on the baking sheets for 5 minutes before transferring to a wire rack to cool completely. Store in an airtight container.


BAKED NEW ORLEANS STYLE BEIGNETS (AND BEYOND)  

Top picture, beignets just out of the oven. Second picture, after sprinkled with powdered sugar.

Just so you know, New Orleans style beignets are different from classic French beignets in that the dough for New Orleans beignets includes yeast to help the dough rise. True French beignets are a choux pastry (no yeast) that relies on moisture content instead of yeast to facilitate rising. (And yes, Café du Monde uses yeast in their beignet dough. And of course, they deep fat fry their beignets, and serve them hot out of their oil bath liberally sprinkled with powdered sugar. But we aren’t going in that direction today. Except for the powdered sugar sprinkling. We are all in on that part!)  

Now, if you are not familiar with beignets, allow me to elucidate. Beignets are a type of donut, but with a bit more of a yeast risen texture. And the flavor on the inside is not as sweet as a traditional donut. Which I especially appreciate. But for some, beignets are not as sweet and therefore not as well-known or well-loved as glazed or frosted donuts.

So, in order to make everyone happy, I have given you the recipe for baked beignets topped with powdered sugar. But for those of you who prefer a sweeter overall flavor, I have provided 3 topping recipes to sweeten these basic donuts up a bit. So, below you will find my recipes for Vanilla Glaze, Spiced Rum Glaze, and my crazy good Maple Frosting. If choosing one of these options or your own favorite topping, no need to brush with melted butter and sprinkle with powdered sugar. Just let the baked squares (or your choice of shape) cool completely before adding the glaze or frosting.  

The difference with this recipe from other recipes for beignets is not the ingredients in the dough, but the method of turning them from dough into an edible product. In this happy journey to beignet/donut paradise, there is no hot oil used in the making of these tasty morsels. Your oven fulfills that responsibility. Plus, you can choose to make the dough the day before or the same day. Whichever method works best for you. And wait until you read how easy the dough is to prepare. You are going to be blown away. (Hopefully towards your kitchen.) Because this simple recipe makes for some extremely delicious treats that everyone you serve them to is going to love.

One thing I should mention however, which is true for either baked or fried beignets or donuts; they are at their best the day they are made. So, plan to serve them the same day or if that isn’t possible, gently warm them the next day. But be prepared to re-sprinkle them with more powdered sugar. (Like that’s a bad thing. Not!)

So, without further ado (drum roll please), welcome to the world of baked beignets. Or baked glazed or frosted donuts. Regardless of which way you go, you are in for a new and (slightly) healthier way to enjoy a donut.     

As always, peace and love to all.

¾ c. lukewarm water

¼ c. granulated sugar

1½ tsp. active dry or instant yeast

1 lg. egg

½ c. buttermilk

4 T. (½ stick) unsalted butter, melted, divided   

½ tsp. kosher salt

2 tsp. vanilla bean paste or vanilla extract

3½ to 3¾ c. unbleached all-purpose flour, fluffed, or a tiny bit more as needed

veggie oil (for greasing the mixing bowl)

1 T. milk

powdered sugar (for dusting)

In the bowl of your stand mixer, combine the water, sugar, and yeast with your dough hook and stir until well combined. Let sit for about 10 minutes or until the yeast starts to get foamy on the surface. 

Add the egg, buttermilk, 3 tablespoons of the melted butter, salt, and vanilla; mix to combine. Add 3½ cups of fluffed flour and stir on medium-low speed until the dough comes together. The dough should be slightly sticky to touch, but a bit of the dough should still be sticking to the bottom of the bowl. (Resist the urge to add too much flour.) Then turn on medium speed and knead for about 5 minutes.

Pour a small amount of oil into the mixing bowl, and using your hands and a stiff rubber spatula, form the dough into a ball lightly coated with the oil. Cover with plastic wrap.

To bake beignets the same day:

Let the dough rise until doubled in size. (About 2 hours.)

Roll dough to ¼-inch thickness and cut into 1½-2-inch squares. (This is easy to do with a pizza cutter.)

Place the squares on baking sheets lined with parchment paper 1-inch apart. Let the dough rise for about 60 minutes or until the dough is puffy and about doubled in size.

Brush each square lightly with milk and bake in a pre-heated 350-degree oven for about 15 minutes, or until very lightly browned. Don’t overbake.

Remove from oven and while the beignets are still warm (after about 5 minutes), brush them with remaining melted butter and generously dust* with powdered sugar. If possible, eat while still warm.

To bake beignets the next day: Place the covered mixing bowl in the refrigerator overnight. The dough will double or triple in size while it’s in the fridge. Remove from the fridge at least 45 minutes before you plan to roll out and cut the dough.  

On a lightly floured surface, roll the dough to ¼-inch thickness and cut into 1½-2-inch squares. (This is easy to do with a pizza cutter.)

Place on parchment paper lined baking sheets at least 1-inch apart. Let the dough rise for about 60 minutes or until the dough is puffy and about doubled in size.

Brush each square lightly with milk and bake in a pre-heated 350-degree oven for about 15 minutes, or until slightly browned. Don’t overbake.

Remove from oven and while the beignets are still warm (after about 5 minutes), brush them with remaining melted butter and generously dust* with powdered sugar. Eat while still warm.  

Please note: If you don’t plan to eat all the beignets in one sitting, warm them in your microwave for about 10 seconds just before serving. Then sprinkle with more powdered sugar if necessary.

*An easy way to sprinkle/dust powdered sugar is to place a small amount in a fine mesh strainer and then shake the strainer over whatever you wish to decorate. This same technique works well with cocoa for chocolate dusting. 

VANILLA GLAZE

2 c. powdered sugar 

⅛ teaspoon salt

1 tsp. vanilla bean paste or vanilla extract

5-6 T. whole milk or cream

Whisk all the ingredients together in a medium bowl until smooth.

Place the beignets on a wire rack over a baking sheet. Coat the beignets with the glaze by dunking each one into the glaze. Place back on the wire, glazed side up, to set completely before storing in an airtight container.

SPICED RUM GLAZE

1 c. powdered sugar

1 tsp. rum

tiny pinch cinnamon

tiny pinch nutmeg  

2–3 T. whole milk

In a small bowl, whisk the powdered sugar, rum, cinnamon, nutmeg, and 2 tablespoons milk together. If needed, add more milk to achieve desired consistency.  

Place completely cooled beignet pieces on a large baking sheet. Drizzle on the glaze. Allow glaze to harden before storing in an airtight container.

MAPLE FROSTING

2 T. unsalted butter

¼ c. brown sugar, packed

2 T. whole milk

1½ tsp. corn syrup

1 tsp. good maple extract

1 c.  powdered sugar

In a small saucepan, melt the butter, then whisk in the brown sugar. When the brown sugar starts to dissolve whisk in the milk and simmer for about 3 minutes over medium heat, stirring continuously until the brown sugar is completely dissolved.

Remove from heat and whisk in the corn syrup and maple extract. Then whisk in the powdered sugar until the frosting is smooth and free of powdered sugar lumps.

Using a large spoon, ladle frosting onto each cooled beignet piece.

Warning: Work quickly or the frosting will start to set up before you get to the last piece. (Take my word for this!)

ALMOND CAKE WITH STRAWBERRY SAUCE AND VANILLA BEAN PASTE WHIPPED CREAM (GF STRAWBERRY SHORTCAKE)

Strawberry shortcake is one of my all-time favorite desserts. I know, terribly plebian of me, but never-the-less, it’s the truth. And when made with either this GF cake or my Cream Cheese Pound Cake (recipe on site), I defy anyone to come up with a finer dessert! Or to find an easier cake to prepare than this amazing almond cake recipe from bobsredmill.com. (My Cream Cheese Pound Cake, not as quick and easy to build. But absolutely scrumptious! And definitely worth the effort.)

Anyway, whether you are trying to eat less wheat flour or just have a desire to produce a moist, delicious cake that everyone in your family can enjoy (except those who are allergic to nuts, of course), this cake recipe is an absolute winner. Even if you choose to eat this cake without any type of topping, you are in for a treat. It absolutely melts in your mouth. And the flavor is amazing.

As far as the strawberry sauce and whipped cream are concerned, you have only my word that they are both delicious and easy to prepare. And of course, can be used with other wonderful culinary offerings. (Think Sunday morning waffles decorated with strawberry sauce and whipped cream.) Yum!

So, while fresh strawberries are just coming into season, plus almost always available year-round, I suggest you make this dessert for your family and friends any time a tasty treat would make life better. I promise you this strawberry shortcake will be very well received. And just imagine how much joy this delicious combination would bring in say, February, when it’s been raining buckets for 9 straight days. And the wind is howling like a pack of coyotes. And just walking from your car to the door of your grocery store is less desirable than cleaning toilets!

I can only speculate that this dessert might save your sanity. And that of your loved ones. I know it would definitely make me an easier person to live with under similar circumstances!   

Peace and love to all.  

Almond Cake:  

6 T. (¾ stick) unsalted butter, room temp.

½ c. granulated sugar

2 lg. eggs. room temp.

¼ c. whole milk

½ tsp. vanilla extract  

1/8 tsp. good almond extract

¾ c. almond flour

¼ c. organic coconut flour

1 tsp. baking powder  

1/8 tsp. fine sea salt

Grease an 8×8-inch baking pan with cooking spray. Set aside. (If you double this recipe, use 2 8×8-inch pans or 1 9×23-inch pan.) (And yes, next time I make this cake I will double the recipe. The cake is just so very, very good!)

Cream butter and sugar until very light and fluffy. Add the eggs and beat until completely blended. Add the milk and extracts and mix until combined.

In a separate bowl, whisk the almond flour, coconut flour, baking powder, and fine sea salt together. Add the flour mixture to the butter mixture and beat until creamy.

Pour batter into prepared cake pan and smooth top.

Bake in a pre-heated 350-degree oven for 27-30 minutes. Do not over-bake.

Remove from oven and allow to cool completely before serving with Strawberry Sauce and Vanilla Bean Paste Whipped Cream. See recipes below.

Strawberry Sauce

1 lb. strawberries, rinsed, hulled, and thickly sliced

⅓ c. granulated sugar

1 T. fresh lemon juice  

In a medium saucepan, combine the sliced strawberries, sugar, and lemon juice. Place over medium heat and bring to a boil, stirring occasionally.    

Reduce heat and simmer about 15 minutes or until sauce has thickened a bit, stirring occasionally. Remove from heat and cool to room temperature. Refrigerate until needed.

Vanilla Bean Paste Whipped Cream

1 c. heavy whipping cream

½ tsp. vanilla bean paste* or vanilla extract, or more to taste

2 T. powdered sugar

Whip the cream to hard peaks. Add the vanilla bean paste and powdered sugar. Whip until blended.

MALTED MILK BALL CHOCOLATE CHIP COOKIES

Ever since I was a child, I have loved a good chocolate malt. (See recipe for a chocolate malt below.) And another thing I loved with a passion was Whoppers. (Also, maple bars, but that’s a story for another time.) But chocolate malts and malt balls, I mean really, what’s not to love? (Maple bars too, for that matter!)

But, as an older adult, having a milk shake containing malted milk powder every day is totally out of the question! (But truly, if malts were suddenly deemed health food, my blender would not only live on one of our kitchen counters, but it would also be put to use each and every day.) (And before you think to yourself that smoothies are every bit as good, keep that thought to yourself. Bananas, ice, and protein powder will never replace a truly decadent and creamy chocolate malt. Never!)

Anyway, with chocolate malts on my mind, the other day I decided to work up a recipe for a milk chocolate chip cookie with not only malted milk powder in the mix, but also crushed malted milk balls. And the result of my endeavor you now find below.

Now, to say that these cookies are OK, would be putting is mildly. To my malted milk addled brain and taste buds, these cookies are fabulous! Easy to prepare and way too easy to eat.

So, give these cookies a try. You and your family can thank me later.

Peace and love to all.

1 c. unsalted butter, room temperature

1⅓ c. brown sugar, packed

2 lg. eggs, room temperature

4 tsp. vanilla extract

3 c. unbleached all-purpose flour, fluffed

½ c. malted milk powder

1 tsp. baking soda

1 tsp. kosher salt

1 c. milk chocolate chips, chunks, or callets (I use Callebaut milk callets) (Amazon)  

1 c. coarsely chopped malted milk balls*

In the bowl of your mixer, cream the soft butter and brown sugar together. Add the eggs and vanilla extract.

Whisk the flour, malted milk powder, baking soda, and salt together, then stir the dry ingredients into the wet ingredients. Mix in the milk chocolate chips and chopped malt balls.

Using a small ice cream scoop (I use a #40, 1½ tablespoon ice cream scoop), drop balls of dough onto a parchment paper lined baking sheet and refrigerate for several hours or overnight. (The balls can be close together at this point.)

When ready to bake, place the cold dough balls 2-inches apart on a parchment paper lined baking sheet. Bake in a pre-heated 350-degree oven for 13-14 minutes or just until the edges become a light golden brown. Do not overbake.

Remove from oven and let cookies cool on the pan for about 5 minutes before transferring to a wire rack to cool completely.  

When completely cooled (the chocolate pieces are set) store in an airtight container.

*We are huge fans of malted milk balls. So, I go all out and order them on Amazon. Our favorite malt balls are from The Amish-Buggy. Triple Dipped Malted Milk Balls. Spendy but worth every penny.

CHOCOLATE MALT

2 c. really good vanilla ice cream (I like vanilla bean the best)

½ c. whole milk, add more if desired

2-4 T. chocolate sauce (We like Ghirardelli Chocolate Premium Sauce) (Amazon)

2 T. malted milk powder (I use King Arthur Malted Milk Powder) (Amazon)

whipped cream, garnish, opt.

chocolate sprinkles, garnish, opt.

Whirl the ice cream, milk, chocolate sauce, and malted milk powder in your blender. If you prefer a thinner malt, add a bit more milk.

If desired, garnish with whipped cream and chocolate sprinkles.  

PEANUT BUTTER REFRIGERATOR COOKIES  

In my ever-ending quest to make life easier for myself and others, I decided long ago that refrigerator (slice and bake) cookies are the answer to every baker’s dream of building easy and less time-consuming cookies. But, in all my years of baking cookies, I had never found a recipe for a peanut butter refrigerator cookie. So, I decided to work up a recipe myself. (I’ll wait while you take time to applaud my effort.) And I decided to use vegetable shortening instead of butter. Shortening tends to trap more air bubbles and has a higher melting point than butter, so recipes that use shortening tend to produce a product that rises higher, holds its shape during baking better than when using butter, and has an interior texture that is softer or lighter. But in some cookies, especially lightly flavored cookies, there is no substitute for the flavor of butter. But for these peanut butter babies, shortening is definitely the way to go. Because what I wanted was a crisp yet slightly chewy cookie. And that’s exactly what I got.

So, is the taste of this cookie a lot different than any other peanut butter cookie? Nope. Was it easier to shape into a couple logs rather than rolling dough balls? Yup. And like every other cookie I bake, this dough is going to spend some quality time in the fridge. So, the easier I can make this whole process, the more likely I am to make these cookies again.

Now the reason I am baking cookies today is for the faculty concert at Warm Beach this evening. Mr. C. has been working with the rhythm section during a weeklong jazz band camp for adults. I thought it would be nice to offer an after-concert treat to the concert attendees. And of course, to the fine musicians attending the camp and the faculty for all their hard work.

In addition to these cookies, I am serving Chewy Oatmeal Raisin Walnut Cookies (recipe on site) and another new cookie (Malted Milk Ball Chocolate Chip Cookies) that I worked up for the occasion. If the malted milk cookies are a success, you will find the recipe posted within the next few days. If the cookies are not as tasty as anticipated, the recipe will be relegated to the “try again” pile. (It’s a huge pile already, so what’s one more recipe that didn’t quite hit the mark!) Anyway, I hope all three cookies are enjoyed. Since I know a good many of the faculty and have met some of the camp attendees over the years, it should make for a fun evening. And I do so love to feed people. So, a great concert to attend, renewed friendships to anticipate, new acquaintances to make, and cookies to seal the deal. What better combination could this old gal ask for? Well, maybe, that you enjoy making and eating these cookies as much as I do.

As always, peace and love to all.  

1 c. vegetable shortening

1 c. granulated sugar

1 c. brown sugar, packed

1 c. creamy or crunchy peanut butter

1 tsp. vanilla

2 eggs

2½ c. unbleached all-purpose flour, fluffed

2 tsp. baking soda

In a large mixing bowl, cream the shortening, sugars, and peanut butter; beat in vanilla and eggs until light and fluffy.

In a separate bowl, combine the flour and baking soda; gradually beat flour into the creamed mixture until combined.

Divide the dough into 2 equal pieces and shape each into a log.

Wrap each individually in plastic wrap and refrigerate overnight.

Slice the dough and place 1½-inches apart on a parchment paper lined baking sheet.

Flatten in a crisscross pattern with fork tines and bake in a preheated 350-degree oven for 11-12 minutes or until lightly browned around the edges. Do not overbake.

Remove from oven and allow to stand for a few minutes before transferring to a cooling rack. Store at room temperature in an airtight container.

PEACH PIE

OK, I know, everyone who makes peach pie has a favorite recipe. But in case you don’t have a favorite recipe, I am going to share mine with you. Because I strongly believe that peach pie is one of God’s greatest gifts to the human race. And that peach pie should be made as simply as possible. No gilding the lily in the preparation of this pie. But, of course, served with vanilla bean ice cream.

But no pudding over the peach slices, or streusel on top, or other fancy enhancements. Just a great crust, not too much sugar, a touch of good almond extract to bring out the inherent almond like flavor of the peaches, and a bit of cinnamon. Because cinnamon always makes most fruit or berry pies taste better. I don’t know why that is. But give me a piece of apple pie without any cinnamon in the mix, and I’ll give it right back to you!

So, without further ado, my recipe for a peach pie for the masses.

Now don’t get me wrong. There are other perfectly wonderful recipes for peach pie worthy of your time and energy. Of course, there are. But I have been basically making this pie since I was 20 years old. And every time I would pull one of these babies out of my oven, a good friend of mine would magically appear on my doorstep. How he knew I had just made his favorite pie will forever remain a mystery. But there he was as sure as God made little green apples.

So, I’m just sayin’, if you want company, this is the pie to make.

Well, today is a day for both Mr. C. and me with no commitments. And believe it or not, that is a rare occurrence. Because of all the musical adventures Mr. C. is involved with, and at our ages the myriad doctor’s appointments, follow-ups, shots, and other medical and cosmetic requirements to keep our bodies in good working order and acceptable to be seen in public, we are rarely allowed a day off. So, I am taking advantage of this delightful hiatus to catch up on my blog posting and make Pork Paprikash Stew with Egg Noodles for dinner. I made this stew while we were on vacation and it turned out to be not only easy to prepare, but quite tasty. So, look forward to finding it on this site in the next couple of days.

In the meantime, stay happy, stay healthy, and stay committed to making your own life and the lives of those around you better.  

And as always, peace and love to all.

pie crust for a 9-inch two crust pie (see my favorite pie crust recipe below)

7-8 fresh peaches, peeled (see my method of peeling a peach below) and sliced  

¼ tsp. good almond extract

½ c. granulated sugar  

¼ c. brown sugar, packed

½ tsp. cinnamon

1/3 c. unbleached all-purpose flour

3 T. unsalted butter

Place the peach slices in a medium sized mixing bowl. Stir in the almond extract. In another bowl, whisk the granulated sugar, brown sugar, cinnamon, and flour together. Gently mix the flour mixture with the peaches.

Place the bottom crust in the pie pan.  

Pour the peaches into the pie shell. Dot with butter and cover with the top crust and crimp the edges as desired. Cut small slits in the top crust to allow steam to escape. Cover edges of pie crust with strips of aluminum foil.

Bake in a pre-heated 425-degree oven for 35-40 minutes. Remove the foil strips for the last 5 minutes or so before the pie is ready to come out of the oven. The pie crust should be a very light golden brown and the filling should be bubbling a bit into the slits in the top crust.

Remove pie from oven and let sit at least 25 minutes before serving. Great with vanilla bean ice cream.

BTW, I recently made this pie using frozen peaches. For whatever reason, the peaches remained crunchy. And there was a lot of liquid in the bottom of the pie plate. And I had baked the pie for at least 30 minutes longer than usual! I either did something wrong, or those peaches were as hard as rocks when they were picked and packaged. Lesson learned for me. Use fresh peaches or make apple pie!

PIE CRUST

¼ c. + 2 T. very cold water

2½ c. unbleached all-purpose flour, fluffed

1 tsp. salt

heaping 2/3 c. Crisco

Step 1 – Pour cold water into a small bowl. 

Step 2 – Measure flour and salt into a mixing bowl. 

Step 3 – Take 1/3 cup of the flour back out of the mixing bowl and stir it into the water. Make a paste. Set aside. 

Step 4 – Add the Crisco (heaping 2/3 cup) to the flour and salt mixture. Mix together. (I use my KitchenAid mixer.) 

Step 5 – Add the water/flour paste to the flour/shortening bowl and mix just until blended. Do not over-mix.

Roll out a little less than half of the dough and place in pie plate. Then roll out the top crust to be about an inch all-around larger than the pie pan. This recipe makes enough dough for a double crust 9-inch pie.

Best way I have found to peel fresh peaches:

Bring a large pan of water to a boil. Carefully add your peaches. (I lower the peaches into boiling water with a slotted spoon.) This technique, officially called blanching, helps to loosen the peach skins so they peel easily using either your fingers or a paring knife. The process is quick (about 30 seconds), so take care not to leave the peaches boiling for too long.

Using the same slotted spoon, remove the peaches into a large bowl filled with ice water. (You should set this up before starting the boiling process.) Shocking the peaches stops the cooking process and allows you to hold the peaches without scalding your hands.  

Once the peaches are cooled, remove the peaches from the ice bath. Using your hands or paring knife, gently peel away the skin. The skin should release from the flesh with minimal effort.

I have found that cutting the peaches by making the initial cut around the middle rather than from stem to stern works best for me. And I personally like Clingstone peaches best. But I take what’s available and always remember to say thank you. I love peaches just that much!