OK, yet another granola recipe that worked. I say “that worked” because sometimes my granola experiments are less than delicious. Way less than delicious. Take my last one before this one for example.
It included so many healthy ingredients that it tasted like sawdust with a few nuts thrown in for encouragement. Needless to say, that recipe did not make it on this site. One of my never to be repeated, drop it off the face of the earth, do not make this again, what were you thinking kind of recipe that you will never know about. Unless of course I feel compelled to relate another failure I experienced in my kitchen. And yes, I do have monumental debacles every so often. But those washouts often lead to a learning experience. And I did learn one valuable lesson. There is a huge difference between pepitas and dried pumpkin seeds.
Pepitas are delicious and when just a few are added to granola, everything is just fine. And in salads and seed breads they are divine. But the pumpkin seeds I added to the batch of granola that shall forever remain unpublished, were so dry they tasted just like I imagine fodder tastes. Dried hay. And just to clarify, pepitas and pumpkin seeds are two different things.
Pepitas are harvested from styrian or oil seed pumpkins and the seeds do not have hulls. Any other variety of pumpkin produces a hulled seed that’s fibrous and less tender. Now maybe I just got a bad batch of pumpkin seeds that I used in my second to the latest batch of granola. There is always that possibility. But you know the old saying – fool me once shame on you, fool me twice, shame on me. And I intend to remain without shame! At least when it comes to pumpkin seeds!
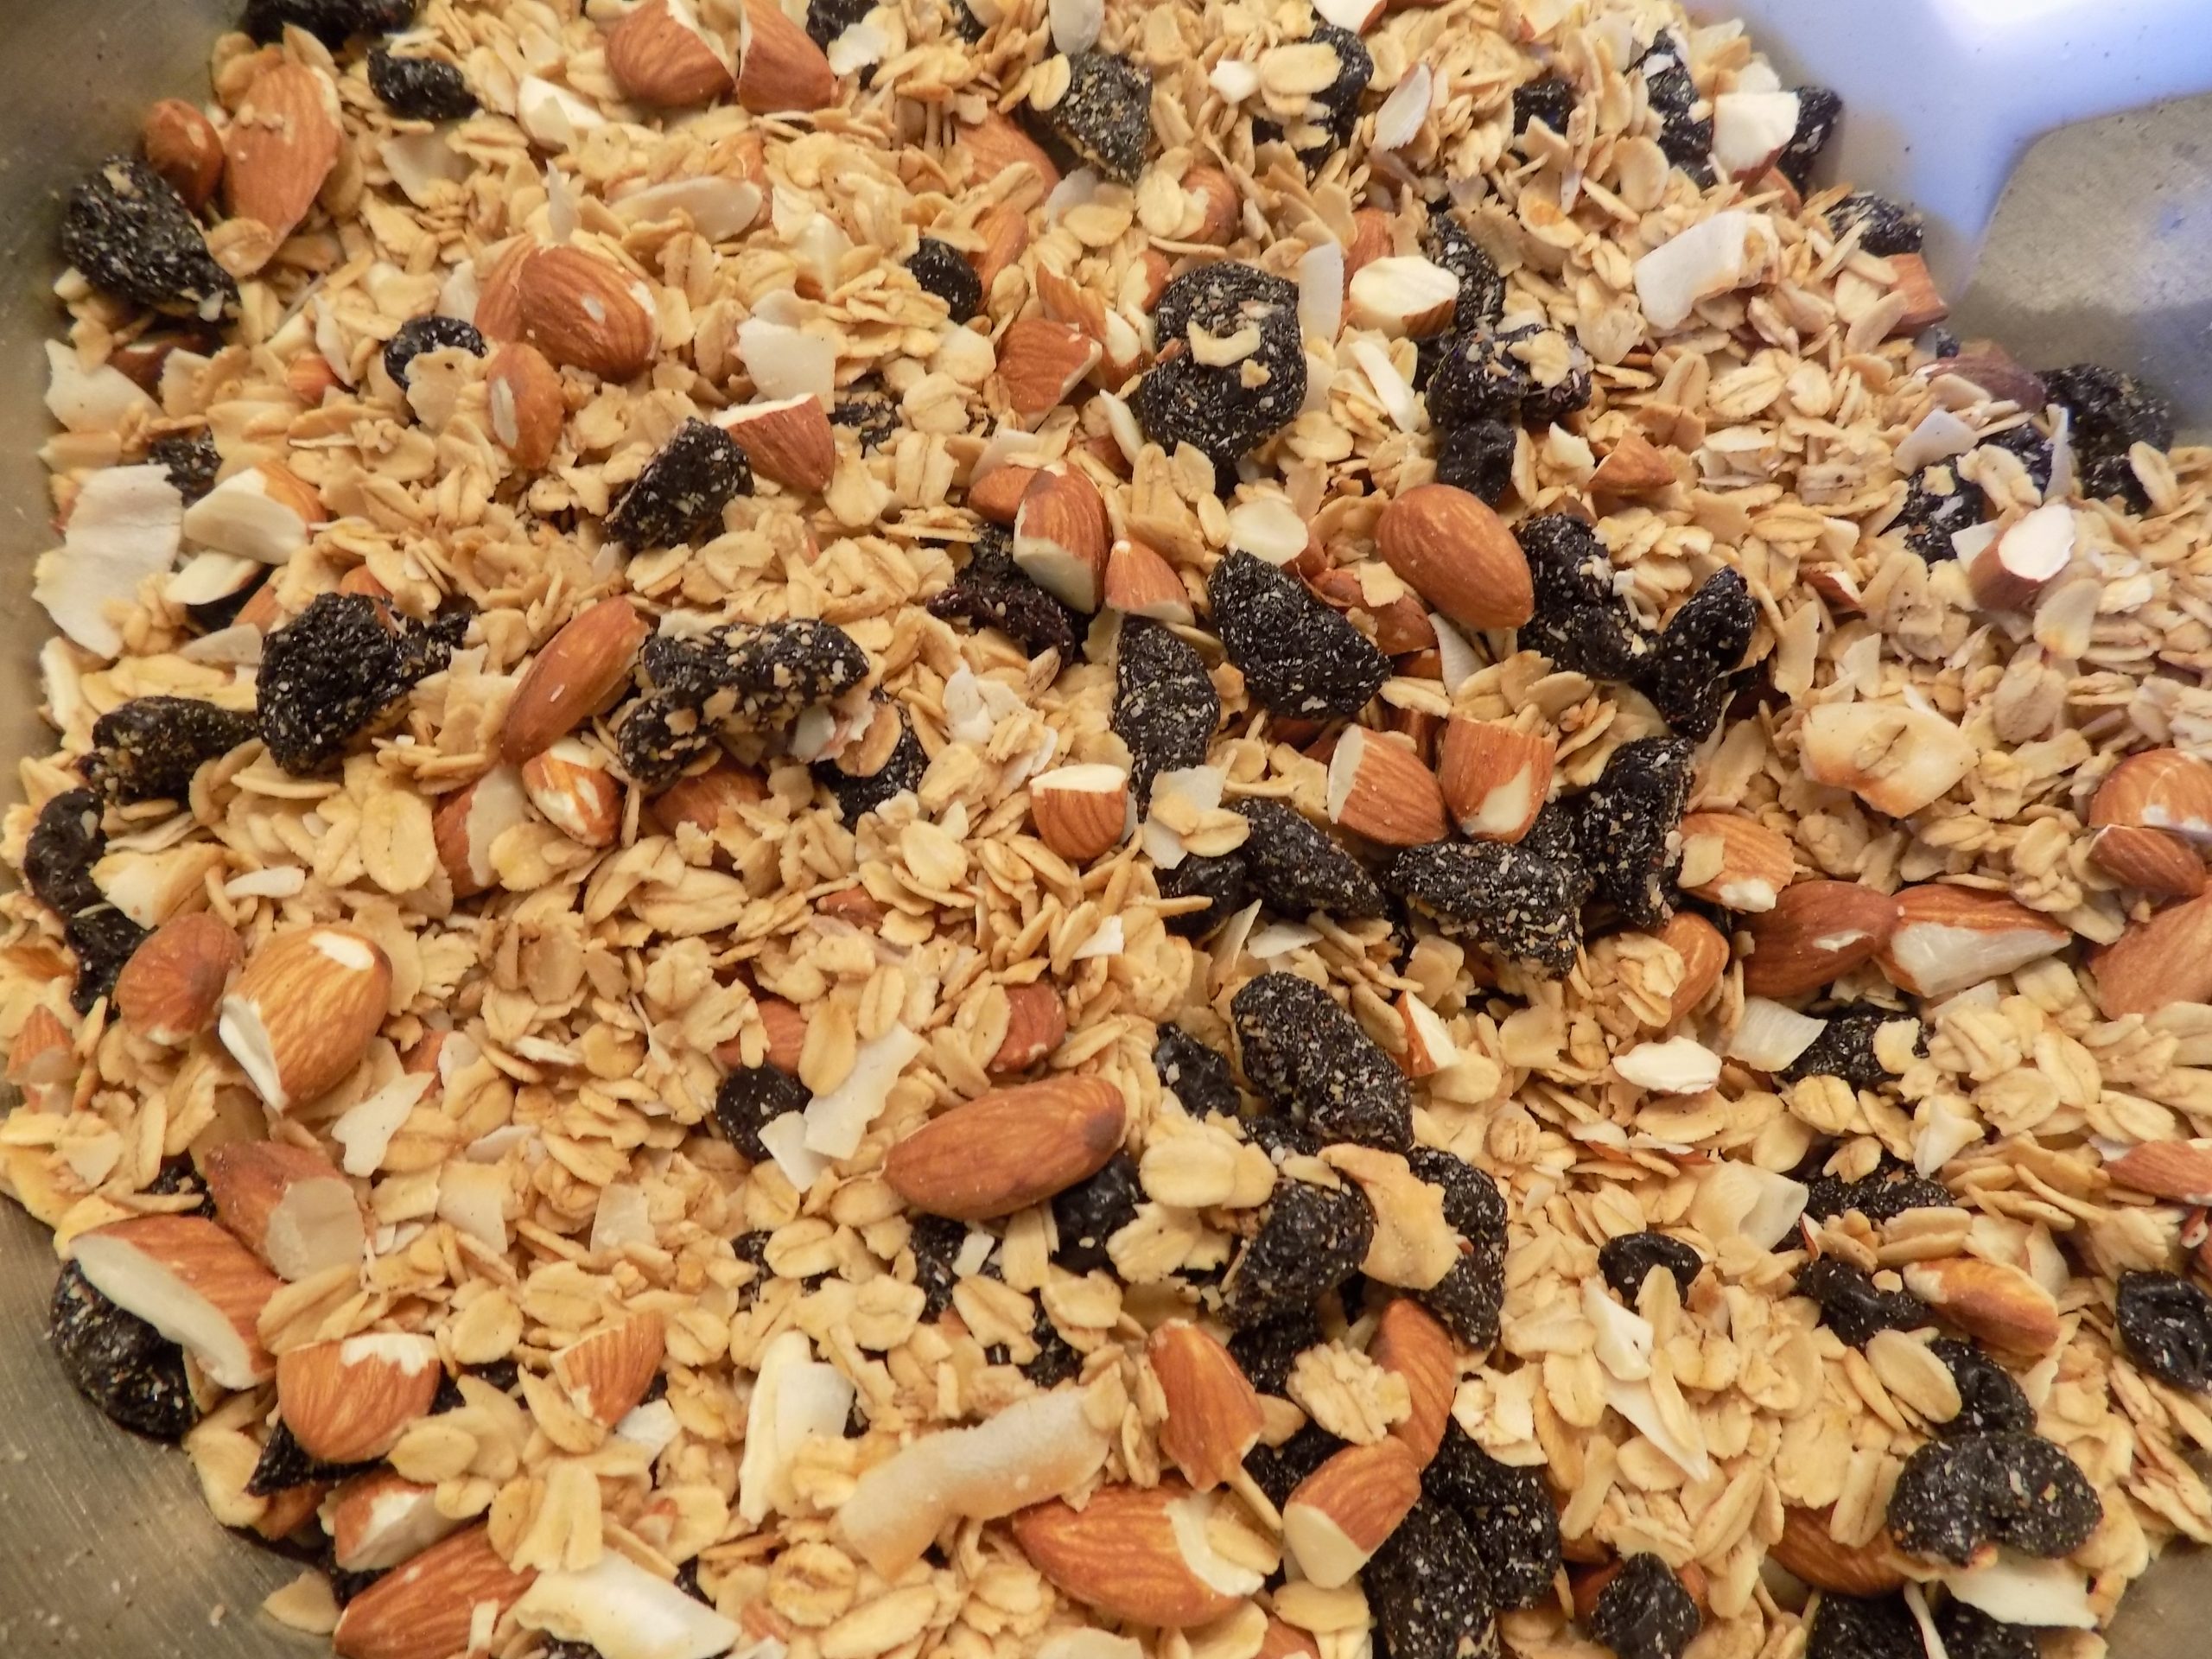
But this batch was perfect. Lots of oats, almonds, coconut, and dried fruit. Just the way I like granola. And I like granola a lot.
So, although I have several recipes for granola on this site, I feel there is always room for one more. Because variety is the spice of life. And I want my life to be spicy.
As always, have fun cooking up a storm. Try new recipes. Try new ethnic cuisines. And don’t be afraid of an occasional failure. No one can produce a winning dish every single time. It truly isn’t possible. Plus, every other cook would hate that person. And who wants that?
Peace and love to all.
½ c. pure maple syrup
½ c. extra virgin olive oil
2 tsp. vanilla
½ tsp. almond extract
1 tsp. kosher salt
1 tsp. cinnamon
8 c. old-fashioned rolled oats
3 c. roughly chopped almonds
1 c. unsweetened flaked coconut
2 c. roughly chopped unsweetened dried cherries
1 c. dried blueberries
Preheat oven to 300-degrees.
In a large mixing bowl, whisk the maple syrup, olive oil, vanilla, almond extract, salt, and cinnamon together. Then stir in the oats. Spread mixture on a rimmed baking sheet or sheets in an even layer and bake for 25 minutes. (Don’t wash the mixing bowl.)
After 25 minutes, add the chopped almonds and coconut. Bake for an additional 20 minutes or until the oats are a light golden brown.
Remove from oven and transfer the granola back to the large bowl and add the dried cherries and blueberries tossing to combine.
Allow to cool completely before storing in an airtight container.
So, here goes. I am on a mission to reduce sugar in our diet. So, that means, I will be posting recipes that fit into our new lifestyle. While I know many of you are much younger than we are and have no need to change your eating habits. The fact remains that Mr. C. and I both need to eat a bit healthier. And of course, that will impact the type of recipes I post. But fear not. For those of you who are familiar with this site, you know that I have previously posted many recipes that contain an abundance of every type of ingredient that is not considered “healthy”. So, if you are into cookies, cakes, breads, desserts, high fat cream sauces, gravies etc. etc., you need not look elsewhere. I’ve still got you covered.
But that was the old me. (Actually, the young me.) And the new me (really the old me) needs to make the change. Of course, being about as human as one can get, I will undoubtedly slip once-in-a-while and come up with possibly the most sinfully caloric recipe ever invented. My hope is that this will not happen. At least not very often. But I have been living in this skin for a long time. And I know my limitations. Just please send good thoughts my way. Healthy, low-calorie thoughts that is! Anyway, back to this recipe.
My daughter Paula has been touting the benefits of using monk fruit sweetener for some time now. I bought some about a year ago, tried it, and promptly sent her the rest of the package. Then when she was up for Thanksgiving this past year, she made granola while she was here. Brought all the ingredients with her. And of course, she used monk fruit as the sweetening agent. The granola was delicious. I’d give you the recipe, but Paula is not one of those cooks, unlike me, who uses a recipe. She just goes for it. And the amazing thing is – her food always tastes wonderful. It must be all those chemistry classes she took in college. Whatever it is, she didn’t get the “wing it” gene from me! Thus, no recipe from her to share with you.
Well, the upshot is – I bought another package of monk fruit and am going to be using it more and more. At least I’m going to give it the old college try!! Ra ra sis boom bah. (Humbug, that is!)
So, if you too want to cut down on sugar and build a granola that is both healthy and delicious, give this recipe a try.
Well, that’s it for today. I’m making Ground Beef and Black Bean Chili for dinner. And I’m going to make cornbread to go with it. But this cornbread is an experiment. I am going to use whole wheat flour and a bit of monk fruit sweetener. If it turns out good, happy day. If not, you will not be hearing from me about the joys of using monk fruit sweetener instead of maple syrup.
Peace and love to all.
½ c. extra virgin olive oil
2 T. monk fruit sweetener*
1 tsp. vanilla
1 tsp. kosher salt
1 tsp. ground cinnamon
½ tsp. ground nutmeg
⅓ c. flaxseed meal
6 c. old-fashioned rolled oats
3 c. mixed nuts (almonds, walnuts, pistachios, pecans, cashews, peanuts)
1 c. flaked unsweetened coconut
3 c. dried fruit (chopped if necessary) (apricots, dates, blueberries, cranberries, cherries, raisins, etc.)
Preheat oven to 300-degrees.
In a large mixing bowl, whisk the olive oil, monk fruit sweetener, vanilla, salt, cinnamon, nutmeg, and flaxseed meal together. Then stir in the oats. Spread mixture on a rimmed baking sheet in an even layer and bake for 25 minutes. (Don’t wash the bowl.)
Add the nuts and coconut. Bake for an additional 20 minutes or until the oats are a light golden brown.
Remove from oven and transfer the granola back to the large bowl and add the dried fruit tossing to combine.
Allow to cool completely before storing in an airtight container.
*According to Food Insight, “Monk fruit, also known as lo han guoor Swingle fruit, is a small round fruit native to southern China. Monk fruit sweeteners are no-calorie sweeteners that can be used to lower one’s intake of added sugars, while still providing satisfaction to enjoy the taste of something sweet. Some types of sweeteners in this category are considered low-calorie — such as aspartame, and others are no-calorie (e.g., monk fruit sweeteners, stevia sweeteners and sucralose). However, collectively they are often referred to as sugar substitutes, high-intensity sweeteners, nonnutritive sweeteners, low- and no-calorie sweeteners or simply low-calorie sweeteners.
Like other no-calorie sweeteners, monk fruit sweeteners are intensely sweet. Monk fruit sweeteners range from being 150-200 times sweeter than sugar, and as such only small amounts are needed in a product to equal the sweetness provided by sugar. Monk fruit sweeteners can be used in a wide range of beverages and foods like soft drinks, juices, dairy products, desserts, candies, and condiments. Because they are stable at high temperatures, monk fruit sweeteners can be used in baked goods. However, a recipe that uses monk fruit sweeteners in place of sugar may turn out slightly different because in addition to sweetness, sugar plays several roles in recipes related to volume and texture, but this varies based on the type of recipe.
Several brands, such as Monk Fruit In The Raw®, Lakanto®, SPLENDA® Monk Fruit Sweetener, SweetLeaf® and Whole Earth® use monk fruit sweeteners in granular and liquid forms.”
For those of us trying to be good (that is staying away from cookies, candy, and the like), we still deserve a treat occasionally. And for those of us getting older and faced with the possible onset of diseases (like diabetes) that often hit as we hobble into our golden years, we have to be particularly careful what we put in our mouths.
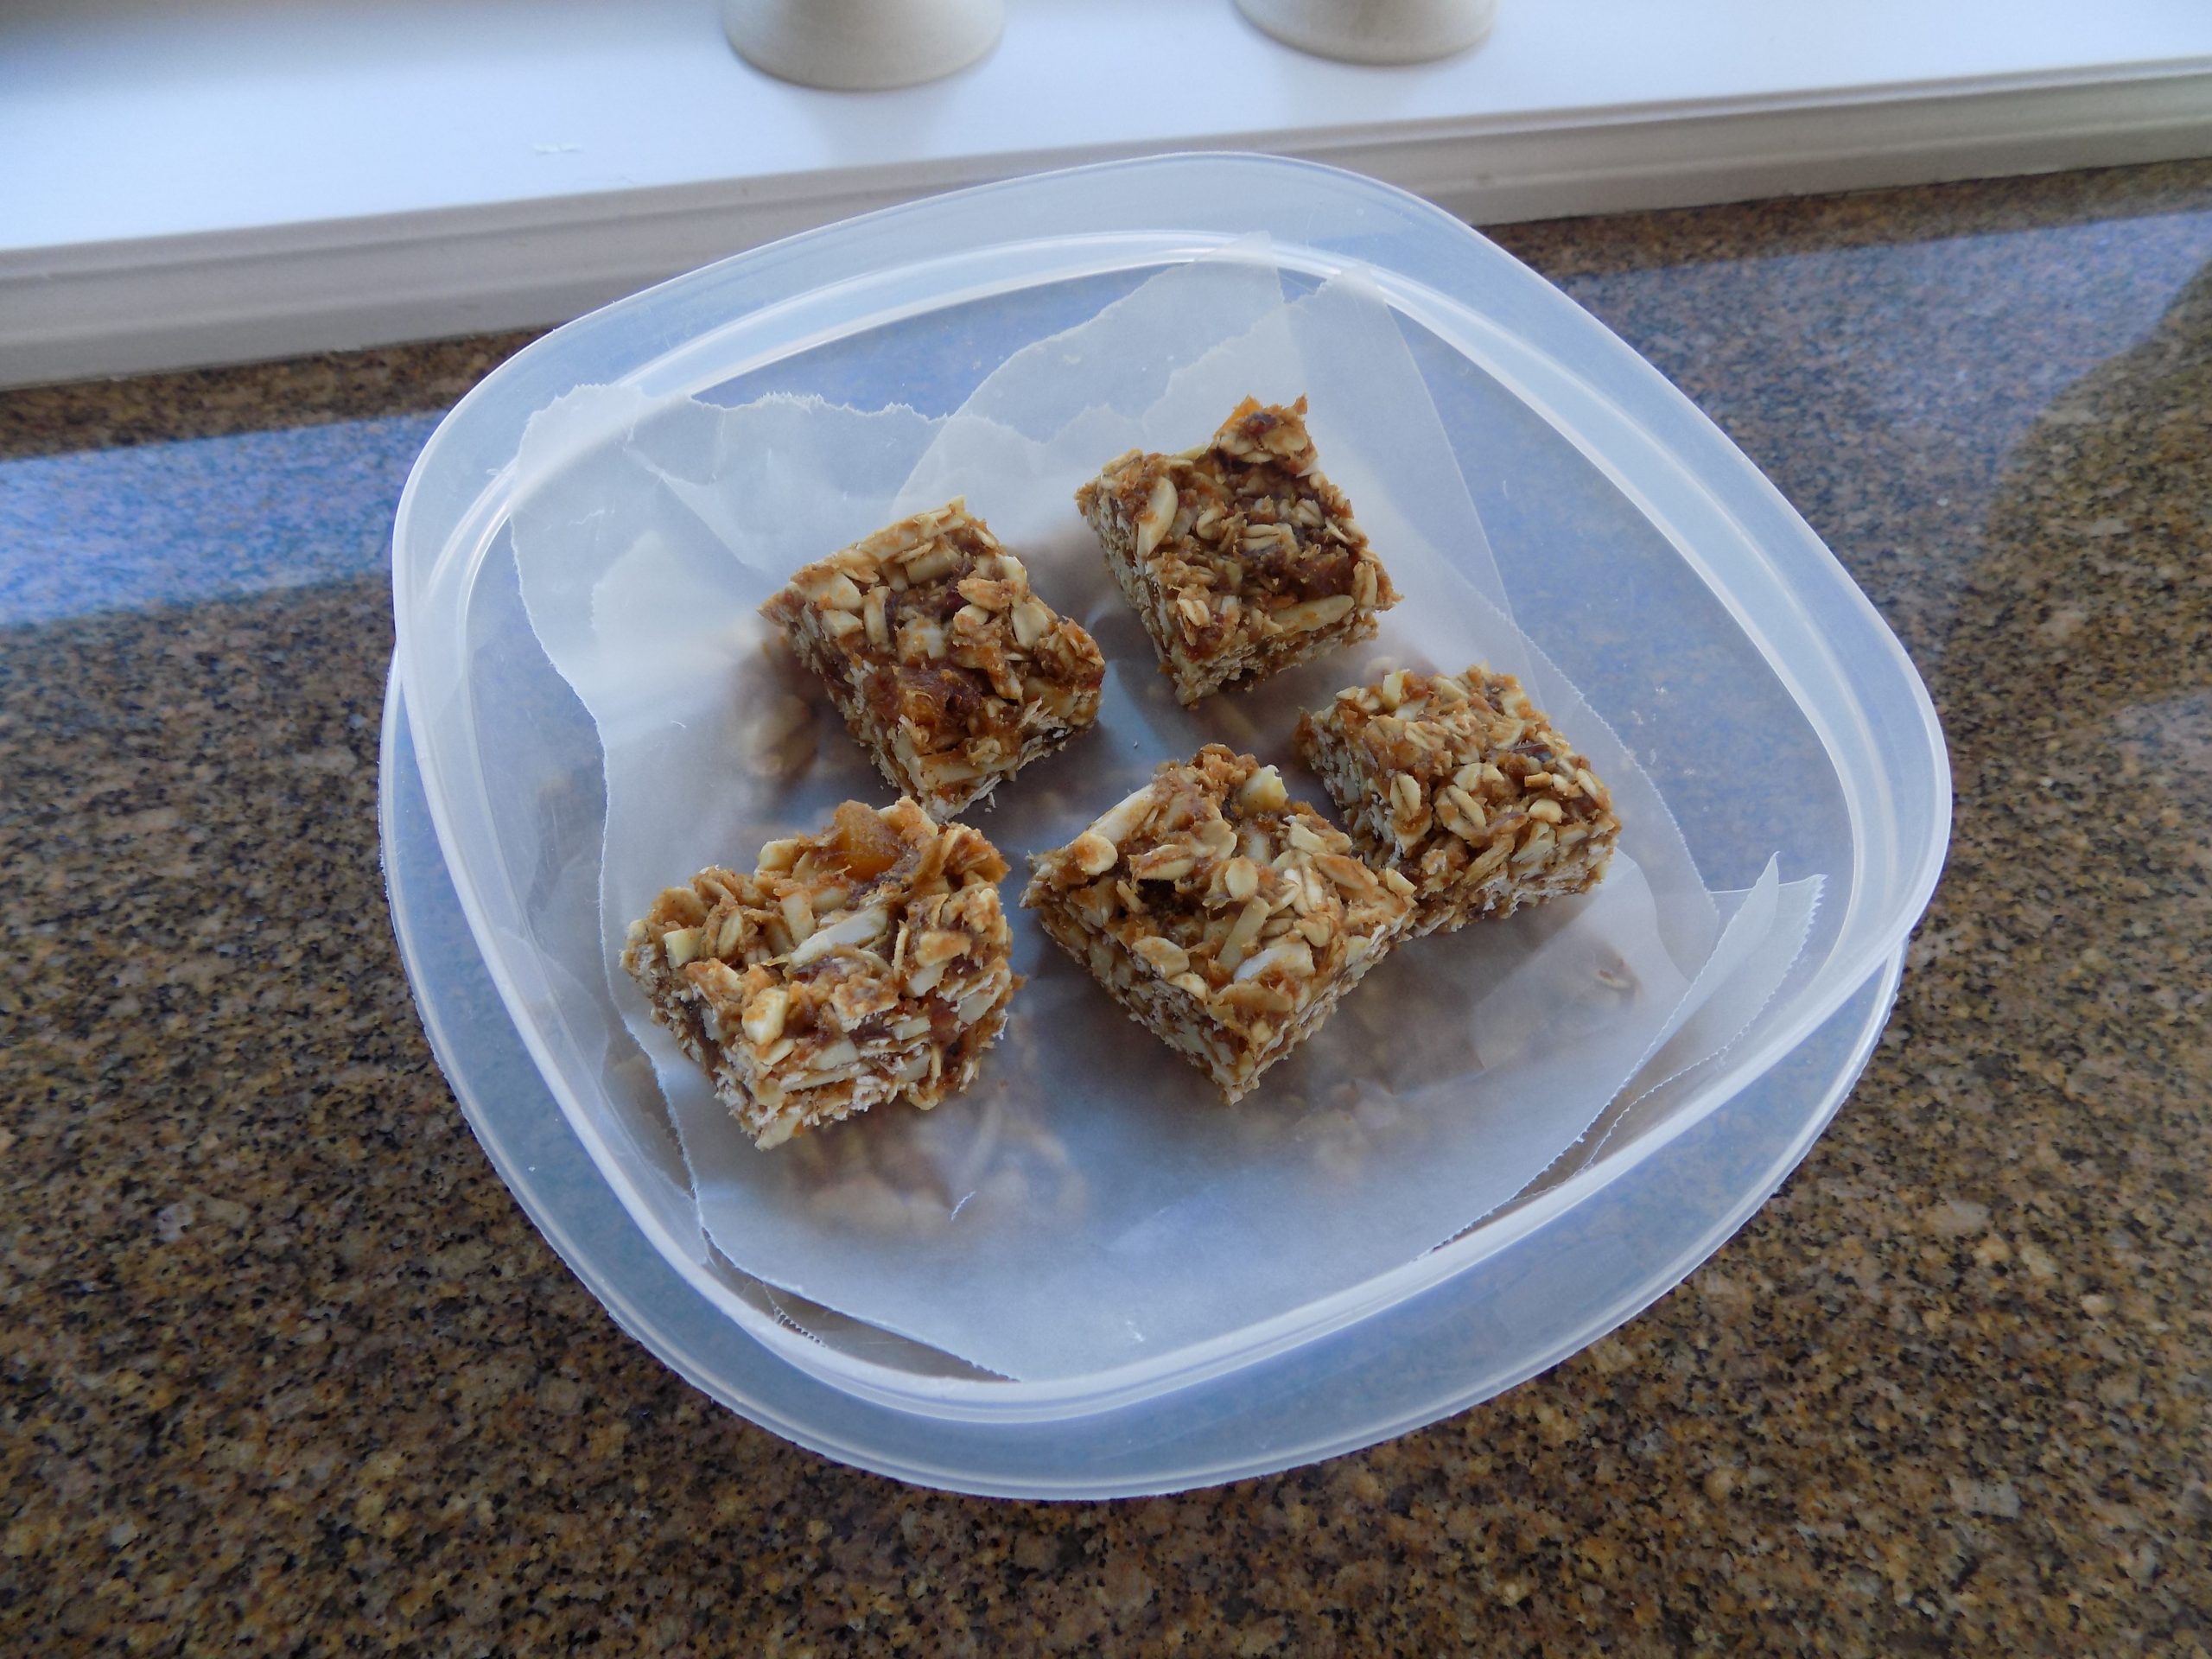
So, I decided to look for a treat recipe for myself that packed a wallop. Wallop in this case defined as having “a big flavor bang, in a small package, that’s reasonably healthy”. (Not an easy task.) So, when I discovered a recipe for a 5-ingredient granola bar on the minimalistbaker.com site, I decided this treat would work for me with a few minor ingredient adjustments. And the recipe you find below is the result. Plus, I cut the pieces much smaller than the original recipe suggests. Actually, about a third the size. But as it turned out, one piece is absolutely enough. Because these babies are rich.
But OMG, they are delicious. Perfect for those times when nothing but a bit of sweet will do! But I try not to eat one a day. They aren’t vitamins after all! Even if they do contain healthy ingredients. According to healthline.com “Dates boast an impressive nutrient profile but are quite sweet. Yet, they’re packed with fiber, which helps your body absorb its sugars more slowly. When eaten in moderation, they’re a safe and healthy choice for people with diabetes.”
And maple syrup, which again should be eaten in moderation, according to food.ndtv.com states “the glycemic index of maple syrup is around 54. Foods with glycemic index lower than 55 get digested slowly, enabling slow release of sugar in the blood stream, prevented chances of abnormal blood sugar spikes.”
And then there’s the peanut butter. (Oh, how I love peanut butter!) According to the nationalpeanutboard.org “Individuals with diabetes need foods that can help manage blood sugar and weight. Peanuts and peanut butter can be a powerful ally to reaching success. Peanuts and peanut butter have a low glycemic index, which means they don’t cause blood sugar to rise sharply.”
And to top things off, these squares also contain almonds and rolled oats. But everyone knows the health benefits of these two incredible ingredients, so I will skip describing their many glorious assets.
Final analysis – these granola squares are easy to prepare, contain healthy ingredients, and taste really, really good. Oh, and they’re crunchy. And who doesn’t love crunchy!
No more to say except – stay healthy, stay kind, stay involved, and stay safe. Oh, and stay informed. It’s natural to want to protect ourselves from all things unpleasant. But it’s not wise to forgo information that is not to one’s liking. Especially on current events. But we should always choose wisely how and where we gather information. And to my thinking, reliable sources don’t just state their own feelings on a subject. They try to give only the facts and allow the reader or listener to use their own critical thinking abilities. For me, this is the foremost criteria for good reporting. I don’t appreciate being talked down to. Or being told what to believe. But when someone is an expert, or reporting on what was said by an expert, it allows me to come to my own conclusion. For this type of reporting, I am most appreciative. And the only kind that truly holds my interest. Or for which any attention is received by me at all!
Peace and love to all.
1 c. (packed) roughly chopped dates (I use Medjool dates)
2-3 tsp. water
1 c. toasted* slivered almonds
1½ c. toasted* rolled oats
½ c. finely chopped dried apricots (or dried fruit of choice)
¼ c. real maple syrup
¼ c. creamy salted peanut butter (not natural)
½ tsp. vanilla
Process dates and water in a food processor until only small bits remain (about 1 minute). Transfer to a mixing bowl. Stir in the toasted almonds, toasted oats, and dried fruit until well blended.
Warm the maple syrup and peanut butter in a small saucepan over low heat. Remove from heat and stir in the vanilla. Pour over the oat mixture and mix well. Scoop mixture into an 8×8-inch baking dish or other small pan lined with parchment paper. (Be sure to use enough parchment paper that you can lift the bars out of the pan.)
Press down firmly with your fingers until the mixture is uniformly flattened. This helps the squares stick together better.
Cover with plastic wrap and let firm up in fridge for 45 minutes or more.
Remove cold contents from the pan and cut into desired size squares.
Store in an airtight container in your fridge.
*To toast almonds and oats, place on a rimmed baking sheet and place in a pre-heated 350-degree oven for 10-15 minutes or until slightly golden brown.
Fiber, fiber, fiber! Fiber appears to be the new battle cry of the health food evangelists that have taken over my Facebook. And yes, I get it. We all need fiber in our diets. Especially those of us over a certain age. But OK, all ready. If we have reached that certain age, we already know when we aren’t getting enough fiber in our diet. (Mother nature has a very effective way of letting us know. No subtlety required!)
Now, if you have no idea what I’m talking about, you are either young or you are well and truly blessed. But seriously, for more information simply search the internet under “why is fiber so important as we get older” and all will be revealed.
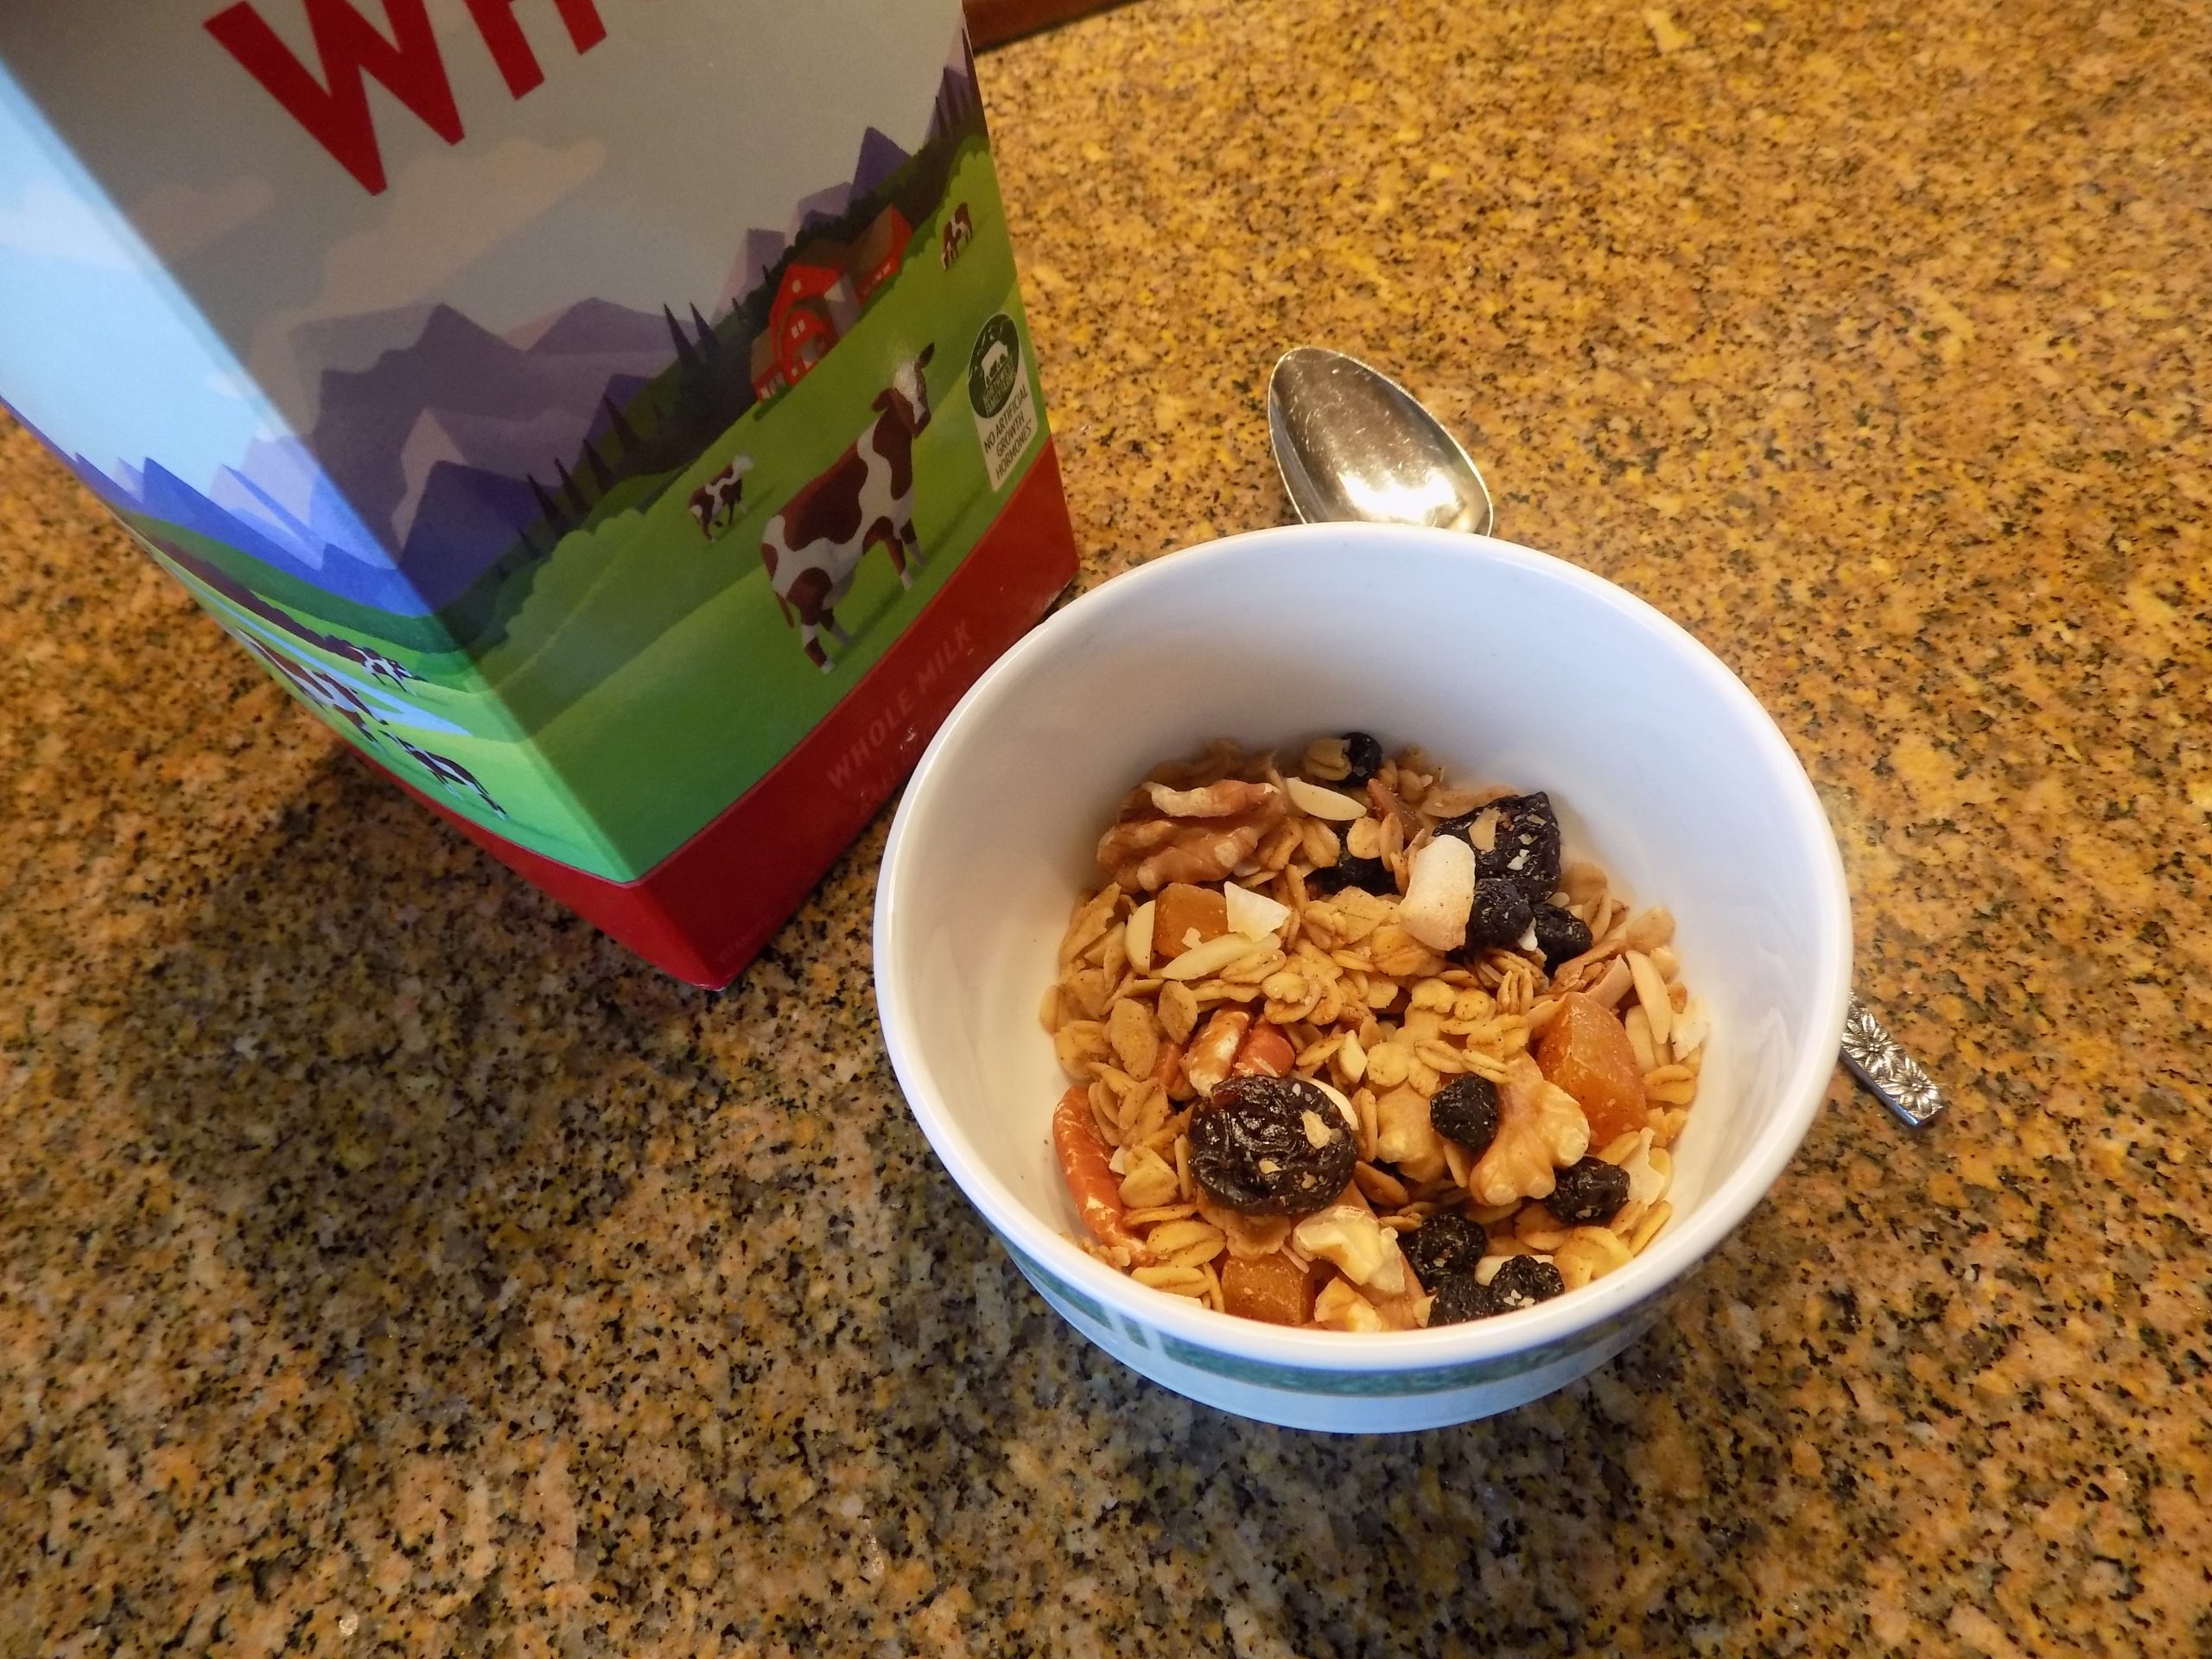
Now one very effective way to ramp up the fiber in our daily diet is to include a small portion of granola for breakfast every morning. Doesn’t have to be a lot, and it doesn’t mean you have to give up that easy over egg you so dearly love. (No wait. That’s me that has to have my daily egg. You might not even like eggs!)
Anyway, if you are like Mr. C. and me, we usually have a good-sized breakfast. A very small portion of meat (half a slice of bacon or one link sausage), one egg, a piece of toast or half a bagel, a small bit of yogurt, half a tiny orange each (winter) or berries on our yogurt (summer), and a quarter cup granola. I know it sounds like a huge breakfast, but we do not allow ourselves snacks after dinner, so we are usually ready for a fair amount of food by the time I finally get our morning repast on the table. (I am not a morning person. I need my hour or so after rising to read the paper and drink my Americano before I can successfully find my way to our kitchen. But most days breakfast comes before 10:00, but not by much!)
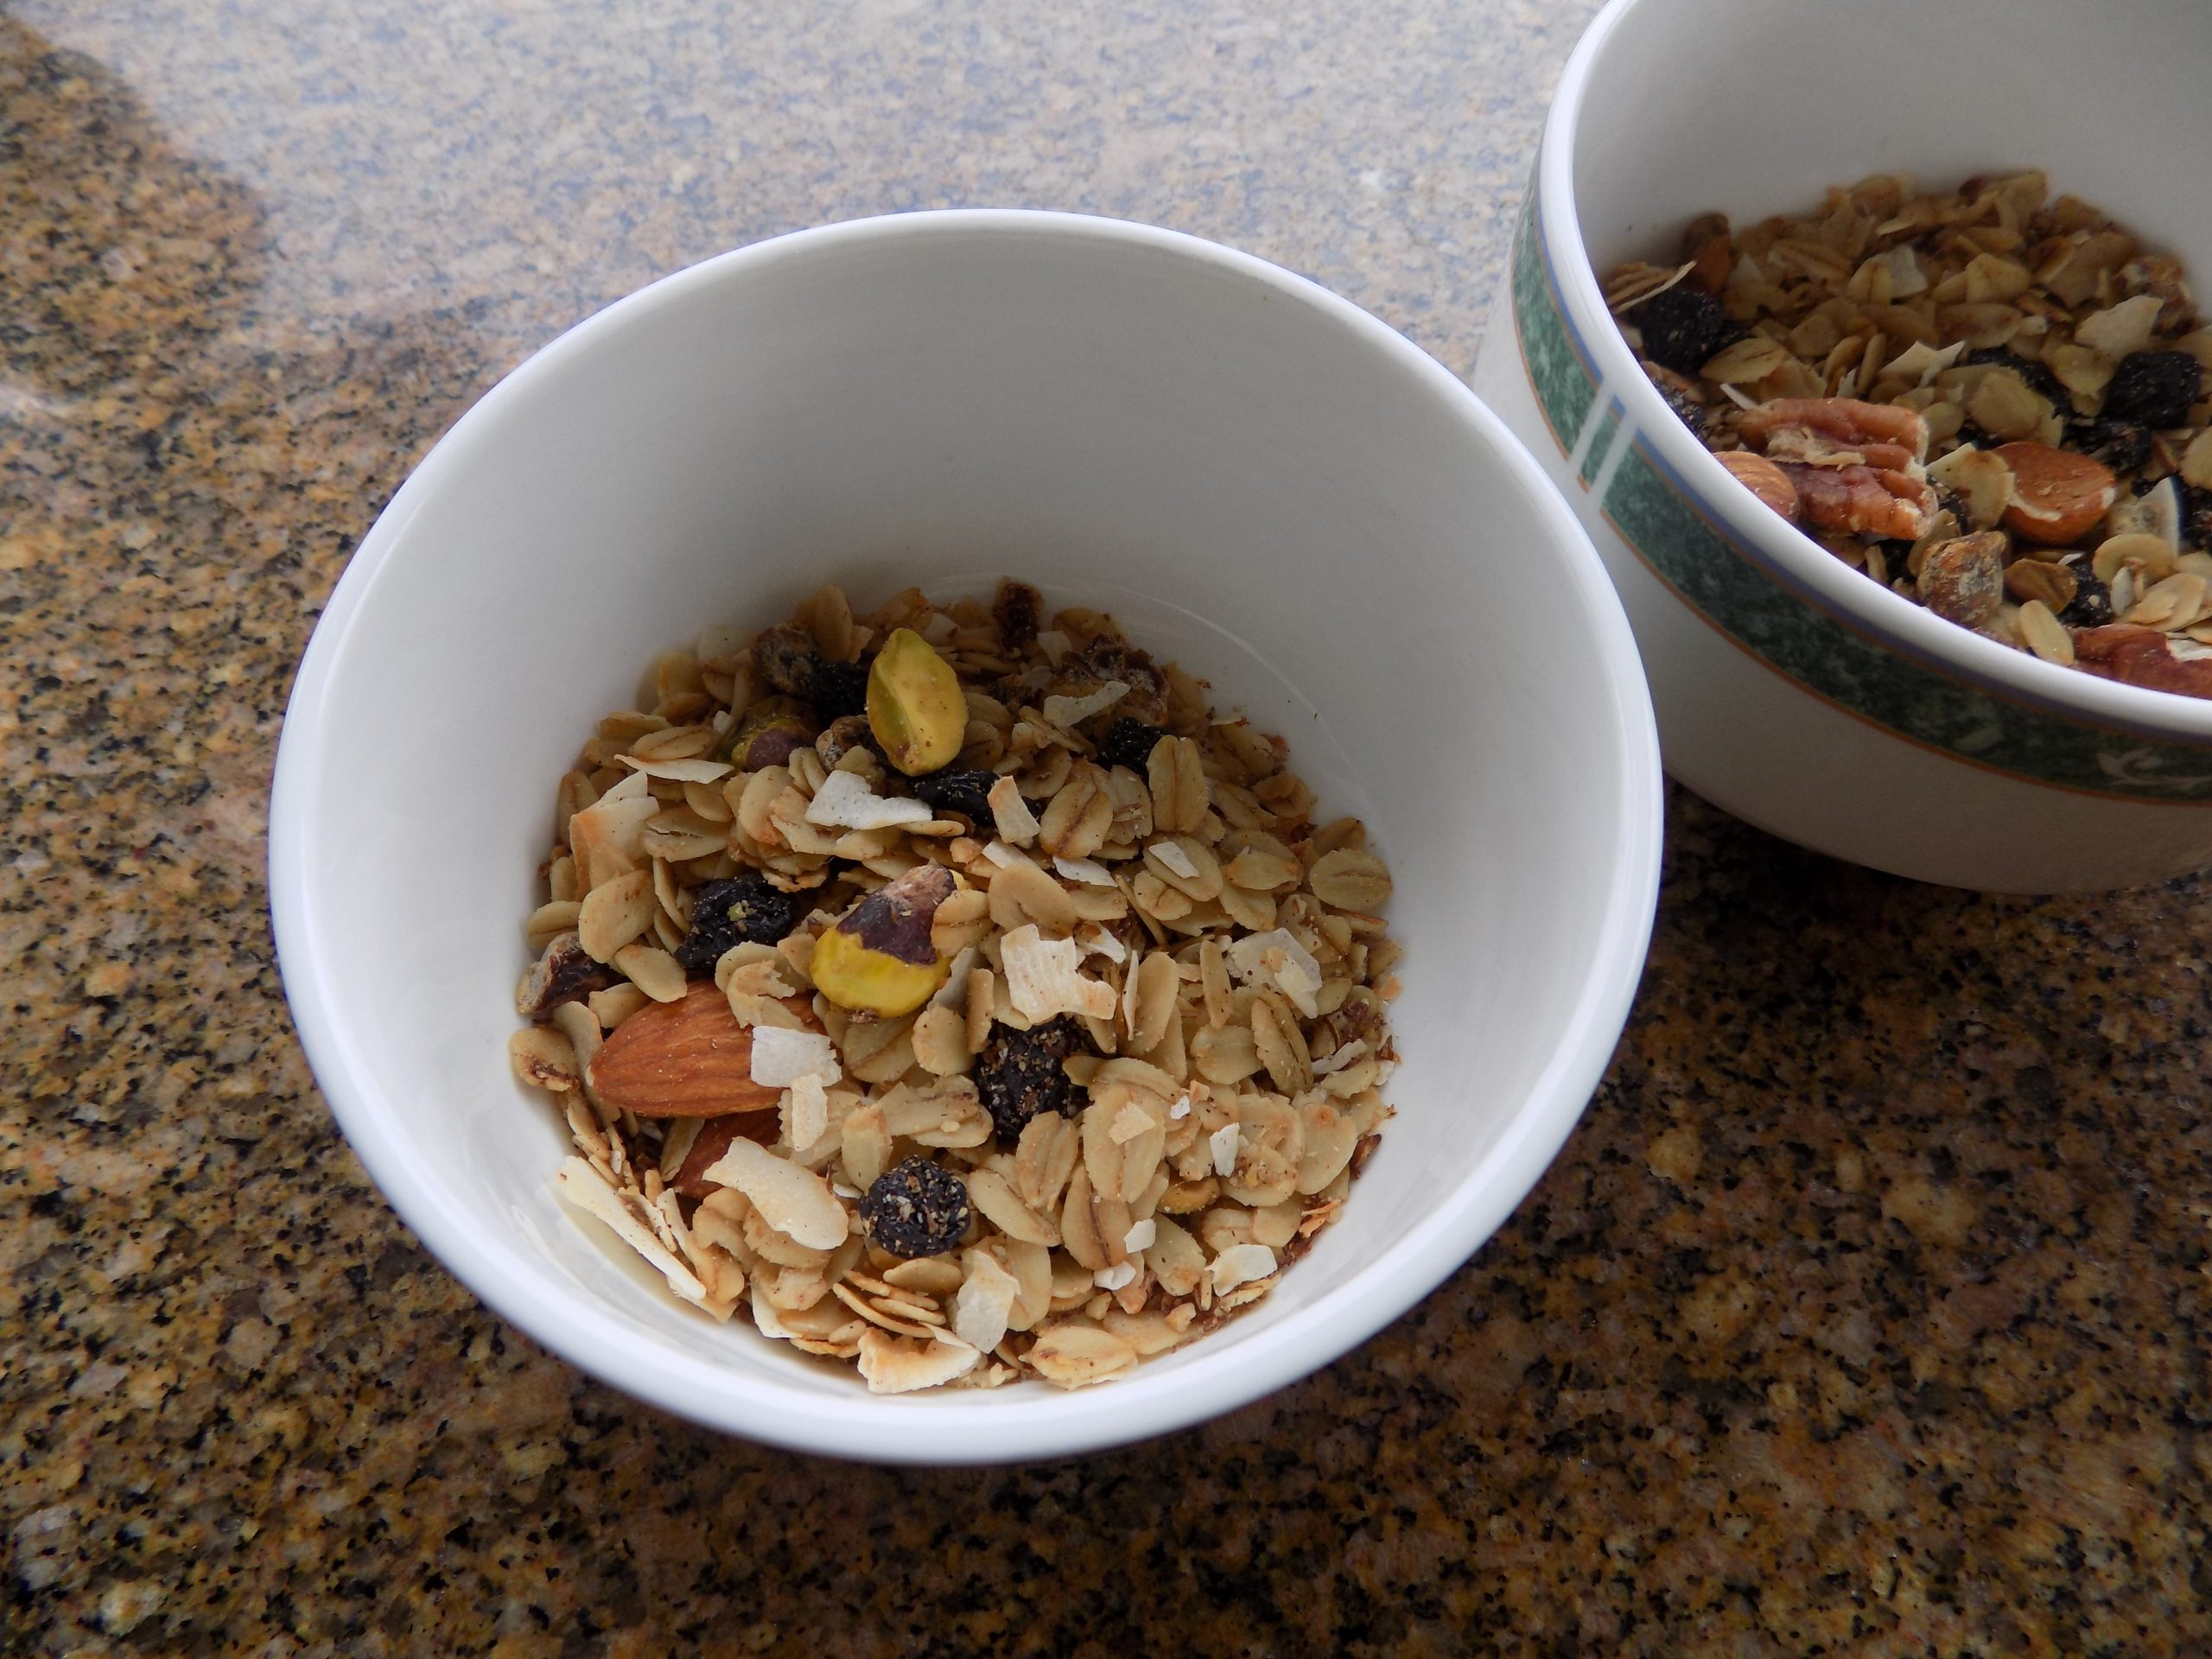
If you have perused my blog at all, you might have noticed that I already have several recipes for granola already posted. And if you were paying attention to what I wrote above, you also know that we eat a lot of granola. And being the gourmands that we are, our palates demand variety. Thus, another new granola recipe to share with you.
And because this granola is made with olive oil rather than butter, and maple syrup rather than granulated or brown sugar, I feel like this is a healthy varietal to add to my collection of granola recipes. Plus, it’s very easy to make, contains no scary ingredients, and tastes wonderful.
So, do yourself and your family a favor. Make homemade granola. It is ever so much tastier than anything you can buy off a shelf. Plus it contains more of everything that’s good for you and none of the ingredients for which there is actually no known pronunciation!
As always, peace and love to all.
½ c. pure maple syrup
½ c. extra virgin olive oil
1 tsp. vanilla
1 tsp. kosher salt
1 tsp. ground cinnamon
½ tsp. ground nutmeg
6 c. old-fashioned rolled oats
3 c. nuts (pecans, almonds, walnuts, etc.)
1 c. flaked coconut
2 c. dried fruit (chopped if necessary) (apricots, dates, blueberries, cranberries, cherries, raisins, etc.)
Preheat oven to 300-degrees.
In a large mixing bowl, whisk the maple syrup, olive oil, vanilla, salt, cinnamon, and nutmeg together. Then stir in the oats. Spread mixture on a rimmed baking sheet in an even layer and bake for 25 minutes. (Don’t wash the bowl.)
Add the nuts and coconut. Bake for an additional 20 minutes or until the oats are a light golden brown.
Remove from oven and transfer the granola back to the large bowl and add the dried fruit tossing to combine.
Allow to cool completely before storing in an airtight container.
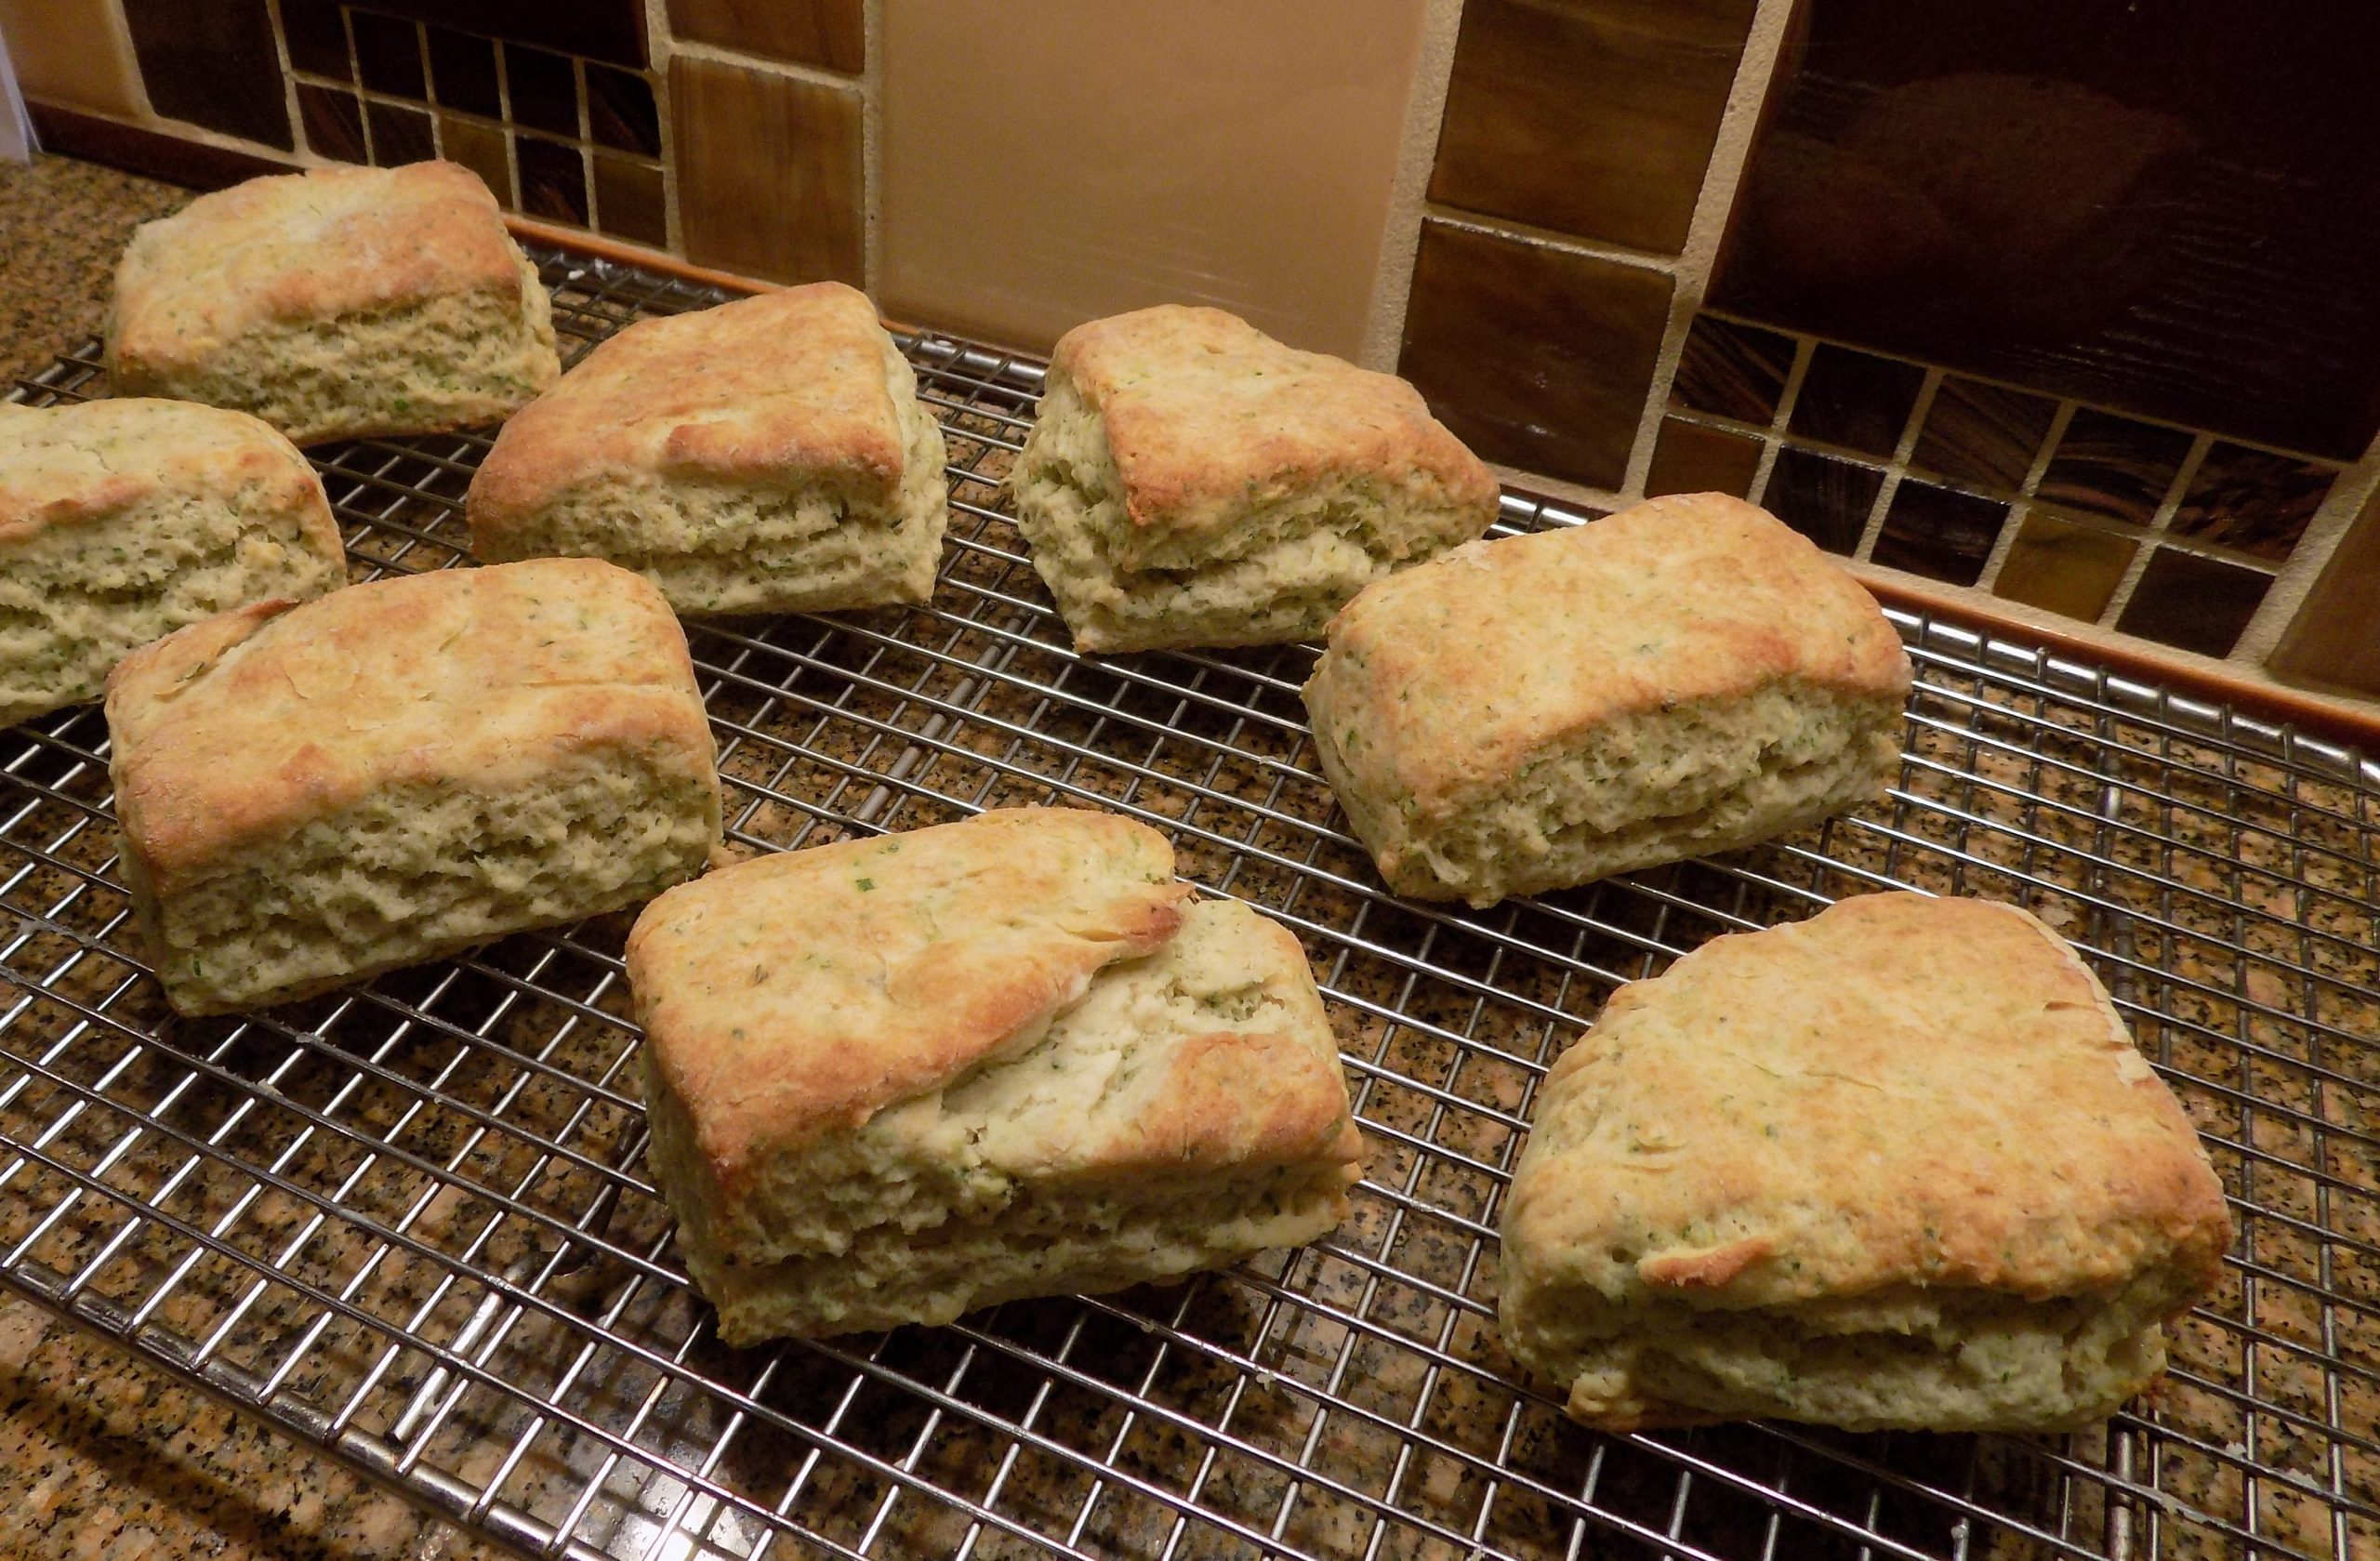
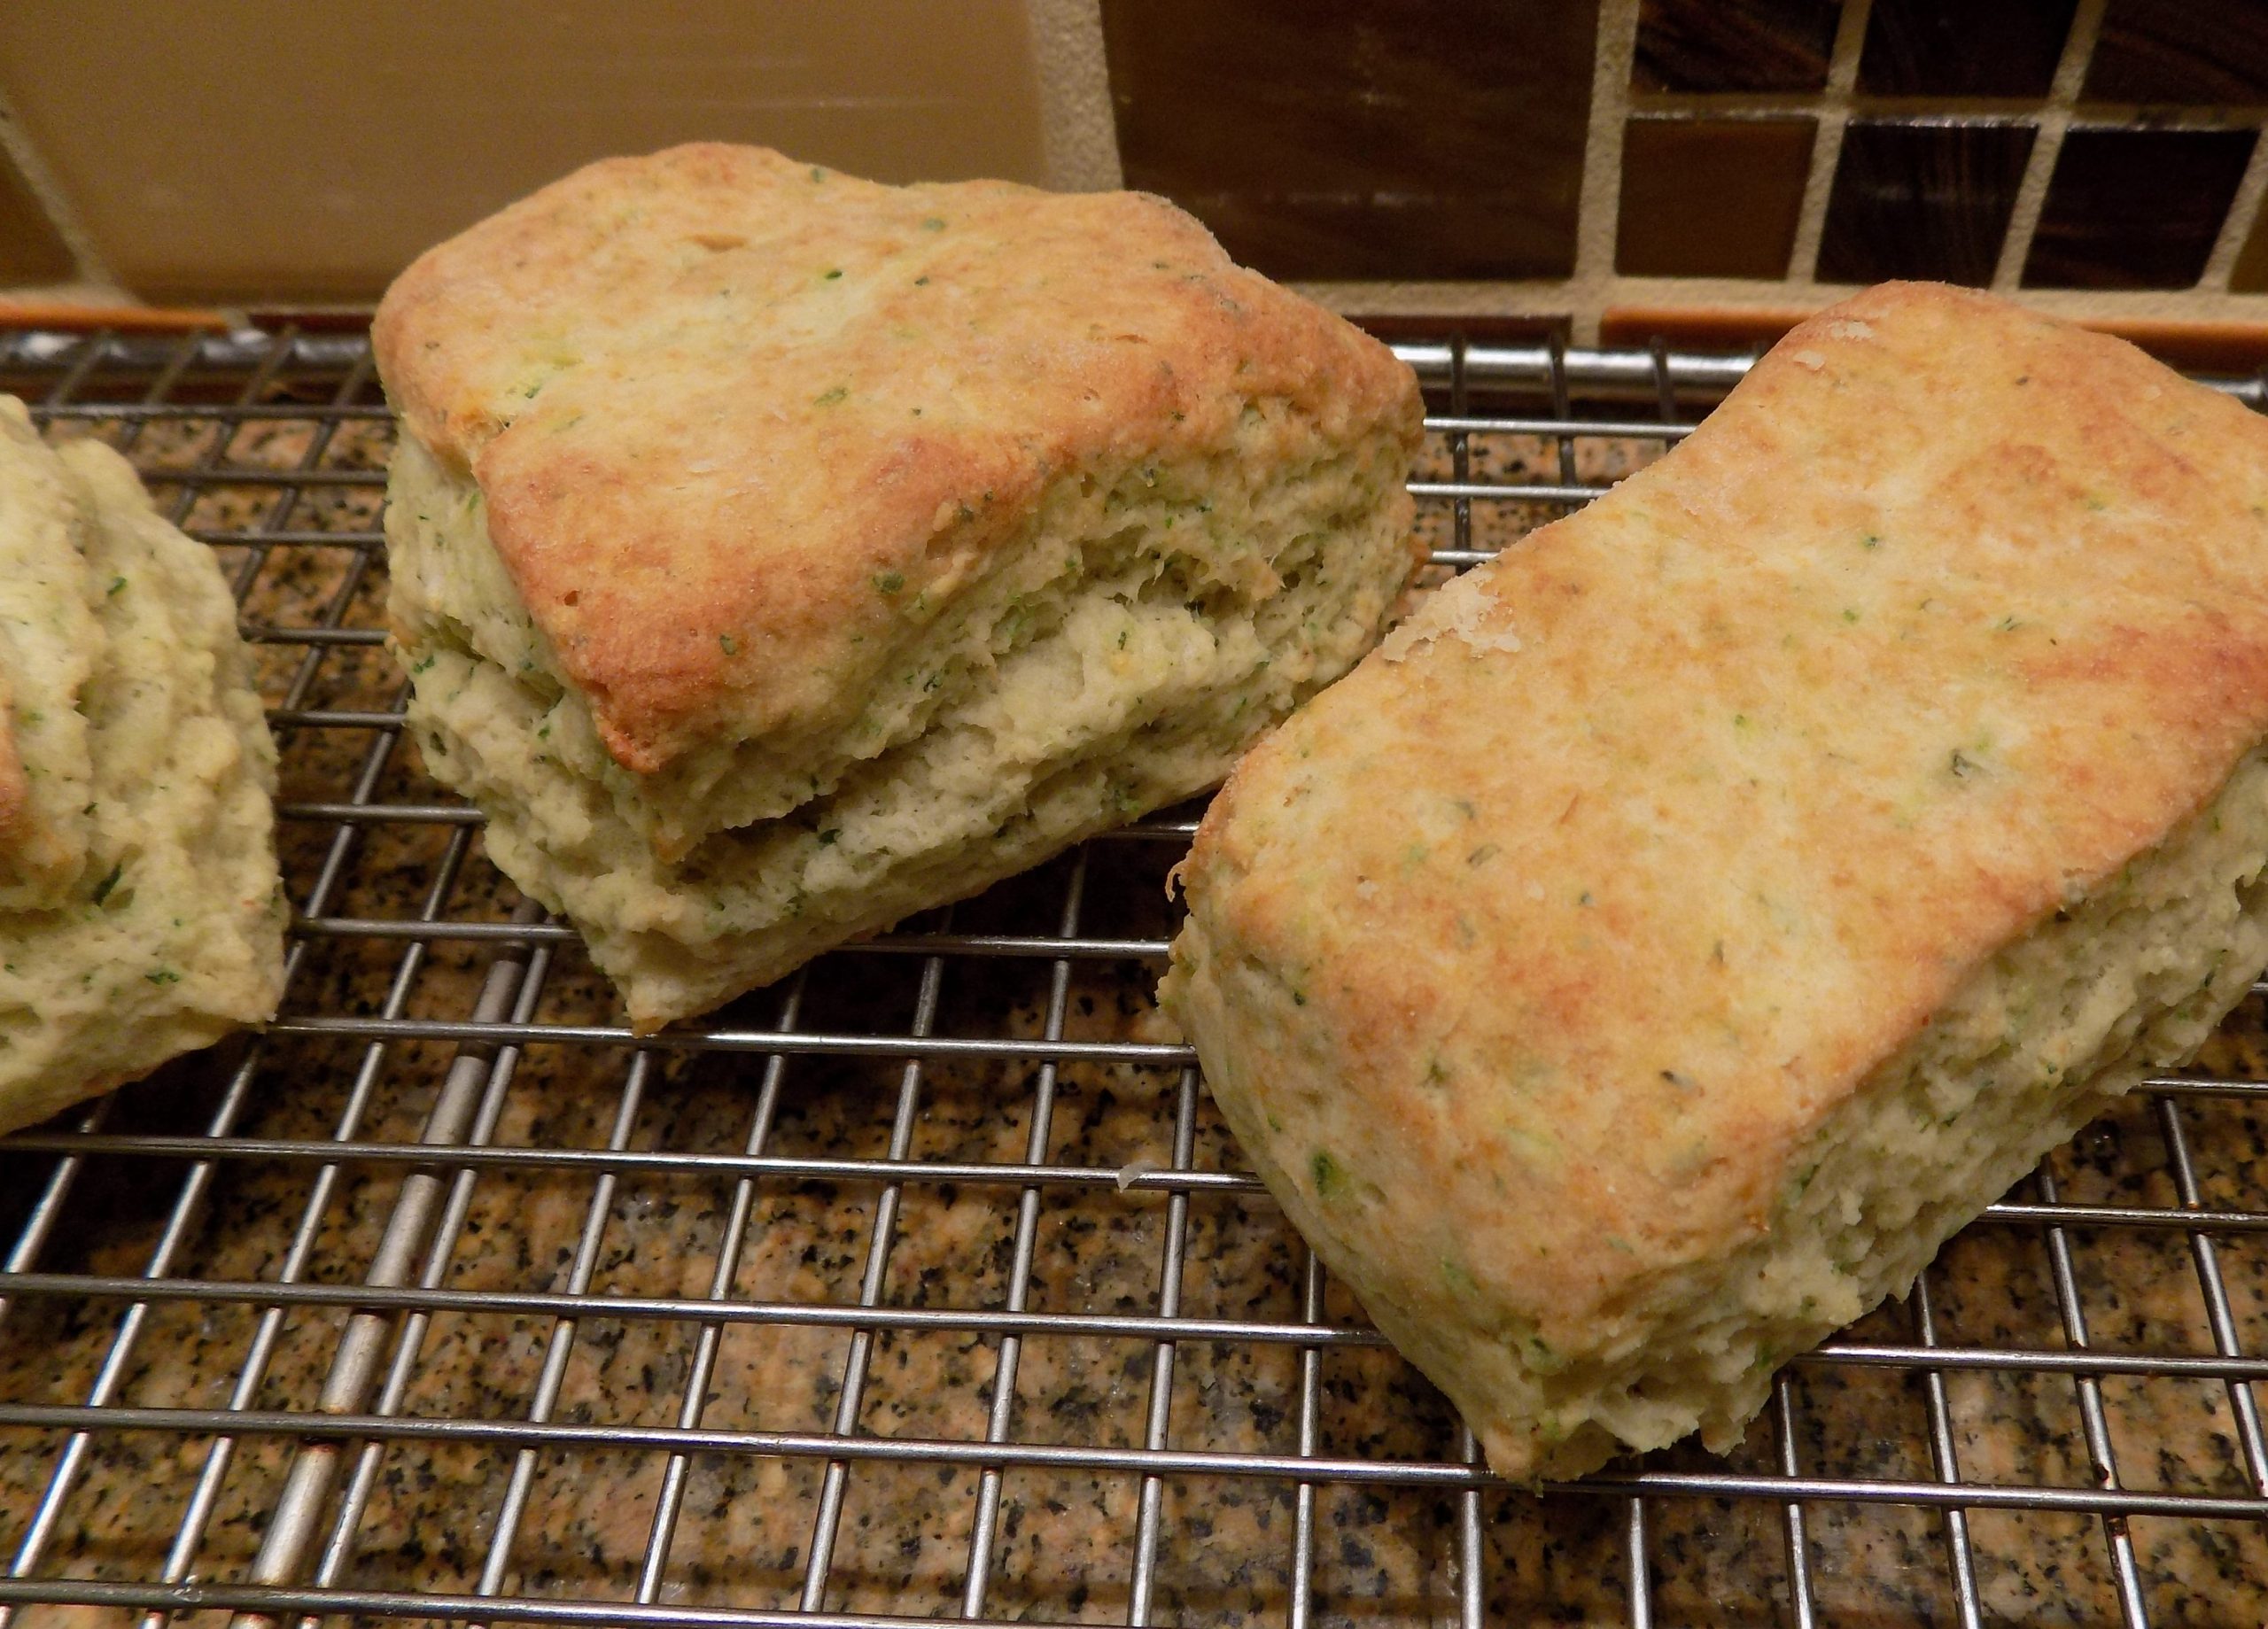
Some days are better than others. Because some days I have leftovers from the previous evenings dinner and only need to fix a little “something” new to make the second dinner a pleasure rather than a chore. So, the other evening I was thinking what would go nicely with leftover pot roast, veggies (plenty of veggies) and of course, pot roast gravy. (For my recipe, search under Pot Roast with Potatoes, Onions, and Carrots.) I decided some kind of herby buttermilk biscuit would be perfect. So, using a recipe I found on the justalittlebitofbacon.com site, with the addition of roasted garlic that really needed to be used up, I baked up a batch of these amazing biscuits. So, so delicious. And as tender as any biscuits I have ever had the pleasure of eating. And for those of you for whom turkey dressing/stuffing is a waste of ingredients (all 2 of you), these biscuits would make a perfect alternative for a “bready side” on your Thanksgiving table.
I think the secret to these savory biscuits lies in the fact that the recipe calls for all fresh vegetative ingredients. And because I happen to grow Italian parsley, chives, and rosemary it made using these terrific ingredients a snap. And thyme, well I’ve tried growing it, but for some unknown reason, I’ve had no luck with this herb. So, I always have one of those small plastic containers of thyme in my fridge. So, for me it was no problem to follow the instruction as written. But if you don’t happen to have all the fresh ingredients on hand, I would say use dried. But of course, only about a third as much since the flavor of dried herbs is so much more concentrated. And if you do use dried chives and herbs, and the biscuits come out perfect, please let me know so I can pass on your comments to anyone reading this recipe. But for now, I’m going to stick with fresh chives and herbs.
Well, that’s it for today. We are expecting at least 15 guests for Thanksgiving dinner, so I am busy strategizing for the event. Even though others are bringing a dish or 2 I still feel compelled to make sure everyone ends up with at least one of the dishes they hold sacred on any Thanksgiving table so that we can send everyone out the door, full and happy. At least, that’s my plan.
This feels like such a special Thanksgiving to me. We have received our covid-19 booster shots and will be with a good portion of our extended family for this day of thanks. And everything else in our lives seems to be happily perking along. So, we have a lot of positive in our lives to be extremely thankful for. May you be as similarly blessed.
Again, Happy Thanksgiving to all. And of course, peace and love.
2 c. unbleached all-purpose flour, fluffed
2 tsp. baking powder
½ tsp. baking soda
½ tsp. fine sea salt
2 T. chopped fresh parsley
2 T. chopped fresh chives
1 tsp. chopped fresh thyme
½ tsp. chopped fresh rosemary
4 cloves roasted garlic
8 T. (1 stick) very cold unsalted butter, (can even be frozen butter), cut into small pieces
¾ c. buttermilk
Pulse the flour, baking powder, baking soda, and salt together in the bowl of a food processor. Add the parsley, chives, thyme, and rosemary and pulse a few more times to distribute through the mix.
Add the roasted garlic and butter; process until the mixture resembles coarse cornmeal and there are no large lumps of butter left.
Add the buttermilk and pulse a few times, until the dough gathers into clumps. Scrape the biscuit dough out onto a lightly floured board.
Pat the dough into an oblong shape at an even 1-inch height. (This will give you 8 good sized biscuits.) Cut with a floured bench scraper or large butcher knife. Place on an ungreased baking sheet.
Bake in a pre-heated 450-degree oven for 10-12 minutes, or until lightly browned and puffed. Serve warm or toast for a wonderful breakfast bread.
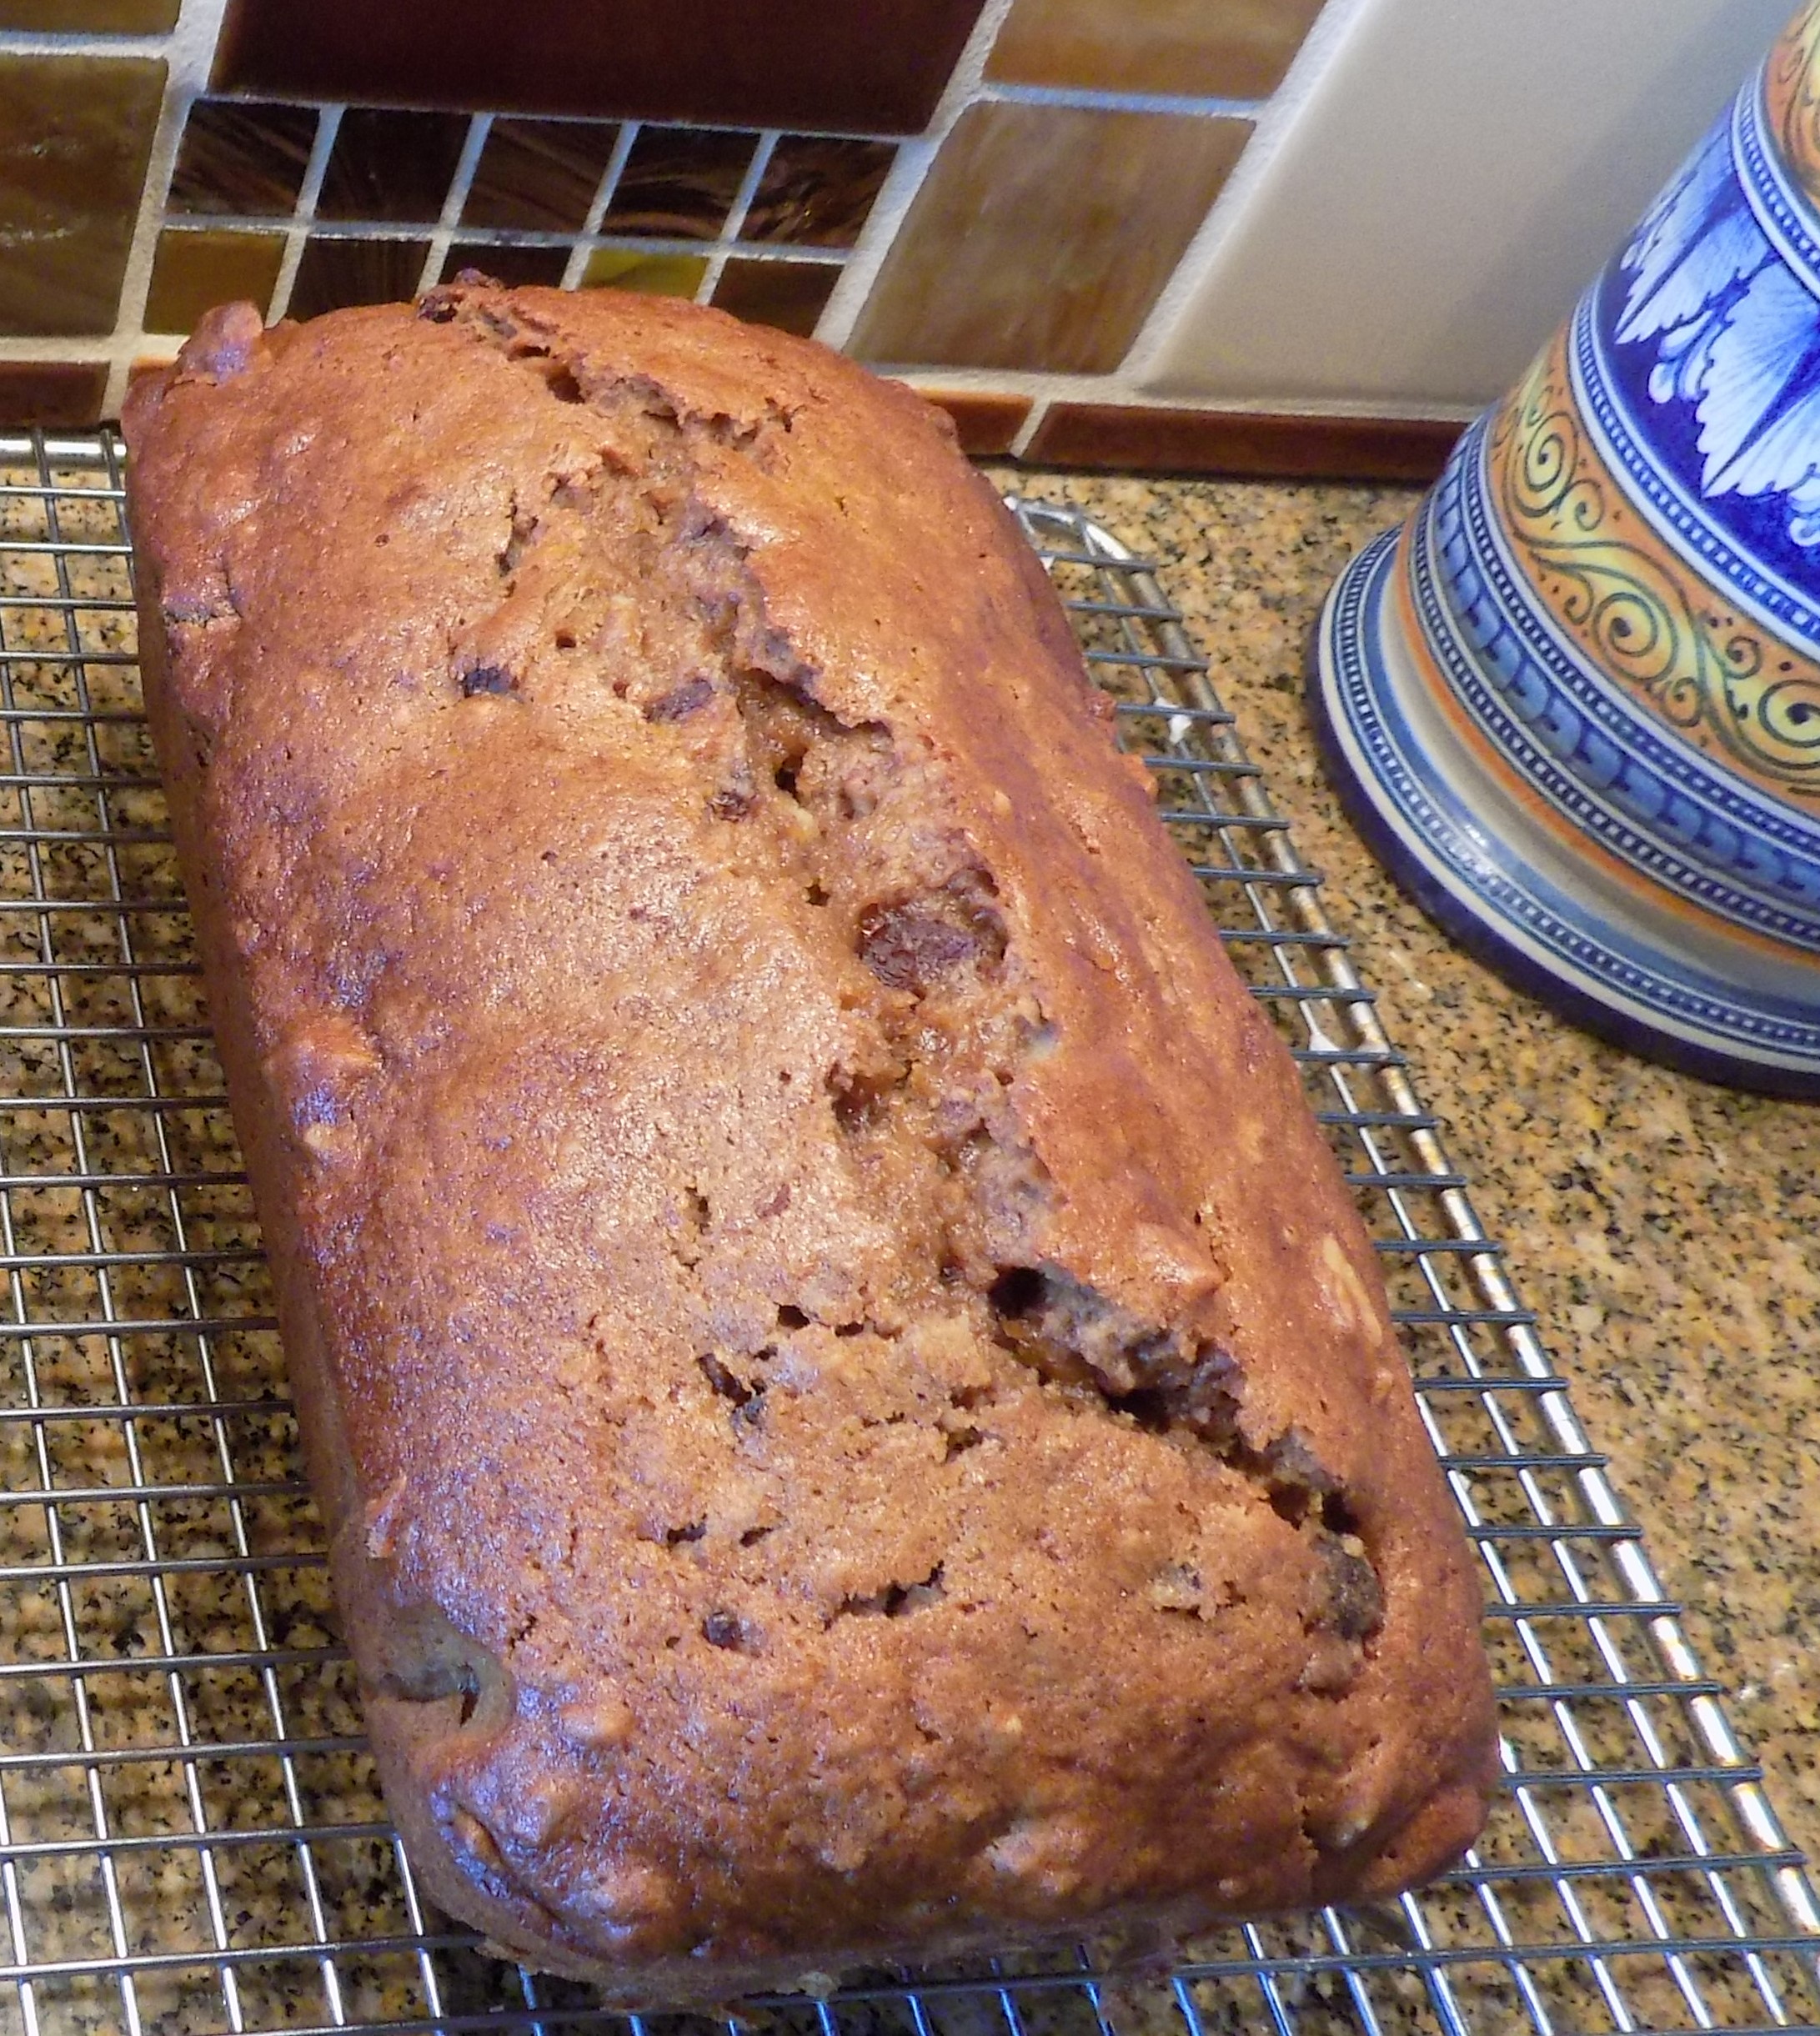
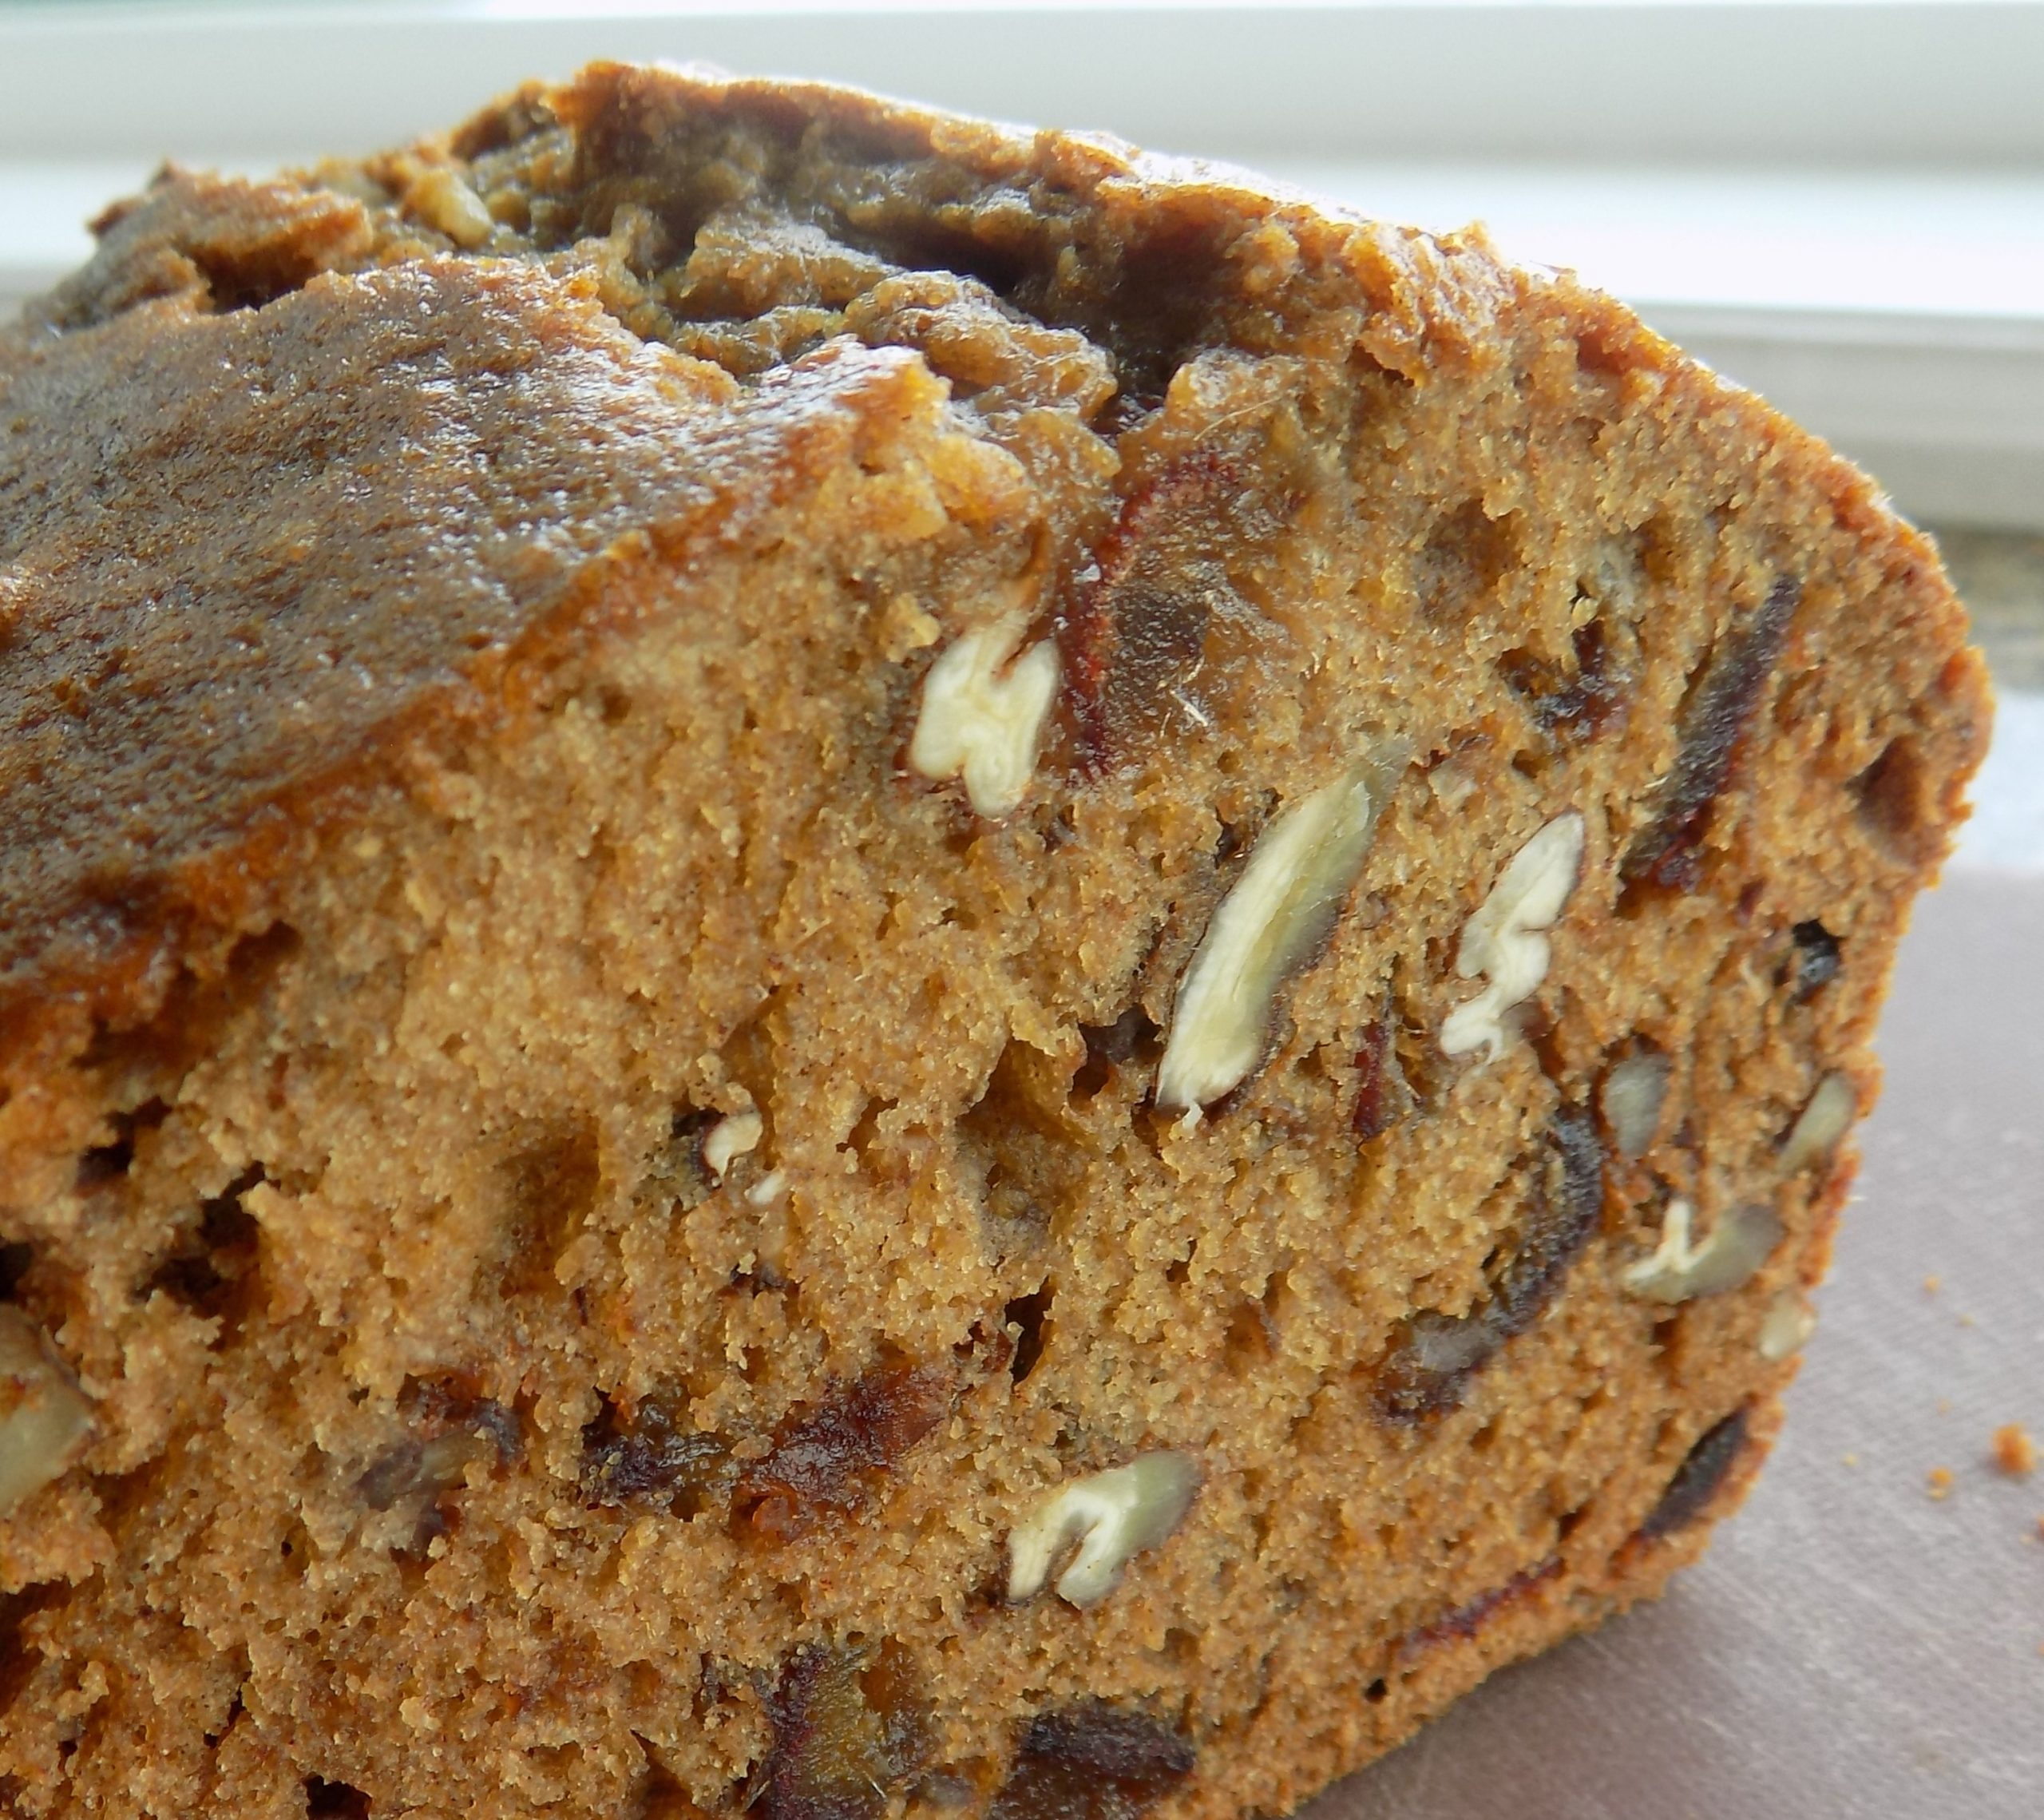
So, our good friend Rudi sent me this recipe. We didn’t happen to have any Jack Daniels on hand, so Mr. C. and I had a deep and informative (at least for me) discussion regarding the relative merits of Jack over Jim (Jim Beam that is!) (Both being bourbon whiskey, or so I was informed.) And whether it would be true enough to the recipe if I used Jim instead of Jack. We came to the conclusion that Jim could stand in for Jack this time, so, to the kitchen I proceeded.
Now one thing you should know. I have my own stash of liquor and liqueurs readily at hand in the pantry when a dish I am preparing requires a bit of booze. So, in my haste to prepare this bread, I grabbed the cognac bottle rather than the bottle of Jim Beam. So, not only did my mistake ignore all the fine facts I had learned regarding bourbon, my haste changed the flavor of the bread.
But, regardless of my error, the bread was delicious. Absolutely delicious! And knowing that the flavor of bourbon is fabulous in all kinds of dishes, I have no qualms about suggesting that you use Jack Daniels when you make this recipe. But of course, if all you have is cognac, go for it. Just make this bread. You will be so glad you did. And thank you so much Rudi for this awesome recipe. And Happy Thanksgiving to all.
Speaking of giving thanks, every year at this time I remember to be thankful for the many blessings I have received over the years. My husband, my family, my friends, the fact that I have a roof over my head, and more than enough to eat. But this year, I am especially aware of how lucky I am. I didn’t get covid-19, I haven’t lost a family member to this horrid virus, and we are still friends with people who have differing opinions from ours. And that isn’t easy. I tend to get on my high horse and think I am the one in the right. (And of course, that’s mainly true!) But I haven’t walked in the other person’s shoes, and they haven’t walked in mine. The very fact that we are still respectful of each other makes me thankful. And hopeful that we can all get through this dreadful time if we continue to think of the greater good for everyone.
So, as always – peace and love to all. And again, HAPPY THANKSGIVING.
1½ – 2 c. chopped Medjool dates
4 T. (½ stick) unsalted butter, room temp., sliced into 4 pieces
1 tsp. baking soda
¾ tsp. kosher salt
¾ c. brown sugar, packed
1 c. hot brewed coffee or 1 c. hot water and 1 tsp. espresso powder
1 lg. egg
1 tsp. vanilla
2 T. Jack Daniels or other bourbon or cognac
½ tsp. baking powder
1¾ c. unbleached all-purpose flour, fluffed
1 c. coarsely chopped pecans
Preheat the oven to 350-degrees. Lightly grease an 8.5-inch x 4.5-inch or 5 x 9-inch loaf pan. Then line the pan with parchment paper. Set aside.
Place the chopped dates, butter, baking soda, salt, and brown sugar in a mixing bowl. Pour the hot coffee into the bowl, stirring to combine. Allow the mixture to cool for 15 minutes.
Add the egg, vanilla, liquor, baking powder, and flour, beating gently until smooth. Stir in the pecans.
Scoop the batter into the prepared pan, gently tapping the pan on the counter to settle the batter.
Bake the bread for 50 to 70 minutes or until a toothpick inserted into the center of the loaf comes out clean and the internal temperature reaches 200-degrees. (If you don’t own an instant-read thermometer, now is the time to get one! Just sayin’!) If the bread starts to get too brown, loosely cover with aluminum foil.
Remove from oven and let sit 10 minutes before gently turning the bread out of the pan and onto a wire rack to cool completely before slicing.
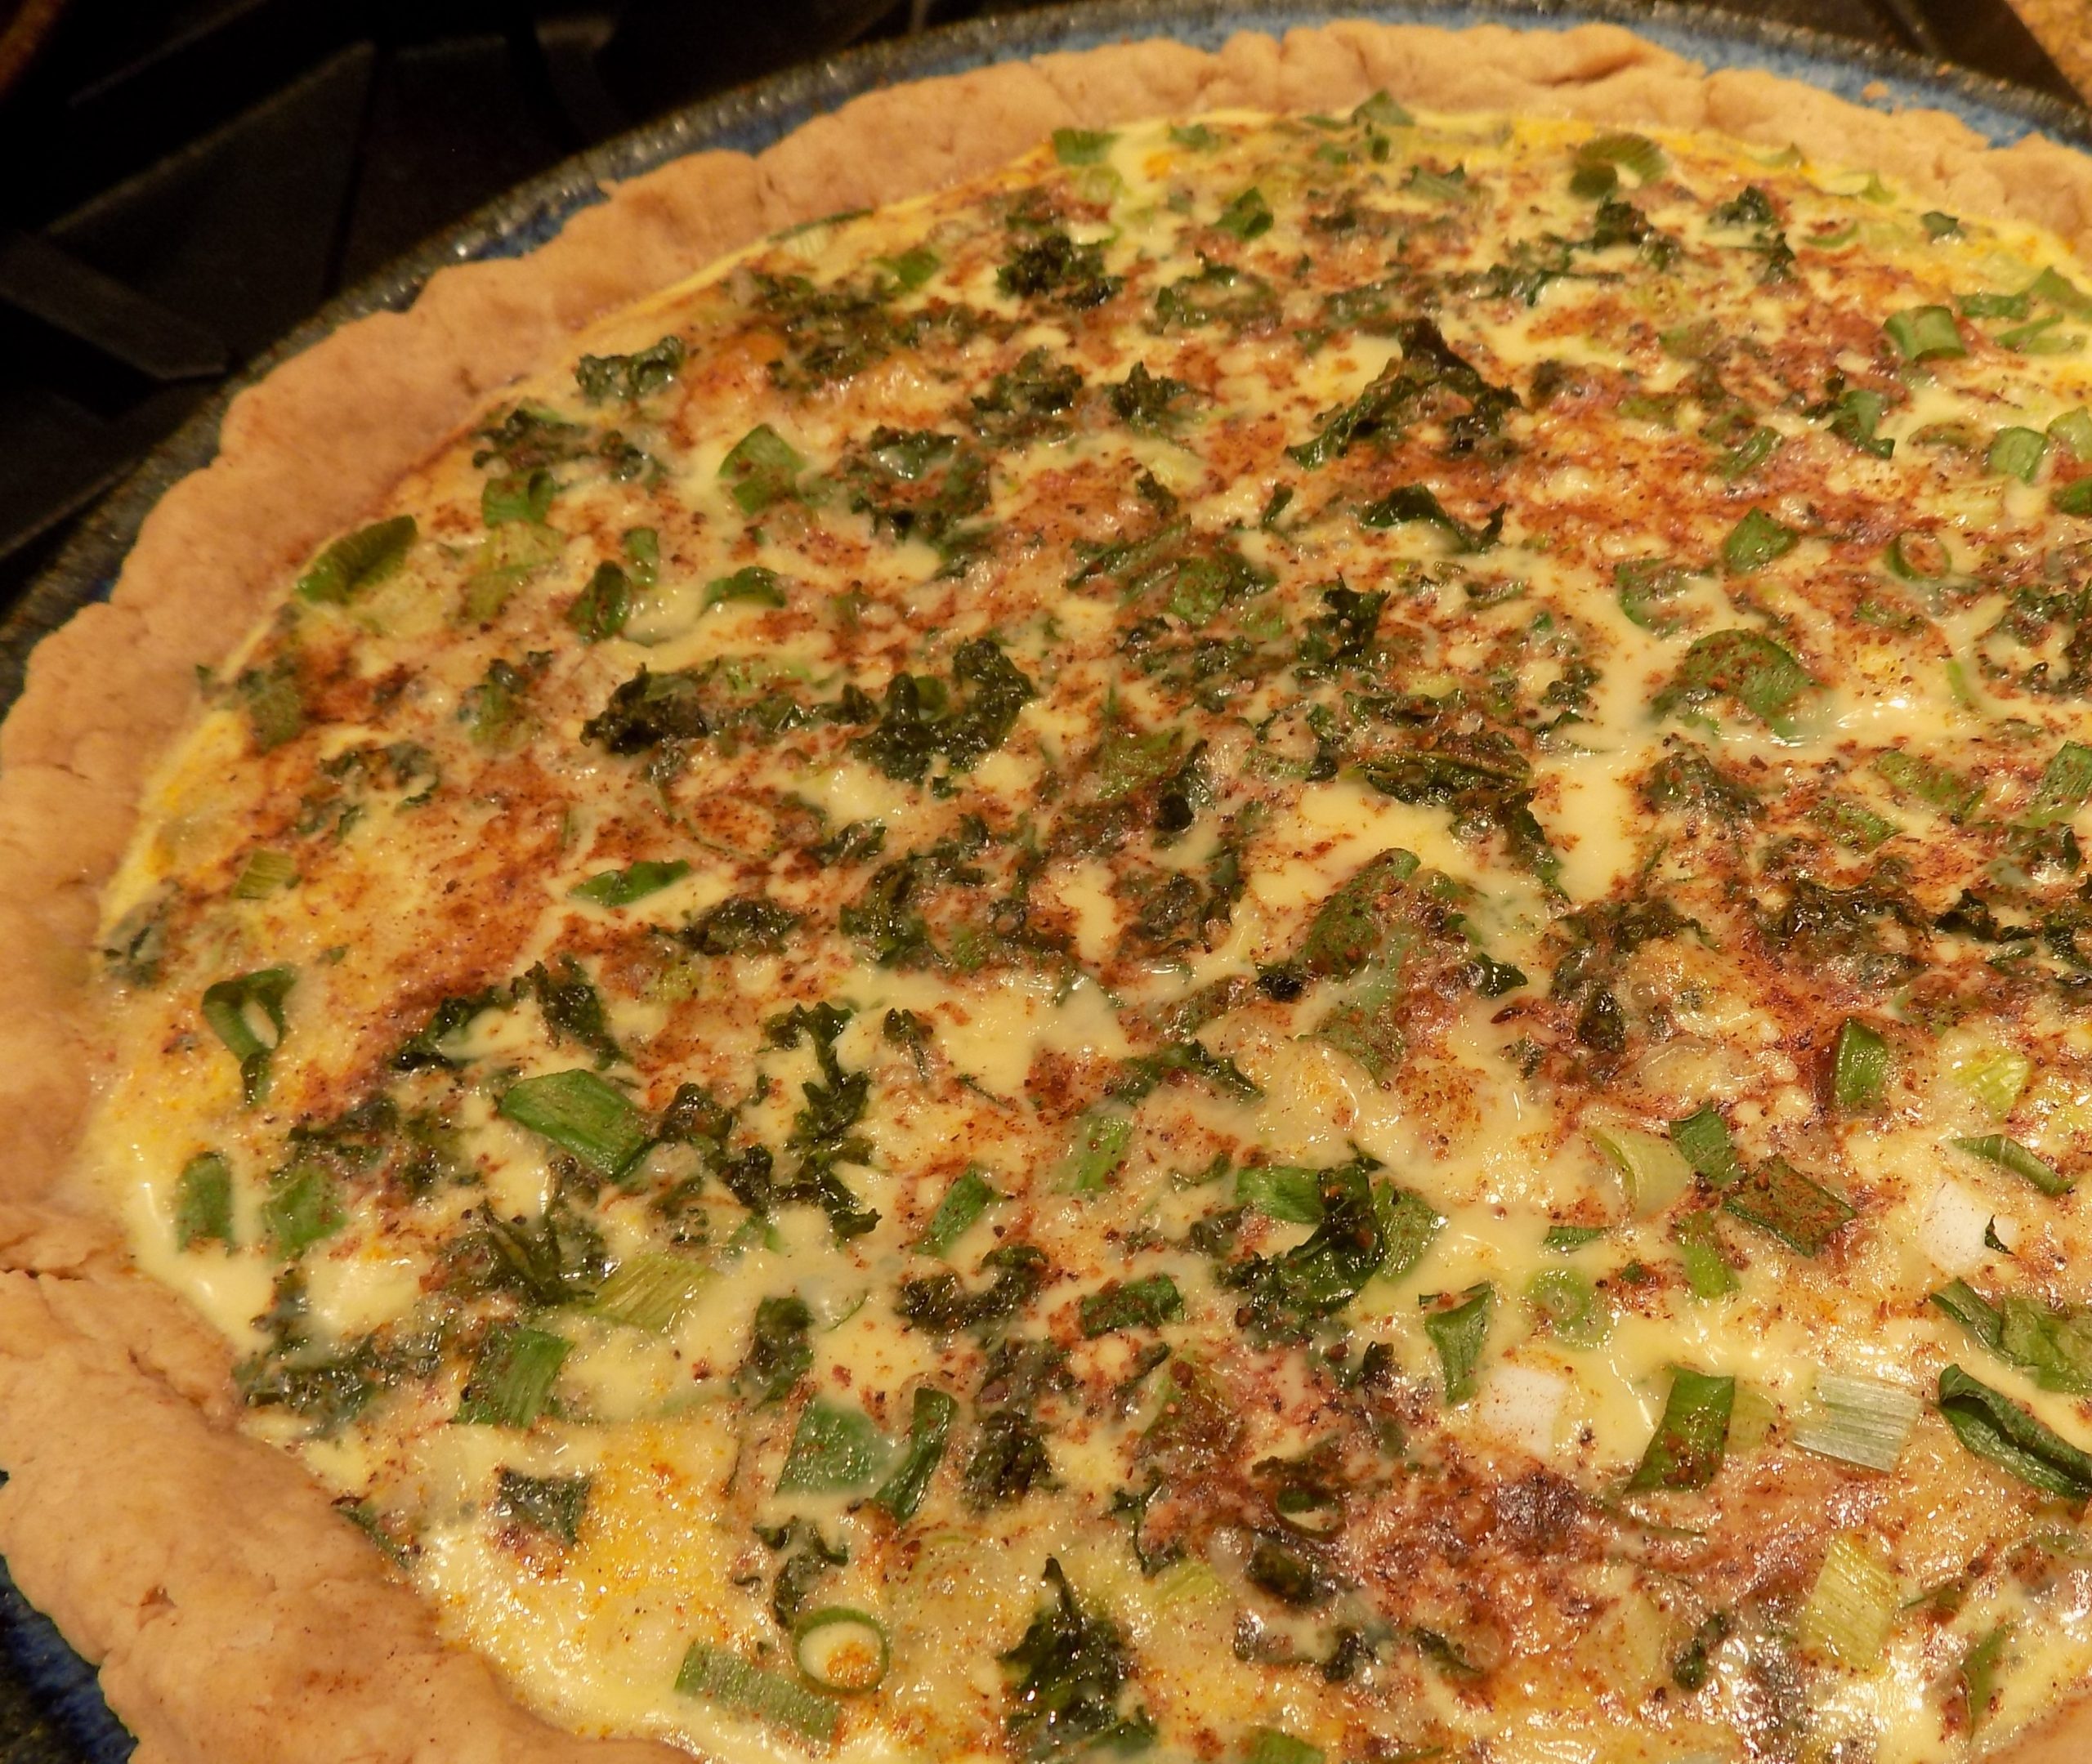
I added a bit of kale and chopped green onion to garnish the quiche before baking. Wasn’t necessary. Won’t do it again.
And yes, we love quiche. And that’s why there are already several quiche recipes on this site. Now, one of the things I like most about quiches is their versatility. I can put pretty much any ingredient in a pie shell, pour eggs and milk over the top, and bake until the filling is set. Voila! Egg pie!
So, the other evening, quiche was on our dinner table. And yes, quiche is also perfect for breakfast or lunch. That’s another versatile thing that I love about this dish. But mainly it’s about how wonderful this dish tastes. And how the creamy rich filling is offset by the crispy pie crust. (I don’t use this simple pie crust recipe for regular pies because it isn’t a flaky crust. But for quiche, it’s perfect!) And very easy to make. And at this stage in my life, I support easy.
So, if you too would enjoy a quiche that has all the requisite elements of a successful dish that includes, easy to prepare, delicious, not too expensive, and everyone at table will love, then this is the recipe for you. Make it “quiche night” at your house in the near future. Your family will love you even more than they already do!
And isn’t that what it’s all about anyway. Love and family and understanding and forgiveness and respect.
In these trying days when there is almost a civil war happening between the people who are vaccinated and those who aren’t, please don’t forget that everyone is doing their best. (Except for certain politicians who are trying to kill Democracy. But that’s another story!)
But for those of us who simply can’t understand why anyone would hesitate to get vaccinated, it seems like such a simple thing to just do it. (I fall in that camp BTW.) But I don’t live in another person’s head. I don’t know their fears or misgivings or past experiences. And I definitely don’t know what it’s like to be unable to make a decision. But from the few I know who haven’t been vaccinated, inertia seems to be the biggest reason to remain unvaccinated. So, be kind to these people and try to understand that life may not be as easy for them as it is for you. Love them, treat them with respect, and above all, don’t give up on them. Not everyone was lucky enough to be born with what I consider to be “a good tool belt”. A tool belt containing a goodly amount of intelligence, an inherent sense of self-worth, imagination, empathy, understanding, energy, and various other attributes that help most of us become happy, caring, and successful adults. If you were born with a good tool belt, you were just plain lucky. Not everyone was similarly blessed. So, be patient and kind. Don’t burn bridges that might never have been built if not for covid-19. And no, it’s not easy. I have a couple relatives I would like to shake by the shoulders, throw them in the back of my car, and drive them to get vaccinated. But I don’t walk in their shoes, and no one (yet) has put me in charge. Until then, I do the best I can. I’m not perfect and I get pretty darned frustrated. But I have yet to lose a friendship because we have differing opinions about being vaccinated. (OK, maybe one. But he isn’t family, and we have history anyway!) So, like I said, it’s not easy to safely maneuver the vaccination minefield. But definitely worth the effort.
And as always, peace and love to all.
8-inch pie crust (see recipe below)
2 T. unsalted butter
1½ c. diced ham
½ med. onion, chopped
2½ c. grated Swiss, Gruyère, Emmental, or Jarlsberg cheese (or combination)
1½ c. whole milk (part half & half is great)
1 tsp. Dijon mustard
freshly ground black pepper
5 lg. eggs
ground nutmeg
Heat the butter in a small frying pan. Sauté the ham pieces until browned. Using a slotted spoon or spatula, remove the ham to a small bowl. Set aside.
Add onion and cook over medium low heat, stirring frequently, until the onion is soft and starts to become a light golden brown, 20 – 30 minutes.
Scatter ham pieces over the partially baked pie crust. Layer cheese on top of ham. Scatter cooked onions evenly over the cheese.
Whisk together the milk/half & half, Dijon mustard, black pepper, and eggs. Pour liquid mixture in pie pan. Sprinkle with nutmeg. Hint: to keep your pie crust edge from getting too brown while baking, cover with thin strips of aluminum foil.
Bake in a pre-heated 350-degree oven until the filling is set, about 45-55 minutes. Allow to cool for 5 minutes before serving.
Whole Wheat Pie Crust
1 c. unbleached all-purpose flour
1 c. whole wheat pastry flour
heaping ½ tsp. salt
1 tsp. sugar
¼ tsp. baking powder
7 T. vegetable or canola oil
5 T. cold water
Whisk the flours, salt, sugar, and baking powder together. Pour the oil and water over the dry ingredients. Stir with a fork until the dough is evenly moistened. Pat the dough across the bottom of a fairly deep pie pan, then up to the rim.
Bake in a pre-heated 400-degree oven for 12 minutes. Remove from oven and set aside until you are ready to assemble the quiche. Reduce oven temperature to 350 degrees.
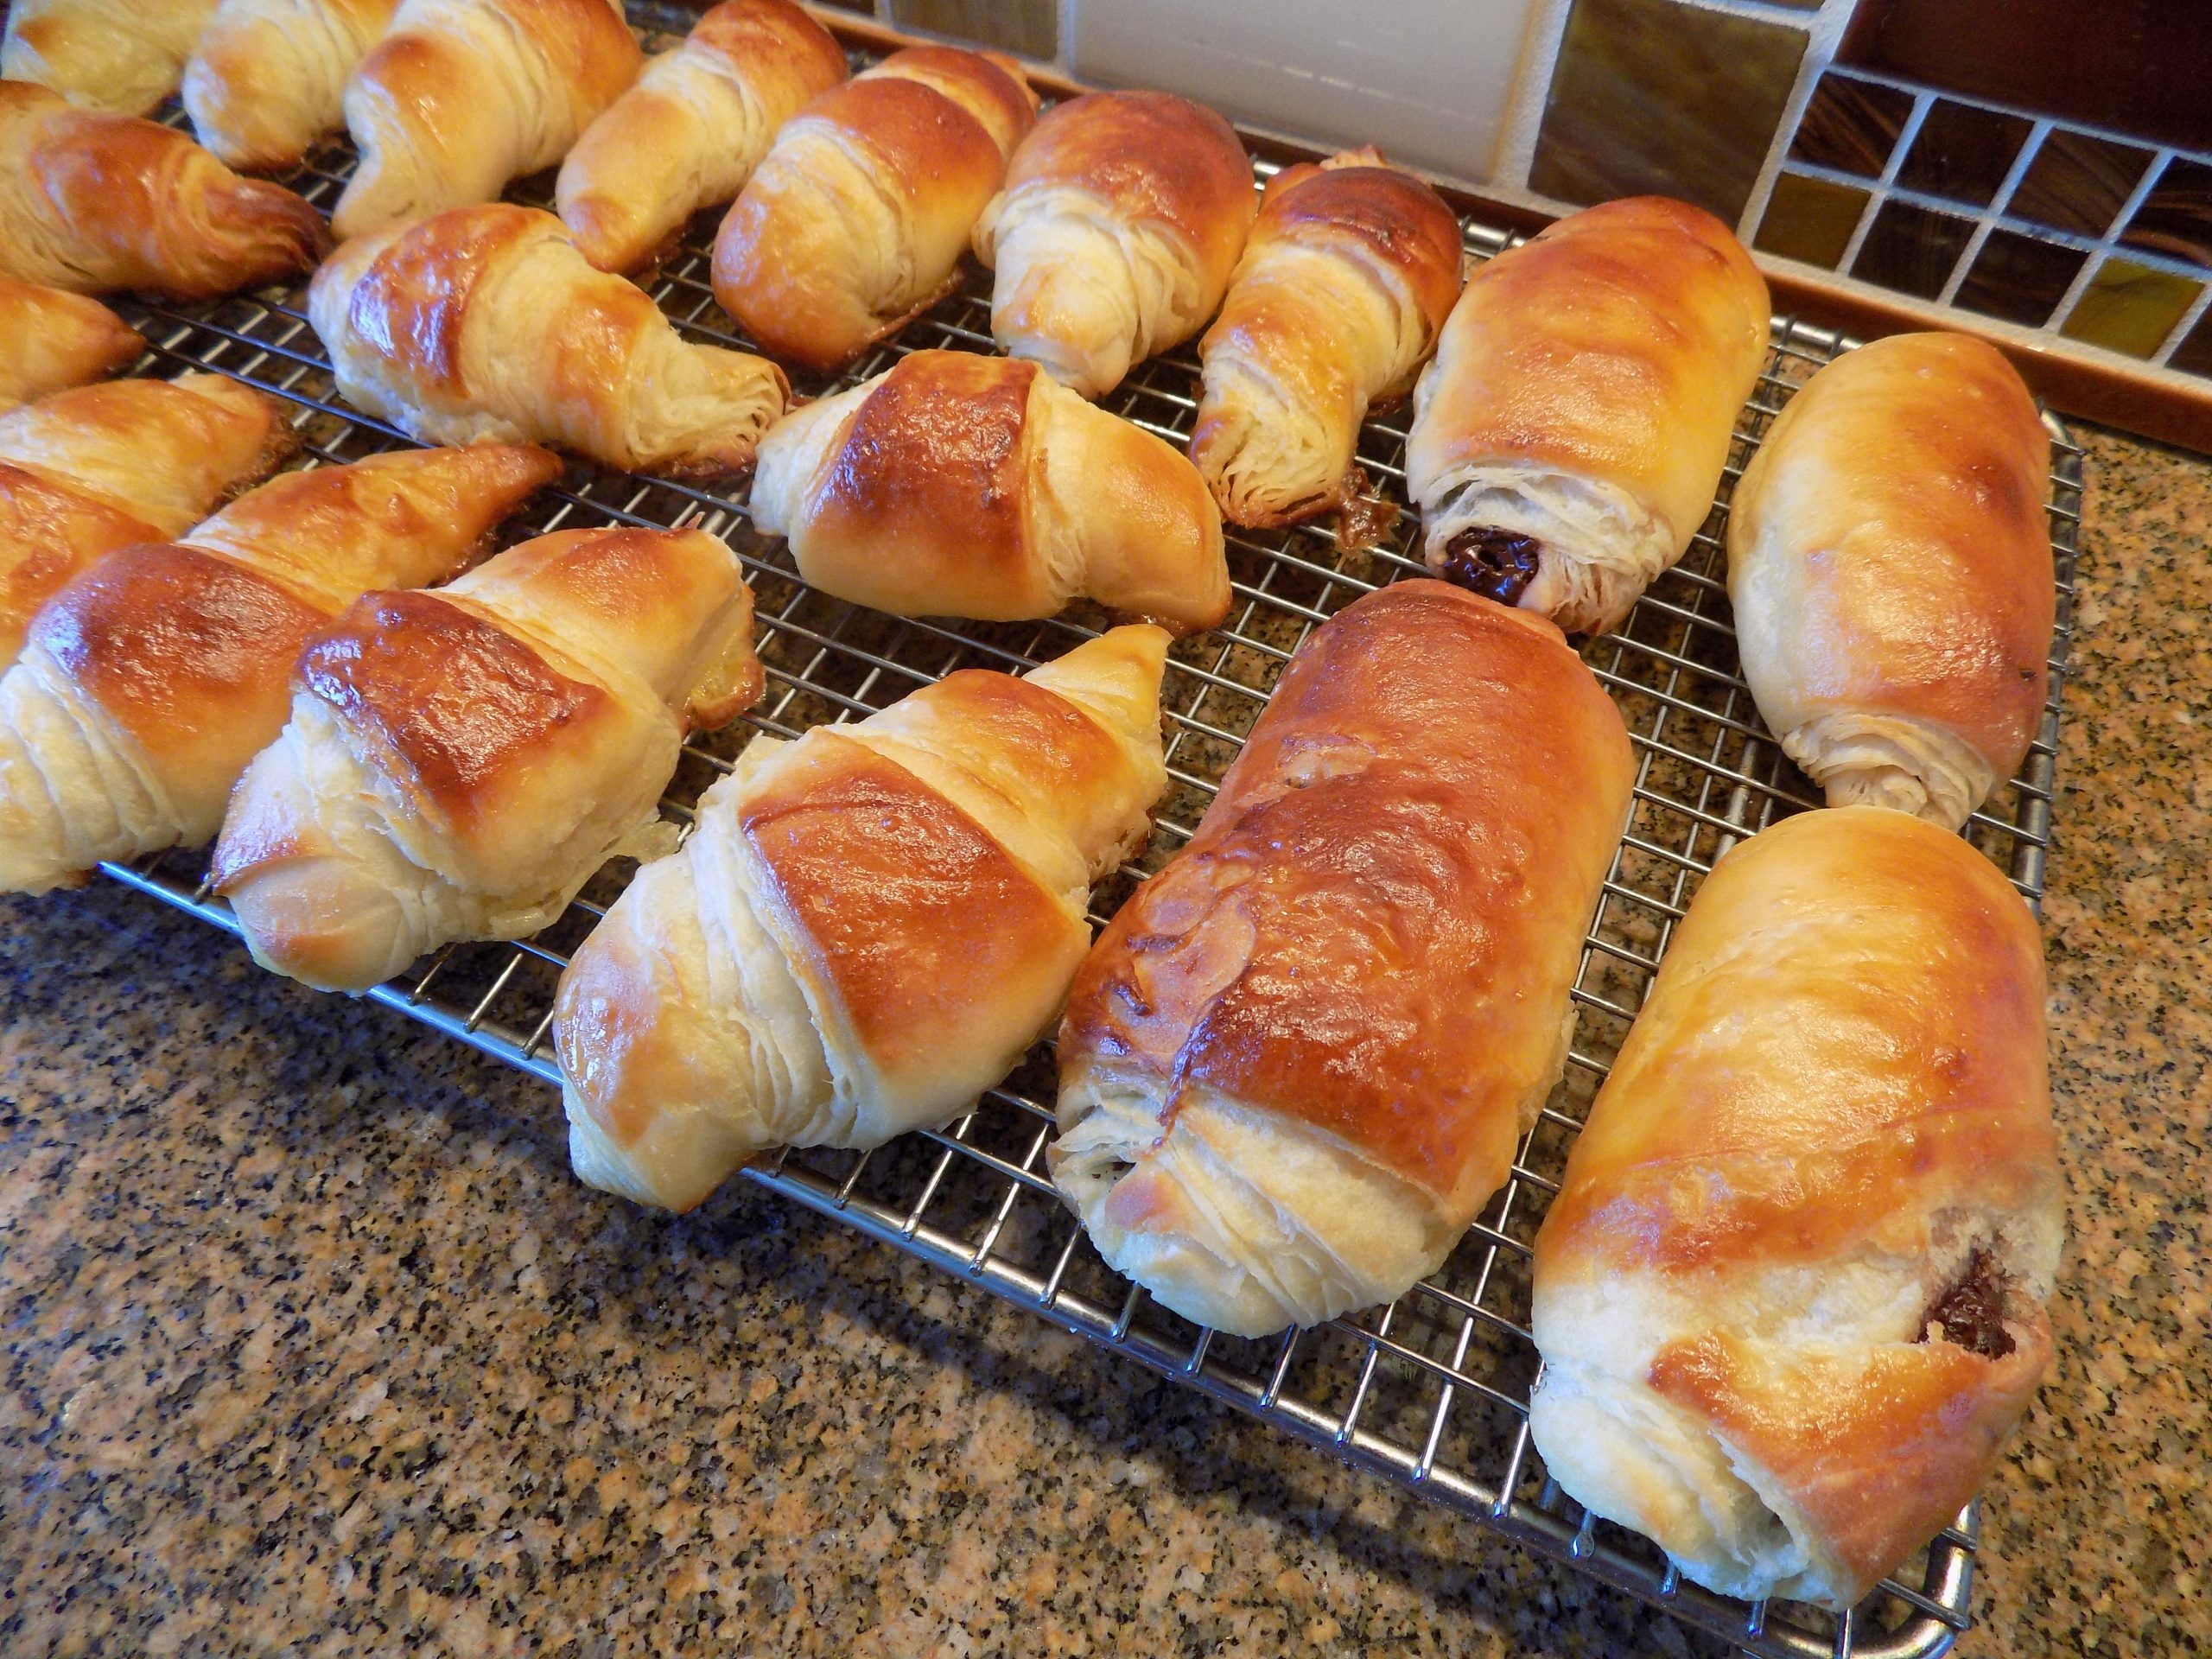
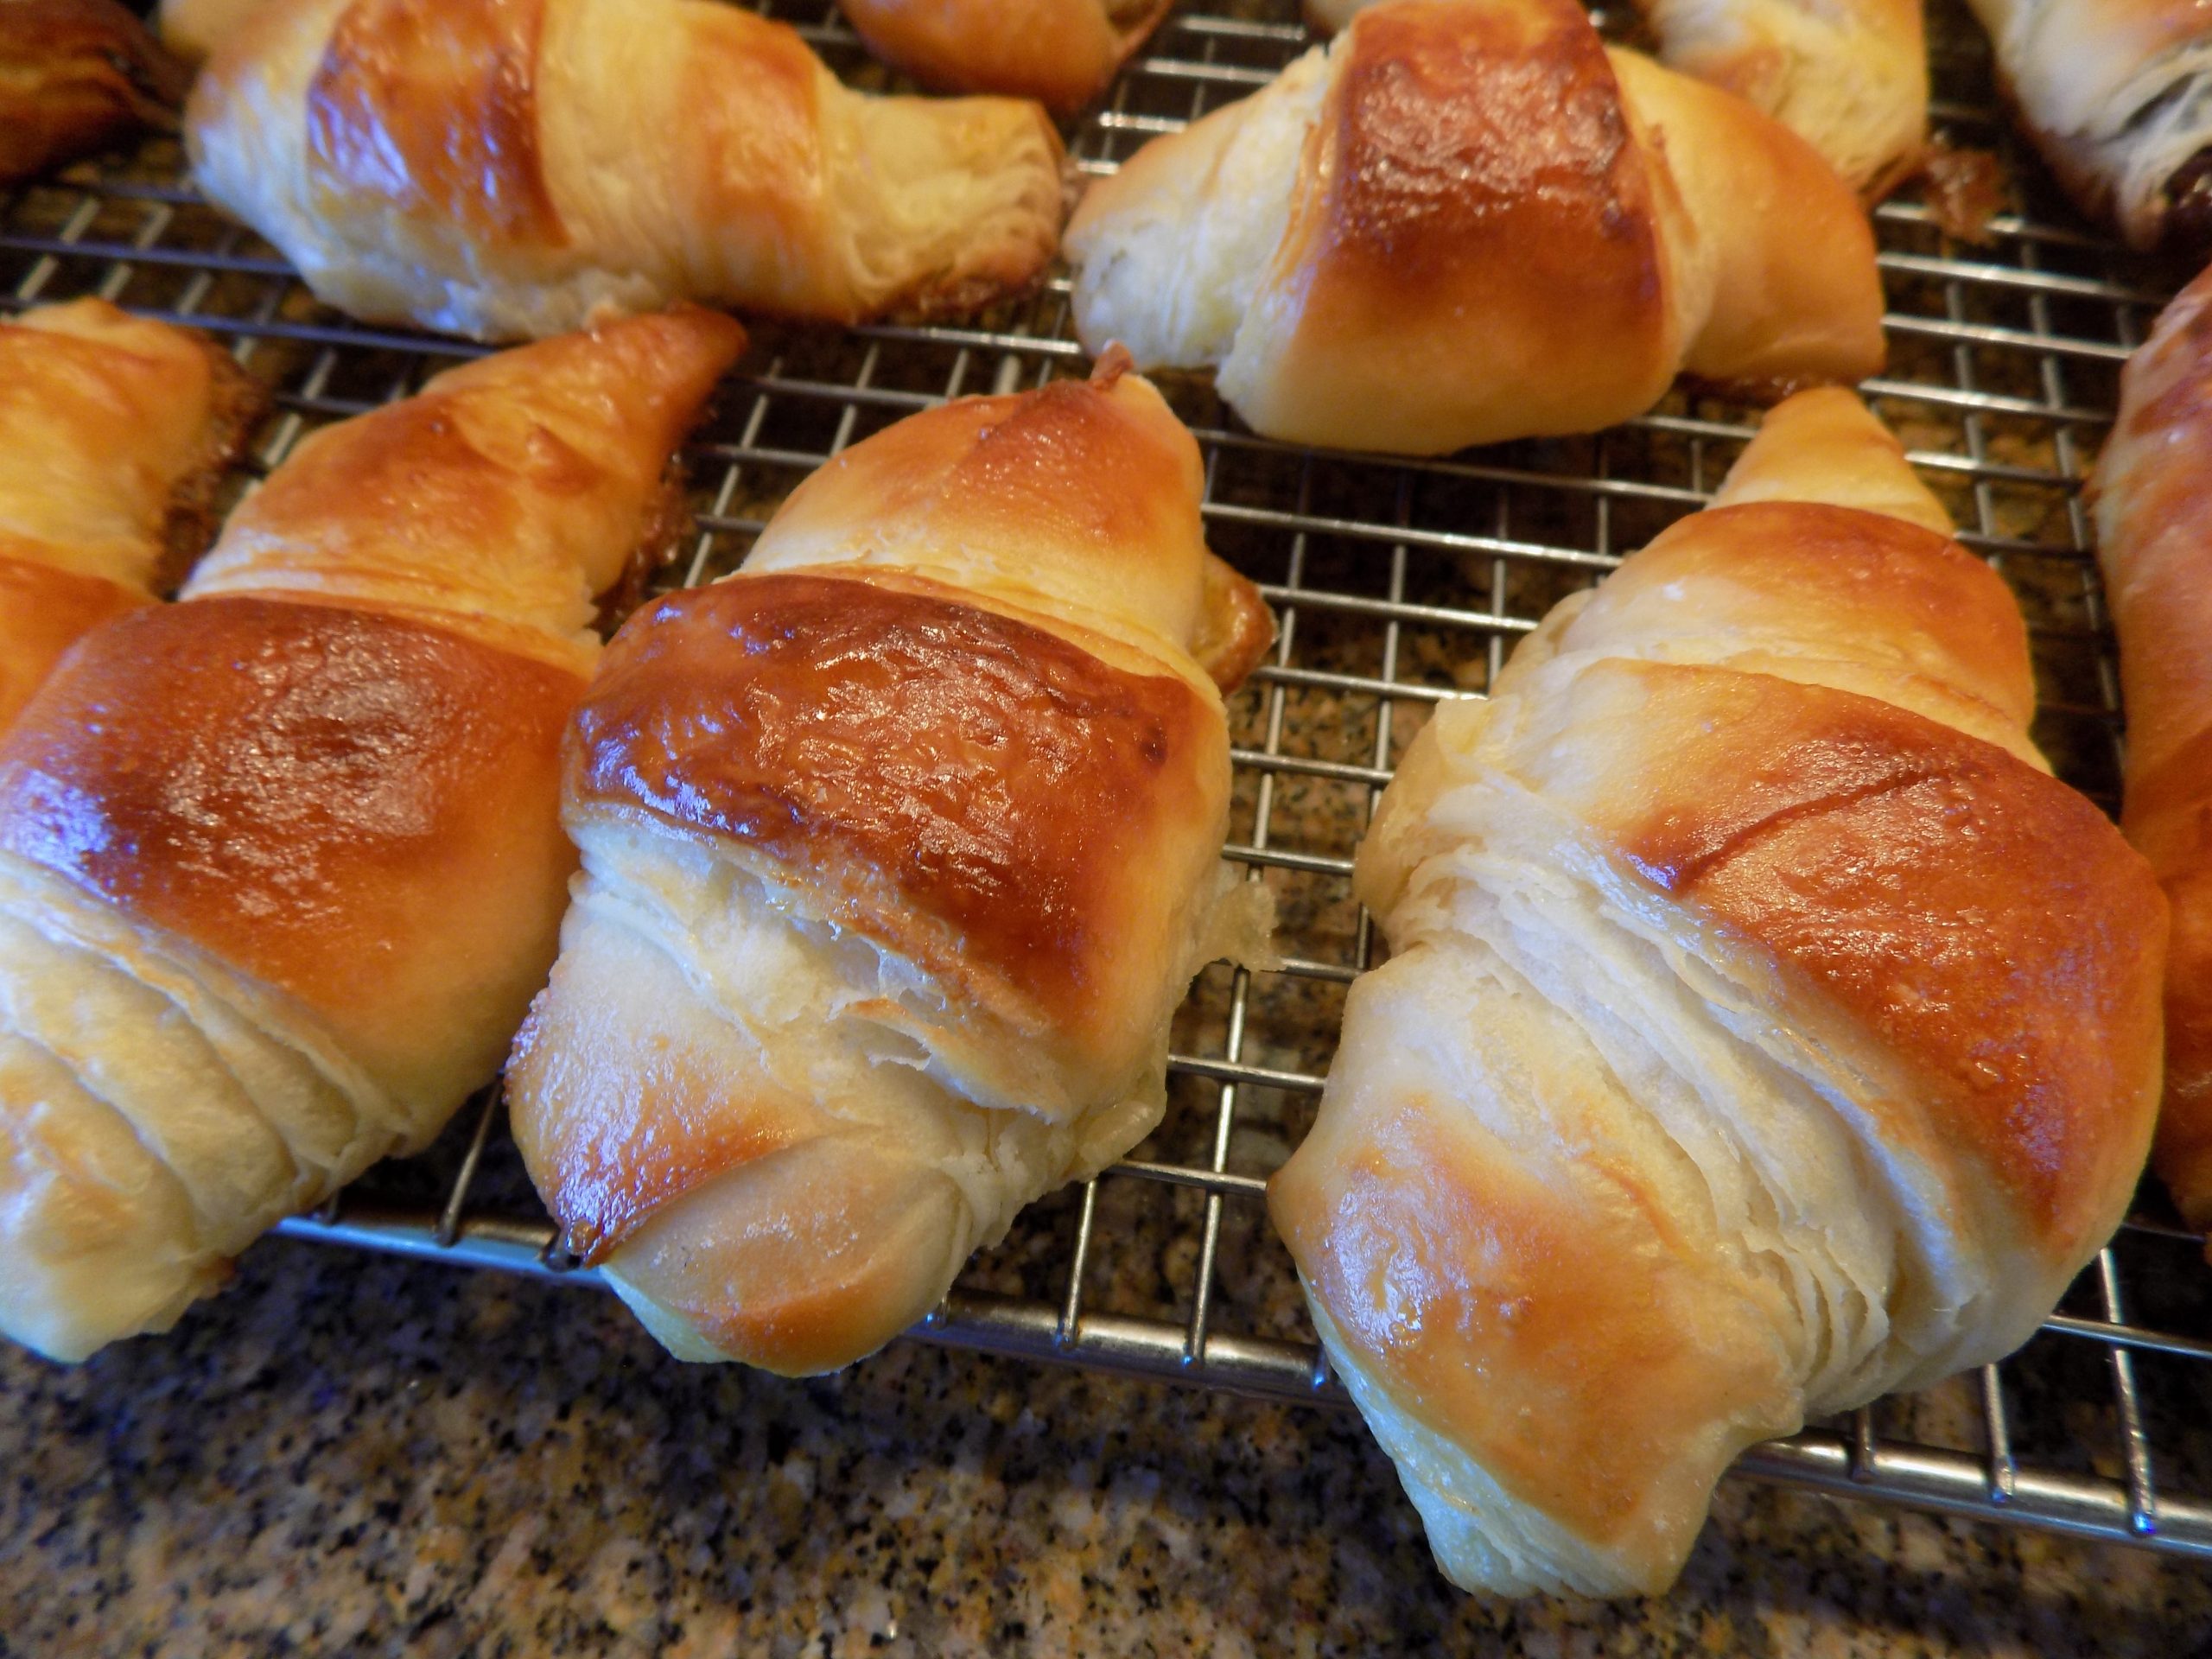
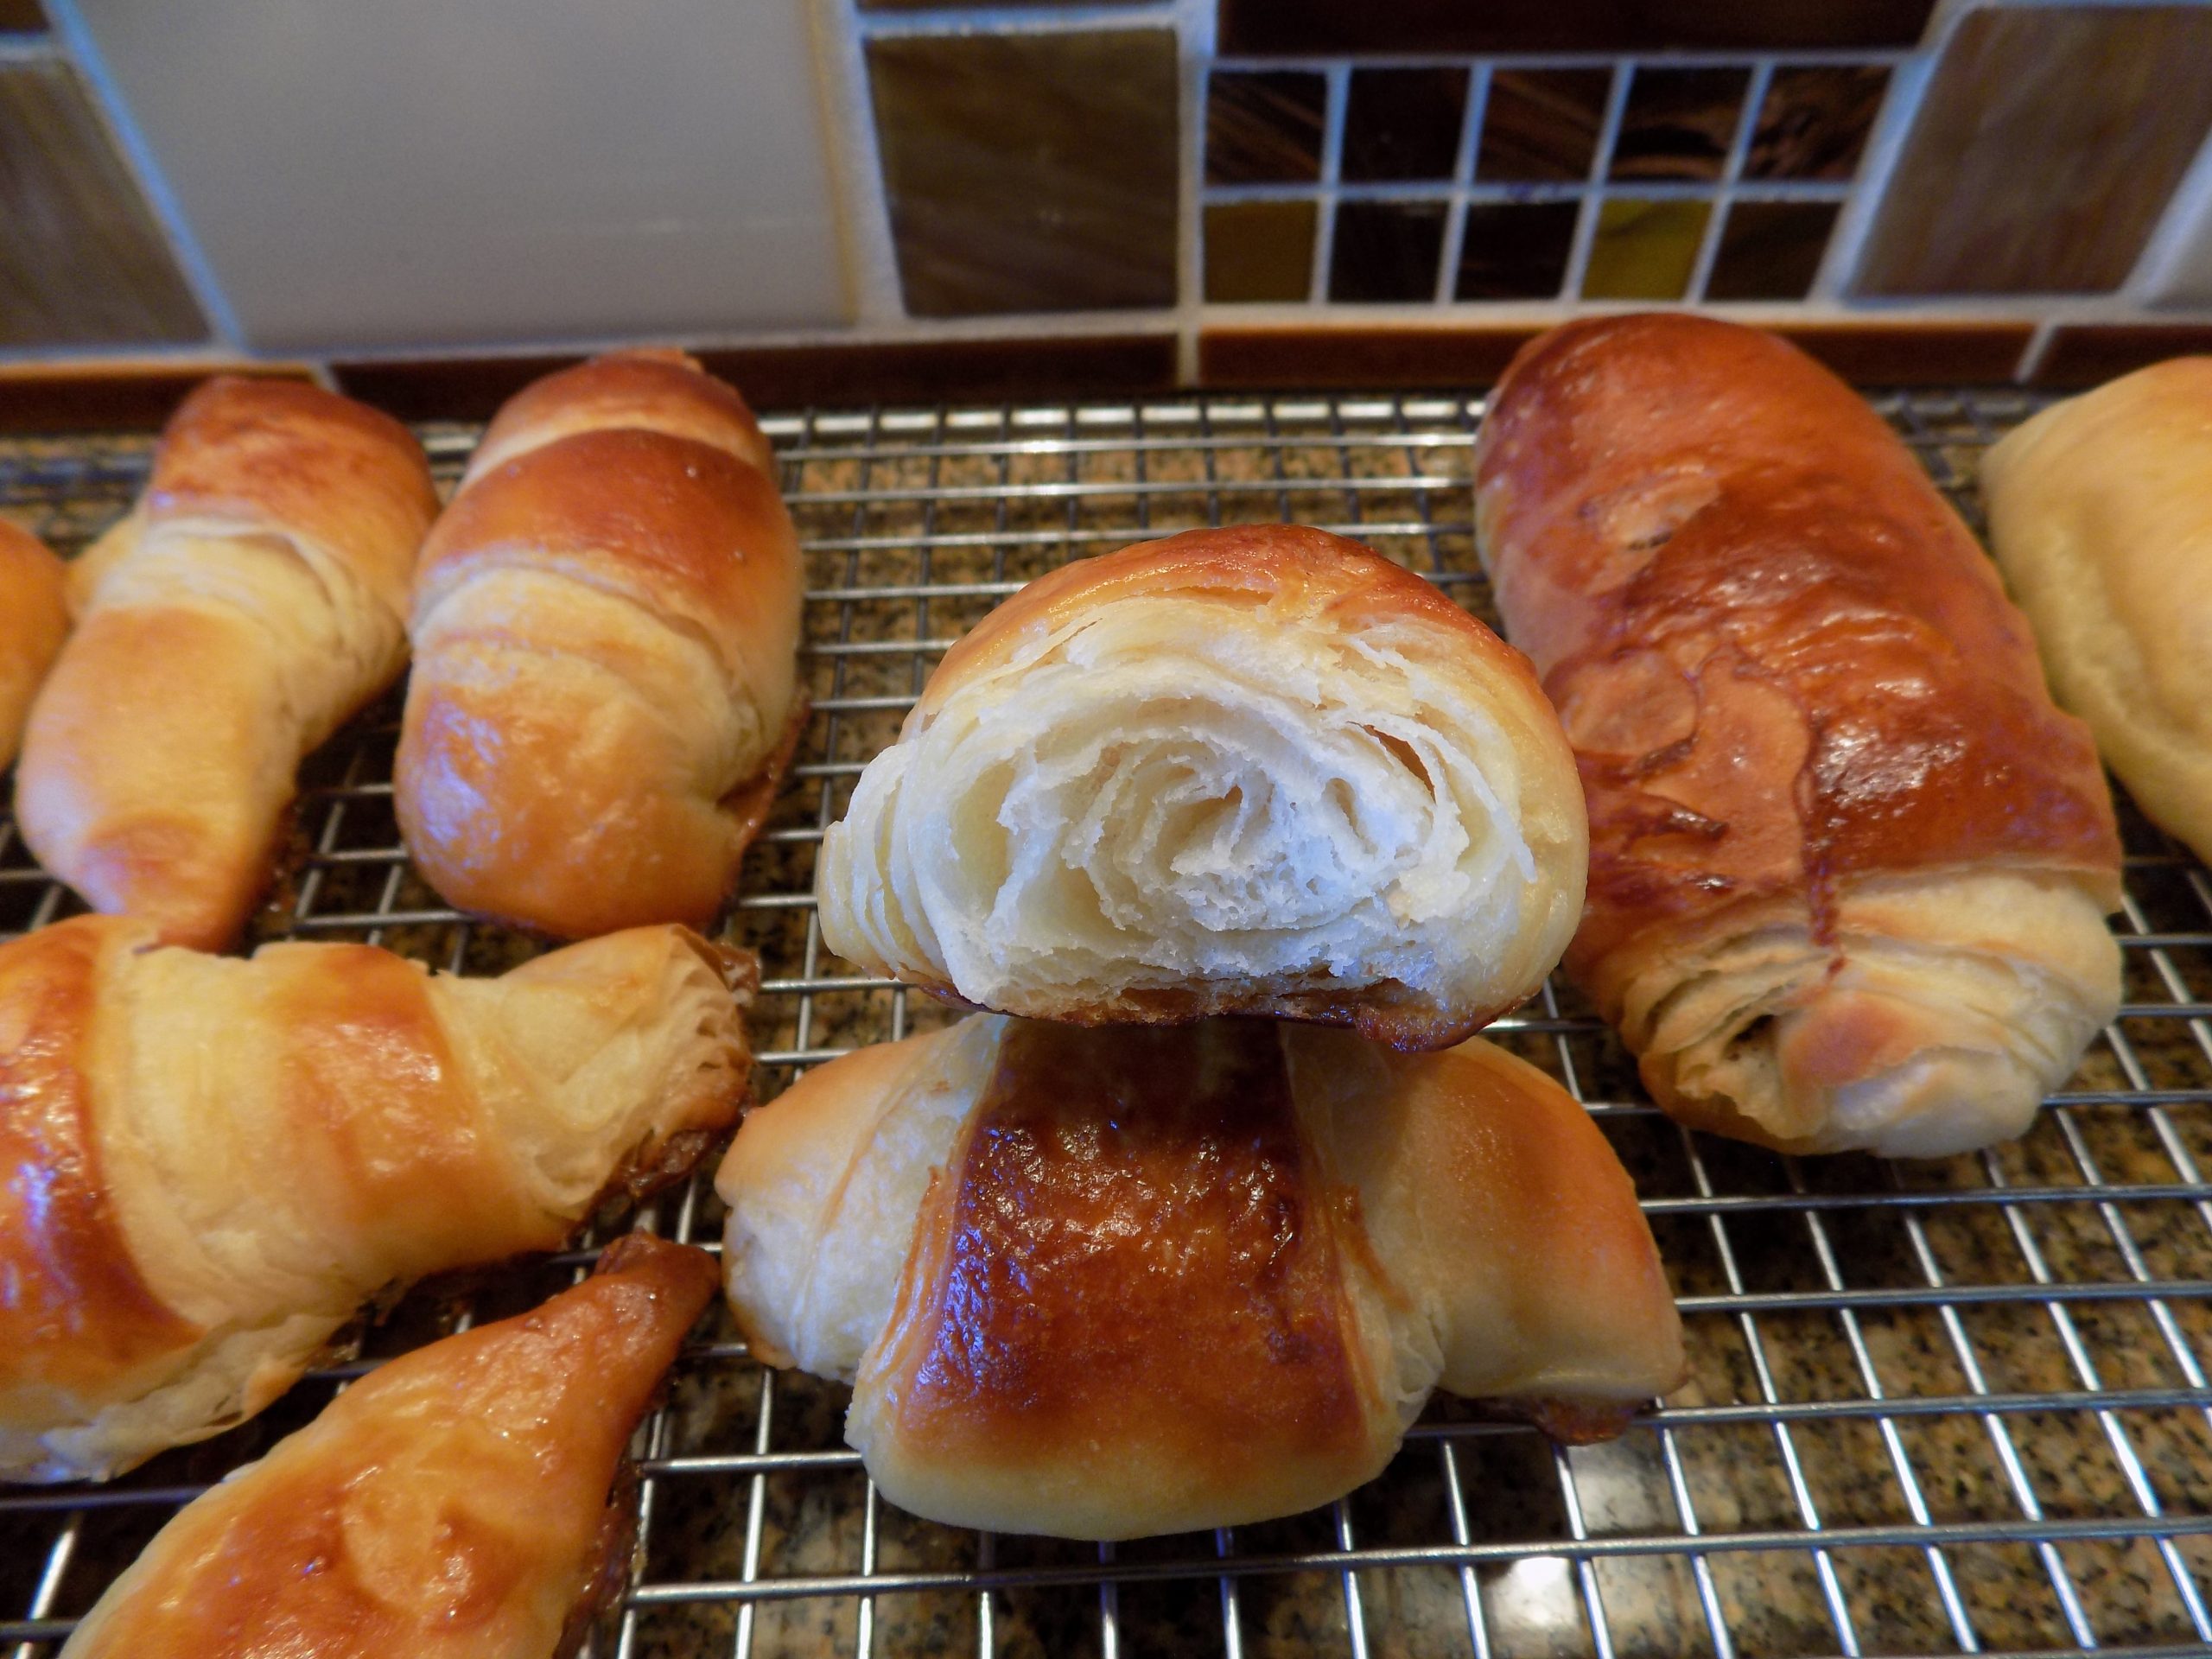
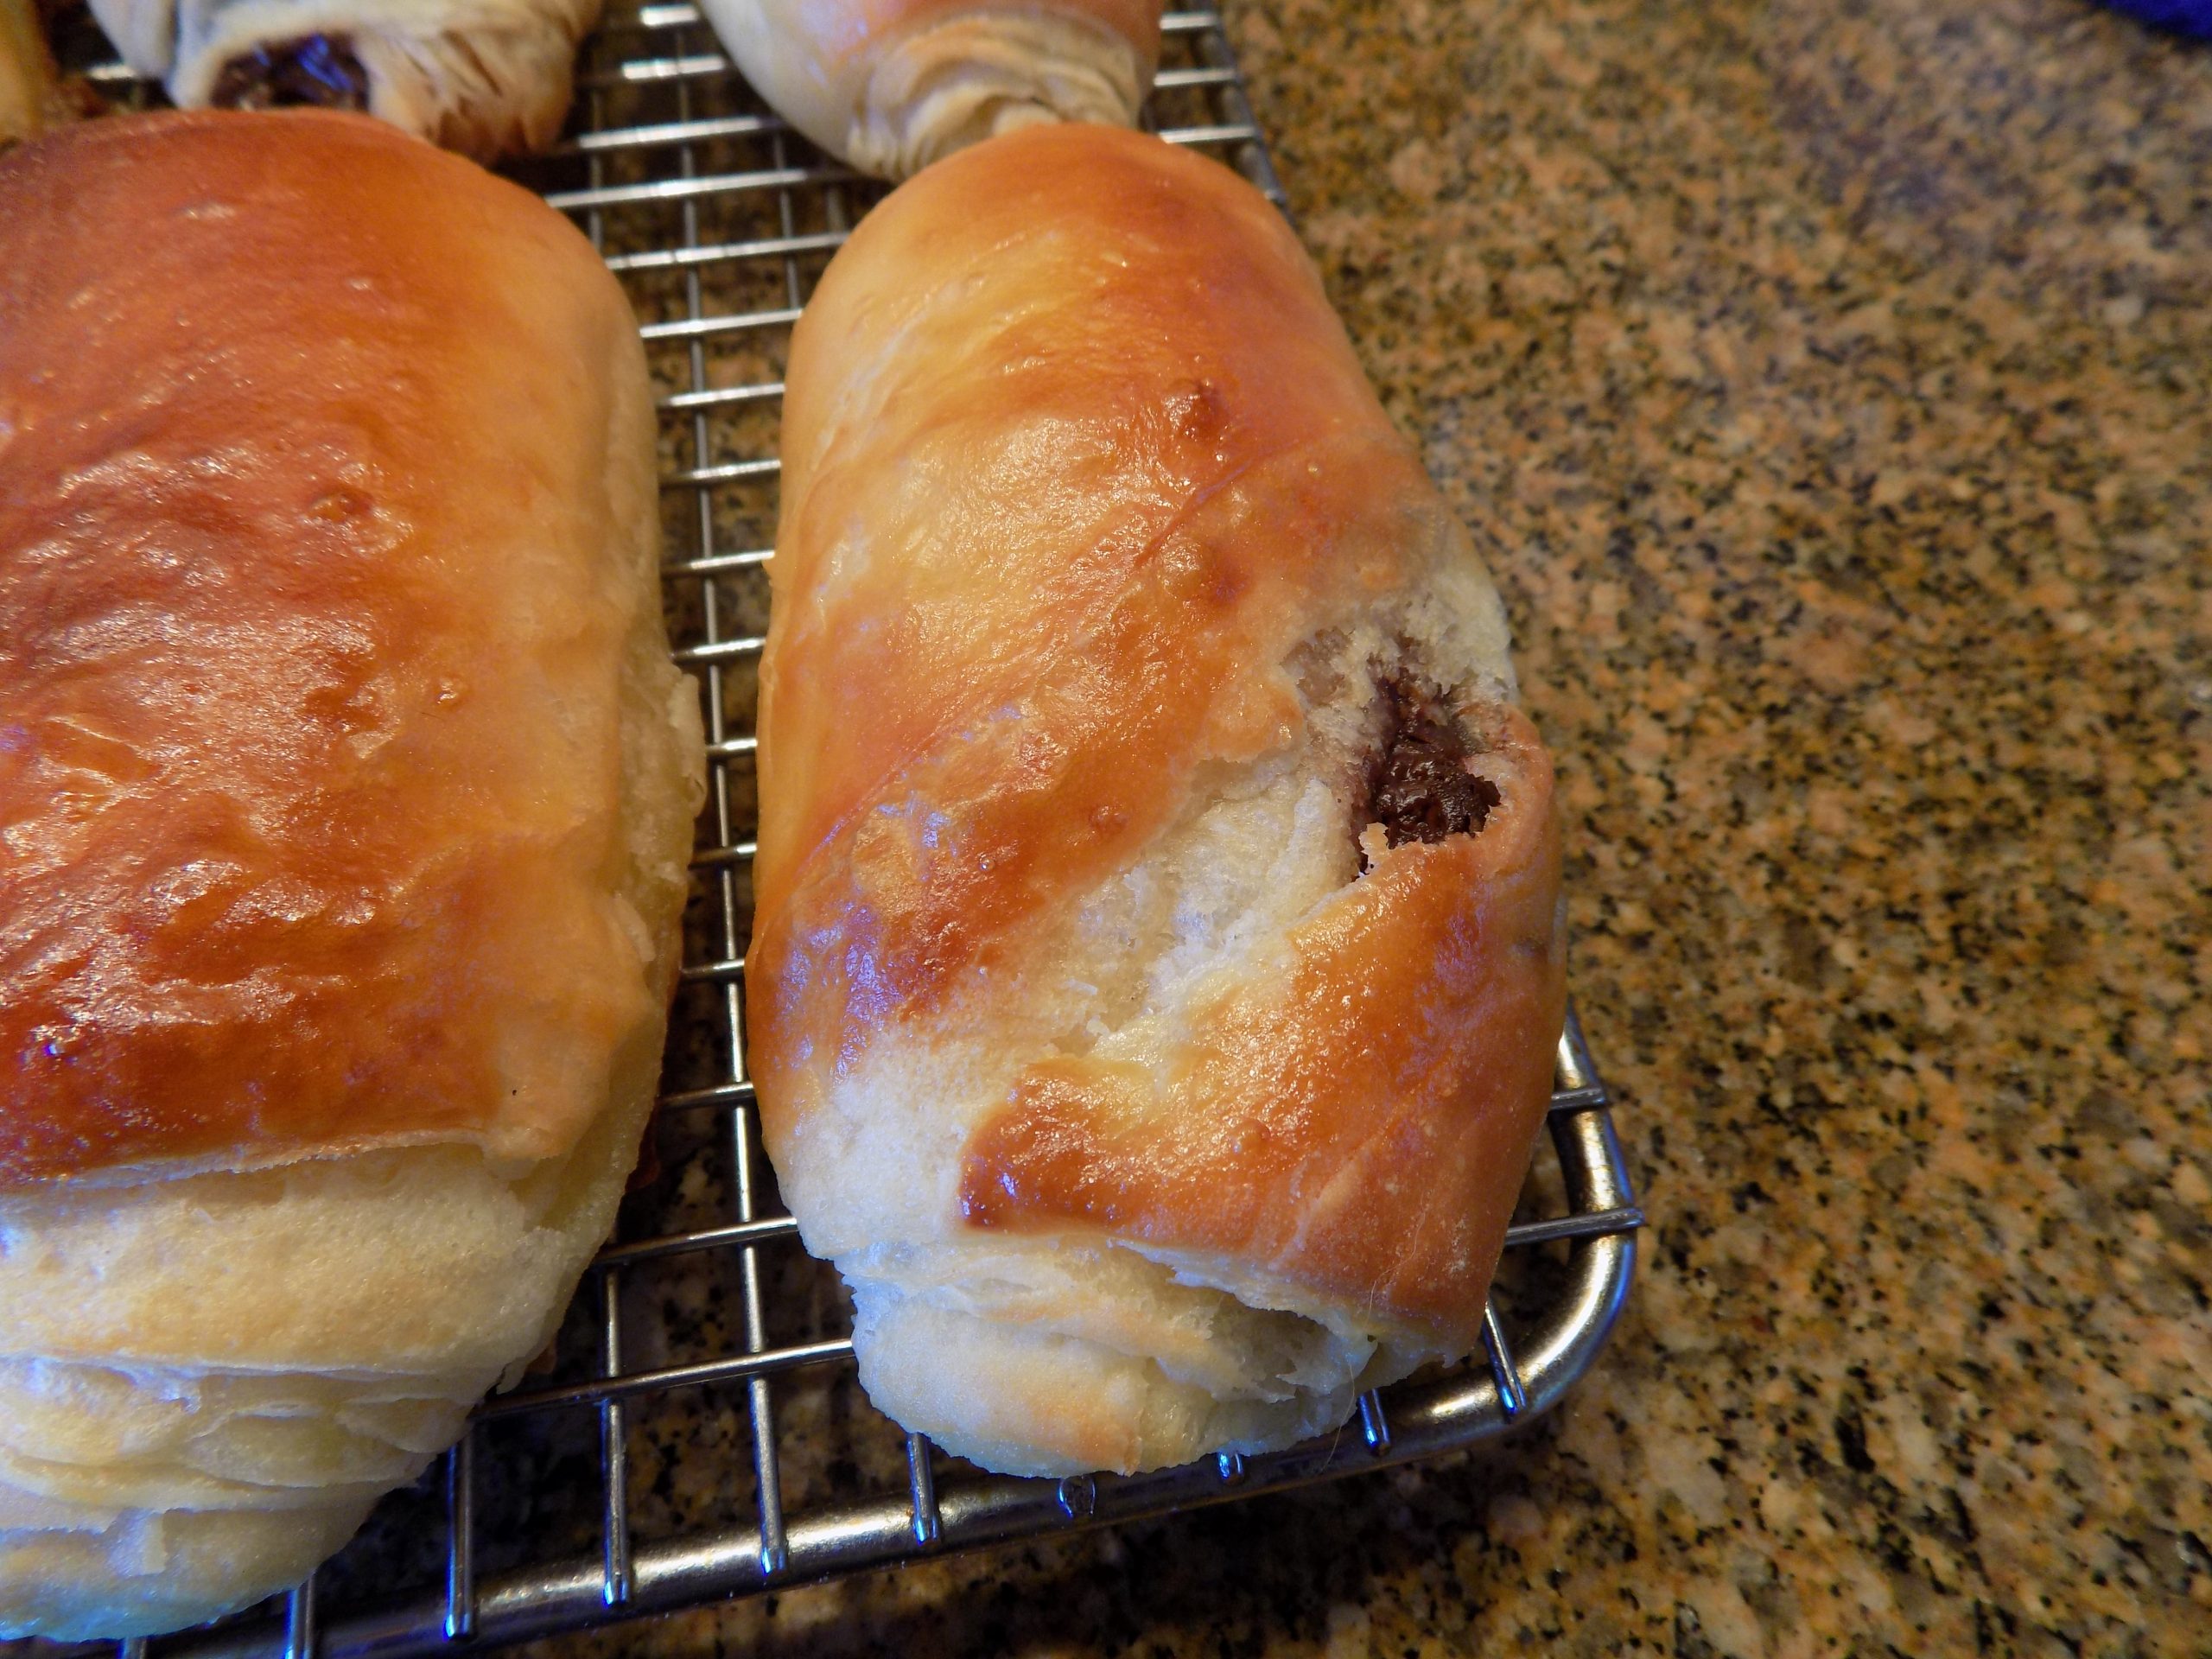
Croissants and pain au chocolatCroissantsView of the flaky interior of a croissantUp close look at pain au chocolat
Well, once again I stepped out of my comfort zone and made THE BEST croissants I have ever tasted. Of course, it didn’t hurt that the croissants were still warm when I bit into my first one. (And yes, I had two. OK, three. But in my defense, they were small croissants, by plan, I might add.) So, thanks to Bincy at merryboosters.com, I no longer have any reason to pay excruciating prices for my all-time favorite accompaniment to bacon and eggs. And the best part – the darn things were easy to prepare. Really!
First of all, you don’t need a mixer to make the dough. And no kneading required. But granted, it did take most of the day to prepare these delicacies because there is a lot of time the dough is busy rising. But so what?! I had nothing else planned yesterday. And during the time I wasn’t actively involved in the process, I dusted the house and cleaned the bathrooms, posted a recipe, and did research for another recipe I plan to present in the future. So, basically, no time wasted.
But patience required, I will certainly admit to that! Mainly because I could hardly wait to chomp into the final product. And of course, terribly concerned that the final product would not meet my expectations. Because little old me, unschooled baker that I am, actually trying my hand at building croissants and pain au chocolat (for Mr. C.)! How extraordinarily presumptuous of me! But still game enough to at least give it a try. And not only making croissants but pain au chocolat as well. (Frankly I don’t see what all the fuss is about when it comes to pain au chocolat. But Mr. C. is a devoted fan. And when it comes right down to it, I like making him happy.) So, 4 pain au chocolat were made along with 12 regular croissants. And since you are concerned with the disparity in my 12 to his 4, forget it! He loves regular croissants too.
And another thing we both really love, is that all 12 of the croissants and 4 pain au chocolat I made cost less than 2 croissants from our local French bakery. Because really, the only expensive ingredients are the European butter (which I buy at Grocery Outlet for $1.99 for 8-ounces), and the really good dark chocolate (about a third of a 3.5 oz. dark chocolate bar from Libeert (Belgian Chocolate Creators). (Probably about a dollars-worth of chocolate.) The rest of the ingredients, not appreciable.
So, for those of you who have been afraid of making homemade croissants – let it go! These are so easy to build. And so delicious. Yes, they take time. But boy are they worth the effort.
As always, have fun in your kitchen. Try new recipes because you may never know what amazing new discoveries you might make. And please don’t wait until you’re 77 (like me) to make homemade croissants and pain au chocolat. All I can think right now, is, why in the world did I wait so long? And should I make some more tomorrow, or wait a couple of days?
So, thank you again Bincy for this fabulous recipe. And for helping me keep my reputation as a “well-rounded” cook. (Define well-rounded any way you like!)
Peace and love to all.
1 c. + 1 tsp. slightly warm whole milk, divided
1 tsp. active dry yeast
¼ c. granulated sugar
2½ c. unbleached all-purpose flour, fluffed
¼ tsp. fine grained sea salt
¾ c. (1½ sticks) unsalted butter, room temperature (European butter* is best for this recipe or any other laminated** pastry for that matter)
1 tsp. vegetable oil (for coating the dough)
1 egg
semi-sweet chocolate, coarsely chopped (if making pain au chocolat)
Whisk 1 cup of the warm milk, yeast, and sugar together in a large mixing bowl. Let sit for 5 minutes to activate the yeast.
Add the salt and flour, and mix by hand until you have a smooth, evenly hydrated dough. Pour the veggie oil on the dough, and using your hands and a stiff rubber spatula, form the dough into a ball thoroughly coated with oil. Cover with plastic wrap and let the dough sit and rise for 1½ to 2 hours or until the dough doubles in size. (Mine took 2 hours.)
After the dough has doubled in size, punch it down, place it on a lightly floured surface and flatten it into a rectangle. Then roll it into a long log (like you were preparing cinnamon rolls) and divide the dough into 12 equal sized pieces.
Using a rolling pin, shape each piece of dough into a circle approximately 6½ to 7-inches in diameter. Spread the first dough circle liberally with butter, then place on a piece of plastic wrap, butter side up.
Then flatten the next piece of dough and slather with butter and stack, butter side up, directly on top of the first piece. Continue until all the dough circles have been buttered until the last piece. Place dough circle number 12 unbuttered on the top of the pile. Wrap securely with as much plastic wrap as it takes, and place in your freezer for about 35-40 minutes. (The time spent in the freezer will allow the butter to harden a bit, but still be pliable enough to roll the dough into a rectangle, 12×16-inches.)
Place the rectangle with one of the longer sides furthest away from you. Using a pizza cutter*** or knife, cut the long sides into 4 top-to-bottom rectangles, then the short sides into thirds, right to left. This will give you 12 (4×4-inch) equal size squares.
For Regular Croissants:
Cut each square into two triangles. With your hands, shape the triangle into a long pie shaped piece of dough. Cut a small incision into the triangle in the middle of the larger end. (This small incision helps keep the center of the croissant from becoming too thick.) Then starting at the larger end, gently force the cut apart while you roll the dough towards the thin pointed end, making sure you are rolling the croissant tightly, but without squeezing the dough. Place on a parchment paper lined baking sheet pointed ends down and about 2-inches apart.
Whisk the egg with the remaining 1 teaspoon milk and brush on each croissant. Cover with plastic wrap and allow to rise for 2 hours or until they puff up a little. (And yes, the plastic wrap will stick a bit to the croissants.) Then, gently but liberally brush each croissant again with a bit of the egg wash being careful not to deflate the dough.
Bake in a pre-heated 400-degree oven for 10 minutes, then reduce the temperature to 375-degress and bake for another 7-8 minutes or until the croissants are a deep golden brown and the internal temperature reaches 210-degrees. Don’t under-bake the croissants.
Remove from oven and cool on a wire rack. Store in an air-tight container at room temperature. Re-heat in a 350-degree oven for a few minutes.
For Pain Au Chocolate Croissants:
Do not cut the 4-inch squares. Place about 3 teaspoons of the chopped chocolate about half an inch up from one of the sides. Fold the dough up over the chocolate and continue rolling until you have created a cylindrical shape. Place on a parchment paper lined baking sheet, seam side down about 2-inches apart.
Whisk the egg with the remaining 1 teaspoon milk and brush on each croissant. Cover with plastic wrap and allow to rise for 2 hours or until they puff up a little. Then gently brush each croissant again with the egg wash being careful not to deflate the dough.
Bake in a pre-heated 400-degree oven for 10 minutes, then reduce the temperature to 375-degress and bake for another 7-8 minutes or until the pain au chocolat croissants are a deep golden brown and the internal temperature reaches 210-degrees. Don’t under-bake.
Remove from oven and cool on a wire rack. Store in an air-tight container at room temperature. Re-heat in a 350-degree oven for a few minutes.
*European-style butter: Excerptfrom an article on thekitchen.com. site “Overall, European-style butters are favored for their rich taste — a direct result of the higher butterfat content. More butterfat also means a softer texture, faster melt, and often, a saturated yellow hue. With less water, European-style butters are often the preferred butter for baking — especially when the flavor of butter is just as important as its function.”
And according to our good friend Keith, who spent many years as a professional baker (and I paraphrase) – “The best butter for the home baker making croissants, or any pastries, is slow-churned European style butter that contains at least 82% butterfat. This type of butter contains less air and water which makes it more pliable and resistant to being absorbed in dough during lamination**.”
**Lamination: Lamination is the process of folding and rolling butter into dough over and over again, or in the case of this recipe, spreading soft butter over layers of thin dough, to create super-thin layers. These layers, which alternate between butter and dough, are what give croissants their signature honeycomb interior structure and their fabulously flaky texture.
***Pizza cutter: My dear friend Vicki explained to me why she preferred using a pizza cutter rather than a knife when cutting dough. Cutting dough with a pizza cutter makes a nice, thin cut. And unlike using a knife, a pizza cutter doesn’t flatten the dough next to the cut. Plus, it doesn’t stretch the dough as it’s being cut. Thanks Vicki for sharing your experience with all of us.
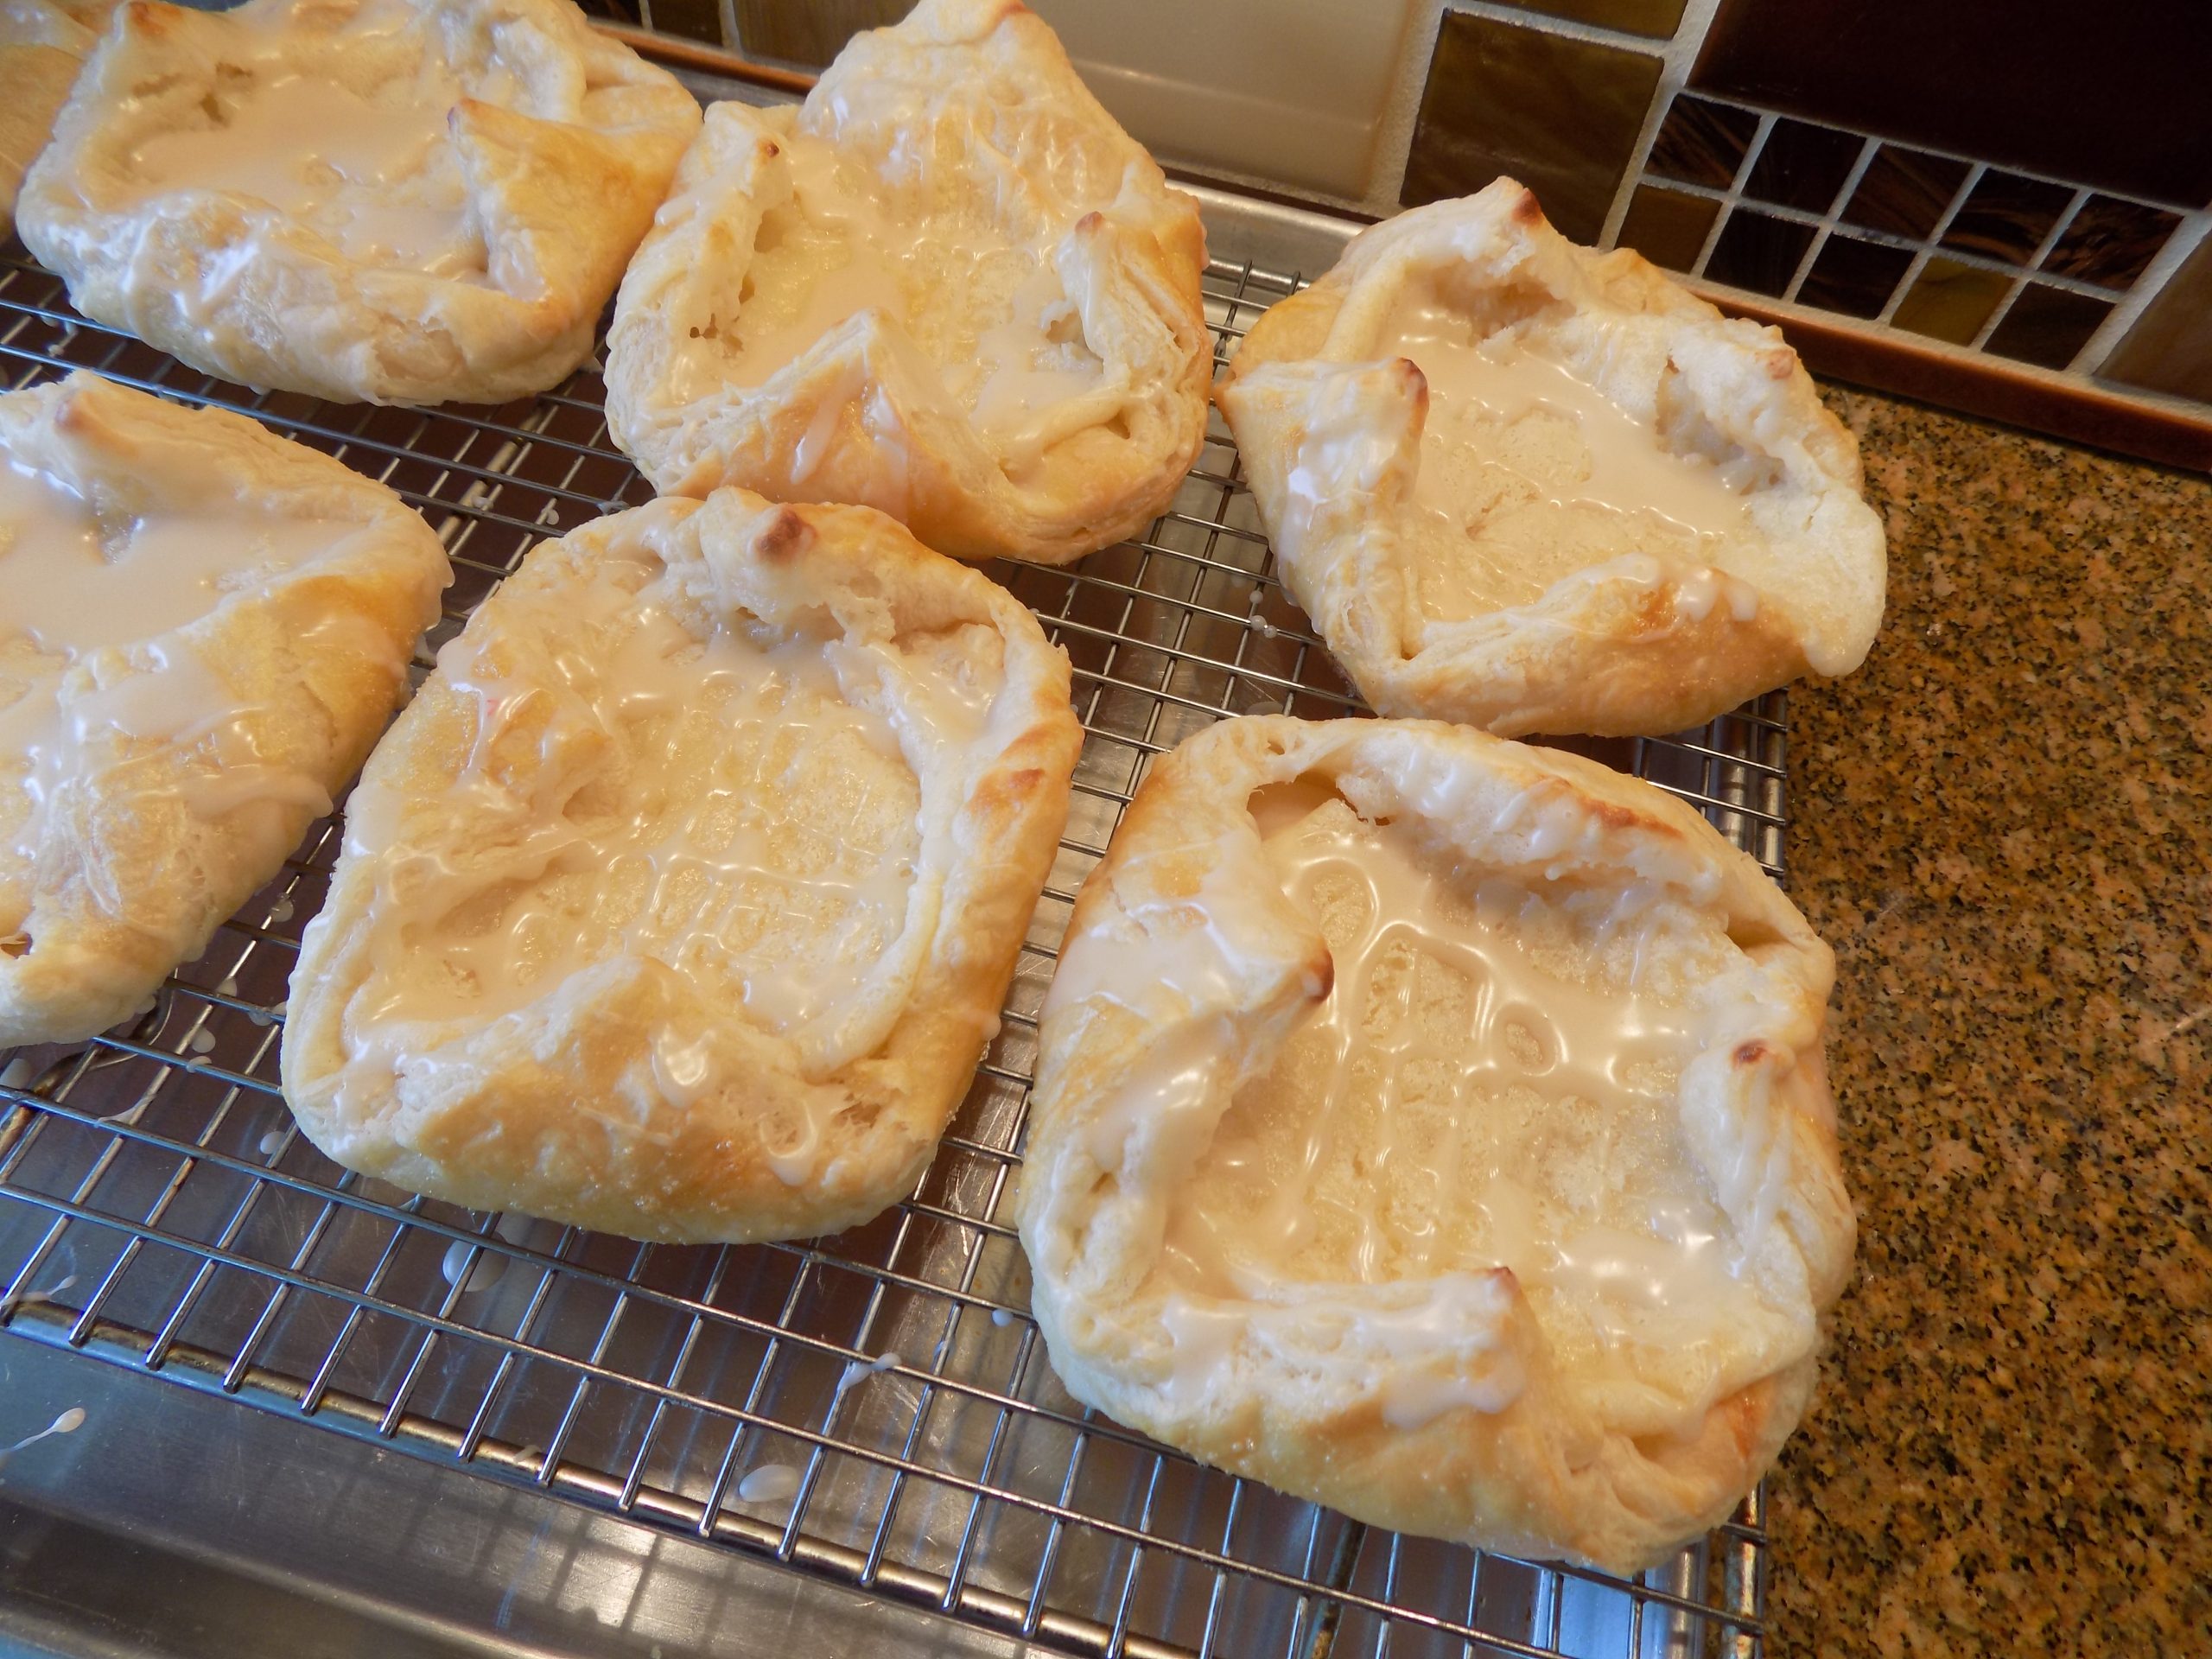
Here I go again offering another recipe some of you would never consider building. But if truth be known, I love Danishes (OK, pastry of any kind), so I keep on trying new ones. And this recipe produces what is undoubtedly the best example of a true cheese Danish that I have ever prepared. (And yes, I think about cheese Danishes way too much!) And maybe that’s why I already have three Danish recipes (Individual Jam Filled Cream Cheese Danish Pastry, Cream Cheese Danish, Dried Cranberry and Almond Braided Danish) already on this site.
When I say I consider the results of this recipe to be a true Danish, it’s because it’s made with puff pastry. Homemade puff pastry. Now don’t panic! Believe me, if I can make this easy puff pastry, you can too. All you need is some flour, butter, and a willingness to try anything once! And trust me, after you’ve made this puff pastry, you will wonder what the big deal was all about. And granted, a “real” pastry chef would probably laugh at this recipe. Chuckle all you want, is all I have to say. Because this recipe produces a pretty darn good puff pastry. Of course, I have had better in Paris, but for homemade, it’s darned acceptable. And don’t even get me started on the puff pastry that comes from the frozen section of your grocery store. Not an ounce of real butter in the whole thing. (For more on the reality of what you are really getting when you buy frozen puff pastry, read my post for Cinnamon Twists.)
So, now that I have you chomping at the bit to build your own puff pastry, let me further tempt your taste buds with the filling. It’s luscious. There’s nothing more that needs to be said. And the tiny bit of drizzle over the whole pastry – yum!
As always, treat yourself every so often to a new or lovingly remembered treat. We are only on this planet for a very short time. Religiously restricting yourself to only foods that are healthy and good for you is not going to prevent the onset of old age or prevent you from getting a debilitating disease. Of course, using moderation or not eating something that is truly harmful to you is simply being responsible. But a pastry or French fries or a cookie once in a while, simply makes life worth living.
Peace and love to all.
And thank you Sam at sugarspunrun.com for this marvelous recipe. And sorry for the couple of minor changes I made.
Homemade Puff Pastry: (equivalent of one box of puff pastry)
2¼ c. unbleached all-purpose flour, fluffed
1 T. granulated sugar
1 tsp. sea salt
1 c. (2 sticks) cold unsalted butter
8-9 T. ice water, or more as needed
Whisk the flour, sugar, and salt together in a large bowl. Using a box grater, grate the butter into the flour mixture, briefly tossing the butter each time you’ve shredded about ½ stick so that it doesn’t clump together.
Once you’ve grated all of your butter, stir briefly until all of the butter is evenly mixed into the flour mixture. (A table knife works great for this step.)
While stirring by hand, (do not use an electric mixer or over-mix this recipe) slowly drizzle ice water into the flour/butter mixture. Add just enough ice water so that if you pinch the dough it will hold its shape and not fall apart. (Start with 8 tablespoons.) All of the flour should be mixed into the dough, but the dough should still appear very dry and shaggy. If the mixture is still dry and crumbly and not sticking to itself when pressed after you have added 8 tablespoons, add additional water one teaspoon at a time. (My dough took 9 tablespoons.) Take care not to overwork the dough or it will be tough.
Transfer to a lightly floured surface and work the dough together with your palms to make dough cling together. Work (with your palm) into a 6×3” rectangle (it will almost look like a brick!). The dough will not look perfect. In fact, there should be chunks of butter showing. Cracks in the dough are fine too.
Wrap dough with plastic wrap and chill for at least 30 minutes.
Once dough has chilled, roll into an 8×12-inch rectangle.
Fold dough into thirds (like you are folding a letter), rotate 90 degrees, and then roll dough into an 8×12-inch rectangle again. (Use as little flour on your rolling surface as possible,)
Fold into thirds again and repeat this process of folding and rolling until you have done four turns of your dough.
Wrap dough with plastic wrap and return to refrigerator to chill for at least 30 more minutes before using as directed below. While the pastry is resting, prepare the filling and egg wash.
Please note: This puff pastry may be stored in the refrigerator for several days or it may be frozen (make sure to wrap it well) for several months and then thawed in the refrigerator before using.
Filling:
8 oz. (1 pkg.) cream cheese, room temp.
½ c. granulated sugar
1 tsp. fresh lemon juice
¾ tsp. vanilla extract
Stir all the ingredients together until smooth. Set aside.
Egg Wash:
1 egg white
1 tsp. water
Whisk together. Set aside.
Build the Danishes:
Divide the puff pastry into 2 even parts (If using homemade puff pastry cut the dough widthwise. If using store-bought dough it will already be divided into two even sheets for you).
Roll first half of puff pastry into a 12×12” square (about 1/16” thick). Cut into 4 even-sized squares. (I use a pizza cutter for this step.)
Transfer squares onto a parchment paper lined baking sheet. Using a #30 ice cream scoop (teal handle), drop balls of filling onto the center of each square of dough. If you don’t have an ice cream scoop, dollop about two tablespoons filling into the center of each square. Spread the filling out a bit using the back of a spoon. Fold the corners over the center of the filling, leaving a space about ¼” thick in the center and between corners. Brush egg wash generously over the top of the puff pastry dough.
Place in a pre-heated 400-degree oven for 18-20 minutes or until light golden brown. Pastries will puff up considerably while baking but will settle as they cool. Repeat steps with second half of puff pastry dough. Meanwhile, prepare the glaze.
Remove from oven and allow to cool before drizzling with glaze.
Vanilla Glaze:
1 c. powdered sugar
½ tsp. vanilla extract
3-5 tsp. whole milk
Whisk the powdered sugar, vanilla, and enough milk together until you have reached desired thickness. Drizzle glaze generously over cooled cheese Danishes.
Chocolate Glaze:
1 c. powdered sugar
2 T. cocoa powder
½ tsp. vanilla extract
3-5 tsp. whole milk
Whisk the powdered sugar, cocoa powder, vanilla, and enough milk together until you have reached desired thickness. Drizzle glaze generously over cooled cheese Danishes.
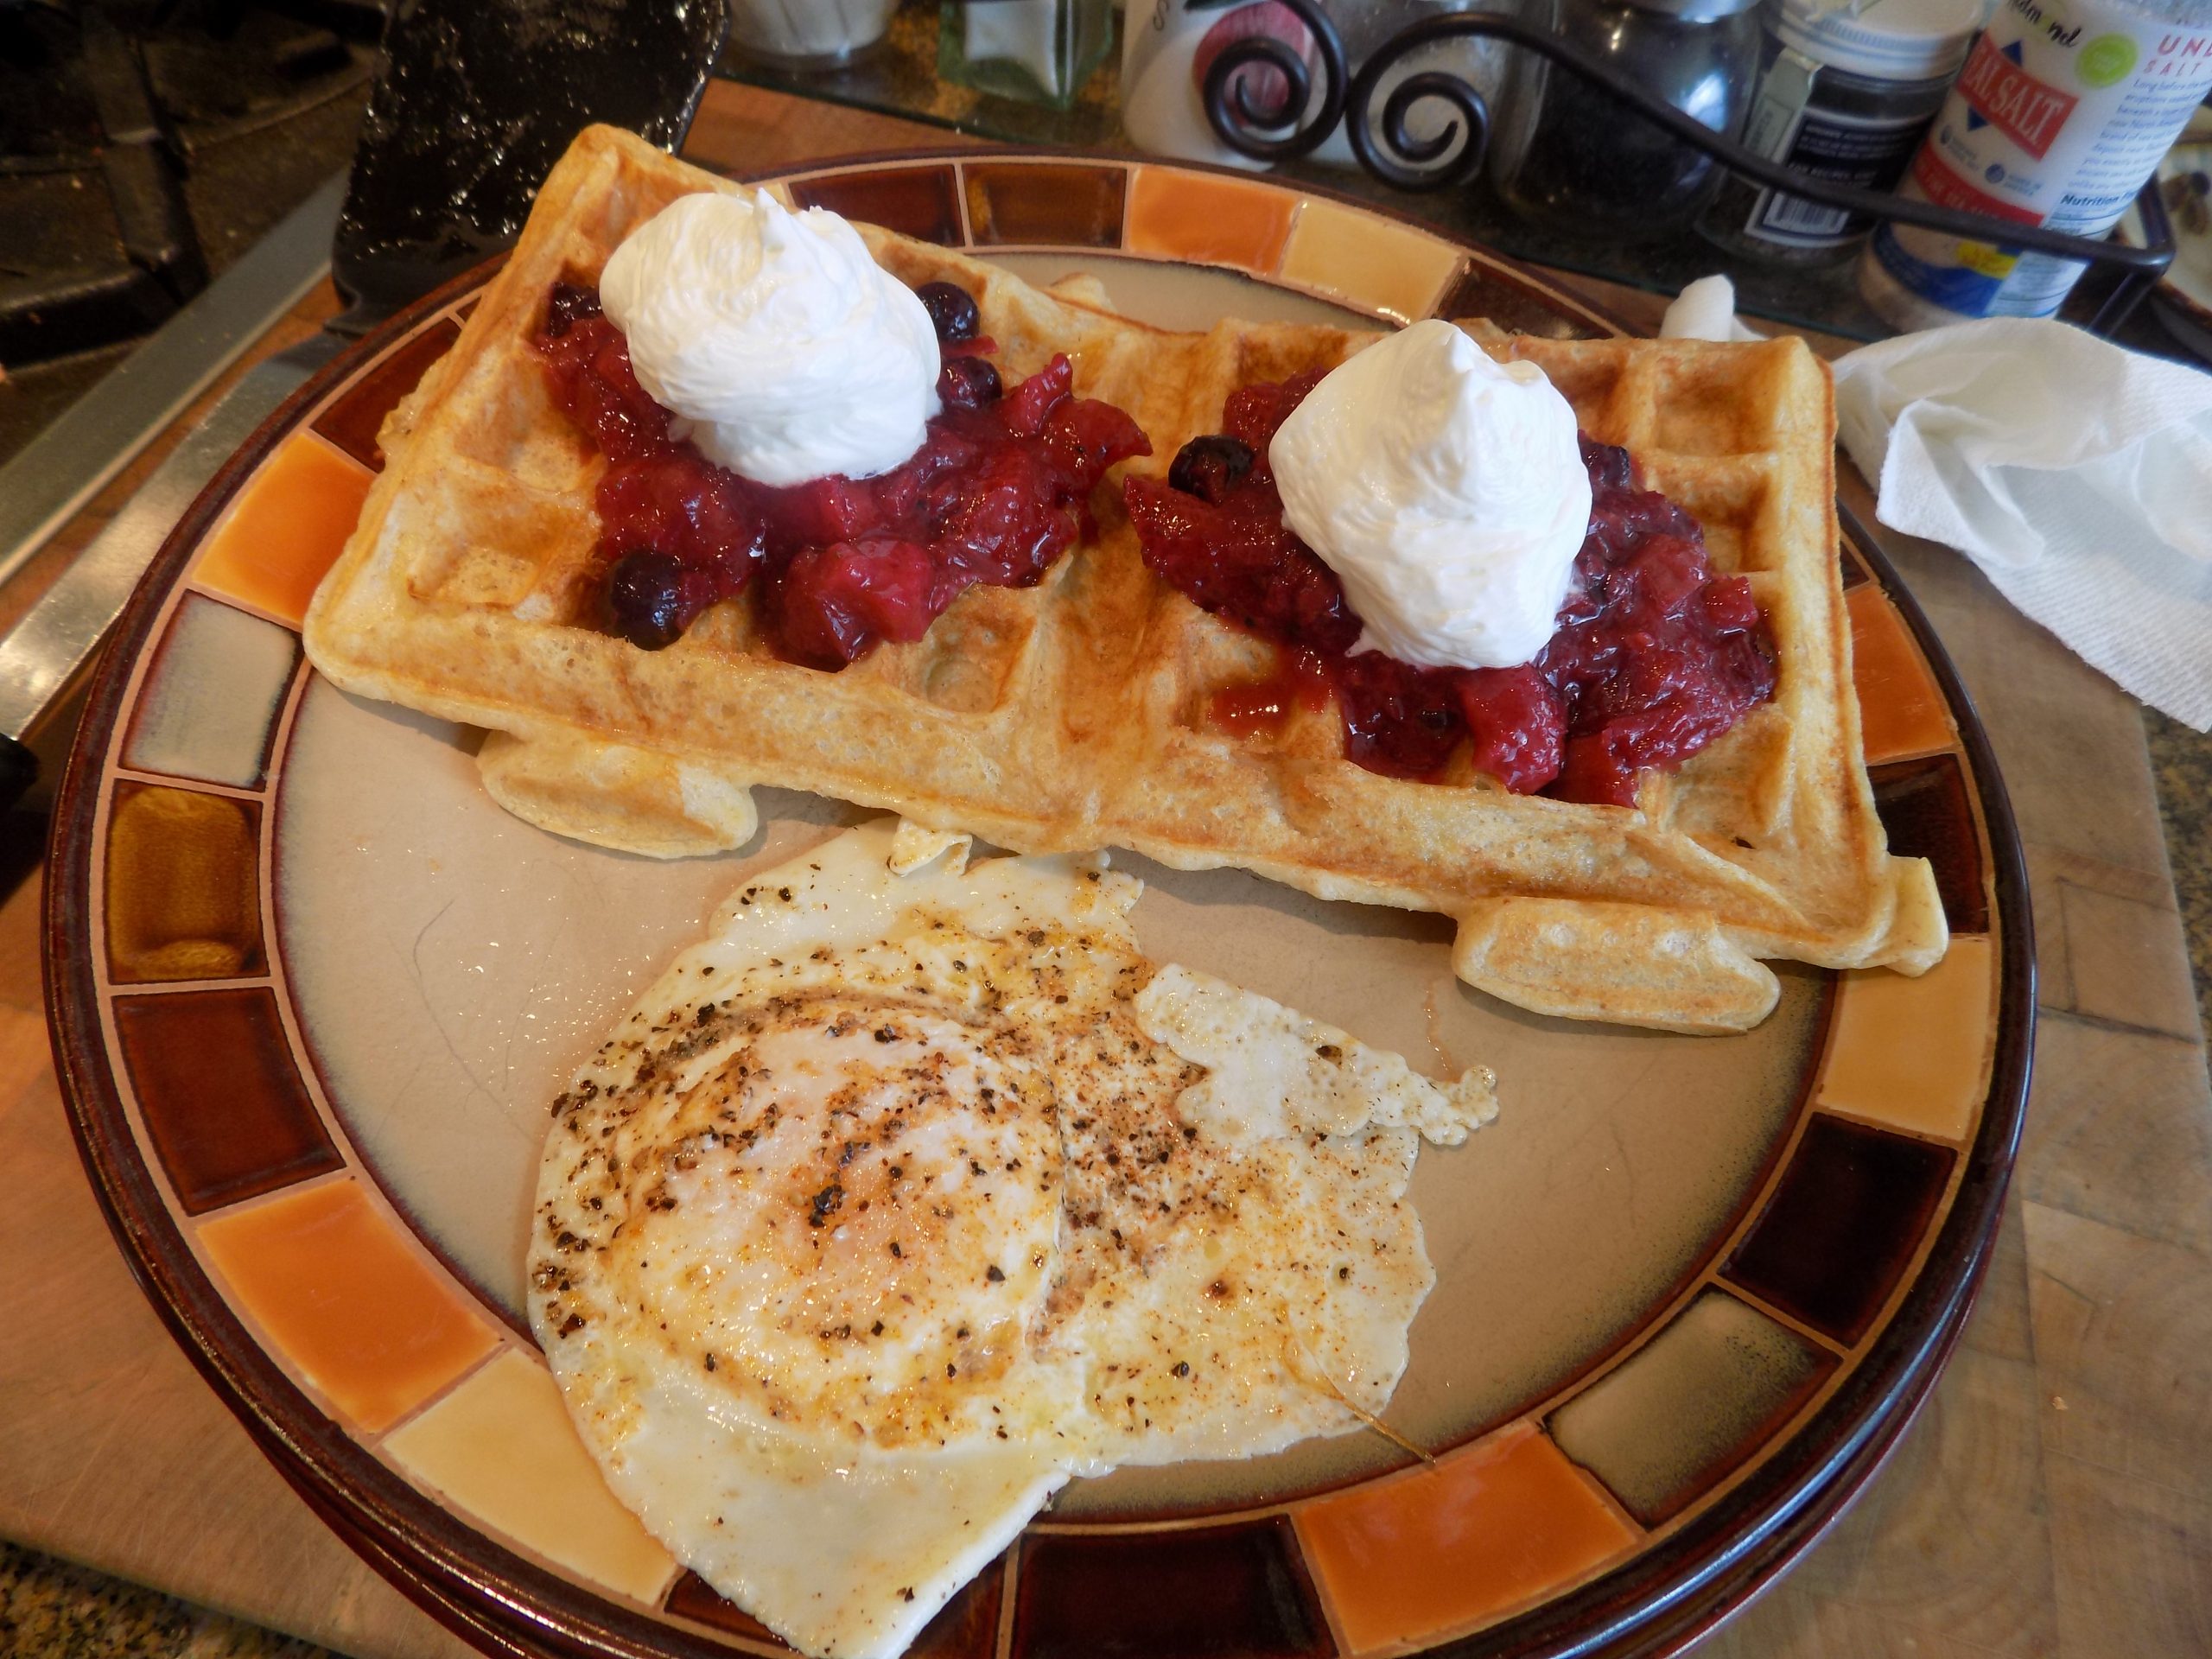
And yes, I am back to playing with sourdough starter. And because I don’t make a weekly meal plan or usually have even a vague idea of what ingredients I want to experiment with in the near future, I am often stuck with using sourdough discard. (If whatever I plan to make includes sourdough starter, that is. My penance for being lazy.) But even then, I sometimes get in over my head before I realize exactly what happened! Such is the case with this delightful recipe for sourdough waffles from the kingarthurbaking.com site.
It almost always takes me a while to wake up. Even after my morning coffee, I remain groggy until about 10:00 am. But a few mornings ago, I woke up early hungry for waffles. And not just any waffles. I hungered for sourdough waffles. And since I had a quick and easy recipe for sourdough pancakes using pancake mix, I thought I’d just pop onto the internet and come up with the perfect, easy, sourdough waffle recipe too that I could whip us in the next 10 minutes. Right!? Wrong! Didn’t happen.
But I did find this recipe, and even though it calls for sourdough starter discard, a sponge still needs to sit on your counter overnight contemplating the relative merits of using convection over regular heat while baking the perfect prime rib roast. (Or some other subject equally pithy.) So, you guessed it. No waffles for me that morning.
But the next morning the waffles were glorious. And very easy to prepare because half the work had been done the day before. (Better and better if you too are not at your best in the morning.) So, give these simple to prepare, light as a feather waffles a try. They are beyond delicious.
As always, greet each day with a big old smile on your face. (Coffee helps.) And never fail to remind yourself how lucky you are to be living in a country, though not perfect, a lot better than some.
I think we sometimes forget that luck has a lot to do with who and where we are today. Of course, luck is only part of the equation. Hard work also brought us to this point. But it was just sheer luck that gave us the parents we had, the country we were born in, our level of intelligence, our physical appearance, and any special talents we might possess. But the most important aspects of who we are as an individual, each of us has complete control over. If we are kind, nice, a good parent, a good friend, an honest and productive person, etc. – that is all on us. And we should take pride in those attributes. And use those qualities to make the world around us a better place to live. While always remembering that the rest, like looks and intelligence, was just plain old-fashioned good luck.
Peace and love to all.
Day 1: (overnight sponge)
½ c. sourdough discard
1 c. buttermilk
1 T. granulated sugar
1 c. unbleached all-purpose flour
In a large bowl, combine all ingredients. Cover and let rest at room temperature (65 to 70-degrees) for about 12 hours, or overnight.
Day 2: (waffle batter)
1 lg. egg
2 T. unsalted butter, melted
¼ tsp. kosher salt
½ tsp. baking soda
In a small mixing bowl, whisk the egg and melted butter together. Add to the overnight sponge, stirring just to combine.
Add the salt and baking soda, stirring to combine. (The batter will expand and may bubble a bit. Let rest for a few minutes before baking.)
To make waffles: Pour the batter onto your preheated, greased waffle iron, and bake according to the manufacturer’s instructions. Repeat with the remaining batter.
To make pancakes: Pour the batter onto a preheated, lightly greased griddle. Cook until bubbles form and pop on the top side of the pancakes, then turn over and cook until browned underneath.
Please note: Both the waffles and the pancakes are great topped with Strawberry, Rhubarb, and Blueberry Compote with Bourbon. (See recipe below.)
STRAWBERRY, RHUBARB, AND BLUEBERRY COMPOTE WITH BOURBON
¾ c. finely chopped rhubarb
½ c. chopped strawberries
¼ c. blueberries
3 T. brown sugar
pinch kosher salt
2 tsp. bourbon
Combine chopped rhubarb, strawberries, and blueberries in a heavy saucepan. Add the brown sugar and salt; stir to coat evenly. Let sit until fruit has released its juices, about 15 minutes.
Bring fruit mixture to a light boil over medium heat. Reduce heat to medium-low and simmer, stirring occasionally, until fruit is soft and mixture has started to thicken, about 5 minutes.
Remove from heat, stir in bourbon, and let cool, about 30 minutes. (Mixture should thicken a bit more as it cools.)
Place in a jar or storage container and refrigerate for up to a week. Can be warmed gently in your microwave.