Category Archives: BREAKFAST RECIPES

SIX WEEK BRAN MUFFINS

The first thing you should know is that as the recipe title implies, this amazing batter can be stored in your refrigerator for up to six weeks. The second thing you should know is that the recipe below is for half an original batch. So, feel free to double this recipe, because we already know it will double beautifully. But, at this time in our lives, unless I am planning to feed 60 people, half the original recipe is still a lot for 2 senior citizens to consume, even if it is over a six-week period! (My story and I’m sticking to it!)

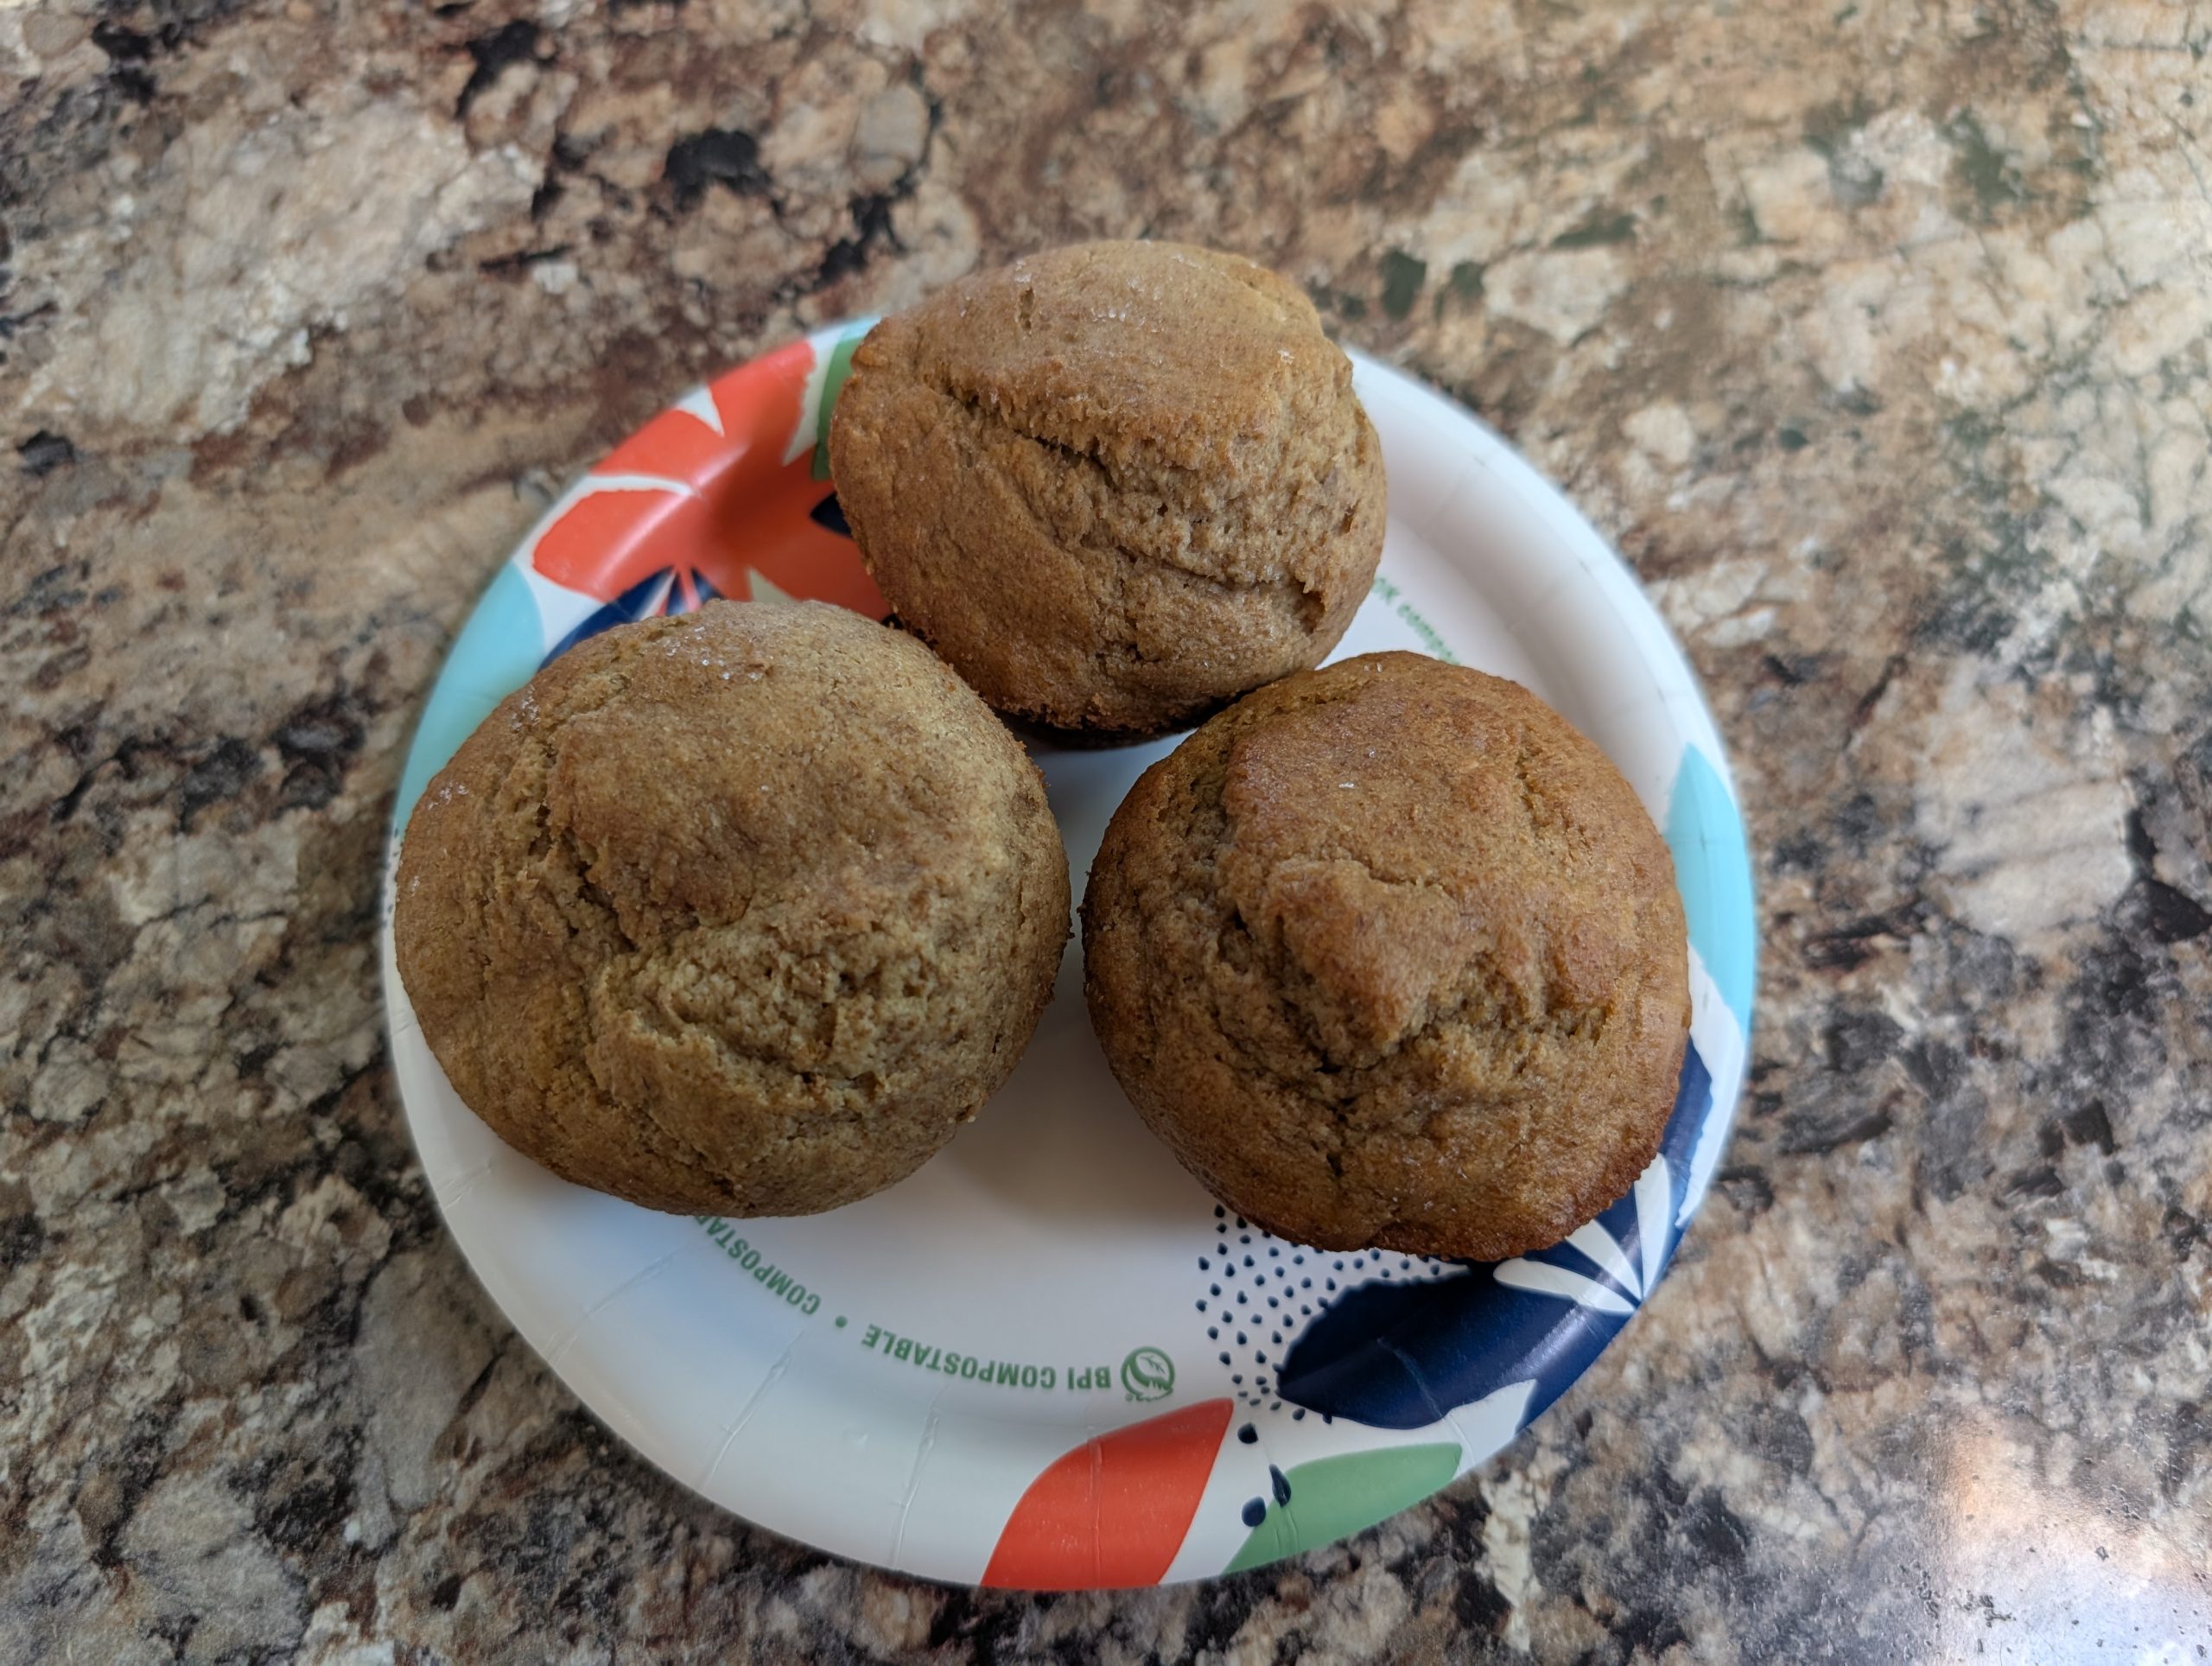
But the most important thing you should know is that this recipe has been around for decades because it produces absolutely delicious muffins. And bran is good for most of us because it is a rich source of fiber, vitamins, and minerals. 

But no, this is not the healthiest bran muffin recipe out there. But I challenge you to find a better tasting bran muffin recipe.

So, if you want to ramp up your breakfast enjoyment, I suggest you add muffins to your list of breakfast favorites. And this muffin recipe is a good one to start with. Easy to build, and even easier to eat.

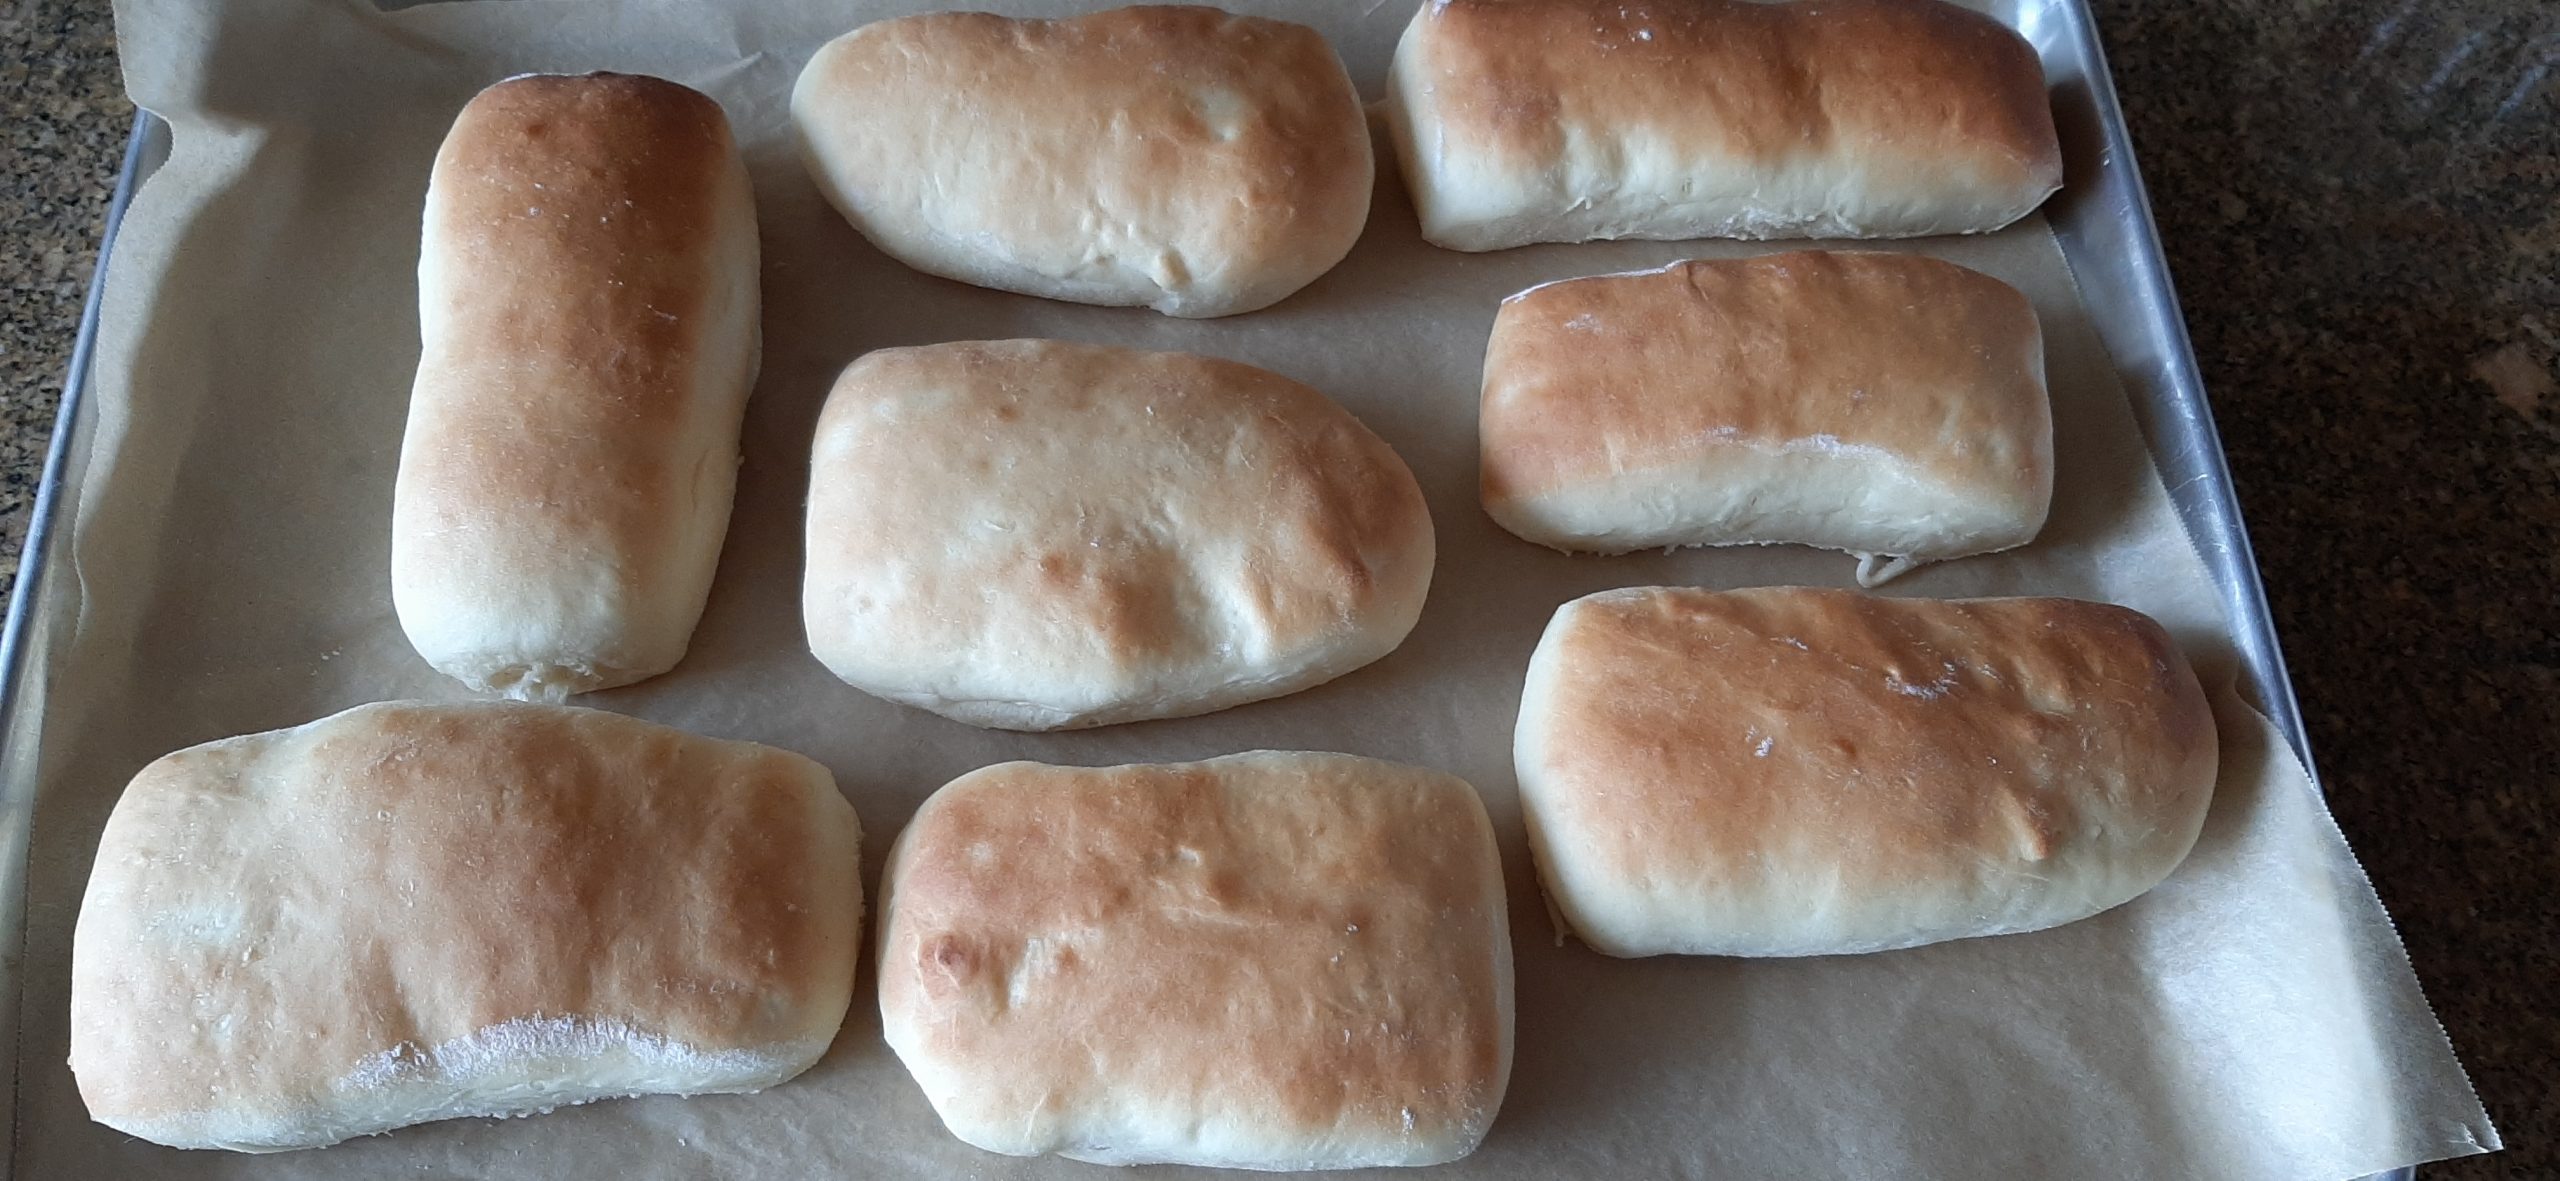
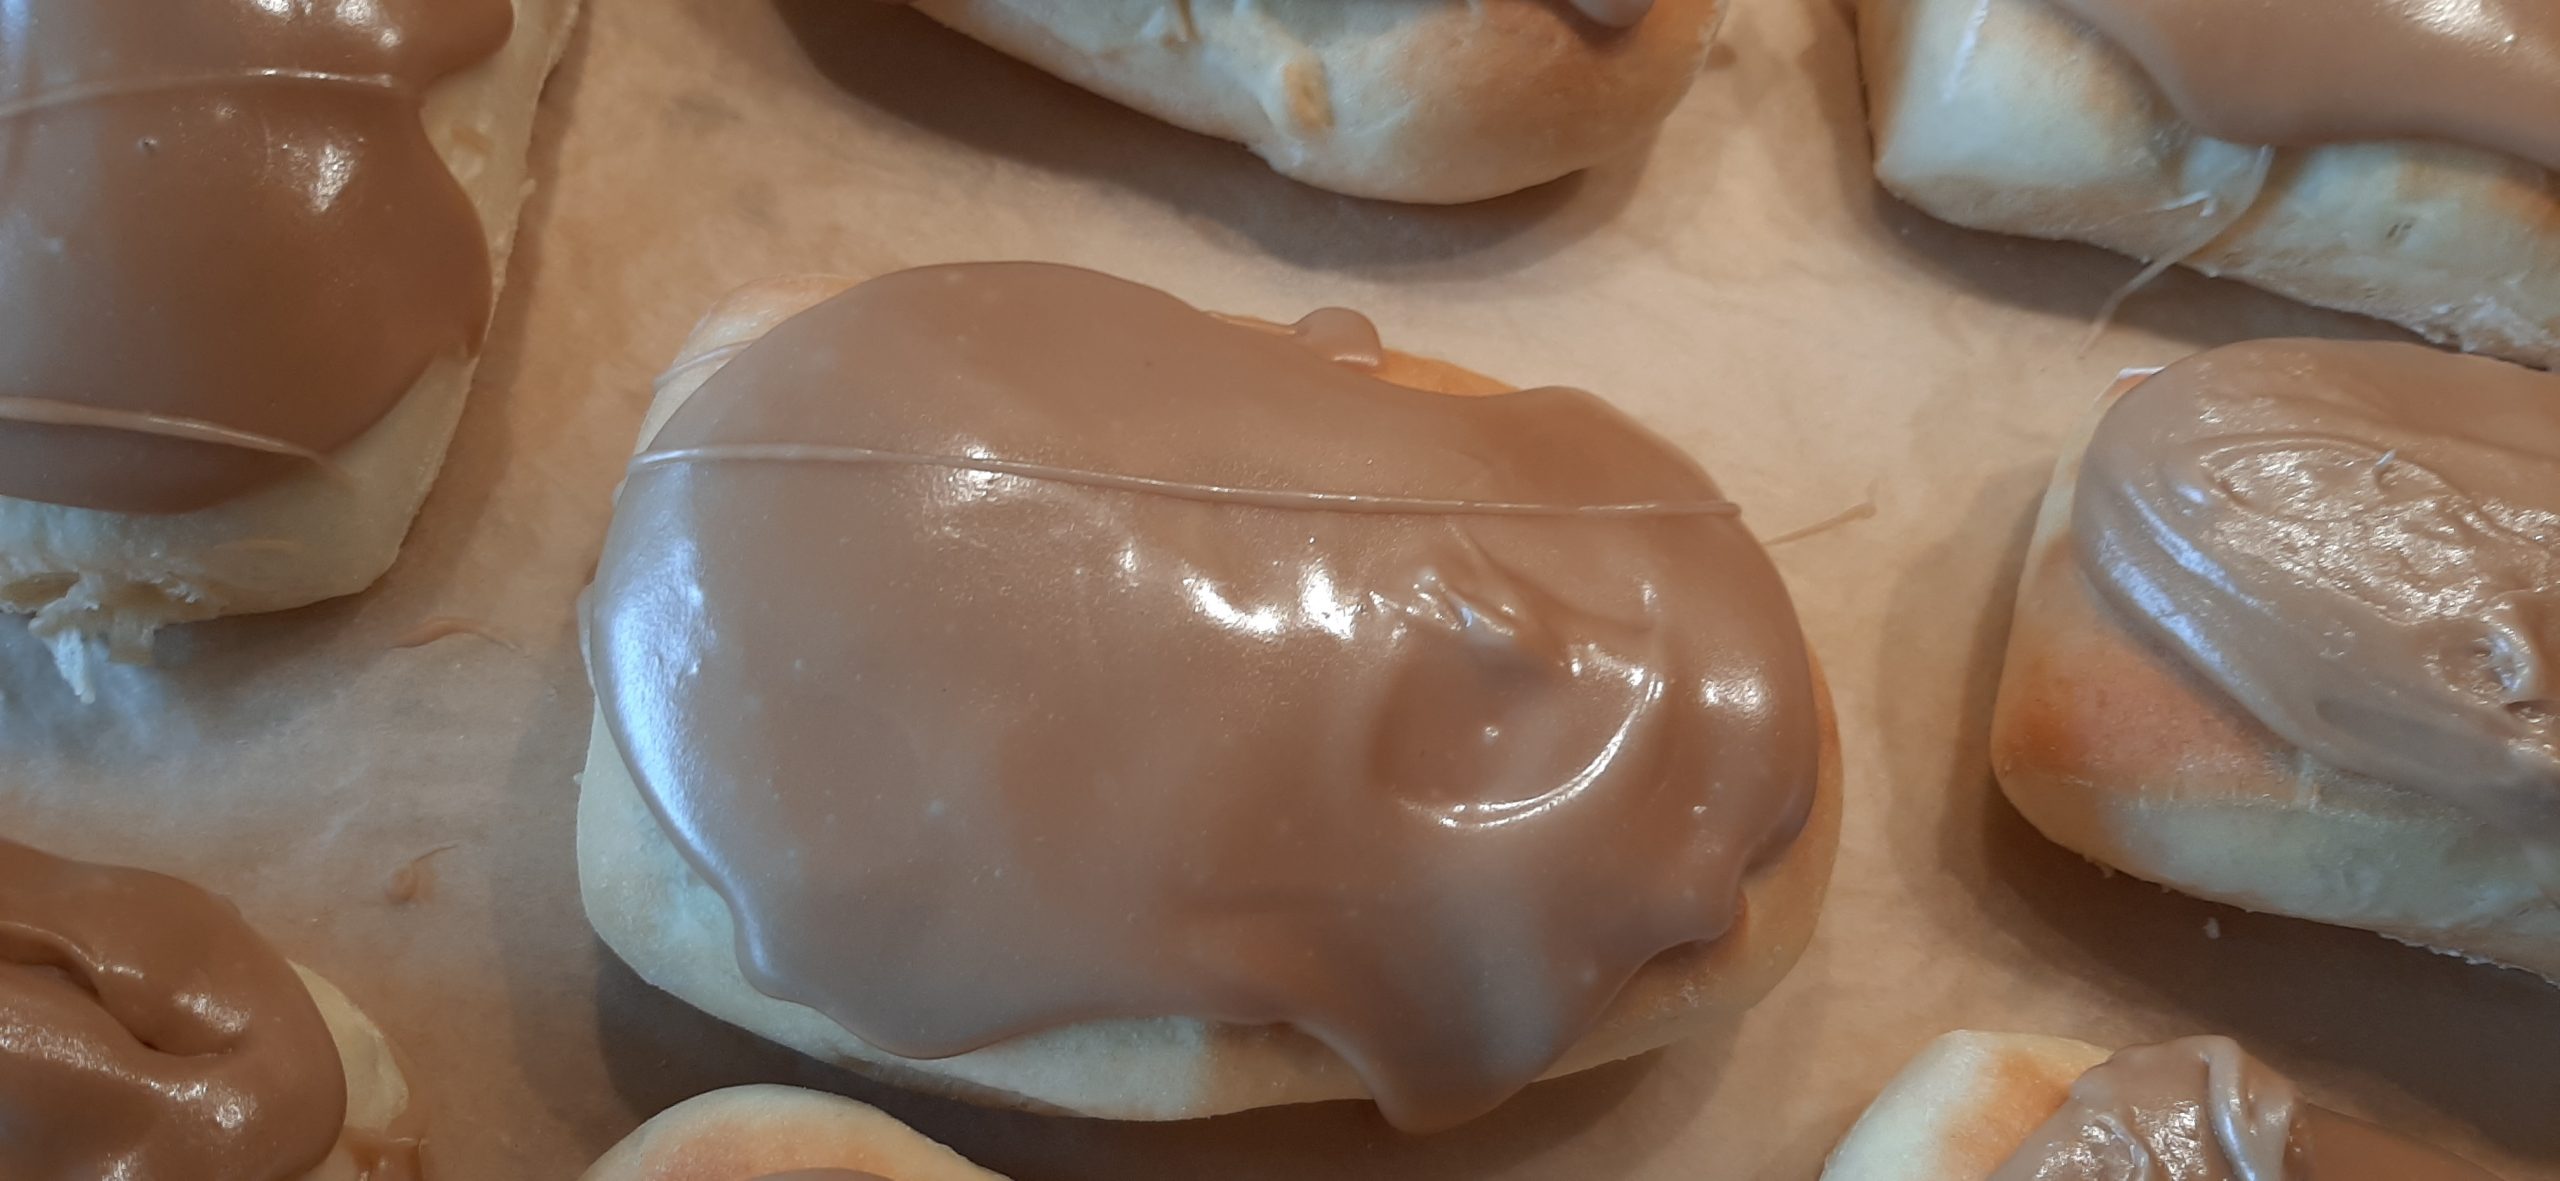
Well, that’s it for today. Andy’s sister and her husband are coming for breakfast tomorrow morning. And since I have been hungry for maple bars for weeks now, I finally have the excuse to bake up a batch. That’s right. My recipe – Quick and Easy Baked Maple Bars, are baked rather than deep fat fried. And believe it or not, they are even yummier than the ones you get from a bakery.  

So, I will build the dough today and let it sit in my fridge overnight and bake it off just before they arrive. Then slather the bars with maple frosting a few minutes before they are to be served. Yum.

For how to build yeast dough one day, and bake it off the next, read my simple technique below.

So, farewell for now. Keep smiling. Be strong. And as always, peace and love from our home to yours.

3 c. bran cereal (I use Kellog All-Bran Buds)

1 c. boiling water

½ c. vegetable oil

1½ c. granulated sugar

2 lg. eggs

2 c. buttermilk 

2½ c. unbleached all-purpose flour, fluffed

2½ tsp. baking soda

1 tsp. kosher salt

In a large mixing bowl, pour the boiling water over the bran buds and let the mixture sit for 5 minutes or more.

In a separate bowl, whisk the vegetable oil, granulated sugar, eggs, and buttermilk together.

In yet another bowl, whisk the flour, baking soda, and salt together.

Using a large wooden or metal spoon, stir the liquid mixture (veggie oil etc.) into the moistened bran until well combined.

Then add the flour mixture, stirring just until combined, being careful not to overmix.

Cover the batter and refrigerate. The batter is best if chilled for at least six hours before the first batch is baked.

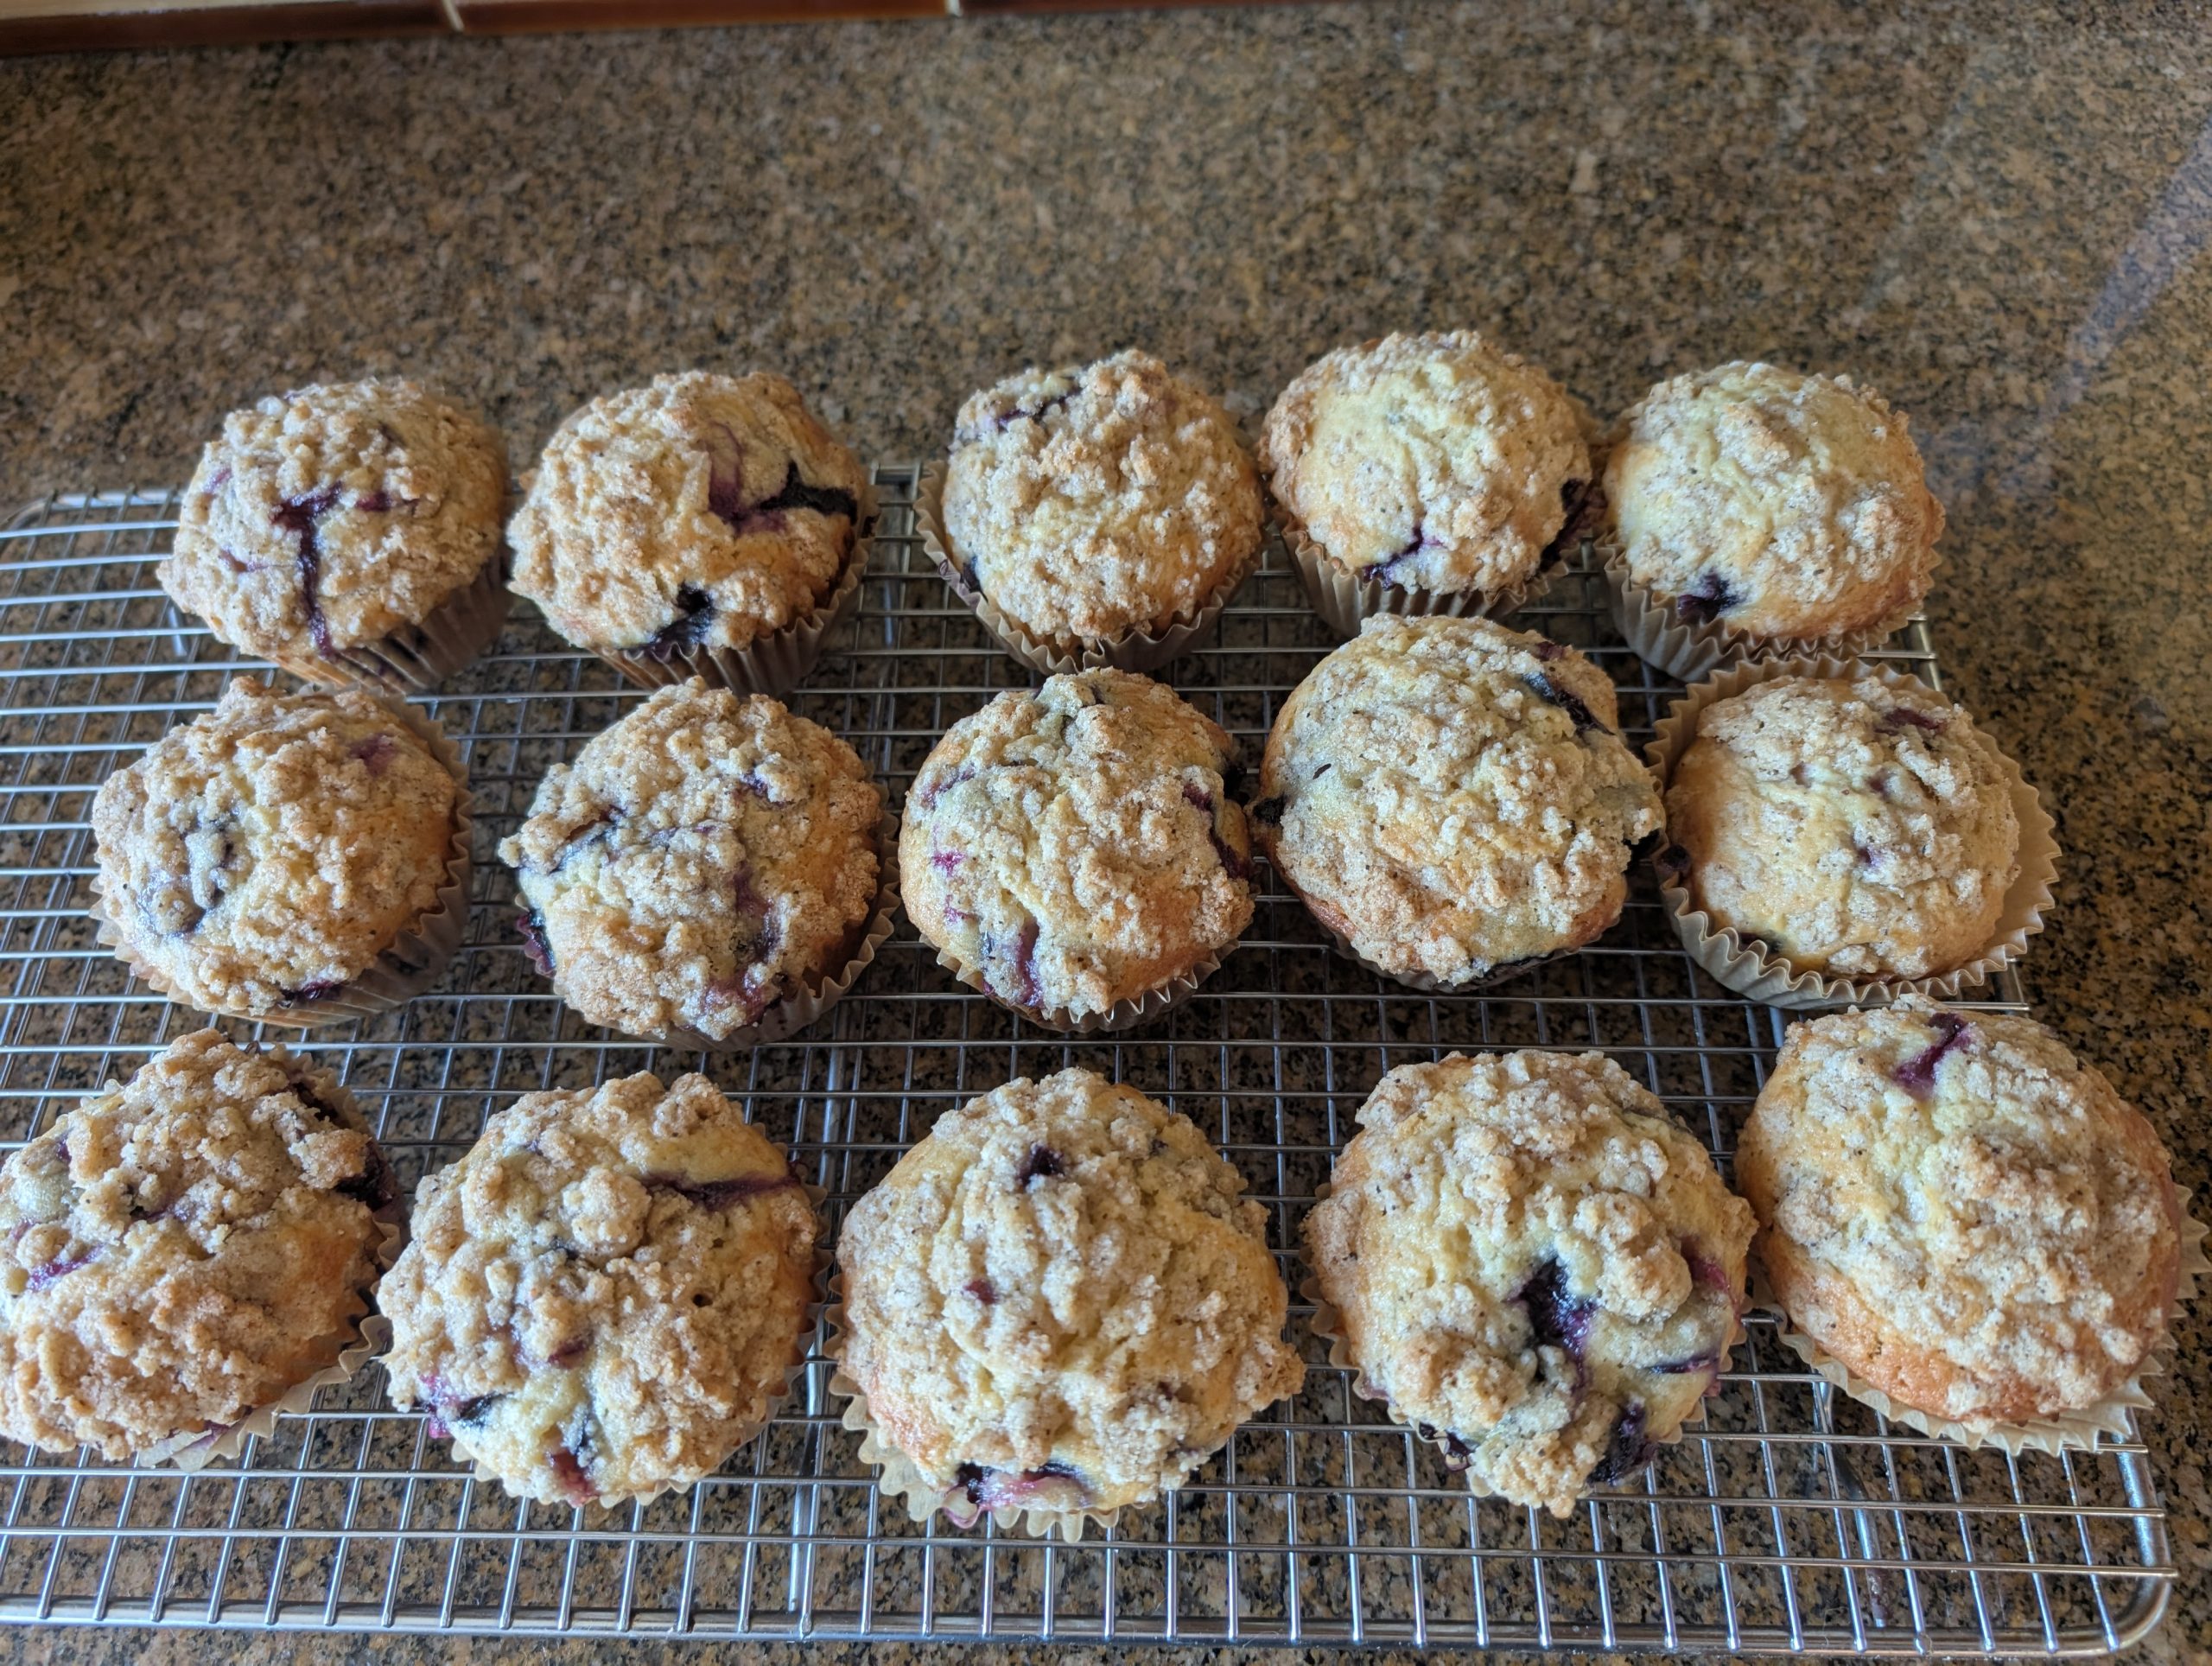
To bake, pre-heat your oven to 400-degrees. Grease a muffin tin or line it with paper liners. (I use parchment paper liners. See my recipe for Streusel Topped Blueberry Breakfast Muffins for why.)

Fill the muffin cups about two-thirds full. (Batter should still be cold when you fill the paper liners.) (For filling the paper liners, I use a large ice-cream scoop).

Then bake in the pre-heated oven for 15–20 minutes, or until a toothpick inserted into the center of a muffin comes out clean.

Remove from oven and allow the muffins to cool before serving. 

This recipe yields about 2½ dozen regular sized muffins.

For 2-day yeast bread:

  1. After building the dough, cover the mixing bowl with plastic wrap, and allow the dough to rise for about 20 to 30 minutes on the counter before sticking it in the fridge. Make sure your mixing bowl gives plenty of room for the dough to expand.
  2. The next day, before shaping the dough, allow your dough to regain some warmth on the counter for 40 to 60 minutes and become slightly puffy before shaping it.
  3. Then follow the original recipe for the second rise.

STREUSEL TOPPED BLUEBERRY BREAKFAST MUFFINS   

So, this recipe is especially for our dear friend Tim C. I served these on a recent trailer trip, and after biting into one Tim indicated that he wanted the recipe. So, I thought, while I was providing him with the recipe, I might as well share it with the world. (Like I wouldn’t do that anyway. But that’s not the point!) I want Tim to feel special, because he is special.

Now, the first thing you should know is that you don’t need a mixer for the muffin part. However, if you are as impatient as I am in mixing cold butter into a flour mixture, using a small food processor is the best way to easily incorporate cold butter into the flour mixture for the streusel topping. So, if truth be told, this recipe is not particularly quick and easy to prepare. But it is definitely worth the effort. And yes of course you can make just the muffin part and forget about the streusel topping. But why would you do that? If you only want a healthy muffin made from sawdust and nary an unhealthy ingredient, this is not the recipe for you. So, go the whole mile and add the topping. Believe me, you will not regret ignoring the angel on your right shoulder for the shear joy of following the little devil on your left shoulder. Now, I’m not suggesting that you ignore your good angel, in fact, most times your angel is by far the better choice. But once in a while, especially when it applies to a treat, we should all cave in and give the little devil his just desserts. (Sorry, I just couldn’t help myself!)

Anyway, just make these muffins. They truly are amazing.

Well, that’s it for now. I just finished posting my last travel report and find myself with absolutely no “must work my tail off” missions in the next week or so. So, I’m going to take it easy and finish reading, for the second time, Louise Penny’s wonderful mystery series starring Chief Inspector Gamache. If you love mystery series as much as I do, and haven’t read these books, you are missing out on not only a wonderful read but also a lesson on how to be a kind, caring, and responsible individual.

From Louise Penny’s “letter” she includes at the beginning of each book, the following has helped me work towards being a better person.

“No one quite appreciates, and recognizes, the light like those who’ve lived in darkness. That awareness is what I try to bring to my books. The duality of our lives. The power of perception. The staggering weight of despair, and the amazement when it is lifted.

The gap between how we appear and how we really feel.

Those are foundations of the Gamache books”

And as always, peace and love to all.         

For the blueberry muffins:

2 c. unbleached all-purpose flour, fluffed

¾ c. granulated sugar

¼ c. brown sugar, packed

2 tsp. baking powder

½ tsp. kosher salt

2 lg. eggs

½ c. (1 stick) unsalted butter, melted

½ c. whole milk

1 tsp. vanilla extract

2 c. (1 pint) fresh blueberries (cut in half if the blueberries are large)

Pre-heat oven to 400-degrees. Prepare a muffin pan with cupcake liners*.

In a mixing bowl, whisk the flour, sugars, baking powder, and salt together.

In another bowl, whisk the eggs until smooth. Add the melted butter, milk, and vanilla. Whisk until combined. Stir the egg mixture into the flour mixture and stir until just combined. (The dough will be lumpy.) Carefully fold in the blueberries.

Fill the prepared muffin cups with batter. Top each muffin with streusel topping, about 1 tablespoon each. (See recipe below.)

Bake the muffins until a toothpick inserted in the center comes out clean with just a few crumbs attached, about 18 to 22 minutes.

Remove from oven and cool on a rack for several minutes before removing from pan. Cool completely and store the muffins in an airtight container. Or freeze them for later use. When ready to eat, nuke just until warm.

For the streusel topping:

¼ c. unbleached all-purpose flour, fluffed

2 T. brown sugar, packed

2 T. granulated sugar

¼ tsp. ground cinnamon

pinch kosher salt

2 T. (¼ stick) cold unsalted butter, cut in 8 pieces

Blend the flour, brown sugar, granulated sugar, cinnamon, and salt in your food processor. Add the cold butter and pulse until coarse crumbs form. (And of course, you can use a fork or grate the butter if you don’t happen to want to use your food processor. But I’m lazy and I use my small food processor which makes life so much easier.)

*I use muffin and cupcake liners made of parchment paper. I know, they aren’t elegant, but muffins and cupcakes don’t stick to the paper. Frankly, I’m more interested in getting every crumb than pretty paper that sticks to whatever I’m about to put in my mouth!  

SAUSAGE GRAVY OVER EASY BUTTERMILK DROP BISCUITS

One of my favorite breakfast treats is a warm homemade biscuit smothered in sausage gravy. Now don’t get me wrong. I don’t fix this very often. (I did say “treat” above and that’s exactly what I meant.) Because as much as I might desire this combination more often than I prepare and serve it, I know it’s not the healthiest way to begin my day. But OMG, if calories didn’t count, and I had the metabolism of a Ruby-throated Hummingbird, I would gobble up this delicious combination every 3 or 4 days. It is just such a delightfully savory, creamy, tasty, and soul satisfying bundle of joy, that there would be no hesitation on my part. But then reality enters the picture. Bottom line: this is not what I should eat routinely, but only periodically as a special treat. So, ladies and gentlemen, that’s exactly what happens here at Chez Carr. Maybe once every 4 months and then usually for a trailer trip.

I make the biscuits and gravy and neatly pack them in small containers that fit perfectly in our trailer’s freezer. Then while on the road, I simply nuke the biscuits, and warm up the gravy on my lovely three burner propane stove. Breakfast ready.

So, if you too love biscuits and sausage gravy, this is the quickest and easiest recipe for this delicious breakfast treat.

BTW – my next post is for all of you out there who spend time in your trailers or boats. I’m going to share my list of prepared foods I make ahead of time to free up my time while on the road. Plus, the exact list of foods I plan to prepare for our upcoming trailer trip with dear friends Margo and Jim and Phyllis and Tim.  

Well, that’s it for now. My plan for today is to prepare the trailer food list, make Creamy Roquefort Dressing (see recipe below) for the green salad I plan to serve with Hamburger Dip Sandwiches with Onion and Dry Sherry Au Jus (recipe on site) this evening, and start the 5th book in the Louise Penny series featuring Chief Inspector Armand Gamache of the Sûreté du Québec. (And yes, I have already read the series, but I am enjoying each book just as much the second time around.)

So, may you too continue to plan and prepare new and not so new dishes for your family and friends. Spend quality time with the books you love and consider old friends but be open to new and exciting adventures. And always remember to count your blessings. We all have blessings just waiting to be acknowledged. A beautiful sunrise, a bit of rain on a summer day, a smile from a stranger, an unexpected call from a friend (thank you Ann B.) who was just thinking of you, etc. etc. These are the real things that matter.

Peace and love to all.

And if you are into cats, the latest picture of Miles, sleeping in a place only this magical guy could find for himself.   

For the drop biscuits:

2 c. unbleached all-purpose flour, fluffed 

1 T. baking powder

½ tsp. baking soda

½ tsp. kosher salt

6 T. (¾ stick) grated cold unsalted butter

1 c. cold buttermilk

Line a baking sheet with parchment paper.   

In a large mixing bowl, whisk the flour, baking powder, baking soda, and salt together.

Add the grated cold butter to the mixing bowl. Work the butter evenly into the flour mixture using a regular table knife.  

Pour in the cold buttermilk and stir with that same table knife just until combined. (This will be a slightly wet and very sticky dough.) (BTW, a plain old table knife is one of my favorite implements for mixing thick or heavy dough. Cuts (sorry) right into the ingredients and blends the dough much better than any spoon or spatula can accomplish.)  

Using a large ice cream scoop (about a quarter cup), plop balls of dough onto your prepared baking sheet about 2-inches apart.  

Bake in a pre-heated 450-degree oven for about 10-13 minutes or until the bottoms are golden brown.

Remove from oven and cool on the baking sheet.

Serve immediately (while still hot) or cool completely before storing in an airtight container in your refrigerator or freezer.

For the sausage gravy:

2 T. unsalted butter, divided

1 lb. bulk breakfast sausage

3 T. unbleached all-purpose flour

1½ c. whole milk, plus more if needed  

1½ tsp. Worcestershire sauce

½ tsp. dried thyme

¼ tsp. seasoned salt

freshly ground black pepper (not too much)

Melt 1 tablespoon of the butter in a medium sized pan. Add sausage, breaking it up as it cooks. Fry until the meat is a nice dark brown and there are tasty meat bits stuck to the bottom of the pan.

Add the remaining butter to the pan and whisk in the flour lifting the browned bits off the bottom as you stir the mixture. Let the whole mess burble for a couple of minutes.

Slowly whisk in milk, Worcestershire sauce, thyme, seasoned salt, and pepper.

Bring to a gentle boil, reduce heat and let simmer for about 5 minutes, stirring occasionally. (The sauce will thicken nicely during this time.) Taste and adjust seasoning. Add additional milk or water if the consistency is too thick.

CREAMY ROQUEFORT DRESSING

¾ c. crumbled roquefort cheese, or more to taste

½ c. buttermilk

¼ c. sour cream

3T. mayonnaise

2 tsp. white wine vinegar

¼ tsp. granulated sugar

1small garlic clove

¼ tsp. kosher salt

freshly ground black pepper

Combine all the ingredients in a food processor. That’s it!

Notice where Miles is and where the striped pillow is. Now look at the next picture (after I put the whole “pillow thing” back where it belonged) and tell me how this kitty moved the striped pillow out of the way without disturbing the one just in front of him. Which BTW is the backside of the pillow as you will see in the next picture. If this isn’t magic, I don’t know what else it could be!

The way the pillows are normally arranged on our guest bed.

APPLE CARROT PECAN QUICK BREAD WITH CINNAMON STRUESEL TOPPING

I am always looking for new quick bread recipes to take along on trailer trips or when we leave for a few days to visit family, friends, or stay in a condo on the ocean. I enjoy going out for breakfast occasionally, but much prefer to save my eating out experiences to lunches on the road or dinners where I can have a drink and leisurely enjoy my evening meal. Breakfast out simply does not carry the same cachet as having dinner at a restaurant. And frankly, except for the hashbrown potatoes, I can whip up breakfasts faster in our trailer or condo than getting in our truck and driving into whatever town may be close by. And of course, I always like to try new recipes.

For my birthday celebration I made Carrot Cake with Cream Cheese Frosting (recipe on site) because I truly love a good carrot cake. So, when getting ready to go to a family reunion in Oregon a couple of weeks ago, I decided to continue the “carrot cake” theme and made this bread to take along. And it was well received. Moist and tender with a lovely bit of crunch from the pecans and streusel topping.

So, if you too love carrot cake but feel guilty when you have a big old piece of carrot cake with cream cheese frosting for breakfast, then give this “bread” recipe a try instead. And yes, you might miss the cream cheese frosting. But I promise the streusel topping will make everything OK.

Well, it’s overcast here in Western Washington. And unfortunately, lightning storms are predicted for the Cascade Mountains. Which is always a problem. We already have a terrible wildfire burning close to the village of Stehekin, at the North end of Lake Chelan, in the heart of the North Cascades. And any lightning strike that hits land, especially in summer, is a fire just waiting to happen.

So, wherever you are, please be extra diligent in putting out your campfires, lighting and shutting down your outdoor grills, burning trash, or disposing of your cigarettes, etc. We are all in this together. And natural causes do enough damage without our avoidable assistance.

And sorry for no picture. I was so busy putting things together to take along, I failed to capture this bread on my camera. (Bad Patti!) But next time I make this bread I will rectify my error.

Peace and love to all.    

1¾ c. unbleached all-purpose flour, fluffed

1 tsp. baking soda

½ tsp. baking powder

½ tsp. fine sea salt

1½ tsp. ground cinnamon

¼ tsp. ground ginger

¼ tsp. ground nutmeg

3 eggs, room temp.

½ c. vegetable oil

⅓ c. sour cream

1 med. apple, peeled and grated

2 c. grated carrot

1 c. light brown sugar packed

1 tsp. vanilla extract

¾ c. finely chopped pecans

Grease a 9×5-inch loaf pan or 2 7-inch loaf pans. Line the bottom(s) with parchment paper.

Whisk together the flour, baking soda, baking powder, salt, cinnamon, ginger, and ground nutmeg in a medium bowl.  In a large bowl, stir together the eggs, vegetable oil, sour cream, grated apple, grated carrot, brown sugar, vanilla extract, and chopped pecans.

Stir the flour mixture into the carrot mixture just until combined.  Pour into prepared pan(s). Top with streusel mixture.

Bake a 9×5-inch pan in a pre-heated 350-degree oven for 50-60 minutes or until a toothpick inserted in the center comes out clean. Bake 2 7-inch loaf pans for about 40 minutes or until a toothpick inserted in the center comes out clean. Do not overbake. Remove from oven and cool the bread in the pan on a wire rack for 5-7 minutes before removing from pan. (Also remove the parchment paper at this time.)

Streusel:

2 T. melted unsalted butter

½ c. brown sugar, packed

1 tsp. ground cinnamon

½ c. unbleached all-purpose flour

½ c. finely chopped pecans

Blend the butter, brown sugar, and cinnamon. Add the flour and nuts, mix until crumbly. Place the mixture on top of bread dough and bake as instructed above.

CHICKEN SAUSAGE GRAVY OVER EASY BUTTERMILK DROP BISCUITS

the whole meal deal

drop biscuits

sausage gravy

OK, for me, there is nothing better for breakfast than biscuits and sausage gravy. And I say “sausage gravy” because I have been fooled when ordering biscuits and gravy in a café or restaurant. Unless so noted as sausage gravy on the menu, you might just find yourself eating a biscuit with no meat in the gravy. And then, why bother!

Anyway, the other morning we went to breakfast at a local cafe, and I ordered Country Benedict Biscuit, 2 sausage patties, 2 poached eggs, covered in Sausage Gravy with Hashbrowns. I know, I know! Way too much food and none of it what anyone in their right mind could possibly consider healthy. But it sounded good at the time.

Well, suffice it to say, I ate half a biscuit, one of the sausage patties, but the poached eggs resembled rubber. So, I’m sure they are still bouncing around in some garbage can in downtown Stanwood. The hashbrowns I brought home. But I was left with a huge desire for truly tasty biscuits and gravy. (And make that sausage gravy, thank you very much!)

And although I have a great recipe for Biscuits with Sausage Gravy and 2 recipes for buttermilk biscuits already on this site, I wanted to simplify the whole process. And that’s just what I did.

So, I hope you enjoy this recipe for easy to prepare drop biscuits smothered in chicken sausage gravy. Add an easy over egg to the plate, and life is good.

And do make the breakfasts you fix for your family as much of a treat as the dinners you serve. And I know, it takes time to make and serve breakfast especially if you are a working mom or dad. I’ve been there. But scrambled eggs, toast, and some fruit or hot cereal and toast and fruit don’t take that long to prepare. And full tummies to start the day for children especially, helps them concentrate on the hard work of learning. And these items are a whole lot cheaper and better for your family than cold cereal. OK, enough telling you how to live your life.

But I still say – peace and love to all.  

3 T. butter, divided

1 lb. bulk chicken sausage (I use Isernio’s all-natural Classic Chicken Sausage)

5 T. unbleached all-purpose flour

1¼ c. whole milk, plus more if needed  

1 c. chicken stock (or additional milk)  

½ tsp. seasoned salt

freshly ground black pepper  

Melt 1 tablespoon of the butter in a medium sized pan. Add sausage, breaking it up as it cooks, and fry until good and caramelized.  

Add the remaining 2 tablespoons butter to the pan and add the flour lifting the browned bits off the bottom as you stir the mixture. Let burble for a couple of minutes. Slowly pour in the milk and chicken stock (gently stirring the entire time) and when thoroughly blended add the seasoned salt and pepper.

Bring to a gentle boil, reduce heat and let simmer uncovered for about 5 minutes, stirring occasionally. (The sauce will thicken nicely during this time.)

Taste and adjust seasoning. Add additional milk if the consistency is thicker than you prefer.

Serve over Easy Buttermilk Drop Biscuits (recipe below) or your favorite baking powder biscuits.

EASY BUTTERMILK DROP BISCUITS

2 c. unbleached all-purpose flour, fluffed 

1 T. baking powder

½ tsp. baking soda

½ tsp. kosher salt

6 T. (¾ stick) grated cold unsalted butter

1 c. cold buttermilk, plus additional for brushing on top

Line a baking sheet with parchment paper.   

In a large mixing bowl, whisk the flour, baking powder, baking soda, and salt together.

Add the grated cold butter to the mixing bowl. Work the butter evenly into the flour mixture using a regular table knife.  

Pour in the cold buttermilk and stir with that same table knife just until combined. (This will be a slightly wet and very sticky dough.) (BTW, a plain old table knife is one of my favorite implements for mixing thick or heavy dough. Cuts (sorry) right into the ingredients and blends the dough much better than any spoon or spatula can accomplish.)  

Using a large ice cream scoop (about a quarter cup), plop balls of dough onto your prepared baking sheet about 2-inches apart. Brush tops with additional buttermilk right before baking.

Bake in a pre-heated 450-degree oven for about 12-14 minutes or until the bottoms are golden brown.

Remove from oven and cool on the baking sheet.

Serve immediately (while still hot) or cool completely before storing in an airtight container in your refrigerator.   

CHOCOLATE GANACHE TOPPED CREAM CHEESE DANISH PASTRIES

So, what happens when you bet your husband “dollars to doughnuts” on some trivial matter that you can’t even remember but you are sure your husband remembers that you lost? Well, I’ll tell you what happens when I lose a bet in this household. Dollars are disregarded, but a nagging reminder is always present that I owe Mr. C. his reward for winning the bet. And because Mr. C. is the wonderful man that he is, he never even mentions, much less demands his reward. Which is good, because in our relationship I would start laughing at any kind of a demand, walk out of the room, and come back in to discuss the matter in an adult fashion when he too stopped laughing.) (We are, after all, adults!)

Anyway, I decided that since Mr. C. is a devout lover of pain au chocolat, which is basically a chocolate filled croissant, I would work up a recipe for a chocolate topped cream cheese Danish as his reward for winning the bet. And the recipe you find below is the result. (And for those of you who know me, working up a new recipe is always a win. So, in this case, our bet, won or lost was in reality a win/win situation.) But enough about our delightful life and on to this recipe.

The basics for this recipe come from my recipe for Individual Jam Filled Cream Cheese Danish Pastries on this site. I just left off the jam part and added a ganache topping. So, if you too are into pastry and chocolate, I recommend you give this recipe a try.

But be warned, this is not a quick pastry to prepare. It’s easy to make, but it does take some time. Most of it simply waiting for the dough to rise. But you still need significant time to dedicate to the whole process. But truly, it is worth the time and effort. And as a special treat, or reward for a bet, there is nothing finer.

Well, that’s it for today. Mr. C. has a gig in the dining room of the Bellwether Hotel this evening. And I am fortunate enough to be joining Karen, the bass player Tom’s wife, for a lovely evening of fabulous conversation, fine dining, and not incidentally, great music. Life just does not get any better. I am one truly lucky lady.

May you too be lucky in love, friendship, and a life filled with fabulous music.

And as always, peace and love to all.  

Pastry Dough:

1 c. lukewarm whole milk

2 tsp. active dried yeast 

⅓ c. granulated sugar

2 T. sour cream

4 egg yolks

¼ tsp. kosher salt

3 oz. (¾ stick) unsalted butter, room temperature

3½ – 4 c. unbleached all-purpose flour

vegetable oil 

In the bowl of your stand mixer, combine the lukewarm milk, yeast, and sugar. Let sit for 5 minutes.

Add the sour cream, egg yolks, salt, butter, and about 3 cups of flour. Using your dough hook, mix/knead the dough for 6-8 minutes or until the dough pulls away from the sides of the bowl and feels slightly tacky to the touch. (You will probably need more flour. And there will still be a bit of dough that wants to stick to the bottom of the bowl when it’s time to stop the machine.)

Pour a bit of veggie oil over the dough, and using your hands and a stiff spatula, roll the dough into a ball. Make sure the entire ball of dough is lightly oiled. (This helps keep the dough from cracking and drying as it rises.)   

Cover the bowl with plastic wrap and let the dough rise for 70-90 minutes or until doubled in bulk. Meanwhile, prepare the cream cheese filling. Once the dough is doubled, punch it down and divide it into 14-16 equal sized pieces.

Shape each piece of dough into a ball by tucking the ends underneath until you get a smooth surface on top. Set the balls on large parchment paper lined baking sheets evenly spaced. Make sure the pastries are at least 3-inches apart.  Let rest for 10 minutes, then dip the bottom of a glass into the middle of each pastry to form an indentation that goes almost to the bottom of the ball.

Using a medium-small sized ice cream scoop, fill each pastry indentation with the cream cheese filling. Smooth out the filling and place in a warm place to allow the pastries to almost double in size, about 45 minutes.

Bake in a preheated 350-degree oven for 19-22 minutes, or until the outside is golden brown. The internal temperature of the pastry should be at least 190-degrees.

Remove from the oven and transfer to a wire rack to cool completely. When cool, top each Danish with the ganache topping. Then Store in an airtight container on your counter for up to a day. Then move to the refrigerator.

When ready to serve, warm on high for 10 seconds in your microwave. You can also freeze the pastries for up to a month. To thaw, pop them in the oven straight from the freezer for about 5 minutes at 350-degrees.

Cream Cheese Filling:

2 pkgs. (8 oz. each) cream cheese, room temp.

1 c. granulated sugar

1 tsp. vanilla

Beat the cream cheese, sugar, and vanilla together until smooth. Set aside until needed.

Ganache Topping:

1½ c. semi-sweet chocolate chips 

6T. (¾ stick) unsalted butter chopped into small cubes

½ c. whole milk 

In a medium-sized bowl, combine the chocolate chips and butter.

In a liquid measuring cup, heat the milk in your microwave for 1 – 2 minutes, or until the milk begins to bubble.

Pour the hot milk over the chocolate chips and butter (do not stir yet!). Allow to sit for about 3 minutes, then use a whisk to stir until smooth and creamy. (It may take a minute or two to come together; it often looks separated at first.)

Allow to cool for about 30 minutes before topping the Danishes. You will probably have extra ganache. Lucky you!

CANDIED FRUIT AND NUT BRAIDED YEAST BREAD

I have been enjoying a variation of this bread since I was a child. Every Christmas, our close family friend Charlotte always made a similar bread, and I routinely made a pig of myself. It was just so amazingly delicious.

So, when I started making bread in my early twenties, I found this recipe which was very like Charlottes, but also included a small amount of candied citron and candied cherries. And I liked it even better. (Some days an angel really does land on your shoulder.) Well, as you might have guessed, I have been making this bread ever since.

One of the fun Christmas events when my kids were young was to have an open house. All kinds of goodies were served including this Christmas bread. It was a way to share Christmas with our friends. And to teach the kids the enjoyment that can come from hosting. Other years we would deliver goodies to friends and family. The picture you see below was taken I believe in 1974. Ursala on the left and Paula on the right.

I didn’t bake this bread every year because there are just so many incredible breads out there that make wonderful Christmas treats. Like cinnamon rolls (several recipes on site), Christmas Berliner Stollen, Krendl (Russian Christmas Bread), Dried Cranberry and Almond Braided Danish, Bread Pudding with Spiced Rum Sauce, Baba Au Rhum, and Cream Cheese Danish. To name a few.  

But as with other favorite recipes of mine, I just make them and assume the recipe has already been posted on this site. Silly me. So, I apologize for not getting this braided yeast bread recipe posted sooner. (Like in time for Christmas 2023.) Also, this year, I changed things up a bit. Shape wise that is. I decided to make 5 small loaves instead of three braided breads. Every year I give 4 of our neighbors a small loaf of some type of sweet bread for Christmas. This year, as you can see from the picture above, it was a loaf of this delightful bread. (And yes, the fifth loaf stayed here and was gobbled up very quickly.)

So, if you too are a bread lover, and want to make something special for Christmas (or any other day of the year for that matter), this is a bread I am sure you will enjoy as much as I do. If you aren’t a candied fruit lover, just leave it out. Or change the type of candied fruit. Or add more nuts. Whatever appeals. Just don’t forget the glaze. It is just so wonderful. Not too sweet – just perfect. And if you have never used vanilla paste, get some at your earliest convenience. It is tantamount to heaven in a jar.

Well, it’s still raining here in NW Washington. But at least we aren’t having the same terrible snowstorms that are battering the East Coast and California. But there is a small chance of snow this weekend. And I say – bring it on! I love snow. Especially when there is nothing on our calendar. And for more weeks than I care to count, our weekend is free. And to that I say – HALLELUJAH! Let it snow, let it snow, let it snow.

And as always, peace and love to all.

2 c. whole milk, scalded

½ c. (1 stick) unsalted butter, room temp.

2/3 c. granulated sugar

2 tsp. kosher salt

¼ tsp. crushed cardamon seed

1 tsp. ground cinnamon

scant 2 T. active dry yeast

¼ c. lukewarm water

2 lg. eggs

8 c. unbleached all-purpose flour

1½ c. chopped walnuts

1 c. diced citron

1 c. chopped candied red and green maraschino cherries, plus more for decoration

veggie oil

½ c. powdered sugar

1 tsp. vanilla paste or vanilla extract

milk

Combine the scalded milk, butter, salt, crushed cardamon seeds, and cinnamon in the bowl of your stand mixer. Cool to lukewarm

Add the yeast softened in water. Add eggs. Mix well. Add 4 cups of the flour and beat well. Add the nuts, citron, chopped candied cherries, and enough remaining flour to form a firm dough (dough will be sticky).

Pour a bit of veggie oil in the bowl, and using your hands and a stiff spatula, form the dough into a lightly greased ball. Cover with plastic wrap and place in a warm place until doubled in bulk, about 60 minutes. Punch down the dough.

For three braided loaves:

Turn onto a lightly floured surface; divide into thirds. Divide each portion into thirds again. Shape each into a 14-in. rope. Place 3 ropes on parchment paper or a greased baking pan and braid; pinch ends to seal and tuck under. Repeat with remaining dough. Cover and let rise for 40-50 minutes or until doubled in size. Bake in a pre-heated 350-degree oven for about 20-25 minutes or until the internal temperature reaches at least 195-degrees.

Remove from oven and place on wire racks. Make the glaze by whisking the powdered sugar and vanilla bean paste together with enough milk to make a thin consistency. Using a pastry brush, coat the braids with a thin layer of icing. Decorate with holly leaves and additional red and green candied maraschino cherries.

For 5 small loaves:

Turn onto a lightly floured surface; divide into 5 equal sized pieces. Shape into footballs and place in small, lightly greased loaf pans.

Cover and let rise for 40-50 minutes or until doubled in size. Bake in a pre-heated 350-degree oven for 25-30 minutes or until the internal temperature reaches at least 195-degrees.

Remove from oven and place on wire racks. (If you have baked the loaves in aluminum foil pans, let the bread cool in the same pans. If not, remove from pans. Make the glaze by whisking the powdered sugar and vanilla bean paste together with enough milk to make a thin consistency. Using a pastry brush, coat the braids with a thin layer of icing. Decorate with holly leaves and additional red and green candied maraschino cherries.


THREE CHEESE CANADIAN BACON QUICHE WITH CARAMELIZED ONION AND SPINACH

We are definitely fans of quiche. And because of this, I am always trying to mix things up a bit so that quiche boredom doesn’t set in. So, with variation in mind, and a general nod towards using ingredients on hand, I came up with this quiche recipe.

The first ingredient I was especially delighted to use was the wonderful Canadian bacon we get from a local purveyor of all thing’s carnivore – Del Fox Meats in little old Stanwood, Washington. Not only is this a local business, but the prices are reasonable, the staff nice and helpful, and the quality of the meat very good. And they make their own sausage and jerky. Their homemade Landjeager being Mr. C’s all-time favorite.

So, tick the meat part of the quiche off the list. Now onto the cheese. I happened to have a bit of Swiss cheese in the fridge, along with some Manchego cheese (a sheep’s milk cheese from Spain and one of Mr. C’s favorites) and of course Tillamook Sharp Cheddar.

So, I thought to myself “what the heck, why not use some of each”? I also had some other wonderful cheeses from which to choose, but I thought these three would work well together, and I was right! So, that only left a few additional ingredients to do their part in adding flavor and texture to the usual suspects (great name for a band BTW) – eggs and milk. So, why not caramelized onion instead of the normal green onions, a touch of garlic, some Dijon mustard and black pepper for savory, a tiny pinch of cayenne pepper for the personality component, and fresh spinach to add both color and nutrition. And there you have it. Use what you have on hand quiche.  

Now something you should also know. The crust recipe below is super easy to make. No mixer required. But in all honesty, it is not going to produce the flakiest crust you have ever tasted. But for quiche this crust recipe is perfect. It stays together when you lift it out of the pie pan and tastes great. But perfectly flaky it ain’t! So, feel free to use a different pie crust recipe if you should choose to do so.

OK class, what is your cooking lesson for today? Make quiche with what you have on hand and treat yourself and your family to one of the finest dishes ever conceived. And always remember – one of the best things about quiche – it’s a perfect dish to serve for breakfast, lunch, or dinner. And how many other dishes can truly make that claim?!

Well, that’s it for today. It’s still cloudy outside, with rain not predicted, but the clouds have assumed a threatening perspective regardless of what the weather folks have to say.

So, I am going to stay inside and read, write, and generally hide from the world until it is time to go hear a local band – The Usual Suspects (not to be confused with eggs and milk) perform this evening. This will be our first time hearing this band. And I can’t wait because I already know the drummer (Chris Leighton) is one of the best drummers in the area. And the band comes highly recommended by our dear friends and neighbors Mark and Vicki who are also going to be in attendance.

So, I look forward to a night of great music, my dear husband by my side and not on the bandstand, good friends to share the evening with, and the consumption of a dinner I didn’t prepare myself. Can life get much better than this?

And as always – peace and love to all.   

For the crust:

2 c. unbleached all-purpose flour   

heaping ½ tsp. salt

1 tsp. granulated sugar

scant ¼ tsp. baking powder

7 T. melted unsalted butter or vegetable oil

¼ c. cold water + 1 T. if the mixture seems dry

Whisk the flour, salt, sugar, and baking powder together. Whisk the butter and ¼ cup cold water together. Pour over the dry ingredients. Stir until the dough is evenly moistened. (I use a regular table knife to stir the ingredients together.) Add an additional tablespoon of water if necessary.

Pat the dough across the bottom and up and a little over the sides of a 9-inch pie pan. Crimp or mold the pie crust around the edge to make it pretty.  

Bake in a pre-heated 400-degree oven for 12 minutes. Remove from oven and let cool while you prepare the filling for your quiche. Reduce oven temperature to 350-degrees.

For the filling:

2 T. unsalted butter

1½ c. diced Canadian bacon

½ yellow onion, chopped

1 garlic clove, finely minced

1 c. grated Swiss cheese

½ c. grated Manchego cheese (or more cheddar cheese)

1 c. grated sharp cheddar cheese

1½ c. whole milk (part half & half is great)

1 tsp. Dijon mustard

freshly ground black pepper

tiny pinch cayenne pepper

5 lg. eggs

1 c. chopped fresh baby spinach

Heat the butter in a small frying pan. Sauté the Canadian bacon pieces for about 3 minutes. Using a slotted spoon or spatula, remove the bacon to a small bowl. Set aside.

Add the chopped onion and cook over low heat, stirring frequently, until the onion is soft and starts to become a light golden brown, 20–30 minutes. Add the garlic and cook for 1 minute.

Scatter bacon pieces over the partially baked pie crust. Combine the three different kinds of grated cheese and layer 2/3 of the cheese mixture on top of bacon. Scatter caramelized onion evenly over the cheese.

Whisk the milk/half & half, Dijon mustard, black pepper, cayenne pepper, and eggs together. Pour mixture into the pie pan. Sprinkle the spinach and remaining cheese mixture evenly overall.  

Hint: to keep your pie crust edge from getting too brown while baking, cover with thin strips of aluminum foil.

Bake in a pre-heated 350-degree oven until the filling is set, about 50-55 minutes. Remove from oven and allow to cool for 5 minutes before serving.

BAKED NEW ORLEANS STYLE BEIGNETS (AND BEYOND)  

Top picture, beignets just out of the oven. Second picture, after sprinkled with powdered sugar.

Just so you know, New Orleans style beignets are different from classic French beignets in that the dough for New Orleans beignets includes yeast to help the dough rise. True French beignets are a choux pastry (no yeast) that relies on moisture content instead of yeast to facilitate rising. (And yes, Café du Monde uses yeast in their beignet dough. And of course, they deep fat fry their beignets, and serve them hot out of their oil bath liberally sprinkled with powdered sugar. But we aren’t going in that direction today. Except for the powdered sugar sprinkling. We are all in on that part!)  

Now, if you are not familiar with beignets, allow me to elucidate. Beignets are a type of donut, but with a bit more of a yeast risen texture. And the flavor on the inside is not as sweet as a traditional donut. Which I especially appreciate. But for some, beignets are not as sweet and therefore not as well-known or well-loved as glazed or frosted donuts.

So, in order to make everyone happy, I have given you the recipe for baked beignets topped with powdered sugar. But for those of you who prefer a sweeter overall flavor, I have provided 3 topping recipes to sweeten these basic donuts up a bit. So, below you will find my recipes for Vanilla Glaze, Spiced Rum Glaze, and my crazy good Maple Frosting. If choosing one of these options or your own favorite topping, no need to brush with melted butter and sprinkle with powdered sugar. Just let the baked squares (or your choice of shape) cool completely before adding the glaze or frosting.  

The difference with this recipe from other recipes for beignets is not the ingredients in the dough, but the method of turning them from dough into an edible product. In this happy journey to beignet/donut paradise, there is no hot oil used in the making of these tasty morsels. Your oven fulfills that responsibility. Plus, you can choose to make the dough the day before or the same day. Whichever method works best for you. And wait until you read how easy the dough is to prepare. You are going to be blown away. (Hopefully towards your kitchen.) Because this simple recipe makes for some extremely delicious treats that everyone you serve them to is going to love.

One thing I should mention however, which is true for either baked or fried beignets or donuts; they are at their best the day they are made. So, plan to serve them the same day or if that isn’t possible, gently warm them the next day. But be prepared to re-sprinkle them with more powdered sugar. (Like that’s a bad thing. Not!)

So, without further ado (drum roll please), welcome to the world of baked beignets. Or baked glazed or frosted donuts. Regardless of which way you go, you are in for a new and (slightly) healthier way to enjoy a donut.     

As always, peace and love to all.

¾ c. lukewarm water

¼ c. granulated sugar

1½ tsp. active dry or instant yeast

1 lg. egg

½ c. buttermilk

4 T. (½ stick) unsalted butter, melted, divided   

½ tsp. kosher salt

2 tsp. vanilla bean paste or vanilla extract

3½ to 3¾ c. unbleached all-purpose flour, fluffed, or a tiny bit more as needed

veggie oil (for greasing the mixing bowl)

1 T. milk

powdered sugar (for dusting)

In the bowl of your stand mixer, combine the water, sugar, and yeast with your dough hook and stir until well combined. Let sit for about 10 minutes or until the yeast starts to get foamy on the surface. 

Add the egg, buttermilk, 3 tablespoons of the melted butter, salt, and vanilla; mix to combine. Add 3½ cups of fluffed flour and stir on medium-low speed until the dough comes together. The dough should be slightly sticky to touch, but a bit of the dough should still be sticking to the bottom of the bowl. (Resist the urge to add too much flour.) Then turn on medium speed and knead for about 5 minutes.

Pour a small amount of oil into the mixing bowl, and using your hands and a stiff rubber spatula, form the dough into a ball lightly coated with the oil. Cover with plastic wrap.

To bake beignets the same day:

Let the dough rise until doubled in size. (About 2 hours.)

Roll dough to ¼-inch thickness and cut into 1½-2-inch squares. (This is easy to do with a pizza cutter.)

Place the squares on baking sheets lined with parchment paper 1-inch apart. Let the dough rise for about 60 minutes or until the dough is puffy and about doubled in size.

Brush each square lightly with milk and bake in a pre-heated 350-degree oven for about 15 minutes, or until very lightly browned. Don’t overbake.

Remove from oven and while the beignets are still warm (after about 5 minutes), brush them with remaining melted butter and generously dust* with powdered sugar. If possible, eat while still warm.

To bake beignets the next day: Place the covered mixing bowl in the refrigerator overnight. The dough will double or triple in size while it’s in the fridge. Remove from the fridge at least 45 minutes before you plan to roll out and cut the dough.  

On a lightly floured surface, roll the dough to ¼-inch thickness and cut into 1½-2-inch squares. (This is easy to do with a pizza cutter.)

Place on parchment paper lined baking sheets at least 1-inch apart. Let the dough rise for about 60 minutes or until the dough is puffy and about doubled in size.

Brush each square lightly with milk and bake in a pre-heated 350-degree oven for about 15 minutes, or until slightly browned. Don’t overbake.

Remove from oven and while the beignets are still warm (after about 5 minutes), brush them with remaining melted butter and generously dust* with powdered sugar. Eat while still warm.  

Please note: If you don’t plan to eat all the beignets in one sitting, warm them in your microwave for about 10 seconds just before serving. Then sprinkle with more powdered sugar if necessary.

*An easy way to sprinkle/dust powdered sugar is to place a small amount in a fine mesh strainer and then shake the strainer over whatever you wish to decorate. This same technique works well with cocoa for chocolate dusting. 

VANILLA GLAZE

2 c. powdered sugar 

⅛ teaspoon salt

1 tsp. vanilla bean paste or vanilla extract

5-6 T. whole milk or cream

Whisk all the ingredients together in a medium bowl until smooth.

Place the beignets on a wire rack over a baking sheet. Coat the beignets with the glaze by dunking each one into the glaze. Place back on the wire, glazed side up, to set completely before storing in an airtight container.

SPICED RUM GLAZE

1 c. powdered sugar

1 tsp. rum

tiny pinch cinnamon

tiny pinch nutmeg  

2–3 T. whole milk

In a small bowl, whisk the powdered sugar, rum, cinnamon, nutmeg, and 2 tablespoons milk together. If needed, add more milk to achieve desired consistency.  

Place completely cooled beignet pieces on a large baking sheet. Drizzle on the glaze. Allow glaze to harden before storing in an airtight container.

MAPLE FROSTING

2 T. unsalted butter

¼ c. brown sugar, packed

2 T. whole milk

1½ tsp. corn syrup

1 tsp. good maple extract

1 c.  powdered sugar

In a small saucepan, melt the butter, then whisk in the brown sugar. When the brown sugar starts to dissolve whisk in the milk and simmer for about 3 minutes over medium heat, stirring continuously until the brown sugar is completely dissolved.

Remove from heat and whisk in the corn syrup and maple extract. Then whisk in the powdered sugar until the frosting is smooth and free of powdered sugar lumps.

Using a large spoon, ladle frosting onto each cooled beignet piece.

Warning: Work quickly or the frosting will start to set up before you get to the last piece. (Take my word for this!)

QUICK AND EASY BAKED MAPLE BARS

I’m sure I’ve mentioned my addiction to maple bars somewhere along the line in one of my stream-of-consciousness introductions to a recipe. But if not, let me state unequivocally – I LOVE MAPLE BARS. And have since 4th grade when right across the street from our hilltop grade school in Bothell, Washington (can’t remember the real name of the school) was a small convenience store that sold among other things, maple bars. (I actually have no idea what other items were sold in the store because I was mainly interested in the maple bars. I do have a vague recollection that there were candy bars and ice cream bars available too. But if there was anything else that didn’t resemble something sweet that a kid could put in their mouth, I’m not at all sure what that would be!) And if I recall correctly, the maple bars were a great whacking 5 cents. So, as often as I could, I availed myself of those scrumptious treats. And I have adored them ever since.

Now don’t get me wrong. I have literally gone years without a maple bar coming anywhere near my mouth. But as I’ve gotten to the stage of life when my remaining years are far less than the exceedingly large number of years I’ve already experienced, I’ve come to the conclusion that denying myself the pleasure of a maple bar now and then is ridiculous. Thus, my decision to learn to build my own maple bars in the privacy of my own kitchen!

The first thing I wanted to perfect was the dough for a fabulous donut like base for the frosting. And then of course, figure out how to make the maple frosting just like it’s made in bakeries. And believe me, I’ve tried making maple frosting several times throughout the years. And although the previous tries were OK, they were not what my 9-year-old mouth remembered. Until today, that is!  

And truly I don’t remember where I originally found the bones for the frosting recipe. But I messed with the original recipe a bit, and by golly, the kid buried deep within me, was doing cartwheels right in our living room after the first bite. OK, mental cartwheels, but if I were still 9 years old, it would be the real thing!

So, if you too or someone you love has a maple bar addiction, let me introduce you to this quick and easy recipe. The dough is baked not deep fried, so there is a bit of redemption in that regard. However, the frosting is sinfully sweet and has absolutely no healthy redeeming qualities. It is just pure heaven. And definitely should be classified as a guilty pleasure.

Well, that’s it for today. It’s still off and on drizzling outside so I can’t work off any of the calories I took in while savoring today’s maple bar. But hopefully tomorrow I will be able to do more hacking and slashing of shrubs that have become an impediment to anyone wanting to get to our front door or onto our deck. Mainly because my plan is to have another maple bar tomorrow morning along with my over easy egg.

And as always, peace and love to all.  

¾ c. whole milk

3 T. unsalted butter

2 T. granulated sugar  

1 tsp. kosher salt

2 T. warm water  

1 pkg. or 1 scant T. instant dry yeast  

1 lg. egg

2½ c. unbleached all-purpose flour, plus more as required

Scald the milk in a small saucepan. Remove from heat and add the butter, granulated sugar, and salt. Stir together and cool to just slightly warm.

In the bowl of your stand mixer add the yeast to the warm water. Add the cooled milk mixture and the egg. Stir together using the dough hook.

Add the flour and knead until the dough is soft and elastic. (You will probably need a good bit more flour. You want the dough to pull away from the sides of the mixing bowl, but still leave a bit stuck to the very bottom of the mixing bowl. The dough will be soft to the touch but not at all tacky. Cover the bowl with plastic wrap and let rise for 1 hour.

Punch down and pat out into a 1″ thick square on a floured surface.

Cut into 8-10 rectangles and let rise again covered for about 30 minutes on a parchment paper lined baking sheet.

Bake in a pre-heated 425-degree oven for 7-8 minutes or until light golden brown. Do not overbake.

Remove from oven and allow to cool for a few minutes before spreading with the Maple Frosting. Then cool the frosted bars completely before eating or storing in your fridge or freezer.

Please note: I start making the frosting as soon as the bars are out of the oven. If you prepare the frosting too far ahead of time, it will be too hard to spread nicely and evenly on the cooling bars.

MAPLE FROSTING

¼ c. unsalted butter

½ c. brown sugar, packed

3 T. whole milk

1 T. corn syrup

2 tsp. good maple extract

2 c.  powdered sugar

In a small saucepan, melt the butter, then whisk in the brown sugar. When the brown sugar starts to dissolve whisk in the milk and simmer for about 3 minutes over medium heat, stirring continuously until the brown sugar is completely dissolved.

Remove from heat and whisk in the corn syrup and maple extract. Then whisk in the powdered sugar until the frosting is smooth and free of powdered sugar lumps.

Using a large spoon, ladle frosting onto each warm bar.

Warning: Work quickly or the frosting will start to set up before you get to the last bar. (Take my word for this!)

Please note: This makes a lot of frosting. You may not need all of it. If so, refrigerate the remaining frosting and see what kind of inventive use you can come up with for the rest.