I love puttanesca, but when you plan to serve it to a small army, serving the sauce over perfectly cooked pasta is for a cook with a lot better kitchen skill set than I possess! So what to do? Well, since I was already preparing a béchamel sauce for one of the other pasta dishes I was serving, I thought “what the heck”, why not make a puttanesca casserole too. So that’s just what I did. And it turned out pretty darn good. So that is the genesis of this recipe. (I tell you, necessity is indeed the mother of invention!)
I was slightly worried that the pasta bake would be too rich. But given that there is no meat in a puttenesca sauce, and a sharp bite from the Kalamata olives, capers, and red pepper flakes, it was just right. Of course the three different cheeses didn’t hurt either. They just helped with the creamy part. So all and all, a good dish to serve a crowd. And you can make it ahead of time. (The only way I can feed 30 some people at 1:00 in the afternoon!)
So if you like puttanesca and would like to serve it as a casserole, give this recipe a go. It is perfect company food, although I don’t think Mr. C. is going to think of it in that way. (That man loves his pasta.)
I also plan to make this dish using an arrabiata sauce instead of puttanesca sauce. I see no reason why it wouldn’t adapt well to a pasta casserole with a béchamel sauce layer. For my recipe for arrabiata sauce, see Pasta with Arrabiata Sauce on this site.
So dear readers, as in all of my recipes, make them your own. If you already have a favorite puttanesca sauce recipe, use it in this dish. Or change my recipe any way you like. I promise I will not be offended. After all, that’s what I do with other people’s perfectly good recipes all the time. I just want to provide you with ideas to make your job as family cook easier. I know I’ve said it before, but good food is a wonderful way in which to let your family and friends know in how high a regard you hold them.
So spend time in the kitchen. Make it a pleasure rather than a chore. Try new recipes. Use fresh and healthy ingredients. Be creative. But most of all, have fun in your kitchen. After all, it really is the center of your home.
- 3 T. extra virgin olive oil
- 1 med. onion, chopped
- 4 garlic cloves, finely chopped
- ¼ tsp. dried red pepper flakes, or more to taste
- 2-oz. can anchovy fillets (or 10-12 fillets)
- 16 oz. can tomato sauce
- 16 oz. can diced tomatoes (preferably Italian)
- 18-20 Kalamata olives, sliced
- 2 T. drained capers
- 2 T. chopped fresh parsley
- 4 T. butter
- ¼ c. flour
- 2½ c. whole milk
- ¼ tsp. kosher salt
- freshly ground black pepper
- 1 c. grated provolone cheese
- 1½ c. grated Parmesan cheese, divided
- ¾ lb. penne or rigatoni pasta
- 1 c. shredded mozzarella cheese
In a medium covered saucepan, heat the olive oil and add the onion. Fry until the onion is translucent. Add the garlic and red pepper flakes. Sauté for one minute. Add the anchovy fillets and stir them around with the other ingredients until they are all mushed up. Add the tomato sauce and diced tomatoes, cover the pan, and simmer for about 15 minutes. Stir in the olives, capers, and fresh parsley. Remove from heat.
Meanwhile, melt the butter for the béchamel sauce in a heavy saucepan over low heat. Whisk in the flour and cook for 3-4 minutes or until the flour starts to turn a delicate golden brown. Slowly whisk in the milk and simmer until the sauce thickens and comes to a boil. Boil for one minute. Remove from heat and add salt, pepper, provolone cheese, and 1 cup of the Parmesan. Set aside.
Before cooking the pasta, have all the other ingredients prepped and ready to go. Cook the pasta in boiling salted water until al dente (firm to the bite). Remove from heat. Don’t drain. Leave the pasta in the water as you assemble the pasta bake. Remove the pasta as needed with a slotted spoon.
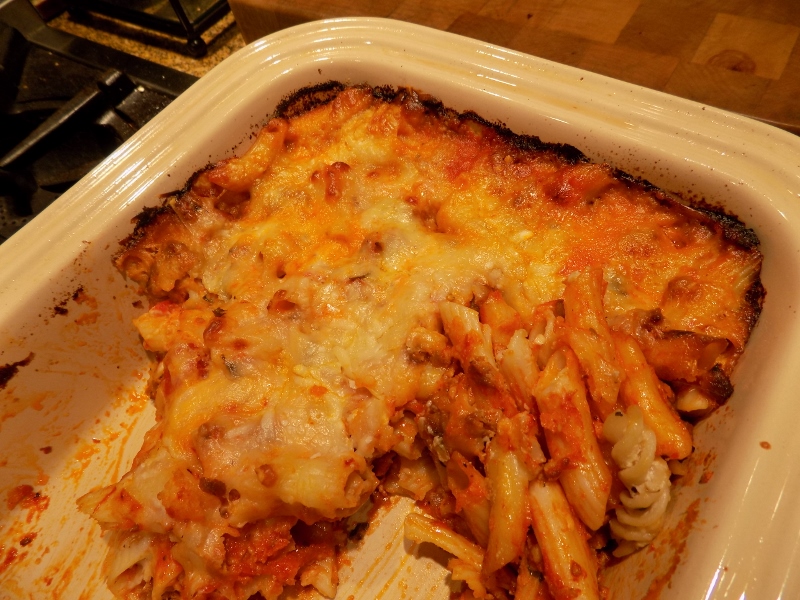
Spread just a smear of the puttanesca sauce on the bottom of a buttered 9×13-inch, fairly high sided casserole dish. Place 1/3rd of the pasta in a single layer on top of the sauce. Spread 1/3rd of the puttanesca sauce over the pasta. Spread 1/3rd of the béchamel sauce over the puttanesca sauce. Sprinkle 1/3rd of the remaining ½ cup Parmesan cheese and 1/3rd of the shredded mozzarella over the béchamel sauce. Repeat. For the final layer, add the remaining pasta, puttanesca sauce, béchamel, and cheeses. Cover the casserole with a piece of aluminum foil that has been sprayed with non-stick cooking spray.
Bake for 30 minutes in a pre-heated 375 degree oven. Remove the foil and bake for an additional 15 to 20 minutes, or until the pasta bake is bubbly and the cheese is completely melted and starting to brown. Remove from oven and let stand 8-10 minutes before serving.
Note: This dish can be assembled, covered, and refrigerated for up to 3 days before baking. It can be frozen for up to 1 month. Bring to room temperature before baking. (This takes about 1-3 hours, depending if the casserole has just been refrigerated, or if it is just out of the freezer.)