QUINOA WITH SAUTEED SHALLOT, GARLIC, DRIED MUSHROOMS, AND FRESH SPINACH

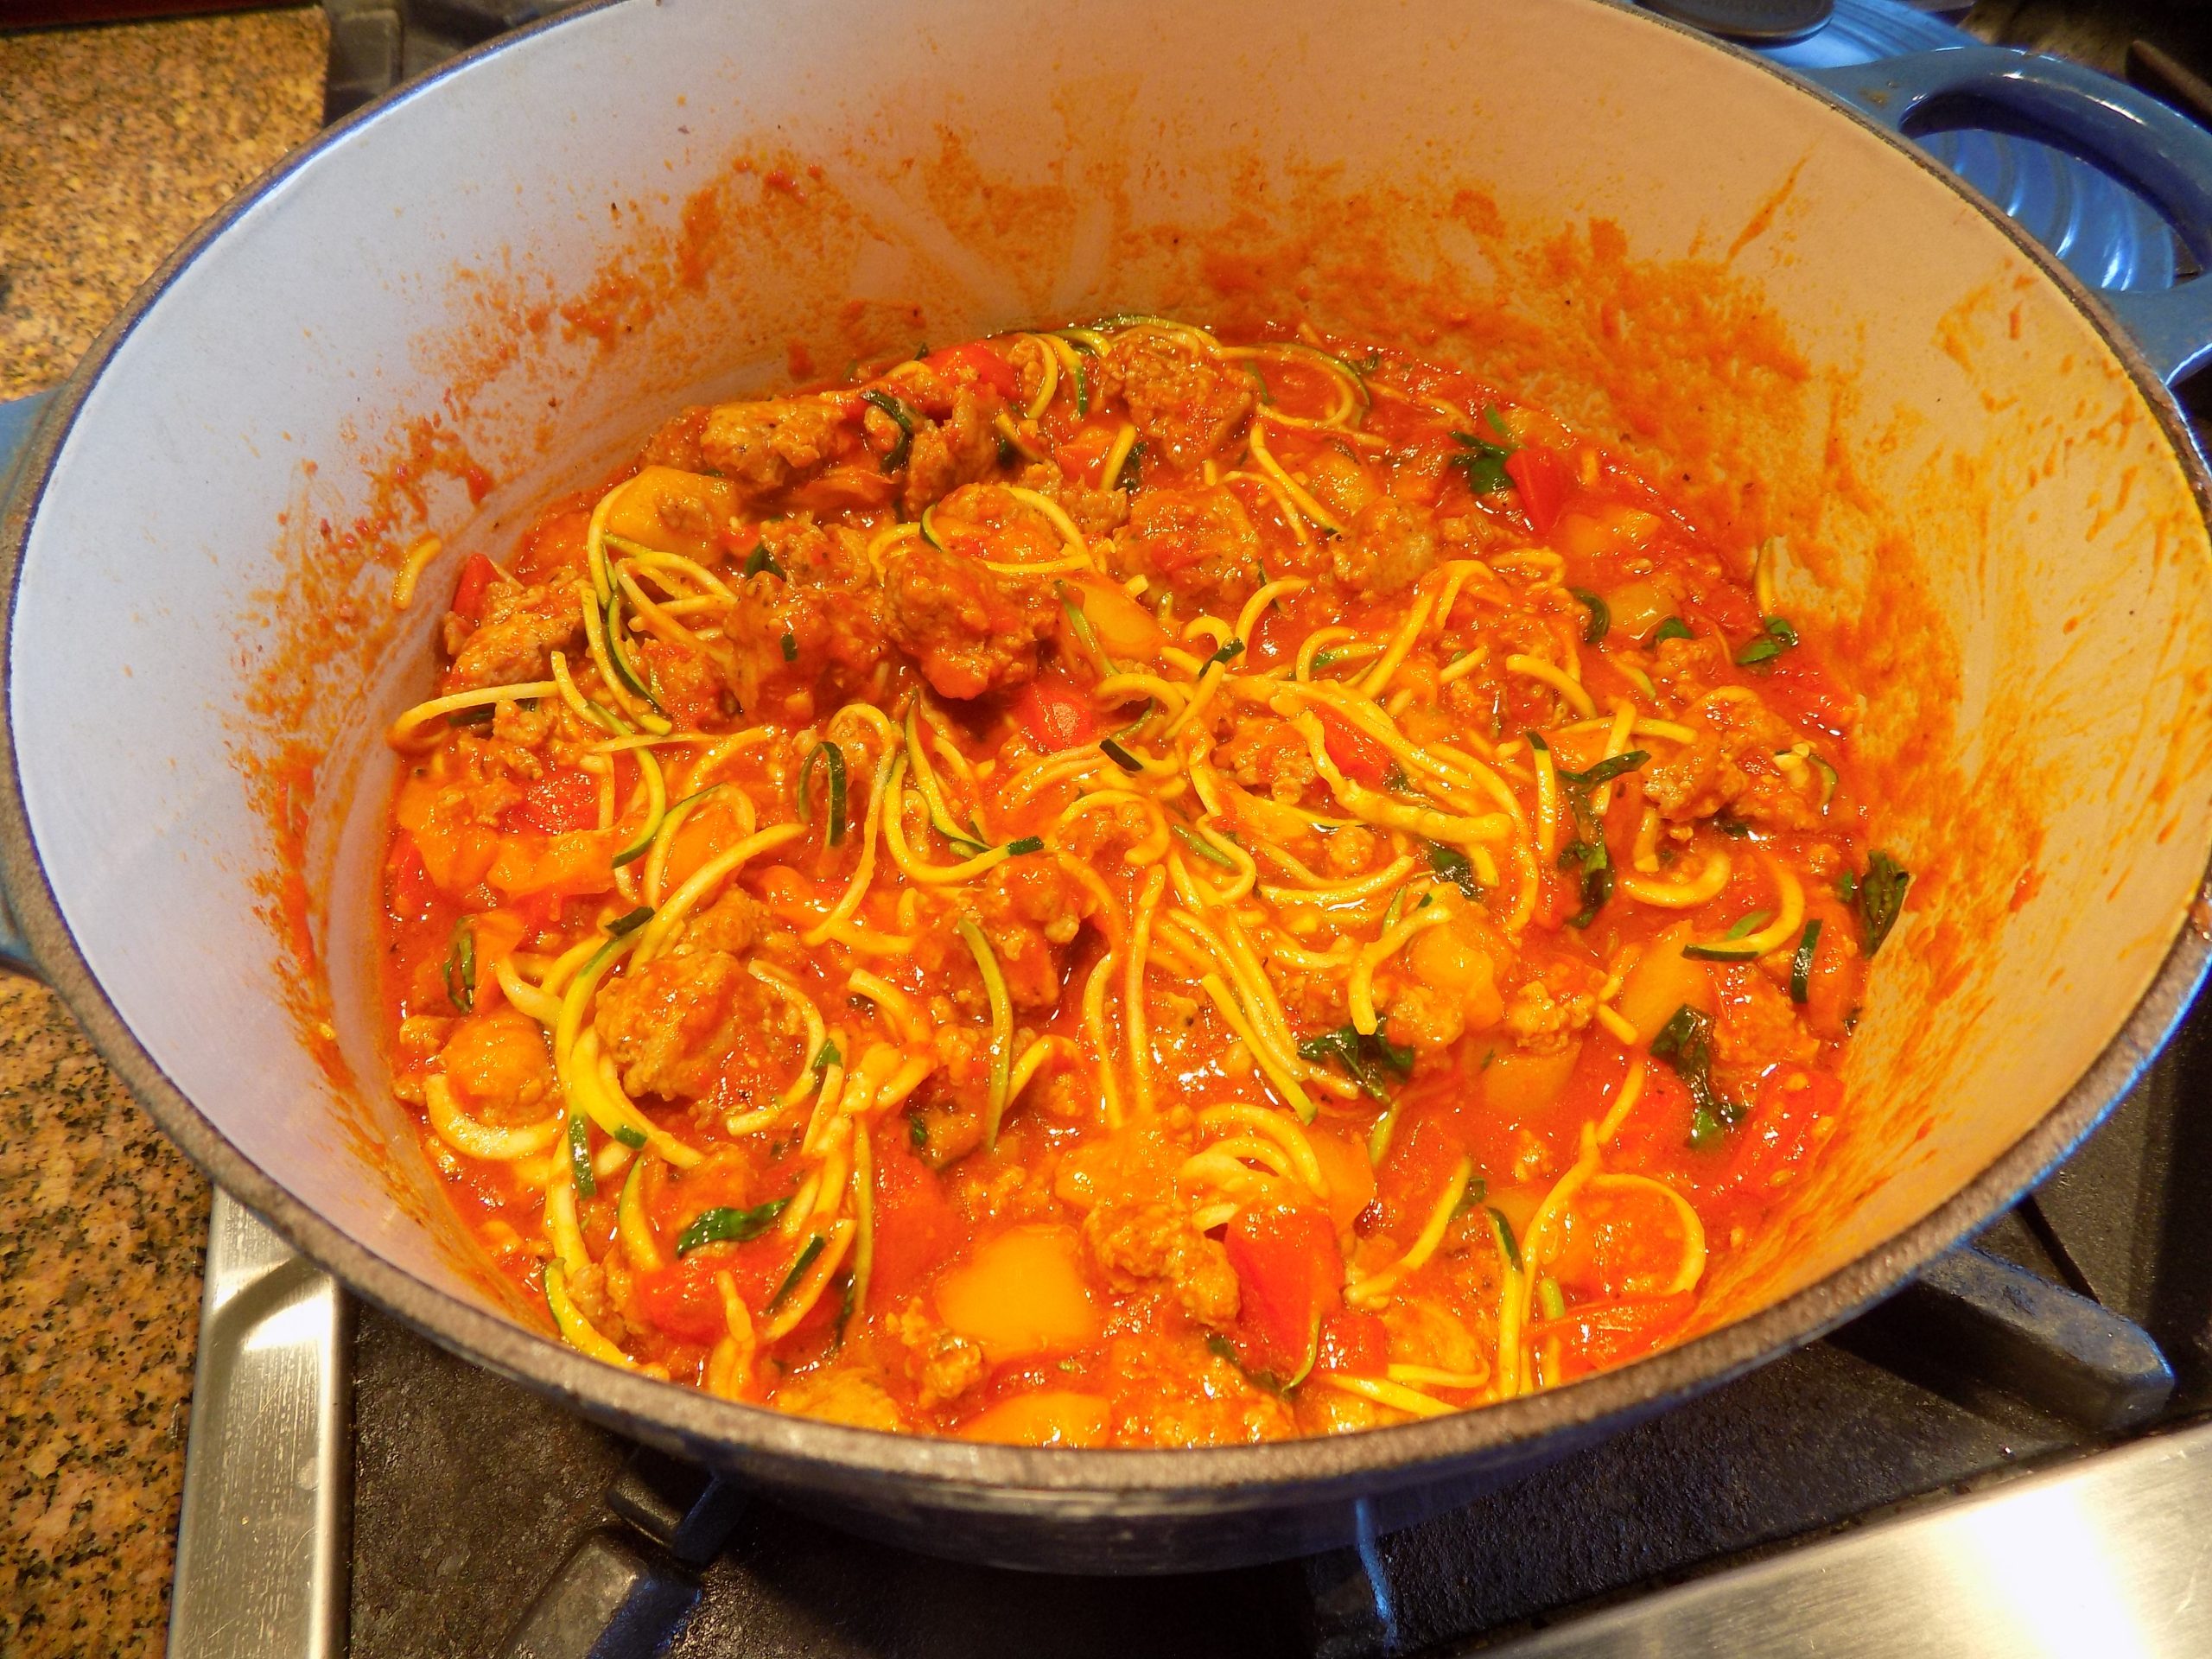
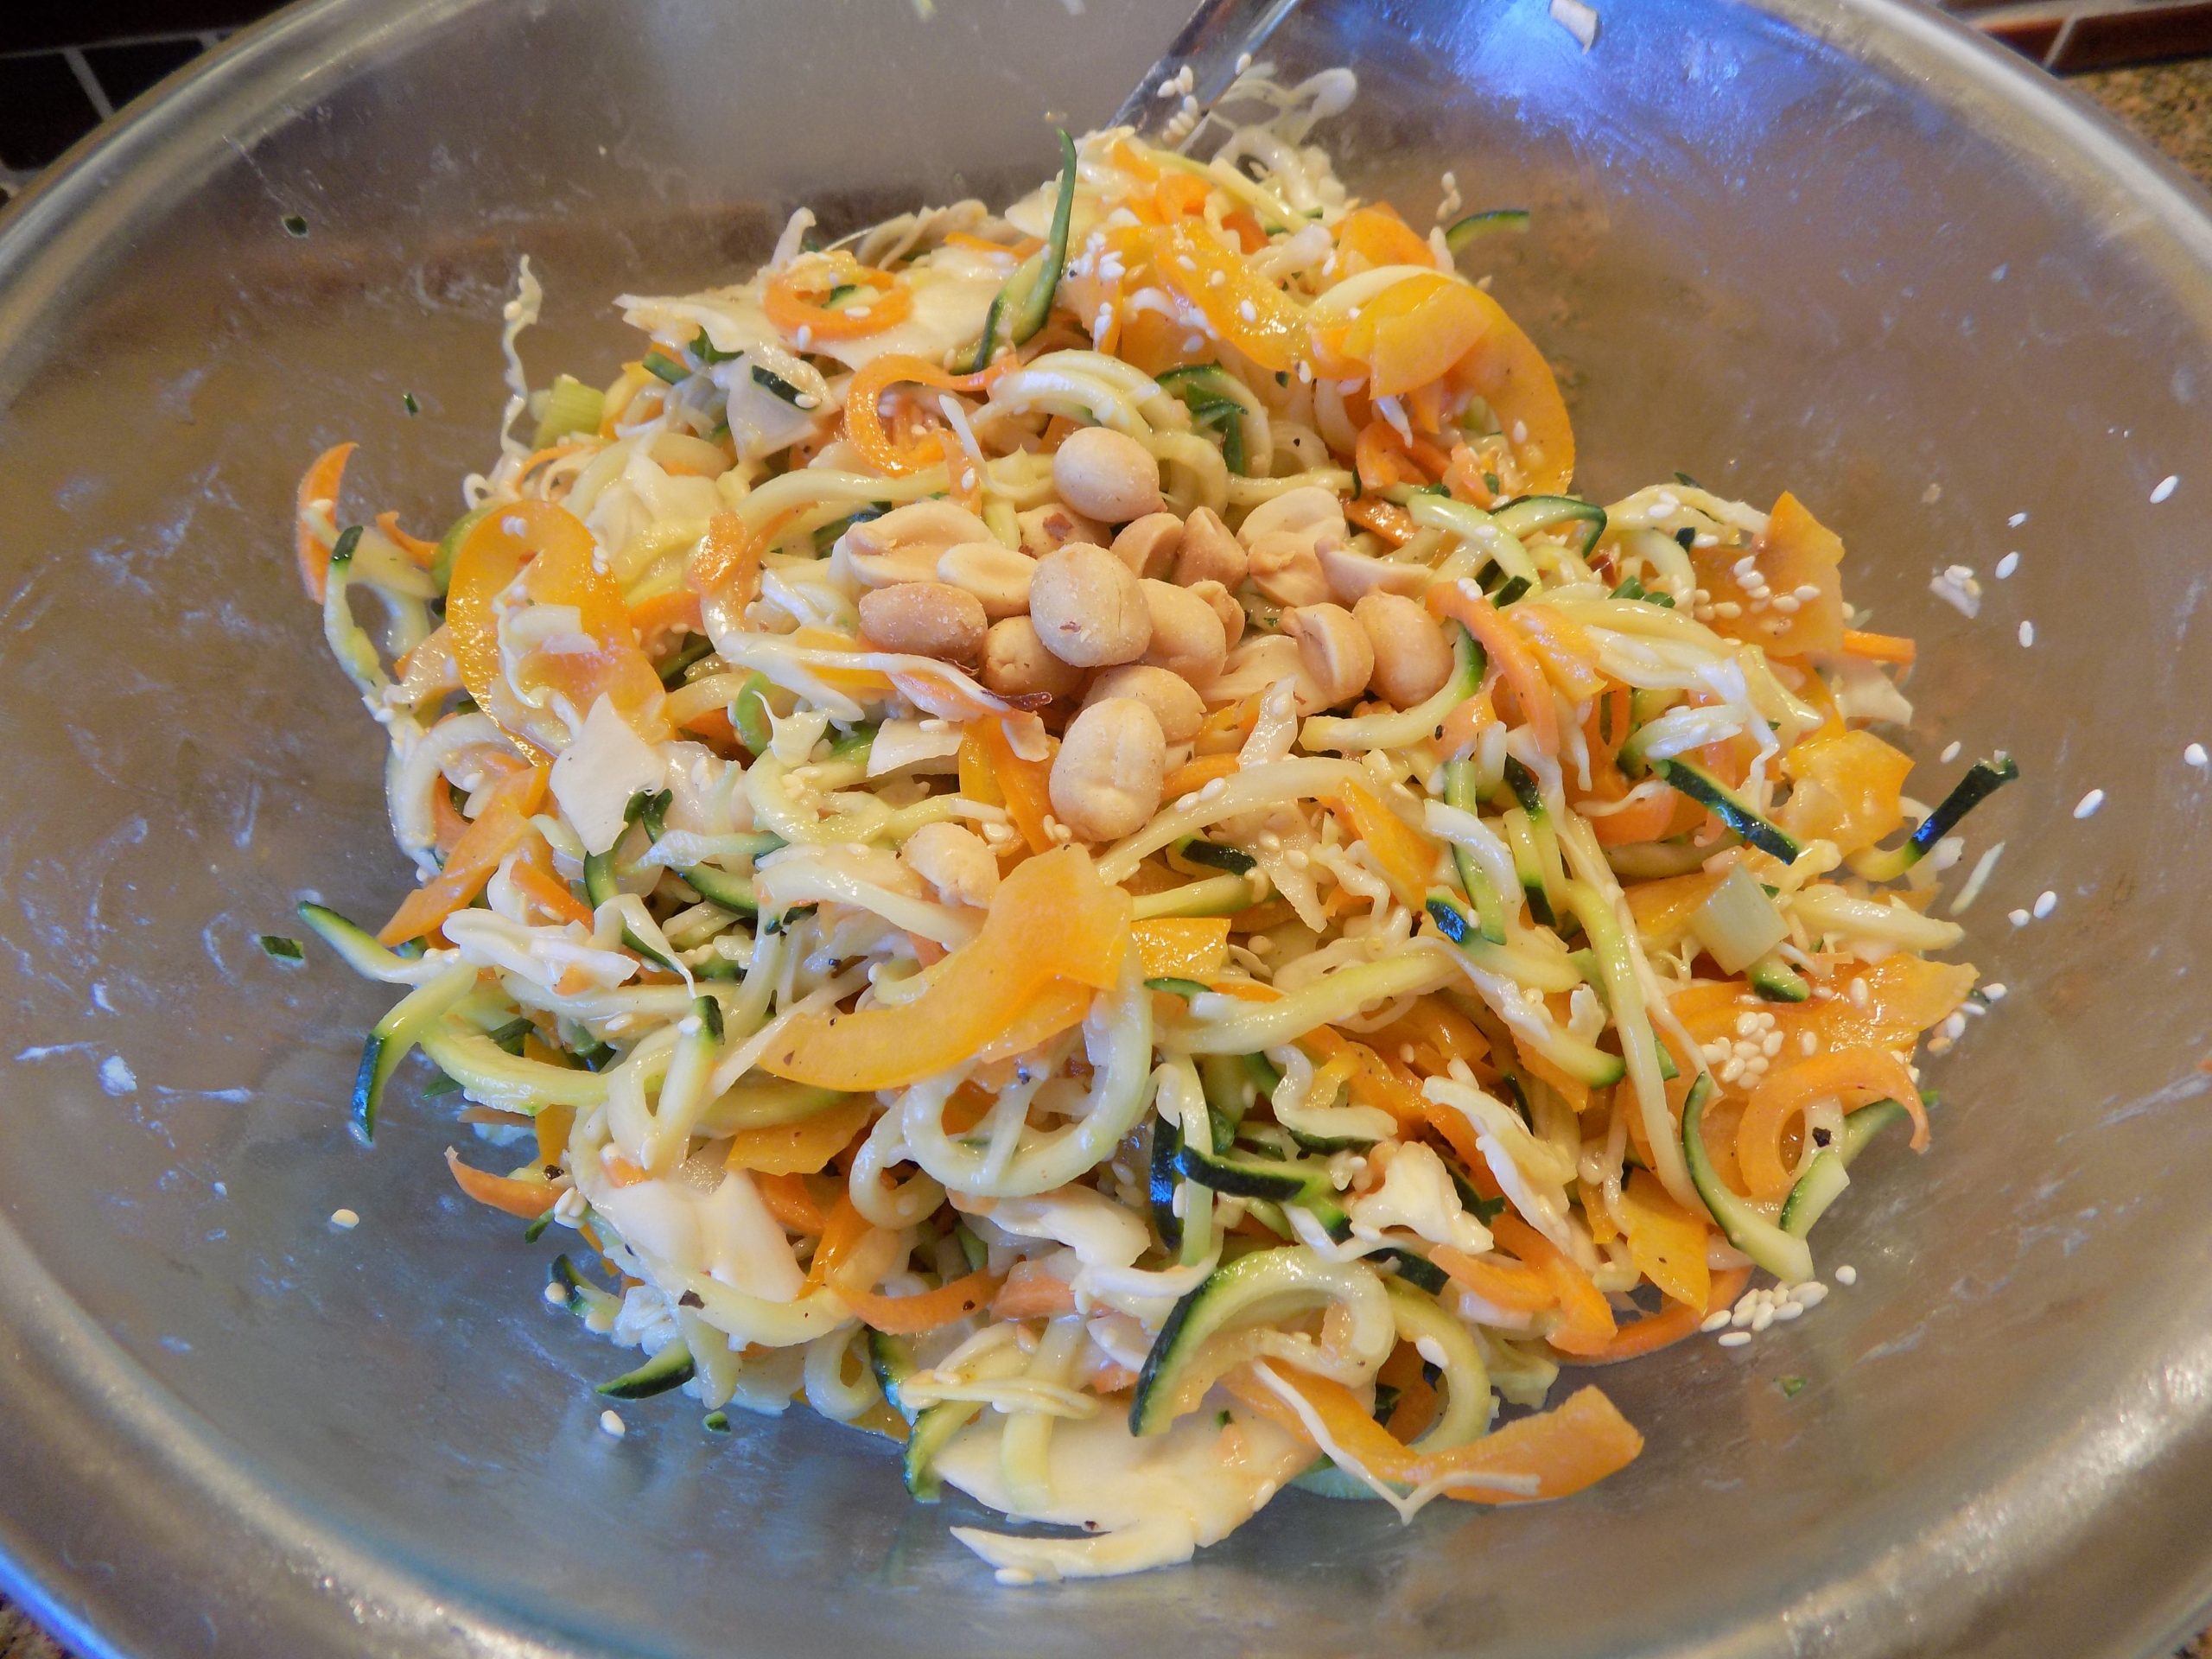
I try, really I do, to cook healthy food. Sometimes I go a little whacko and decide the only thing worth eating right at that moment is a Vanilla Glazed Cream Cheese Danish (recipe to follow BTW). But mainly I make every effort to keep to the healthy side of the scale. But for a person who loves savory, creamy, and tasty side dishes, it’s not easy. But then, I find a recipe like this one. And it contains all three of the components I love in a good side dish.

But I must confess. This recipe is not true to the original recipe I found on the damndelicious.net site, mainly because I didn’t have any fresh mushrooms on hand. But please note: If you have fresh mushrooms at your disposal, you can always substitute them for the rehydrated dried mushrooms called for in this recipe. Just slice them and fry along with the shallot.

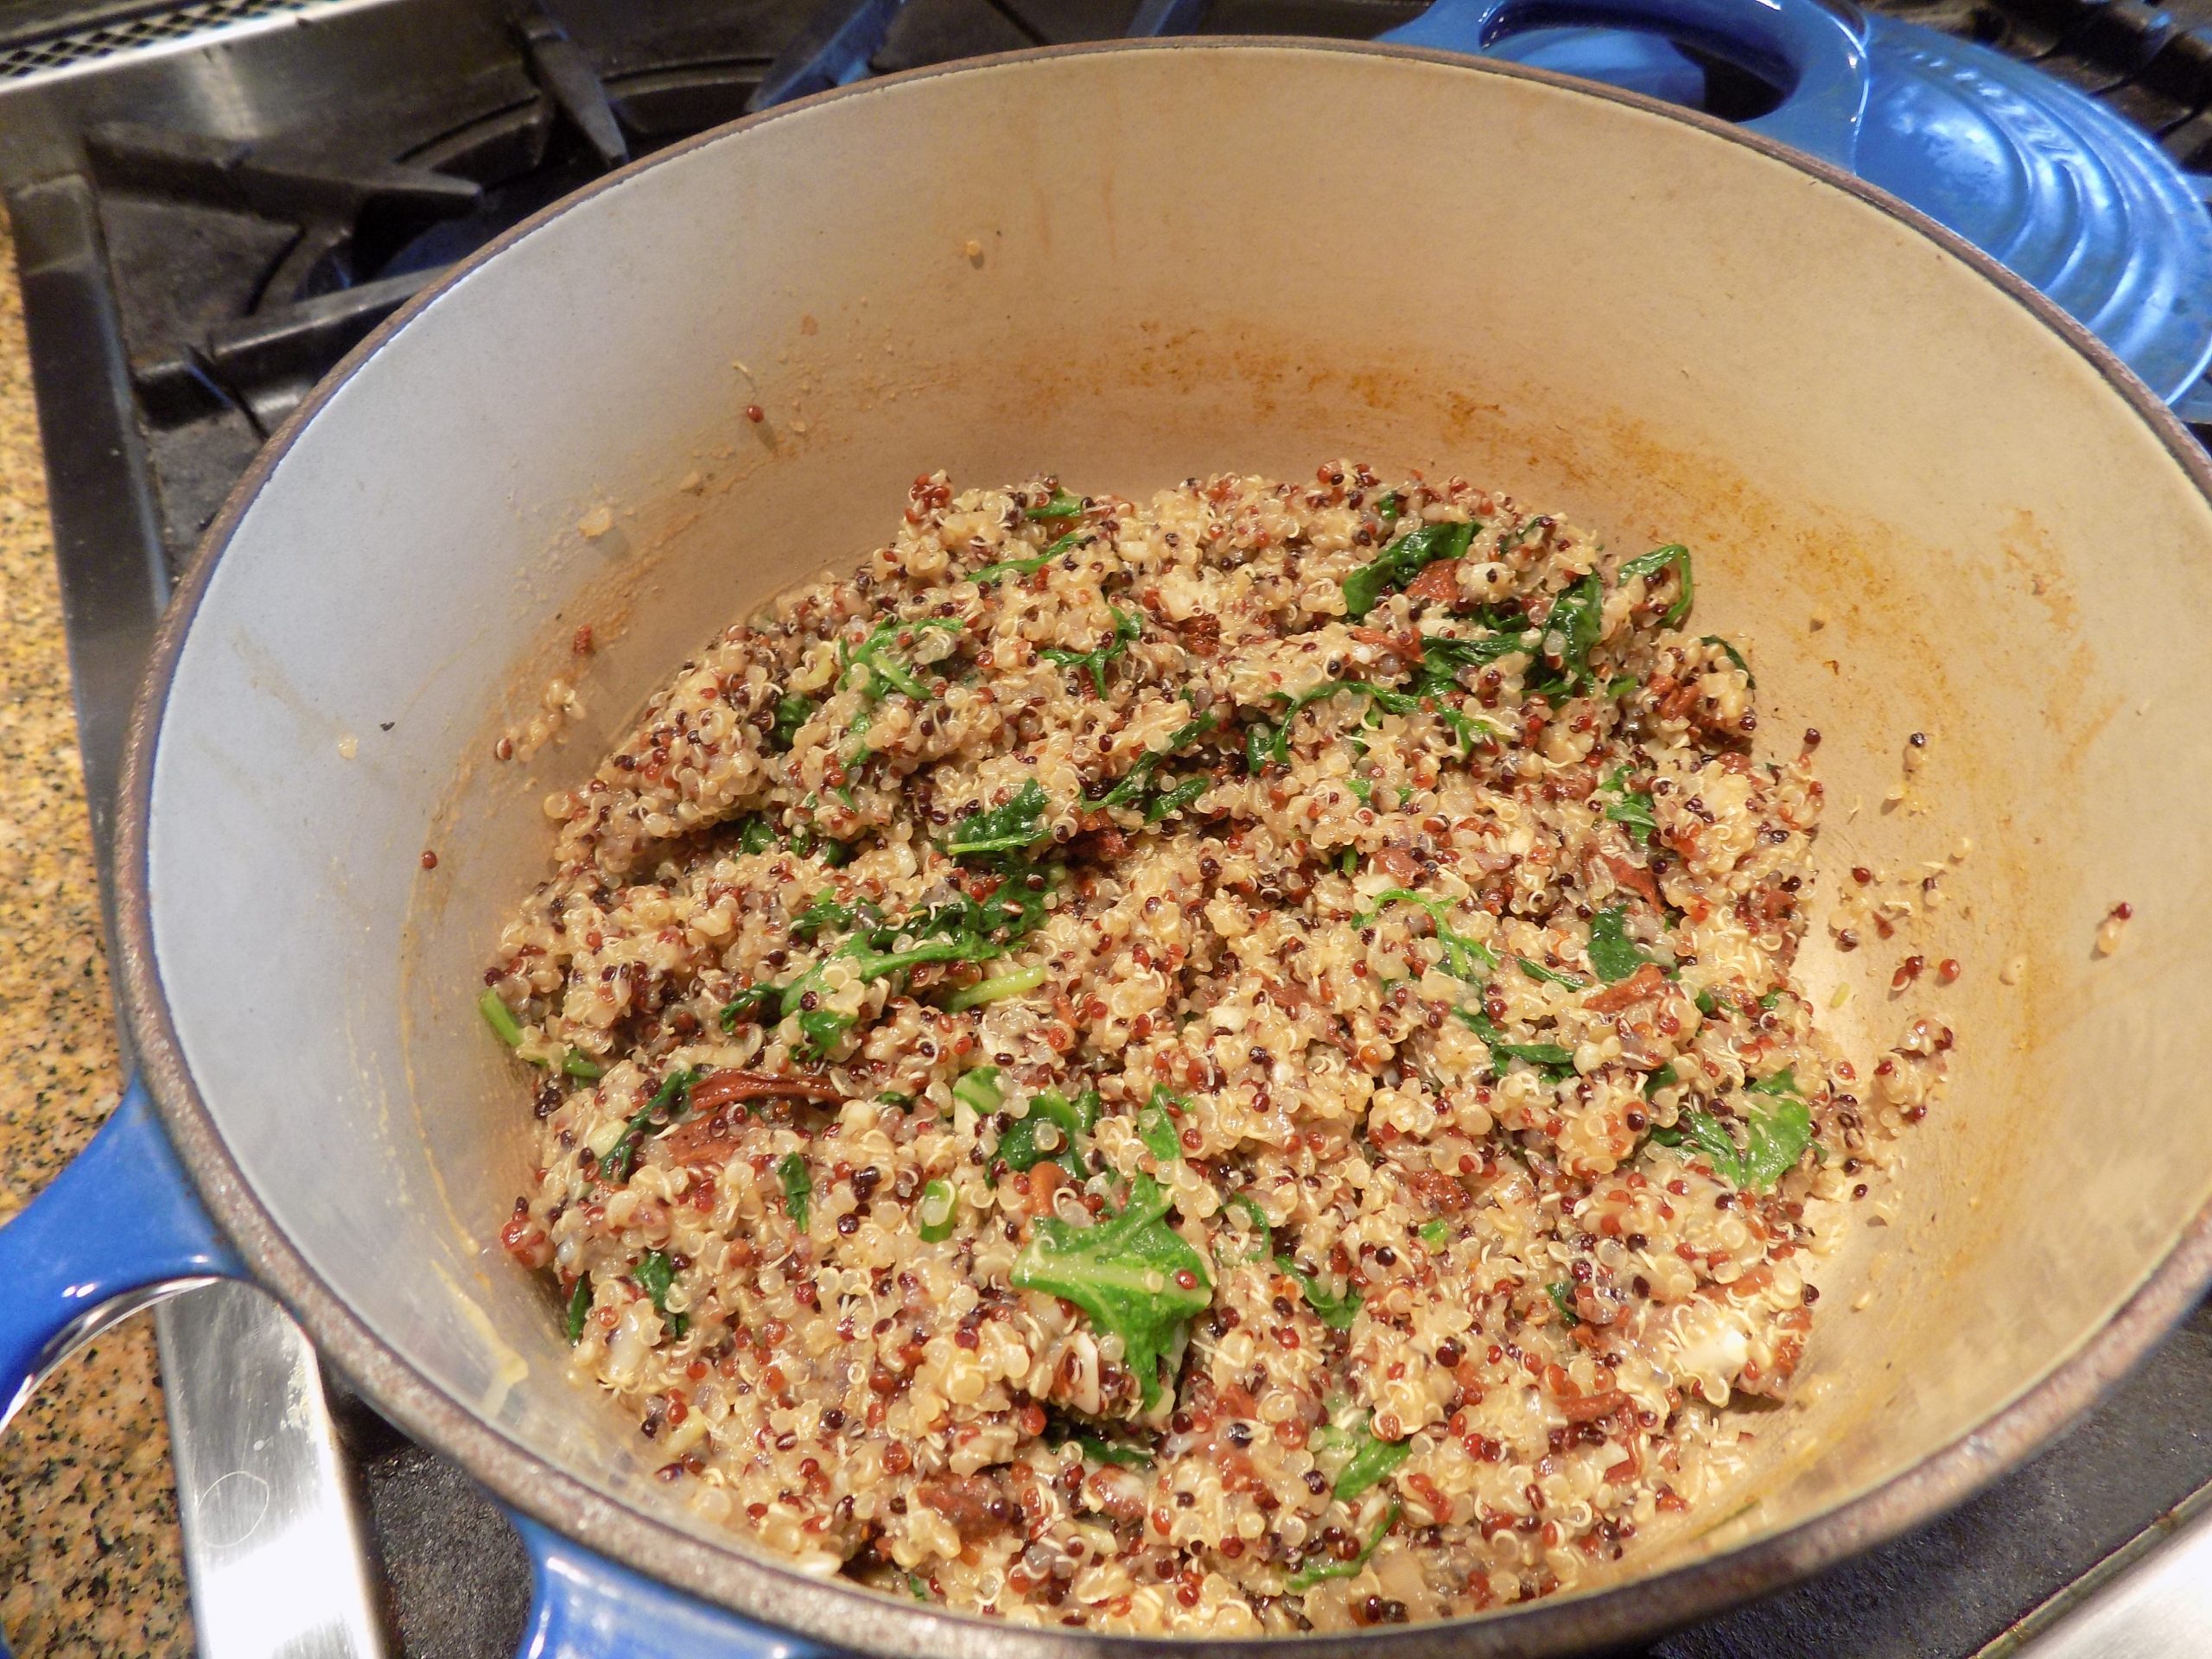
Speaking of the shallot, I thought adding shallot (or some kind of onion) to the mix would result in another layer of flavor. (And it did.) Along with cooking the quinoa in veggie stock instead of plain water. And then, why not throw in a couple cups of cut spinach to completely up the healthy quotient? (It’s what I do folks. I change recipes to fit my needs. And no, I can’t help myself!)

But I still want to give kudos to Chungah for the bones of this recipe and the inspiration to make it in the first place!

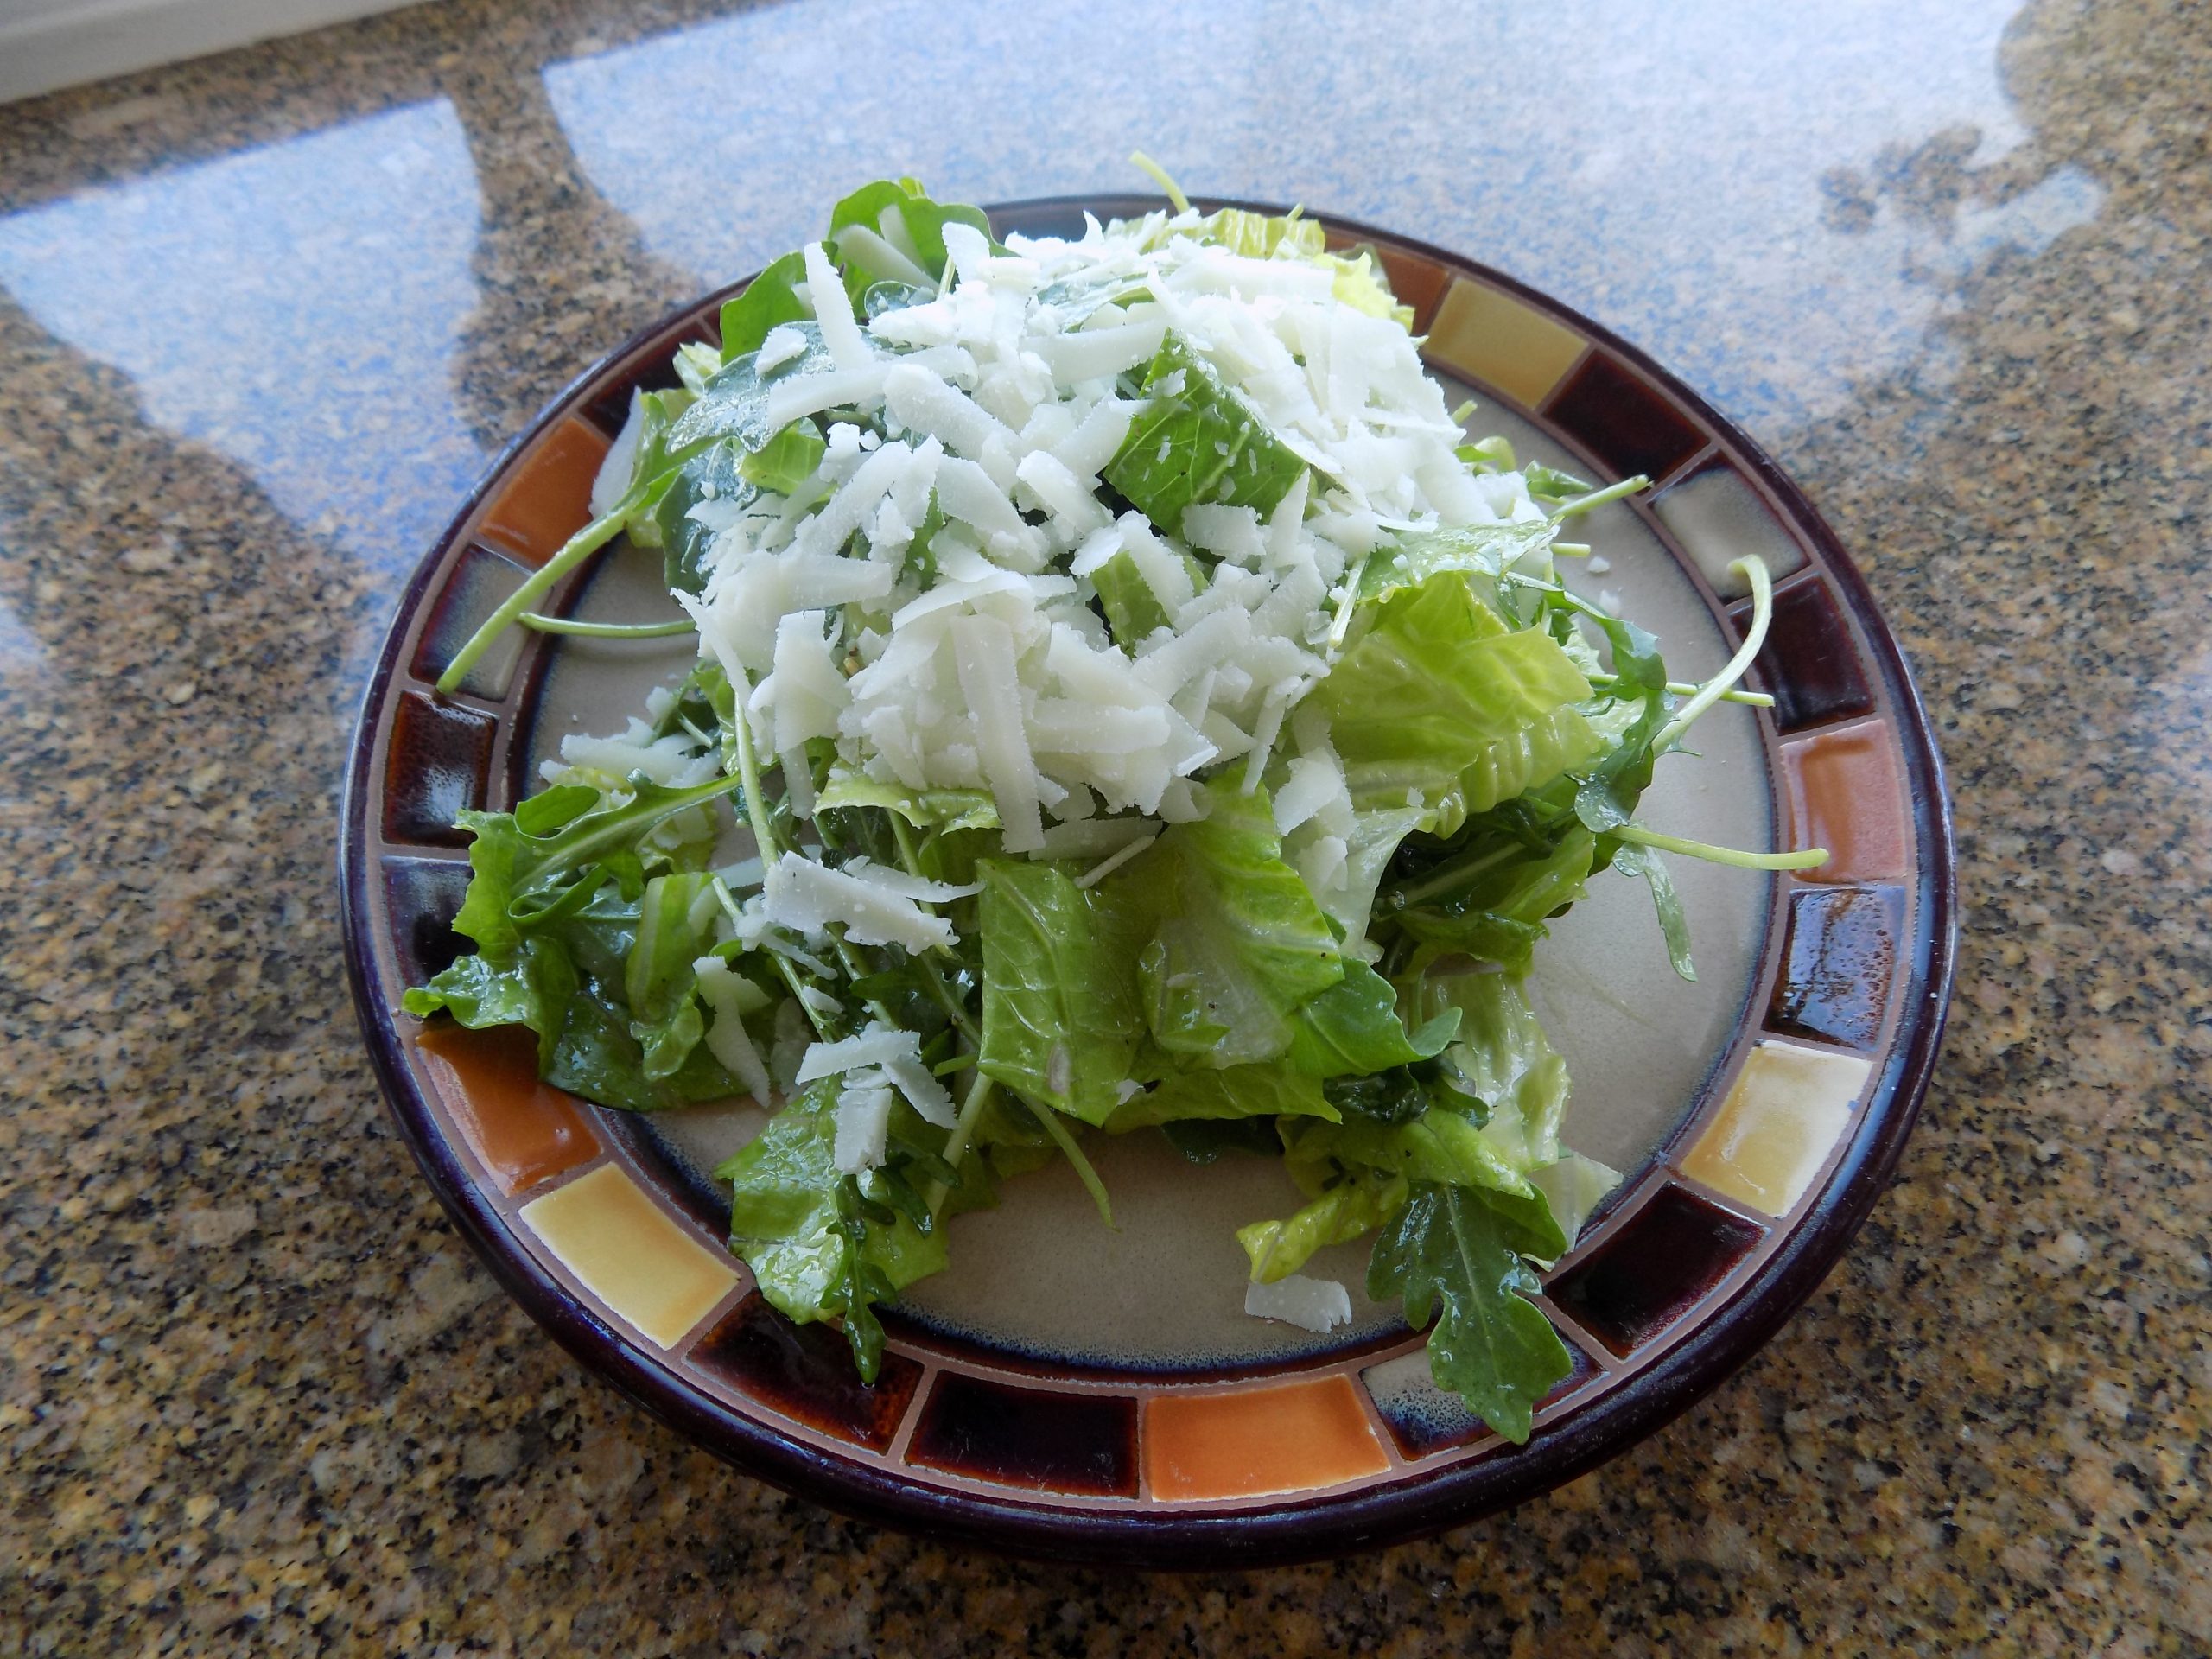
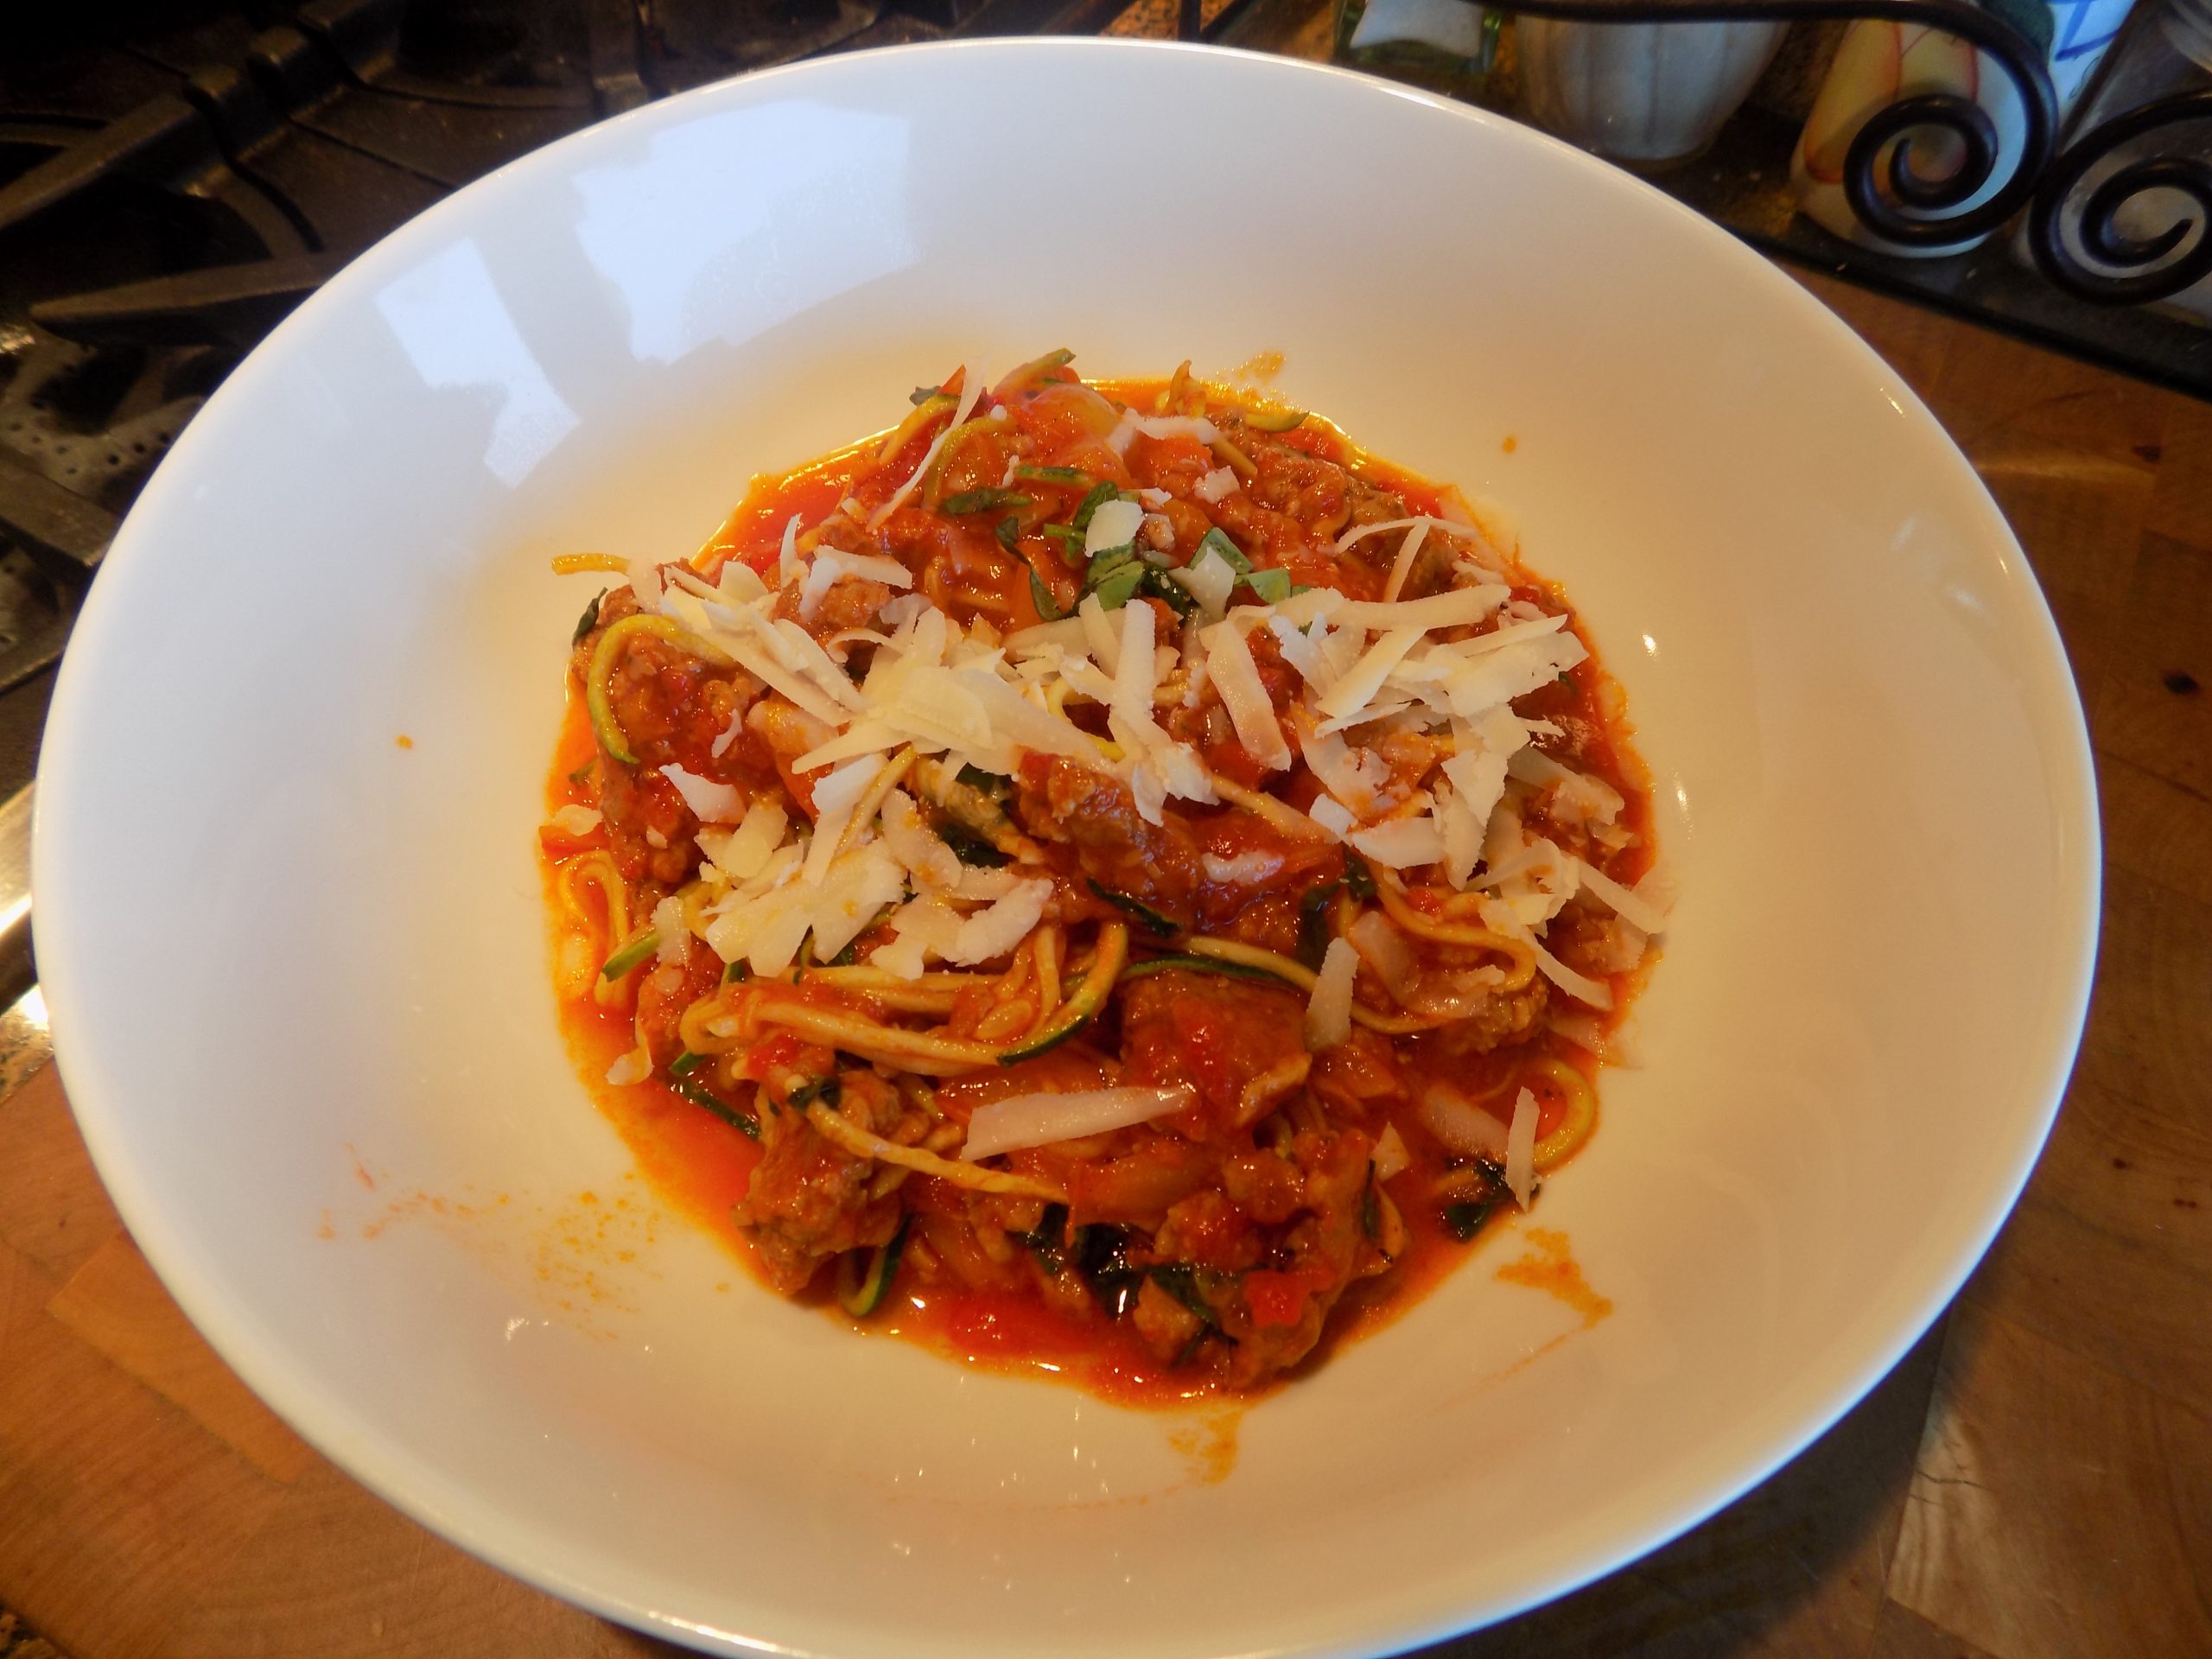
So, having said mostly what I wanted to say on the subject, all that’s left is to tell you that we really enjoyed this dish. It was easy to prepare, and terribly healthy. I served it with Grilled Marinated Lamb Chops (recipe to follow) and sliced tomatoes, topped with fresh basil chiffonade, extra virgin olive oil, salt, and pepper. Made for a lovely meal out on our deck even though we couldn’t see across the bay because of the heavy wildfire smoke drifting down from Canada. But we were outside, the temperature was pleasant, and my dinner companion (Mr. C.) was his usual appreciative, loving, and charming self. (I am one lucky lady!)

So, as always, make every effort to eat better. Try new dishes that focus on healthy ingredients. And use substitutions that reduce fat and carbs. And of course, the dish won’t taste exactly the same. But it will undoubtedly be a healthier option. And isn’t that what you’re after in the first place.

So, give spiralized veggies a try. Cook quinoa or brown rice instead of white rice. And don’t be above sneaking veggies and healthy ingredients into dishes you know your family loves.

When my kids were young, I always had a jar of wheat germ in the refrigerator. I would sneak a small amount into everything from cookie dough to meatloaf in my quest to get this nutrient rich product into their growing bodies. And even if it made no real difference health wise, I felt good about at least trying to help them grow to be healthy adults. And to this day, I have no idea whether they knew about the wheat germ or not. But even if they didn’t know at the time, they do now!   

Peace and love to all.

¼ c. small pieces of dried mushroom

¼ c. boiling water

2 c. vegetable broth

1 c. quinoa, rinsed several times under cold water* (I used Bob’s Red mill Tri-Color Quinoa for this recipe)

1 T. extra virgin olive oil

1 shallot, finely chopped

3 cloves garlic, finely minced

½ tsp. dried thyme

freshly ground black pepper

2 c. loosely packed sliced spinach

2 T. grated Parmesan, opt.

In a small bowl, stir the dried mushroom pieces and boiling water together. Set aside.

In a large saucepan, bring the vegetable broth to a boil. Stir in the rinsed quinoa and return to a boil. Cover, reduce heat, and simmer gently until all the water is absorbed, about 12 minutes. Remove from heat. Fluff, cover, and let stand for 15 minutes. Meanwhile prep the other ingredients.   

Heat the olive oil in a medium sized skillet over medium-low heat. Add the shallot and cook for about 4 minutes. Then add the garlic, thyme, and black pepper. Drain the mushrooms, then stir into the shallot mixture. Stir in the spinach.

After the quinoa has rested its prescribed 15 minutes, stir the veggie mixture into the cooked quinoa. Taste and adjust seasoning.

Serve immediately, garnished with Parmesan.

*Quinoa Caution: Quinoa is coated with a naturally occurring toxic substance called saponin.  So always rinse quinoa before cooking. Place the quinoa in a strainer and run cold water over it until the entire soapy residue has been washed away. You can taste test a few seeds; if they still have a bitter taste, run more cold water over them.


OATMEAL CHOCOLATE CHIP COOKIES WITH TOASTED COCONUT (Levain Bakery knockoff, if they made this kind of cookie)

One ingredient that rocks my socks is toasted coconut. Now I know, not everyone likes coconut, but I happen to love it. And remember, this site is really just all about me! And this recipe is absolute proof of that statement. And I figure you must like coconut too if you are even bothering to look at this recipe. But if you aren’t really interested in cookies, but are a friend just reading about our life here on Camano Island, hello, and love to all from Mr. C. and me. But if you are a devoted fan of chocolate chip oatmeal cookies and toasted coconut, have I got a deal for you.

Some of you know that I have already worked up knock off cookie recipes from the Levain Bakery in New York City. Even if I haven’t ever actually tasted one of their cookies. And I got to thinking, they should offer a coconut, chocolate chip oatmeal cookie. So, being the good gal that I am, I went ahead and glommed a recipe together for them. Was that not kind of me? I thought so too.

But because I am not as gifted as the bakers in New York City, I baked the cookies too long. Oh, they’re still delicious, but they don’t have that trademark crunchy outside, gooey middle that sets Levain Bakery cookies so far apart from your regular, run of the mill cookie. But I can learn, and you can profit from my mistake. Never, ever, under any circumstances, over-bake these cookies.

Oh, you will be tempted as I was today. But I should have trusted myself. I should have pulled them out of the oven after only 8 minutes, instead of 10 minutes. Sure, they would have been lightly browned and very soft to the touch after only 8 minutes. But they would have finished baking as they cooled. And then they would have been perfect.

So, if you too happen to over-bake them a bit, you are excused. I, on the other hand, should have known better. After all, I have baked hundreds of cookies over the 65 years I have been actively and religiously playing with cookie dough. But, in my defense, these cookies, and my other Levain Bakery knock-off cookies are decidedly different. And it’s that very difference that makes them the best cookies I have ever tasted. So, I hope you too enjoy this recipe. And don’t skip the step of toasting the coconut flakes. It truly does make a difference.

As always, have fun in your kitchen. Make every day a fun day. Laugh out loud. Smile at everyone you meet. (I know. Doesn’t really show when you’re wearing a mask!) But do it anyway. You will know you are smiling, and that matters to your own well-being.

Peace and love to all.

½ c. (1 stick) cold unsalted butter, cut into small cubes

½ c. brown sugar, packed

¼ c. granulated sugar

1 lg. egg

1 tsp. vanilla extract 

¼ c. cake flour (fluffed)

1 c. unbleached all-purpose flour (fluffed)

1½ tsp. cornstarch

½ tsp. baking soda

½ tsp. coarse sea salt

1 c. old-fashioned oats 

1 c. toasted coconut flakes (I use Bob’s Red Mill unsweetened coconut flakes)

1 c. semi-sweet chocolate chips

Place the butter, brown sugar, and granulated sugar in the bowl of your stand mixer. Using the paddle attachment, beat the butter and sugars on medium low speed until smooth and completely blended, 2-3 minutes. Add the egg and vanilla. Beat just until the egg and vanilla are incorporated with the butter/sugar mixture.

In a small mixing bowl, whisk the cake flour, all-purpose flour, cornstarch, baking soda, salt, and oats together. Add to the wet ingredients and mix only until combined. Add the coconut flakes and chocolate chips. Slowly mix until combined. Refrigerate dough for 30 minutes.  

Using an ice cream scoop (I use a #40, 1½ tablespoons, orchid handled scoop), place the balls of dough on a parchment paper lined cookie sheet 2 inches apart. 

Bake in a pre-heated 400-degree oven for 8-11 minutes or until the cookies appear dull and light golden brown on top.  Do not over-bake. The top should look done, but the cookies should not be fully set. 

Remove from oven. Cookies will continue to finish cooking as they set and cool on the baking sheets for at least 8 minutes before removing to a wire rack to cool completely. The cookies are quite delicate after just baking, so handle them carefully. They should still be plenty gooey inside.

Store in an airtight container.

Me in our kitchen last evening trying to decide if I would prefer a before dinner martini or a Margarita. Not an easy decision. But my apron made the decision for me. And please excuse the messy pantry. And of course, Miles had to be in the photo. His house, his rules!


ROASTED GARLIC SOURDOUGH BOULE (uses sourdough discard and added yeast)

I am always amazed when I bake bread. Amazed that “we” actually produced such an awesome loaf. Me, myself, and I, that is! Of course, with the help of my little yeasty-beasty sourdough starter friends. But then, why shouldn’t they help me out? I’ve been feeding them conscientiously every 7-10 days for months. We’ve become buddies, comrades, and allies in my quest for the perfect sourdough loaf. And they’ve been very patient with me. Sometimes I have used them to less advantage. Other times they have shown their true colors. And this, dear friends, is one of those times. If I do say so myself, this is one darn good loaf of bread. Period! It’s flavorful, but not over the top garlicky. It’s chewy, but not too chewy. And the crust is divine. All and all, I’d give this bread a rating of 9.8 out of 10. (Nothings perfect, after all.) But this bread is about as good as it gets. And extremely easy to build. And let me tell you true, this bread makes the best ever toast. Lightly spread with soft butter, there is just nothing better to accompany bacon and eggs.

Plus, no fancy ingredients, not even bread flour required for this loaf. Just plain old unbleached all-purpose flour. And even if you don’t have a cast iron Dutch oven or a cloche (clay baker), you can simply bake the boule on a piece of parchment paper. It will still taste delicious. The crust might not be as fabulous, but the chewy texture and the light sourdough flavor will still be present. And of course, the lovely roasted garlic.

So, I see nothing stopping you from building a loaf that will knock your friends and family’s socks off. (They don’t need them on anyway. It’s SUMMER!)

As always, be the one who brings the entire family together around the dining table. With heaps of good and healthy food and lively conversation. Because these precious days together will not last forever.

I remember how I felt some days while my kids were young. I’d ask myself will this ever end? Will I ever have any peace and quiet? Will there ever be any milk left in the refrigerator?? But those days did end, and honestly, I’d bring a few of them back if that were possible. Because they were also joyous days. Hectic, frantic, but very gratifying. And always full of love. And the best times we experienced together almost always revolved around the heart of our home – the kitchen. Good food always makes for better companionship. And as cooks, we can make that happen.

Peace and love to all.   

¾ c. sourdough starter discard   

½ c. warm water  

1½ tsp. instant dry yeast 

1 tsp. granulated sugar

1¼ tsp. kosher salt

2½ c. unbleached all-purpose flour (more or less)

1 head garlic, roasted* then cloves roughly chopped

extra virgin olive oil, for greasing bowl and brushing on boule after baking

super-fine sea salt, for sprinkling over baked boule

Combine the sourdough starter discard, water, yeast, and sugar in the bowl of your stand mixer. Let stand for 5 minutes. Then add the salt and flour. Using your dough hook, knead until the dough is smooth, elastic, and quite stiff, about 6 minutes.

Pour a bit of olive oil around the dough, and using your fingers and a stiff rubber spatula, form dough into a ball. Cover with plastic wrap and let rise for an hour or until doubled. (If you gently poke a finger into the dough, an indentation should remain when you remove your finger.)

Turn the dough onto a lightly floured surface and pat into a rough rectangle or oval about ½-inch thick. Spread the chunks of roasted garlic evenly over the dough. Roll into a log starting with a short side.

To form into a boule, gently bend one end up towards the middle. Do the same with the other end. Then turn the dough over and tug and tuck towards the bottom of the ball until you’ve formed the dough into a tight ball shape. Place the dough ball, smooth side up on a piece of parchment paper long enough to allow you to lower the dough into a Dutch oven or cloche (clay baker). Cover the dough with greased plastic wrap and let rest for 60 minutes. (It should just about double as it rises.)

Meanwhile, place your Dutch oven or clay baker (cloche), lid and all, in your oven. After the dough has been rising for about 30 minutes, pre-heat your oven to 425-degrees. When the dough has risen sufficiently, carefully remove the Dutch oven or clay baker from the hot oven. Immediately use a sharp knife or lame blade to score an X about ¼-inch deep into the surface of the bread dough. This allows the bread to expand without tearing as it bakes. (Don’t press down too hard. You don’t want to deflate the dough ball.)

Carefully remove the Dutch oven or cloche lid and place the parchment paper and loaf in the bottom of your Dutch oven or on the bottom portion of your cloche. Then cover and place in the pre-heated 425-degree oven for 30 minutes. Remove the lid and continue baking for an additional 10-13 minutes or until the crust is nicely browned and the loaf sounds hollow when tapped. (Your instant read thermometer should read between 200 to 205-degrees.)

Remove from oven and carefully transfer to a cooling rack. Brush generously with extra virgin olive oil and sprinkle with super-fine sea salt. Let cool completely before slicing.

Please note: If you prefer a crisp, chewy crust, don’t slather with olive oil. Leave as is.

Store leftovers at room temperature wrapped in a tea towel.

*To roast a head of garlic, cut off the top of the garlic to expose the cloves. Drizzle with 1-2 teaspoons of olive oil. Cover and roast at 400-degrees for 60 minutes or until tender. Remove from oven and let cool until you can easily remove the golden, soft cloves from their paper-thin wrappers.

How can Miles possibly be comfortable with his back half on the desk surface? And a very comfortable amount of kitty bed still available to accommodate the rest of his big, fuzzy body. But there he lay as I wrote this post. My little buddy. My helper. And the guy who tells me not only is it lunch time, it’s kitty treat time too!


SHRIMP AND ZOODLES STIR FRY

I know I’ve mentioned it before, but I love my new spiralizer. And yes, I am kind of a gadget girl. Melon ballers and the like have a tendency to follow me out of kitchen shops regardless of whether or not I might actually have a need for said product. It’s the old “isn’t that cute” syndrome that afflicts many of us. And for which there seems to be no known cure. And now with Amazon, it’s even easier to locate those special little items you had no idea you needed so badly. But in all fairness, they are often inexpensive, and even if they serve only one purpose, they are worth the dollars just for the convenience. See, I can justify almost anything. After all, I’ve been at it for a long time. But enough about my rather light case of kitchen tool neurosis. And on to why you too should purchase a spiralizer. (If of course you don’t own one already!)

Then with your spiralizer firmly attached to a counter, you can spiralize your zucchini and carrot and prepare this fabulous recipe courtesy of Holly at the spendwithpennies.com web site. Of course, you could just chop up the zucchini and carrot, but what fun would that be? Getting out the spiralizer, and then making a slight mess on your countertop seems so much more chef-like than merely hacking and slashing the vegetables on a cutting board. Not to mention – classier. And don’t we all want to be thought of as classy cooks? Of course, we do! And speaking of classy, to really up your game, you can refer to spiralized zucchini as “courgetti” which is how spiralized zucchini is referred to in France. English – zucchini, French – courgette.

But whatever you choose to call these thin, spaghetti like strands of fresh zucchini, you are in for a treat. So much healthier than using pasta, and so very tasty. And on that happy note, I hope you enjoy this dish as much as we do. It’s easy to prepare, contains simple, healthy, and everyday ingredients, and most importantly, tastes wonderful.  

So, as always, be content. It’s not always easy. Sometimes I forget that I’m not alone feeling insecure or a bit scared about the future. Most of us who have been productive individuals all our lives, find it difficult to accept that our usefulness has become limited by age and/or health issues. And it’s no fun accepting the new reality. I often find myself worried about how the aging process has limited my abilities. And then I realize there isn’t a darn thing I can do about it. And how much even my closest and most loving family and friends might hate me if I didn’t age right along with them. Which of course I am. No one escapes the aging process. Not even if we thought it would never happen to us! (That would include me.)

Then, I laugh at myself for being such a doofus. And remember how lucky I am in the grand scheme of things. And I figure, as long as I can still laugh at myself, I’m OK. After all, it’s a well-known fact that laughter is the best medicine. And the type of “medicine” that has no adverse side effects. Only beneficial properties.  

Peace, love, and contentment to all.

¼ c. water

1 tsp. chicken base (I use Better Than Bouillon Chicken base)

1 T. cornstarch

2 T. brown sugar

3 T. soy sauce

½ tsp. sesame oil

½ tsp. Sriracha, or to taste

1 (6-8 inch) zucchini, spiralized (zoodles)  

¼ tsp. kosher salt

2 T. extra virgin olive oil or avocado oil, divided

½ lb. large shrimp, peeled, deveined, and tails removed, then cut in thirds

1 carrot, spiralized

1 red bell pepper, sliced into thin strips

2 tsp. minced fresh ginger

3 garlic cloves, minced

sesame seeds, topping, opt.

thinly sliced green onions, topping, opt.

In a small bowl, whisk the water, chicken base, cornstarch, brown sugar, soy sauce, sesame oil, and Sriracha together. Set the stir fry sauce aside.

Spiralize the zucchini. (I leave the skin on.) Using scissors, cut the long strands into shorter pieces. Place in a colander in your sink, and sprinkle with the kosher salt. Give the zucchini a toss with the salt, then let it sit until you are ready to add it to the stir fry. (Salt and all.)   

Meanwhile, heat 1 tablespoon of the olive oil in a large pan or wok over medium heat. Add shrimp and cook just until done (about 2-3 minutes). Transfer to a separate bowl and set aside.

Add remaining 1 tablespoon olive oil to the pan and add the spiralized carrot and red pepper strips. Cook until softened (about 4 minutes).

Add minced ginger and garlic and cook until fragrant (about 30 seconds).

Add the zoodles and cook for about 2 minutes.

Add cooked shrimp and stir fry sauce to the pan. Stir well and increase heat to medium-high. Cook until sauce is thickened. Remove from heat.

Serve immediately topped with sesame seeds and green onions.


BABY ARUGULA AND ROMAINE SALAD WITH LEMON SALAD DRESSING AND PARMESAN CHEESE

So, the other day Mr. C. comes home from the grocery store with a tub of baby arugula. We had been talking about how much we liked arugula, but I hadn’t included it on my shopping list. Never-the-less I was delighted with the purchase. So, that evening I made this salad. The recipe from saltpepperskillet.com didn’t call for romaine, but I felt that using a combination of the two different kinds of lettuce would be delicious. The arugula providing the spicy, peppery, slightly bitter component, while the romaine offered a nice crunch. And then, when tossed with this lemon dressing, well, to put it succinctly, we were blown away! This made for an absolutely delicious, simple to prepare salad. One that we will be enjoying over and over. A salad that will go very well with any kind of simply prepared meat or seafood I choose to serve. Yum, I can’t wait.

We are avid lemon lovers to begin with. But when you add the other ingredients to the firm lemon base in this dressing, magic happens. And of course, you could add other ingredients besides lettuce to this salad. But honestly, why bother! This is perfect as is. So, thank you Justin for this marvelous recipe.

As always, eat your vegetables! They are good for you and when they taste as good as they do in this salad, there is no excuse for not gulping them down!

Peace and love to all.  

¼ tsp. lemon zest

2 T. lemon juice

2 T. extra virgin olive oil 

¼ tsp. Dijon mustard

2 tsp. minced shallot

1 T. honey

1/8 tsp. kosher salt

freshly ground black pepper

baby arugula

romaine lettuce, chopped

coarsely grated Parmesan or Pecorino-Romano cheese

Whisk or shake the lemon zest, lemon juice, olive oil, Dijon mustard, shallot, honey, salt, and pepper together.

Place the arugula and romaine lettuce in a salad bowl. (I use equal amounts of each.) Toss with enough of the dressing to coat the lettuce leaves without drowning them. Serve immediately. Pass the Parmesan.


ITALIAN SAUAGE, BELL PEPPERS, AND SPIRALIZED ZUCCHINI (ZOODLES)

When it comes to pasta, I am a complete sucker. I like it all. Doesn’t matter in what form the pasta takes, be it shells, rotini, spaghetti, fettuccine, egg noodles, etc. etc., I enjoy every variation. But in hoping to trim off some of the carbs in our diet, and since I now own a spiralizer and have been reading splendiferous reviews about the use of zoodles instead of noodles, I decided to join the throng and substitute zucchini for “the real thing” in one of my favorite pasta dishes.

Well, boy howdy, was I delighted with the result. I DID NOT MISS REAL PASTA IN THE LEAST!!!! Not kidding here folks. This “pasta” dish was the best Italian food I have made or eaten in quite some time. And although I know many of you have been using spaghetti squash in lieu of pasta, I truly like the taste of zoodles better. Or should I say, the lack of taste better. I too have used spaghetti squash, but the flavor wasn’t ever quite right. Not to mention the texture. And I’m a devoted fan of any kind of squash! But with zucchini, it seems to take on any flavor you put with it. And since the simple sauce in this recipe is so darn delicious, who wants any outside flavor detracting from the essence of Italian sausage, bell peppers, and basil? Not me!

And I’m sure you have noticed, with only a cursory glance at the ingredients, this is a really simple dish to prepare. And no, you don’t need onion, garlic, crushed red pepper flakes, etc. Don’t even be tempted. Just trust me on this one. This is a KISS principle recipe. (Keep It Simple Sister.)

So, as always, have fun creating healthy and delicious dishes for your family. And anytime you can get your family to eat (and enjoy) more veggies, give yourself a gold star.

Peace and love to all.    

1 T. extra virgin olive oil

1 lb. bulk Italian sausage, pork or chicken

1 tsp. fennel seeds

3 bell peppers, diced (yellow, orange, or red) – I use one of each

1 28-oz. can Italian peeled whole tomatoes (Roma or other)  

freshly ground black pepper

½ c. loosely packed basil chiffonade

2 med. sized (about 6-inch each) zucchini

¼ tsp. kosher salt

grated Parmesan or Pecorino Romano cheese

Heat the olive oil in a heavy, large-covered pan. Add the sausage and fry until it is nicely browned. Add the fennel seeds, diced peppers, canned tomatoes (I cut the canned tomatoes into small pieces with a scissors before adding to the pot), and black pepper. Bring to a boil, reduce heat, cover, and cook, stirring occasionally for about 45 minutes or until the peppers are very tender, but not mushy.

Meanwhile, spiralize the zucchini. (I leave the skin on.) Place in a colander in your sink, and sprinkle with the kosher salt. Give the zucchini a toss with the salt, then let it sit until you are ready to add it to the sauce. (Salt and all.)   

When ready to serve, add the zoodles and basil to the sauce and cook for 3-4 minutes.

Serve liberally sprinkled with Parmesan or Pecorino-Romana, or my favorite, a combination of the two cheeses. 


ANISE BISCOTTI WITH SLIVERED ALMONDS (traditional Italian favorite)

When I think of biscotti, I always envision traditional anise flavored biscuits. Because I happen to be someone who truly loves a strong, licorice-like taste. But if you are familiar with this site, you know I have several biscotti recipes already posted that do not include anise. So, if you happen to fall in the category that is not anise addicted, I still have you covered. (Just search under “biscotti”, and all will be revealed.)

And I should mention that I already have an anise biscotti recipe on site that is the same as this one except for the addition of anise seed in this recipe. I could have simply updated the original recipe, but I thought it would be more fun to publish this version too. (After all, choices are always nice.) Anyway, these are now my new favorite traditional anise flavored biscotti.

So, lets talk a bit about how easy biscotti biscuits are to build. The dough is basically like many cookie doughs. Cream the butter and sugar together, add eggs and flavoring. Then whisk the flour, leavening (in this case baking powder), and salt together. Then combine the whole mess. But where in drop cookies you simply plop balls of dough on a baking sheet, or rolled cookies, where you cut the rolled-out dough into various shapes, with biscotti you form logs. Then you bake the logs for a short time, remove them from the oven, let them cool a bit, then cut the logs into slices, and bake them a second time until they are done. It may sound like more work then plopping or rolling, but it actually takes very little skill to make perfectly formed biscotti biscuits.

And I’m telling you true, there is just nothing better than a biscotto (singular of biscotti) dunked in your morning coffee or tea. So, you simply must give biscotti a try. And if you have been making biscotti for decades – Saluti!

As always, stay safe and stay focused on the well being of others. If you haven’t been vaccinated against covid, please consider the health of those with whom you make contact. You may be extremely healthy, but you can’t tell from just looking at someone whether or not they too share your good fortune. They could have an immune deficient condition that is not apparent. And even if they have been vaccinated, it would still be very unhealthy for them to contract the disease. So, please don’t make this all about you. Because it is not all about you or your personal rights or about your being a faithful member of your chosen political party! Politics has absolutely nothing to do with fighting a disease. Covid-19 has no affiliation with any political party. It has no political agenda. It’s only mission, if you care to define it as a mission, is to attack people’s lungs and possibly cause an overactive immune response which can lead to increased inflammation throughout our bodies. So, getting vaccinated is necessary if we hope to stop the spread of this deadly disease. Getting vaccinated is simply about saving lives! Yours included. Nothing else. Please do your part.

Peace and love to all.

½ c. unsalted butter, room temperature

1 c. granulated sugar

3 lg. eggs, room temp.

1 tsp. vanilla extract

1 tsp. good anise extract

2 tsp. ground anise seed

3 c. unbleached all-purpose flour

1 T. baking powder

½ tsp. kosher salt

1 c. slivered almonds, lightly toasted  

Cream butter and sugar together until light and creamy. Add the eggs, vanilla, anise extract, and ground anise seeds. In a separate bowl, whisk together the flour, baking powder, and salt. Combine with butter mixture. Stir in the slivered almonds.

Using your hands liberally coated with flour, divide the dough into 4 pieces on a floured surface. Pat each piece into a 12×1½-inch rectangle. Place on a large lightly greased baking sheet about 4 inches apart. (Use more than one baking sheet if necessary.) Bake the logs in a pre-heated 350-degree oven for about 20 minutes, or until a light golden brown. Remove from oven.

Cool for 15 minutes. Then cut each roll on a slight diagonal into ¾-inch thick slices. Turn the slices cut side down on the baking sheet. Bake for 10-13 minutes or until each piece is firm and nicely browned. Remove from oven and cool on the baking sheet(s). Cool completely before storing in an airtight container.

Note: I suggest baking biscotti with straight oven heat. Convection baking browns them too quickly.  


SWEET AND SALTY SHORTBREAD COOKIES

Ok, I’m going to mess with your perceived ideas about Scottish shortbread a wee bit. We all know how wonderful traditional shortbread is with its crunchy, buttery goodness. But what if you added a bit more powdered sugar and coarse kosher salt to the mix? Well, you’d get this cookie, that’s what would happen! And I have to say, for a new way of enjoying plain shortbread, this is so very tasty. The extra sweetness combined with the tiny bits of coarse salt, is a fun new taste sensation. Especially since no one’s taste buds are expecting the cookies to be as sweet or as salty. (And isn’t that fun!)

So, I guess the only thing left to say is – next time you want to prepare a simple shortbread cookie that will be a hit with your family and friends, give this recipe a try.

And if you are wondering why I chose to make tiny heart shape shortbread cookies, well, they were for a very special event. The marriage of my son Sven to Jill, a truly wonderful woman and just the perfect fit for my son. Both being intelligent, athletic, successful, delightful and caring people, and devoted parents. I could not be happier for either of them. (Or for me, if truth be known.)

As always, have fun in your kitchen and always keep thinking positive thoughts. Things do have a way of working out, even if it appears to the contrary as you wait for some type of resolution. So, practice patience. Not easy, I’ll grant you that. But if you continue to have hope, most often, time will take care of whatever situation has held you in its grip.

And again – congratulations to Sven and Jill. And to the many family members on both sides who attended the wedding – thank you for being a part of this special celebration. I love you, one and all.

Peace and love to all.

1 c. (2 sticks) unsalted butter

1 c. powdered sugar

1 tsp. vanilla

½ tsp. kosher salt

¼ tsp. baking powder

2 c. unbleached all-purpose flour, fluffed

Cream the butter, powdered sugar, and vanilla together until light and creamy. Whisk the salt, baking powder, and flour together in a separate bowl. Add to the butter mixture just until well combined. Form dough into a ball.

Place on a lightly floured surface and roll to approximately ⅓-inch thick. Cut into your favorite shapes.

Place on an ungreased cookie sheet and bake in a pre-heated 350-degree oven for 17-18 minutes or until the bottom of the cookies are a nice golden brown. Don’t under-bake. (Please note: the cookies will not expand very much, so they can be placed quite close together on your baking sheet.)

Remove from oven and cool completely on a wire rack. Store in an airtight container.   


ASIAN SPIRALIZED VEGGIE SALAD

When we were camping in May with Andy’s sister Katie and her husband Rick, each couple took turn cooking dinner. One night it would be Mr. C. and me slaving away in our trailer preparing dinner for four, and the next evening it would be Rick and Katie’s turn to do the honor. This is what is called, in the vernacular, a win/win situation. Each couple got a night off from cooking (and doing dishes) with the sure knowledge that dinner would be delicious. And in Katie’s case particularly – healthy and inventive. She even went so far as to bring her spiralizer along for the ride. How cool is that! And of course, after seeing how much fun it was to operate the gizmo and how nice the veggies were cut, I made myself a mental note to purchase one when I returned home.

Well, apparently my mental notes aren’t as reliable as they used to be. So, when the mental note finally found its way out of the abyss formerly known as my memory 6 weeks later, I got right on it. I ordered a Brieftons 5-blade spiralizer from Amazon. And frankly, I was amazed at how inexpensive it was. $24 (well really only $23.99) but we all know that’s $24 to anyone with half a brain! But I digress……. And the other evening, for the first time, I took the plastic wonder out of its box, gave it a quick wash, and set it up on my counter. Then with the help of the directions (and yes, I read directions because I’m not mechanically inclined enough to intuit how something works), I spiralized the zucchini, cabbage, carrot, and orange bell pepper for this salad. It was so much fun! And the machine was so easy to clean after I was all done playing with the veggies.

And the salad was delicious. I especially loved the “zoodles”. (That’s zucchini noodles to the unenlightened.) And now I can hardly wait to serve zoodles instead of spaghetti next time I get a hankering for Old Fashioned Meatballs and Spaghetti. Of course, I’ll have to rename the dish. Meatballs and Zoodles. Or Oodles of Zoodles and Meatballs, or a name equally as catchy.  

So, in the final analysis, I think I made a wise choice purchasing this new kitchen tool. The price was right, and now the only problem is where to store the darn thing. My pantry is already filled to the brim. But I will make it work. Somehow.

As always, have fun making delicious and healthy food for your family. And thanks again Katie for turning me on to this new way to get more veggies into our diet. Yet again, I am in your debt. Hugs to you and Rick.

And peace and love to all.

Oh, and just so you know, I included 3 salad dressing recipes that can be used with the veggies in this recipe. All 3 are Asian inspired.   

Dressing #1 has a bolder flavor than Salad dressings #2 & #3

Dressing #2 would be a better choice if you want the flavor focus to be on the veggies. Dressing #1 takes the focus off the veggies and places it more on the flavor of the dressing.

Dressing #3 is the same dressing you would find on a standard Chinese chicken salad or my version – Asian Slaw.  

Salad Dressing #1

2 T. vegetable oil

1 tsp. toasted sesame oil

⅓ c. rice vinegar

3 T.  hoisin sauce, or more to taste

5 tsp. soy sauce, or more to taste

1-2 T. peanut butter (creamy or crunchy), or more to taste

1 clove garlic, finely minced

2 tsp. finely minced fresh ginger

pinch crushed red pepper flakes

Whisk the veggie oil, toasted sesame oil, rice vinegar, hoisin sauce, soy sauce, peanut butter, garlic, ginger, and crushed red pepper flakes together. Let sit at room temperature at least 30 minutes before dressing your salad. Store unused dressing in the refrigerator.

Salad Dressing #2

3 T. rice vinegar

1 T. peanut butter

1 tsp. soy sauce

1 tsp. toasted sesame oil

1 clove garlic, finely minced

1 tsp. granulated sugar

freshly ground black pepper

pinch crushed red pepper flakes

Whisk the rice vinegar, peanut butter, soy sauce, toasted sesame oil, garlic, sugar, pepper, and crushed red pepper flakes together. Store in refrigerator.

Salad Dressing #3

¼ c. vegetable oil

2 T. sesame oil

4 tsp. white vinegar (the regular old fashioned distilled kind)

1 tsp. lemon juice (the kind that comes from a real lemon)

1 tsp. sugar

1 tsp. kosher salt

freshly ground black pepper

Whisk all ingredients together. Store in refrigerator.

Put it all together:

2 zucchini (about ¾ lb.) spiralized (zoodles)

¼ tsp. kosher salt

1 c. spiralized green or red cabbage   

1 lg. carrot, spiralized

1 red, yellow, or orange bell pepper, spiralized

2 green onions, thinly sliced on the diagonal

2 T. toasted sesame seeds

salted peanuts, for garnish, opt. (or slivered almonds would be perfect if you chose to use dressing #3)

Place the spiralized zucchini in a colander either in a bowl or in the sink. Toss with the salt. Let the zoodles drain a bit of their excess moisture while you prep the other vegetables. Before building the salad, cut the spiralized zucchini with a pair of scissors to make them easier to toss (and eat). (You might want to do the same with the other veggies too.)

In a large mixing bowl, combine the zucchini noodles (unwashed) with the cabbage, carrot, bell pepper, and green onions.

Pour enough dressing (your choice) over the vegetables to coat them, but not drown them. Toss, taste, and adjust seasoning. Refrigerate the salad if made ahead.

Just before serving, toss in the toasted sesame seeds. Garnish with salted peanuts (or almonds).  Serve immediately.

And in case you were wondering, of course you can use any old veggie you want in this salad. Actually, the more and different the veggies, the better!  


CHOCOLATE CHIP AND NUT BLONDIES

Sometimes I’m almost embarrassed to post a recipe as simple as this one. But maybe, just maybe, you never thought of putting chocolate chips in your blondies either. I say either, because I never thought to do so until our good friend Keith made some to sell at his wife Sheila’s choir fund raiser. One taste told me that I had been missing out on a really good thing. And as some of you well know, I’m getting quite lazy in my golden years. So, a butterscotch flavored chewy bar cookie that is very simple to build, (no mixer required), chocolaty, and crunchy is excellent in every regard! (Including the short amount of time this cookie takes to prepare.)

Absolutely perfect to feed hungry children and starving musicians. (I don’t have kidlets in the house any longer, but sometimes jazz musicians can be found huddled around the baby grand in our living room. And of course, they must be fed frequently to ensure that they keep up their strength. And for whatever reason, cookies and strong coffee are their preferred method of securing sustenance. Imagine that!)

Anyway, these bar cookies are terrific. And like I mentioned above, very easy to make. And I promise not to be offended, in any way, if you already have a favorite blondie recipe you would prefer to use. Just add some chips (chocolate, mint chocolate, peanut butter, white chocolate, M&Ms, etc.) and whatever nut you happen to have around (or not), and you have a whole new bar cookie with which to thrill and delight your family and friends. Drum roll please!  

So, as always – have fun in your kitchen. Make some cookies. Because cookies are the only food group that everyone, of every age enjoys. And I know cookies aren’t the healthiest thing to feed your children. But as an occasional treat, there is nothing finer.

Peace and love to all.

½ c. (1 stick) unsalted butter, melted

2 c. brown sugar, packed

2 lg. eggs

2 tsp. vanilla extract

2 tsp. baking powder

1 tsp. kosher salt

2 c. unbleached all-purpose flour, fluffed

1½ c. semisweet chocolate chips

1 c. chopped walnuts, lightly toasted pecans, hazelnuts, etc.  

Stir the melted butter, brown sugar, eggs, vanilla, baking powder, and salt together using a whisk. Using a rubber spatula, stir in the flour just until combined. Stir in the chocolate chips and walnuts.

Spread the dough out evenly in a lightly buttered 9×13-inch pan (glass is best). Bake in a pre-heated 325-degree oven (350-degrees if you are using a metal pan) for 30-35 minutes or until a toothpick inserted in the center comes out clean or with just a few fudgy crumbs and the top looks set. Resist overbaking.   

Remove from oven and cool on a wire rack. Cut into whatever size pieces you want. Store in an airtight container at room temperature or freeze for longer storage.