NEW MEXICO STYLE WHOLE PINTO BEANS

(Sorry about no picture, but in accordance with the theme of this post, I decided a picture was unnecessary.)

One of the mistakes I feel many good cooks make when they are planning even a simple meal for family and friends, is to believe that every dish served has to sparkle with its own star quality flavor. And until recently I was just as guilty as the next cook in thinking this way. It wasn’t until I was on our latest trip to New Mexico that I got to thinking about what constitutes a truly memorable meal. And the lunch I ordered at the High Country Restaurant & Saloon in Chama, New Mexico will remain as memorable as any I have experienced because it was this delicious meal that started me thinking. (Well actually it was these beans that started the thought process that changed my entire way of thinking about meal planning, at least at a conscious level!)

Until then, I guess I never fully grasped the idea that even taste buds need a break. (And yes, I had read and understood about palate cleansing and serving small portions of many foods rather than large portions of a couple of dishes, etc., but I never categorized these concepts in relationship to every day meals.)

When I reflect on the average dinner I prepare for us, I think main dish, side, and veggie/salad. And until recently, I felt that all three needed to scream “I’m the star; I’m the star!!!” What I was forgetting was that our taste buds are also included in these little dinner parties. And like the rest of our body, need a periodic rest.

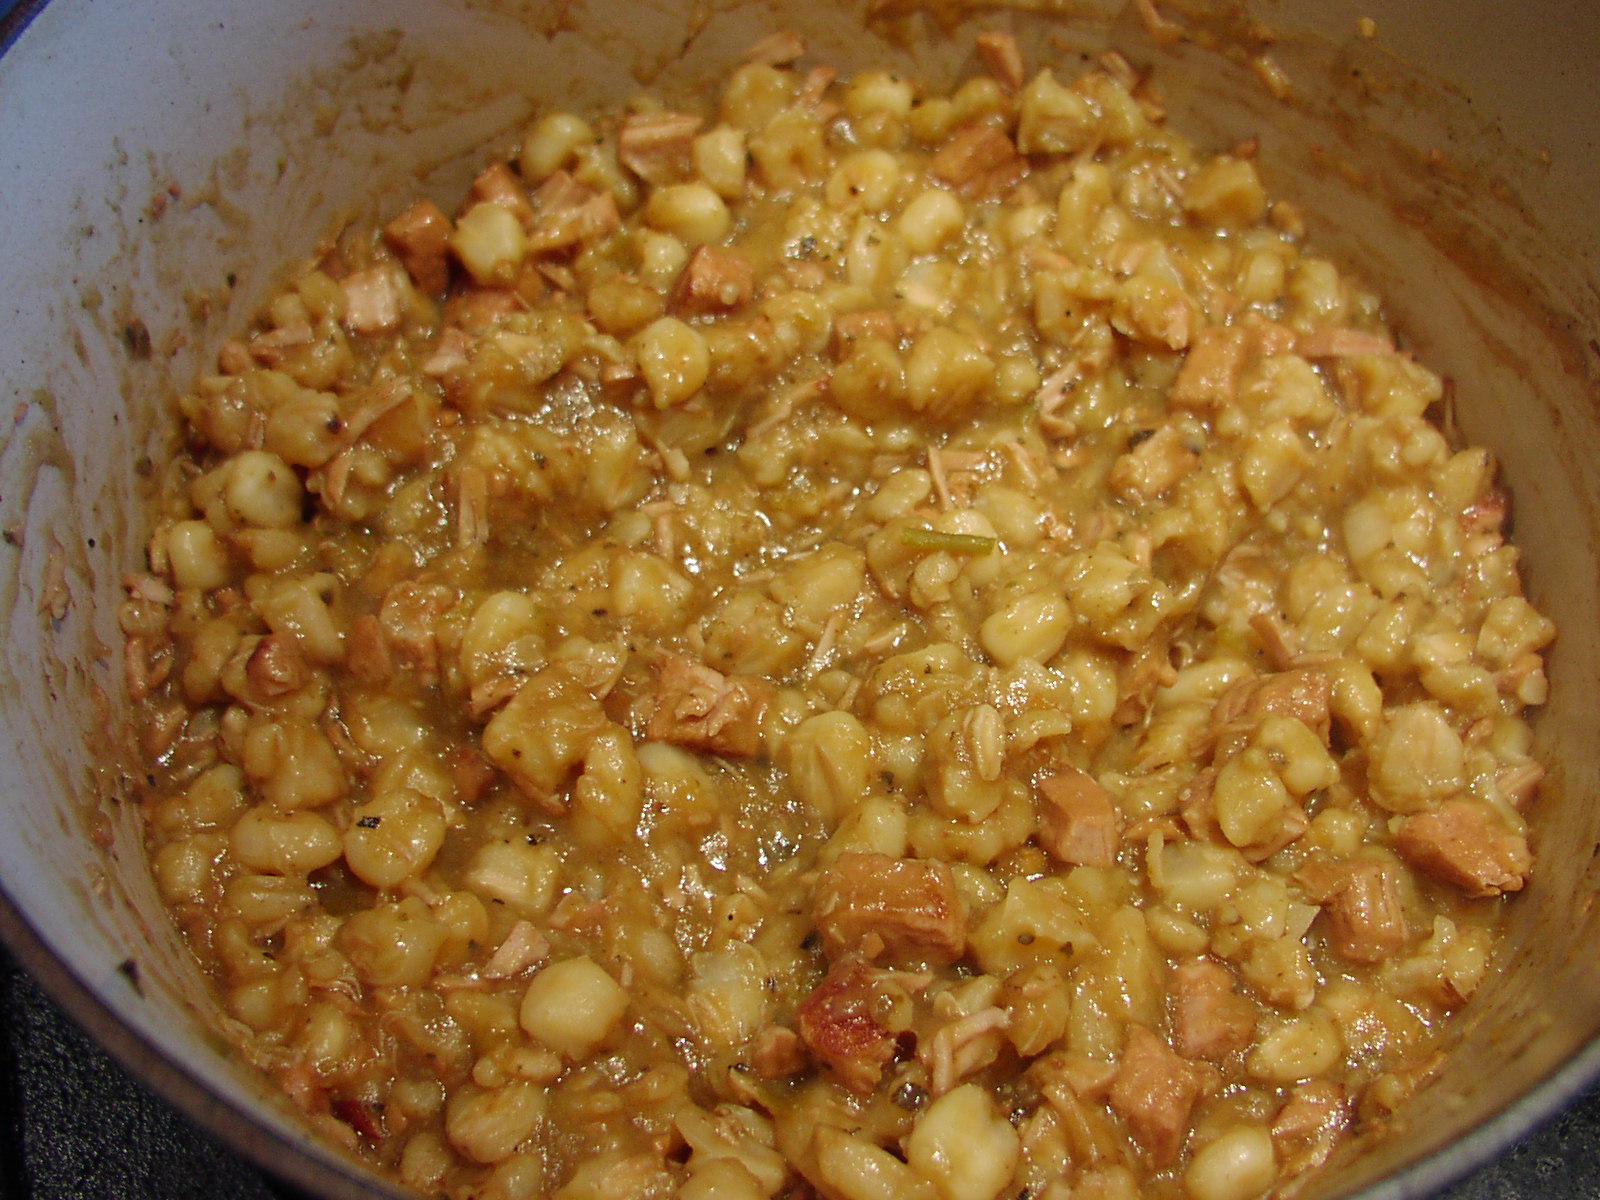
So after analyzing this amazing, 3 item lunch I ate in New Mexico, I concluded that what I enjoyed the most was the simple preparation used on the pinto beans. Not only did the flavor of the bean shine through, they were not laden with lard or smothered in sauce, cheese, or salsa. They were perfectly plain. And in combination with the fantastic cheese enchilada and the rich pozole, they were the “time out” place my taste buds craved.

So then I started thinking about other dishes that possess the same qualities as these beans. And I realized that sides like potatoes (mashed, baked, boiled or roasted), rice, pasta and the like are all “time out” places for our taste buds. And even though these dishes might be topped with some kind of gravy, sauce, condiment, or dressings, they still possessed the underlying bland flavor that is necessary for our taste buds to appreciate the more exotic flavors featured in other dishes.

And yes I know what some of you are thinking. It took you until age 71 to figure this out? Well yes, I guess it did! I think I knew at a sub-conscious level that I was slightly off track in some of my thinking. But until New Mexico, I hadn’t had a lesson in perfect meal planning presented to me in such a clear and precise manner.

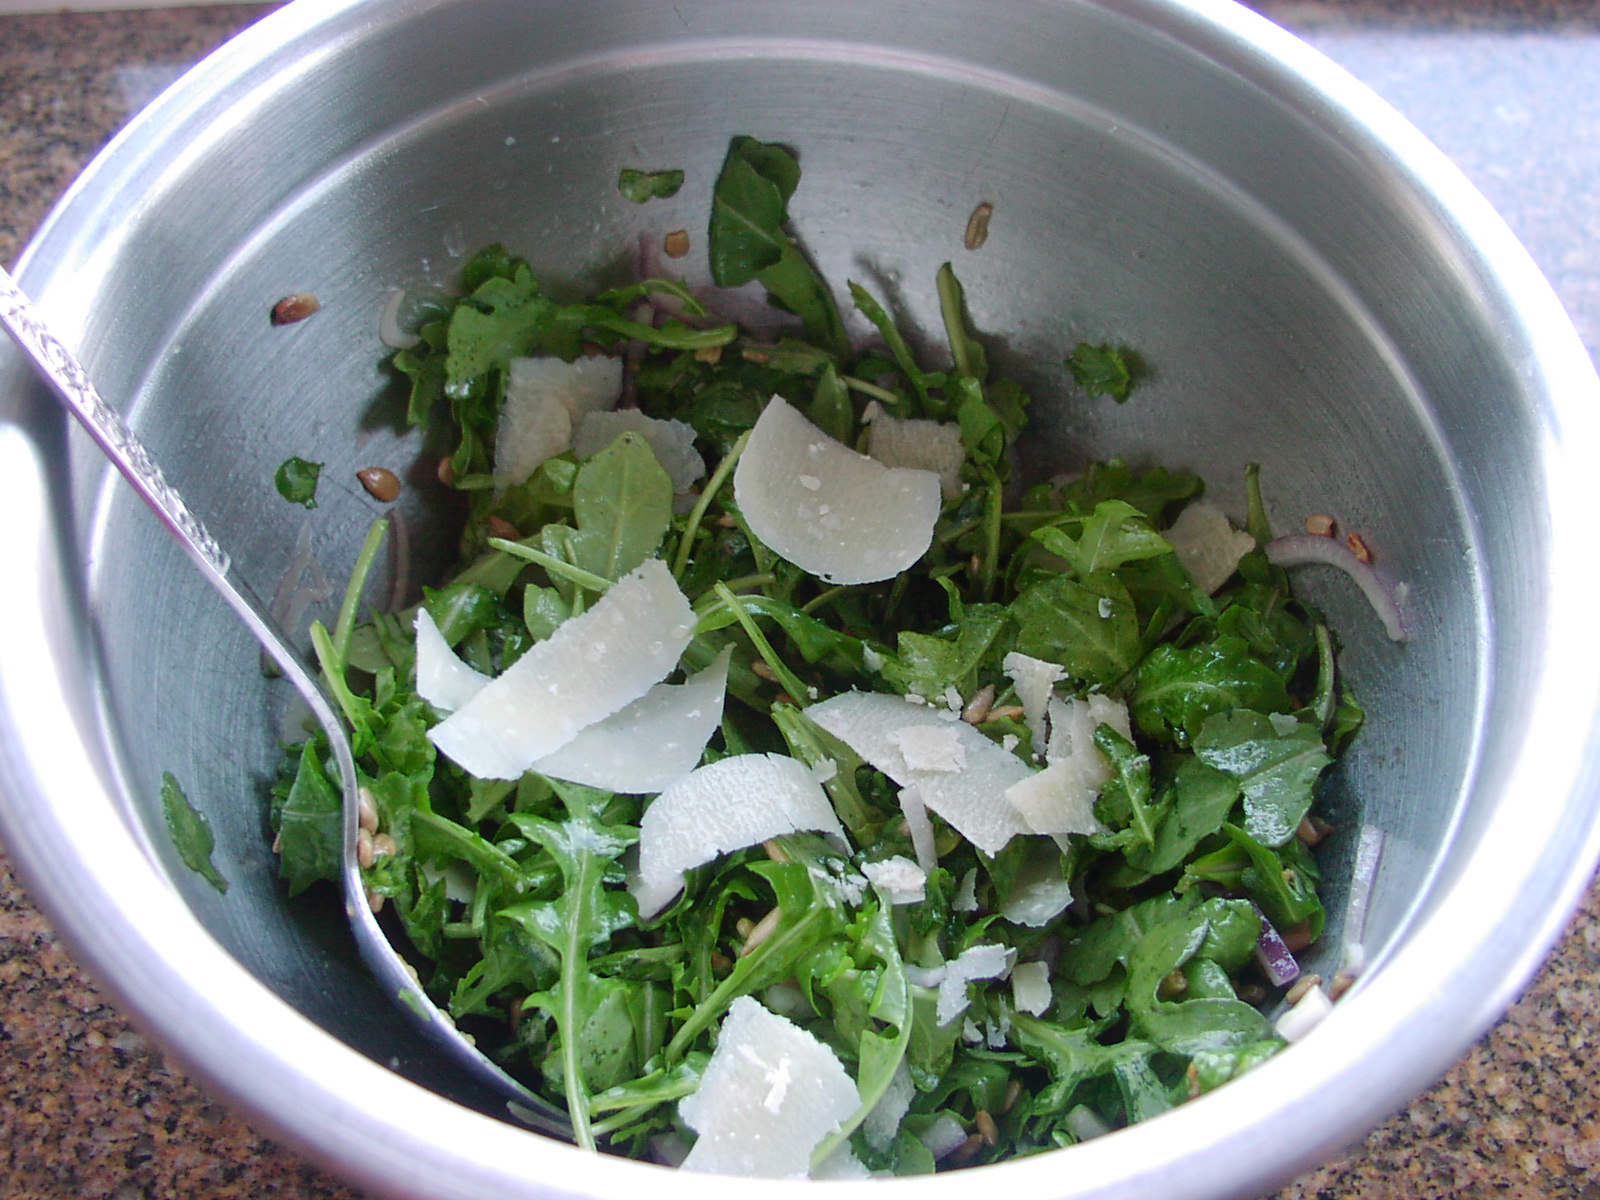
Now what this all means for me, is that I have been over achieving when it wasn’t necessary. That always striving to find a new and exciting way to feature a potato, for example, is not always the best choice. Or when I do serve a fancy main and side dish, my veggie or salad should be very simply prepared. I think this will not only free up some of my time, it will also make for more enjoyable meals.

In much the same way you can’t tell a bed by its covers, you are not going to know if this spin on meal planning works for you, until you give it a try. And speaking of trying things, I hope you enjoy this recipe for delicious pinto beans. The flavor is not going to scream “I’m a star” at you when you bite into them. But rather the flavor will seduce you into enjoying the more predominant flavors featured in the other dishes being served. But never fear; your taste buds will lead you back to the beans over and over again throughout the meal. It’s as inevitable as rain in the spring.

  • 2 c. dried pinto beans
  • water
  • 1 tsp. kosher salt
  • a few grinds of freshly ground black pepper
  • pinch white pepper
  • 1 tsp. sugar
  • 1 tsp. granulated garlic
  • 1 T. vegetable oil

Spread the beans out in a baking pan. Discard any foreign matter such as small rocks, bits of dirt, or shriveled beans. Rinse the beans under cold water. Place in a bowl and cover with water by about 4 inches. Soak at room temperature or in your refrigerator for at least 8 hours or overnight. Thoroughly rinse the beans before proceeding. (If pressed for time, place the beans and water in a sauce pan, bring to a boil, remove from heat, cover, and let stand for 1-2 hours. Thoroughly rinse the beans before proceeding.)

Place in a large covered sauce pan. Add enough water to cover by about 2 inches. Bring to a boil; reduce heat to low, cover, and simmer for 1 hour. Stir the beans often as they cook and add water as needed. After the first hour, add the salt, black pepper, white pepper, sugar, granulated garlic, and oil. Continue to simmer for another hour or until the beans are very tender and the water has reduced to the consistency of thick gravy. (If the beans are too runny, remove the lid and let simmer until they reach the desired consistency.) Adjust seasonings and serve whole. (None of that mashed action for these beans!)


BRUTTI MA BUONI (UGLY BUT GOOD) ITALIAN HAZELNUT COOKIES

OLYMPUS DIGITAL CAMERA

These cookies are outrageously delicious and BTW – GF! With no added oil, fat, butter, etc. to make us feel guilty. (Of course the nuts themselves contain fat, but it’s mostly good fat, so it doesn’t count. Well at least in my mind it doesn’t count.) Plus ladies and gentlemen, these easy to prepare cookies contain only 5 ingredients! Jean Anthelme Brillat-Savarin is widely quoted as saying “The discovery of a new dish does more for human happiness than the discovery of a new star.” I am absolutely convinced he must have had this cookie in mind when he coined this very well known phrase. Because these cookies are unlike any other cookie I have ever had the pleasure of tasting. They possess a wonderfully crisp exterior with an internal texture that is both soft and chewy. They are slightly reminiscent of macaroons, but that’s as close to a comparison of them to any other cookie as I can come.

While I was researching these cookies I visited several sites. Each recipe was quite different from the others. Some had you using granulated sugar, some had you warm egg whites and granulated sugar before beating the heck out of the mixture, most contained flour, and some even contained chocolate. But what captured my fancy was this recipe from Oreste Molinari. His family bakery in Frascati, Lazio, Italy has been selling these cookies using this recipe since the 1800s. So I figured; if the recipe is good enough for the Molinaris, and they are still in business after all this time, it surely must be good enough for me!

So please do not hesitate to build yourself a batch of these little packages of heaven at your earliest convenience. And to those of you who are gluten intolerant, you owe me. (Your debt will be forgiven if you send me your favorite GF recipe(s) so that I can share it/them with others.)

And to Monsieur Brillat-Savarin (wherever you may presently reside), please accept my thanks for some wonderful quotes related to all things culinary. And because it’s my blog and I have nothing more to say about these cookies, I am going to share a couple of my favorite Brillat-Savarin quotes with you.

“A man who was fond of wine was offered some grapes at dessert after dinner. ‘Much obliged’, said he, pushing the plate aside, ‘I am not accustomed to taking my wine in pills’.”

“Whoever receives friends and does not participate in the preparation of their meal does not deserve to have friends.”

“Cooking is one of the oldest arts and one that has rendered us the most important service in civic life.”

And my favorite quote attributed to Brillat-Savarin, which I feel is as true today as it was in his day (1755-1826). “The pleasure of the table belongs to all ages, to all conditions, to all countries, and to all areas; it mingles with all other pleasures, and remains at last to console us for their departure.”

Bon Appétit

  • 8 oz. roasted unsalted hazelnuts* – roughly 1¾ cups (best way to know for sure is to weigh the nuts)
  • 1½ c. powdered sugar
  • pinch of salt
  • 1 lg. room temperature egg white, lightly beaten
  • 2 tsp. pure vanilla extract

*I often use part dry roasted unsalted shelled almonds in these cookies because they are cheaper, more readily available, and considered by some to be slightly more nutritious than hazelnuts (aka filberts). And bottom line, using almonds does not affect the wonderful hazel nutty flavor of the cookies.

Preheat your oven to 400°. Spread the hazelnuts on a large rimmed baking sheet and toast for about 10 minutes or until the nuts are fragrant and the skins blister. (When I use almonds I toast them right along with the hazelnuts.) Transfer the nuts to a kitchen towel, swaddle them tightly, and let cool to room temperature. Then rub them together while still in the towel to remove the skins. (Don’t worry if all the skin doesn’t peel off. Just get as much off as possible. The rest – well its good roughage! And don’t worry about the light brown skin on the almonds either. Just provides a bit more texture to the cookies.)

In a food processor, pulse the hazelnuts with the confectioners’ sugar and salt until finely chopped. Add the egg white and the vanilla and pulse just until the dough is thoroughly combined.

Line the baking sheet with parchment paper. Using a very small ice cream scoop, (one that will contain about a tablespoon of water) drop the blops (a Chez Carr technical kitchen term) of dough onto the parchment paper lined cookie sheet about 1-inch apart. If you don’t have a small ice cream scoop, (and shame on you if you don’t have a couple of these in your kitchen) spoon tablespoon-size mounds of the dough onto the prepared baking sheet, again about 1 inch apart.

Bake the cookies in the center of your oven for about 11-13 minutes or until lightly browned all over. Watch carefully, because the bottom of the cookies can get too brown if baked too long. But the longer you bake them, the crispier on the outside they become. Which BTW, is what you want. So at least for the first batch you prepare, pay extra special attention to your oven temperature and the length of time it takes to bake these little darlings to perfection. Then of course – WRITE DOWN YOUR FINDINGS so that next time (and believe me, there will be a next time), you won’t have to tax your brain as much!

Brutti ma Buoni are best the first day, but will last for about 4 days if kept in an airtight container.


ROASTED VEGGIES WITH LEMON GARLIC AIOLI

OLYMPUS DIGITAL CAMERA

So OK, most of you already know that roasted veggies are the greatest culinary breakthrough since polenta was introduced into mainstream American cooking. And of course, unless you happen to be from another planet, you also know that veggies when roasted are as universally revered as Boris Badenov and Natasha Fatale! It’s just an accepted culinary fact. (Not that Boris and Natasha are edible, you realize. But you must admit they are about as delectable as your favorite apple pie!)

But if you happen to be one of the few who are unfortunate enough to have no experience with roasted veggies, have I got a treat for you! Even if you do know roasted veggies as well as you know your mailman or milkman (no implication of wrong doing intended) this Lemon Garlic Aioli recipe from Melissa Clark will lift even the already magnificent roasted veggie to a new high!

And for being an aioli that you make from scratch rather than starting with a mayonnaise base, it is really quick and easy to prepare. Plus you can make it up to three days in advance. Wee ha……

So I guess the only thing left to say is that I hope you give this recipe a try the next time you roast veggies. I love to serve this dish as an appetizer, but it would work just as well as a veggie side dish.

But wait – there is one other small little thing I should warn you about before I send you off to the kitchen to warm up your blender. This aioli is so amazing, that people have been known to take one bite, throw back their head, and howl in delight. They have also been known to sputter OMG three times in a row. If either response happens, do not be too concerned. They will soon recover and return to their natural apathetic selves as soon as their equilibrium returns.

Aioli Ingredients:

  • 1-2 garlic cloves (I use 1 medium)
  • 1 tsp. lemon juice or more to taste
  • ⅛ tsp. fine sea salt or more to taste
  • 1 large egg, room temperature
  • 1 lg. egg yolk, room temperature
  • ¾ c. extra-virgin olive oil

Suggested Veggies Ideal for Roasting:

  • beets, (any color) peeled and cut into 3/4-inch cubes
  • romanesco, cut into bite-sized florets
  • broccoli, cut into florets and the stems (after they have been peeled), cut into bite-size pieces
  • cauliflower, cut into bite-size florets
  • sweet potato, peeled, halved, quartered lengthwise and cut into 3/4-inch cubes
  • eggplant, cut into 1-inch squares
  • red, orange, or yellow peppers, cut into 1/2-inch wide pieces
  • broccoli rabe/rapini, cut into even sized portions, leaves and stems still attached (no need to peel the stems)
  • whole button mushrooms or large slices of portabella mushrooms
  • zucchini or other summer squashes, cut in half lengthwise and then into 3/4-inch long pieces
  • pea pods

Aioli Directions:

Grate the garlic clove(s) directly into your blender or food processor. Add lemon juice and salt; let sit for a couple of minutes. Add eggs and blend until combined. With the blender running, slowly add the olive oil in a thin, steady stream. Taste for seasoning and add more salt or lemon juice as needed. Can be prepared up to 3 days in advance.


Roasted Veggie Directions:

  • extra virgin olive oil
  • kosher salt
  • freshly ground black pepper

Place vegetables on rimmed baking sheets according to how long each needs to bake. (See chart below)

(Veggies with about the same baking time can be placed on the same sheet. I tend to keep each variety separate so I can remove the veggies individually if necessary and keep them separate for plating.) Drizzle all the veggies with just enough olive oil to moisten, and sprinkle with salt and pepper. (You don’t want too much olive oil or your veggies will taste greasy.)

Roast in a pre-heated 425 degree oven for the time reflected below or until they are fork tender. Turn the veggies periodically while they are roasting. Remove from oven and cool to room temperature. Arrange on platter and serve with the aioli on the side.

Approximate Roasting Time for Veggies: (watch the veggies carefully because every oven and veggie is different)

  • beets – 40 to 50 minutes
  • petite carrots – 40 to 50 minutes
  • romanesco – 20 to 30 minutes
  • broccoli – 20 to 30 minutes
  • cauliflower – 20 to 30 minutes
  • sweet potato – 20 to 30 minutes
  • eggplant – 20 to 30 minutes
  • red, orange, or yellow peppers – 15 to 20 minutes
  • broccoli rabe/rapini – 15 to 20 minutes
  • whole button mushrooms or large slices of portabella mushrooms – 15 to 20 minutes
  • zucchini or other summer squashes – 15 to 20 minutes
  • peapods – 15 to 20 minutes


BIZCOCHITOS (OFFICIAL STATE COOKIE OF NEW MEXICO)

OLYMPUS DIGITAL CAMERA

There are two things that I am about to confess that could possibly make you uncomfortable or at the very least, lower what little esteem you might otherwise have for me. But I am willing to take that chance because I feel strongly about both issues. So, if you aren’t afraid of what I might say, continue reading. Just remember – you were warned.

First of all, I don’t like Snickerdoodles. (In my estimation, they’re boring.) Secondly, I tend to be a real cynic when it comes to politicians. (Maybe I listen to too much NPR?) But there – I’ve stated my position for all to see and I feel better for having done so. Now, you ask, what does all this have to do with a cookie recipe? (An excellent question BTW!)

Well first of all, these cookies are like Snickerdoodles, but as Mr. C remarked (BTW, he doesn’t like Snickerdoodles either), “the cookies are like Snickerdoodles, but on steroids”! (He loves them, in other words.)

And my remark about politicians, well my opinion of politicians was reaffirmed when I read about the New Mexico legislature that voted in 1989 to make Bizcochitos the state cookie of New Mexico. As with all legislative matters, it seems to me that there must be dissension. (Must be an implied amendment, probably tucked into the Bill of Rights somewhere between the right to keep and bear arms and the guarantee of a speedy, public trial with an impartial jury.) Anyway, it seems the New Mexico legislature agreed immediately that the Biscochitos/Bizcochitos should indeed be the state cookie. But in what seems to me to be typical legislative posturing, they had to argue about something. So they apparently duked it out over the spelling of the cookie name. Really?? The spelling??

Regardless, I must give them credit for their choice of the state cookie. Because if ever a cookie should receive accolades, or the title of “state cookie”, it is this amazing creation. And the best part, they are really easy to prepare.

So next time you want to make a cookie that is just a little different, has a taste that is very unique, and isn’t a Snickerdoodle, give this recipe a try. I promise you will become as hooked as we are.

And if anyone from the 1989 New Mexico legislature is reading this post, (like that’s even remotely probable) I offer sincere condolences for the sleep you must have lost over making such an important, life changing decision. Hopefully other issues on the docket that year didn’t require the expenditure of as much thought provoking, soul searching time to reach an adequate result.

  • 1 c. lard*, chilled (yep, lard!)
  • ½ c. (1 stick) unsalted butter*
  • 1 c. plus 3 T. sugar, divided
  • 2 eggs, room temperature
  • 4 c. unbleached all-purpose flour
  • 2 tsp. baking powder
  • ½ tsp. salt
  • 2 tsp. anise seeds, finely ground in a spice grinder
  • 3 T. good bourbon or brandy**
  • 2 tsp. ground cinnamon

Beat the lard, butter, and 1 cup of the sugar together until light and fluffy. Add the eggs and beat until well blended. In a separate bowl, whisk together the flour, baking powder, salt, and ground anise seeds. Add to creamed mixture along with the bourbon. Beat no longer than necessary to incorporate the dry ingredients. Chill for about 45 minutes or until the dough is no longer soft. Form the cookies using either of the methods described below.

1)      Using a small ice cream scoop, drop the cookies onto a plate covered with a combination of the remaining 3 tablespoons of sugar and the cinnamon. (Don’t roll the balls in the mixture.) Place the cookies on parchment paper lined baking sheets sugar side up. Flatten each ball to about a ¼-inch thickness with the bottom of a glass. Bake in a pre-heated 350 degree oven for 12-14 minutes or until tops of cookies are just set and a pale golden color. Cool cookies on wire racks. Store in an air-tight container for up to a week.

2)      Roll out the dough between waxed paper to just over ¼-inch thick. Cut with flour dusted cutters into desired shapes or cut into 2-inch rounds. Combine the remaining 3 tablespoons of sugar and the cinnamon on a small plate. Dip the unbaked cookies into the cinnamon-sugar mixture on one side. Place cookies on parchment paper lined baking sheets (sugar side up). Bake in a pre-heated 350 degree oven for 12-14 minutes or until tops of cookies are just set and a pale golden color. Cool cookies on wire racks. Store in an air-tight container for up to a week. This recipe is based on Jane Butel’s Biscochitos recipe.

*1 cup butter and ½ cup vegetable shortening can be substituted for the lard and butter amounts reflected in my recipe

**Apple juice or milk can be substituted for the bourbon or brandy, however the cookies won’t be nearly as tasty


TRES LECHE (THREE MILKS) CAKE

OLYMPUS DIGITAL CAMERA

OLYMPUS DIGITAL CAMERA

So for years I have been hearing about this cake. But there was just something about the whole concept that never really appealed to me. But because I was fixing a Southwestern meal for last Sunday’s JazzVox pre-concert meal, I decided what-the-heck, give it a try. Well, you know, sometimes I can be a real dummy! If this cake is beloved throughout Latin America, which is literally millions of people, why in the world did I hesitate? Like I said – sometimes I can be a real dummy! Because ladies and gentlemen, this is one of the best desserts you will ever sink a fork into. It is incredibly easy to prepare, beautiful to look at, needs no special ingredients, and has to be prepared ahead of time so that it can spend some quality time in a cold environment. What can be better than that?

And you want compliments? Holy cow, I had people coming at me from all sides telling me how amazing it was. Everyone absolutely loved it!

So next time you want to impress the pickles out of your family or guests, make this dessert. The texture is somewhere between cake and pudding; so very soft and delightful on the tongue. (Just don’t forget the whipped cream. It is an absolutely mandatory part of the whole experience.) And I say “experience”, because that’s what eating a piece of this cake is. It’s a taste treat unlike any other and definitely one not to be missed.

And to those of you who for years told me about this cake to no avail, I offer my sincere apologies. I was so very wrong not to try this delicacy when it was first brought to my attention. But I’m a smart girl. I can learn. Next time someone waxes poetic about a favorite dish, I will try to be more receptive. I still draw the line at pickled pig’s feet and certain innards, but I will endeavor to keep a more open mind to other new taste adventures.

  • 1 c. unbleached all-purpose flour
  • 1½ tsp. baking powder
  • ¼ tsp. salt
  • 5 large eggs, room temperature, separated
  • 1 c. granulated sugar, divided
  • 1/3 c. whole milk
  • 2 tsp. vanilla extract
  • 1 (14-oz.) can sweetened condensed milk
  • 1 (12-oz.) can evaporated milk
  • 1 pint heavy cream, divided
  • ¼ c. powdered sugar
  • 2 c. sliced fresh strawberries (or berry of choice)

Whisk together the flour, baking powder, and salt in a large bowl. Beat the egg yolks with 3/4 cup of the sugar on high speed until the yolks are pale yellow. Stir in the whole milk and the vanilla. Pour the egg yolk mixture over the flour mixture and stir very gently until combined.

Beat the egg whites on high until soft peaks form. With the mixer on, add the remaining ¼ cup sugar and beat until the egg whites are stiff but not dry. Gently fold the egg white mixture into the flour mixture until just combined. Spoon the batter into a lightly buttered 9×13-inch glass pan and even out the surface. Bake on the middle rack in a pre-heated 325 degree oven until the cake is lightly golden and reaches an internal temperature of 200 degrees, 30-35 minutes. Remove the cake to a cooling rack. Cool completely before proceeding. (While the cake is cooling, I kind of push down the edges so the top is of even thickness.)

Meanwhile whisk together the sweetened condensed milk, evaporated milk, and ¼ cup of the heavy cream in a small bowl. Poke the top of the cake all over with a fork. Gradually pour the milk mixture over the top of the cake, cover with plastic wrap, and refrigerate overnight.

Place the remaining heavy cream into the bowl of a stand mixer. Using the whisk attachment, whisk until stiff peaks form. Change to medium speed and whisk in the powdered sugar. Spread the whipped cream topping over the cake and allow to chill in the refrigerator until ready to serve topped with strawberries.

BRAISED KALE WITH BACON AND GARLIC

OLYMPUS DIGITAL CAMERA

When I first started working with kale I was amazed how fast it went from looking like too much to wondering if it was enough! Somehow I didn’t think it would shrink like spinach or other greens when cooked. Well – silly me! It can perform the ritual shrinking act just as well as any other cooked green – thank you very much! So this recipe, even if it starts with 6 cups of chopped kale only feeds 2 people, and then one of them is going to be kind of short-changed. (Sorry Mr. C., but I so does love me my greens.)

Of course, knowing that all of you who read my blog are super intelligent and can easily double, triple, quadruple, etc. a recipe, I leave it to you to figure out a) how many people you are going to be serving, and b) if there is a greens piglet like me at table. If so, then of course you should fix an entire portion just for them. And why is that you ask. Well, after you have tasted this braised kale, you will understand that to a greens lover, eating kale fixed this way approaches nirvana. (Nirvana: a state of perfect happiness) So take a clue from this Buddhist concept, and transcend yourself into your happy place by partaking of this delicious and nutritious dish at your earliest convenience. You will not only love yourself, (and isn’t that special), but your family will think you the greatest. (My aim is to help you achieve your own personal best.)

So get thee to the store for some organic kale, some bacon (who cares if it’s organic – it’s bacon for God’s sake), and whip up a batch of this healthy and delicious veggie dish. You will not be disappointed, unless you don’t fix enough that is. So plan well and enjoy every mouth watering bite. (And BTW: if you can stay out of the kale while it is cooking, you are a far better person than I am. Just sayin’!)

  • 1-2 thick slices of meaty bacon, chopped
  • 1 garlic clove, minced
  • 6 c. rough chopped kale leaves (stems removed and thoroughly washed)
  • 4 green onions, thinly sliced
  • 1 c. chicken stock
  • tiny pinch crushed red pepper flakes
  • kosher salt
  • freshly ground black pepper

In a large heavy covered skillet, cook the bacon over medium heat until crisp. Remove from pan and let drain on a paper towel. Add the garlic to the fat remaining in the skillet and cook for one minute. Add the kale, green onions, chicken stock, red pepper flakes, and simmer, covered, for 10 minutes, or until the kale is wilted and tender. Remove the lid, add the reserved bacon, and continue to simmer until most of the liquid is evaporated. Season with salt and pepper and serve immediately.


POSOLE (HOMINY) SIDE DISH WITH PORK AND GREEN CHILE

OLYMPUS DIGITAL CAMERA

So I guess the first order of business is to apologize for not posting for over a month. But we were on a trailer trip and I just didn’t have the time or the inclination. (How’s that for putting my priorities in the proper order?) But I did return from our visit to New Mexico with a couple of new and exciting recipes to share with you. But first, a little insight into New Mexico’s take on Southwestern cuisine.

Unlike most of the Mexican restaurants in the Seattle area, whole pinto beans are served in New Mexico restaurants rather than mashed or refried beans. And along with the whole beans, the two best restaurants we visited served posole (dried white corn hominy) as a side dish instead of rice. (I seriously dislike most Mexican rice, so this was just fine by me!)

In fact, I enjoyed the posole as a side dish so much, I couldn’t wait to get home and work up a recipe for myself.

Now as most of you know, most posole is served as a stew. In fact, I have both red and green posole stew recipes already posted on this site – Red (Rojo) Posole with Pork and Green Posole with Chicken. But when posole is served as a side dish, all the wonderful flavor of a stew is still right there; it just isn’t as “saucy”. But before I say more about this recipe, and because I know you are all just dying to know if we enjoyed our trip, the answer is yes, yes, yes! In fact, we can hardly wait to return. The quality of the art in the Santa Fe area was beyond belief! The pueblos, Aztec Ruins National Monument, and Mesa Verde were spectacular. And of course the food was wonderful. And the high road (scenic byway) between Taos and Santa Fe was an absolute delight. (Very reminiscent of driving through the hill towns in Italy.)

Along the way (all 5,327 miles) we visited other areas that were equally amazing. Our favorites were Craters of the Moon, Moab, Bandelier National Monument, and Vedauwoo.

But the area that captured our hearts and caught us completely by surprise was the Eagle Cap Wilderness in North-Eastern Oregon. What an absolutely enchanted and lovely part of the world. So much so, that I told Mr. C. that if we didn’t already live in paradise, I could actually see us living in a home somewhere between Enterprise and Joseph, Oregon. Beautiful mountain vistas, plenty of open space, creeks in abundance, a lovely lake, and the cost of living about half what it is here. (What’s not to love about that, right?!) The photos below were taken at our RV park outside Joseph, Oregon where we spent 3 fabulous nights.

OLYMPUS DIGITAL CAMERA

OLYMPUS DIGITAL CAMERA

(The “swimming” hole just beside our trailer)

OLYMPUS DIGITAL CAMERA

(The creek right behind our trailer)

OLYMPUS DIGITAL CAMERA

(The cow pasture and view of the mountains just behind our trailer)

But enough with the travel log and back to this recipe. Suffice it to say, that when I served this dish to Mr. C. last evening, he declared it a masterpiece. And of course I had to agree with his excellent evaluation. If there ever was a food that could awaken the spirits of the indigenous people from the region now known as New Mexico, it would have to be this combination of ingredients.

So if you too feel the need for a little awakening or just a change from your normal rotation of favorite dishes, give this recipe a try. It is simple to prepare, but it does take some planning and time to cook. So find yourself some dried white corn posole (QFC usually carries it) and take a culinary trip to the Southwest. You will not be disappointed.

For additional recipes from the Southwest, look under Mexican Food Recipes.

  • 2 c. dried posole
  • water
  • 1 T. vegetable oil
  • ½ lb. lean pork, cut into small pieces and dried with paper towels
  • kosher salt
  • freshly ground black pepper
  • 1 med. onion, chopped
  • 4 garlic cloves, minced
  • 1 c. canned mild diced green chiles or roasted, peeled, and chopped Anaheim chile
  • ½ tsp. dried oregano (Mexican oregano preferably)
  • 6 c. chicken broth

Place dried posole in a non-reactive container, cover with water by about 3 inches, and place in your refrigerator overnight. Drain well before proceeding.

Heat the oil in a large, covered pan. Season the meat well with salt and pepper. Add to the pan and fry, stirring frequently until brown. Add the onion and cook until transparent, about 4 minutes. Add the garlic and cook for 1 minute. Add the chile, oregano, and chicken broth. Bring to a boil, reduce heat, cover, and simmer for about 3 hours or until the posole is tender and some of the kernels have popped open or “blossomed”. (After about 2 hours of cooking, taste and adjust the seasoning.) Stir regularly and add water as needed. (Don’t add too much water, because you are not making stew. This recipe is served as a side dish, in much the same way you would serve whole or refried beans.) Adjust seasoning. Serve with any of your favorite Southwestern/Mexican dishes.


SIMPLE ITALIAN ROCKET (ARUGULA) SALAD

OLYMPUS DIGITAL CAMERA

I don’t know who invented those plastic flip top boxes that contain ready to eat greens, but whoever it was, she has my everlasting gratitude. And yes, triple washed greens were invented for lazy people like me who love salad but don’t always have the willpower or energy to wash a bunch of greens. (And yes, I know part of the solution for flagging energy – more greens, right?) So for me, prewashed organic greens that come all tidily nestled in their own plastic tub or bag are an absolute Godsend. Conundrum solved!

Plus, the package provides the pull date, so I can reasonably judge how long the contents of the box or bag will last before becoming yard waste fodder. (As many of you know, I need all the help I can get with my predisposition to allow perfectly good veggies to molder in my refrigerator.)

So with pre-washed veggies in mind, I decided to post another simple salad that Mr. C. and I enjoy regularily. And the great thing about this salad; it compliments just about any entrée, Italian or not. So without further ado, the only thing left to say about this salad besides how easy and fast it is to prepare is, yummy, yummy, yummy!!!

  • 1 T. fresh lemon juice
  • ¼ tsp. kosher or sea salt, or more to taste
  • 2 T. extra virgin olive oil
  • ¼ c. thinly sliced red onion
  • ¼ c. salted sunflower seeds
  • 4 c. baby arugula (rocket)
  • shaved Parmesan, as much or as little as you want (remember: the better the Parmesan, the better the salad)

Whisk together the lemon juice, salt, and olive oil in a salad bowl. Add the red onion, sunflower seeds, and arugula. Toss in the Parmesan. Serve immediately.

MOCHA CHOCOLATE CHIP SHORTBREAD BAR COOKIES

OLYMPUS DIGITAL CAMERA

What is it about shortbread? And why is it that most people would choose shortbread over almost any other kind of cookie? And why do I keep posting recipes for shortbread? Well I know the answer to the last question at least. Personally, I absolutely adore shortbread because first and foremost, it’s not overly sweet. And almost anything I choose to add to the basic recipe is going to taste marvelous. And I love the amazing texture of shortbread. It’s at once soft, crisp, crunchy, crumbly, and best of all – buttery. And then of course there is the ease of preparation. So I guess when I analyse what it is about this amazing Scottish creation, every single factor leads to cookie perfection. (Of course what I still don’t understand is how the country that gave us shortbread could think up a concoction like haggis? My guess is that in order to get young Scottish children to eat this pudding made with sheep’s heart, liver, and lungs, minced onion, oatmeal, suet, spices, and salt encased in a sheep’s stomach, parents had to have something like shortbread to reward their children if they actually finished their plate!) But I digress…..

Now, did I happen to mention that shortbread bar cookies are really easy to prepare? I think so, but if I didn’t, I’m telling you now! In fact, the most novice of cooks should be able to whip up a batch of these cookies without a worry in the world.

So whether you have been baking cookies like I have (since God was a child), or you have never before baked anything with gluten in it, I suggest that shortbread is perfect regardless of your level of expertise. And just to make sure you know that shortbread is nothing if not adaptable, there are 12 other shortbread recipes on this site, (7 alone under “Christmas Refrigerator Shortbread Cookies”). So even if you are not a mocha or chocolate fan (all 2 of you), there should be a shortbread recipe already posted that speaks to your inner cookie monster. And yes, I am going to say it right here on this blog. Homemade shortbread is almost always better than packaged shortbread. And a lot cheaper too! Of course Walker’s shortbread could be the exception (flavor wise that is), but again, there’s still the monetary aspect to consider. They ain’t cheap! (And yes I know, some would say I’m what’s really cheap in this whole equation. I however, prefer to think of myself as merely “spendthrift challenged”! Thank you very much!!)

  • 1 c. (2 sticks) unsalted butter, room temperature
  • 2/3 c. powdered sugar
  • ½ tsp. vanilla
  • ¼ tsp. kosher or coarse sea salt
  • 2 c. unbleached all-purpose flour
  • 2 tsp. instant espresso coffee (I use Medaglia D’oro. It comes in a small red, white, and green labeled jar with a bright green lid.)
  • ½ c. mini chocolate chips

Whip the butter and powdered sugar together until creamy and light. Add the vanilla and salt; beat until smooth. In a separate bowl, whisk together the flour and espresso powder. Stir in the mini chocolate chips. Gradually add the flour mixture to the butter, mixing just until combined.

Scoop the dough into a lightly buttered 9×13-inch glass baking pan, pat into place, and level off the top with an offset spatula. Prick the dough all over with a fork.

Bake in a pre-heated 325 degree oven for about 40-50 minutes or until a light golden brown. (Do not under-bake.) Remove from oven and cool for about 6 minutes before cutting into desired size pieces. Cool completely before storing in an airtight container.

ROMAINE AND RED ONION SALAD WITH CREAMY PARMESAN-PEPPERCORN DRESSING

OLYMPUS DIGITAL CAMERA

I love salad, and for quite some time now I have been envisioning a creamy salad dressing with Parmesan cheese and peppercorns having the starring roles. So recently when I needed a simple salad to go with an Italian food themed dinner I was planning, I figured there was no time like the present to work up a recipe for the dressing I had been imagining.

I knew the dressing had to include vinegar and olive oil. But the creaminess I was seeking could only be achieved if I included mayonnaise. My problem then was – how not to taste the mayonnaise. (Don’t get me wrong, I love mayonnaise. But I really didn’t want mayonnaise to be the predominant flavor.) So I started with the vinegar and olive oil, and added mayonnaise a tablespoon at a time until I achieved the consistency and flavor I wanted.

So what I came up with is a dressing that tastes a lot like Caesar dressing, but not quite. It has an intense Parmesan and peppercorn flavor that works perfectly with simple romaine. Add a small amount of thinly sliced red onion, and you have a very simple salad to prepare, but one that packs a lot of flavor. And luckily, the dressing works great with just about any greens or veggies you might have on hand.

So do yourself a favor. Build some of this dressing and use it on any of your favorite combinations of greens and chopped vegetables. Or if you are feeling completely uninspired some evening, try this recipe as written. (Some nights just lend themselves better to letting someone else supply the creativity while zombie like, you follow the recipe instructions as given.) Believe me, I get it. I have had more of those times than I care to admit. Just get the dinner on the table, and be done with the whole thing! And yes, before you ask, I still have evenings like that every once in awhile. Now granted, not as many as when I was a working mommy, but there are still times when cooking dinner and cleaning the bathrooms are equally abhorrent! Those are the times I set myself on cruise control and rely on muscle memory to find my way around the kitchen. Actually in retrospect, some of my best meals have been executed by the automaton that lies within! Perhaps I should give this side of me free rein more often. I’m sure Mr. C. would appreciate dining more often on food he has previously enjoyed rather than always being subjected to yet another new recipe I am trying to perfect. I’ll think about it. Let you know what I decide. But for now, I will continue bombarding you with my new and other peoples’ fabulous recipes until I can no longer stand the sight of my BlueStar range. Sorry honey.

  • ¼ c. white wine vinegar
  • ¼ c. mayonnaise
  • 2 small garlic cloves, finely minced
  • 1 tsp. Dijon mustard
  • ½ tsp. kosher salt
  • lots of coarse ground black pepper
  • 6 T. extra-virgin olive oil
  • 2/3 c. finely grated Parmesan cheese
  • chopped romaine
  • very thinly sliced red onion

Whisk together the vinegar, mayonnaise, garlic, mustard, salt, and pepper. Whisk in the olive oil until mixture emulsifies. Gently stir in the Parmesan. Adjust seasoning. Refrigerate until ready to use. Bring to room temperature before mixing with romaine and red onion. Serve immediately.

Note: This is a potent dressing, so error on the stingy side when dressing the greens. You can always add more dressing as needed.