FRESH PLUM AND DRIED FIG CHUTNEY

OLYMPUS DIGITAL CAMERA

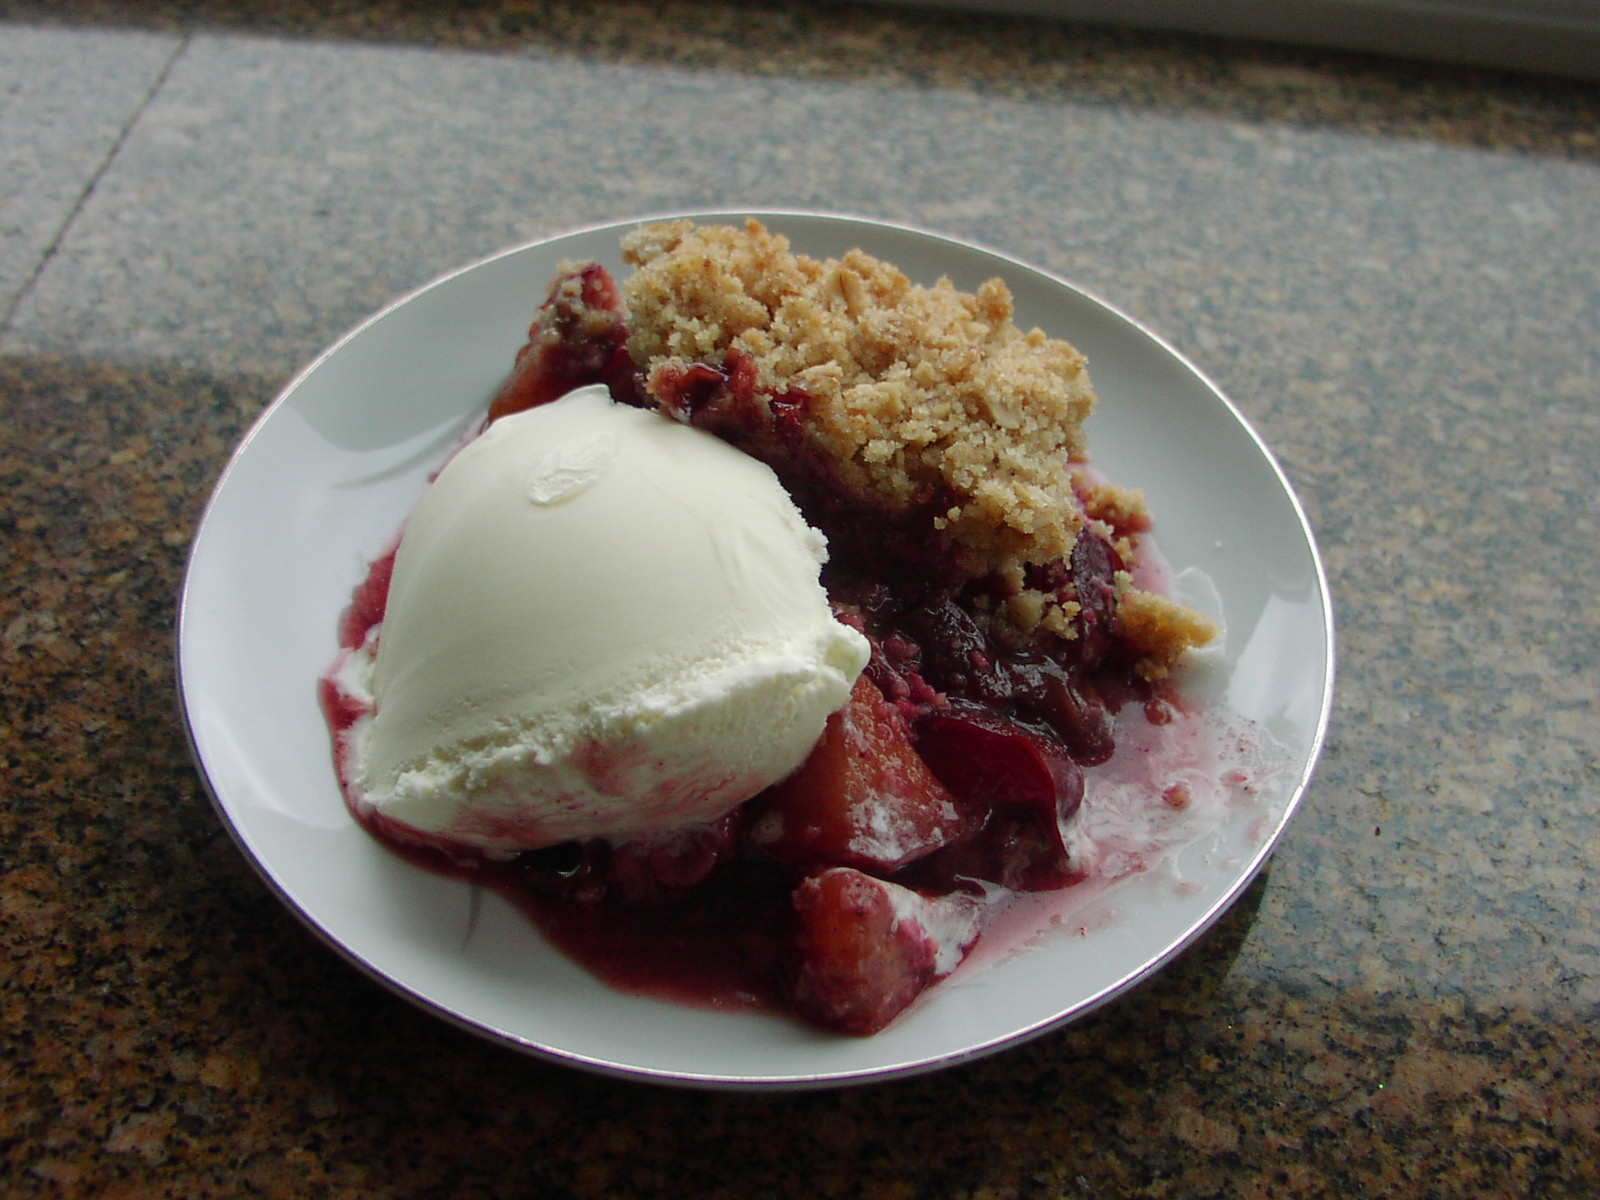
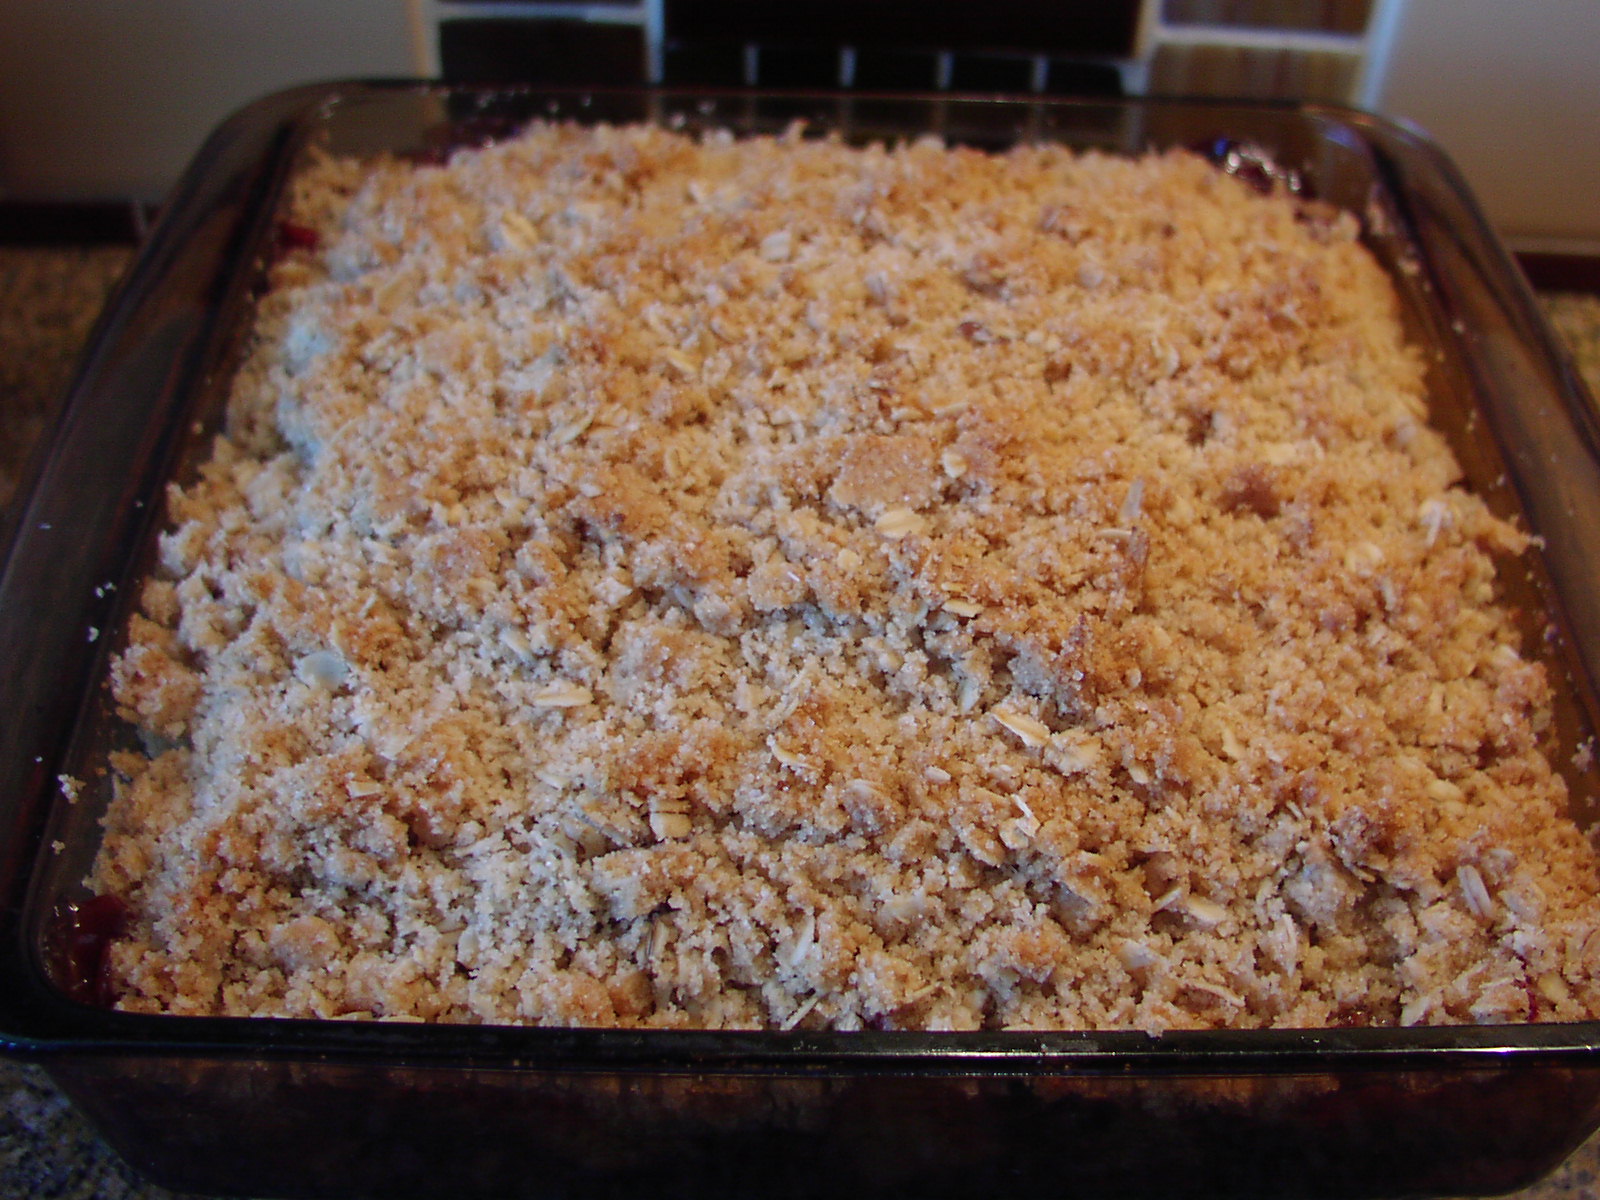
Yesterday I posted my recipe for Spicy Plum Crunch, and tomorrow I plan on posting my recipe for Spicy Plum Freezer Jam. I’m calling this 3 recipe mini-series starring fresh plums “Plum Crazy”.

This is actually the first recipe I made using the plums we received from our dear friends Mark and Vicki. Their plum tree limbs were literally dripping with plums and Vicki had already used as many as she could. So when they offered to send us home with a bunch, we jumped at the chance. Especially since all morning we had been scarfing down Vicki’s delicious Prune Relish and savoring every bite. So of course I had to have the recipe and then of course I had to change it a wee bit. With her approval of course! I thought just a small amount of dried fig would be a nice addition and that the resulting concoction would be more like a chutney than a relish. And in creating a “chutney”, I could achieve one of my own culinary goals.

I think in one of my earlier posts I mentioned that I had never been able to produce a decent chutney. And even though the recipe Vicki gave me calls itself a “relish”, I theorized that by adding just a little bit of fig, it would not only add an additional depth of flavor, I could then allow myself to label it a ”chutney”. And truly, I can’t think of a better condiment to go with a spicy curry than this exceptional combination of ingredients. And of course there was the added benefit that now I could legitimately cross “chutney” off my “culinary no can do” list. (Remember: It’s really just all about me!)

So if you too are a chutney lover, this is the recipe for you. It’s very easy to prepare and costs a fraction of what those small 9-ounce bottles of good chutney cost in the grocery store. And truly, if you don’t give this recipe a try, you’re plum crazy! (And I don’t mean that in a good way!)

  • 4 c. chopped fresh plums or prunes
  • ½ c. chopped dried figs
  • 2 sweet onions, rough chopped
  • 2 c. apple cider vinegar (I use organic unfiltered cider vinegar)
  • 1 T. kosher salt
  • 2 tsp. freshly ground black pepper
  • 1 T. ground cloves
  • 1 T. ground cinnamon
  • 1 T. dry mustard
  • 4 c. sugar

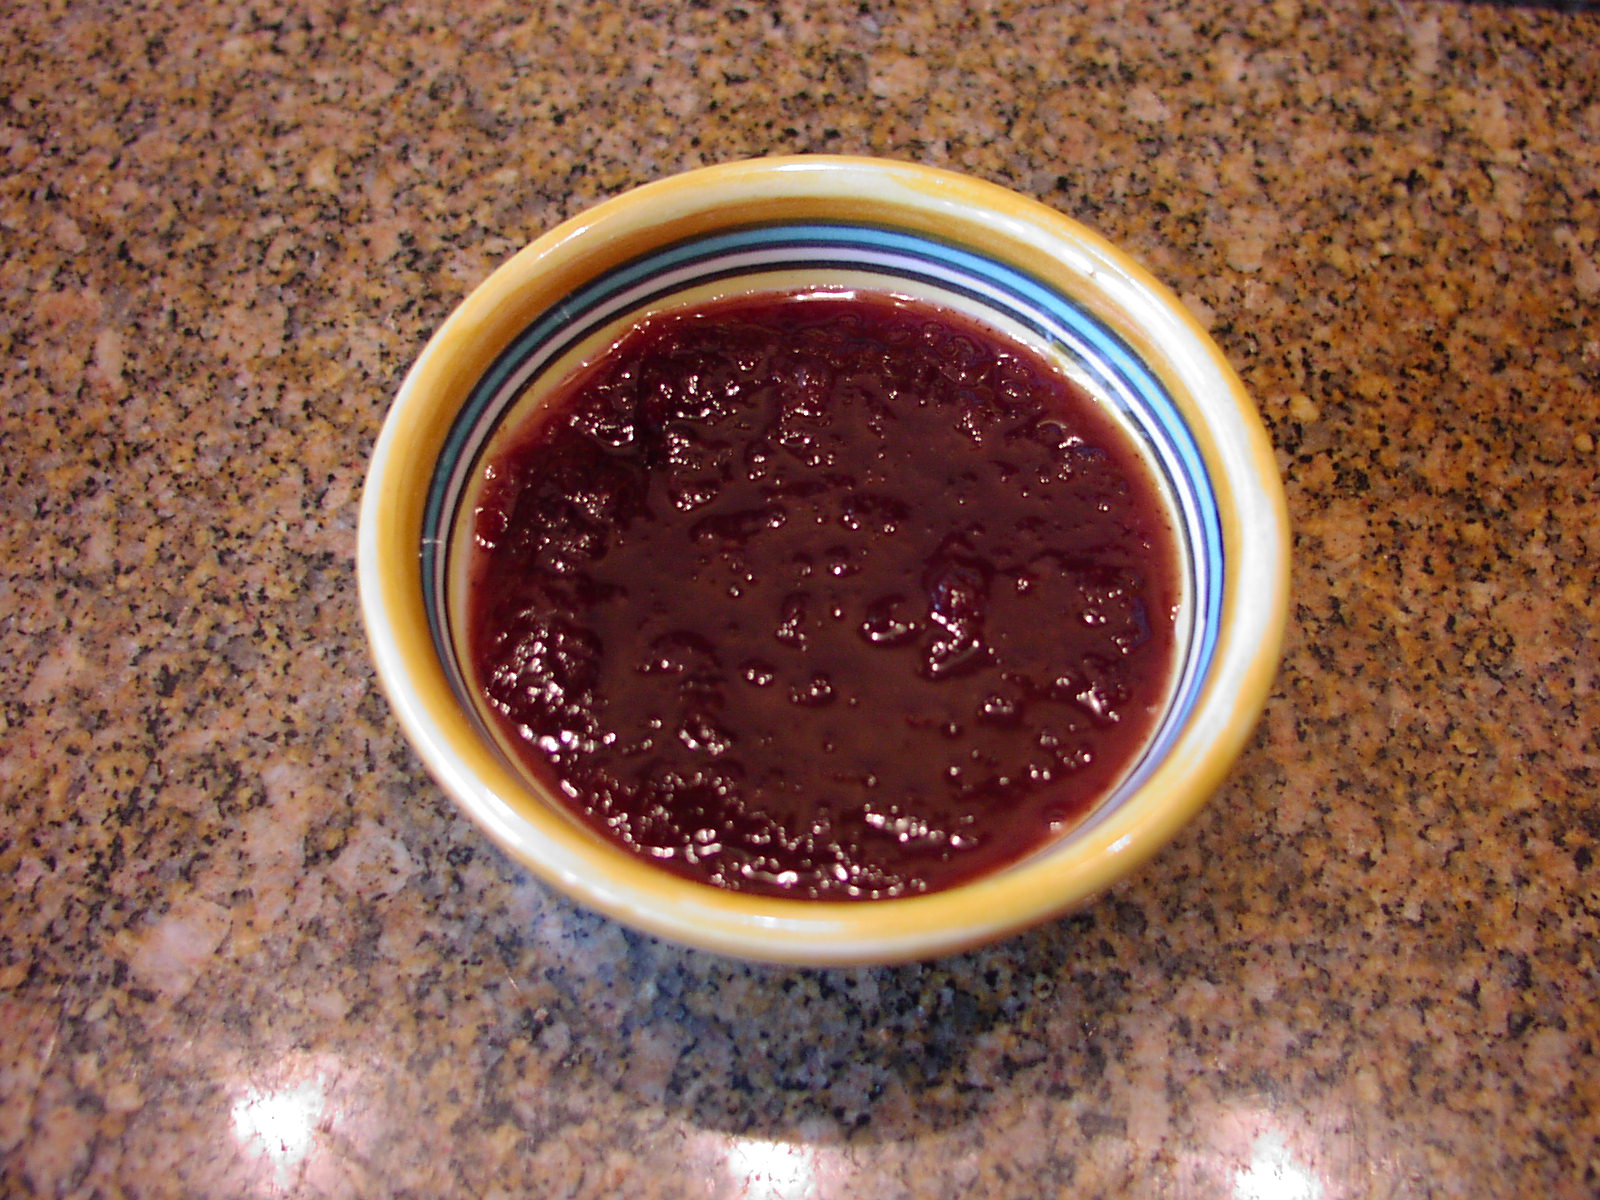
Place the plums, figs, and onion in the bowl of your food processor. Whirl until everything is smooth or to your own desired consistency. Pour into a heavy pan. Add the vinegar, salt, pepper, cloves, cinnamon, dry mustard, and sugar. Bring to a rapid boil, reduce heat, and simmer for an hour. Stir periodically. Remove from heat and allow to cool before placing in 5-6 pint size freezer containers*. Attach lids and let sit overnight before placing in your freezer. (Don’t even think of trying the chutney for at least 2 weeks.)

Wonderful as a topping on mild creamy cheese frosted crackers. (Think chèvre.) Lovely on baked Brie lightly garnished with toasted pecans or walnuts. (See my recipe for Baked Brie with Curry Powder, Chutney, and Toasted Pecans under the title “Two Brie, or Not Two Brie: That is the Question”. And of course, great as an accompaniment to any curry dish. (See my recipes for Chicken, Shrimp, or Roasted Vegetables in a Curry Masala Sauce and Curry Sauce for Chicken, Shrimp, Beef, or Lamb.)

*If you prefer, the hot chutney can be stored in prepared canning jars.

SPICY PLUM CRUNCH

OLYMPUS DIGITAL CAMERA

I must be plum crazy. There just isn’t anything about plums I don’t like. They are easy to pit*, you don’t have to peel them, and they are just too delicious for words. And when you combine them with spices, sugar, and a crunchy topping, there is just nothing better. Well, except of course if you get the plums free of charge. (There’s absolutely nothing better than free fruit!) Which is just what happened to me last week.

We were over at our friends Mark and Vicki’s beautiful home in Mount Vernon, and their plum trees were covered with fruit. Vicki had been canning plum this and that until even she, who also happens to be “plum crazy” had thrown her hands in the air and declared – enough! So we were asked if we would like to take a few bushels home, (no thank you), but we would gladly accept a few (thank-you very much)!

So one of the creations Vicki had prepared was a Fresh Plum Relish. It was absolutely delicious. So I begged for the recipe, changed it just a bit, and came up with Fresh Plum and Dried Fig Chutney (recipe to follow later this week). I also decided to make a freezer jam. It too turned out amazing. So look for my Spicy Plum Freezer Jam recipe in the near future too.

But the pièce de ré·sis·tance, mainly because it is a stand-alone dish and not merely an accompaniment, is this delightful crunch.

The fruit part is sweet and lightly spiced, while the topping is crunchy, sweet, and buttery. In other words, there is just nothing not to like! So join my club of plum crazies, and fix one of these recipes starring fresh plums while they are at their peak and not coincidentally at their cheapest price of the year. Or better yet, find a friend with a sagging plum tree and offer to exchange a jar of freezer jam for a bag of plums. That would be what I call a win/win situation for everyone involved. And again Mark and Vicki, thanks for the fruit. It went to good use.

  • 2 T. + ¾ cup unbleached all-purpose flour
  • 1 tsp. ground cinnamon
  • ½ tsp. ground nutmeg
  • ¼ tsp. ground cloves
  • 1½ c. brown sugar, lightly packed, divided
  • 3 T. plum vodka, crème de cassis liqueur, or any raspberry flavored liqueur like Chambord or Framboise
  • 6 c. chopped plums (no need to peel)
  • ¾ c. granulated sugar
  • ¼ tsp. kosher salt
  • ¾ c. oats
  • ½ c. (1 stick) cold unsalted butter, diced
  • vanilla ice cream or sweetened whipped cream

Whisk together the 2 tablespoons of flour, cinnamon, nutmeg, cloves, ¾ cup of the brown sugar, and the plum vodka. Stir in the plums and pour the mixture into a lightly buttered 8 x 8-inch glass baking dish.  Combine the remaining ¾ cup flour, granulated sugar, remaining ¾ cup brown sugar, salt, oats, and butter in the bowl of an electric stand mixer fitted with the paddle attachment. (If you don’t have a stand mixer, cut the butter into the mixture by hand.) Mix on medium low speed until the mixture is crumbly and the butter is the size of peas. Scatter evenly over the top of the plums.

Bake in a pre-heated 350 degree oven for 40 to 45 minutes, or until the plums are bubbling and the top is browned.

OLYMPUS DIGITAL CAMERA

Serve warm or at room temperature with ice cream or whipped cream.

*If you ever have trouble pitting plums, just cut them in 6-8 sections top to bottom. Then simply peel the sections away from the fruit. BTW, this works for any fruit with a pit.


HAM, FARRO, CANNELLINI BEAN, AND SWISS CHARD SOUP


OLYMPUS DIGITAL CAMERAWe have experienced a really strange summer this year in the Pacific NW. No rain for weeks on end, hot temperatures, and more aggressive winds than normal. Then suddenly about 2 weeks ago, the skies clouded over, the winds whipped up to a mighty force, and we received our first rain in months. And believe me, there was rejoicing heard all around our glorious state. The farmers were happy, the hardy folks fighting our numerous wild fires were ecstatic, and those of us who were trying to keep our yards and gardens alive could be found dancing in the showers while sending grateful thanks up to whichever benevolent deity would listen.

So now, after several decent rain storms our yards are looking better, the webs are starting to come back between our toes, and at least to this native Washingtonian, it appears that fall is on its way. Now don’t get me wrong. I’m not wishing for the gray days of winter to get here any sooner than they must. But when I wake up thinking about making soup, I know that it’s my own internal precursor to the onset of fall.   (Some people get aches and pains in their joints when fall weather approaches; I suddenly get a desire to build soup.)

So yesterday morning I decided to build a version of Deborah Madison’s Smokey Farro and Chickpea Soup. I changed a couple of ingredients to suit my taste, and added some ham to add a depth of flavor and additional protein. The result was an absolutely divine new addition to my fall and winter soup recipe collection. I hope you too will add this to your soup recipe repertoire. It is delightfully easy to prepare, healthy to the max, and absolutely delicious.

  • 4 c. water
  • 1 c. emmer farro (I use Bluebird Grain Farms organic Emmer Farro)
  • ¼ tsp. kosher salt
  • 2 T. extra virgin olive oil
  • 1 lg. onion, finely chopped
  • 2 stalks celery, finely chopped
  • ½ c. chopped fresh parsley
  • 2 garlic cloves, minced
  • 1 bay leaf
  • 1 heaping cup diced ham (for vegetarian soup, leave out ham)
  • 3 c. vegetable broth
  • 2 c. water
  • 1½ tsp. Spanish smoked paprika
  • freshly ground black pepper
  • 1 (14.5-oz.) can fire-roasted diced tomatoes, undrained
  • 1 (15-oz.) can cannellini beans, rinsed and drained
  • 4 c. chopped Swiss chard
  • 4 good sized green onions, thinly sliced
  • ¾ c. finely grated Parmesan cheese, garnish
  • garlic croutons (see recipe attached) or toasted baguette slices, opt.

Place the 4 cups of water, emmer farro, and salt in a covered pan. Place on high heat and bring to a boil. Boil for 5 minutes, stirring frequently. Reduce heat, cover, and simmer for about 45 minutes or until berries are plump and chewy. When the farro is done, drain, reserving the excess liquid, and set both the farro and reserved liquid aside. (You may need the liquid to thin out the soup at the end of the cooking time.)

Meanwhile, heat the olive oil in a large heavy covered soup pot and fry the onion, celery, and parsley for a few minutes until onion is tender, stirring frequently. Add the garlic, bay leaf, and ham; cook for 2 minutes. Add the broth, 2 cups water, smoked paprika, pepper, cannellini beans, and canned tomatoes. Bring to a boil. Reduce heat, cover pan, and simmer gently for about 20 minutes. (If the farro isn’t done after the soup is finished simmering, remove the soup from heat and set aside until the farro is drained and ready to be added to the soup.)  When the farro is drained and ready, place pot back on heat, and stir in the Swiss chard and farro. Simmer for about 3 minutes or until the chard wilts. Adjust seasoning. If the soup seems too thick, add some of the reserved farro cooking water. (You want a nice brothy soup.) Stir in the green onions just before ready to serve.

OLYMPUS DIGITAL CAMERA

Serve with Garlic Croutons or toasted baguette slices, and grated Parmesan cheese.

GARLIC CROUTONS

Chop up some small bite sized pieces of a chewy, artisan baguette. Place in a frying pan with butter or olive oil (or a combination) and sauté until each crouton is crunchy. (This takes about 45 minutes because you need to go low (heat) and slow.) Add more butter or oil as needed. When desired crunchiness is attained, sprinkle with granulated garlic. Allow to cool completely before placing in an airtight container.


GRILLED LAMB PATTIES WITH TZATZIKI (GREEK CUCUMBER SAUCE)


OLYMPUS DIGITAL CAMERAIn my estimation lamb is under-utilized. And I believe one of the reasons is that a lot of parents with young children think their children won’t like the taste. Well, I beg to differ. When my children were growing up, a leg of lamb was one protein source I knew would be devoured right down to the bone. And I mean this literally. (I’m pretty sure they would have gnawed on the bone if I would have let them!) They truly loved it. And really, what’s not to love? A nice bone-in piece of meat with slits all over the surface stuffed with slivered garlic and fresh rosemary. Then liberally slathered with oil, sprinkled with salt and pepper, and baked to a medium rare. What person of any age could resist this delicacy?

Now granted, lamb isn’t cheap. But because it’s so lean, it doesn’t shrink as much as beef either.

So attached is a recipe for ground lamb that has tons of flavor and is a good way to introduce your family to the joy that is lamb. (Of course, even if your family are already lamby pie lovers, you can fix this recipe. The flavor just won’t be as much of a pleasant surprise.) I take that back. Because of all the herbs and spices, the flavor is still going to be a pleasant surprise! So regardless of your families’ level of culinary acquaintance with baby sheep, fix this quick and easy recipe while it is still BBQing season. You won’t be sorry.

And for all you parents out there introducing your children to lamb for the first time, at least you won’t have to explain that the lamb on the table absolutely did not come from Shari Lewis’s puppet Lambchop! True story! Thanks for the memories kids. Love you mucho!

  • 1 clove garlic, finely minced
  • 1 T. finely chopped red onion
  • 1 T. chopped fresh cilantro
  • 1 T. dry sherry
  • ½ tsp. kosher salt
  • freshly ground black pepper
  • ½ tsp. ground cumin
  • ¼ tsp. dried oregano
  • 1/8 tsp. ground allspice
  • pinch crushed red pepper flakes
  • 1 lb. ground lamb, room temperature

Combine the garlic, onion, cilantro, dry sherry, salt, pepper, cumin, oregano, allspice, and red pepper flakes in a bowl. Add the ground lamb and gently combine with the other ingredients. Don’t overwork the meat. Divide into 3 or 4 patties. While you are forming the patties don’t over press the meat together; just work enough so that the meat retains its shape and doesn’t fall through the grill while it is cooking. (Not good form and you will lose points if the patties fall apart on the grill!)

Place the patties on a medium hot grill and do not overcook. A little red in the middle is perfect. Let rest for 3-4 minutes before serving. Serve with Tzatziki (recipe below). Also great with Cucumbers with a Yogurt, Feta, and Dill Dressing.

TZATZIKI  

  • 2 T. extra virgin olive oil
  • 2 c. plain Greek Yogurt
  • 3 small or 2 medium garlic cloves, finely minced
  • ½ tsp. dill weed
  • ¼ tsp. kosher salt, or more to taste
  • freshly ground black pepper
  • 1 English cucumber, partially peeled, seeded, and grated

Combine all ingredients. Adjust seasoning. Cover and refrigerate until ready to serve.

SAUTÉED CHICKEN WITH GRUYÈRE CHEESE, MUSHROOMS, AND WHITE WINE

OLYMPUS DIGITAL CAMERA

This is yet another chicken recipe that is quick and easy to prepare, making it a perfect dinner entrée after a hectic work or play day. And of course, it’s delicious. (Like I would post anything but a delicious recipe!)

But this is one of those recipes that works best when all the chopping, slicing, mincing, and assembling has been done in advance. In other words, get your act together and have all your ingredients prepped and in place before you start sautéing the chicken. (Hey, why not? You have to do it anyway. So why not get it over with before you actually fire up the burners and curse yourself for not heeding my warning to begin with?) Anyway……

The bones of this recipe come from the Food.com web site. And while I’m giving that site credit, I would like to get on my high horse (with a little help from a tall self-righteous attitude), and say what I really think about all the cooking sites out there in internet land. Thank you, thank you, THANK YOU! (Bet you didn’t see that one coming, did you?) There isn’t a recipe under the sun that can’t be found either by title or ingredient combination. There isn’t a cooking technique, gadget, or unique ingredient that can’t be ordered on-line and delivered directly to your home. There isn’t an excuse in the world for someone to rely on fast food or packaged, processed products to feed their family when every resource imaginable to provide a healthy and delicious meal is at their fingertips! (That’s the high horse part in case you were wondering!)

So to all of those wonderful sites out in internet land that provide great recipes, cooking techniques, and commentary on every aspect related to culinary endeavor, I salute you. And to the Food network (I’m now back on my high horse again), please bring back more love (good cooks/chefs and their sterling recipes) and less war (cupcake, chopped, etc). I personally want recipes, not entertainment. If I wanted to occupy my time watching and listening to suspense, drama, and a staged production, I would watch the news and read every word written about the candidates and their race to be in next years’ presidential election!

  • 2 boneless, skinless chicken breasts, halved lengthwise, then cut in two (8 pieces in all)
  • kosher salt
  • freshly ground black pepper
  • nutmeg
  • 3 T. butter
  • 8 medium sized button mushrooms, halved and thinly sliced
  • 2 small or 1 large shallot, finely minced
  • ½ c. dry white wine (I use Pinot Grigio)
  • ½ c. heavy cream
  • ¾ c. finely grated Gruyère cheese (you can use plain Swiss cheese, but a premium Swiss cheese is best)
  • dash paprika

Season one side of each piece of chicken with salt, pepper, and a light sprinkling of nutmeg. Melt the butter in a large, covered fry pan over medium-high heat. Add the chicken and sauté until both sides are slightly browned and the chicken is cooked through. (Do not overcook the chicken.) Remove from pan, tent with aluminum foil, and set aside. Add the mushrooms and shallot to the pan, reduce the heat, and sauté until the mushrooms are starting to brown and the shallot pieces have all but disappeared from sight. Stir in the white wine and simmer until the wine has all but evaporated. Whisk in the cream, Gruyère cheese, and the paprika. Cook for one minute. Adjust seasoning. Stir in the reserved chicken along with any pan juices; remove from heat, cover, and let sit for about 3 minutes.

OLYMPUS DIGITAL CAMERA

Great served over mashed potatoes with a side green veggie or a nice crisp green salad. And of course, some more of that wonderful Pinot Grigio you used in the dish itself!

TACO SALAD

OLYMPUS DIGITAL CAMERA

Ok, this is not a fancy new recipe for taco salad. It doesn’t feature spectacular new ingredients, or a taco sauce that takes 14 ingredients, special equipment, and an hour to prepare. The meat is plain old ground beef, chicken, or turkey, and the toppings are just what you would expect if you ordered taco salad at any of your favorite restaurants.

What this recipe for Taco Salad does feature however, is an oven baked tortilla base, taco meat that is perfectly seasoned with dried herbs, spices, and ingredients that you should already have in your pantry, and a two ingredient taco sauce that is refreshingly light and delicious. And because you season the meat yourself; no more buying those expensive little packets of taco seasoning mix that contain unnecessary ingredients like too much salt and sugar that you wouldn’t even want your childhood nemesis to ingest, much less your family!

Oh, and did I mention that this salad is stinkin’ easy to prepare? Probably not! I get so excited about the ingredients and flavor of a dish sometimes that I forget to tell you about the ease of preparation. I also sometimes fail to mention that certain parts of the recipe, the taco meat and the taco sauce in this case, can be prepared ahead of time and sequestered on a shelf in your refrigerator.

So no matter how you want to look at this dish, as an easy to prepare one dish weekday meal, as an inexpensive one dish weekday meal, or as a delicious one dish weekday meal, you’re covered. (I’ve always got your back; don’t you ever forget it!)

  • 4 small (7½-inch) or 2 large (10-inch) flour tortillas
  • vegetable cooking spray
  • taco sauce (see recipe below)
  • taco meat (see recipe below)
  • chopped romaine lettuce (as much or as little as you want)
  • any of the following toppings for your salad:
  •     diced tomatoes
  •     halved black olives
  •     diced avocado
  •     diced yellow, white, red, or green onion
  •     grated sharp cheddar, Monterey Jack, or Cotija cheese
  •     canned black beans, drained and rinsed
  •     canned corn, drained and rinsed
  •     anything else that strikes your fancy

Preheat oven to 425 degrees. Place 4 oven-proof bowls or for larger tortillas, 2 6-inch cake pans on a large rimmed baking sheet. Warm the tortillas in your microwave for 20 seconds or until pliable. Spray both sides with cooking spray, then drape over the bowls (smaller tortillas) or nest the larger tortillas inside the cake pans. Bake until the tortillas are crisp and just starting to brown, 10 to 12 minutes. (Watch them carefully the last few minutes.) Set aside.

OLYMPUS DIGITAL CAMERA

Meanwhile prepare the Taco Sauce and the Taco Meat (recipes below).

OLYMPUS DIGITAL CAMERA

When ready to serve, place a taco shell on a large plate. Scatter lettuce in and around the shell. Scoop some of the taco meat into the shell and surround with your toppings of choice. Serve with taco sauce.

Taco Sauce:

  • 1 c. (8-oz.) sour cream
  • ½ c. salsa verde – I use Trader Joe’s Hatch Valley Salsa (which BTW contains no preservatives or ingredients that can’t be pronounced) when I’m feeling lazy. When I have time and inclination, I prepare the Salsa Verde recipe on this site.)

Whisk ingredients together, cover, and store in the refrigerator until needed.

Taco Meat:

OLYMPUS DIGITAL CAMERA

  • vegetable cooking spray
  • 1 lb. ground beef, chicken, or turkey
  • 2 T. dehydrated onion
  • 2 tsp. chili powder
  • 1 tsp. ground cumin
  • 1½ tsp. dried oregano (Mexican oregano if possible)
  • 1 tsp. granulated garlic
  • ½ tsp. seasoned salt
  • freshly ground black pepper
  • 1 T. tomato paste
  • ½ c. water

Spray a non-stick fry pan with cooking spray. Add the ground beef and cook slowly until the meat is just about brown. Add the remaining ingredients, bring to a high simmer, reduce heat, and cook for 5 minutes. Adjust seasoning.


RÉMOULADE SAUCE

OLYMPUS DIGITAL CAMERA

If I were to describe myself culinarily in just one word, it would have to be “saucy”. Now please don’t misunderstand the term “saucy” as it relates to my personality! (Granted I can be a bit cheeky, irreverent, disrespectful, bold, and even brazen – all synonyms for saucy BTW.) But in this case, I mean “saucy” as it relates to my love for all thick liquids or accompaniments served with food to add moistness and flavor, i.e. sauces, gravies, aiolis, relishes, salsas, condiments, dips, dressings, etc. etc.

As proof, after our last JazzVox home concert featuring the fabulous vocalist Cindy Scott and the amazing jazz guitarist Brian Seeger, Mr. C., Nich (Mr. JazzVox himself), Cindy, Brian , and I were sitting around eating leftovers, drinking wine, beer, and other adult beverages, the conversation turned to all of our shared love of food. (Well of course it did!) And since both Cindy and Brian live in New Orleans, and I just happen to love Creole and Cajun food as much as they do, we discussed restaurants, favorite dishes, cookbooks that I absolutely needed to own, and other things related to the culinary wonder that is New Orleans. And Brian happened to mention rémoulade as one of his favorite things to serve on anything seafood. I guess my eyes must have glazed over from just the thought of a new sauce for seafood, because a couple of days later when Brian and Cindy were safely back in the Big Easy, Brian sent me his favorite rémoulade recipe. The recipe was the brainchild of John Folse, a famous Louisiana chef, restaurateur, and leading authority on Cajun and Creole cuisine.

Now I have to tell you, John’s recipe produced one of the best sauces I have ever tasted. I served it along with boiled shrimp last Saturday night to our cooking club and they agreed it was amazing.

So if you want to make a sauce to serve with boiled shrimp, crab cakes, grilled scallops, fried oysters, or any fried fish, do not hesitate to give this recipe a try. It is simply over-the-top delicious.

And if you want to think of me in the more traditional way “saucy” ladies are thought of, that’s OK too! This 71 year old lady can handle it. Of course I can’t fulfill the expectations associated with “saucy” any longer, but I have my memories. Love and happy cooking to all.

  • ¾ c. mayonnaise
  • ¼ c. Creole whole grain mustard (Zatarain’s is perfect)
  • ¼ c. ketchup
  • 1½ tsp. Worcestershire sauce
  • ½ tsp. hot pepper sauce
  • ¼ c. finely diced green onions
  • 2 T. finely diced celery
  • 1 T. finely minced garlic
  • 2 T. finely chopped parsley
  • ¾ tsp. fresh lemon juice
  • ¼ tsp. kosher salt
  • freshly ground black pepper

In a mixing bowl, combine all of the above ingredients. Cover and place in the refrigerator, preferably overnight or at the least four hours. When ready to serve, remove from refrigerator and adjust seasonings to taste.

GRILLED CORN ON THE COB WITH CHILI GARLIC SPREAD

OLYMPUS DIGITAL CAMERA

Now that it’s corn season, I thought I should post this recipe because there is just nothing as economical, easy, and delicious as fresh corn grilled on the BBQ. And when you can purchase fresh corn at a farmer’s market for four ears for a dollar, there is absolutely no reason not to serve grilled corn a couple times a week. And when the corn is slathered with butter that has been lovingly seasoned with chili powder, garlic, paprika, seasoned salt, and pepper; all the better!

I first started making this corn about 20 years ago. And why I haven’t already posted this recipe is beyond me. Maybe it’s because I have recently started doing a lot more grilling. And if truth be told, I haven’t grilled as much as most people because it has always intimidated me. And no I don’t know why. Well, actually I do know one of the reasons. I’m cheap. And have never owned a really top quality BBQ. My good friends have Webbers and Traegers and even Big Green Eggs. But since I never grilled that much, I never felt like I needed to spend the money. (See a chicken/egg thing happenin’ here?)

But I’ve decided not to let the fact that I have a reasonably inexpensive BBQ stop me any longer. And you know, I’ve been turning out some really wonderful grilled food lately. And along with some other amazing new BBQ dishes, this grilled corn has been featured frequently. And I’ve got to tell you, Mr. C. doesn’t mind that a bit!

So if you too have a perfectly functional BBQ feeling lonely and neglected, I suggest you fire it up, toss on an Adobo Seasoned Grilled Flat-Iron or Skirt Steak (recipe on this site), some ears of this corn, and if you really want to go the distance, a Grilled Romaine Salad (recipe also on this site). I promise you that if you make the meal I just suggested, your family and friends might end up doing a happy dance right on your deck or in your dining room. And wouldn’t that be special to watch!! Happy days my friends.

  • ¼ c. very soft butter
  • ½ tsp. chili powder
  • ½ tsp. granulated garlic
  • ½ tsp. paprika
  • ¼ tsp. seasoned salt
  • freshly ground black pepper
  • 4 shucked ears of corn, yellow or white

Combine the butter, chili powder, granulated garlic, paprika, salt, and pepper. Place ears of corn on a medium hot BBQ. Slather with the butter mixture and rotate the corn as necessary to make sure the corn is evenly cooked. Keep smearing the butter on until you run out, or the corn is done, whichever comes first. Serve hot.

EASY LEMON AND BASIL SPAGHETTI

OLYMPUS DIGITAL CAMERA

If there is an easier pasta dish to prepare than this slightly adapted version of a Giada de Laurentiis classic, I’d appreciate it if you would send me the recipe at your earliest convenience! (And BTW, your recipe has to be as delicious.) Because, frankly, this is the tastiest quick and easy pasta I have ever had the pleasure of putting in my mouth. Now granted, I love fresh lemon, basil, Parmesan, and pasta more than just about any other ingredients. So for me, this simple dish is just about as good as it gets. And the fact that I only have to make one pot dirty is not only a bonus for me, but the resident dish washer (Mr. C) also appreciates that benefit.

So about this recipe, I have very little more to say either about the dish or about life in general. (I know – no caustic remarks directed at politicians, no firm instructions not to mess with the ingredients, not even a comment about myself or my friends that you don’t care to read about anyway!)

So, just one more little tidbit for the record. Make this dish and you will know what summer tastes like. And thank you Linder for sending me the recipe, and Giada, for sharing yet another incredibly divine recipe with all of us.

  • 1/3 c. extra virgin olive oil
  • 1½ tsp. lemon zest
  • scant ¼ c. fresh lemon juice
  • 1/3 c. finely grated Parmesan cheese
  • ¼ c. chopped fresh basil + more for garnish
  • ¼ tsp. kosher salt
  • freshly ground black pepper
  • 8 oz. spaghetti, cooked al dente

Whisk together the olive oil, lemon zest & juice, Parmesan, basil, salt, and pepper in a large bowl. Add the cooked pasta, adjust seasoning, garnish with basil, and serve immediately. (If you need additional liquid for your sauce, use a small amount of the pasta water.)


CUCUMBERS WITH A YOGURT, FETA, AND DILL DRESSING

OLYMPUS DIGITAL CAMERA

OK, I’m a sucker for dill. Dill pickles, salmon baked with lemon and dill, dill bread, you name it! So when I had some feta cheese that really needed to be used, an English cucumber that was screaming at me from the vegetable bin, and a small amount of plain Greek yogurt waiting patiently for me to notice it, I immediately thought of dill. (Wouldn’t everyone?)

And yes, I know. This is just a basic cucumber and red onion salad with the addition of some feta cheese. Got it in one! That’s exactly what it is. But I am tellin’ you true, the addition of feta takes the whole cucumber/red onion salad to a new level. Now, a word of warning: You will notice that I used only a small amount of both red onion and feta. That’s because this dish is a subtle blend of ingredients, not an in-your-face onion and feta dish. (At least, that’s how I see the dish.) Now if you want to mess with a good thing, and overpower the taste of the cucumbers, yogurt, and dill, by all means increase the amount of onion and feta. But if you want what is in my humble opinion a perfect blend of flavors – DON’T MESS WITH THE AMOUNTS!

So give this amazingly easy salad recipe a try. It goes together faster than you can agree on what movie to watch later in the evening. And delicious? You can bet your grandmothers’ dill pickle relish recipe that your family, (well maybe not your little ones) are going to love this dish. But anyone over the age of reasonable (about 16) is going to think this a really good salad, especially on a warm summer evening. It’s crunchy, slightly tangy, and complex without being pretentious. (16 year old eaters hate pretentious!) After all, by 16 they know the difference between a really good burger (think Red Robin) and a burger that simply fills them up (think Dick Donald’s). But pretentious, precious food is still a consumable to be avoided by them at any cost. And actually, I’m with them, the 16 year olds that is! I still dislike food that is overly fussed with, just too darling to be real, costs more than the current car I am driving, and in such a small portion that even a 95 pound, 95 year old diner would find it reasonable to demand that the chef leave the kitchen and justify his/her very existence! So you and your 16 year old, please enjoy this salad. And if your 16 year old turns his/her nose up at it, send them to their room. Tell them grandma Patti said to!

  • ½ c. plain Greek yogurt
  • ½ tsp. dried dill weed
  • ½ tsp. kosher salt
  • freshly ground black pepper
  • 1 T. finely chopped red onion
  • 1 medium sized English cucumber
  • ¼ c. crumbled feta cheese

In a medium sized salad bowl stir together the yogurt, dill weed, salt, pepper, and red onion. Cut off ends and partially peel the cucumber. Cut in half lengthwise and then in half again. Cut the 4 long pieces into small cubes. Add to the yogurt dressing and stir to coat all the pieces of cucumber. Gently fold in the feta being careful not to over-mix. Adjust seasoning and refrigerate for up to 2 hours or serve immediately.