SALMON CAKES

OLYMPUS DIGITAL CAMERA

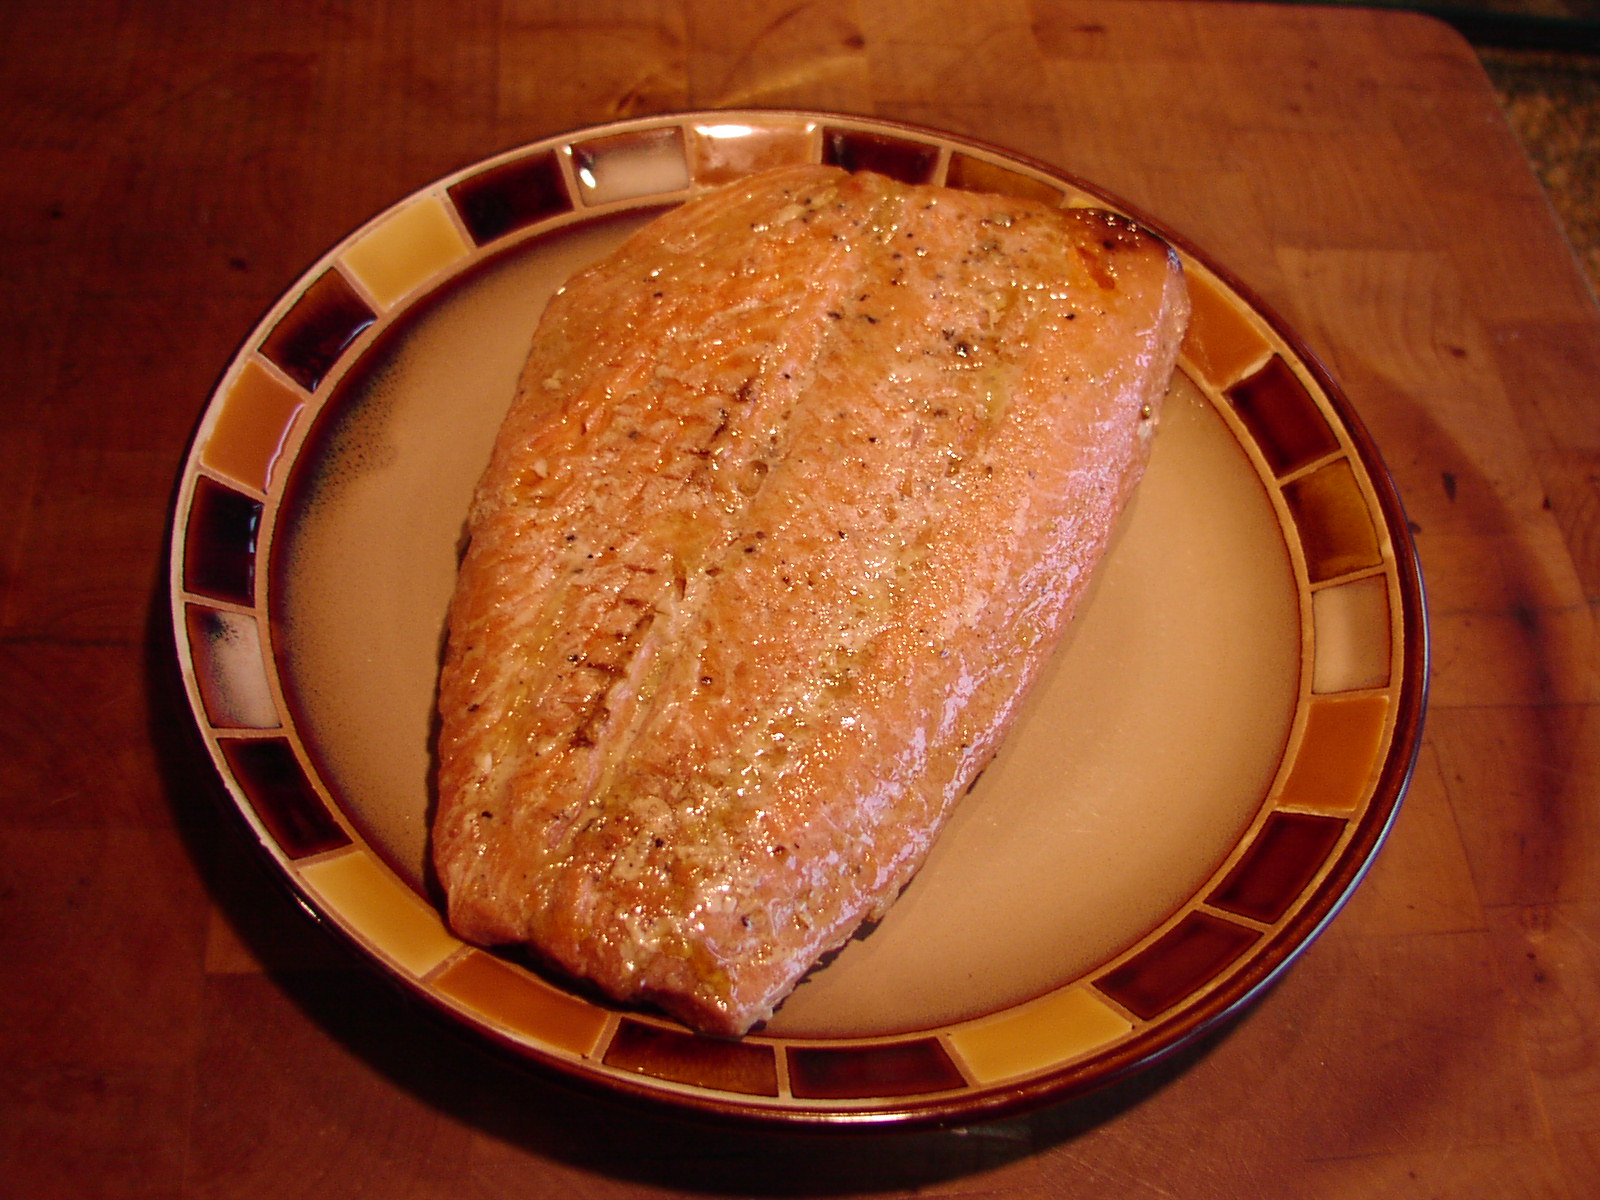
There is just something about a homemade cake. And I don’t really care if it’s chocolate, carrot, apple, etc. as long as it’s moist and delicious. And that goes for the savory varieties of cakes also.

To my mind, there is nothing worse than a crab or salmon cake that has the consistency and look of particle board that has gotten wet! Now granted, I have never tasted wet particle board, but I have an active imagination. And what my imagination tells me is that wet particle board tastes a lot like a poorly prepared crab or salmon cake! (If any of you have firsthand knowledge on this subject, please don’t hesitate to correct me if I’m wrong.)

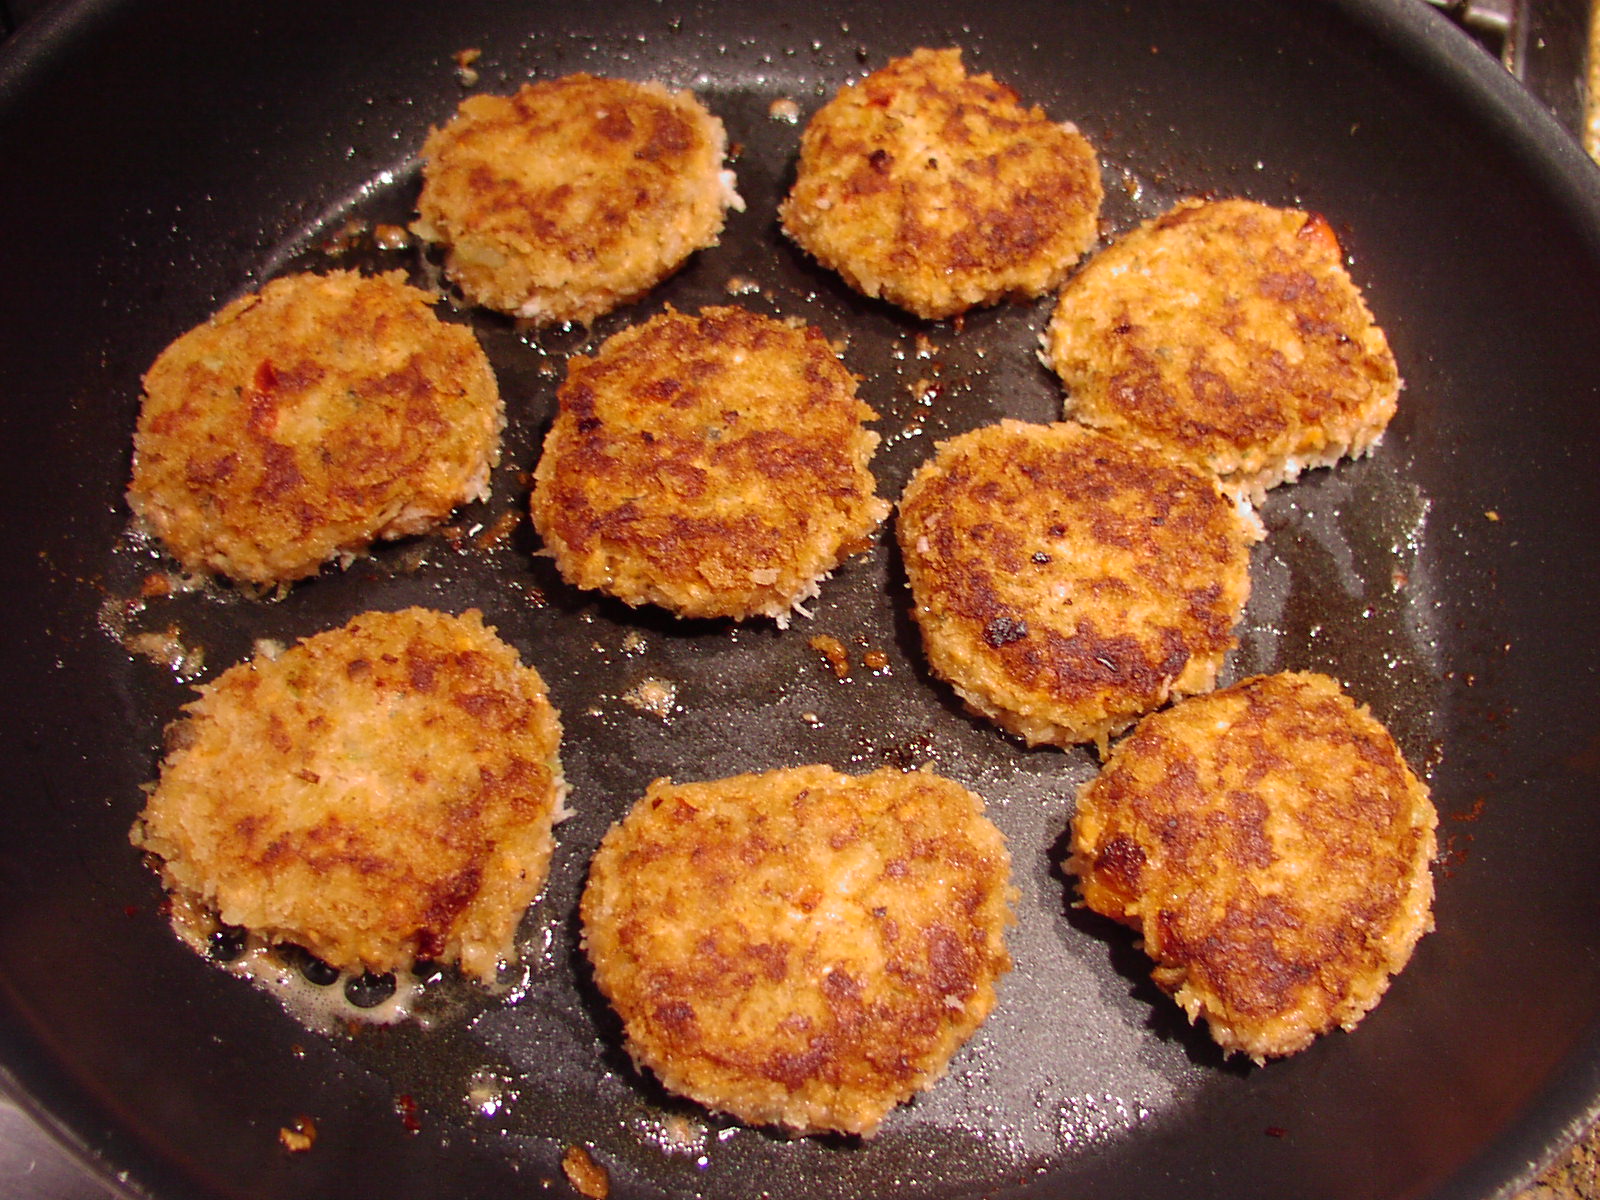
Anyway, what I am trying to say in my own indomitable way, is that these salmon cakes are not dry. They are delightfully tender, moist, and juicy. They are also very easy to build, especially if you use planned over salmon, which it what I usually use when I make these cakes. I look for salmon on sale, then buy 2 pounds rather than just one. Then I cook both pounds setting one pound aside to use within the next couple of days. Then with my planned over salmon I either prepare this dish or one of a handful of other dishes like Salmon Caesar Salad or Salmon, Bacon, and Corn Chowder. (Both recipes can be found on this site.)

One additional detail I should really mention before I shut up so that you can go to the store and buy the ingredients to make these little darlings for dinner. These salmon cakes are absolutely delicious. (I know, you probably already ascertained that little detail since I posted the recipe in the first place.) But I still felt it was obligatory to state the obvious. (A little compulsion left over from my days in human resources. “Miss Smith, you were applying for “work” when you came to us for employment. So now, please just sit down and do the job for which you were hired.”) I loved my job! But back to salmon.

So keeping in mind that salmon is a good source of niacin, omega-3 fatty acids, protein, phosphorus, vitamin B6, choline, pantothenic acid, biotin, and potassium, make up a batch of these tender and delicious salmon cakes at your earliest convenience. They truly are a salmon lover’s delight. You might even be surprised if one of your family members, who professes to hate salmon, suddenly becomes a huge fan. It has happened before and it can happen again. Enjoy

  • 2 T. unsalted butter, divided
  • 2 T. extra virgin olive oil, divided
  • 2 T. finely chopped red bell pepper
  • ¼ c. finely diced celery
  • 2 T. finely minced shallot or green onion
  • 1 egg
  • ½ c. mayonnaise
  • 1 tsp. Dijon mustard
  • 1 tsp. Worcestershire sauce
  • ¼ tsp. hot sauce (I use Frank’s RedHot Sauce)
  • 1½ tsp. Old Bay Seasoning
  • freshly ground black pepper
  • 1 T. finely minced fresh parsley
  • 1 T. capers, drained
  • 10 finely crushed unsalted or low salt saltine crackers (I use the kind with no additional salt on the top)
  • 1 lb. cooked salmon, flaked
  • ¾ c. Panko bread crumbs, or more as needed

In a large frying pan, bring 1 tablespoon of the butter and 1 tablespoon of the olive oil to medium-high heat. Add the red pepper, celery, and shallot; sauté for about 4 minutes or just until the veggies are starting to soften. Take pan off heat, remove the veggies with a slotted spoon, and set veggies aside to cool. (Don’t wash the pan. You are going to be frying the salmon cakes in this same pan.)

Meanwhile lightly beat the egg in a medium sized bowl. Whisk in the mayonnaise, Dijon mustard, Worcestershire sauce, hot sauce, Old Bay Seasoning, black pepper, parsley, and capers. Stir in the finely crushed saltines, the cooled vegetables, and the salmon. Form the mixture into 8-10 small flat cakes. (Will be messy!)  Coat each cake with Panko and place on a wax paper lined plate*. Cover and  refrigerate for at least 2 hours before frying. When ready to cook, heat the remaining butter and olive oil in the reserved fry pan. Fry cakes over medium heat until golden brown on both sides. (About 4 minutes per side.)

OLYMPUS DIGITAL CAMERA

If you enjoy a sauce with your salmon cakes, may I recommend Old Bay Aioli. (See recipe below.)

*I use my 2-inch diameter ice cream scoop, drop the balls in a small bowl filled with the Panko crumbs, roll the balls around in the Panko, and then place the coated balls on a wax paper lined platter. Flatten each ball slightly with your hand.

OLD BAY AIOLI

  • ½ c. light mayonnaise (I use Best Foods Light Mayonnaise)
  • 2 tsp. Dijon mustard
  • ½ tsp. granulated garlic
  • ¼ tsp. sriracha
  • 4 tsp. fresh lemon juice
  • ½ tsp. Old Bay Seasoning
  • freshly ground black pepper to taste
  • kosher salt to taste

In a small bowl, whisk together the mayonnaise, mustard, granulated garlic, sriracha, lemon juice, Old Bay Seasoning, and pepper. Add salt if needed.


GRILLED MARINATED SALMON

OLYMPUS DIGITAL CAMERA

I found this recipe on the allrecipes web site. I was researching seafood dishes because we need to add more seafood to our diet. And since salmon is one of our favorites, I jumped all over this recipe when I read the ingredients list. Now granted I did change out olive oil for vegetable oil, and low-sodium, GF Tamari for regular soy sauce. But the bones of the recipe are straight off the site. (And thank you allrecipes for that!)

What appealed to me most when I first read this recipe was the fact that I could probably get away without serving a sauce of some kind with this marinated and grilled preparation. (And believe me, my dear husband loves tartar sauce or aioli with his seafood!) So finding a fish dish that wouldn’t require a sauce is exactly what I was looking for when I went searching. After all, if you are going to go to the trouble of adding more foods to your diet that were designed by Mother Nature to help lower cholesterol, like salmon, then adding a sauce made with mayonnaise isn’t the wisest choice as an accompaniment! (Kind of bad karma trying to mess with Mother Nature that way!) Plus, did you ever hear the term “defeating the purpose”? Well that’s exactly what I would have been doing if I had served this salmon with Mr. Cs favorite aioli or tartar sauce! Not to mention; any sauce I could have prepared would have detracted from the subtle and delectable flavor the salmon derived from its short bath in the Asian inspired marinade. So, as they say – mission impossible (serving fish without a sauce) became mission accomplished (he didn’t miss a sauce in the least)!

So please give this recipe a try if you too are trying to add more seafood to your diet. It’s really an outstanding seafood dish. And as a personal favor, since he rarely reads my blog, please don’t mention this post to Mr. C. I am slowly and surely reducing the amount of fat in our diet to try and bring both of our cholesterol levels down. But I don’t want him to feel deprived, so the less Mr. C. knows of my master plan, the better off he’ll be! (In more ways than one!) Thanks

  • 1½ – 2 lbs. salmon fillet or fillets*
  • granulated garlic
  • sea salt
  • lemon pepper
  • 1/3 c. brown sugar
  • 1/3 c. low sodium GF Tamari or soy sauce
  • 1/3 c. chicken stock or water
  • ¼ c. extra virgin olive oil

Moderately season the salmon with granulated garlic, salt, and lemon pepper. (Flesh side only. No need to season the skin.) In a shallow pan, whisk together the brown sugar, Tamari, chicken stock, and olive oil. Place the seasoned salmon fillet or fillets flesh side down in the pan. Cover with plastic wrap and place in the refrigerator for at least 2 hours.

When ready to cook, preheat the grill to medium. If you have a basket or other grilling container, lightly coat with cooking spray. If not, lightly coat the grill grate itself with cooking spray. Place the salmon in the basket or on the grate skin side down, lower lid and let cook for about 4-8 minutes, depending on thickness of the fish. Discard marinade. When time to turn, carefully lift the salmon and turn it over. (Usually the skin stays in the basket or on the grill.) Cook covered for another few minutes just until done**. Do not overcook or the salmon will be dry. Serve immediately or cool and serve at room temperature. No tartar sauce or aioli required.

*If I purchase one large fillet, I usually cut it in half. That way it’s easier to marinate and also to flip when grilling.

**The USDA recommends cooking salmon to an internal temperature of 145 degrees. Push the tip of the meat thermometer gently into the middle of the salmon fillet at its thickest part to get an accurate reading.

Please note: Another method of grilling salmon or any fish with skin on one side, is to place the fillet skin side down on aluminum foil that has been pierced in several places with a table fork. Place the aluminum foil on the grill, lower lid, and cook for 4-6 minutes over medium heat. When it’s time to turn, grab the closest edge of the foil with both hands and slide it off the fire. Flip the fish gently onto the hot part of the grill. Gently remove the foil and the skin should lift right off. Lower the lid again and cook just until done.


CHICKEN AND BROCCOLI FETTUCCINE (HAVE IT BOTH WAYS!)

OLYMPUS DIGITAL CAMERA

So here’s the skinny! A regular Alfredo sauce is considered by many to be one of the top ten forbidden foods. (Or at the very least, a dish that should only be consumed once in a blue moon, which for those who don’t remember, is about once every 2½ years!)

Now I am here to tell you, that is just not often enough for yours truly and Mr. C! We love us our pasta Alfredo. So in an effort to keep our desire for Alfredo commensurate with our need to keep our cholesterol at a level that is appropriate for people in their “golden years”, and not coincidentally keep our doctors from jumping up and down and yelling at us, I have modified one of our favorite “Alfredo” style dishes. Now granted, without the cream it’s certainly never ever going to replace the real deal. But, truly, it ain’t half bad! But since I know that some of you are purists, I decided to also provide you with the original recipe that won my grandchildren (Derek and Rebecca) over to the belief that broccoli is the best green vegetable ever invented!

So give my modified version a try. It still has the creamy sauce that is so important to a delicious “Alfredo”. But I have to tell you. When you warm up leftovers, no puddle of butter is left in the bottom of the bowl. (If you happen to be one of the people who has never reheated an Alfredo sauce, please believe me when I tell you that looking in the bowl after the pasta has been reheated is enough to immediately change your thinking on Alfredo Sauce. Does the term “swimming in liquid fat” mean anything to you? Well that’s exactly what your noodles will be doing if you reheat a true Alfredo sauce.)

But like I said, if you are a purist, under the age of 30, have the metabolism of a pigmy shrew, are 6’2’’, and weigh about 102 pounds, please give my original recipe a try. It is really fabulous. Just don’t tell me about it. I might start crying, and no one likes to see tears on their computer screen.

Reduced fat CHICKEN AND BROCCOLI FETTUCCINE:

  • 2 T. unsalted butter, divided
  • 1 c. bite sized pieces of fresh broccoli
  • 3 cloves garlic, finely minced
  • 1 boneless, skinless chicken breast half, cubed
  • ¼ tsp. kosher salt
  • freshly ground black pepper
  • 2 T. dry white wine
  • 2 T. flour
  • pinch ground nutmeg
  • ¾ c. chicken broth
  • 1 c. milk (I use 2%)
  • 8-oz. fettuccine pasta, cooked al dente (keep some of the cooking water*)
  • ¾ c. finely grated Parmesan cheese + more for passing (or use part Parmesan and part Pecorino Romano)

Melt 1 tablespoon of the butter in a large fry pan. Add the broccoli and sauté for 2-3 minutes. (Broccoli should still be crisp.) Add the garlic and cook for 1 minute. Remove broccoli and garlic from pan with a slotted spoon and place in a bowl. Add the chicken, salt, and pepper; cook until the chicken is barely cooked through. Remove from pan and add to the reserved broccoli and garlic.

Pour wine into the pan and cook until very little liquid remains. Add the remaining 1 tablespoon butter and the flour. Whisk together and cook for about 2 minutes.  Add the nutmeg, chicken broth, and milk; stirring until the sauce boils and thickens. Remove from heat and add the cooked pasta, reserved broccoli, garlic, and chicken, and ¾ cup Parmesan. Add some of the pasta cooking water if the sauce seems too thick. Adjust seasoning and serve immediately with additional Parmesan cheese.

Please note: If doubling this recipe, use only 3 tablespoons of flour, but double all the remaining ingredients. FYI: many of my recipes feed just 2-3 people. Unless otherwise stated, my recipes can easily be doubles or tripled.

* You really don’t need to use seemingly gallons of water when you cook pasta. In fact, you only need to use enough so that the pasta has room to expand and not stick together. This not only saves water and energy, but the resulting cooking water has a higher percentage of residual starch, which makes it perfect for adding to the sauce if more liquid and/or thickening is required. For more information, search Serious Eats; The Food Lab; A new way to cook pasta?

Good old fashioned CHICKEN AND BROCCOLI FETTUCCINE:

  • ¼ c. (½ stick) unsalted butter, divided
  • 1 c. bite sized pieces of fresh broccoli
  • 1 large garlic clove, finely minced
  • 1 boneless, skinless chicken breast half, cubed
  • ¼ tsp. kosher salt
  • freshly ground black pepper
  • 1 c. whipping cream
  • 8-oz. fettuccine pasta, cooked al dente (keep some of the cooking water)
  • ¾ c. finely grated Parmesan cheese + more for passing (or use part Parmesan and part Pecorino Romano)

Melt 1 tablespoon of the butter in a large fry pan. Add the broccoli and sauté for 2-3 minutes. (Broccoli should still be crisp.) Add the garlic and cook for 1 minute. Remove broccoli and garlic from pan with a slotted spoon and place in a bowl. Add the chicken, salt, and pepper; cook until the chicken is barely cooked through. Remove from pan and add to the reserved broccoli and garlic.

Add the remaining 3 tablespoon butter and cook until butter is lightly browned. Add 1/3 cup of the cream and boil rapidly over high heat until large shiny bubbles form; stir occasionally. Reduce heat to medium and add cooked noodles to sauce. Toss vigorously and add the chicken mixture, Parmesan cheese and the remaining cream, in about 3 additions. Adjust seasonings and serve immediately with additional Parmesan cheese.


OVEN ROASTED STEAK FRIES WITH FRY SAUCE

OLYMPUS DIGITAL CAMERA

Mr. C. is not a potato lover. Can you believe it? I mean really, what’s not to love about a potato? But in his defense, he does enjoy French fries, and will tolerate, albeit only rarely, Twice Baked Potatoes (recipe soon to come) and garlic mashed potatoes. But there is one fairly healthy way I serve potatoes that he actually enjoys, and you guessed it, it’s when I “bake” a potato using this recipe.

I learned about this recipe for oven roasted potatoes one day while watching Rachael Ray on the Food Network. This was a few years back when it seemed to me that the Food Network still had more cooking shows dedicated to educating people than pathetic attempts at entertainment aimed at the lowest common denominator! (My high horse has been hitched too long in the North 40, so I decided today I should either take off the bridle, or give it full rein. I decided I might ride it again, so I gave it full rein!) And yes, I still enjoy watching programs that provide me with wonderful recipes and cooking techniques. But truly, you would have to hog tie me to get me to watch some of the programs currently being broadcast on TV. But back to our regularly scheduled program.

These potatoes are really good. They satisfy my inner “French fry fiend” without any of the bother, hot grease, mess, cleanup, or fuss associated with the real thing. And because you use such a small amount of oil, and the kind that I think is still good for us (the experts change their mind on whether or not olive oil is good or bad for us as often as I wash my hands when I am cooking!), they are certainly healthier for us than regular fries.

So next time you want some “fries” with your lunch or dinner, give this recipe a go. You will not be disappointed. They are easy, inexpensive, and oh so tasty with or without Fry Sauce. (Recipe below.) And just as an FYI: 1 large russet potato is perfect for 2 or 3 people.

  • 1 very large russet potato, cut into 8 wedges
  • 2 tsp. extra virgin olive oil
  • ¼ tsp. dried thyme
  • ¼ tsp. dried oregano
  • 1 tsp. Montreal Steak Seasoning
  • sea salt

Preheat oven to 450 degrees. Spread potato wedges on a baking sheet. Slather potatoes with olive oil. Combine thyme, oregano, and steak seasoning. Sprinkle over oiled potato wedges. Bake for 20-25 minutes or until tender inside and brown on the outside. Turn after 10 minutes. Serve hot from the oven sprinkled with a small amount of sea salt and with Fry Sauce on the side.

FRY SAUCE

  • ½ c. ketchup
  • ½ c. low fat mayonnaise
  • hot sauce (I use Frank’s RedHot sauce)

Whisk the ketchup and mayonnaise together. Add as much hot sauce as you like.


CREAMY PASTA WITH PANCETTA AND PEAS

OLYMPUS DIGITAL CAMERA

Usually when I make a creamy sauce, I use cream. Sounds reasonable, right? But in an effort to reduce the number of calories and amount of fat in the dishes I prepare, I decided to use chicken stock and 2% milk instead of cream when I prepared this dish last evening. (OK, I did use 2 tablespoons of butter, but that’s just a fraction of the amount I normally would use!) So of course the resulting product was not as rich as a regular Alfredo sauce. (How could it be without a half cup of butter and 2 cups of heavy cream?) But regardless, it was still quite delicious. And without all the fat, it just had a fresher taste to it. Perhaps it was because the other ingredients were forced to shine on their own without relying on the cream to carry the day.

Whatever the reason, we were very happy to chomp away on this pasta sans the guilty feeling we usually experience when we are eating a creamy pasta dish. Not to say, we won’t ever eat a true Alfredo again. But I think I will be adapting my other standard Alfredo type dishes too, so that we can enjoy them more often without our cholesterol numbers shooting into the stratosphere!

And the first one I am going to adapt is one of our favorite pasta recipes – Chicken and Broccoli Fettuccine. So look for this recipe in the near future. And for those of you who have no cholesterol worries or don’t ever have to concern yourself with putting on weight, I will also post the “real” recipe. Which just happens to be Derek and Rebecca’s (two of my grandchildren) favorite food. (Poor kids. They unfortunately inherited their grandmother’s love of sauces.)

So if you too love pasta with a creamy sauce, give this dish a try. It takes no time to whip up. And I’m sure your whole family will love it. And miss all those calories in a traditional Alfredo sauce? I think not!

  • 2 T. unsalted butter, divided
  • ½ c. diced pancetta
  • 3 garlic cloves, finely minced
  • 2 T. dry white wine
  • 2 T. flour
  • ¼ tsp. kosher salt
  • freshly ground black pepper
  • pinch crushed red pepper flakes
  • pinch ground nutmeg
  • ¾ c. chicken broth
  • ¾ c. milk (I use 2%)
  • 8-oz. penne pasta, cooked al dente (keep some of the cooking water*)
  • ½ c. uncooked frozen petite peas, thawed
  • ½ c. finely grated parmesan cheese + more for passing (or use part Parmesan and part Pecorino Romano)
  • 2 tsp. chopped fresh parsley

Melt 1 tablespoon of the butter in a large fry pan. Add the pancetta and fry until crisp. Remove the pancetta from pan with a slotted spoon and set aside. Add the garlic to the pan. Cook for 1 minute. Add the wine and cook until no liquid remains. Add the remaining 1 tablespoon butter and the flour. Whisk together and cook for about 2 minutes.  Add the salt, pepper, crushed red pepper flakes, nutmeg, chicken broth, and milk; stirring until the sauce boils and thickens. Remove from heat and add the cooked pasta, peas, cooked pancetta, ½ cup Parmesan, and parsley. Add some of the pasta cooking water if the sauce seems too thick. Adjust seasoning and serve immediately with additional Parmesan cheese.

Please note: If doubling the recipe, use only 3 tablespoons of flour, but double all the remaining ingredients.

*Something I had thought for a long time just came out as being accurate. You really don’t need to use seemingly gallons of water when you cook pasta. In fact, you only need to use enough so that the pasta has room to expand and not stick together. This not only saves water and energy, but the resulting cooking water has a higher percentage of residual starch, which makes it perfect for adding to the sauce if more liquid and/or thickening is required. For more information, search Serious Eats; The Food Lab; A new way to cook pasta?


VEGETARIAN MUSHROOM STROGANOFF

(Sorry, no picture. I lost it when my computer and my camera were not speaking. They have resolved their differences now, but the picture is still missing in action. Will add a picture in the near future.)

Of course you know what most savvy people are saying about vegetarians or people who eat at least one or more meatless meals a week. And yes you are right there with me if you too believe the word is “smart”. But another word immediately jumps into my brain also. And that word is “yummy”. Because there are just an abundance of wonderful recipes out there that don’t contain as much as a quarter cup of meat broth or a tablespoon of bacon fat to make them both delicious and nutritious.

So when I hear someone say they hate vegetarian food, I almost always look at them as if they just stepped out of a brand spanking new Studebaker. And just for your information, the last Studebaker was manufactured in 1967!

Because in my opinion, what these folks have done is limit themselves to food choices that are often expensive, include more protein than is necessary for continued good health, and lack the vegetables, herbs, spices, and whole grains needed to supply our bodies with the necessary vitamins and minerals to support good health. (And no, I don’t believe taking a daily multi-vitamin replaces the lack of fresh vegetables, herbs, spices, and fruits in our diet!) And don’t even get me started on fiber!

So when I decided the other evening to serve “Beef Stroganoff”, I thought about my pledge to serve more meatless dishes. And I concluded that the meat in a stroganoff was not the part I cherished the most. What I loved were the mushrooms, noodles, and the savory sour cream gravy. So I basically made my standard recipe without the meat. And truly, I didn’t miss the meat one little bit.

So in essence you might say that this new spin on my old recipe was “fashioned by an impulsive epicure”.

(Sorry Leah Worth for changing out the words “for” and “ingénue” with “by” and “epicure” from the Bobby Troup classic song “The Meaning of the Blues”.) But it really was Mr. Cs idea to change the lyric. He changed the word “ingénue” to “epicure” while we were listening to the song and talking about food. (Nothing new, believe me!) And I loved the new words, because like Mr. C, I too feel that the word epicure has fallen into disuse. So while I was writing up this recipe, our conversation while listening to Janis Mann’s version of this beautiful blues song came to mind. And I totally felt that Mr. Cs new lyric applied to what I had just done to my original Beef Stroganoff recipe. Hence the musical reference.

(For those of you haven’t the foggiest idea what I’m talking about, I have included the words to one of the loveliest and saddest songs ever written. I’m sure after reading the lyrics you will perfectly understand how the entire chain of events came about. Or not!) But regardless, give this recipe a try. I truly believe the epicure in you won’t miss the meat in the least.

The Meaning of the Blues

Blue was just the color of the sea,

Til my lover left me;

Blue was just a bluebird in a tree,

Til he said “Forget me.”

Blue always made me think of summer,

Cloudless summer skies so fresh and warm;

But now the blue I see is more like winter

Winter skies with clouds about to storm.

Blue was just the color of his eyes

Til he said “Goodbye, love.”

Blue was just a ribbon for first prize

Til he said, “Don’t cry, love.”

And blues were only torch songs

Fashioned for impulsive ingénues;

But now I know, too well I know,

Too well I know the meaning of the blues.

(To hear this song performed, search on “Julie London meaning of the blues”.)

  • 1 T. extra virgin olive oil
  • 2 T. butter, divided
  • 1 lb. cremini mushrooms, sliced (or any combination of fresh mushrooms)
  • scant ½ c. chopped onion
  • 2 garlic cloves, minced
  • ¼ c. dry white wine
  • 2 tsp. fresh thyme leaves or ¾ tsp. dried thyme leaves
  • 2 tsp. paprika
  • ½ tsp. kosher salt
  • freshly ground black pepper
  • 2 T. flour
  • 1½ c. vegetable or mushroom broth
  • 1 c. sour cream
  • 8-oz. wide egg noodles, cooked al dente
  • 2 T. chopped Italian parsley

Heat the olive oil and 1 tablespoon of the butter in a large skillet over medium-high heat. Add the mushrooms and onion; cook until the onion is translucent and the mushrooms slices are starting to brown. Stir in garlic and cook for one minute. Deglaze the pan with the white wine. When the wine is all but evaporated, add the thyme, paprika, salt, and pepper. Cook, stirring occasionally for 3 minutes. Stir in the flour and remaining 1 tablespoon of butter, and cook, stirring constantly for 2 minutes.

Whisk in broth, bring to a boil, reduce heat, and cook for 5 minutes. Remove from heat and stir in the sour cream and noodles. Sprinkle with fresh parsley and serve immediately.

Tip: Never cook noodles ahead of time and let them sit until you’re ready for them. If any part of the dish needs to wait, it should be the sauce. And no, I don’t care what any given recipe says. If it instructs you to cook the noodles and just keep them warm, just say no! You know better!


CHOCOLATE CHIP COOKIES

OLYMPUS DIGITAL CAMERA

Is it ever too late to try a new recipe and find it better than the one you have been using for the last 50 years? In my case, apparently not! Because this recipe produces, hands down, the best “toll house” type chocolate chip cookies I ever tasted. And you have to know that I have baked and tasted a lot of chocolate chip cookies in my day! (Actually, if I had a dollar for every cookie I ever baked, I would not be writing this blog today. I would be sipping Vin Santo and munching on cantuccini (small biscotti) on my balcony overlooking the piazza of a small hill town in Tuscany!)

I don’t know why I decided to look for a new recipe, but I typed “perfect chocolate chip cookies” as my search criteria, and this recipe from Cook’s Illustrated popped up. And when I looked at the recipe, it just made sense. So I gave it a try. And as they say – the rest is history. (Or in this case, my old recipe is history!)

There is just something about the browned butter that lifts the whole flavor of the cookie to a new level. And letting the butter/sugar mixture rest to allow time for the sugars to melt simply makes sense from a scientific point of view. (Like I would know a scientific fact if it walked up and bit me in the posterior!) So believe me when I say I would never have thought to brown the butter and let the dough rest on my own. But I’m sure glad the good folks at Cook’s Illustrated had the genius cells necessary to come up with this concept. Because my good friends; it works! Boy does it work! It even changes the taste of the chocolate.

Yesterday I brought some of these cookies to one of Mr. Cs rehearsals. James, one of the band members, absolutely did not believe me when I told him I had used plain old Nestle’s Toll House Semi-Sweet Chocolate Chips in the cookies. He truly thought I had used a much higher grade of chocolate. I quickly assured him that I don’t usually keep Barry Callebaut* chips in my freezer, so he just had to trust me on this one. (I think the reason the chips tasted so good, was because the browned butter and dark brown sugar had created a more caramel flavored dough. And that dough had brought out the best in the rather très ordinaire chocolate chips I had used.) Whatever the reason, it was decided by one and all, that this was a winner of a cookie.

So next time you bake chocolate chip cookies, give this recipe a try. The dough does take a little longer to prepare because of the recess times. But those are perfect times to perform a little quality control. I mean really, don’t you feel it’s always necessary to sample a couple of the chocolate chips to make sure they haven’t spoiled? And what better time, than during recess?

*According to a taste test performed by the staff of Serious Eats, the following brands were the winners in “The Best Chocolate Chips for Chocolate Chip Cookies” contest:

– Trader Joes (best super market chip) $2.29 for a 12-ounce bag

– Scharffen Berger (best fancypants chips for adults) $6.50 for a 6-ounce bag (yikes)

– Barry Callebaut (pricey but great for children of all ages) $6.95 for a 16-ounce bag

  • 1¾ c. unbleached all-purpose flour
  • ½ tsp. baking soda
  • 1¾ sticks (14 tablespoons) unsalted butter, divided
  • ½ c. granulated sugar
  • ¾ c. packed dark brown sugar
  • 1 tsp. table salt
  • 2 tsp. real vanilla extract
  • 1 lg. egg
  • 1 lg. egg yolk
  • 1½ c. semi-sweet chocolate chips

Whisk the flour and baking soda together in a medium bowl; set aside. Heat 10 tablespoons of the butter in a 10-inch skillet* over medium heat until melted, about 2 minutes. Whisking gently, continue cooking until the butter is a dark golden brown and has a nutty aroma, 5-6 minutes. (Don’t hurry this step. If it takes longer than 6 minutes; so be it! You want the butter brown, not burnt.) Remove skillet from heat and transfer browned butter to the bowl of your mixer. Stir the remaining 4 tablespoons of butter into the browned butter until completely melted. Add both sugars, salt, and vanilla to bowl with butter and beat on medium until fully incorporated. Add egg and yolk and whisk until mixture is smooth with no sugar lumps remaining, about 30 seconds. Let mixture stand 3 minutes, then beat for another 30 seconds. Repeat process of resting and beating 2 more times until mixture is thick, smooth, and shiny. With mixer on a very low speed, add the flour mixture until just combined. Stir in chocolate chips just until evenly disbursed throughout the dough. Do not over-mix. Allow to sit for 5 minutes.

Using an ice cream scoop, shape dough into whatever size cookie you prefer. (Actually the larger the better.) Arrange the balls 2 inches apart on baking sheets that have been lined with parchment paper. Bake 1 tray at a time in a pre-heated 375 degree oven until cookies are golden brown and still puffy, and edges have begun to set but centers are still soft, 10 to 14 minutes, rotating baking sheet halfway through the baking time. Transfer baking sheet to wire rack; cool for about 5 minutes, then remove cookies from pan and let cool completely on rack before serving.

*Avoid using a nonstick skillet to brown the butter; the dark color of the nonstick coating makes it difficult to gauge when the butter is browned.

Please note: You may have noticed that there are no nuts in these cookies. There are two schools of thought on whether or not chocolate chip cookies should contain nuts. I am of the opinion that nuts detract from the overall pleasure of biting into a truly delicious chocolate chip cookie. Now, an oatmeal raisin cookie without nuts – unthinkable! So in essence, everyone needs to choose to include nuts or not. If you simply must have nuts in your chocolate chip cookies, add about ¾ cup chopped and toasted pecans or walnuts at the same time you add the chocolate chips.


CRUNCHY CABBAGE SLAW WITH PEANUTS AND PARMESAN

OLYMPUS DIGITAL CAMERA

And yes I know! After you peruse the recipe listed below, you are undoubtedly going to be saying to yourself that it looks like a strange combination of ingredients for a coleslaw. Well, at least the butter, peanuts, and Parmesan part. But there are times when you just have to trust me, and this is one of those times.

I have been making this salad now for more than 20 years. And I can hear what you’re thinking.  “If that’s the case, why have you waited so long to publish the recipe?” Well I guess my only excuse is that I have been busy sharing other recipes with you. And let’s be honest. Not everyone is as enamored with slaw as I am or you are. (You’re reading this recipe, so obviously you like coleslaw too.) So how come you are publishing it now you ask?

Well, it all started because I needed a slaw to serve yesterday with chili. (You really need to serve something crunchy with chili and cornbread, or your guests might as well check their dentures at the door!) So with crunchy and delicious in mind, this old favorite jumped into my brain along with one of my favorite cookbook related memories.

I was still working in HR at the time I self-published my first cookbook which included this recipe. One day I was sitting in my cube minding my own business, when a fellow associate burst through my “door”* jumping up and down with excitement. Apparently she and her teenage daughter had prepared this salad the evening before and her whole family had loved it. She must have thanked me 5 times before she left my cube. I was exhausted by the time she returned to her office and I hadn’t even lifted my carcass off my chair!

So if a good coleslaw excites you too, this is one you simply must try. It’s delicious, and all of the slaw can be prepared ahead of time (even the day before) except for the last minute addition of fried peanuts and finely grated Parmesan cheese.

*And for those of you who don’t know what a work cubicle (cube) “door” looks like, allow me to elucidate. It looks like air! A cubicle door is merely an opening in a small partitioned, low walled work space, through which anyone can enter any old time they choose, and not a single secret can be hidden either from view or from auditory perception. In other words, doorknobs need not apply! Enjoy the slaw.

  • 4 c. shredded green cabbage
  • 1 c. shredded red cabbage
  • 1 c. finely chopped celery
  • ½ c. sour cream
  • ½ c. light mayonnaise
  • ½ tsp. seasoned salt
  • freshly ground black pepper
  • ¼ c. thinly sliced green onions
  • ¼ c. chopped red bell pepper
  • ½ English cucumber, partially peeled, seeded, and cubed
  • 1 T. chopped Italian parsley
  • 1 T. butter
  • ½ to ¾ c. lightly salted peanuts, coarsely chopped
  • 2 T. finely shredded Parmesan cheese

Combine cabbage and celery in a large salad bowl. Cover and refrigerate. Mix sour cream, mayonnaise, salt, pepper, green onions, red pepper, cucumber, and parsley together. Cover and refrigerate. Just before serving, melt butter in a small sauté pan. Add peanuts and stir fry until lightly browned. Remove from heat and stir in cheese. Toss chilled vegetables, dressing, and peanuts together. Serve immediately.


GRILLADES (CAJUN MEAT STEW) AND CHEESE GRITS

OLYMPUS DIGITAL CAMERA

Until I read the latest issue of Southern Living, I had never heard of Grillades. (Remember, I live in the Northwest corner of the US, so dishes like Grillades are not indigenous to our area.) But through the years I have learned to absolutely adore many of the dishes that have their roots in the South. (Thus my subscription to Southern Living!) So when I read the ingredients in the Grillades recipe, I was hooked immediately.

Grillades (pronounced ɡree-yahds) is a kind of meat stew typical of French regional and Cajun cooking. And at least in Cajun country, Grillades is most often served with grits. And since I am a true believer in the merits of grits, you can bet your best Squirrel Perlo recipe that if grits are even mentioned in conjunction with any given dish, I will be fixing them too!

So yesterday I decided it was the perfect day to tackle Grillades. But as some of you know, I almost never try a recipe until I have researched other recipes for the same dish. Especially if the dish is one that I have not previously tasted. I simply like to read what other cooks have included or excluded in their recipes so that I can better judge what might work best for our tastes. As a result, I didn’t change a thing in the Southern Living seasoning mix recipe. (Well that’s not entirely true. I did reduce the amount of cayenne from 1½ teaspoons to ½ teaspoon because I thought the original amount might be just too spicy for me. And I’m glad I did. The amount of cayenne I used was perfect for both of us.)

I did however change a couple of amounts and cooking methods from the magazine recipe based on other recipes I perused. For example, I changed thinly sliced pork to pork cubes. (Much easier to deal with.) But all in all, the recipe is basically as reported in the September 2015 edition of Southern Living.

Now comes the best part. When we sat down to dinner last evening, and each of us took our first bite, almost simultaneously we looked at each other and uttered the same three little words. OMG! We both exclaimed that this dish was one of the best things we had ever tasted.

So if you too are fans of Cajun cuisine, you have simply got to try this recipe. It is an all time winner at Chez Carr.

  • 7 tsp. Creole Seasoning Mix for Grillades, divided (see recipe below)
  • 2 lbs. boneless pork roast, cut into 1-inch pieces
  • 1 c. unbleached all-purpose flour, divided
  • 7 T. vegetable oil
  • 1 med. yellow onion, chopped
  • 1 c. chopped celery
  • 1 lg. green bell pepper, chopped
  • 2 lg. garlic cloves, finely minced
  • 4 bay leaves
  • 3 c. beef or chicken broth
  • ½ c. dry red wine
  • 1 (14.5-oz.) can diced tomatoes
  • 1 T. Worcestershire sauce
  • 1 tsp. dried thyme
  • 1 tsp. kosher salt
  • hot cooked Cheese Grits (see recipe below)

Sprinkle about 2 teaspoons of the seasoning mix on all sides of the pork cubes in a large bowl. In a gallon size freezer bag combine ½ cup of the flour and another 1 teaspoon of the seasoning mix together. Add pork to bag (don’t wash the bowl) and shake until all the cubes are coated.

Heat oil in a large heavy covered Dutch oven over medium-high heat. Add the pork, and fry for about 4 minutes on each side or until golden brown. (You will probably need to fry the pork in 2 batches.) Using a pair of tongs, transfer the browned pork back to the bowl where you coated the meat originally and reserve the drippings in the Dutch oven.

Sprinkle remaining ½ cup flour over drippings. Cook over high heat, whisking constantly, about 4 minutes or until mixture is medium brown. Immediately add the onion, celery, bell pepper, and garlic, and stir with a wooden spoon until well blended. Add bay leaves and the remaining 4 teaspoons of seasoning mix. Reduce heat slightly and continue cooking, stirring constantly, about 2 minutes.

Add the broth to vegetable mixture, stirring until well incorporated. Add wine, diced tomatoes, Worcestershire sauce, thyme, salt, and browned pork; bring to a boil over high heat. Reduce heat to low, cover, and cook, stirring often, about 90 minutes or until the meat is tender. Midway through, taste to check seasoning. Add additional salt and/or seasoning mix to taste. (I had to add more salt to mine.) Just before serving, remove bay leaves.

OLYMPUS DIGITAL CAMERA

To serve, ladle a large serving of Grillades into a shallow bowl. Add a heaping spoonful of Cheese Grits on top and to the side. Serve immediately. (At our home, this is a meal unto itself. Nothing else to eat required. Of course a nice glass of wine to go with the Grillades is always welcome. Mr. C. recommends a hearty Cabernet-Sauvignon.)

CREOLE SEASONING MIX FOR GRILLADES

  • 1½ tsp. onion powder
  • 1½ tsp. granulated garlic
  • 1 tsp. kosher salt
  • 1 tsp. white pepper
  • 1 tsp. freshly ground black pepper
  • 1 tsp. paprika
  • ½ tsp. dry mustard
  • ½ tsp. dried thyme
  • ½-1½ tsp. cayenne (depends on how much heat you like or can tolerate)
  • ½ tsp. gumbo file

Combine all the ingredients and store in an airtight container.

CHEESE GRITS

  • 1 tsp. kosher salt
  • 5 c. water
  • 1 c. hominy grits (I use Quaker brand Quick cooking grits)
  • 3 T. unsalted butter
  • 2 T. cream cheese
  • ¼ c. grated Gruyère, Swiss, or Edam cheese

In a large saucepan over high heat, bring salt and water to a boil. Slowly whisk in the grits. Reduce the heat to low; cover and cook for 25 to 30 minutes, stirring occasionally to make sure the grits don’t stick to the bottom of the pan. (Grits are done when they have the consistency of smooth cream of wheat.) Remove from the heat and stir in the butter, cream cheese, and grated Gruyère. Season with salt to taste and serve warm.

OLYMPUS DIGITAL CAMERA

SPICY PLUM FREEZER JAM

OLYMPUS DIGITAL CAMERA

OK, call me lazy, but I like freezer jam because there’s no cooking involved, no boiling jars, boiling water baths, pressure cooker action, or botulism concern. (Temperatures below freezing render botulism inactive, which is why it isn’t a concern with frozen jams or jellies.) Plus, the un-cooked fruit in freezer jam simply tastes fresher than if it had been subjected to a baptism of fire. But of course, there is always the exception that proves the rule. And if anyone can find one (exception that is) it’s yours truly.

So you guessed it; this “freezer” jam is cooked. But I have to tell you, in this case the cooking works to advantage. The cooking process helps to blend the flavors (plums and spices) resulting in a final product that is incomparable.

So if you too are crazy about freezer jam, I would highly recommend that you put your prejudices aside (fresh rather than cooked fruit) and give this recipe a try. It is simply delicious, plus you get to break the rules. (This is in essence the encapsulation of the idea that although technically this recipe is a breach of standard freezer jam procedure, there is no need for punishment, apology, or retribution since no actual damage has occurred.) In other words, no harm, no foul! Just good eating.

  • 8 c. pitted and chopped plums (about 4 lbs.)
  • 3 c. granulated sugar
  • ½ c. brown sugar, packed
  • zest and juice of 1 large lemon
  • 2 tsp. ground cinnamon
  • ½ tsp. ground nutmeg
  • ¼ tsp. ground cloves
  • 2 3-oz. packets liquid pectin (6-oz. total)

Combine the plums and sugars together in a large heavy pan. Bring to a boil, stir in the lemon zest, lemon juice, cinnamon, nutmeg, and cloves. Continue to gently boil for 30-40 minutes or until the jam thickens and the liquid resembles syrup. Stir in the pectin and bring to a rolling boil for 5 minutes. Remove from heat and let cool to room temperature. Spoon into freezer containers and let sit on your counter for 8 hours or overnight.  Makes about 6-7 cups of jam. Store in the refrigerator if using immediately, or freeze until ready to us. Wonderful on fresh Buttermilk Biscuits. (See recipe on site.)