SESAME SEED (BENNE) WAFERS

OLYMPUS DIGITAL CAMERA

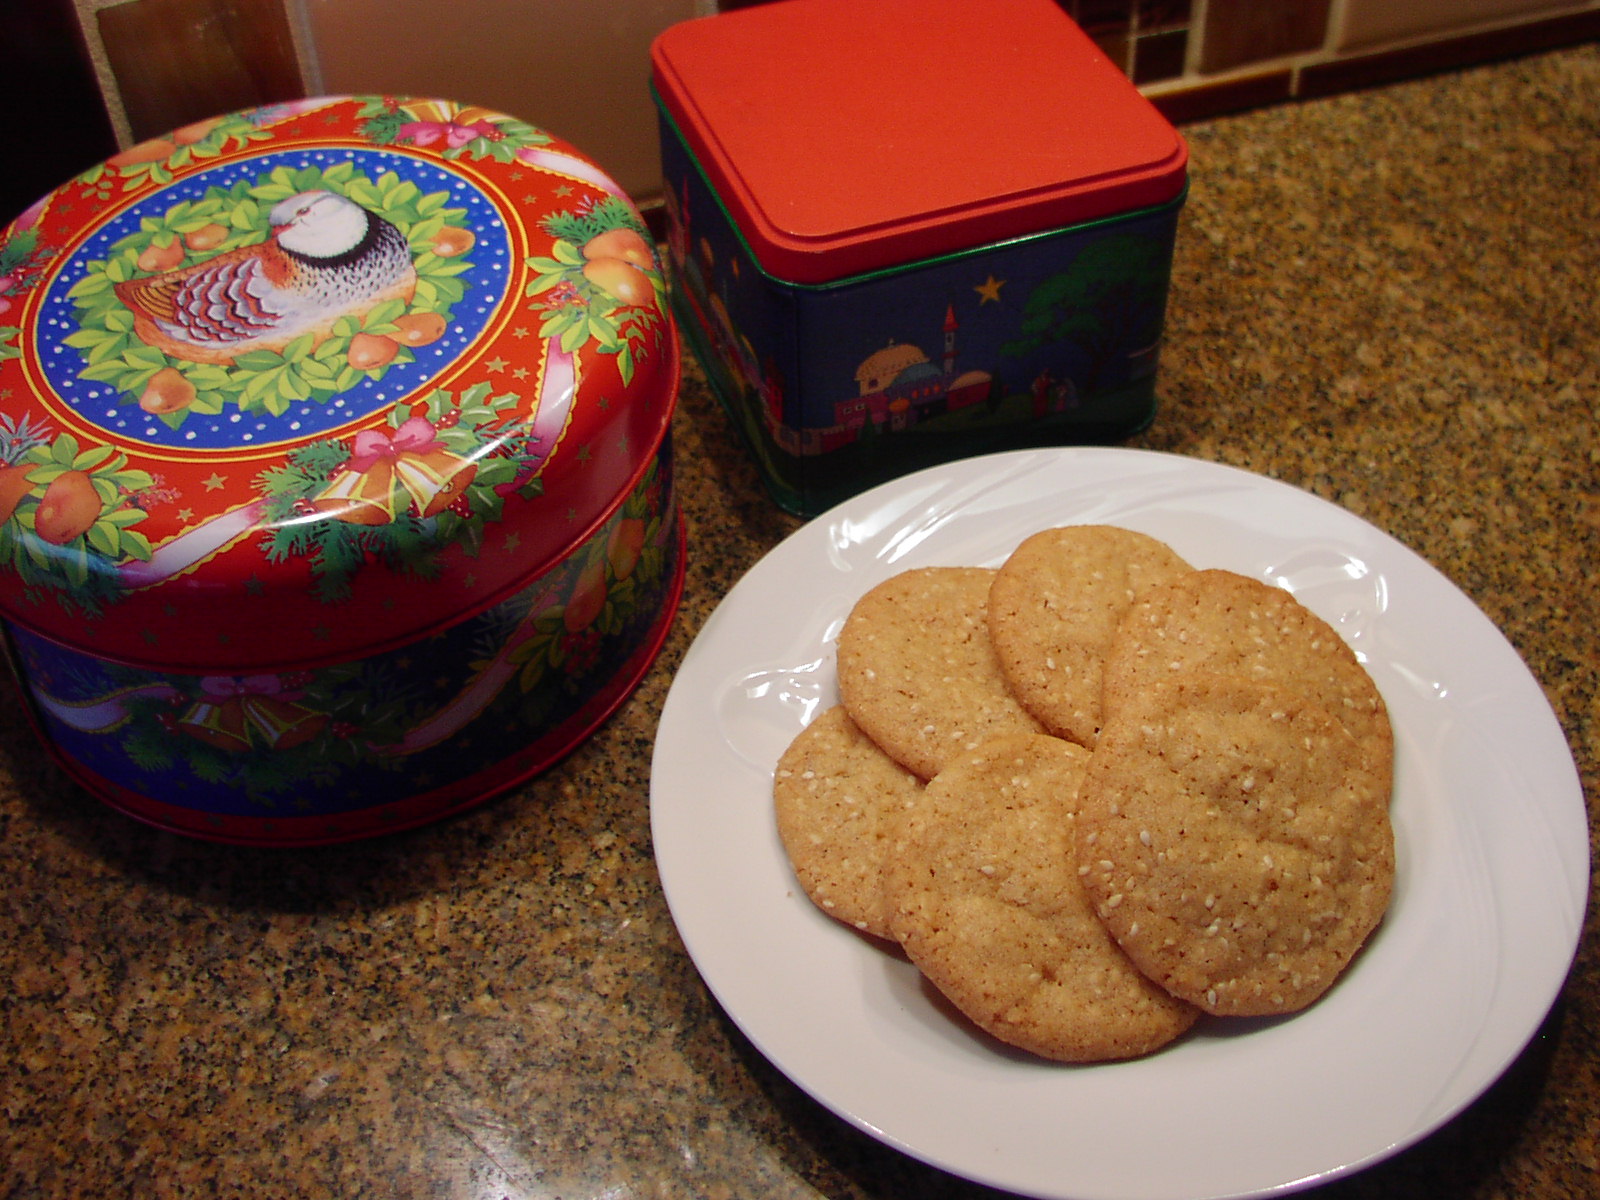
Our good friend Vicki served us these cookies at her home recently, and I thought I had died and gone to heaven. They are just about as good as any cookie I have ever had the pleasure of stuffing in my mouth. Apparently West African slaves introduced sesame seeds to America in the 17th century. And for decades now, benne (the Nigerian name for sesame seeds) wafers have been a southern favorite. They are light, crisp, and delightfully flavorful. The flavor actually reminds me of the crisp sesame seed candy my children used to beg me to bring home from the International district when I worked there in the 70s.

So this year in their Christmas goody packages, I wrapped up some of these cookies along with their other favorite Christmas treats. I can’t wait to hear their reactions, because even though they are all grown up, they are still kids at heart when it comes to Christmas cookies. (Who isn’t?) I’m just hoping the benne wafers also remind them of one of their favorite childhood candies. (Christmas is so fun!!!)

So for a delightfully different cookie experience, give these wafer cookies a try. I have served them to several people now, and every person has just loved them.

So thanks again Vicki for another wonderful recipe. And I am so glad you grew up in the South. Having been born and raised in the Seattle area, I had no idea such a cookie existed. But as I have said before, I am really learning to appreciate the fact that our country has such a wealth of dishes that are distinctive to individual regions. And the best way to discover these new dishes, is to either travel to the areas or have a good friend who has lived there. In the case of the latter, it’s the cheaper way to go. But getting out and seeing our beautiful country and experiencing the cuisine first hand is definitely my preference.

So, you get out to the kitchen and bake up a batch of these wafer cookies. I’ll be at my desk planning our next domestic vacation/food destination!

  • ½ c. (1 stick) unsalted butter, room temperature
  • 2 c. brown sugar
  • 1 egg, room temperature
  • 1 tsp. vanilla
  • 1 c. unbleached all-purpose flour
  • ½ tsp. baking powder
  • ¼ tsp. salt
  • ¾ c. toasted* sesame seeds

Cream the butter and brown sugar together until very light. Add the egg and vanilla extract. Whisk together the flour, baking powder, salt, and toasted sesame seeds. Add to the butter mixture and combine thoroughly.

Using a small ice cream scoop, place balls of soft dough onto a parchment paper lined baking sheet about 2 inches apart. Bake in a pre-heated 325 oven for 12-15 minutes until lightly browned and set. (They will feel and look like they are not quite done, but don’t worry. They will crisp up as they cool.) Remove from oven and let sit for a minute before transferring to a cooling rack. Store in an airtight container.

*Preheat oven to 350 degrees. Place the seeds in a single layer on a baking sheet. Place in the oven for about 3-5 minutes, watching carefully. They should be a light golden brown. Set aside to cool completely.


PEPPERMINT CANDY AND CHOCOLATE CHIP BISCOTTI

OLYMPUS DIGITAL CAMERA

If there is a flavor combination that screams Christmas louder than peppermint and chocolate, I truly don’t know what it is. So when I decided that a biscotti would be perfect for my coffee based theme for my adult children’s Christmas goody package this year, I came up with this recipe.

Now, to be honest, I usually do include either a cookie or a candy with this winning combination. But this year the lure of combining peppermint candy (good peppermint candy that is) and chocolate in a dunkable biscotti was just too overwhelming to even consider one of my regular alternatives. Besides, I knew I would be making our perennial favorite, Chocolate Peppermint Sandwich Cookies (recipe to come in a few days) for my good friends Jim and Margo for Christmas anyway. I simply have no choice. I didn’t make them last Christmas, and Jim hasn’t failed to mention my neglectful omission even once this entire past year! Also closer to Christmas I will be making Peppermint Bark. I also plan to post this candy recipe in the near future.

Other mint and chocolate favorites already on this site include Double Chocolate Mint Cookies, combination number 4 under Christmas Refrigerator Shortbread Cookies, and Grasshopper Brownies.

So while you are considering which cookies and candies to make for your family and friends this holiday season, think about preparing one of these recipes. And for those hard to gift people like your spouse’s uncle, your boss, or your brother-in-law who has everything but expects to be given something, a simple bag of gourmet coffee beans and a pretty bag of these biscotti is sure to win you points. (Even if it doesn’t win you points, it’s an easy solution. And we all need easy solutions at this hectic time of year! Think of it as your Christmas present to yourself.)

Enjoy the holidays my friends.

  • ¾ c. (1½ sticks) unsalted butter, room temperature
  • ¾ c. granulated sugar
  • 3 eggs, room temperature
  • 2 tsp. good peppermint extract
  • 3¼ c. unbleached all-purpose flour
  • 1 tsp. baking powder
  • ¼ tsp. salt
  • 1 c. crushed peppermint soft mint candy, like See’s, King Leo, or Bob’s Sweet Stripes
  • ½ c. mini semi-sweet chocolate chips or ½ cup chopped regular chocolate chips
  • melted white chocolate, milk chocolate, or semi-sweet chocolate for drizzle, opt.

In your mixer bowl, cream together the butter and sugar until light and fluffy. Add the eggs, one at a time, beating well after each addition. Beat in the extract. In a separate bowl, whisk together the flour, baking powder, and salt. Stir in the crushed peppermint candy and the chocolate chips. Gradually add the flour mixture to the creamed mixture, beating only until blended. Using your hands liberally greased with butter, divide the dough in half. On a parchment paper lined baking sheet, pat each half into a 12 x 2½-inch rectangle. Bake in a pre-heated 350 degree oven for 25 to 30 minutes, or until golden brown. Remove from oven. Carefully remove the loaves to wire cooling racks and cool for 15 minutes.

On a cutting board, cut the loaves at an angle into ¾-inch thick slices. Place the slices back on the parchment paper lined baking sheet(s) cut side down. Bake 12 to 15 minutes or until lightly browned. Remove from oven and cool completely on wire rack before drizzling with melted chocolate if desired. (I usually don’t decorate them because I’m lazy, and frankly they are sweet enough already. But if you are making them as a gift, a chocolate drizzle is a lovely touch.) Store in an airtight container.


BOURBON PECAN BARS

OLYMPUS DIGITAL CAMERA

Some of us, at least my husband and I, love pecan pie. And pecan pie is always welcome on Thanksgiving and Christmas, at least with our extended family. But invariably, on these occasions, there are several other wonderful desserts from which to choose. (Not complaining here you understand!) So a few years ago I decided that bar cookies that basically contained the same ingredients as our favorite pies was the way to go. First of all, bar cookies are much easier to make. But the main reason I thought about preparing them was that then I could sample all the desserts if I could have just a small portion of each. (Remember, it’s really just all about me!) And if you have ever tried to cut a pie into 14 pieces, you know that it is darned near impossible. The likelihood of placing anything that even remotely resembles a slice of pie onto someone’s plate after you have basically cut the pie to ribbons is highly unlikely. But a cute little 1-inch square of a bar cookie is fairly easy to manage. Plus it’s just darling to look at. (Remember, points for presentation!)

Now I am not saying that you should give up baking pies. That after all would border on sacrilege! And I have to admit, some types of pie are easier to cut into tiny slices than others. Pumpkin pie, for example, is fairly easy to cut into thin wedges. Apple pie, not so much.

So this Thanksgiving, I decided to try a new pecan bar recipe instead of preparing my regular pecan pie bar recipe that is already on this site. (Chewy Pecan Cookie Bars) Both are delicious, and absolutely perfect for the holidays.

So while you are thinking about what desserts to serve on Christmas Eve, Christmas day, or for New Year’s, consider a pie bar instead of a regular pie. You will be very surprised how well they are received by your friends and family.

Other bar cookie recipes on this site include Pumpkin Pie Bars with Bourbon-Caramel Whipped Cream, Apple Pie Bars, Mincemeat Bars with Brandy Whipped Cream, and Chocolate and Pecan Toffee Bars. They too are delicious and can be cut into almost bite size pieces.

Other desserts on this site that are also perfect for the holidays – Nantucket Cranberry Cake, Flourless Orange Chocolate Cake, Baba Au Rhum, Dried Cranberry and Almond Braided Danish, and Eggnog Bundt Cake.

Whatever you prepare, have fun doing so. And remember – if the dessert comes from your kitchen, or from the kitchen of one of your family members or friends, it is sure to be better than anything you can buy. After all, it was made with love. And isn’t that really what the holidays are all about? Peace to all this holiday season and happy baking.

Crust:

  • 1 c. unbleached all-purpose flour
  • 1/3 c. packed light brown sugar
  • ¼ c. toasted pecans, coarsely chopped
  • 1 tsp. kosher salt
  • ¼ tsp. baking powder
  • 6 T. unsalted butter, cut into ½‑inch pieces and chilled

Filling:

  • ½ c. packed dark or light brown sugar
  • 1/3 c. light corn syrup
  • 4 T. unsalted butter, melted and cooled
  • 1 T. bourbon
  • 2 tsp. vanilla extract
  • ½ tsp. kosher salt
  • 1 lg. egg, room temperature
  • 1¾ c. toasted pecans, coarsely chopped

Crust instructions:

Process flour, sugar, pecans, salt, and baking powder together in food processor until combined, about five pulses. Sprinkle butter over top and pulse until mixture is pale yellow and resembles coarse cornmeal, about eight pulses. Lightly butter an 8×8-inch pan (glass preferably). Pour mixture into prepared pan and press into even layer with your fingers. Bake crust in a pre-heated 325 degree oven (for glass), 350 degrees (for metal) until fragrant and beginning to brown, 20 to 25 minutes. Remove from oven and spread filling evenly over crust and sprinkle with pecans. Bake bars until top is  golden brown and cracks start to form across surface, 25 to 30 minutes, rotating pan halfway through baking.

Set pan on wire rack and let bars cool completely, about two hours. Cut into desired size pieces.

Filling Directions:

While the crust is baking, whisk sugar, corn syrup, melted butter, bourbon, vanilla, and salt together in large bowl until sugar dissolves. Whisk in egg until combined. Pour over baked crust.

Thank you Americas Test Kitchen for this wonderful recipe.

EASY HAM AND CHEESE QUICHE

OLYMPUS DIGITAL CAMERA

Our good friend Jim sent me this recipe the other day and I fixed it for dinner a couple of nights ago. It was crazy easy to prepare, and absolutely delicious! As it happens, I didn’t have enough Gruyère cheese on hand, (and was too lazy to go to the store), so along with a couple of other bits and pieces of cheese that I thought might go well together in this dish, I proceeded according to the directions. (I used about a half cup of grated Gruyère, a half cup of grated aged gouda, and a cup of grated manchego.) It tasted great, so basically I think you could use just about any combination of cheeses and come out with a wonderful product.

Now I must admit that I have tried so called “impossible” or “crust-less” quiche recipes before and have never been impressed. But this recipe from Cook’s Country is an exception. It’s very easy to cut into wedges, and very easy to take out of the pie plate. And oh so yummy! I served it with a Greek salad for a quick and easy dinner, and we both were thoroughly happy campers.

So if you too love quiche, but find regular quiche either intimidating to prepare, or too time consuming, give this recipe a try. Just don’t be afraid to change it up a bit. I see no reason why fried bacon or crumbled sausage could not be substituted for the ham. Or lightly sautéed mushrooms added for a delectable taste treat. Or chives used in place of green onions. This is a “use your imagination” recipe if I ever met one. It’s also a perfect dish to serve for either breakfast, lunch, or dinner. (And how many recipes can lay claim to that honor?)

So have fun and mix up one of these quick and easy quiches at your earliest convenience. You will be delighted by the results and your family and friends will think you amazing. (Which of course you are, but it’s always nice to be reminded of the fact!)

  • 1 T. unsalted butter, softened, plus 2 T. melted butter cooled to room temperature
  • 3 T. finely grated Parmesan cheese
  • 8 oz. Gruyère cheese, shredded (2 cups) or cheese(s) of choice
  • 4 oz. thickly sliced deli ham, diced
  • 4 green onions, minced
  • ½ c. all-purpose flour
  • ¾ tsp. baking powder
  • ¼ tsp. kosher salt
  • freshly ground black pepper
  • 1 c. half-and-half
  • 4 lg. eggs
  • 2 tsp. Dijon mustard
  • 1/8 tsp. ground nutmeg

Grease a 9-inch pie or quiche dish with the 1 tablespoon softened butter, then evenly sprinkle pan with Parmesan cheese. Combine the Gruyere cheese, ham, and scallions in a bowl. Sprinkle mixture evenly in the bottom of the prepared dish. Whisk together the flour, baking powder, salt, and pepper in the now empty bowl. Add the half-and-half, eggs, melted butter, mustard, and nutmeg to the flour mixture and whisk until smooth.

Slowly pour the batter over the cheese and ham mixture. Bake in a pre-heated 350 degree oven for 30-35 minutes, or until the quiche is a light golden brown and the filling is set. (It’s set when it doesn’t jiggle when you gently shake the pan.) Cool on a rack for 10 minutes. Cut into wedges and serve warm.


AMARULA AND BRANDY MALVA PUDDING

OLYMPUS DIGITAL CAMERA

We discovered this amazing dessert, basically South Africa’s answer to Latin America’s Tres Leche Cake (recipe on this site BTW), on our recent trip to South Africa. It is one dessert that a diner can almost always find on the menu. And there is a very good reason why it is featured so often. It’s absolutely delicious. And like apple pie, there appear to be as many variations of this popular dessert as there are pastry chefs or home bakers.

This variation was given to me by the owner/chef of the Soeterus Guest Farm in Calizdorp, South Africa. One of the two nights we stayed on the farm, Hannelie and her husband Jamesly fixed a wonderful dinner for all of us who were staying with them that night. We had marinated ostrich steaks that Jamesly grilled on the Braai (BBQ). Hannelie made three salads – a green salad with an amazing vinaigrette, a shredded raw carrot salad with fresh pineapple, and a fresh green bean and feta salad. Along with the grilled ostrich and salads, she also served tiny buttered new potatoes. All of the dishes were wonderful and we ate until we were totally full. Then she served dessert. OMG. Big squares of this amazing concoction with vanilla ice cream on the side.

Now I don’t normally eat sweets. Not because I don’t like them, but because as I have gathered a few post Medicare years under my belt, my stomach has decided that it will no longer tolerate refined sugar. And as much as I try and reason with my stomach, it usually wins and I forgo dessert. But not this evening! There are just times when you have to fly in the face of sagacity. And oh am I glad I did. The malva was so very wonderful. Soft, delicious, and actually quite light. Perfect after a heavy, rich meal.

Now don’t be put off after you read this recipe by the fact that this is a “5 steps to heaven” dessert. The “5 step” plan may seem onerous at first glance, but really the dessert goes together very quickly, and is SO worth the effort.

So next time you want to serve a dessert that is different and that is actually better if it is prepared a day or two ahead, give this South African classic a try. You will not be disappointed. In fact, you will probably thank me after you try this recipe. And I will respond like a true South African – “pleasure”!

Step 1 – Pudding:

  • 1 c. cake flour
  • 1 c. sugar
  • 2 T. cocoa
  • ¼ tsp. salt
  • 1½ tsp. baking powder
  • ½ c. vegetable oil
  • ½ c. boiling water
  • 4 eggs, room temperature, separated
  • 1 tsp. vanilla

Whisk together the cake flour, sugar, cocoa, salt, and baking powder. Set aside. Whisk together the vegetable oil and boiling water and gently mix with the dry ingredients. Separate the 4 eggs. Beat the yolks and vanilla together and stir in with the other ingredients. Whip the egg whites until soft peaks form. Fold into batter. Pour into a lightly buttered 9×13-inch pan. Bake in a pre-heated 325 degree oven for 30-35 minutes if using a glass pan, or 350 degree oven for about 25-30 minutes if using metal. Remove from oven when the pudding is set and immediately pour the Sauce evenly over the top. Cool completely and frost with Dulce de Leche. Refrigerate. When ready to serve, cut into pieces and dollop with Whipped Cream or vanilla ice cream. Sprinkle lightly with Cocoa powder.

Step 2 – Sauce:

  • 1 c. sugar
  • 1 c. water
  • 1 tsp. vanilla
  • 2 T. brandy
  • 2 T. Amarula Cream Liqueur* (look for an elephant on the label)
  • 1 tsp. espresso powder

Combine all the ingredients, bring to a boil, and while still hot, pour over the just out of the oven pudding.

Step 3 – Topping:

  • 1 can Dulce de Leche (to make your own, see instructions below)

Step 4 – Whipped Cream:

  • 1 pint whipping cream
  • 3 T. powdered sugar
  • 1 T. Amarula Cream Liqueur

Whip the cream to stiff peaks. Add the powdered sugar and Amarula and continue whipping until thoroughly combined.

Step 5 – Garnish:

  • Cocoa, for dusting

Homemade Dulce de Leche

  • 1 can sweetened condensed milk (solid cans without tab lids preferred)

Peel the label off the can of sweetened condensed milk. Place the can upright in a pan tall enough to allow water to cover the can by at least 2 inches. Add water. Bring the water to a very gentle boil, reduce the heat to low, and gently simmer for 3 hours, carefully turning the can (using tongs works best) halfway through the cooking process.

VERY IMPORTANT: Watch the water level carefully. Never allow the water level to fall below the top of the can. So add water as necessary and keep a careful eye on the simmering process.

After the simmering time, turn off the heat and allow the can to come to room temperature. Never open the can while it is still hot. It must reach room temperature before opening. After opening the can, stir and pour over the cooled pudding. Homemade Dulce de Leche can be made ahead and stored in the refrigerator.

*Amarula Cream (per the label on the bottle), “is a pure blend of nature’s fresh cream and the mysterious taste of the wild marula fruit. Africa’s majestic elephants walk for miles to feast on the sun-ripened marula fruit which is indigenous to the region’s vast subequatorial plains”.

Note about elephants: Elephants love citrus fruit. Upon entering a nature reserve, guests are always asked if they have any citrus fruit with them. If so, they are persuaded to leave it behind because elephants can smell it from miles away. Who knew? Good thing the fine rangers and other qualified nature reserve people are watching out for us poor uneducated tourists. I mean really, who wants to have their rental car turned over by an elephant in search of a lemon anyway?

IMG_0870

(Just one of the many darling “little” fellows we encountered while visiting nature reserves.)


LAMB BOBOTIE WITH YELLOW RICE (SOUTH AFRICAN)

OLYMPUS DIGITAL CAMERA

Well I guess the first thing to do is apologize for not posting any new recipes for the last few weeks. But I have a very good excuse. (Don’t I always!) I was in SOUTH AFRICA! Yep – you read it right – South Africa. And I have to say, my time there was one of the best travel experiences of my life. We only visited the Eastern side of the country as far up as Richards Bay and environs – Hluhluwe-Umfolozi Game Reserve for wild animals and St. Lucia for an afternoon boat ride spent cruising the river estuary amid the local hippo and crocodile population. (BTW – if you are interested in how you pronounce Hluhluwe, I will give you the same advice I was given by a nice older couple from Johannesburg. “Pretend you have had too much to drink, and then slur your words. If it sounds like schlu-shlouwee, you’ve got it right!”) Let’s see, where was I? Oh yes.

We only drove from Cape Town as far up as Richards Bay, touring mostly along the coast. On the way back to Cape Town, we stuck close to the Indian Ocean again for about half the distance, then turned inland to drive through glorious mountain passes and wine country. During the 24 days that we had our rental car, we drove a total of 7,016 kilometers or 4,360 miles. And even if the amount of kilometers we travelled seems like a lot, we actually only visited a very small part of this glorious country.

And of course along the way, we had many opportunities to enjoy South African cuisine. Along our route one day, we stopped for lunch at a quiet little café. Basically it was a place to buy gourmet condiments, fresh bread, and take-away food. But we were tired, so we asked the kind server if she would heat something up for us. She said, “pleasure” and we settled ourselves in their small outside dining area to await our meal.

I truly don’t recollect what Mr. C. ordered, but I decided to try a South African comfort food  called Bobotie. Bobotie is basically a savory meat loaf flavored with curry and other aromatic spices and topped with a simple egg custard. Well from bite one I was hooked. So I decided there and then that Bobotie had to be the first South African recipe to get posted when I returned.

So for the next few weeks, my cooking time is going to be mainly spent trying to duplicate some of the amazing dishes we experienced on our trip. And because I know you all love new and different recipes to fix for your family and friends, I have faith that as you try some of these amazing dishes, you will forgive me for being away from my blog for so long.

So give this recipe a try. It’s easy to prepare and just delicious. Comfort food, Cape Town style.

  • 1 T. vegetable oil
  • 1 onion, chopped
  • 1 lb. ground lamb or beef
  • 2 garlic cloves, minced
  • 1 tsp. ground coriander
  • 1 tsp. ground ginger
  • 1 tsp. curry powder
  • 1 tsp. cinnamon
  • 1 tsp. turmeric
  • 1 tsp. sugar
  • 1 tsp. salt
  • freshly ground black pepper
  • 1 lg. carrot, peeled and grated
  • 1 T. fresh lemon juice
  • 1 thick slice or 2 thin slices of white bread soaked in ¼ cup milk
  • 1/3 c. slivered or sliced almonds
  • 1/3 c. golden raisins
  • 1 c. buttermilk or plain milk (or combination)
  • 2 eggs
  • 5 bay leaves
  • chutney, opt.

Heat the oil in a large fry pan. Add the onion and sauté until translucent. Add the ground lamb and cook until just cooked through, breaking up the meat as it cooks. (You don’t want any large lumps of meat.) Add the garlic and cook for 1 minute. Add the coriander, ginger, curry powder, cinnamon, turmeric, sugar, salt, pepper, grated carrot, and lemon juice. Remove from heat and add the soaked white bread, making sure you have mixed the milk and bread thoroughly. (You shouldn’t be able to see big chunks of bread). Add the almonds and golden raisins and mix through. Spoon the mixture into a lightly buttered casserole dish, press down and level the top.

Whisk together the buttermilk and eggs and pour over the meat mixture. Gently lay the bay leaves over the egg mixture for decoration.

Bake in a pre-heated 375 degree oven for about 40 minutes. (The egg custard should be firm and set and the top a nice golden brown in color.)

Serve hot with Yellow Rice (see recipe below), Greek salad, and chutney.

YELLOW RICE

OLYMPUS DIGITAL CAMERA

  • 1½ c. long grain white rice
  • ½ tsp. salt
  • freshly ground black pepper (just a bit)
  • 1 tsp. ground turmeric
  • ¼ tsp. ground cinnamon
  • 1 tsp. sugar
  • ¼ c. golden raisins
  • 1 T. butter
  • 2½ c. chicken broth

Place all the ingredients in a rice cooker and set it on “go”. Serve with Bobotie or any other South African dish.


SEAFOOD AND FRIED TOFU LO MEIN

OLYMPUS DIGITAL CAMERA

I love one dish, one pot meals. And I wish I could tell you this was one. (Well, it is a one dish meal. But as hard as I tried, there is just no getting around the fact that your kitchen help is going to have several bowls and a couple of fry pans to wash after dinner.)

Now in my case, Mr. C is our after meal kitchen clean up crew. And he knows, from years of dish washing experience, that I have washed as many bowls and utensils as possible as I went along. But with this recipe, every part of the dish comes together at the very last minute. So there is no time to wash dishes, much less take a sip of martini (for that matter). (Not that I would have experience drinking a martini while fixing dinner you realize. Right! Only about 25 years of experience, but who’s counting……)

Anyway, regardless of the number of bowls and pans involved with this Lo Mein, you are going to love diving into a plate of this yummy homemade Asian inspired noodle dish. And unlike Lo Mein prepared in a restaurant, there is a lot less salt and fat, and not a sprinkle of MSG to be had. Plus you can make it with as many or as few veggies as you like. (When I fixed this last evening, I used the veggies listed below, because that’s what I had on hand. But next time I can see myself adding or substituting red bell pepper, those darling little corn cobs that come in a can, a small amount of broccoli, or maybe some re-hydrated dried mushroom pieces. This is a “clean your vegetable bin” kind of dish. In other words – the best kind of dish.)

So if you too are a Lo Mein lover, give this recipe a try. And to you or anyone else in your family who gets stuck with the dishes, please accept my apology.

Oh – one last thing. This is a Lo Mein, rather than a Chow Mein because the noodles are not fried. Same kind of noodles are used for both dishes, but in an effort to keep the fat content as low as possible, I decided the cooked noodles really didn’t need to be stir fried in additional oil. (Another positive proof that I am on your side in the quest for healthier eating.) Your welcome!

And yes I do know that tofu is not always used in either Chow Mein or Lo Mein. But we happen to love it. Plus it’s just one more source of protein. Actually, if you wanted to make this an almost* vegetarian dish, you could simply substitute vegetable stock for the chicken broth, and skip the seafood altogether. The tofu could absolutely hold its own as the requisite protein component. It’s good that way!

*Oyster sauce has a bit of oyster extract

Tofu:

  • 1 lb. firm tofu
  • 3 T. low sodium Tamari or soy sauce
  • 6 T. cornstarch, or more as needed
  • 2 T. vegetable oil
  • 1 tsp. sesame oil

Sauce:

  • 2 T. water
  • 2 T. cornstarch
  • 1½ c. low sodium chicken broth
  • ¼ c. oyster sauce
  • 3 T. GF low-sodium Tamari or low sodium soy sauce
  • 1 T. sesame oil
  • 2-3 tsp. Sriracha

Veggies and Seafood:

  • 2 stalks celery, thinly sliced
  • 1 large carrot, shredded
  • 8 thinly sliced white button mushrooms
  • 2 c. Napa cabbage, finely shredded or 1 c. finely shredded regular green cabbage
  • 2 large garlic cloves, finely minced
  • 2 tsp. minced ginger
  • 8 green onions, white and green parts, sliced
  • 12-15 peapods, sliced in 3rds
  • 1 lb. mixed seafood* (shrimp, scallops, calamari, etc.)
  • 2 T. vegetable oil (needed when veggies are stir-fried)

Noodles:

  • kosher salt
  • 6 oz. chow mein or Chinese egg noodles (I use Sun Luck chow mein noodles mainly because I can buy them at my local grocery store)

Preparation: (Complete each step below before actually cooking the Lo Mein)

Tofu – Remove the tofu from its watery container. Using paper towels, gently squeeze as much liquid as you can from the block of tofu. Cut into 32 pieces and place in a flat pan. Pour the soy sauce over the tofu cubes, turning as required to coat all surfaces. Leave for about 5 minutes.

When ready to fry, coat all sides with corn starch. Heat the vegetable and sesame oils in a large fry pan. Add the tofu cubes and fry until all sides are crispy and golden brown. Remove from heat and set aside until needed.

Sauce – Whisk together the water, corn starch, chicken broth, oyster sauce, Tamari, sesame oil, and Sriracha in a small bowl and set aside.

Veggies – Cut all the veggies as instructed above. Set aside. Combine seafood in a bowl and set aside.

Lo Mein assembly: In a large pot of salted boiling water, cook the noodles according to the package directions. While the noodles are cooking, heat the 2 tablespoons of vegetable oil in a very large fry pan or wok. Add the celery, carrot, mushrooms, and cabbage to the hot oil and cook for 3-4 minutes. (You want the veggies to be crisp tender.) Add the garlic, ginger, green onions, and pea pods; cook for 1 minute. Finally add the seafood and cook until almost done.

Add the sauce and cook only until thickened. Drain the noodles and add to the fry pan along with the fried tofu. Remove from heat when all ingredients are hot. Serve immediately.

*You can use chicken, beef, or pork instead of seafood. Just add in place of seafood and cook only until done.


ASIAN MARINATED SEARED TUNA

OLYMPUS DIGITAL CAMERA

(Sorry about the fuzzy picture, but before I could take a picture, the tuna was all but consumed. Then before I could actually check to see if I had taken a decent enough picture, it was all gone!)

If there is anything better than having wonderful neighbors, I can’t think what it could possibly be? Except of course if said neighbors are also good friends AND bring you fresh tuna. Now that is what I call a winning combination.

So when Jerry and Jeanie got back from their fishing trip and asked if we would like some fresh tuna, we jumped at the chance. It isn’t just every day that we get to sink our teeth into such a delicacy. Plus this is a delicacy that takes very little effort or time to prepare. (Another winning combination!)

With such an amazing piece of fish (about 2 pounds), the last thing I wanted to do was prepare it in such a way as to spoil either the delicate flavor or moistness of the fish. So off to the internet in search of both elucidation and inspiration. I knew I wanted to either grill or sear the tuna, but did I want to marinate the fish or serve it with something like a wasabi aioli? After remembering that I wanted to cut down on the amount of sauces and aiolis I served, I decided that a marinade was the answer.

I was lucky enough to stumble on a Youtube by Chris Henry, a personal chef. The tuna she prepared on her video looked so delicious, I just knew it would be outstanding. And take it from me, this was the best tuna preparation I ever tasted, much less prepared myself. And like I mentioned; simple as can be.

So next time you want to treat your family and friends, I suggest you find yourself a lovely hunk of tuna and use this recipe. So thank you Chris for sharing your recipe. And thank you again Jerry and Jeanie for your lovely gift of tuna. But mainly, we both want to thank you for your friendship. It means more to us than even the sushi grade tuna you gave us. And that my dear friends, is saying a lot!

  • 2 T. GF, low sodium Tamari
  • 2 T. regular soy sauce
  • juice of ½ of a lime
  • 2 tsp. finely minced fresh ginger root
  • 2 garlic cloves, finely minced
  • 1 – 1½ lbs. fresh tuna fillets or steaks
  • extra virgin olive oil

Combine the Tamari, soy sauce, lime juice, ginger, and garlic in a covered bowl or airtight freezer bag. Add the tuna and place in refrigerator for an hour or up to 4 hours (if the steaks are really thick). Remove from refrigerator about 30 minutes before you plan to cook the steaks. (I marinated 1½-inch steaks for 2 hours the other evening and they were perfect!)

Remove the steaks from marinade. Discard marinade.

Coat a medium sized fry pan with olive oil. Heat the oil until just before it starts to smoke. Fry the steak(s) for about 1½ – 2 minutes on each side or until the internal temperature reaches between 115 and 120 degrees.* (You never want to overcook tuna. So this is one of those times when an instant read thermometer is worth its weight in gold!) Remove tuna from pan, let sit for 3-4 minutes, then slice thinly against the grain. Serve immediately.

Please note: the marinade gives the tuna a wonderful flavor. In my estimation no other condiment or sauce is necessary, in fact it might detract from the glorious flavor of the fish.

*To cook and serve rare tuna, the tuna must be free of parasites. In order to do that, the just caught tuna must either be frozen at -4° F for 7 days or frozen at -31° F (“flash frozen”) for 15 hours. Even if the tuna in your store is marked “sushi or sashimi grade” (considered safe to be eaten raw) you can’t always be sure you are receiving a safe product.

According to Marc Matsumoto, “The term “sushi-grade” is often tossed around to imply some level of freshness, but in the US, there’s no regulation around the use of the phrase, so it can be used to describe anything. That said, most stores aren’t in the business of getting their customers sick, so they usually reserve the label for their freshest fish.” (Which I have discovered in my research doesn’t mean the fish is free of parasites. It just means it’s “fresher” than the fish that isn’t labeled “sashimi or sushi grade”!)

So moral of the story: Trust your fishmonger and buy tuna from a reliable source or buy commercially frozen fish.


SPINACH WITH ALMONDS AND FETA CHEESE

OLYMPUS DIGITAL CAMERA

So call me slow, but it took me almost 71 years to figure out that Popeye didn’t eat spinach because it tasted good (it was canned for heaven’s sake!), but rather because he thought it would make him stronger. Not until I conducted some research on good old Popeye did I learn the error of my thinking and his as well.  (As if a cartoon character could think in the first place, but bear with me, I’ll get to the point sooner or later!)

The truth begins more than fifty years before Popeye was even a glimmer in E. C. Segar’s eye. According to Samuel Arbesman, Popeye’s “thinking” was precipitated by a scientific error. To quote Mr. Arbesman, “Popeye, with his odd accent and improbable forearms, used spinach to great effect, a sort of anti-Kryptonite. It gave him his strength, and perhaps his distinctive speaking style. But why did Popeye eat so much spinach? What was the reason for his obsession with such a strange food?

Back in 1870, Erich von Wolf, a German chemist, examined the amount of iron within spinach, among many other green vegetables. In recording his findings, von Wolf accidentally misplaced a decimal point when transcribing data from his notebook, changing the iron content in spinach by an order of magnitude. While there are actually only 3.5 milligrams of iron in a 100-gram serving of spinach, the accepted fact became 35 milligrams. To put this in perspective, if the calculation were correct each 100-gram serving would be like eating a small piece of a paper clip.

Once this incorrect number was printed, spinach’s nutritional value became legendary. So when Popeye was created, studio executives recommended he eat spinach for his strength, due to its vaunted health properties. Apparently Popeye helped increase American consumption of spinach by a third!

This error was eventually corrected in 1937, when someone rechecked the numbers. But the damage had been done. It spread and spread, and only recently has gone by the wayside, no doubt helped by Popeye’s relative obscurity today. But the error was so widespread that the British Medical Journal published an article discussing this spinach incident in 1981, trying its best to finally debunk the issue.”

So now that you have Popeye’s story, I’m going to bore you with mine. (Your lucky day folks. But then you know me – I yam, what I yam, and that’s all what I yam.)

I don’t care that spinach has only 3.5 milligrams of iron in a 100-gram serving rather than 35 milligrams. Because spinach is also an excellent source of vitamin K, vitamin A (in the form of carotenoids), manganese, folate, magnesium, copper, vitamin B2, vitamin B6, vitamin E, calcium, potassium, and vitamin C. It is also a very good source of dietary fiber, phosphorus, vitamin B1, zinc, protein, and choline. And most important of all – IT TASTES GREAT! And I don’t care that Popeye was disillusioned. He was still one healthy and strong dude. After all, if he was good enough for Olive Oyl; he’s alright in my comic book too!

So if you too are a believer in the powers of spinach, give this recipe a try. Anytime I ask Mr. C. if he likes a dish, and his answer is “no, I love it”, then I know the recipe is a winner. It shivers me timber just thinkin’ about how much you are going to love serving this dish to your family. BTW, Bluto says Hi!

  • 2 T. extra virgin olive oil
  • 2 garlic cloves, minced
  • 6-10 oz. fresh baby spinach, roughly chopped
  • ¼ c. slivered or chopped whole almonds
  • freshly ground black pepper
  • pinch crushed red pepper flakes
  • ½ c. crumbled feta cheese

In a large skillet, heat the olive oil and add the garlic. Sauté for 1 minute, or until the garlic releases its aroma. And the spinach, almonds, a small amount of pepper, and crushed red pepper flakes; sauté until the spinach is just wilted. Sprinkle with cheese and serve immediately.


OATMEAL RAISIN COOKIES

OLYMPUS DIGITAL CAMERA

There are few cookies I like better than a good oatmeal raisin cookie. And that’s not because oatmeal raisin cookies are necessarily better for me, calorie wise that is, but you do have to admit, they feature healthier ingredients than some cookie varieties out there! Especially this recipe that contains whole wheat flour, and lots of oats, walnuts, and raisins. So in essence oatmeal raisin cookies are a lot better for us nutritionally than a chocolate chip cookie, for example. (And no, I don’t mean to suggest that you stop eating chocolate chip cookies. That would be entirely too great a sacrifice.) All I’m saying is that a good oatmeal raisin cookie is also worthy of your attention.

But I hold this truth to be self-evident; not all oatmeal raisin cookies are created equal. And in my humble opinion, their creator, our dear friend Jim’s father Don, in order to form a more perfect union, found just that perfect blend of ingredients in his pursuit of oatmeal raisin cookie happiness. These are simply the best oatmeal raisin cookies I ever tasted. They are chock full of nuts and raisins, are crunchy (from the nuts) and chewy (from the oats and raisins), and the overall flavor is unequalled in all the land.

So without any further preamble or declaration, I give you Don’s magnificent recipe for oatmeal raisin cookies. And if these cookies don’t insure domestic tranquility and promote the general welfare at your home, then I don’t know the difference between a preface and a prologue!

  • ½ c. (1 stick) unsalted butter or margarine, room temperature
  • 1/3 c. canola oil
  • 1 c. granulated sugar
  • 1 c. brown sugar, packed
  • 2 eggs, room temperature
  • 1 tsp. vanilla
  • 1 tsp. baking soda
  • 1 tsp. salt
  • 1½ c. whole wheat flour
  • 3 c. regular oats
  • 1 c. chopped walnuts
  • 1 c. walnut halves, not chopped
  • 2 c. golden raisins

Cream the butter, oil, and sugars together until light and fluffy. Add the eggs and vanilla; beat until thoroughly combined. In a separate bowl, whisk together the baking soda, salt, and flour. Stir in the oats. Add to the butter mixture until just combined and then stir in the nuts and raisins.

Drop by ice cream scoop or rounded tablespoon onto ungreased cookie sheets. Bake in a pre-heated 350 degree oven for 8-10 minutes or just until set. Do not overbake. Remove from oven and let cool for a couple of minutes on baking sheet, then remove to cooling racks. Allow to cool completely before storing in an airtight container.