OK, what I like most when I go to a Mexican restaurant are the beans, after the warm tortilla chips and salsa that is! Now I don’t know about you, but to my thinking, a Mexican restaurant is defined by the quality of the beans they serve. Because even in a good Mexican restaurant, most of the enchiladas, tacos, etc. taste pretty much the same. But give me a restaurant that makes good beans, and I’m in heaven.
And believe me, over the years I have tried dozens of times to make really good, refried beans. And I have a couple recipes on this site that are good. But I am still in search of the perfect refried bean recipe.
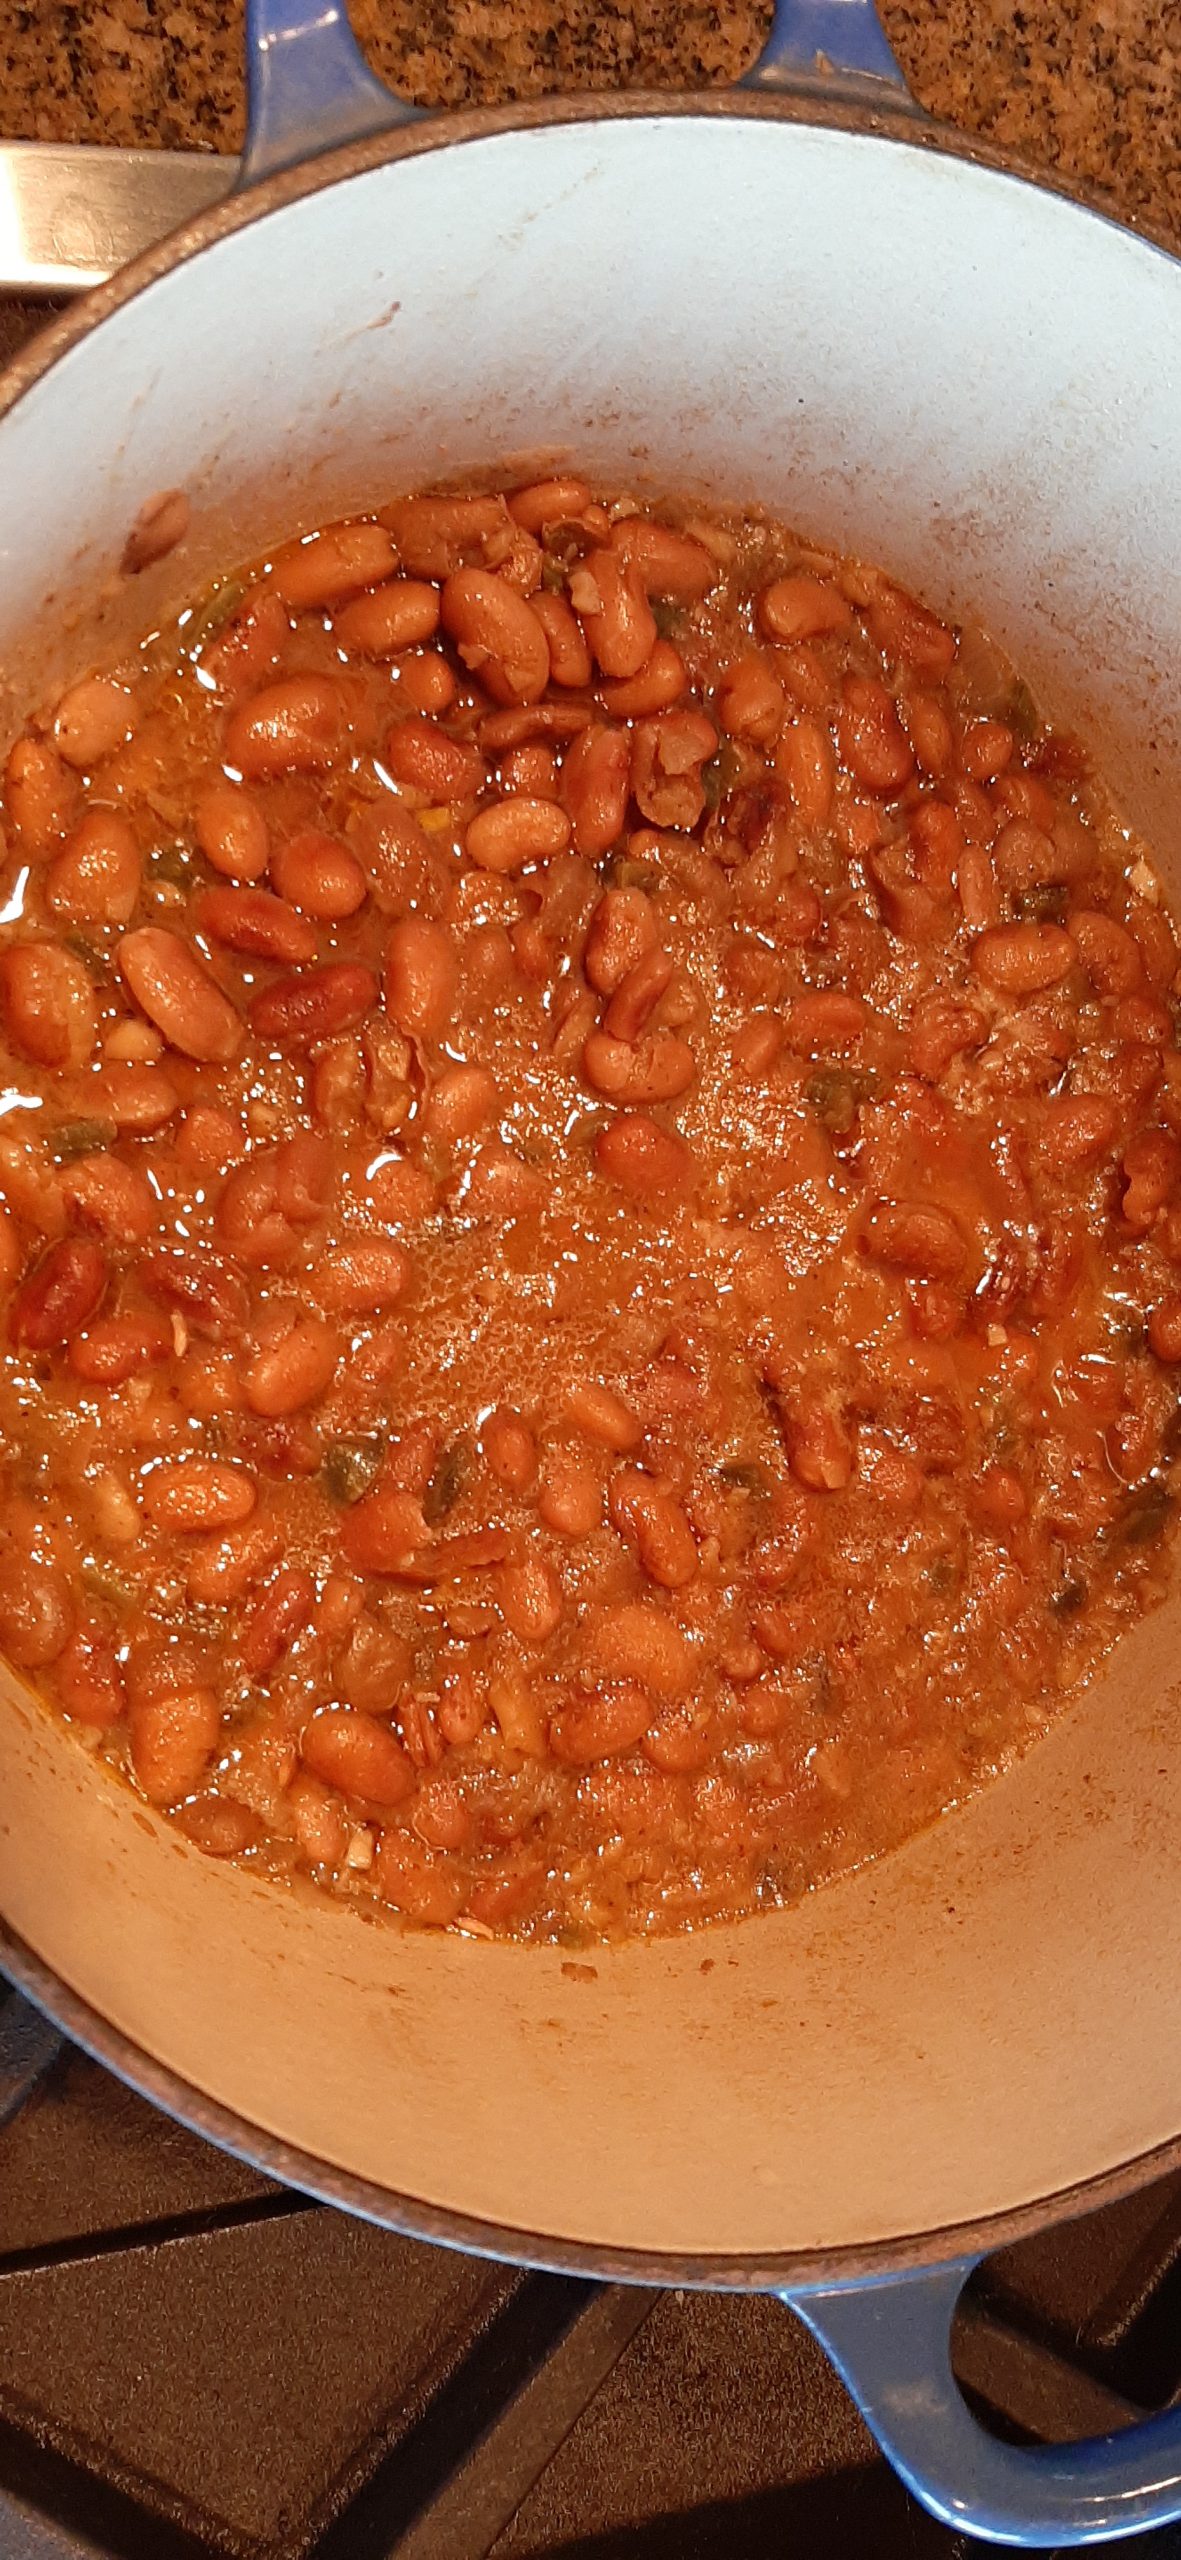
Recently however, some Mexican restaurants have been serving the main dish with a side of beans in a small bowl. Not re-fried or drained whole beans, but rather, saucy beans that require containment. And I have found that I really like beans served this way. Thus, this recipe.
Now, this is not a mild-mannered recipe for beans. These beans come with an attitude. They practically demand to be taken seriously! So, be prepared. And if you don’t like strongly flavored beans, this is not the recipe for you.
But if you like savory dishes with a bit of heat, then by all means proceed on down the page. Because this simple recipe produces some mighty fine tasting beans. Enough said.
Well, it’s the 4th of July. And some of our neighbors, who obviously have very few brain cells left working properly, have been setting off fireworks for several days now. And I for one am tired of the noise. And damn tired of our poor kitties having to hide in our basement hallway to try and get as far away from the booms as possible.
So, when I read this article in todays’ Seattle Times, I thought I would pass it along to you. Because it beautifully states how I feel about the subject. Oh, that I was intuitive and clever enough to have penned this short and poignant article. But alas, it was written by people with greater insight than I possess. Regardless, the fact that it was written and published at all is what really matters!
DON’T SET OFF FIREWORKS — IT’S THE PATRIOTIC THING TO DO – by the Yakima Herald-Republic editorial board.
“Be careful out there with fireworks. Here’s a perspective from Washington’s dry side at the start of wildland fire season.
The warnings go out every year — because every year, the thoughtless among us make the same irresponsible mistakes. Mistakes that can threaten lives, destroy people’s homes, and cost us all money.
So here it is again: Don’t set off illegal fireworks this week.
Yes, the Fourth of July is a great cause for celebration. It’s the anniversary of our nation’s conception — the date we declared our independence from England’s royal rule.
But setting off dangerous and illegal fireworks doesn’t do anything to advance the cause of freedom. It’s just boneheaded behavior that puts bone-dry countryside at risk needlessly.
If the Founding Fathers could’ve seen this coming, maybe they’d have held off on the Declaration of Independence until December or January, when the ground is usually a lot wetter.
This year, after a historically dry spring, local fire authorities have gone a step further than usual, issuing a summerlong burn ban throughout the unincorporated areas of Yakima County. The ban took effect Saturday and stays up through Sept. 30.
The ban, combined with an existing prohibition on fireworks in unincorporated areas, is meant to discourage would-be pyromaniacs from accidentally laying waste to their neighbors’ houses or setting off wildfires that blacken hundreds of acres.
Instead, they’re urging fireworks fans to express their love for the country by attending any of the various community celebrations planned for the Fourth — and by taking in any of the professionally staged fireworks shows that are in the works.
Trust us, you’re doing the patriotic thing here.
Your neighbors will thank you. Your pets will thank you. And perhaps more than anyone else, local fire crews will thank you. Besides, if you really love your country, you don’t want to burn it down, do you?”
On that happy note, have a great 4th of July everyone. And peace and love to all.
¾ c. dry pinto beans, rinsed
1½ c. water
1 T. bacon grease or extra virgin olive oil (if you want vegetarian beans)
¾ c. chopped onion
2 lg. garlic cloves, minced
freshly ground pepper
½ tsp. ground cumin
1-2 T. chopped pickled jalapeño (depends how spicy you like your beans)
2 c. water, or more as needed
2 tsp. vegetable base (I use Better Than Bouillon)
Bring the rinsed pinto beans and 1½ cups of water to a boil in a covered pan. Boil for 2 minutes. Remove from heat, and leave covered for 2 hours. Or soak the beans overnight.
Heat the bacon grease or olive oil in a medium sized heavy pan with a lid. Add the onion and cook until translucent. Add the garlic and cook for 1 minute.
Then add the black pepper, cumin, chopped pickled jalapeño, water, and veggie base to the pot. Drain the soaked beans and add them to the pot.
Bring to a boil, reduce heat, and cover and simmer for about 90 minutes, stirring every so often until the beans are tender. Add more water if needed.
Remove the lid and simmer another 15 minutes or so, until the liquid has evaporated a bit.
Serve with any of your favorite Mexican dishes.