Category Archives: VEGETARIAN RECIPES

HUMMUS A TUNE MR. C.

OLYMPUS DIGITAL CAMERA

So what is this thing called hummus, and what in the heck is tahini? Those were just 2 of the questions I asked Mr. C the first time he took me to his favorite Middle Eastern restaurant. (Having just recovered from raising and educating about a dozen (or so it seemed) children, I hadn’t had a lot of time or disposable income to go out to any but the most inexpensive of restaurants.) In fact, the only ethnic restaurants I patronized, and then on an infrequent basis, were Mexican, Chinese, or Italian (pizza).

So here I am in a restaurant with this guy I hardly know and he orders some of the best food I ever tasted. Well, I’ll tell you what – his choice of restaurants was one of the contributing factors to my falling head over heels in love. That and the fact that he was pretty darn cute, played the piano, and in casual conversation had mentioned those three little words every girl longs to hear – medical and dental! (He must have been paying attention to one of the comments made by Kaetche, one of the Fabulous Fenderskirts during one of their concerts. She often alluded to the fact that “I love you” was almost passé. What woman really wanted to hear was “medical and dental”.)

Anyway, it was Mr. C who really taught me to appreciate the many delights offered by some of the ethnic restaurants in the Seattle area. And as I discovered fantastic new foods, I would buy cook books (those were the days before internet) and try to duplicate the dishes in my own kitchen. And of course I would try them out on Mr. C. That was almost 24 years ago, and the poor guy is still my number one human guinea pig victim food tester.

But of all the foods I tried early on in our relationship, it was hummus that first captured my taste buds. And since then I must have prepared hummus at least 75 times. It is just a wonderful appetizer, goes beautifully with all kinds of Middle Eastern and Mediterranean food, and is easy and economical to prepare. And all the main ingredients are super foods in their own right.

Garbanzo beans (chickpeas) are full of protein and fiber. (Black beans are good for us too!) Tahini (sesame seed paste) is loaded with copper, manganese, calcium, magnesium, phosphorus, iron, zinc, selenium, vitamin B1, and fiber. Garlic is an excellent source of manganese which helps contain essential enzymes and antioxidants that assist with the healthy formation of bones and connective tissues, bone metabolism, calcium absorption, and proper thyroid function. Garlic contains 17% of the daily value of vitamin B6, and 15% of vitamin C, along with goodly amounts of calcium, phosphorus, and selenium. And last but not least, extra virgin olive oil is a monounsaturated fatty acid which is considered a healthy dietary fat.

So next time you want to do your mouth a favor as well as your entire body, whirl up a batch of any one of the three hummus recipes given below. They are all delicious and ever so easy to prepare.

Before I go any further, I would like to share a trick I recently learned about fresh garlic. If you are using fresh garlic in a recipe, but would like to reduce a bit of the “bite”, warm the peeled garlic cloves in a small bowl covered by milk. You only want to warm the cloves in your microwave, not cook them. Then remove the cloves from the milk and slice or mince according to your recipe. You will find that the flavor is still there, but the bite has mysteriously disappeared.
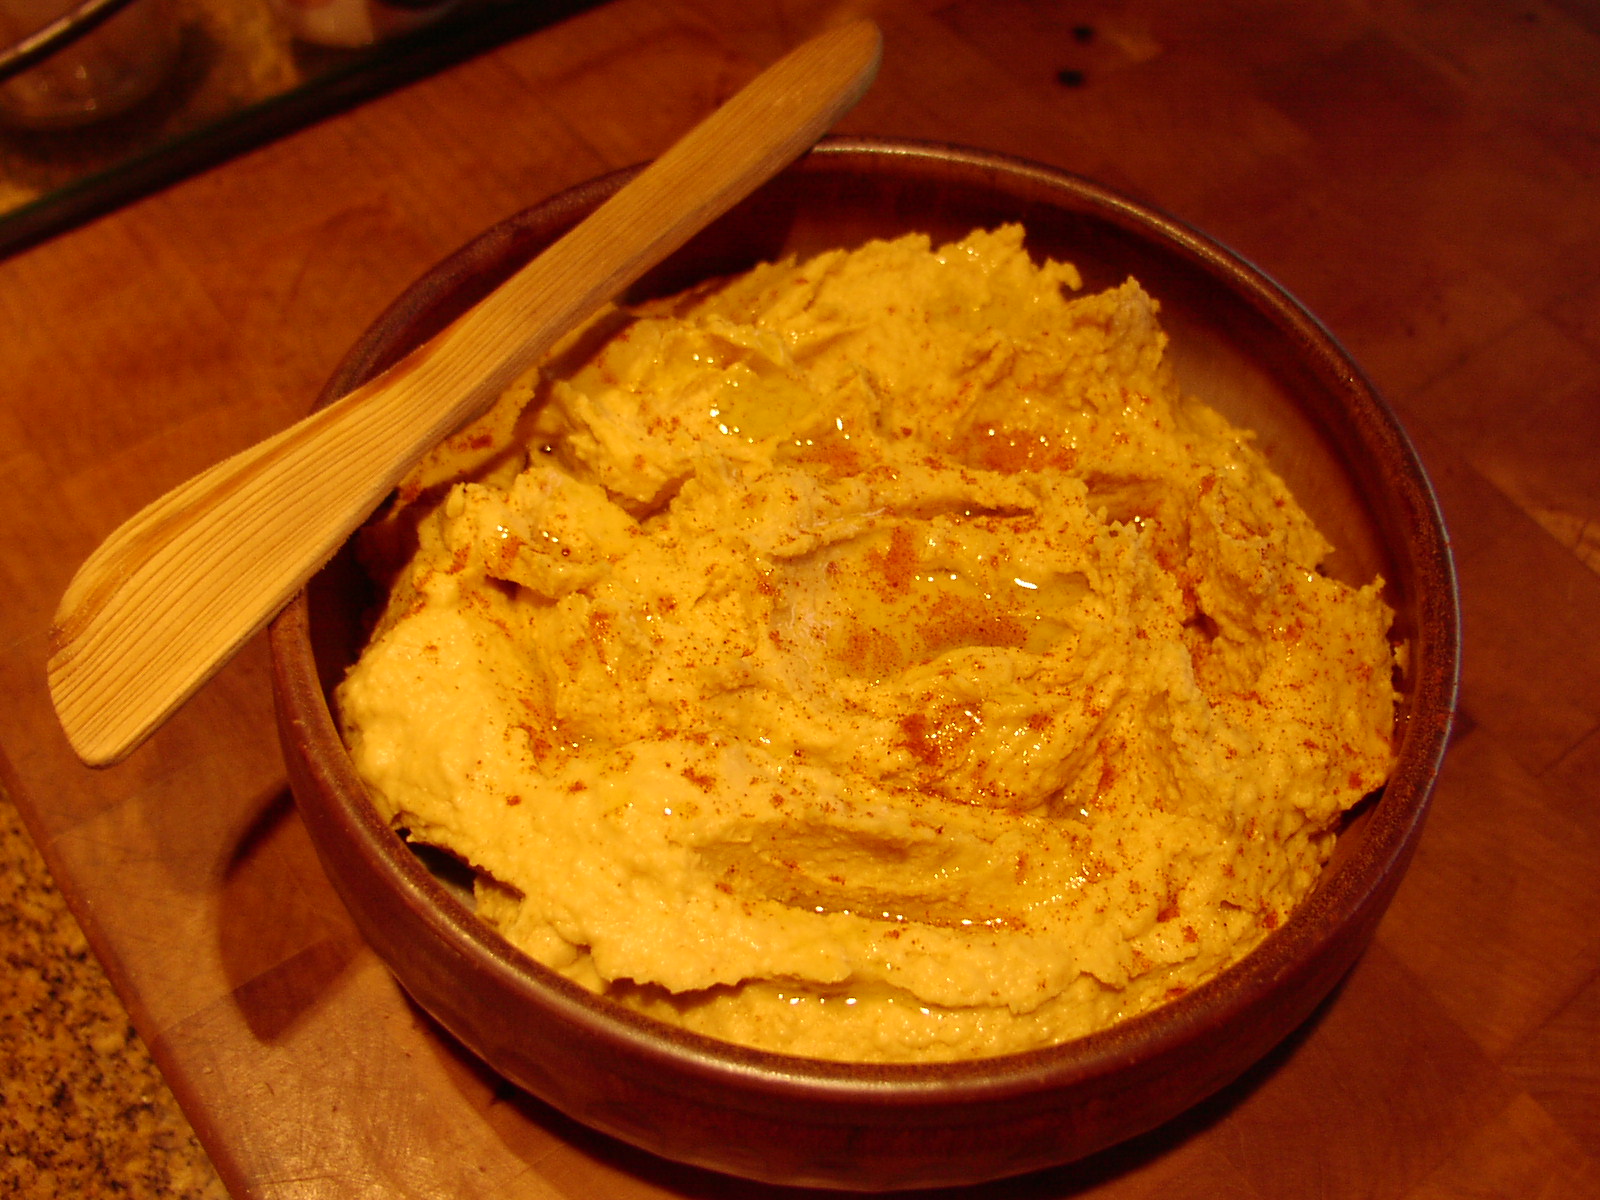
HUMMUS

  • 1 (15-oz.) can garbanzo beans, drained and liquid reserved
  • juice of 1 lemon, or more to taste
  • 1 T. extra virgin olive oil, or more to taste and for drizzling
  • 3-4 T. tahini (either purchased or homemade) – see recipe below
  • 2 cloves garlic, rough chopped
  • dash Sriracha or to taste
  • ¼ tsp. kosher salt
  • 1 tsp. paprika, plus more for sprinkling
  • 2 tsp. finely chopped fresh parsley, garnish, opt.
  • kalamata olives, opt.

In an electric blender or food processor, process the garbanzo beans (also known as chickpeas), lemon juice, olive oil, tahini, garlic, Sriracha, salt, and paprika until smooth and creamy. Add reserved liquid from garbanzo beans if consistency is not as creamy as desired. Add more lemon if not tangy enough or more olive oil if it seems like the hummus needs more depth of flavor. Refrigerate for at least 1 hour. (The hummus can be made up to 3 days ahead and refrigerated. Return to room temperature before serving.) Serve on a flat plate garnished with parsley, a light sprinkling of paprika, a drizzle of olive oil, and a few kalamata olives. Warm pita bread is great with hummus as are Pita Chips (see recipe below).

ROASTED RED PEPPER HUMMUS

  • 1 (15-oz.) can garbanzo beans, rinsed and drained
  • 1 roasted red pepper, or more to taste
  • 3- 4 T. fresh lemon juice
  • 1½ T. tahini (either purchased or homemade) – see recipe below
  • 1 small clove garlic, rough chopped
  • ½ tsp. ground cumin
  • dash Sriracha
  • ¼ tsp. kosher salt
  • paprika

In an electric blender or food processor, puree the garbanzo beans, red pepper, lemon juice, tahini, garlic, cumin, Sriracha, and salt. Process the mixture until smooth and creamy. Transfer to a serving bowl and refrigerate for at least 1 hour. (The hummus can be made up to 3 days ahead and refrigerated. Return to room temperature before serving.) Sprinkle with paprika before serving.

SPICY BLACK BEAN HUMMUS

  • 1 garlic clove
  • 2 T. fresh lemon juice
  • 1 T. tahini
  • 1 tsp. ground cumin
  • ½ tsp. kosher salt
  • 1 (15-oz.) can black beans, drained and rinsed
  • ½ fresh jalapeno pepper, chopped
  • 1/8 tsp. Sriracha hot chili sauce (available in almost every grocery store)
  • extra virgin olive oil
  • paprika

Place garlic in food processor; process until finely chopped. Add lemon juice, tahini, cumin, salt, black beans, jalapeno, and Sriracha. Process until very smooth. Place mixture in small bowl, drizzle with extra virgin olive oil, and sprinkle with paprika. Serve with Pita Chips (see recipe below) or I like Stacy’s Simply Naked that can be found at Costco.

Note: I found this basic recipe in Cooking Light. I made a couple of slight modifications, because that’s what I do, but the “bones of the recipe” remain untouched.

TAHINI 

  • 1 c. toasted* sesame seeds (plain old fashioned white hulled sesame seeds)
  • 3 T. extra virgin olive oil, or more if needed
  • half a pinch of kosher salt, opt.

Place the cooled sesame seeds in a food processor. Whirl for about 3 minutes or until the seeds make a crumbly paste. Add the oil and salt; process until you have a smooth, thick paste. Add more oil if a thinner tahini is desired. Store the tahini for up to a month in an airtight container in your refrigerator. Use in any of your favorite recipes.

*place the sesame seeds in a dry skillet over medium heat, stirring often with a wooden spoon. Toast the seeds until they are lightly colored (not brown) and fragrant, about 5 minutes. Cool completely before using.

PITA CHIPS

  • 6 pita breads
  • 1½ tsp. granulated garlic
  • 2 tsp. kosher salt
  • pinch cayenne
  • 1½ tsp. ground cumin
  • 2 tsp. dried oregano
  • 2 T. extra virgin olive oil

Preheat the oven to 350 degrees. Cut each of the pitas into 8 triangles. Combine the granulated garlic, salt, cayenne, cumin, dried oregano, and olive oil in a medium sized bowl. Add the pita pieces and toss well; spread out on a sheet pan. Bake until golden brown and crisp, about 10 to 15 minutes, shaking the pan once during cooking. Cool and serve.

Note: If baking ahead, store in an airtight container. If they get soft, warm then just before serving in a 350 oven for a couple of minutes.

ANGEL HAIR PASTA WITH A BUTTER, SAGE, AND LEMON CREAM SAUCE

OLYMPUS DIGITAL CAMERA

Once in a while I have a stroke of genius. I’m not bragging here, I’m just stating a fact! And when I decided that I needed a simple meatless pasta dish to serve along with a chicken pasta casserole for an upcoming JazzVox pre-concert meal, I thought about one of my favorite pasta recipes – Pasta with Butter and Sage. But as much as I love that recipe (on this site BTW), it is a last minute wonder. And frankly, with as many as 35-40 people coming for a meal at 1:00pm on a Sunday afternoon, I just don’t have the luxury of serving “last minute wonders”. So I thought, how can I basically duplicate the flavors in one of my favorite pasta dishes without the last minute anxiety. (And yes, even though I have been cooking for a crowd for more years than I care to admit, I still suffer anxiety especially when there is a time restraint involved.) Frankly, I don’t know how caterers and restaurant chefs keep their sanity. If I had made a career in the food service, I would probably be serving time in a mental institution and you would not be hearing from me on a cooking blog! But more about this pasta.

Good pasta sauces usually involve multiple ingredients and a lot of time. This sauce has very few ingredients and takes almost no time to prepare. Now granted, this is not a low cal sauce. Anytime one of the ingredients is heavy cream, you know the calorie and fat count are going to be high. But this isn’t an everyday kind of sauce. This is a want to impress my date, about to propose marriage, must impress my in-laws, or desperately need to show my boyfriend’s ex-girlfriend why he chose me over you kind of sauce! So once in awhile, this is the sauce you should make for any of the afore mentioned reasons or just to celebrate being alive. If there ever was a sauce that serves to remind us that life is truly wonderful, this is the one.

And for all you foodies out there who know down to your toenails that Parmesan cheese goes with all foods Italian, this is one time I would recommend against its use. (I know – almost un-American, right?) But this sauce has a really delicate flavor. And although Parmesan is fabulous in a standard Alfredo sauce, it is my belief that the strong hint of fresh sage and lemon in this sauce would be overwhelmed by the addition of Parmesan cheese.

  • ½ c. (1 stick) unsalted butter
  • 10-12 fresh sage leaves, finely chopped (or more to taste)
  • 1 T. flour
  • ½ c. chicken broth or milk
  • 2 tsp. fresh lemon juice
  • 1 c. heavy cream
  • pinch kosher salt
  • freshly ground black pepper
  • 6-8 oz. angel hair or thin spaghetti pasta, cooked al dente

Melt the butter in a large skillet over medium heat and cook until the butter is a light golden brown; add the sage leaves and remove from heat. Whisk in the flour, return to low heat and cook for about 2 minutes. Whisk in the chicken broth, lemon juice, heavy cream, salt, and pepper. Cook until the mixture is hot and thickened.* Adjust seasoning and add the hot pasta. Serve immediately.

*The sauce can be made ahead of time and gently re-heated just before you are ready to serve.

OLYMPUS DIGITAL CAMERA

KALE AND WILD RICE SALAD

OLYMPUS DIGITAL CAMERA

This is my adaptation of PCCs Emerald City Salad. PCCs recipe calls for half a bunch of kale and half a bunch of chard, half a red pepper and half a yellow pepper, and half a fennel bulb. I don’t like “half a somethings”. As much as possible I like to use the entire pepper, or bunch of green onions or whatever. And that’s because I unfortunately have this unforgivable tendency to forget about “half a somethings” and let them turn to “ish” in my veggie drawer. And I know. You would expect a savvy person like me to have my culinary life better organized. Forget that! I’m as capable as the next person when it comes to forgetting what lies at the bottom of my refrigerator. In fact, I may actually be better at it than any of you. (I know, not something to be proud of.) But enough about my shortcomings and more about this amazing salad.

Mr. C and I first enjoyed this salad at our friend Rachael’s home. She had purchased the salad from her local PCC. Now being the food snob that I am, I assumed that any purchased salad could never taste as good as one prepared at home. What I was forgetting was that the salad came from PCC. PCC knows how to do food right. Of course you pay through the nose for their deli items, but the few I have tasted have been first cabin. And I know they are made with fresh organic ingredients and contain no unhealthy additives.

So before you prepare this salad, should you have any misgivings, go to your nearest PCC, after first hitting your local cash machine of course, and give this salad a try. Then having learned that the salad is absolutely delicious, give my version a try. I promise you won’t miss the chard, or the flavor of both a red and a yellow pepper, or the additional thin slices of fennel. Just don’t not make this salad. It is ever so healthy for you without making you feel like you have had to sacrifice flavor for the pleasurable feeling of virtuosity. I say that’s a win/win situation.

  • 1 c. uncooked wild rice
  • 3 c. salted water
  • ½ c. extra virgin olive oil
  • ½ c. fresh lemon juice
  • 2 garlic cloves, minced
  • ½ tsp. kosher salt
  • freshly ground black pepper
  • 1 bunch kale, stems removed, cut into bite sized pieces and massaged (see massage instructions below)
  • 1 red or yellow bell pepper, diced (or half a red & half a yellow pepper)
  • 1 carrot, cut into match stick sized pieces
  • 1 fennel bulb, thinly sliced
  • 1 bunch green onions, chopped
  • ½ c. chopped Italian parsley

Bring water to a boil; add rice. Stir. Bring rice back to a boil, cover and reduce heat to simmer. Cook until the water is absorbed, 60 to 65 minutes; remove from heat and let cool. (Or do like I do –use your rice cooker!) While the rice cooks, whisk together the olive oil, lemon juice, garlic, salt, and pepper. When the rice is cool, toss it with the dressing. Just before serving, toss the massaged kale, red pepper, carrot, fennel, green onions, and parsley in with the dressed rice. Add salt if needed.

Salad can be made up to 4 days in advance.

Massaged Kale:

Using your fingers, rub the kale until it turns a darker green and when tasted, has lost all its bitterness.


EINKA FARRO WITH KALE AND SLIVERED ALMONDS

OLYMPUS DIGITAL CAMERA

I just get so excited when I follow, or as in this case adapt a recipe for a healthy dish and it turns out to be amazingly delicious. And this modified version of Stuart Dietz’s recipe for Einka farro is no exception.

Last evening Mr. C again brought me a package of meat from the freezer that desperately needed to be eaten. His latest effort to clean out the freezer resulted in a package of chicken sausages with spinach and feta cheese. So wondering what would go well with the sausages, I glanced in the pantry for inspiration. After a cursory review of what was available, my eyes lit on my new unopened package of Einka farro. I glanced at the package for recipes, but none were exactly what I was envisioning. So I went on line and found Mr. Dietz’s recipe for Einka Salad with Tuscan Kale & Butternut Squash.

This recipe immediately appealed because I had leftover butternut squash purée in the refrigerator and some kale that was almost as old as I am! I thought I would use the puréed squash as a bed for the farro. However, after tasting the farro, I decided the squash would be better on the side. The farro was delightful in its own right. All I thought it needed was a little crunch. So I quickly toasted some slivered almonds and added them along with the fresh parsley just before serving. The result was a wonderful and healthy new whole grain side dish.

I love it when the stars are in alignment and dishes work out as planned. Just don’t ask me about the other recipe I tried yesterday. It sounded good at the time, but the reality was less than stellar. I love maple flavored sausage links, but they are expensive and contain ingredients (corn syrup and MSG) that I am trying very hard to eliminate from our diet. So I thought I would try my hand at making a maple flavored breakfast sausage. Does the term “stinko” mean anything to you? But I’m not going to let one little defeat get the best of me. Don’t hold your breath, but I am going to continue working on this recipe, because I know I am not alone in my love of maple syrup sausage links. Wish me luck!

In the mean time, put maple flavored pork out of your mind and think healthy. Give this recipe a try!

  • 1 c. whole grain Einka farro* (I use Bluebird Grain Farms brand Organic Whole Grain Einka Farro)
  • 2½ c. water
  • ¼ tsp. kosher salt
  • 2 c. ¼-inch sliced kale
  • 1 T. sherry vinegar
  • 2 T. extra virgin olive oil, divided
  • kosher salt
  • freshly ground black pepper
  • ¼ c. minced shallot
  • 1½ tsp. finely chopped fresh sage
  • 1 garlic clove, minced
  • 3 T. dry white wine
  • 1/3 c. toasted slivered almonds
  • 2 T. chopped Italian parsley

In a medium sized covered saucepan, add the farro, water, and ¼ teaspoon salt; bring to a boil. Reduce heat, cover, and simmer over moderate heat until farro is tender, about 25 minutes. When done, add the kale, cover and remove from heat; let stand until the kale is wilted, about 5 minutes. Drain well and pour back into the pan. Add the vinegar and 1 tablespoon of the oil; season with salt and pepper and toss. Cover and set aside.

Meanwhile, in a medium skillet, heat the remaining 1 tablespoon of oil. Add the shallots and a pinch of salt and cook over moderately high heat until shallot is translucent, about 3 to 4 minutes. Add the sage and cook for 1 minute. Add the garlic and cook another minute, stirring, for 1 minute. Add the wine and simmer, stirring, until evaporated. Scrape the shallot and garlic into the pan with the farro and stir to combine. Adjust seasoning. When ready to serve, stir in the toasted almonds and parsley.

OLYMPUS DIGITAL CAMERA

Serve warm or at room temperature.

*You can substitute Emmer Farro for Einka Farro. Use the following cooking instructions if you make the substitution:

Place the water, emmer farro, and a pinch of kosher salt in a covered pan. Place on high heat and bring to a boil. Boil for 5 minutes, stirring frequently. Reduce heat, cover and simmer for about 35 minutes or until berries are plump and chewy. When the farro is done, add the kale, cover and remove from heat; let stand until the kale is wilted, about 5 minutes. Drain well and pour back into the pan. Continue recipe as written above.

VEGETARIAN THREE BEAN CHILI

OLYMPUS DIGITAL CAMERA

In an effort to reduce the amount of meat, fat, and dairy products in our daily diet, while at the same time increasing the number of beans we consume, I decided to work up a vegetarian chili recipe.

I prepared this chili last night for dinner and both of us thought it was wonderful. The saucy part was very flavorful. The corn actually provided a bit of a crunch and the olives had enough of a different texture as to create a lovely mouth feel. (Not to mention a wonderful taste). Then of course the crisp and pungent bite from the red onion added just before serving – marvelous. And nary a morsel of meat, sprinkling of cheese, or dollop of sour cream to be seen or needed. This chili and a nice piece of cornbread (made with canola oil, not butter) and you have a lunch or dinner that anyone watching their cholesterol would be happy to eat on a regular basis. And did I mention it was really easy to prepare?

So give this recipe a try. Just don’t forget to stock up on “beano” when you purchase the ingredients for this dish. And if you don’t know what “beano” is, suffice it to say you have lived a charmed life!

  • 1 T. olive oil
  • 1 medium carrot, chopped
  • 1 onion, chopped
  • 2 celery stalks, chopped
  • 2 garlic cloves, minced
  • 1 can (28-oz.) chopped tomatoes (Italian preferably)
  • 1 can (6-oz.) tomato paste (again – Italian preferably)
  • 2 c. water
  • 1 T. Dijon mustard
  • 2-3 tsp. chili powder
  • 1 tsp. ground cumin
  • 1 tsp. dried oregano
  • 1 tsp. paprika
  • pinch ground cloves
  • 1 tsp. kosher salt
  • freshly ground black pepper
  • 1 can (15-oz) cannellini, kidney, or chili beans, rinsed and drained
  • 1 can (15-oz) black beans, rinsed and drained
  • 1 can (15-oz) garbanzo beans, rinsed and drained
  • 1 can (15-oz) whole kernel corn, drained
  • 1-2 cans black olives, drained and halved (I use about a can and a half and munch on the rest later)
  • chopped red onion, opt.

Heat olive oil in a large covered soup pot. Add the carrot, onion, and celery and sauté until the onion is transparent. Add the garlic and cook for one minute. Stir in the chopped tomatoes, tomato paste, water, mustard, chili powder, cumin, oregano, paprika, cloves, salt, and pepper. Bring to a boil, reduce heat, cover, and simmer for 30 minutes. Stir periodically. Add the beans, corn, and olives and simmer covered for another 30 minutes. Adjust seasoning. Serve garnished with chopped red onion.

SAVORY GERMAN BREAD PUDDING WITH MUSHROOMS

OLYMPUS DIGITAL CAMERA

This is the second savory bread pudding I have posted to my blog. They are basically very similar. The recipe entitled Wild Mushroom Bread Pudding however has more of an Italian bent to it. For example, Parmesan cheese is one of the ingredients.

This recipe is much more consistent with a dish that would be served in Germany. Both savory puddings are delicious and a wonderful addition to any meal where the starch needs to be a key player but not become a participant in a “who’s the star” battle with the meat. (I hate it when food starts fighting right on my dinner plate.)

This dish can also be served as a vegetarian main dish. The mushrooms provide that toothsome mouth feel that is so necessary to a good vegetarian entrée.

So by all means, give this bread pudding a try. The sourdough bread gives the pudding a special tang, and the truffle oil – OMG, it really puts the mushroom flavor over the top. And as you can see, you only need 1 teaspoon of truffle oil to enhance the entire dish. But please do not be tempted to add more because of the old theory that if some is good, more is better. (I have never been an advocate of that practice.) Truffle oil is very potent stuff. It must be treated carefully and with great respect. (Think approaching a yellow jacket’s nest without appropriate head gear!) Or if you need a cooking analogy, using too much thyme. Not a good thing even though thyme is a lovely herb and used in many wonderful recipes.

And I know some culinary arts experts are saying that truffle oil is passé. Or if it simply must be used, it should only be used as a drizzle. Well to these experts I say – fooey! In my opinion you can take many dishes to a new level of deliciousness with the judicious use of a drop or two of this amazing ingredient.

Wonderful drizzled over scrambled eggs, in vinaigrettes, almost any dish with mushrooms, and the most decadent use of all – over popcorn along with a little salt.

So if you don’t already own a bottle of truffle oil, don’t hesitate to get yourself a bottle at your earliest convenience. In my opinion, white truffle oil is great as an ingredient or a drizzle. I tend to use black truffle oil only as a finishing oil, in much the same way I might garnish a dish with a light sprinkling of Fleur de Sel.

  • 1 c. very hot water
  • ¼ c. chopped dried shiitake mushrooms
  • 2 T. butter
  • 1 medium onion, finely chopped
  • 1 lb. coarsely chopped mushrooms (cremini, shiitake, button)
  • 2 cloves garlic, finely minced
  • ½ tsp. kosher salt, div.
  • freshly ground black pepper
  • 1 c. milk
  • 1 c. whipping cream
  • 3 large eggs, room temp.
  • 1 tsp. white truffle oil (Trader Joe’s carries truffle oil certain times of the year or you can purchase on line)
  • ¼ tsp. dried thyme
  • 2 T. chopped fresh parsley
  • 4 c. packed cubed sourdough bread (1 or 2 day old bread is best for this recipe)

Place hot water and dried shiitake mushrooms in a small bowl. Set aside. Melt butter in a medium sized frying pan. Add onion and sauté until soft. Add mushrooms and cook until golden brown. Add the garlic and ¼ teaspoon salt and pepper; cook for one minute. Remove from heat and let cool. Meanwhile combine milk, cream, eggs, truffle oil, remaining ¼ teaspoon salt, pepper, thyme, and parsley in a large bowl. Gently fold in bread cubes and set aside. Scoop the reserved mushroom mixture into the bowl with the bread cubes. Drain the re-hydrated shiitake mushrooms and add to the mixture. Stir gently and pour mixture into a lightly buttered pan. Bake in a pre-heated 350 degree oven for 45 minutes or until a knife inserted into the middle comes out clean. Serve immediately.

Can be made a day ahead and kept in the refrigerator until about 30 minutes before baking.


EGGPLANT, ZUCCHINI, AND TOMATO CASSEROLE (RATATOUILLE) – PROVENÇAL STYLE

OLYMPUS DIGITAL CAMERA

Since this is the time of year when zucchini, eggplant, and tomatoes are in every farmer’s market or home garden in America, I decided to post an absolutely delicious way to serve these delightful vegetables. (And I know what you are thinking. Not another zucchini recipe. But if I may speak frankly, this is not just another zucchini recipe. This is a killer way to use zucchini if I say so myself!)

This dish came about because I started re-reading (for the third time, I think) Peter Mayle’s wonderful tale about the joys of living in Provence entitled “A Year in Provence”. For a foodie like myself, half the reading pleasure in this book is in the telling of the food they eat. So that got me researching recipes from the south of France. When I saw a variation of this dish using zucchini (I had 2 large zucchini in my refrigerator) and tomatoes (I had lots of cherry tomatoes from our garden), I decided I just had to work up a recipe that incorporated these two ingredients. And this recipe is the result.

This dish can be served as a meatless main course or as a side dish that compliments just about any meat you feel like serving. And it is easy to prepare. It takes a little time to cut up the veggies, but once you have the knife work done, the assembly goes rather quickly. I served it last evening with just a salad and it made for a perfect meal.

So if you too are looking for a way to say yes to your neighbor who keeps offering you zucchini, or if you yourself have zucchini threatening to take over your yard, give this recipe a try. Believe it or not, your love for this ever so easy to grow and abundant veggie will be restored with just one bite! In fact, you may never again have to turn down a free zucchini when a neighbor makes you an offer. And won’t that feel good. It’s the neighborly thing to do after all.

  • 2 T. extra-virgin olive oil, plus more for drizzling
  • 1 large onion, chopped
  • 3 garlic cloves, minced
  • 1 tsp. dried marjoram
  • ½ c. dry white wine (I use Pinot Grigio)
  • kosher salt
  • freshly ground black pepper
  • 1 lb. zucchini or yellow summer squash, sliced lengthwise ¼-inch thick (combination is nice)
  • 1 medium sized eggplant, partially peeled and sliced lengthwise ¼-inch thick
  • 1 basket of cherry tomatoes, halved or 2 large beefsteak tomatoes, sliced ¼ inch thick
  • 2 T. chopped parsley
  • 3/4 c. finely grated Pecorino Romano or Parmesan cheese (combination is wonderful)

Heat the oil in a skillet to medium-high. Add the onion and sauté until transparent. Stir in the garlic and marjoram and cook for 1 minute. Add the white wine and cook until the liquid evaporates. Season with salt and pepper; remove from the heat.

Oil a 9-by-13-inch ceramic or glass baking dish. Arrange half of the zucchini on the bottom of the dish (single layer if possible but a little overlap is fine), drizzle with oil and season lightly with salt and pepper. Scatter half of the onion mixture on top, followed by half of the eggplant. Drizzle the eggplant with oil, season lightly with salt and pepper and sprinkle with half of the parsley. Arrange half of the tomatoes cut side down over the zucchini. Repeat the layering finishing with a drizzle of oil and a light seasoning of salt and pepper.

OLYMPUS DIGITAL CAMERA

Bake the vegetables uncovered in a pre-heated 400 degree oven for 70-75 minutes. Sprinkle with cheese and continue baking until the edges are browned, the vegetables are very tender, and the cheese is melting and starting to brown, about 10 minutes more. Let cool for about 5 minutes before serving.

EMMER FARRO CAPRESE SALAD

OLYMPUS DIGITAL CAMERA

As I wrote in my preface for my blog on Split Emmer Farro and Wild Rice with Mushrooms and Pecans, “Emmer (farro) has been cultivated in the Fertile Crescent (the region in the Middle East which curves like a quarter-moon shape, from the Persian Gulf, through modern-day southern Iraq, Syria, Lebanon, Jordan, Israel, and northern Egypt) and in Italy for over 10,000 years. Farro, which is just the Italian name for emmer wheat, has a delicate roasted nutty flavor and a distinctive chewy texture. It has a higher fiber and protein content than common wheat, is rich in magnesium, niacin, zinc, and B vitamins, and holds the distinct honor of containing the lowest glycemic index of all cereal grains.”

And in addition to all the nutritional attributes mentioned above, this ancient grain just happens to be extremely delicious. I mean really, is there anything else you could ask of a simple grain? Both good for you and extremely palatable. I think not!

And this recipe, straight off the emmer farro package (with a little re-working of the preparation instructions on my part) is just a wonderful example of how tasty and versatile this grain can be. It just takes a little re-thinking of your use of grains to make room for this ingredient in your diet.

I know there for awhile, most of us were hesitant to include grains in our diet because they were in the dreaded “carbohydrate” category. But as we have all read, there are carbohydrates that are better for us than others. And emmer farro is one of them.

According to Jane Lear from the takepart website, “As far as complex carbohydrates go, farro is rich in the cyanogenic glucosides that stimulate the immune system, regulate blood sugar levels, and lower cholesterol. Although it isn’t a complete source of protein, like quinoa*, farro contains more than, say, brown rice, and it also contains lignans that give it antioxidant properties. In general, whole grains take longer to digest, so they keep you feeling full longer and provide sustained energy. They’re also thought to reduce the risk of heart disease, diabetes, and some cancers.” And as for me, even though I am not a rocket scientist or a learned nutritionist, I somehow know instinctively that farro is much better for me than the refined and processed carbohydrates found in high fructose corn syrup or white bread!

So do yourself and your family a favor. Buy some emmer farro, prepare this recipe, and stand back and wait for the compliments. This salad is like the essence of summer in a bowl.

*for a wonderful taste treat featuring quinoa, try my Lemony Quinoa with Fresh Herbs

  • 5 c. water
  • 1 c. emmer farro (I use Bluebird Grain Farms*)
  • pinch of kosher salt
  • 2 T. extra virgin olive oil
  • 1 T. balsamic vinegar
  • ¼ c. finely chopped shallot or onion
  • ½ tsp. sea salt
  • a touch of freshly ground black pepper
  • 2 tomatoes, seeded and chopped (I like to use heirloom tomatoes in 2 different colors)
  • ¼ c. loosely packed chopped fresh basil (not too much or the basil flavor will overwhelm the other ingredients)
  • 4-oz. finely diced mozzarella cheese, either fresh or regular

Place the water, emmer farro, and a pinch of kosher salt in a covered pan. Place on high heat and bring to a boil. Boil for 5 minutes, stirring frequently. Reduce heat, cover and simmer for 45-50 minutes or until berries are plump and chewy. Meanwhile, combine the olive oil, vinegar, shallot, sea salt, and pepper in a medium sized bowl. Set aside. Combine the tomatoes, basil, and cheese and set aside. When the farro is done, drain off excess liquid and pour into bowl with olive oil dressing. Stir to combine and let sit for about 30 minutes. Add the tomatoes, basil, and cheese; stir and adjust seasoning. Serve warm or at room temperature.

This salad is best prepared just before serving. Leftovers are still tasty the next day, but the tomatoes break down and the general mouth feel is not as appealing.

*For information about retail locations in your area, visit www.bluebirdgrainfarms.com


COLD TOMATO BASIL SOUP

OLYMPUS DIGITAL CAMERA

When I first saw this recipe in a recent issue of Cooking Light, I thought immediately that this was a winner. And then when I tasted it, I knew for sure. It is light and creamy and very, very tasty, especially when it is garnished with a small plop of Greek yogurt to provide that perfect bit of tang. Yum!

And this is the time of year for cold soup. Not only does it beat the heck out of standing over a hot stove, but the vegetative ingredients are at their prime and as inexpensive as they are going to get for the entire year. A winning combination if I ever heard one!

So do yourself and your family a favor. Serve this some hot evening along with a big old plate of cold cuts, a hunk or two of really good cheese, a loaf of rustic bread, a couple jars of hearty mustard, a bowl of mixed olives, some chunks of fresh fruit, and a glass of your favorite wine or beer, and you have a summertime meal fit for a king. Thank you Cooking Light for another wonderful and healthy recipe.

  • ¾ c. buttermilk
  • 2 tsp. sugar
  • ½ tsp. kosher salt
  • freshly ground black pepper
  • 2 T. fresh lemon juice (or more to taste)
  • 2 T. extra virgin olive oil
  • 4 ripe fresh from the vine or vine ripened tomatoes, cored and quartered
  • ¼ c. coarsely chopped fresh basil leaves, plus additional small leaves for garnish
  • 2 green onions, rough chopped
  • 1 clove garlic
  • plain Greek yogurt, opt.

Whirl the buttermilk, sugar, salt, pepper, lemon juice, olive oil, tomatoes, basil, green onions, and garlic in a blender* until smooth. Adjust seasoning. Refrigerate until ready to serve. Garnish with yogurt and basil leaves.

FYI: Although most of us have relegated our blenders to the back of our pantry or to the garage, bring that old standby back into your life. Food processors simply do not do as good a job at pureeing food.


COLD TOMATILLO AND AVOCADO SOUP

OLYMPUS DIGITAL CAMERA

For our summer BlueStreet Jazz Voices potluck dinner party, one of our wonderful first sopranos brought this delightful cold soup. Deb served the soup in very pretty and very tiny little dishes. Each was garnished with a cilantro leaf. Each little bowl only provided about 6 small spoonfuls of this glorious concoction, which of course left us wanting more. But with all the other food available, the amount she served was just right. Plus, the soup is quite rich, so a small amount was absolutely perfect. So of course being the foodie that I am, I immediately asked for the recipe. I was astounded when she told me the soup contained only 4 ingredients plus salt, if required. What’s not to like about that?

So being the sweetie that she is, she sent me the recipe. Now you know me. I never leave well enough alone. I decided to try my hand at making the soup from scratch, rather than use store bought Salsa Verde. (I have since laid in a supply of Trader Joe’s Salsa Verde for those occasions when I need a tomatillo and avocado soup fix right now!) But for many, like myself, there are no Trader Joe’s in the immediate vicinity. And the green salsas I can find in my local grocery store, at least the ones that look like they are half decent, are all quite pricey. ($6.95 for 20 ounces; I think not!)

So I am going to provide you with both Deb’s recipe and my recipe for this amazing soup. Both are delicious. Both are fairly economical and healthy, and both are perfect to serve as a first course on a warm summer evening.

Thanks again Deb for this great recipe.

Recipe number 1:  

  • 3 small ripe avocados diced, about 2½ cups
  • 1½ c. Trader Joe’s Salsa Verde* or salsa Verde of choice
  • heaping ¼ c. chopped cilantro, plus more for garnish
  • heaping ¼ c. sour cream
  • kosher salt, if required

In blender, puree all. Thin with water if desired; season. Chill until cold. Serve in small bowls garnished with cilantro.

*FYI: Trader Joe’s Salsa Verde is about $2 a jar. Worth every penny!

Recipe number 2:

  • ½ small jalapeno pepper, seeds and stem removed
  • 4 large or 5 small tomatillos, cores removed
  • ½ tsp. kosher salt
  • freshly ground black pepper (not too much)
  • ½ c. loosely packed rough chopped fresh cilantro
  • 1 green onion, rough chopped
  • 1 very small garlic clove
  • 3 small ripe avocados, cut into large chunks
  • heaping ¼ c. sour cream (I use Crema Mexicana – Mexican style sour cream)

Place the jalapeno pepper and tomatillos in a shallow roasting pan and bake in a 350 degree oven for about 40 minutes or until veggies start to soften. Remove veggies from oven; cool.  Whirl in a blender or food processor with salt, pepper, cilantro, green onion, garlic, avocados, and sour cream. If the soup is too thick, add a small amount of water. Adjust seasoning. Chill until cold. Serve in small bowls garnished with cilantro.