I’ve said it before, and I’ll say it again – I love sweet potatoes. Love them! And this year for Christmas I served ham. And along with the ham I wanted to serve some type of sweet potato dish because ham and sweet potatoes are just a fabulous combination. But I didn’t want a pecan topping on my sweet potatoes this time, because I was serving a salad (Roasted Beets, Candied Pecans, and Feta Cheese Salad with a Balsamic Vinegar Dressing) which included pecans as an ingredient. So, my Sweet Potato Casserole with Butter Pecan Crumble Topping would have been just a bit too much pecan.
I decided instead, to just prepare the sweet potato part and leave the pecan topped version for another dinner. And oh am I glad I made this dish to serve along-side the ham. Sweet and delicious, and a perfect creamy textural compliment to the crunchy pecans in the salad. I also tried a new cornbread muffin recipe to complete the menu. You will not be seeing that recipe on this site because the muffins simply did not live up to my expectations. (See, I can be polite when I choose to be!)
So, for all of you out there who love sweet potatoes, give this simple recipe a try. It can be prepared a day or two in advance, so it is perfect for dinner parties, or holiday meals, or anytime preparing a dish ahead of time helps keep chaos in check on the day of the event.
As always, keep smiling and stay positive. And stay tolerant of your own foibles, as well as those of your family members. After all, it’s those idiosyncrasies that make us human. And ultimately make us lovable. Peace and love to all. And HAPPY NEW YEAR.
2 very lg. ruby or garnet sweet potatoes (sometimes labeled incorrectly as yams)
⅓ c. brown sugar, packed
2 T. whole milk
¼ c. (½ stick) unsalted butter, softened
1 lg. egg
½ tsp. vanilla
¼ tsp. kosher salt
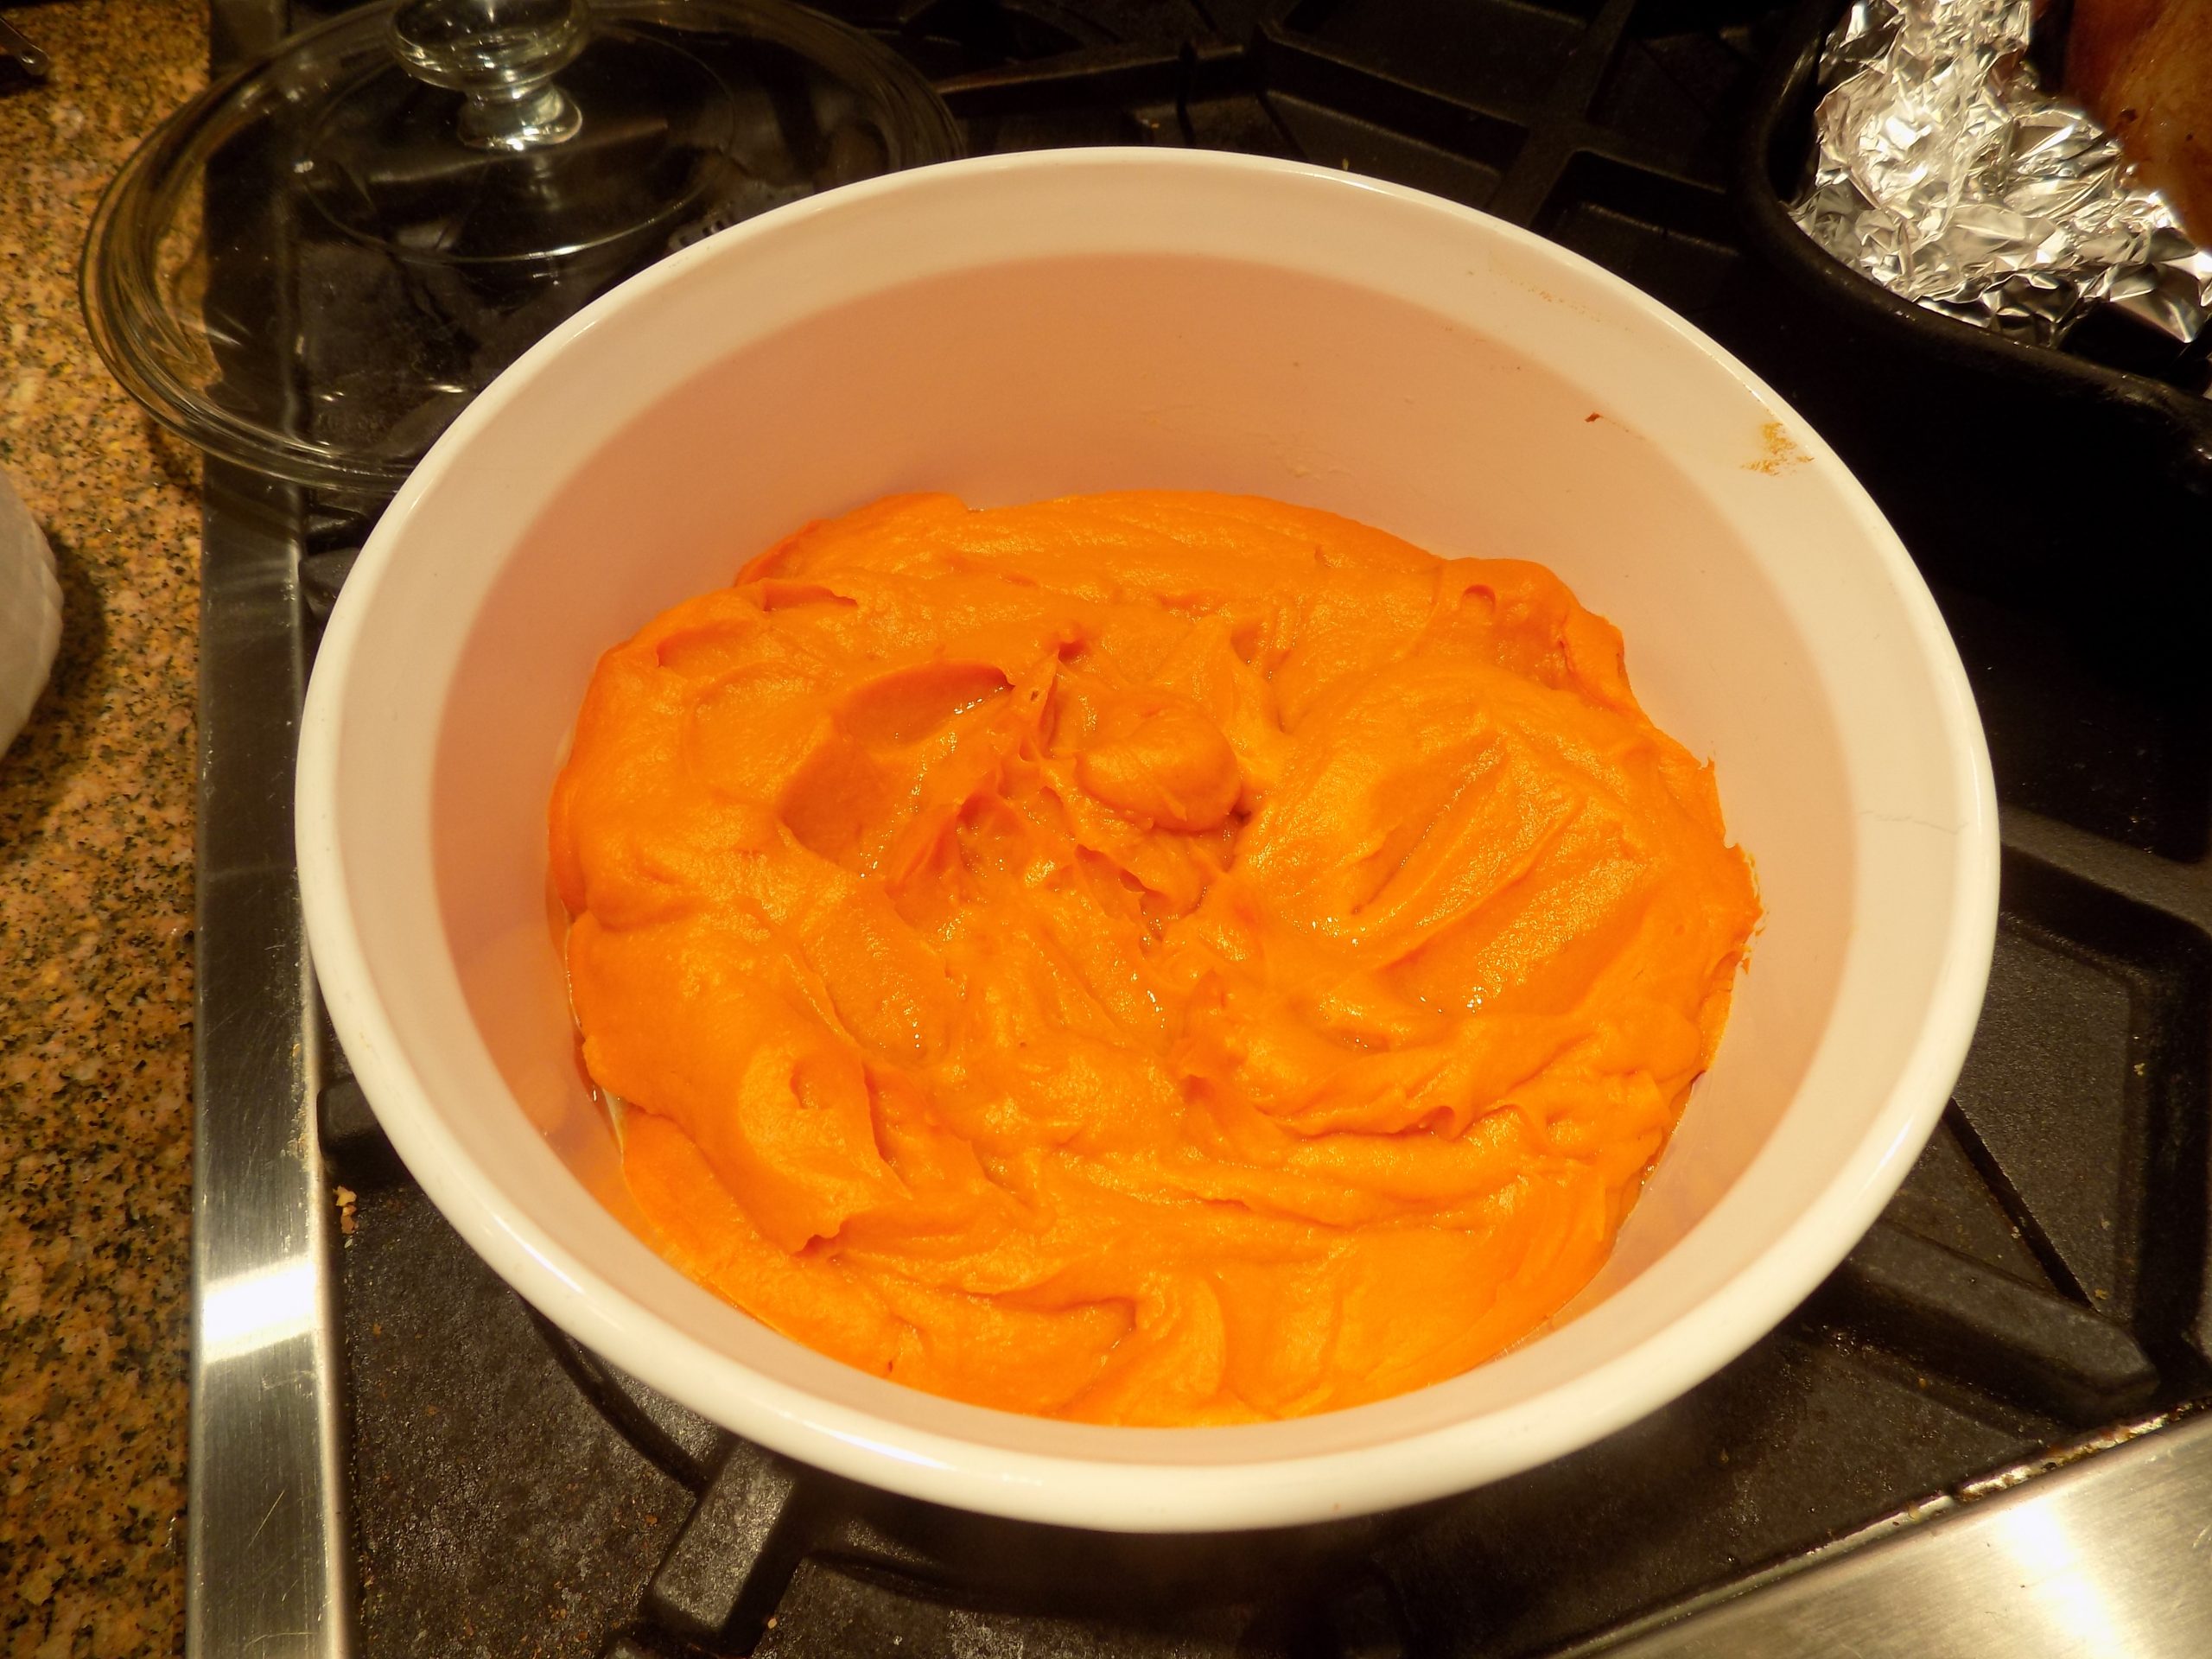
Bake sweet potatoes in a pre-heated 400-degree oven for about 90 minutes or until tender. Remove from oven and allow to cool to touch. Remove peel and throw the flesh into your food processor. Add the brown sugar, milk, butter, egg, vanilla, and salt. Whirl until smooth. Pour mixture into a buttered baking dish.
Bake in a pre-heated 350-degrees for 30-40 minutes. Remove from oven; let stand 10 minutes before serving.
This is another one of those “I’m too tired to cook but I want a comforting pasta dish for dinner” recipes. Because you just gotta know that this dish takes no time at all to prepare. (OK, it takes thyme, but no time!) (Sorry – the devil made me do it!) Anyway, there is close to no effort involved in getting this sauce ready to receive freshly cooked al dente spaghetti. (And yes, I know, many recipes of this ilk call for penne pasta. But my heart belongs to spaghetti, so spaghetti it is at our home a lot of the time. But of course, you can choose any old pasta shape you want. Just don’t cook the pasta before it’s time*, or past al dente, and we can remain friends.)
So, the other evening I decided pasta would be lovely for dinner. And along side the pasta, a big old green salad dressed with a simple vinaigrette. So that was dinner. And even chopping a few veggies for the salad, I was done within an hour. And at the tortoise like speed at which I now find myself moving, that ain’t bad for this old gal. OK, the vinaigrette was already prepared, but still, dinner on the table in an hour is just fine in my book.
Now, on to how this sauce tastes. I’d be lying if I said this was the best thing I ever tasted. Because that distinction belongs to my father’s older sister Louise’s homemade salami, which I last tasted when I had just turned 16. (I know that for a fact, because I drove most of the way to Nebraska because I had just gotten my driver’s license.) But to this day, I still remember that delicious salami. It made quite the impression. And since you might also be interested to know, her fried chicken was also absolutely sensational. And it’s not just my memory alone that can recall how outstanding our Aunt Louise’s food was, because my brother Phil also used to wax poetic about her cooking. And he was 4 years younger than me! We were just too young at the time to ask for recipes or even realize that older people might not always be around. But wonderful memories still abound. And that includes wonderful memories of my dear brother. (And yes, I miss my little brother.)
So, is this the best dish I ever tasted, no. Is it a dish I look forward to enjoying again and again, yes indeed! But about the thyme.
Somewhere I read that basil and thyme go well together. I was a bit apprehensive, but I though just a modicum of dried thyme might be a nice addition. And yes indeed, a great combination. It’s like the thyme is there in the background to lift the basil to new heights. You don’t really recognize the thyme flavor, but you know something is there that you really like. So please leave it in the recipe when you decide that this simple pasta dish is just what the doctor ordered.
As always, try new dishes, but keep your favorites always available. Life is fleeting, so treasure the wonderful times you’ve already had, but make new memories, even during this impossibly ugly pandemic. Someday, when we all look back on this, I pray that we can once again surround ourselves with our families and friends and celebrate together. Peace and love to all.
4 T. (½ stick) unsalted butter
¼ c. finely chopped onion
2 lg. garlic cloves, finely minced
½-¾ c. loosely packed fresh basil chiffonade, plus more for garnish
¼ tsp. dried thyme
½ c. whole milk
½ c. heavy cream
½ tsp. kosher salt
freshly ground black pepper
4-6 oz. thin spaghetti, cooked barely al dente (save some of the cooking water)
freshly grated Parmesan or Pecorino-Romano cheese
Melt the butter in medium sized fry pan. Add onion and cook until soft and translucent. Add the garlic, basil, and dried thyme and cook for 1 minute. Add the milk, heavy cream, salt, and pepper; cook until thoroughly heated. Transfer the pasta into the sauce using a pair of tongs and let it cook for a minute or two until the sauce thickens. If the sauce gets too thick or you feel a little more sauce would be nice, stir in a small amount of the pasta water. Adjust seasoning. Serve immediately. Pass the cheese.
*It truly makes a difference if you don’t cook pasta ahead of time, drain it, and make it wait for the sauce to be prepared. If anything is required to wait, the sauce is much the better choice.
Now I know there are evenings when all you want is to spend as little time as possible in your kitchen while at the same time serving a delicious and soul satisfying pasta dish to your family. So as the saying goes, “have I got a deal for you”! Now that I have you all excited, I better add a warning. This is probably not a dish young children would appreciate. It is also a dish that anyone whose stomach responds poorly to spicy food might also want to avoid. Not that this dish is super spicy. In my opinion it is not. And I’m kind of a wimp when it comes to spicy food. But everyone’s stomach and taste buds are different. And as much as someone might enjoy an all heat 5 star experience at the moment, there can be a world of hurt that follows if your mouth and your stomach are not in full accord to begin with. (Like wine for me. My mouth loves wine. My stomach, not so much!)
Anyway, before I begin telling you how wonderful and easy this dish is to prepare, I felt it only fair to provide you with the whole story. (It’s called a disclaimer.) Now where was I? Oh yes – telling you how delicious and easy this dish is to prepare. But first, how we discovered the true meaning of “arrabbiata”.
The best arrabiata we ever tasted was in the Eastern part of Italy as we traveled from the Amalfi Coast towards the Adriatic Sea. Our travels took us just north of the Gulf of Taranto with a one night landing in the small town of Bernalda (near Mataponto, if that helps) at what was essentially a modern, business man’s, no frills hotel. We arrived hungry, and as luck would have it, lunch was still being served. But we were informed that the lunch menu was limited to just a few items. Mr. C. chose arrabiata and I went for something else. Mine was excellent, but not nearly as memorable as Andy’s choice. I really could not stop myself from taking small bites of his pasta throughout the meal. That meal at this humble hotel restaurant was the first of many fabulous meals we experienced as we traveled north along the Adriatic. And a wonderful surprise because that part of Italy is much less frequently visited than along the eastern, middle, and northern part of the country. And because the tourist trade is not as prevalent in that part of the country, we had not expected to be so royally treated and served such amazing food along our chosen route. But we were. And I can tell you true, if you want to experience the best that Italy has to offer, go off the beaten track. We are still reeling from the experience, and it was seven years ago! But, back to arrabbiata. (I so easily get distracted.)
This is probably one of the easiest red pasta sauces you will ever prepare. It takes hardly any time to produce a deeply flavored sauce that hasn’t had to spend several hours simmering. So while it burbled away, I made salad dressing, toasted up some croutons, threw some lettuce and romaine through my salad spinner, grated up some pecorino-Romano cheese, and cooked perfect al dente spaghetti. Ta da – dinner on the table.
So give this sauce a try. It’s just as good as the one we had in Bernalda and a heck of a lot easier to obtain. You will also find another really wonderful recipe for Pasta with ArrabiataSauce on this blog. It too is delicious, and just enough different to give you a choice. Whichever recipe you choose, you are in for an Italian treat.
Two “B”, or not two “B”, that is the question. And yes, you will see this angry sauce spelled with either one “B” or two. But the spelling we learned while in Bernalda contained only one “B”. However, I have since learned that the correct spelling contains double Bs. So “B” it!)
As always, have fun trying new recipes. It’s always good to expand the bounds of your comfort zone. And in such a safe way as trying out new dishes, pretty much a safe way to do so. Peace and love to all.
¼ c. extra virgin olive oil
4 cloves garlic, finely minced
½ tsp. crushed red pepper flakes (more or less to taste) (I use a scant ½ teaspoon – perfect for Mr. C. and me)
1 tsp. kosher salt
freshly ground black pepper
3 T. dry red wine
1 tsp. brown sugar, packed
1 (28-oz.) can crushed or whole tomatoes in sauce (Italian if possible – I use Cento brand)
8 oz. spaghetti, cooked al dente
1-2 T. pasta cooking water, if needed
¼ c. fresh basil chiffonade, plus more for garnish
freshly grated pecorino-Romano cheese (Parmesan in a pinch)
Heat the olive oil in a medium sized covered Dutch oven. Add the garlic and cook over low heat for a few minutes until the garlic has softened and turned a light, golden brown. Stir often to make sure the garlic doesn’t burn. If it does, start over!
Stir in the crushed red pepper flakes, salt, and black pepper. Let the ingredients dance around the pan together for about a minute before pouring in the wine. Leave alone until the wine has all but evaporated. Then stir in the brown sugar and crushed tomatoes. Bring just to a boil, reduce heat, cover, and simmer gently for 20 minutes. Remove lid and simmer another 10-15 minutes or until the sauce has had a chance to thicken a bit, stirring occasionally.
Transfer the al dente pasta into the sauce using a slotted spoon or spider strainer. Stir in pasta water if the sauce is too thick, then add the basil*. Simmer for a couple of minutes to blend flavors. Taste and adjust seasoning. (The sauce should be thick, but not so thick that it almost forms chunks. You want the sauce to lovingly cling to every surface of the pasta.)
Serve the pasta hot, topped with additional basil. Pass the grated pecorino-Romano cheese.
*It is always best to add fresh basil towards the end of any cooked recipe calling for fresh basil. It can become bitter if added too soon. Plus it gives the sauce (or whatever dish you are preparing) that fresh herby basil flavor we all adore.
Last evening was November 3rd. And frankly what I thought Mr. C. and I needed more than anything else, was comfort food to the max. Well that and a couple of good stiff drinks! I knew the election results wouldn’t be in until later this week (or maybe longer than that), but none the less, I was worried and I wanted as much positive in my life as I could get. At the same time, I didn’t want to spend a lot of time in the kitchen. So grilled chicken sausages, mac and cheese, and more of my delicious Oven Roasted Delicata Squash “Fries” with Buttermilk Herb Dipping Sauce. (I tell you true, I am totally addicted to this recipe for delicata squash. Can’t seem to get enough.)
Anyway, like I said, I didn’t want to spend any more time than necessary in the kitchen last evening. I wanted fast and easy. So I went on line and found the bones for this recipe on the joyfoodsunshine.com site. I changed the preparation instructions a bit and added a couple of ingredients (black pepper and Dijon mustard) that I felt the dish needed, but mainly I followed Laura’s great recipe. (Oh, I lowered the amount and type of salt too. I really can’t help myself!)
And before you ask, of course I had made stovetop mac and cheese before. But I was feeling particularly lazy yesterday and didn’t want to have to think too hard. I wanted someone else to do the heavy lifting, while I just supplied a bit of my years of cooking experience to the mix. So that’s just what happened.
Now I know you too must have several great recipes for mac and cheese. But I would be willing to wager up to a nickel, that none of your recipes are as fast or as easy to prepare as this recipe. Or as delicious! I’m serious. This recipe makes one fabulous pan of creamy mac and cheese.
So give this recipe a try. I’m sure you will be pleasantly surprised.
As always, keep having fun in your kitchen and keep being adventurous. Peace and love to all.
2 T. unsalted butter
2 T. unbleached all-purpose flour
¼ tsp. kosher salt
freshly ground black pepper
¼ tsp. granulated garlic
1 c. whole milk
¼ c. sour cream
1 tsp. Dijon mustard
2 c. dry (8 oz.) elbow macaroni, cooked al dente*
2 c. grated sharp cheddar cheese** (fairly packed down)
Melt the butter in a medium sized saucepan. Whisk in the flour, salt, pepper, and granulated garlic. Cook for a couple minutes or until lightly browned.
Remove from heat and whisk in the milk, sour cream, and Dijon mustard until smooth.
Return to heat and cook until the mixture is thickened (about 3-5 minutes) whisking the entire time. Do not let the sauce boil.
Once the mixture is thick, transfer the just cooked al dente pasta into the sauce using a large slotted spoon. Remove from heat and add the cheese. Stir until smooth. If the sauce is too thick, add a small amount of the pasta water. Taste and adjust seasoning if required. Let sit for a couple of minutes before serving. (This helps the sauce stick to the pasta.)
*Remember, if the sauce has to wait for the pasta to be cooked perfectly, so be it. No problem. Just don’t make the pasta wait for the sauce. In other words, don’t cook the pasta ahead of time.
**I use Tillamook Sharp Cheddar for this recipe. (The one in the red package.)
And yes, there’s a “fry” in the Buffalo Dipping Sauce. Not a problem. I love Buffalo sauce. And better a fry than a fly!
OK, am I the only one who didn’t know about delicata squash fries? I mean really, someone should have mentioned these delightful and healthy morsels to me long ago. But if you are another of the uninformed, like I was until two days ago, read on and learn about my new discovery.
First of all, delicata squash fries are so, so delicious. And oh so easy to prepare. And when dipped in a delicious sauce, you are not going to miss any of the more traditional dunkable veggies, like French fries, in the least.
I mentioned earlier that prepared this way, delicata squash fries are a healthy way to eat this delightful fruit. And yes, botanically speaking, delicata squash, as well as other squash varieties such as butternut, acorn, hubbard, kabocha, pumpkin, and spaghetti, are all fruit because they contain seeds and develop from the flower-producing part of the plant. Whereas vegetables are the roots, stems, or leaves of a plant. Pretty cool, right!? And as a quick nutritional note, delicata squash are a good source of potassium and dietary fiber, and contains magnesium, manganese, and vitamins C and B. But back to the real reason I am posting this recipe.
I love squash. And to find such a simple recipe that tastes so great doesn’t happen every day. So I hope you enjoy delicata squash fixed this way as much as we do.
As always, keep fixing good and healthy food for your family. And try new recipes. It will be more fun for you as the cook, and I’m sure your family will enjoy tasting something new. Family dynamics at the best of times can be frustrating. But because of all the pandemic concerns, variety is a bit of a challenge these days. The same four walls can get mighty boring if some new adventure doesn’t come along to relieve the monotony. So a new dish on the table can help. And even if the results don’t work out as well as you planned, you have provided your family members with a new subject to gripe about. Peace and love to all. (Oh and yes, I still consider this a vegetable dish.)
1 delicata squash
1 T. extra virgin olive oil
½ tsp. kosher salt
freshly ground black pepper
Wash the squash, cut in half lengthwise, and scoop out the seeds. Cut each half into ½ – inch slices. Dry off with paper towels if necessary.
Place the slices in a bowl and drizzle with the olive oil. Sprinkle with the kosher salt and grind on plenty of pepper. Stir to combine.
Line a baking sheet with parchment paper and place the squash on the sheet in a single layer. Roast in a pre-heated 450 degree oven for 20 to 25 minutes or until tender and slightly browned. Turn the squash half way through the roasting. Remove from oven and serve hot out of the oven with either of the two delicious dip recipes listed below. (Or sans dips, and they’d still be wonderful.)
BUTTERMILK HERB DIPPING SAUCE
½ c. plain Greek yogurt (low fat is fine)
¼ c. buttermilk (I like the Bavarian style)
½ tsp. granulated onion
scant ¼ tsp. dried dill weed
¼ tsp. kosher salt
¼ tsp. seasoned salt
freshly ground black pepper
1 garlic clove, finely minced
2 tsp. minced fresh Italian parsley
1 T. chopped fresh chives
Whisk the yogurt, buttermilk, granulated onion, dill weed, salt, and pepper together in a covered container. Stir in the garlic, parsley, and chives. Store in refrigerator.
BUFFALO DIPPING SAUCE
1 T. unsalted butter
2 T. Frank’s Red Hot Sauce
pinch granulated garlic
Melt the butter in a small container. Stir in the hot sauce and granulated garlic together.
OK, I thought I was done using my Instant Pot because the last time I tried preparing dried beans this way, the darned things never got soft. Even though I added a bunch of extra time, they were still too hard. I assumed there was simply something wrong with my Instant Pot. Nope. The problem was not the pressure cooker. The problem had to do with the age of the beans I was trying to cook.
If you are anywhere around my age (older than dirt), then you grew up with parents who had either lived during the depression or shortly thereafter. And those of us who then grew up to be the cooks for our own families, remembered the lessons from our youth. Don’t waste food. Keep a stock of your favorite ingredients on hand. (Replacement Shop.) And save money any way possible.
We soon discovered that buying in bulk was a good way to stretch the food dollars. That meant, that buying a 5 pound bag of pinto or navy beans, for example, was much more cost effective than buying 5 – 1 pound packages. Because, dried beans last forever. Right?! Wrong!!
Fact: Dried beans that are several years old (some say even two years old) may not soften no matter how long you cook them. Who knew? I sure as heck didn’t. I just always figured that because the beans were dried, they could happily sit in my pantry for years with no ill effects. Kind of like Twinkies. But in reality, beans are merely dried to extend their shelf-life. They were never meant to last a lifetime! Or even several years.
Now I know what you’re thinking. Does Patti really expect me to go through my pantry and throw away all those wonderful dried beans I‘ve been hoarding all these years? No, that is not what I’m telling you to do. But I’ve got to be honest with you. That’s what I’m going to do. Because frankly, some of my beans may have moved with us from our Bellevue home 12 years ago. Well maybe not, but darned close! And as much as it’s going to kill me to buy dried beans in small packages or small amounts of bulk beans, and forgo my inherent inclination to sock away masses of dried beans in case there’s a zombie apocalypse or devastating earthquake, that’s my plan from here on out. Because there truly is a difference between a one year old dried bean and a 5 year old dried bean. So on that happy note, I’m going to tell you all about this recipe.
I have been trying all of my adult life to build refried beans that had enough wonderful flavor on their own as not to require any type of embellishment or garnish. No added cheese, raw onion, sour cream, salsa, etc. Nada! And I finally reached my goal the other evening after only 56 years of trying. (Persistence is its own reward.) Anyway, this combination of ingredients really worked for us. And using recently purchased dried pinto beans, adding a wee bit of fat, and a lot of flavorful additives, these beans can be served as is. And proudly take their place alongside any other flavor packed Mexican dish. In other words – they are truly yummy. And creamy. And healthy. And very easy to prepare. Your Instant Pot does all the hard work. You just need to feed it a few ingredients, turn the thing on GO, then walk away and let the pot do its magic. Piece of cake. (And no, I am not naïve enough to believe that all dried beans on my grocery store shelves are not as old as the ones in my pantry. But it’s the best I can do to alleviate the problem of dried beans that will not get soft! Well that and cross my fingers.)
So believe me, I am really glad I gave my Instant Pot another chance. And yes I have apologized to it for any unfair comments I may have issued out of ignorance. And to the Instant Pots credit, I have graciously been forgiven.
As always, be kind, be forgiving, give others the benefit of the doubt, and be that person that everyone considers a good friend. Good friends are like stars. You can’t always see them, but you know they are there. Peace and love to all.
1 c. dried pinto beans
2 tsp. extra virgin olive oil
½ sm. yellow onion, chopped
2 cloves garlic, minced
1 can (4-oz.) diced green chiles (I use mild hatch green chiles)
1/8 tsp. dried jalapeño*
2 c. vegetable broth (I use Better Than Bouillon Vegetable base)
1 c. water
1 sm. bay leaf
1 tsp. kosher salt
freshly ground black pepper
1 tsp. chili powder
1 tsp. dried oregano (Mexican oregano is the best)
1 T. unsalted butter
Thoroughly wash and pick over the pinto beans. Place in the instant pot. Heat the olive oil in a small frying pan. Add the onion and sauté until tender. Add the garlic and cook for 1 minute. Pour the onion and garlic into the pot. (Or you can use the sauté function on your Instant Pot.)
Add the diced green chiles, dried jalapeño, broth, water, bay leaf, salt, chili powder, and oregano. Stir to combine.
Cook on High or Beans for 50 minutes. When the 50 minutes are over, let the pressure release naturally for 40 minutes. Carefully open the lid.
Discard the bay leaf. Drain the beans reserving about a cup of water. (You probably won’t use that much additional liquid, but it’s better to be safe than sorry.) Using your immersion blender or potato masher, mush the beans until they reach your desired consistency, adding reserved liquid as needed. Stir in the butter, taste, and adjust seasoning. (You will probably need a bit more kosher salt at this point.) Serve warm as a side dish or as a glorious bean dip.
Can be prepared ahead of time and re-heated just before serving.
*I use dried powdered jalapeño quite a bit because I rarely have a fresh jalapeño on hand. The brand I use is Badia ground jalapeño. (You can purchase it through Amazon.)
The leaves are changing color and dropping at a prodigious rate. The sky is replete with clouds in every shade of grey. And every once in a while a bit of blue sky allows us a teasing glimpse of the sun. In other words – it’s fall in the Northwest. And with fall comes my ingrained desire to build comfort food. And of course the first dish that comes to mind is soup. But what kind of soup? (That is always the question.)
So I decided to open my first self-published cookbook (Cooking with Family and Friends) to check out the soup recipes in case there was one that I had inadvertently forgotten. My instincts were spot on, because right there in black and white on page 29 was a recipe for lentil soup. And in the note at the bottom of the recipe were the words “Andy loves this soup generously sprinkled with crumbled feta cheese.” How had I let this lovely soup avoid my detection for all these years? Anyway, to make a long story short, the other evening I prepared this soup, with a couple of upgrades, and there was a very happy man sitting with me at the dinner table that evening.
Now one of the lovely aspects of this soup is that it is vegetarian. I try, most of the time unsuccessfully, to cook at least one dinner every week that doesn’t contain meat. We have actually cut way down on our meat consumption, but I still try to eliminate meat completely as much as possible. Not because we aren’t carnivores through and through. But because too much meat isn’t good for either one of us. So when I can serve a soup like this one that has all the flavor and heartiness of a meat dish, I feel extremely proud of myself. And with a soup like this one, neither of us miss meat in the slightest.
So if you too would like to build a healthy and delicious soup for yourself and your family, give this recipe a try. Just don’t forget the feta cheese. Its creamy salty deliciousness just can’t be beat in combination with lentils.
As always, make your kitchen a happy place. Keep it clean and tidy so you can feel refreshed whenever you walk into it to start your meal prep. A nice vase of flowers, or a couple of candles, or some special photos or your children’s art work on the refrigerator to welcome you and the rest of your family into the heart of your home.
When I was raising my children, we had, by today’s standards, a fairly small kitchen. However, there was still enough room for a small round ice cream table with 3 chairs. And even though the dining room table was large and just on the other side of the kitchen wall, plus each of the kids had their own desk, guess where they wanted to do their homework? Yep. When my three youngest children were young, that’s exactly where they wanted to be. At the kitchen table. Maybe not all at the same time. But I was never alone in the kitchen. And that was because the kitchen was warm and cozy, I was there, and I was going about the business of preparing a meal for them. They could see me and talk to me about their day. As far as I was concerned, that simple everyday occurrence was magic. And I wouldn’t exchange those memories with my children for any amount of money. As the kids got older, they shifted to doing their homework at the dining room table. But they were still always close enough to speak with me or hear me clanking cooking pans. (And no, they never once did their homework at their own desks.)
So I offer a toast to happy kitchens! And peace and love to all. And please enjoy this simple soup recipe. It really is delicious.
2 T. extra virgin olive oil, plus more for table
1 onion, chopped
½ tsp. granulated sugar
1 carrot, chopped
2 stalks celery (including leaves), thinly sliced
4 cloves garlic, minced
2 T. finely chopped fresh parsley
3 tsp. curry powder, divided
2 tsp. dried marjoram
1 tsp. seasoned salt
1 tsp. dried mint
pinch crushed red pepper flakes
freshly ground black pepper
2 c. dry lentils, sorted and rinsed (I use Bob’s Red Mill Lentils – Heritage Beans)
6 c. vegetable broth (I use Better Than Bouillon Vegetable Base)
2 c. water
2 c. chopped fresh baby spinach
2-3 T. fresh lemon juice
crumbled feta cheese (French feta is our favorite)
Heat olive oil in a large heavy covered soup pan. (I use my Le Creuset Dutch Oven.) Add the onion and sugar. Slowly sauté the onion until it is very soft and starting to turn a light caramel color, about 30 minutes. Stir in the carrot and celery and cook for about 10 minutes, stirring often. Add the garlic, parsley, 2 teaspoons of the curry powder, marjoram, seasoned salt, dried mint, crushed red pepper flakes, black pepper, and the rinsed lentils. Sauté for 5 minutes more, stirring almost constantly.
Add the broth and water, stir well to combine, making certain you lift any delicious brown bits off the bottom of the pan. Bring to a boil, stir again, reduce heat, cover, and simmer until the lentils are soft, about 1 hour. Stir periodically.
When the lentils are soft, and just before you are ready to serve, stir in the spinach, remaining 1 teaspoon of curry powder, and lemon juice. (Start with 2 tablespoons. Add more to taste.) Adjust seasoning.
At table, offer crumbled feta cheese and extra virgin olive oil for drizzling. Great served with warm bread.
Cauliflower is one of those veggies that I don’t serve very often. And yes I know that I should fix it more regularly because it’s relatively inexpensive, easy to prepare, and is an extremely healthy vegetable. It’s basically full of nutrients. It also contains unique plant compounds that may reduce the risk of several diseases, including heart disease and cancer. But even with its impeccable pedigree, cauliflower is still a cruciferous vegetable and therefore a bit disdained by my dear husband. And of course there is always the consideration that cauliflower can cause gastrointestinal distress (gas and bloating). Which can be a little disconcerting if you are at a social gathering. But since the onslaught of covid-19, social gathering are prohibited anyway! So really not a problem, at least for now! But I digress…..
So last evening faced with a really large head of cauliflower that definitely needed to be eaten, I went in search of a way to disguise the potent flavor of this veggie.
Now don’t get me wrong. Mr. C. is a really good sport about eating his veggies. Even the ones I know he would never eat if I weren’t around. But because I know that Mr. C. endures rather than enjoys some of the vegetables I serve, I always try my best to make them as palatable for him as possible. And last evening, this recipe I cobbled together received Mr. Cs unsolicited comments expressing overall approval of the dish. (Sometimes the stars really are aligned perfectly.)
So if you too have someone at your table for whom cauliflower is not their favorite vegetable, give this recipe a try. With all the cheesy, creamy goodness going on, your picky eater may not even notice the “white veggie” hidden under the luscious sauce. Just call it “Cheese Casserole”. That should do the trick.
As always, keep cooking, keep playing well with others, keep taking care of yourself, and keep wearing a mask when necessary. We are all in this together. And until every single one of us works as a team, we are never going to reap the benefits of a positive united front against anything, be it Covid-19, racial and social injustice, or a decaying political system. Peace, love, and understanding to all.
1-1½ lg. head(s) of cauliflower, cut into small florets
2 T. extra virgin olive oil
1 tsp. kosher salt
freshly ground black pepper
½ c. sour cream
2 T. whole milk
1 tsp. Dijon mustard
generous pinch granulated garlic
couple squirts hot sauce (I use Frank’s RedHot sauce)
1½ c. grated sharp cheddar cheese, divided
paprika
2-3 sliced green onions or 2-3 T. chopped fresh chives
Preheat oven to 425 degrees. Line a large rimmed baking sheet with parchment paper.
In a greased 9×13-inch baking dish, combine the cauliflower with the olive oil, salt, and pepper. Make sure every bit of the cauliflower is coated with the seasoned oil. Transfer the cauliflower to the prepared baking sheet making certain the cauliflower is in a single layer. (Do not wash the baking dish.) Roast the cauliflower until crisp-tender, about 12-16 minutes.
Meanwhile, mix the sour cream, milk, Dijon mustard, granulated garlic, hot sauce, and ¾ cup of the grated cheddar cheese in the 9×13-inch baking dish. (Yes the same one you mixed the raw cauliflower with olive oil, salt, and pepper. And you’re right, I hate to wash dishes as much as the next gal!)
When the cauliflower is crisp-tender, transfer it back into the 9×13-inch baking dish. Stir it into the sour cream mixture until well combined. Top with the remaining shredded cheddar and sprinkle with paprika. Return to the oven and bake just until the cheese is melted, about 10 minutes.
Remove from oven and sprinkle with the green onions or chives. Serve hot out of the oven.
Now I realize you all know how to roast potatoes. But the other evening I wanted a simple veggie side dish to go with roasted chicken. (I really would have preferred serving the chicken with dressing, mashed potatoes, and gravy. But I am endeavoring to refrain from routinely serving our treasured favorites, like dressing and gravy, in favor of healthier substitutes.)
So armed with good intentions and 2 Yukon gold potatoes that really needed to be used, and two small sweet potatoes that had arrived in our last farm basket, I prepared this dish.
I found the recipe on the epicurious site. And since I have a culinary sage bush in my yard about the size of a Volkswagen Beetle, I decided using a few of the leaves was inconsequential to the well-being of the plant. (Actually the plant is practically indestructible and bees absolutely love the purple flowers. So it’s a great addition to our herb garden.) But back to this recipe.
What a delightful way to feature potatoes. And healthy to boot! And the sage leaves, although they really don’t flavor the potatoes, are never-the-less a nice little crunch in contrast to the creaminess of the potatoes. And no the sage leaves do not taste burned, even though they appear dark and desiccated. Actually, yum is all I can say to describe this dish. And it is ever so easy to prepare. And absolutely perfect with roast chicken. I added a crunchy English cucumber salad to the menu, and dinner was proclaimed a success.
So if you too are trying to feature healthier versions of your favorite potato dishes, I invite you to try this recipe. Mixing sweet potatoes which are highly nutritious, in with regular potatoes, just makes good sense from every standpoint.
As always – happy trails to you, until we meet again……
2 T. extra virgin olive oil
2 sweet potatoes (the darker the flesh the better), peeled and cut into ¾-inch cubes
2 med. sized Yukon gold potatoes, skins on or off, and cut into ¾-inch cubes
25-30 fresh sage leaves
1 tsp. kosher salt, or more as seems appropriate
freshly ground black pepper
Combine the olive oil, potatoes, and sage leaves on a large rimmed baking sheet. Sprinkle with the salt and plenty of black pepper.
Roast in a pre-heated 425 degree oven for 30-40 minutes or until potatoes are tender and browned around edges. Stir once during the baking time. Serve warm or at room temperature.
OK, what do you get when you combine béchamel sauce, three beautiful cheeses, perfectly cooked pasta, and a seasoned bread crumb topping? Well in this case you get a dish that is perfect in every respect. At least, this mac and cheese lover finds it absolutely delightful. And I happen to be extremely picky when it comes to mac and cheese! (After all, if I’m going to consume masses of calories, those calories better taste like they came straight down from heaven. Because otherwise, there’s no way for me to justify the guilt I’m going to feel after enjoying every mouthful!)
So when our dear friends Chip and Linda sent me this recipe from chef/owner Rick Mahan of the Waterboy Restaurant in Sacramento, having first prepared and loved the dish themselves, I just had to give it a try. And oh am I glad I did. What a relatively easy and delicious way to up my calorie intake with barely any redeemable nutritional value to warrant my doing so! Except of course, for the flavor, texture, and culinary happiness that came with every bite of this delectable dish. But I can’t say I wasn’t warned.
In Chip’s email to me which included this recipe and his comments about it, he pretty much said it all in one sentence. And I quote – “The recipe includes the Nutrition Facts, but really, that’s better left uncontemplated”. Good way to tell me that ignorance is bliss on this one. So a big thank you to Chip for sparing me the unpleasant details of fat and sodium content, etc. in this wonderful pasta dish. And to both Linda and Chip for sharing this wonderful recipe so that I could pass it along to you.
Now that you know I am absolutely sold on this recipe, you must taste this dish for yourself. It is just a perfect blend of ingredients. But it is a very rich pasta dish. So a small portion goes a long way. But in these difficult times, I firmly believe that spoiling ourselves with extra special food is justified. Now if only my bathroom scale would be a bit more supportive, my relationship with food could be even more expansive. But unfortunately, the only things expanding around here is my waist.
But through all, even being forced to live with a mendacious bathroom scale, we remain well and happy. We continue to hope and pray for an end to covid-19, that true social justice will soon become a reality in our country, and more than ever, fervently desire to once again experience political leadership that embraces humanity rather than inhumanity.
In the meantime, I cook, Mr. C. plays the piano, and we live comfortably in place. As always, peace and love to all.
3 T. unsalted butter
3 T. flour
1½ c. + 2 T. milk
½ tsp. kosher salt
½ tsp. white pepper
pinch nutmeg
pinch granulated onion
2 tsp. Dijon mustard
2/3 c. (2 oz.) grated Gruyére cheese
2/3 c. (2 oz.) grated sharp cheddar cheese
¼ c. grated Parmigiano-Reggiano cheese
2 c. uncooked macaroni, cooked al dente (I use large elbow macaroni)
½ c. (4 oz.) heavy cream
1/3 c. unseasoned dried bread crumbs
2 tsp. extra virgin olive oil
pinch seasoned salt
freshly ground black pepper
Melt the butter in a heavy saucepan. Whisk in the flour and cook, stirring constantly until the roux cooks for about 2 minutes. Do not let the roux get brown.
Heat the milk in a small pan until bubbles appear along the edge. Pour the hot milk in with the roux and continue to whisk as the sauce thickens. Bring to a boil. Add salt, white pepper, nutmeg, and granulated onion. Lower the heat, and cook, stirring for 2 to 3 minutes more. Remove from heat and stir in the Dijon mustard and cheeses. Taste and adjust seasoning.
Place the cooked macaroni in a lightly buttered baking dish. (I just lift the al dente macaroni right out of the salted water with a large slotted spoon directly into the prepared casserole dish.) Stir in half of the sauce, then top with the remaining sauce. Drizzle on the heavy cream.
Mix the breadcrumbs, olive oil, seasoned salt, and pepper together. Scatter evenly over the whole casserole.
Bake in a pre-heated 400 degree oven for about 30 minutes or until the top is nicely browned and the sauce is bubbly. Remove from oven and let sit for about 5-7 minutes before serving.
I think this is a first! The “twins” and the resident princess all three on our bed together. Maybe there’s hope yet!