Category Archives: PORK RECIPES

PAN SEARED AND SAUCED PORK MEDALLIONS

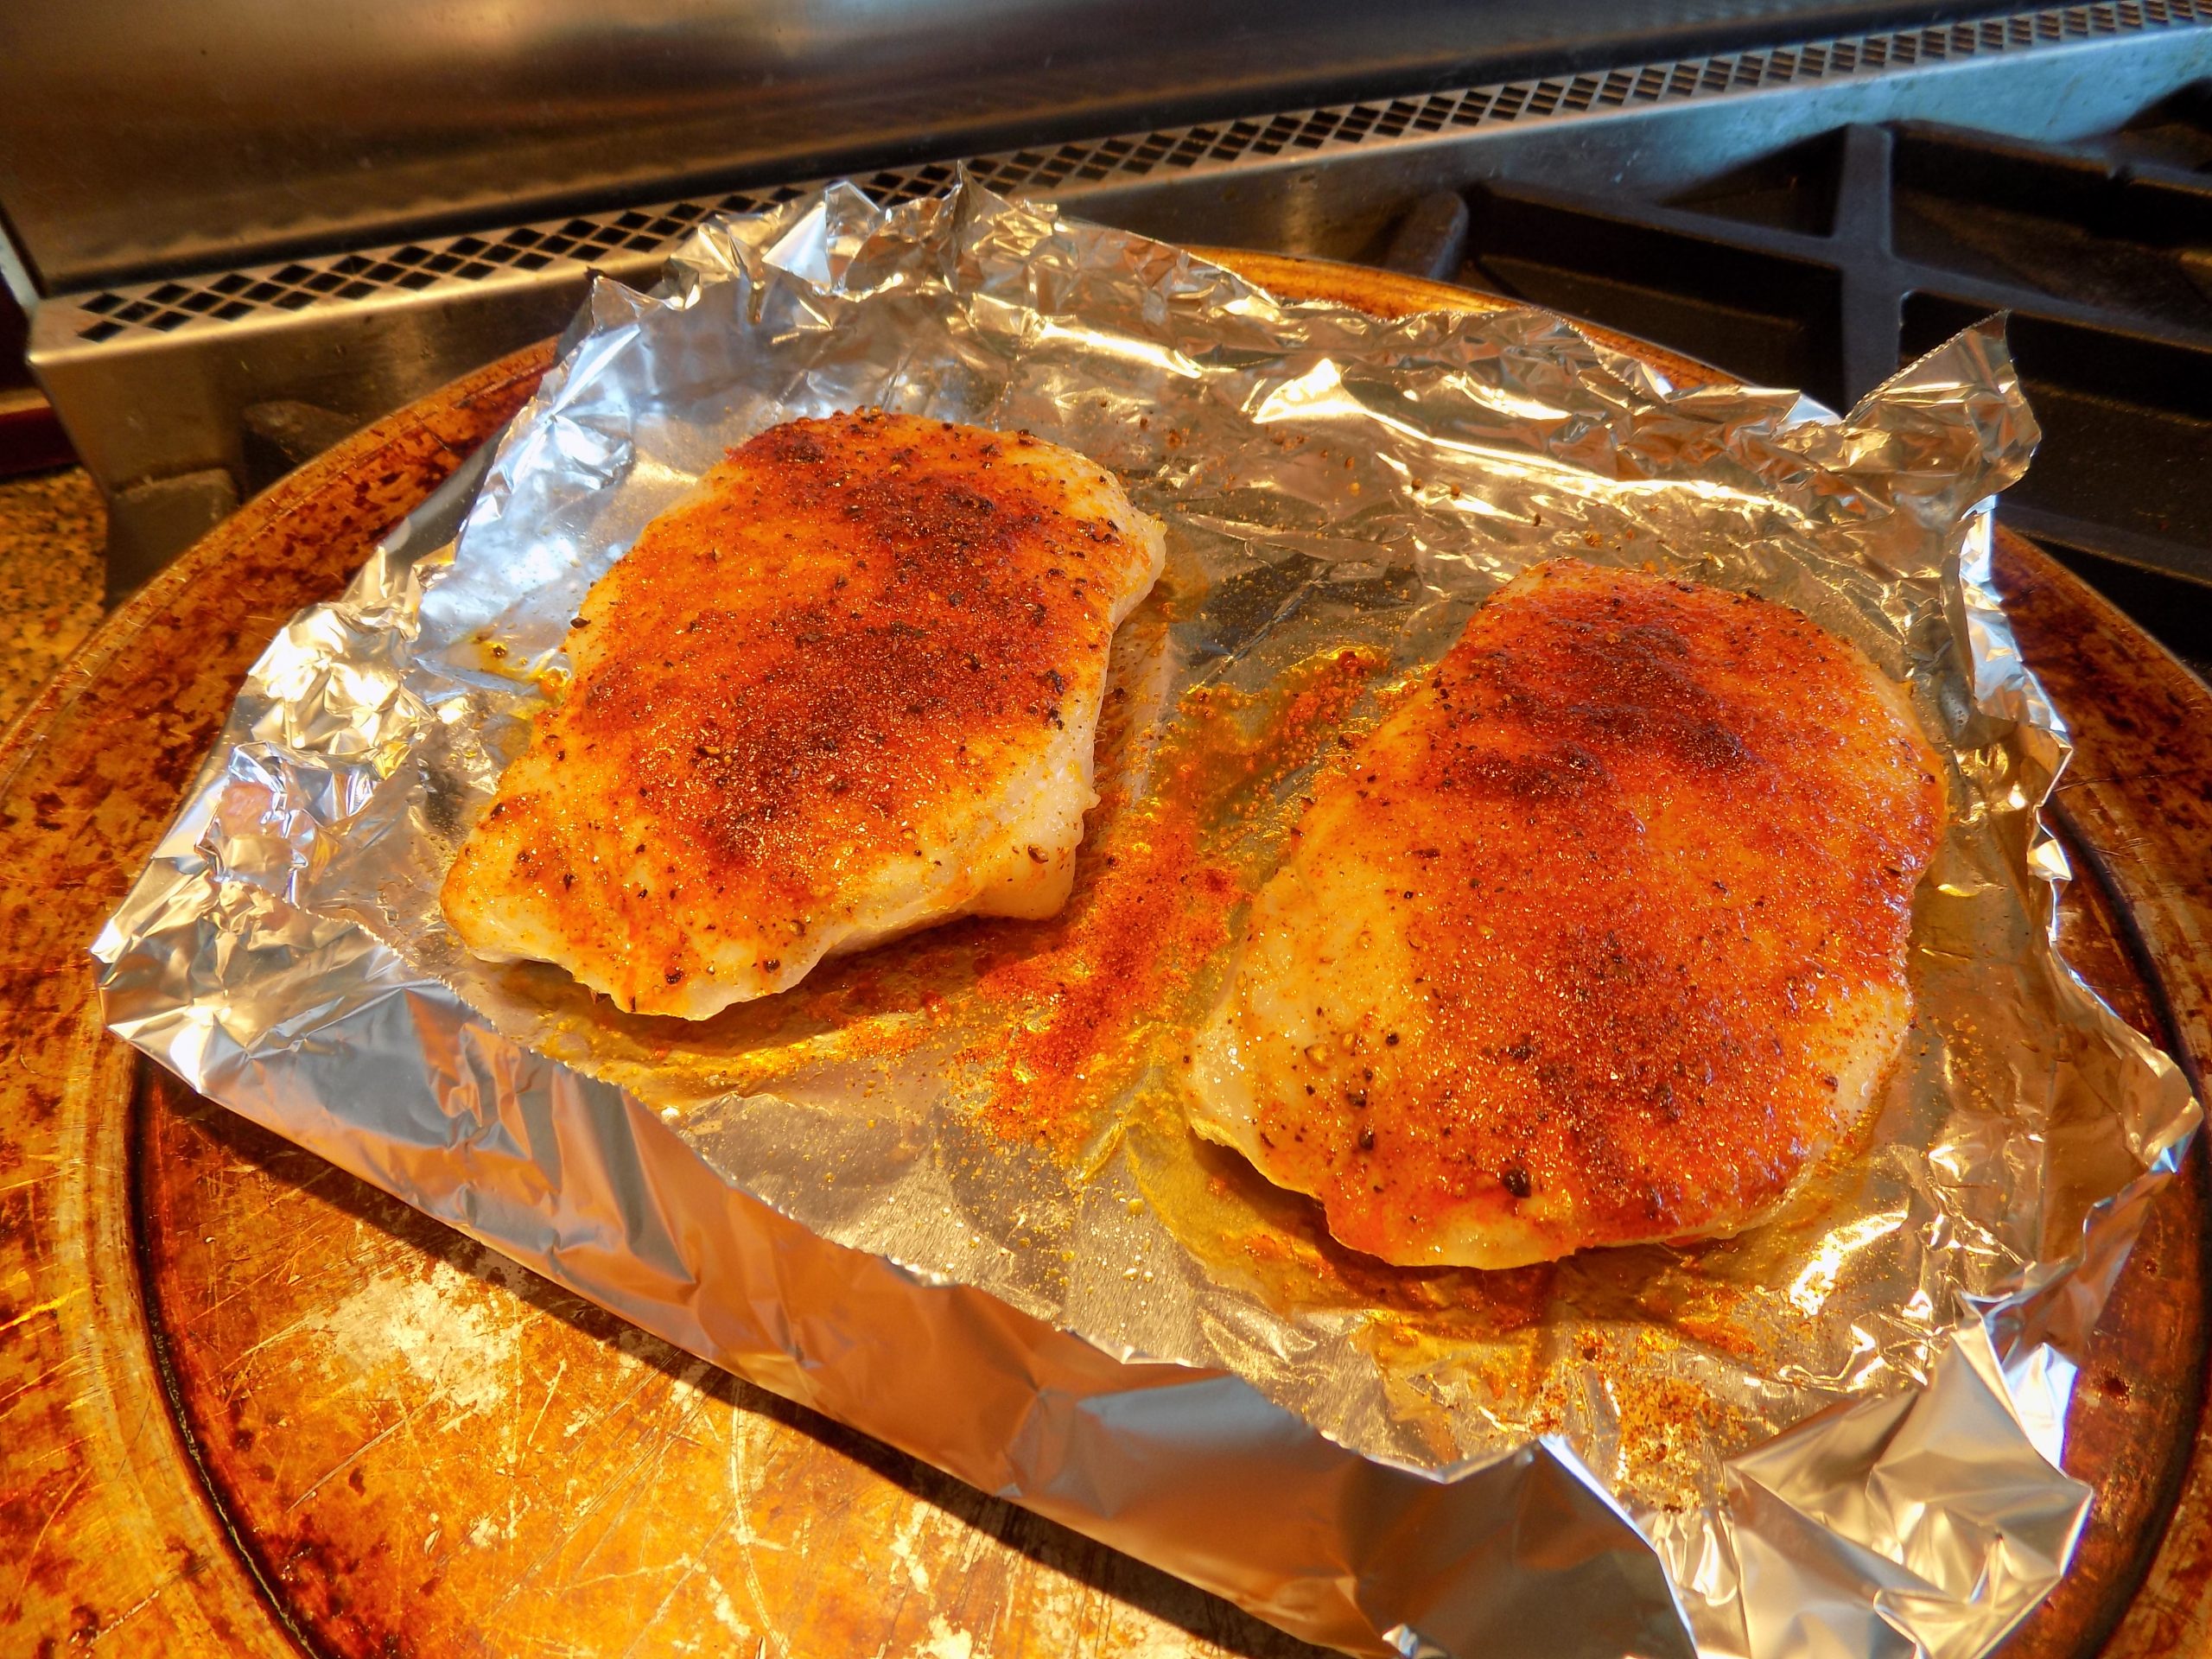
Now one thing you should know. These days, I am leaning more and more towards recipes that are quick and easy, but still deliver a big bang for the buck! And pork tenderloin remains one of the best ways I know to accomplish this goal. Except for the bit of silver skin, that BTW must be removed prior to cooking, there is no waste. Plus, you can flavor it up any old way you choose. So, the other evening I chose to adapt a recipe I found on the diethood.com site for our dinner repast. And I can hardly wait to share the recipe with you.

This recipe is so blinkin’ easy I’m almost embarrassed to pass it along. Almost! But I simply must provide you with this recipe because even though I’ve been retired for almost 20 years, I still remember coming home from work wanting nothing more than a nice cocktail and a bit of time to rest my weary bones. But as with all of us, there was still dinner to fix. Now that I’m a bit older, there is still dinner to be prepared, and I still want my evening cocktail. But now that same cocktail is my incentive to cook dinner! I sip away while I prepare dinner. Some might consider my evening libation a bribe to cook dinner. I consider it simply a necessary ingredient for whatever I happen to be making! (And no, I don’t have a drink every evening. But it makes for a good story.)   

Anyway, this is an entrée that can be prepared very quickly, but still taste like it was prepared by the head chef of a truly fine restaurant. And the preparation is extremely easy. Serve the medallions with mashed potatoes, rice, or even buttered noodles and a salad or green veggie, and life’s good. And thank you Katerina for this wonderful recipe.

As always, have fun in your kitchen. Make good food. Laugh a lot. And be kind. Mr. C. and I just finished reading Man of Nazareth by Anthony Burgess. A beautifully written historical novel about the life of Jesus. And throughout the entire book, the theme of kindness was upper most. Kindness to others regardless of ethnicity, color, or any of the other aspects of an individual that result in distrust with no real reason. I wholeheartedly recommend this book to anyone who thinks they may have a bit yet to learn about kindness.

Peace and love to all.

scant ½ tsp. kosher salt

freshly ground black pepper

½ tsp. dried thyme

¼ tsp. paprika

¼ tsp. granulated garlic

¼ tsp. granulated onion

1 (1-1½ lb.) pork tenderloin, all excess fat and silver skin removed  

2 T. avocado or vegetable oil

3 T. unsalted butter, divided

½ c. water

½ tsp. chicken base (I use Better Than Bouillon Chicken base)

1 T. chopped fresh parsley, for garnish 

Combine the salt, pepper, thyme, paprika, granulated garlic, and granulated onion in a small mixing bowl.

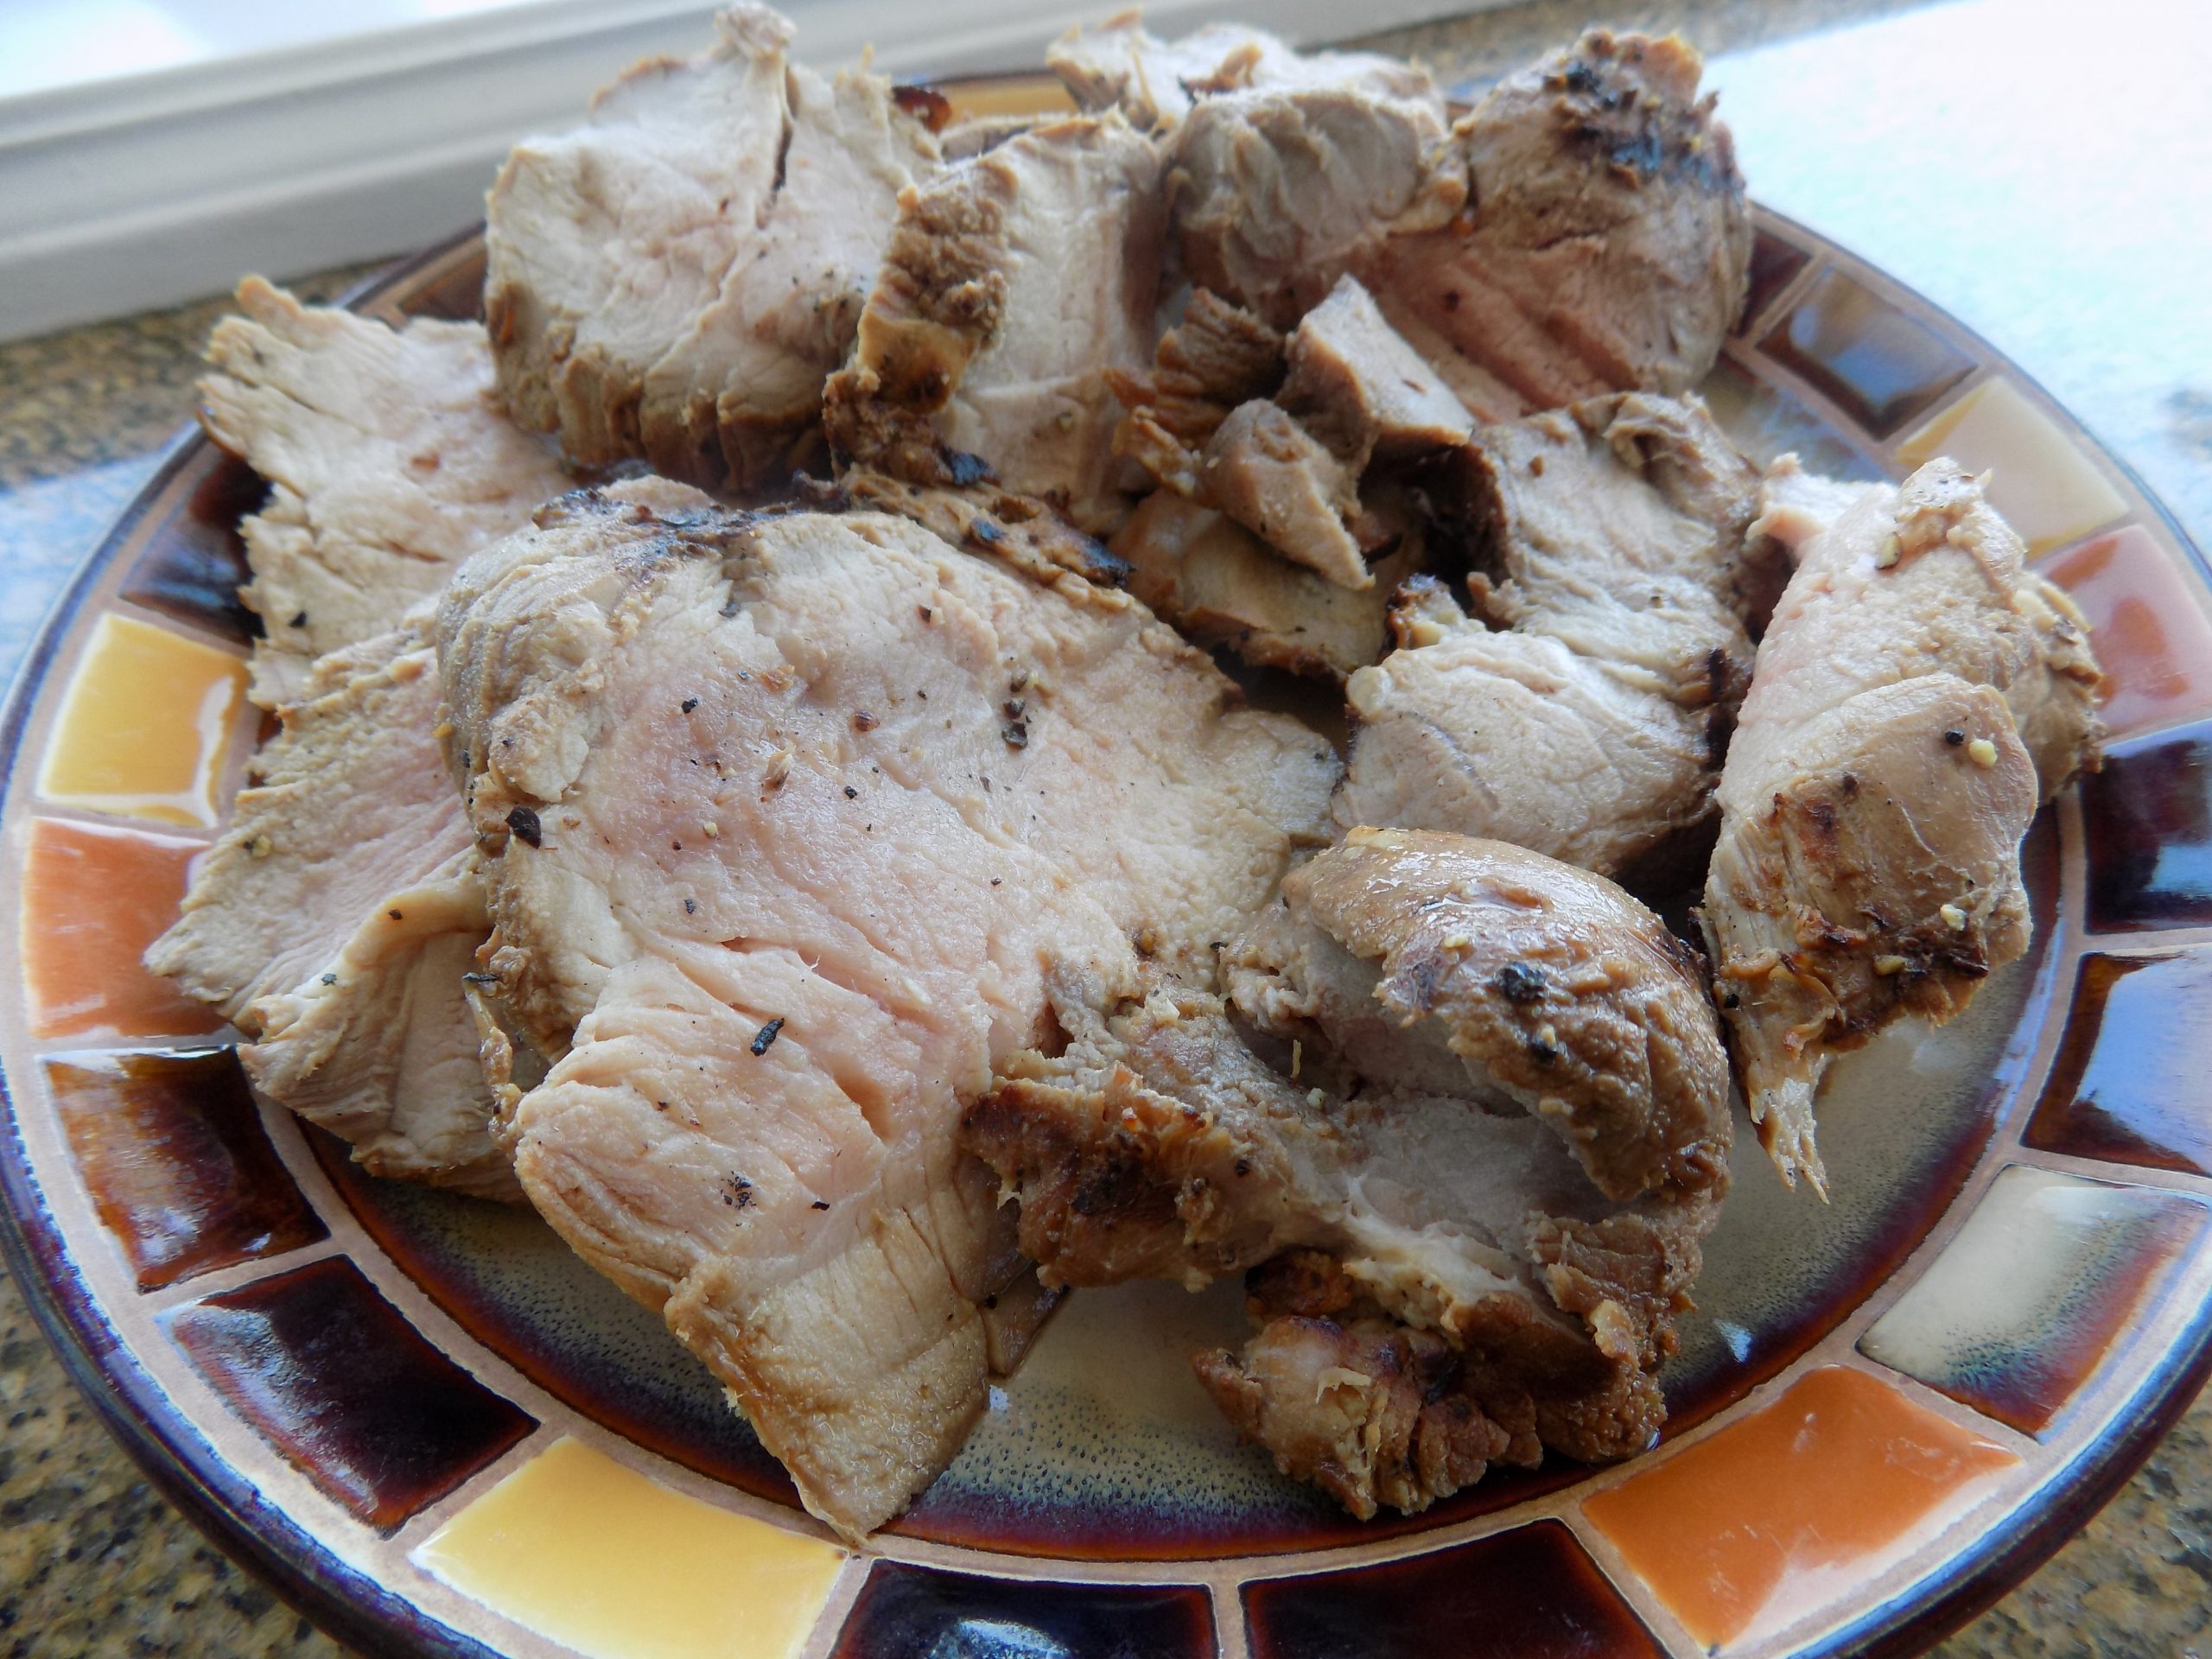
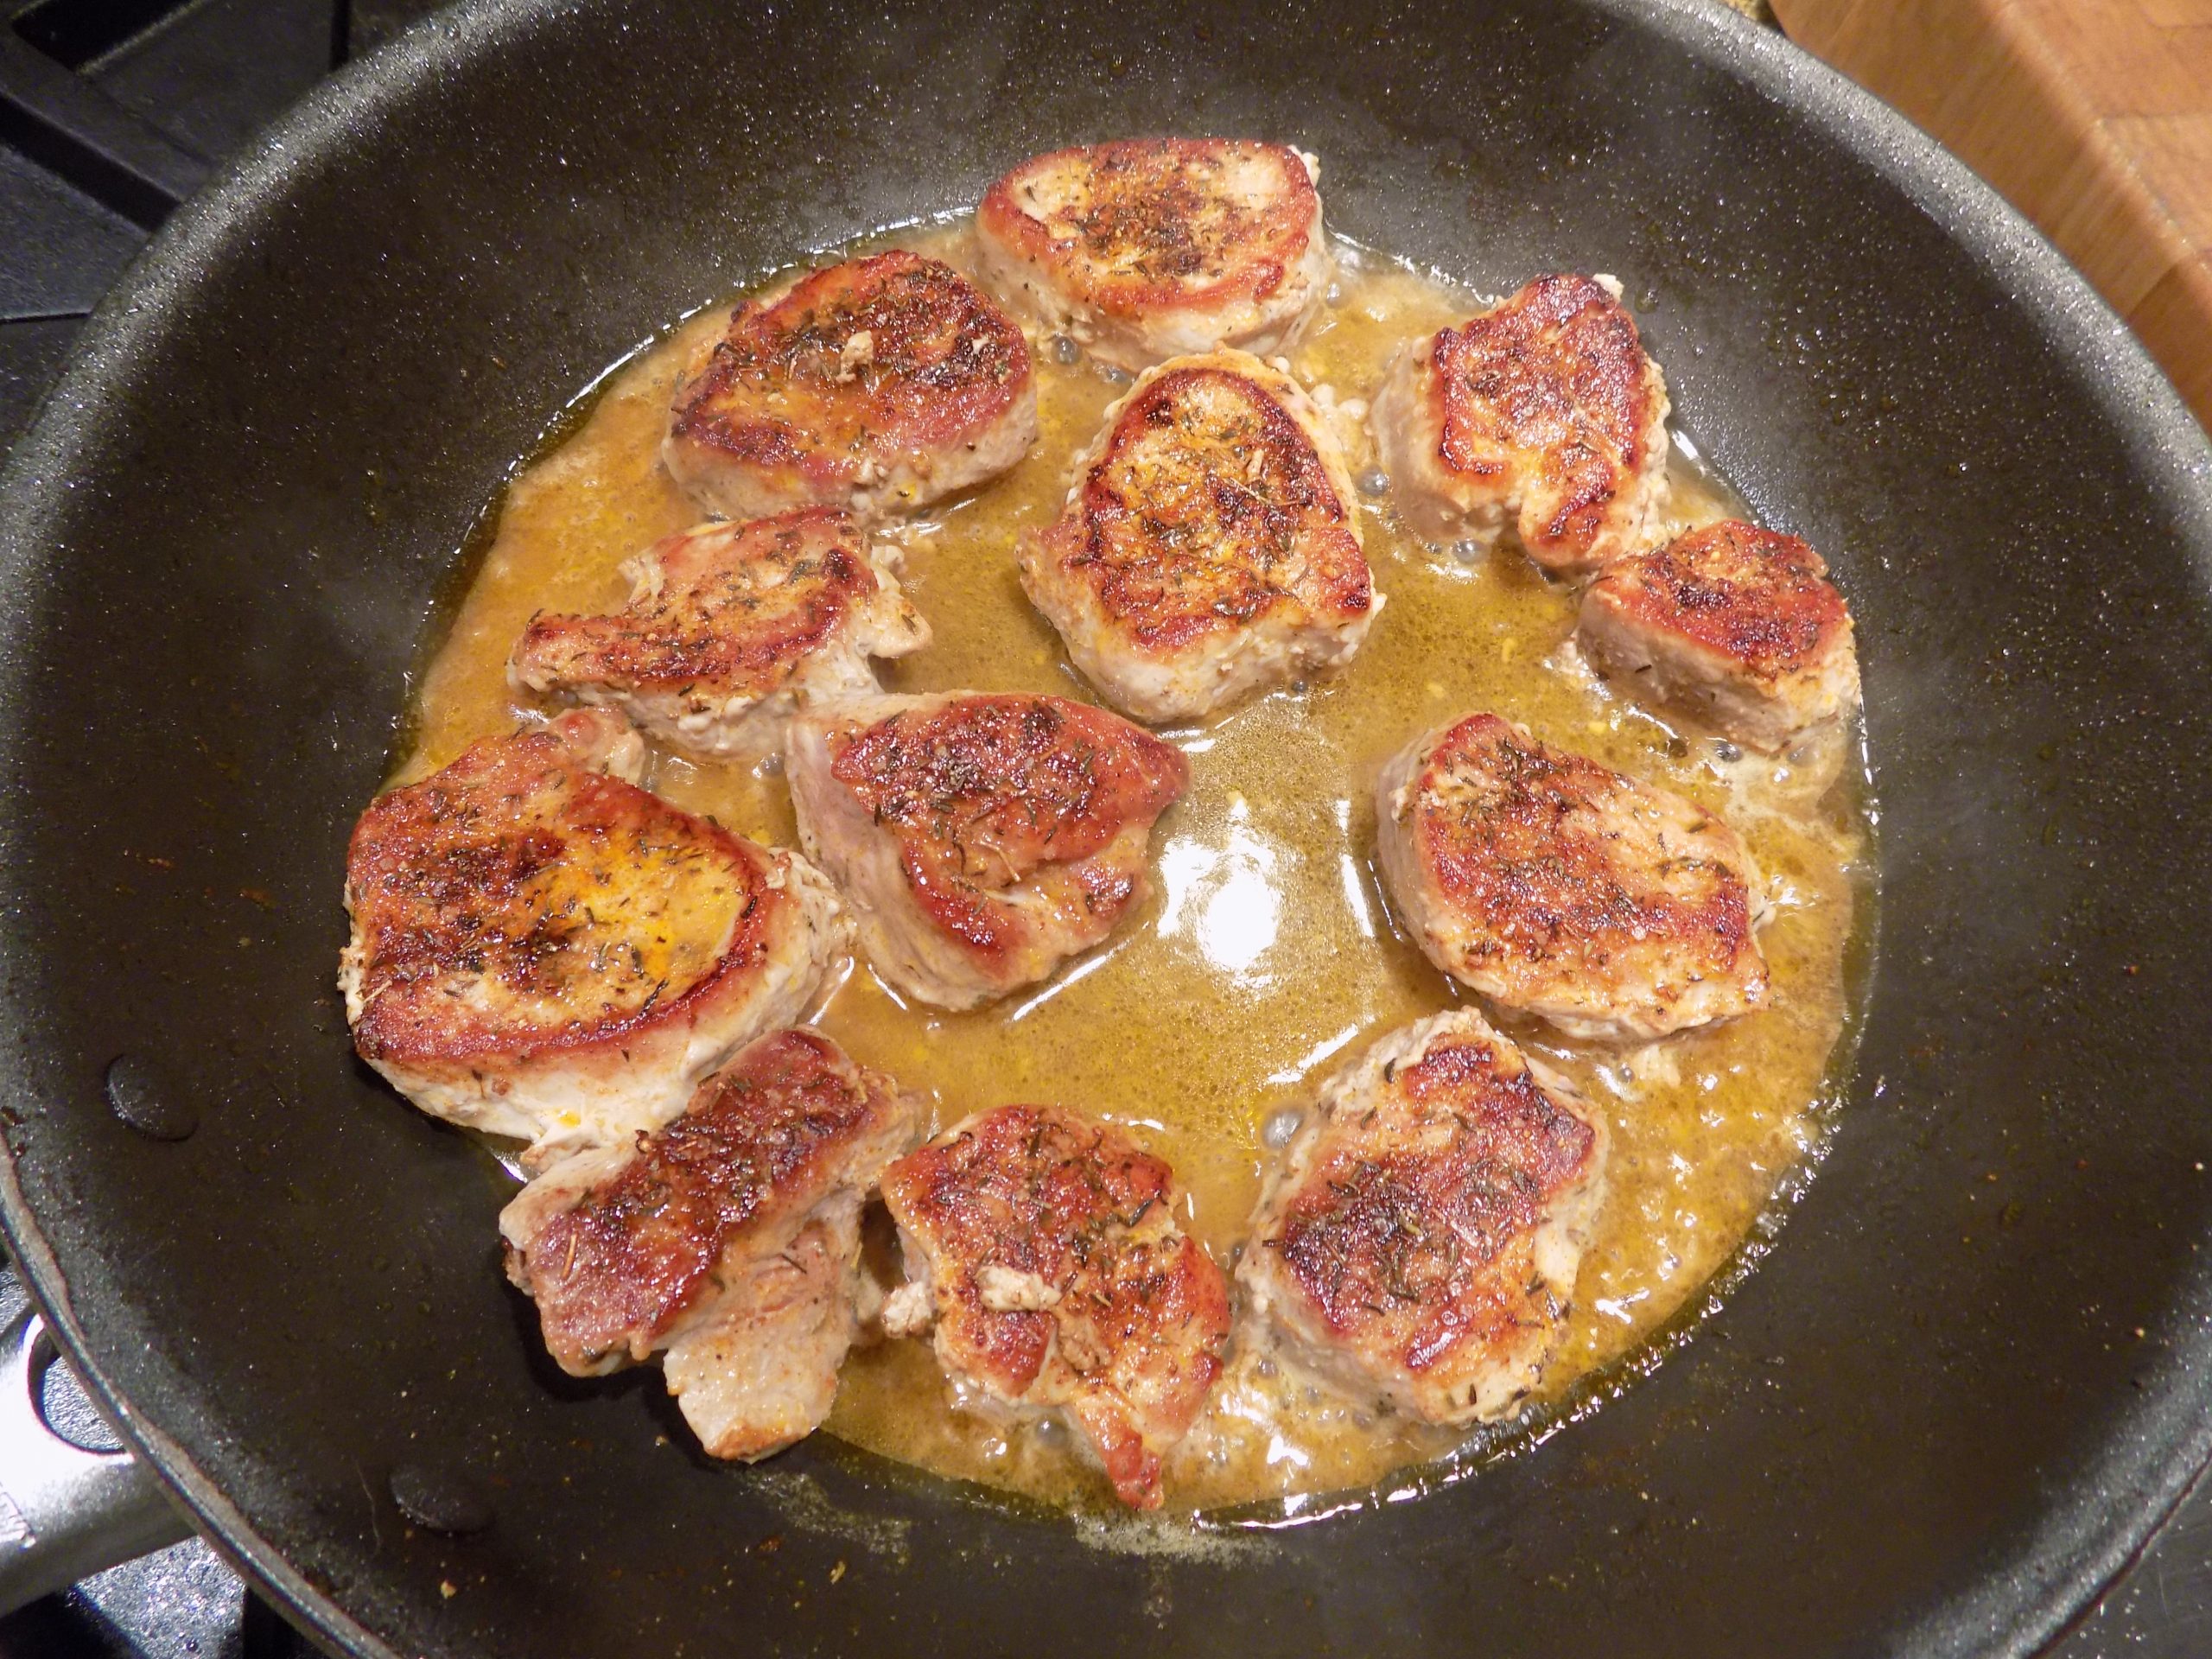
Cut the tenderloin into 12 equally thick medallions (rounds). Place the medallions on a small baking sheet. Sprinkle half the seasoning evenly over each medallion. Press down on the medallions to secure the seasoning and to flatten them to an even thickness.

Add the oil to a large fry pan set over medium-high heat. Add the pork medallions (seasoned side down) to the skillet and cook for 3 minutes. While the first side cooks, add the remaining seasoning to the top side of each medallion. Please note: if you don’t have a large enough frying pan so the medallions aren’t crowded in the pan, cook the medallions in 2 batches.

Flip the pork medallions and add 1 tablespoon of the butter to the pan; cook for 2-3 more minutes, or until the internal temperature of the medallions register 135-degrees. (Cooking time will depend on the thickness of the medallions.) DO NOT OVERCOOK!

Remove the medallions from the skillet and set aside on a platter.

Slowly whisk in the water and chicken base while scraping up all the browned bits from the bottom of the pan. As the sauce cooks over medium heat, add the remaining 2 tablespoons of butter. Gently stir until the melted butter has slightly thickened the sauce.

Return medallions to the skillet. Gently spoon the sauce over the medallions as they heat. Remember: you don’t want to cook the medallions any longer. You are simply re-heating them a bit.  

Remove from heat, garnish with parsley, and serve the medallions immediately.

HAM HOCK AND NAVY BEAN SOUP WITH FENNEL 

And yes, I make soup frequently. Because – I love soup. It’s easy to prepare, most of the time includes lots of veggie action, and it tastes good. And during the fall and winter months, soup is a comfort. For me it’s a reminder of how lucky I am to be warm and cozy in my own home. And to my mind, soup should be the poster child for comfort food. And you know how I feel about comfort food! Thus – I make soup all the time. Luckily Mr. C. loves soup as much as I do. Otherwise, he’d be on his own for dinner because I’d be serving soup anyway! Of course, you know that’s not true. But it makes for a good story. And it serves as an affirmation of how much I really do love a big old bowl of really good soup. And there in lies the heart of this harangue. I only like soup when it is delicious. And usually that means – homemade. (Or made in a fine restaurant.) And I know. I’m picky. But I’m sorry folks, a bowl of soup that comes from a can, just doesn’t make it for me.

First of all, canned soup is usually too salty. Then, for what you get, it’s expensive. If there is any meat, in a soup that calls itself chicken noodle soup for example, any of us would be hard pressed to find more than just a smidgen of chicken. So, what would we be paying for? I rest my case. (And yes, I know, convenience is worth something.)

Actually, I really shouldn’t be preaching to the choir in the defense of homemade soup. Because if you weren’t into homemade soup in the first place, you wouldn’t even be reading this diatribe!   

Anyway, all blather aside, I truly believe you would find this soup easy to prepare and ever so delicious. Absolutely perfect for a grey, Pacific Northwest dinner. (Or anywhere else for that matter!)

Peace and love to all.

1 T. extra virgin olive oil,

½ lg. onion, chopped

2 carrots, chopped

4 celery ribs plus leaves, thinly sliced

1 lg. fennel bulb, diced

4 lg. cloves garlic, finely minced

½ c. dry white wine

6 c. chicken broth (or 6 c. water and 2 T. chicken base)

1 (8-oz.) can tomato sauce

½ tsp. seasoned salt

freshly ground black pepper

2 tsp. fennel seeds

¼ tsp. dried thyme leaves

4-6 crushed red pepper flakes

1 bay leaf

1 smoked ham hock

1⅓ c. small navy beans, rinsed

2 c. thinly sliced baby spinach

Heat olive oil in a large, covered soup pan or Dutch oven. Add the onion, carrots, celery, and fennel bulb. Sauté only until onion starts to soften. Add the garlic and cook for 1 minute.

Add the wine and cook until any liquid has evaporated.

Add the chicken broth, tomato sauce, seasoned salt, pepper, fennel seeds, thyme, crushed red pepper flakes, bay leaf, ham hock, and navy beans. Bring to a boil, reduce heat, cover, and gently simmer until the beans are soft, about 2 hours. After about 90 minutes, remove the ham hock, let cool, and separate the meat from the bone and fatty tissue. Chop or shred the meat and add it back to the pot.

When the beans are tender, add the spinach. Remove from heat. Taste and adjust seasoning. Discard bay leaf before serving.

Great accompanied by crusty baguette slices or Crostini. See recipe below.  

Please note: For this recipe, beans do not need to be pre-soaked.

CROSTINI

baguette or similar chewy long loaf of bread

extra-virgin olive oil

flaky or coarse sea salt

Pre-heat your oven to 450-degrees. Line a rimmed baking sheet with parchment paper for easy clean-up. 

Slice the bread on the diagonal into pieces no wider than ½-inch. Lightly brush both sides of each slice with olive oil.

Place the slices in a single layer on your prepared baking sheet and bake them on the middle rack for about 9 minutes, until they are crisp and nicely golden on top. Remove from oven and sprinkle lightly with salt. Serve immediately.

GROUND TURKEY AND MEXICAN CHORIZO FILLED GREEN PEPPERS, BURRITOS, AND TACOS  

Stuffed Green Peppers

As promised, here is another recipe featuring Mexican chorizo. This recipe comes straight from our dear friend Jim. Who, BTW, is an amazing cook. And for anyone who has had the pleasure of dining at Jim and Margo’s home, you know of what I speak. You too are blessed. But enough pontificating. I don’t want Jim to get a swollen head. I just want you to know that I am not responsible for this marvelous recipe. I wish I were, but my mother always told me that honesty is the best policy. (Apparently, a lot of politicians never got that same directive from their mothers, but that’s a story for another time!)

Anyway, this versatile filling recipe is absolutely delicious and super easy to prepare. At first glance it looks like the recipe makes a big batch of filling. And guess what? It does! All’s the better as far as I’m concerned. Because this filling freezes beautifully. Besides, what kind of recipe calls for half a pound of ground meat? Ground meat doesn’t come in half pound packages. At least not in the grocery stores I frequent!

Anyway, just make this fabulous filling. Make stuffed peppers, or use it for terrific burritos or tacos, or any other dish that would profit from a spicy, meaty infusion of southwestern flavor. And lest I forget, this is a fairly healthy filling. Lots of veggie action happening and no starchy ingredients.  

So, again, thank you Jim for this terrific recipe. I made Stuffed Green Peppers last night for dinner, and this morning I made Breakfast Burritos. Absolute culinary bliss my friends.

As always, keep smiling. We aren’t out of the woods yet with covid. But we are moving towards the edge of the woods where the trees are further apart, the sun is breaking through, and that just might be a meadow further down the path.

Peace and love to all.

Ground Turkey and Mexican Chorizo Filling:

2 tsp. extra virgin olive oil

1 lb. ground turkey (part white and dark meat, if possible)

1 lb. bulk Mexican chorizo

1 onion, diced

3-4 celery ribs, diced

1 green pepper, diced

1 red pepper, diced

5-6 garlic cloves, minced

1 (28-oz,) can diced tomatoes (Italian are best)

3-4 T. chili powder

3-4 T. taco seasoning

freshly ground black pepper

¾-1 c. chopped fresh cilantro or 2-3 T. dried cilantro*

Heat the olive oil in a large skillet over medium-high heat. Add the ground turkey and chorizo. Fry the meat until cooked through and browned.

Add the onion, celery, green pepper, and red pepper. Cook until the veggies are softened, about 8 minutes. Stir in the garlic and cook for 1 minute.

Add the diced tomatoes, chili powder, taco seasoning, and black pepper. Cook, uncovered, for about 30 minutes to blend flavors and reduce the liquid. Remove from heat and add the cilantro. Taste and adjust seasoning.

*Dried cilantro doesn’t taste like fresh cilantro. Fresh cilantro has a strong lemony and slightly peppery flavor, which some people (like me) find to taste kind of soapy. In other words, fresh cilantro is not my favorite ingredient. I much prefer dried cilantro which has a weak cilantro flavor and is perfect in soups, stews, or any recipe that requires a bit of cooking time to blend flavors.

STUFFED GREEN PEPPERS

4 green peppers (or however many you need)

Ground Turkey and Mexican Chorizo filling

grated cheese (I use sharp cheddar or mozzarella)

Slice the green peppers in half, top to bottom. Carefully cut out the stem, then remove the membranes and seeds.   

Lightly grease a baking pan. Place the half peppers, cut side up in the pan and fill with the meat mixture. You will have extra filling. I suggest freezing it for tacos or burritos. (See recipes below.)   

Bake the peppers in a pre-heated 375-degree oven for 75-90 minutes or until the pepper are soft and starting to brown. (If the filling gets too brown during the baking process, cover with aluminum foil.) About 5 minutes before removing the peppers from the oven, liberally cover the tops with grated cheese.

Remove from oven and serve immediately.

BURRITOS*

tortillas (whole wheat or regular)

Ground Turkey and Mexican Chorizo filling

grated cheese

refried or whole pinto beans, opt.

shredded lettuce

finely diced tomato

sour cream

diced avocado

Stuff lightly warmed tortillas with filling, grated cheese, and a tiny bit of refried beans. Wrap and heat on high for 1 minute in your microwave. Serve lettuce, diced tomato, sour cream, and diced avocado on the side.

Note: I warm the tortillas just before wrapping because warming them makes them more pliable.

BREAKFAST BURRITOS*

tortillas (whole wheat or regular)

Ground Turkey and Mexican Chorizo filling

scrambled eggs

grated sharp cheddar cheese

chopped green onions

Stuff lightly warmed tortillas with filling, scrambled eggs, grated cheese, and chopped green onion. Wrap and heat on high for 1 minute in your microwave. Serve sprinkled with a bit more grated cheese and sour cream on the side.

Note: I warm the tortillas just before wrapping because warming them makes them more pliable.

TACOS*

taco shells

Ground Turkey and Mexican Chorizo filling

refried or whole pinto beans, opt.

grated cheese

shredded lettuce

finely diced tomato

diced avocado

sour cream

Place hot filling in shells. Serve with a variety of additives including refried beans, grated cheese, shredded lettuce, diced tomatoes, diced avocados, and sour cream.

*In my opinion, there is no need for salsa with these dishes. The salsa would just get in the way of the lovely flavor of the Ground Turkey and Mexican Chorizo filling.


ITALIAN SAUSAGE AND PENNE RIGATE SOUP WITH CROSTINI   

Soup
Crostini made with Tangy Overnight Sourdough bread – recipe to follow within the next couple of days

OK, at first glance it looks like a lot of ingredients in this recipe. And your first glance would be correct. But other than frying the Italian sausage, chopping the mirepoix (onion, carrot, celery), garlic, spinach, fresh parsley, and basil, the rest of the preparation is quick and easy. Just a matter of adding a bit of this and a bit of that to the pot. Then the soup burbles for a while, and soups on!

And what you get for this effort, is a truly rich and delicious soup. And a meal unto itself. Nothing else required. Of course, if you want to take the meal to an even higher level, while the soup simmers away, you can build crostini to serve with the soup. (See recipe for crostini below)

And now, my friends, you have a meal fit for a king or queen. (Or even company!)

So, frankly, there is nothing left to say. I want this soup to speak for itself!

Peace and love to all.

1 T. extra virgin olive oil

1 lb. bulk Italian sausage 

1 c. chopped onion 

1 med. carrot, chopped 

2 ribs celery, sliced

3-4 cloves garlic, finely minced

¼ c. dry red wine

4 c. chicken broth

1 (28-oz) can tomatoes (preferably Italian)

2 T. tomato paste

2-3 Parmigiano-Reggiano rinds*, opt.

1 bay leaf

2 tsp. paprika

2 tsp. Italian seasoning

1 tsp. fennel seed, coarsely cracked

pinch crushed red pepper flakes

½ tsp. seasoned salt

freshly ground black pepper

½-1 c. penne or penne rigate** pasta (or pasta of choice)   

2 c. chopped fresh spinach, chard, or kale

2 T. chopped fresh parsley

⅓ c. chopped fresh basil (or 1 T. pesto)

freshly grated Parmigiano-Reggiano or Pecorino-Romano (or combination)

freshly baked crostini or baguette slices (see recipe for crostini below)

Heat olive oil in a large, covered soup pot over medium heat. Add the sausage and break into chunks as it browns. When brown, remove from pan and set aside***.

Add onion, carrot, and celery to the pot. Sauté until onion starting to soften, about 6 minutes. Add garlic and sauté 1 minute longer. Add the red wine and cook until liquid is all but evaporated.

Add the broth, canned tomatoes (plus juice), tomato paste, Parmigiano-Reggiano rinds*, bay leaf, paprika, Italian seasoning, fennel seed, crushed red pepper flakes, seasoned salt, and black pepper.

Bring to a boil, cover, reduce heat to medium-low, and let simmer for about 30 minutes.

Add penne rigate. Cover and let simmer, stirring occasionally (while scraping along bottom of pot as pasta will tend to stick). Cook until pasta is nearly al dente. About 8 minutes. Stir in cooked Italian sausage and cook for 2 minutes. Taste and adjust seasoning. Remove from heat. Stir in spinach, fresh parsley, and basil.

Serve hot. Pass grated Parmigiano-Reggiano or Pecorino-Romano. Great with crostini or fresh, chewy sourdough bread.

*Parmesan rinds

I used to feel cheated by having to pay for the thick rind on Parmigiano-Reggiano. Heaven knows, the stuff was expensive enough without having to discard the rind. But I love the flavor of Parmigiano-Reggiano, so, I would pay the price. But a few years ago, I read that Parmigiano-Reggiano rinds are packed with flavor and can enrich the taste of tomato-based sauces, ragù, and soups. So, I have been using them ever since. (When I remember to use them, that is!)

**Penne and penne rigate

The shape of penne comes from the Italian word for “quill.” There are generally two variations of penne: smooth (lisce) and ridged (rigate). Thanks to its ridges, the rigate version is a bit sturdier and tends to soak up more sauce than smooth penne.

But either are perfect in this soup. As are elbow macaroni or any other small pasta.

***Setting cooked sausage aside

I have found that when I cook sausage for soups like this one and leave the meat in the pot while is simmers to blend all the other wonderful flavors, the meat loses it’s unique flavor in the process. And I want that burst of sausage flavor when I enjoy my soup. So, I remove the meat just after it’s been cooked and add it at the end. You, of course, can leave the meat in the entire cooking time if you prefer. It’s a personal choice.

CROSTINI

crusty French or Italian bread

extra-virgin olive oil

flaky or fine sea salt, to taste

Pre-heat your oven to 450-degrees. Line a rimmed baking sheet with parchment paper for easy clean-up.  

Slice the baguette on the diagonal into pieces no wider than ½-inch. Lightly brush both sides of each slice with olive oil.

Place the slices in a single layer on your prepared baking sheet and bake them on the middle rack for about 9 minutes, until they are crisp and nicely golden on top. Remove from oven and sprinkle lightly with salt. Serve immediately.


CRISPY BACON, JARLSBERG CHEESE, SPINACH, AND GREEN ONION QUICHE

When it comes to quiche, we, the residents of Chez Carr, are avid fans. And because I love to try new ways of presenting this perennial favorite, I play mix and match with ingredients as often as I make quiche. Sometimes the combination of ingredients work, sometimes, not so much. Oh, the quiches are still edible. But they simply don’t deliver the fantastic result I was striving so hard to achieve. But last night’s quiche was a winner. And therefore, worthy of this post.

But really, there is nothing new or inventive about the ingredients I chose to use. I had Jarlsberg cheese that needed to be consumed. And bacon, green onions, and baby spinach available and willing to be a part of the adventure.

So, bottom line, there are no screaming new taste sensations to be experienced when biting into this quiche. But there are old favorites in combination that make you want to stand up and shout hallelujah! (Wait, that was me who stood up and shouted hallelujah. You, I’m sure, are much more refined and dignified!) Anyway – what I’m trying to relate, in my own idiosyncratic way, is that this recipe produced a really good quiche! (I really must learn to tell a story in fewer words!)

So, if you too are a quiche lover, consider giving this recipe a try. The dish is easy to prepare, contains everyday ingredients, and everyone will love it. It contains bacon!

As always, have fun in your kitchen. Keep trying new recipes, but don’t forget about your old favorites.

And don’t let anyone ever tell you that real men don’t eat quiche. The men I know LOVE quiche. And they are as real as men get! And as wonderful, I might add. (You know who you are!)

Peace and love to all.

8-inch pie crust, unbaked and set in pie plate  

10 slices thick, meaty bacon, chopped and cooked until crisp

2 c. grated Jarlsberg cheese (or Swiss, Gruyère, Emmental, etc.)

⅓ c. sliced green onions

2 c. chopped baby spinach  

¾ c. milk (whole milk is best)

¼ c. half & half

4 lg. eggs

freshly ground black pepper

dash ground nutmeg

Scatter half of the cooked bacon over pie crust. Then layer half the cheese, half the greens onions, and half the spinach on top of that. Then repeat until all the bacon, cheese, green onions, and spinach are in the pie pan.

Whisk the milk, half & half, eggs, and black pepper together. Pour liquid mixture over all. Sprinkle with nutmeg. Cover edges of crust with thin strips of aluminum foil.

Bake in a pre-heated 325-degree oven until filling is set, about 45 minutes. Remove aluminum foil and bake for another 5 minutes.

Remove from oven and allow to sit for about 5 minutes before serving.


ITALIAN SAUSAGE PASTA WITH ROASTED RED PEPPERS AND MOZZARELLA CHEESE

Well, once again laziness and frugality paid off here at Chez Carr.

I had a couple of left-over Italian dinner sausages, half a jar of Cento brand roasted red and yellow peppers, and a couple of cups of shredded mozzarella cheese in the fridge that either needed to be used or added to the yard waste barrel. (And no, they were neither engulfed in blue fur or too far gone to use safely. Just great ingredients that really should be used before they went bad.) So, what immediately sprang to mind was a pasta dish. (Unfortunately, pasta is never far from what’s on my mind, but that’s a discussion for another day.)

So, I decided a quick and easy “lasagna like” casserole for a lazy Saturday evening meal would be perfect.

Starting with my old standby marinara recipe, I deleted a couple of ingredients, added a couple of others, and came up with what you see written below. And OMG, for the brief time I spent on this dish, it tasted like I had spent hours slaving over its preparation. Plus, I got to use part of a package of strozzapreti pasta in the process. Which BTW, we discovered we really liked. (I had been a bit reluctant to try it because A) it is hard to find in our part of the world, B) I thought it might be difficult to eat, and C) because I’d purchased it two or three years ago and it might no longer be good.) Well, not only was it still good; it was absolutely delicious. And my hesitation about the shape making it hard to eat; completely unfounded. Of course, I did break the roughly 3-inch pieces in thirds, which significantly reduced any chance of choking. (Read about the history of strozzapreti below.)

So, if you too love a pasta casserole, give this recipe a try. And don’t be afraid of using fennel seed. After all, it’s what makes Italian sausage so delightfully delicious. Stay safe everyone. And peace and love to all.

3 T. extra virgin olive oil, divided

½-1 lb. Italian dinner sausage, cut into thin slices (or bulk Italian sausage)

½ med. onion, chopped

4 garlic cloves, finely minced

1 (28-oz.) can chopped or diced tomatoes (Italian tomatoes preferably)

1 c. chopped roasted red/yellow peppers (Cento brand is amazing)

1 bay leaf

pinch crushed red pepper flakes

1½ tsp. dried oregano (I use Mexican oregano)

1½ tsp. ground fennel seed

½ tsp. kosher salt

freshly ground black pepper

6 oz. strozzapreti*, gemelli, or fusilli pasta – cooked al dente

2 generous c. shredded mozzarella cheese, divided

In a large fry pan, heat 1 tablespoon of the olive oil. Add the sliced Italian sausage and cook until the sausage is nicely browned on both sides. Remove from heat and set aside.

In a medium sized heavy covered pan, heat the remaining 2 tablespoons of olive oil. Add the onion and cook just until softened. Add the garlic and cook for one minute.

Add the chopped or diced tomatoes, roasted red peppers, bay leaf, crushed red pepper flakes, oregano, ground fennel seed, salt, and black pepper. Bring to a boil, reduce heat, cover, and simmer for about 30 minutes.

Meanwhile lightly butter a 9×9-inch baking dish. Set aside.

After the sauce has burbled for 30 minutes, stir in the browned sausage and al dente pasta. Scoop half of the mixture into the prepared baking dish. Then sprinkle with half of the shredded mozzarella, them layer on the remaining sauce. Sprinkle on the remaining shredded mozzarella cheese.

Bake uncovered in a pre-heated 350-degree oven for 30 minutes. Remove from oven and let sit for 5-7 minutes before serving.

*To quote Chef Stef “Strozzapreti is the taller cousin of cavatelli and the gangsta of the pasta family. Strozzapreti‘s name literally means “Priest Stranglers”. Yes, in the Middle Ages this pasta was designed to choke priests to death right in front of you as you were having dinner. The Heimlich maneuver hadn’t been invented yet.  But a hatred of paying taxes to the church had been. Furthermore, medieval Italy had a love of curses. Apparently a sfoglina (female pasta maker) would mutter a curse damning the priest with each cut of pasta. Think of strozzapreti as the semolina version of John Wick**!”

**Apparently, John Wick is a fictional character and the titular protagonist of the neo-noir action thriller film series “John Wick,” portrayed by Keanu Reeves. John is a legendary hitman who had retired until a gang invades his house, steals his car, and kills the puppy that his late wife Helen had given him.


HAM, CARAMELIZED ONION, AND SWISS CHEESE QUICHE IN A WHOLE WHEAT CRUST

I added a bit of kale and chopped green onion to garnish the quiche before baking. Wasn’t necessary. Won’t do it again.

And yes, we love quiche. And that’s why there are already several quiche recipes on this site. Now, one of the things I like most about quiches is their versatility. I can put pretty much any ingredient in a pie shell, pour eggs and milk over the top, and bake until the filling is set. Voila! Egg pie!

So, the other evening, quiche was on our dinner table. And yes, quiche is also perfect for breakfast or lunch. That’s another versatile thing that I love about this dish. But mainly it’s about how wonderful this dish tastes. And how the creamy rich filling is offset by the crispy pie crust. (I don’t use this simple pie crust recipe for regular pies because it isn’t a flaky crust. But for quiche, it’s perfect!) And very easy to make. And at this stage in my life, I support easy.

So, if you too would enjoy a quiche that has all the requisite elements of a successful dish that includes, easy to prepare, delicious, not too expensive, and everyone at table will love, then this is the recipe for you. Make it “quiche night” at your house in the near future. Your family will love you even more than they already do!

And isn’t that what it’s all about anyway. Love and family and understanding and forgiveness and respect.

In these trying days when there is almost a civil war happening between the people who are vaccinated and those who aren’t, please don’t forget that everyone is doing their best. (Except for certain politicians who are trying to kill Democracy. But that’s another story!)

But for those of us who simply can’t understand why anyone would hesitate to get vaccinated, it seems like such a simple thing to just do it. (I fall in that camp BTW.) But I don’t live in another person’s head. I don’t know their fears or misgivings or past experiences. And I definitely don’t know what it’s like to be unable to make a decision. But from the few I know who haven’t been vaccinated, inertia seems to be the biggest reason to remain unvaccinated. So, be kind to these people and try to understand that life may not be as easy for them as it is for you. Love them, treat them with respect, and above all, don’t give up on them. Not everyone was lucky enough to be born with what I consider to be “a good tool belt”. A tool belt containing a goodly amount of intelligence, an inherent sense of self-worth, imagination, empathy, understanding, energy, and various other attributes that help most of us become happy, caring, and successful adults. If you were born with a good tool belt, you were just plain lucky. Not everyone was similarly blessed. So, be patient and kind. Don’t burn bridges that might never have been built if not for covid-19. And no, it’s not easy. I have a couple relatives I would like to shake by the shoulders, throw them in the back of my car, and drive them to get vaccinated. But I don’t walk in their shoes, and no one (yet) has put me in charge. Until then, I do the best I can. I’m not perfect and I get pretty darned frustrated. But I have yet to lose a friendship because we have differing opinions about being vaccinated. (OK, maybe one. But he isn’t family, and we have history anyway!) So, like I said, it’s not easy to safely maneuver the vaccination minefield. But definitely worth the effort.  

And as always, peace and love to all.

8-inch pie crust (see recipe below) 

2 T. unsalted butter

1½ c. diced ham

½ med. onion, chopped

2½ c. grated Swiss, Gruyère, Emmental, or Jarlsberg cheese (or combination)

1½ c. whole milk (part half & half is great)

1 tsp. Dijon mustard

freshly ground black pepper

5 lg. eggs

ground nutmeg

Heat the butter in a small frying pan. Sauté the ham pieces until browned. Using a slotted spoon or spatula, remove the ham to a small bowl. Set aside.

Add onion and cook over medium low heat, stirring frequently, until the onion is soft and starts to become a light golden brown, 20 – 30 minutes.

Scatter ham pieces over the partially baked pie crust. Layer cheese on top of ham. Scatter cooked onions evenly over the cheese.

Whisk together the milk/half & half, Dijon mustard, black pepper, and eggs. Pour liquid mixture in pie pan. Sprinkle with nutmeg. Hint: to keep your pie crust edge from getting too brown while baking, cover with thin strips of aluminum foil.

Bake in a pre-heated 350-degree oven until the filling is set, about 45-55 minutes. Allow to cool for 5 minutes before serving.

Whole Wheat Pie Crust

1 c. unbleached all-purpose flour

1 c. whole wheat pastry flour   

heaping ½ tsp. salt

1 tsp. sugar

¼ tsp. baking powder

7 T. vegetable or canola oil

5 T. cold water  

Whisk the flours, salt, sugar, and baking powder together. Pour the oil and water over the dry ingredients. Stir with a fork until the dough is evenly moistened. Pat the dough across the bottom of a fairly deep pie pan, then up to the rim.  

Bake in a pre-heated 400-degree oven for 12 minutes. Remove from oven and set aside until you are ready to assemble the quiche. Reduce oven temperature to 350 degrees.


BOURBON MARINATED GRILLED PORK TENDERLOIN

Whenever I want a simple main dish that requires a minimum of effort and a maximum of flavor, I think of pork tenderloin. I know I’ve said it before, but pork tenderloin is just about the perfect meat. It is tender and juicy, when treated with respect, easy on the budget, and tastes amazing when given the opportunity. And it does taste marvelous when marinated, baked, or sauced with other yummy ingredients. Because let’s be honest here. Left unadorned, pork tenderloin (or pork roast or chops) can be a bit boring. But quite often, I don’t want a heavy sauce with all the extra calories. I just want a simple piece of meat, but I want it to be flavorful. And that’s where a great marinade can come in handy. And oh my, this marinade makes for a very flavorful meat. I changed the recipe a bit from the original I found on the plainchicken.com site to better reflect our tastes, but the bones of the recipe are all on Stephanie.

And I also know what some of you are thinking. Here you go again Patti with your love/hate relationship with bourbon. And you’d be correct. I still can’t get the stuff past my lips if it is in the form of a drink. But as an ingredient, I have nothing but respect for what it lends to all kinds of dishes, from savory to sweet. In fact, if you want to see how frequently I use bourbon as an ingredient, just type bourbon in the “search” box on this site, and you will be amazed at this whiskey’s versatility. (And no, I am not on the bourbon industry’s payroll. But perhaps I should be. Of course, it would all be fun and games until they offered me a drink. Then all bets would be off! I would probably be asked to resign and that would hurt my feelings. So, I’m better off just using the product in recipes, then sharing my recipes with you, and leaving the rest in the capable hands of people who actually enjoy drinking the stuff.)  

So, bottom line, if you would like a recipe for pork tenderloin that is easy to build and tastes wonderful, give this recipe a try. And no, you don’t have to use fancy bourbon for this recipe. I use Jim Beam in every dish I make that calls for bourbon. I keep the bottle in my pantry along with other wines and spirits I use exclusively in recipes. My own stash for my own use! (OK, I do let Mr. C. use my booze if he asks very nicely.)

As always, have fun in your kitchen. Try new recipes, but cling to your favorites as well. There is just nothing better than making an old favorite that everyone adores. It’s like having a good friend over to dine. Just brings a smile to your face. Speaking of which, isn’t it wonderful to be able to once again have family and friends over for dinner. Or to go to someone else’s home for a visit.

On that happy note, I wish to propose a toast to all the medical personnel who worked on the covid-19 vaccine, who attended people who came down with the virus, or who were in any way responsible for helping us make it this far in our pandemic struggle. And to the people who taught our children via Zoom, worked in grocery stores, or in any way provided services that brought them into potential harm, my sincere thanks to each and every one of you.

And if you have yet to be vaccinated, please do so as soon as possible. We should each do our part to help conquer this horrible virus. I feel that it is not only our responsibility to help in this cause; it should also feel like our privilege to assist in putting an end to the spread of this often-fatal disease. So, please do your part. Get vaccinated!

Peace and love to all.  

¼ c. bourbon

2 T. brown sugar

2 T. soy sauce

1 T. Worcestershire sauce

1 T. fresh lemon juice

¼ tsp. granulated garlic

1/8 tsp. granulated onion

1 pork tenderloin, silver skin removed

kosher salt

Whisk the bourbon, brown sugar, soy sauce, Worcestershire sauce, lemon juice, granulated garlic, granulated onion, and black pepper together in a covered container.

Place pork tenderloin in the marinade and refrigerate for an hour to overnight. (Overnight is best.)

Remove pork from marinade, sprinkle liberally with kosher salt and grill until internal temperature reaches 145-degrees. (about 12 minutes) 

Remove from grill, tent, and allow to sit for about 5 minutes before thinly slicing on the diagonal.  


BRINED AND BAKED PORK CHOPS

Whenever I plan a trailer camping trip, the first meat I think to bring along is the other white meat. You know – pork. And because pork products come in many forms, for this post, I am only referring to pork chops and pork tenderloin. But why only chops and tenderloin? That’s simple to explain. They are both very easy to cook. Sometimes it takes a little prep work to coach the best out of these cuts, but never very much. But cooking either cut takes a gentle hand. Pork needs to be respected and of utmost importance, it should never be over cooked. (Of course, it can be over cooked, but not if you desire a tender piece of meat.)

For years I couldn’t fix a tender pork chop to save my soul. But then I discovered brining and learned that trichinosis is not the plague it once was, and therefore we no longer need to cook pork to death! So now, every camping trip includes pork chops and pork tenderloin. And both are always very well received with very little effort expended on my part.

Happily, last evening, we feasted on tender and succulent pork chops thanks to this recipe I found on the iwashyoudry.com site. I served the chops with Easy Fried Rice and Garlic Roasted Sugar Snap Peas. (Both recipes soon to be posted.)

So, if you too are a fan of pork chops but can’t stand it when your chops turn out dry and fit only for repairing the soles of your favorite leather boots, give this recipe a try. You will be glad you did.

As always, keep smiling, keep being tolerant of others even if their views differ radically from your own, and most importantly, thank your lucky stars that you were blessed with a mind that can discern fact from fiction. Because there is a lot of fiction being touted these days around the country, and especially in Washington DC. And unfortunately, not everyone was born with a healthy intellect or was taught critical thinking. That level of intelligence or skill is simply not possessed by everyone. So, be kind. Understand that you are just luckier than some.

Peace and love to all.

2 (4 oz. each) 1-inch or thicker boneless pork chops

2 c. warm water

2 tsp. kosher salt

2 tsp. seasoned salt

extra virgin olive oil

1 tsp. granulated garlic

½ tsp. paprika

freshly ground black pepper

Bring the pork chops to room temperature before preparing the brine.  

Place the warm water in a flat glass container that will allow the pork chops to not overlap. Stir in the kosher and seasoned salt until they are both dissolved. Place the pork chops in the salt water, making sure the chops are completely covered. (Add additional water if necessary). Let the pork chops sit in the water at room temperature for 30 to 45 minutes, or place in your fridge for up to 24 hours. (I brined and refrigerated our chops for 7 hours. They were perfect.)  

Line a baking sheet with foil or parchment paper.

Remove pork chops from salt water and pat dry with paper towels, making sure all moisture is removed. Drizzle both sides of pork chops with a bit of olive oil, then season both sides with the granulated garlic, paprika, and black pepper.  

Bake in a pre-heated 425-defree oven for about 8 minutes or until the internal temperature reaches about 143-degrees. Remove from oven and cover loosely with foil for 5 minutes before serving.


BAKED PORK CARNITAS

OK, I admit, the picture does not do the carnitas justice. But if there were any real justice anyway, someone would take my camera away from me. I give the whole “photography thing” a bad name!

For whatever reason, I had never made carnitas before yesterday. I had prepared pulled pork, but never pork carnitas. And I must say, I much prefer carnitas. Because unlike pulled pork, the meat is finished by roasting uncovered in the oven until all tender and brown with lovely crispy bits. Then removed from the pan, allowed to cool a bit, and shredded. Then returned to the pot and stirred into the remaining juice. So, in the end you have, tender, partially crisp, and very flavorful meat in sauce to use in any of your favorite Mexican recipes. Tacos, burritos, tamales, to name a few.

Last evening, I simply warmed some corn tortillas to hold the pork carnitas meat, then laid out homemade refried beans, diced avocado, finely chopped tomato, shredded cheese, sour cream, and a mild red salsa. Yum! And the beautiful part, I had spent hardly any prep time on this fabulous way to use a fairly inexpensive cut of pork. Well, the prep time was insignificant, but the time in the oven would preclude this being a great weekday recipe for any person getting home after 2:00 in the afternoon. Because the total time in the oven is at least 3 hours.

However, the good news is that the cook doesn’t have to babysit the pork while it’s in the oven. So, this is a great recipe for a Saturday or Sunday evening, or whatever day of the week you are off work.   

And oh my gosh, pork is so delicious fixed this way. The smell alone emanating from your oven is worth any effort expended on this dish. And while the pork is braising/roasting away, all you wonderful cooks out there will be free to attend to other household duties. Such as cleaning your house, doing loads of laundry, hunting and gathering groceries, providing assistance with your kid’s homework, gardening, and my personal favorite – chauffeuring your kidlets all over God’s creation! (And yes, I still have vague memories of weekends when my kids were young. But a lot of my time spent being a mommy to young children and keeping a household running remain a blur, which I fervently hope will solidify as I get old. OK, get even older! Because I would really like to remember a bit more about those very busy years of my life!) (And I know, be careful what you wish for!)

Anyway, take it from me, this dish from the recipetineats.com site is one you most assuredly should make at your earliest convenience. Your family will love it. And it’s absolutely guest worthy. Perfect for a taco party. (When we can once again welcome guests into our homes, that is!) 

So, as always, be adventurous in your kitchen, laugh out loud whenever the mood strikes, and cherish the time you spend with your family. They may drive you bat poop crazy some days, but those days will be long gone sooner than you can even begin to imagine.

Peace and love to all.

2 tsp. extra virgin olive oil

1 tsp. kosher salt

freshly ground black pepper

2 tsp. dried oregano

1 tsp. ground cumin 

2½ lb. boneless, skinless pork shoulder, trimmed of as much fat as possible

½ onion , chopped

½ jalapeño, seeded, deveined and finely chopped

2 cloves garlic, minced

½ c. orange juice

1½ c. water  

Combine the olive oil, salt, pepper, oregano, and cumin. Rinse and dry the pork, then rub all over with olive oil mixture. 

Place the pork in a Dutch oven or covered roasting pan. Surround the meat with the onion, jalapeño, minced garlic, orange juice, and water.

Cover and braise the meat in a pre-heated 325-degree oven for 2 hours. Uncover and continue roasting for another 60-90 minutes. During this time, the liquid will reduce considerably, and the meat will become brown and crisp. (Check after 60 minutes.) Add additional water if required. (You want to end up with very tender, partially crispy brown meat, and a scant cup of liquid.)

Remove meat to a platter, let cool slightly, then shred using two forks. Discard any fat. Add the meat back to the pot and stir to combine with the remaining liquid. Use in any of your favorite recipes.

Easy way to warm corn tortillas:

Wrap a stack of tortillas (five or fewer) in aluminum foil and heat at 350-degrees  for 15 to 20 minutes. 

I wish the pink in this picture of the evening sky was as vivid as what we experienced first hand the other evening. It still amazes me after living on Camano Island for 12 plus years, to see masses of clouds over the mainland. And clear skies overhead and to the West. So the setting sun often brightens up the clouds like this. It’s a wonderful world folks. And watching the beauty of nature is a gift we can all share.