Category Archives: MAIN DISH RECIPES

WEEKNIGHT TAMALE PIE

OLYMPUS DIGITAL CAMERA

Ok, now that you have my real Tamale Pie recipe, I am going to share my weeknight tamale pie recipe with you. This recipe is especially helpful for working parents.  In fact, this recipe helped save my sanity many times over the years when I would arrive home from work, having already exhausted every fiber in my body, and there was still work to be done, i.e. dinner to fix, laundry, baths to oversee….you know the drill! For all the years my kids were growing up, this was my “I’m too tired to cope and basically I hate everything and everybody” go to recipe. (I’m sure, as a parent, you’ve never experienced that kind of a feeling, but if you ever do, this recipe will be just the thing to help you make it through!) And the best part, Weeknight Tamale Pie is really tasty. Everyone in your family will love it. Now granted, this is not gourmet food, and will never make the likes of Gourmet Magazine or Bon Appétit. Also, it will not win you the “best working mother or father nutritional achievement award”. But I say who cares. It contains enough good, nutritious ingredients for occasional simple dinners; plus your little darlings will love it. And truly, after an exhausting day, do you really want to spend the evening arguing with your children about broccoli or Brussels sprouts? Save those battles for days when you have even a remote chance of winning! So, on the days when it seems that everything that could have gone wrong did, remember this recipe. When you first get home from work, take a package of ground beef out of the freezer and place it in the microwave to defrost. Then change your cloths, tell your family how happy you are to see them, and that you would appreciate their patience while you prepare them a wonderful dinner. Take the meat out of the microwave, place it in a large covered pan, and pour yourself a wee dram of something delicious. Doesn’t even have to be an adult beverage, although why not? Then sit down to dinner with your family and relax. That hideous pile of laundry can wait!

  • 1 lb. extra lean ground beef
  • 1 small onion, chopped or ¼ c. dehydrated chopped onion
  • 1 (8-oz.) can tomato sauce
  • 1 pkg. taco seasoning or 2 T. bulk taco seasoning (or to taste)
  • 1 (16-oz.) can whole kernel corn, drained
  • 1 (6-oz.) can black olives, drained and halved
  • 1 c. shredded sharp cheddar cheese
  • tortilla chips
  • sour cream, opt.
  • salsa, opt.

Fry ground beef in a heavy covered Dutch oven or sauce pan. Add chopped onion and cook until tender. Add tomato sauce, taco seasoning, corn, and black olives. Bring to a boil, reduce heat, cover and simmer for 10 minutes, stirring occasionally. Reduce heat as far as possible.

OLYMPUS DIGITAL CAMERA

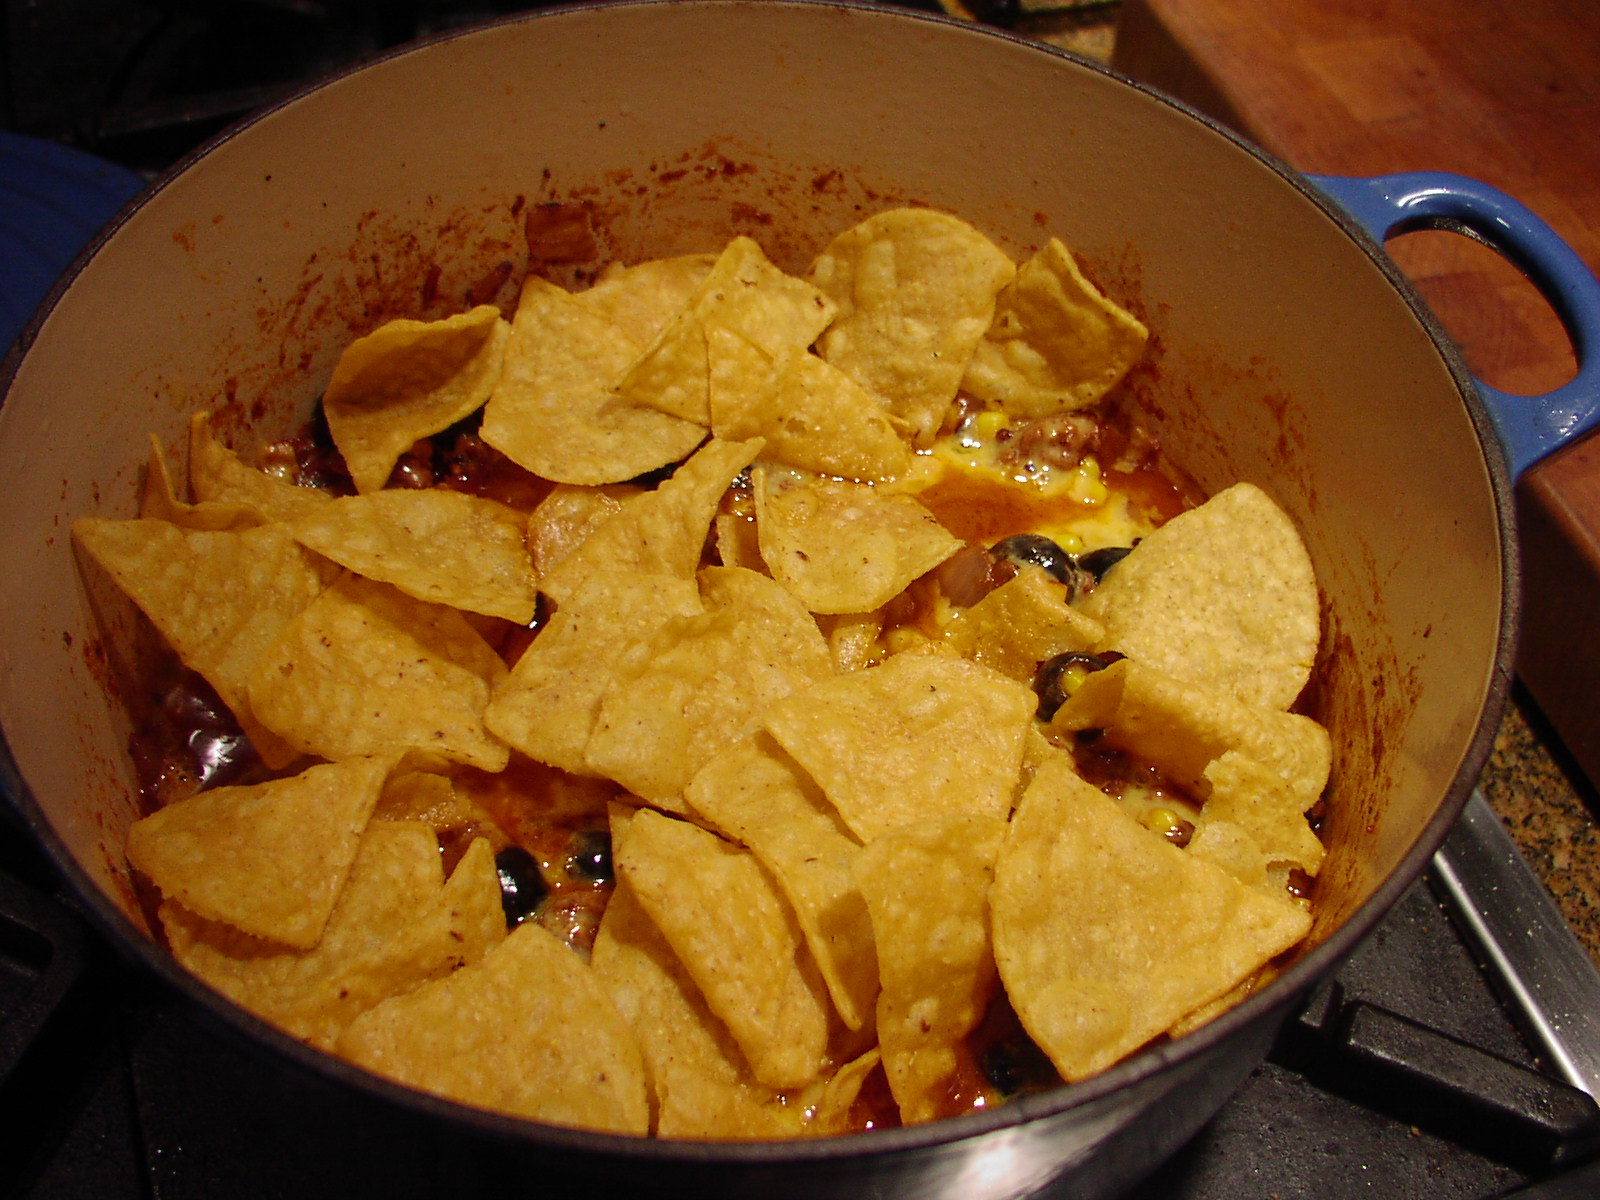
Remove lid and sprinkle with cheese and enough tortilla chips to hide the cheese, cover and let sit on low heat until cheese melts, about 5 minutes. Do not stir. Serve as soon as cheese is melted with additional tortilla chips, sour cream, and salsa.  Note: I serve this dish as a stand-alone dish. It may not be as well balanced a meal as it should be, but some nights I’m not as well balanced as I should be either! And do yourself a favor. Since this is a dish that contains mostly pantry ingredients, stock up on cans of tomato sauce, black olives, corn, etc. when they go on sale. And never be without ground beef in your freezer. Or tortilla chips in your pantry.


TAMALE PIE

OLYMPUS DIGITAL CAMERA

Pictured: Tamale Pie, upper right, Refried Beans, and Cheese Enchiladas

OK, I absolutely adore a good tamale. (That old starch addiction of mine, I’m sure.) But I am not about to do the whole corn husk thing, especially when I want to serve tamales to a crowd. (Thank goodness there are actually times when my better judgment and survival instincts work together to save what little bit of sanity I have left.)  So, where does that leave me when I want to serve tamales to the masses, or just want tamales for Mr. C. and myself? Well, of course, Mr. C. and I can always pop off to a Mexican foodatorium, but darn, you only get at the most 2 little tamales stuffed with not even enough meat to upset your average vegetarian. So when I went in search of an easy way to make tamales I stumbled onto this recipe on a site entitled “Please, don’t pass the salt!” I really enjoyed the author’s comments and of course I had to give the recipe a try. So off to the store to buy masa mix I proceeded. I thought I would have a difficult time, but even my local grocery store on the island carried what I needed. (So very nice when that happens.) So armed with nothing more than a burning desire for a tamale and my new found knowledge, I set about making myself (and Mr. C. of course) some tamales for dinner. It turned out that the dough recipe from the site was basically the same recipe as on the Instant Corn Masa Mix bag, but the technique for building the tamale pie was what I found most informative.  So after carefully following the recipe instructions, except for the filling (I chose to use my own recipe because I knew I liked it), my tamale pie went into the oven. As I pulled it out of the oven (carefully by the way), I knew I had a winner. It smelled just like a good tamale should smell. And when I finally bit into the tamale pie, I was immediately lifted to Mexican food heaven. And so what if I didn’t have a sticky corn husk to peel off before eating! (After all, most restaurants don’t serve tamales in their corn husk skins anyway.) Instead, I had a big old lovely piece of tamale pie, thick with meat that was ever so lovingly encased in a flavorful masa crust, and drizzled with a fabulous chili sauce. Final analysis, did I miss the whole corn husk part of making tamales? Not in the least!  (That’s like asking if I miss mosquitoes when I go hiking in late fall? Same answer!) There are just some things in life that are better off not experiencing. I figure corn husk manipulation is just one of those experiences I will gladly forgo.

Tamale Filling (aka Mexican Shredded Meat):

  • 1 lb. lean pork or beef cut into 2-inch cubes
  • 1 1/2 tsp. kosher salt
  • freshly ground black pepper
  • 1 tsp. cumin
  • 1 T. chili powder
  • 2 tsp. granulated garlic
  •  1 tsp. onion powder
  • 1 bay leaf
  • 1 small onion, chopped fine

Put the chunks of meat into a stockpot and add all of the remaining seasoning ingredients, except for the onion. Cover with water plus about a half inch and bring to a boil. Reduce heat and simmer, covered, for 2 hours. Add more water if necessary. Add the chopped onion and continue simmering, covered, for an additional hour. Uncover, stir to begin breaking up meat and continue simmering until liquid begins to reduce and meat shreds easily, about 1 more hour. Let cool.

Tamale Pie:

  • 2 ¼ c. Instant Corn Masa Mix for Tamales (Maseca for Tamales)
  • 1 tsp. baking powder
  • ¼ tsp. kosher salt
  • 2 c. lukewarm broth (I use “Better than Bouillon reduced sodium chicken base” carried by Costco)
  • ½ c. vegetable oil

Combine masa, baking powder, and salt in a large bowl. Add warm broth and oil. Stir together until dough is thoroughly combined. Cover and let rest for at least 15 minutes so the masa can thoroughly absorb the moist ingredients. Butter a 9 x 9-inch square ovenproof casserole dish. Press a little more than half of the tamale dough into the casserole dish. Using your hands (best tools in the kitchen) press the mixture evenly on the bottom and up the sides of the dish, about 1/4 to 1/3 inch thick. Using a slotted spoon, scoop a generous amount of the filling evenly over the dough, being careful not to spoon in too much gravy. (Remaining liquid can be thickened and served over tamales.) Carefully spread the remaining tamale dough over the filling, trying to make the top portion the same thickness as the bottom.  Fill a large roasting pan with about 2 inches of very hot water and put the uncovered tamale casserole in the water bath. Cover both the casserole and the roaster with 2 layers of regular or 1 layer of heavy duty aluminum foil. Carefully set the roaster in a pre-heated 350 degree oven.  Bake for about 50 minutes or until the masa is set. Remove from oven, uncover and let cool a few minutes before serving.  Serve warm with Green Chili Sauce with Pork, Red Chili Sauce, or gravy made from the filling liquid. Garnish with sour cream, shredded cheese, chopped onions, salsa, or whatever your little heart desires. Leftover meat mixture is great for tacos, as a filling for enchiladas or burritos, or to top tostadas. And it freezes beautifully. To fancy things up a bit, try making individual “tamales” in muffin tins.


CHEESE ENCHILADAS WITH RED CHILI SAUCE

OLYMPUS DIGITAL CAMERA

Pictured: Cheese Enchiladas, bottom left, Tamale Pie, and Refried Beans

For years, all I would order when we dined at Campo’s Mexican restaurant in Seattle’s University district (long since closed unfortunately) was their bean dip and cheese enchiladas. Their bean dip was better than any other bean dip I have ever had the pleasure to taste, and the cheese enchiladas, well frankly they were simply divine. But since this restaurant closed (and I will never forgive them for closing without my permission and more to the point, without sharing their recipes first) and I can’t get my monthly fix of their bean dip and cheese enchiladas, I have been forced to make my own. (And no, I still don’t have the perfect bean dip recipe to share with you. I keep experimenting, but nothing I’ve tried so far even comes close to what Campo’s served all warm from the oven, in its own little brick red container and surrounded by warm tortilla chips. I’m really still in mourning over that bean dip, and will probably always feel a little pull on my heartstrings for the bean dip that was. Sigh.) But cheese enchiladas, well that’s a different story. I received this recipe from a friend probably 40 years ago and have been making it ever since. The enchiladas themselves are made with only 3 ingredients – corn tortillas, a little vegetable oil for frying, and Monterey Jack Cheese. But what makes this dish amazing is the Red Chili Sauce. The sauce is easy to make and can be used in many different ways. It’s also great drizzled over refried beans, tamales, any other type of enchilada, or as an ingredient in a perfect burrito. So if you too love cheese enchiladas, give these babies a try. And kid friendly, oh yah! (You might want to skip the fresh onion garnish on your kid’s portion however, but on your own serving, go for it! After all, onion breath is better than no breath at all!)

Cheese Enchilada:

  • 1 lb. Monterey Jack cheese
  • vegetable oil
  • 12 corn tortillas

Red Chili Sauce:

  • 4 T. unsalted butter
  • 3 ½ T. flour
  • 3 ½ c. water
  • 5-6 tsp. beef base (like Superior Touch brand “Better Than Bouillon” – beef base)
  • 1 tsp. paprika
  • 4 T. mild chili powder (yes, tablespoons)
  • 1 tsp. granulated garlic
  • 4 tsp. dried oregano
  • 1 bay leaf
  • freshly ground black pepper

Garnish:

  • chopped onion, opt.
  • sliced black olives, opt.
  • crisp shredded lettuce, opt. 

Red Chili Sauce Preparation: In a medium sized covered sauce pan, melt butter over medium heat. Add flour and cook on low for about 5 minutes to get rid of the “raw” taste of the flour. Add water, beef base, paprika, chili powder, garlic, oregano, bay leaf, and pepper. Bring to just under a boil, reduce heat, cover pan and simmer gently for 30 minutes. Serve over your favorite Mexican dish.

Cheese Enchilada Preparation: Grate Monterey Jack cheese; set aside. Fry 12 corn tortillas is a small amount of oil. Swab fried tortillas in Red Chili Sauce, fill with cheese, roll, and place in a shallow oven proof baking dish. Drizzle with a small amount of the Red Chili Sauce. Bake in a pre-heated 350 degree oven for 20-30 minutes or until cheese melts. Garnish with finely chopped onion, sliced black olives, and crisp shredded lettuce. Serve with additional sauce. Note: You will probably have some leftover sauce. Try drizzling a wee bit on your scrambled eggs the next morning. Just add a tiny bit of salt to your eggs however, as the sauce itself tends to be a bit salty.


GREEN CHILI SAUCE WITH PORK

OLYMPUS DIGITAL CAMERA

(Green Chili Sauce pictured on Tamale Pie, upper right)

For years when I have been in Denver visiting my Aunt Ruth, we have dined at Ruth’s favorite Mexican restaurant. If you have never been to the Denver area, (which is a mistake I might add) you pretty much can’t drive a block without bumping into a Mexican restaurant. (Please note, this is not a bad thing in my book. I truly adore really good Mexican food.) And Denver, unlike some areas of the US that I could mention, has more than its fair share of really good Mexican restaurants. (And I’m sorry if my next comments bring offence to anyone, but I don’t consider most of the food served by large Mexican chain restaurants in our area to be good Mexican food! To me, everything tastes the same. Regardless of what you order, it’s served swimming in an uninspired sauce that tastes like it has been sitting in a steam table container since just after the Mexican revolution ended in 1920.) So when I taste a sauce that is fresh tasting and has a depth of flavor that compliments rather than detracts from my chosen entrée, I am in pure hog heaven. And speaking of hogs, a pork product is usually at the base of a truly good green chili sauce. You can practically bet your share of pickled pig’s feet on that one! But back to dining in Denver……

Mexican restaurants in and around Denver are known for their sauces, especially their green chili sauce. And my aunt’s favorite restaurant served the best green chili sauce I had ever tasted. That is until I started messing around with the one I am going to share with you today. (And no I will not give you the name of the restaurant in Denver! I am not going to advertise for them because they have never, and believe me I have asked several times over the years, even given me the slightest hint as to what goes into their amazing sauce. So call me a baby, but darn it, I live 1350 miles away. It’s not like I would publish the recipe in a cookbook or blog for heaven’s sake!) So, in order to pay homage to one of the truly wonderful world cuisines, and to let you know that there are homemade dishes that are far superior to what is available in most Mexcian restaurants today, I’m goin’ south of the border for the next few days. Today Green Chili Sauce with Pork; tomorrow Red Chili Sauce. After that Cheese Enchiladas, Mexican Shredded Beef, Pork Tamale Pie, Mexican Rice (nary a tomato product in this rice), Margaritas, and a couple of other favorites of mine. So pack your metaphorical bags and join me on my Mexican food adventure.  Open yourself a Negra Modelo or Dos Equis, start reading a book by Carlos Fuentes, and listen to some Carlos Santana. Mexico here we come. Provecho!

  • 1 T. vegetable oil
  • 2-3 bone in pork chops
  • kosher salt
  • freshly ground black pepper
  • ½ medium yellow onion, chopped
  • 4 large garlic cloves, minced
  • 2 tsp. cumin
  • 1 tsp. chili powder
  • ¼ tsp. dried oregano
  • ½ tsp. kosher salt
  • 2 ½ c. chicken stock
  • 1 T. tomato paste
  • 2 lg. tomatillos, chopped
  • 5 Anaheim peppers, charred (skins, seeds, veins removed) and chopped
  • 1 lg. or 2 small fresh jalapenos, charred (skins, seeds, veins removed) and finely minced
  • flour

Heat oil in a large, covered sauce pan. Season chops with kosher salt and freshly ground black pepper. Carefully place in hot oil and fry until very, very brown and there are lots of brown bits in the bottom of the pan. Add onion and cook until translucent. Add garlic and cook for about a minute or until you can smell the garlic. Stir in the cumin, chili powder, oregano, and salt. Add chicken stock, tomato paste, tomatillos, and peppers. Bring to just under a boil, reduce heat, cover, and simmer gently for about 2 hours. Remove chops and allow to cool. When cool, remove bones and as much fat and sinew as possible. Flake the meat into very small pieces and return to the sauce. Discard bones and sinew. You will probably need to thicken the sauce at this point. Take about 1/4 cup of the liquid out on the pan and place in a small mixing bowl. Depending on how thick you like your sauce, whisk in a tablespoon or two of flour into your mixing bowl and gently stir back into the pan. Allow to burble for about 3 minutes. Remove from heat. Allow to cool for about 10 minutes, adjust seasoning, and serve over your favorite enchiladas, tamales, burritos, refried beans, etc.


PROSCIUTTO WRAPPED PORK TENDERLOIN

It isn’t very often that I get to prepare a braised meat dish where the first step isn’t to dredge the meat in seasoned flour and fry said meat until brown all over in hot vegetable or olive oil. Or pat the meat all over until it is very dry, season it with salt and pepper and fry it in a small amount of oil or butter over fairly high heat. So when I find a recipe for braised meat without this step, I am naturally suspicious! After all, how in the name of all things caramelized or browned is my meat going to have any taste? Then of course, what about the sauce? How is my sauce going to have any depth of flavor without all those wonderful little browned bits in the bottom of the pan? (And really, isn’t a braised meat recipe all about the sauce?) Well fret not. This recipe is living (well not really living anymore) proof that browning and caramelizing meat is not the only way to assure extraordinary flavor in braised dishes. I can’t truly begin to describe how tender and flavorful pork is when it has been prepared this way. And the sauce, oh, it is truly out of this world. So next time you want an easy recipe for pork tenderloin that does not require marinating the meat for hours or browning it before adding the other ingredients, give this dish a try. It is quick and easy enough to prepare even on a weeknight. I know that for a fact. (I wasn’t always a retired lady of leisure you know. I too know what it is like to come home from a long day of work to a cold empty kitchen and a hungry family.) I wish I had some words of wisdom to offer you at this point which would miraculously make your life easier when it came to fixing supper after a long day. But unfortunately I paid good money to have my memories of the first hour at home after work blocked, so you will just have to figure it out for yourself. However, I have retained a couple of little hints that I can share with you. Make your dinners fairly simple, packed full of good nutrition and made with love. Love is actually the best ingredient you can ever add to any dish.

  • 1 T. Dijon mustard
  • ¾ tsp. dried thyme
  • 1 tsp. kosher salt
  • freshly ground black pepper
  • 2 pork tenderloin
  • 6-8 slices prosciutto
  • 1 T. vegetable oil
  • ¾ c. dry Riesling
  • ½ c. half & half
  • 2 T. chopped fresh Italian parsley

Combine mustard, thyme, salt, and pepper in a small bowl. Remove all silver skin, connective tissue, and fat from tenderloins. Dry completely with paper towels. Lay 3-4 pieces of prosciutto next to each other (long sides together) on a flat surface. Slather about a fourth of the mustard mixture on one side of a pork tenderloin. Place it mustard side down on the prosciutto. Slather another fourth of the mustard on the top and wrap the prosciutto around the pork. Repeat the process with the second tenderloin. Pour the vegetable oil in an oven proof baking pan (about the right size for the two tenderloins) and lay the tenderloins, seam side down in the pan. Pour the wine over the meat and bake uncovered in a pre-heated 350 degree oven until meat reaches an internal temperature of 145 degrees (35-45 minutes). Remove meat from pan and cover with aluminum foil for at least 15 minutes before slicing. Meanwhile add half & half to remaining meat juices and simmer while meat is resting. The sauce should thicken a bit as it is simmering, so watch carefully. After the meat has rested, slice to desired thickness and place on serving platter. Spoon sauce on meat and sprinkle with parsley. Hint: An electric knife works best when slicing the tenderloins.

Side Dish Suggestions:  baked sweet potatoes and a green veggie or green salad

Wine Pairing: chilled Pinot Grigio or Sauvignon Blanc


PASTA WITH BUTTER AND SAGE SAUCE

When it comes to pasta, I am a sucker! I like everything pasta. Plain, fancy, smothered in sauce, meatless, in soup – you name it. And because I am such a huge fan, I have made many pasta dishes over the years. One of my favorites is this incredibly unpretentious, meatless pasta that can be served as either a main or side dish. And the most amazing thing, besides of course how wonderful this pasta tastes, is how easy and inexpensive it is to prepare. (I love that!) So if you can’t think of anything to fix for dinner some evening when you only have the strength for about 20 minutes in the kitchen, give this recipe a try.

A quick word about sage. Although most grocery stores carry fresh sage leaves, you might consider growing your own sage bush. Sage is extremely easy to grow, and it over-winters very well, at least in the areas around the Pacific NW that are fairly mild. In fact, sage grows almost as well as many of our more aggressive and sinister weeds! God bless them. (And I mean that in the most sarcastic way possible!) And while you are at it, think about planting some oregano and a bay tree also. Just pay very close attention to your oregano plant. Oregano can turn against you and become as much of a problem as those darling weeds I referenced above. And I think I made myself pretty clear on how I feel about them! So keep oregano contained in a planter or in an area where it can’t become a nuisance. Think mint!

  • ¼ lb. to 1/3 lb. pasta*
  • 4 T. butter (don’t even think about using anything but real butter)
  • 8-9 fresh sage leaves, roughly chopped
  • 4 tsp. fresh lemon juice
  • ¼ c. grated Parmesan cheese
  • freshly ground black pepper

While your pasta cooks to al dente’, melt butter in a medium sized sauté pan.  Cook until the butter is a light golden brown. Quickly add the chopped sage leaves and remove from heat. (I say quickly because brown butter can go to burned butter in the twinkling of an eye!) Add the lemon juice. Drain the pasta, reserving about ¼ cup of the cooking water. Carefully pour the drained pasta into the sauté pan and return to low heat. Add the cheese, a grind or two of pepper, and 2 tablespoons of the reserved cooking water. Toss to coat and let cook until water absorbed, about a minute. If pasta appears too dry, add another tablespoon or two of cooking water. Serve immediately.

*Linguini is lovely with this sauce, but pumpkin or butternut squash ravioli is absolutely divine.

Side Dish Suggestions (when serving pasta as a main dish): a crisp green salad and crusty, chewy baguette slices

Wine Pairing: Pinot Grigio

OVEN CHICKEN FRICASSEE

OLYMPUS DIGITAL CAMERA

There are just those days when it feels like the culinary spirits are conspiring against me. I know I’m headed for one of “those days” when for example, I break the yokes on our morning easy-over eggs, which not coincidentally I have over seasoned, and the toast is 2 shades darker than I would like. Those are the times when I know I’m going to have to be extra careful with anything I touch in the kitchen. So when I begin my day with less than confidence in my culinary aptitude, I prepare this easy chicken dish. I know for a fact that no matter which poltergeist is trying to mess with my kitchen karma that day, it can’t mess up this recipe. This dish is just too unsophisticated for even the lowest in the poltergeist hierarchy to consider it worthy of their efforts. So If you too ever feel like you’re in for a day like I described above, or you know that work is going to be horrendous, and dinner needs to be as simple to prepare as possible, try fixing this ever so easy and foolproof comfort food.  While the chicken is baking, throw some rice in your rice cooker (a must by the way for busy cooks) and open a package of frozen petite peas. (I pour the peas in a small covered casserole, add a dab of butter and a sprinkle of seasoned salt and nuke them for about 2 minutes. You aren’t really cooking the peas; you’re just hotting them up.) Serve the chicken over the rice with the peas on the side, and relax. You might even want to have a glass of wine with dinner. Or, if you really want to make life better, you might have a glass while you prepare dinner and then enjoy another one with dinner. After all, if it was good enough for Julia, it should be good enough for us mere mortals! Oh, and one other little helpful hint. Don’t forget to take the chicken out of the freezer before you leave for work or get otherwise distracted. Having to stop at the store before you get home, or after a hard day of gardening, for example, is just not going to make life better. That’s the wines job!

Oh, and just for the record, this is not a true French fricassée; this is really just an all American fricasee. And yes, there is a difference!

  • 3 T. butter, melted
  • 3 T. flour
  • 1 tsp. kosher salt
  • freshly ground black pepper
  • 1 ½ tsp. poultry seasoning or more to taste
  • ½ tsp. paprika + more for sprinkling
  • 6-8 pieces of chicken (I use boneless skinless chicken thighs or breasts)
  • 1 (12-oz.) can evaporated milk
  • 1 can cream of mushroom soup

Blend melted butter, flour, salt, pepper, poultry seasoning, and ½ teaspoon paprika together. Place chicken in a shallow buttered baking dish. Spread one half of the butter mixture on top of each piece. Flip over, and spread the rest on top of each piece. Bake uncovered, in a pre-heated 375 degree oven for 20 minutes. Meanwhile whisk the evaporated milk and soup together. Pour over chicken, sprinkle with paprika, and continue baking for 30 minutes or until chicken is very tender.

Side Dish Suggestions: steamed rice or mashed potatoes, simple green veggie or salad

Wine Pairing: a not too oaky Chardonnay or a crisp Sauvignon Blanc


PUTTANESCA

OLYMPUS DIGITAL CAMERA

I first had Puttanesca (Spaghetti alla puttanesca  – literally “whore’s spaghetti” in Italian) many years ago at our good friend Gaspare Tranis’ Italian restaurant. I was immediately smitten. And truthfully I don’t remember where I found this recipe or if I just played around with ingredients until I stumbled on to the taste I wanted. All I care about now is that Puttanesca is quick and easy to prepare, consists of ingredients I almost always have on hand (being the consummate replacement shopper that I am), and Mr. C. and I both truly love it. And it’s meatless! Oh I know, you could legitimately argue that Puttanesca isn’t technically meatless because of the salty little fish Mr. C. and I so dearly love. But for those of us who are trying to reduce the amount of meat (beef, lamb, pig products) in our diet, Puttanesca is in essence “meatless”. And I know what you’re thinking. Puttanesca being meatless is kind of like saying someone is just a little bit pregnant. They either are, or they aren’t! But for me, enjoying a dish that is darned close to meatless is good enough. And not being even the slightest bit pregnant is even better!!

  • ¼ c. extra virgin olive oil
  • 1 medium onion, chopped
  • 4 cloves garlic, finely chopped
  • ¼ tsp. dried red pepper flakes, or more to taste
  • 2-oz. can anchovy fillets (or 10-12 fillets)
  • 32-oz. tomato sauce
  • 18-20 kalamata olives, sliced
  • 2 T. drained capers
  • 12-oz. spaghetti, linguine, or penne pasta, cooked al dente
  • ¼ c. chopped fresh Italian parsley
  • freshly grated Parmesan cheese

In a medium covered saucepan, heat olive oil and add onion, garlic, and red pepper flakes. Sauté until garlic is just starting to brown. Add the anchovy fillets and stir them around until they are all mushed up. Add the tomato sauce, cover the pan, and simmer for about 15 minutes. Stir in the olives and capers. Remove from heat and add pasta. Cover and let sit for a couple of minutes. Sprinkle with parsley just before serving. Pass Parmesan cheese separately.

Side Dish Suggestions: a simple green salad and Focaccia or baguette slices

Wine Pairing: a rich Merlot, a bold Cabernet Sauvignon (Puttanesca can stand it), or a chewy Lemberger

BLACK BEAN PATTIES

Over the past few years I have dramatically reduced the amount of meat that Mr. C. and I eat. Now that does not mean that we are trying to give up meat (we are still carnivores to the core), it just means that our previous choices were not as healthy as they should have been. It was partly due to the times. We did after all grow up in the meat and potatoes era, and let’s face it, slapping a big old steak on the grill was easy. Add a baked potato with all the trimmings, a green veggie or salad, and a glass of red wine, and dinner is served! But we both know how to read, and every article we read about a healthy life style, indicated that we were consuming way too much protein (mainly in the form of meat) and not enough fruits and veggies. Since I do the meal planning around our household, and am reasonably intelligent (some would argue that statement, I know!) I decided to make a change in the way we approached food. (Well actually it was a change in the way I approached food. Mr. C. will eat just about anything I put in front of him!) So, I started buying less meat, adding more veggies to our diet (that didn’t make Mr. C. real happy at first) and generally thinking more about nutrition and portion control.  And I started serving main dishes with NO meat on a more consistent basis. What we found was that we didn’t miss big helping of meat as much as we thought we might. The only thing I personally missed were the little sauces I would make to go on the meat. You know the kind of sauces I mean – the lovely wine sauce or flavorful aioli or savory, creamy, gooey, or sticky “something” that lifted the meat from ordinary to outstanding! Those little sauces were and still apparently are a part of my genetic makeup. I just could not give them up. And I haven’t! Now, instead of spreading a sauce like the Cilantro Sour Cream Sauce or Roasted Red Pepper Aioli (recipes below) on a big hunk of meat, I prepare a dish like the Black Bean Patties and dollop one of my beloved sauces on them instead. Crafty little devil, aren’t I?

  • 3 T. vegetable oil, divided
  • 1 egg
  • 1 (15-oz.) can black beans, rinsed and drained
  • 8 T. dried bread crumbs or panko, divided
  • ¼ c. finely minced green onions
  • 2 T. chopped fresh cilantro
  • 1 garlic clove, minced
  • ¾ tsp. ground cumin
  • ¼ tsp. kosher salt
  • ¼ tsp. Aleppo, cayenne, or ancho chili pepper
  • freshly ground black pepper

Place 1 tablespoon of the vegetable oil, egg, and black beans in a food processor. Pulse 20 times or until mixture becomes a coarsely chopped paste. Combine bean mixture with 5 tablespoons of the bread crumbs, onions, cilantro, garlic, cumin, salt, chili pepper, and a little pinch of pepper. Form bean mixture into small patties to serve as appetizers or larger patties to serve as a vegetarian main dish. Pour remaining bread crumbs on a dish. Dredge each patty in bread crumbs. Heat remaining vegetable oil in frying pan. Add patties; cook three minutes on each side or until patties are a nice crunchy brown. Serve hot or at room temperature. Serve with Cilantro Sour Cream Sauce or Roasted Red Pepper Aioli. Thanks to Cooking Light magazine for the wonderful recipe for Blank Bean Cakes.

CILANTRO SOUR CREAM SAUCE

  • 1 c. sour cream
  • 1-2 T. heavy cream
  • 2-4 T. chopped fresh cilantro
  • ¼ tsp. kosher salt
  • freshly ground black pepper

Combine all ingredients. Refrigerate until ready to serve. 

ROASTED RED PEPPER AIOLI

  • 1/2 c. mayonnaise
  • 1 T. Dijon mustard
  • 1 clove garlic, minced
  • 1/3 c. finely chopped roasted red peppers, drained well
  • kosher salt
  • freshly ground black pepper

In a small bowl, combine the mayonnaise, mustard, and garlic. Stir in the peppers and season with salt and pepper. Cover and chill.


NOODLES ROMANOFF

IMG_5546

I have been making this pasta dish (my version of an old Betty Crocker recipe) for over 40 years. I love it. It’s rich and ever so creamy. But a dish with a name that literally smacks of Russian aristocracy absolutely demands at least a small nod to its origin. And since my blog is intended for a learned and sophisticated audience, I knew you too would be interested in any information I could glean on the subject. So off to Wikipedia I went (my favorite source for semi-accurate information on the most obscure subjects imaginable).  Like I said above, I really thought the name “Romanoff” must have something to do with The House of Romanov, which was the second and last imperial dynasty to rule (1613-1917) over Russia. But nothing I read seemed conclusive enough to point in that direction. What I did learn however, was that “Noodles Romanoff” was a gangster and head of an evil organization N.A.S.T.Y. (National Association of Spies, Traitors and Yahoos) in an animated  American children’s television comedy series that first aired in 1965. Starring Roger Ramjet and the American Eagle Squadron, the show was known for its crude animation, frenetic pace, and frequent references to popular culture, which allowed the show to entertain various age groups.

Along with the villainous “Noodles”, there was another gangster name in the series that caught my eye – Tequila Mockingbird. So once again it was off to my favorite search engine to learn if “Tequila Mockingbird” produced any results. Turns out it’s a drink containing (you guessed it!) – rum! Well no, but it does sound like a drink that could either be really, really delicious, or absolutely horrid. (I think this might be one of those drinks you either love or hate!) As there were quite a few recipes for a “Tequila Mockingbird” provided on line, I felt absolutely duty bound to pick one and share it with you. The concoction that sounds the most appealing, and not coincidentally less lethal than some of the others, contains 1 ½-oz. tequila, ¾-oz. green Crème de Menthe, and the juice of 1 lime. Shake ingredients with ice and strain into a cocktail glass. Now mind you, I have yet to try this drink, but I plan to put the resident mixologist to work in the very near future. I will let you know how it tastes, if I survive that is! And if per chance you are a fan of this drink and have the perfect recipe you are willing to share, please send me an email with preparation instructions. Can’t promise I will post your recipe, but I am always willing to perform empirical research, at least when tequila is involved! Cheers!

  • 2 T. butter
  • 2 T. flour
  • 1 ¾ c. milk
  • ¼ c. dry white wine (I use Pinot Grigio)
  • 2 T. dehydrated chopped onion
  • 1 tsp. granulated garlic
  • freshly ground black pepper
  • 1 c. low fat sour cream
  • 1 c. grated sharp cheddar cheese
  • 2-3 c. dry noodles cooked al dente

Melt the butter in a medium large saucepan. Add flour and let cook for about 2 minutes. Whisk in milk, wine, onion, garlic, and pepper. Add sour cream and bring just to a boil. Remove from heat and stir in cheese and cooked noodles. Serve immediately or spoon into a buttered casserole and keep warm in the oven set on the lowest temperature.

Side Dish Suggestion (if serving as a Main Dish): green salad, steamed veggie, and a crusty baguette

Wine Pairing: Well that should be obvious – the rest of the Pinot Grigio you used in the recipe!