Category Archives: MAIN DISH RECIPES

RACK OF LAMB WITH KALAMATA-ROSEMARY CRUST

There are few words that light up Mr. Cs eyes like the word “lamb”. He loves lamb just about any old way. But this recipe for rack of lamb that I adapted from an R.S.V.P. request in Bon Appétit a few years ago is one of his favorites. Mine too! In fact, I have never served it to anyone who hasn’t been absolutely charmed. Truly, what’s not to like? Rosemary, I’m convinced, was considered just a weed until someone paired it with lamb. And hearty red wine, you have a better use for it? And Dijon mustard, who ever invented it must have had lamb in mind. So you combine these three wonderful items with a few others simpatico ingredients and you are about to experience the real reason God gave us all those sheep to count!

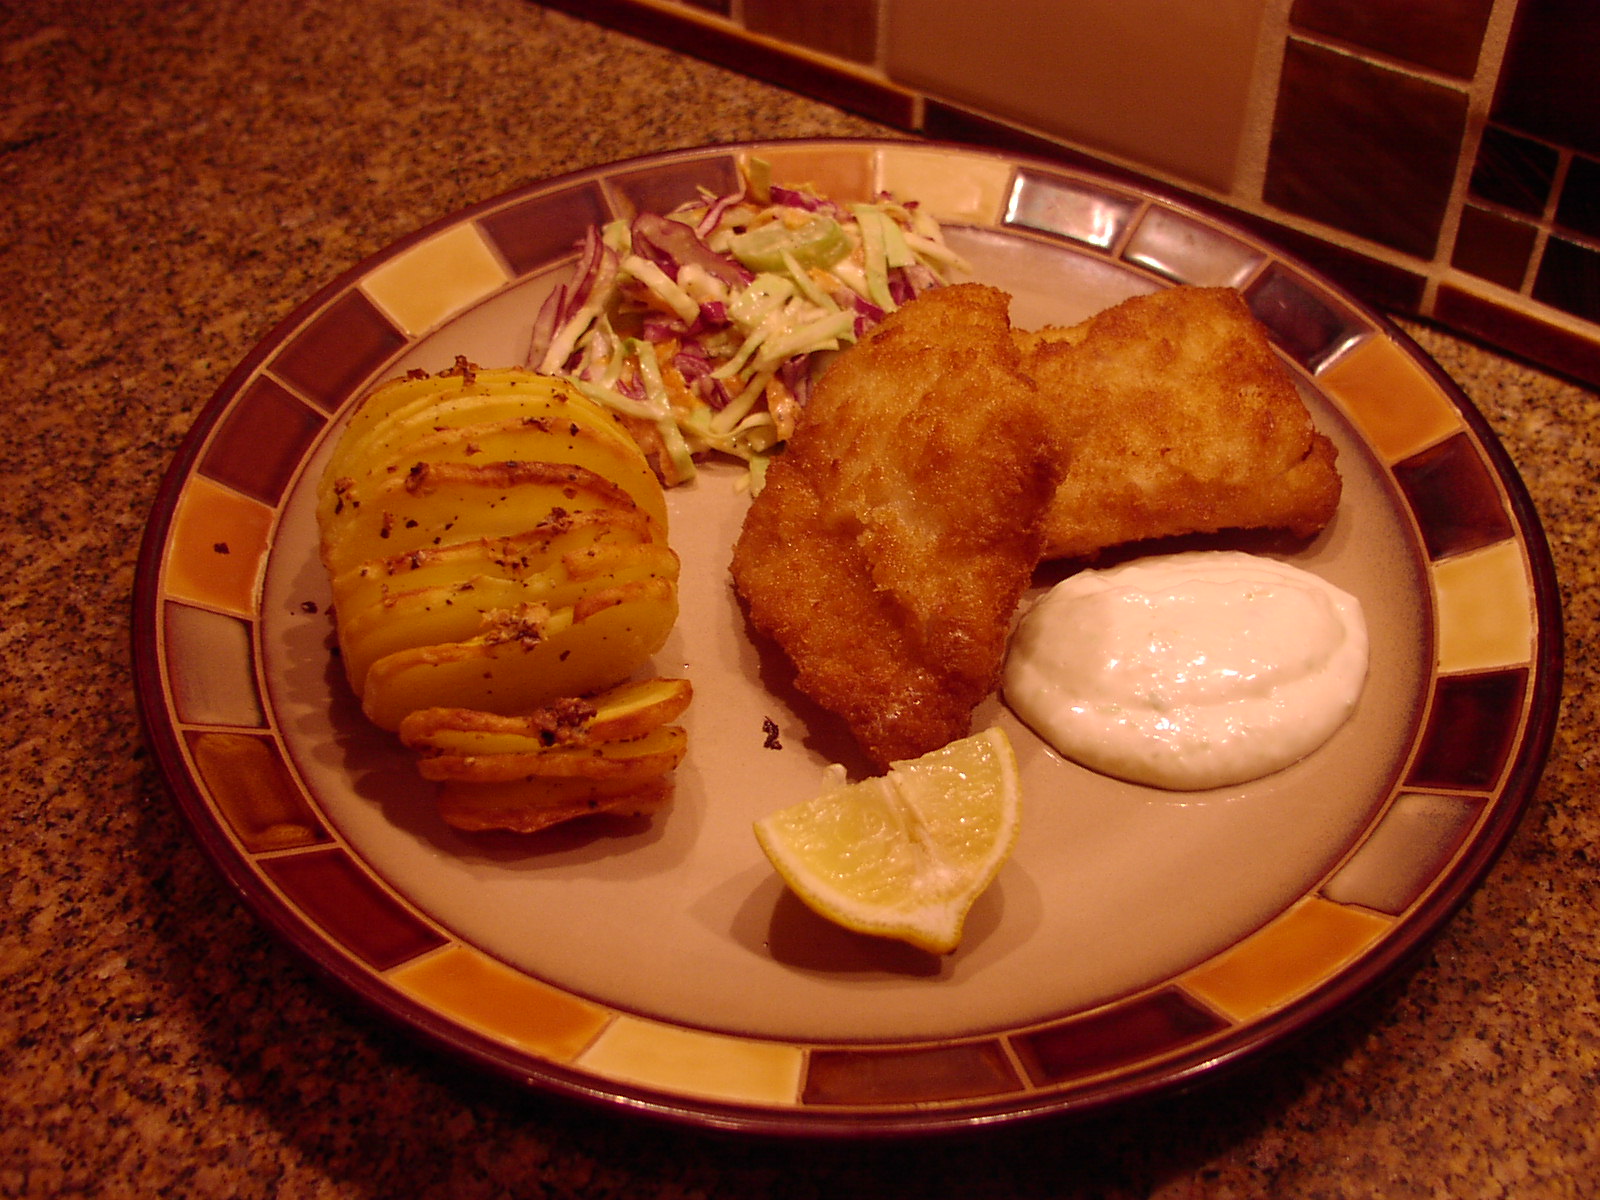
So, if you are looking for something different and wonderful to serve on Christmas or for any other special occasion, this is the recipe for you. Just keep your side dishes fairly plain. Although a lovely rich cheesy potato gratin is very festive, it would not be as good with the rack of lamb as plain roasted potatoes. And a simply prepared dish of green beans or peas would be my choice for a veggie. Believe me the lamb is rich enough to carry the whole meal. Plan on 2-3 rib chops (we call them lamb lollypops) per person. Two racks of lamb are perfect for 4 people with maybe a couple left over if you’re lucky. (I personally have never been that lucky, but I’m sure the day will come. Probably the same day donkeys fly to the North Pole to visit Santa!)

  • 1 c. Demi-Glace (under This & That) or 4 c. low sodium beef broth reduced to 1 cup
  • ¼ c. dry red wine (like a hearty merlot)
  • 3 garlic cloves, minced
  • 1 bay leaf
  • 1 ½  tsp. chopped fresh rosemary, divided
  • kosher salt
  • freshly ground black pepper
  • 2 T. extra virgin olive oil, divided
  • 1 lg. shallot, minced
  • 3/4 c. dried breadcrumbs
  • ½ c. finely chopped kalamata olives (about 4-oz.)
  • 2 racks of lamb, room temperature (remove from refrigerator about 2 hours before needed)
  • 2-3 tsp. Dijon mustard (depending on size or the racks)

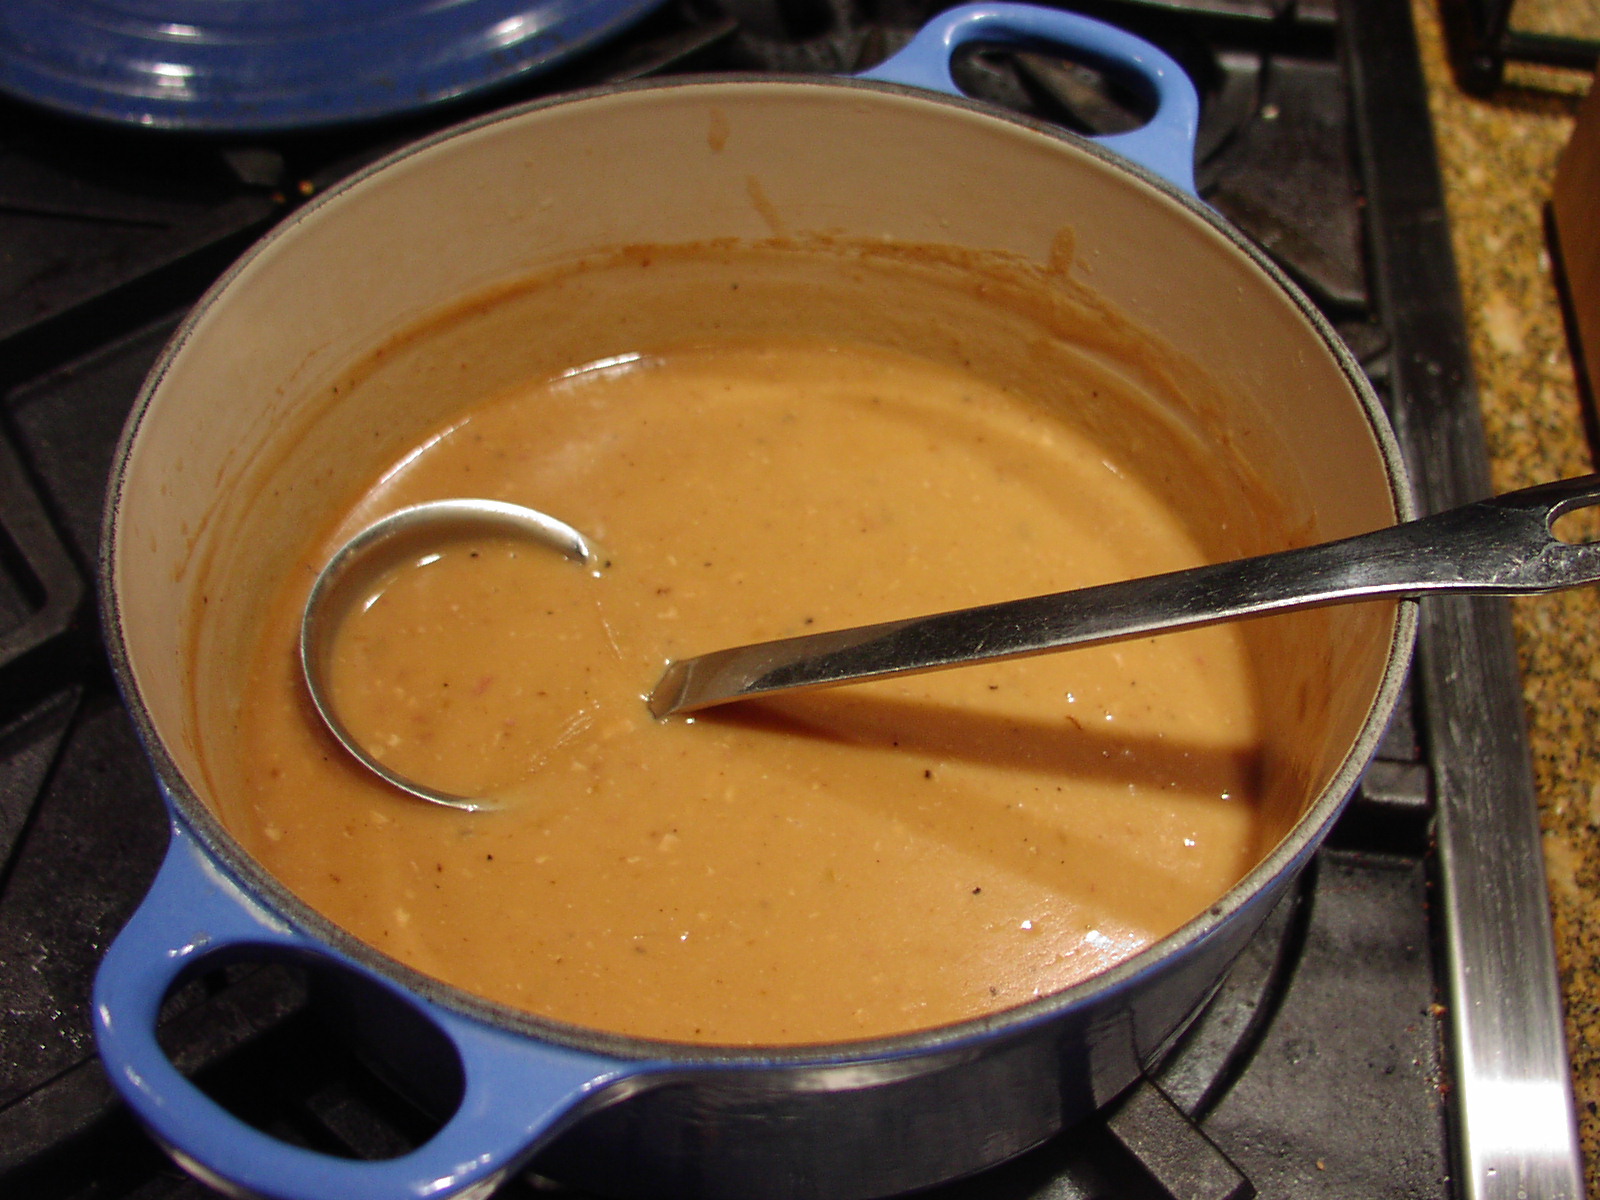
Sauce: Combine the demi-glace (or reduced beef broth), red wine, garlic, bay leaf, and ½ teaspoon chopped rosemary together in a small heavy saucepan. Bring to a boil, partially cover, and simmer on low for about an hour or until reduced and thickened. (Watch carefully during this time.) Season the sauce lightly with salt and pepper. Set aside until the lamb is ready to serve. Can be made ahead of time.

Breadcrumb Mixture: Meanwhile heat 1 tablespoons olive oil in a large heavy fry pan. Add shallot and remaining teaspoon of rosemary; sauté until soft, about 3 minutes. Add breadcrumbs and sauté until well blended. Stir in kalamata olives and lightly salt and pepper to taste. (Don’t over salt because other ingredients, like the olives themselves and the Dijon mustard also contain salt.) Remove mixture from pan and set aside.

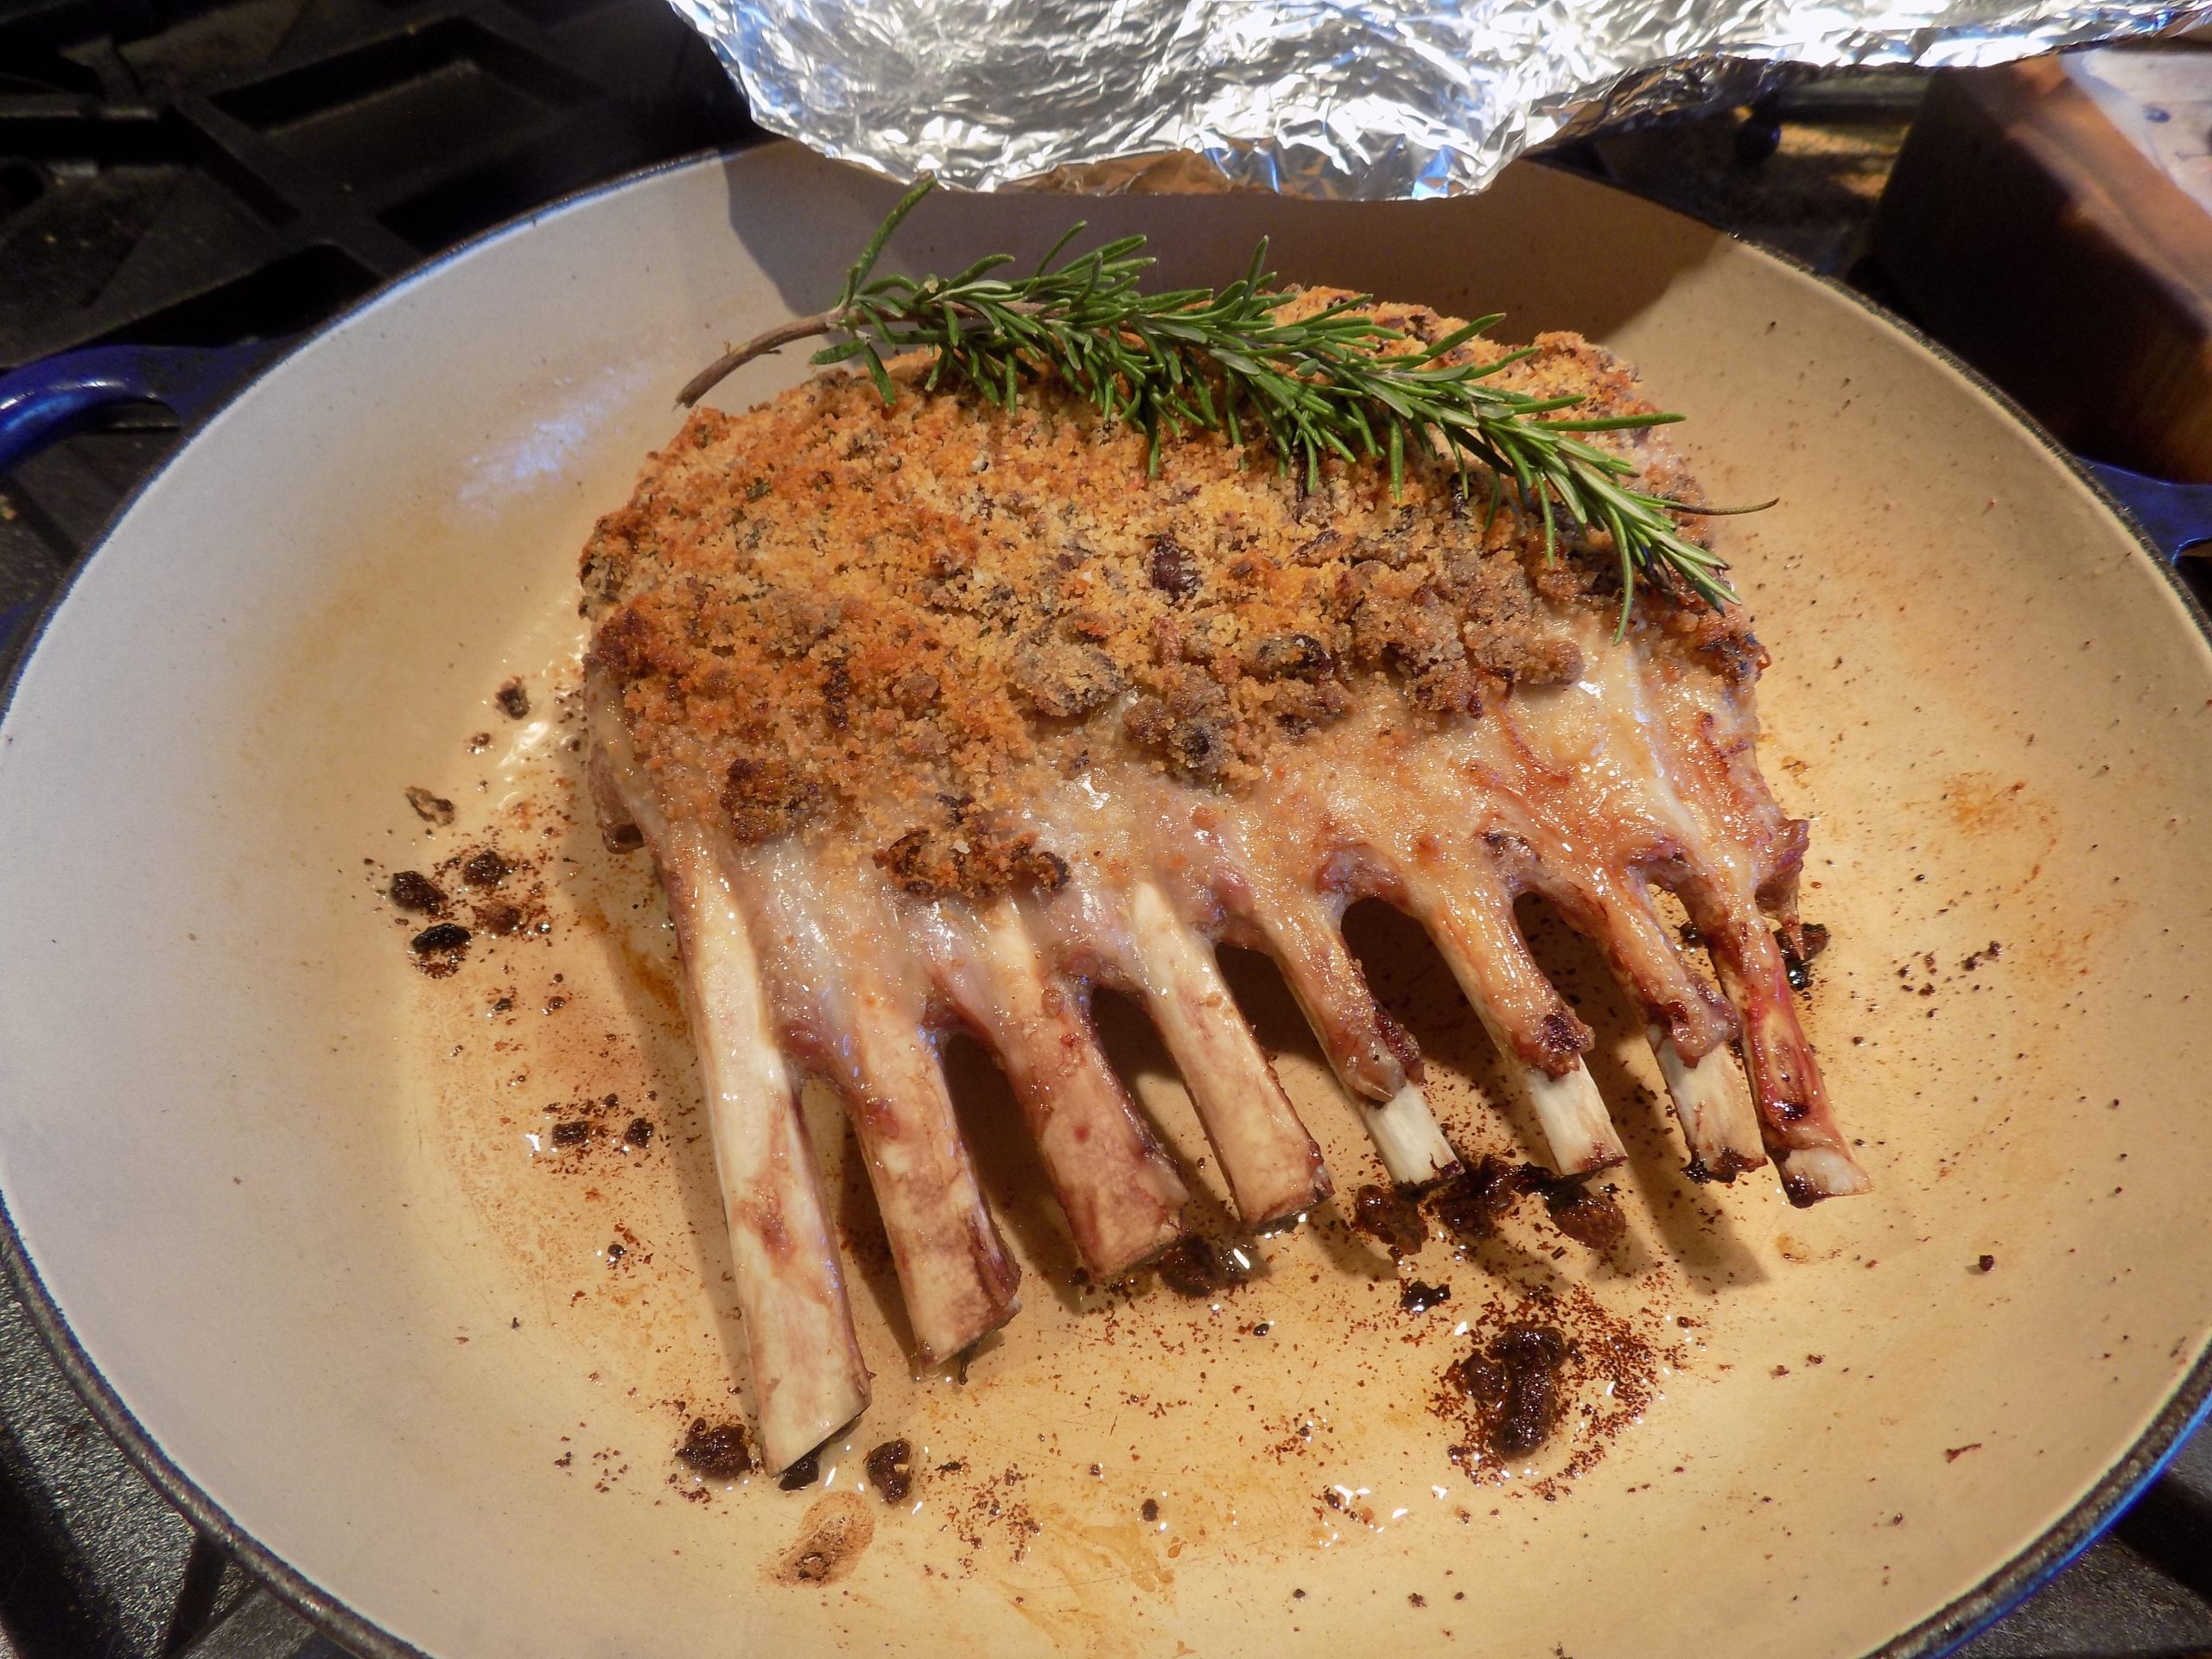
Lamb preparation: Add remaining 1 tablespoon olive oil to pan. Fry racks of lamb rounded side down until evenly brown, about 5-6 minutes. Transfer to a large rimmed baking dish or pan, seared side up. Spread with Dijon mustard. Press reserved bread crumb mixture onto lamb. Roast lamb in a pre-heated 400 degree oven for 12-15 minutes or until a meat thermometer inserted into the thickest part of the meat registers 125 degrees for rare or 135 for medium rare. Remove from oven and loosely tent with aluminum foil for 6-8 minutes. Cut lamb between bones and serve with reserved sauce.

Great served with simple oven roasted potatoes, a green vegetable, fresh fruit salad, chewy bread, and the rest of the bottle of merlot. (If it’s still around that is!)


CRISPY SKINNED ROAST CHICKEN AND GRAVY

OLYMPUS DIGITAL CAMERA

For those of you who are addicted to chicken the way I am, there is just nothing that compares with a lovely roasted chicken with creamy rich gravy served over mashed potatoes and/or my Cornbread Dressing. Add a green veggie, Waldorf Salad with Dried Cranberries and Orange Zest, and dinner rolls, and you have a meal that will help you celebrate any special occasion in style. And coincidentally, will not break the bank or your budget.

For many people, the thought of massive amounts of leftovers after a large holiday dinner is overwhelming. With this fowl recipe (and yes, I got the spelling correct and the usage right if you consider that “fowl” is now used in colloquial speech to be nearly synonymous with “poultry”) you are almost guaranteed to have very few if any leftovers.

So treat yourself to this lovely roasted chicken anytime you want comfort food or to help celebrate a special occasion. In our house, any night we are actually home for dinner is a special occasion! Perhaps it’s time to slow down a wee bit. Yah think!?

  • 1 whole small chicken (4 1/2 – 5 lbs.)
  • 2 T. butter, room temperature
  • 1 ½ tsp. seasoned salt
  • freshly ground black pepper (just a couple of grinds)
  • 1/2 tsp. cornstarch (yep, cornstarch – it helps crisp the skin)
  • 2-3 (6-inch) sprigs fresh rosemary
  • ½ onion, rough chopped
  • 2 garlic cloves, rough chopped
  • 1 small lemon, rough chopped
  • 2-3 c. chicken broth, divided

Pat chicken dry with paper towels. Combine the butter, seasoned salt, pepper, and cornstarch together in a small bowl. Set aside. Stuff the cavity with rosemary, onion, garlic, and lemon. Tie legs together with kitchen twine.

Place chicken, breast side up, on rack in a low sided roasting pan or large oven proof frying pan. (You don’t want to use a Dutch oven or any other tall sided pan because you want the air to circulate freely around the bird as it bakes.) Tuck wings under. Rub the seasoned butter all over the skin of the chicken.

OLYMPUS DIGITAL CAMERA

Pour 1 1/2 cups of the chicken broth in the bottom of the pan. (Not only will the liquid absorb any fat drippings off the bird thus preventing a smoky, messy oven, it will form the base for your gravy.)  Roast for 30 minutes in a pre-heated 450 degree oven. Remove from oven, and add another 3/4 cup of chicken broth (or more if the pan was completely or almost dry). Return to oven, rotating pan. Roast until chicken juices run clear and an instant-read thermometer inserted into the thickest part of a thigh reaches 175 degrees, about 45 minutes more. Remove from oven and move chicken to a platter. Tent with aluminum foil and let rest for at least 15 minutes before carving. If you want gravy to serve with your roast chicken, see recipe below.

CREAMY CHICKEN GRAVY

OLYMPUS DIGITAL CAMERA

  • pan drippings from roasted chicken
  • flour
  • chicken stock
  • heavy cream or milk
  • ½-1 tsp. Kitchen Bouquet
  • freshly ground black pepper
  • 1-2 chicken gravy mixes (just in case)
  • 1-2 tsp. cognac, opt.

Place the roasting pan on the stove after the chicken has been removed. Turn the heat to very low and begin making your gravy immediately. (Good gravy flavor and consistency require time to develop.)    Do not remove any fat from the pan, do not strain the liquid, do not do any of the things most cook book writers tell you to do to make good gravy (except me, that is!)

Whisk in enough flour to absorb the fat. Let burble for a couple of minutes. (This process takes time, so be patient.) Slowly whisk in equal parts chicken stock and cream (or any combination you prefer) until you reach the desired thickness you like. Add the Kitchen Bouquet (gives the gravy great color) and some freshly ground black pepper. No salt yet! Taste the gravy. If you think it needs more depth of flavor, begin by adding one of the gravy mixes and a small amount of stock. Let it simmer for a couple of minutes and taste again. Add salt at this time if needed.

Turn heat as low as possible and let the gravy simmer away for the next 10 minutes or so, whisking periodically. (You will probably need to add more stock during this time.) Also, after the chicken is sliced and plated, don’t forget to add the juices that have accumulated to the gravy.

Just before serving (and gravy should be the last item plated), taste the gravy and make any final adjustments to the seasoning. Stir in the cognac and serve piping hot.

HERB CRUSTED PORK LOIN ROAST WITH FIGS AND PORT

Since it’s just a couple of days before Thanksgiving, it’s once again time to start thinking about Christmas. (Like the Christmas decorations that have been up in stores since before Halloween could let anyone forget that Christmas is just around the corner!) But until about this time of year, I try real hard not to get hooked into the whole Christmas “thing”.

Now don’t get me wrong. I love Christmas, but not until after Thanksgiving. And no, I am not one of those people who spend the Friday after Thanksgiving spending thousands of dollars at the local mall. There actually isn’t enough money to get me to even go to a mall on the day after Thanksgiving. I’m just too old and dislike people enough to want no part of that scene. And no, I don’t really dislike people, but you know what I mean!

Anyway, the whole point of this rant is to tell you that I am starting a series on Christmas recipes, many of which, like this recipe for pork roast, are perhaps not traditional Christmas dinner fare, but are never-the-less delicious and fairly inexpensive to serve to a crowd. And since I’m sure you too have noticed that Christmas is an expensive holiday, I hope one or more of these recipes can help you serve up a wonderful holiday meal without spending too much of your children’s college fund or inheritance.

So this year instead of ordering that fabulous spiral cut ham, serve this delicious and festive pork loin roast. Your guests will love how succulent the meat is, and the sauce and drizzle are simply amazing. Trust me, no one will miss the spiral cut ham or feel somehow cheated by its absence. And you – you may be able to eat the rest of the month!

  • 1 T. extra virgin olive oil
  • 1 T. chopped fresh rosemary leaves
  • 2 tsp. kosher salt, divided
  • freshly ground black pepper
  •  1 (2-3 lb.) boneless pork loin roast
  • 2 c. chicken broth, divided
  • 1 ¼ c. port
  • 4 dried mission figs or 2 dried Turkish figs
  • 1 sprig rosemary
  • ½ stick cinnamon
  • 1 ½ tsp. honey
  • 2 T. butter

Stir the oil, rosemary, 1 ½ teaspoons salt, and pepper in a small bowl to blend. Place the pork loin in a heavy roasting pan. Spread the oil mixture over the pork to coat completely. Roast in a pre-heated 425 degree oven until an instant-read meat thermometer inserted into the center of the pork registers 145 degrees, turning the pork every 15 minutes to ensure even browning, about 45 minutes total. Meanwhile, in a heavy medium saucepan, combine ¾ cup chicken broth, port, coarsely chopped figs, rosemary sprig, cinnamon stick, honey, remaining ½ teaspoon salt, and pepper. Boil over medium-high heat until reduced by half, about 30 minutes. Discard the herb sprig and cinnamon sticks (some of the rosemary leaves will remain in the port mixture). Transfer the mixture to a blender and puree until smooth. Blend in the butter. Season the sauce to taste with salt and pepper. (The sauce can be made 1 day ahead. Cover and refrigerate. Re-warm over medium heat before using.) When the pork has reached the desired temperature, transfer to a cutting board and tent with foil to keep warm. Let the pork rest at least 15 minutes. Meanwhile, stir the remaining 1 ¼ cup chicken broth into the roasting pan. Place the pan over medium heat, and scrape the bottom of the pan to remove any browned bits. Bring the pan juices to a simmer. Adjust seasoning and reduce sauce by about a half. Cut the pork crosswise into 1/2-inch thick slices. Arrange the pork slices on plates. Spoon the jus over. Drizzle the warm fig sauce over and around the meat and serve immediately. Thanks Giada for another wonderful recipe. This roast is lovely served with Refrigerator Mashed Potatoes, Creamy Caramelized Pearl Onions and Petite Peas, and Waldorf Salad with Dried Cranberries and Orange Zest.


HERB SALTED TURKEY WITH COGNAC GRAVY

OK, you got to know that I have roasted a lot of turkeys in my day. From my first days of roasting turkeys until about 15 years ago I baked my Thanksgiving and Christmas turkeys in a brown paper bag. Many a great turkey was roasted this way, by-the-way.  (I even tried this method one year at our cabin. Suffice it to say that it is not a good idea to use a brown PAPER bag in the oven of a wood burning stove! Duh!) But that’s a story for another time…………

Then a few years ago brining turkeys became the rage. And of course I had to give that method a try. And yes indeed, brining a turkey creates a flavorful, tender and succulent bird. Absolutely no doubt about it. And that’s how I prepared my turkeys for the next several years. But brining a turkey is a pain in the bucket. So when I found this recipe in the November 2008 issue of Bon Appétit, I decided what the heck, if it’s good enough for Bon Appétit, it should be good enough for me and mine!

Well boy howdy, I about flipped when I tasted the melt-in-your-mouth meat. And the gravy! Now I pride myself on being able to make good gravy (my friend Jim says it’s because of the grandma gene), but my old standby recipe went into overdrive when I used the juices and fat from the herb salted bird. It simply was the best turkey gravy I had ever prepared, let alone tasted!

And salting a bird, rather than surrounding it in brine is so very easy. And the effect is the same – juicy, flavorful meat. Can you ask for more than that? Well yes you can. Gravy from heaven! And I am here to help you with just that very thing.

So fasten your seat belts and prepare to read about making sensational and easy turkey and gravy for your family and friends. And if you decide to give it a try, I am confident you will not be disappointed. Happy Thanksgiving.

Herbed Salt Ingredients:

  • 1/3 c. + 1 T. kosher salt
  • 1 ½ tsp. dried rosemary
  • 1 ½ tsp. dried sage
  • 1 ½ tsp. dried thyme
  • 1 tsp. black peppercorns, crushed
  • 3 bay leaves, coarsely chopped
  • 1 lemon

Turkey Ingredients:

  • 14-16 lb. fresh turkey (there really is a difference)
  • 1 lg. onion, chopped
  • 1 celery stalk, chopped
  • 1 tsp. dried rosemary
  • 1 tsp. dried sage
  • 1 tsp. dried thyme
  • ½ c. melted butter
  • 2 c. chicken stock
  • 3 c. turkey stock, or more if needed (recipe below)

Turkey Stock Ingredients:

  • 1 turkey drumstick or 2 to 3 turkey thighs (get yours early and freeze, because it’s darn near impossible to find these just before Thanksgiving)
  • reserved neck and giblets
  • 2 qt. chicken stock
  • 2 qt. water
  • 1 onion, rough chopped
  • 2 carrots, cut into large chunks
  • 2 garlic cloves
  • 3 stalks celery, cut into big chunks (don’t use the leaves – you want them for the dressing)
  • 2 bay leaves
  • 3 T. dried parsley
  • 1 tsp. dried thyme
  • 6 peppercorns
  • 1 tsp. kosher salt

Herbed Salt Directions: Combine salt, rosemary, sage, thyme, peppercorns, bay leaves, and zest from lemon. (Chop the rest of the lemon and refrigerate until ready to bake the turkey.) Rinse the turkey but don’t pat dry. (Save the neck and giblets for the Turkey Stock you are going to make Thanksgiving morning.)  Sprinkle herbed salt on the inside and outside of the turkey. Place in two small garbage bags, set inside a container and refrigerate 18-20 hours.

Roasting the Turkey Directions: Just before baking, wash the bird and pat dry. In a small bowl, combine the onion, celery, rosemary, sage, thyme, and reserved chopped lemon and stuff into the cavity of the bird. Place the turkey on a rack inside a large roasting pan. Slather with some of the butter. Pour 2 cups of chicken stock in the bottom of the pan and bake for 45 minutes in a pre-heated 325 degree oven. Baste the bird with more butter and add turkey stock (by this time you can use your own homemade stock) to the bottom of the pan. (The pan should not be allowed to go completely dry.) Continue basting the bird and adding stock to the pan every 30-45 minutes or so until the turkey thigh reaches an internal temperature of about 170 degrees. This should take about 4-4 ½ hours. (If the bird gets too brown after a couple of hours, cover with aluminum foil for the remainder of the baking time.) Carefully remove the turkey from oven when done, remove to a platter, cover with aluminum foil, and allow to cool at least 45 minutes before slicing. Make gravy (see below) while the bird is resting.

Turkey Stock Directions: If you have a second oven, or make your stock ahead of time, spread the turkey parts out on a rimmed baking pan. Bake in a 400 degree oven for 1 hour or until the meat is well browned. (If you don’t have a 2nd oven, place the raw turkey parts in the bottom of a large soup pot.) When the bones are out of the oven, place them in the bottom of a large soup pot. Pour a little water onto the baking pan, and allow to sit and cool for a few minutes. Then carefully pour the water and as much of the brown stuff that was stuck to the bottom of the pan on top of the meat. Add all the remaining ingredients, bring to a boil, reduce heat, cover pan and let simmer gently while your turkey bakes. Use as needed for baking the turkey. Use remaining turkey stock for gravy.

TURKEY COGNAC GRAVY:

All is fair when it comes to making gravy. And truly great gravy starts with the pan drippings left in the bottom of the roasting pan after the turkey has been removed to cool. (And yes, we are talking cholesterol city here, but once or twice a year, leave your worries behind and travel to the dark side!)

  • pan drippings from roasted turkey
  • flour
  • turkey or chicken stock
  • 2 tsp. Kitchen Bouquet
  • freshly ground black pepper
  • 2-3 turkey gravy mixes (just in case)
  • 2-3 tsp. cognac

Place the roasting pan on the stove after the turkey has been removed. Turn the heat to very low and begin making your gravy immediately. (Good gravy flavor and consistency require time to develop.) Do not remove any fat from the pan, do not strain the liquid, do not do any of the things most cook book writers tell you to do to make good gravy (except me, that is!).

Whisk in enough flour to absorb the fat. Let burble for a couple of minutes. (This process takes time, so be patient.) Slowly whisk in turkey or chicken stock until the gravy reaches the desired thickness you like. Add the Kitchen Bouquet (gives the gravy great color) and some freshly ground black pepper. No salt! Taste the gravy. If you think it needs more depth of flavor, begin by adding one of the gravy mixes and a small amount of turkey stock. Let it simmer for a couple of minutes and taste again. Repeat if needed.

Turn heat as low as possible and let the gravy simmer away for the next 30 minutes or so, whisking periodically. (You will probably need to add more stock during this time.) Also, after the turkey is sliced and plated, don’t forget to add the juices that have accumulated to the gravy.

Just before serving (and gravy should be the last item plated), taste the gravy and make any final adjustments to the seasoning. Stir in the cognac and serve piping hot.

Note: if the gravy seems a little salty, you might try adding a teaspoon or two of fresh lemon juice.


CHICKEN AND DUMPLING STEW

There are few foods as comforting to eat as chicken and dumplings. Every time I make this dish I am transported back to my childhood when chicken was the featured meat almost every Sunday. My grandmother was the queen of frying chicken and also of a dish she called Southern fried chicken. Her version of southern fried chicken started with chicken perfectly fried in lots of butter.  Then she adding cream, covered the pan, and baked it for 30-40 minutes. And on the rare occasions when she made dumplings to go on top of the creamy sauce, I was one very happy little girl.

Well now that I’m older than my grandmother was when she was preparing this dish, and much more aware of calories, cholesterol, and the importance of using less protein and more veggies in dishes, I came up with this recipe. It will never replace my grandmothers’ butter and heavy cream laden sauce, nor will the chickens I cook ever be as fresh or flavorful. (My grandparents sold eggs for a living, so the chickens we ate were grain fed, free to roam in a fairly large chicken house, and killed only a couple of hours before being cooked.) But regardless, the flavor of the sauce in this recipe is both rich and savory. The addition of fresh parsley and thyme to the dumpling batter help make them savory too. Plus the addition of corn meal adds a bit of density to the dumpling batter which prevents the cooked dumplings from having that “not-quite-done” consistency.

So next time you are feeling like a little comfort food is in order, prepare this easy and fairly inexpensive dish. Your family will love it! And although you might feel that a salad or something else is necessary to serve along with the stew, resist the urge. After all, you have all the basic food groups (except chocolate of course) covered in this one pot meal. Remember we are talking comfort food here, and you deserve a little comfort too. So instead of building a salad, have a glass of wine. I promise you no one will miss the salad, but you will miss out on the whole “comfort food experience” if you make the meal complicated. Use the KISS principle. Keep It Simple Sweetie!

Stew:

  • 3 large boneless skinless chicken breasts cut into large bite-sized pieces
  • kosher salt
  • freshly ground black pepper
  • 1/4 c. all-purpose flour
  • 2 T. butter
  • 2 T. extra virgin olive oil
  • 1/2 c. finely diced carrots
  • 1/2 c. finely diced celery
  • 1 medium onion, finely diced
  • 1/2 tsp. dried thyme, crumbled
  • 1/8 tsp. turmeric
  • 1 tsp. poultry seasoning
  • 1 bay leaf
  • 1/2 c. white wine (I use Pinot Grigio)
  • 4 c. chicken broth
  • 1/2 c. heavy cream
  • 2 tsp. + 1 T. minced fresh parsley

Dumplings:

  • 3/4 c. all-purpose Flour
  • 1/4 c. yellow cornmeal
  • 2 tsp. baking powder
  • 1 tsp. kosher salt
  • ¼ tsp. dried thyme, opt.
  • 3/4 c. half-and-half

Sprinkle chicken pieces with salt and pepper. Place flour in a re-sealable plastic bag and add the chicken pieces. Seal the bag and turn the bag several times until the chicken is completely coated with flour. Melt the butter and olive oil in a pot over medium-high heat. Brown the chicken pieces, remove from pan and set aside.

In the same pot, add the diced onion, carrot, and celery. Stir and cook for 3 to 4 minutes over medium-low heat. Stir in the dried thyme, turmeric, poultry seasoning, bay leaf, and white wine. Cook until the white wine is reduced to about 1 tablespoon. Add the chicken broth and cover pot; simmer for 20 minutes, stirring occasionally.

While the gravy is simmering, make the dough for the dumplings: sift together all dry ingredients and gently stir in the 2 teaspoons parsley, thyme, and the half-and-half. Set aside.

After the gravy has simmered for 20 minutes, add the cooked chicken, heavy cream, and remaining 1 tablespoon of parsley; stir to combine. Adjust seasoning.

Drop tablespoons of dumpling dough into the simmering pot. Cover pot halfway and continue to simmer on low for 15 minutes. Remove from heat, completely cover pan and allow to sit for 10 minutes before serving.

EASY FRIDAY NIGHT FISH FRY!

OLYMPUS DIGITAL CAMERA

To me, there is just nothing better for dinner on a fall or winter Friday night than fish and chips. But I don’t always want to go out for fish, and really, I would prefer not to be tempted by the “chips” that are always a part of the package. So that leaves me with making my own “fish and chips”.

We also love to have dinner companions on Friday nights, so this is my win/win way to entertain and have my favorite Friday night meal. The amounts shown are perfect for 4 normal people.

Even though I am retired, I still like to do a lot of the prep work ahead of time. So the following recipes are designed to take Friday night time constraints and exhaustion levels into consideration.

Although the fish preparation steps need to be done Friday night, the tartar sauce can and actually should be prepared the night before. Also, the dressing for the coleslaw is better if it has time to let its ingredients mingle for awhile. And the cabbage and other veggies can be cut or grated the night before and refrigerated until needed.

So that just leaves the potatoes to get in the oven before you start working on the coleslaw and fish.  And both the coleslaw (mix the dressing into the veggies) and the fish preparation could not be easier.

A little hint: A nice before dinner drink helps a great deal towards making this process run smoother. Even if you don’t drink adult beverages, a simple tonic with a slice of lime makes you feel like the party has already begun.

And because it’s Friday night, and both you and your guests are probably one step from zombie level, forget making any fancy appetizers. Put out a small bowl of olives or nuts, and a couple kinds of raw veggies, and call it good. It’s Friday night people. Time to relax so that you have the strength for all those weekend chores!!

CRISPY FRIED FISH

  • 1/3 c. all-purpose flour
  • 2 tsp. seasoned salt
  • 1 egg
  • 1/4 c. dark beer or water
  • 1 c. panko or more as needed
  • oil for frying
  • 1 1/2 – 2 lb. fish fillets (we love cod, halibut, and tilapia)
  •  lemon wedges, opt.

In a shallow dish, combine the flour and seasoned salt. In medium bowl, whisk
together the egg and beer. Place panko in a large re-sealable food-storage
plastic bag. In an electric skillet or deep fryer, heat about an inch of oil to 350 degrees. Coat both sides of the fish with flour mixture. Then dip in beer mixture, letting excess drip back into bowl. Place 1 or 2 pieces of fish at a time in the plastic bag with panko; seal bag and shake to coat completely. Fry fish in batches in hot oil for about 4 minutes, turning once, until golden brown. Drain on paper towels. Serve hot.

IVAR’S FAMOUS TARTAR SAUCE

  • 2 T. chopped yellow onion
  • 1 T. chopped green bell pepper
  • 1 ½ tsp. plain old fashioned white vinegar
  •  ¾ tsp. sugar
  • ¼ tsp. kosher salt
  • 1 T. dill pickle relish
  • 1 c. mayonnaise

Combine the onions, bell pepper, vinegar, sugar, and salt in a food processor; process for 10 seconds. Add the relish and mayonnaise and process for an additional 10 seconds. Serve chilled. Best made at least a day ahead.

CLASSIC COLESLAW

  • 2/3 c. mayonnaise
  • 1/4 c. minced onion
  • 3 T. minced dill pickle
  • 2 T. pickle brine
  • 2 T. old fashioned white vinegar
  • 2 tsp. prepared creamy horseradish
  • 1 T. sugar
  • 1/2 tsp. kosher salt
  • freshly ground black pepper
  • 4 c. shredded green cabbage
  • 2 c. shredded red cabbage
  • 1 large grated carrot
  • 1 celery stalk, sliced lengthwise, then cut into very thin slices on the bias

Whirl the mayonnaise through black pepper in a food processor. Prepare at least 1 day ahead, if possible. Combine with veggies about an hour before serving.

ACCORDIAN BAKED POTATOES (HASSELBACK) – from the Relish Section of The Seattle Times

  • 2 T. butter, melted
  • 1 garlic clove, finely minced
  • ½ tsp. kosher salt
  • freshly ground black pepper
  • 4 medium sized Yukon Gold potatoes, peeled

Combine butter, garlic, salt, and pepper. Slice potatoes crosswise, leaving about ½-inch at bottom still attached. (Place pencils on each side of the potatoes when cutting to ensure you don’t slice all the way through.) Using a pastry brush, coat the potatoes with butter mixture, carefully working it between the slices and coating all sides. Place potatoes on a rimmed baking sheet and bake in a pre-heated 375 degree oven for about 60 minutes or until golden brown, crispy, and soft when pierced with a fork. Serve immediately.

SPICY CHICKEN CHOW MEIN WITH SOFT NOODLES

Mr. C and I recently attended a birthday party for our good friend Dave. Dave (I never use last names, but he knows who he is) was turning 60. Poor old guy! And among the guests were our good friends Larry and Clay.

Clay and I started talking about food, (what a surprise!) and he asked me if I had a good chow mein recipe. (He and Larry love to go out for Chinese food, but sometimes they just want to stay home, but still be able to enjoy one of their favorites.) I told Clay my cooking repertoire was sorely lacking in the Asian food department. But I told him I would look into chow mein and see what I could find.

Turns out recipes on the internet for chow mein are as abundant as recipes for spaghetti and meatballs. And since I have been concentrating lately on Italian cuisine, I thought I would try a recipe for chow mein from a chef who has some Italian ancestry. (Why a chef with Italian heritage you ask? All I can say is that it made sense at the time! Maybe it was the noodle part.) Anyway, I made a few changes to Guy Fieri’s recipe for Hong Kong Style Noodles with Chicken. And because Mr. C and I enjoyed it so much, I decided to post the recipe right in the middle of my series on Italian cuisine. (Again, it must be the noodle part. That’s the only thing that makes even a semblance of sense to me!) But regardless, this is truly a wonderful recipe and I wanted to share it with you as soon as possible.

To my thinking, the chili garlic sauce in the marinade gives the chicken just the right amount of spiciness. Enough to get your attention, but not enough to beat up your taste buds. (I don’t really appreciate having my mouth set on fire, but if you do, by all means add more chili sauce or even some crushed red pepper flakes.)

If you are a true devotee of Chinese food, you know that some chow mein recipes have a high fat content. I have reduced the amount of fat in this recipe to the lowest amount I feel is reasonable. Another thing you should know is that the “planned-overs” were just as good as the chow mein fresh off the flame. (You just can’t ask for more than that!)

So next time you get a hankering for a relatively simple to prepare, economical, and tasty alternative to going out for “the real thing”, give this recipe a try.   个饱 Gè bǎo

  • 6 T. soy sauce, divided (low sodium is fine, as is Tamari or GF Tamari)
  • 2 T. minced fresh ginger
  • 2 garlic cloves, minced
  • 2 T. chili garlic sauce (use less if you don’t like spicy chow mein)
  • 4 T. cornstarch, divided
  • 2 skinless boneless chicken breasts, cut 1/4-inch slices (or pork, shrimp, or beef)
  • 3 T. vegetable oil, divided
  • 3 T. hoisin sauce
  • 1 tsp. sesame oil
  • 1 1/2 c. chicken stock
  • 1 small carrot cut into 1/4-inch sticks
  • 2 stalks celery, cut into ½-inch bias-cut chunks
  • ½ medium sized onion, sliced 1/8-inch
  • 1 red pepper cut into 1/4-inch strips
  • 2 c. sliced mushrooms (I like part button and part shiitake)
  • 4 oz. snow peas, 1/2-inch bias cut strips
  • 8 oz. mung bean sprouts
  • 8-10 ounces chow mein noodles, cooked al dente (follow instructions on the package)
  • 1/2 c. bias cut green onions, garnish

In a re-sealable plastic bag add 3 tablespoons of the soy sauce, ginger, garlic, chili garlic paste, and 2 tablespoons of the cornstarch; mush together thoroughly. Add the chicken and marinate for 90 minutes. Meanwhile, whisk together the hoisin sauce, sesame oil, chicken stock, remaining 2 tablespoons of cornstarch, and the remaining 3 tablespoons of soy sauce in a medium sized bowl. Set aside.

In a large sauté pan or wok (I use a very large non-stick pan because less oil is required), heat 2 tablespoons of the vegetable oil to almost the smoking point and add chicken, separating each piece after you get all of the chicken in the pan. Cook chicken until just browned on both sides. (Do not overcook.) Remove to a small bowl and set aside.

In the same pan, heat the remaining 1 tablespoon vegetable oil and add the carrot and celery. Sauté for 2 minutes then add the onion, red pepper, and mushrooms and sauté for 2 more minutes. Finally add the snow peas, and bean sprouts. Stir in the chicken broth mixture and let burble until sauce thickens. Stir in the cooked chicken and cooked noodles. Adjust seasoning. Serve immediately sprinkled with green onions.

Note: If you prefer rice to noodles, just prepare the sauce and serve over steamed rice. For gluten free – use GF Tamari and serve over steamed rice.


SPAGHETTI WITH FRESH CLAMS AND MUSSELS

OLYMPUS DIGITAL CAMERA

While we were in Italy, Mr. C and I shared many wonderful pasta dishes. Since we were in southern Italy, home to some of the best seafood you could ever hope to taste, many of the pasta dishes we ate contained seafood, especially shellfish. The dishes were simple with no one flavor overwhelming any of the others. Each dish was a perfect marriage of ingredients.

But before I go any further about the joys of eating seafood in Italy or sharing with you my spin on a classic Italian seafood pasta dish, I have one small confession about Italian cuisine that I need to share with you. There is one shrimp preparation that I doubt either Mr. C or I will ever be able to fully appreciate.

raw shrimp

raw shrimp

In Italy shrimp are often deep fried or added to dishes still wearing the suits they were given at birth. In other words, the heads are still on, the skeletal bodies (including the icky little “legs”) are intact, and even the thread like feelers are left on to make the desirability of eating one of these critters even that much less appealing. And then to add insult to injury, Italian chefs tend to cook the hell out the little darlings. So what remains is an almost desiccated carcass in an inpenetrable and unappetizing casing. It leaves me wondering how a country that prides itself, and in almost every other way produces some of the best food in the world, can turn what should be a succulent treat into what Mr. C and I consider an inedible, is nothing short of savagery. But then, in all honesty, we don’t really know how to eat the clothed shrimp either. We watched others seem to enjoy biting off the little heads and (I’ll leave this part to your imagination), but we just could not embrace the whole “alla naturale” experience. But that’s OK. Every other seafood dish we tried was excellent. Just proves not everyone can love every dish they taste, even if it’s an Italian dish! But enough about shrimp and the fact that we prefer our shrimp scantily clad! Back to mussels and clams.

Like I said, we enjoyed clams, mussels and pasta several different times during our time in Italy. In some cases the sauce was more like a marinara, while in a few instances there was no evidence of tomato at all. But often, just to provide a lovely splash of color, a few cherry tomatoes were added just at the last moment. I learned to look forward to those warm, still semi-raw taste treats. I hope you learn to love them too.

And finally, don’t be surprised if I don’t post any recipes for fried shrimp. It just ain’t going to happen!

  • 3 T. extra virgin olive oil
  • 3 medium sized shallots, coarsely chopped
  • 3 cloves garlic, finely minced
  • ½ tsp. kosher salt
  • freshly ground black pepper
  • 1 c. white wine (I use Pinot Grigio)
  • 1 c. vegetable or chicken broth
  • 1/4 tsp. crushed red pepper flakes, or to taste
  • 3/4 lb. fresh clams, cleaned
  • 3/4 lb. fresh mussels, cleaned
  • 8-oz. spaghetti, cooked al dente
  • 2 T. butter, room temperature
  • 2 T. chopped fresh Italian parsley
  • 8 cherry or grape tomatoes cut in half, opt.

In a large skillet or saucepan, heat the olive oil over medium-high heat. Add the shallots and sauté until soft, about 4 minutes.  Add the garlic, salt, and pepper; cook for about a minute or until the garlic is aromatic. Add the wine and simmer until the liquid has reduced by half, about 2 minutes. Stir in the broth, red pepper flakes, clams and mussels.  Bring the mixture to a simmer. Cover the pan with a tight-fitting lid and cook until all the shellfish have opened, about 5 to 8 minutes. Discard any unopened shellfish.

Using tongs lift the al dente pasta out of the cooking water and add to the pan. Add the butter, parsley and tomatoes; toss until all of the pasta is coated. Adjust seasoning and serve immediately.


PASTA WITH ARRABIATA SAUCE

So, we have just left our beloved Amalfi coast (no scratches on our rental car or permanently frazzled nerves, I am glad to report) and are headed east to visit the Adriatic side of Italy’s boot. It is really difficult to plan how long it will take to reach any given location in Italy because a km can take 60 seconds or 60 minutes depending on the road conditions and terrain. And this leg of our journey was no exception.

After departing at 9:30, we took the Amalfi coast road to Salerno and the autostrada (speed limit 110 – wee hah) which took us east over the Apennine Mountains in the Basilicata region. The Apennine mountains, at least the part we saw were green and hilly (only one jagged ridge visible), becoming drier on the eastern slopes. (Sound familiar?) There was some agriculture, but not the extensive terracing of fruit and olive trees that we had witnessed on earlier vacations in Northern Italy. As we drove along, all of the streams and rivers were overflowing with tumbling brown water from the torrential downpour the entire European continent had experienced a couple of days before. So with fast speed limits and great roads, we basically crossed the “boot” in a few short hours.

We arrived at our hotel at about 1:30 in the afternoon. We put our bags in our room and proceeded downstairs for lunch. In Italy, lunch is usually served between 1:00 and 3:00. As it was only 1:45, we were in luck.

Now let me set the stage for our lunch. The hotel I found on Expedia (great place to book hotels, I might add) was chosen because of its location as a mid-way stop rather than for the many glories of the region. (Had I known how fast we would get across the boot, I would have booked us further toward the Adriatic rather than on the Gulf of Taranto.) But here we were in our unpretentious business class hotel right off the highway with a whole afternoon to fill. So, deciding to fill our tummies before heading out on some type of afternoon adventure, we went down to the eating area.

We were the only patrons and in her best broken English, the waitress explained that there were only a very limited number of items on the menu, especially at lunch time. I can’t even remember what I ordered except to say that it was wonderful, but Mr. Cs Arrabiata was, and I quote “to die for”! Like I said, I don’t even remember what I ordered. What I do remember is stealing pasta off of Andy’s plate with alarming regularity.

After lunch we tried our best to tell our waitress how much we had enjoyed our meal, especially the Arrabiata. She looked at us, got a little twinkle in her eye, turned around and headed for the kitchen. She returned shortly with a stalk of the peppers that had been used in this very spicy dish. She wrote down the name of the peppers, pepperoncini, and broke off a few to give to us. I wanted to keep those peppers so badly, but I knew they would never make it past US customs (the brutes!) So as best we could, we explained how grateful we were for her thoughtfulness, but that we just could not accept her gracious offer.

All the time we’d been in Italy I had wanted to visit a supermercado (grocery store).  So upon receiving driving instructions from the hotel manager, we preceded into “town” to give me the opportunity to see what an Italian home cook in a fairly poor area of Italy has at his/her disposal. Well howdy, if I had that store on Camano Island, I would be one happy camper. The fresh meat, deli meat, cheeses, and produce were amazing and inexpensive. No frozen food cases filled with frozen pizza and TV dinners, just a small case filled with amazing flavors of gelato. Absent also, isle after isle of dried scalloped potatoes packages or canned beef stew. And absolutely no area devoted to soft drinks. But pasta, you want pasta, every shape, size and variety available was at that store. And inexpensive Arborio rice. Sigh! There were some canned goods – tomatoes, cannelloni beans; that type of vegetable. And olives. Oh how I dearly love the green olives in Italy! And of course – spices. I found jars of the regional dried pepperoncini that had been used in the wonderful Arrabiata we had “shared” for lunch.  So of course I had to bring home 4 jars. (I stuffed them in the toe of my shoes so they could safely and cozily survive the long journey to America.) Cookies were the one item that shared about the same amount of space as in an average American grocery store. Italians too love their sweets.

After doing our grocery shopping we drove to the seashore through camera crews, fire fighters and clean-up vehicles and workers. Apparently this part of Italy was especially hard hit by the heavy rain storms. There was so much flooding that all the businesses right by the shore were closed, including the hotels and restaurants. It was very interesting to poke around and witness how beautifully the Italians handled this emergency situation. No heavy handed behavior on the part of the people in charge. Just a general feeling of cooperation and “let’s get the job done”! And if some crazy Americans wanted to drive around and possibly get their tiny Fiat 500 stuck in the mud, so be it!

After a delightful afternoon of seeing the area we headed back to our hotel and yet another delicious meal in the hotel restaurant. Dinner was excellent, but the Arrabiata we enjoyed at lunch and the absolutely charming and cordial hotel staff that treated us as long lost family members made even this rather pedestrian stop a memorable event. Lesson learned: Don’t judge a book by its cover or a business class hotel by its lack of fancy furniture and potted plants in the lobby. You never know what pleasures may await.

  • 1 T. extra virgin olive oil
  • 1 c. finely chopped yellow onion
  • 5 garlic cloves, finely minced
  • ½ – 1 tsp. crushed red pepper flakes
  • 1 tsp. kosher salt
  • freshly ground black pepper
  • ½ c. red wine (I like Pinot Noir)
  • 2 T. brown sugar
  • 2 T. chopped fresh basil
  • 6-oz. tomato paste (I use Cento brand)
  • 2-28oz. cans crushed or whole peeled San Marzano tomatoes* (Use cans of Italian tomatoes, like Cento brand, if possible. And yes, there really is a difference!)
  • 1 lb. penne pasta, cooked al dente
  • chopped fresh Italian parsley, opt.
  • grated Pecorino Romano or Parmesan, opt.

Heat olive oil in a medium-large heavy sauce pan. Add onion and cook until transparent. (Don’t let the onion brown.) Add the garlic and red pepper flakes and cook for about a minute or until the garlic smells aromatic. Add the salt, pepper, and wine. Let wine cook until it is all absorbed. Stir in the brown sugar, basil, and tomato paste. Finally add the 2 cans of crushed tomatoes and bring mixture to a boil. Reduce heat and gently simmer uncovered for about 30-40 minutes. Adjust seasoning. Add cooked pasta, sprinkle with parsley; serve immediately. Pass grated cheese.

*If using whole peeled tomatoes, chop them before adding to sauce


RISOTTO WITH CREAM AND SHRIMP SAUCE

OLYMPUS DIGITAL CAMERA

View from our hotel veranda in Amalfi, Italy

OLYMPUS DIGITAL CAMERA

Mr. C and I just got back from a three week trip to southern Italy. We ate and drank ourselves from Rome down to the Isle of Ischia, to Sorrento, Capri, the Amalfi coast, across to the Adriatic, up around the Gargano Peninsula and back across to Rome. The food we experienced was fantastic. And during the next couple of weeks I will be telling you more about our trip and give you a taste (so to speak) of some of the amazing dishes we experienced.

We ordered this incredible risotto dish our last night in Italy. We were flying out early (well early for us – 10:35am) the next day, so we returned our rental car (a Fiat 500) in Rome, took the train to the Leonardo da Vinci airport in Fiumicino, (about 30 km from downtown Rome) and hopped a cab to our seaside hotel. Fiumicino is a lovely small seaside town with many hotels and excellent restaurants. We stayed at the Hotel Del Mare (translated – hotel by the sea). The first floor of the building/hotel was a large, very busy pesce ristoranti (seafood restaurant). So when it came dinner time, we made the very long journey down one flight of stairs, out the front door of the hotel and into the side door of this restaurant.

We had been eating a lot of fish and a lot of pasta during our proceeding time in Italy, so something about the words risotto caught my eye. And when I read the next two ingredients, cream and shrimp, I was hooked. So for our primi (first course), I ordered the Risotto with Cream and Shrimp Sauce. And to my dying day I’m going to be glad I did. It was the best risotto I had ever tasted. So, of course I had to try and duplicate it when I got home. And I did! I got some help from internet searches, but came up with this final version that I think does the restaurant credit.

So next time you are in the mood for Italian food, and have a little time to spend in the kitchen, give this recipe a try.

A note about lobster base: It ain’t cheap! My favorite is Knorr, but it is hard to find. (PFI carries it if you live in the Seattle area.) More readily available is Better Than Bouillon, and I know Haggen’s (north sound grocery store chain) carries it. But if you can’t find lobster base, not to worry. Just make your stock with the shrimp shells and it should be just fine.

Shrimp Stock:

  • 1 tsp. olive oil
  • shrimp shells and tails
  • 5 1/2 c. water
  • 1-2 tsp. lobster base, opt.
  • 1/4 onion, roughly chopped
  • 2 T. roughly chopped celery
  • 1/2 small carrot, roughly chopped
  • 1 bay leaf
  • pinch salt
  • 8 black peppercorns
  • 1 sprig fresh thyme
  • 1 large sprig fresh parsley

In a large heavy stockpot, heat the oil over medium-high heat. When hot, add the shrimp shells and cook, stirring occasionally, until shells are pink and fragrant, 4 to 6 minutes. Add the water and all remaining ingredients and bring to a boil. Reduce the heat to medium-low and slowly simmer until stock is flavorful, 45 minutes to 1 hour. Strain the stock into a large container and use immediately or allow to cool completely. Refrigerate until ready to use.

Shrimp Cream:

  • 2 T. extra virgin olive oil
  • 3/4 lb. raw shrimp, peeled and deveined (save the shells and tails for Shrimp Stock – see above)
  • 1/4 c. heavy cream + more for risotto*
  • 1 c. canned tomatoes (Italian if possible)

Heat the olive oil in a large covered sauté pan over medium heat and sauté the shrimp until just opaque, about 2 minutes. Remove from pan, allow to cool, chop into whole hazelnut sized pieces, and refrigerate until ready to use. In a food processor, puree ¼ cup heavy cream and tomatoes until smooth. Refrigerate until needed.

Risotto:

  • 5 cups shrimp stock (see recipe above)
  • 2 T. butter
  • 1/2 c. finely minced shallots
  • 1 small clove garlic, minced
  • 1 c. Arborio rice
  • 1/2 c. white wine (I like Pinot Gris)
  • 1 tsp. kosher salt
  • freshly ground black pepper
  • *heavy cream (about a cup)
  • 2 T. chopped fresh basil
  • 2 T. finely chopped Italian parsley, plus 2 T. for garnish   
  • 2 T. finely grated Parmesan

In a small pot bring the shrimp stock to a boil. Reduce the heat and keep warm. Heat the butter in a heavy pot over medium heat; add the shallots and garlic (I use my small food processor to mince the shallots and garlic) and sauté until soft. Add the Arborio rice and stir until it is coated with butter, about 1 to 2 minutes. Turn the heat to high and add the white wine, stir until most of the wine has been absorbed by the rice. Stir in the salt and pepper. Add the hot stock 1/2 cup at a time, stirring constantly, after each addition, until the liquid is absorbed. Continue adding the stock and stirring to release the starch from the rice. Begin to check the rice for doneness after 18 minutes, it should be al dente. Add the shrimp cream mixture (blended cream and tomatoes) and continue to cook for 2 to 3 minutes. Add the reserved cooked shrimp and heat through. Add enough cream to bring to desired consistency. (The risotto should be very soft and creamy, not stiff.) Remove from heat and stir in the basil, parsley, and Parmesan. Adjust the seasoning. Sprinkle with remaining parsley and serve immediately.

A note about Italian food: The best way I know to describe authentic Italian food is fresh, local meat, seafood and produce, enhanced with subtle seasonings and complimentary ingredients. Except in rare cases, like the recipe for Arrabbiata (a very spicy red pasta sauce) that I am going to post in a couple of days, Italian chefs use a very light hand in everything they prepare. They absolutely do not ascribe to the old adage that if a little bit of something is good, a whole lot is better! And because they don’t use more of an ingredient than is necessary, like cheese or fresh basil for example, the taste of the dish is lighter, fresher and much more enjoyable.