Category Archives: MAIN DISH RECIPES

QUICK AND EASY BEEF STROGANOFF

In my attempt to reduce the amount of meat we consume, I usually have a small, beautifully marbled steak safely tucked away in our freezer. Never large enough for grilled steak for 2, but enough for a dish like this. So, the other evening I decided to do something with the aforementioned piece of beef that had been residing in our freezer longer than any amount of common sense on my part would dictate! But then what to do with said tiny bit of steak?

I had been to the grocery store the day before and purchased about ¾ of a pound of cremini mushrooms, confident that I could find something wonderful to do with a paper bag full of fungi. And what better way to feature these beautiful baby portabellas than in a savory, saucy beef stroganoff. Then I got to thinking that the Au Jus I made for our French dip sandwiches the night before would make an excellent base for a stroganoff sauce. (I love it when a plan comes together!)

So, that’s how this recipe was conceived. Need, lucky purchase, and a beautiful au jus sauce that was easy to make, delicious, and contained all the right ingredients. The rest, as they say – is history. And yes, of course I already have a recipe for beef stroganoff on this site under the catchy title – Beef Stroganoff. But it’s a bit different. And now you too have 2 recipes for beef stroganoff from which to choose.

Well, that’s it for today. I’m feeling extremely lazy and all I really want to do is read my book. But Mr. C. isn’t feeling well. So, yesterday I made him chicken soup with dumplings, and today I threw together oatmeal cookies. (Mr. C. spoiled? Nah! Just well loved!) As I hope all of you are too.

Peace and love to all.

1 tsp. extra virgin olive oil

¼ c. chopped onion

1 garlic clove, finely minced  

2 T. dry red wine

1 T. Worcestershire sauce

¼ tsp. Kitchen Bouquet, or more to taste

freshly ground black pepper

2 c. water

1-2 T. Better Than Bouillon (Beef flavored)

4-5 oz. piece of lean beef steak, thinly sliced across the grain

1 T. cornstarch*  

unsalted butter (about half a stick)

3-4 c. thickly sliced cremini mushrooms (button mushrooms are great too)

2 T. all-purpose flour

¼ tsp. seasoned salt

1½ c. sour cream

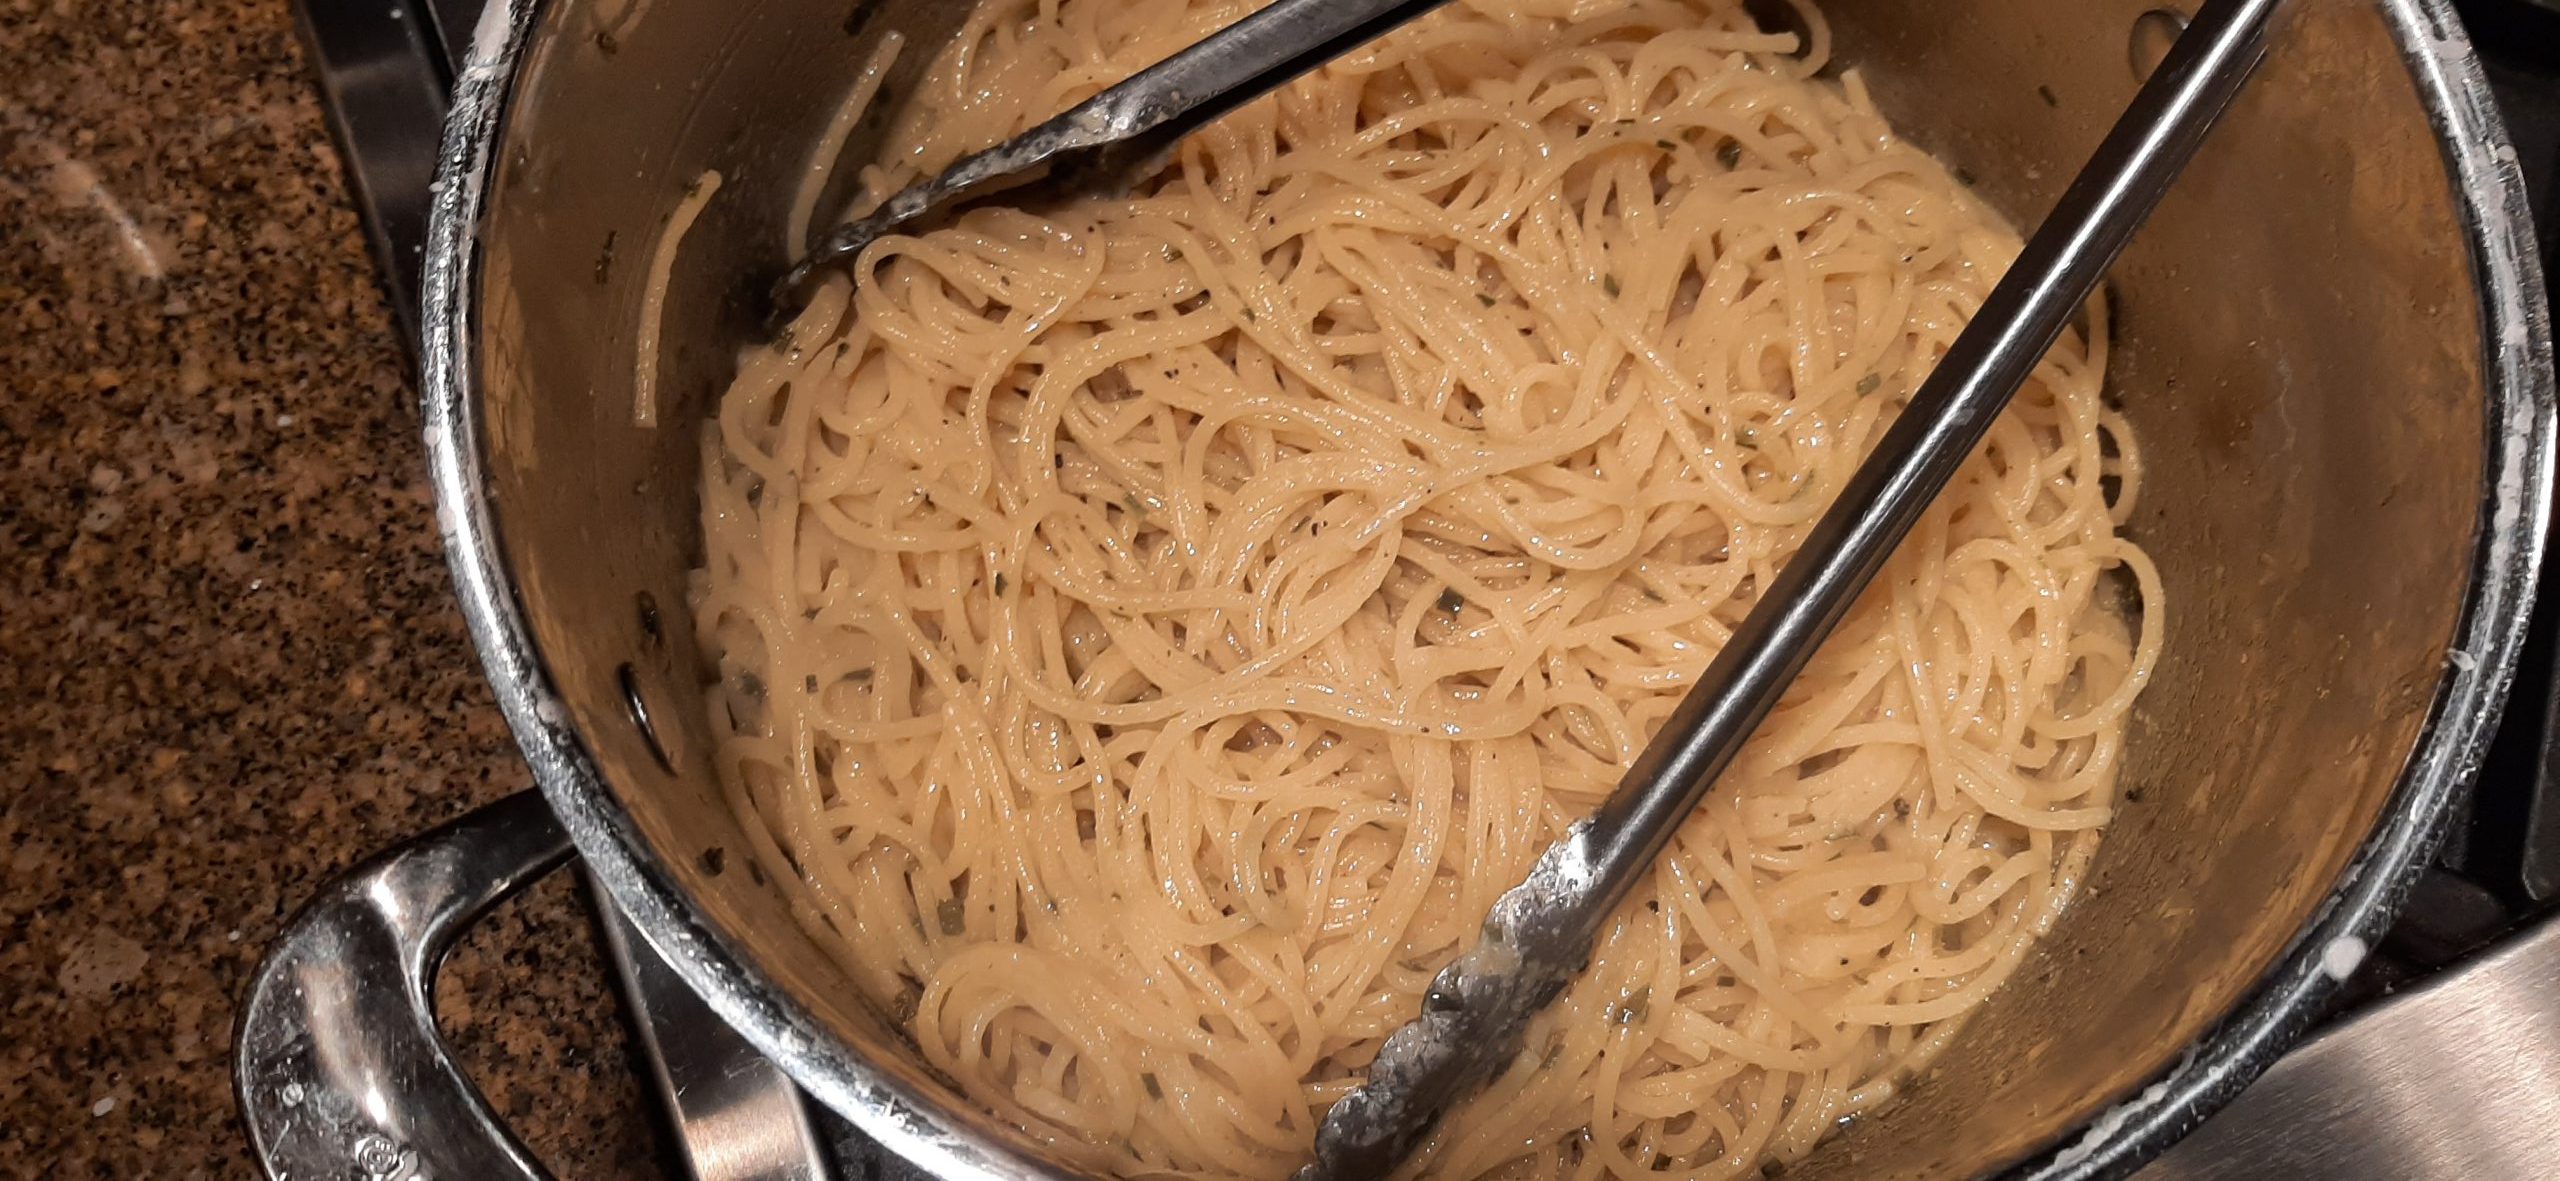
2 c. thick egg noodles, cooked al dente

Heat the olive oil in a heavy covered saucepan. Add the onion and cook until soft. Add the garlic and cook for a minute or two more.

Deglaze the pan with the wine, then add the Worcestershire sauce, Kitchen Bouquet, and black pepper. Cook for another minute, stirring constantly.

Add water and beef base; bring to a light boil. Reduce heat and simmer covered for about 30 minutes. Sauce can be made ahead and refrigerated until needed.

While the sauce is simmering, coat the meat with cornstarch* and set aside. (The meat should sit for about 20 minutes.)

Melt 2 tablespoons of butter in a large fry pan. Add the mushrooms and sauté until they are nicely browned. Remove from pan and add another tablespoon of butter to the pan along with the meat. Fry the first side just until lightly browned. The top side should still be pink. Flip and fry the second side for only about 30 seconds. Remove from pan and add to the mushrooms.

(If all the butter is gone, add another tablespoon or so.)

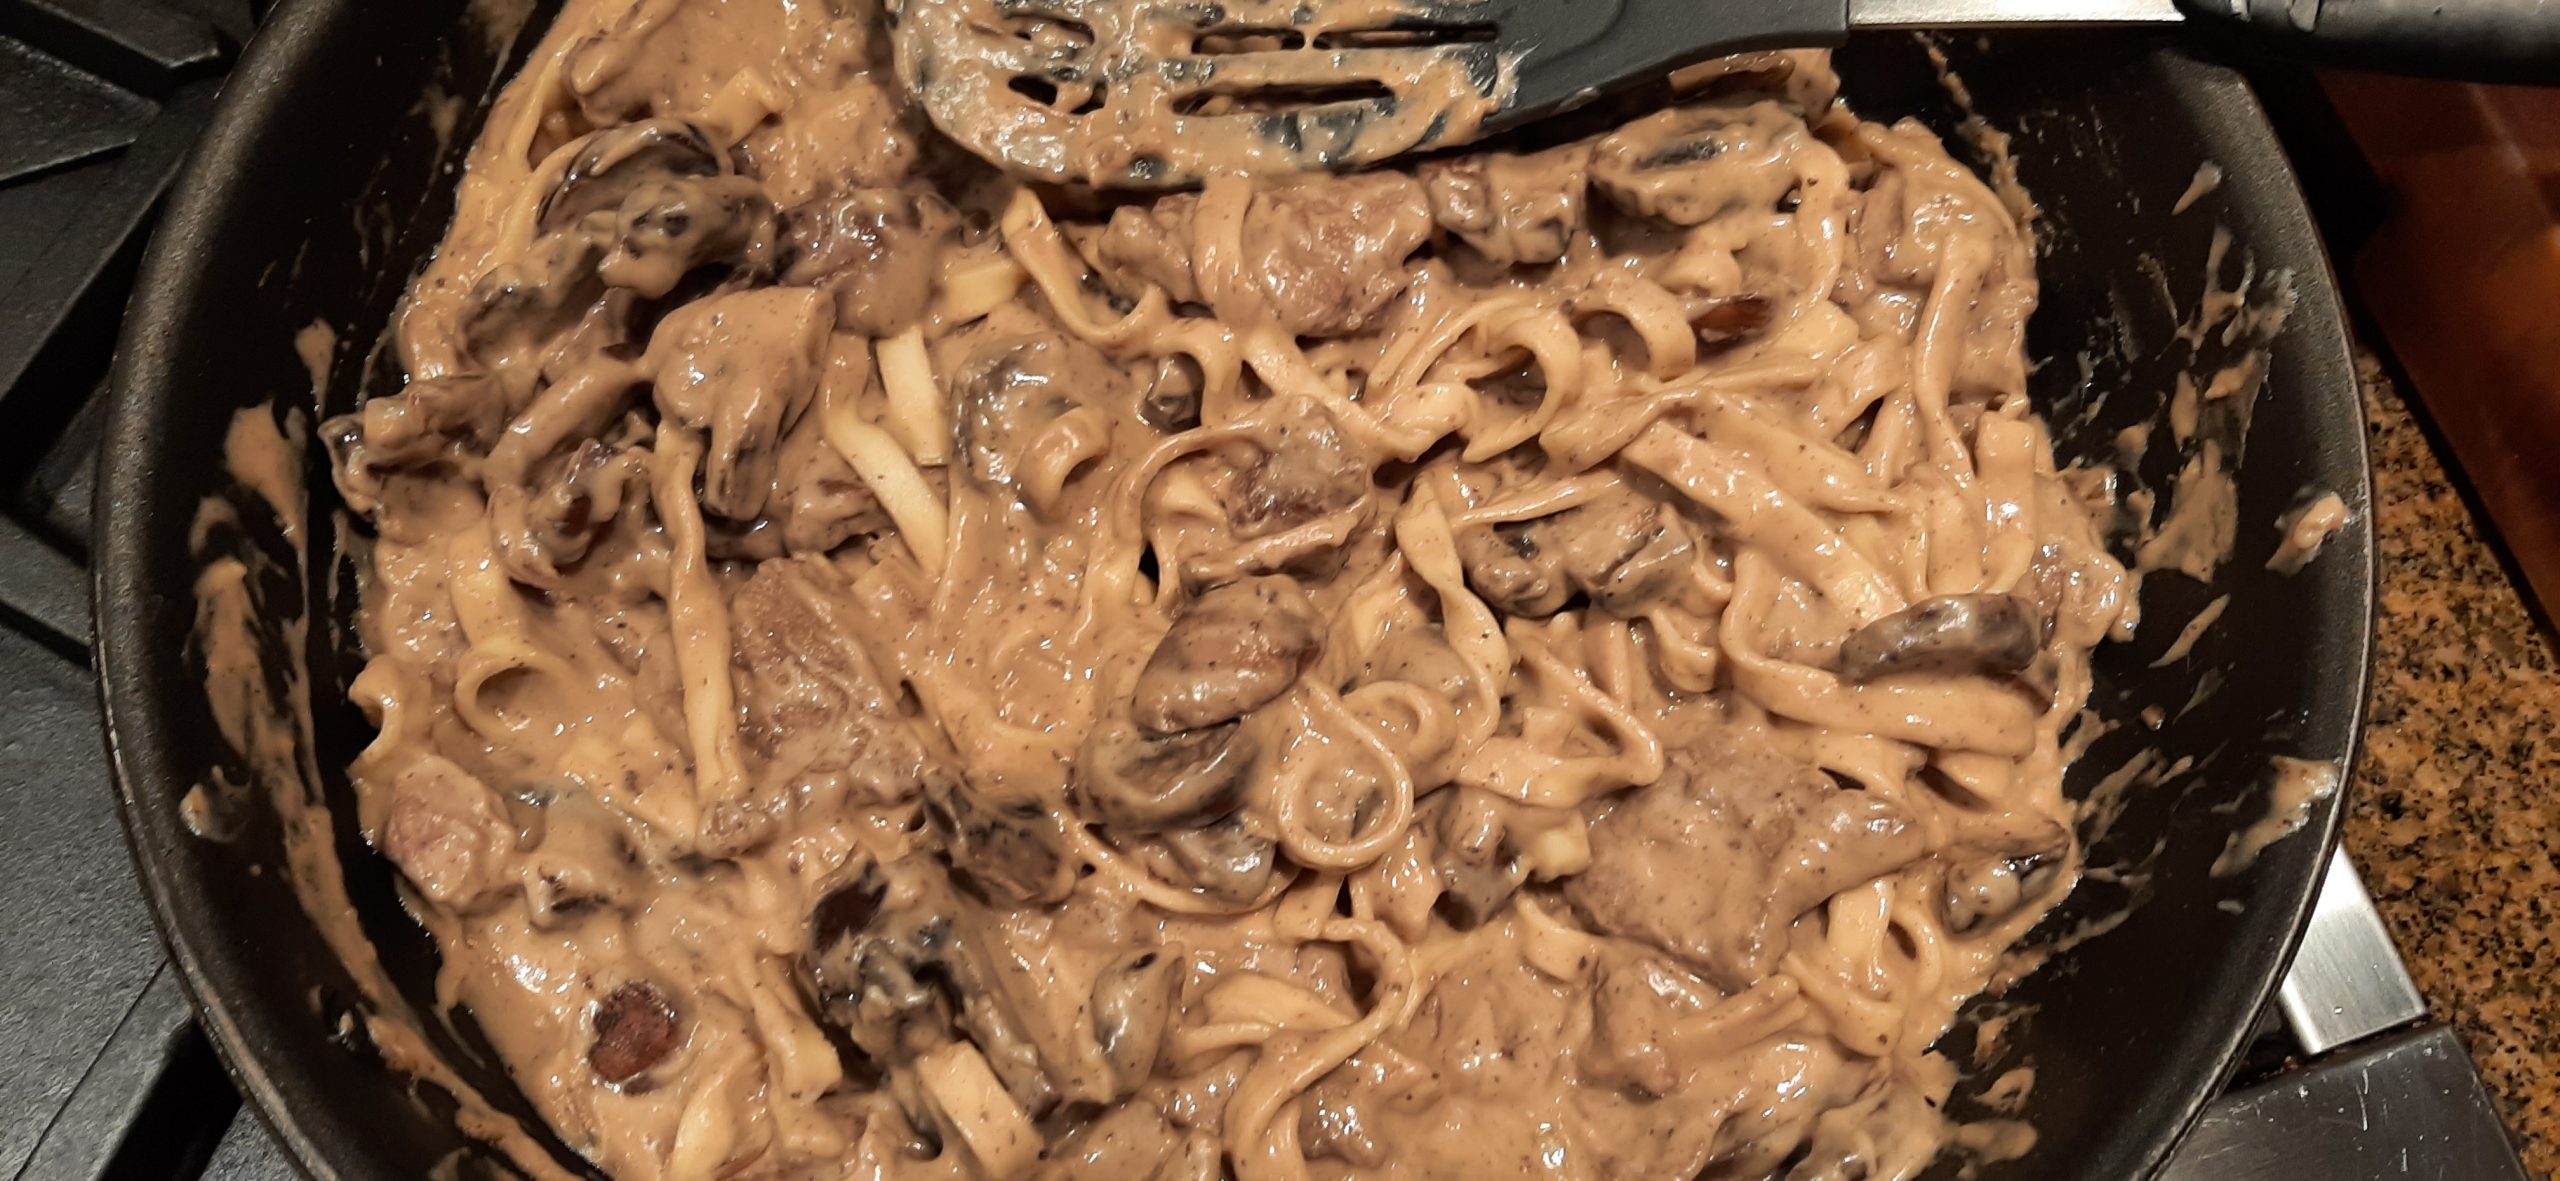
Add the flour and seasoned salt; cook it for about 2 minutes. Then gradually whisk in the beef sauce making certain you get every last bit of the stuck on bits from frying the mushrooms and meat. Bring to a boil. Add the sour cream, and once again bring just to a boil. Add the cooked mushrooms, meat, and cooked noodles. Taste and adjust seasoning.

* Cornstarch protects the meat from touching the hot oil directly and locks the moisture inside, thus resulting in tender meat.

PERFECTLY SEASONED SPAGHETTI (OR PASTA SHAPE OF CHOICE)

So, this is not a low-fat, low calorie pasta recipe. This is an in-your-face, decadent, and indulgent way to appreciate one of the greatest culinary gifts ever presented to mankind. Pasta.

What you perhaps don’t know about me, is that I am a devoted fan of all things pasta. And although I mainly try to keep my recipes as low-fat and low-calorie as reasonable, this is not one of  them. This is the brain child of our dear friend Jim. Who BTW is a wonderful cook and could probably make the rusted bumper of a 1954 chevy taste good. Not kidding!

The other evening, Mr. C. and I had the opportunity to help out in Jim and Margo’s kitchen for an impromptu dinner where all 4 of us (Jim, Margo, Mr. C., and I) were assigned drink and food preparation tasks. (BTW, this was a fun way to get dinner on the table.)

Under Jim’s direction, I was put in charge of the pasta. And I must say, I was a bit aghast at the ingredient list. Wait! That’s a lot of butter and olive oil you’re telling me to throw in the al dente pasta. And 2 tablespoons of granulated garlic? Holy cow!

But being the good little minion that I am, I followed his instructions to a tee. And the result? Amazing pasta. Not only did I love the pasta with sauce on it, but I went back for seconds for just the pasta alone. It was just that delicious.

Now of course, it helped that the pasta used for this dish was made in Italy. Italian pasta typically has strict governmental quality and control standards. And it is made with 100% durum wheat (semolina flour), a hard grain. Hard grain contains much more fiber, more protein and also carotenoids (recognized by the fact that it is more yellow than other grains). Durum wheat also retains more starch during cooking which is essential for producing excellent al dente pasta. If the pasta releases starch too easily, it quickly becomes a sticky mess. So, pasta made in Italy is not only higher in protein, but it stands up better to submersion in boiling water.

So, whenever possible, bring home pasta made in Italy. And never, ever cook pasta more than al dente. According to Barilla, “Cooking pasta perfectly ‘al dente’ (still slightly firm) allows you to reap the full benefits of pasta’s already strong ability to increase satiety, delaying hunger pangs and providing fuel for working muscles long after meals.” “Plus, al dente pasta just plain tastes better.” (That quote is attributed to Patti Carr!) And as written up in the health section of U.S. News, “Prepare your pasta like they do in the Mediterranean – al dente, which means neither too hard nor too soft. When cooked correctly, pasta will have a lower glycemic index than when it’s cooked to be soft or mushy. The average GI of al dente penne pasta is 50, which is even lower than the GI of oatmeal or many whole-grain breakfast cereals. A lower GI can help keep blood sugar levels stable so you will stay fuller longer.”

Well, I’ve said all I’m going to say about pasta and this recipe. If you can’t conclude for yourself that pasta prepared this way is a treat, then I won’t bother you any further with additional information.

And as always, thank you Jim and Margo for your friendship and love, and for all the wonderful food we have shared together throughout the many years we have known each other. May there be many more good times to come.

And as always, peace and love to all.

1 lb. spaghetti (preferably made in Italy with 100% durum wheat semolina – organic Garofalo brand from Costco is fabulous)

2 T. kosher or coarse sea salt

¼ c. (½ stick) unsalted butter

¼ c. extra virgin olive oil

1-2 T. granulated garlic (I used a scant 2 tablespoons last evening)

2 T. freeze dried chives

1 c. pasta cooking water, or more as needed (I used about a cup and a half)

freshly ground black pepper, if desired

Bring a pot of water to a boil. Not too much water. Add the salt and pasta. Cook the spaghetti at a low boil, stirring periodically with a pair of tongs, until almost to the al dente stage. (Err on the side of not enough cooking time rather than too much.)

Drain the pasta, keeping at least 2 cups of pasta water in reserve.

Add the drained spaghetti back to the pot. Turn the burner on low and stir in the butter, olive oil, granulated garlic, and dried chives. Cook until the butter is melted. Then add a cup of the pasta water and cook until most of the water is gone. Taste the pasta. It should now be at a perfect al dente. If you prefer a moister pasta, add more pasta cooking water, a couple of tablespoons at a time.  

Please note: No additional salt should be required because of the amount of salted water in which the pasta was cooked. If you are a black pepper fan, go ahead and add as much as you like.

This pasta can be served as a stand-alone side dish (passing grated Greek mizithra, pecorino-Romano, or Parmigiano-Reggiano at table), or with inclusions such as thinly sliced prosciutto or petite green peas, or as a base for any of your favorite pasta sauces.

Leftovers can be stored in either the refrigerator or for longer storage, your freezer. If your pasta has been frozen, bring to room temp. before re-heating.

To re-heat your cooked pasta, coat the bottom of a frypan with water. Add the pasta and periodically give it a stir. Leave on heat only until the pasta is hot. Serve any way you wish.     

SAVORY SPATCHCOCKED CORNISH GAME HEN

OK, this way of baking a Cornish game hen could not be easier. And yes, I have 3 other recipes for game hens on this site. Which might lead you to the conclusion that we love game hens. And if that is the case, then you are absolutely correct. We categorically adore these tasty, tender little guys that are super easy to prepare. OK, Mr. C. isn’t concerned with the time it takes to get one of these little darlings on the table. But I am! Quick and easy to prepare dinners has become my new rallying cry when it comes to the use of my time. It doesn’t always work out that way, but then why should it when it doesn’t often work for politicians either? (Rallying cries that is! Not how to put food on the table in a timely manner!) But I digress!

Anyway, the other evening I served a game hen prepared this way, and we both thought it was mighty tasty.

I’m still amazed that in just 20 years, we have transitioned from each devouring our own game hen (and often wanting more) to not being able to finish even a half of one now. But then I used to laugh at older people who only talked about their ailments too. And guess what, I am now terribly interested in how my friends’ sleeping habits, pill consumption, and inability to drive at night have impacted their lives. But as the old saying goes “live and learn”. And as I have reasoned more instinctively as I’ve gotten older, I still have a lot to learn. And not judging people because of my lack of knowledge or experience is one of the areas that could still use improvement. But thankfully, I am aware enough to know that I need to change some of my attitudes in this regard. So, along with still trying to learn how to make a good pad Thai, the secret to a perfect green sauce for enchiladas, and how to get Mr. C. to love cruciferous vegetables, I am going to work on me. About darn time, wouldn’t you say!

Peace and love to all.

1 (24-oz.) Cornish game hen, spatchcocked (see how to spatchcock below) 

1 tsp. Italian seasoning

½ tsp. seasoned salt

freshly ground black pepper

¼ tsp. granulated garlic  

¼ tsp. granulated onion  

¼ tsp. paprika

tiny pinch savory

1 T. melted unsalted butter

Pre-heat the oven to 400-degrees. Line a baking sheet or pan with parchment paper.

Thoroughly dry the game hen using paper towels. Place breast side up on prepared pan to air dry while you make the seasoning mix.

Combine the Italian seasoning, salt, pepper, granulated garlic, granulated onion, paprika, and savory together in a small bowl.  

Rub the melted butter all over the Cornish hen. Sprinkle with the spice mix.

Bake in the pre-heated oven for 1 hour or until the game hen is golden brown and the internal temperature in the thigh reaches 160-degrees.

Remove from oven, tent with aluminum foil, and let sit for 10 minutes before serving.

To spatchcock a game hen: (or a chicken or turkey for that matter)

Dry the hen and place on a cutting board, breast side down. Using sharp kitchen shears, cut down each side of the backbone, starting from the neck end down to the tail. Remove the backbone, pull open the hen, flip it over, then press down on the breast to open it out flat.

My partners in crime as I wrote up this recipe the other evening. From left to right – Mr. C., Max and Miles. (My desk is just to the left of Miles.) Now I ask you, could a person ever ask for any finer writing companions? I think not too!


SAVORY OVEN BAKED PORK LOIN BACK RIBS

Sometimes, there is just nothin’ will do except some BBQ’d ribs. But it is winter, and it is cold outside, and I really didn’t want Mr. C. to have to get the smoker going or fire up the barbeque. Even though both the smoker and the barbecue are under cover, it’s still not pleasant being outside.

So, I came up with this recipe and darn, the ribs were really delicious. The meat literally fell off the bones, and was juicy, tender, and ever so succulent. And this way to bake ribs had been super easy. No fuss, no muss, and just good eating.

So, if you too love ribs but aren’t excited about spending a lot of time in the making, give this recipe a try. The ribs are seriously yum.

Now if you do have time, I suggest you make your own BBQ sauce. Because, well, there is nothing on the market better than a really good homemade BBQ sauce. And because I am feeling charitable today, I’m going to provide you with my 2 favorite recipes. Please note, if you are trying to stay away from sugar, the second recipe BBQ Sauce with Monk Fruit Sweetener is sugar free.

Well, it’s kind of pretty outside right now. Lots of clouds, but the sun is setting so there is some pink in the sky too. Perhaps since it’s getting on to dinner time, I should think about making like a cook. I’m pretty sure Mr. C. would agree wholeheartedly. So, bye for now.

Peace and love to all.

1 (3 lb.) rack of pork loin back ribs* or spareribs

1 T. rib rub (see recipe below)

2 tsp. Montreal Steak Seasoning

1 tsp. granulated garlic

BBQ sauce

Place ribs meaty side up in a covered baking pan. (Or use aluminum foil.) (I use my Le Creuset Braiser.)

If the rack is too long for your pan, cut the rack in half. Evenly sprinkle the meat with the rib rub, Montreal Steak Seasoning, and granulated garlic.

Cover the pan and bake in a pre-heated 300-degree oven for 2 hours. After 2 hours, check to see if the meat is tender and falling off the bones. If not, bake for another half hour.

When the meat is tender, raise the temperature to 350-degrees, remove the lid or foil and baste with barbecue sauce and place in oven for 20 minutes.  

Remove from oven, cut the ribs between the bones, and serve with additional BBQ sauce.

*Pork loin back ribs are cut from the top part of the pig’s rib cage, just below the loin muscle. These ribs have meat both in between and on top of the rib bones, making them meatier than spareribs.

RIB RUB:

2 T. paprika

2 tsp. freshly ground black pepper

2 T. kosher salt

2 tsp. granulated garlic

1 tsp. cayenne

1 tsp. ancho chili powder (found in most upscale grocery stores in bulk)

2 tsp. dried oregano

2 tsp. dried thyme

Combine all ingredients in an airtight container. Store at room temperature.

BOURBON BBQ SAUCE

¼ c. unsalted butter

¼ c. minced onion

3 cloves garlic, minced

¼ c. brown sugar

2 tsp. whole grain mustard

1 c. ketchup

1/3 c. Worcestershire sauce

¼ c. fresh lemon juice

¼ tsp. hot sauce, or to taste

¼ tsp. cayenne

2 T. bourbon

Melt butter in a medium sized covered saucepan. Sauté onion until translucent; add garlic and cook until garlic releases its aroma, about 1 minute. Add remaining ingredients, bring to a boil, reduce heat, cover pan, and simmer gently for 30 to 60 minutes, stirring occasionally. Basically, cook the sauce until you reach desired thickness. (Sauce will thicken as it simmers. If the sauce is still too thin after 60 minutes, remove the lid. But be warned – simmer at a low temperature or you will have BBQ sauce all over you and your kitchen!) Serve sauce warm or at room temperature.

BBQ SAUCE WITH MONK FRUIT SWEETENER

2 T. extra virgin olive oil

½ c. finely chopped onion

3 garlic cloves, finely minced

1 (6 oz.) can tomato paste

¾ c. water

1 T. monk fruit sweetener (I use the “golden” variety)

1 T. apple cider vinegar, or more to taste 

3 T. Worcestershire Sauce

¼ tsp. hot sauce, or to taste (I use Frank’s RedHot)

1 tsp. smoked paprika

½ tsp. seasoned salt  

freshly ground black pepper

tiny pinch cayenne pepper

tiny pinch ground cloves

Heat the olive oil in a small, covered saucepan. Sauté the onion until translucent. Add the garlic and cook for 1 minute. Add the remaining ingredients. Bring to a boil, reduce heat, cover, and simmer for 30 minutes. Taste and adjust seasoning.


ITALIAN HAMBURGER SOUP WITH VEGGIES AND PASTA

The other evening, I was hungry for soup. (Actually, when do I not have a strong craving for soup would be a more accurate statement.) Anyway, I wanted soup for dinner. But I didn’t want a soup that would take a great deal of time to prepare or need to burble on the stove for hours. I wanted a quick, easy, yummy Italian flavored soup that contained pasta. Normally a veggie soup would contain chunks of potato. But I happen to be married to a guy who does not appreciate boiled potatoes. French fries, baked potatoes, and mashed potatoes are OK occasionally. But cut up potatoes in soup or chowder does not in any way, shape, or form appeal to this guy. But pasta? Absolutely!

For the soup, this time, I used extra wide egg noodles because I had just the right amount left in a big old bag that I really wanted to use up. I wanted it gone from my pantry. (One of my New Year’s projects is to clean out my pantry. This was a good beginning.) But next time I make this soup, I will be using a sturdier pasta.

And of course, because this was a beef vegetable soup, I began with a mirepoix (onion, carrot, and celery sautéed in oil). Then I added garlic and many of the other usual suspects you would find in any beef and veggie soup. A pretty simple preparation, but hearty and very tasty. You of course, could choose to add more veggies. But I found this to be the ideal balance of veggies, meat, and pasta.

I chose to serve the soup liberally sprinkled with pecorino-Romano cheese. We love this hard, salty Italian cheese made from sheep’s milk. It was the perfect complement to this brothy Italian soup, being an Italian cheese after all!

So, if you too would like to serve a soup that I feel everyone in your family would enjoy, this is probably the recipe for you. Simple, savory, and satisfying.

As always, peace and love to all.  

2 T. extra virgin olive oil 

¾ c. chopped onion

2 sm. carrots, thinly sliced

2 celery stalks, thinly sliced

3 garlic cloves, finely minced

1 lb. lean ground beef

1½ tsp. Italian seasoning

1 bay leaf

½ tsp. seasoned salt, or more to taste  

freshly ground black pepper   

4 c. beef broth

1 (15 oz.) container tomato sauce or diced tomatoes (Italian preferably)

1-2 T. tomato paste

1 tsp. Kitchen Bouquet, opt.   

1 c. dry pasta (I think Fusilli, Rotini, or penne are best)

grated pecorino-Romano cheese, opt. (for serving) (Parmesan in a pinch)

Heat olive oil in a large soup pot or Dutch oven. Add onion, carrots, and celery. Cook until the veggies are crisp tender. Add the garlic and cook until very fragrant, 1-2 minutes. Add the ground beef, Italian seasoning, bay leaf, seasoned salt, and pepper, breaking up the meat as it cooks.

When the meat is cooked, add the beef broth, tomato sauce, tomato paste, and Kitchen Bouquet. Bring soup to a boil, reduce heat, cover the pot, and allow to simmer for 30-40 minutes or until the carrot pieces are tender. Stir occasionally. Add more beef broth if you prefer a more brothy soup.  

Bring the soup to a boil and add the dry pasta. Cook until the pasta is al dente. Remove bay leaf, taste, and adjust seasoning. Serve piping hot. Pass the pecorino-Romano cheese.  


CREAMY LEMON PASTA WITH PROSCIUTTO AND PEAS

Please note: I would have posted this recipe yesterday, but my site was still causing me some problems. And frankly, I’m too lazy to re-write this preface. But since I’m sure you would want to know, Mr. C. never made it home after his afternoon rehearsal in Seattle because of a 4-hour traffic delay in Everett. So, he went straight to rehearsal in Mt. Vernon, missing dinner of course, but enjoyed a big old bowl of avgolemono when he got home around 10:00 pm. And yes, the poor guy was totally pooped after his ordeal. But very glad to be home where he was greeted by Miles, Max, and his adoring wife. (Miles and Max are our cats.)

The older I get, the less time I want to spend in the kitchen. I know that sounds just plain wrong coming from someone who has always enjoyed cooking and sharing her recipes. But I’m not as young as I used to be. Well, none of us are, but you know what I mean. But, and here’s the real killer, I still love to eat and share great food with Mr. C. and others. And I still look forward to posting recipes. So, that leaves me trying new recipes that have fewer ingredients and take just a reasonable amount of time to prepare.

So, the other evening I had a package of prosciutto that really needed to be eaten and a couple of lemons that had seen better days. And over the years I have made plenty of quick and easy pasta recipes, because frankly, pasta of any kind is just about my favorite food. Well, that and any bread product you care to mention.

So, using what I had on hand, I formulated this recipe. And it made for one heck of a good entree. We both absolutely loved this pasta dish. And it was simple and fast to prepare. Yeah! I served the pasta with a simple green salad, which was the perfect accompaniment.

So, if you too love a tasty pasta dish, but do not want to spend a great deal of time in its preparation, this is the recipe for you. And it is a recipe that could easily be adapted. You could use small cubes of pancetta instead of prosciutto, regular onion in lieu of shallots, whole milk in place of heavy cream, and whatever style of pasta you prefer. The only thing I will haunt you about is if you use some kind of bottled lemon juice in place of the real thing. Unacceptable. On oh so many levels.

Well, it’s dismal outside today. But it’s warm and cozy inside our home. Our cat Miles is nestled into the kitty bed on Andy’s desk. His brother is napping on our bed. Mr. C. is down in Seattle taking a piano lesson, then rehearsing with our dear friend Vivianna for one of her upcoming recitals for her PhD in music. This evening Andy has a rehearsal in Mt. Vernon. He is one very busy guy. But I love that he is getting to play music as much as he does. And I go with him to as many of his gigs as I can. I just love being married to such a talented musician. And a fabulous person to boot!

So, with his very tight schedule in mind, I am going to make one of his favorite soups for dinner. Avgolemono. Which in case you don’t know is a Greek lemon rice soup. And you can bet your bottom dollar I will be using fresh lemon juice. Because Mr. C. deserves the best! As do each of you.

Peace and love to all.  

1 tsp. extra virgin olive oil

1 (3-oz.) pkg. prosciutto, chopped into small pieces

2 T. unsalted butter

3 T. finely chopped shallots

¾ c. chicken broth

¾ c. heavy cream

zest from ½ lemon

1 T. fresh lemon juice

¼ tsp. kosher salt

freshly ground black pepper

1 c. frozen peas

10 oz. penne rigate, cooked al dente (save some of the water)

grated Parmigiano-Reggiano, for serving

Heat the olive oil in a small skillet. Add the prosciutto and brown for 4-5 minutes or until crisp. Remove from heat and set aside.

Melt the butter in a large nonstick skillet over medium heat. Add the shallots and sauté until soft, about 4 minutes.

Add the broth and simmer over medium high heat until mixture is somewhat reduced, about 2 minutes.

Add the cream, lemon zest, lemon juice, salt, and pepper. Simmer until sauce thickens slightly, about 3 minutes.

Add the frozen peas and then simmer just until the peas are heated through. (You really do not need to cook them. They just need to be warm.) Add the al dente pasta and browned prosciutto. Toss pasta with sauce until coated. If sauce is too thick, add a bit of pasta water. Taste and adjust seasoning.

Serve immediately. Pass the Parmigiano-Reggiano.

SAVORY BLACK BEAN CHILI

I made this chili the other evening using only the experience of making chili for roughly 58 years. So, did I need a recipe to follow? No, I did not. So, why am I giving you this recipe? You probably already have the perfect chili recipe. But in case you don’t or haven’t been cooking all that long, you might just need a great recipe for chili. Because a great chili recipe is something every cook should have at their disposal. Chili is simply one of those dishes that is loved by people of all ages. And really, is there anything better to eat when it’s cold, dark, and dreary outside? Of course not! Add a chunk of cornbread spread with lots of soft butter and honey to accompany the chili, and you have a meal fit for a king.

So, what’s so special about this chili you might ask? Actually, there is nothing exceptional or unique about this dish, except it’s darned delicious. And easy to prepare. And warms up beautifully. And is the perfect comfort food.

So, if you live in a temperate environment where the sun shines every day, the temperature never goes under 70-degrees, and you don’t even own a heavy jacket, you absolutely do not need this recipe in your life. But for the rest of us who can and usually do complain about cold and rainy weather especially in winter, if not this recipe, you should have at least one good chili recipe at hand.

Well, that’s it for today. I am having trouble with my site. I keep getting an error message that says I’m using an outdated version of PHP. (Whatever the heck that means.) Anyway, I’m trying to get it fixed, but for someone like myself who can barely remember to plug in my cellphone daily, having technical problems on my site is tantamount to asking me to replace the engine in our Prius! But keep trying I must. (Any good thoughts sent my way very much appreciated.)

If you have favorite recipes on this site, I advise you to print them out ASAP. Who knows when I might just blow up the whole site!

Peace and love to all.  

1 T. extra virgin olive oil

1 lb. lean ground beef

1 onion, chopped

1 c. chopped celery

3 lg. garlic cloves, finely minced

¼ c. chopped fresh parsley

1 (28-oz.) can diced tomatoes (preferably Italian)

1 (15-oz.) can/box tomato sauce (preferably Italian)

1 (15 to 20-oz.) can black beans (rinsed and drained) (I use Cento brand)

1 can black olives, drained and sliced

1 (4-oz.) can diced green chilies (I prefer Hatch diced chilies)

3 T. chili powder

1 T. oregano (I like Mexican oregano)

1 tsp. paprika

dash ground cloves

½ tsp. seasoned salt

freshly ground black pepper

Warm the olive oil in a large heavy covered pan or Dutch oven. Add the ground beef, onion, and celery. Cook until the ground beef is nicely browned. Add the garlic and fresh parsley and cook for 1 minute.

Add the diced tomatoes, tomato sauce, black beans, black olives, diced green chilies, chili powder, oregano, paprika, ground cloves, seasoned salt, and pepper.

Bring to a boil, reduce heat, cover, and simmer for an hour. Taste and adjust seasoning just before serving.

Great topped with grated sharp cheddar cheese and sour cream. (Corn bread on the side is nice too.)

LEMON AND GARLIC BAKED HALIBUT  

We would truly enjoy eating fresh seafood on a weekly basis. Not only for the health benefits* seafood supplies, but also because we both love the taste of almost any critter which spent its entire life in either fresh or salt water. But regrettably, dining on fresh seafood weekly just doesn’t quite happen for us. For one thing, I don’t trust the “fresh” fish selection offered by our local grocery store. (Name withheld to protect the innocent.) Second, we don’t go to Costco weekly although I love Costco’s fresh seafood selection, and finally, because fresh seafood is bloody expensive!

And granted, if push came to shove, we could afford to eat seafood on a more frequent basis. But it still doesn’t happen. So, when we do get an opportunity to feed on fish, I try my darndest to prepare it in a way that will emphasize its most admirable qualities.

So, please allow me to elucidate on the qualities of fresh halibut since that’s what this recipe is all about.  

Halibut is a very lean fish, with almost sweet tasting flesh. And when cooked properly, the firm but tender texture of the fish flakes into large segments that literally melt in your mouth. (So, no pressure involved with preparing a lovely halibut fillet to avoid rendering it dry and tasteless! Right? Wrong! Unfortunately, over cooking seafood is the easiest thing in the culinary world to achieve!)

If I have learned anything in all my years of cooking seafood, it’s to err on the side of underdone. Because you can always cook it longer if necessary. But, unless you are not of this world or have some voodoo knowledge of which I am unaware, you can’t undo overdone. My solution – an instant read thermometer. And I recommend you adopt this simple solution to overcooked seafood anytime you also prepare fish.  Actually, when you prepare any meat for that matter. (OK, not the meat in stew for example. You can be sure stew meat is perfectly cooked when it falls apart when you bite into it. But for rare steak, perfectly cooked pork, chicken, or slightly rare lamb, an instant read thermometer is indispensable.)

Now, about this recipe. I wanted to prepare a baked halibut dish that featured a bit of a savory topping that I hoped would complement the flavor of the fish, not disguise it. And be very easy to prepare. And with this recipe I believe I achieved my goal.

So, if you too love halibut, or any firm white fish, and want to give it a bit of a special fixing, I invite you to try this recipe. All I can say is that halibut fixed this way made for mighty fine dining for us the other evening. (If I say so myself!)

Well, that’s all I have to say on the subject of fish today. Happy cooking, happy eating, and try to stay healthy. There is a miserable cold like “something” going around our area. And I have heard it’s no darn fun. So, take especially good care of yourself as we go into the cold and flu season.

And as always, peace and love to all.

1 lb. halibut fillet

2 T. melted unsalted butter

2 tsp. fresh lemon juice

1 sm. garlic clove, finely minced

1/8 tsp. dried parsley

¼ tsp. paprika

½ tsp. kosher salt

freshly ground black pepper

Place halibut in a lightly greased baking dish.

In a small bowl, combine the melted butter, lemon juice, minced garlic, dried parsley, paprika, salt, and black pepper. Pour this mixture over halibut.

Bake in a pre-heated 400-degree oven for 12 to 15 minutes or until the fish is no longer transparent. The internal temperature should reach between 137 and 140-degrees and the fish should flake easily when tested with a fork.   

Remove from oven and serve immediately.

* Seafood is known to be an excellent source of lean, high quality, easily digested protein. A 3.5-oz. serving provides almost half of an adult’s daily protein needs for only 100 to 200 calories. Seafood is also low in saturated fat and sodium and is a rich source of many essential vitamins and minerals.


DUCK SAUSAGE AND BEAN SOUP

OK, not everyone has a neighbor that gifts them with a package of duck sausages just for the fun of it. But I do! (Vicki, my dear friend next door.) But then, what the heck to do with the sausages? So, bottom line, the poor sausages languished in our freezer for several months before I had the courage to use them in a dish. That, and Mr. C., who happens to have taken on the dubious task of “keeper of the freezer”, had grown weary of asking me when I planned to do something with the sausage. (Somebody has to make sure the freezer is always well stocked, and I am not that person. I am great at keeping the fridge and pantry in good supply. But I am terrible when it comes to the freezer. It lives in our garage, so out of sight, out of mind as the old saying goes!  You know how it is!)

Anyway, I finally decided that the sausage would be perfect in soup. And where better to look for a recipe than on the site that sells all things duck – D’Artagnan. (Great site BTW!)

So, this is my version of D’Artagnan’s White Bean & Duck Sausage Soup. (Why do I always think of the Marx Brothers when I say duck soup?)

Anyway, the soup turned out to be quite delicious, and very easy to build. There is one difficult step however, but that step happens almost every time I make soup. It’s the waiting time while the soup burbles away to yummy perfection. Because all the time soup is cooking, great smells emanate from the kitchen. And this soup was no exception when it came to smelling delightful as it cooked.  

So, if you too just happen to have some duck sausage laying around, make this soup. It is ever so nourishing and makes your mouth happy while filling your tummy. A perfect winter treat! If you don’t have any duck sausage on hand, then consider ordering some online. It is very rich and delicious. And an 8.5-oz. package goes a long way.

Well, that’s all for today. It’s very cold outside. And mother nature can’t decide whether to cover us with snow or torture us with the fact that the clouds could dump on us at any old time. So, we wait. And watch. And change a couple of appointments just in case. Never a dull moment. But then, that’s OK too!

Peace and love to all.

1 c. dry cannellini beans

2 T.  extra virgin olive oil, divided

1 (8.5-oz.)  pkg. Duck and Armagnac Sausage, removed from casings and cut into small dice (duck sausage available at D’Artagnan – on line)

1 lg. shallot, chopped

½ c. chopped onion

1 lg. carrot, chopped

1 rib of celery plus leaves, chopped

4 cloves garlic, finely minced

2 tsp. tomato paste

4 c. chicken stock  

1 lg. bay leaf

¼ tsp. dried thyme

¼ tsp. kosher salt

freshly ground black pepper

½ tsp. Aleppo pepper or half Spanish paprika and cayenne or Piment d’Espelette   

2 c. arugula, Swiss chard, kale, or baby spinach, finely chopped

2 tsp. cognac, opt.

The night before you plan to build the soup, rinse beans under cool running water then place in a large non-reactive container and cover with 2-inches of cool water. Let beans soak at room temperature overnight. Or, rinse the beans, cover with 3-inches of water, bring to a boil, remove from heat, cover, and let sit for 2-3 hours. 

Heat 1 tablespoon of the olive oil in a covered large pot or Dutch oven over medium-high heat. Thoroughly brown the sausage then remove it to a small bowl. Set aside to cool then place in your refrigerator until called for.

Add the second tablespoon of olive oil to the pan along with the shallot, onion, carrot, and celery. Season with salt and pepper. Sauté vegetables until shallots are translucent and carrots start to soften slightly, about 7 minutes. Add the garlic and cook for 1 minute.

Stir in the tomato paste and cook for about 3 minutes. Add the chicken stock, stirring up any browned bits at the bottom of the pan. Add the bay leaf and thyme. Bring the mixture to a boil, then turn down the heat to medium-low, drain beans, rinse, then add to the pot. Cover the pot and simmer the mixture for about 2½ hours, or until beans are cooked through. Remove bay leaf.

When the beans are tender, stir in the sausage, arugula, and Aleppo pepper. Continue to cook over medium heat for 20 minutes. Adjust seasoning and add the cognac. Serve hot.

Olive Oil Drop Biscuits are great with this soup. Look for recipe on this site in the very near future.  

CREAMY PARMESAN AND GARLIC PASTA WITH HAM AND PEAS  

I never quite know what to do with leftover ham. OK, I can always build soup, or use it in a quiche, or just fry it up for breakfast. But sometimes I am in the mood for pasta. (Sometimes! Now that’s an understatement if I ever made one! Because I am ALWAYS in the mood for pasta!) Anyway, the other evening I had a pasta craving, but was totally aware that in our refrigerator, a hunk of ham was languishing and really needed to be eaten. And not just any ham, but a small chunk of Black Forest ham. My favorite.

So, with a little angel on one shoulder lecturing me to not be wasteful, and a red, demon-like character with small horns protruding from his head, an arrowhead pointed tail, and a pitchfork in his hand yammering in my other ear that I should ignore my conscience, I went online for inspiration. And I found this recipe on the damndelicious.net site. And that’s what this dish turned out to be. Damned Delicious! And, ever so easy and quick to prepare. So, many thanks to Chungah for this great recipe.

Not only did I use up the ham, I got my pasta fix too. A win/win situation. And, I now have a perfect way to serve leftover ham. Because as we all know – the holidays are on their way. And I don’t know about you, but after working several days setting a menu, doing the grocery shopping, preparing the dishes, serving the food, and then doing the cleanup after hosting an event, I’m one pooped gal. And not for just that one day. I’m bushed for a couple days thereafter. But somehow, we still need to eat during my recuperative period. And frankly, this dish is so easy to make that I’m already planning to use the leftover ham from either Christmas dinner or another meal I plan to serve sometime around that time for just this dish.

So, if you too plan to serve ham during the holidays, don’t forget this recipe. Because the KISS principal is always in vogue. Keep It Simple Sister (or Sir). And truly, I don’t have any doubts that you will find this recipe a snap to prepare. And that everyone in your family will enjoy eating this dish. The flavor is fairly mild, so even the youngest at table should have no problem gobbling it down.  

Peace and love to all.

2 T. unsalted butter

2 cloves garlic, minced

2 T. unbleached all-purpose flour

1 c. chicken broth

½ tsp. dried thyme

¼ tsp. dried basil

pinch seasoned salt

freshly ground black pepper

¼ c. half and half

¼ c. freshly grated Parmesan

½ c. frozen petite peas

1 c. diced ham

4 oz. spaghetti broken in thirds, cooked al dente (save some of the cooking water)

Melt the butter in a skillet over medium heat. Add the garlic and cook for 1 minute. Whisk in the flour until it and the garlic are both a light golden brown, about 2 minutes.

Gradually whisk in the chicken broth, dried thyme, dried basil, seasoned salt, and pepper. Cook, whisking constantly, until well blended, about 1-2 minutes.

Stir in the half and half and Parmesan and cook until slightly thickened, about 1-2 minutes. If the mixture is too thick, add some of the pasta cooking water until desired thickness is obtained. Taste and adjust seasoning.

Stir in the peas and cook for 1 minute. Then add the ham and al dente spaghetti. Toss to combine. Serve immediately.