Category Archives: MAIN DISH RECIPES

HUNK OF BEEF CHILI

OLYMPUS DIGITAL CAMERA

This is my answer to the age old question – “what to do with half a grilled London broil steak when the flavor of the new rub you tried rendered the final product almost inedible”? Yes ladies and gentlemen, I too try new recipes that look sensational in print and turn out to be, well how do I say this politely – not worth the ink used to print the recipe! And that’s exactly what happened when I tried a new recipe that appeared in our local paper. The steak rub/paste sounded oh so good, but unless you have only about 9% of your taste buds left, the taste of fresh herbs knocked your socks clear into next Tuesday! And you know how I feel about blended flavors. Each ingredient should compliment all the other ingredients. The only analogy I can draw is that the steak was like Wile E. Coyote, and the rub had the same characteristics as the Road Runner. And you know how that always turned out! – the steak, I mean  Wile E. never had a chance!

So, back to my original question; what to do with half a pound of highly spiced cooked beef on a cold and rainy spring day? And of course, the only answer that made perfect sense was chili. So after thinking on it for a few minutes, I came up with this recipe. And low and behold, it was good! No, not just good, it was really good.

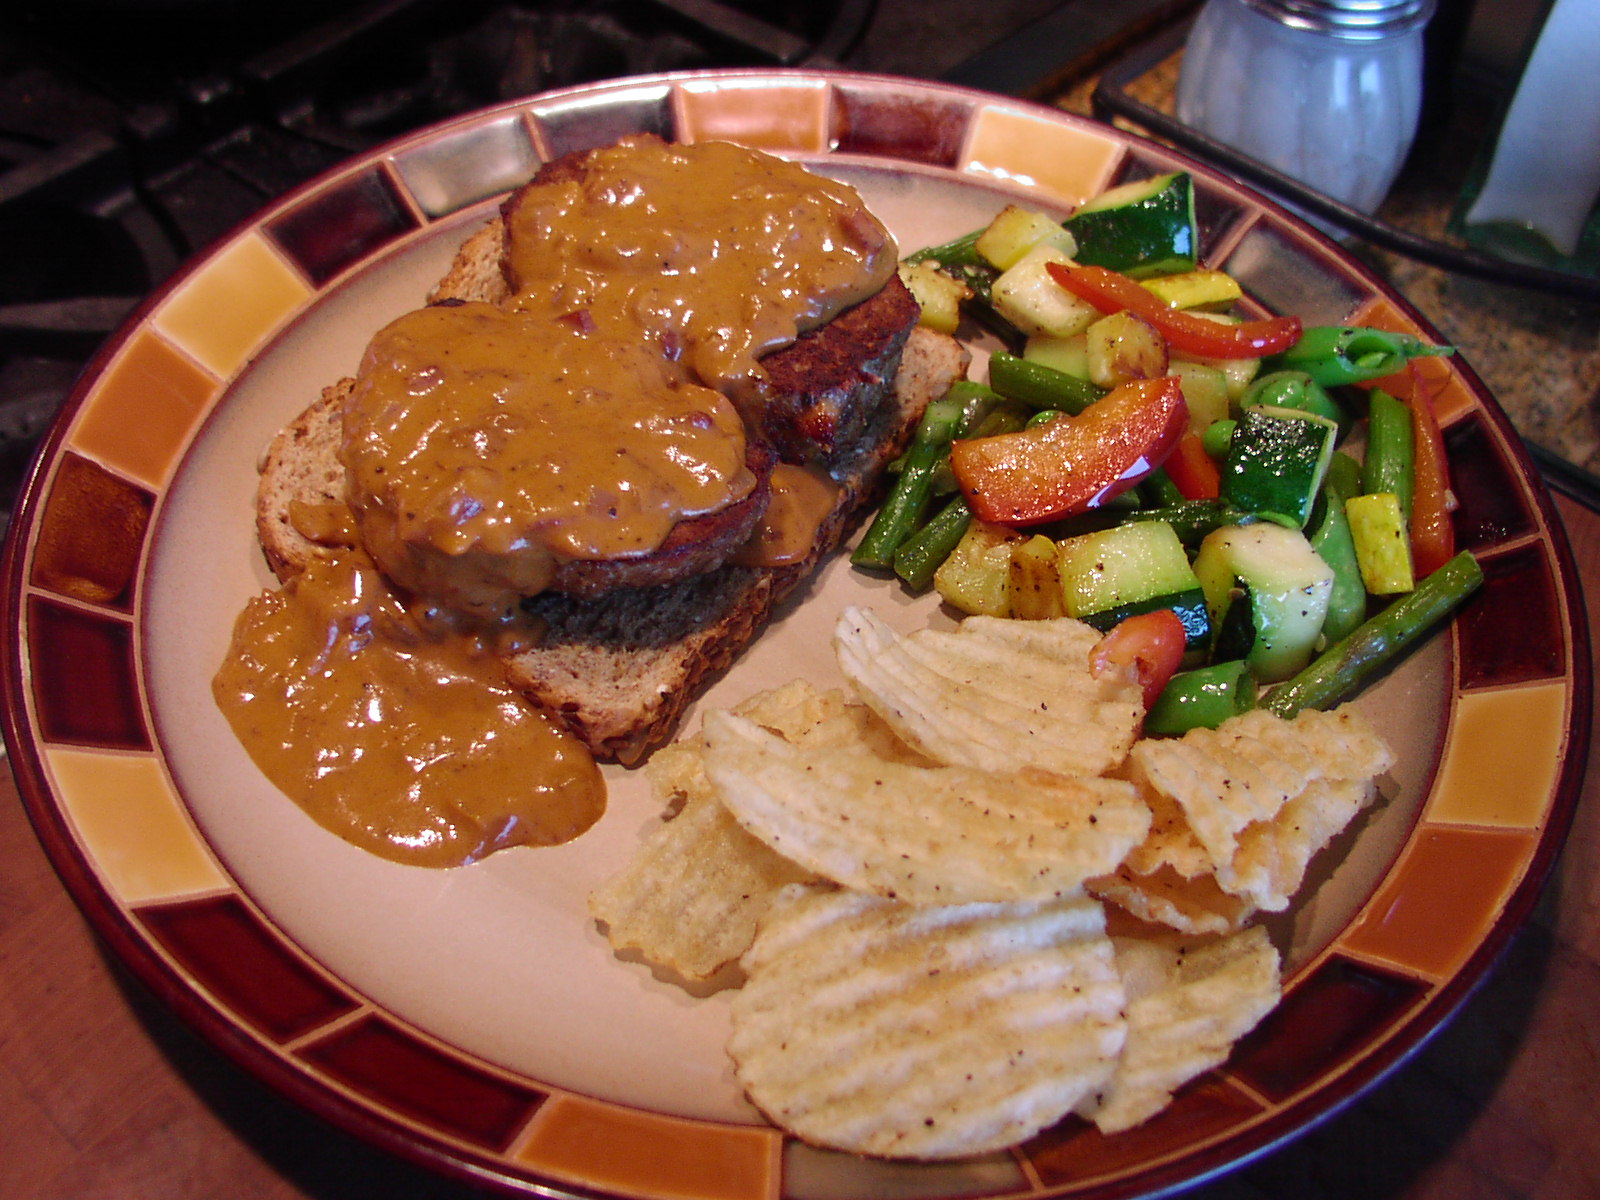
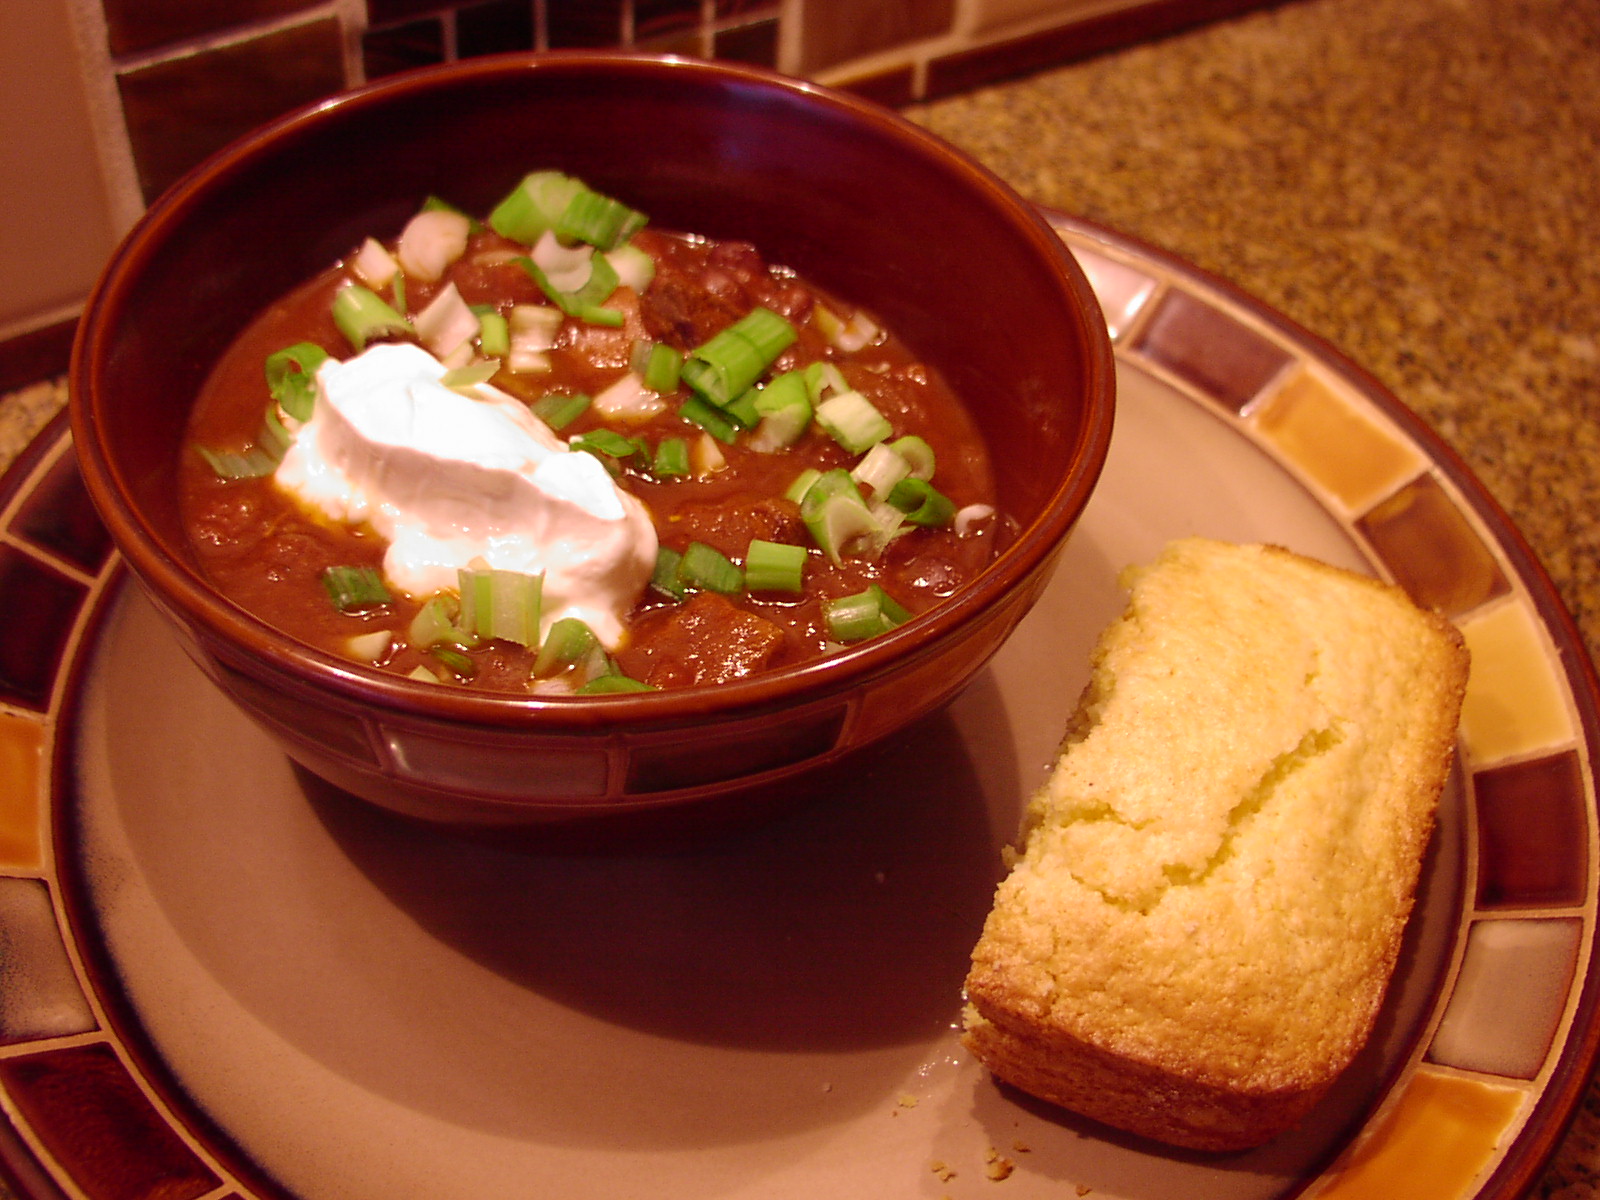
So next time you get a hankering for chili, give this simple and tasty recipe a try. Serve it with corned bread and a good hearty beer, and life will become a bed of roses. (Just don’t over spice the chili, or you’ll end up like I did when I tried the rub recipe. Your bed of roses will have thorns large enough to use as knitting needles!)

  • 1 T. extra virgin olive oil
  • ½ lb. lean beef such as London broil, round steak, top sirloin (raw or cooked*), diced into bite sized pieces
  • kosher salt
  • freshly ground black pepper
  • 1 garlic clove, finely minced
  • ½ red pepper, chopped
  • 1 (28-oz. can) diced/chopped tomatoes (preferably Italian tomatoes)
  • 1 heaping tsp. beef base
  • 1 can black beans
  • pinch marjoram
  • pinch dried rosemary
  • 2 T. chili powder
  • 1 tsp. Mexican oregano
  • ¼ tsp. crushed aleppo pepper or pinch crushed red pepper flakes
  • 1/8 tsp. ground guajillo pepper, opt.
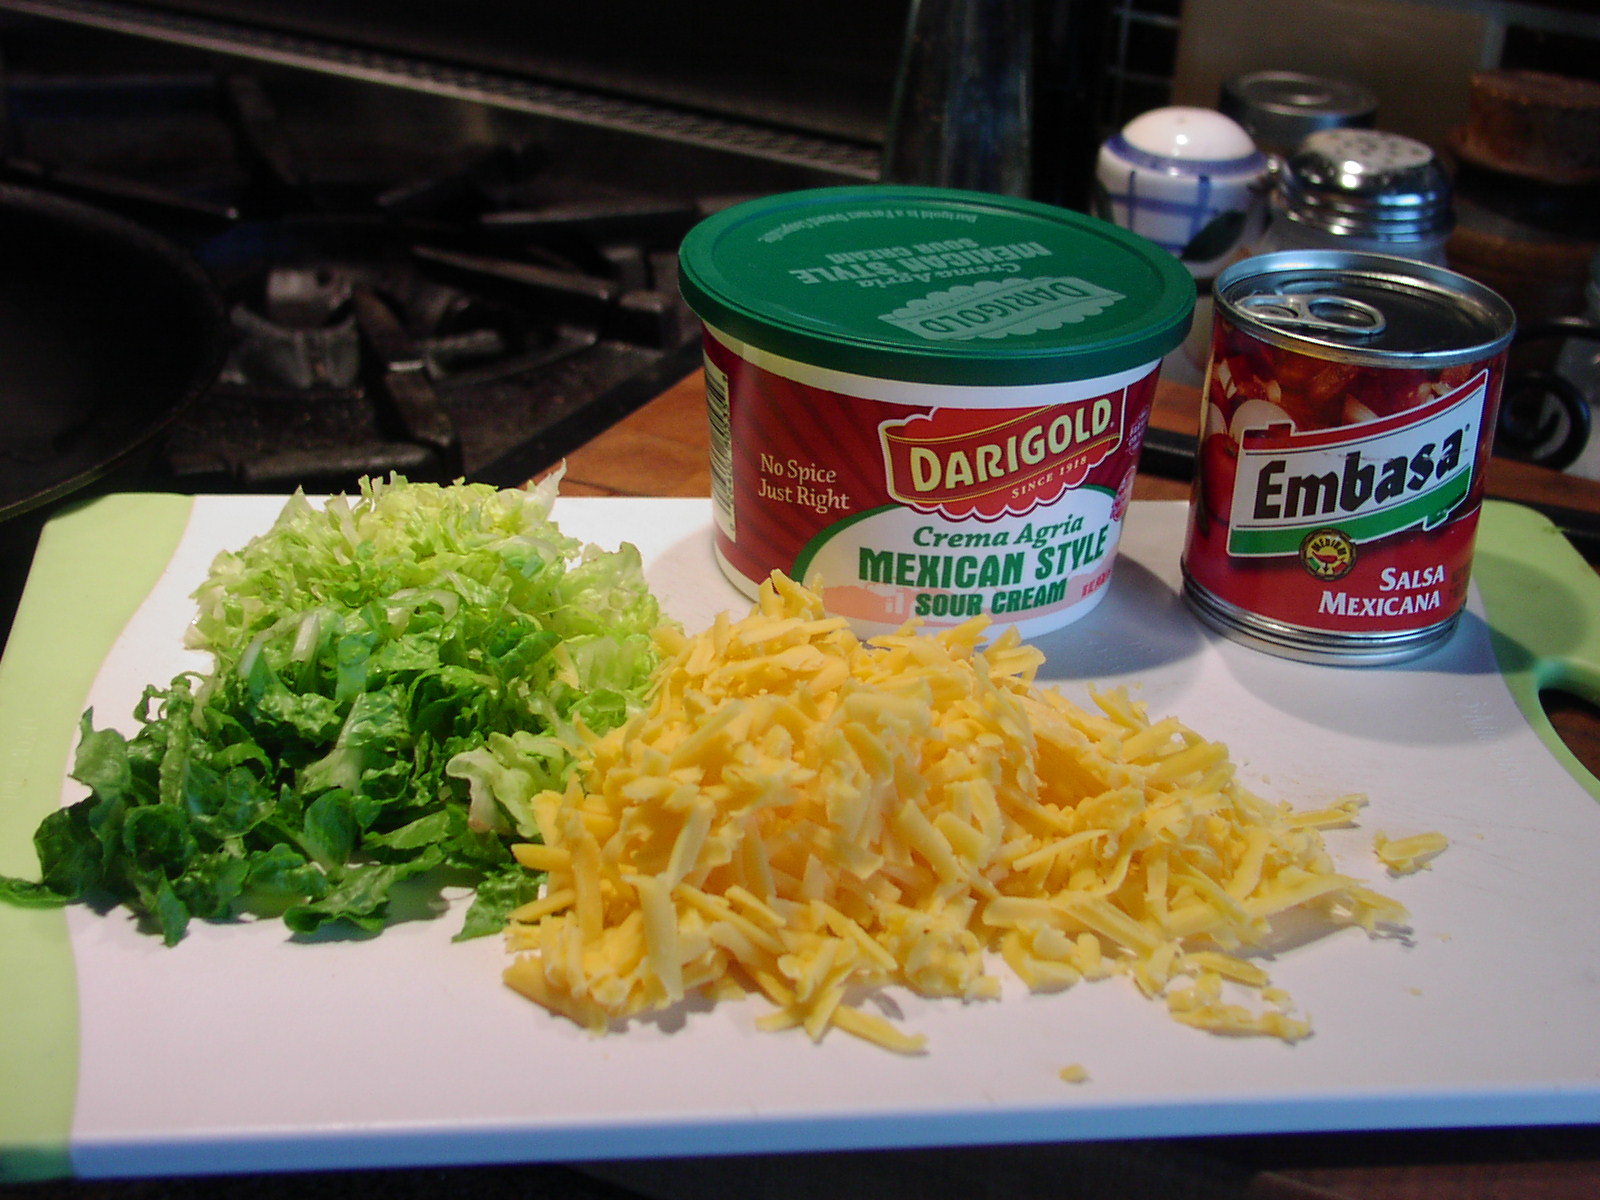
  • thinly sliced green onions, garnish, opt.
  • Mexican sour cream, garnish, opt.

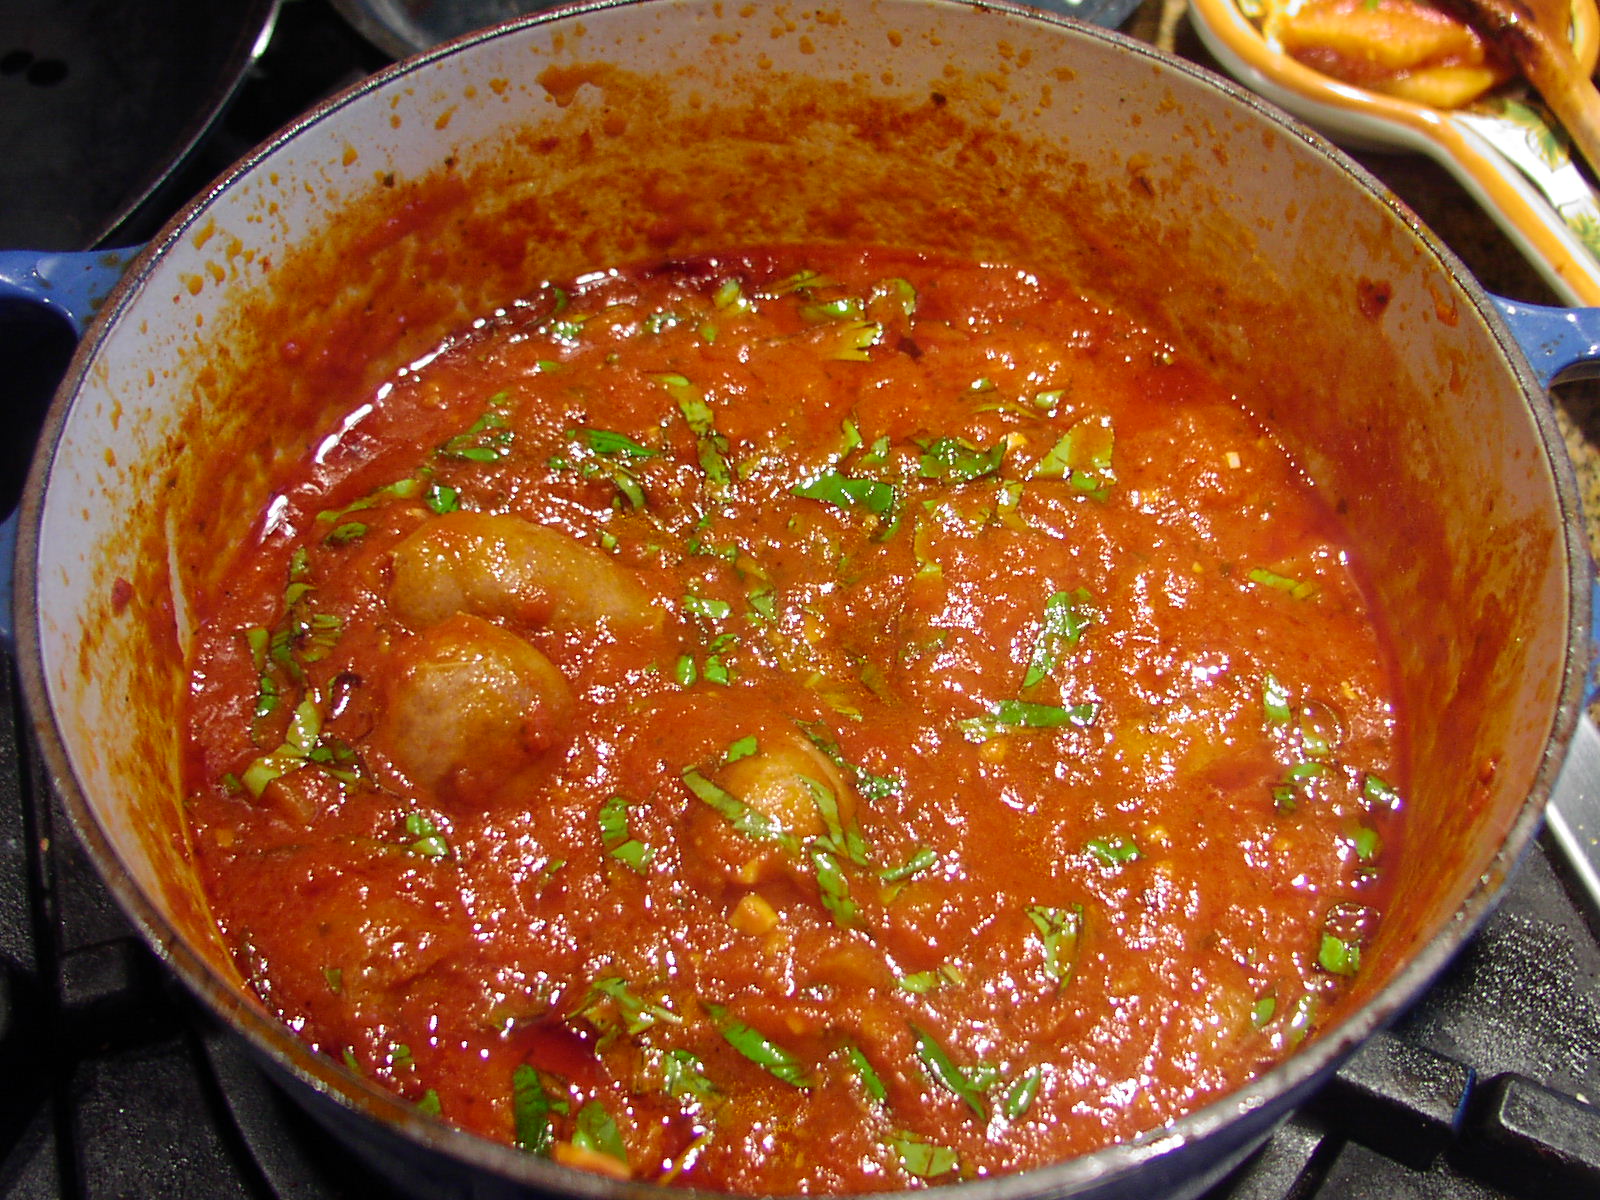
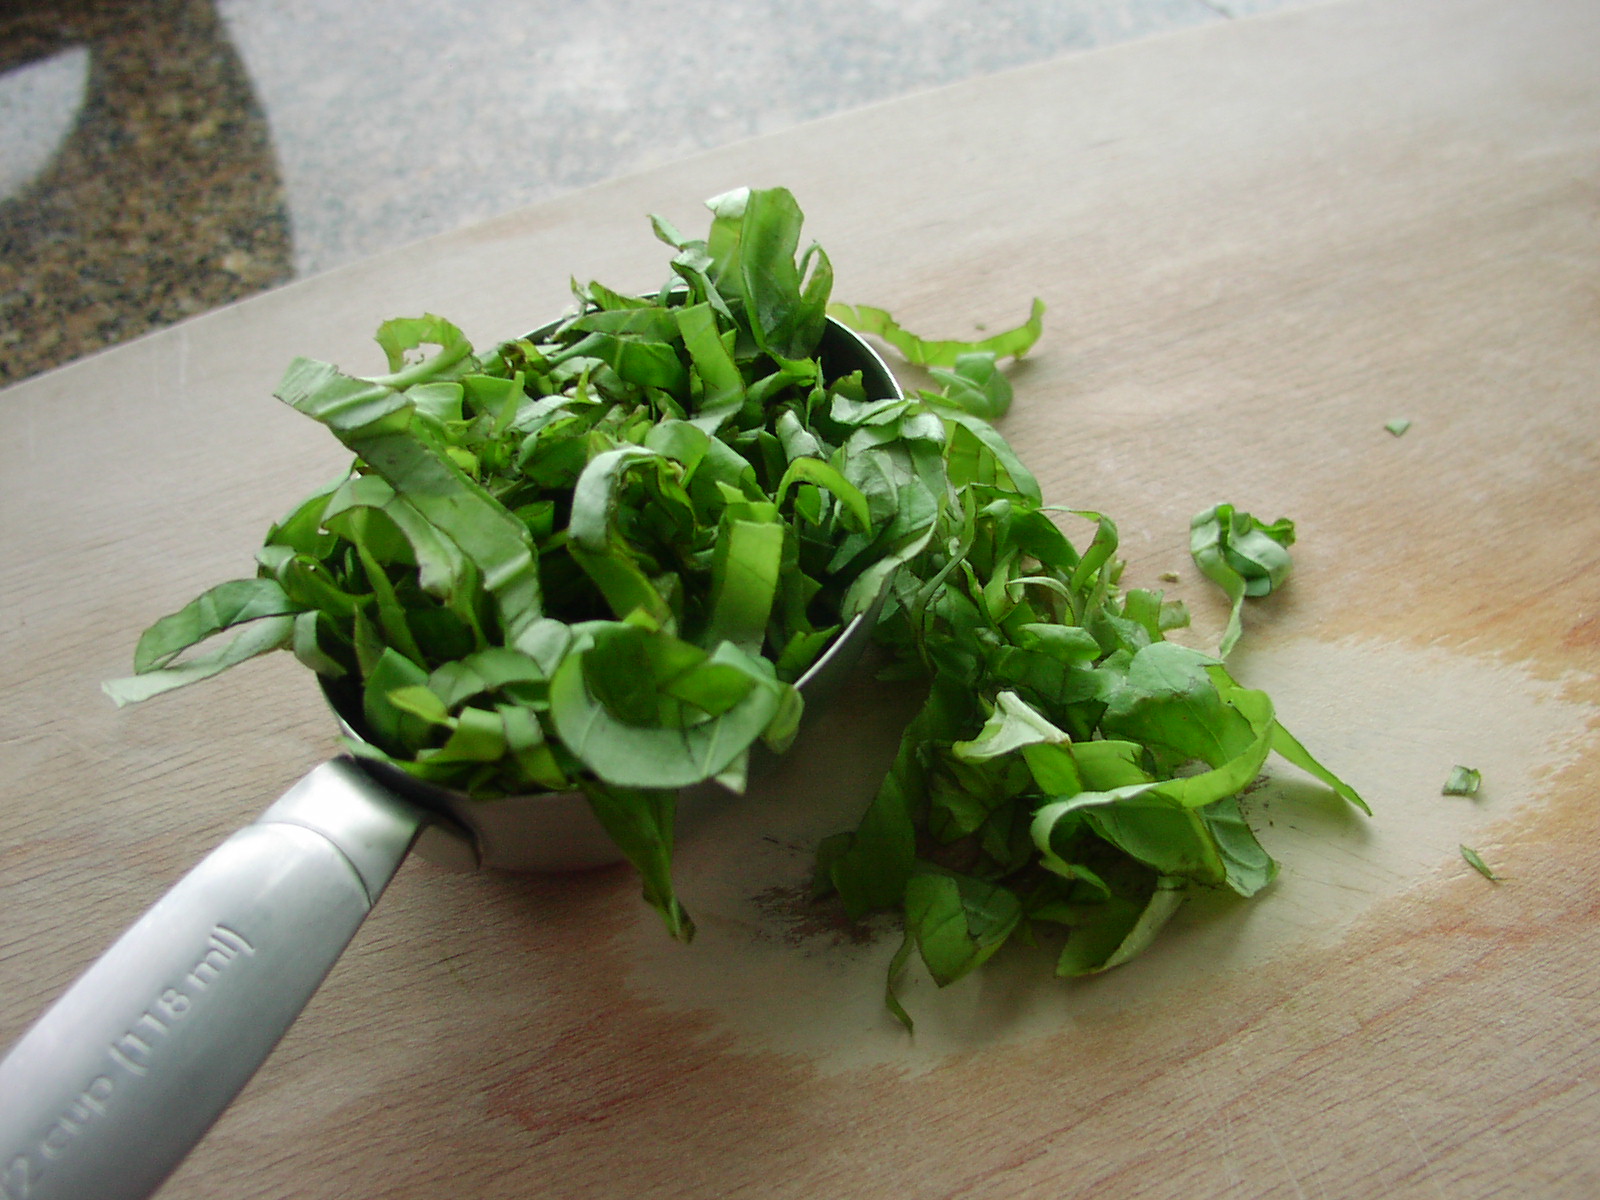
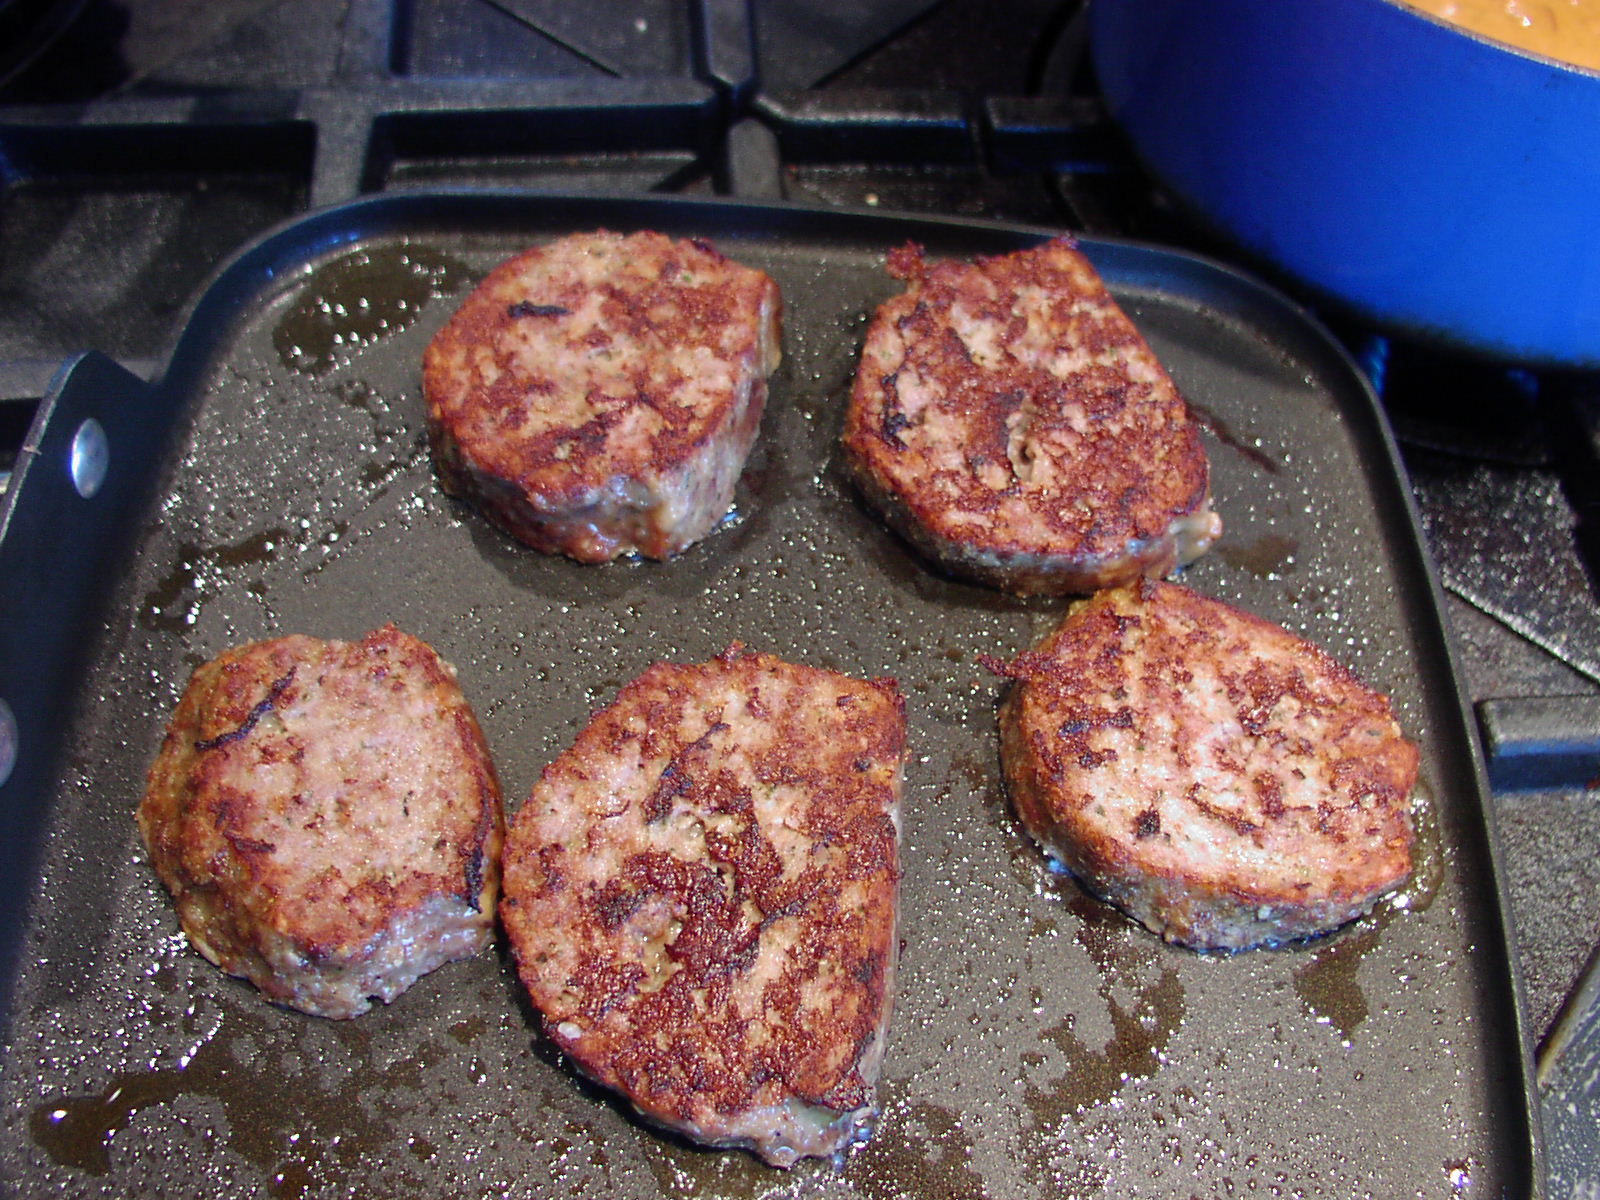
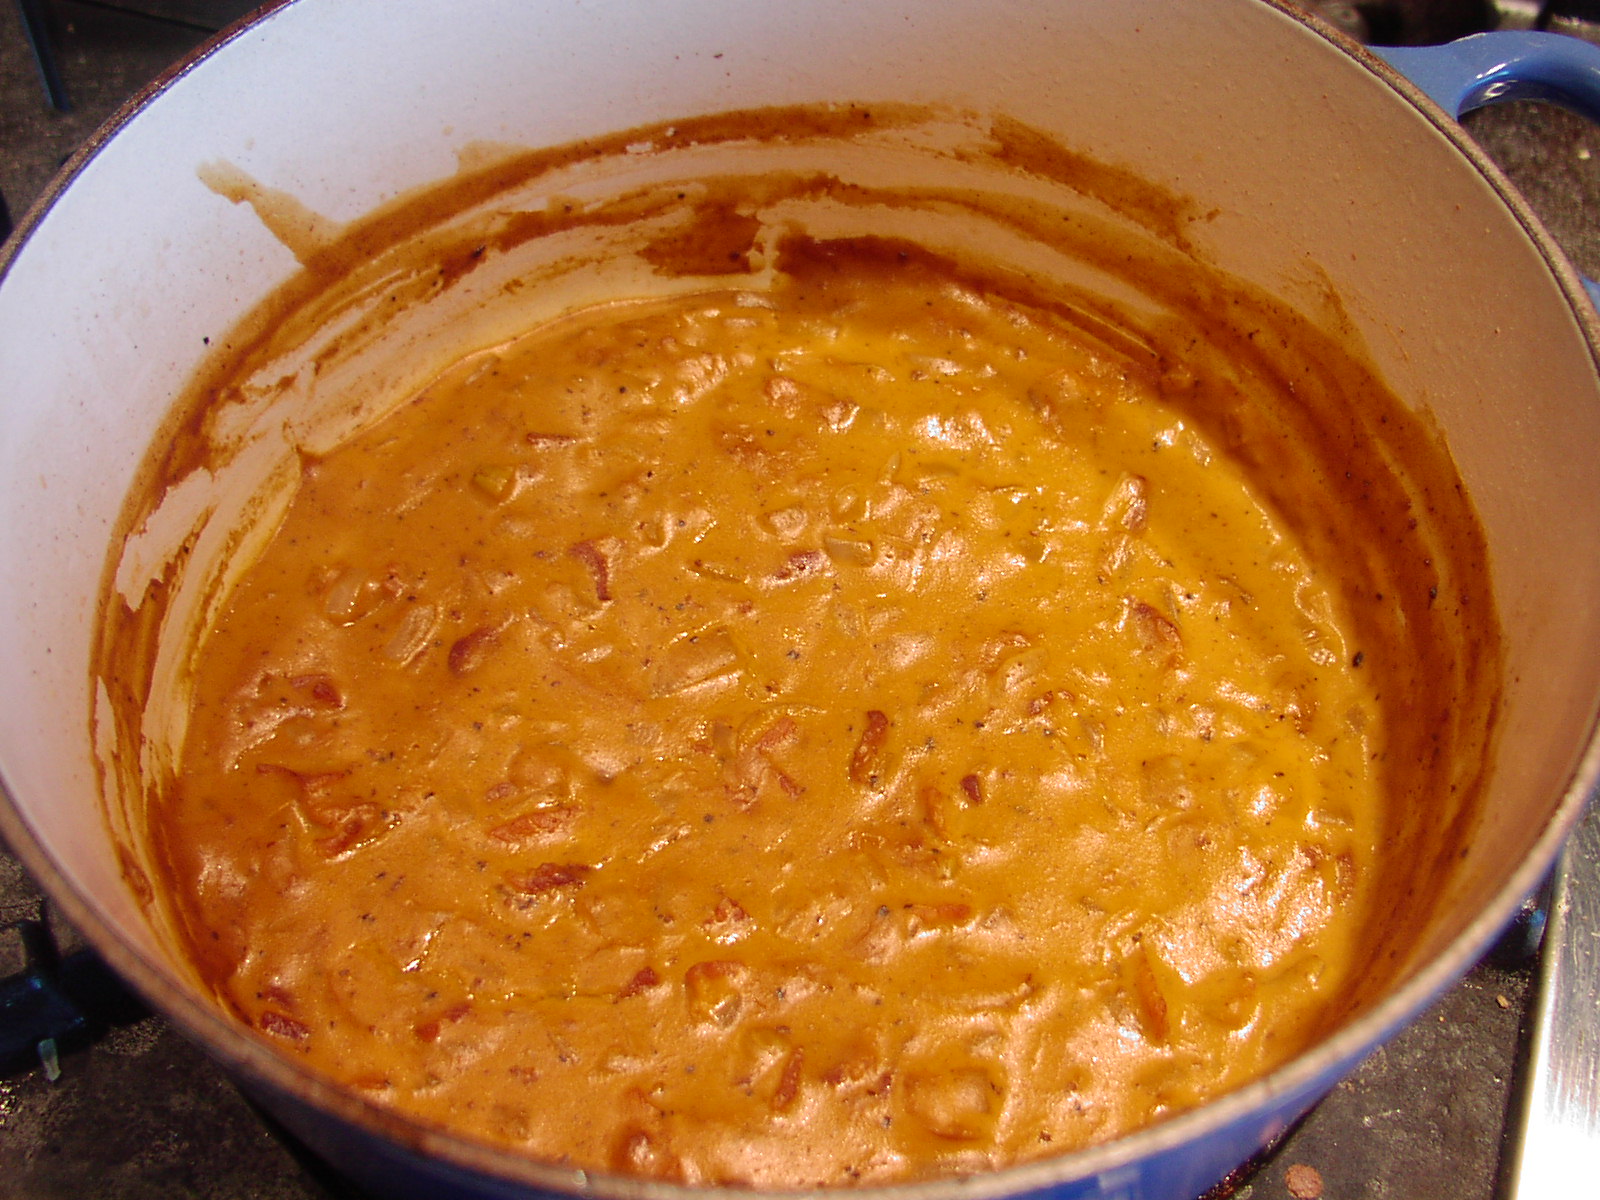
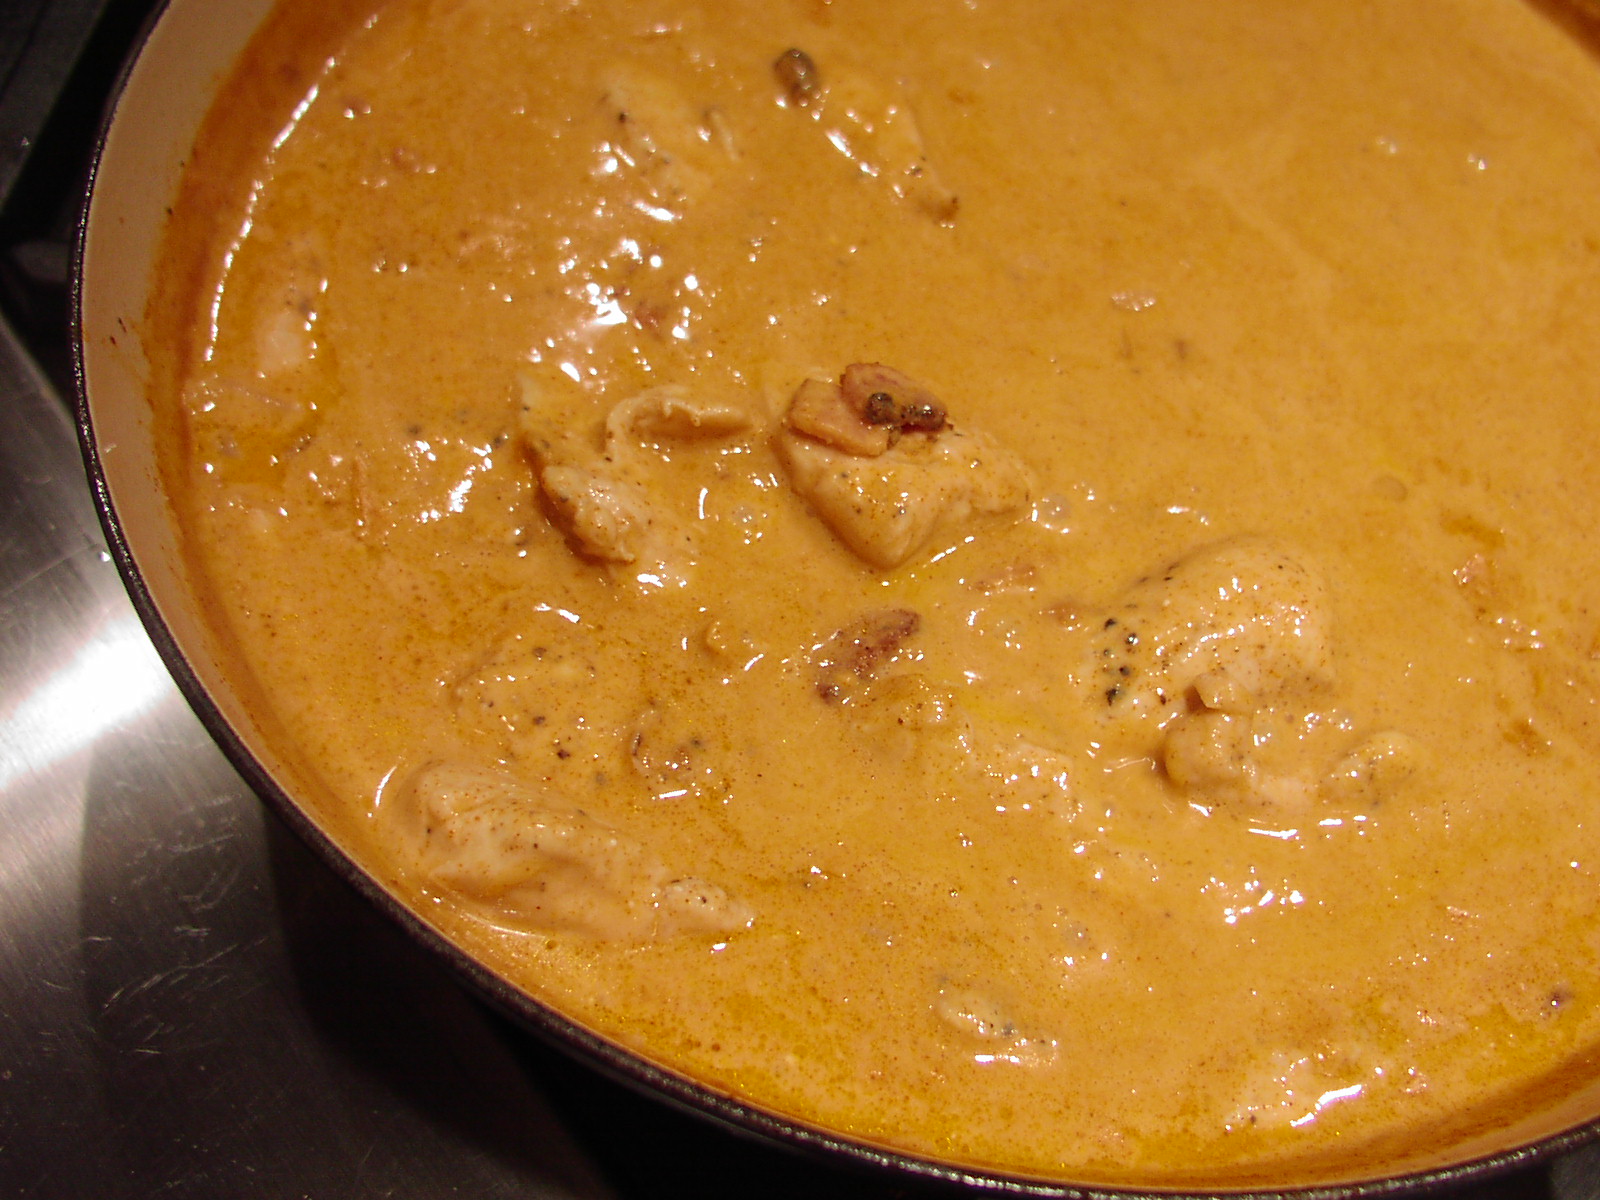
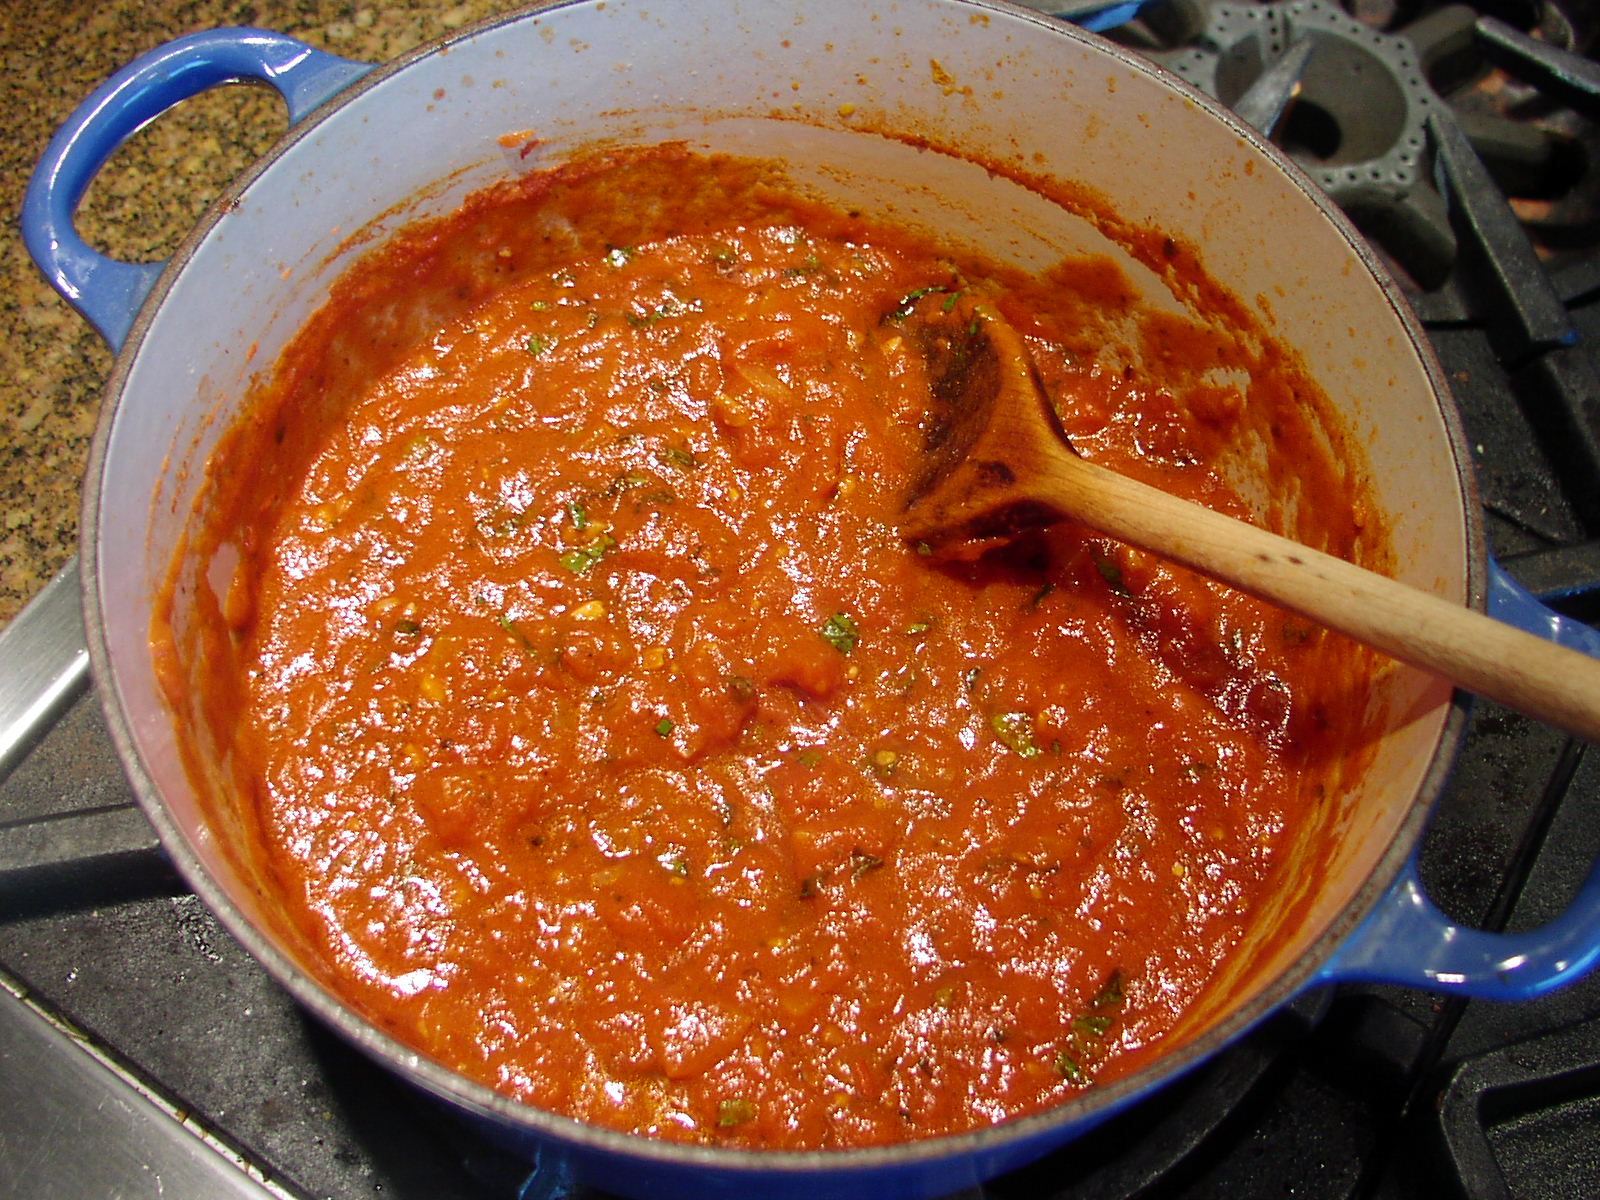
Heat the olive oil in a medium large covered pan. Add the raw meat* that has been dried with paper towels and sprinkled with salt and pepper. Fry until brown on all sides. Add the onion and cook for about 3 minutes. Add the garlic and red bell pepper and cook for about a minute or until you can smell the garlic. Add the canned tomatoes, beef base, black beans, marjoram, rosemary, chili powder, oregano, Aleppo and guajillo peppers. Bring mixture to a boil. Reduce heat to low, cover pot, and cook for about 2 hours or until the beef is fork tender. Stir often during the cooking time. Adjust seasoning along the way. Serve sprinkled with green onions and sour cream.

*if you are using already cooked meat, add along with the black beans

Note: aleppo and guajillo peppers are both new to me, but both have quickly become near and dear to my heart. Finding them ground can be kind of an adventure, but if you live in the Seattle area, visit PFI (Pacific Food Importers). Heck, even if you live in Portland you should visit PFI! It’s worth the trip. And if you don’t live in the area, go on line and order a bit of each. They are simply head and shoulders more tasty than crushed red pepper flakes.


TOSSED NOODLES WITH SHRIMP AND VEGGIES

OLYMPUS DIGITAL CAMERA

For this post, I thought instead of boring you with my scintillating repartee, I would bore you instead with my method for creating the perfect pasta dish.

To my thinking, the secret to any good pasta dish lies not only in the list of ingredients but in the preparation itself. (Actually, that really goes for any dish you prepare!)  I always recommend that before beginning any recipe, you read the preparation instructions as carefully as you read the list of ingredients. There is simply nothing worse than happily cooking along and realizing that your seafood is cooked to perfection and that it’s now time to add the sauce. But your “sauce” has yet to be assembled!

That is exactly what would have happened to me if I had followed the instructions as written for the recipe that was the basis for this pasta dish.  And for the very reason I just cited, in this case “the sauce step”, I almost always deconstruct a dish from top to bottom before I remove even one cooking implement from its resting place. I simply do not appreciate being blindsided halfway through a recipe!

But every cook is different. So even though I have tried to make this recipe, and actually all my recipes for that matter, as easy and logical as possible, I still recommend you go through the preparation instructions with an eye to making it even more efficient for yourself. (And don’t limit yourself to just my recipes.) Apply this tactic with every new recipe you contemplate.

So as you will see when you read the instructions for this dish, having all the ingredients assembled ahead of time is truly a must. The actual cooking time is only a few precious little minutes. Having all your ingredients prepped ahead of time not only makes good sense, but will help ensure perfect results. Happy cooking! Oh, and I hope you enjoy the recipe.

  • 1 T. minced fresh ginger
  • 2 large garlic cloves, finely minced
  • 1 medium carrot, cut into matchsticks
  • 1 red pepper, thinly sliced
  • 12 snap peas, cut in half on the diagonal
  • 1 lb. raw large shrimp (16-20 per pound is best for this recipe)
  • 1 T. cornstarch
  • pinch – ¼ tsp. crushed red pepper flakes
  • pinch kosher salt
  • freshly ground black pepper
  • 2 tsp. sesame oil
  • 2 T. tamari
  • ½ c. chicken broth
  • 3 green onions, thinly sliced on the diagonal
  • 2 T. vegetable oil
  • 8-oz. thick egg noodles (I use the Country Pasta Homemade Style Egg Pasta sold at Costco in a 64-oz. bag)

Combine the minced ginger and garlic together in a small bowl. Set aside.  Cut up the carrot, red pepper, and snap peas. Set aside. Peel the shrimp. Set aside. Start the water for your pasta. (Don’t forget to add salt when the water comes to a boil.) In a small bowl, whisk together the cornstarch, red pepper flakes, salt, pepper, sesame oil, tamari, and chicken broth. Set the sauce aside. Slice the green onions. Set aside.

When the salted pasta water is boiling, add the pasta to the pot and heat the 2 tablespoons of vegetable oil in a large fry pan or wok. When the oil is hot, add the minced ginger and garlic; cook for about one minute or until you can smell the garlic. Add the carrot, red pepper, and pea pods and sauté for a couple of minutes or until the veggies are crisp tender. Add the shrimp and cook only until done (the shrimp will no longer be grey). Add the sauce and cook only until sauce has thickened, about a minute. Drain the noodles (when they are al dente, of course) and add to the sauce. Stir to coat all the noodles and serve immediately sprinkled with the sliced green onions.


SPICY ITALIAN SAUSAGE SPAGHETTI

OLYMPUS DIGITAL CAMERA

This is my answer to “I want spaghetti and meatballs for dinner but don’t want to spend much time in the kitchen”. And yes, I am fully aware that sliced sausage links are not “meatballs”. But for those occasions when all I want is Italian comfort food, and my energy level is somewhere in the minus zero zone, sliced Italian sausage links are close enough for me! (Plus Mr. C loves Italian sausage!) And when the sausage is simmered for a short time in this quick and easy marinara sauce, what could be simpler or tastier? Add a lovely Caesar salad, a hunk of chewy bread, and a bottle of your favorite red wine, and life is good. (OK, if you’re really tired you can skip the salad part. Just don’t forget the wine!)

So if you too ever have the urge for good old fashioned spaghetti and your energy level is down a pint or two, give this recipe a try. I also recommend that while you are slaving away in the kitchen, that you taste test the wine you plan to serve with dinner. If a nice glass of good red wine doesn’t renew your flagging energy level, I’d say skip the whole thing and just head straight for bed. (And yes, I speak from experience.)

  • 1 pkg. spicy or mild Italian sausage links
  • 3 T. extra-virgin olive oil, divided
  • 1/3 c. water
  • ½ c. chopped onion
  • 2 cloves garlic, chopped
  • 1 (28-oz.) can chopped or diced tomatoes (Italian tomatoes preferably)
  • 1 bay leaf
  • pinch crushed red pepper flakes
  • 1 tsp. dried oregano
  • ½ tsp. kosher salt
  • freshly ground black pepper
  •  ½ c. loosely packed fresh basil chiffonade*
  •  1-2 T. butter, optional
  • spaghetti cooked al dente
  • grated Parmesan cheese

Place the sausages along with 1 tablespoon of the olive oil and the water in a medium covered fry pan. Cover the pan and steam/fry the sausages until they are nicely browned. Remove from heat and set aside.

OLYMPUS DIGITAL CAMERA

Meanwhile, in a large covered sauce pan, heat the remaining 2 tablespoons oil over medium high heat. Add the onion and sauté until soft and translucent, about 6 minutes. Stir in the garlic and cook for an additional minute. Add the tomatoes, bay leaf, red pepper flakes, oregano, salt, and pepper.  Stir to combine ingredients. Bring to a boil, reduce heat, cover, and simmer for about 30 minutes. (Take the lid off part way if the sauce is too thin.) About half way into the cooking process, cut each cooked sausage diagonally into 4 equal size pieces and add to the sauce. When the sauce is done, remove from heat, remove bay leaf, add basil, and adjust seasoning.

OLYMPUS DIGITAL CAMERAIf the sauce tastes acidic, add butter 1 tablespoon at a time to round out the flavor. Serve over cooked pasta and pass grated Parmesan. (Don’t forget the wine!)

*Chiffonade (pronounced “shif-oh-nod”) is a knife technique used for cutting herbs and leaf vegetables such as lettuce into thin strips or ribbons. To chiffonade leaves of basil, stack the basil leaves and roll them into a tube. Then carefully cut across the ends of the tube with your knife to produce fine strips.

OLYMPUS DIGITAL CAMERA

GRILLED MEATLOAF WITH BACON FLAVORED RED GRAVY

OLYMPUS DIGITAL CAMERA

We were in Salt Lake City visiting my son earlier this spring, and since it happened to be Mother’s Day, Sven and Mr. C decided to take me out for dinner at one of Sven’s favorite restaurants. So off we went to Ruth’s Diner, located in historic Emigration Canyon. (It’s a new little place; only been around since the 1930s.) And OMG – what a wonderful time and meal we shared that day. I felt like I had just been chosen queen for a day. First of all, I was with my two favorite men in the whole world. (What could be better than that?) And to top things off, my entrée choice was off the charts delicious!

Apparently Ruth’s Diner is famous for several dishes they serve, among them Grandma Claire’s Baked Mac and Cheese, Chicken Fried Steak, and Ruth’s Meat Loaf. So never one to argue with success, I ordered the meatloaf.

The grilled meatloaf (who ever heard of grilling meatloaf slices?) came lightly dressed with a delicious, not too highly seasoned reddish gravy. Nestled up to the meatloaf all cozy and warm, were creamy mashed potatoes, sautéed veggies, and a warm from the oven biscuit. Oh my. It was simply heaven on a plate.

So yesterday, even though everyone knows it is just plain wrong to serve meatloaf in late Spring/early Summer, I flew in the face of convention and attempted to reproduce my Ruth’s Diner experience.

Well boy howdy, I am here to tell you, once in awhile I create a blue ribbon winner. (OK, no one actually awarded me a blue ribbon, but I know a winner when I taste one!) So even though it is not technically “meatloaf season”, I’m going to recommend giving this new spin on meatloaf a try. (And yes I know, you may have known about grilling meatloaf for decades, but for me it was like waking up and realizing I’m no longer in Kansas!) Note to self: no more sneaking into the TV room late at night and watching The Wizard of Oz!

I hope you enjoy this different and delicious way to prepare and serve an all-American classic.

Grilled Meatloaf:

  • 2 T. chopped dehydrated onion
  • 1 T. dried parsley
  • 1 tsp. granulated garlic
  • 1 tsp. Montreal Steak Seasoning (comes in bulk in the dried herbs and spices section)
  • 1 tsp. seasoned salt
  • freshly ground black pepper
  • ¼ tsp. dried savory
  • ½ c. dry bread crumbs (I use the Italian bread crumbs – also come in bulk at many grocery stores)
  • 2 eggs
  • ¼ c. milk
  • 1 lb. bulk sausage
  • 1 lb. not so lean ground beef

In a large mixing bowl combine the onion, parsley, garlic, Montreal Seasoning, salt, pepper, savory, bread crumbs, eggs, and milk. Stir in the sausage and then the ground beef. I use a table knife for this purpose. Cuts through the mixture like a knife! (Pardon the pun….)

Form into 2 rectangular loaves. Place in a baking pan and bake for 1 hour in a pre-heated 350 degree oven. Remove from oven and let sit for at least 30 minutes. Just before ready to serve, cut into ¾-inch thick slices and fry on a lightly greased griddle or fry pan, just until each side is nicely browned and slightly crispy.

OLYMPUS DIGITAL CAMERA

Serve lightly spread with gravy. Great served with Cheesy Grits (recipe below) or mashed potatoes and sautéed veggies.

Bacon Flavored Red Gravy:

OLYMPUS DIGITAL CAMERA

  • 3 slices thick meaty bacon, chopped
  • ½ small onion, finely chopped
  • 2 T. flour
  • ½ tsp. smoked paprika
  • freshly ground black pepper
  • ½  c. strong coffee or ½ tsp. espresso powder and ½ c. water
  • ¾ c. beef stock or 1 heaping tsp. beef base and ¾ c. water
  • 1 T. tomato paste
  • ¼ c. half and half
  • milk – if needed to thin the gravy to desired consistency

Fry bacon until crisp. Remove cooked bacon from pan reserving bacon grease. Add onions to skillet and cook until onions are softened, scraping up any browned bits on pan bottom. Whisk in flour, paprika, and pepper; stir well to combine. Cook for 1 to 2 minutes. Whisk in coffee, beef stock, and tomato paste. Cook sauce until thickened, about 6 minutes. Add half & half and reserved bacon*; cook for an additional 5 minutes. Thin to desired consistency with milk.

*If you don’t want little bits of bacon in your gravy, save the bacon and add to scrambled eggs the next morning.

Bonus Meal Idea for Leftovers:

OLYMPUS DIGITAL CAMERA

Grill up some more of the meatloaf. Also warm up the leftover gravy, toast up some bread, and serve the grilled meatloaf on the toasted bread liberally slathered with gravy. Yum!

Cheesy Grits: (see picture at top of post)

  • 1½ c. whole milk
  • 1½ c. water
  • ½ tsp. kosher salt
  • freshly ground black pepper
  • ¾ c. quick-cooking grits
  • 1 c. grated white cheddar cheese

Bring milk, water, salt, and pepper to a boil in a saucepan over high heat. Gradually whisk in grits. Reduce heat to low, and simmer uncovered, stirring occasionally, 10 to 12 minutes or until thickened. Remove from heat and stir in the cheese. Adjust seasoning. If you like thinner grits, add a little more milk. Serve immediately.


.


BAKED HALIBUT WITH SOUR CREAM AND DILL

OLYMPUS DIGITAL CAMERA

So, here we are in the middle of Colorado, and all I can think about is fresh seafood baked in a savory sauce. (Suffice it to say I ignored my taste buds and ordered the only sensible alternative – green chili.) And as I have told you before, you want great green chili – go to Colorado. (Or any of the surrounding states, I might add.) See my recipe for Green Chili Sauce with Pork if you too are a green chili lover.

But back to seafood….. So when we got home, of course one of the first dinners I prepared was this wonderful and easy preparation for halibut. BTW, it’s great with any firm fleshed fish. (Pardon the alliteration.)

So next time you have a hankering for seafood that’s a little bit dressy and really, really good, give this recipe a try. It’s a great company dish. And although it’s not as calorie pure as simple baked fish with a squeeze of lemon, it’s not that bad either. As I have heard it said – moderation in all things. (Like I have even a modicum of understanding when it comes to moderation!) But it sounds good, right?

Hope you enjoy the recipe.

  • 1-1½ lbs. fresh halibut fillet
  • ¼ c. finely diced green onion
  • ½ c. sour cream (I use Tillamook light sour cream)
  • ¼ tsp. fresh or dried dill
  • ¼ c. finely grated Parmesan cheese (don’t use more or the cheese flavor will overpower the fish)
  • freshly ground black pepper
  • paprika

Place halibut skin side down in a baking dish. (No skin, butter the baking dish before adding the fish.) Combine the green onion, sour cream, dill weed, cheese, and pepper. Slather over the top of the fish. Bake in a pre-heated 350 degree oven for 20-25 minutes or until the halibut is barely baked through. (The fish is done when it is opaque all the way through when slashed in the thickest part or an instant-read thermometer reads 156 degrees.) If you have a convection oven, turn on the convection fan about 15 minutes into the baking process. When the fish is done, remove from oven; lightly sprinkle with paprika and let sit a couple of minutes before serving. Great served over lightly steamed spinach with coleslaw on the side.

HUNGARIAN PAPRIKÁS CSIRKE (CHICKEN PAPRIKA)

OLYMPUS DIGITAL CAMERA

This is one of Mr. Cs favorite dishes. The original recipe came to me from my dear friend Dodie. Her in-laws had immigrated to America from Hungary. And apparently Dodie’s mother-in-law was an amazing cook. I of course had to mess with the recipe to get it down to a manageable size, since the original recipe started off with 12-14 meaty whole pieces of chicken. All the original ingredients are still in my version, but several steps have been eliminated to allow for a more manageable preparation time. But my dear husband, whom I regard as a “chicken paprika connoisseur” is adamant that none of the flavor demonstrated in the original recipe has been sacrificed in the reconstruction.

So ladies and gentlemen, I give you a very easy and delicious recipe for the Hungarian classis – Chicken Paprikash. Hopefully you will enjoy it as much as we do.

And about the 1 hour of letting the finished dish sit before re-heating and serving it. Well the only thing I can say is that I have always adhered to this step offered in the original recipe and have no idea what the results would taste like if I served the dish before it had that hour to sit and mellow. I suppose it would be alright if you chose to give it a go before the resting period. But for me, I’m not going to mess with the original recipe any more than I already have. I’m not so sophisticated as to believe that spirit’s might not actually exist. So the last thing I want to experience, if only in a dream, is the spirit of the fine woman who’s recipe I have altered to come after me with a live chicken in one hand and a meat cleaver in the other. I’m sure even spirit’s have their “that’s it” point.  So needless to say, I do not wish to garner any more disfavor by eliminating even one more tiny little insignificant detail from the original recipe. Enjoy!

  • 3 slices bacon, cut into small pieces
  • ¼ small onion, finely chopped
  • 1 large boneless, skinless chicken breast, cut into bite sized cubes
  • kosher salt
  • freshly ground black pepper
  • 1 c. chicken broth
  • 1/3 c. milk or more
  • 2 T. flour
  • 1 T. Hungarian paprika, or more to taste
  • ¾ c. sour cream, or more to taste

In a heavy sauce pan, fry the bacon until very crisp. Remove from pan and place in a small bowl. Add the onion to the pan and sauté for a couple of minutes or until the onion is translucent. Add the chicken pieces and sprinkle very lightly with salt and a goodly amount of fresh pepper. Stir fry until the chicken is just done. Remove to the same bowl with the cooked bacon.

Meanwhile whisk together the chicken broth, milk, flour, and paprika. After removing the chicken and onion, pour the liquid mixture into the pan, bring to a boil, reduce heat and let gently burble for about 5 minutes, stirring the whole time. Whisk in the sour cream. (If the sauce seems too thick, add a little additional milk.) When thoroughly heated, but not boiling, add the reserved bacon, chicken, and onion mixture. Adjust seasoning. Continue to heat until just before ingredients reach a boil. Remove from heat, cover, and let sit for 1 hour. Reheat and serve over rice or wide egg noodles.

OLYMPUS DIGITAL CAMERA

Perfect with fresh green beans, a chunk of hearty bread, and a chilled Fume Blanc.

Note: This recipe doubles, triples, etc. beautifully.


FRIED MARINATED TOFU WITH GREEN ONIONS AND SESAME SEEDS

OLYMPUS DIGITAL CAMERA

So I know what you are thinking. Where in the world has Patti been that she hasn’t written a post in almost a month? First of all – sorry about that, but Mr. C. and I have been on the road with our ginormous 19 foot trailer taking in the sites and visiting family from here to Colorado and back. Touring with a trailer is a lovely way to experience our country and believe me, our country is worth seeing. For example, staying in a fairly primitive campground at the Black Canyon of the Gunnison National Park in Colorado, with snow still on the ground and deer grazing around the trailer is a fantastic experience. Never heard of the Black Canyon of the Gunnison National Park? Well neither had we until I discovered it on line while I was planning our itinerary. Now I can hardly wait to return. Just for grins, visit the park’s website at www.nps.gov/blca/index.htm. I’m sure you will instantly become as fascinated with this amazing and little known area of Colorado as we were.

And speaking of amazing areas that are not as well known as say Yellowstone and coincidentally not as far away, Steens Mountain and the Malheur National Wildlife Refuge in SE Oregon are tops on our list of places to be visited with regularity. But enough with the travel guide prose. Let’s get on with the dish of the day.

This marinated tofu dish is absolutely delicious and ever so “in”. With all the press about eating organic, sustainable, local, slow, vegan, vegetarian, etc. etc., this dish comes as close to “realistic” healthy food as I can muster. And I do try to cook healthy, really I do. So give this fried tofu recipe a try. Mr. C tells me for him this tofu dish is analogous with “crack” (crack-cocaine), not that he has ever tried crack you understand, but you get the gist. He LOVES it.

  • ¼ c. soy sauce
  • ¼ c. rice wine vinegar
  • 1 T. chili-garlic sauce or Sambal Oelek and 1 small clove finely minced garlic
  • 1 tsp. sesame oil
  • pinch kosher salt
  • 1 lb. firm tofu
  • 3 T. corn or peanut oil
  • ¼ c. cornstarch or more + 1 tsp., divided
  • ¼ c. thinly sliced green onions
  • 1 tsp. sesame seeds

Combine the soy sauce, vinegar, chili-garlic sauce, sesame oil, and salt in a small container. Remove the tofu from the container and press gently between several sheets of paper towel to remove some of the liquid. Cut into 12 same size pieces and add to the marinade. Let tofu marinate for about 2 hours. When ready to fry add oil to medium sized frying pan and hot over medium high heat. When oil is hot, take each piece of tofu out of the marinade (reserving marinade), blot on a paper towel, dip in the ¼ cup cornstarch (or more as needed) and place in hot oil.  Fry the pieces until they are crispy brown on both sides.

OLYMPUS DIGITAL CAMERA

Meanwhile pour the remaining marinade and 1 teaspoon of cornstarch into a small pan. Whisking the entire time, bring the mixture to a boil and stir until thickened. Remove from heat.

When tofu is crisp and golden brown, remove to a serving plate. Pour sauce over the tofu and sprinkle with green onions and sesame seeds. Serve immediately.

Please note: Play around with the sauce. If you are a ginger lover, add some ginger. I know I am going to the next time I make this dish.


CHICKEN FAJITAS

OLYMPUS DIGITAL CAMERA

Well once again I have proven to one and all that my photographs of food will never make the rotogravure section of the Sunday Chronicle. Whoa Nellie – that was a thought blast from the past!  Maybe I thought about the long gone rotogravure* section of Sunday papers because I have been going half mad all day trying to get Irving Berlin’s melody for the song Easter Parade out of my head. (There is a reference to the rotogravure in the song lyrics.) Whatever the reason, the truth of what I said remains. I am simply a lousy food picture taker (can’t even refer to myself as a photographer) and I want to take this opportunity to apologize for my ineptitude.

OK, I got that off my chest; on to better and tastier subjects.

I don’t know about you, but I love fajitas. What I don’t appreciate is when fajitas are so highly seasoned that you can’t taste the flavor of the meat. (Just my old hang-up of wanting a blend of flavors in whatever dish I eat or prepare!) I also don’t like buying seasoning packets when I can jolly well produce a better and less expensive product at home! Of course, my spice blends don’t have the likes of monopotassium glutamate, disodium guanylate, or disodium inosinate (not making these names up folks), but I don’t really feel I’m missing anything by their absence!

So the following recipe is my answer to a not overly spiced fajita that can be made with chicken, beef** (skirt steak works great), or shrimp**.  This mélange of herbs is perfect for Mr. C and me. For those who prefer spicier fajitas, I recommend using a hot salsa to ramp up the heat.

*According to the Free Dictionary website, rotogravure is an intaglio printing process in which letters and pictures are transferred from an etched copper cylinder to a web of paper, plastic, or similar material in a rotary press. i.e. printed material, such as a newspaper section, produced by this process.

  • 1 T. cornstarch
  • 1 tsp. chili powder
  • ½ tsp. ground cumin
  • ½ tsp. onion powder
  • ½ tsp. granulated garlic
  • ¼ tsp. smoked paprika
  • scant 1/8 tsp. cayenne
  • 1 tsp. kosher salt
  • freshly ground black pepper
  • ¼ c. water
  • 3 T. extra virgin olive oil, divided
  • 1 lb. boneless skinless chicken breasts cut into 1/3-inch strips
  • 1 green pepper, thinly sliced (or half green, half red pepper)
  • 1 medium yellow onion, thinly sliced
  • 2 T. fresh lime juice
  • 8 warm flour tortillas
  • shredded lettuce, grated cheddar cheese, salsa, thin avocado slices, and sour cream (preferably Mexican) for serving

Note: Remember – you don’t have to buy your spices in those darling little jars at the grocery store. Buy your spices in bulk and save yourself mucho dinero (well we are talking fajitas here you know!)

Combine the cornstarch, chili powder, ground cumin, onion powder, granulated garlic, smoked paprika, cayenne, salt, and pepper. Place in an airtight container for storage. (I make about a triple batch at a time.)

When ready to prepare fajitas, whisk together the water, 2 tablespoons of the olive oil, and the chili powder mixture together in a small bowl. (If you have made a larger amount of the spice mixture, use about 4 tablespoons for this recipe.) Add the chicken, and stir together until the chicken is evenly coated. Refrigerate for about 20 minutes. **

After the chicken has had a chance to marinate, heat the remaining 1 tablespoon of olive oil in a large nonstick skillet until shimmering. Carefully empty the chicken into the skillet along with the green pepper and onion. Cook over medium high heat, stirring continually with a heavy spatula to remove browned bits off the bottom of the skillet, until the vegetables are crisp-tender and the chicken is just cooked through, about 4 minutes.

OLYMPUS DIGITAL CAMERA

Remove from the heat and stir in the lime juice. Serve in warmed tortillas, with lettuce, cheese, salsa, avocado slices, and sour cream.

OLYMPUS DIGITAL CAMERA

** 15 minutes for shrimp and about 1 hour for skirt steak

SEARED SCALLOPS WITH BEURRE BLANC SAUCE

OLYMPUS DIGITAL CAMERA

So, just to prove that I can cook fairly sophisticated food when need be, I decided to post this recipe for seared scallops. Actually, I was recently asked if I would give a class on sauces, especially sauces for seafood, but I had to respectfully decline. I’m already way over committed, plus my good friend Gay and I made a pact on New Year’s Eve that in 2014 we would get a whole lot better at saying no. Two months ago she told me she had said no to what would entail a great deal of effort on her part, something to do with a conference if I remember correctly, and I had nothing to contribute. Now at least I can tell her next time we meet that I too have conquered my addiction to the word “yes”. And just like with any other addiction, it wasn’t easy for me to break my lifelong habit. It actually took me a few days to come to my decision, but I know I made the right one. But I did promise the person that requested the class that I would post a recipe for an easy and almost fool proof recipe for beurre blanc within the next few days.

So here ladies and gentleman is my way of preparing one of the best known classic sauces. Considering that you only need a very small glazing of this simple and elegant sauce to add a depth of unparalleled flavor to any type of simple seafood preparation, any lack of healthy attributes in the sauce can and should be forgiven. (My subtle way of telling you that this sauce is full of “f” and “c” – fat and calories.) But truly, a tablespoon or two is sufficient. In fact, any more would take on the aspect of “gilding the lily”. Which brings up a subject near and dear to my heart; the idea that if some is good, a whole lot is better!

I believe this notion of more, more, more is one of the differences between an OK cook, and a really excellent cook. In fact, I think the better the cook, the more that person is able to show restraint. An excellent cook doesn’t over season food. Or add too much cheese, for example, or ever allow any one ingredient to overpower all the other flavors in a dish. If I may use a musical analogy, no section of a choir, band or orchestra should ever be allowed to drown out the sound of all the other singers or instrumentalists. The term we use musically is “blend”. And that’s exactly what we want to achieve in every dish we prepare – a perfect blend or marriage of flavors. Every ingredient should compliment every other ingredient. In other words, we should simply not allow any one ingredient to become a bully! And to take the concept one step further, we shouldn’t allow a base, like pasta, rice, or as in this recipe, perfectly seared scallops to be ruined by too much sauce.

In conclusion (I feel like I have been delivering a lecture and lectures always come with a conclusion) I should at least mention that the seared scallops in this recipe are pretty darned delicious too! (Nothing new or exciting about the preparation, in fact, possibly the easiest way there ever was to cook a scallop.)

So next time you are in the mood for a seafood dish that’s fit for even the most discerning palate in your family or group of friends, give this recipe a try. It is simply a perfect marriage of flavors.

Beurre Blanc Sauce:

  • 1 shallot, very finely chopped
  • ½ c. dry white wine
  • 1 T. fresh lemon juice, or more to taste
  • 2 tsp. heavy cream
  • 6 T. cold unsalted butter, cubed
  • pinch kosher salt
  • pinch white pepper
  • cut fresh chives, garnish, opt.

Combine the shallot, white wine, and lemon juice in a non-reactive fry pan over high heat and reduce to 1 tablespoon. Reduce heat and whisk in the cream. Once the liquid bubbles whisk in the butter one cube at a time until there are only 2 or 3 cubes left. Remove from heat and continue whisking while adding the last few butter cubes. Continue whisking until the mixture is fully emulsified. Add the salt and pepper. Taste and adjust seasoning. To keep the sauce warm while you cook the scallops, place the fry pan over a bowl of hot water.

OLYMPUS DIGITAL CAMERA

Seared Scallops:

  • 8 good sized scallops (or as many as you need)
  • kosher salt
  • freshly ground black pepper
  • 1 T. vegetable oil, or more as needed to lightly coat the bottom of your pan

Pat the scallops dry with paper towels. Lightly sprinkle with salt and pepper. Heat the oil in a fry pan until just about smoking. Add the scallops and sauté for about a minute or until you start to see brown around the lower edges of the scallops. Flip the scallops and cook for about another minute. Remove from pan and serve lightly glazed with the Beurre Blanc sauce and garnished with fresh chives. Serve immediately.


CHICKEN PARMESAN

OLYMPUS DIGITAL CAMERA

A couple of days ago I asked Mr. C. what he would like for dinner. He usually responds with either “whatever you feel like fixing” or “anything is fine with me” or words to that effect.  But this time he said he would love some Chicken Parmesan. No problem. I could just look up the recipe in one of my own cookbooks and be on my merry way. Well low and behold; I had never written out a recipe for Chicken Parmesan. (Out of 888 recipes contained in those 2 cookbooks, you would think there would be a recipe for Chicken Parmesan.) But no cigar! So that meant I had to do some research. So I started by looking in my 2  favorite sources for all food Italian – Essentials of Classic Italian Cooking (Marcella Hazan) and The Splendid Table (Lynne Rosetto Kasper). Nothing. Turns out Chicken Parmesan is not an Italian classic. In fact it’s about as American as apple pie! Hmph!

So never being one to be afraid of a challenge, I took the bold step of going online. My exploratory journey took me far and wide. But it finally came to rest on this recipe by Giada De Laurentiis. (Well the chicken part is Giada’s, with a few minor changes, but the Marinara Sauce is my very own.)

I liked the look of Giada’s recipe immediately because there was no breading action required. Not that I’m lazy or don’t appreciate a nicely breaded and sautéed cutlet, but with all the other rich ingredients cuddling up to the partially fried chicken, I felt it totally unnecessary to add more steps and not coincidentally more calories to an already very rich dish.

So the following recipe is my answer to the age old question – what would you like for dinner dear? I hope the next time I ask Mr. C. that question I will again be required to do some research. For me, a lot of the pleasure associated with cooking is in trying new recipes. (One of the reasons I never wanted to be a cook in a restaurant. I’d be forced to cook the same things over and over. I’d go stir crazy, both literally and figuratively!) So for me, most of the pleasure of adapting or creating new recipes is in the hunt. No guns required!

I hope you enjoy the recipe. Lovely served with a green or a Caesar salad and a side of buttered pasta.

  • 2 T. extra virgin olive oil, divided
  • ½ tsp. chopped fresh rosemary leaves
  • ½ tsp. chopped fresh thyme leaves
  • ½ tsp. chopped fresh Italian parsley leaves
  • 2 boneless skinless chicken breasts
  • kosher salt
  • freshly ground black pepper
  • 1 c. Marinara Sauce, recipe follows, or purchased marinara sauce
  • 1/3 c. shredded mozzarella
  • ¼ c. grated Parmesan
  • 1 T. unsalted butter

Whisk 1 tablespoon of the oil and herbs together in a small bowl. Set aside. Cut each chicken breast into three pieces. First cut off the thinner end. Then slice the thicker end in half horizontally. (Or if the chicken breasts are fairly small and of uniform thickness, just slice in half lengthwise.) Dry off the chicken pieces with paper towels if necessary and sprinkle lightly with salt and pepper. Brush both sides of the cutlets with the herb oil. Heat a large heavy oven-proof skillet containing the remaining 1 tablespoon of olive oil over high heat. Carefully whirl the pan so that the oil coats the bottom of the pan. Add the chicken pieces and fry just until brown, about 2 minutes per side. Remove the skillet from the heat.

Spoon the Marinara Sauce over and around the cutlets. Sprinkle the mozzarella and Parmesan evenly over each piece of chicken. Cut the butter into very small bits and scatter over all. Bake in a pre-heated 500 degree oven for 3-5 minutes or until the cheese melts and the chicken is cooked through.

Marinara Sauce:

  • 2 T. extra-virgin olive oil
  • ½ c. chopped onion
  • 2 cloves garlic, chopped
  • 1 (28-oz.) can chopped or diced tomatoes (Italian tomatoes preferably)
  • 1 bay leaf
  • pinch crushed red pepper flakes
  • 1 tsp. dried oregano
  • ½  tsp. kosher salt
  • freshly ground black pepper
  • 3 T. chopped fresh basil leaves
  • 1-2 T. butter, optional

In a large covered sauce pan, heat the oil over medium high heat. Add the onion and sauté until soft and translucent, about 6 minutes. Stir in the garlic and cook for an additional minute. Add the tomatoes, bay leaf, red pepper flakes, oregano, salt, and pepper.  Stir to combine ingredients. Bring to a boil, reduce heat, cover, and simmer for about 30 minutes. (Take the lid off part way if the sauce is too thin.) Remove from heat, remove bay leaf, add basil and adjust seasoning. If the sauce tastes acidic, add butter 1 tablespoon at a time to round out the flavor.

OLYMPUS DIGITAL CAMERA

Note: this is a very basic marinara sauce that can be used in a myriad of recipes. Leftover sauce freezes beautifully.