Category Archives: MAIN DISH RECIPES

ROTOLO AL FORNO (MEAT AND CHEESE ROLLED SANDWICH)

OLYMPUS DIGITAL CAMERA

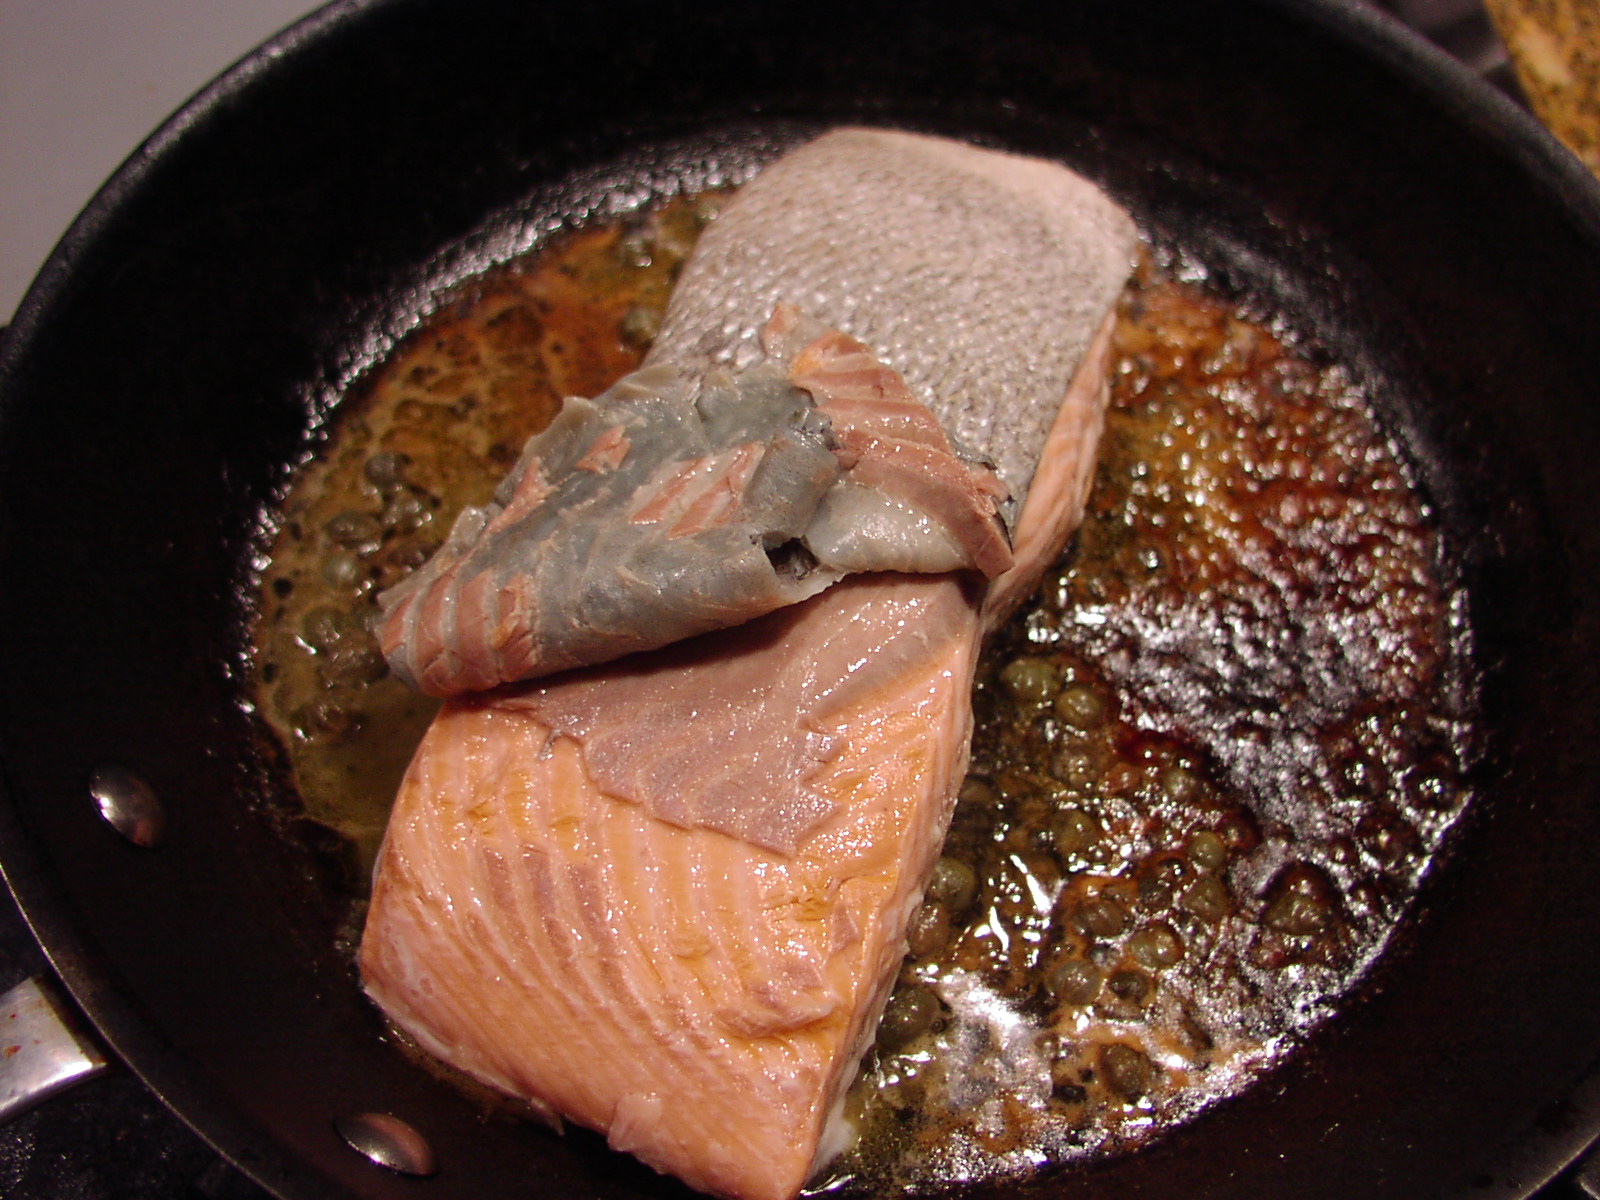
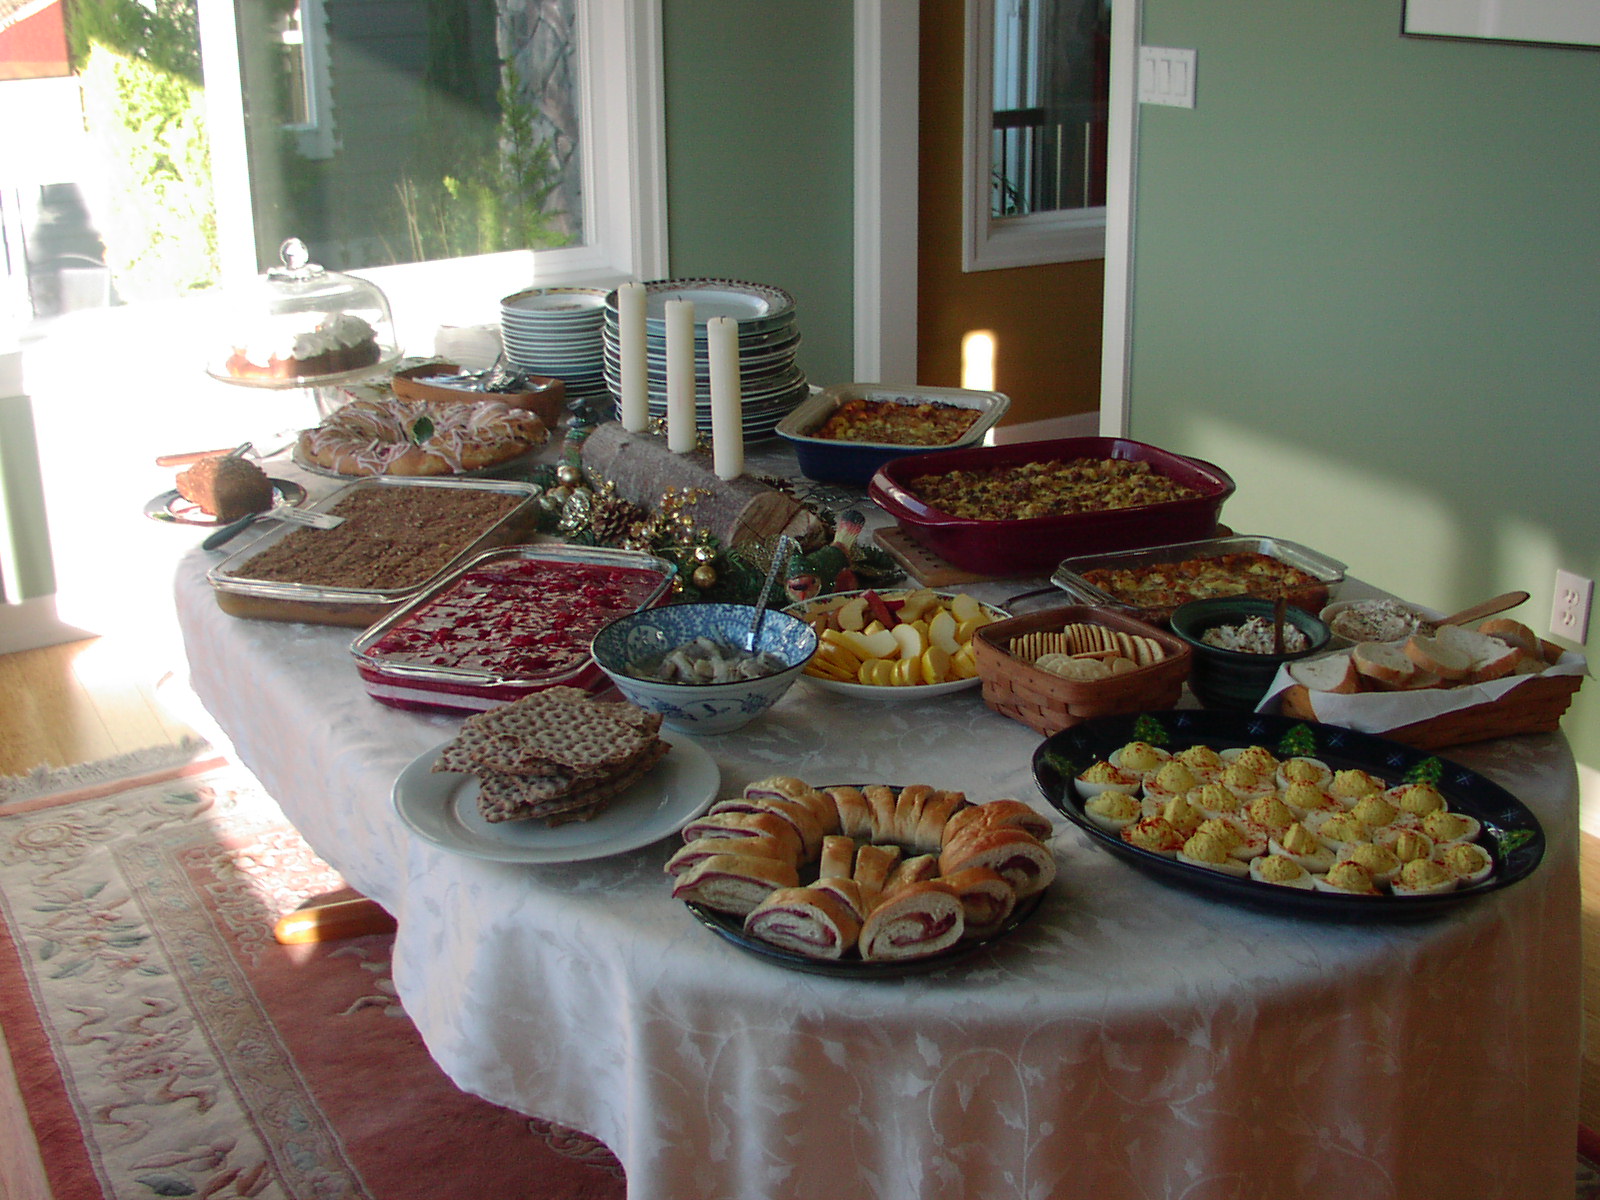
(The Rotolo al Forno is in the foreground, just to the left of the deviled eggs.)

This is one of those recipes that is easy to prepare and sure to please. It is simply a wonderful combination of soft white bread, tangy mustard, tasty deli meat, and 2 kinds of cheese. Sounds just like a sandwich, right? Well it should, because that’s exactly what it is. Except for the fact that it’s kind of fancy and looks divine on a table, Rotolo al Forno is just your basic meat and cheese sandwich presented in a gussied up form. (Love that word – “gussied”.) Anyway, it’s lovely to behold and even lovelier to consume.

I first had this appetizer/sandwich/main dish many years ago when my friend Julie made it for a dinner gathering she and her husband Joe were hosting. At the time, most of our friends had small children, good jobs or were starting new businesses, but no what you would call “disposable income”. We were all just able to pay our mortgages, feed and clothe our children (if we had them), go camping in the summer, and afford box wine or Coors beer for occasions with our buddies. (This was the 70s folks, so cut us some slack on the box wine and Coors beer!) Where was I? Oh yes – so for all of us, this much meat and cheese in one dish was considered if not gourmet, pretty swell and elegant.

And that was Julies’ forte. She loved to try new recipes and the more labor intensive the better. So those of us who were her friends got to experience all kinds of new and amazing taste adventures. She was a true gourmet and taught me a lot about fine cuisine. Julie and Joe are now both deceased, but their friendship lingers on in our memories of fun get-togethers, fabulous New Year’s Eve parties and new and exciting dishes. This may not be an exciting dish, but it is never-the-less delicious. Try it the next time you have guests coming for lunch or you need a hearty appetizer. Just don’t forget to lift a glass to Julie. I’m sure from heaven she will lift a glass right back at you. Cheers everyone.

  • 1 loaf frozen white bread dough
  • Dijon mustard
  • ¼ lb. thinly sliced deli salami
  • ¼ lb. deli pastrami, thinly sliced
  • ¼ lb. deli ham, thinly sliced
  • 1/3 lb. thinly sliced Swiss cheese
  • 1/3 lb. thinly sliced Provolone cheese
  • 1 beaten egg yolk

Thaw bread and let rise one hour. Punch down and roll out to approximately a 12×16-inch rectangle. Using a pastry brush, spread a very thin layer of Dijon mustard over the bread dough. Layer with meat and cheese and roll up like a jelly roll. Pinch the seam together and place, seam side down, on a lightly greased cookie sheet. Brush with egg yolk. Let sit uncovered for 30 minutes. Bake the bread in a pre-heated 375 degree oven for about 25 minutes or until the top is a dark golden brown.

Remove from oven and let sit for about 25 minutes before cutting into 1-inch slices. Serve warm or at room temperature.

Note: If you are going to bake the roll ahead of time, let the bread cool completely before you cover with plastic wrap and place in the refrigerator. When you are ready to serve, slice, plate, and warm for a few seconds in microwave.


GARAM MASALA BAKED CHICKEN

OLYMPUS DIGITAL CAMERA

We love East Indian food. And I know the main reason is because of the spices. And the spice mix – garam masala is one of our favorite spice combinations. So yesterday when I found myself with a couple of small packages of chicken in the freezer that really needed to be used, I thought of making a tandoori chicken or butter chicken for dinner. I went on line and found a couple of great recipes for said dishes. But of course, there always seem to be obstacles to my best laid plans, and this time was no different. Tandoori chicken requires a 24 hour marinating time, and butter chicken requires bite sized pieces of meat, neither of which I had available. So, never being one to let a little problem like time or ingredient get in my way when I am in the mood for a certain type of food, I decided to search under one of the ingredients that was common to both tandoori and butter chicken. (Besides the chicken itself, of course!) And that ingredient was “garam masala”.

After much research and nail biting, I stumbled upon Aida Mollenkamp’s recipe for Garam Masala Chicken with Roasted Vegetables and adjusted it to fit my needs.

So here ladies and gentlemen is my rendition (oops, that’s a musical term) – my take on Aida’s lovely recipe. It is easy to prepare and tastes like a million dollars. And best of all, Mr. C. absolutely loved this chicken at first bite. Love it when a plan comes together!

Recipes for Tandoori Chicken and Murgh Makhani (Butter Chicken) to follow within the next few weeks.

  • ¼ c. canola oil
  • 4 tsp. garam masala spice mix
  • 1 (2-inch) piece ginger, minced
  • 6 medium garlic cloves, minced
  • 2 tsp. kosher salt
  • freshly ground black pepper
  • 8 skinless, bone in pieces of chicken
  • ¼ c. plain yogurt or sour cream

In a medium sized bowl, mix together the canola oil, garam masala, ginger, garlic, salt, and pepper. Add the chicken, stir making sure every piece is thoroughly coated with the marinade. Refrigerate from 1-2 hours. Place the chicken in a 9 x 13-inch baking dish. (Save any marinade that remains in the bowl.) Bake in a pre-heated 400 degree oven for 30 minutes. Meanwhile add the yogurt to the remaining marinade. Set aside. Remove the chicken from the oven and lightly brush each piece with half of the yogurt/marinade mixture. Turn the chicken, and brush with remaining mixture. Bake an additional 15 minutes or until the chicken registers 165 degrees on an instant-read thermometer. (If you have a convection option on your oven, use convection heat for the last 15 minutes of baking time.) Let chicken rest at least 5 minutes before serving.


SPAGHETTI WITH TURKEY OR CHICKEN MEATBALLS IN MARINARA SAUCE (AKA HEALTHY SPAGHETTI AND MEATBALLS)

OLYMPUS DIGITAL CAMERA

You know, there are actually times when I just want to cook healthy. I know that shocks many of you because of my predisposition to use butter with alarming regularity. But never-the-less, it’s true! I can actually be as health conscious as the next gal. So when my “good conscience angel” wins over my “bad conscience devil”, I make a meal featuring a recipe like this one.

Now granted, there is nothing wrong with this recipe. In fact, I love both the meatballs and the marinara sauce. And truly, I am not going to feel cheated in the least when I eat this dish. It’s just that when I look at the recipe, I have trouble seeing beyond the fact that it just plain looks good for us and therefore is inherently going to taste like sawdust! (You know, it really is hard to teach old dogs new tricks. And this old dog is no exception!)

But you just have to trust me on this one. The sauce is truly delicious and the meatballs are tender and flavorful.

So next time your “angel” wins, build a batch of these meatballs and stir up a pot of this sauce. You are going to feel absolutely elated serving your family such a healthy dish. And maybe, just because you have shown yourself to be such an exemplary contributor to your families good health, your “angel” will forgive you a second glass of wine! Could happen!

  • ¼ c. finely ground uncooked oats or dried bread-crumbs (I prefer ground oats)
  • ¼ c. finely grated Parmesan cheese + plus more to pass at the table
  • 2 T. chopped fresh parsley, divided
  • 2 garlic cloves, minced
  • ¾ tsp. kosher salt
  • freshly ground black pepper
  • 1 egg
  • 2 T. milk
  • 16 to 20 oz. ground turkey or chicken meat
  • 2 tsp. extra virgin olive oil
  • 8-10 mushrooms, chopped
  • marinara sauce (see recipe below)
  • 6-8 oz. thin spaghetti, cooked al dente

Combine breadcrumbs, Parmesan, parsley, garlic, salt, pepper, egg, and milk in a medium large mixing bowl. Gently stir in ground turkey. (Mix only until combined. Do not over mix.) Form into 1-inch meatballs (I use a small ice cream scoop) and place on a lightly greased rimmed baking sheet. Bake meatballs in a pre-heated 350 degree oven for approximately 20 minutes or until meat is no longer pink.

Meanwhile pour olive oil into a medium sized sauce pan. Sauté mushrooms until tender. Add the marinara sauce and the meatballs. Serve over al dente spaghetti. Offer Parmesan at the table.

Marinara Sauce:

  • 2 T. extra-virgin olive oil
  • ½ c. chopped onion
  • 2 cloves garlic, chopped
  • 1 (28-oz.) can chopped or diced tomatoes (Italian tomatoes preferably)
  • 1 bay leaf
  • pinch crushed red pepper flakes
  • 1 tsp. dried oregano ( I use Mexican oregano)
  • ½ tsp. kosher salt
  • freshly ground black pepper
  • 3 T. chopped fresh basil leaves
  • 1-2 T. butter, optional

In a large covered sauce pan, heat the oil over medium high heat. Add the onion and sauté until soft and translucent, about 6 minutes. Stir in the garlic and cook for an additional minute. Add the tomatoes, bay leaf, red pepper flakes, oregano, salt, and pepper. Stir to combine ingredients. Bring to a boil, reduce heat, cover, and simmer for about 30 minutes. (Take the lid off part way if the sauce is too thin or allow to gently burble away until the sauce reaches your desired thickness.) Remove from heat, discard bay leaf, add the basil, and adjust seasoning. If the sauce tastes acidic, add butter 1 tablespoon at a time to round out the flavor.

Note: this is a very basic marinara sauce that can be used in a myriad of recipes. Leftover sauce freezes beautifully.

SHRIMP GUMBO

OLYMPUS DIGITAL CAMERA

I think many people shy away from Creole and Cajun food because they think it’s going to be too spicy. They hear words like gumbo filé and Creole seasoning and they automatically shy away. And it’s true, some Creole and Cajun dishes can be very spicy, but they don’t have to be. And this recipe, based on a recipe from Marcela’s Creole Cookery in Seattle, contains a bit of heat but only enough to compliment the other ingredients. And that’s good. The last thing you want is a sauce that is so spicy hot that the wonderful taste of your expensive shrimp is completely obliterated. (Along with your taste buds, I might add!)

So figuratively speaking, this sauce is the perfect foil for shrimp. Then all you need is a big old ball or two of cooked rice, and you have a simple and delicious one course meal.

Now like any other stew like dish, there are about as many recipes for gumbo as there are Louisiana residents. And many of them are fabulous. (The stews that is; I don’t know about all the residents!) But we especially like this gumbo recipe because it is fairly mild. (Did I mention that both Mr. C and I are both kind of wusses when it comes to really spicy food?)

So if you are a person unfamiliar with Creole or Cajun food, but consider yourself in possession of a sophisticated and educated uraniscus (palate), step on out of your comfort zone and travel “culinarily speaking” down to the land of Marti Gras, hush puppies, and bread pudding. Make yourself up a batch of this gumbo honey and there will be no turning back.

  • ¼ c. canola oil
  • ¼ c. flour
  • 4 c. chicken stock, heated to almost boiling
  • ½ small onion, chopped
  • 4 chopped green onions
  • 2 lg. stalks celery, chopped
  • 3-4 cloves garlic, minced
  • 1½ tsp. dried thyme
  • 1 tsp. gumbo filé powder
  • 3 bay leaves
  • freshly ground black pepper
  • pinch cayenne pepper
  • ½ tsp. commercial Creole seasoning or see recipe for homemade Creole Seasoning below
  • 1 lb. uncooked large shrimp
  • cooked rice

In a large covered saucepan, cook the oil and flour over medium heat until it is chocolate colored, about 25 minutes, stirring continuously. (If it burns, throw it away and start over!) Carefully whisk in the hot chicken stock, reduce heat, and simmer uncovered for 15 minutes.

Add the onion, green onions, celery, garlic, thyme, gumbo filé powder, bay leaves, pepper, cayenne, and Creole seasoning. Cover the pan and gently simmer for 1½ hours, stirring occasionally. (Add additional chicken stock if needed.) Adjust seasoning (probably will need salt), remove bay leaves, add the shrimp, and simmer until the shrimp are just cooked through.

OLYMPUS DIGITAL CAMERA

Serve with cooked rice.

Creole Seasoning:

  • 1/3 c. paprika
  • 3 T. dried oregano
  • 3 T. freshly ground black pepper
  • 2 T. dried basil
  • 2 T. kosher salt
  • 1 T. cayenne pepper
  • 1 T. onion powder
  • 4 tsp. dried thyme
  • 4 tsp. granulated garlic

Combine all ingredients and store in an airtight container. Makes about 1 cup.


POACHED SALMON WITH LEMON, DILL, AND CAPERS

OLYMPUS DIGITAL CAMERA

I have been preparing this recipe for at least 20 years now. It is my standard recipe for salmon when I am basically too tired to do anything else! And yes, that is happening more and more since I am fast approaching middle age. (In my book, old age begins around age 95!) And of course, this recipe is really, really good. (If it weren’t delicious, I don’t care how easy it was to prepare, it just wouldn’t be happening at Chez Carr!)

And when I say easy, I mean easy. The only hard part is squeezing the lemon, and really, how difficult is that? Of course, you do have to drain the capers, but again……..

So if you too love salmon but get weary of firing up the BBQ or preparing a tartar sauce or aioli to liven the flavor up a bit, or just simply want to get dinner on the table as soon as possible, give this recipe a go. Truly, if it were any easier or quicker to prepare, it might be considered fast food and bring down the wrath of “Slow Food” proponents everywhere!

  • 2 T. butter
  • 2 T. fresh lemon juice
  • ¼ tsp. Worcestershire sauce
  • 1½ tsp. finely chopped fresh dill or ½ tsp. dried dill weed
  • ¼ tsp. seasoned salt
  • freshly ground black pepper
  • 1 T. capers, drained
  • 1-1½ lb. salmon fillet

Combine butter, lemon juice, Worcestershire sauce, dill, salt, pepper, and capers in a medium large covered fry pan and heat until butter melted. Place salmon, skin side up in pan. Cover and poach over low heat for 15 to 20 minutes or until flesh is flaky when tested with a fork.

Before serving, gently lift off the skin and discard.

OLYMPUS DIGITAL CAMERA

Turn the fish so that both sides are coated with the sauce.

OLYMPUS DIGITAL CAMERA

Serve immediately.


RAGOUT PEBRONATA (BRAISED PORK WITH RED PEPPERS) PROVENÇAL WITH SAVORY POLENTA

OLYMPUS DIGITAL CAMERA

Since fall is definitely on its way (I know this because the yellow jackets have surfaced and the annuals in my pots on the deck are looking very tired), I thought it might be time to post this recipe for a delicious Provençal ragout. Pebronata, which means “peppered up” by the way, is a glorious mélange of braised meat, white or red wine, red peppers, and tomatoes (with a few others ingredients thrown in for good measure). And of course, as with ragouts found anywhere around the world, there are as many recipes for pebronata as there are cooks. This is a pretty standard recipe and very easy to prepare.

Now granted, this is not a dish that is going to send your taste buds into fits of ecstasy. This is a hearty every day dish that has enough good flavors going for it as to be interesting, but benign enough that even your picky eaters may not turn up their noses! (In other words, your kids are probably going to like it too.) It’s basically just as much a comfort food as spaghetti and meatballs or macaroni and cheese, but just enough different as to make the job of cooking it a wonderful change from your usual entrée rotation. We love it. Serve with a side veggie or salad, and dinner is ready.

  • 3-4 T. olive oil
  • 2 lb. boneless lean pork shoulder, trimmed of all sinew and fat, cubed and dried with paper towels
  • kosher salt
  • freshly ground black pepper
  • 1 onion, chopped
  • 3 cloves garlic, finely chopped
  • 4 juniper berries, finely crushed
  • 2 T. flour
  • 1 c. dry white wine
  • 1 c. chicken stock
  • 28-oz. Italian chopped or crushed tomatoes
  • 1 tsp. chopped fresh thyme
  • 1 bay leaf
  • 2 large red peppers, deseeded and cut into strips
  • 2 T. chopped Italian parsley

Heat half the oil in a heavy covered oven proof pan. Sprinkle the pork cubes lightly with salt and pepper. Brown the pork in batches over medium high heat, removing to a plate when browned. Reduce the heat, add the remaining oil and the onion and cook for about 10 minutes, until transparent. Stir in the garlic and juniper berries and cook for a few seconds. Sprinkle in the flour, stir well and cook for 1-2 minutes. Add the wine, chicken stock, and tomatoes and stir over a medium heat until thickened. Return the meat and accumulated juices to the pot. Add the thyme, bay leaf, and adjust seasoning. Cover and bake in a pre-heated 325 degree oven for 45 minutes. Remove from oven and add a little water if the ragout seems too dry. Add the red pepper strips and parsley and bake for about 45 minutes more or until the pork is tender. Remove the bay leaf before serving over Savory Polenta. (see recipe below)

Note: Just like any other braised meat dish, always better the next day. So make ahead if you have the time.

SAVORY POLENTA

  • 2 T. olive oil
  • 3/4 c. finely chopped red onion
  • 1 tsp. kosher salt
  • freshly ground black pepper
  • 2 cloves garlic, finely minced
  • 1 qt. chicken stock
  • 1 c. coarse ground cornmeal
  • 3 T. butter
  • 2-oz. finely grated Parmesan

In a large, oven-proof covered saucepan heat the olive oil over medium heat. Add the onion, salt, and pepper; sauté until the onion begins to turn translucent, approximately 4 to 5 minutes. Reduce the heat and add the garlic. Sauté until the garlic releases its aroma, about 1 minute. Add the chicken stock and bring to a boil. Reduce heat a bit and gradually whisk in the cornmeal. Cover the pan and bake in a pre-heated 350 degree oven for 30 to 35 minutes, stirring every 10 minutes to prevent lumps. Once the polenta is creamy, remove from the oven and add the butter and Parmesan. Adjust seasoning.


PORK TENDERLOIN WITH MUSTARD CORNICHON CREAM SAUCE (PORC NOISETTES AVEC CHARCUTIÈRE SAUCE)

OLYMPUS DIGITAL CAMERA

Well as you can see, I am still on my French food kick. And will be for the next few blog posts. But I’m thinking you probably aren’t minding my foray into French cuisine, because if you too live in a rural area there are undoubtedly no French restaurants anywhere near you either. For us, there is a wonderful bistro in Arlington, (Bistro Sam Martin) about 45 minutes away. (Not really French cuisine, more world inspired regional cuisine.) And although we would love to eat there on a regular basis (the food is outstanding), it’s just a little out of our price range as a regular place to dine. (It’s one of our “special occasion” places.) So that leaves it up to me to go back to my French lineage and fix dishes that evoke wonderful memories of meals I have previously enjoyed. Or try out new dishes like this wonderful pork tenderloin recipe that I adapted from the Flavor Mosaic blog.

Actually, that brings up a question about the food choices Americans are making these days. For every French restaurant (at least in the greater Puget Sound area) there must be 2,000 Mexican restaurants. Now, I am not putting down Mexican food, because I too love good Mexican food, but why aren’t there more French restaurants? There are plenty of good Italian restaurants (thank God), so Italian cuisine is alive and well. And Thai – we’ve got Thai coming out of our ears. But a good French restaurant? Nary a one for miles and miles. (It’s depressing, as far as I’m concerned!)

So since I happen to love French food, I guess my only recourse is to fix it myself. And of course, share what I learn with you. So come along all you latent Francophiles and we will travel to the land of Pâté, Pissaladière, Aligot, and Céleri Salade (to name a few) together.But hang on tight; it’s going to be a fast ride! (Fun too!)

Hope you enjoy this recipe.

  • 2 T. extra virgin olive oil
  • 1 small pork sirloin roast or 2 pork tenderloin, trimmed of all fat and silver skin
  • kosher salt
  • freshly ground black pepper
  • 1 T. butter
  • 1 lg. shallot, minced (about 3 tablespoons)
  • 2 garlic cloves, finely minced
  • ½ c. white wine (I use Pinot Grigio)
  • 2 tsp. herbs de Provence
  • ½ c. heavy cream
  • 2 T. whole grain Dijon mustard (Maille brand is wonderful)
  • ½ tsp. regular Dijon mustard
  • 3-4 cornichons, not too finely chopped
  • 1-2 T. chopped fresh parsley, garnish, opt.

Pour the olive oil into a deep oven proof skillet over medium high heat. Dry off the sirloin or tenderloins and lightly season with salt and pepper. Place the seasoned pork in the skillet, turning it about every 2 to 3 minutes to brown on each side.

Place the roast in a preheated 325 degree oven for about 20 minutes or until the pork reaches 135-140 degrees F. Remove from oven, move to a platter, tent with aluminum foil, and let rest for at least 15 minutes. While the pork is resting, prepare the sauce in the same skillet as the pork was baked. (Don’t clean the pan first.)

Over medium heat, melt in the butter. Reduce heat and add the shallot and cook for about 2 to 3 minutes. Add the garlic and cook for about 1 minute. Pour in the white wine and turn up to medium low. Cook until about half of the liquid is evaporated. Stir in the herbs de Provence and a small amount of black pepper. Reduce heat to low and stir in the heavy cream, mustards, and chopped cornichons. Adjust seasonings. (Not too much salt.) Let burble for a few minutes over very low heat. (The flavor doesn’t really develop until the sauce has cooked for a few minutes and thickens.)

OLYMPUS DIGITAL CAMERA

When ready to serve, slice the tenderloin on a cutting board and place on platter. Add any accumulated juices from the resting pork to the sauce. To serve, drizzle a small amount of sauce over the sliced pork and sprinkle with fresh parsley. Serve the remaining sauce on the side.

SPICY FRIED CHICKEN THIGHS

OLYMPUS DIGITAL CAMERA

This has been my favorite recipe for fried chicken for many years now. And I know there are quite a few ingredients in the recipe as well as some planning time involved, and in truth the frying part isn’t that much fun either. But you are just going to have to trust me when I say I have tried to cut the ingredients and time down, but none of my attempts have been successful. I even gave it a go again the other night for our dear friends Jim and Margo. And although the chicken wasn’t bad, it simply was not as good as this recipe either. (I’ve tried, really I have.) So from now on I am just going to have to plan ahead and follow my original adaptation of Selma Brown Morrow’s recipe to a tee. But I promise you will not be disappointed if you too love a crispy crusted, tender and spicy piece of home cooked chicken. And yes I know, just looking at the ingredients you would imagine that the chicken would be way too spicy. Not the case. It merely has an attitude. Not too much of an attitude mind you, but enough to make it interesting. And we all know that the taste of chicken can be a thundering thumping bore if not given a little flavor enhancement here and there.

So give this fried chicken recipe a try. It will lift your spirits with just the first bite. And you will never have to be embarrassed to be seen in its company. No one could possibly consider you less than a true bon vivant for serving this dish or even being in the same room with it. And how many other foods, or friends for that matter, can you make that same statement about? Just sayin’!

  • 1 c. buttermilk
  • 2 T. Dijon mustard
  • 1 T. powdered onion, divided
  • 1½ tsp. granulated garlic, divided
  • ½ tsp. paprika
  • 1½ tsp. dry mustard, divided
  • 1½ tsp. cayenne pepper, divided
  • 2 tsp. kosher salt, divided
  • 2 tsp. freshly ground black pepper, divided
  • 1½ c. flour
  • 1½ tsp. baking powder
  • 8-10 skinless chicken thighs (not boneless)
  • extra virgin olive oil
  • 2 T. ghee, opt.

To make life easier, I suggest getting out a medium sized glass or plastic bowl with a cover and a large enough rimmed baking sheet to contain the chicken pieces in a single layer. (There are lots of ingredients that are duplicated in the marinade and the coating. So make life easier on yourself and touch each spice container only once.) So as we go, I will follow each new ingredient with “B” for bowl and “S” for sheet. Buttermilk (B), Dijon mustard (B), 1½ teaspoons powdered onion (B), 1½ teaspoons powdered onion (S), ½ teaspoon granulated garlic (B), 1 teaspoon granulated garlic (S), paprika (B), ½ teaspoon dry mustard (B), 1 teaspoon dry mustard (S), ½ teaspoon cayenne (B), 1 teaspoon cayenne (S), ½ teaspoon kosher salt (B), 1½ teaspoon kosher salt (S) 1 teaspoon black pepper (B), 1 teaspoon black pepper (S), flour (S), baking powder (S). (Looks much more difficult than it really is!)

Whisk the marinade ingredients in the bowl together. Whisk the ingredients for the flour coating together on the baking sheet. (Don’t use the same whisk until you have washed and dried it thoroughly.) Set pan aside because you aren’t going to need it until the chicken has marinated for up to 48 hours.

Place the chicken in the bowl of marinade. Stir to make certain all of the chicken has been exposed to the buttermilk mixture. Cover bowl and refrigerate for 24-48 hours.

An hour before you plan to fry the chicken, make certain that the seasoned flour covers every inch of the baking sheet. Remove the chicken from the marinade (do not shake off any of the marinade) and place each piece on top of the flour. Turn each piece carefully to coat thoroughly and let stand for 1 hour before frying. (Turn as needed during the hour to allow chicken to absorb as much of the flour mixture as possible.)

Pour enough olive oil into a large fry pan to cover the bottom; with a little more just for good luck. Add the ghee. Bring temperature to medium high. Place chicken in pan with the less meaty side down first. (In other words, if the skin were still on the chicken, the skin side would be closest to the ceiling.) Turn the heat down under the chicken until the oil is just bubbling nicely around the chicken. When the first side is a lovely dark golden brown (and yes you can carefully peak to make sure it’s a lovely brown) turn the chicken being ever so careful not to pierce the flesh or disturb the crust. Cook the second side until the chicken is done (internal temperature should be at least 165 °F) and the crust is a deep golden brown. When chicken is finished cooking, remove to cooling racks. Do not place on paper towels or the underside will get soggy. Best served at room temperature.


EGGPLANT, ZUCCHINI, AND TOMATO CASSEROLE (RATATOUILLE) – PROVENÇAL STYLE

OLYMPUS DIGITAL CAMERA

Since this is the time of year when zucchini, eggplant, and tomatoes are in every farmer’s market or home garden in America, I decided to post an absolutely delicious way to serve these delightful vegetables. (And I know what you are thinking. Not another zucchini recipe. But if I may speak frankly, this is not just another zucchini recipe. This is a killer way to use zucchini if I say so myself!)

This dish came about because I started re-reading (for the third time, I think) Peter Mayle’s wonderful tale about the joys of living in Provence entitled “A Year in Provence”. For a foodie like myself, half the reading pleasure in this book is in the telling of the food they eat. So that got me researching recipes from the south of France. When I saw a variation of this dish using zucchini (I had 2 large zucchini in my refrigerator) and tomatoes (I had lots of cherry tomatoes from our garden), I decided I just had to work up a recipe that incorporated these two ingredients. And this recipe is the result.

This dish can be served as a meatless main course or as a side dish that compliments just about any meat you feel like serving. And it is easy to prepare. It takes a little time to cut up the veggies, but once you have the knife work done, the assembly goes rather quickly. I served it last evening with just a salad and it made for a perfect meal.

So if you too are looking for a way to say yes to your neighbor who keeps offering you zucchini, or if you yourself have zucchini threatening to take over your yard, give this recipe a try. Believe it or not, your love for this ever so easy to grow and abundant veggie will be restored with just one bite! In fact, you may never again have to turn down a free zucchini when a neighbor makes you an offer. And won’t that feel good. It’s the neighborly thing to do after all.

  • 2 T. extra-virgin olive oil, plus more for drizzling
  • 1 large onion, chopped
  • 3 garlic cloves, minced
  • 1 tsp. dried marjoram
  • ½ c. dry white wine (I use Pinot Grigio)
  • kosher salt
  • freshly ground black pepper
  • 1 lb. zucchini or yellow summer squash, sliced lengthwise ¼-inch thick (combination is nice)
  • 1 medium sized eggplant, partially peeled and sliced lengthwise ¼-inch thick
  • 1 basket of cherry tomatoes, halved or 2 large beefsteak tomatoes, sliced ¼ inch thick
  • 2 T. chopped parsley
  • 3/4 c. finely grated Pecorino Romano or Parmesan cheese (combination is wonderful)

Heat the oil in a skillet to medium-high. Add the onion and sauté until transparent. Stir in the garlic and marjoram and cook for 1 minute. Add the white wine and cook until the liquid evaporates. Season with salt and pepper; remove from the heat.

Oil a 9-by-13-inch ceramic or glass baking dish. Arrange half of the zucchini on the bottom of the dish (single layer if possible but a little overlap is fine), drizzle with oil and season lightly with salt and pepper. Scatter half of the onion mixture on top, followed by half of the eggplant. Drizzle the eggplant with oil, season lightly with salt and pepper and sprinkle with half of the parsley. Arrange half of the tomatoes cut side down over the zucchini. Repeat the layering finishing with a drizzle of oil and a light seasoning of salt and pepper.

OLYMPUS DIGITAL CAMERA

Bake the vegetables uncovered in a pre-heated 400 degree oven for 70-75 minutes. Sprinkle with cheese and continue baking until the edges are browned, the vegetables are very tender, and the cheese is melting and starting to brown, about 10 minutes more. Let cool for about 5 minutes before serving.

BISCUITS WITH SAUSAGE GRAVY

OLYMPUS DIGITAL CAMERA

As promised, this is one of my retro dishes that I mentioned I would share with you. I make this every once in awhile because I love a good biscuit and gravy breakfast more than just about anything else I can set on my plate before 9:00a.m. And I am definitely not alone.

When it comes to biscuits and gravy, there are very few people I know who don’t break out in spontaneous giggles at the very mention of this tantalizing combination. OK, there are some who would never touch a biscuit, much less a cream gravy. But for those of us who once in a while allow ourselves a taste of heaven, this decadent yet exceedingly simple recipe has all the right components.

First of all, the gravy is high in fat. (Any mouth worth its teeth loves the feel of food rich in fat.) Then of course, this recipe is loaded with bad carbohydrates. (Who in their right mind doesn’t adore the taste of bad carbohydrates to begin with, and especially when they come presented so deliciously?) Then of course, there are the idle calories. (Who among us doesn’t put idle calories into our bodies once in a while when life gets rough or we feel the need to celebrate?) The only thing this delightful combination doesn’t have going for it is an over abundance of refined sugar. (But no recipe’s perfect!)

So next time you feel the need to celebrate life or treat your family and friends to one of life’s little guilty pleasures, or just go wild and do something fairly innocuous for which you will still probably hate yourself the next morning, bake a batch of biscuits (see my recipe for Buttermilk Biscuits on this site) and stir yourself up some sausage gravy. Then sit back and savor every single solitary morsel of fat, bad carbohydrate and empty calorie. After all, we only have one life to live and once in a while it just feels good to break all the nutritional rules and simply enjoy the moment. That’s my story and I’m stickin’ to it! Cheers!

  • 2 T. butter, divided
  • 1 lb. bulk breakfast sausage, either pork or chicken – as lean as possible (if you buy breakfast sausage from a good butcher shop it will be leaner than Johnsonville or Jimmy Dean, for example)
  • 3 T. flour
  • 1½ c. milk, plus more if needed (I use 2% milk because the gravy is rich enough without using whole milk, half & half, or cream)
  • 1½ tsp. Worcestershire sauce
  • ½ tsp. dried thyme
  • ¼ tsp. seasoned salt
  • freshly ground black pepper (not too much)
  • fresh parsley, garnish, opt.

Melt 1 tablespoon of the butter in a medium sized pan. Add sausage, breaking it up as it cooks, and fry until good and caramelized. (That means it’s a nice dark brown and there are tasty meat bits stuck to the bottom of the pan.) Add the remaining butter to the pan and whisk in the flour lifting the browned bits off the bottom as you stir the mixture. Let burble for a couple of minutes. Slowly pour in the milk and Worcestershire sauce (gently whisking the entire time) and when thoroughly blended add the thyme, salt, and pepper. Bring to a gentle boil, reduce heat and let simmer for about 5 minutes, stirring occasionally. (The sauce will thicken nicely during this time.) Add milk if the consistency is too thick.

OLYMPUS DIGITAL CAMERA

When ready to serve, adjust the seasoning and serve dolloped over warm biscuits and sprinkled very lightly with fresh parsley.