Category Archives: MAIN DISH RECIPES

TACO SALAD

OLYMPUS DIGITAL CAMERA

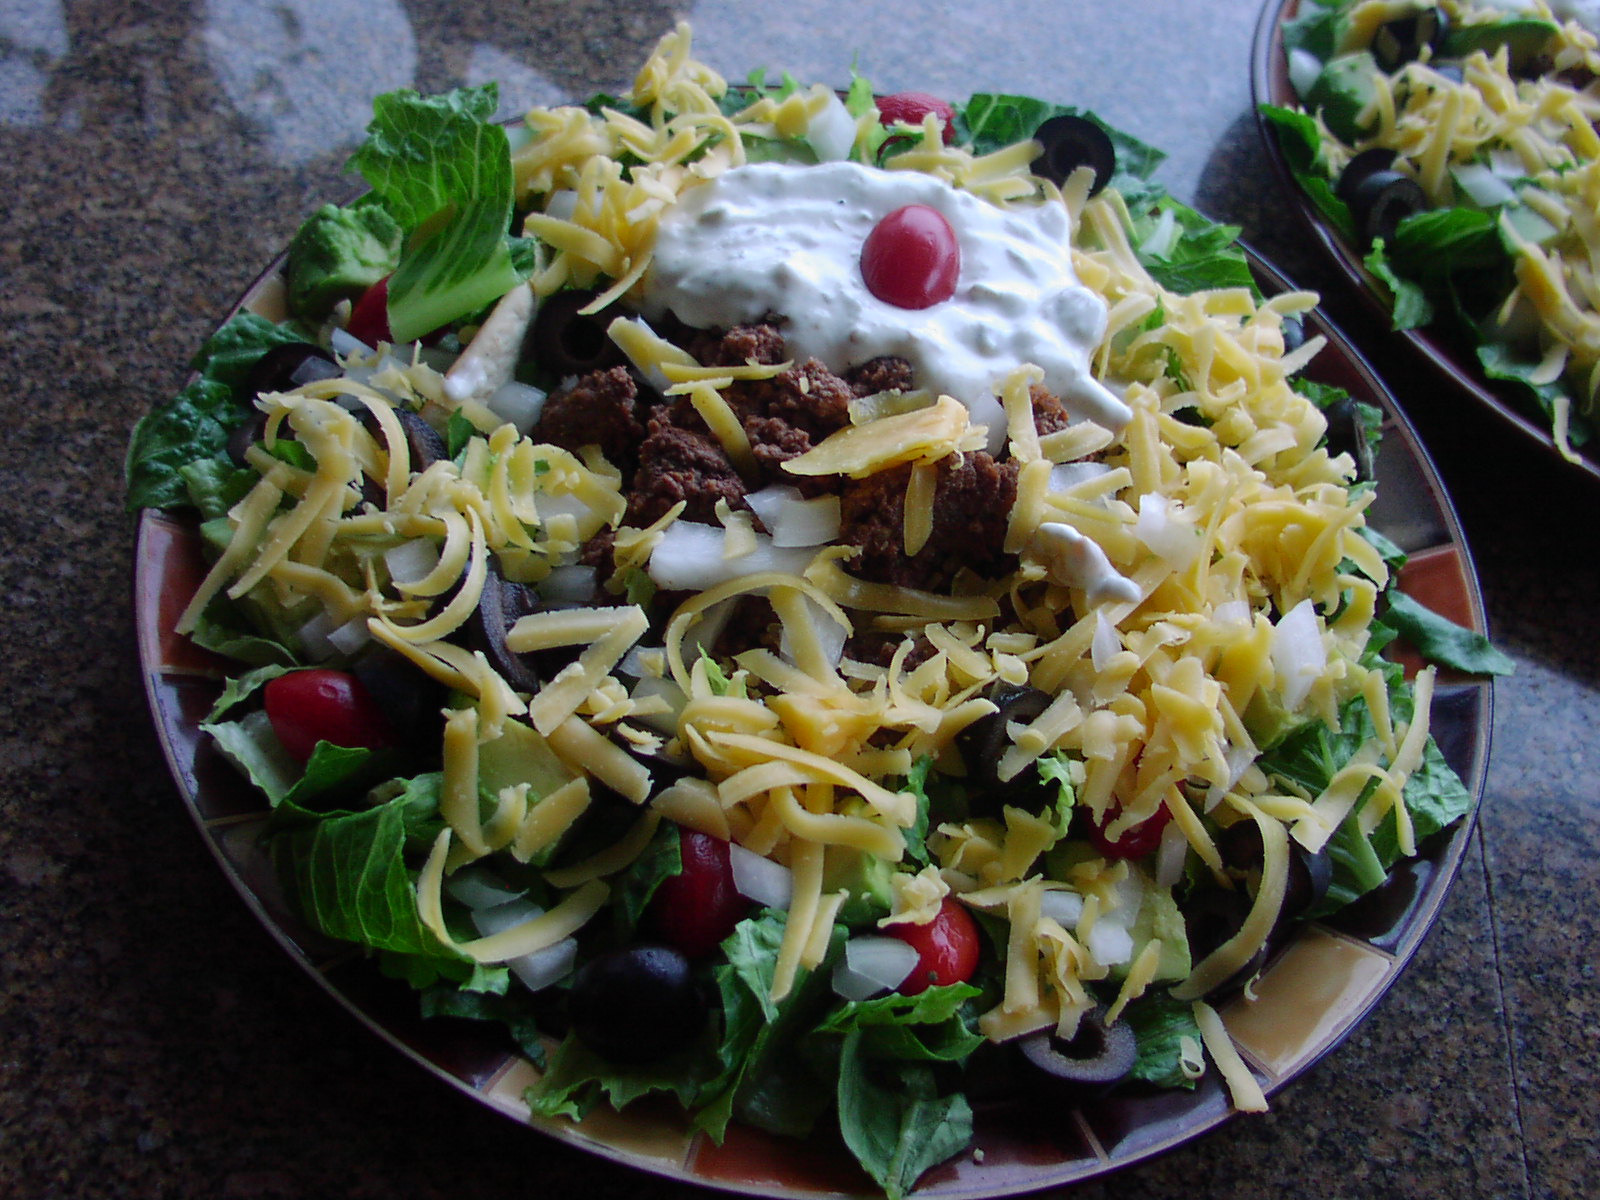
Ok, this is not a fancy new recipe for taco salad. It doesn’t feature spectacular new ingredients, or a taco sauce that takes 14 ingredients, special equipment, and an hour to prepare. The meat is plain old ground beef, chicken, or turkey, and the toppings are just what you would expect if you ordered taco salad at any of your favorite restaurants.

What this recipe for Taco Salad does feature however, is an oven baked tortilla base, taco meat that is perfectly seasoned with dried herbs, spices, and ingredients that you should already have in your pantry, and a two ingredient taco sauce that is refreshingly light and delicious. And because you season the meat yourself; no more buying those expensive little packets of taco seasoning mix that contain unnecessary ingredients like too much salt and sugar that you wouldn’t even want your childhood nemesis to ingest, much less your family!

Oh, and did I mention that this salad is stinkin’ easy to prepare? Probably not! I get so excited about the ingredients and flavor of a dish sometimes that I forget to tell you about the ease of preparation. I also sometimes fail to mention that certain parts of the recipe, the taco meat and the taco sauce in this case, can be prepared ahead of time and sequestered on a shelf in your refrigerator.

So no matter how you want to look at this dish, as an easy to prepare one dish weekday meal, as an inexpensive one dish weekday meal, or as a delicious one dish weekday meal, you’re covered. (I’ve always got your back; don’t you ever forget it!)

  • 4 small (7½-inch) or 2 large (10-inch) flour tortillas
  • vegetable cooking spray
  • taco sauce (see recipe below)
  • taco meat (see recipe below)
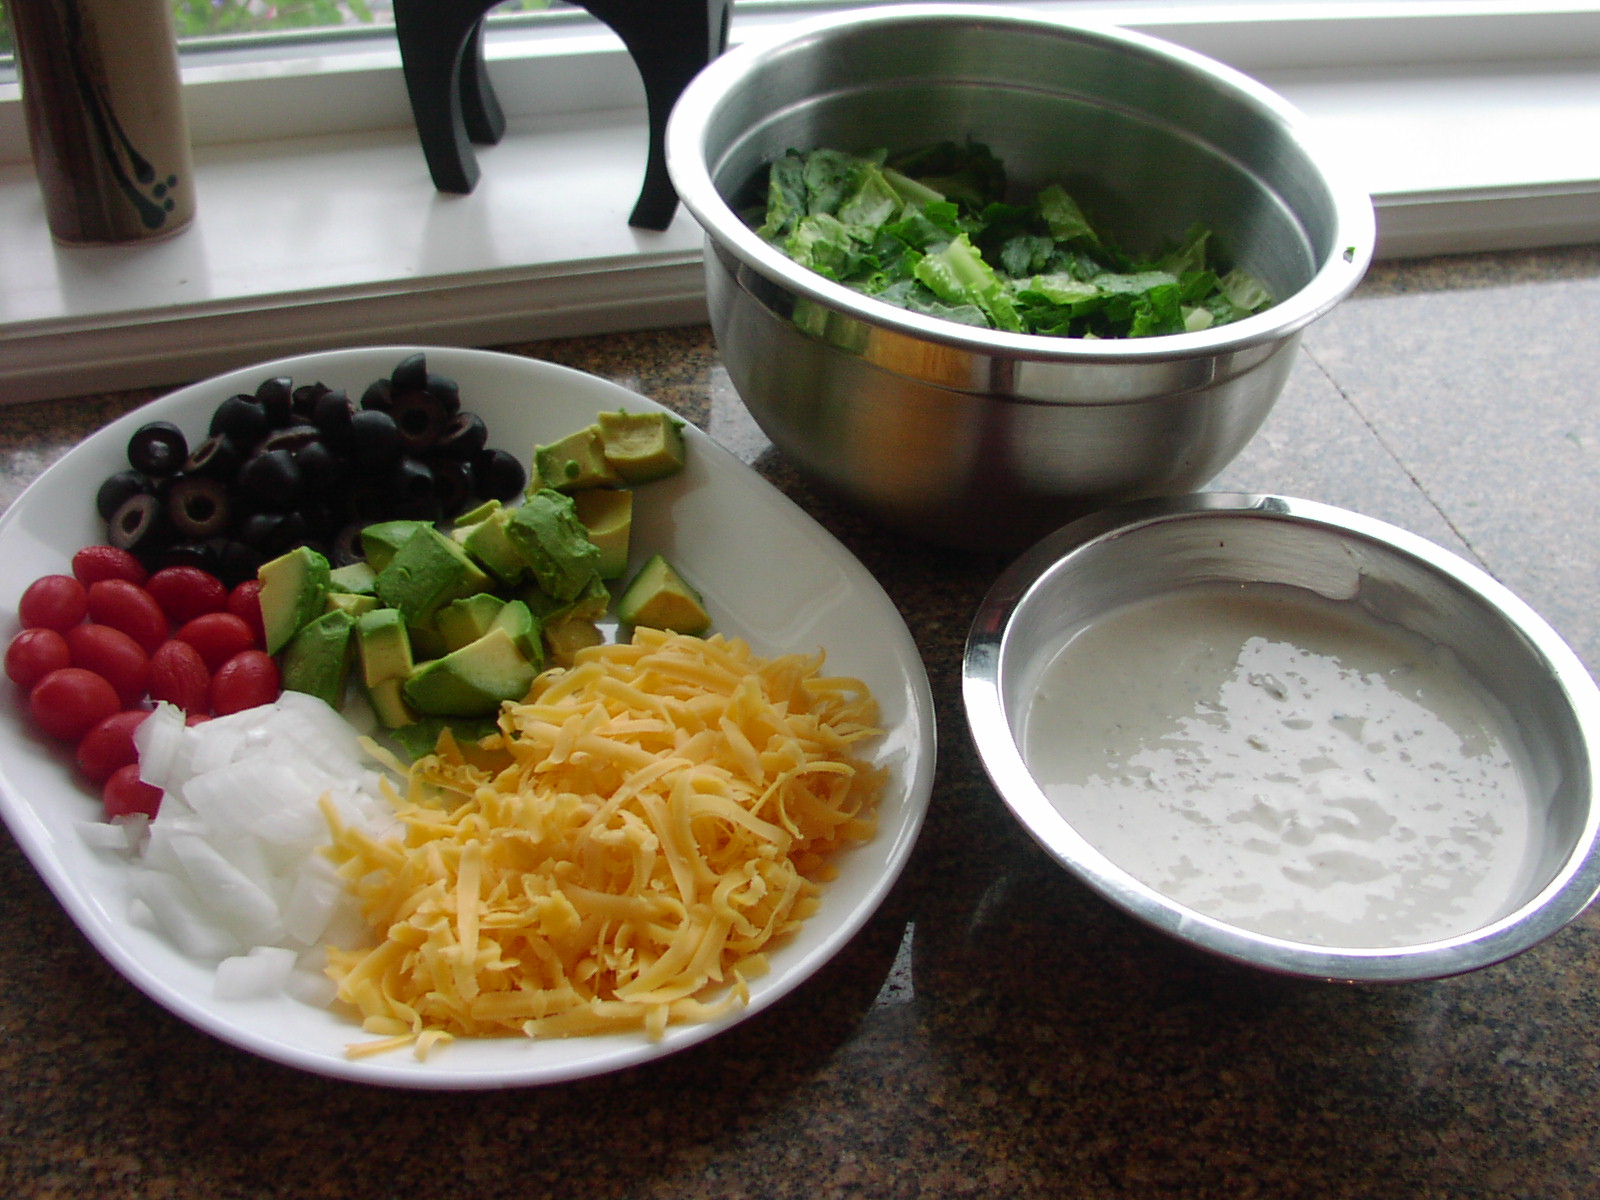
  • chopped romaine lettuce (as much or as little as you want)
  • any of the following toppings for your salad:
  •     diced tomatoes
  •     halved black olives
  •     diced avocado
  •     diced yellow, white, red, or green onion
  •     grated sharp cheddar, Monterey Jack, or Cotija cheese
  •     canned black beans, drained and rinsed
  •     canned corn, drained and rinsed
  •     anything else that strikes your fancy

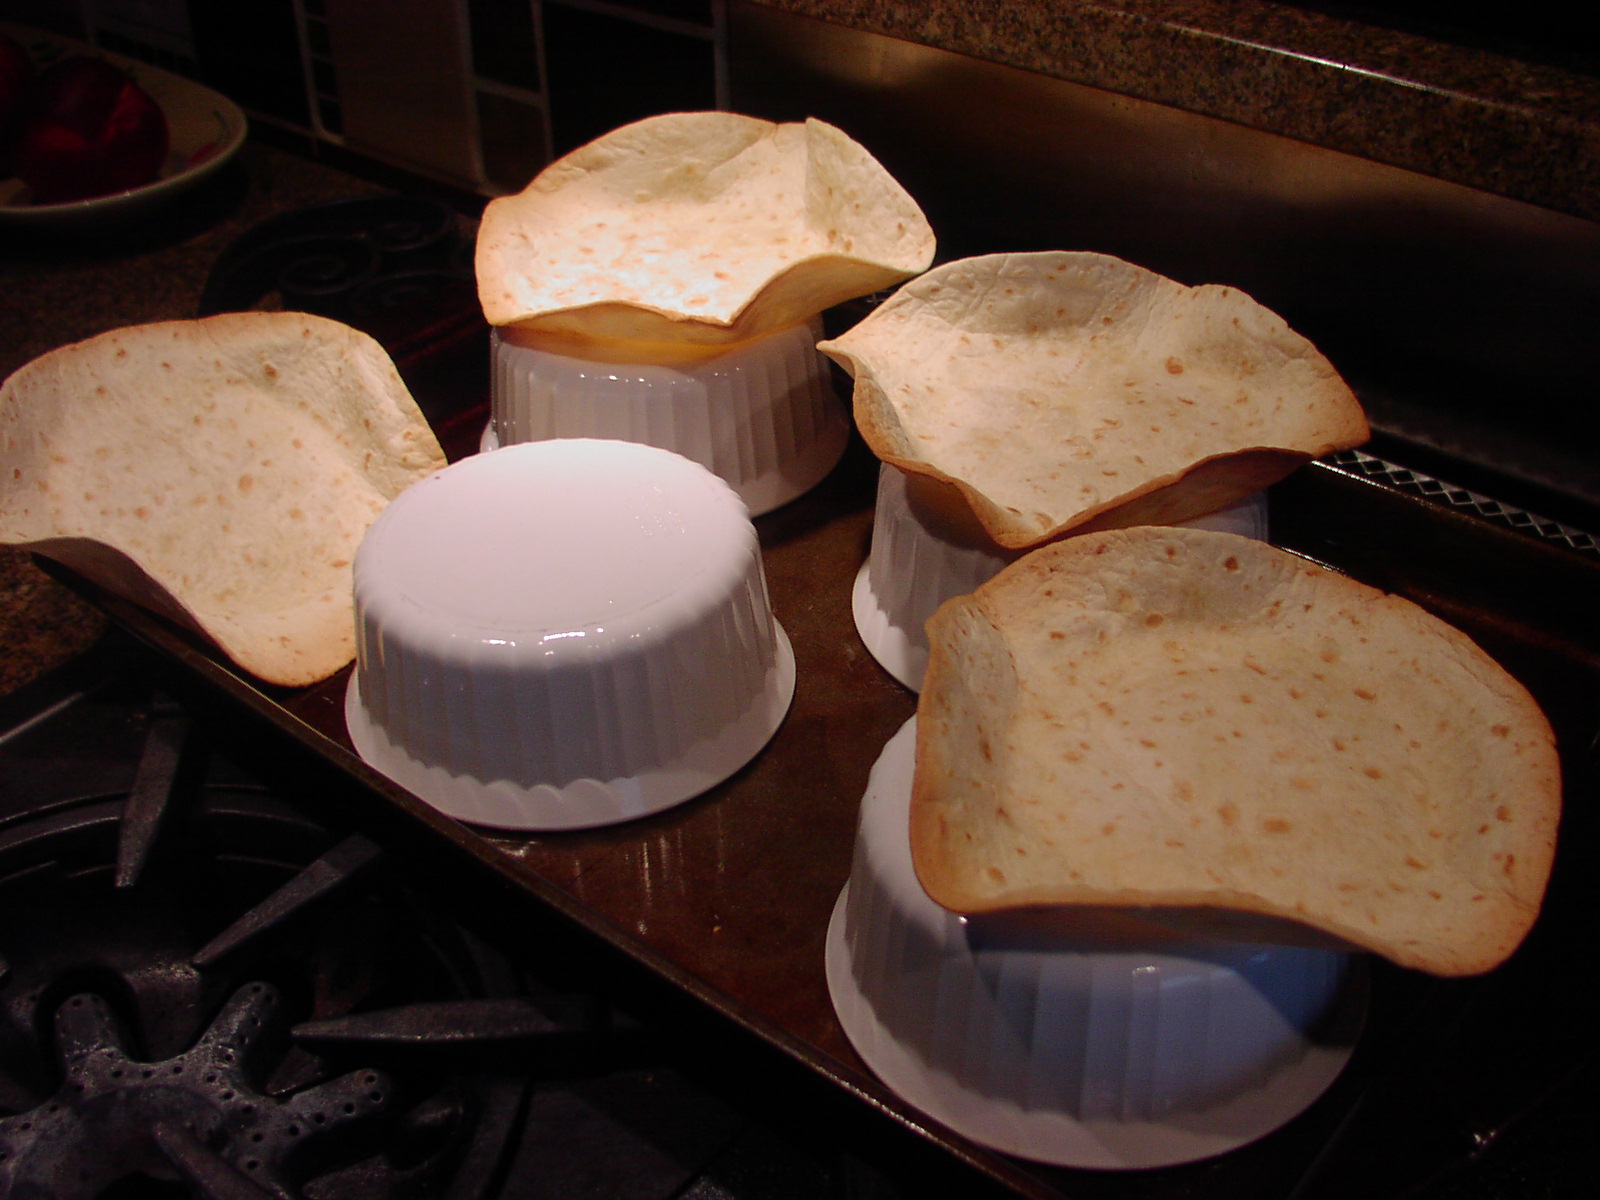
Preheat oven to 425 degrees. Place 4 oven-proof bowls or for larger tortillas, 2 6-inch cake pans on a large rimmed baking sheet. Warm the tortillas in your microwave for 20 seconds or until pliable. Spray both sides with cooking spray, then drape over the bowls (smaller tortillas) or nest the larger tortillas inside the cake pans. Bake until the tortillas are crisp and just starting to brown, 10 to 12 minutes. (Watch them carefully the last few minutes.) Set aside.

OLYMPUS DIGITAL CAMERA

Meanwhile prepare the Taco Sauce and the Taco Meat (recipes below).

OLYMPUS DIGITAL CAMERA

When ready to serve, place a taco shell on a large plate. Scatter lettuce in and around the shell. Scoop some of the taco meat into the shell and surround with your toppings of choice. Serve with taco sauce.
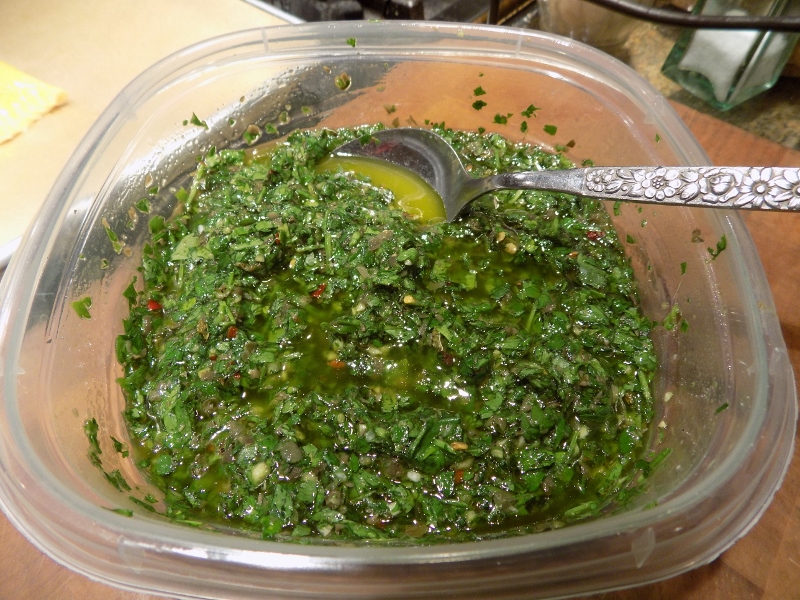
Taco Sauce:

  • 1 c. (8-oz.) sour cream
  • ½ c. salsa verde – I use Trader Joe’s Hatch Valley Salsa (which BTW contains no preservatives or ingredients that can’t be pronounced) when I’m feeling lazy. When I have time and inclination, I prepare the Salsa Verde recipe on this site.)

Whisk ingredients together, cover, and store in the refrigerator until needed.

Taco Meat:

OLYMPUS DIGITAL CAMERA

  • vegetable cooking spray
  • 1 lb. ground beef, chicken, or turkey
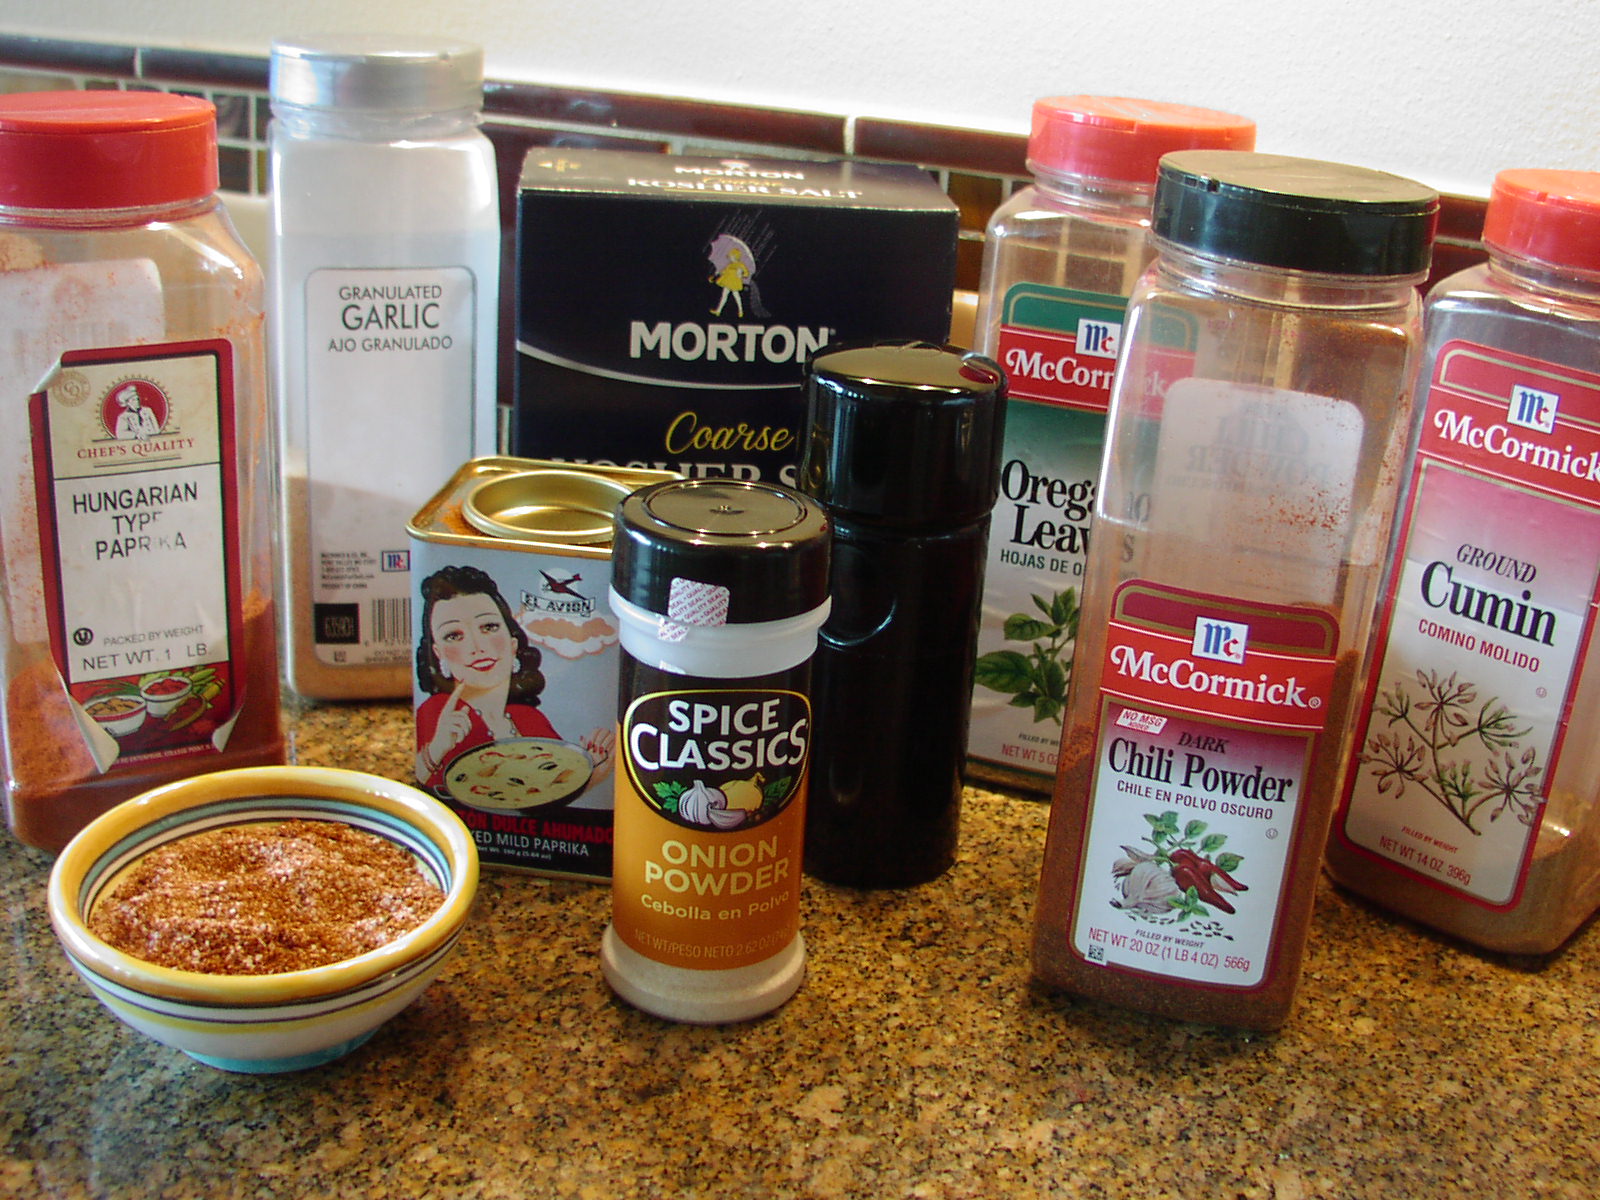
  • 2 T. dehydrated onion
  • 2 tsp. chili powder
  • 1 tsp. ground cumin
  • 1½ tsp. dried oregano (Mexican oregano if possible)
  • 1 tsp. granulated garlic
  • ½ tsp. seasoned salt
  • freshly ground black pepper
  • 1 T. tomato paste
  • ½ c. water

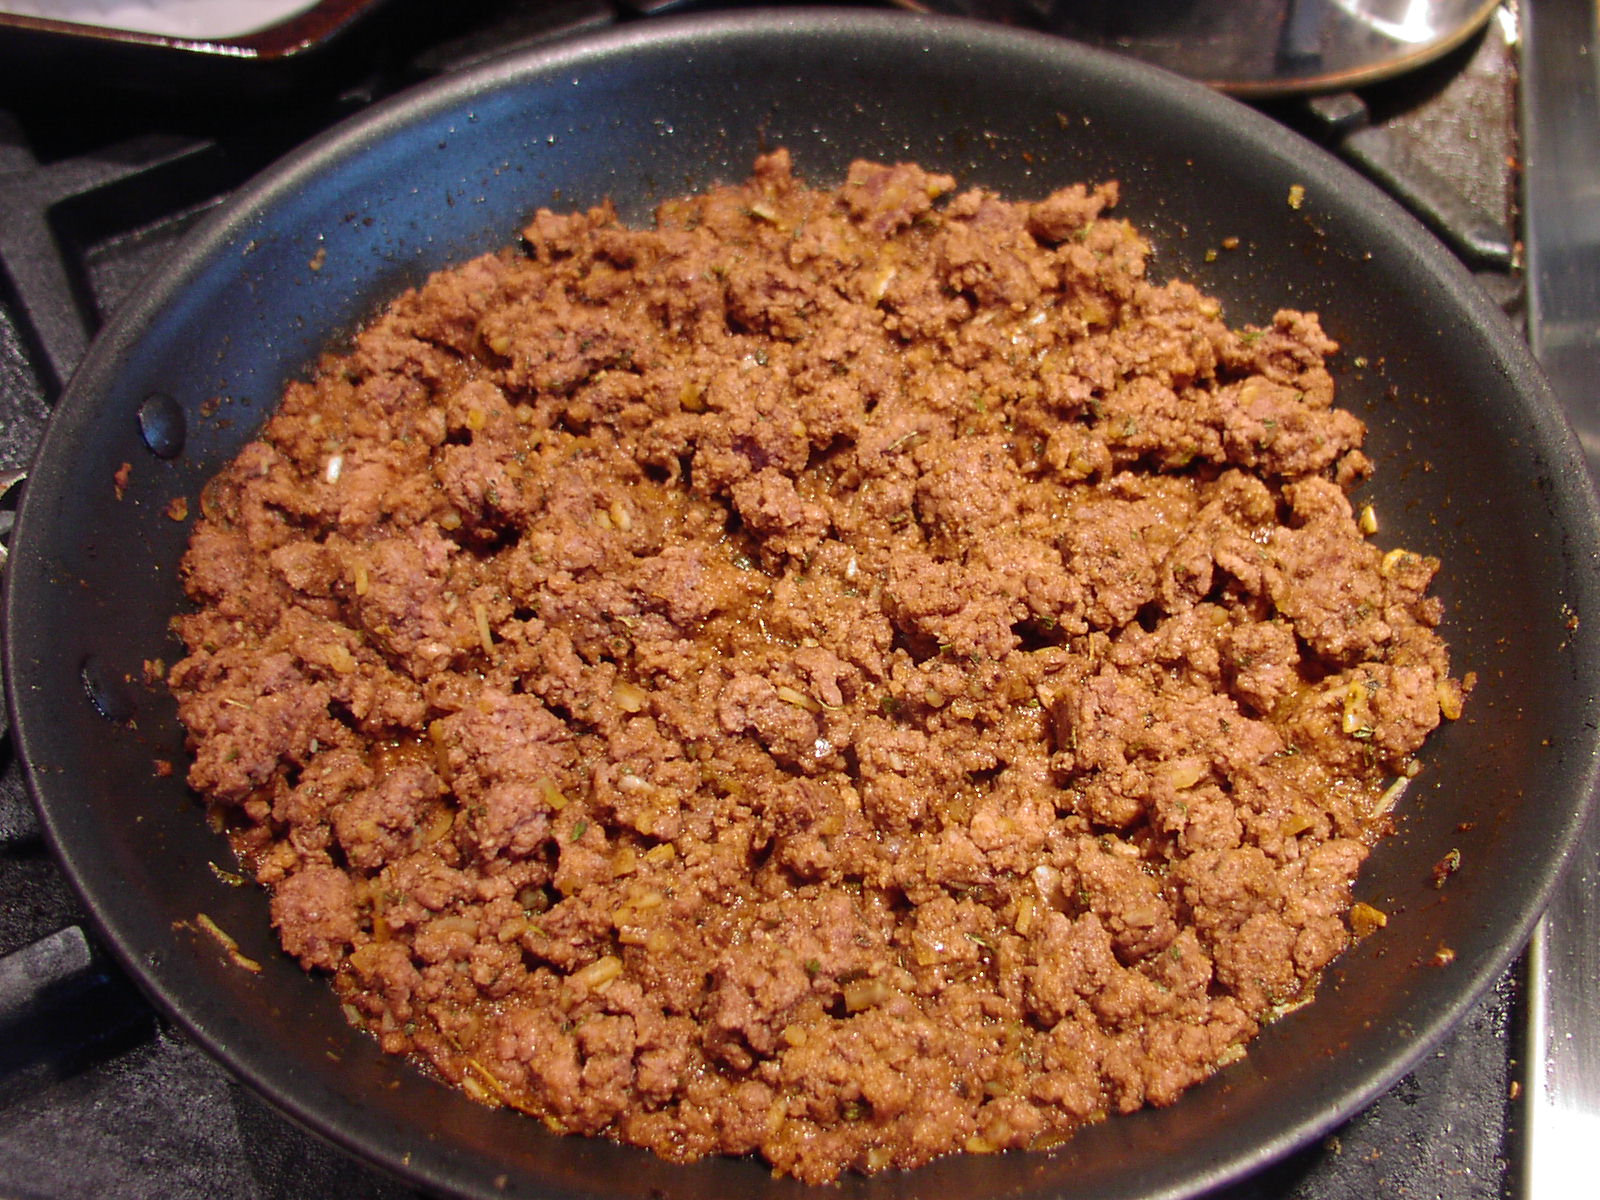
Spray a non-stick fry pan with cooking spray. Add the ground beef and cook slowly until the meat is just about brown. Add the remaining ingredients, bring to a high simmer, reduce heat, and cook for 5 minutes. Adjust seasoning.


MONGOLIAN BEEF WITH GREEN ONIONS

OLYMPUS DIGITAL CAMERA

During the 70s I worked for Seafirst Bank (remember them?) at their International Branch. I loved working there. Fabulous people to work with, great customers, and nothing like having wonderful Asian food available each and every day.

In those days, the area was known as “China Town”. (It is now more aptly referred to as the “International District”.) And more often than not I would go out for lunch on Fridays. And almost invariably I would order Mongolian Beef.

Now the Mongolian Beef of my yore was spicier (whole red chilies running throughout the dish) and included deep fat fried Saifun (mung bean) noodles. Then all the ingredients were mixed together and fried in even more oil. It was wonderful. But I can’t handle that much spice, fat, or salt anymore. So I needed a recipe for a milder, tamer, more polite, and definitely healthier version of this dish. So to the internet I proceeded. None of the recipes I found were just exactly what I thought I was looking for. So I added, subtracted, reduced, increased, and generally had my way with several recipes, and this combination of ingredients is the result.

And if I do say so myself, which of course I do, this doesn’t taste even close to the Mongolian Beef I used to get in the International District in the 70s! And this, if I’m honest with myself, is a good thing. Because of how I eat today, (less fat, salt, and my bodies rejection of really spicy food), I honestly don’t think I would enjoy “the real thing” any longer. So in remembrance of days gone by, I plan to lift a martini glass (complete with contents) tonight to the good old days when I could eat anything I wanted, was totally unaware of things like sodium content and saturated fat, and not eating spicy food meant you were a sissy!

So for all my readers who like me, are Mongolian Beef lovers, I offer my healthier version of this classic Asian dish. I think it’s pretty OK, and I hope you do too.

  • 1 lb. lean beef steak (round, London broil, sirloin, etc.) cut into very thin strips
  • ¼ c. cornstarch
  • ½ c. tamari (low sodium & GF)
  • ½ c. water
  • 2 tsp. sesame oil
  • 2/3 c. brown sugar
  • ¼-½ tsp. crushed red pepper flakes
  • 2 T. vegetable oil, divided
  • 1 T. minced ginger
  • 2-3 garlic cloves, minced
  • 1 bunch green onions, sliced on the diagonal

Mix the steak strips and cornstarch together and set aside. Whisk together the soy sauce, water, sesame oil, brown sugar, and red pepper flakes. Set aside.

In a large fry pan, heat 4 teaspoons of the oil to medium high. Add the meat and fry just until each side is lightly browned. (The middle should still be slightly pink.) Remove from pan and set aside. Add the additional 2 teaspoons of oil to the pan along with the ginger and garlic. Fry for one minute then add the reserved soy sauce mixture. Let burble for 2-3 minutes or until the sauce starts to thicken. Add the reserved meat and the green onions. Cook about 30 seconds. Remove from heat, adjust seasoning, and serve immediately. Great served over brown rice.

CHICKEN MARENGO (CHICKEN IN A SAVORY WINE AND TOMATO SAUCE)

OLYMPUS DIGITAL CAMERA

Every once in awhile Mr. C. will be completing the New York Times cross word puzzle, and will run across (or down) an answer that by its clue he knows is a cooking term or dish. And if he doesn’t recognize the term or dish, he asks me to enlighten him since I am the self proclaimed resident expert on all things cuisine. Now sometimes I can answer with assurance, sometimes with a faint idea of what I’m talking about, but more often than not, I haven’t got a clue. So when Mr. C. recently asked me about marengo, I just stared at him and shrugged my shoulders. But of course, later that morning I had to look it up.

I discovered that Marengo is a town in Italy, and that maybe possibly Chicken Marengo was prepared for Napoleon by his personal chef after the French won the battle of Marengo on June 14, 1800. (Myth or legend, who knows?!) What I do know for sure however, is that Melissa d’Arabians recipe for Chicken Marengo, with a couple of minor adaptations on my part, is an absolutely delicious, easy to prepare, and healthy chicken dish. So who cares about the origin of the recipe even though both the French and the Italian claim it as their own creation. (Well of course they do!) And incidentally, there are about as many wildly different ingredients and ways to prepare this dish as there are Carter’s Little Liver Pills! (Actually since 1959 they have simply been called Carter’s Little Pills.) And yes, they are still being made and apparently sold. Or they wouldn’t keep making them, right??? But back to the variety of ingredients possible in a Chicken Marengo.

Some include poached or fried eggs (yikes), crayfish, Cognac, garlic, black olives, thyme, etc. The list is endless. But for my taste, this simple preparation is absolutely perfect. (And no I don’t care if Napoleon would have liked it or not!)

So do yourself a favor. First of all, don’t buy any Carter’s Little Liver Pills (talk about an expired pull date), but do prepare this amazing dish next time you want to feature chicken in a new and exciting way.

  • 2 large boneless, skinless chicken breasts, sliced lengthwise, and then pounded thin
  • kosher salt
  • freshly ground black pepper
  • ¼ c. all-purpose flour
  • 3-4 T. extra virgin olive oil
  • 1 medium sized sweet onion, sliced
  • ½ lb. button mushrooms, sliced
  • 1 yellow bell pepper, seeded and thinly sliced
  • 2 T. tomato paste
  • ½ c. dry white wine
  • ½ c. beef broth (yes, beef broth)
  • 1 (14-oz.) can chopped tomatoes
  • 2 tsp. butter

Season the chicken with salt and pepper and lightly dredge in flour. In a large sauté pan, heat 3 tablespoons of the olive oil over medium-high heat and add the chicken. Brown on both sides, until lightly golden, about 3 minutes per side. Remove from the pan and set aside.

In the same pan, add another tablespoon of the olive oil, if needed, along with the onion, mushrooms, and pepper. Sauté until the veggies are almost soft, about 5 minutes. Stir in the tomato paste and cook for 2 minutes. Turn up the heat, and add the wine and let it reduce by about half. Add the beef broth and chopped tomatoes. Once the mixture begins to burble, reduce the heat, and cook for about 7-8 minutes. Add the reserved chicken and any accumulated juices and cook until the chicken is warmed through, about 2 minutes. Remove from heat and stir in the butter. Serve immediately. Great served over brown rice.


CHICKEN, SHRIMP, OR ROASTED VEGETABLES IN A CURRY MASALA SAUCE

OLYMPUS DIGITAL CAMERA

There really isn’t anything about Indian curry that I don’t like. And this curry dish, slightly altered from a recipe provided when I recently purchased a package of Aromatic Curry Masala at the Methow Masala shop in Winthrop, WA, is just about as good as an Indian style curry can get. It’s so delicious, that if I had been served this curry dish in a restaurant, I would have wanted to go back for more at my earliest convenience. The only changes I made to the original recipe were to replace tomato paste for diced tomatoes, use my own curry masala blend (the second time I made it), and add sour cream or yogurt right at the end. (Just makes the sauce a little creamier.)

Now if you happen to live near Winthrop, you can buy the curry blend any old time you want. But for those of us who would have to make a special trip, I went to all the trouble of working out what I believe to be an adequate Aromatic Curry Masala substitute. (BTW, Mr. C. loved both curries I made before writing this post. But he did admit that he liked the curry made with chicken better (curry number 1) than the curry I made with shrimp (curry number 2). No mention of the sauce flavor being any different when I used my own curry blend (curry number 2). Just that he preferred chicken curry over shrimp curry.

Now of course, many of you are not going to go to the bother of making your own curry masala powder. And believe me, if I still had 4 kids at home and worked full time, I wouldn’t be making my own curry powder either! But since my kids are grown and I am retired, I take no greater pleasure than trying my hand at what I call “seasoning blend mixology”. (I have kind of a spice and herb obsession if truth be known!) And if I do say so myself, my recipe below for Curry Masala Powder is darned good. But dear friends, even if you don’t have the time, energy, or interest in making your own curry powder, make this delicious dish anyway. Just use purchased curry powder. (There will be no points subtracted or shame attached to using a commercially produced curry powder. The only shame would be if you didn’t give this recipe a try when next you got a hankering for Indian food!)

So grind yourself up some curry powder (or start with purchased curry powder), steam up some rice (remember, brown rice is healthier for you than white rice), and prepare a chicken, shrimp, or roasted vegetable curry for your family in the near future. They will be delighted to have something new and exciting to eat for dinner. And you will have had a new adventure in the kitchen. And isn’t that the real reason many of us love to cook??

  • 1 tsp. cumin seed
  • 1 tsp. brown mustard seed
  • ¼ c. (½ stick) butter
  • 2 large onions, finely chopped
  • 5 lg. garlic cloves, finely minced
  • 1-inch piece of fresh ginger, finely minced
  • 3-4 T. Aromatic Curry Masala spice blend from Methow Masala or my version of Curry Masala Powder (see recipe below)
  • 1 tsp. kosher salt
  • ¼ c. tomato paste
  • 2-3 med. jalapeño chili peppers, seeds and veins removed, and finely minced
  • 4 c. (1 qt.) chicken or vegetable broth (or use 4 tsp. chicken or vegetable base and 4 c. water)
  • 6-8 boneless, skinless chicken thighs cut in bite sized pieces or 2 lb. large uncooked shrimp, peeled and deveined or 3 cups assorted roasted vegetables
  • ½-¾ c. sour cream or plain yogurt

Toast the cumin seeds and mustard seeds in a dry pan over medium heat until the aroma of the two spices is released. Set aside.

Melt the butter in a heavy covered pan. Add the onions and cook until they start to brown. Add the garlic and ginger and cook for one minute. Add the curry masala powder, salt, toasted cumin and mustard seeds, and the tomato paste. Let the mixture cook for about a minute. Whisk in the jalapeños and chicken broth and simmer uncovered for about 15 minutes. Add the chicken pieces and cook just until the chicken is no longer pink in the middle. If you are using shrimp, cook only until the shrimp turn light pink. If you are using roasted vegetables, add just long enough to heat through. Whisk in the sour cream or yogurt, adjust seasonings, cover, remove from heat, and let sit for 15 minutes. Serve over brown rice. And yes I know brown rice is not usually served with most curry dishes, but it’s healthy and we love it! If you must, you can serve the curry over basmati rice.

Also, since I know many of you are wondering – no this is not a recipe for a really spicy hot curry. The jalapeños truly add more flavor than heat, especially if you carefully remove the seeds and veins. Of course, there is a bit of heat, but I pride myself in not hurting anyone. So if you are super sensitive, you might want to use less jalapeños or none at all.

CURRY MASALA POWDER RECIPE

  • scant ½ c. coriander seeds
  • 2 T. fennel seeds
  • 2 T. cumin seeds
  • 1 T. black or brown mustard seeds
  • 1 tsp. black peppercorns
  • ½ tsp. fenugreek seeds
  • 2 tsp. crushed red pepper flakes
  • 2 tsp. ground cinnamon
  • 2 tsp. turmeric powder
  • 1 tsp. ground ginger
  • 1 tsp. ground cloves
  • 1/8 tsp. ground cardamom

In a small pan over low heat, individually dry roast the coriander seeds, fennel seeds, cumin seeds, mustard seeds, peppercorns, fenugreek seeds, and crushed red pepper until aromatic. Don’t hurry the process.

When each is toasted, remove to a bowl to cool. (And yes, it can be the same bowl.) When all of the spices are room temperature, whirl in a grinder until powdered. (It’s OK if there are still tiny chunks. If the chunks bother you, sieve the mixture before proceeding.) Add the ground cinnamon, turmeric, ginger, cloves, and cardamom. Store in an airtight container. Use in any of your favorite recipes calling for curry powder.

FYI: Internet source for dried herbs and spices www.myspicesage.com

I have always been more than satisfied with the price, delivery method (most of the time free delivery) and products I have received from this company.

ADOBO SEASONED GRILLED FLAT IRON OR SKIRT STEAK

OLYMPUS DIGITAL CAMERA

Flat iron and skirt steaks are two of the best cuts of beef available for grilling. They are rich in flavor, extremely juicy, and just amazingly succulent and tender if not cooked to death. Both are perfect when served medium rare. Any more done and you might as well eat shoe leather! So if you are one of those people who want your steak cooked till no semblance of beef flavor remains and you basically have to use a hack saw to cut the pieces into bite size; please move on to another recipe. (I said please, so that makes it OK!) And since I know many of you like your steak really rare, I will give you the same advice I received from a waiter at the now closed Buenos Aires Grill in downtown Seattle. I ordered entraña (grilled skirt steak) rare. The waiter informed me that for cuts of meat like skirt and flat iron, they are at their best when cooked medium rare. I followed his advice and I have never looked back. I now order or cook steaks medium rare regardless of the cut.

Although flat iron and skirt steaks are good when seasoned only with salt and pepper, I think using Adobo Seasoning is absolutely the best way to enhance the natural flavor of the meat. So give this blend of spices and herbs a try. And for heavens’ sake, if you don’t have one or more of the listed herbs or spices at home, don’t buy one of those cute little spice jars or cans at your local grocery store that cost an arm and a leg. Winco, your local food co-op, IGA, Haggen Foods, Central Market and many other grocery stores carry herbs and spices in bulk including the ones used in this Adobo Seasoning blend. And trust me; you will save an incredible amount of money if you buy in bulk. And that doesn’t mean that you have to buy a great deal of product. You can actually scoop out as much or as little into a bag as you need. Just don’t be surprised at how little the bulk spice or herb actually costs.

A few years ago I conducted an experiment when I was writing Spice it Up! I performed a cost comparison at our very own Camano Island IGA. For 1 pound of McCormick oregano, the cost would have been $164.90 ($6.39 for each .62 oz. bottle). For 1 pound of oregano in bulk, the cost would have been $9.19. Buying oregano in darling little glass bottles would cost 1800% more than buying in bulk! Now as I said, this cost comparison was done a few years ago so both the bottled oregano and bulk price have undoubtedly gone up. But I’m sure the price ratio difference is still about the same. Don’t believe me? Put about a half cup of bulk oregano in a bag and pay for it along with your other groceries. If it costs more than a buck fifty, I’ll send you the difference!

But for those times when I need dried herbs or spices that are unavailable at my local grocery stores, or I simply want the luxury of ordering them over the internet, I use www.myspicesage.com. I have always been more than satisfied with the price, delivery method (most of the time free delivery) and products I have received from this company. So basically what I am saying is this. Don’t give me any lame excuse about the cost of dried herbs and spices or how expensive it is to prepare your own herb and spice blends! Because my dears, your own homemade blends are always going to be less expensive to prepare (if you buy in bulk), taste fresher, and not coincidentally be generally healthier for you. Now granted, they won’t contain the likes of cottonseed oil or silicone dioxide, but I’m sure you’ll get over their absence in time!

So if you want to serve your family and friends a steak that will knock their socks off, get yourself to the store and buy a flat iron or skirt steak. Then mix up some Adobe Seasoning, fire up the BBQ, and prepare for a taste treat even an Argentinean would take pride in serving. If you want to send this steak over the top, serve with Chimichurri Sauce. (See recipe below)

  • 1½ lbs. flat iron or skirt steak, room temperature, trimmed of silver skin if necessary (skirt steak), cut into 2½-inch wide pieces – basically in half lengthwise (flat iron steak)
  • extra virgin olive oil
  • Adobo Seasoning (see recipe below)

Lay the steak on a baking pan and lightly coat with olive oil. Sprinkle on enough adobo seasoning to almost cover up the meat. (Don’t go hog wild, but don’t be too shy either. You should have over half of the amount from the recipe below left after you are finished decorating the steak on both sides.) Grill over a very hot fire, but don’t cook past medium rare. (With my grill, that’s about 4 minutes on the first side and about 1 minute on the second.) Let rest about 4 minutes before slicing into 1-inch diagonal strips. Use the remaining adobo on any meat, poultry, or fish dish. Or after trying this recipe, use it the following week when your family begs you for more of that wonderful steak!

ADOBO SEASONING

OLYMPUS DIGITAL CAMERA

  • 2 T. kosher salt
  • 2 tsp. regular paprika
  • 1½ tsp. onion powder
  • 1½ tsp. dried oregano (preferably Mexican)
  • 1½ tsp. ground cumin
  • 1 tsp. smoked paprika
  • 1 tsp. granulated garlic
  • 1 tsp. chili powder
  • freshly ground black pepper

Whisk all the ingredients together in a bowl. Store in an air tight container in a cool, dry place.

CHIMICHURRI SAUCE 

  • 2 T. drained capers
  • 2 garlic cloves, rough chopped
  • 1 bunch Italian parsley
  • ½ bunch cilantro
  • 2 T. red wine vinegar
  • 1 tsp. kosher salt
  • freshly ground black pepper
  • ½ tsp. dried oregano (Mexican is best)
  • ¼ tsp. crushed red pepper flakes
  • ½ c. extra virgin olive oil

Place capers and garlic in the bowl of a food processor. Whirl until finely chopped. Add the parsley and cilantro and pulse 4-6 times to rough chop the leaves. (Don’t over process.) Transfer to a bowl. Stir in the vinegar, salt, pepper, oregano, crushed red pepper flakes, and olive oil. Taste and adjust the salt and pepper as needed.

Refrigerate until ready to use (preferably the same day).


PASTA WITH TUNA, CHEDDAR CHEESE, AND GREEN OLIVES

OLYMPUS DIGITAL CAMERA

For this blog, I like to title dishes so that people performing an internet search have a reasonably good chance of locating one of my recipes by listing desired ingredients in their search criteria. I also hope researchers can simply search on the standard name for a dish, like Spaghetti and Meatballs, and find my blog. So basically, none of this “Uncle Dan’s Favorite Cookies” or Jim’s Dad’s Special Cookies” is ever going to become an official title for one of my recipes. (I mean really, who in the world would start a search using Uncle Dan or Jim as one of their criteria anyway? No offense guys!) So Pasta with Tuna, Cheddar Cheese, and Green Olives says most of what you need to know about this recipe. But, if I were to name this dish as it is lovingly referred to in the Carr household, it would be entitled “Tuna Glop”! That’s right, Tuna Glop! (I mean really, who would go any further if that name was staring them in the face?) But by whatever name you choose to call it, this dish is my take on the almost forgotten, never revered Tuna Noodle Casserole. But in my version of this classic, there’s a lot of cheddar cheese action going on, green olive action happening, no oven time required, not a casserole dish to be seen, and never before tasted at the likes of a Lutheran potluck supper. (I’m Lutheran, so I know of what I speak! Green Jello with Marshmallows anyone?) But I digress…

Now knowing full well that no one in their right mind would search for “Tuna Glop” or even for a Tuna Noodle Casserole recipe, I changed the name simply to trick everyone into thinking they were about to discover a new and amazing way to use either fresh or good old fashioned canned tuna. (Albacore tuna, of course!) But wait, let me explain. I actually have your best interests at heart.

Each of us who spend any time at all in the kitchen, have days when we would rather chew off an arm than prepare a complicated dish for dinner. So this pasta, with its refrigerator and pantry ingredients, ease of preparation, and comfort food qualities could just possibly save you a long and arduous hospital recovery. (Plus you might actually find that you like it enough to want to prepare it even if you and your kitchen are on fabulous speaking terms.) It is truly comfort food to the max. And on any day, be it a good or a bad day, the whole dish comes together in about 20 minutes. And it tastes like a decadent indulgence. (And don’t we all need that every once in awhile?)

So basically what I am saying is – try it you’ll like it. And yes, among your own family you may call it Tuna Glop. Just don’t call it that until your whole family has already asked you to fix it again. Only then should you reveal the “true” name of this dish. And never, under any circumstance call it Tuna Noodle Casserole. Even children who have never been exposed to “the real thing” might object, just because of the name alone. Just sayin’!!

  • 1 can cream of mushroom soup (And no, I don’t use canned soup very often, but there are times when it comes in mighty handy!)
  • 2 tsp. dried parsley
  • 2 tsp. dehydrated onion
  • ½ tsp. granulated garlic
  • ½ tsp. Worcestershire sauce
  • freshly ground black pepper
  • 2 cans water packed Albacore tuna, drained
  • ½ c. sliced pimento stuffed green olives
  • 1 c. sour cream
  • 1 c. grated sharp cheddar cheese
  • 2 c. dry penne pasta, cooked al dente (you can use rigatoni or any other pasta shape you like)

In a medium large saucepan, combine the soup, parsley, onion, garlic, Worcestershire sauce, and pepper. Bring to a boil, stirring frequently. Reduce heat and add the tuna, green olives, and sour cream. Bring just to a boil, stirring frequently. Remove from heat and stir in the cheddar cheese and cooked pasta. Serve immediately.

(And yes, for anyone who wants to know, Mr. C. loves this dish. Actually he is the one who first called it “glop”. The man has such a way with words! Ahhhh)


SAUSAGE, SPINACH, AND CHEESE STUFFED PORTOBELLA MUSHROOMS

OLYMPUS DIGITAL CAMERA

We were recently invited to the home of one of the famous “Jazz Gents” (7 wonderful musicians who get together weekly to play their favorite jazz pieces and not coincidentally laugh a lot and eat donuts as often as possible)! And of course, when you get a group of musicians together for a social event, there is going to be music happening. So while we wives and assorted guests sat around listening to our husbands and friends play some of their favorite tunes, we did what every group of women do when they get together. (No, we didn’t talk about our children! We are all of an age that even talking about our grandchildren is oh so yesterday.) We talked about food. Duh!! And while we were talking about food we love and in some cases miss, Nyla, one of the band wives, told me about the wonderful stuffed Portobella mushrooms she used to order at a now closed restaurant in La Conner, WA. And since she knows that I love nothing better than trying to reproduce delicious food that I have eaten, she elucidated on the basic flavors she remembered. Based on the ingredients Nyla could recall tasting, I came up with this dish.

Now, I have no idea if this recipe produces anything like what Nyla enjoyed. Since I never experienced the dish myself, I had to go from her memory and my knowledge of what ingredients would work well together. So dear Nyla, I hope that even if this dish has no resemblance to what you remembered, you enjoy my “version”. I know Mr. C. could hardly contain himself he liked the stuffed portabellas so well. But then, he loves Italian sausage, feta, and Portobella mushrooms; so I had him from the first bite!

And to all of my faithful readers, I apologize for not posting as often this summer as usual. But I have been out of town a lot, my computer was in the hospital, and my camera and my computer stopped talking to one another so I could not download my food pictures. And now that all things electronic seem to be back in working order, in some cases with band aides still attached however, 2 new loves have come into my life to monopolize my time. Their names are Miles and Max. Miles for Miles Davis; Max for Max Roach. (If you are unfamiliar with these names, please accept my sincerest sympathies. If you do know them, then of course you understand why we simply had to choose the names we did!)

So bare with me. Fall and winter are coming, and by then I will be cooking more, and of course posting more to my blog. And if the Gods of electronics consider me once again an acceptable recipient of their good favors, I won’t have any more computer problems. I’m crossing all my fingers as well as my coaxial cable with my USB cable just to make sure. That should work, right???

OLYMPUS DIGITAL CAMERA

(Just awake after a nap – Max on the left; Miles on the right. Born 5/21/2015)

  • 4 medium large sized Portobella mushroom caps
  • ½ lb. bulk Italian sausage, either pork or chicken
  • 2 cloves garlic, finely minced
  • small pinch crushed red pepper flakes
  • freshly ground black pepper
  • 2 T. dry white wine
  • 4 handfuls fresh baby spinach leaves, roughly chopped (about 5 oz.)
  • ½ c. crumbled feta cheese
  • ½ c. shredded mozzarella cheese
  • ½ c. grated Parmesan cheese
  • ½-¾ c. chicken, vegetable, or mushroom broth

Using a slightly damp paper towel, wipe the mushroom caps removing any dirt. Cut the stems off and use a spoon to remove the dark gills on the underside of the mushroom caps. Discard gills and set mushrooms aside.

In a large fry pan, break up the sausage and cook just until no pink remains. Add the garlic, red pepper flakes, black pepper, and wine; cook for one minute. Remove from heat and add the spinach, feta, and mozzarella cheese.

Place the mushrooms in a baking dish. Evenly divide the sausage mixture as you stuff the mushrooms. Sprinkle the Parmesan on top and pour the broth around the mushrooms. Place in a pre-heated 350 degree oven for 30-35 or until the mushrooms are soft and the Parmesan cheese is crisp on top. Serve immediately.

Please note: If you have a convection oven, turn it on the last 5 minutes or so of baking.


VEGETARIAN BAKED BEANS

OLYMPUS DIGITAL CAMERA

So, I have to tell you, starting a pot of baked beans without first frying up about a half pound of bacon just felt sick and wrong. I mean really, how could baked beans taste right without this quintessential ingredient? But I wanted a vegetarian side dish that could, if need be, stand in as the compulsory protein if one of my guests didn’t eat meat. So I took my standard recipe and simply left out the first ingredient.  

So if you too would like to step over to the dark side, I suggest you give this recipe a try as written. It produces absolutely lovely baked beans and I promise you will not miss the bacon in the slightest. Even Mr. C, whose middle name actually should have been “bacon” loved the beans and didn’t miss it in the least.

So next time you invite the gang over for a backyard BBQ, include these beans in your menu planning. They are perfectly delicious and the best part – they are truly at their finest when they have had a day or two to mellow out in the refrigerator. So, for you, that means one less dish to prepare on the day of the event. (As you know, I am just crazy about dishes that can and really should be prepared ahead of time.)

For additional recipes that are fun to serve at a picnic/BBQ, search under the heading BBQ & PICNIC RECIPES. Cheers to the lazy, hazy, crazy days of summer!

And for a sad story about baked beans, see my story below. Sigh…… 

  • 1 lb. small navy beans
  • water
  • ¼ c. maple syrup (the real stuff!)
  • 1 c. brown sugar
  • ½ c. molasses, or more to taste (regular or part black strap)
  • 1 small can tomato paste
  • 1 24-oz. bottle of ketchup
  • ¼ c. yellow mustard
  • ¼ c. Worcestershire sauce
  • 1 T. kosher salt, or more to taste
  • freshly ground black pepper
  • 1 yellow onion, chopped

Carefully wash the beans removing any matter that doesn’t look like a healthy, fat dried bean. Place in a large bowl and cover with water by about 3 inches.  Place in refrigerator overnight. Next day, rinse and drain the beans.

Place in a covered pot with enough water to cover the beans by about 3 inches. Bring to a boil, reduce heat, and simmer gently until the beans are tender, about 40-45 minutes. (Do not worry that the beans will become mush while they are spending their time in a low oven. They will be just fine!)

Drain the cooked beans and place in a Dutch oven. (The main thing here is that the beans must be covered as they bake. If you don’t have a Dutch oven, you can bake them in any kind of pan, as long as the pan is covered, even if it’s covered with aluminum foil. However, it may take a longer baking time if you use aluminum foil rather than a tight cover. Sad story to follow.)

In a medium sized bowl whisk together the maple syrup, brown sugar, tomato paste, ketchup, yellow mustard, Worcestershire sauce, salt, and pepper. Add the mixture to the beans along with the chopped onion. (I usually rinse out the ketchup bottle with a little water and then throw the liquid in with the other ingredients.)

Bring to a boil, cover, and bake in a pre-heated 225 degree oven for 3-4 hours. (Check the beans periodically to make certain they are not getting too dry. While you have the lid off, give them a little stir. Add water as needed.) Uncover the beans the last hour to brown them up a bit. Best made the day ahead and either re-warmed or served at room temperature.

Sad story:

So here it is, 3 days before I plan to serve baked beans to our home concert (JazzVox) guests, and I place 4 pounds of beans to soak. (quadruple recipe) Next day I cook the beans in water for a short time, but not long enough. Then I throw the rest of the recipe together in a large pan and cover the whole mess with aluminum foil. Seven (7) flippin’ hours later the beans are still in the oven and they are still crunchy! There is obviously no hope for these beans. So I did what any self-respecting cook would do. I tossed the whole shebang into the yard waste barrel, sent a little invocation to the Gods of yard waste asking for their help with the next batch, and started all over again. Sad, right?

And just to prove that this girl obviously can’t learn from her mistakes or that the Gods were watching the World Cup while I was requesting assistance, the second batch of beans still didn’t have that wonderful creamy mouth feel that should be the hallmark of really good baked beans. Once again, I simply didn’t cook the beans long enough on the stove top before adding the other ingredients. So once again, the beans were in the oven about 7 hours. OK, this time they weren’t crunchy. They tasted fine, but I knew they could be better.

So the moral of my sad story is to cook your beans until they are tender. Not over cooked, but perfect. And when you figure out how to do that, would you please let me know!


BBQ CHICKEN WITH BOURBON BBQ SAUCE

OLYMPUS DIGITAL CAMERA

Ok, once you take a look at this recipe you are going to wonder if I have lost my mind thinking you would ever consider going through all the steps listed below just to prepare a simple thing like BBQ’d chicken. (You might even be wondering why I would ever construct a sentance like the one I just did!) In fact I would go so far as to say, you might even be calling me a lunatic right this very minute! (Wouldn’t be the first time, I’m sure!) But – if you did take the time and effort to make this wonderful chicken, you might actually forgive me both the recipe and the sentance structure. Because, if I do say so myself, this is just darn fine BBQ chicken. And yes I know, there are 4 steps (well 5 if you count making the BBQ sauce) and I understand that it looks like an all day process. But actually it’s not that bad, especially if you make the Dry Rub for Chicken and the Bourbon BBQ Sauce ahead of time. And really, the brine goes together in about 3 minutes.

Now granted, skinning the chicken pieces is about as much fun as cleaning the gutters of your home. But removing all those unnecessary fat calories should make you feel super virtuous. So take one for the team, give yourself some points for protecting your own and your loved ones arteries, and prepare to be amazed at how much skin and fat are actually on your average piece of chicken. It’s enough to almost put you off visiting Ezells or Colonel Chicken ever again! Almost! And yes, I know. You can simply buy boneless, skinless chicken pieces and call it good. But I truly believe that chicken pieces which still contain the bones God gave them at birth, remain juicier longer during their arduous adventure with heat, which in turn helps create a better finished product. (Good grief! Where are these sentences coming from today? Sometimes I even scare myself! Perhaps it was the BBQ chicken I ate yesterday?)

Anyway, don’t worry about me. Just have some fun and  invite your friends over for a BBQ. Serve them this chicken, along with a side of Old Fashioned Potato Salad, Vegetarian Baked Beans, some chunks of cold watermelon, and my Mocha Chocolate Cake with Sour Cream Frosting and you will have a happy crowd on your hands.

And in case you can’t figure out what constitutes the 5 steps mentioned above, allow me to list them for you:

1)      Brine the chicken pieces

2)      Dry rub the chicken pieces

3)      Bake the chicken pieces

4)      BBQ the chicken pieces

5)      Serve the chicken pieces with BBQ sauce

6)      Devour the chicken pieces (Oops. I guess there are actually 6 steps. And I a retired banker. Shame on me!)

Brine Ingredients:

  • 4 c. water
  • 1/3 c. white vinegar
  • 1/3 c. kosher salt
  • 1/3 c. brown sugar

16 or so pieces of chicken (I start with bone-in, skin-on chicken pieces – 3 breast halves – skinned and cut in two, 6 thighs – skin removed, and 4 drumsticks, most of the skin removed)

Brining Directions:

In a large plastic or glass container, whisk together the water, vinegar, salt, and brown sugar. Add the chicken and refrigerate for 1½ to 2 hours, but no longer.

Please note: If you don’t own a large glass or plastic container, line a metal pan with a garbage bag and pour the liquid in the bag along with the chicken pieces. Also, buy reasonably small pieces of chicken if at all possible. The smaller the pieces, the more delicious the final product.

Dry Rub for Chicken Ingredients:

  • 6 T. packed dark brown sugar
  • 2 T. regular paprika
  • 2 T. chili powder
  • 2 T. kosher salt
  • 1 T. smoked paprika
  • 1 T. granulated garlic
  • 1 T. onion powder
  • ½ tsp. dried thyme
  • coarsely ground black pepper

Dry Rub Directions:

Mix all ingredients together and store in an airtight container.

Putting it All Together:

Drain the chicken pieces and pat dry with paper towels. Place the pieces on sided baking sheets liberally coated with cooking spray. Generously coat each piece with the dry rub. Loosely tent the pan(s) with a piece or pieces of aluminum foil. Bake the chicken for 30-35 minutes in a pre-heated 350 degree oven or until the internal temperature of each piece reaches 160 degrees. Remove from oven and place pieces on your BBQ set at a fairly low temperature. BBQ each piece for about 3 minutes on each side. (Remember, the chicken is already done. All you are doing at this point is adding a little bit of smoky flavor and a couple of grill marks to each piece.) And lest you think I forgot about the BBQ sauce, I don’t add sauce while the pieces are on the grill. I have found that some people prefer just the flavor of the rub and don’t bother with the sauce, so I serve the sauce on the side. Once all the pieces have finished their short acquaintance with the grill, place them on a platter, loosely cover with foil, and serve them either warm or at room temperature.

Please note: if you don’t have a BBQ or just don’t want to go to the bother and mess, just serve the pieces straight out of the oven. You might want to remove the foil for the last few minutes to allow the spice rub to dry out a bit.

BOURBON BBQ SAUCE

  • ¼ c. butter
  • ¼ c. minced onion
  • 3 cloves garlic, minced
  • ¼ c. brown sugar
  • 2 tsp. whole grain mustard
  • 1 c. ketchup
  • 1/3 c. Worcestershire sauce
  • ¼ c. fresh lemon juice
  • ¼ tsp. hot sauce, or to taste
  • ¼ tsp. cayenne
  • 2 T. bourbon

Melt butter in a medium sized covered saucepan. Sauté onion until translucent; add garlic and cook until garlic releases its aroma, about 1 minute. Add remaining ingredients, bring to a boil, reduce heat, cover pan, and simmer gently for at least 30 minutes, stirring occasionally. Sauce should thicken some during cooking. Serve warm or at room temperature.

This recipe (at least the brining, dry rubbing, and baking part) is loosely based on the BBQ chicken recipe found on the Smitten Kitchen web site. (Great blog BTW.)


SPICY RISOTTO WITH SCALLOPS AND SHRIMP

OLYMPUS DIGITAL CAMERA

Sometimes I get so caught up in trying new recipes, I forget about preparing some of our old favorites. And this dish is no exception. So the other day when I was planning what to fix for our good friends Tim and Susie, I decided to go through my first cookbook for inspiration. And there on page 109 was this recipe which I had all but forgotten.

I can’t remember where I got this recipe (it was over 20 years ago after all), but I sure as heck know I didn’t invent this amazing concoction. I think it may have been a cooking class I took at an Italian restaurant back before the dawn of cell phones (not really, because the first mobile cell phone call was made in 1973). But you catch my drift; it was a long time ago!

In short, this is absolute perfection in risotto. The gist of the sauce (garlic, anchovies, kalamata olives, capers, tomato sauce, and parsley) is almost pure Puttanesca (on this site BTW). I strongly believe that whoever the brainchild was who dreamt up this fabulous dish simply borrowed a basic puttanesca recipe, used Arborio rice instead of pasta, and added seafood. Brilliant!

So to whoever it was that came up with this fabulous combination of ingredients, I salute you. And to those of you who give this recipe a try, I salute you too. I promise you will not be sorry, unless of course you are allergic to shellfish. Then of course, all bets are off. But if you do try this dish, and like it, send me a reply. I love hearing from you all. (If you don’t like the risotto, keep it to yourselves. I’m getting kind of a fragile ego in my old age. Right!!!!)

  • 1 T. butter
  • 1 c. arborio rice
  • 2 c. simmering chicken stock
  • 2 T. extra virgin olive oil
  • 2 garlic cloves, minced
  • generous 2 tsp. anchovy paste
  • generous 2 T. chopped fresh basil
  • generous 2 T. minced fresh parsley
  • ¼ c. chopped kalamata olives
  • 25 capers, drained
  • generous 1 T. finely chopped sun dried tomatoes in oil
  • juice of 1 lemon
  • ½ lb. raw scallops
  • ½ lb. raw large shrimp or prawns, peeled and de-veined (I use shrimp that are 16-20 per pound)
  • ¾ c. dry white wine (I use Pinot Grigio)
  • ¼ c. tomato sauce

Melt the butter in a medium sized heavy pan. Add the rice and sauté for about 5 minutes over medium heat, stirring constantly. Add one large soup ladle of hot stock. Stir and when all of the liquid has been absorbed by the rice, add another ladle of hot stock. Stir continuously. Continue adding stock until the rice is creamy but just al dente. Remove from heat and set aside. (You may have a little bit of the chicken stock left.)

After the rice is finished cooking, heat the olive oil in a large sauté pan. Add the garlic, anchovy paste, basil, and parsley. Stir fry for about 2 minutes. Add the olives, capers, sun dried tomatoes, and lemon juice. Cook for 1 minute. Add the seafood and cook until just done, about 2 minutes. Stir in the wine, tomato sauce, and cooked risotto. Adjust seasonings and cook until just warmed through. Serve immediately.

Hint: This is a recipe where it is almost mandatory to have all your sauce ingredients ready to go before you start cooking. The cooking process goes very quickly and there simply is not time between steps to be chopping and fetching.