Category Archives: MAIN DISH RECIPES

CREAMY SHRIMP AND SCALLOP PASTA

So here I am at my local QFC (Quality Food Center) in front of the fresh seafood case contemplating buying some of the beautiful large fresh scallops. When next thing you know I hear the fellow next to me order some of the shrimp that are on sale. Wait – I know that voice! It’s Frank, one my neighbors who also happens to be a good friend. After we greet each other, our conversation immediately turns to his decision to buy some of the shrimp. If I remember correctly, he had previously purchased the same type of shrimp and was eager to buy more. So, never being one to not take a hint from someone who appreciates good food, I decided to buy some of the shrimp and still remain faithful to my first choice. So I bought a few of the scallops too. I figured I could decide how to prepare these beauties when I got home.

I remembered that I already had 3 wonderful recipes for this glorious seafood combination (Shrimp and Scallop Ceviche, Spicy Risotto with Scallops and Shrimp, and Seafood and Fried Tofu Lo Mein) in my repertoire. But I was in the mood for a pasta dish. (When am I not in the mood for a pasta dish?) So I did a little research, took some bits and pieces from other creamy sauced pasta dishes that I prepare, and came up with this recipe.

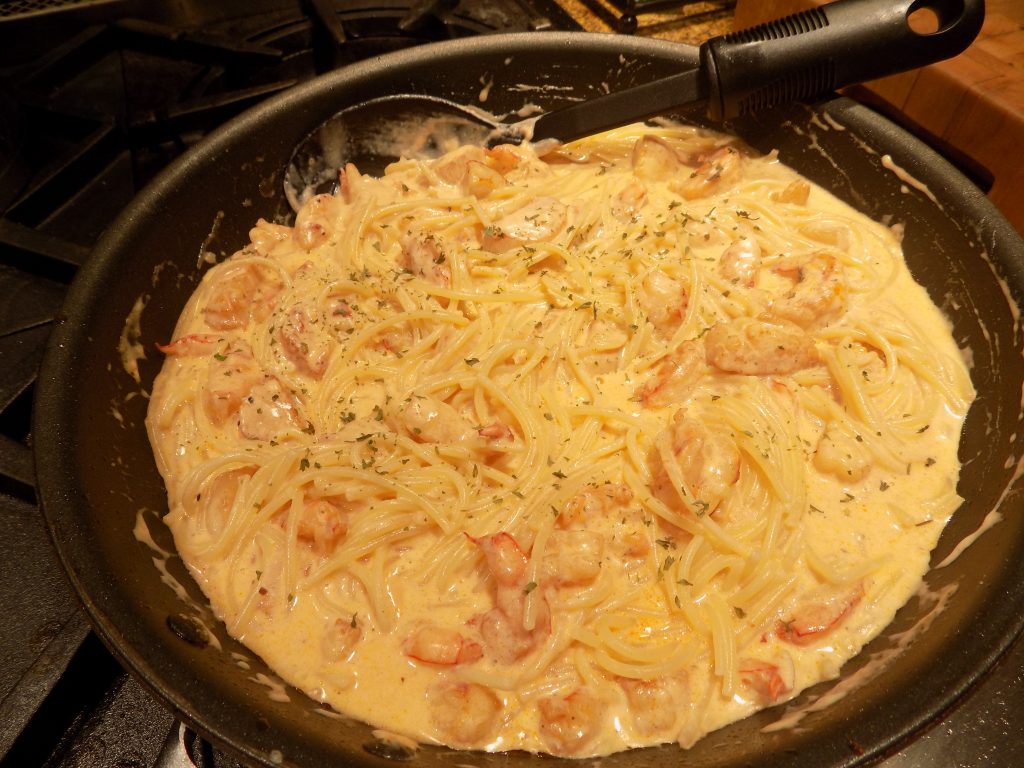
And oh my! The pasta was delectable. We both loved it. In fact, we almost came to fisticuffs over the leftovers the next day. (Not really of course, but the pasta was just that good!)

So next time you pay a visit to your local fishmonger, buy some large shrimp and a few fresh scallops. Then make this pasta dish. Serve the pasta with a simple green salad, and if you are feeling terribly worthy, treat yourself to some garlic toast too. (See recipe below.) You may thank me later! Buon Appetito   

2 T. unsalted butter, divided

1 T. vegetable oil

6-8 lg. sea scallops, patted dry with paper towels

1 lb. lg. uncooked shrimp, peeled, deveined, and cut in half

kosher salt

freshly ground black pepper

paprika

2 shallots, finely minced

2 garlic cloves, finely minced

1 T. flour

1/3 c. dry white wine

1 c. heavy cream

1 c. whole milk

½ lb. spaghetti or fettuccini, cooked al dente (actually use any pasta shape you want)

½ c. grated Parmesan cheese

1 T. finely chopped Italian parsley, garnish  

Heat 1 tablespoon of the butter and oil in a large frying pan. Add the scallops, making sure they are not touching each other. Sear the scallops for 1½ minutes on each side. The scallops should have about a ¼-inch golden crust on each side while still being translucent in the center. Remove from pan and place in a bowl. Once the cooked scallops have cooled a bit, cut them into the same sized pieces as the cooked shrimp. (I use my cooking scissors.)

Add the shrimp to the pan. Lightly season with salt, pepper, and paprika. Cook 1-2 minutes or just until fully cooked and no longer translucent. (They should be pink on the outside and opaque white on the inside.) Don’t overcook or they will be tough. Remove shrimp to another bowl or the same bowl with the scallops if they have been cut to size.

In same pan, melt the remaining 1 tablespoon of butter and sauté shallots until translucent. You do not want them to get brown, so go easy. Stir in the garlic and sauté another minute.

Whisk in the flour and let cook for 1 minute. Whisk in the wine lifting all the bits on the bottom of the pan during the process.

Whisk in the cream and milk; simmer for 2 min. Remove pan from heat and stir in the grated Parmesan cheese, cooked seafood, and hot, just cooked fettuccini noodles*. (I lift the noodles right out of the boiling water with a pair of tongs and add them to the sauce.) Toss until everything is combined, adjust seasoning, then serve immediately sprinkled with fresh parsley.  

*Reminder: Never make the cooked noodles wait for the sauce. The sauce can wait. Perfectly cooked pasta is always the number one priority. (At least in my book!)

GARLIC TOAST

4 T. unsalted butter (½ stick), room temperature

2 medium garlic cloves, minced

2 tsp. finely chopped fresh Italian parsley leaves

½ tsp. kosher salt

½ of a crusty Italian or French baguette, cut in half lengthwise, and then cut into serving size pieces

Place the butter, garlic, parsley, and salt in a small bowl and mix with a table fork until well blended. Place the bread on a baking sheet, crust side down. Spread the butter mixture evenly over all of the pieces.

Bake the bread in a pre-heated 425 degree oven for about 10 minutes or until the top is a nice golden brown.

GARLIC AND GINGER GLAZED STICKY PORK


I really love Chinese food. Well, maybe not all Chinese food. For example, I don’t ever want to even try chicken feet! I’m really just talking about loving the kind of Chinese food that is more American than Chinese.

Now don’t get me wrong. I love traditional dim sum, but even then my tastes run to the little dishes that I feel certain only contain ingredients that I can buy at my local IGA. So call me a coward, sissy, or your favorite term for someone who lacks courage when it comes to edible unknowns, but the reality remains the same. I prefer to know what ingredients are contained in the dishes I am being served. In an Italian restaurant, I have no qualms. In an authentic Chinese restaurant, I tend to feel less confident.

So how do I assuage my love of Chinese food with the fear of unknown ingredients? Easy. I build the food myself. (Or I stick with restaurants I’ve known for decades, like Tai Tung or House of Hong in Seattle’s International district.) And yes, these restaurants have dishes that are authentic, or to me they appear authentic, but I have learned through experience which dishes to order and which to avoid. But back to the real reason for this post. Sticky Pork.

I love pork. But if I’m honest with myself, pork can be a bit bland. And some people don’t appreciate pork for that very reason. But if you combine pork with the other ingredients listed below, there is enough flavor going on to make a believer out of even the most ardent pork critic.

So what are you waiting for? Give your family a treat for dinner. Go Chinese for the evening. Or better yet, go totally ethnic and serve Sunomono (Japanese recipe on this site) as a side dish.   

Serving different ethnic cuisines, even in the same meal, is a wonderful way to travel the world. Makes for a lovely topic of conversation around the dinner table too. Enjoy

½ c. honey

1 T. Sriracha, or more to taste

1 T. rice wine vinegar

2 T. Tamari or soy sauce

1 T. water

1 tsp. kosher salt

freshly ground black pepper

1 T. cornstarch

1½ lbs. boneless pork chops, loin, or country style ribs, cut into ¼-inch thick pieces, then ¼-inch thick strips, about 2 inches long

2-3 T. vegetable oil, plus extra if necessary

3 garlic cloves, finely minced   

2 T. finely minced fresh ginger

toasted sesame seeds, opt. garnish

4-6 thinly sliced green onions, opt. garnish

Mix the honey, Sriracha, rice wine vinegar, Tamari, and water together in a small bowl. Set aside.

Place the salt, pepper, and corn starch in a large plastic freezer bag. Add the pork and shake until the meat is thoroughly coated.

Heat the oil in a heavy large skillet over medium high heat. Carefully add the pork to the pan, working in batches to avoid overcrowding the pan. Let the first side brown, flip the pieces with tongs or a spatula, and brown the second side. Transfer the pork to a bowl. Repeat until all of the meat is cooked. 

Reduce the heat and stir in the garlic and ginger. Cook until fragrant, about 45 seconds. Raise the heat to medium-high and pour in the sauce mixture; bring to a boil, stirring frequently. When the sauce is very bubbly and somewhat thickened, add the cooked pork and simmer until the sauce is reduced to a thick, sticky glaze. Serve over rice.

Garnish with toasted sesame seeds and sliced green onions. Pass the Sriracha bottle for those who like more heat.  

PARMESAN BAKED COD

So, the last few days I have been posting mainly recipes associated with the holidays and/or cold weather. This recipe for baked fish however is a lot more versatile. It can be served any old time and for any occasion, be it fancy or down home. Winter, summer, for two or more people, a gang of people, or just for yourself. And it is so stinkin’ easy to build. A few simple ingredients to assemble, a bit of time in your oven, and your main dish is ready to serve. It even comes with its own sauce; no tartar or aioli required. Add a simple side dish and veggie or salad and dinner is on the table in no time flat.

And the most important part. It’s fish! We are trying to include more fish in our diet. It’s good for us and frankly, I will almost always choose something from the sea rather than from a farm. (OK, once in a while I crave a big ol’ honkin’ rare steak, but most of the time I prefer seafood to beef.)

Now I’m sure you’ve already noticed that this is not a low calorie dish. But in my defense, it’s not deep fat fried with a side of French fries either. So when I serve this dish, I make sure my sides are very simply prepared. (I try to be good, I really do!)

So next time you crave seafood (the kind with fins), give this recipe a try. And no, I see no reason why this dish wouldn’t be just as marvelous with salmon, halibut, catfish, tilapia, etc. Just make sure it is a fairly firm-fleshed sea critter. And check for bones. Nothing spoils the enjoyment of a delicious seafood dish faster than trying to work your way around bones. BTW, I use a pair of tweezers for removing fish bones. And no, I do not pluck my eyebrows with the same pair. I keep a dedicated pair of tweezers in the kitchen just for dealing with pesky bone removal. And yes you can run them through your dishwasher.

Well I think I have covered everything I needed to say about this dish. Mr. C. has just delivered a beautiful martini to me, so that must mean it is time for me to get going with dinner. And of course I am trying out a new recipe tonight. I’m calling it Roasted Honey-Mustard Chicken Breasts. If it works, I’ll be sharing the recipe with you in the next few days. If it doesn’t work, you’ll never hear about it again. Cheers!

¾ c. grated Parmesan cheese

½ tsp. granulated garlic

1 tsp. paprika

¼ tsp. kosher salt

freshly ground black pepper (not too much)

zest from ½ of a large lemon

1 T. chopped Italian parsley

3 T. unsalted butter

2 T. drained capers

4 cod fillets (total of about 1½ pounds), de-boned and patted dry 

4 lemon wedges

Combine the Parmesan cheese, granulated garlic, paprika, salt, pepper, lemon zest, and parsley in a shallow pan. Lightly butter a baking dish large enough to accommodate the fish in a single layer.

Melt the butter in a medium fry pan. Remove from heat and stir in the capers. Dip both sides of the fish in the butter, then in the cheese mixture, coating both sides as well as possible.

Place in the prepared pan and pat the remaining topping onto the cod as much as possible. (If you have leftover caper butter, pour over the unbaked fish.)

Bake in a pre-heated 400 degree oven for 12-15 minutes or until the fish is easily flaked with a fork. Serve each piece with a lemon wedge. 


CHICKEN WITH PROSCIUTTO AND PEPPER JACK CHEESE

After two weeks of painters having their way with our living room, kitchen, butler’s pantry, entry way, hall, stairway to the lower level, downstairs hall, and our master bath, I was just about ready to go crazy. (They aren’t quite done yet, but at least I can see my floors and the counters in my kitchen.) So, this past Friday, after they had removed most of the protective paper and tape from the kitchen, I was finally able to cook a real dinner for the first time in 13 days. 13 DAYS!

Now, I don’t know whether this chicken dish tasted amazing because I was totally tired of restaurant food, or because it truly was flat out delicious, but I’m going to lean towards the latter. Plus it was easy to prepare. That’s always a plus in my book!

I found this recipe on the Genius Kitchen site, but of course I made a few changes. I often do a search under ingredients that I really need to use up before they go bad. And sometimes the list is very unusual. But I never fail to find a recipe, even if the ingredients appear at first site to be totally incompatible. Not these ingredients which were obviously made for each other. But you know what I mean. Ingredients like brie and mango chutney. (See my recipe under Two Brie or Not two Brie. Or bacon, onions, garlic, and brown sugar under Bacon Jam.)

So when I searched under chicken, prosciutto, and Pepper Jack cheese, there were a fair number of recipes that included this combination. But the basis for this recipe really caught my eye. And I am so glad it did! This recipe is so scrumptious it should be in its own category – Perfect for Company!

So next time you need an easy and stress less main dish for a family and/or friends gathering, I recommend this lovely recipe. It can easily be doubled, tripled, etc. It can even be made ahead and refrigerated until needed. If you do make it ahead, be sure to bring it to room temperature before you place it in your oven. You really don’t want to overcook the chicken by having it in the oven for any longer than necessary.

  • ¼ c. unbleached all-purpose flour 
  • ½ tsp. kosher salt
  • freshly ground black pepper
  • 2 boneless, skinless chicken breasts, cut in half lengthwise
  • 4 T. unsalted butter, divided
  • 4 slices thinly cut prosciutto, roughly chopped into pieces
  • 1 c. shredded Pepper Jack cheese 
  • 2 T. finely chopped shallot  
  • 8-10 button mushrooms, thinly sliced
  • 2 small garlic cloves, minced
  • ¼ tsp. dried thyme
  • ¼ c. dry white wine
  • ¼ c. chicken broth
  • ¼ c. dry sherry
  • ¼ c. half & half, whole milk, or whipping cream

Place the flour, salt, and pepper in a bag. Shake the bag to blend the ingredients. Add the chicken and shake until the chicken pieces are totally coated. (Save any remaining flour in the bag for the sauce.)

Melt 3 tablespoons of the butter in a large frying pan over medium heat. Cook the chicken until it is a nice golden brown on both sides. Remove from frying pan (set aside the pan) and place the chicken in a lightly buttered 9×13-inch Pyrex baking dish or casserole in a single layer.

Top each piece with a quarter of the cut prosciutto and a quarter of the shredded cheese. Set aside.

Return the frying pan to the stove, add the remaining 1 tablespoon of butter, and cook the shallots and mushrooms until the shallots are soft. Add the garlic and cook for one minute.

Add about a rounded teaspoon of the coating flour to the pan; cook for one minute. Stir in the thyme, white wine, and broth. Let burble over low heat for about 5 minutes. Add the sherry and heavy cream. Adjust seasoning. Cook for another minute or two.

Pour the sauce over the chicken. Bake in a pre-heated 375 degree oven for about 20 minutes or until bubbly.


CAULIFLOWER “RICE” CASSEROLE WITH GROUND BEEF, SOUR CREAM, BLACK OLIVES, AND PEPPER JACK CHEESE

So, if you are culinarily savvy, you probably already know about, and have even used cauliflower rice. However, if you are like me, still basically cooking like I did 30 years ago, you may be thinking to yourself – cauliflower what? Well welcome to my world pilgrim. Until my daughter Paula introduced me to this healthy, delicious, versatile, and low carb substitute for rice, I was completely oblivious to how this humble Brassica oleracea can help people cut back on carbs while at the same time adding more vegetable matter to their diet.

Now of course I have been serving cauliflower to my family and friends since the beginning of my awareness that the room my mother should have spent more time in had a purpose other than to contain a cookie jar! (In other words, since my early 20s.) But I have always lagged behind other cooks when it came to trying new ingredients and using modern cooking techniques, tools, and appliances. I even fought against getting a microwave back when they were the hottest new appliance since the electric fry pan! (I tend to be kind of oblivious when it comes to new gadgets and trendy new food preparations. Maybe if I routinely watched television and therefore commercials, I would know more about what’s new and exciting in the kitchen. But alas – just not going to happen! I will simply have to rely on family and friends for information on innovative new taste treats, products, and appliances. Thanks again for the Instant Pot Paula.)  

But the older I get, the more I love it when people introduce me to wonderful new cooking concepts or as in this case, a brilliant and tasty use for a readily available, inexpensive, and healthy vegetable. Who knew just by chopping a head of cauliflower into rice sized pieces, that many of my favorite recipes could easily be adapted to a healthier version? Not me, that’s for darn sure. So thank you again darling daughter for the cauliflower rice “heads” up.

And while I’m on the subject of cauliflower, I should mention that this casserole is delicious and Mr. C absolutely loves it. (Whoa! Mr. C in the same sentence with cauliflower and love. That’s not a sentence I can write every day and may never have the opportunity to write again. I should mark my calendar. Maybe go buy a lottery ticket? Have a second martini tonight to celebrate the occasion? Not to worry, I’ll think of something memorable.)

  • 1 T. extra virgin olive oil
  • 2-3 c. cauliflower rice (packaged or chopped in your food processor) 
  • 2 tsp. steak seasoning, divided (I use Montreal Steak Seasoning)
  • freshly ground black pepper
  • 1 lb. lean ground beef
  • ½ c. chopped onion
  • 2 garlic cloves
  • ½ tsp. beef base (I use Better Than Bouillon Beef Base)
  • 1 egg
  • 1 c. sour cream (Mexican crema agria is best for this dish)
  • 2 c. grated Pepper Jack cheese, divided (you can substitute sharp cheddar cheese if you prefer)
  • 1 can (2.25 oz.) sliced black olives, drained
  • 3-4 green onions, thinly sliced

Heat the olive oil in a large frying pan. Add the cauliflower rice, 1 teaspoon of the steak seasoning, and pepper. Sauté the cauliflower until crisp tender, about 4-5 minutes. Remove from pan and set aside.

Add the ground beef to the pan and cook until just brown. Add the onions and cook until tender. Add the garlic and cook for 1 minute.

Meanwhile whisk together the remaining 1 teaspoon steak seasoning, beef base, egg, and sour cream. Pour over the meat mixture, along with the sautéed cauliflower rice; stir until well combined. Remove pan from heat. Stir in 1½ cups of the cheese and the black olives. Adjust seasoning.

Scoop into a lightly greased casserole or Pyrex dish. Sprinkle with remaining ½ cup cheese and green onions.

Bake in a pre-heated 350 degree oven for about 30 minutes or until the top is starting to brown and the casserole is bubbly. Remove from heat and let sit for 5-8 minutes to set up before serving.


ZUCCHINI, CARAMELIZED ONION, AND PEPPER JACK CHEESE GRATIN

I believe I have mentioned before that I love zucchini. And this gratin, based on a recipe I found on the I Breathe I’m Hungry site, is just one more reason why I cherish the fruit of the zucchini plant. And yes, botanically speaking, zucchini is a fruit. A type of botanical berry called a “pepo”, being the swollen ovary of the zucchini flower. (I bet that’s more than you ever wanted to know about a zucchini, right? But I remain adamant about keeping you riveted by information that you most likely would never learn by watching a cooking show on the Food Network. Beneficial “how to” shows like Cupcake Wars or World’s Worst Cooks, for example.) Leaving sarcasm behind, I shall now get back to the real topic of this recipe preface. (Sometimes I just can’t stop myself. I really should have made political analysis my career. But in retrospect, I’m very glad I did not. At least everyone is still speaking to me today, rather than only half the population. What a world we find ourselves in now !!)   

As I was saying, before I was so rudely interrupted by the recently revealed caustic side of my psyche, this gratin recipe perfectly displays the humble zucchini as a star ingredient. OK, the Pepper Jack cheese, caramelized onion, butter, and heavy cream help. But the zucchini is still the team leader.

So if you want a truly delicious, easy to prepare, and perfect vegetarian main dish or side dish, this is the recipe for you. Enjoy 

  • 2 tsp. extra virgin olive oil
  • 1 small yellow onion, finely chopped
  • 2 – 6 or 7-inch zucchini
  • 2 T. unsalted butter
  • ½ tsp. granulated garlic
  • ½ c. heavy whipping cream
  • ¼ tsp. xanthan gum*
  • kosher salt
  • freshly ground black pepper
  • 1½ c. grated Pepper Jack cheese or cheese of choice
  • 1/3 c. grated Parmesan cheese, or more to taste

Heat the olive oil in a fry pan. Add the chopped onion and cook (stirring frequently) over low heat until the onion is nicely caramelized (a light golden brown). Remove from heat and set aside.

Meanwhile, slice the zucchini on the diagonal about ¼-inch thick. Lay the pieces on paper towels. Cover with more paper towels until needed. (This step helps eliminate the cut zucchini from releasing moisture (weeping) while other recipe preparations are being performed.) 

Combine the butter, granulated garlic, heavy cream, and xanthan gum in a small sauce pan. Over low heat, whisk until the butter has melted and the sauce is smooth. Set aside. 

Butter a 7×11 or 9×9-inch casserole, Pyrex pan, or metal baking pan.

Layer 1/3 of the sliced zucchini then 1/3 of the caramelized onion in the greased pan. Season lightly with salt and pepper, then sprinkle with half of the grated Pepper Jack cheese.

Repeat two more times until you have three layers and have used up all of the zucchini, onions, and grated cheese. (There will only be two layers of the Pepper Jack cheese.)

Gently pour the butter and cream mixture evenly over the top. Sprinkle with Parmesan cheese.

Bake in a pre-heated 400 degree oven for about 30 minutes. Turn off the oven and allow the gratin to sit in the cooling oven for 15 minutes. Remove pan from oven and allow gratin to rest for another 10 minutes or longer. (Allowing the casserole to “rest” helps the gratin set up.) Serve warm.

*From the Bob’s Red Mill flour people: “Xanthan Gum is a plant-based thickening and stabilizing agent. It is named for the bacteria, Xanthomonas campestris, which plays a crucial role in this description. Technically speaking, xanthan gum is a polysaccharide, which is just a fancy way to say “a string of multiple sugars.” To create xanthan gum, the Xanthomonas campestris bacterium is allowed to ferment on a sugar. The result is a gel that is then dried and milled to create the powder substance.

Xanthan gum has a number of powerful properties. First, it works as an emulsifier, encouraging liquids that normally don’t like one another to mix together. Second, it works as thickener, increasing the viscosity of liquids and batters. Third, it can create a creamy texture.

In the world of gluten-free baking, xanthan gum plays the crucial role of imitating gluten. In baking, gluten is what makes dough “doughy.” It gives the dough elasticity, as well as viscosity. Those properties help to hold a cookie together while it bakes on a sheet in the oven, and they enable cakes and breads to hold onto the gas bubbles that form inside them – this allows them to rise and take shape. Xanthan gum helps replicate these properties in recipes that do not contain gluten. Shop online today to buy xanthan gum for all your gluten free baking adventures.”


INSTANT POT CHILI WITH KIDNEY BEANS AND HATCH CHILES

OK, so it’s confession time. Dear daughter Paula gave me an Instant Pot last Christmas. And frankly, the sheer thought of a pressure cooker in my very own kitchen scared the heck out of me. But late yesterday afternoon, I decided I wanted to serve chili for dinner.

Now, I’m not one of those people who can’t abide beans in my chili. After all, beans are really, really healthy, plus they taste good, and they’re cheap. But low and behold when I looked in my pantry, there was nary a can of beans. (Please forgive me Mr. Bush.) So I decided to bite the bullet and use my Instant Pot to cook the dry kidney beans that were in my pantry just waiting to be appreciated.

At just about the same time, Paula called me. (That girl’s sense of timing can sometimes be just a bit supernormal.) So I asked her how much water to use for 2 cups of dried beans, plus the length of time needed to produce a tender bean. Now, I actually had used the Instant Pot once in January to cook dried beans, but the result had not been sterling. So with Paula’s timely assistance, I once again decided to risk my life and the well-being of our kitchen.

I am here to tell you, the beans came out perfect! And I didn’t once have to leave the kitchen in fear for my life. The Instant Pot performed just like its instructions said it would. Good Instant Pot!

The rest of the chili I made in my largest Le Creuset pot, because I really like to mess with my food. (I guess I really should have entitled this recipe – Semi Instant Pot Chili, but I think I’ll just let that one pass!) Back to the beans. Adding the perfectly cooked beans when the time came, and in such fast order was really quite nice. As a result, I have decided to try making soup in my Instant Pot. I will let you know how that works out.

In the meantime, give this recipe a try. It’s really very tasty and it comes together with not too much effort. Of course working up the courage to use an Instant Pot takes some effort too. But if this 74 year old pressure cooker phobic lady can do it, you can too. The pressure is now on you!

  • 2 c. dry red kidney beans, or dried beans of choice
  • 4 c. water
  • 4 T. chili powder, divided
  • 1 T. dehydrated onion
  • 1 tsp. granulated garlic
  • 1 T. extra virgin olive oil
  • 1 lb. lean ground beef
  • 1 med. onion, chopped
  • 1 c. chopped celery, including leaves
  • 3 large cloves garlic, minced
  • ¼ c. roughly chopped fresh parsley
  • 1 (28-oz.) can chopped tomatoes (Italian if possible)
  • 1 (6-oz.) can tomato paste (Italian, but of course!)
  • 1 T. dried oregano (I use Mexican oregano)
  • 1 tsp. ground cumin
  • generous dash of ground cloves
  • 1 tsp. paprika
  • 1 tsp. kosher salt
  • freshly ground black pepper
  • 1 tsp. beef base (I use Better Than Bouillon Beef Base)
  • 3 roasted mild Hatch chiles* seeded and chopped or 1 (4-oz.) can diced green chiles
  • 1 can black olives, drained and halved

Combine the dried beans, water, 1 tablespoon of the chili powder, dehydrated onion, and granulated garlic in the Instant Pot insert. Cook the beans for 35 minutes on the bean/chili setting. (If no bean/chili setting on your instant pot, cook on high heat.)

Meanwhile heat the olive oil in a large, heavy covered pan. Add the ground beef and fry until most of the red is gone. Add the chopped onion, celery, garlic, and parsley. Cook until the onion is tender and the contents of the pan are starting to stick. Stir in the canned tomatoes, plus a half can of water, the tomato paste, plus a full can of water (using the cans to measure and transport the added water helps remove any remaining tomato from the sides and bottom of the cans), remaining 3 tablespoons of chili powder, oregano, cumin, cloves, paprika, salt, pepper, and beef base to the pot.

Bring chili to a boil, reduce heat, cover, and let burble for about 20 minutes, stirring periodically.

When the beans have cooked and the pressure has been released, either by waiting for it to do its own thing, or by manually releasing the pressure, carefully add the beans and any remaining liquid to the rest of the ingredients. Finally stir in the chopped chilies and the black olives.

Put the cover back on and cook for another 10 minutes or so. Adjust seasoning and serve hot. I like to serve the chili with shredded sharp cheddar cheese, sour cream, and cornbread.

*I buy fresh Hatch chilies (the mild variety) when they appear in our local farmers market or this last time I bought them at our local Haggen’s grocery store. Then I simply grill them on my BBQ and freeze them individually on a large baking pan. Once they are frozen, I place them in a freezer bag. When I need them for a recipe, I remove the amount needed, run cold water over them, peel off the skin, and chop off the stem head which contains most of the seeds. Then I chop the rest and use as needed.     


STUFFED PORTOBELLO MUSHROOMS WITH SWEET ITALIAN SAUSAGE, WHITE WINE, AND FENNEL

Yesterday was devoted to stripping our trailer of our travel clothes, dirty towels, perishable items, cameras, binoculars, and other assorted “things” after our recent trailer trip to Yosemite National Park. (A couple of pictures at end of blog if you’re interested.)

By the time we had finished with the trailer, and gone to the grocery store for a few staple items, the last thing I wanted to do was spend a bunch of time in the kitchen preparing dinner. Plus Mr. C. had a homeowner’s board meeting last evening so I was under a time crunch.

While I was at the store, I happened to have picked up 4 beautiful Portobello mushrooms, a package of Italian sausage, and a fennel bulb. So while putting away the groceries when we got home, I decided to make something using these three ingredients. I already had a lovely recipe for stuffed Portobello mushrooms on this blog, (Sausage, Spinach, and Cheese Stuffed Portobello Mushrooms) but when I looked it over, I didn’t have all the ingredients on hand. And I sure as heck wasn’t going back to the grocery store. So I sat down at my computer and came up with this version.  We loved the mushrooms, so now you are up-to-date with not only our lives, but part of the reason this recipe is now being posted.

A couple other reasons this recipe made the cut, and believe me, about 30% of my culinary endeavors never get posted, is that the mushrooms were easy to prepare and only took me about 35 minutes to get them in the oven. That time even included getting the white rice going in the rice cooker. (And no, I don’t usually serve white rice, but I was in a hurry last evening. And steamed white rice takes less time and effort than almost any other side dish. Sometimes you just have to cut yourself some slack! And last night was one of those times.)

So I would recommend that you give this recipe a try. The filling is perfect with the delicious taste of the mushrooms. (Sweet Italian sausage and fresh fennel are simply a match made in heaven.) Add a little white wine, garlic, and Parmesan, and truly, what’s not to like? Buon Appetito

And for those of you who possess enquiring minds, the steamed white rice was ideal with the stuffed mushrooms. Of course it was!

  • 4 lg. Portobello mushroom caps
  • 1 T. extra virgin olive oil
  • 1 lb. bulk sweet Italian sausage
  • ½ med. yellow onion, chopped
  • 1 chopped fennel bulb
  • 3 garlic cloves, finely minced
  • 1 tsp. kosher salt
  • freshly ground black pepper
  • pinch crushed red pepper flakes
  • 1/3 c. dry white wine
  • 1 T. finely minced fresh parsley
  • 4-6 oz. cream cheese, cut into cubes
  • non-stick cooking spray or butter, for greasing the baking pan
  • ½ c. grated Parmesan cheese

Using a slightly damp paper towel, wipe the mushroom caps removing any dirt. Cut the stems off and finely chop. Set aside. Use a spoon to remove the dark gills on the underside of the mushroom caps. Discard gills and set mushroom caps aside.

In a large fry pan, heat the olive oil, break up the sausage, and cook until only a small bit of pink remains. Add the chopped mushroom stems, onion, and fennel. Cook until both the onion and fennel are starting to soften. Add the garlic, salt, pepper, crushed red pepper flakes, wine, and parsley; cook for one minute. Remove from heat and stir in the cream cheese.

Place the mushrooms in a greased baking dish. Evenly divide the sausage mixture as you stuff the mushrooms. Top each stuffed mushroom with Parmesan cheese.

Place in a pre-heated 350 degree oven for 35-40 minutes or until the mushrooms are soft and the Parmesan cheese is crisp on top. Serve immediately.

Yosemite – Half Dome from Glacier Point

Interesting “fossil” in front of interesting rock formation

CHEDDAR CHEESE POLENTA TOPPED SHEPHERD’S PIE

This is a yet another recipe from our dear friend Jim for a shepherd’s pie that features leftover steak, pot roast, sirloin tip roast, you name it! But don’t let the fact that you don’t have any leftover beef stop you from making this fantastic dish.

Cooking class: The main thing to consider when using cooked beef or cooking some beef right on the spot, is that you should use either a tender piece of cooked steak, or a less expensive piece of beef that has already been tenderized by the cooking method. Like pot roast for example. The reason I mention this is because if you simply fry up a piece of bottom round, for example, then cut it into bite sized pieces, your chances of the beef staying tender after baking for 35 to 40 minutes in a thick liquid is slim. Better to start with an already cooked steak or tenderized piece of meat. If none available, your next option is to grill or fry up a high quality, fairly marbled piece of steak to no more than medium rare. Allow the meat to cool completely, then cut it into bite sized pieces.

But enough about my opinion of the meat you choose to use in this dish. On to the rave reviews this pie garnered from Margo, Mr. C. and me while we stuffed our faces at Jim and Margo’s table a couple of weeks ago.

Wow! I think that was the first word out of my mouth that evening. Quickly followed I’m sure with – please sir, may I have some more? (Sounds familiar, right?) But I meant it. The shepherd’s pie was just amazing. So of course the first thing after dinner I made Jim write down the recipe. (Of course I did.) Because I really wanted to be able to make this dish any old-time I felt like it, and I wanted to share this fabulous recipes with you.

So, last evening, having leftover pot roast in the refrigerator, I prepared Jims’ recipe (only minor changes here and there) and the recipe below is the result.

I have to tell you, this recipe for shepherd’s pie is absolutely scrumptious. Truly the best I have ever tasted. And yes, I can hear you saying “but it isn’t topped with mashed potatoes”. OK, if you must, you can top the pie with mashed potatoes. Just don’t mess with the filling part because it is perfection personified!

Jim, thank you again for this marvelous recipe. Also to you and Margo for being such wonderful people and such dear friends. I don’t know what we did to deserve you, but whatever it was, it must have been spectacular!! 

  • 2 T. extra virgin olive oil
  • 1 med. onion, chopped
  • 1 lg. carrot, cut into small dice
  • 1 small rutabaga, cut into small dice
  • ½ lb. button mushrooms, sliced
  • ¼ c. white (dry) vermouth
  • freshly ground black pepper
  • 2 tsp. herbs de Provence (see my recipe below)
  • 1 T. chopped fresh parsley
  • 2 T. unsalted butter
  • 2 T. flour
  • 2 c. vegetable stock (can be made with Better Than Bouillon and water)
  • 2 tsp. beef flavoring (Better Than Bouillon, straight out of the jar)
  • 2-3 c. cubed leftover steak, pot roast, sirloin tip roast, etc.
  • ½ c. uncooked frozen petite peas, opt.
  • paprika

Heat the olive oil in a large fry pan. Sauté the onion, carrot, and rutabaga until the veggies are starting to get tender. Add the mushrooms; continue cooking until the carrot pieces are completely crisp tender. Deglaze the pan with the vermouth, then add the pepper, herbs de Provence, and parsley.

Add the butter and flour; cook for a good 2 minutes whisking the entire time. Slowly whisk in the vegetable stock and beef flavoring. Allow sauce to thicken stirring continually.  Add the leftover meat. Bring to a boil and adjust seasoning.  (Don’t add too much salt, because the polenta also contains salt.) Stir in the uncooked peas.

Pour into a casserole dish, top with polenta, and sprinkle lightly with paprika. (Leftover polenta works great for this dish.)

Bake the pie in a pre-heated 350 degree oven for 35-40 minutes or until the filling is hot and bubbly. Remove from oven and let sit for 8-10 minutes before serving.

CHEDDAR CHEESE POLENTA

  • ½ c. whole milk
  • 1½ c. chicken stock or water
  • ¼ tsp. kosher salt
  • freshly ground black pepper
  • ½ c. finely ground polenta/cornmeal
  • 1 T. unsalted butter
  • 1 c. shredded sharp cheddar cheese

Bring the milk, stock, salt, and pepper to a boil in a covered, medium-sized saucepan. Pour polenta slowly into boiling liquid, whisking constantly until all polenta is stirred in and there are no lumps. Reduce heat to low and simmer, whisking often, until polenta starts to thicken, about 5 minutes. Polenta mixture should still be slightly loose.

Cover and cook for 20-30 minutes, whisking every 5 to 6 minutes. When polenta is too thick to whisk, stir with a wooden spoon. Polenta is done when the texture is creamy and the individual grains are tender. Turn off heat and gently stir the butter into the polenta then mix in the cheese. Adjust seasoning before topping the Shepherd’s pie.

Note: I made the polenta before I started working on the shepherd’s pie. The polenta happily burbled away while I chopped the veggies for the pie. When I was ready to top the pie, the polenta was already fairly stiff. I merely scraped off portions of the polenta and carefully smeared them all over the top of the beef mixture. Piece of cake.

HERBS DE PROVENCE  

  • 1 T. dried savory
  • 1 tsp. dried rosemary leaves, semi broken down in a grinder or mortar and pestle
  • 1 tsp. dried basil
  • 1 tsp. dried marjoram
  • 1 tsp. dried oregano
  • 1 tsp. dried thyme, semi broken down in a grinder or mortar and pestle
  • 1 tsp. dried parsley

Combine all ingredients in a bowl. Store in an airtight container in a cool, dark place. Notice there is no lavender in my mix. I do not care for cooking lavender, therefore I leave it out!


OVEN-ROASTED SALMON WITH LEMON BASIL AIOLI

I know there are thousands of recipes for cooking salmon in cookbooks and out there in internet land. But this recipe from the American Test Kitchen is truly outstanding, especially since you cook your piece of salmon in the privacy of your own kitchen. No standing out in the cold to BBQ it, no marinating action required, no special poaching ingredients to mess with, and no fancy equipment involved. So for the tiny amount of effort it takes, you will have created a perfectly tender, moist, delicious, and healthy treat for yourself and your family.

Of course if you serve the salmon with Lemon Basil Aioli or any of the other three condiment recipes given below, the healthy meter on this salmon recipe takes a dip towards the not-as-healthy end of the scale. But for some people I know, and not just you Mr. C., simply prepared fish of any kind is just not complete without an aioli or sauce on the side. And the recipes below are our favorites. All are easy to prepare, and just lovely with simply prepared seafood.

So get yourself to your local purveyor of fresh fish and give this roasting method a try. You will thank me just the way I am taking this opportunity to thank our dear friends Mark and Vicki for introducing us to this wonderful and simple method for cooking salmon.

p.s. I’ve included the condiment recipes below just for those of you for whom aioli or tartar sauce with fish is as necessary as chocolate sauce over vanilla ice cream is to others. You’re welcome. 

  • 1 lb. salmon fillet, skin still on one side (the thickest piece you can find)
  • 2 tsp. extra virgin olive oil
  • freshly ground sea salt
  • freshly ground black pepper

Cut off any whitish, fatty portion along the edges of the salmon. Pull out any bones. (I use a pair of tweezers for this purpose.) Cut the salmon fillet into four pieces of equal size.

Make four or five shallow slashes along the skin side of each piece of fish, being careful not to cut into the flesh.

Adjust oven rack to lowest position, place rimmed baking sheet on rack, and heat oven to 500 degrees.

Pat salmon dry with paper towels. Rub the top of each fillet evenly with olive oil and season liberally with salt and pepper. Reduce oven temperature to 275 degrees and remove baking sheet. Carefully and quickly place salmon skin-side down on the baking sheet. Place in oven and roast until centers of thickest part of fillets register 125 degrees when inserted with an instant-read thermometer, about 9 to 13 minutes. (Check after 7 minutes if the salmon pieces are thin.)

Serve immediately. Pass the aioli or tartar sauce.

LEMON BASIL AIOLI

  • ¾ c. light mayonnaise
  • 1/3 c. finely chopped fresh basil
  • 2 small garlic cloves, finely minced
  • 1 tsp. finely grated lemon peel
  • 4 tsp. fresh lemon juice
  • ¼ tsp. kosher salt
  • freshly ground black pepper

Combine all ingredients. Serve with the salmon, other types of seafood, crab cakes, or as a terrific sandwich spread.

PIQUANT TARTAR SAUCE

  • ½ c. light mayonnaise
  • ½ c. sour cream
  • 1 T. drained capers
  • 2 T. rough chopped dill pickle
  • 1 small shallot, peeled and rough chopped
  • 2 tsp. chopped flat leaf parsley
  • 1 T. fresh lemon juice, or to taste
  • 1/8 tsp. Old Bay seasoning
  • ½ tsp. course grained mustard
  • ¼ tsp. kosher salt
  • freshly ground black pepper

In a food processor, combine all the ingredients and pulse several times until the pickle is finely chopped and all of the ingredients are well mixed but not pureed. Adjust seasonings and refrigerate several hours before serving.

OLD BAY AIOLI

  • ½ c. light mayonnaise (I use Best Foods Light Mayonnaise)
  • 2 tsp. Dijon mustard
  • ½ tsp. granulated garlic
  • ¼ tsp. sriracha
  • 4 tsp. fresh lemon juice
  • ½ tsp. Old Bay Seasoning
  • freshly ground black pepper to taste
  • kosher salt to taste

In a small bowl, whisk together the mayonnaise, mustard, granulated garlic, sriracha, lemon juice, Old Bay Seasoning, and pepper. Add salt if needed.

IVAR’S FAMOUS TARTAR SAUCE

  • 2 T. chopped yellow onion
  • 1 T. chopped green bell pepper
  • 1 ½ tsp. plain old fashioned white vinegar
  •  ¾ tsp. sugar
  • ¼ tsp. kosher salt
  • 1 T. dill pickle relish
  • 1 c. mayonnaise

Combine the onions, bell pepper, vinegar, sugar, and salt in a food processor; process for 10 seconds. Add the relish and mayonnaise and process for an additional 10 seconds. Serve chilled. Best made at least a day ahead.