OK, let me just say this before I start writing about this recipe. It is hot outside. Terribly hot. And I live in Western Washington where it’s not supposed to be this hot! But it is! And I guess I’m only mentioning this new development because if you are anything like me, you do not do well in hot weather. I tend to get cranky, and my inherent laziness just seems to blossom when I become too warm. And any thought of too much effort in the kitchen leads me to want to tear into anyone whose ideas differ from mine with the vengeance of a mother bear protecting her cubs. So those of you who are anti-vaxxers, believe you are superior to others because of the color of your skin, want to deny others the right to have control over their own body, or feel your own true God is the one true God – please stay a safe distance from me so that no one will get hurt! It’s only for your own good that I admit to this uncharacteristic tendency of mine to verbally assault anyone with beliefs I find abhorrent when the weather outside becomes unbearable. Lucky for us we had a heat pump installed when we built our house. Or I would probably get into our air-conditioned car and vandalize any Trump sign I found still on display. Like I said, I don’t do well when it’s too damn hot!
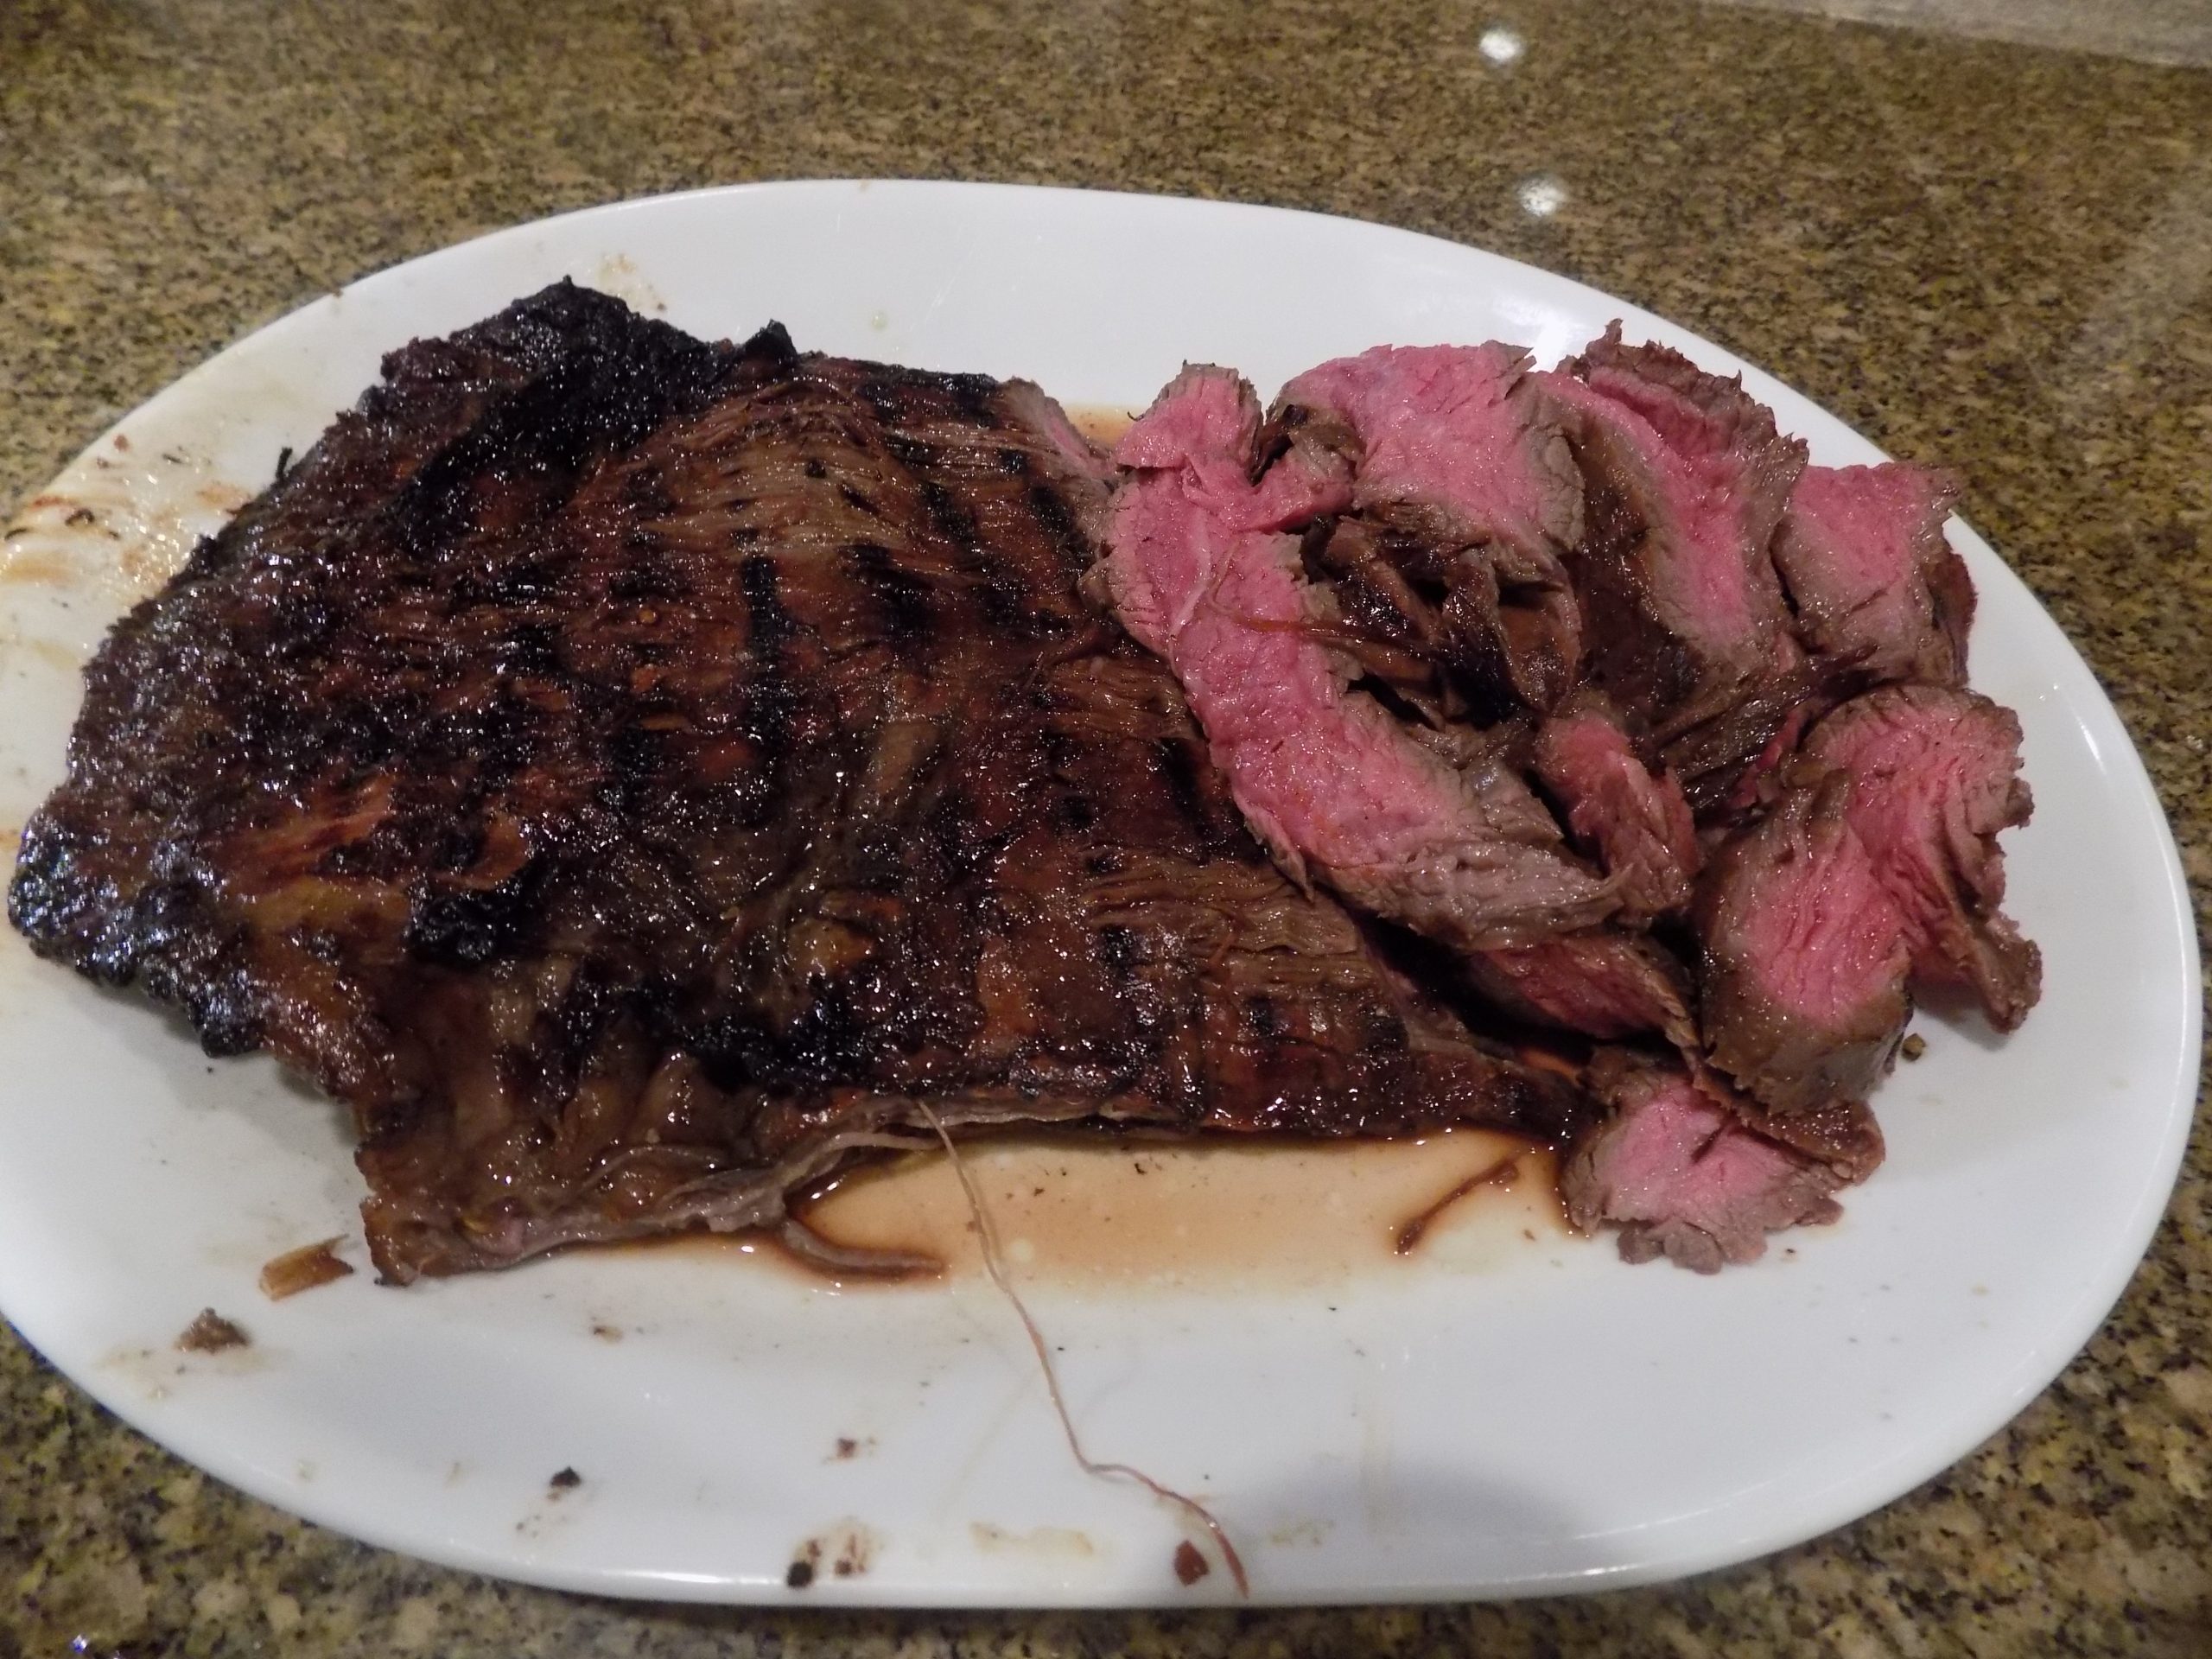
So, with ease of preparation in mind, I offer up my rendition of a simple marinade for flank steak. I modified the original recipe I found on the simplyrecipes.com site to make the marinade even easier to prepare. And perfect for camping or trailering where kitchen and workspace can be limited. Throw a few ingredients into a Ziplock bag, along with the flank steak of course, and place it in your fridge or cooler overnight. Then place it on a hot grill, take it off the grill, let it rest a few minutes, then slice and serve. Terribly easy and terribly delicious.
So, that’s it for today. Have a great day and stay cool. And if you were appalled at my rant about people who have a different idea of humanity than I do, so be it. There are millions of great cooking sites out there. Be my guest.
Peace and love to all.
⅓ c. extra virgin olive oil
⅓ cup soy sauce
¼ c. honey
2 T. red wine vinegar
2 tsp. granulated garlic
1 tsp. granulated onion
1 flank steak
kosher salt
freshly ground black pepper
Combine the marinade ingredients in a large non-reactive bowl.
Place steak in the bowl and turn so that it is completely coated with the marinade. (You can also place the steak and marinade in a freezer bag and place it in a bowl.)
Chill and marinate for at least 2 hours and up to overnight. (Overnight is best.)
Heat your grill until very hot. (The grill is hot enough when you can hold your hand about an inch over the grill only for about a second.)
Remove the steak from the marinade and gently shake off the excess marinade from the steak (but make sure there is still a thin coating because the oil in the marinade helps to keep the steak from sticking to the grill).
Generously sprinkle steak with kosher salt and freshly ground pepper. (The salt and pepper will help form a savory crust on the steak.)
Place steak on the hot grill. Grill for a minute or two on each side to get a good sear, then turn down the heat on the grill, cover and cook a few more minutes or until the internal temperature reaches about 135-degrees for medium-rare. Remove from grill and cover with aluminum foil to hold in the heat while the steak rests for 10 to 15 minutes. Then slice diagonally against the grain into thin pieces with a very sharp knife and serve immediately.
The other day, much to my chagrin, I failed to find my recipe for Chicken Cacciatore on my blog. What!?!? Had it really been over 8 years since I made this delightful chicken dish? (You see, I started this blog in January 2013. And without fail, I always post any recipe worthy of my reader’s discerning palate. So, being reasonably bright, I deduced that I must not have prepared this amazing dish for a very long time.) Well – shame on me! Because there is nothing finer than a good cacciatore. And this recipe produces an outstanding cacciatore if I do say so myself!
This version is based on the recipe I conceived for my 2nd self-published cookbook which came out in 2009. I made a few changes to that recipe to bring the dish more in line with how we eat today. But it is still just a basic recipe for a truly yummy tomato-based chicken stew. I must admit that preparing this dish takes a bit of prep work, but most of the time required from start to finish involves your oven.
While we were partaking of this dish a few nights ago, we were reacquainted with just how fond we are of this dish. And I realized that very few Italian restaurants feature cacciatore on their menu. And for the life of me, I can’t understand why that is. (Unless they too have forgotten just how wonderful it is.) Perhaps they consider cacciatore a comfort food and choose not to feature it in their upscale Italian dining establishment. But if that is the case, I must ask why that is. Because for me, a succulent piece of meat surrounded by a lovely herby tomato sauce and served over creamy polenta is about as trendy as it gets. And if restaurants still serve lasagna and spaghetti and meatballs, why would they feel that cacciatore wasn’t as appealing? I guess somewhere along the line I must have missed the article that revealed the reasoning. Either that, or I have completely lost touch with my Italian heritage and therefore no longer intuitively understand why certain Italian dishes are no longer popular. (Actually, I have no Italian ancestors, I just wish I did!)
So, for your culinary edification, and with full knowledge that this old gal doesn’t possess even a single Italian gene in her entire body, I offer my take on this centuries old Italian chicken dish. I hope you enjoy this dish as much as we do.
As always, have fun in your kitchen. Try new dishes, but always keep your old favorites in mind. And don’t hesitate to change your sacred recipes to reflect how your tastes have changed. Or to make the dish healthier or easier to prepare. I mean really, you probably didn’t hesitate when deciding to change your appliances from avocado green to stainless steel. Or replace your old shag rug with hardwood flooring. So, why not bring your favorite recipes into the 21st century too. If I can do it, so can you!
Peace and love to all.
6-8 small boneless, skinless chicken thighs
kosher salt
freshly ground black pepper
3 T. extra virgin olive oil
1 med. white onion, chopped
4 garlic cloves, finely minced
1 red bell pepper, diced
10-12 med. sized button mushrooms, sliced
2 T. chopped fresh parsley
2 T. chopped fresh basil, plus more for garnish
1½ tsp. dried oregano
¼ tsp. dried thyme
1/8 tsp. crushed red pepper flakes
¾ c. dry white wine
1 (28-oz.) can diced or crushed tomatoes with juice
1 T. tomato paste
½ c. chicken broth
3 T. drained capers
grated Parmesan for table, opt.
Season chicken with salt and pepper. Heat the olive oil in a heavy, oven-proof, covered skillet. Sear chicken on both sides until golden, about 3-4 minutes each side. Remove from skillet and set aside.
Sauté the onion until transparent, about 3-4 minutes. Add in garlic and cook until fragrant, about 30 seconds. Add the red pepper, mushrooms, parsley, 2 tablespoons of the fresh basil, oregano, thyme, and crushed red pepper flakes. Cook for 5 minutes until vegetables begin to soften.
Pour in the wine, scraping up browned bits from the bottom of the skillet. Cook until wine is reduced, about 2 minutes.
Add crushed tomatoes, tomato paste, chicken broth, and capers. Taste and adjust seasoning. Return chicken pieces to the skillet.
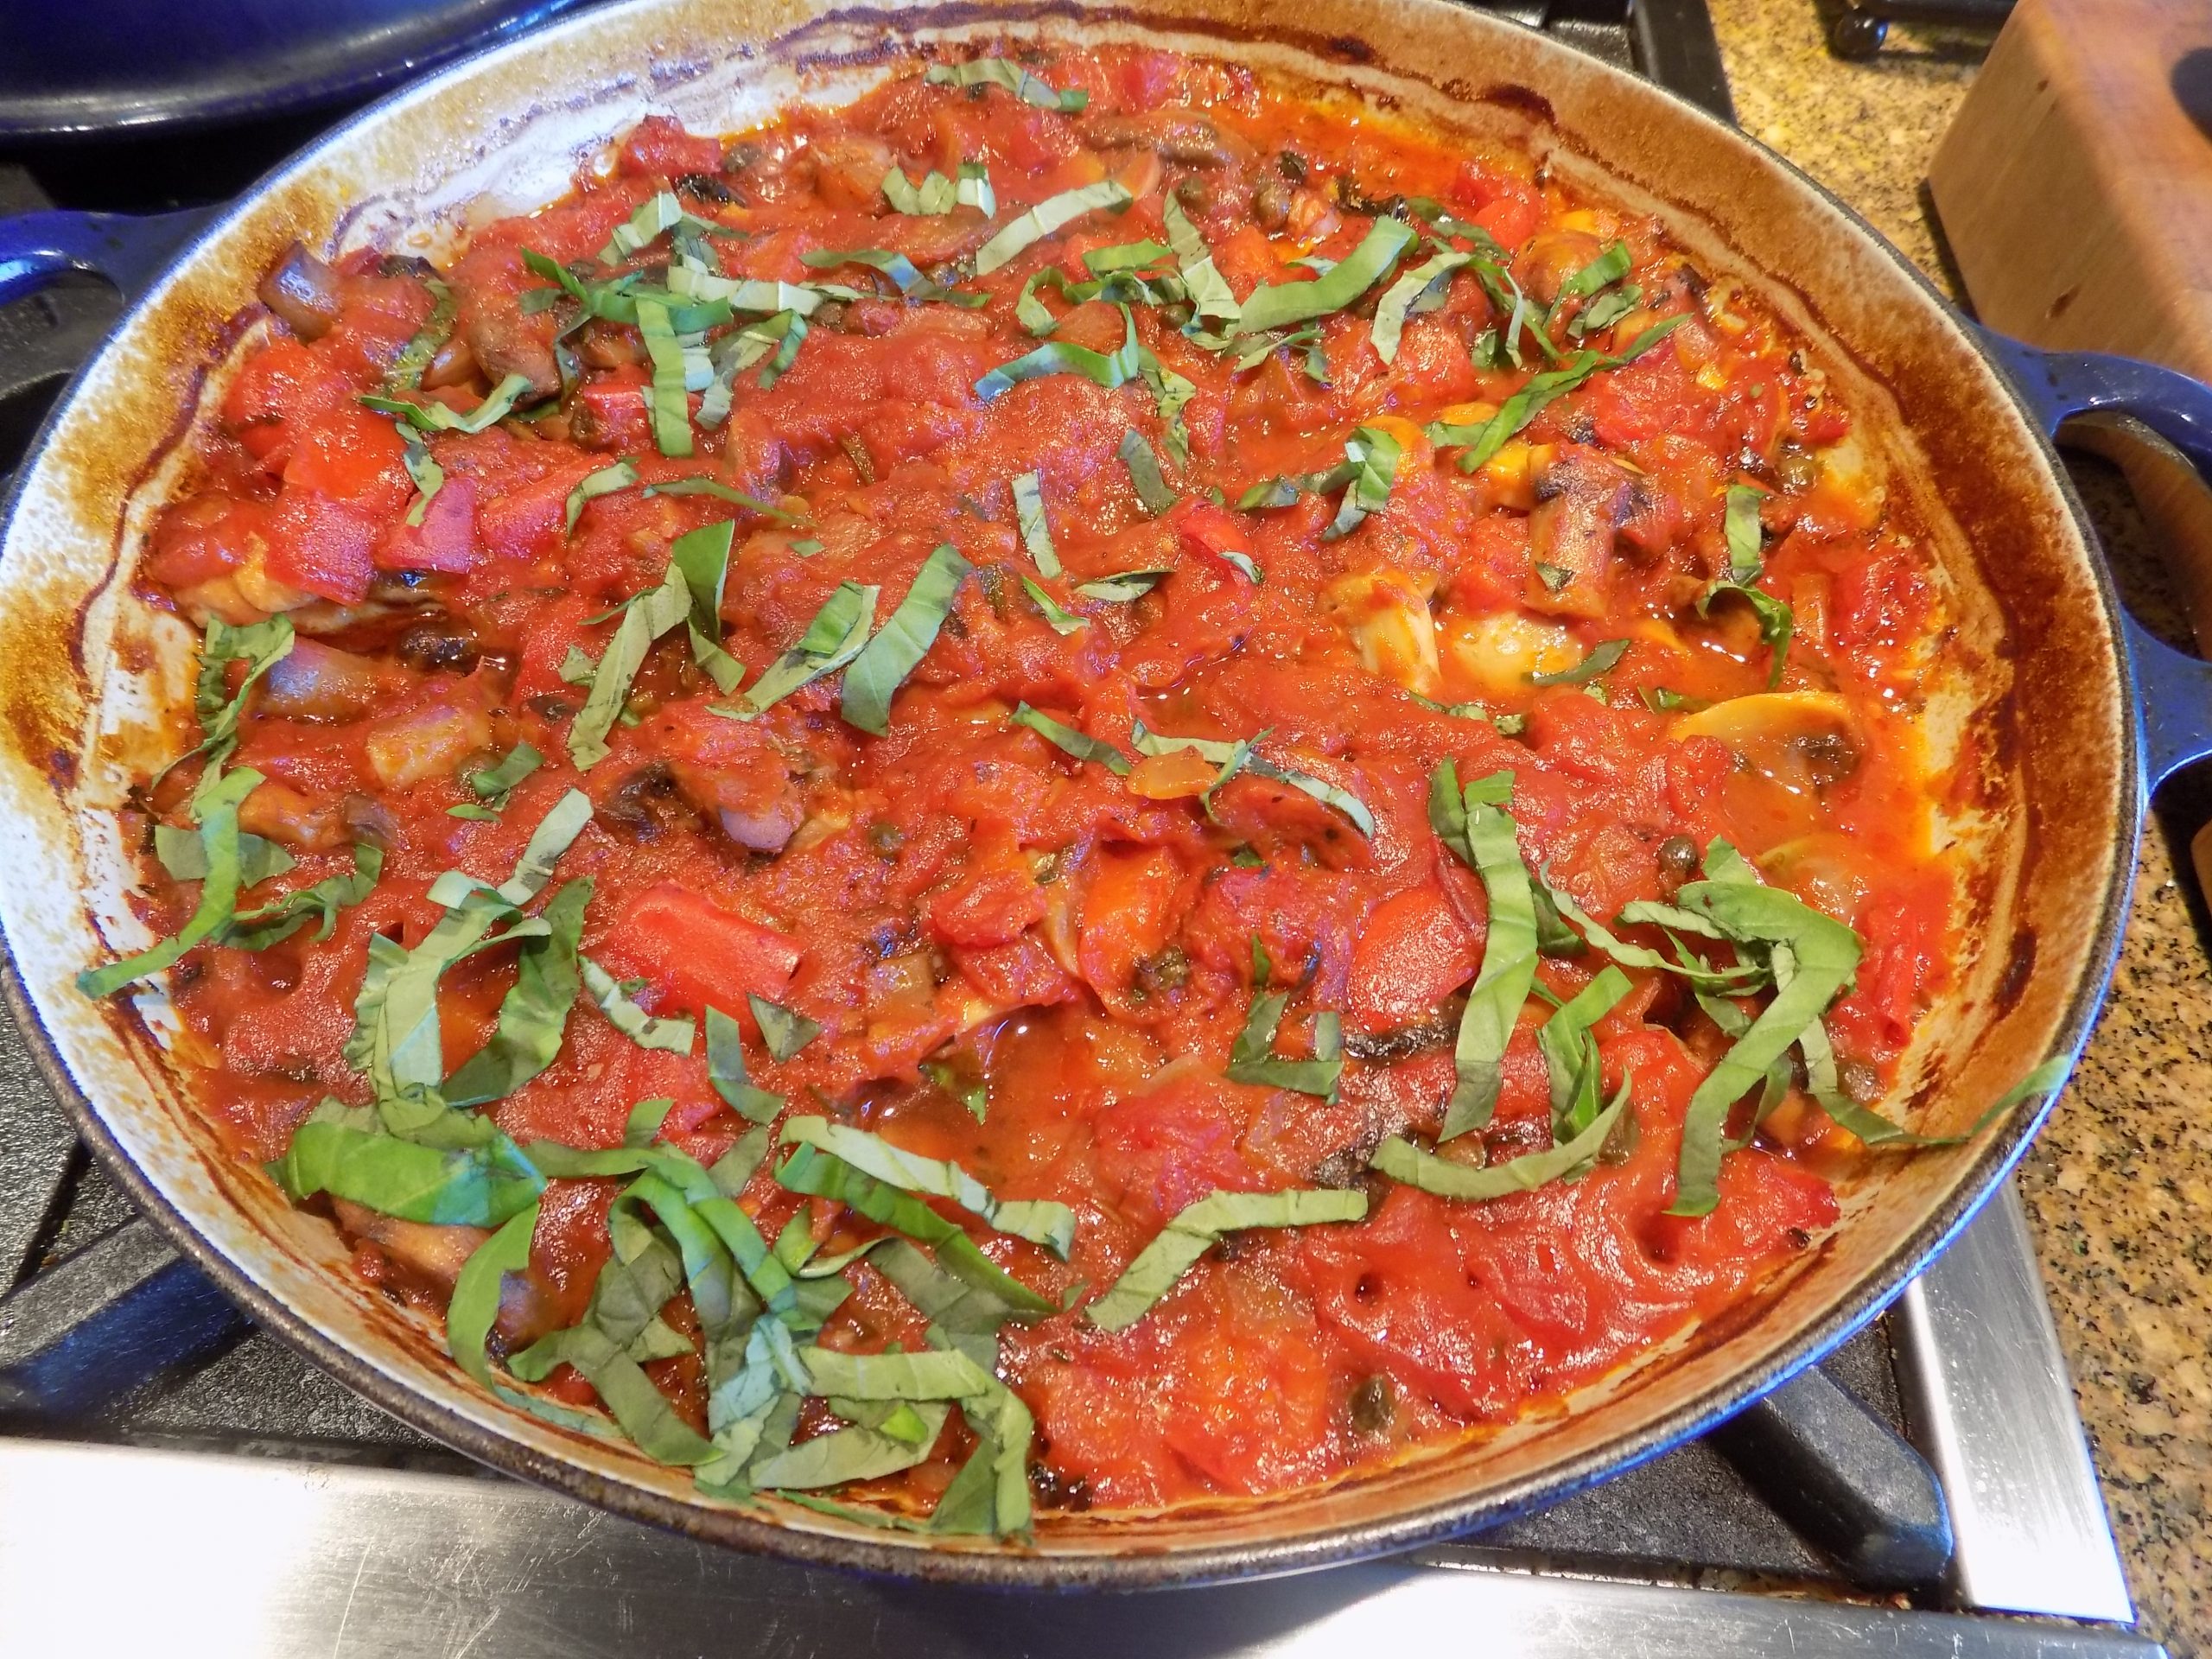
Cover the skillet and transfer to a pre-heated 350-degree oven. Cook for 50 minutes. Remove the lid and cook for an additional 30 minutes or until the sauce is thickened and the chicken is fork tender.
Remove from oven, sprinkle with remaining basil, and let sit a few minutes before serving. Great served over Parmesan Polenta. (See recipe below)
PARMESAN POLENTA
4 c. chicken broth
pinch sea salt
freshly ground black pepper
1 scant c. polenta (coarsely ground cornmeal) (not instant or fast cooking variety)
3 T. unsalted butter
½ c. freshly grated Parmigiano-Reggiano cheese
Bring broth, salt, and pepper to a boil in a medium-sized, covered saucepan. Whisk the dry polenta slowly into the boiling broth until all of the polenta is stirred in and no lumps remain.
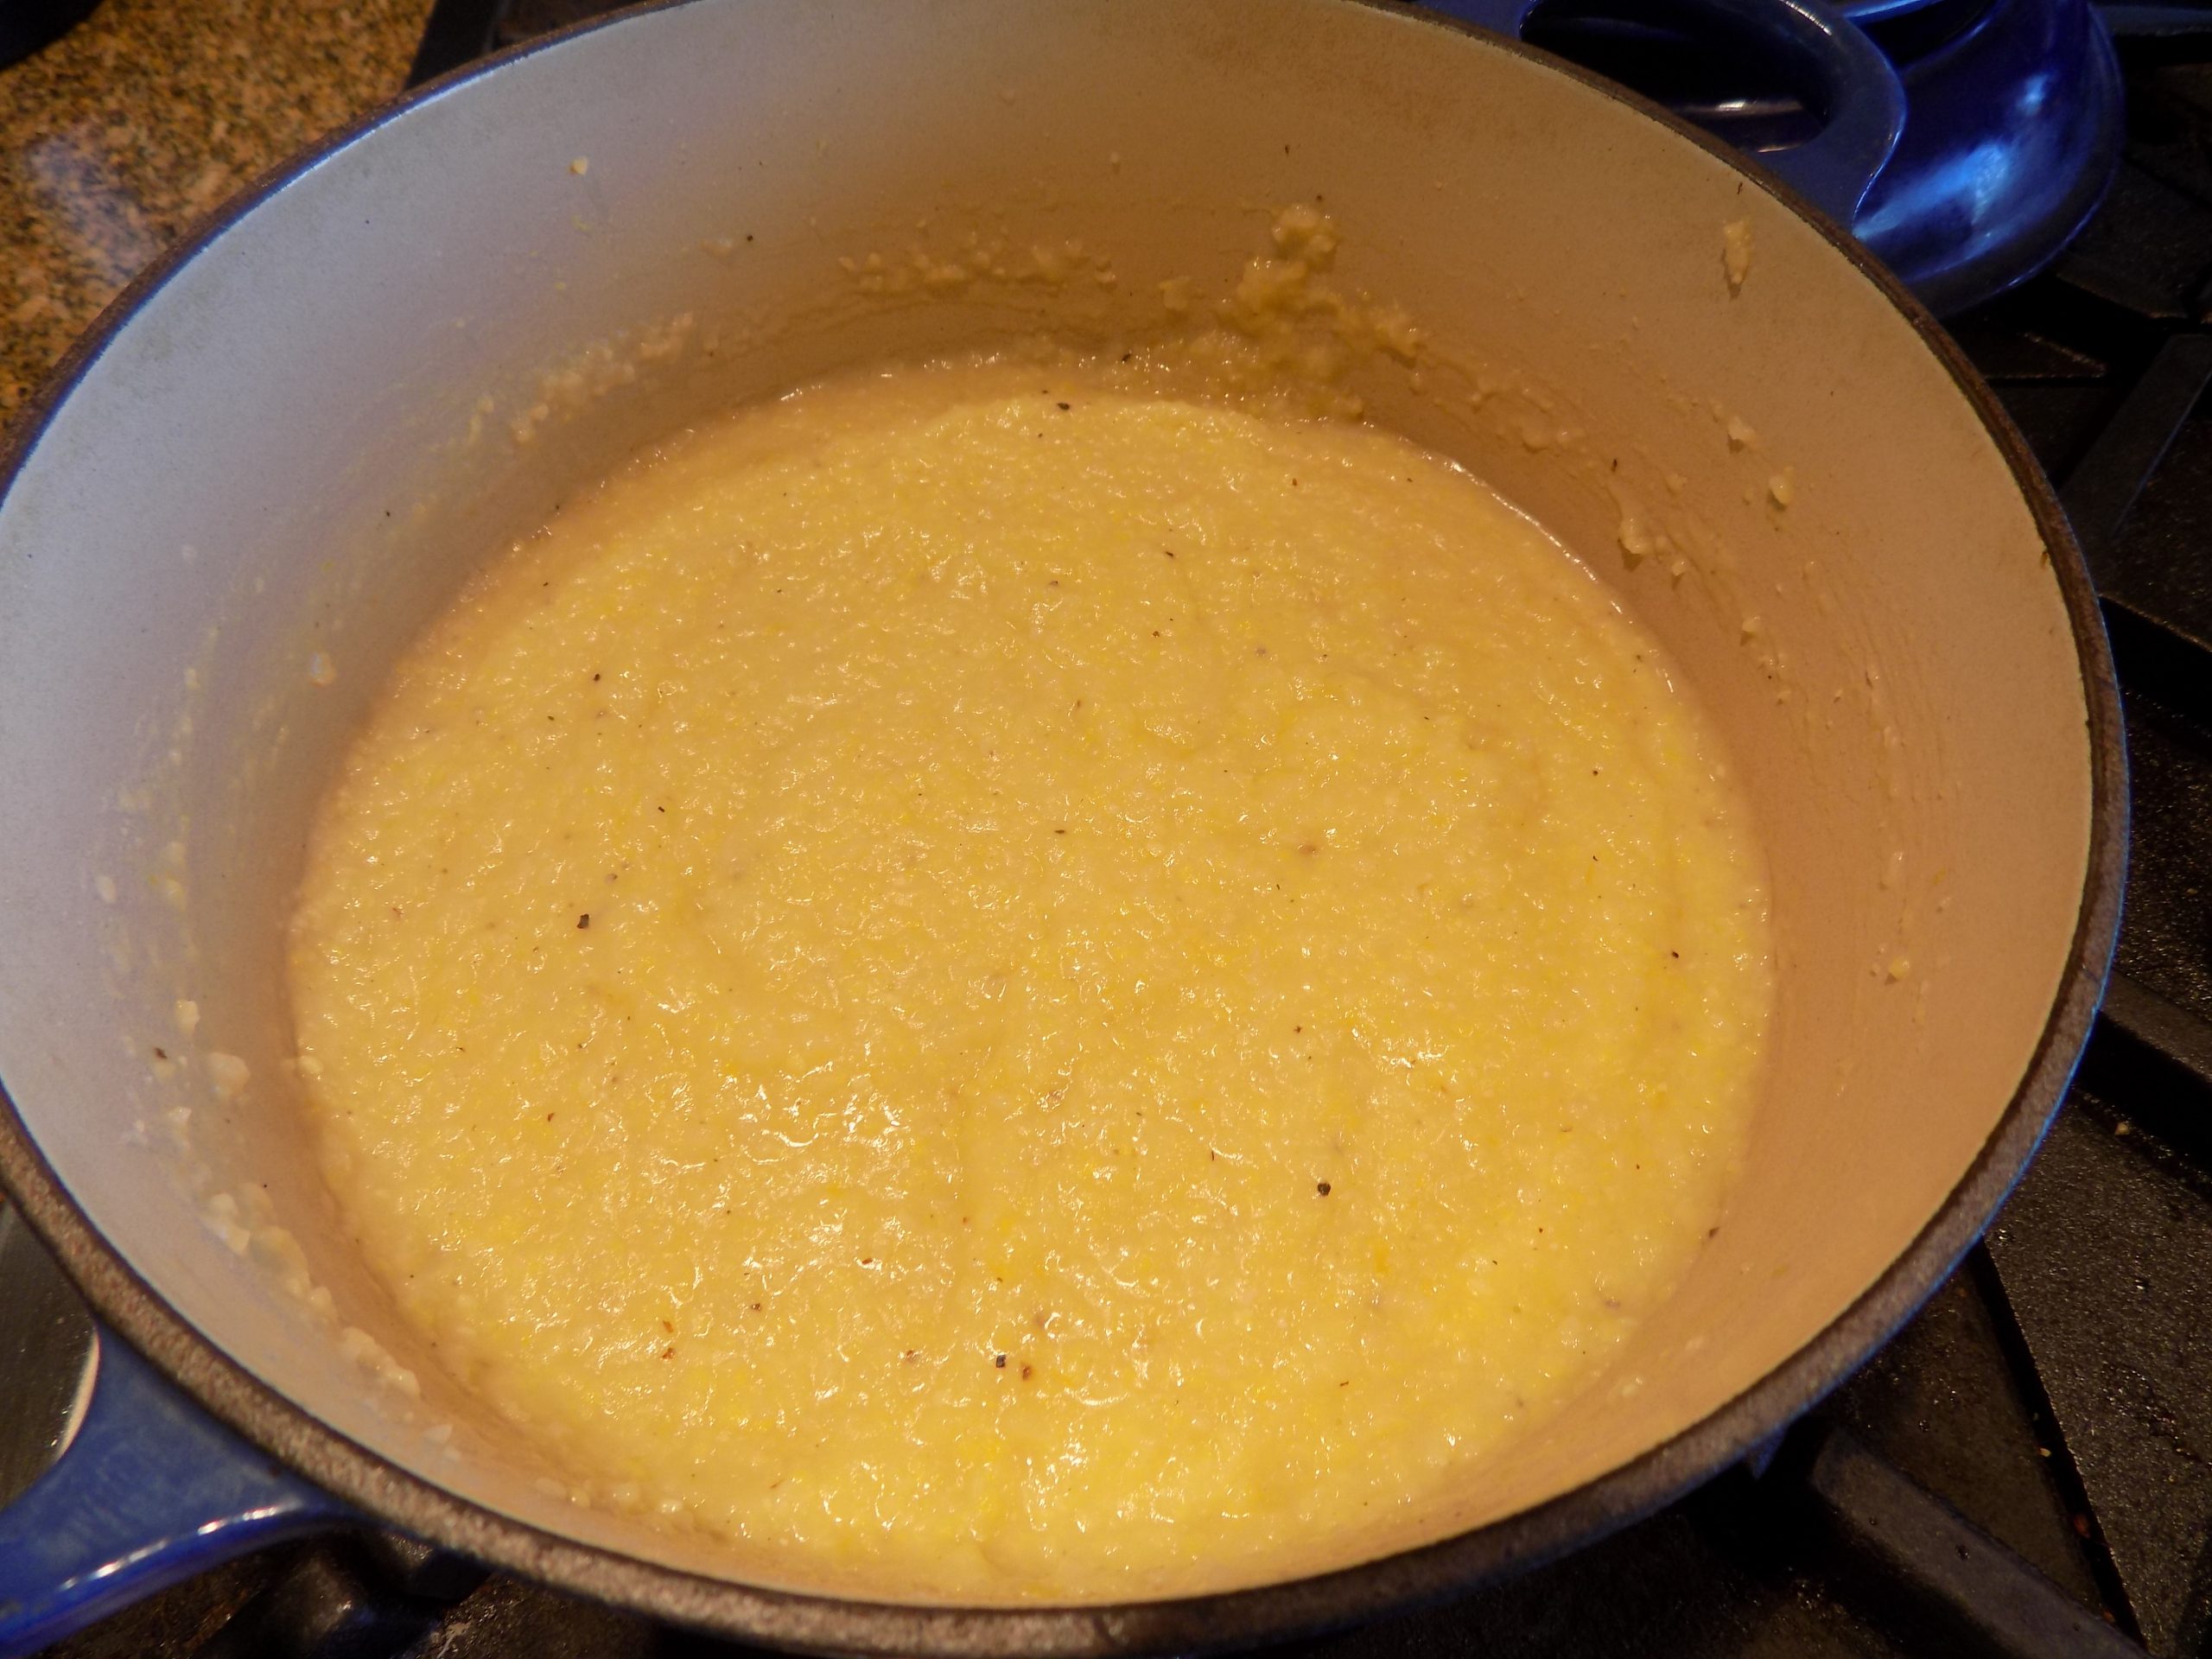
Reduce heat to low and simmer, whisking continuously until polenta starts to thicken, about 5 minutes. (Polenta mixture should still be slightly liquid.) Cover and cook for 30 minutes, whisking every 7 minutes or so. (When polenta is too thick to whisk, stir with a wooden spoon.) Polenta is done when the texture is creamy, and the individual grains of ground corn are tender.
Remove from heat and gently stir in the butter until partially melted. Then add in the Parmigiano-Reggiano until the cheese too has melted.
Cover and let stand 5 minutes to thicken. Stir, then taste to see if additional salt or pepper is required.
Serve as a base for the Chicken Cacciatore or any saucy meat dish. Or serve it as is. It’s wonderful just plain too!
Whenever I plan a trailer camping trip, the first meat I think to bring along is the other white meat. You know – pork. And because pork products come in many forms, for this post, I am only referring to pork chops and pork tenderloin. But why only chops and tenderloin? That’s simple to explain. They are both very easy to cook. Sometimes it takes a little prep work to coach the best out of these cuts, but never very much. But cooking either cut takes a gentle hand. Pork needs to be respected and of utmost importance, it should never be over cooked. (Of course, it can be over cooked, but not if you desire a tender piece of meat.)
For years I couldn’t fix a tender pork chop to save my soul. But then I discovered brining and learned that trichinosis is not the plague it once was, and therefore we no longer need to cook pork to death! So now, every camping trip includes pork chops and pork tenderloin. And both are always very well received with very little effort expended on my part.
Happily, last evening, we feasted on tender and succulent pork chops thanks to this recipe I found on the iwashyoudry.com site. I served the chops with Easy Fried Rice and Garlic Roasted Sugar Snap Peas. (Both recipes soon to be posted.)
So, if you too are a fan of pork chops but can’t stand it when your chops turn out dry and fit only for repairing the soles of your favorite leather boots, give this recipe a try. You will be glad you did.
As always, keep smiling, keep being tolerant of others even if their views differ radically from your own, and most importantly, thank your lucky stars that you were blessed with a mind that can discern fact from fiction. Because there is a lot of fiction being touted these days around the country, and especially in Washington DC. And unfortunately, not everyone was born with a healthy intellect or was taught critical thinking. That level of intelligence or skill is simply not possessed by everyone. So, be kind. Understand that you are just luckier than some.
Peace and love to all.
2 (4 oz. each) 1-inch or thicker boneless pork chops
2 c. warm water
2 tsp. kosher salt
2 tsp. seasoned salt
extra virgin olive oil
1 tsp. granulated garlic
½ tsp. paprika
freshly ground black pepper
Bring the pork chops to room temperature before preparing the brine.
Place the warm water in a flat glass container that will allow the pork chops to not overlap. Stir in the kosher and seasoned salt until they are both dissolved. Place the pork chops in the salt water, making sure the chops are completely covered. (Add additional water if necessary). Let the pork chops sit in the water at room temperature for 30 to 45 minutes, or place in your fridge for up to 24 hours. (I brined and refrigerated our chops for 7 hours. They were perfect.)
Line a baking sheet with foil or parchment paper.
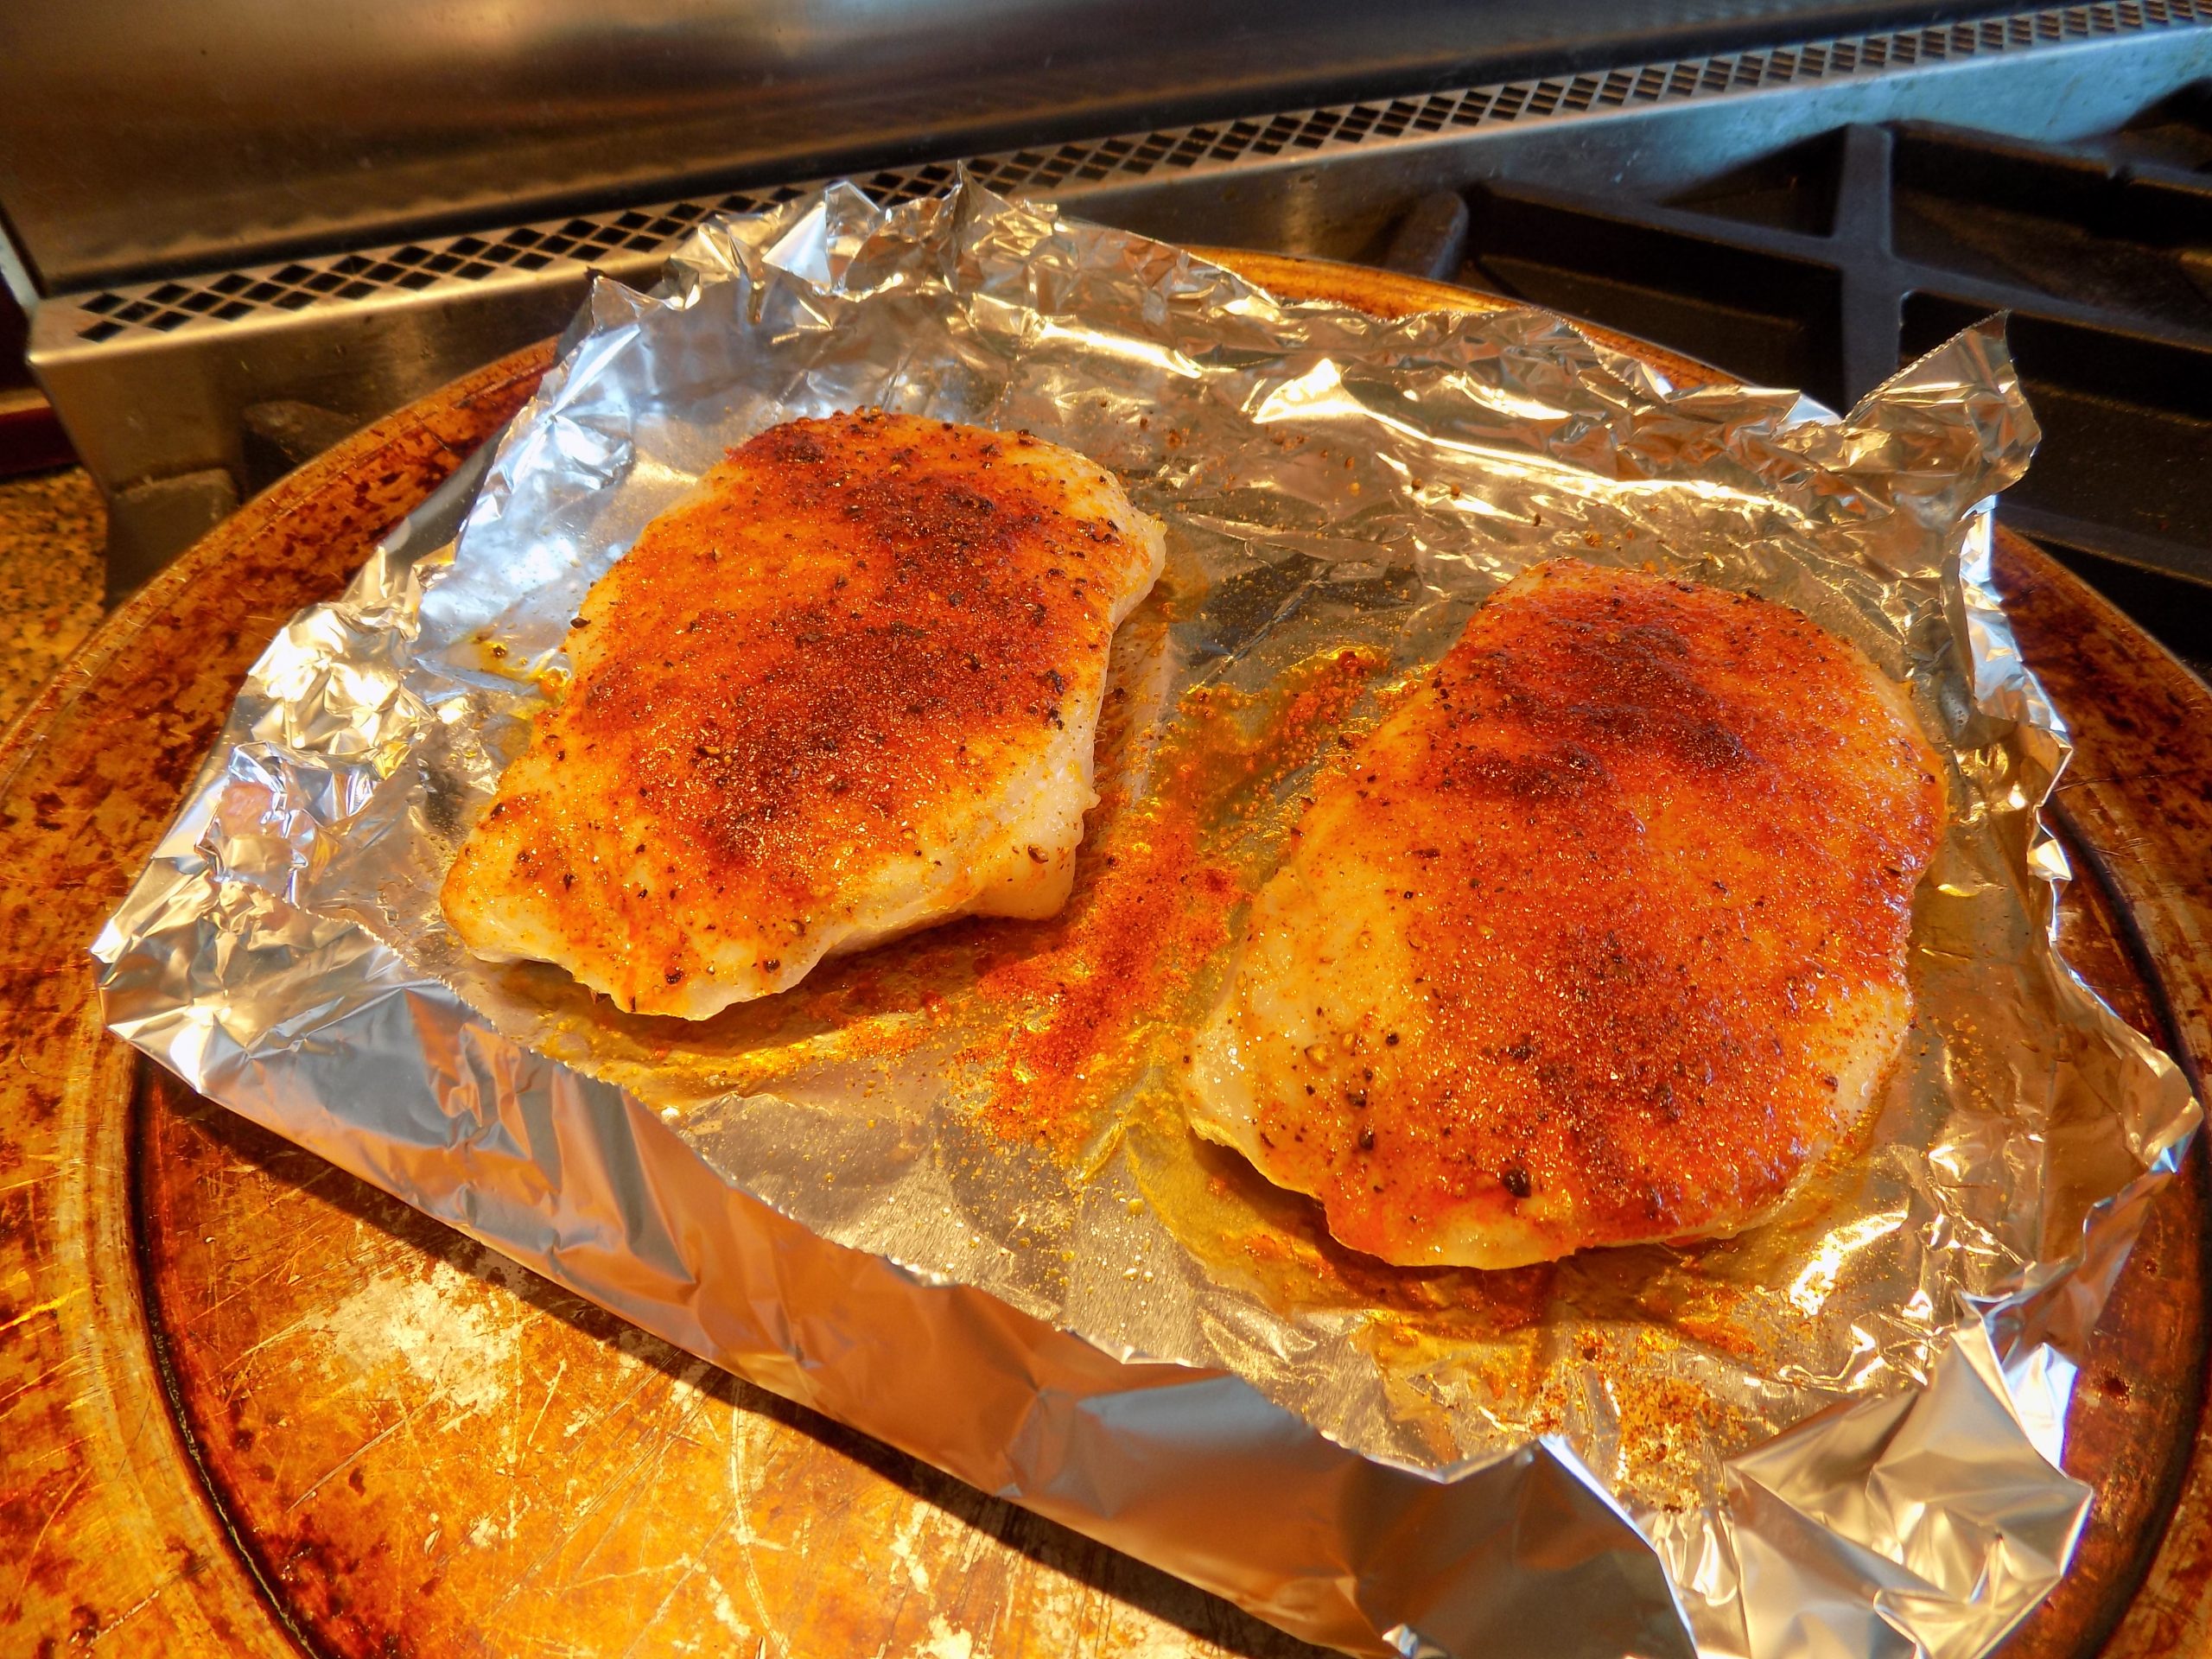
Remove pork chops from salt water and pat dry with paper towels, making sure all moisture is removed. Drizzle both sides of pork chops with a bit of olive oil, then season both sides with the granulated garlic, paprika, and black pepper.
Bake in a pre-heated 425-defree oven for about 8 minutes or until the internal temperature reaches about 143-degrees. Remove from oven and cover loosely with foil for 5 minutes before serving.
The only thing Mr. C. and I disagree about regarding this dish, is that he likes his pasta lightly sprinkled with Parmesan cheese, and I like mine undecorated. Other than that, we totally agree that this is one of the best pasta dishes we have ever tasted. Now I realize this recipe is ever so close to my recipe for Spicy Lemon Shrimp with Pasta. But it is just different enough to be interesting. But either recipe will guarantee a better lemony shrimp pasta dish than you will ever taste in any restaurant. Not bragging here folks – just stating a fact.
Because most restaurants have to dumb down their recipes to please the majority of their clientele. So, instead of making recipes like this one lemony enough, they will only go so far. And of course, restaurants don’t use as much shrimp, because, well, shrimp costs money. And they are in the business of making a profit. And heaven help them if they give a dish like this a bit of a kick. But that little “kick” helps make this dish super delicious.
So, of course I am prejudiced, but I have eaten many a lemon shrimp dish where only my sense of decorum prevented me from paying a visit to the restaurant chef and demanding a lemon, a pinch of crushed red pepper flakes, and more shrimp! Now you too won’t have to be tempted to embarrass yourself or whomever you are dining with. When you get a hankering for an easy lemon pasta to prepare, that is going to make every adult in your home happy, don’t hesitate to give this recipe a try. I do feel that this much flavor might be a tad too much for a young child. But if you too are empty nesters, I say GO FOR IT!
And of course, you must be a lemon lover. Because lemon is really the star in this pasta. Of course, the shrimp doesn’t hurt either. But it’s really the intense lemon flavor that takes this dish into a whole new realm of delicious. So, please give this recipe a try.
As always, keep smiling, keep cooking, and keep trying new dishes.
Heat the butter and olive oil over medium-high heat. Add the shrimp, green onions, and garlic; cook just until the shrimp turn pink, 2-3 minutes. Remove from pan with a slotted spoon.
Add the wine to the pan and cook until the liquid is mostly evaporated. Then add the broth, lemon zest, lemon juice, salt, pepper, and crushed red pepper flakes. Bring to a boil and cook for about 1 minute. Return shrimp mixture to pan and heat through.
Remove from heat and add in the al dente pasta. If more moisture is required, add in a bit of pasta water and return pan to heat for only about a minute. Taste, adjust seasoning if necessary, then stir in the fresh parsley. Serve immediately.
I’m not known for keeping my opinions to myself. You should be quite aware of this if you are in the habit of reading my blog. There just doesn’t seem to be any way for me to keep my innermost, private, terribly biased, and probably offensive to some, thoughts inside my head where they belong. So, here goes another blast from me that shouldn’t be said, or in this case written down for everyone and their grandmother to read! But I’m going to say it anyway! “In my opinion, those who loudly proclaim that they hate lamb but have never even tasted said critter, should be made to ride the “It’s a small world” Disneyland ride for 10 hours straight!” (And no real offense to whomever is running the show for the Disney corporation now. But whoever you are, I’d be willing to bet you couldn’t stand this ride for 10 hours straight, even if they doubled your yearly salary!) (I rode it once when I went to Disneyland with daughter Paula and kids. Once! And even then, I was almost screaming by the time the poor ride attendant “helped” me to the exit.) So, that’s how strongly I feel about the subject of lamb! And I stand behind my comment!
Now, for those who have tasted lamb, but don’t like the slightly gamey taste, that’s a different story. But just to arbitrarily decide that lamb is icky before even giving it a chance, well that’s just not right! I mean it’s not sea urchin or parsnips for goodness sake!
OK, I feel better now. And I know I am preaching to the choir about the marvels of lamb because you wouldn’t be reading this post if you weren’t interested in preparing a ground lamb dish. Of course, you could be just reading this post to find out what I felt compelled to rant, advise, or sweet talk you into today! Either way, I feel I have adequately fulfilled my responsibility for every type of reader.
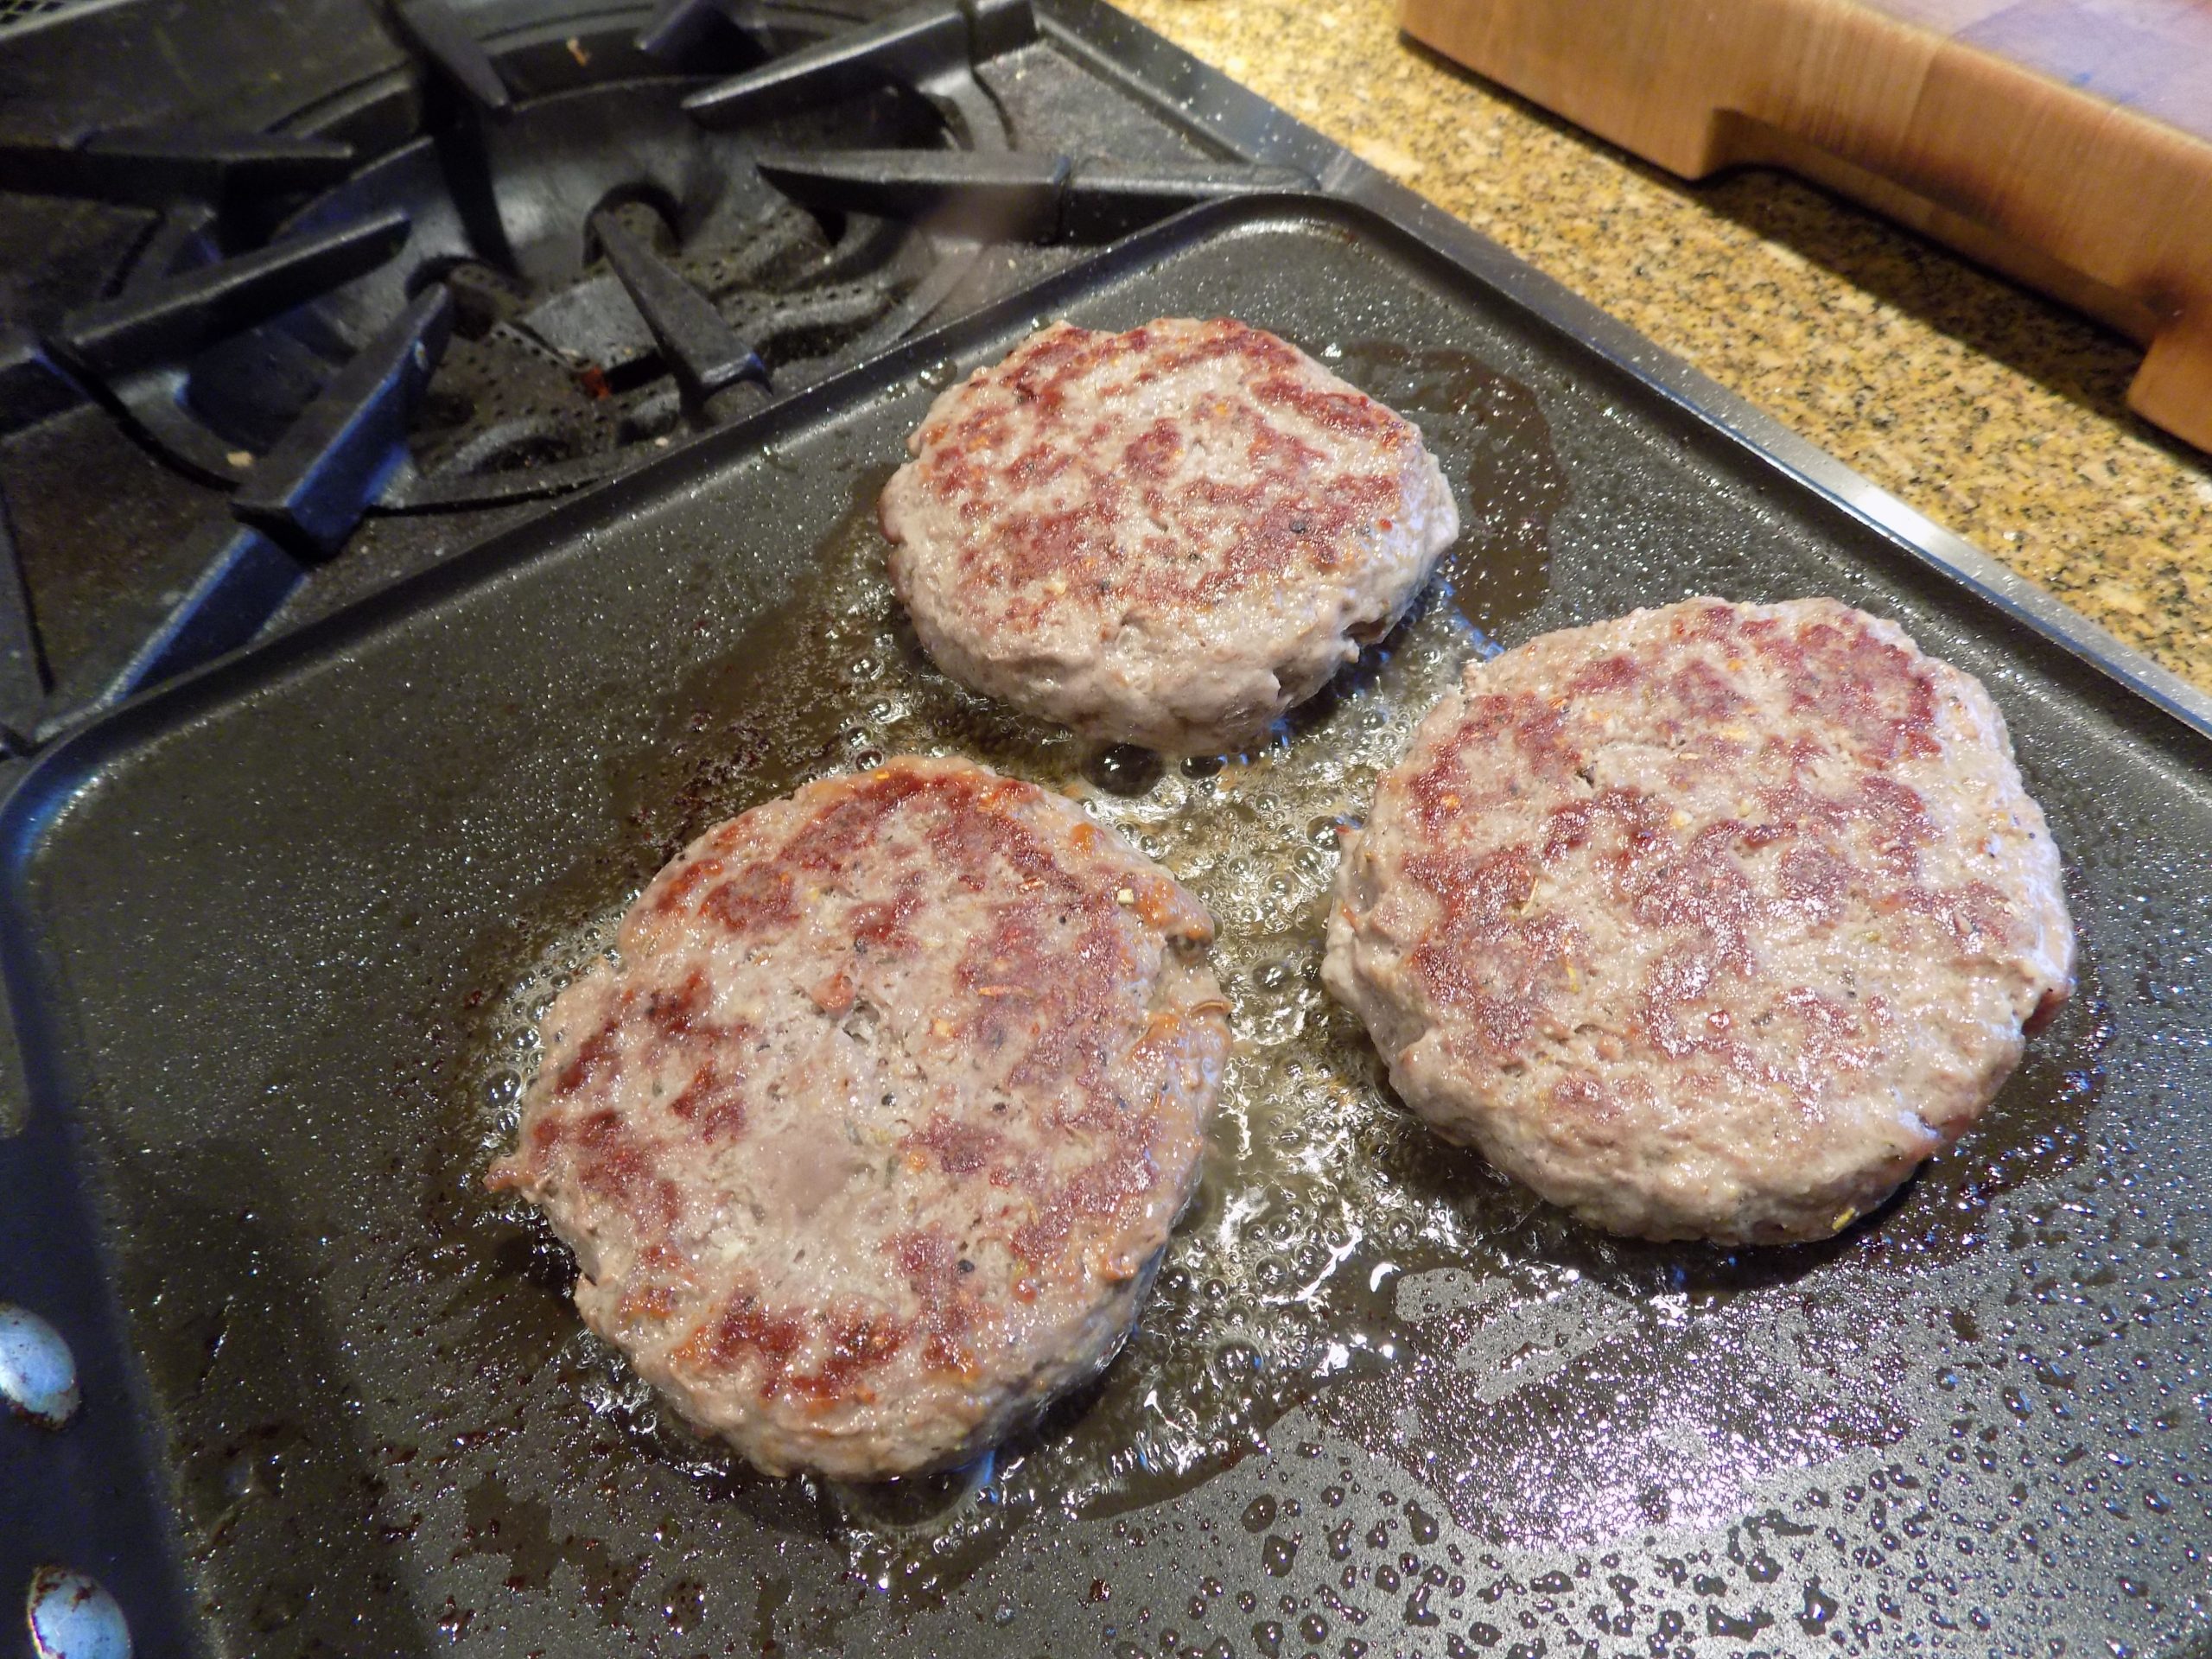
But, if it’s a great recipe for ground lamb you are after, this recipe should make you happy. One thing you should know. I compiled this group of ingredients based on ease of preparation. I plan to serve these patties while traveling in our trailer. Because dried seasonings and herbs are much easier to use when I am trying to fix dinner in an area roughly the size of a linen closet. Without the shelves, of course! (Not complaining here, because I love our trailer. But too much of my hacking and slashing can become hazardous to Mr. C. as he tries to navigate his way past me from the dining/reading/game playing area of the trailer to the bathroom or the bedroom area. (And I hope you realize that I am delineating both “bathroom” and “bedroom” very loosely in this context.)
So, for trailering, it’s mostly dried herbs and spices all the way. But you will find that I have also listed fresh equivalents, which I too will be using when I have the luxury of a larger “kitchen” in which to prepare these lamb patties.
As always, keep having fun. Laugh at yourself when it’s appropriate. And find the joy in everything you do. Peace and love to all.
1 lb. ground lamb
2 tsp. Montreal Seasoning
1½ tsp. granulated garlic or 1 large garlic clove, finely minced
½ tsp. dried rosemary, crushed or 1 tsp. finely chopped fresh rosemary
OK, we love Cornish game hens. And whereas, when we were younger, we could each easily polish off our own game hen, that is no longer the case. So, we now share a hen. (A 24-ounce hen that is. And yes, they come in smaller sizes!) And as much as I think a grilled game hen is lovely, I prefer to stick the darn thing in the oven and forget about it. So, I am always trying to find new and different ways to serve these rather affordable and succulent little beasties.
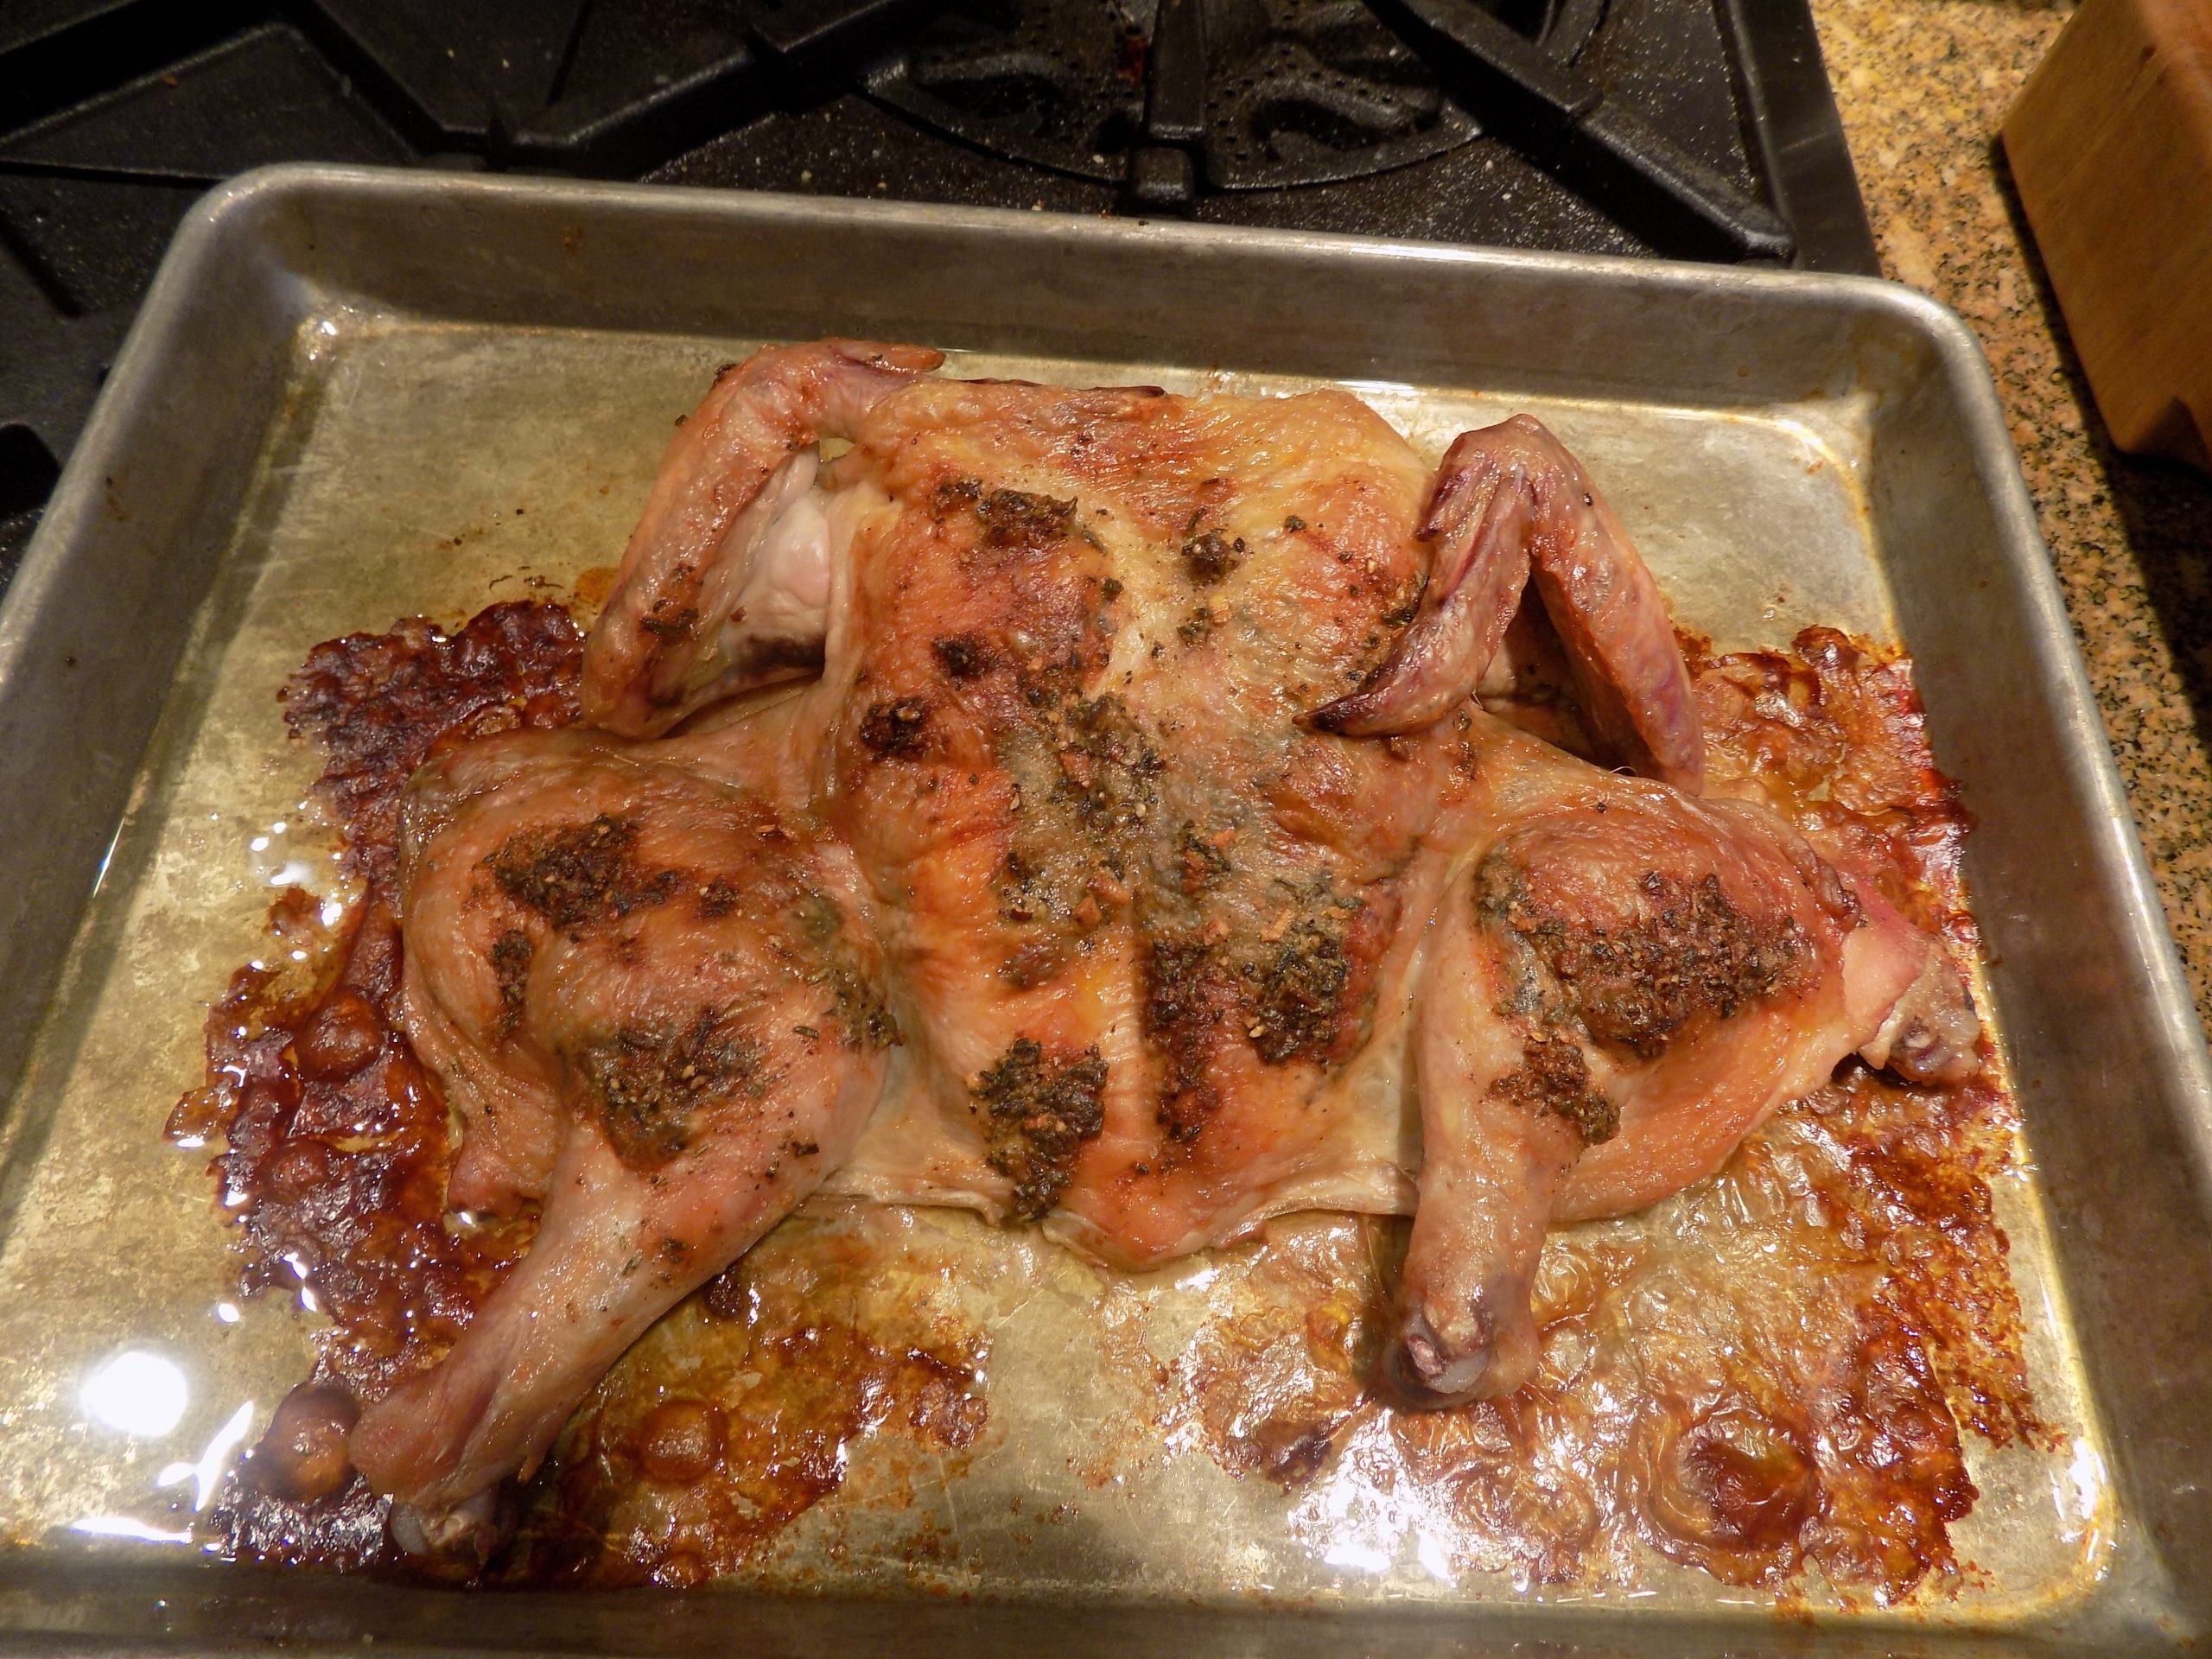
So, the other evening, for the first time ever, I decided to try my hand at spatchcocking. I’d heard about this method of insuring that every bit of the hen gets roasted evenly, but I had never tried it. For whatever reason. (Oh heck, I know the reason. I thought it would be much more difficult than it was and that I would make as much of a mess spatchcocking, as I do when I try to cutup a whole chicken. Which, unfortunately, I have never succeeded in doing, enough so, that you could identify it as chicken rather than mystery meat! But that’s a long, sad tale for another day!) Anyway, I managed to make short work of the job and was quite proud of myself. And the hen roasted beautifully. And I was so delighted to find that the skin (which is one of the best parts of a game hen) had browned and crisped up beautifully. Revelation! And I’ve got to say, for me there is no turning back! It’s spatchcocked game hens for me from now on. And yes, I have another wonderful recipe for game hens on this site. Rosemary, Lemon, and Garlic Roasted Cornish Game Hens. But you can bet your last turkey wish bone, that the next time I make that delightful recipe, there will have been some spatchcocking action going on before that baby reaches the oven! (I’m nothing if not flexible!)
So, if you too are a fan of Cornish game hens, and for the world I wouldn’t know why you wouldn’t be, then I suggest you give this recipe a try. And to learn how to spatchcock a game hen, go on-line. There are innumerable videos for you to watch presented by people who actually know what they’re doing! I leave you in their capable hands.
So, as always, leave your fears behind when you go into your kitchen. I remember taking a short cake decorating class many years ago. And the first thing our instructor said to us was “remember, frosting is an inanimate object, and you all are smart human beings.” (She was making a huge assumption when it came to this class attendee. But I was smart enough to catch her point.) Frosting, or any ingredient for that matter, is subject to the whims and wishes of the cook. In a cook’s capable hands, frosting can be spread beautifully, or if can look like a 5-year-old had fun alone in the kitchen. But her point was, so what if your first try isn’t successful, scrape the frosting off the cake and try again. You, the human, are in charge. I learned a lot that day from that fine instructor. But I still can’t cut up a chicken to save my soul!
Peace and love to all.
3 T. unsalted butter, room temperature
½ tsp. seasoned salt
freshly ground black pepper
1 clove garlic, finely minced
½ lemon, zested
1 tsp. minced fresh rosemary
½ tsp. minced fresh sage
½ tsp. fresh thyme leaves
1 (24-oz.) Cornish game hen, washed, dried and spatchcocked
In a small bowl, mix the butter, seasoned salt, pepper, garlic, lemon zest, rosemary, sage, and thyme together. Place the spatchcocked hen on a small, rimmed baking sheet.
Using your finger loosen the skin from the breast and legs/thighs and stuff all but 1 tablespoon of the lemon-herb butter under the skin. Rub the remaining butter over the top of the hen.
Bake in a pre-heated 375-degree oven for 1 hour or until the skin is golden brown and the internal temperature in the thigh reaches 160-degrees. Remove from the oven and let rest for 10 minutes before serving.
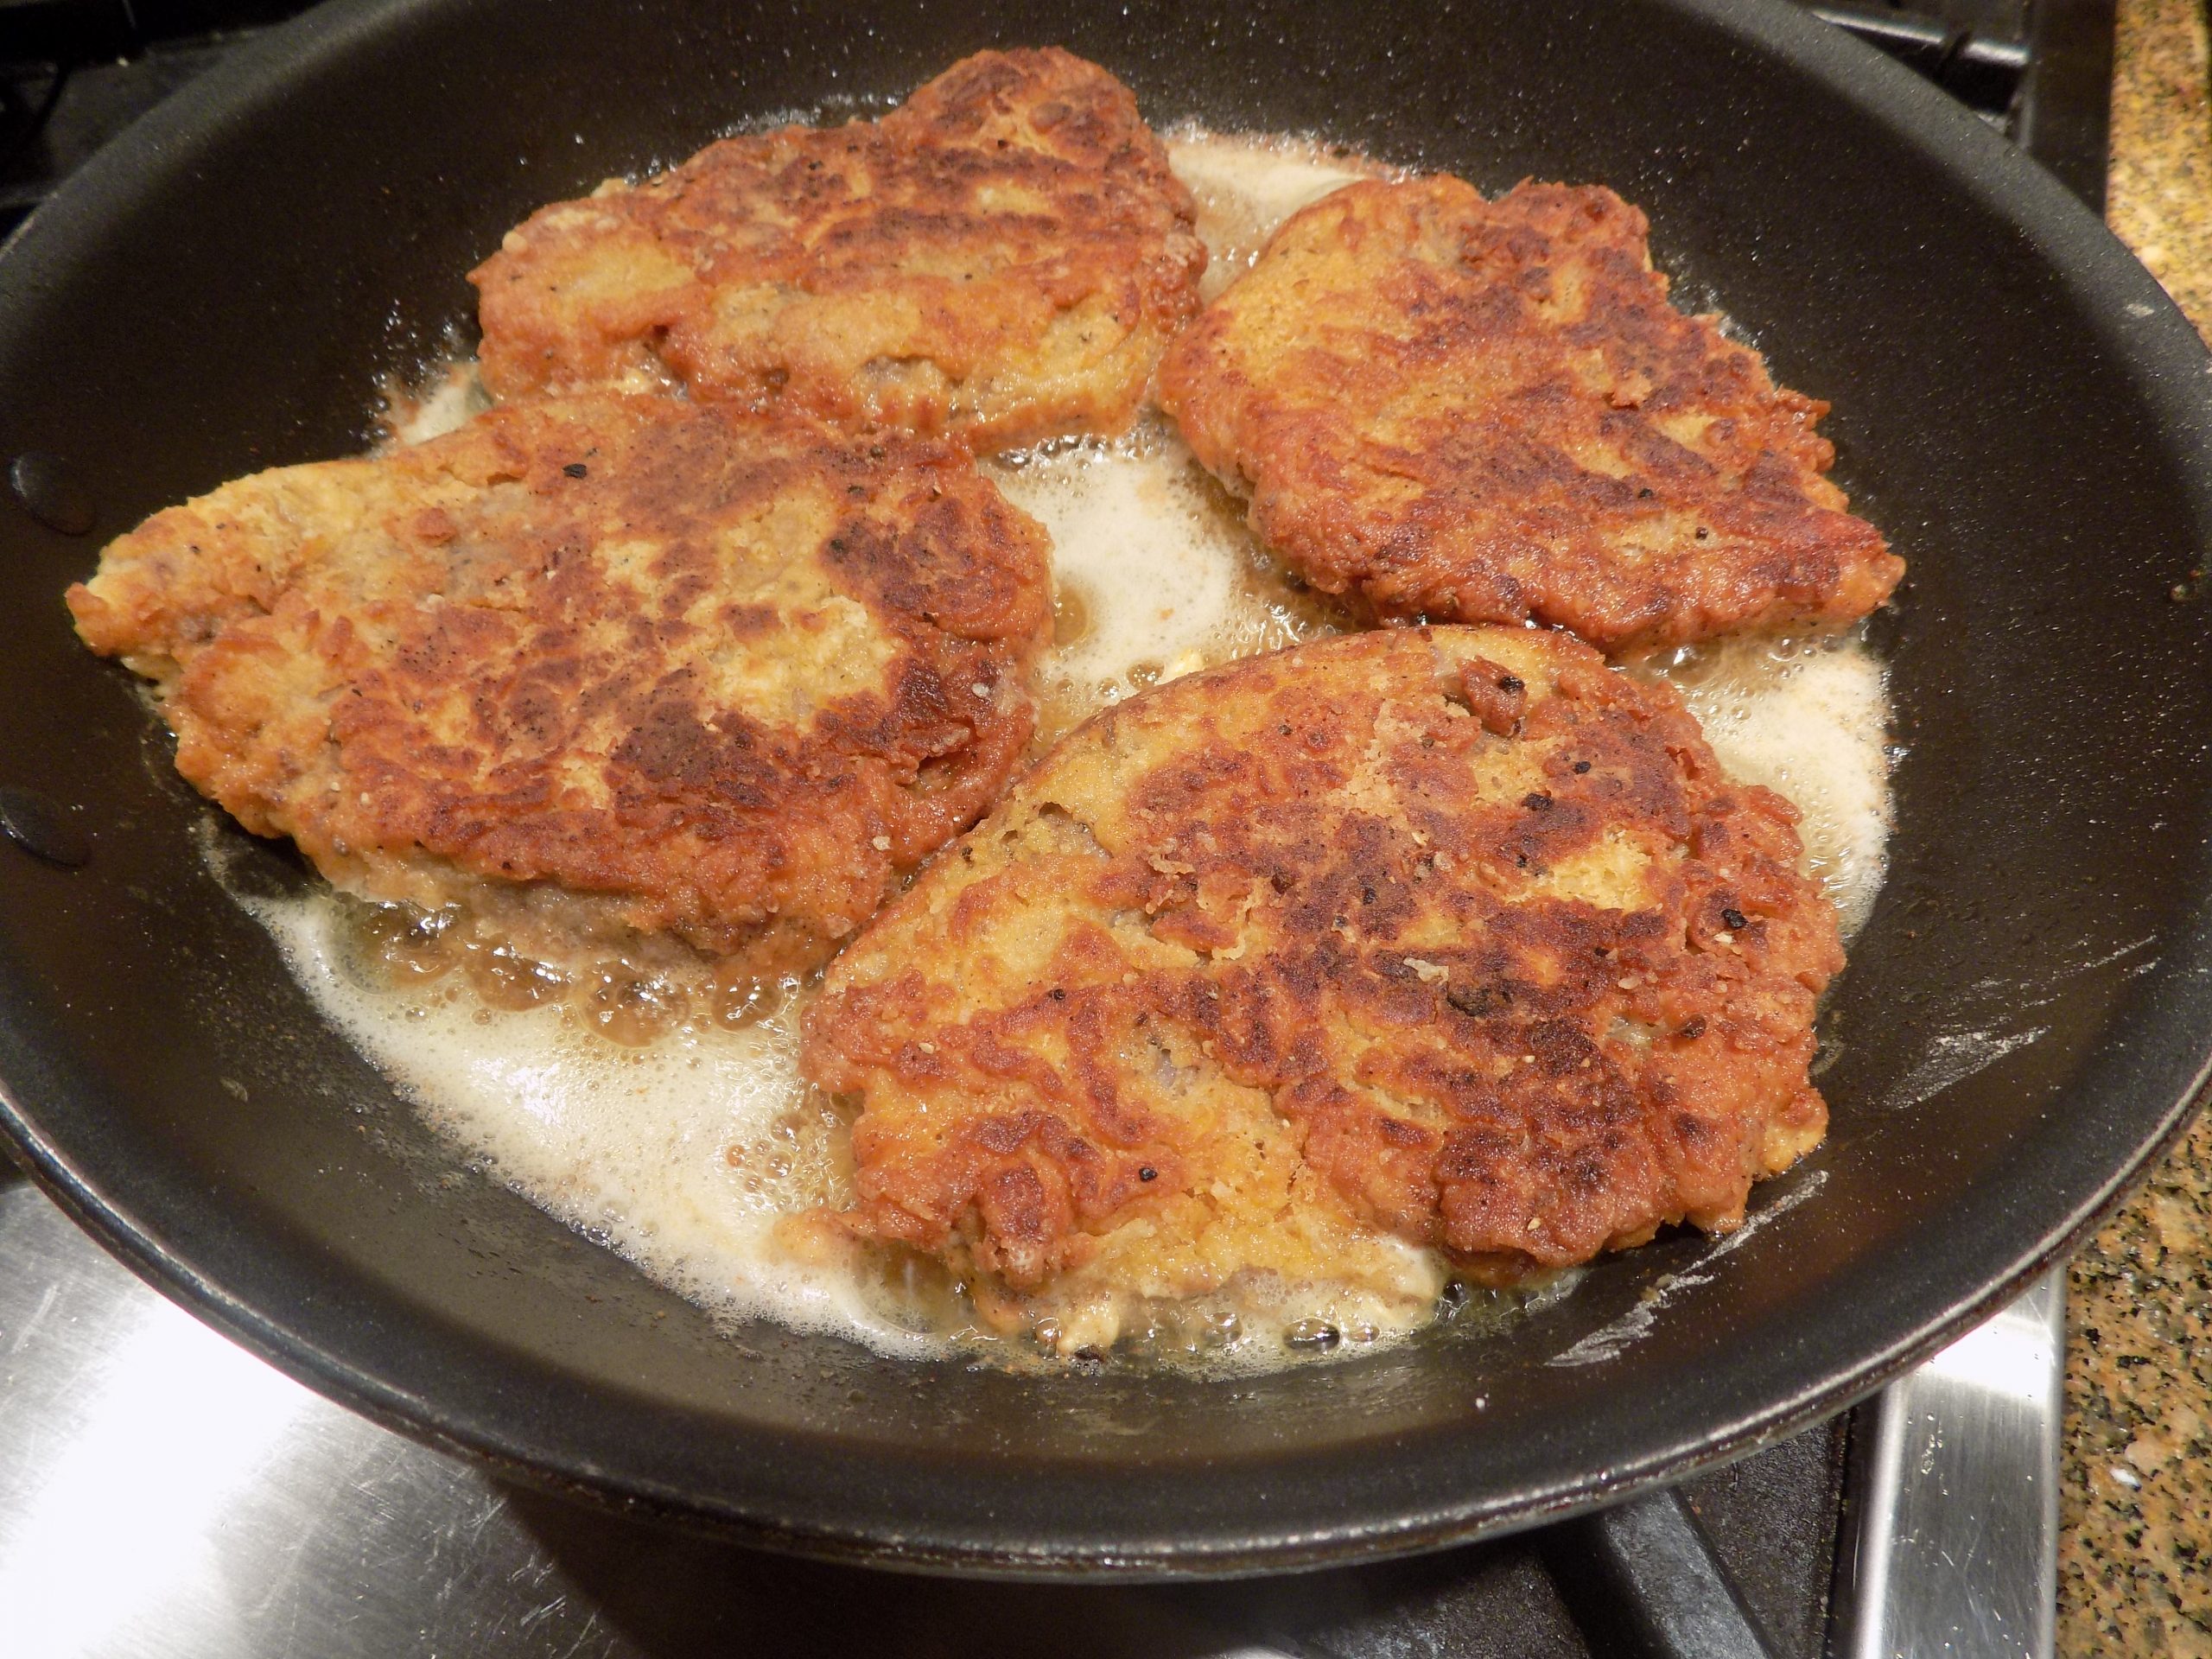
It’s all my daughter Paula’s fault! I know it’s usually all the mother’s fault, but not this time. My preparing this way too caloric, cholesterol laden, fattening, crazy delicious comfort food dish is all on Paula! And even though I don’t plan to serve chicken fried steak (CFS) very often, I must say thank you to my dear daughter for reminding me of this lovely Southern delicacy. (You might know it better as country-fried steak.) And for those of you with more discerning palates, just consider CFS the poor man’s wiener schnitzel. (Veal and breadcrumbs prepared in a similar manner.) But in my humble opinion, CFS is every bit as delicious. (And a whole lot cheaper to produce!)
It all started with a simple phone conversation. Paula happened to mention that she was making one of her husband’s favorite dishes for dinner that evening. And of course, I had to ask which of Mark’s favorites was she preparing? And as she described how she fixed this dish my mouth started to water. Holy guacamole! I hadn’t eaten CFS for years. And it sounded just so tempting. And as you well know, I give in to culinary temptation way more than is good for me. But hey, if I only eat it once every 10 years, how much can that hurt? (As if I can refrain from making CFS now that I know how wonderful the homemade version can be. I’d never actually fixed it at home before. I’d only had it on a few rare occasions for breakfast when traveling.) But now, who knows how frequently this might appear on our dinner table. I’m only human after all! And it’s still all Paula’s fault!
But in her defense, she doesn’t usually fix gravy to slather on their CFS. Nor does she make sinfully rich grits to go along with the steak. That part is all on me! But I figure, in for a dime, in for a dollar. If I’m going to sin, let it be a big one and then be done with it! So, the following recipe is not a low-calorie wonder. But boy of boy is it delicious. And a dish I guarantee everyone in your family will adore.
I found most of this recipe compliments of the momontimeout.com site. (Great site BTW.) The modifications came from several suggestions Paula shared with me, with a couple thrown in by me for good measure. So, this recipe is definitely a team effort. (Look for my recipe for Creamy and Savory Grits soon to come to your very own computer.)
As always, make every meal special. And while I totally advocate eating healthy nutritious food most of the time, I also believe that there are times when nothing but a big old meal of comfort food helps keep people happy and content. Too much depriving ourselves of food that brings us pleasure just can’t lead to a well-balanced mind. I mean really, who can remain sane when all they can think about is a hamburger and fries? I’m not sure the previous statement speaks well to my mental stability, but never-the-less, it’s how I feel. It’s the old “moderation in all things” thing! And I am a firm believer in “moderation in all things”, in moderation of course! So, to that end, I must also tell you, that along with our CFS, gravy, and grits last evening, I also served plain old steamed fresh green beans. No frills attached.
Peace and love to all.
Chicken Fried Steak
1½ c. all-purpose flour
1 tsp. kosher salt
freshly ground black pepper (quite a bit)
1 tsp. paprika
1 tsp. granulated garlic
1 tsp. granulated onion
½ tsp. baking soda
½ tsp. baking powder
¾ c. buttermilk
1 tsp. hot sauce (I use Frank’s RedHot original cayenne pepper sauce)
1 egg
4 cube steaks
Montreal Seasoning
vegetable oil
In a shallow container (I use an 8-inch cake pan), whisk the flour, salt, black pepper, paprika, granulated garlic, granulated onion, baking soda, and baking powder together. Set aside.
In a separate shallow container (yup, another cake pan), whisk the buttermilk, hot sauce, and egg together. Set aside.
It the cube steaks appear moist, pat them dry with a paper towel, removing as much moisture as possible. Season one side of each cube steak with a sprinkling of Montreal Seasoning. Let sit for 5 minutes.
While the cube steaks are resting, scatter a bit of the flour, the same size as the cube steaks, on a baking sheet.
Dredge the cube steaks in the flour mixture, shaking off excess, then dredge in the buttermilk-egg mixture, letting excess drip off, and then once again in the flour mixture, shaking off excess. (This is a messy process, so plan on washing your hands several times as you coat the steaks.)
Place the breaded cube steaks on the floured areas of your baking sheet. (Having a bit of flour before you set the breaded steaks down, allows the steaks to absorb a bit more flour as they rest. And also, not stick to the baking sheet.) When all 4 steaks have been breaded, press a bit more flour into the top of each one. (Save the remaining flour for use in the gravy.) Let the breaded steaks rest for 10 minutes.
Preheat oven to 225-degrees.
Heat about an eighth inch of vegetable oil in a large heavy skillet over medium high heat. How much oil you need depends on the size of your skillet. And if possible, use a fry pan that will accommodate all 4 steaks. If not, fry 2 at a time.
Test the oil by dropping a bit of the breading into the oil. The oil should sizzle and bubble around the breading. (The oil should glisten, but not be hot enough to start smoking.)
Place the steaks into the pan and fry for 3 to 4 minutes on each side or until golden brown. After the steaks have browned on both sides, carefully flip them back to the first side. Only fry for an additional minute or so.
Remove steaks from pan and drain on paper towels. Place in the preheated oven to stay warm while you make the gravy. (I place the paper towels and fried steaks on the the same baking pan I used to hold the breaded steaks before they were fried. Washed first, of course!)
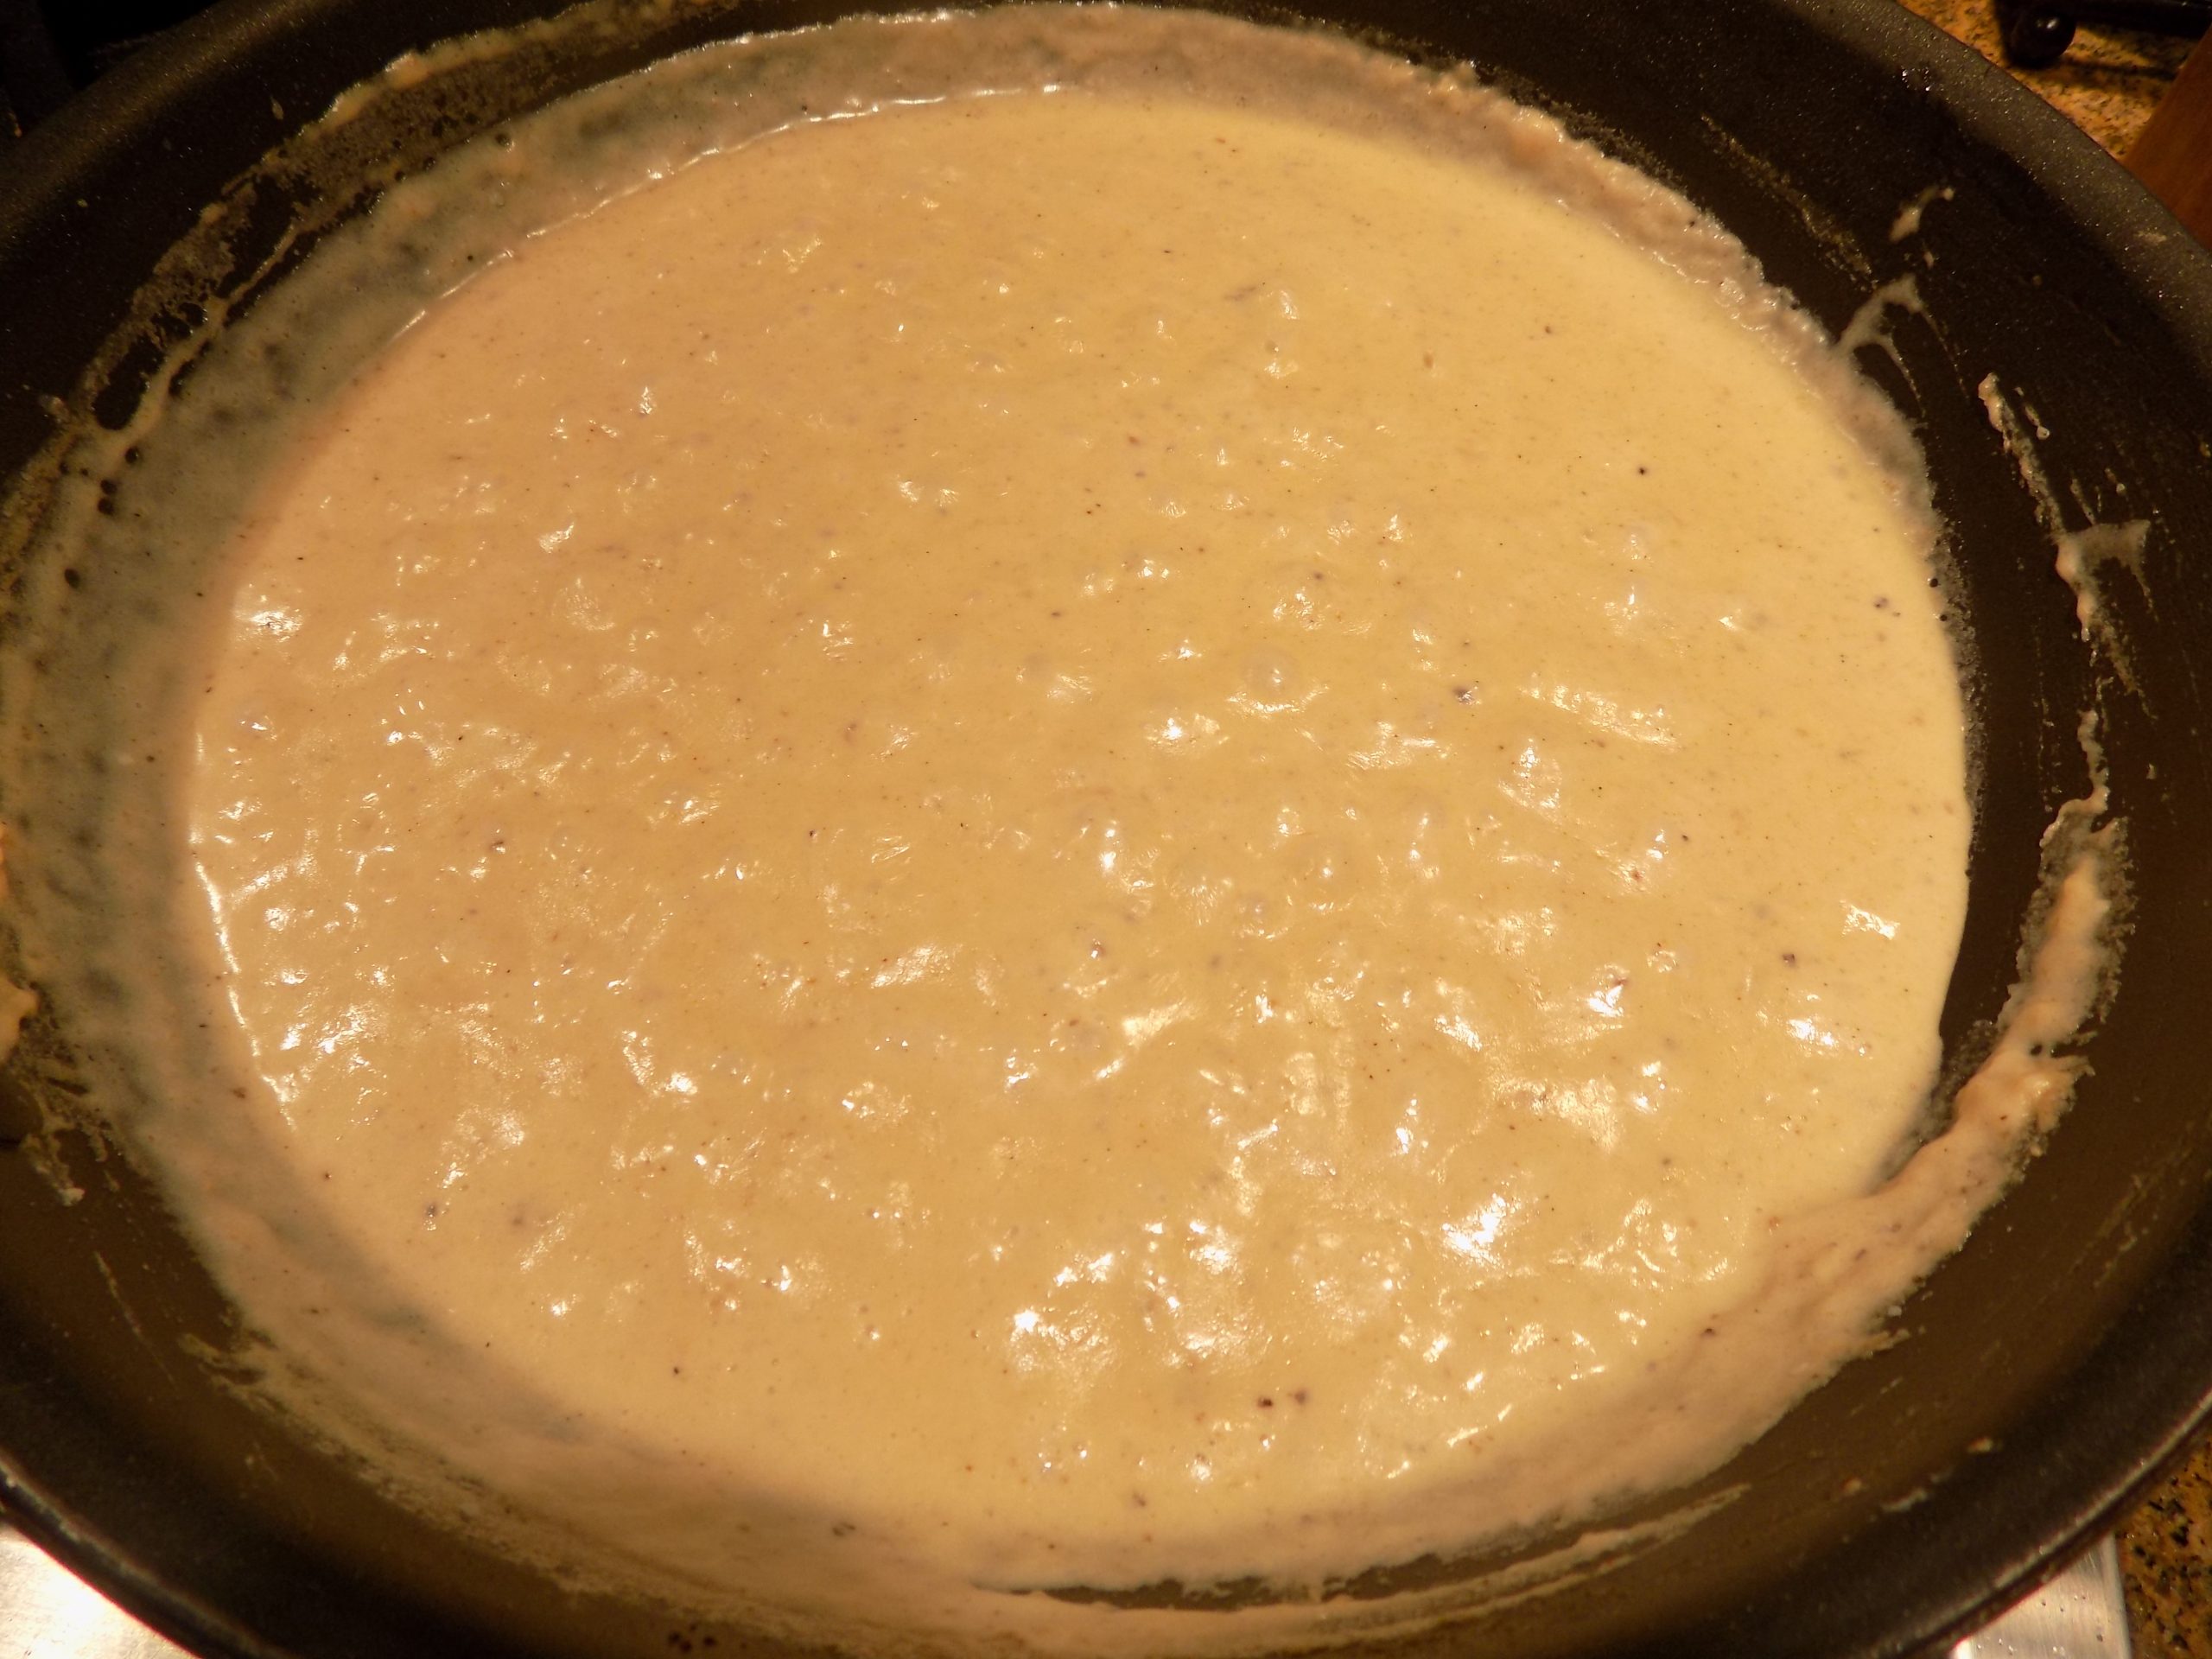
Pan Gravy
2 T. vegetable oil from frying the steaks
2 T. seasoned flour (from breading the steaks) or if none left, just regular flour
1½ c. whole milk
¼ c. heavy cream
seasoned salt, if more salt is required
freshly ground black pepper
Save about 2 tablespoons of the grease in your pan. Discard the rest. Do NOT scrape the skillet clean. You want all of those brown bits for added flavor in the gravy.
Over medium-low heat, whisk in the seasoned flour and continue whisking for two to three minutes or until the flour is nice and golden brown.
Slowly whisk in the milk and heavy cream and bring gravy to a simmer. Cook until the gravy is smooth and creamy, about 5 to 7 minutes. If the gravy gets too thick, add in a little more milk. Taste and add seasoned salt, if necessary, and lots of fresh ground pepper.
Serve the CFS with a drizzle of gravy and a side of Creamy and Savory Grits (recipe to follow in the next few days) or mashed potatoes. Add your favorite green veggie and dinner is served. A perfect comfort food dinner.
Please note: To re-heat leftover CVS, place on a low-sided baking pan fitted with a wire rack in a pre-heated 400-degree oven and bake for about 20 minutes. Remove from oven and let cool a couple of minutes before serving.
Do not microwave. The breading will get soggy and yicky. (And yes, yicky is a technical term used by culinary experts everywhere!)
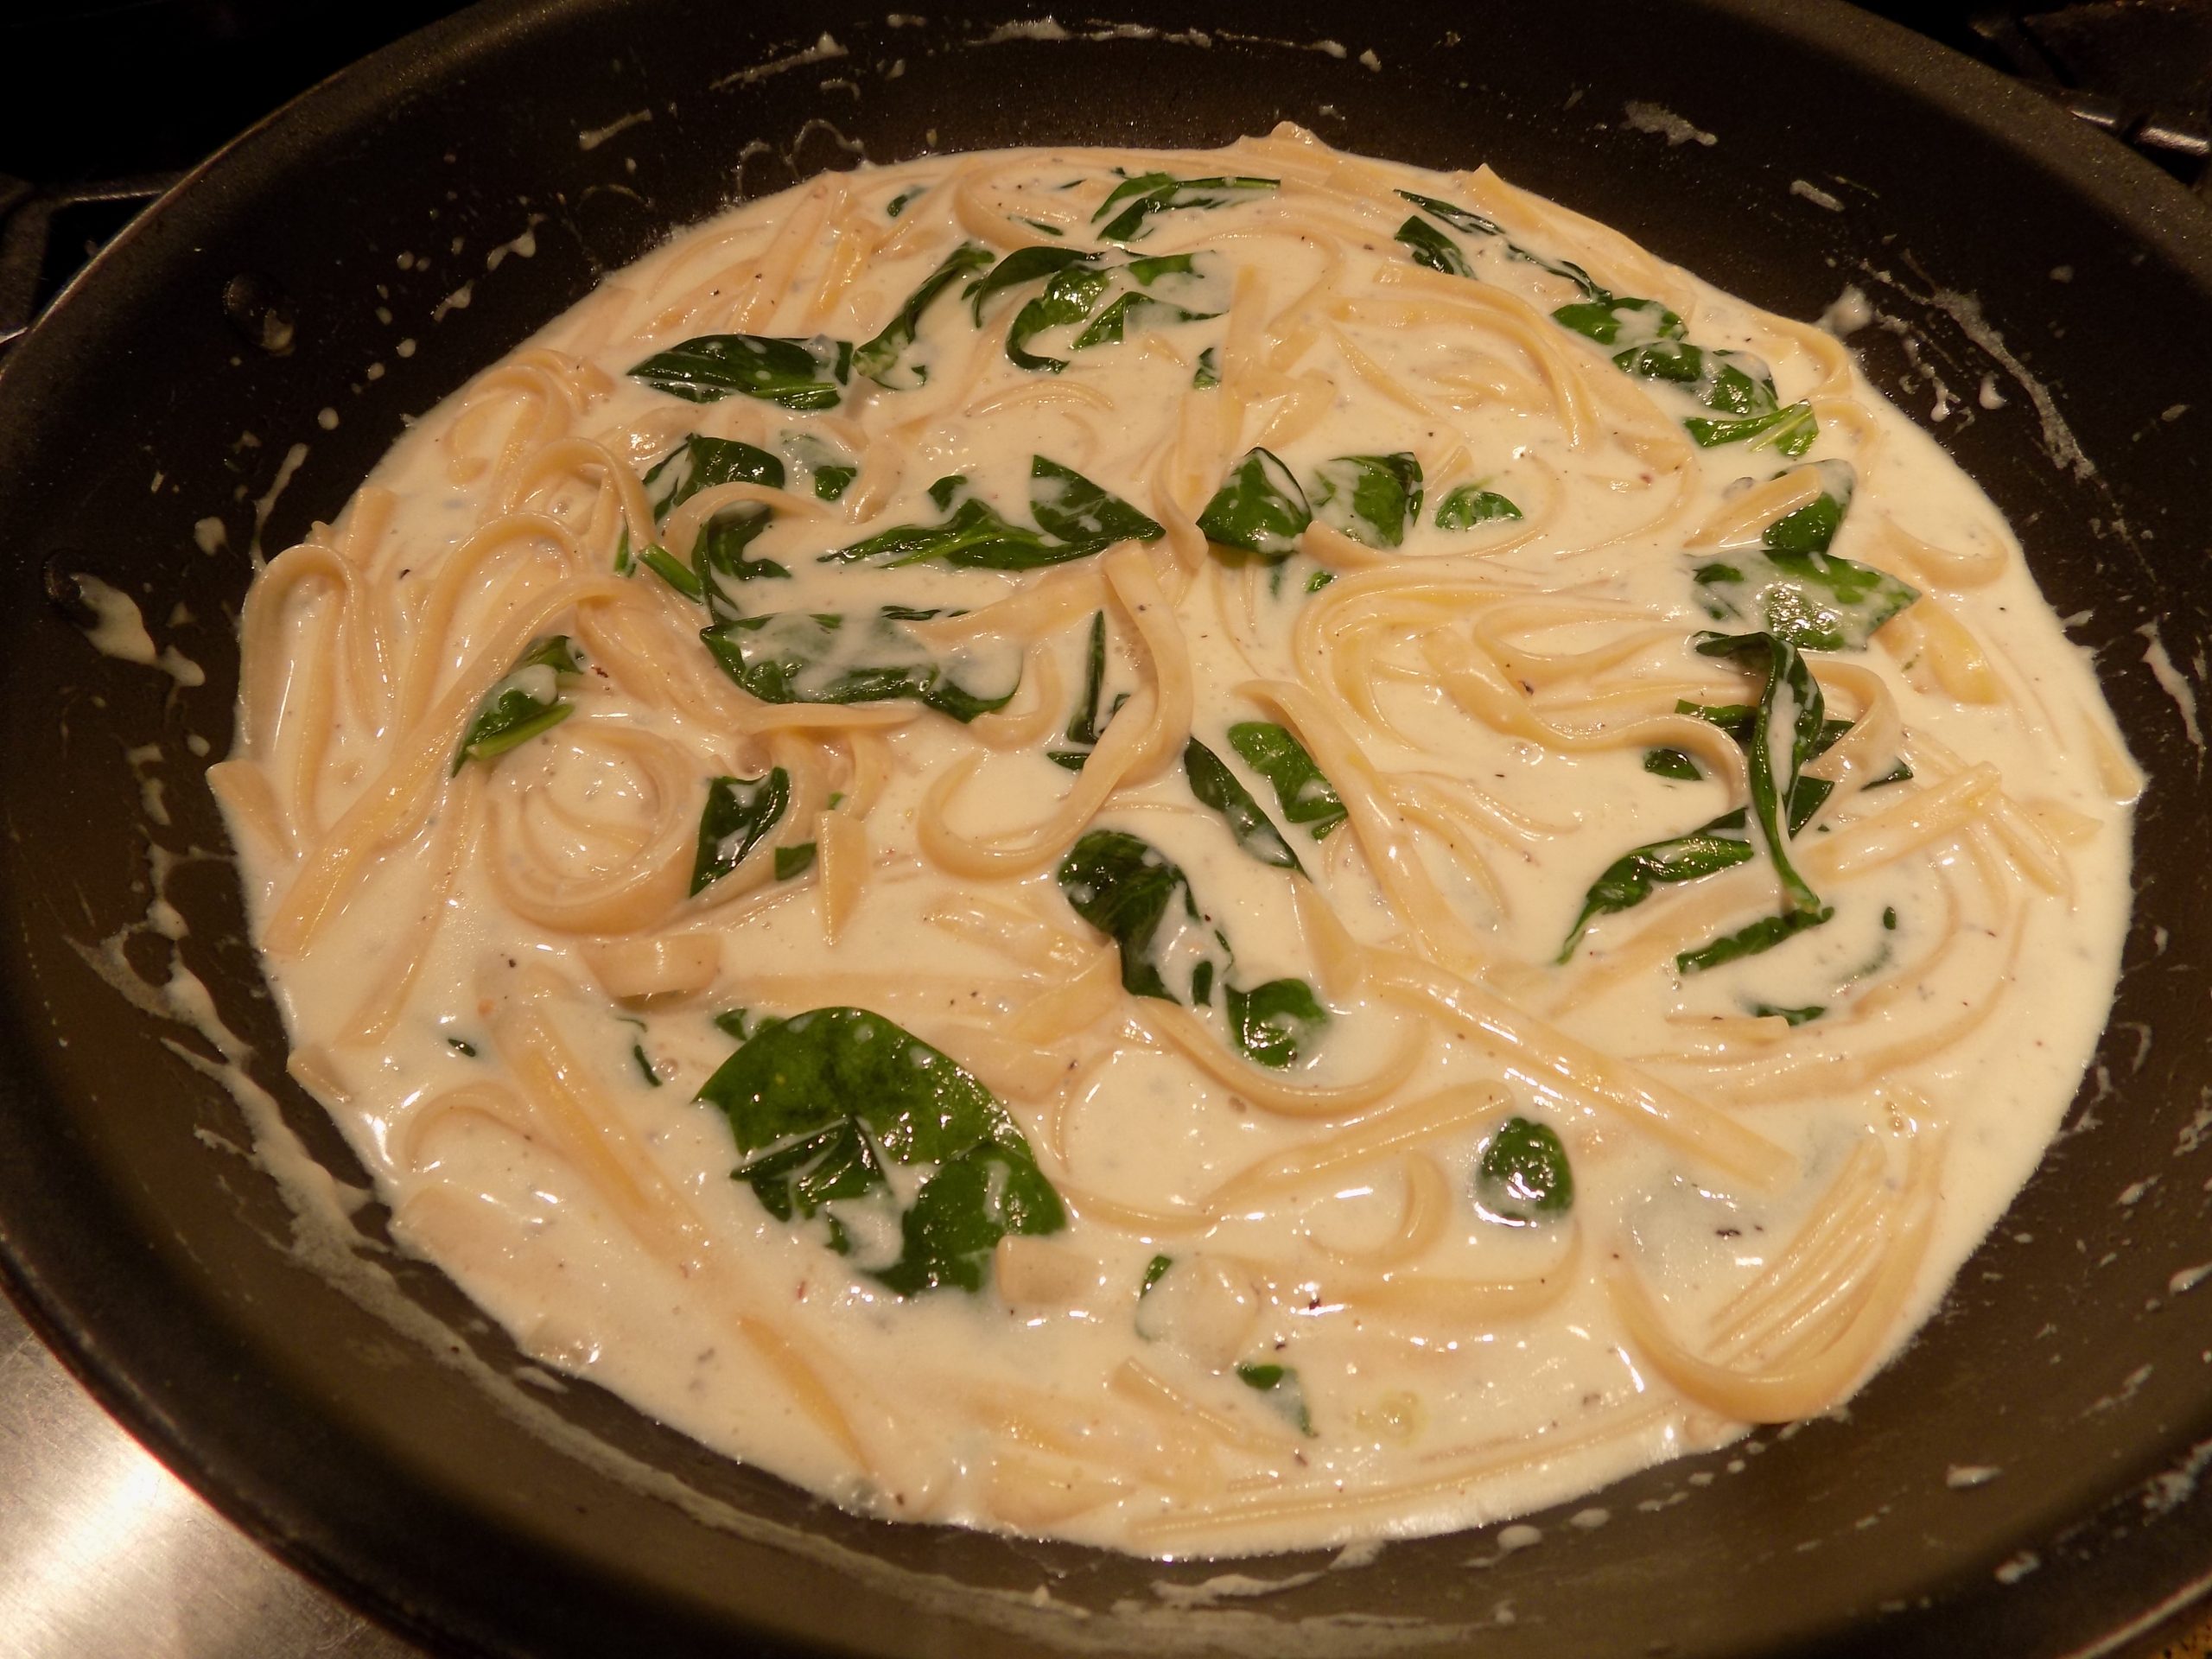
Yesterday I was in the mood for pasta. But not in the mood to spend long hours in the kitchen. I just wanted to prepare an easy and delicious creamy sauce that would lovingly encase perfectly cooked pasta. Not too much to ask, right?!?! But then came the dilemma. If I didn’t want to spend time hacking and slashing vegetables, or frying up meat, or even watching over a simmering pot, the dish had to be very, very simple.
I thought about making a simple mac and cheese, but that wasn’t quite what I was after. I wanted a dish that was a bit more decadent. But cheese definitely could be part of the equation. And then I remembered that I had a big old honkin’ tub of Gorgonzola cheese from Costco in my fridge. And ideas started formulating quicker that I could write them down.
I knew I didn’t have any heavy cream available, but then Gorgonzola cheese is already so very rich. Perhaps starting with a simple béchamel sauce would be the better choice regardless of whether or not I had heavy cream at my disposal. Then what else could I include in the sauce to add interest and possibly offset some of the richness? (I’ve eaten too many Gorgonzola sauces that became cloying after just a few bites.)
It just so happened that I had a bit of fresh baby spinach available, so now my plan was really coming together. But what kind of pasta to use?
I so dearly love plain old spaghetti, but I thought this yummy sauce might demand a bit more of a sophisticated partner. So, fettuccini immediately came to mind. And luckily, fettuccini was the perfect choice. Then it was only a matter of what to serve with the pasta. Salad. It had to be a simple salad consisting of lettuce with a fairly acidic dressing to offset the richness of the pasta. And it just so happened that I had recently found a recipe for Savory Italian Dressing (will post in the next couple of days) that I thought would totally fit my needs. So, I made the dressing and chopped up some romaine. Total time spent in the kitchen for both the pasta and salad – about 60 minutes. Yeah!
And I must say, the pasta was delicious. We ate every bit of it. And the salad was perfect. Crunchy from the romaine, and the dressing is one that I will be making over and over. Simple to prepare and so very flavorful. One of the best dressing I have ever tasted.
So, as always – stay safe, stay happy, and keep finding the joy in your life. It’s getting warmer outside and daylight is getting longer. Buds are appearing on trees. And while March may bluster and spit water at us, we know that Mother Earth is in her rejuvenating phase. And I for one am going to let Mother Nature take a crack at revitalizing me too. After all we have gone through in 2020 and what yet remains to be done to keep covid-19 under control, it feels to me like Spring could not have come at a better time.
Peace and love to all.
3 T. unsalted butter
1 T. flour
1 c. whole milk
1 c. Gorgonzola cheese crumbles
freshly ground black pepper
2 loosely packed c. fresh baby spinach
¼ c. finely grated Parmigiano-Reggiano
scant 8 oz. fettuccini pasta, cooked al dente (reserve cooking water)
Heat the butter in a 12-inch heavy skillet over moderate heat until foam subsides. Add the flour and cook for 1 minute. Add the milk and let burble away until the sauce starts to thicken. Remove from heat and stir in the Gorgonzola cheese until the sauce is smooth, about 2 minutes. Then stir in the black pepper and spinach. Place over low heat and add the al dente pasta and Parmesan cheese. Taste and adjust seasoning. Thin with reserved pasta water if necessary. Serve immediately.
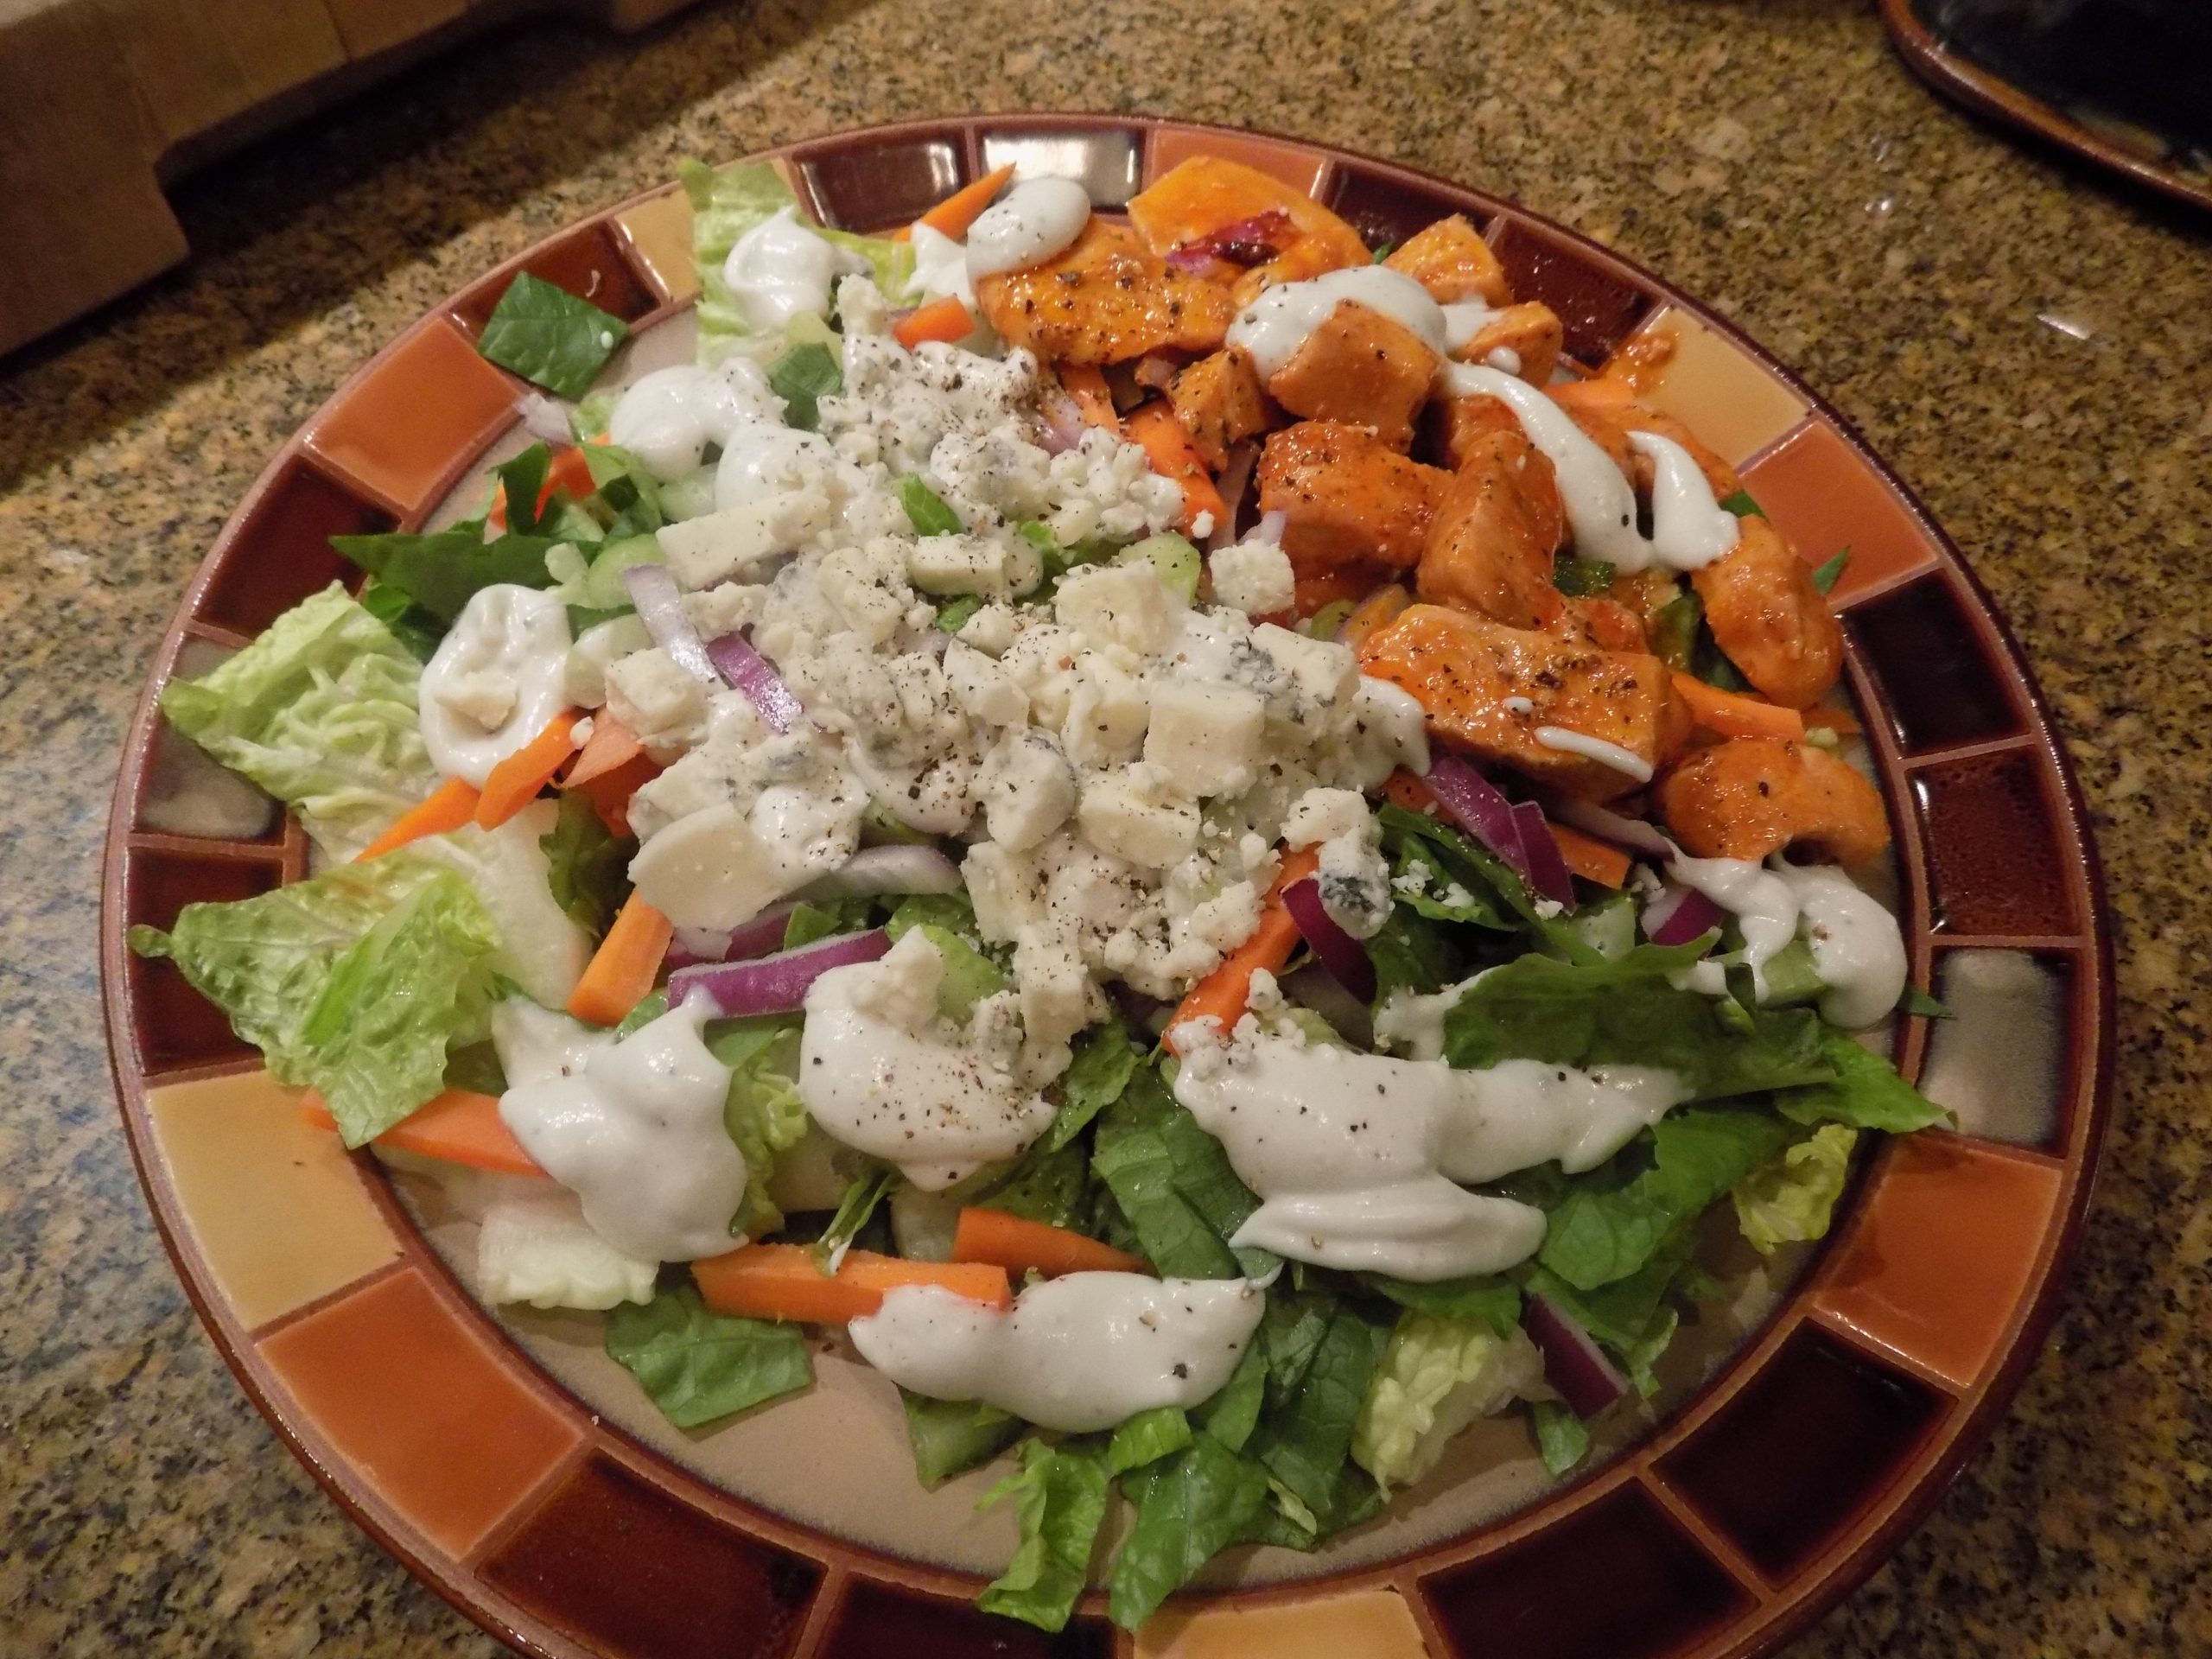
Any way you fix it, buffalo chicken is fabulous. I remember the first time I tasted Buffalo Wings (yes of course there’s a recipe on this site), I made a complete pig of myself. It was truly love at first bite. But over the years, as much as I enjoy wings, they are not the healthiest part of a chicken if you are paying even a modicum of attention to fat or protein content. So, as the resident cook and nutritionist here at Chez Carr, I felt obligated to try and make a healthier version of one of our favorite appetizers. And at the same time, turn it into an entrée. (I always love a good challenge.) Sometimes my plans work, sometimes not so much. But I still always endeavor to work towards the goal of healthy, nutritional, super tasty food.
So, with buffalo wings in mind (when are they not in mind), I decided to prepare a salad that would feature all the best parts of a buffalo wing appetizer plate. Of course there had to be carrots, celery, and blue cheese dressing. Absolutely mandatory! And, for the star of the show, chicken slathered in hot sauce. So, I took my wings recipe, massaged it a bit, and the rest as they say is history.
So, if you too are a buffalo wings lover, but feel guilty after you have eaten them, please allow me to help you rid yourself of any guilt. (Well, almost any guilt. There’s still the calories in the sauce and the blue cheese dressing to consider. But of course, some concessions must always be made for gastronomic integrity!)
As always, stay healthy, stay happy, and stay well fed. We who can appreciate truly delicious food are lucky. Whenever I see someone placing the likes of a box of ground beef helper or a dried potato mix in their grocery cart, I want to stop them and ask why they find this type of product acceptable? But then, I’ve had dear friends for 50 plus years who eat mediocre food because they are simply too lazy to go to any effort. So, I can only ascertain, that food is more important to some folks than others. But I certainly know where Mr. C. and I fall on that spectrum. And I feel thankful that not only do we both cherish good food, but that I am still able to prepare food that both of us can enjoy. It’s all about choices. And as long as I have an option, I’m going to prepare food that brings us both pleasure. (And if coincidentally it’s good (or better) for us, like the use of chicken breasts in this recipe, that’s just an added benefit!)
I closed the preface to my first self-published cookbook with the following words. I feel they are as true today as they were when I first wrote them. “When it comes to feeding my family and friends, nothing is too good for them. There is no better way for me to show them in how high a regard I hold them, than by serving well prepared food in an attractive manner.”
Peace and love to all.
For the Dressing:
½ c. mayonnaise
½ c. plain Greek yogurt
4 tsp. fresh lemon juice
pinch kosher salt
freshly ground black pepper (quite a bit)
1/8 tsp. granulated garlic
1 c. blue cheese crumbles (or more), plus some for garnish
milk
Combine the mayonnaise, yogurt, lemon juice, salt, pepper, and blue cheese in food processor or blender. Process until smooth and creamy. Add enough milk to reach desired consistency. Store in an airtight container in your refrigerator.
For the Chicken:
2 boneless, skinless chicken breasts, cut into bite sized pieces
kosher salt
freshly ground black pepper
granulated garlic
3 T. unsalted butter, melted
3 T. Frank’s Red Hot Sauce (no substitution allowed)
1 tsp. fresh lemon juice
Place chicken pieces on a lightly greased rimmed baking pan. Sprinkle with a bit of salt, pepper, and granulated garlic. Bake in a pre-heated 425-degree oven for 15-20 minutes or until the pieces are fully cooked. Meanwhile melt the butter in a medium sized bowl; add hot sauce and lemon juice.
When the chicken has finished baking, add to the bowl with hot sauce mixture and stir until well coated. Set aside to cool. (If you prepare the chicken ahead of time, remove from oven, add to sauce, cool, and refrigerate. When ready to serve, warm in microwave.)
For the Salad: (amount for 2 healthy appetites)
4-6 c. chopped romaine lettuce
½ c. thinly sliced carrot
½ c. thinly sliced celery
⅓ c. thinly sliced red onion
To serve the salad, first lay down a bed of lettuce. Then sprinkle on the carrot, celery, and red onion. Add the chicken to one area of the salad, then drizzle some of the dressing over all and garnish with a few blue cheese crumbles and a grind or two of black pepper. (You probably will have extra dressing. Lucky you!)
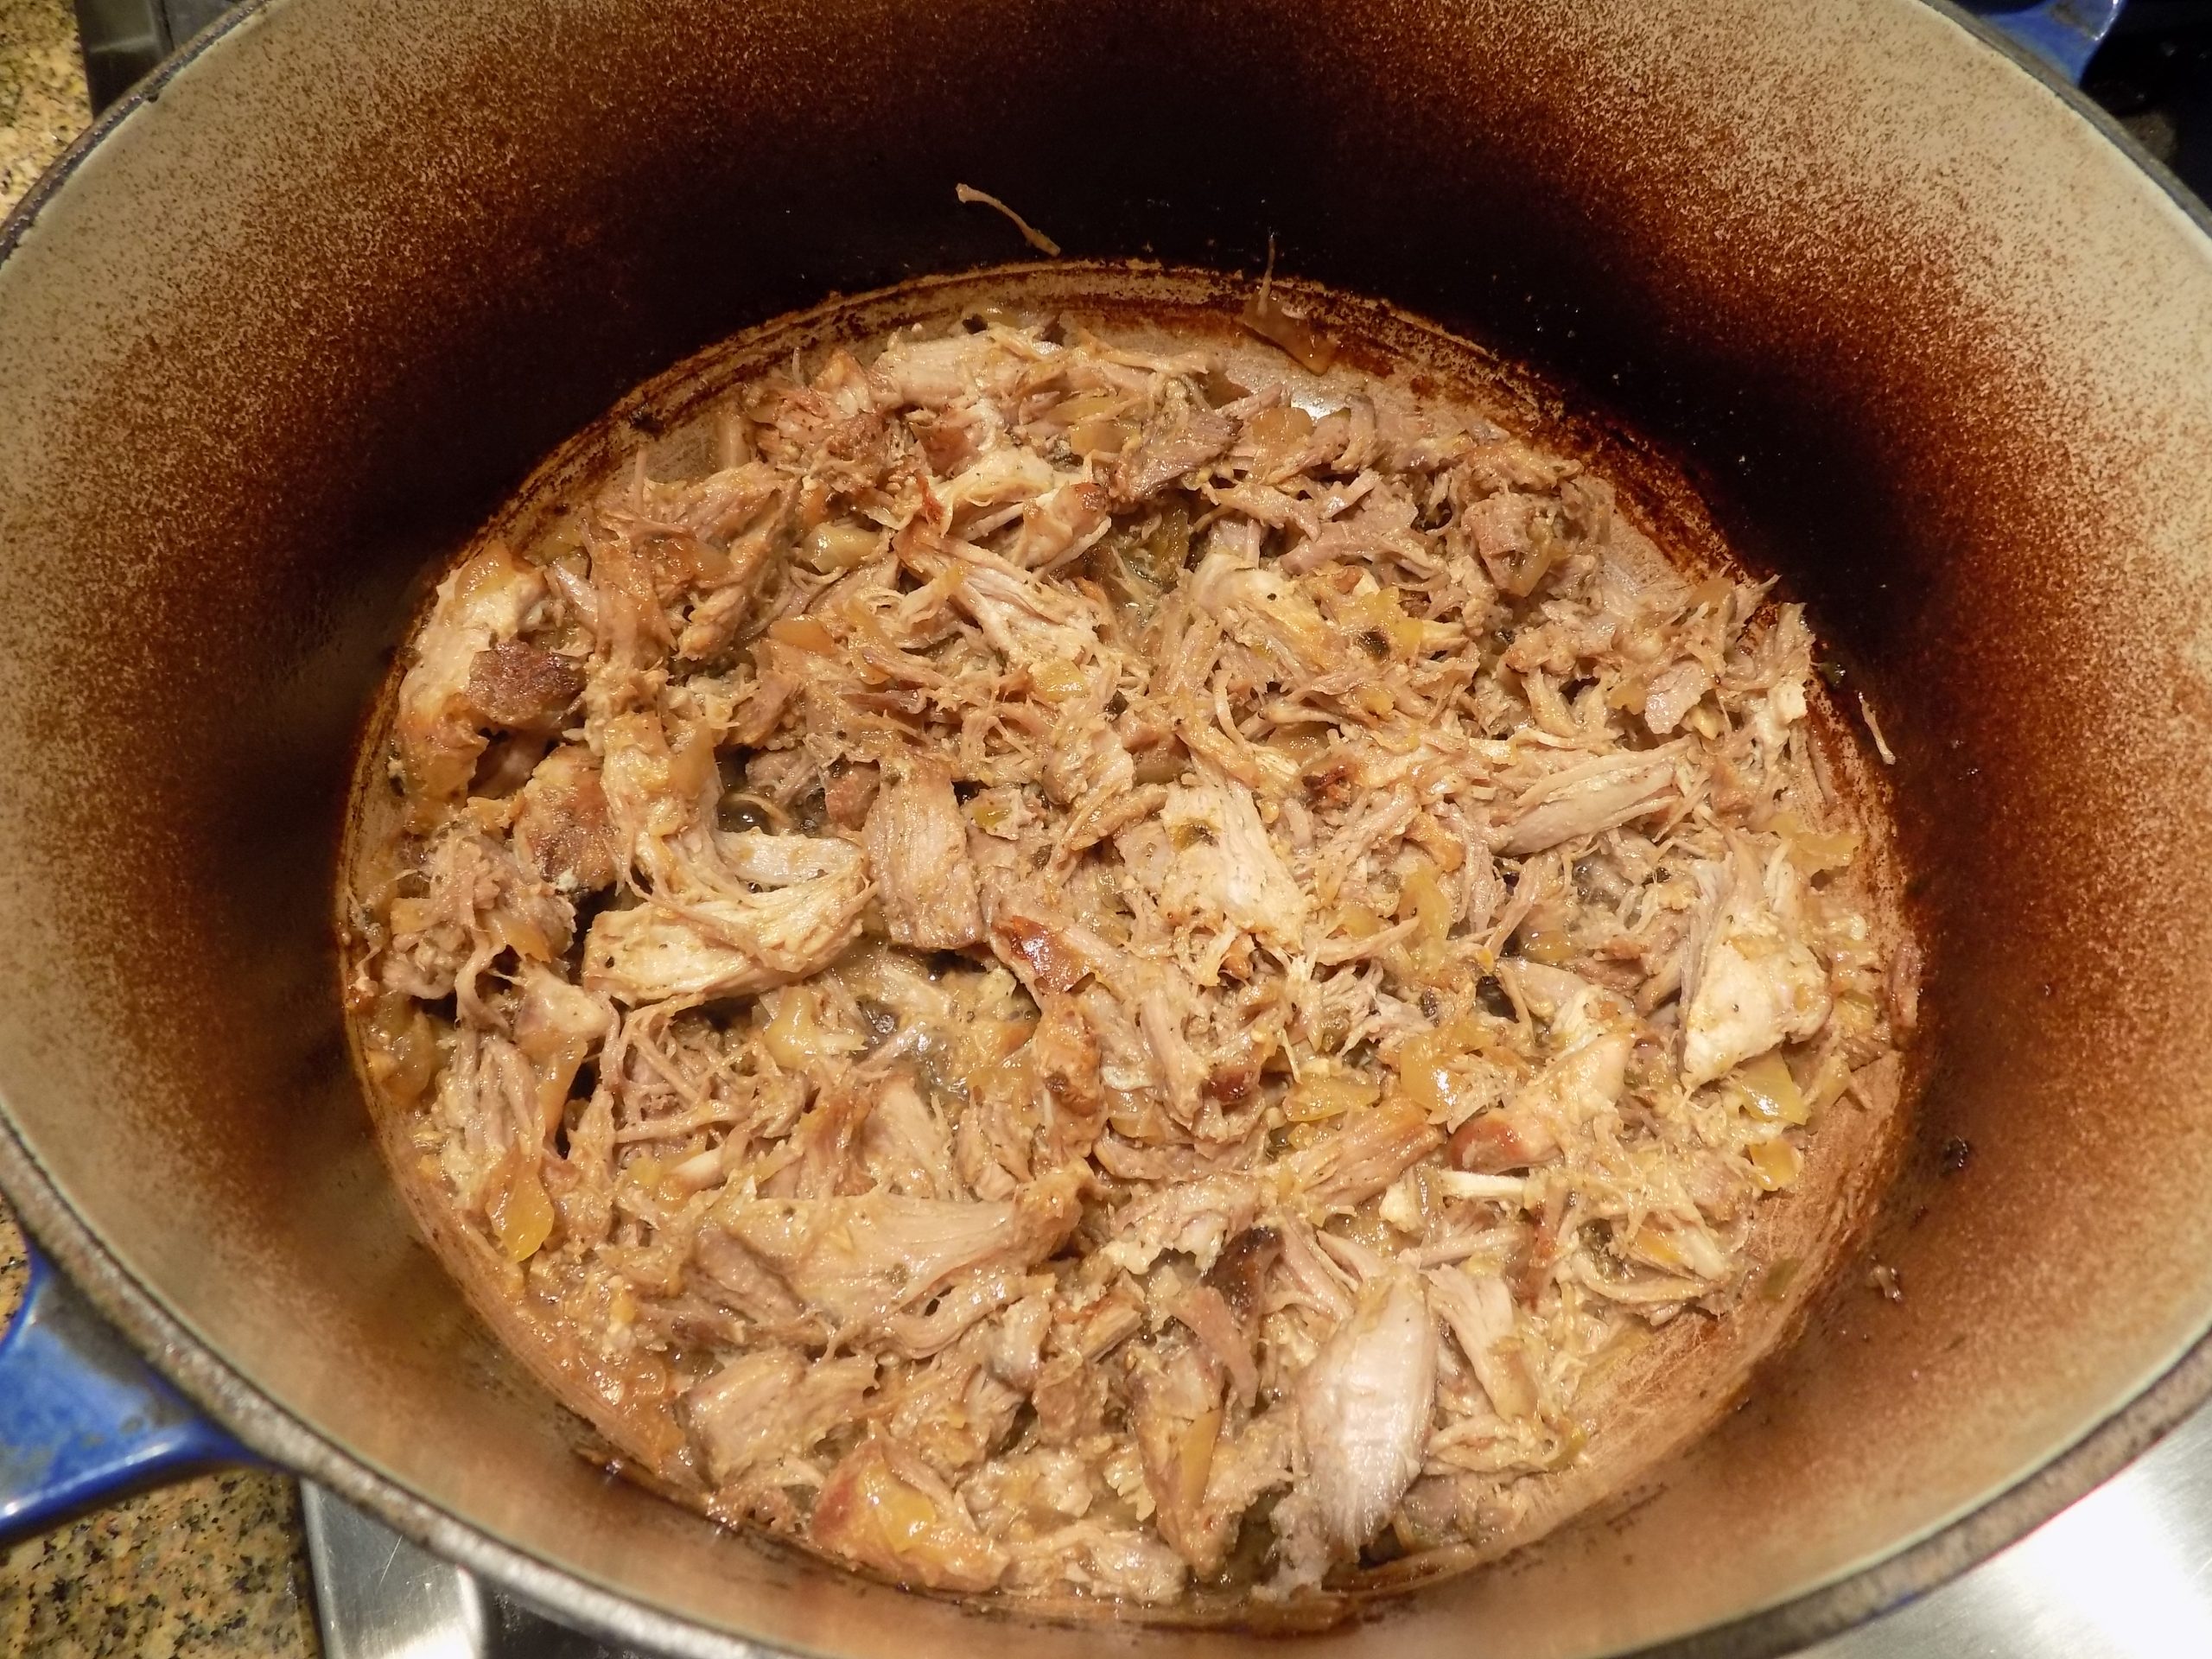
OK, I admit, the picture does not do the carnitas justice. But if there were any real justice anyway, someone would take my camera away from me. I give the whole “photography thing” a bad name!
For whatever reason, I had never made carnitas before yesterday. I had prepared pulled pork, but never pork carnitas. And I must say, I much prefer carnitas. Because unlike pulled pork, the meat is finished by roasting uncovered in the oven until all tender and brown with lovely crispy bits. Then removed from the pan, allowed to cool a bit, and shredded. Then returned to the pot and stirred into the remaining juice. So, in the end you have, tender, partially crisp, and very flavorful meat in sauce to use in any of your favorite Mexican recipes. Tacos, burritos, tamales, to name a few.
Last evening, I simply warmed some corn tortillas to hold the pork carnitas meat, then laid out homemade refried beans, diced avocado, finely chopped tomato, shredded cheese, sour cream, and a mild red salsa. Yum! And the beautiful part, I had spent hardly any prep time on this fabulous way to use a fairly inexpensive cut of pork. Well, the prep time was insignificant, but the time in the oven would preclude this being a great weekday recipe for any person getting home after 2:00 in the afternoon. Because the total time in the oven is at least 3 hours.
However, the good news is that the cook doesn’t have to babysit the pork while it’s in the oven. So, this is a great recipe for a Saturday or Sunday evening, or whatever day of the week you are off work.
And oh my gosh, pork is so delicious fixed this way. The smell alone emanating from your oven is worth any effort expended on this dish. And while the pork is braising/roasting away, all you wonderful cooks out there will be free to attend to other household duties. Such as cleaning your house, doing loads of laundry, hunting and gathering groceries, providing assistance with your kid’s homework, gardening, and my personal favorite – chauffeuring your kidlets all over God’s creation! (And yes, I still have vague memories of weekends when my kids were young. But a lot of my time spent being a mommy to young children and keeping a household running remain a blur, which I fervently hope will solidify as I get old. OK, get even older! Because I would really like to remember a bit more about those very busy years of my life!) (And I know, be careful what you wish for!)
Anyway, take it from me, this dish from the recipetineats.com site is one you most assuredly should make at your earliest convenience. Your family will love it. And it’s absolutely guest worthy. Perfect for a taco party. (When we can once again welcome guests into our homes, that is!)
So, as always, be adventurous in your kitchen, laugh out loud whenever the mood strikes, and cherish the time you spend with your family. They may drive you bat poop crazy some days, but those days will be long gone sooner than you can even begin to imagine.
Peace and love to all.
2 tsp. extra virgin olive oil
1 tsp. kosher salt
freshly ground black pepper
2 tsp. dried oregano
1 tsp. ground cumin
2½ lb. boneless, skinless pork shoulder, trimmed of as much fat as possible
½ onion , chopped
½ jalapeño, seeded, deveined and finely chopped
2 cloves garlic, minced
½ c. orange juice
1½ c. water
Combine the olive oil, salt, pepper, oregano, and cumin. Rinse and dry the pork, then rub all over with olive oil mixture.
Place the pork in a Dutch oven or covered roasting pan. Surround the meat with the onion, jalapeño, minced garlic, orange juice, and water.
Cover and braise the meat in a pre-heated 325-degree oven for 2 hours. Uncover and continue roasting for another 60-90 minutes. During this time, the liquid will reduce considerably, and the meat will become brown and crisp. (Check after 60 minutes.) Add additional water if required. (You want to end up with very tender, partially crispy brown meat, and a scant cup of liquid.)
Remove meat to a platter, let cool slightly, then shred using two forks. Discard any fat. Add the meat back to the pot and stir to combine with the remaining liquid. Use in any of your favorite recipes.
Easy way to warm corn tortillas:
Wrap a stack of tortillas (five or fewer) in aluminum foil and heat at 350-degrees for 15 to 20 minutes.
I wish the pink in this picture of the evening sky was as vivid as what we experienced first hand the other evening. It still amazes me after living on Camano Island for 12 plus years, to see masses of clouds over the mainland. And clear skies overhead and to the West. So the setting sun often brightens up the clouds like this. It’s a wonderful world folks. And watching the beauty of nature is a gift we can all share.