Category Archives: MAIN DISH RECIPES

CREAMY SHRIMP AND BROCCOLI FETTUCCINI (reduced fat)

I don’t have a sweet tooth. I have a creamy tooth. Or should I say, creamy teeth! If it has a cream sauce, I will eat just about anything. OK, I draw the line at creamed Spam, eel, chitlins, Rocky Mountain oysters, or other ingredients of that ilk. But that’s about it!

But true cream sauces are not good for us. So, I must cheat. I am forced, by my desire to keep us healthy, to achieve that lovely smooth creamy taste and consistency we so admire by substituting highly caloric ingredients with those that are less caloric. Not an easy feat my friends. But definitely one worth pursuing.

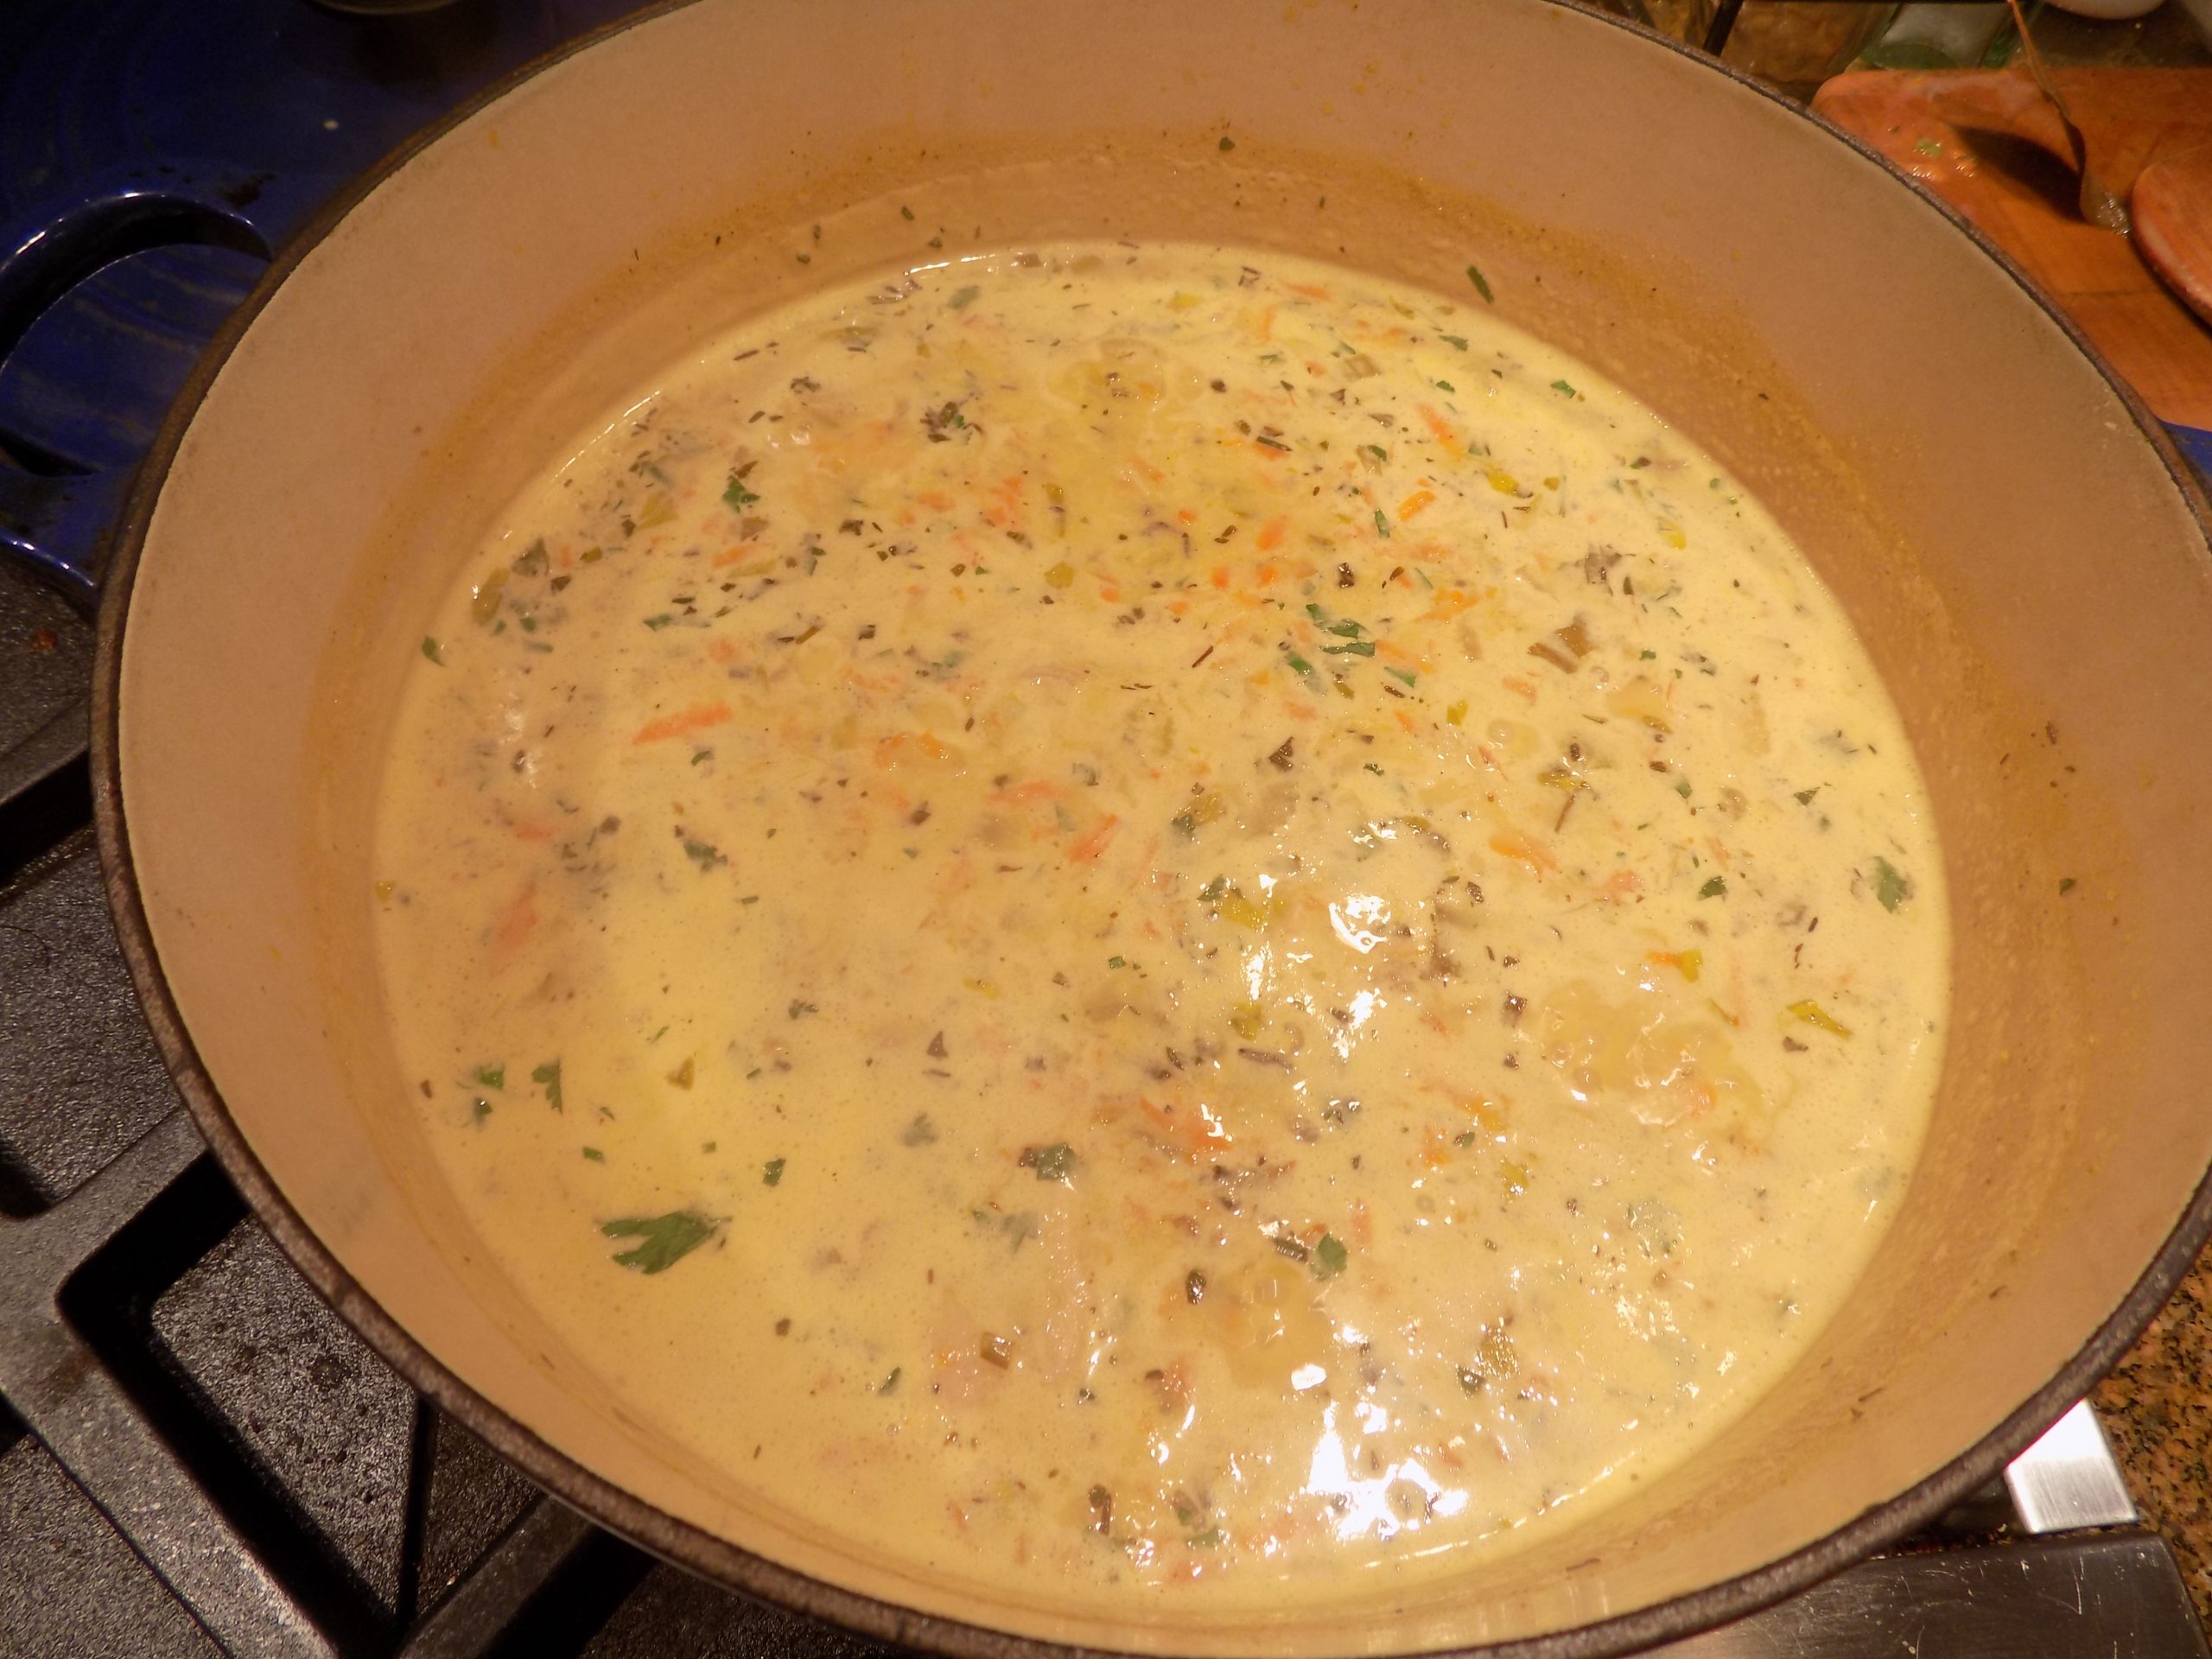
Now at first glance, this recipe might scare you because there is still some butter and cheese in the recipe. But if you consider the amount of cream, butter, and cheese in a regular alfredo sauce, you should feel significantly relieved by the substitutions I have made in this recipe. And regardless of the fact that this sauce is basically a fake alfredo sauce, it is still absolutely delicious. That creamy flavor and texture we all adore is still there.   

But, in truth, no cream sauce is ever going to be as healthy as say, a simple tomato-based sauce which has roughly 55 calories, 1 gram of fat, and 280 milligrams of sodium per ½ cup serving. Whereas a true alfredo sauce has about 275 calories, 28 grams of fat, and 145 milligrams of sodium per serving. But there are just some dishes I am unwilling to live without. And a creamy pasta dish like this one is just one of those dishes.

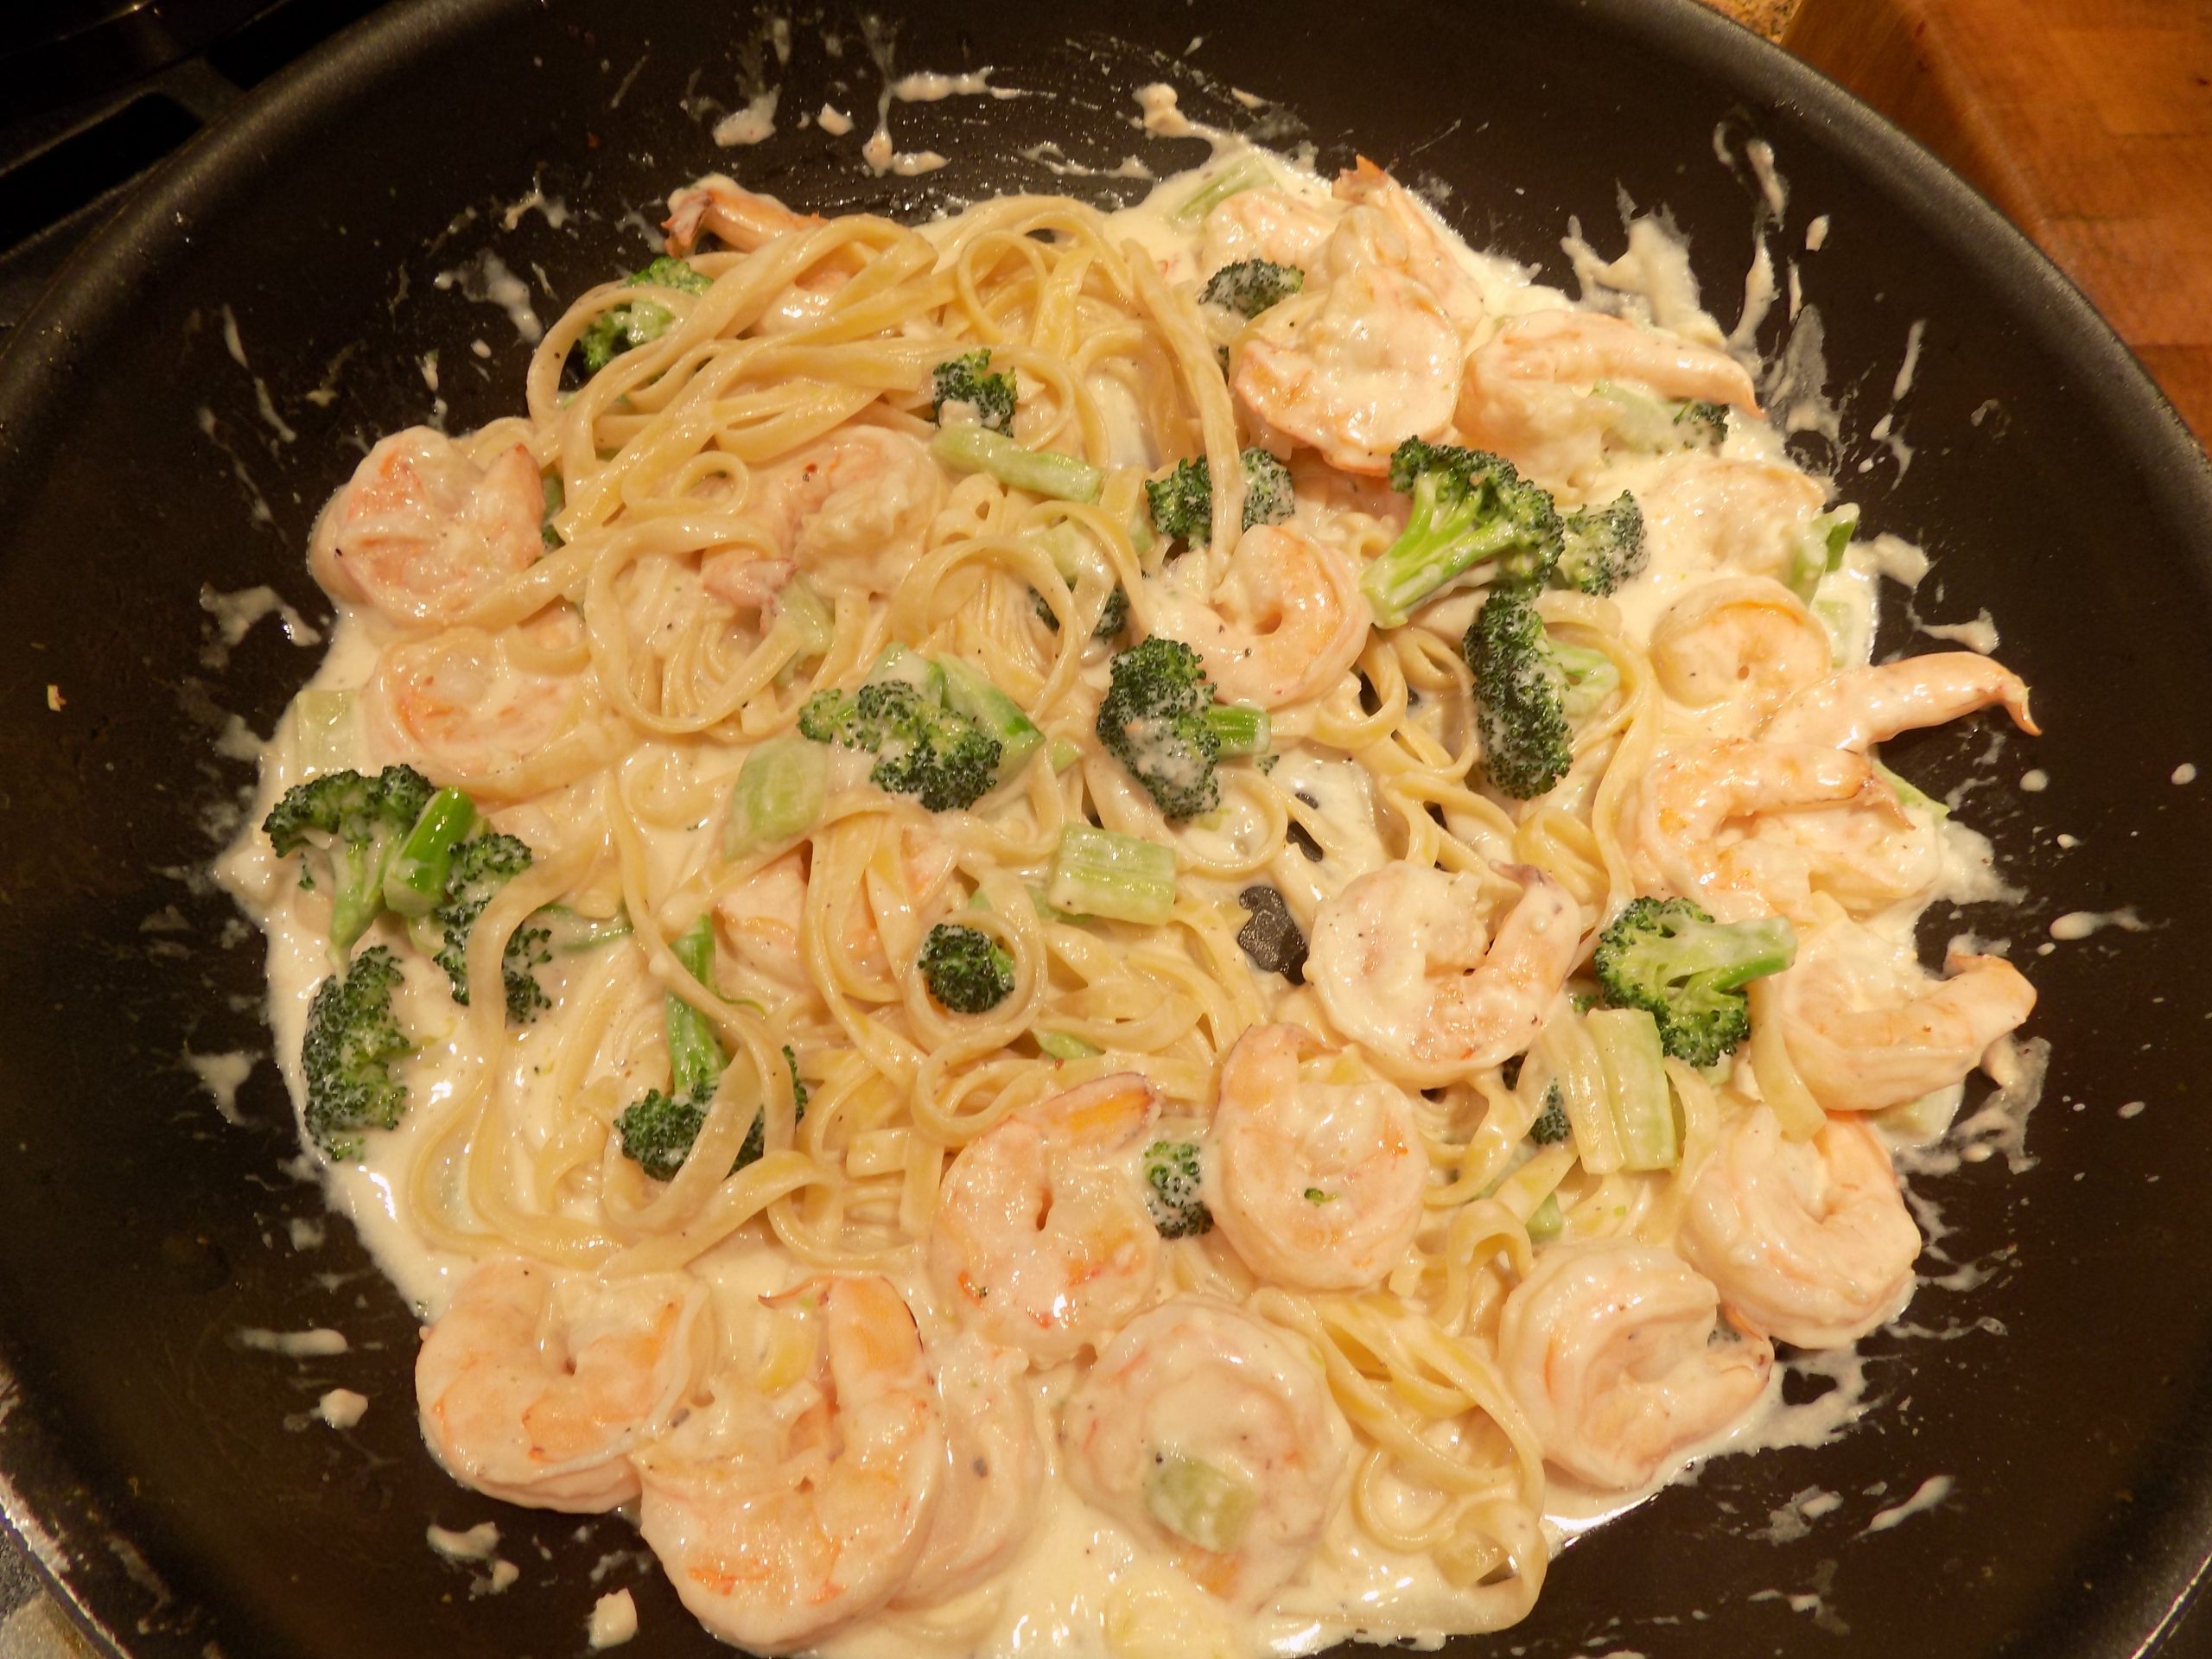
So, if you too love shrimp and broccoli in a creamy sauce with pasta, this is the dish for you. Not too much sauce. Not too much pasta. Just the right amount of everything.

Well, it’s Thursday here on Camano Island. Nothing planned for the day but posting this recipe, researching recipes, and planning what to fix for dinner. Of course, I could do a little housework, but that seems too productive for such a mellow day. So, I think I’ll read a while this afternoon, do some more planning for our September trailer trip, and generally take it easy. With omicron still running amuck, this forced confinement is getting a bit old. But I would still rather be safe than sick. So, I basically stay home as much as possible. And yes, I know, the best laid plans of mice and men often go awry. (You can’t live to my ripe old age and not know first-hand the truth contained in that statement.) But I am willing to stay home if it helps keep me and others from contracting this terrible disease. I just feel blessed to have a home. A place to stay warm, sleep, eat, and stay healthy. My wish is that everyone else was as lucky.

Peace and love to all.

1 T. extra virgin olive oil

2 c. small bite-sized pieces of fresh broccoli (florets and peeled stems)

5 cloves garlic, finely minced

¼ tsp. kosher salt

freshly ground black pepper

tiny pinch crushed red pepper flakes 

1 lb. lg. uncooked shrimp (peeled and deveined)

2 T. dry white wine

1 T. unsalted butter

1 T. flour

1½ c. milk

2 oz. cream cheese 

½ c. freshly grated Parmesan, plus more for passing  

6-oz. fettuccini pasta, cooked al dente (save some of the pasta water)

Heat the olive oil in a large fry pan. Add the broccoli and sauté for 2-3 minutes. (Broccoli should still be crisp.) Add the garlic, salt, pepper, and crushed red pepper flakes. Cook for 1 minute. Remove broccoli mixture from pan and place in a bowl.

In the same frying pan, over medium heat, cook the shrimp until they are pink. Remove from pan and add to the bowl with the broccoli. Pour wine into the pan and cook until just a whisper of liquid remains. Add the tablespoon of butter and the flour. Whisk together and cook for about a minute.  

Gradually whisk in the milk, and cook over low heat, whisking constantly, until sauce is very slightly thickened. Stir in the cream cheese and whisk until the cream cheese is lump free. Stir in the Parmesan. Taste and adjust seasoning.

Add the broccoli and shrimp to the pan. Then gently toss in the al dente pasta until it is well coated with sauce. (Add a bit of pasta water if the sauce is too thick.) 

Serve immediately. Pass additional Parmesan at table.


VEGETARIAN LENTIL SOUP

OK, I know. Most lentil soups are vegetarian. But I felt compelled to make certain, right from the onset, that you knew that this soup contained no meat or meat products. Mainly because most of the main dish recipes I post contain meat as the primary protein. But not this recipe. Lentils are the protein star of this show. And in fact, according bbcgoodfood.com “Lentils are a rich source of protein making them a great alternative to meat or fish. As much as a third of the calories from lentils comes from protein, which makes lentils the third highest in protein, by weight, of any legume or nut”. 

In addition to the lentils being super good for us, all the veggie action happening in this soup makes it a very healthy, high fiber choice to serve for lunch or dinner. Plus, it tastes really, really good. Of course, I can never leave well enough alone. I had to bake some cornbread to go with the soup. But the cornbread – Classic Buttermilk Cornbread (recipe to be posted in the near future) contains no added sugar. So, at least I get points for serving my new recipe for cornbread in place of some of our other favorites containing sugar. (Mr. C. and I both loved the cornbread. Plus, it was darned easy to build. As was the soup BTW.)  

So, if you too love a great bowl of lentil soup, give my version of a recipe I found on the cookieandkate.com site a try. (Great site BTW.) And, trust me, you will not miss meat in the least when you savor the wonderful flavor and heartiness of this soup. And as far as serving this healthy soup with cornbread, well, life is short my friends. And good food is one of life’s greatest pleasures. So, if I stick to the old aphorism “all things in moderation”, serving a modest sized piece of cornbread along with the soup is well within reason! (My story, and I’m sticking to it!)

Peace and love to all.

¼ c. extra virgin olive oil

1 med. onion, chopped

2 carrots, diced

2 stalks celery, diced

4 garlic cloves, finely minced

2 tsp. ground cumin

2 tsp. curry powder

½ tsp. dried thyme

1 tsp. seasoned salt

pinch crushed red pepper flakes

freshly ground black pepper

1 (14-oz.) can tomatoes (Italian preferably)

6 c. water

2 T. vegetable base (I use Better Than Bouillon Vegetable Base)

1 c. brown or green lentils, rinsed and picked over

2 c. chopped fresh spinach, collard greens, or kale

2 T. fresh lemon juice, or more to taste

crumbled feta cheese, opt.

Heat the olive oil in a large covered Dutch oven or pot over medium heat. Add the onion, carrot, and celery. Cook, stirring often, until the onion has softened and is turning translucent, about 5 minutes.

Add the garlic, cumin, curry powder, thyme, seasoned salt, crushed red pepper flakes, and lots of black pepper. Cook for 1 minute. Add the canned tomatoes, breaking up any large chunks (if any), and cook for a few more minutes. Stir in the water and vegetable base.

Bring to a boil, cover the pot, and reduce the heat to maintain a gentle simmer. Simmer for about 30 minutes. Add the lentils, and cook for 30 to 40 minutes, or until the lentils are tender but still hold their shape.

Add the chopped greens and cook for about a minute. Remove from heat and stir in the lemon juice. Taste and adjust seasoning, including more curry powder if you are a true curry lover.  

Great topped with a bit of crumbled feta.


CREAMY LEFTOVER TURKEY AND WILD RICE SOUP

OK, I don’t know about your household, but in this house my husband pays attention to what is in our freezer. Now I know that sounds strange, so allow me to elaborate.

We have a two-story house. The bottom level includes a two-car garage (including a second refrigerator/freezer combination), a work room, a storage room, a utility room (where the freezer lives), a big closet under the stairs, and a wine cellar. And most of the time, Mr. C. is the one who visits the basement on a regular basis. So, while he is downstairs doing “whatever”, I often ask him to bring up items from the freezer. And since we only have a stand-alone refrigerator in the kitchen, his visitations to our freezer is almost a daily occurrence. Therefore, Mr. C. knows what’s in our freezer much better than I. (We do have a stand-alone ice maker in our pantry adjacent to the kitchen, because, well, doing without a ready source for ice cubes would be inconceivable.)

So, yesterday morning, I mentioned that I had no idea what I was going to prepare for dinner. He hastily reminded me that there was one lone package of leftover turkey that probably should be used in the very near future. I had already been thinking of some kind of soup to serve for dinner, so I very sweetly asked him if he would retrieve the leftover turkey the next time he found a need to visit the basement. 

But I wasn’t quite in the mood for my regular standby Turkey Noodle Soup. (But I assure you, it is also a delicious way to use leftover turkey.) I was simply in the mood for something creamy. (When am I not in the mood for something creamy?) Anyway, I found this recipe (with a few adaptations by yours truly) on thefoodcharlatan.com site. And I must say, this is one of the best soups I have ever tasted. Absolutely delicious. And no, I am not going to wait to make this soup again until I have leftover turkey. I may actually buy a turkey breast next time I go to the grocery store just so that I have turkey meat available when I want to have this soup again for dinner. Like next week. It is just that good!

So, I hope you give this soup a try. It’s easy to prepare, includes every day ingredients, and is relatively inexpensive to produce. What more could you ask?

Peace and love and hot soup to all.

8 c. chicken broth, divided

½ c. wild rice*

pinch kosher salt

5 T. unsalted butter, room temperature, divided

1 lg. onion, chopped

1½ c. chopped celery (including leaves)

2 c. shredded carrot

3 garlic cloves, finely minced

1 tsp. seasoned salt

freshly ground black pepper

1 tsp. dried poultry seasoning

1 tsp. dried thyme

1 bay leaf

2-4 c. chopped leftover cooked turkey (a mixture of dark and white meat if possible)

3 T. unbleached all-purpose flour

¾ c. heavy cream, half & half, or even whole milk

2 T. fresh lemon juice

1 T. chopped fresh parsley, plus more for garnish

1½ tsp. finely chopped fresh sage

½ tsp. finely chopped fresh rosemary

In a small, covered saucepan, bring 2 cups of the chicken stock to a boil. Stir in the wild rice and pinch of salt. Reduce heat to low, cover the pan, and simmer for 55-60 minutes or until the rice is tender. Remove from heat and set aside.

Meanwhile, in a large stock pot, melt 2 tablespoons of the butter over medium heat. Add the onion and celery. Cook until the onion is translucent. Add the shredded carrot and garlic; cook for 1 minute. Then add the seasoned salt, black pepper, poultry seasoning, dried thyme, bay leaf, and remaining 6 cups of chicken stock.

Bring to a boil, reduce heat, and simmer for 30 minutes or until the shredded carrot is tender.

Add the turkey and cooked rice. Bring to a boil. While the soup comes to a boil, mush the remaining 3 tablespoons of butter together with the flour. Gradually stir the semi-Beurre manié** into the soup.

When the soup thickens a bit, add the heavy cream, lemon juice, parsley, sage, and rosemary. Bring back to a boil, remove from heat, taste, adjust seasoning, and discard the bay leaf.

Serve garnished with chopped parsley or herb(s) of choice.  

*Despite its name, wild rice is not rice at all. It is the seed of an aquatic grass like rice, but it is not directly related. Wild rice grows naturally in shallow freshwater marshes and along the shores of streams and lakes.  It is only referred to as “rice” because it looks and cooks like real rice. Wild Rice is rich in antioxidants and is considered a healthy option to white rice. The low calorie and high nutrient contents make wild rice a nutrient-dense food. It’s a very impressive source of minerals and a great plant-based protein source.  

**I call it semi-Beurre manié, because true Beurre manié is equal parts butter and flour. And for those who are unfamiliar with the term, Beurre manié (French “kneaded butter”) is a dough, consisting of equal parts of soft butter and flour, used to thicken soups and sauces. By kneading the flour and butter together, the flour particles are coated in butter, resulting in no nasty little flour lumps in your perfectly prepared soup or sauce. And as far as the butter part? Well, everything tastes better with a bit of butter.


ITALIAN SAUSAGE PASTA WITH ROASTED RED PEPPERS AND MOZZARELLA CHEESE

Well, once again laziness and frugality paid off here at Chez Carr.

I had a couple of left-over Italian dinner sausages, half a jar of Cento brand roasted red and yellow peppers, and a couple of cups of shredded mozzarella cheese in the fridge that either needed to be used or added to the yard waste barrel. (And no, they were neither engulfed in blue fur or too far gone to use safely. Just great ingredients that really should be used before they went bad.) So, what immediately sprang to mind was a pasta dish. (Unfortunately, pasta is never far from what’s on my mind, but that’s a discussion for another day.)

So, I decided a quick and easy “lasagna like” casserole for a lazy Saturday evening meal would be perfect.

Starting with my old standby marinara recipe, I deleted a couple of ingredients, added a couple of others, and came up with what you see written below. And OMG, for the brief time I spent on this dish, it tasted like I had spent hours slaving over its preparation. Plus, I got to use part of a package of strozzapreti pasta in the process. Which BTW, we discovered we really liked. (I had been a bit reluctant to try it because A) it is hard to find in our part of the world, B) I thought it might be difficult to eat, and C) because I’d purchased it two or three years ago and it might no longer be good.) Well, not only was it still good; it was absolutely delicious. And my hesitation about the shape making it hard to eat; completely unfounded. Of course, I did break the roughly 3-inch pieces in thirds, which significantly reduced any chance of choking. (Read about the history of strozzapreti below.)

So, if you too love a pasta casserole, give this recipe a try. And don’t be afraid of using fennel seed. After all, it’s what makes Italian sausage so delightfully delicious. Stay safe everyone. And peace and love to all.

3 T. extra virgin olive oil, divided

½-1 lb. Italian dinner sausage, cut into thin slices (or bulk Italian sausage)

½ med. onion, chopped

4 garlic cloves, finely minced

1 (28-oz.) can chopped or diced tomatoes (Italian tomatoes preferably)

1 c. chopped roasted red/yellow peppers (Cento brand is amazing)

1 bay leaf

pinch crushed red pepper flakes

1½ tsp. dried oregano (I use Mexican oregano)

1½ tsp. ground fennel seed

½ tsp. kosher salt

freshly ground black pepper

6 oz. strozzapreti*, gemelli, or fusilli pasta – cooked al dente

2 generous c. shredded mozzarella cheese, divided

In a large fry pan, heat 1 tablespoon of the olive oil. Add the sliced Italian sausage and cook until the sausage is nicely browned on both sides. Remove from heat and set aside.

In a medium sized heavy covered pan, heat the remaining 2 tablespoons of olive oil. Add the onion and cook just until softened. Add the garlic and cook for one minute.

Add the chopped or diced tomatoes, roasted red peppers, bay leaf, crushed red pepper flakes, oregano, ground fennel seed, salt, and black pepper. Bring to a boil, reduce heat, cover, and simmer for about 30 minutes.

Meanwhile lightly butter a 9×9-inch baking dish. Set aside.

After the sauce has burbled for 30 minutes, stir in the browned sausage and al dente pasta. Scoop half of the mixture into the prepared baking dish. Then sprinkle with half of the shredded mozzarella, them layer on the remaining sauce. Sprinkle on the remaining shredded mozzarella cheese.

Bake uncovered in a pre-heated 350-degree oven for 30 minutes. Remove from oven and let sit for 5-7 minutes before serving.

*To quote Chef Stef “Strozzapreti is the taller cousin of cavatelli and the gangsta of the pasta family. Strozzapreti‘s name literally means “Priest Stranglers”. Yes, in the Middle Ages this pasta was designed to choke priests to death right in front of you as you were having dinner. The Heimlich maneuver hadn’t been invented yet.  But a hatred of paying taxes to the church had been. Furthermore, medieval Italy had a love of curses. Apparently a sfoglina (female pasta maker) would mutter a curse damning the priest with each cut of pasta. Think of strozzapreti as the semolina version of John Wick**!”

**Apparently, John Wick is a fictional character and the titular protagonist of the neo-noir action thriller film series “John Wick,” portrayed by Keanu Reeves. John is a legendary hitman who had retired until a gang invades his house, steals his car, and kills the puppy that his late wife Helen had given him.


SPICY BROCCOLI BEEF

I am always happy when I make any kind of Asian dish for dinner. And over the years, Mr. C. has learned to enjoy Asian dishes just about as much as I do. Of course, he will never truly appreciate a dish containing bok choy, but as far as I’m concerned, that’s his loss! More for me! And although broccoli is never going to make Mr. C. want to do cartwheels on our front lawn (we don’t even have a front lawn), he has learned to enjoy broccoli in its many culinary iterations. And to say that I love broccoli is an understatement. I could eat broccoli every day, in one form or another, and be perfectly content. So, when we sat down to this dish recently, we both loved every bite.

And for all of you out there who know how labor intensive many Asian dishes are to prepare; this easy recipe is going to please you no end. And as far as I’m concerned, this is a one dish meal when served over rice. You got your meat, veggie, and side all there on your dinner plate. What else would you need?

If you prefer ground beef to steak, you might like to check out my recipe for Ground Beef and Broccoli Stir-Fry.

Well, that’s it for today. I have some emails to answer, the protagonist in the book I’m reading to tag along with, my daily 20-minute workout to perform, and the recipe for tonight’s dinner still needs a bit of revising.

So, I wish you all a lovely weekend. And please be extra careful while you are away from the safety of your own home. We have several friends and relatives who have recently contracted covid. And even though they are fully vaccinated, and super careful when they are with others, they are never-the-less ill from this disease. No one needing hospital assistance (at least yet thank God), but still feeling poorly and confined to their homes. So, stay vigilant.

And as always, peace and love to all.

3 T. soy sauce or tamari

1 T. dark soy sauce (or another tablespoon of regular soy sauce)

2 tsp. sesame oil

2 tsp. finely grated ginger

3 garlic cloves, finely minced

crushed red pepper flakes, to taste

½ lb. sirloin steak, very thinly sliced

2 T. cornstarch

¼ c. beef broth  

1 T. brown sugar  

3 T. veggie oil, divided

3 c. broccoli florets and peeled stems  

4-6 sliced green onions, plus more for garnish

steamed brown or white rice

Whisk the regular soy sauce, dark soy sauce, sesame oil, ginger, garlic, and crushed red pepper flakes together in a bowl.  Add the sliced steak and let marinate for 1 to 4 hours.

Place the cornstarch in a bowl. Remove steak from marinade, letting the marinade drip off a little, and drop the meat in the cornstarch. Stir the meat around until it is totally coated with cornstarch. Reserve any liquid remaining after the steak has been removed from the bowl. Stir in the beef broth and brown sugar. Set aside.

Heat 2 tablespoons of the oil in a large wok or heavy frying pan over medium-high heat. Add the steak and cook until the first side is nicely browned. Flip and only cook the beef for a minute more. Remove to a bowl and set aside.

Add the remaining 1 tablespoon oil to the pan along with the broccoli. Stir fry, stirring occasionally, until the broccoli is crisp tender, about 2 minutes. Stir in the green onions and cook, stirring the whole time, until fragrant, about 30 seconds.

Add the marinade to the pan and bring to a boil. Let burble for a minute or so until the sauce thickens up a bit. Then taste and adjust seasoning.

Serve over rice. Garnish with additional green onions, if desired.


TUNA SALAD SALAD

First an apology. I haven’t been posting as many new recipes these last few weeks because, well, I’ve been busy being Mrs. Santa. I’m sure most of you will fully understand. The rest of you, well, it’s easier to ask for forgiveness than it is to get permission. (Words to live by, BTW. Especially when it includes serving a cruciferous veggie at the Carr table!) But I digress….

The other evening both of us had just about eaten all the rich food we could stand. So, I suggested a simple salad. Mr. C. thought that was a good idea. And since Mr. C. is very fond of tuna, I thought a nice crunchy tuna salad would hit the spot. But Mr. C. is also enamored with a creamy salad dressing. So, I decided to mix up a ranch style dressing to slather on the greens. And boy was the salad good. Just what was needed.

So, if you too are a bit tired of rich food, give this salad a try. I promise it will be a nice change from leftover turkey or ham.

As always peace and love to all. And a special thank you to all of you who are fully vaccinated. Getting a covid shot is such an easy way to help stop the spread of this horrid disease. And for any of you who resent wearing a mask while grocery shopping or entering a restaurant, imagine that you were in the service industry and had to wear one every single moment you were at work.

It should be an honor to help stop the spread of this deadly pandemic. And a simple gesture like wearing a mask should not be construed as an attack on an individual’s freedom. But rather as a kindness shown to others to help keep everyone healthy.

HAPPY NEW YEAR

For the tuna salad:

⅓ c. light mayonnaise

1 tsp. Dijon mustard

2 tsp. fresh lemon juice

¼ tsp. seasoned salt

freshly ground black pepper

pinch granulated garlic

2 T. minced dill pickles or dill pickle relish

1 T. finely minced onion

½ c. finely chopped celery

1 can (5-oz.) water packed albacore tuna, drained

Mix all together.

For the dressing: (and yes, you need a bit of dressing for the greens, etc.)

½ c. sour cream (I use Mexican style)

⅓ c. buttermilk (I use Bulgarian style)

1 T. mayonnaise (I use Best Foods light)

1 garlic clove, finely minced

½ tsp. Worcestershire sauce

1 tsp. dried dill weed

1 tsp. dried parsley

¼ tsp. seasoned salt, or more to taste

freshly ground black pepper

Whisk all the ingredients together in a small bowl. Taste and adjust seasoning. Refrigerate until needed.

For the salad part:

romaine lettuce (or lettuce of choice)

any combination of the following: (or anything else that sound good)

cucumber slices, tomatoes, black olives, hard-boiled egg slices, grated carrot, pepperoncini slices, frozen peas (thawed and uncooked), sunflower seeds

To serve the salad, lay down a bed of greens and other assorted yummies on a dinner plate.  Dollop on a big old scoop of the tuna salad, then drizzle on as much or as little of the dressing as you like. That’s it! Tuna salad salad.

GROUND BEEF AND BLACK BEAN CHILI

OK, I know, everyone already has their favorite recipe for chili, and I actually already have several recipes on this site that I dearly love too. So, what made me go online and look for another chili recipe is anyone’s guess. And why black beans? Well, that’s easy. I was too lazy to cook kidney beans from scratch and all I had in the pantry was a lone can of black beans. So, I thought – what the heck. Go online and see how other cooks make their chili using black beans. And I stumbled on to the juliasalbum.com site. As I perused the ingredients, it looked like the perfect chili recipe to me. Of course, I added a couple of ingredients and played fast and loose with some of the spice amounts, but other than that, this fabulous and easy to prepare chili recipe is compliments of Julia.

So, what makes this chili special? Well for one thing, it contains more vegetables than you usually find in chili. (That’s a plus BTW.) And 5 cloves of garlic. That’s more garlic than you find in most chili recipes. The spices are not uncommon, but the cup of beef broth is. And beef broth is such a wonderful ingredient to bring extra richness to any dish. So, basically, this is just a good basic recipe for a fabulous bowl of chili. And in my book, there is just nothing finer. Served with a nice cornbread muffin, life is good.

As always, have fun in your kitchen. And remember, some of the best food in the world is often very simple to prepare and has been a family favorite for decades. But that doesn’t mean the dish can’t be “revised” periodically. Hope you enjoy this “revision”.

Peace and love to all.

1 T. extra virgin olive oil

1 lb. ground beef

1 onion, chopped

1 med. carrot, finely chopped

1 celery stalk, finely diced

¼ c. chopped Hatch chili or ½ c. chopped green bell pepper

5 garlic cloves, chopped

3 T. chili powder

4 tsp. paprika

4 tsp. Italian seasoning

2 tsp. cumin

½ tsp. kosher salt

freshly ground black pepper

1 (28-oz) can whole or diced tomatoes, plus juice (Italian tomatoes, if possible) 

1 c. beef broth

1 (15-oz.) can black beans, rinsed and drained

grated sharp cheddar cheese, garnish

thinly sliced green onions, garnish

sour cream, garnish

Heat olive oil in a large Dutch oven or heavy covered pan. Add ground beef and cook until browned. Add the onion, carrot, Hatch chili or bell pepper, and celery; stir well and continue cooking for about 2 more minutes. Add the garlic and cook for one minute.

Stir in the chili powder, paprika, Italian seasoning, cumin, salt, and black pepper. Add the canned tomatoes with juices and the beef broth. Bring mixture to a boil, reduce heat, cover, and simmer gently for 1 hour. Taste and adjust seasoning.

Add the black beans and cook for another 20 minutes or so.

To serve, pass the grated cheddar cheese, sliced green onions, and sour cream.

LEFTOVER TURKEY À LA KING

Let me begin by saying that Mr. C. loves leftovers. So, one of the benefits of cooking too much food for Thanksgiving is having just what he loves at his disposal. (Remember that word – disposal, because it’s going to be used again in this post, but in a very different context!)

But after the first meal of all things leftover, and even a second attempt to present him with yet another opportunity to enjoy all the delicious flavors that make Thanksgiving such a special occasion, his desire to eat anymore of the leftovers began to wane. And I could hardly stand to open the refrigerator. So, that meant that I had to figure out a better way to use up the leftovers. Thus, this recipe.

So, with 3 cups of shredded turkey to use in a dish that would hopefully be welcome, even if the name included “leftover turkey”, I came up with this recipe. But what to serve it over? That part came next.

So, I went online to find a drop biscuit recipe that didn’t require getting out the food processor or my stand mixer. (I’m still recovering from all the cooking I did for Thanksgiving, so the simpler the food prep for now, the better.) I found this recipe on the cookingclassy.com site and the biscuits turned out perfect for the intended purpose. Split in two, they weren’t smooth surfaced like so many of my biscuit recipes produce. (Which is perfect in most cases.) However, these biscuits had the perfect crumb to absorb the lovely gravy base that makes this àla King so delicious. And, best of all, the drop biscuits had been super easy to prepare.   

As for the leftover mashed potatoes, dressing, and corn pudding, well you remember that word I used above – disposal, that’s exactly where they ended up. Sometimes you just have to do what’s best for everyone concerned. And for my own sanity, not having the leftovers stare me down every time I opened the refrigerator, was a prudent move towards keeping me mentally healthy. Of course, the guilt is still there, but then, that’s another story for another time.

As always, keep staying healthy, keep making decisions that benefit not only yourself but those around you, and stay positive. Your positive outlook on life can be contagious. You never know who might need positive inspiration from time to time.

Peace and love to all.

¼ c. (½ stick) unsalted butter

½ c. minced onion  

¼ c. shredded carrot

¼ c. finely diced celery

2 garlic cloves, finely minced

¼ c. unbleached all-purpose flour

1 tsp. seasoned salt

freshly ground black pepper

¼ tsp. poultry seasoning 

1/8 tsp. dried thyme

¼ c. dry sherry

1½ c. turkey or chicken broth, or more as needed   

¾ c. whole milk

¼ c. heavy cream

2-3 c. diced turkey (and yes of course, you can used cooked chicken in place of turkey)

1 sm. (4-oz.) jar sliced pimento, well drained

½ c. frozen petite peas                                                

2 T. freshly chopped parsley

In a medium saucepan over medium heat, melt butter and sauté onion, carrot, and celery until tender, 3-5 minutes. Add the garlic and cook for 1 minute. Whisk in the flour, seasoned salt, pepper, poultry seasoning, and thyme and cook a minute or two. Add the dry sherry and let it evaporate for about 30 seconds.

Gradually whisk in the chicken broth, milk, and heavy cream. Cook until the mixture is thickened and bubbly. If too thick, add a bit more broth. Add the cooked turkey, drained pimento, frozen peas, and fresh parsley. Cook only until the chicken is hot. Taste and adjust seasoning.

Serve over halved biscuits, steamed rice, or mashed potatoes.

See recipe below for quick and easy Buttermilk Drop Biscuits.

BUTTERMILK DROP BISCUITS  

2 c. unbleached all-purpose flour, fluffed

2 tsp. baking powder

½ tsp. baking soda

1 tsp. granulated sugar

¾ tsp. kosher salt

½ c. (1 stick) unsalted butter, cut into small pieces

1 c. buttermilk

In a small mixing bowl whisk the flour, baking powder, baking soda, sugar, and salt together.  

Place the butter in a medium sized microwave safe dish and heat until about ¾ of the way melted. Remove and stir to melt fully.

Pour the buttermilk in with the butter and whisk until mixture appears lumpy.

Pour the flour mixture into the buttermilk mixture and stir gently just until all the flour is incorporated.

Using a #16 ice cream scoop that has been coated with cooking spray, scoop the dough onto a parchment paper lined baking pan at least 1½-inches apart. If you don’t own a #16 ice cream scoop, spray a quarter cup round measuring cup with non-stick cooking spray. 

Bake in a pre-heated 475-degree oven until tops are golden brown and the internal temperature reaches 205 to 210-degrees, about 12 – 14 minutes. Remove from oven, split, and serve topped with plenty of the à la King.

HAM, CARAMELIZED ONION, AND SWISS CHEESE QUICHE IN A WHOLE WHEAT CRUST

I added a bit of kale and chopped green onion to garnish the quiche before baking. Wasn’t necessary. Won’t do it again.

And yes, we love quiche. And that’s why there are already several quiche recipes on this site. Now, one of the things I like most about quiches is their versatility. I can put pretty much any ingredient in a pie shell, pour eggs and milk over the top, and bake until the filling is set. Voila! Egg pie!

So, the other evening, quiche was on our dinner table. And yes, quiche is also perfect for breakfast or lunch. That’s another versatile thing that I love about this dish. But mainly it’s about how wonderful this dish tastes. And how the creamy rich filling is offset by the crispy pie crust. (I don’t use this simple pie crust recipe for regular pies because it isn’t a flaky crust. But for quiche, it’s perfect!) And very easy to make. And at this stage in my life, I support easy.

So, if you too would enjoy a quiche that has all the requisite elements of a successful dish that includes, easy to prepare, delicious, not too expensive, and everyone at table will love, then this is the recipe for you. Make it “quiche night” at your house in the near future. Your family will love you even more than they already do!

And isn’t that what it’s all about anyway. Love and family and understanding and forgiveness and respect.

In these trying days when there is almost a civil war happening between the people who are vaccinated and those who aren’t, please don’t forget that everyone is doing their best. (Except for certain politicians who are trying to kill Democracy. But that’s another story!)

But for those of us who simply can’t understand why anyone would hesitate to get vaccinated, it seems like such a simple thing to just do it. (I fall in that camp BTW.) But I don’t live in another person’s head. I don’t know their fears or misgivings or past experiences. And I definitely don’t know what it’s like to be unable to make a decision. But from the few I know who haven’t been vaccinated, inertia seems to be the biggest reason to remain unvaccinated. So, be kind to these people and try to understand that life may not be as easy for them as it is for you. Love them, treat them with respect, and above all, don’t give up on them. Not everyone was lucky enough to be born with what I consider to be “a good tool belt”. A tool belt containing a goodly amount of intelligence, an inherent sense of self-worth, imagination, empathy, understanding, energy, and various other attributes that help most of us become happy, caring, and successful adults. If you were born with a good tool belt, you were just plain lucky. Not everyone was similarly blessed. So, be patient and kind. Don’t burn bridges that might never have been built if not for covid-19. And no, it’s not easy. I have a couple relatives I would like to shake by the shoulders, throw them in the back of my car, and drive them to get vaccinated. But I don’t walk in their shoes, and no one (yet) has put me in charge. Until then, I do the best I can. I’m not perfect and I get pretty darned frustrated. But I have yet to lose a friendship because we have differing opinions about being vaccinated. (OK, maybe one. But he isn’t family, and we have history anyway!) So, like I said, it’s not easy to safely maneuver the vaccination minefield. But definitely worth the effort.  

And as always, peace and love to all.

8-inch pie crust (see recipe below) 

2 T. unsalted butter

1½ c. diced ham

½ med. onion, chopped

2½ c. grated Swiss, Gruyère, Emmental, or Jarlsberg cheese (or combination)

1½ c. whole milk (part half & half is great)

1 tsp. Dijon mustard

freshly ground black pepper

5 lg. eggs

ground nutmeg

Heat the butter in a small frying pan. Sauté the ham pieces until browned. Using a slotted spoon or spatula, remove the ham to a small bowl. Set aside.

Add onion and cook over medium low heat, stirring frequently, until the onion is soft and starts to become a light golden brown, 20 – 30 minutes.

Scatter ham pieces over the partially baked pie crust. Layer cheese on top of ham. Scatter cooked onions evenly over the cheese.

Whisk together the milk/half & half, Dijon mustard, black pepper, and eggs. Pour liquid mixture in pie pan. Sprinkle with nutmeg. Hint: to keep your pie crust edge from getting too brown while baking, cover with thin strips of aluminum foil.

Bake in a pre-heated 350-degree oven until the filling is set, about 45-55 minutes. Allow to cool for 5 minutes before serving.

Whole Wheat Pie Crust

1 c. unbleached all-purpose flour

1 c. whole wheat pastry flour   

heaping ½ tsp. salt

1 tsp. sugar

¼ tsp. baking powder

7 T. vegetable or canola oil

5 T. cold water  

Whisk the flours, salt, sugar, and baking powder together. Pour the oil and water over the dry ingredients. Stir with a fork until the dough is evenly moistened. Pat the dough across the bottom of a fairly deep pie pan, then up to the rim.  

Bake in a pre-heated 400-degree oven for 12 minutes. Remove from oven and set aside until you are ready to assemble the quiche. Reduce oven temperature to 350 degrees.


SHRIMP OR PORK EGG FU YUNG WITH GRAVY OR SAUCE

Pork Egg Fu Yung

If you are new to my blog, there is something more you should know about me than just what I have confessed to in my introduction – “It’s really just all about me!” I love Chinese food. And not the kind you find in China because I have never been there. Nope, I love the kind of Chinese food you find in good old American Chinese restaurants, especially the ones that can be found in any large-city International District. And I especially love the dishes that have only a superficial resemblance to any dish you might actually find in China. Except for one. Because even though egg fu yung is considered an American Chinese dish, its culinary roots reach back to Shanghai, and the name of this dish is Cantonese, with several accepted spellings including egg foo young, egg fooyung, egg foo yong, egg fu yung, and egg furong. I have chosen to spell this dish egg fu yung, because, well I don’t know why, I just have!  For the sake of simplicity, you may think of this dish as basically a fried omelet, with not very much meat, lots of veggies, and topped with a yummy sauce or gravy.  

You will notice that I have included 2 recipes for the gravy/sauce. I made them both but couldn’t choose which one I preferred. And neither could Mr. C. or our dear friends Mark and Vicki. So, your choice.

Now after a rudimentary glance at these recipes, you might think they would be anything but easy to prepare. But I’m here to tell you, they are not difficult at all. Just preparing a simple gravy or sauce, then a bit of hacking and slashing of veggies, a bit of playing with the meat, then combining all the egg fu yung ingredients together. (Except the gravy/sauce that is!) And once you’ve ladled the egg mixture into the pan, you are about 3-5 minutes away from sitting down to dine.

So, if you too are a Chinese food fan, then I think you are in for a treat. And even though you may be a true Chinese food aficionado, I’m willing to bet you haven’t ordered egg fu yung in quite some time. Because if you are like me, you consider yourself to be a “foodie”. And how can a true food connoisseur consider a humble and often thought of “secondary” dish now be relighted to the highly sought over position of “entrée”? Well, until recently, I wouldn’t have considered egg fu yung to be the star of the show either. In fact, I hadn’t ordered it in years. OK, decades. But during a recent visit to a Chinese restaurant, I was advised to order it, and I simply flipped over how delicious it was. It was my favorite dish on the table. What had I been waiting for? So, be reminded. Egg Fu Yung is delicious, and when you make it yourself, you can include any old meat or veggies you choose. And regulate the amount of salt, etc. etc. So, take my advise and make this dish at your earliest convenience. It is truly delicious, not too expensive to prepare, and a lot less caloric than many other Chinese dishes that you might enjoy.

As always, have fun in your kitchen. Try new recipes, especially the dishes you enjoy the most when you go out to eat. They may be easier to prepare than you would imagine. And don’t get me started on how much money you will save by fixing your favorite dishes at home. I neither have the time nor the energy to prepare a 60-page dissertation on nutrition, unpronounceable ingredients, marketing, and economics.  

Peace and love to all.

Egg Fu Yung “Gravy”

Egg Fu Yung Gravy:

¼ c. vegetable oil

¼ c. finely diced onion

6 med. button mushrooms, chopped well (or the equivalent in chopped shiitake mushrooms)

2 garlic cloves, finely minced

¼ c. flour

1 tsp. granulated sugar

pinch white pepper

2 c. water

3 tsp. chicken or vegetable base (I use Better Than Bouillon bases)

2 T. dark soy sauce

2 tsp. toasted sesame oil

Heat the vegetable oil in a frying pan. Add the onion, mushrooms, and garlic and cook until the garlic starts to brown. Whisk in the flour and cook for at least one minute. As it cooks whisk in the sugar and white pepper.

Slowly whisk in the water and chicken base. Cook until nice large bubbles appear. Then stir in the soy sauce and cook for another minute. Taste and adjust seasoning. Just before serving, whisk in the sesame oil.

Simple Egg Fu Yung “Sauce

Simple Egg Fu Yung Sauce:

4 tsp. cornstarch

1 c. beef broth or 1 cup water and 1 teaspoon beef

2 T. soy sauce

Combine all sauce ingredients in a small pan and heat to a boil, stirring constantly. Boil for 1 minute; serve hot.

SHRIMP Egg Fu Yung:

2 T. vegetable oil, divided

3-4 button mushrooms, chopped

⅓ c. thinly sliced celery

1 sm. garlic clove, finely minced

6 eggs

½ c. bean sprouts

3 green onions, thinly sliced, divided

4 oz. chopped raw shrimp    

¼ tsp. kosher salt

pinch white pepper

1 tsp. sesame oil

sesame seeds, opt. garnish

steamed rice

Heat 1 tablespoon of the vegetable oil in a very large, non-stick pan. Cook the mushrooms and celery until just starting to get soft. Add the garlic and cook for 30 seconds. Remove from heat and set aside.

Whisk eggs in a bowl. Add the beansprouts, ¾ of the green onions, raw shrimp, salt, and pepper. Add the cooked mushrooms, celery, and garlic.

Heat remaining 1 tablespoon vegetable oil and sesame oil in the same very large pan and set over medium heat. (Use additional oil if you feel there isn’t enough in the pan. Especially if your pan is quite large.) Ladle in ¼ of the batter for each egg fu yung. Use a spatula to push edges in to form 4 round(ish) shapes. As mixture sets at the edges, with spatula, gently keep the egg mixture together as if you were corralling sheep. 

Cook until the undersides are medium golden brown then flip and cook the other sides again until nicely browned. (The raw shrimp will cook during this time.)  

Slide omelets onto plates. Dribble on some of the gravy. Then sprinkle with sesame seeds and remaining green onion slices. Serve with a side of rice and the remaining gravy or sauce.

Note: You can use any combination of meat/seafood and veggies. Use a total of 2 to 2½ cups of protein/veggies for 6 eggs.

PORK Egg Fu Yung:

4 oz. ground pork  

½ tsp. soy sauce
½ tsp. oyster sauce

¼ tsp. sugar

dash sesame oil

2 T. vegetable oil, divided

3-4 button mushrooms, thinly sliced

⅓ c. thinly sliced celery

1 sm. garlic clove, finely minced

6 eggs

½ c. bean sprouts

3 green onions, thinly sliced, divided

¼ tsp. kosher salt

pinch white pepper

1 tsp. sesame oil

sesame seeds, opt. garnish

steamed rice

Place pork in a bowl. Mix in the soy sauce, oyster sauce, sugar, and sesame oil. Set aside.

Heat 1 tablespoon of the vegetable oil in a very large, non-stick pan. Cook the mushrooms and celery until just starting to get soft. Add the garlic and cook for 30 seconds. Remove from heat and set aside.

Whisk eggs in a bowl. Add the beansprouts, ¾ of the green onions, salt, and pepper. Add the pork mixture crumbled into the egg mixture with your fingers. Add the cooked mushrooms, celery, and garlic.

Heat remaining 1 tablespoon vegetable oil and sesame oil in the pan and set over medium heat. Ladle in ¼ of the batter for each egg fu yung. Use a spatula to push edges in to form 4 round(ish) shapes. As mixture sets at the edges, with spatula, gently keep the egg mixture together as if you were corralling sheep. 

Cook until the undersides are medium golden brown then flip and cook the other sides again until nicely browned. (The raw pork will cook nicely during this time.)  

Slide omelets onto plates. Dribble with gravy then sprinkle with sesame seeds and remaining green onion slices. Serve with a side of rice and prepared gravy or sauce.

Note: You can use any combination of meat/seafood and veggies. Use a total of 2 to 2½ cups of protein/veggies for 6 eggs.