Category Archives: MAIN DISH RECIPES

CHICKEN ENCHILADA CASSEROLE  

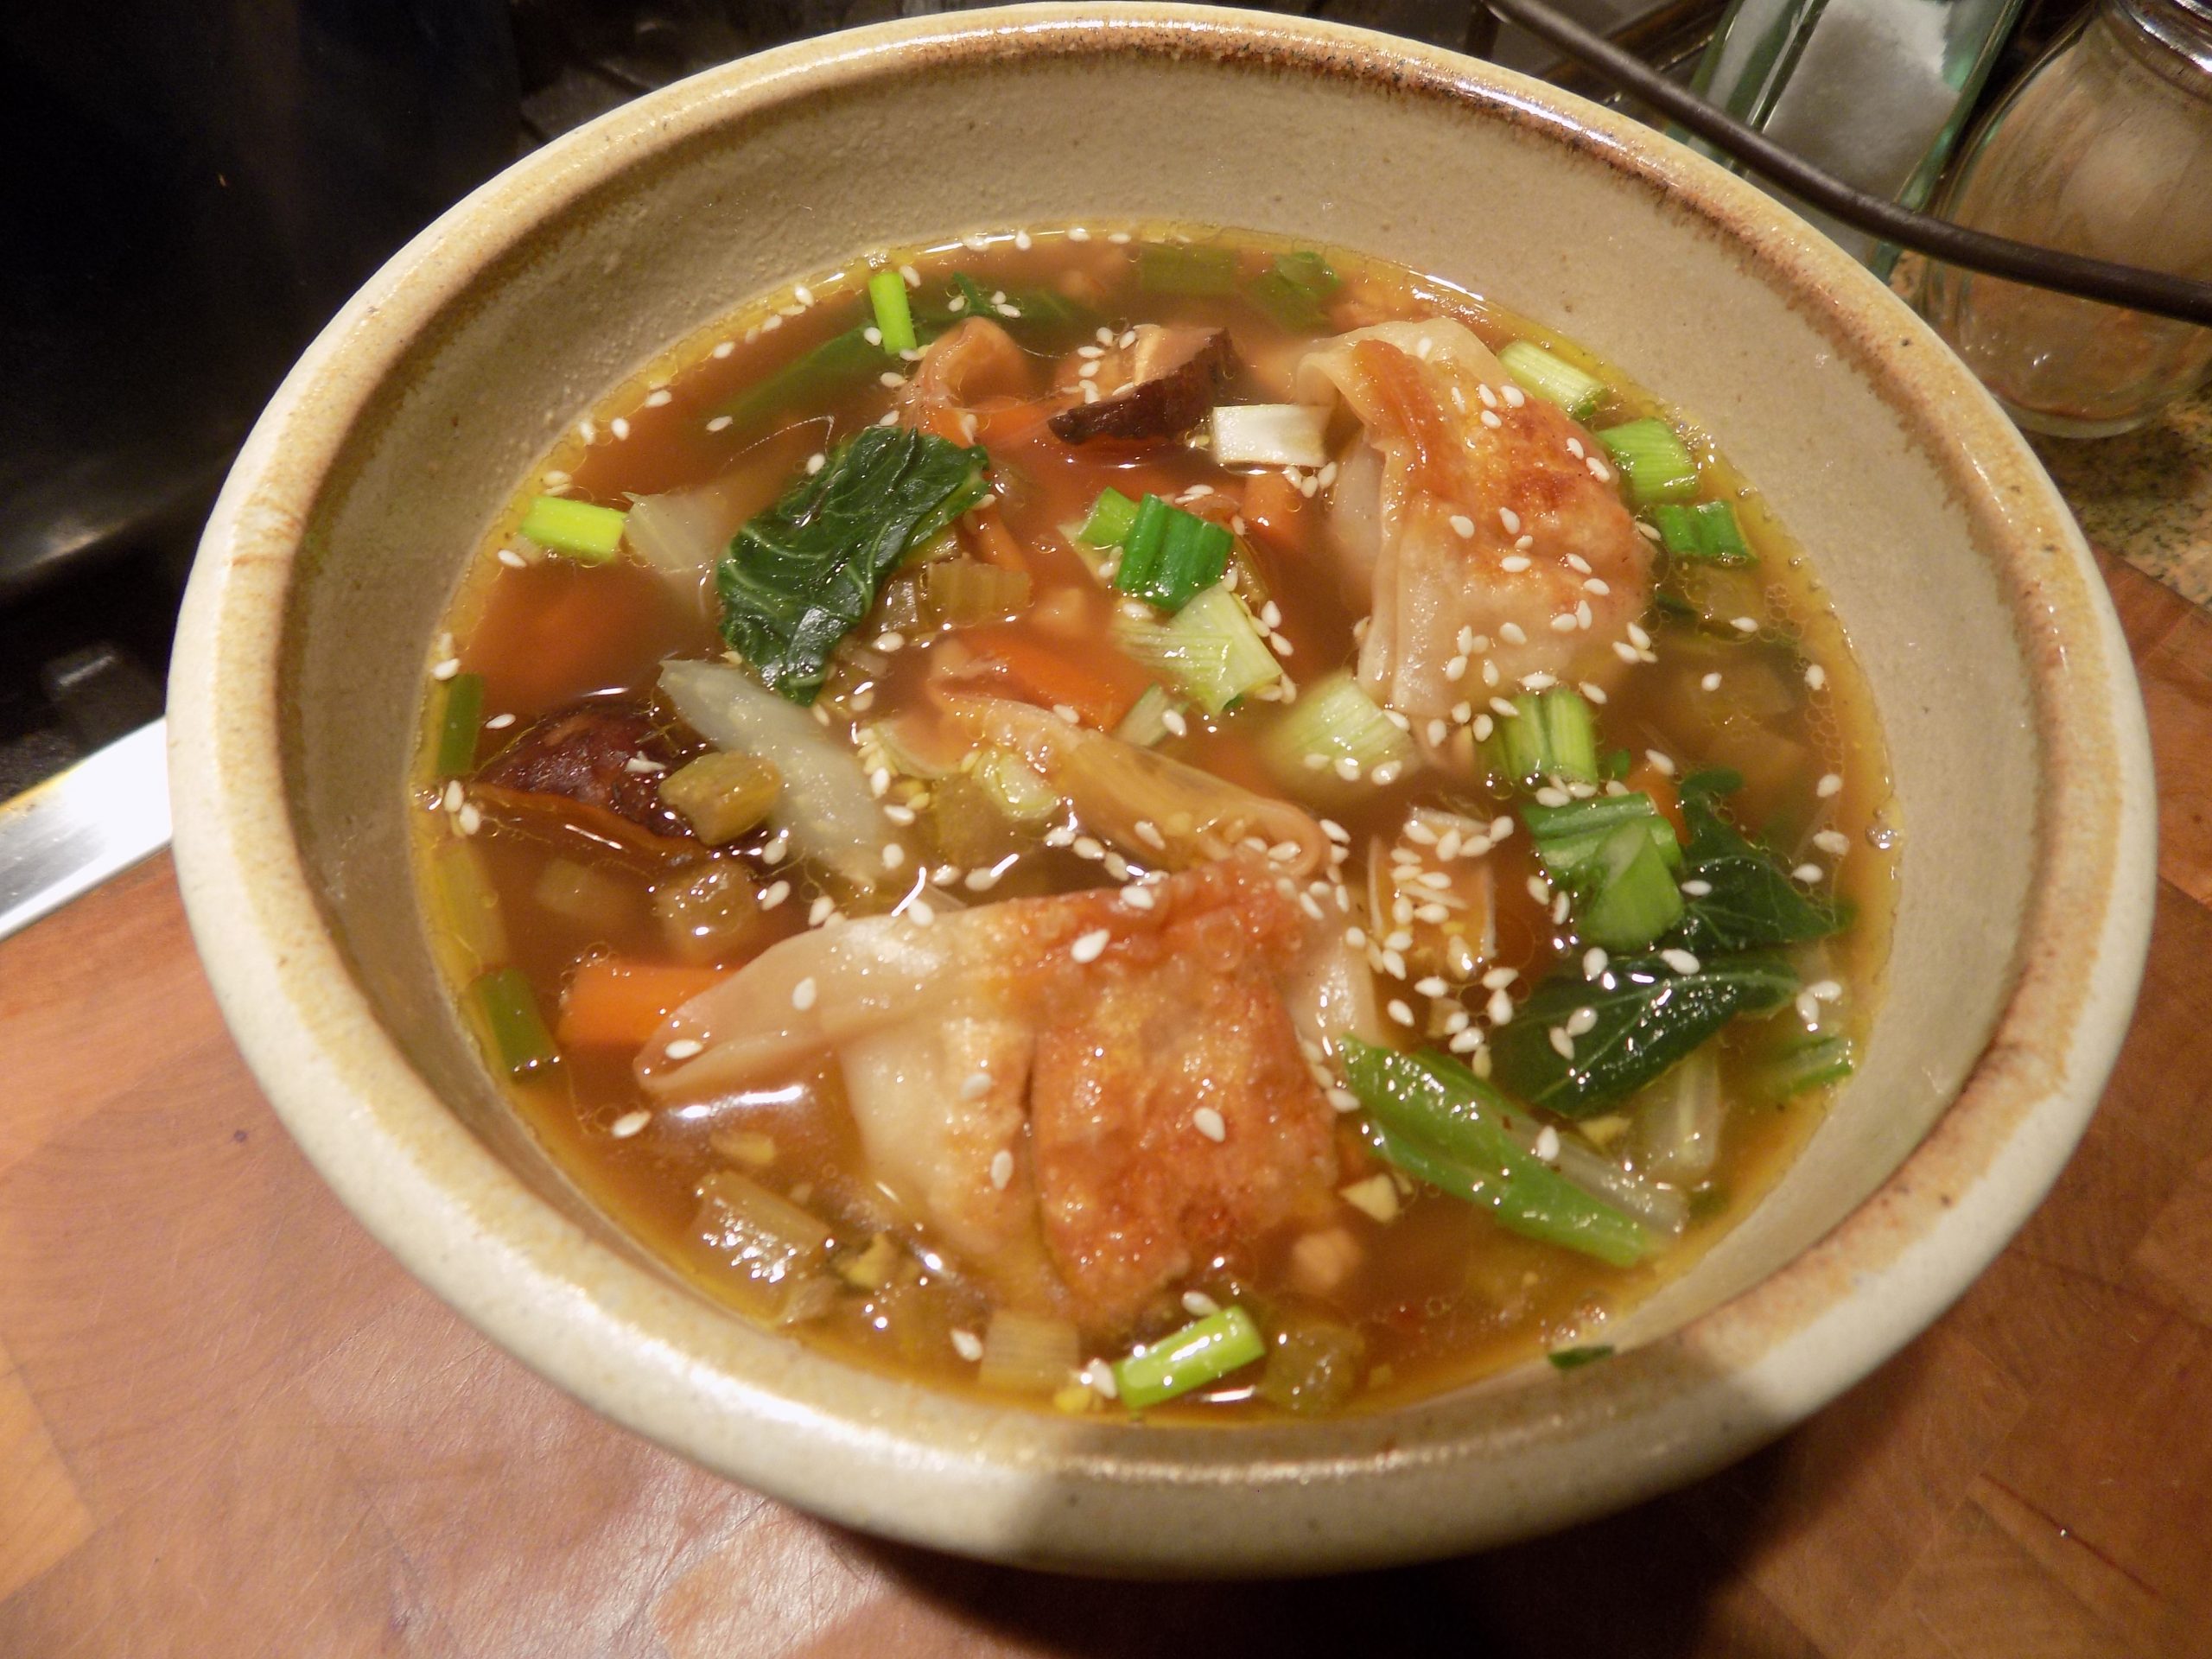
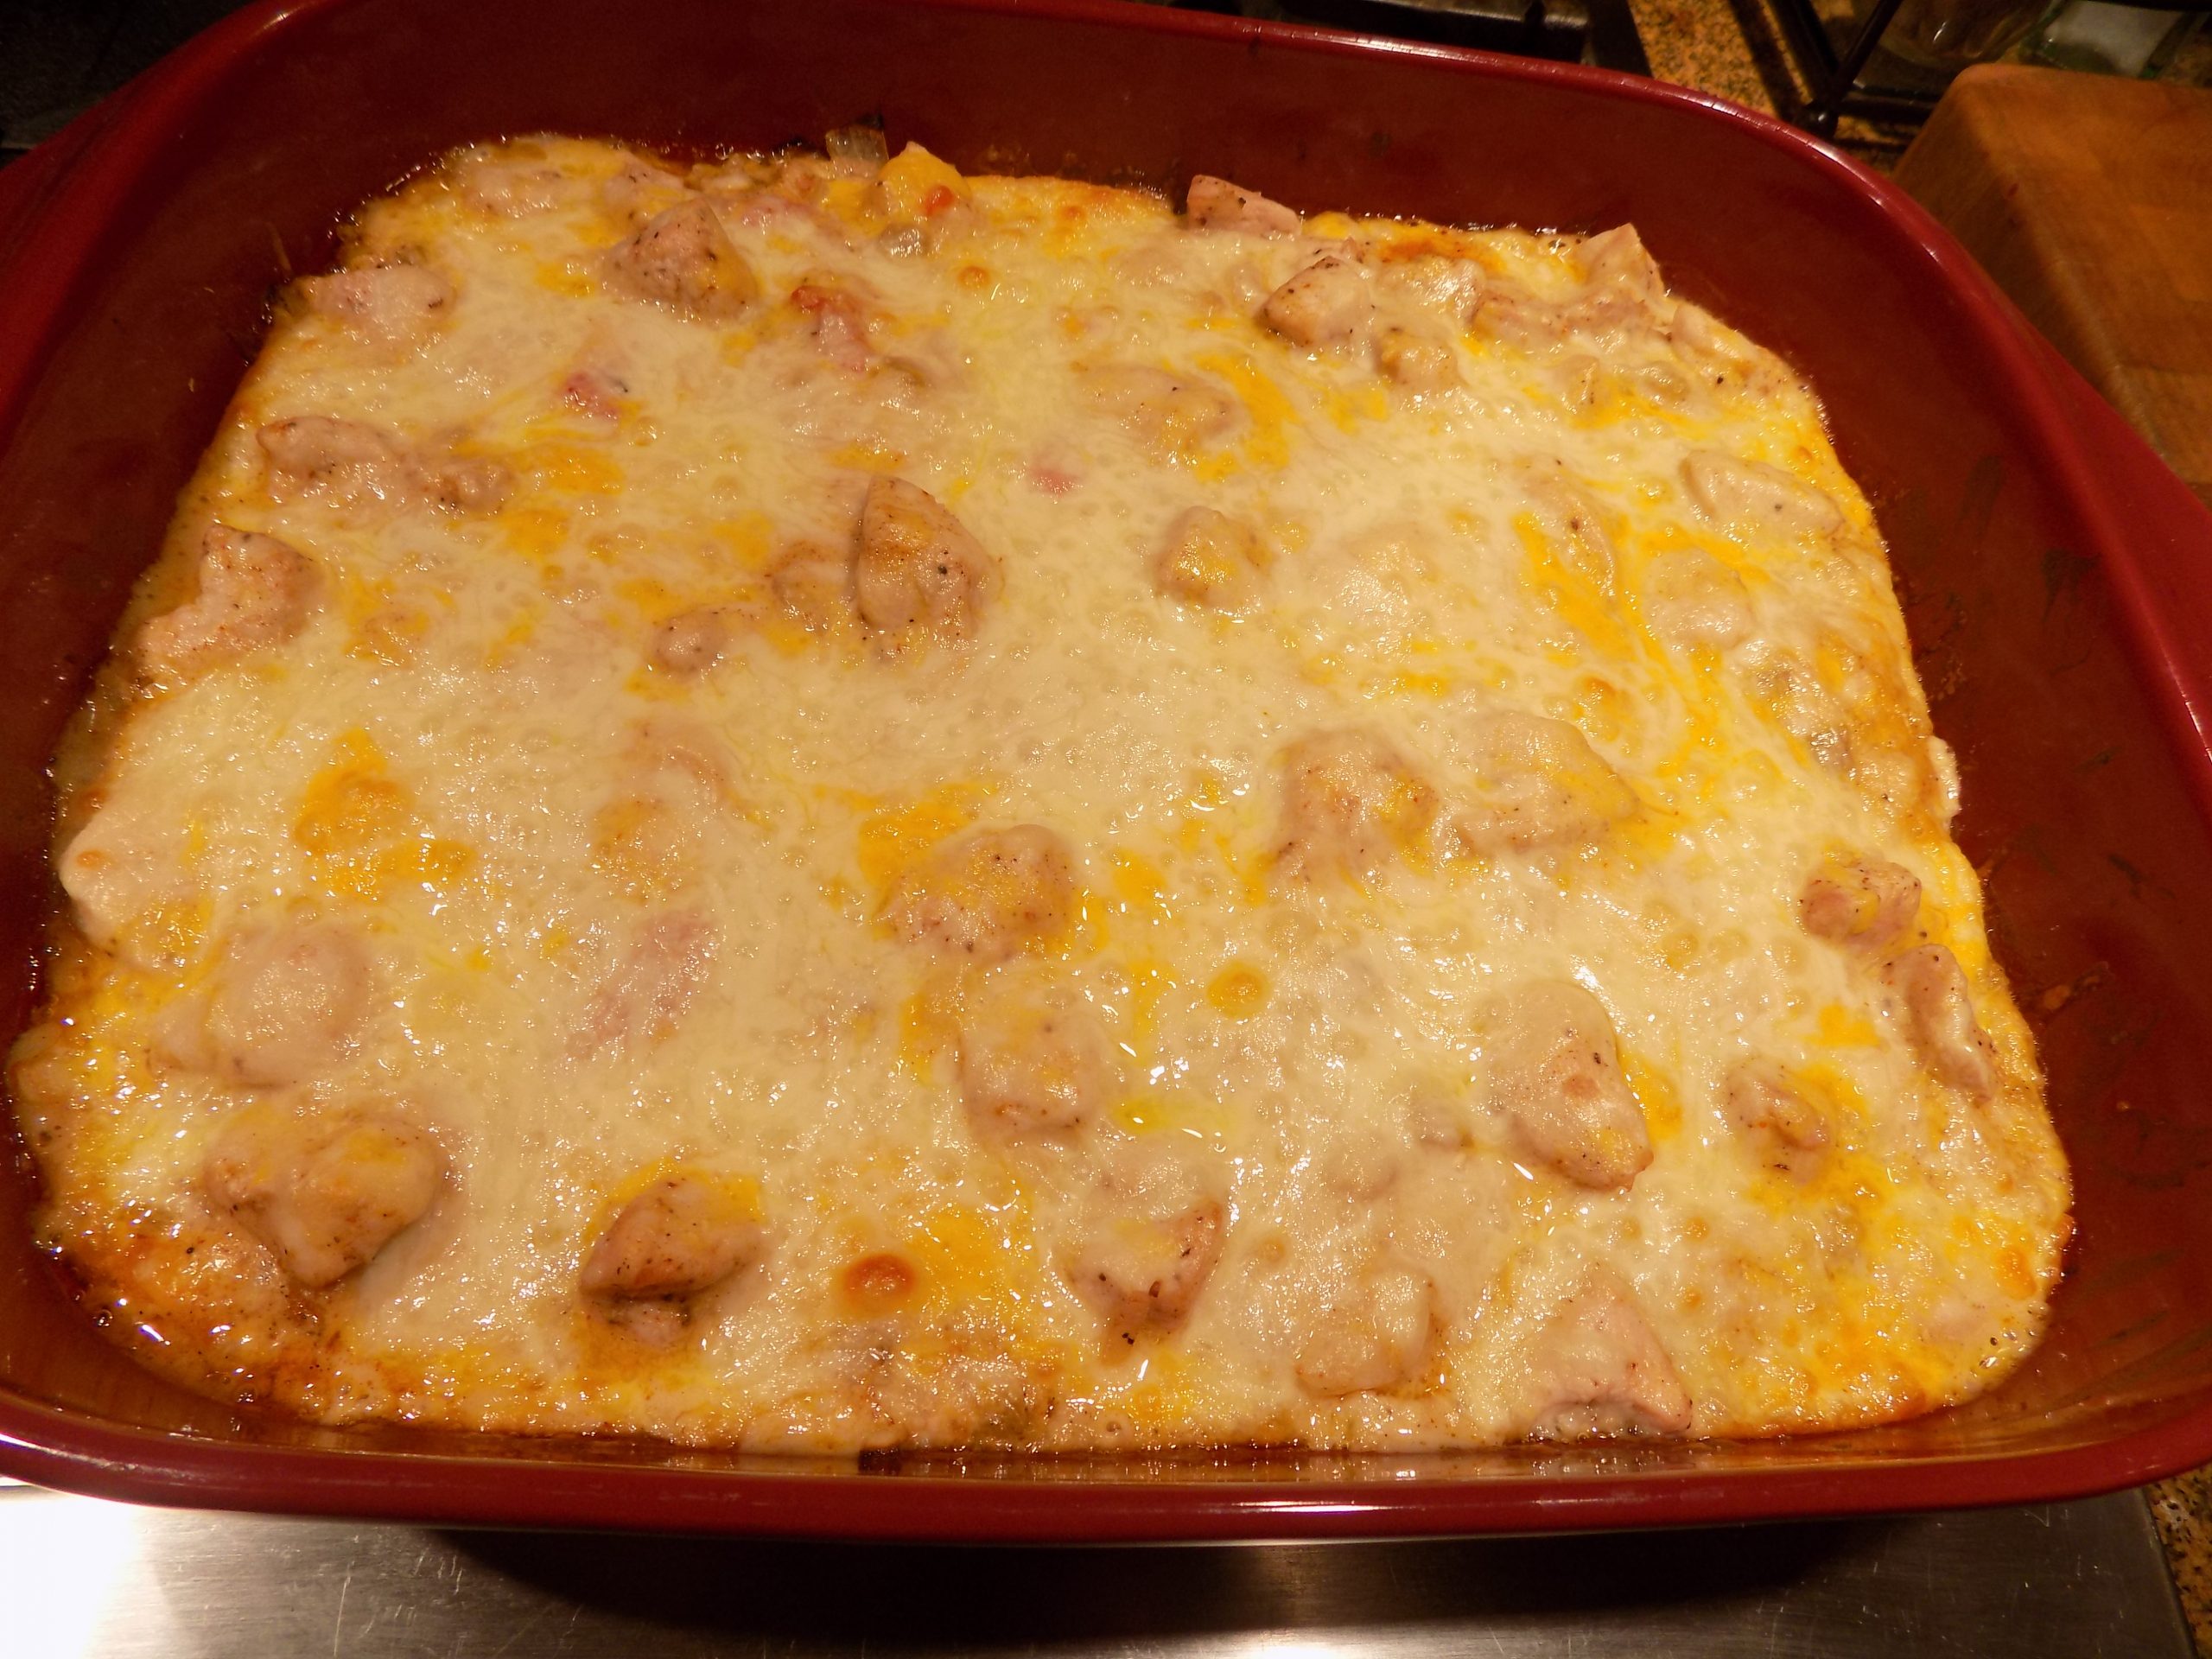
Oh, the siren call of a truly delicious casserole. And yes, I know that part of the definition of “siren call” includes “potentially harmful and dangerous”. And the kind of casseroles I am always drawn to, can be just that for me. Because I am always tempted to eat more casserole (like this one) than is healthy or required by my body to stave off starvation. And let’s face it. My aged body doesn’t need very much nourishment to keep it alive and healthy. But my mouth, has obviously decided to ignore the memo from my brain. Because my mouth keeps wanting more, more, more! So, my common sense is often driven to intercede in my brain’s defense. Which is quite a difficult thing for it to do, as some of you might attest. But, whenever possible, I allow my common sense to prevail. And it absolutely must take over when I am sitting at dinner with a big old pan of this kind of casserole beckoning me to have seconds a mere 6 feet from where I am dining. It isn’t fair, but then, what in life is?!

So, I guess what I am trying to relate, is that this is a very tasty casserole. And quite easy to prepare. And the kind of casserole that everyone in your family will enjoy. And I know that some people have an aversion to casseroles. What’s with that? It’s got to be a holdover from when they were children and forced to eat a dry tuna casserole. (Like the one my mother used to make.) To these people I say – GET OVER IT! Times change, recipes change, and when made correctly, casseroles can be fantastic. And this is a good one to prove that point!

So, even if you have a family member who is casserole resistant, make one anyway. This person will soon learn that a good casserole is a joy and a delight! I’ve got broad shoulders. Tell them, Patti made you do it.

Peace and love to all.

3 T. unsalted butter, divided

2 boneless, skinless chicken breasts, cut into small bite sized pieces

½ c. finely diced onion

2 T. unbleached all-purpose flour

2½ c. water

4-5 tsp. chicken base (I use Better Than Bouillon Chicken base)

12 regular size corn tortillas  

½ c. sour cream (Mexican sour cream is best)

¼ tsp. seasoned salt

freshly ground black pepper

1½ tsp. chili powder

1/8 tsp. cayenne

1 tsp. granulated garlic

⅓ c. diced roasted red peppers

4 oz. can diced green chilies (I use Hatch chilies)

2 c. grated sharp cheddar cheese

1 c. grated Monterey Jack or mozzarella cheese

Melt 2 tablespoons of the butter in a good-sized frying pan. Cook the chicken until still a bit of pink remains. Add the onion and cook for about 3 minutes. Using a slotted spoon, remove the chicken and onion to a small bowl.

Add the remaining 1 tablespoon butter to the pan. Add the flour and whisk together for about 3 minutes. Add the water and chicken base. (And of course, you can skip the water and chicken base and use chicken broth.) Bring to a boil, reduce heat, and let burble for a couple of minutes as the mixture thickens. Before adding the other ingredients, remove a half cup of the mixture and spread on the bottom of a lightly greased 9×13-inch casserole or Pyrex baking dish.

Then stir in the sour cream, seasoned salt, pepper, chili powder, cayenne, granulated garlic, roasted red peppers, green chilies, and chicken and onion mixture plus any residual juice.    

Next add 6 tortillas evenly distributed to the baking dish. Then spread the tortillas with half of the chicken mixture, and half of both kinds of grated cheese.

Repeat with the remaining 6 tortillas, remaining chicken mixture, and top with the remaining grated cheese.

Bake uncovered in a pre-heated 350-degree oven for 35-40 minutes or until bubbly.   

BAKED RACK OF LAMB WITH A SAVORY TOPPING 

This is a simple variation on my Rack of Lamb with Kalamata-Rosemary Crust recipe. (My favorite rack of lamb recipe BTW.) But some days I don’t want to mess around in the kitchen as much as other days when I can hardly wait to start dinner. And I know, for those of you for whom cooking is the antithesis of a pleasurable way to spend your time, you must think I am bat (fill in the blank) crazy! But it’s true. There are days when I truly look forward to my time in the kitchen. But then there are the days I still want to serve up a delicious meal, but putting in the effort to do so, just doesn’t appeal at all! And the evening I served this recipe for rack of lamb just happened to be one of those times.

In truth, I had already prepared Mediterranean Quinoa Salad, which BTW is not only delicious but very easy to prepare.  But my flagging stamina that day had already been taxed. The last thing I wanted was to spend more than 20 minutes more in food prep. Being the rather resourceful person that I am, I brought out my standard recipe, the one mentioned above, and paired it down to the recipe you find below. And to my great delight, the meat was juicy and very well-seasoned. Which along with the salad made for a mighty fine meal.

So, if you too have those days when you would rather do almost anything besides cook, this is the perfect recipe for you. Quick, easy, and delicious.

And lest you think that I am losing my love of all things culinary, fear not. I still love my kitchen and producing different dishes at a prodigious rate. I’m just getting older, and what used to take me an hour, can now take me two or even three hours. But I’m still in the game. Fearless, searching for new and different recipes with which to thrill and delight you, and always up for a challenge. It’s just that now I am no longer the hare, I’m the tortoise!  

Peace and love to all.  

1 garlic clove, finely minced

1 tsp. Dijon mustard  

½ tsp. finely chopped fresh rosemary leaves

2 tsp. finely chopped shallot

¼ tsp. kosher salt

freshly ground black pepper

2 tsp. extra virgin olive oil

4 pitted kalamata olive, minced 

1 (8-rib) frenched rack of lamb, silver skin removed

lemon wedges, for serving

Mix the garlic, Dijon mustard, rosemary, shallot, salt, pepper, olive oil, and kalamata olives together. 

Place the rack of lamb, meaty side up on a small, rimmed aluminum foil covered baking sheet. Coat the top of the meat with the garlic mixture and let sit at room temperature for 1 hour.

Roast the lamb in a pre-heated 450-degree oven for 20 minutes for medium-rare, or until a thermometer inserted in the center reads 120 to 125-degrees. 

Remove from oven, tent with foil, and let rest at least 10 minutes before carving into chops.

Serve with lemon wedges.


GROUND TURKEY AND MEXICAN CHORIZO FILLED GREEN PEPPERS, BURRITOS, AND TACOS  

Stuffed Green Peppers

As promised, here is another recipe featuring Mexican chorizo. This recipe comes straight from our dear friend Jim. Who, BTW, is an amazing cook. And for anyone who has had the pleasure of dining at Jim and Margo’s home, you know of what I speak. You too are blessed. But enough pontificating. I don’t want Jim to get a swollen head. I just want you to know that I am not responsible for this marvelous recipe. I wish I were, but my mother always told me that honesty is the best policy. (Apparently, a lot of politicians never got that same directive from their mothers, but that’s a story for another time!)

Anyway, this versatile filling recipe is absolutely delicious and super easy to prepare. At first glance it looks like the recipe makes a big batch of filling. And guess what? It does! All’s the better as far as I’m concerned. Because this filling freezes beautifully. Besides, what kind of recipe calls for half a pound of ground meat? Ground meat doesn’t come in half pound packages. At least not in the grocery stores I frequent!

Anyway, just make this fabulous filling. Make stuffed peppers, or use it for terrific burritos or tacos, or any other dish that would profit from a spicy, meaty infusion of southwestern flavor. And lest I forget, this is a fairly healthy filling. Lots of veggie action happening and no starchy ingredients.  

So, again, thank you Jim for this terrific recipe. I made Stuffed Green Peppers last night for dinner, and this morning I made Breakfast Burritos. Absolute culinary bliss my friends.

As always, keep smiling. We aren’t out of the woods yet with covid. But we are moving towards the edge of the woods where the trees are further apart, the sun is breaking through, and that just might be a meadow further down the path.

Peace and love to all.

Ground Turkey and Mexican Chorizo Filling:

2 tsp. extra virgin olive oil

1 lb. ground turkey (part white and dark meat, if possible)

1 lb. bulk Mexican chorizo

1 onion, diced

3-4 celery ribs, diced

1 green pepper, diced

1 red pepper, diced

5-6 garlic cloves, minced

1 (28-oz,) can diced tomatoes (Italian are best)

3-4 T. chili powder

3-4 T. taco seasoning

freshly ground black pepper

¾-1 c. chopped fresh cilantro or 2-3 T. dried cilantro*

Heat the olive oil in a large skillet over medium-high heat. Add the ground turkey and chorizo. Fry the meat until cooked through and browned.

Add the onion, celery, green pepper, and red pepper. Cook until the veggies are softened, about 8 minutes. Stir in the garlic and cook for 1 minute.

Add the diced tomatoes, chili powder, taco seasoning, and black pepper. Cook, uncovered, for about 30 minutes to blend flavors and reduce the liquid. Remove from heat and add the cilantro. Taste and adjust seasoning.

*Dried cilantro doesn’t taste like fresh cilantro. Fresh cilantro has a strong lemony and slightly peppery flavor, which some people (like me) find to taste kind of soapy. In other words, fresh cilantro is not my favorite ingredient. I much prefer dried cilantro which has a weak cilantro flavor and is perfect in soups, stews, or any recipe that requires a bit of cooking time to blend flavors.

STUFFED GREEN PEPPERS

4 green peppers (or however many you need)

Ground Turkey and Mexican Chorizo filling

grated cheese (I use sharp cheddar or mozzarella)

Slice the green peppers in half, top to bottom. Carefully cut out the stem, then remove the membranes and seeds.   

Lightly grease a baking pan. Place the half peppers, cut side up in the pan and fill with the meat mixture. You will have extra filling. I suggest freezing it for tacos or burritos. (See recipes below.)   

Bake the peppers in a pre-heated 375-degree oven for 75-90 minutes or until the pepper are soft and starting to brown. (If the filling gets too brown during the baking process, cover with aluminum foil.) About 5 minutes before removing the peppers from the oven, liberally cover the tops with grated cheese.

Remove from oven and serve immediately.

BURRITOS*

tortillas (whole wheat or regular)

Ground Turkey and Mexican Chorizo filling

grated cheese

refried or whole pinto beans, opt.

shredded lettuce

finely diced tomato

sour cream

diced avocado

Stuff lightly warmed tortillas with filling, grated cheese, and a tiny bit of refried beans. Wrap and heat on high for 1 minute in your microwave. Serve lettuce, diced tomato, sour cream, and diced avocado on the side.

Note: I warm the tortillas just before wrapping because warming them makes them more pliable.

BREAKFAST BURRITOS*

tortillas (whole wheat or regular)

Ground Turkey and Mexican Chorizo filling

scrambled eggs

grated sharp cheddar cheese

chopped green onions

Stuff lightly warmed tortillas with filling, scrambled eggs, grated cheese, and chopped green onion. Wrap and heat on high for 1 minute in your microwave. Serve sprinkled with a bit more grated cheese and sour cream on the side.

Note: I warm the tortillas just before wrapping because warming them makes them more pliable.

TACOS*

taco shells

Ground Turkey and Mexican Chorizo filling

refried or whole pinto beans, opt.

grated cheese

shredded lettuce

finely diced tomato

diced avocado

sour cream

Place hot filling in shells. Serve with a variety of additives including refried beans, grated cheese, shredded lettuce, diced tomatoes, diced avocados, and sour cream.

*In my opinion, there is no need for salsa with these dishes. The salsa would just get in the way of the lovely flavor of the Ground Turkey and Mexican Chorizo filling.


MEXICAN CHORIZO SOUP WITH VEGETABLES AND BLACK BEANS

I don’t know if all grocery stores carry bulk chorizo sausage, but our local IGA does, house made, and really tasty. But I must confess. I am brand new at using chorizo as an ingredient. And for the life of me, after making this soup, I have no idea what I was waiting for. An engraved invitation from the chorizo growers of America? Or divine inspiration from heaven? Whatever!! But I’m darn sure you will be seeing more recipes in the near future containing chorizo. And it all started with Mr. C.  

Since the beginning of the covid scare, Mr. C. has been doing 99% of our provisioning. And some time ago, apparently, he came home with a package of bulk chorizo sausage. Since he is also the member of our family who does most of the retrieving from our freezer, I never even knew this package of chorizo existed. (Well, maybe he mentioned it to me. But I have as much of a selected hearing problem as the next person.) So, when he recently asked me when I planned to use the chorizo, I gave him one of my “deer in the headlights” look. He immediately understood that I had no idea what in the heck he was talking about. So, after a bit of discussion, it was decided that I would figure out a way to use this ingredient in the near future. So, based on a chorizo and white bean soup recipe I found on the Curtis Stone site, please allow me to introduce you to a really great use for chorizo.

This soup is easy to prepare and absolutely delicious. With lots of vegetable action happening. And isn’t that great. Veggies are so darn good for us. Which reminds me.

The other day as I was chopping up carrot, onion, and celery (mirepoix), I thought about how often I use this vegetative trio. In truth, at least twice a week. Especially during fall and winter. And I end up chopping fresh garlic at least 4 times a week. At least! But that’s just fine with me. Because these ingredients make such a great flavor base for so many tasty dishes. So, hats off to onions, carrots, celery, and garlic.

Well, that’s it for today. I believe I have always told you that I am one lucky lady. And today is another proof positive. The guys from Seabreeze are rehearsing in our living room. Live jazz. Right here. In my very own living room. Life just doesn’t get much finer than listening to great music performed in your own home.

Peace and love to all.

2 T. extra virgin olive oil, plus more for drizzling

1 lb. Mexican* chorizo sausage 

1 onion, finely chopped

2 carrots, cut in half, then into thin slices   

2 celery ribs, cut into ¼-inch-thick slices

2 sm. or 1 lg. fennel bulb, trimmed and cut into small pieces  

4 garlic cloves, finely minced

2 tsp. finely chopped fresh thyme

1 tsp. finely chopped fresh rosemary

1 tsp. smoked paprika

½ tsp. ground cumin

¾ c. dry white wine

6 c. chicken broth

freshly ground black pepper

1 (15 to 19-oz.) can black beans, drained and rinsed (I use Cento brand black beans)

Heat a large, heavy, covered soup pot over medium heat. Add the olive oil, then add the chorizo and cook, stirring occasionally until the meat is nicely browned. Using a slotted spoon, remove the chorizo to a small bowl. Set aside.

Add the onion, carrots, celery, and fennel; cook, stirring occasionally, for about 5 minutes, or until the vegetables begin to soften. Add the garlic, thyme, rosemary, smoked paprika, and cumin and cook for 1 minute.

Add the wine and cook until the liquid has evaporated. Add the broth and pepper. Bring to a boil, then reduce the heat to medium-low, and simmer, covered, for about 20 minutes, or until the vegetables are tender.

Stir in the beans and cooked chorizo. Taste and adjust seasoning. Simmer gently for about 10 minutes to blend flavors.

Ladle the soup into soup bowls. Drizzle with extra-virgin olive oil.

Great served with crostini. (See recipe below.)

CROSTINI

crusty French or Italian bread

extra-virgin olive oil

flaky or fine sea salt, to taste

Pre-heat your oven to 450-degrees. Line a rimmed baking sheet with parchment paper.  

Slice the baguette on the diagonal into pieces no wider than ½-inch. Lightly brush both sides of each slice with olive oil.

Place the slices in a single layer on your prepared baking sheet. Bake them on the middle rack for 6 to 9 minutes, or until they are crisp and nicely golden on top. Remove from oven and sprinkle lightly with salt. Serve immediately.

*The difference between Mexican and Spanish chorizo

Chorizo is a highly seasoned chopped or ground pork sausage used in Spanish and Mexican cuisine. Mexican chorizo is made with fresh (raw, uncooked) pork (and needs to be cooked), while the Spanish version is usually smoked. (Can be eaten like any other salami or sausage.)

According to The Spruce Eats “Spanish chorizo is a cured, or hard, sausage made from coarsely chopped pork. The red color of Spanish chorizo is due to the heavy amounts of paprika in the spice mix. Depending on the type of paprika used, Spanish chorizo can be either spicy or sweet. The paprika used in Spanish chorizo is almost always smoked, which gives the sausage a deep, smoky flavor. Other ingredients are herbs, garlic, and white wine, and the links can range from short to very long.

Because the sausage has been cured, meaning it has been aged for several weeks, it can be eaten without cooking and is often served sliced as part of a meat tray or tapas assortment. Spanish chorizo is also used to add flavor to cooked dishes like stews or paella, and even for special occasions. In general, fattier Spanish chorizos are used for cooking, whereas leaner chorizos are sliced and eaten without cooking. For both, the casings are edible.

Mexican chorizo is quite different from Spanish chorizo. The meat is usually ground, rather than chopped, and the sausage is fresh rather than cured. The red color of Mexican chorizo usually comes from spicy red pepper rather than the smoked paprika you find in Spanish chorizo. Pork fat is often added to the meat mixture, along with other spices and vinegar. The links are short, and air dried for one day to a week.

Mexican chorizo is sold raw and must be cooked prior to eating. It can be cooked either in its casings or removed from the casing and cooked like ground meat. Mexican chorizo is a popular grill item but is also used in place of ground beef in tacos, burritos, chili, burgers, soups, and even egg dishes.”

Mr. C. at piano
Grant on drums, Walt on bass, and Jerry on flugelhorn
And last but not least, the amazing Mr. Dave K. on trombone

ITALIAN SAUSAGE AND PENNE RIGATE SOUP WITH CROSTINI   

Soup
Crostini made with Tangy Overnight Sourdough bread – recipe to follow within the next couple of days

OK, at first glance it looks like a lot of ingredients in this recipe. And your first glance would be correct. But other than frying the Italian sausage, chopping the mirepoix (onion, carrot, celery), garlic, spinach, fresh parsley, and basil, the rest of the preparation is quick and easy. Just a matter of adding a bit of this and a bit of that to the pot. Then the soup burbles for a while, and soups on!

And what you get for this effort, is a truly rich and delicious soup. And a meal unto itself. Nothing else required. Of course, if you want to take the meal to an even higher level, while the soup simmers away, you can build crostini to serve with the soup. (See recipe for crostini below)

And now, my friends, you have a meal fit for a king or queen. (Or even company!)

So, frankly, there is nothing left to say. I want this soup to speak for itself!

Peace and love to all.

1 T. extra virgin olive oil

1 lb. bulk Italian sausage 

1 c. chopped onion 

1 med. carrot, chopped 

2 ribs celery, sliced

3-4 cloves garlic, finely minced

¼ c. dry red wine

4 c. chicken broth

1 (28-oz) can tomatoes (preferably Italian)

2 T. tomato paste

2-3 Parmigiano-Reggiano rinds*, opt.

1 bay leaf

2 tsp. paprika

2 tsp. Italian seasoning

1 tsp. fennel seed, coarsely cracked

pinch crushed red pepper flakes

½ tsp. seasoned salt

freshly ground black pepper

½-1 c. penne or penne rigate** pasta (or pasta of choice)   

2 c. chopped fresh spinach, chard, or kale

2 T. chopped fresh parsley

⅓ c. chopped fresh basil (or 1 T. pesto)

freshly grated Parmigiano-Reggiano or Pecorino-Romano (or combination)

freshly baked crostini or baguette slices (see recipe for crostini below)

Heat olive oil in a large, covered soup pot over medium heat. Add the sausage and break into chunks as it browns. When brown, remove from pan and set aside***.

Add onion, carrot, and celery to the pot. Sauté until onion starting to soften, about 6 minutes. Add garlic and sauté 1 minute longer. Add the red wine and cook until liquid is all but evaporated.

Add the broth, canned tomatoes (plus juice), tomato paste, Parmigiano-Reggiano rinds*, bay leaf, paprika, Italian seasoning, fennel seed, crushed red pepper flakes, seasoned salt, and black pepper.

Bring to a boil, cover, reduce heat to medium-low, and let simmer for about 30 minutes.

Add penne rigate. Cover and let simmer, stirring occasionally (while scraping along bottom of pot as pasta will tend to stick). Cook until pasta is nearly al dente. About 8 minutes. Stir in cooked Italian sausage and cook for 2 minutes. Taste and adjust seasoning. Remove from heat. Stir in spinach, fresh parsley, and basil.

Serve hot. Pass grated Parmigiano-Reggiano or Pecorino-Romano. Great with crostini or fresh, chewy sourdough bread.

*Parmesan rinds

I used to feel cheated by having to pay for the thick rind on Parmigiano-Reggiano. Heaven knows, the stuff was expensive enough without having to discard the rind. But I love the flavor of Parmigiano-Reggiano, so, I would pay the price. But a few years ago, I read that Parmigiano-Reggiano rinds are packed with flavor and can enrich the taste of tomato-based sauces, ragù, and soups. So, I have been using them ever since. (When I remember to use them, that is!)

**Penne and penne rigate

The shape of penne comes from the Italian word for “quill.” There are generally two variations of penne: smooth (lisce) and ridged (rigate). Thanks to its ridges, the rigate version is a bit sturdier and tends to soak up more sauce than smooth penne.

But either are perfect in this soup. As are elbow macaroni or any other small pasta.

***Setting cooked sausage aside

I have found that when I cook sausage for soups like this one and leave the meat in the pot while is simmers to blend all the other wonderful flavors, the meat loses it’s unique flavor in the process. And I want that burst of sausage flavor when I enjoy my soup. So, I remove the meat just after it’s been cooked and add it at the end. You, of course, can leave the meat in the entire cooking time if you prefer. It’s a personal choice.

CROSTINI

crusty French or Italian bread

extra-virgin olive oil

flaky or fine sea salt, to taste

Pre-heat your oven to 450-degrees. Line a rimmed baking sheet with parchment paper for easy clean-up.  

Slice the baguette on the diagonal into pieces no wider than ½-inch. Lightly brush both sides of each slice with olive oil.

Place the slices in a single layer on your prepared baking sheet and bake them on the middle rack for about 9 minutes, until they are crisp and nicely golden on top. Remove from oven and sprinkle lightly with salt. Serve immediately.


CRISPY BACON, JARLSBERG CHEESE, SPINACH, AND GREEN ONION QUICHE

When it comes to quiche, we, the residents of Chez Carr, are avid fans. And because I love to try new ways of presenting this perennial favorite, I play mix and match with ingredients as often as I make quiche. Sometimes the combination of ingredients work, sometimes, not so much. Oh, the quiches are still edible. But they simply don’t deliver the fantastic result I was striving so hard to achieve. But last night’s quiche was a winner. And therefore, worthy of this post.

But really, there is nothing new or inventive about the ingredients I chose to use. I had Jarlsberg cheese that needed to be consumed. And bacon, green onions, and baby spinach available and willing to be a part of the adventure.

So, bottom line, there are no screaming new taste sensations to be experienced when biting into this quiche. But there are old favorites in combination that make you want to stand up and shout hallelujah! (Wait, that was me who stood up and shouted hallelujah. You, I’m sure, are much more refined and dignified!) Anyway – what I’m trying to relate, in my own idiosyncratic way, is that this recipe produced a really good quiche! (I really must learn to tell a story in fewer words!)

So, if you too are a quiche lover, consider giving this recipe a try. The dish is easy to prepare, contains everyday ingredients, and everyone will love it. It contains bacon!

As always, have fun in your kitchen. Keep trying new recipes, but don’t forget about your old favorites.

And don’t let anyone ever tell you that real men don’t eat quiche. The men I know LOVE quiche. And they are as real as men get! And as wonderful, I might add. (You know who you are!)

Peace and love to all.

8-inch pie crust, unbaked and set in pie plate  

10 slices thick, meaty bacon, chopped and cooked until crisp

2 c. grated Jarlsberg cheese (or Swiss, Gruyère, Emmental, etc.)

⅓ c. sliced green onions

2 c. chopped baby spinach  

¾ c. milk (whole milk is best)

¼ c. half & half

4 lg. eggs

freshly ground black pepper

dash ground nutmeg

Scatter half of the cooked bacon over pie crust. Then layer half the cheese, half the greens onions, and half the spinach on top of that. Then repeat until all the bacon, cheese, green onions, and spinach are in the pie pan.

Whisk the milk, half & half, eggs, and black pepper together. Pour liquid mixture over all. Sprinkle with nutmeg. Cover edges of crust with thin strips of aluminum foil.

Bake in a pre-heated 325-degree oven until filling is set, about 45 minutes. Remove aluminum foil and bake for another 5 minutes.

Remove from oven and allow to sit for about 5 minutes before serving.


UPPER CRUST LEFTOVER CHICKEN, TURKEY, OR CAPON POT PIE

This is a recipe for individual pot pies with only an upper crust. And I know, I too love crust with a passion. But incipient old age has now proved, beyond a shadow of a doubt, that too much of a good thing is indeed NOT a good thing! So, with that in mind, I decided to make pot pies with our leftover baked capon, with moderation in all things foremost in mind. (Well, kinda sorta!)

So, forget a bottom crust, but save the day by topping the darling little quiches with a really delicious top crust.  

Now one of the joys of making your own crust, is that you can control the amount of fat in the dough. Well, there is no miserly fat content happenin’ in this crust recipe! There is plenty of fat to go around. (Hey, if I’m going to deny us a bottom crust, then the top crust, like I said above, has got to be fabulous!)

Then that leads to the filling. Although for some of us the crust is the star of the show, the filling must be equally delicious. So that when you take a bite that contains both filling and crust, your mind automatically goes to its happy place. And your mouth makes a smile that can only be interpreted by others as a sign of true bliss. Then you know – you’ve got a marriage of crust and filling not made in heaven, but in your very own kitchen.

So, don’t hesitate to make a pot pie from scratch. And I know, pot pies are not low calorie. But as an occasional treat, they are perfect. And yes, they take a bit of time to prepare. But the end product is so worth the effort.  

Peace and love to all.

For the Crust: This recipe makes enough crust to cover 4 (5-inch wide and 2½-inch deep) Corning Ware French white casserole dishes or a single 8-inch pie plate plus a bottom crust for a pie (or whatever)   

1 sm. egg

2 tsp. milk

2½ c. unbleached all-purpose flour

1 tsp. kosher salt

5 T. vegetable oil

½ c. (1 stick) cold unsalted butter, cut into small pieces 

7-8 T. ice water 

Whisk the egg and milk together in a small bowl. Set aside

Place the flour and salt in the bowl of your food processor. Pulse to combine. Add the oil and pulse until mixture resembles coarse crumbs. Toss in the butter. Dribble ice water in, a tablespoon at a time, mixing just until the mixture can hold its shape. The dough should be moist, but not wet and not crumbly.

Remove the dough onto a large sheet of plastic wrap. Use the plastic wrap to gather the dough into a disc shape, then wrap the dough tightly and press down on it firmly to compact it. Chill the dough in the refrigerator for 1-2 hours.

Remove from fridge and divide the dough in half. Re-wrap one of the halves for another purpose. Or store the dough in your freezer for up to 3-months. If you do freeze the dough, bring to room temperature before using.

With the remaining half disc, cut it into 4 even pie-shaped pieces. Then using your hands, make 4 balls, then roll each into a 7-inch circle.

Please note: If you prefer to make just a single large quiche, roll as much of the dough as needed to cover the entire diameter of a pie plate plus a 1-inch hangover. Set the 4 small crusts or single crust aside while you make your filling.

For the Filling:

2 T. unsalted butter

½ onion, chopped

¾ c. chopped celery

1 carrot, diced

2½ c. gravy, either leftover or made just for the occasion (see Gravy recipe below)

chicken base (I use Better Than Bouillon Chicken Base)

2 c. cooked veggies (green beans, peas, broccoli, mushrooms, etc.)

3-4 c. diced cooked chicken, turkey, or capon

Melt the butter in a medium sized pan. Add the onion, celery, and carrot and cook until the carrot is just becoming tender. Stir in the gravy, cooked veggies, and the diced chicken, turkey, or capon.

Scoop the filling evenly into the 4 small casserole dishes or single pie plate. Top with the dough which will hang over the edge(s). For the small casseroles, crimp the dough to fold over the side, pressing it a bit to make it stick. Brush the dough with the egg wash. Make 3-5 slits in the top. Place the pies on a rimmed baking sheet.

For a large quiche, top the filling with the crust. Crimp the edges. Brush the dough with the egg wash. Make 5-7 slits in the top.

Bake in a pre-heated 400-degree oven for 45-50 minutes or until the tops are nicely browned and the filling is bubbly. Remove from oven and let sit for 5-minutes before serving.  

Gravy:

2 T. unsalted butter

2 T. flour

2½ c. water

4-5 tsp. chicken base (I use Better Than Bouillon Chicken Base)

1 tsp. Kitchen Bouquet

freshly ground black pepper

1-2 tsp. cognac

Melt the butter in a small saucepan. Whisk in the flour. Let burble for a couple of minutes. (This process takes time, so be patient.) Slowly whisk in the water and chicken base. Let that burble for a few minutes too. Add the Kitchen Bouquet (gives the gravy great color) and some freshly ground black pepper. No salt! Taste the gravy. If you think it needs more depth of flavor, begin by adding another teaspoon of chicken base. Let it simmer for a couple of minutes and taste again. Repeat if needed. Just before using as called for in the pot pie recipe, taste the gravy and make any final adjustments to the seasoning. Stir in the cognac. (Don’t forget the cognac!)

DUTCH OVEN BAKED CAPON WITH LEMON, GARLIC, ROSEMARY, AND THYME

So, why a capon you might ask. And I would totally understand. Because that is just what I asked Mr. C. when he returned from a grocery shopping expedition just before Christmas. A capon. Really? Why?! And his answer. “Because it was there and we had talked about it recently, and it seemed like a good idea.” Fine. I get it. We now have a capon in the freezer. Life is good.

But then, how in the heck should I go about cooking this oversized, male version of a chicken?! So, I did what I sometimes do when faced with this kind of situation. I procrastinated. I’m not proud of this lamentable tendency, but I’m not going to lose sleep over it either. (There are much worthier causes to feed my anxiety and keep me from a good night’s sleep!)  But finally, the time came to face this 7.58-pound frozen hunk of poultry. So, armed with 1 capon defrosting on my drainboard and a good bit of timidity, I went in search of a recipe.

Well, to be truthful, there aren’t that many recipes out there for baked capon. Of course, I could have used one of my recipes for baked chicken, and simply added more baking time to allow for the difference in weight. But frankly, after baking the capon, I realized that there is much more than a size difference between a chicken and a capon.

According to The Spruce Eats, “A capon is a special type of chicken created to make the meat more tender and less gamy. It is a rooster that has been castrated before reaching sexual maturity, which improves the quality of the meat; after that, it is fed a rich diet of milk or porridge. The lack of testosterone makes for a more tender, flavorful meat that is a delight compared to regular chicken. Unfortunately, in the United States today, it may be rare to see capon on a dinner menu or in the grocery store.

This poultry was once considered a luxury, and during the early part of the twentieth century, the capon was the chosen bird for Christmas feasts, especially for the wealthy. Working-class families saw capon as a rare treat because it was quite expensive.”

(And BTW – it still is. And at least in our immediate vicinity, capons are only available during the holidays.)

So, what to do? I simply took a bit from this recipe, and that recipe, and came up with the recipe you see below. And the meat was perfect. Tender, succulent, and tasty. Really tasty! I mean, how could it not be with all the herb, garlic, and lemon action going on. Truly delicious.

So, when you decide to bake a capon, I hope you find it to be as rewarding an experience as I did. The ease of preparation, the simplicity of ingredients (except the capon itself, of course), and the fantastic results make the effort completely worthwhile.

And for those of you who also have a predilection for using delaying tactics when faced with an unknown, take heart from my experience with baking a capon. If I hadn’t baked the capon, I never would have had the satisfaction of overcoming. And I think overcoming has never been given the respect it deserves. I overcame procrastination and my self-doubt about baking a capon. And I know, at a glance, both seem trivial. But when I add them to all the other minor achievements that make up my daily routine, like cleaning up after myself, or doing the laundry, calling a friend, or performing my almost daily exercise program, it leaves me feeling good about myself. And if I feel OK about me, then I can reflect my inner peace to my family, friends, and especially to Mr. C. And witness their comfort and happiness with me in their countenance. That, my friends, is the greatest feeling in the world!

Peace and love to all.  

1 T. vegetable oil

4 T. (½ stick) unsalted butter

5 cloves garlic – 3 minced, 2 halved

2 T. finely minced rosemary

1 lemon – zested, halved, and juiced (all parts will be used in this recipe)

2 tsp. kosher salt, plus more for seasoning the cavity

freshly ground black pepper

1 capon (7-8 lb.), giblets removed, then washed and dried thoroughly

½ onion, cut in 4 pieces

1 (3-inch) sprig fresh rosemary

3 (2-3 inch each) sprigs fresh thyme

Coat the bottom and sides of an enameled Dutch oven with the veggie oil. (I use my Le Creuset Dutch oven.) Set aside.

Preheat your oven to 475-degrees.

Melt the butter in your microwave. Stir in the minced garlic(3 cloves), minced rosemary, lemon zest, kosher salt, and black pepper. Set aside.

Season the cavity of the capon with salt and pepper. (Not too much.) Then stuff the bird with the zested and juiced lemon rind, 2 halved garlic cloves, onion pieces, sprig of fresh rosemary, and thyme sprigs. Place the capon in the prepared Dutch oven, breast side up.

Using your hands, spread the mixture liberally over every part of the chicken and under the breast skin. (Be careful not to tear the skin).

Tie the legs of the capon together tightly using kitchen twine. Pour reserved lemon juice over all.

Roast capon uncovered for 15 minutes at 475-degrees, then reduce heat to 350-degrees. Bake still uncovered for approximately 20 minutes per pound, or until internal temperature taken reaches 180-degrees in the thickest part of the thigh.  (About two and a quarter hours for a 7.5 lb. capon). The capon should be uncovered the entire time it cooks, unless it seems like it’s getting too brown. If so, place the lid ajar on the Dutch oven until the capon has fully cooked.

Remove from oven, remove the capon to a platter, and let it rest for at least 15 minutes before carving. Use the liquid left in the pan for gravy, if desired. See recipe below.

CAPON GRAVY WITH COGNAC

pan drippings from roasted capon

flour

chicken stock

1 tsp. Kitchen Bouquet

freshly ground black pepper

chicken base (I use Better Than Bouillon Chicken Base)

1-2 tsp. cognac

Skim off a bit of the fat. Whisk in enough flour to absorb the remaining fat. Let burble for a couple of minutes. (This process takes time, so be patient.) Slowly whisk in chicken stock until you reach the desired thickness. Add the Kitchen Bouquet (gives the gravy great color) and some freshly ground black pepper. No salt! Taste the gravy. If you think it needs more depth of flavor, begin by adding one teaspoon of chicken base and a small amount of chicken stock. Let it simmer for a couple of minutes and taste again. Repeat if needed.

Turn heat as low as possible and let the gravy gently simmer while you carve the capon. Whisk periodically. (You will probably need to add more stock during this time.) Also, after the capon is sliced and plated, don’t forget to add the accumulated juices on the platter to the gravy.

Just before serving (and gravy should be the last item plated), taste the gravy and make any final adjustments to the seasoning. Stir in the cognac and serve piping hot.

POTSTICKER SOUP

Now, believe it or not, this is one of the best soups I have ever made. And I know, I say that about all the soup recipes you find on this site. And granted, I love soup. But it’s kind of like someone asking me what is my favorite cookie? And of course, I would most likely answer – the one I am eating at the time. Duh!

But I must also add that I am very partial to Asian soups. And the broth in this soup has tons of the Asian flavors I so dearly love. Combine that with ease of preparation, the use of fairly standard pantry and refrigerated ingredients, and what’s not to love about this dish?

And although this soup might not be the heartiest soup I make, it’s absolutely perfect for two adults approaching the golden years of their lives. (Like we aren’t already there, but unwilling to let our actual ages diminish our zest for life and our enjoyment of gastronomic pleasures!) But I digress…..

Anyway, this soup is really good. You should give it a try. And I’ll share a little trick with you. I love bok choy. Mr. C., not at all. So, I cooked the bok choy separately. I chopped up 2 cups of this wonderful vegetable. Then I cooked it for a couple of minutes in a bit of chicken broth. When it came time to serve the soup, I ladled a big portion of the soup into a bowl for Mr. C. Then I placed a couple big old spoonsful of bok choy in the bottom of my bowl and topped it off with the bok choy unadulterated broth with veggies that Mr. C. requested. Win/win. I got my bok choy fix. And Mr. C. did not have to suffer any cruciferous flavor discomfort. But in his defense, had I used spinach or kale, he would have been just fine eating the soup the way it was originally intended. I just didn’t happen to have either spinach or kale on hand.

So, with way too much knowledge of the idiosyncrasies of the residents of Chez Carr, I offer up this delicious soup recipe. It truly is yummy.

Peace and love to all.

⅓ c. broken pieces of dried shiitake mushrooms (or dried mushroom of choice)

½ c. boiling water

2 T. extra virgin olive oil

1 pkg. frozen pot stickers (I use Annie Chun’s organic potstickers – 7.6-oz. pkg.)

1 med. carrot, julienned

1 stalk celery, finely diced

1 T. minced fresh ginger

4 garlic cloves, finely minced

5 c. water

5-6 tsp. chicken base (I use Better Than Bouillon Chicken base)

3 T. soy sauce, or more to taste

1 T. toasted sesame oil

½ tsp. Asian chili-garlic sauce, or more to taste

4-6 green onion, thinly sliced, divided

pinch sea salt

freshly ground black pepper

1-2 c. chopped bok choy, spinach, or kale

sesame seeds, opt.

In a small bowl, soak the dried mushroom pieces in the boiling water. Set aside.

Coat the bottom of a large, covered soup pot with the olive oil. Fry the pot stickers over medium heat until they get some nice browning on all sides (about 10 minutes). Remove from pan and set aside.

In the same pan, sauté the carrot and celery until the carrot is tender. Stir in the ginger and garlic and cook for 1 minute. Add the water, chicken base, soy sauce, sesame oil, chili-garlic sauce, half the green onions, salt, pepper, and the re-hydrated mushrooms plus soaking water. Bring to a boil, reduce heat, cover, and simmer for 15 minutes. Taste and adjust seasonings.

Add the bok choy and fried potstickers. Increase heat and bring to a boil.

Serve garnished with sesame seeds and the remaining sliced green onions.


CAJUN HAMBURGER PATTIES SMOTHERED IN ONION GRAVY

These days, for me, when given a choice, 90% of the time I prefer a dish featuring lean ground beef over steak. Why this is I have no idea. Except that, ground beef can be flavored easier than steak. And ground beef just smacks of comfort food. And most of you know, I am all about comfort food.

Of course, I would never turn down a rare steak, especially when grilled by our dear friend Jim. But when I think about fixing beef for dinner, it usually involves a package of lean ground beef.

But how to turn a pound of ground beef into a delicious dish? Quite easy, as this recipe will attest. A few simple ingredients. A modicum of time. And a spirit of adventure.

And what do you get for your time and energy preparing this dish? A hearty meal that is delicious and quite inexpensive to produce. And a sure winner that your entire family will enjoy. I mean really! Who doesn’t love gravy? No one I know, that’s for darn sure! And nothing could be easier to prepare than the gravy for this dish. And served over grits – well boy howdy, nothing could be finer! Southern comfort to the max.

I found the bones of this recipe on the themccalumsshamrockpatch.com site. Of course, I changed the original recipe a bit. But the true hero is Heidy, who thunk up this recipe in the first place. Hat off to you Heidy. And thanks, of course!

So, without further ado, I present this amazing comfort food recipe for your gastronomic delight. (You may thank me later!)

As always, peace and love to all.

For the Patties:

1 lb. lean ground beef

¼ c. Panko breadcrumbs

¾ tsp. Cajun seasoning

½ tsp. granulated onion

¼ tsp. granulated garlic

¼ tsp. seasoned salt

freshly ground black pepper

1 T. extra virgin olive oil

Combine the ground beef, Panko breadcrumbs, Cajun seasoning, granulated onion, granulated garlic, seasoned salt, and freshly ground black pepper. Form into 3-4 equal sized patties.  

Heat the olive oil in a large fry pan. Place the patties in the hot oil and fry until the bottom of each patty is dark brown. (You want a nice crust on these babies.) Flip and brown the second side. When browned, remove from pan. Do not remove the dripping from the pan.

For the Gravy:

3 T. pan drippings or unsalted butter

1 yellow or white onion, halved then thinly sliced

2 garlic cloves, finely minced 

3 T. flour

½ tsp. Cajun seasoning

freshly ground black pepper

pinch crushed red pepper flakes

2 c. water

1 T. beef base (I use Better Than Bouillon Beef base)

1 T. Worcestershire sauce 

kosher salt, to taste

If less than 3 tablespoons of drippings left in the pan, add unsalted butter to make up the difference. Add the sliced onion and cook on medium-low heat for about 8 minutes or until the onion is tender. Add the garlic and cook for 1 minute. Add the flour, Cajun seasoning, black pepper, and tiny pinch of crushed red pepper flakes. Allow to cook for a couple of minutes. Then whisk in the water, beef base, and Worcestershire sauce. Whisk until the gravy starts to thicken. Taste and add salt or other seasoning as needed. Add the hamburger patties back to the skillet, reduce heat to the lowest setting, and cook for about 10 minutes. Stir occasionally and flip patties once or twice during this time.

Remove from heat. Serve the hamburger patties and gravy over grits. (See recipe below.) Or, if you prefer, serve the patties and gravy over rice, mashed potatoes, or thick al dente egg noodles.

GRITS

1½ c. milk

1½ c. water

¼ tsp. kosher salt

freshly ground black pepper (just a bit)

¾ c. regular or quick-cooking grits

1 T. butter

Bring milk, water, salt, and pepper to a simmer over medium heat in a covered pan. Slowly whisk in the grits. (Whisking helps to avoid lumps.)

Cook grits covered over medium-low heat, stirring frequently (about 15 minutes for regular grits, 5 minutes for quick-cooking grits).

Remove from heat and stir in butter. Taste and adjust seasoning if necessary.