Category Archives: ITALIAN CUISINE

BOLOGNESE SAUCE (RAGÙ ALLA BOLOGNESE)

OLYMPUS DIGITAL CAMERA

Once in a while I have an “aha moment”.  And usually when this happens I wonder why in the world I didn’t think of this (whatever it might be) sooner! Well one of those “aha moments” occurred this last week when I was preparing Lasagna Bolognese. I had prepared the red sauce for the lasagna and was giving it a taste to make sure the seasoning was correct, when it hit me that this easy sauce, with the possible addition of a grated carrot and a stalk of celery, would be perfect over al dente spaghetti. Add a sprinkle of Parmesan cheese, and Bob’s your uncle!

And yes, I have other recipes for spaghetti sauce, but this particular recipe uses very simple ingredients, doesn’t take all day to simmer, and always turns out wonderfully. Plus it freezes beautifully.

Now I know what those of you who are Italian sauce experts will be thinking when you look at the list of ingredients. (And yes, I can read minds!) Where are all the rest of the herbs usually in a recipe for ragù, like thyme, rosemary, Italian seasoning, for example? And what about wine? Where’s the wine in this recipe? Well the answer is quite simple really. Additional herbs are simply not necessary. And frankly, wine can sometimes make an Italian red sauce taste too acidic.

Now don’t get me wrong, I sometimes use wine in my sauces, but this one just doesn’t need it. Neither does it need any sugar, especially if you use canned Italian tomatoes. And then, even if the sauce is a slight bit acidic, a tablespoon or two of butter right at the end takes care of the problem in a second. (I really do try to stay away from additional sugar if at all possible.)

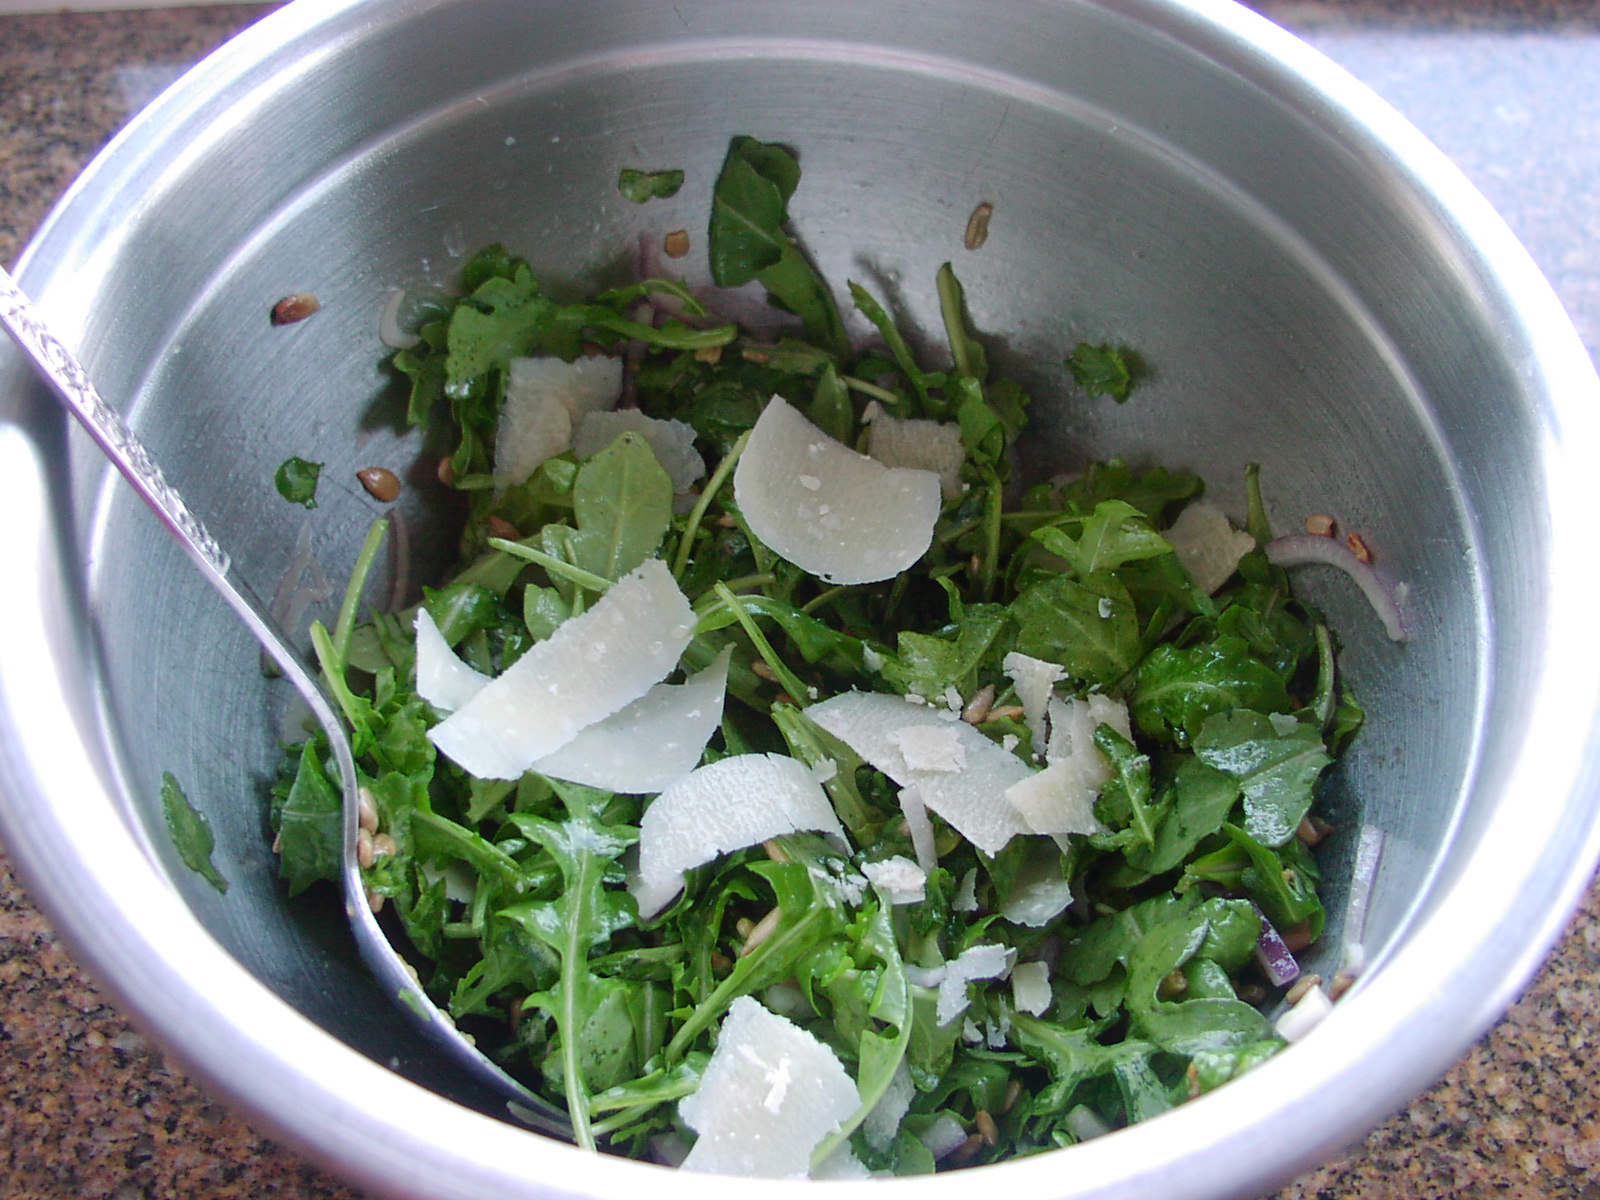
So next time you want a hearty Italian meal that your entire family is sure to like, make up a big old batch of this sauce, boil up some spaghetti (al dente of course) and grate up some Parmesan cheese. Serve with a simple green salad, and perhaps some garlic bread, and you have a recipe for success. And of course, since you didn’t pour any wine in your sauce, you should have plenty to pour in your glass. And if this sauce doesn’t fairly scream out for a nice rich cabernet, pinot noir, or Sangiovese as an accompaniment, I’m not the proud owner of “Essentials of Classic Italian Cooking” by Marcella Hazan. And I’ve got my copy right in front of me as I write!

  • 1 T. extra-virgin olive oil
  • 1 lb. bulk Italian sausage (either chicken or pork)
  • ½ c. chopped onion
  • 1 small carrot, grated
  • 1 stalk celery, very finely chopped
  • 2 cloves garlic, chopped
  • 1 (28-oz.) can chopped or diced tomatoes (Italian tomatoes preferably)
  • 1 bay leaf
  • pinch crushed red pepper flakes
  • 1 tsp. dried oregano
  • ½ tsp. kosher salt
  • freshly ground black pepper
  • ½ c. loosely packed fresh basil chiffonade*
  • 1-2 T. butter, optional

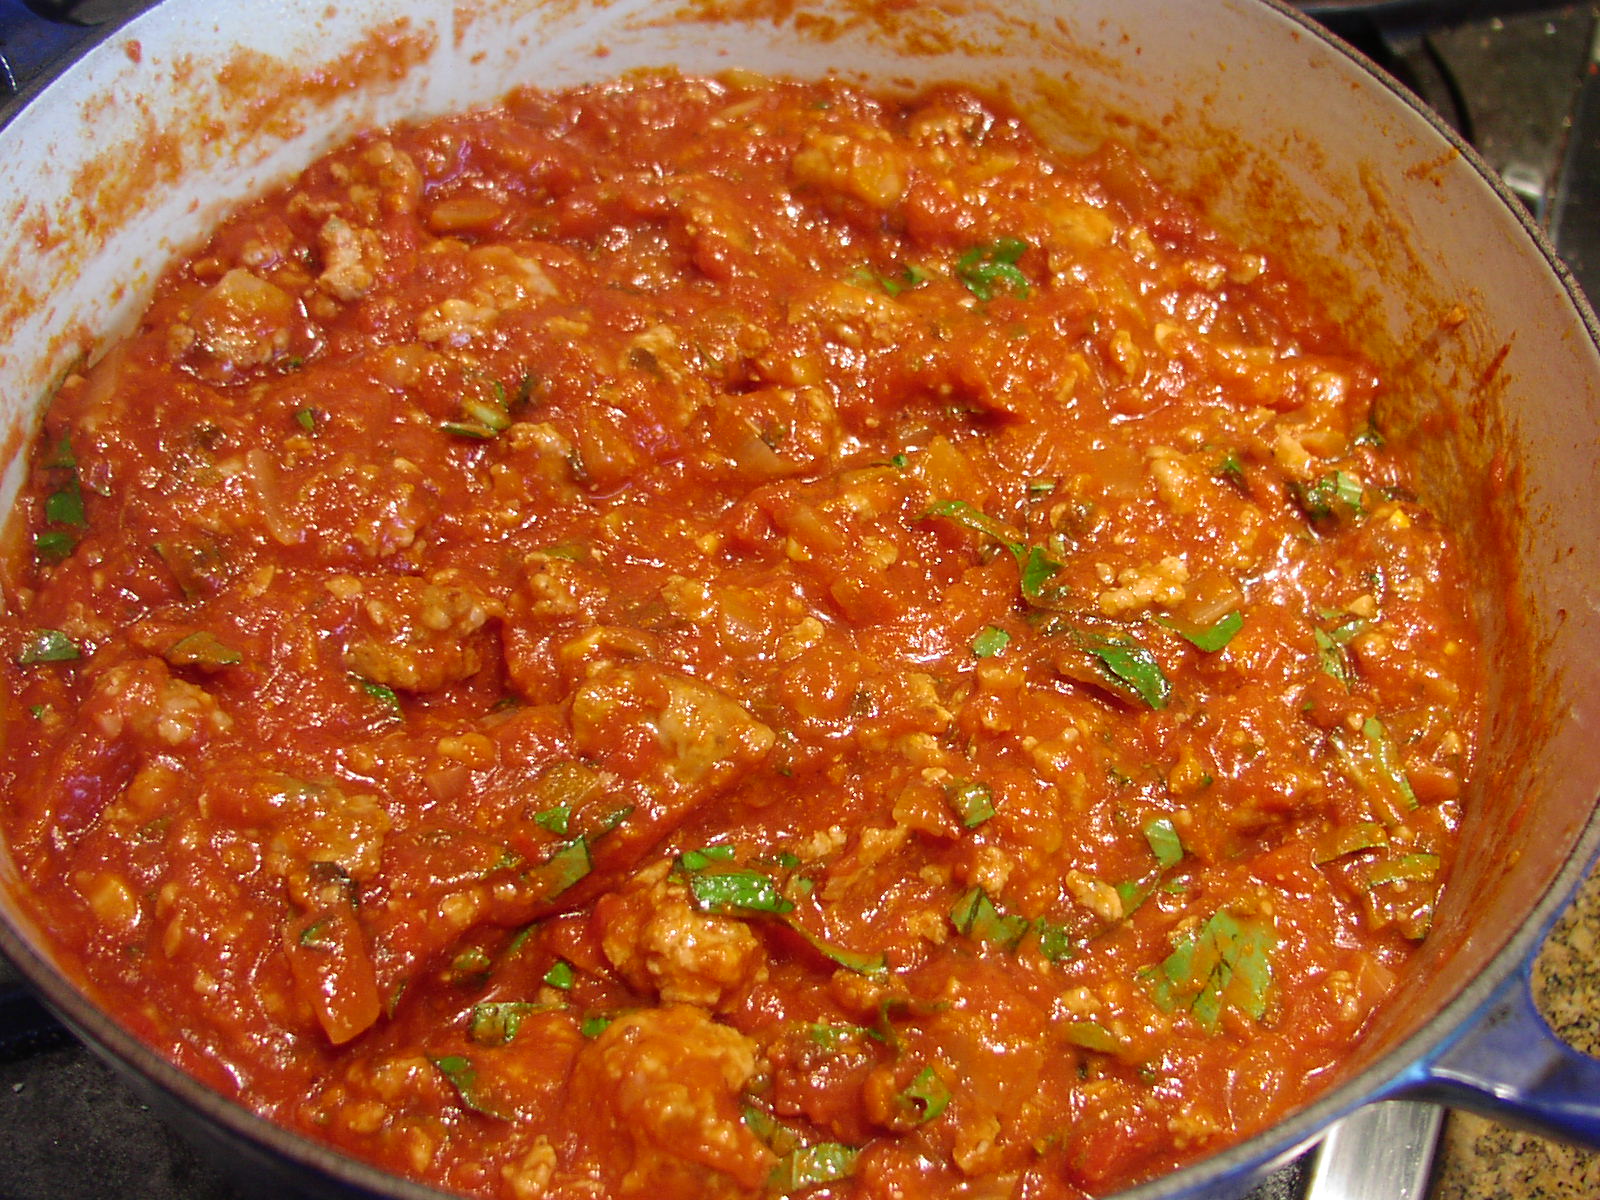
In a large covered sauce pan, heat the olive oil over medium high heat. Add the sausage, chop it into small pieces as it cooks, and sauté until nicely browned. Add the onion, carrot, and celery; sauté until the onion is soft and translucent, about 4 minutes. Stir in the garlic and cook for an additional minute. Add the tomatoes, bay leaf, red pepper flakes, oregano, salt, and pepper.  Stir to combine ingredients. Bring to a boil, reduce heat, cover, and simmer for about 30 minutes.  When the sauce is done, remove from heat, remove bay leaf, add basil, and adjust seasoning. If the sauce tastes acidic, add butter 1 tablespoon at a time to round out the flavor.  (Even better if made a day or two ahead.)

Please note: This is a very thick and chunky sauce. If you prefer a more “saucy” sauce, add a small can of tomato sauce along with the chopped or diced tomatoes.

*Chiffonade (pronounced “shif-oh-nod”) is a knife technique used for cutting herbs and leaf vegetables such as lettuce into thin strips or ribbons. To chiffonade leaves of basil, stack the basil leaves and roll them into a tube. Then carefully cut across the ends of the tube with your knife to produce fine strips.


ROASTED MUSHROOM LASAGNA WITH BÉCHAMEL SAUCE

OLYMPUS DIGITAL CAMERA

Since I knew I was going to have a large crowd (41) for last Sundays JazzVox concert, I decided to fix a big ole Italian meal. Complete with appetizers – Caponata Alla Siciliana, Marinated Goat Cheese, and Crab and Artichoke Dip. (I didn’t get a picture of the Crab and Artichoke Dip, so I am going to have to make it again very soon before I can post the recipe. Oh the sacrifices I must make for this blog!) Followed by Lasagna Bolognese, vegetarian Roasted Mushroom Lasagna with Béchamel Sauce (this recipe), romaine salad with Italian Salad Dressing (soon to be published), and Herb and Garlic Focaccia (again – soon to be published). And for dessert, Italian Dream Cake and Glazed Italian Lemon Cookies. Look for the cookie recipe in the near future also.

And for those of you who are looking at the menu and saying to yourself “is this woman crazy making all that food”, I offer a simple response. Yes she is! I mean – yes I am!

But if you are going to lavish food on 41 hungry people, 10 of whom are teenagers, you simply need to fix a large quantity with multiple choices. And what better dish or dishes to feed a large crowd than lasagna? Now granted, lasagna is not a quick dish to prepare.  But none of the steps taken individually are difficult to construct. It’s just that there are a stinkin’ lot of steps! (I sound like I’m trying to persuade you not to make this lasagna, but that’s not the case. But, I’m also not going to lead you down a primrose path! (For those of you who are too young to know the meaning of “being led down a primrose path”, it means “being led to a life of ease and pleasure”.) Or as Lemony Snicket* would define it “being in and out of the kitchen in less than 30 minutes”. Simply not going to happen!)

But if I do say so myself, it is time well spent. The lasagna is creamy, herby, and full of mushroom flavor. And it’s vegetarian. So next time you need or want a veggie main dish, give this lasagna a try. It’s just really, really good.

*For a wonderful read that contains more vocabulary words and definitions (some real, some just for the circumstance) than your average grade school English primer, check out one of Lemony Snicket’s books in the charming children’s series “A Series of Unfortunate Events”. If all of the 3 R’s could be taught in such a delightful way, there would be a lot more children achieving than left behind. And if Lemony Snicket were telling you about this recipe, he would undoubtedly tell you not to make this dish. That you should try a recipe that was simpler and quicker to prepare. That you should fix a dish that you knew you would like. That you would be upset with the final product. But then, he tries with all his might to dissuade youngsters from reading his books too if all they like are happy endings. (His books never have a happy ending!) But unlike his books, this recipe does have a happy ending. It’s called a happy mouth. Enjoy!

  • ½ onion, coarsely chopped
  • 2 lbs. mixed mushrooms (cremini, button, Portobello, shiitake) sliced between ¼-inch and ½-inch thick
  • 2 T. extra virgin olive oil
  • 8 T. unsalted butter, divided
  • 1 tsp. kosher salt
  • freshly ground black pepper
  • 1 T. finely chopped fresh rosemary
  • 2 garlic cloves, finely minced
  • ½ c. flour
  • 6 c. milk (whole milk is best)  
  • ¼ tsp. kosher salt
  • ¼ tsp. white pepper or black pepper to taste (white pepper actually has a sharper flavor than black)
  • 1 lb. lasagna noodles* (I like Culinary Circle Authentic Bronze-cut Lasagna noodles)  
  • 1 c. grated Pecorino Romano cheese
  • 1½ c. grated mozzarella cheese 
  • 1½ c. grated Parmesan cheese
  • 2 T. chopped Italian parsley

Place the onion and mushrooms on a large low sided baking sheet.  Drizzle with olive oil. Cut 2 tablespoons of the butter into small pieces and place on top of the mushrooms. Sprinkle with the salt and pepper. Using your hands, toss the vegetables together until they are evenly coated with the oil, butter chunks, and seasonings.

OLYMPUS DIGITAL CAMERA

(Before the mushrooms are roasted.)

Place in a pre-heated 400 degree oven for 20 minutes or until the vegetables are tender and browned. (Turn once during the baking process to ensure even browning.)  Remove from the oven and sprinkle with the fresh rosemary. Stir. Set aside.

OLYMPUS DIGITAL CAMERA

(After the mushrooms are roasted.)

Meanwhile to prepare your béchamel sauce, melt the remaining 6 tablespoons of butter in a heavy saucepan over low heat. Add the garlic and cook for about 1 minute of until the garlic gives off its aroma. Whisk in the flour and cook for a couple of minutes or until the roux starts to turn a delicate golden brown. Slowly whisk in the milk and bring to a slow boil, stirring the entire time. Boil for one minute as the sauce continues to thicken. Remove from heat and whisk in the salt and pepper. Set aside. Reserve 1 cup of the béchamel sauce. (This will be spread on the lasagna half way through the baking process.)

Before cooking the noodles, have all the other ingredients prepped and ready to go. Cook the noodles in boiling salted water until al dente (firm to the bite). Drain the noodles and run under cold water. Drain again.  

To assemble:  Spread ½ cup béchamel sauce in a buttered 10×16-inch baking pan.  Arrange 1/3rd of the lasagna noodles over the sauce. Spread half of the roasted vegetables over the noodles, followed by half of each kind of cheese, then half of the béchamel sauce. Repeat, beginning with another third of the noodles, remaining roasted veggies, and remaining half of each cheese, except the Parmesan. Save out about a quarter cup. Layer on the remaining noodles. Carefully cover the pan with foil that has been sprayed with non-stick cooking spray and bake in a pre-heated 375 degree oven for 30 minutes. Remove the foil; spread the reserved 1 cup béchamel over the top and sprinkle with the reserved quarter cup of Parmesan cheese. Bake uncovered for an additional 15-20 minutes or until the lasagna is bubbly and lightly browned on top. Remove from oven, lightly cover with the foil you used earlier, and allow the lasagna to sit about 15 minutes before serving. Sprinkle with the parsley just before cutting into portion sized pieces.

*Hint: when deciding how many noodles to cook, spread the bottom of your pan with a single layer of uncooked noodles. Triple that number and you have just the right amount. (Seems too easy, doesn’t it?)  


ITALIAN MEATLOAF

OLYMPUS DIGITAL CAMERA

We recently purchased half of a Highland* cow together with Mr. Cs sister Katie and her husband Rick. When we received our quarter of the beef, we had 34 – 1 lb. packages of very lean ground beef among all the other cuts. Now that’s a lot of ground beast! Our beef had been packaged exactly as Rick and Katie’s. So at Christmas time when they were visiting for the holidays, Katie asked me what I planned to do with all the ground beef? Since I happen to really love ground beef, I answered that I already had several recipes that called for ground beef. But when I looked through my recipes, I realized I didn’t actually have that many. So I thought about my favorite cuisine – Italian. What about an Italian meatloaf, I thought to myself? So I set about figuring out a recipe.

Now the one thing that meatloaf absolutely must be is moist. If it is dry and has the consistency of sawdust, you might as well use it as a doorstop! So in order to offset the leanness of the beef, I added an equal part of pork Italian sausage. (You could use chicken Italian sausage, but the meatloaf would not be quite as moist.) And the recipe turned out to be very good. Absolutely moist and full of the Italian flavors that we so dearly love. And the topping, which is basically a simple marinara sauce, is a nice alternative to the usual ketchup and brown sugar variety.

So if you want a new slant on meatloaf, give this recipe a try. It is a wonderful way to prepare a large meat dish using 2 fairly inexpensive cuts of meat. Plus planned-overs can be used in a number of different ways – sandwiches, cut up in small squares to use as “meatballs” for spaghetti, or crumbled on a pizza, to name just a few.

So however you serve this dish, your family and friends are bound to like it. And for your young children who think of meatloaf as a boring alternative to “real” food, like McDonalds hamburgers, for example, don’t call it meatloaf. Call it something fun like Monday Moo Meat or some other fun name depending on whatever night you are serving it to your family. Then serve it with a potato dish like Oven Roasted Steak Fries with Fry Sauce (on this site) and carrot sticks, and your kids will love it. Or they might possibly think you have slipped over the edge. That could also happen! (I always felt it was better for my children to think of me as slightly crazy rather than as your average boring mother type! I succeeded too!)

*Highland cattle are a Scottish breed. They have long horns and long wavy coats that are black, brindle, red, yellow, white, silver or dun colored. And, this is the hard part, they are just stinkin’ cute! But, as cute as they appear, they are raised primarily for their meat. So as long as I stick to thinking of these darling critters in terms of small white packages that live in my freezer, I’m OK.

  • 1 T. extra virgin olive oil
  • ½ onion, finely chopped
  • 3 garlic cloves, minced
  • 2 T. Italian seasoning, divided
  • 1 tsp. kosher salt
  • freshly ground black pepper
  • ¼ c. minced fresh parsley
  • 1 c. finely grated Parmesan cheese
  • 3 eggs
  • 2 T. milk
  • ½ c. Italian style dry bread crumbs
  • 1 lb. bulk Italian sausage* (pork or chicken)
  • 1 lb. lean ground beef
  • 1 (8-oz.) can tomato sauce

Heat the oil in a small fry pan. Add the onion and fry until translucent. Add the garlic and sauté for one minute. Take all but 2 tablespoons of the cooked onion and garlic out of the pan and place in a large mixing bowl.  Set the pan, complete with contents aside. 

To the bowl with the cooked onion and garlic, add one of the tablespoons of Italian seasoning, salt, pepper, parsley, Parmesan, eggs, milk, and bread crumbs. Stir until thoroughly blended. Add the Italian sausage and gently stir until completely blended. (I use the meat serving fork from my set of tableware to help break up the meat as I stir it into the other ingredients. I find it to be the best tool for the job.)  Add the ground beef and do the same. Pat into a lightly greased 9X13-inch baking dish. 

Bake in a pre-heated 350 degree oven for 25 minutes. Meanwhile, add the tomato sauce, remaining 1 tablespoon Italian seasoning, and a pinch of kosher salt and pepper to the pan with the 2 tablespoons onion and garlic. When the meatloaf has baked for 25 minutes, remove it from oven and slather on the sauce. Return the meatloaf to the oven and bake an additional 15 minutes or until the meatloaf reaches an internal temperature of 160 degrees. (If you don’t have an instant-read thermometer, ask Santa for one next Christmas. They are the best thing to hit the culinary tool parade since high temperature spatulas!) But seriously, the meatloaf should be done after about 40 minutes. So don’t panic if your kitchen does not contain an instant-read thermometer. I didn’t have one until about 3 years ago, and I’ve been making meatloaf for a heck of a lot longer than that!    

*If you don’t happen to have bulk Italian sausage around, you can add 1 teaspoon of fennel seed and ¼ teaspoon crushed red pepper flakes to either plain ground pork or bulk breakfast sausage and achieve a good enough replacement.                                                                                                                                                        


ZUCCHINI PANCAKES

OLYMPUS DIGITAL CAMERA

I think of all the vegetables, I like zucchini just about the best. And I think that’s because it is so versatile and of course so tasty. Not to mention – inexpensive. Especially in the summer when you can easily grow your own, or beg your neighbors for any extra zucchini they might possibly have just laying around. (Like your neighbors aren’t going to be thrilled that someone is actually asking them for zucchini. So much nicer for them than having to leave “care-packages” of zucchini on people’s front porches in the dead of night!)

As I was saying, zucchini is a marvelous vegetable. So when I happened to be watching the Food Network a couple of days ago and saw Ina Garten make these pancakes, I was hooked. Of course, I had to change the ingredients up a bit, because that’s what I do! But the bones of the recipe are strictly Ina.

I just figured, and rightly so I feel, that seasoned salt, olive oil instead of vegetable oil, additional onion, a bit of Parmesan cheese, and a dollop of sour cream could not possibly hurt the basic recipe. And I do believe it made a difference.

So if you too are zucchini lovers, or even if you aren’t particularly fond of this mild mannered, non-presumptuous vegetable, give these pancakes a try. They make just a stunning side dish. Plus they are different. And what cook doesn’t love serving something different to their family and friends?

So get thee to the store and buy yourself some zucchini. You will be amazed at how easy the batter comes together. And the fact that the pancakes are so versatile. They go perfectly with any type of meat. And they contain (but you don’t have to announce this to your children) a green vegetable. (In some cases, sneaky is OK. I believe this is one of those times!)

  • 7 T. all-purpose flour, or more as needed
  • 1 tsp. baking powder
  • 1 tsp. seasoned salt
  • freshly ground black pepper
  • ¼ c. finely grated Parmesan cheese
  • 2 lg. eggs
  • 2 med. zucchini (a healthy ¾ lb.)
  • 3 T. finely minced red onion
  • unsalted butter
  • olive oil
  • sour cream (Mexican crema agria is the best), opt.

Whisk together the flour, baking powder, seasoned salt, and pepper. Stir in the Parmesan until all bits are coated with the flour; set aside. Whisk the eggs in a good sized bowl. Grate the zucchini using the large grating side of a box grater*. Add to the eggs along with the onion. Stir well to mix the ingredients. Stir in the flour mixture only until thoroughly combined. The batter should be fairly thin (like regular pancake batter).

OLYMPUS DIGITAL CAMERA

But if the batter is too thin, add additional flour 1 tablespoon at a time. Note: Do not prepare the batter ahead of time or it will get soggy and won’t fry up properly.

Heat a very large fry pan over medium heat. Add equal amounts of butter and olive oil to liberally coat the bottom of the pan. When the butter and oil are hot, drop heaping spoonful’s of batter into the pan. (Make sure they are not touching. Kind of like kids in the back seat of a car.) Cook the pancakes about 2 minutes on each side, or until each side is brown and crispy. When the pancakes are done, serve immediately, or place on an oven-proof plate and keep warm in a pre-heated 300 degree oven. If your pan is not large enough to fry all the pancakes at once, wipe out the pan with a dry paper towel, add more butter and oil to the pan, and continue to fry the pancakes until all the batter is used. (The pancakes can stay warm in the oven for up to 30 minutes.) Serve hot with a dollop of sour cream.

*If you grate the zucchini ahead of time, place in a colander to allow liquid to drain. Then squeeze lightly just before adding to the eggs.


CHICKEN AND BROCCOLI FETTUCCINE (HAVE IT BOTH WAYS!)

OLYMPUS DIGITAL CAMERA

So here’s the skinny! A regular Alfredo sauce is considered by many to be one of the top ten forbidden foods. (Or at the very least, a dish that should only be consumed once in a blue moon, which for those who don’t remember, is about once every 2½ years!)

Now I am here to tell you, that is just not often enough for yours truly and Mr. C! We love us our pasta Alfredo. So in an effort to keep our desire for Alfredo commensurate with our need to keep our cholesterol at a level that is appropriate for people in their “golden years”, and not coincidentally keep our doctors from jumping up and down and yelling at us, I have modified one of our favorite “Alfredo” style dishes. Now granted, without the cream it’s certainly never ever going to replace the real deal. But, truly, it ain’t half bad! But since I know that some of you are purists, I decided to also provide you with the original recipe that won my grandchildren (Derek and Rebecca) over to the belief that broccoli is the best green vegetable ever invented!

So give my modified version a try. It still has the creamy sauce that is so important to a delicious “Alfredo”. But I have to tell you. When you warm up leftovers, no puddle of butter is left in the bottom of the bowl. (If you happen to be one of the people who has never reheated an Alfredo sauce, please believe me when I tell you that looking in the bowl after the pasta has been reheated is enough to immediately change your thinking on Alfredo Sauce. Does the term “swimming in liquid fat” mean anything to you? Well that’s exactly what your noodles will be doing if you reheat a true Alfredo sauce.)

But like I said, if you are a purist, under the age of 30, have the metabolism of a pigmy shrew, are 6’2’’, and weigh about 102 pounds, please give my original recipe a try. It is really fabulous. Just don’t tell me about it. I might start crying, and no one likes to see tears on their computer screen.

Reduced fat CHICKEN AND BROCCOLI FETTUCCINE:

  • 2 T. unsalted butter, divided
  • 1 c. bite sized pieces of fresh broccoli
  • 3 cloves garlic, finely minced
  • 1 boneless, skinless chicken breast half, cubed
  • ¼ tsp. kosher salt
  • freshly ground black pepper
  • 2 T. dry white wine
  • 2 T. flour
  • pinch ground nutmeg
  • ¾ c. chicken broth
  • 1 c. milk (I use 2%)
  • 8-oz. fettuccine pasta, cooked al dente (keep some of the cooking water*)
  • ¾ c. finely grated Parmesan cheese + more for passing (or use part Parmesan and part Pecorino Romano)

Melt 1 tablespoon of the butter in a large fry pan. Add the broccoli and sauté for 2-3 minutes. (Broccoli should still be crisp.) Add the garlic and cook for 1 minute. Remove broccoli and garlic from pan with a slotted spoon and place in a bowl. Add the chicken, salt, and pepper; cook until the chicken is barely cooked through. Remove from pan and add to the reserved broccoli and garlic.

Pour wine into the pan and cook until very little liquid remains. Add the remaining 1 tablespoon butter and the flour. Whisk together and cook for about 2 minutes.  Add the nutmeg, chicken broth, and milk; stirring until the sauce boils and thickens. Remove from heat and add the cooked pasta, reserved broccoli, garlic, and chicken, and ¾ cup Parmesan. Add some of the pasta cooking water if the sauce seems too thick. Adjust seasoning and serve immediately with additional Parmesan cheese.

Please note: If doubling this recipe, use only 3 tablespoons of flour, but double all the remaining ingredients. FYI: many of my recipes feed just 2-3 people. Unless otherwise stated, my recipes can easily be doubles or tripled.

* You really don’t need to use seemingly gallons of water when you cook pasta. In fact, you only need to use enough so that the pasta has room to expand and not stick together. This not only saves water and energy, but the resulting cooking water has a higher percentage of residual starch, which makes it perfect for adding to the sauce if more liquid and/or thickening is required. For more information, search Serious Eats; The Food Lab; A new way to cook pasta?

Good old fashioned CHICKEN AND BROCCOLI FETTUCCINE:

  • ¼ c. (½ stick) unsalted butter, divided
  • 1 c. bite sized pieces of fresh broccoli
  • 1 large garlic clove, finely minced
  • 1 boneless, skinless chicken breast half, cubed
  • ¼ tsp. kosher salt
  • freshly ground black pepper
  • 1 c. whipping cream
  • 8-oz. fettuccine pasta, cooked al dente (keep some of the cooking water)
  • ¾ c. finely grated Parmesan cheese + more for passing (or use part Parmesan and part Pecorino Romano)

Melt 1 tablespoon of the butter in a large fry pan. Add the broccoli and sauté for 2-3 minutes. (Broccoli should still be crisp.) Add the garlic and cook for 1 minute. Remove broccoli and garlic from pan with a slotted spoon and place in a bowl. Add the chicken, salt, and pepper; cook until the chicken is barely cooked through. Remove from pan and add to the reserved broccoli and garlic.

Add the remaining 3 tablespoon butter and cook until butter is lightly browned. Add 1/3 cup of the cream and boil rapidly over high heat until large shiny bubbles form; stir occasionally. Reduce heat to medium and add cooked noodles to sauce. Toss vigorously and add the chicken mixture, Parmesan cheese and the remaining cream, in about 3 additions. Adjust seasonings and serve immediately with additional Parmesan cheese.


CREAMY PASTA WITH PANCETTA AND PEAS

OLYMPUS DIGITAL CAMERA

Usually when I make a creamy sauce, I use cream. Sounds reasonable, right? But in an effort to reduce the number of calories and amount of fat in the dishes I prepare, I decided to use chicken stock and 2% milk instead of cream when I prepared this dish last evening. (OK, I did use 2 tablespoons of butter, but that’s just a fraction of the amount I normally would use!) So of course the resulting product was not as rich as a regular Alfredo sauce. (How could it be without a half cup of butter and 2 cups of heavy cream?) But regardless, it was still quite delicious. And without all the fat, it just had a fresher taste to it. Perhaps it was because the other ingredients were forced to shine on their own without relying on the cream to carry the day.

Whatever the reason, we were very happy to chomp away on this pasta sans the guilty feeling we usually experience when we are eating a creamy pasta dish. Not to say, we won’t ever eat a true Alfredo again. But I think I will be adapting my other standard Alfredo type dishes too, so that we can enjoy them more often without our cholesterol numbers shooting into the stratosphere!

And the first one I am going to adapt is one of our favorite pasta recipes – Chicken and Broccoli Fettuccine. So look for this recipe in the near future. And for those of you who have no cholesterol worries or don’t ever have to concern yourself with putting on weight, I will also post the “real” recipe. Which just happens to be Derek and Rebecca’s (two of my grandchildren) favorite food. (Poor kids. They unfortunately inherited their grandmother’s love of sauces.)

So if you too love pasta with a creamy sauce, give this dish a try. It takes no time to whip up. And I’m sure your whole family will love it. And miss all those calories in a traditional Alfredo sauce? I think not!

  • 2 T. unsalted butter, divided
  • ½ c. diced pancetta
  • 3 garlic cloves, finely minced
  • 2 T. dry white wine
  • 2 T. flour
  • ¼ tsp. kosher salt
  • freshly ground black pepper
  • pinch crushed red pepper flakes
  • pinch ground nutmeg
  • ¾ c. chicken broth
  • ¾ c. milk (I use 2%)
  • 8-oz. penne pasta, cooked al dente (keep some of the cooking water*)
  • ½ c. uncooked frozen petite peas, thawed
  • ½ c. finely grated parmesan cheese + more for passing (or use part Parmesan and part Pecorino Romano)
  • 2 tsp. chopped fresh parsley

Melt 1 tablespoon of the butter in a large fry pan. Add the pancetta and fry until crisp. Remove the pancetta from pan with a slotted spoon and set aside. Add the garlic to the pan. Cook for 1 minute. Add the wine and cook until no liquid remains. Add the remaining 1 tablespoon butter and the flour. Whisk together and cook for about 2 minutes.  Add the salt, pepper, crushed red pepper flakes, nutmeg, chicken broth, and milk; stirring until the sauce boils and thickens. Remove from heat and add the cooked pasta, peas, cooked pancetta, ½ cup Parmesan, and parsley. Add some of the pasta cooking water if the sauce seems too thick. Adjust seasoning and serve immediately with additional Parmesan cheese.

Please note: If doubling the recipe, use only 3 tablespoons of flour, but double all the remaining ingredients.

*Something I had thought for a long time just came out as being accurate. You really don’t need to use seemingly gallons of water when you cook pasta. In fact, you only need to use enough so that the pasta has room to expand and not stick together. This not only saves water and energy, but the resulting cooking water has a higher percentage of residual starch, which makes it perfect for adding to the sauce if more liquid and/or thickening is required. For more information, search Serious Eats; The Food Lab; A new way to cook pasta?


EASY LEMON AND BASIL SPAGHETTI

OLYMPUS DIGITAL CAMERA

If there is an easier pasta dish to prepare than this slightly adapted version of a Giada de Laurentiis classic, I’d appreciate it if you would send me the recipe at your earliest convenience! (And BTW, your recipe has to be as delicious.) Because, frankly, this is the tastiest quick and easy pasta I have ever had the pleasure of putting in my mouth. Now granted, I love fresh lemon, basil, Parmesan, and pasta more than just about any other ingredients. So for me, this simple dish is just about as good as it gets. And the fact that I only have to make one pot dirty is not only a bonus for me, but the resident dish washer (Mr. C) also appreciates that benefit.

So about this recipe, I have very little more to say either about the dish or about life in general. (I know – no caustic remarks directed at politicians, no firm instructions not to mess with the ingredients, not even a comment about myself or my friends that you don’t care to read about anyway!)

So, just one more little tidbit for the record. Make this dish and you will know what summer tastes like. And thank you Linder for sending me the recipe, and Giada, for sharing yet another incredibly divine recipe with all of us.

  • 1/3 c. extra virgin olive oil
  • 1½ tsp. lemon zest
  • scant ¼ c. fresh lemon juice
  • 1/3 c. finely grated Parmesan cheese
  • ¼ c. chopped fresh basil + more for garnish
  • ¼ tsp. kosher salt
  • freshly ground black pepper
  • 8 oz. spaghetti, cooked al dente

Whisk together the olive oil, lemon zest & juice, Parmesan, basil, salt, and pepper in a large bowl. Add the cooked pasta, adjust seasoning, garnish with basil, and serve immediately. (If you need additional liquid for your sauce, use a small amount of the pasta water.)


CHICKEN MARENGO (CHICKEN IN A SAVORY WINE AND TOMATO SAUCE)

OLYMPUS DIGITAL CAMERA

Every once in awhile Mr. C. will be completing the New York Times cross word puzzle, and will run across (or down) an answer that by its clue he knows is a cooking term or dish. And if he doesn’t recognize the term or dish, he asks me to enlighten him since I am the self proclaimed resident expert on all things cuisine. Now sometimes I can answer with assurance, sometimes with a faint idea of what I’m talking about, but more often than not, I haven’t got a clue. So when Mr. C. recently asked me about marengo, I just stared at him and shrugged my shoulders. But of course, later that morning I had to look it up.

I discovered that Marengo is a town in Italy, and that maybe possibly Chicken Marengo was prepared for Napoleon by his personal chef after the French won the battle of Marengo on June 14, 1800. (Myth or legend, who knows?!) What I do know for sure however, is that Melissa d’Arabians recipe for Chicken Marengo, with a couple of minor adaptations on my part, is an absolutely delicious, easy to prepare, and healthy chicken dish. So who cares about the origin of the recipe even though both the French and the Italian claim it as their own creation. (Well of course they do!) And incidentally, there are about as many wildly different ingredients and ways to prepare this dish as there are Carter’s Little Liver Pills! (Actually since 1959 they have simply been called Carter’s Little Pills.) And yes, they are still being made and apparently sold. Or they wouldn’t keep making them, right??? But back to the variety of ingredients possible in a Chicken Marengo.

Some include poached or fried eggs (yikes), crayfish, Cognac, garlic, black olives, thyme, etc. The list is endless. But for my taste, this simple preparation is absolutely perfect. (And no I don’t care if Napoleon would have liked it or not!)

So do yourself a favor. First of all, don’t buy any Carter’s Little Liver Pills (talk about an expired pull date), but do prepare this amazing dish next time you want to feature chicken in a new and exciting way.

  • 2 large boneless, skinless chicken breasts, sliced lengthwise, and then pounded thin
  • kosher salt
  • freshly ground black pepper
  • ¼ c. all-purpose flour
  • 3-4 T. extra virgin olive oil
  • 1 medium sized sweet onion, sliced
  • ½ lb. button mushrooms, sliced
  • 1 yellow bell pepper, seeded and thinly sliced
  • 2 T. tomato paste
  • ½ c. dry white wine
  • ½ c. beef broth (yes, beef broth)
  • 1 (14-oz.) can chopped tomatoes
  • 2 tsp. butter

Season the chicken with salt and pepper and lightly dredge in flour. In a large sauté pan, heat 3 tablespoons of the olive oil over medium-high heat and add the chicken. Brown on both sides, until lightly golden, about 3 minutes per side. Remove from the pan and set aside.

In the same pan, add another tablespoon of the olive oil, if needed, along with the onion, mushrooms, and pepper. Sauté until the veggies are almost soft, about 5 minutes. Stir in the tomato paste and cook for 2 minutes. Turn up the heat, and add the wine and let it reduce by about half. Add the beef broth and chopped tomatoes. Once the mixture begins to burble, reduce the heat, and cook for about 7-8 minutes. Add the reserved chicken and any accumulated juices and cook until the chicken is warmed through, about 2 minutes. Remove from heat and stir in the butter. Serve immediately. Great served over brown rice.


SIMPLE ITALIAN ROCKET (ARUGULA) SALAD

OLYMPUS DIGITAL CAMERA

I don’t know who invented those plastic flip top boxes that contain ready to eat greens, but whoever it was, she has my everlasting gratitude. And yes, triple washed greens were invented for lazy people like me who love salad but don’t always have the willpower or energy to wash a bunch of greens. (And yes, I know part of the solution for flagging energy – more greens, right?) So for me, prewashed organic greens that come all tidily nestled in their own plastic tub or bag are an absolute Godsend. Conundrum solved!

Plus, the package provides the pull date, so I can reasonably judge how long the contents of the box or bag will last before becoming yard waste fodder. (As many of you know, I need all the help I can get with my predisposition to allow perfectly good veggies to molder in my refrigerator.)

So with pre-washed veggies in mind, I decided to post another simple salad that Mr. C. and I enjoy regularily. And the great thing about this salad; it compliments just about any entrée, Italian or not. So without further ado, the only thing left to say about this salad besides how easy and fast it is to prepare is, yummy, yummy, yummy!!!

  • 1 T. fresh lemon juice
  • ¼ tsp. kosher or sea salt, or more to taste
  • 2 T. extra virgin olive oil
  • ¼ c. thinly sliced red onion
  • ¼ c. salted sunflower seeds
  • 4 c. baby arugula (rocket)
  • shaved Parmesan, as much or as little as you want (remember: the better the Parmesan, the better the salad)

Whisk together the lemon juice, salt, and olive oil in a salad bowl. Add the red onion, sunflower seeds, and arugula. Toss in the Parmesan. Serve immediately.

SPICY RISOTTO WITH SCALLOPS AND SHRIMP

OLYMPUS DIGITAL CAMERA

Sometimes I get so caught up in trying new recipes, I forget about preparing some of our old favorites. And this dish is no exception. So the other day when I was planning what to fix for our good friends Tim and Susie, I decided to go through my first cookbook for inspiration. And there on page 109 was this recipe which I had all but forgotten.

I can’t remember where I got this recipe (it was over 20 years ago after all), but I sure as heck know I didn’t invent this amazing concoction. I think it may have been a cooking class I took at an Italian restaurant back before the dawn of cell phones (not really, because the first mobile cell phone call was made in 1973). But you catch my drift; it was a long time ago!

In short, this is absolute perfection in risotto. The gist of the sauce (garlic, anchovies, kalamata olives, capers, tomato sauce, and parsley) is almost pure Puttanesca (on this site BTW). I strongly believe that whoever the brainchild was who dreamt up this fabulous dish simply borrowed a basic puttanesca recipe, used Arborio rice instead of pasta, and added seafood. Brilliant!

So to whoever it was that came up with this fabulous combination of ingredients, I salute you. And to those of you who give this recipe a try, I salute you too. I promise you will not be sorry, unless of course you are allergic to shellfish. Then of course, all bets are off. But if you do try this dish, and like it, send me a reply. I love hearing from you all. (If you don’t like the risotto, keep it to yourselves. I’m getting kind of a fragile ego in my old age. Right!!!!)

  • 1 T. butter
  • 1 c. arborio rice
  • 2 c. simmering chicken stock
  • 2 T. extra virgin olive oil
  • 2 garlic cloves, minced
  • generous 2 tsp. anchovy paste
  • generous 2 T. chopped fresh basil
  • generous 2 T. minced fresh parsley
  • ¼ c. chopped kalamata olives
  • 25 capers, drained
  • generous 1 T. finely chopped sun dried tomatoes in oil
  • juice of 1 lemon
  • ½ lb. raw scallops
  • ½ lb. raw large shrimp or prawns, peeled and de-veined (I use shrimp that are 16-20 per pound)
  • ¾ c. dry white wine (I use Pinot Grigio)
  • ¼ c. tomato sauce

Melt the butter in a medium sized heavy pan. Add the rice and sauté for about 5 minutes over medium heat, stirring constantly. Add one large soup ladle of hot stock. Stir and when all of the liquid has been absorbed by the rice, add another ladle of hot stock. Stir continuously. Continue adding stock until the rice is creamy but just al dente. Remove from heat and set aside. (You may have a little bit of the chicken stock left.)

After the rice is finished cooking, heat the olive oil in a large sauté pan. Add the garlic, anchovy paste, basil, and parsley. Stir fry for about 2 minutes. Add the olives, capers, sun dried tomatoes, and lemon juice. Cook for 1 minute. Add the seafood and cook until just done, about 2 minutes. Stir in the wine, tomato sauce, and cooked risotto. Adjust seasonings and cook until just warmed through. Serve immediately.

Hint: This is a recipe where it is almost mandatory to have all your sauce ingredients ready to go before you start cooking. The cooking process goes very quickly and there simply is not time between steps to be chopping and fetching.