Category Archives: ITALIAN CUISINE

CAPONATA ALLA SICILIANA (SICILIAN EGGPLANT RELISH)

OLYMPUS DIGITAL CAMERA

People often ask me if I have ever had a failure in the kitchen. That’s like asking if a bear goes number 2 in the woods! Well, of course I have and of course they do! In fact, I don’t know a single cook who hasn’t had a few colossal defeats along the way. It’s just part of the whole cooking experience.

I also have never known a cook who doesn’t have a favorite dish or two that they wish they could perfect, but just can’t seem to come up with the right combination of ingredients or technique to make it happen. I am just as guilty as the next cook in that regard too.

Now granted, I don’t have as many complete failures as I did when I was just learning to cook, but there are still some dishes that I simply can’t duplicate, no matter how hard I try. For example, I still haven’t mastered a truly good version of a Major Grey type chutney. And really, it can’t be that difficult. Never-the-less, I’ve never found a recipe or invented a combination of ingredients that comes close to the real thing.

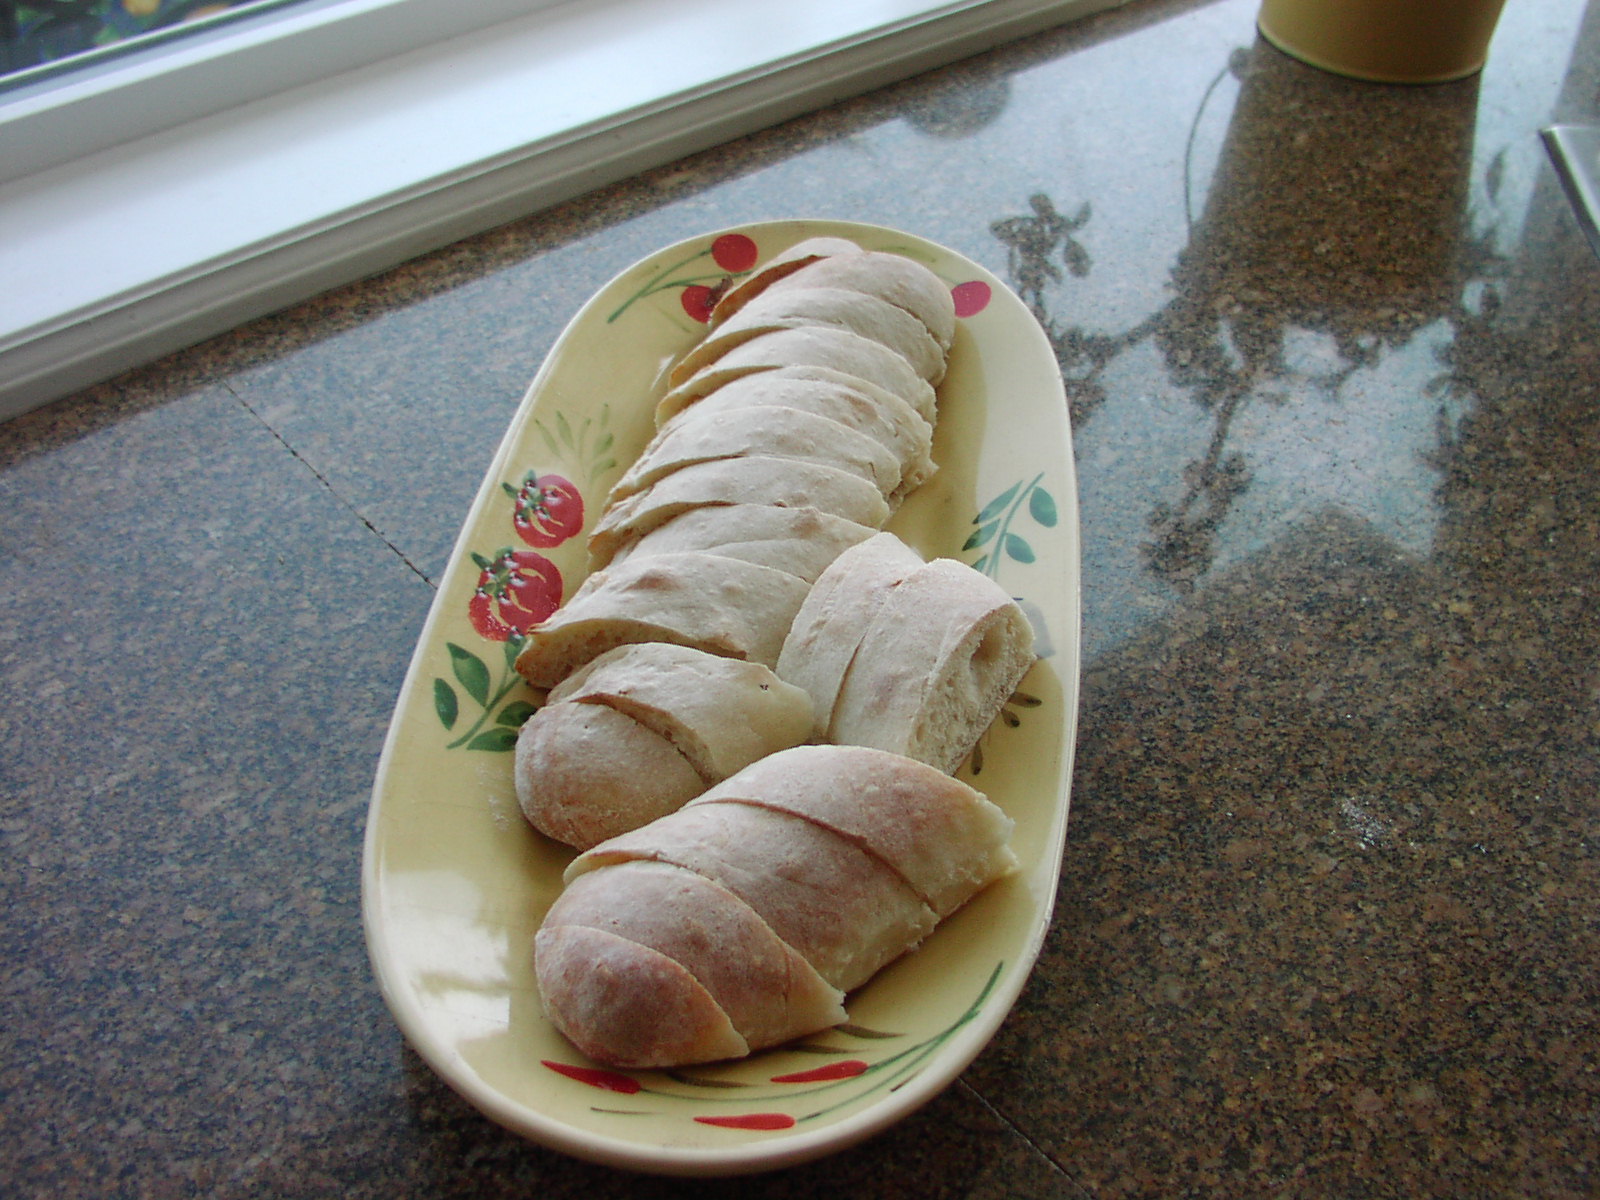
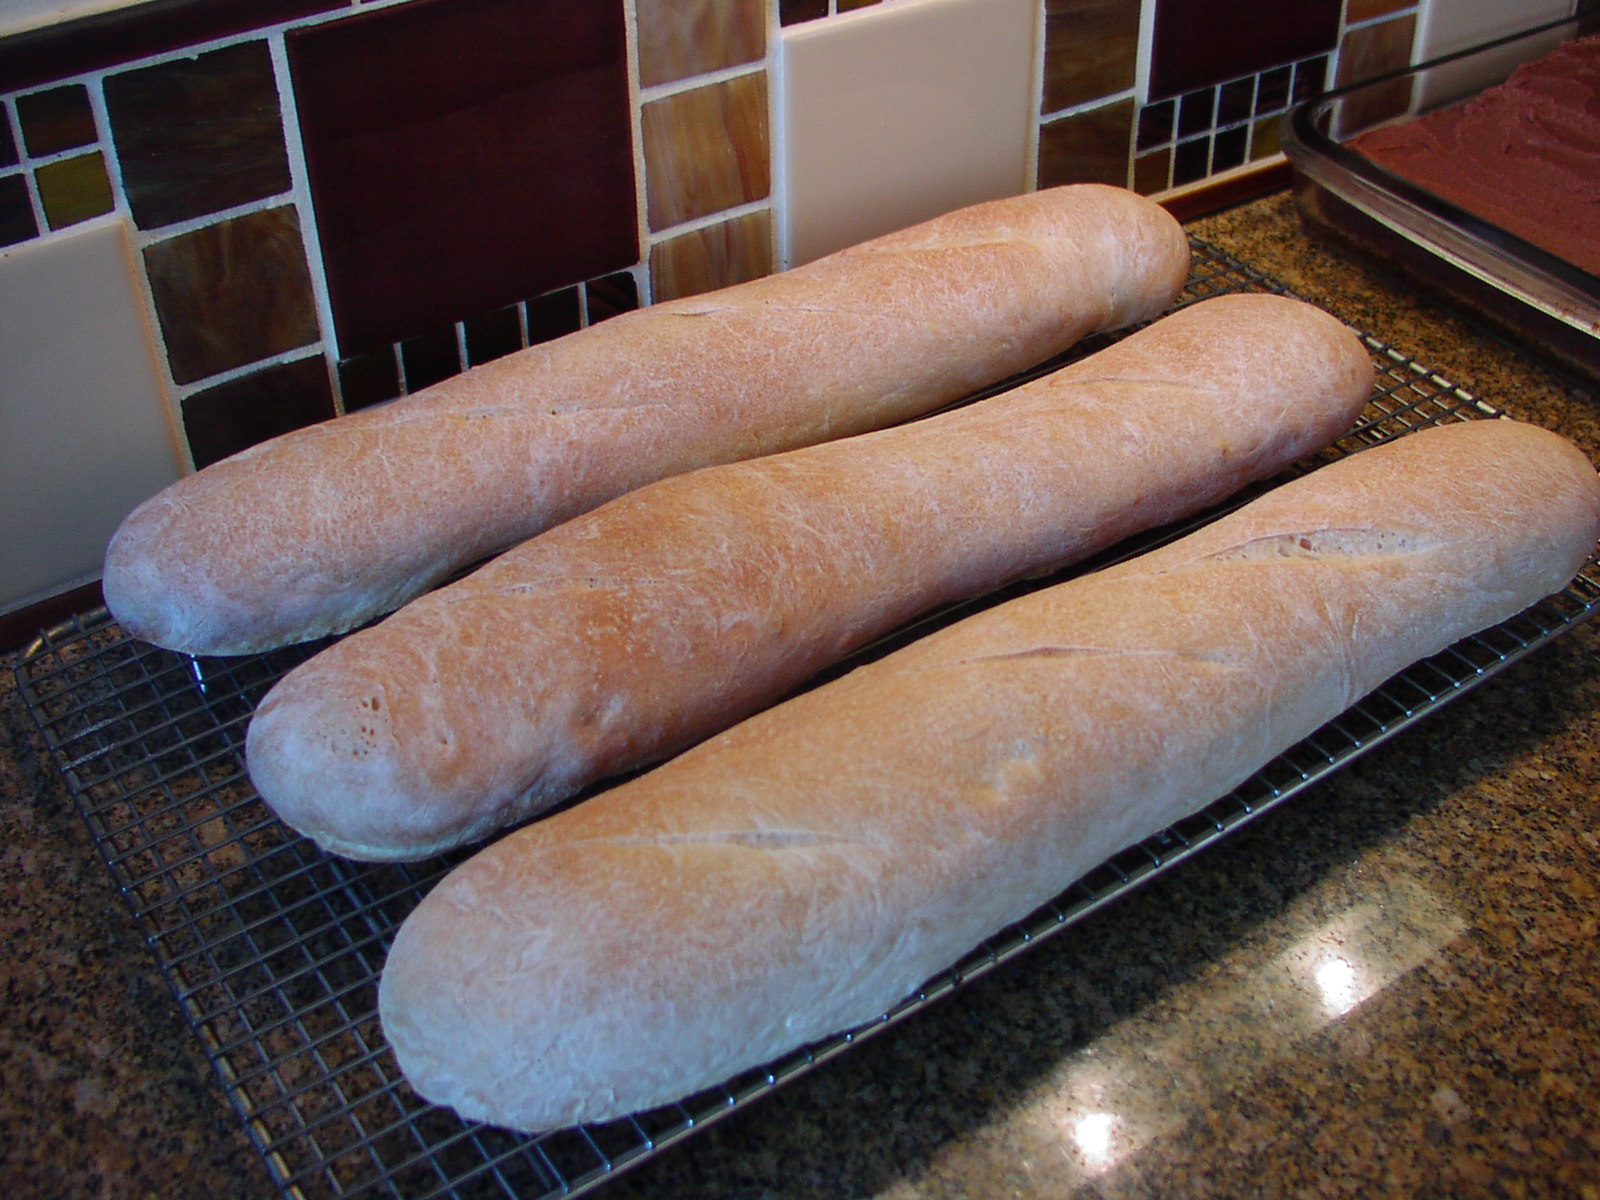
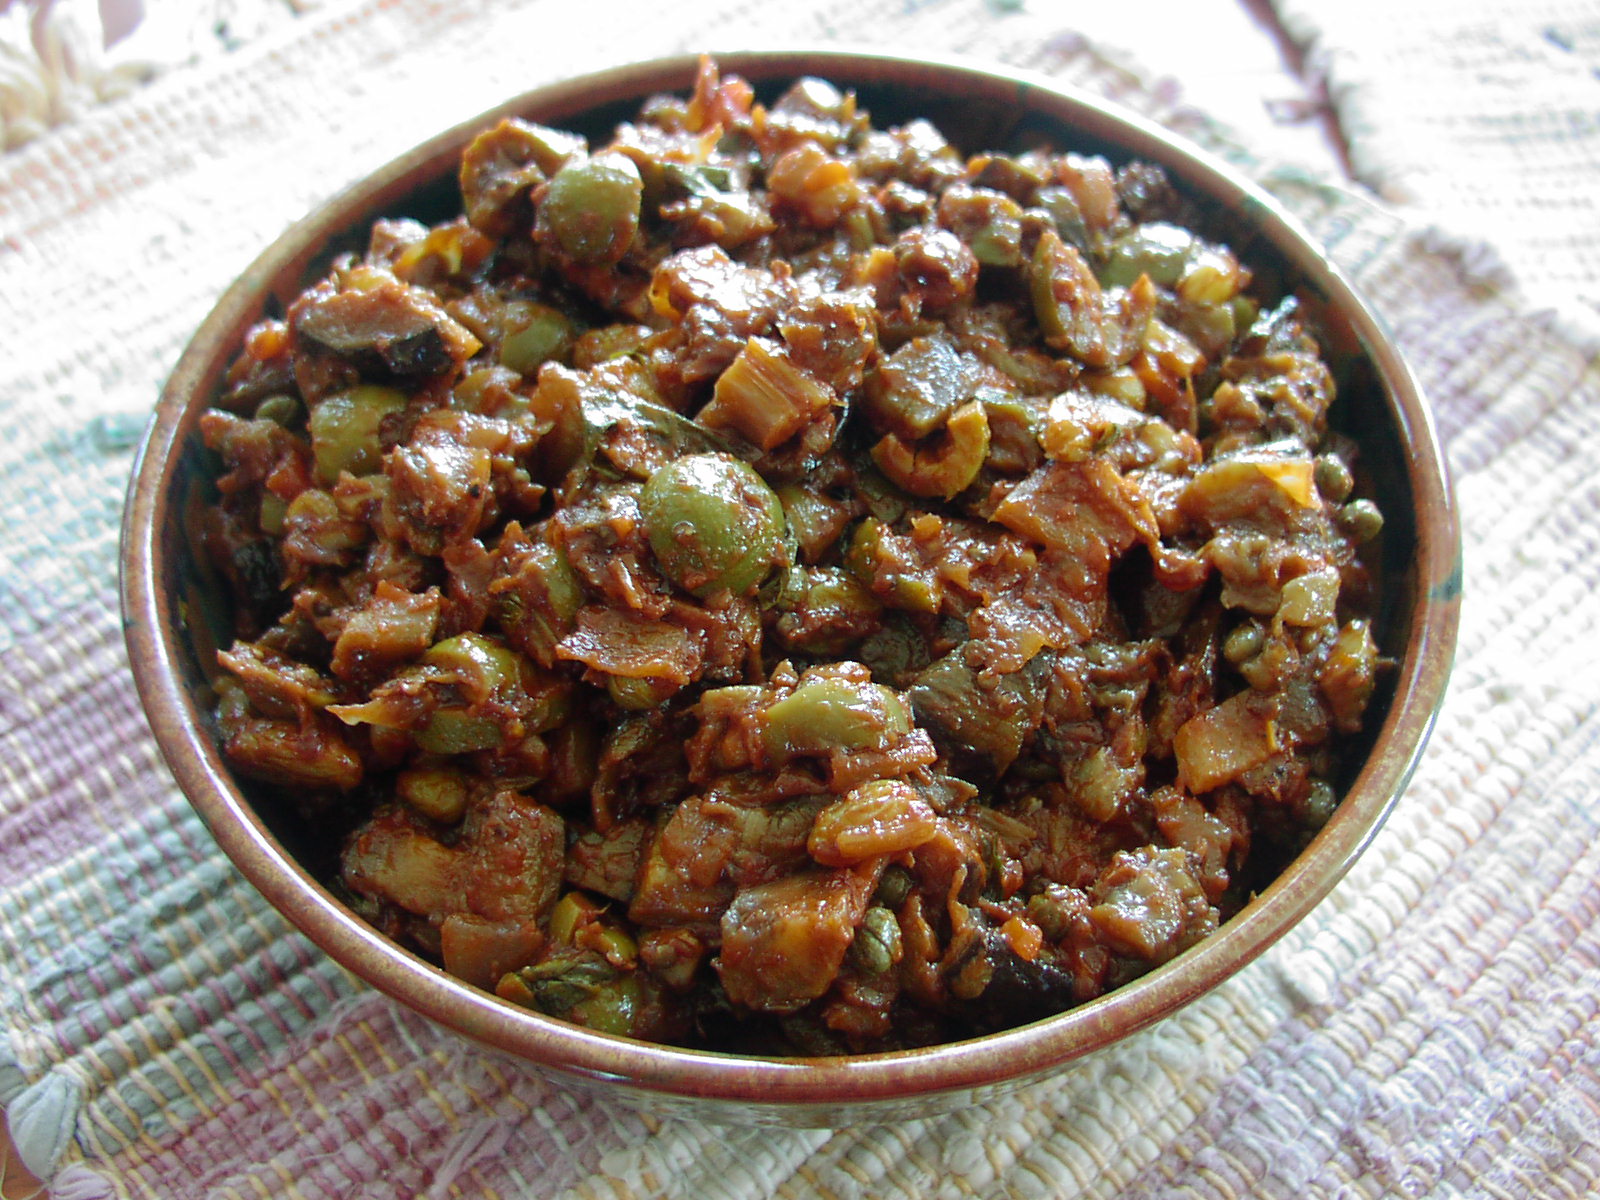
But then, there also used to be a dish with eggplant, onion, green olives, capers, and tomatoes that I enjoyed in Italy and wanted to re-create at home. I had all but given up on creating the perfect caponata after several failed attempts over a number of years. But thanks to Saveur and old fashioned persistence, I can now serve up a caponata that will knock your socks off! (I made a couple of changes to the recipe in Saveur, but then, of course I did!) But truly, this combination of ingredients is just amazingly delicious. Served on fresh baguette slices, there is darn near nothing that compares with this quintessential Sicilian appetizer for absolute culinary bliss. (How’s that for a description of a simple veggie dish made with easily obtainable ingredients?!)

So if you too happen to adore caponata, or even if you have never tasted this Sicilian comfort food, give this recipe a try. Caponata makes a wonderful appetizer to serve at a dinner party, especially when served with other Italian dishes. And easy! It’s at its best when made a couple days ahead, brought to room temperature or slightly warmed, scooped into a pretty bowl, then surrounded with fresh chewy baguette slices. Your guests will think you are the next best thing to Lidia Bastianich, Marcella Hazan or my personal favorite, Ettore Boiardi (Chef Boy-Ar-Dee). Just kidding! (Actually Ettore Boiardi was a real chef. In fact his restaurant Il Giardino d’Italia which opened in 1924 in Cleveland, Ohio was so well regarded that Boiardi started his canned Italian food business because his restaurant patrons kept asking him for his recipes.) Lidia and Marcella of course are also real chefs, but to the best of my knowledge, neither of them have ever forced pasta into a can!

  • 3 medium-large eggplants, partially peeled, and cut into 1/3-inch cubes
  • ½ c. extra virgin olive oil, divided (or more as needed)
  • 1 large yellow onion, chopped
  • 1 celery stalk, thinly sliced
  • ¼ tsp. kosher salt
  • freshly ground black pepper
  • 2 T. tomato paste
  • 1 (15-oz.) can tomato sauce, preferably made with Italian tomatoes
  • 6 oz. pimento stuffed green olives, roughly chopped (about 1 1/3 cups)
  • ½ c. white wine vinegar or if you can find it, Ponti Italian Wine Vinegar – kind of a yellow color – sold at PFI (Pacific Food Importers) – basically my favorite vinegar
  • ½ c. golden raisins
  • ¼ c. capers, drained
  • 3 T. sugar
  • 2 tsp. unsweetened cocoa
  • ½ c. finely shredded basil, or more to taste

Coat the eggplant pieces with 6 tablespoons of the olive oil on a rimmed baking sheet. (If the pieces seem dry, add a little more olive oil. A little more olive oil never hurts.) Roast in a pre-heated 375 degree oven until just browned, about 30 minutes. Turn every 10 minutes.

Meanwhile, add the remaining 2 tablespoons olive oil to a large fry pan. Add the onion, celery, salt, and pepper; slowly cook until the onion starts to caramelize. Add the tomato paste and sauce; let gently burble for 10 minutes. Stir in olives, vinegar, raisins, capers, sugar, and cocoa; cook, stirring occasionally, until thickened, about 5 minutes. Add the roasted eggplant and let burble for another couple of minutes. Remove from heat and stir in the basil. Adjust seasoning. Let cool to room temperature before serving or storing covered in your refrigerator for up to one week. Best made a couple days ahead and served on chewy Italian baguette slices.

OLYMPUS DIGITAL CAMERA


PASTA WITH BUTTON MUSHROOM SAUCE

OLYMPUS DIGITAL CAMERA

I know I have told you before, but sometimes a food item, particularly a veggie, can get kind of forgotten in my refrigerator. I think it’s because I am always trying new recipes and I focus on the new ingredients to the shameful neglect of what came before. And that’s exactly what happened when I recently discovered 4 very large button mushrooms lurking at the bottom of my vegetable bin. Poor things; they looked absolutely pathetic just lying there, stem side up in their very own blue polystyrene container from Costco. So what to do with these mushrooms? The frugal cook in me just could not throw them to the Gods of yard-waste. They simply did not deserve that fate! And although I know that mushrooms lose their potency over time, they weren’t slimy, so I considered that good enough.

But then, what to do with them? Well, the same thing I almost always do with an ingredient that needs to be surrounded by compatible flavors to make it more enjoyable. I make a pasta dish.

So that’s exactly what I did, and the recipe below is the result. And all hubris aside, this recipe is very, very good. Easy too! And vegetarian, if you use vegetable stock, which is my first choice for this pasta. (The dish actually tastes a lot like a meatless beef stroganoff.)

So if you need an easy recipe for a weeknight pasta dish your entire family will enjoy, pick yourself up some button mushrooms and put some pasta water on to boil. But remember: don’t cook your pasta ahead of time. If need be, make the sauce wait for your freshly cooked al dente pasta.

You know, now that I mention cooked pasta, I should provide you with my own guidelines for what I consider to be perfectly cooked pasta.

So for those of you who were not born knowing the fine nuances surrounding perfection in pasta cooking, I have listed the steps below. For those of you who already know how to cook perfect pasta, or were born with the knowledge, (like that could ever happen), just ignore my well thought out, well written, and helpful instructions!

  • 1 T. extra virgin olive oil
  • 1 small shallot, minced
  • 1 clove garlic, minced
  • kosher Salt
  • freshly ground black pepper
  • 8 lg. or 4 very lg. button mushrooms, cut in half and thinly sliced
  • ¼ c. dry white wine
  • ¼ c. vegetable, beef, or chicken stock
  • ½ c. sour cream
  • ¼ c. grated Parmesan cheese
  • 4 oz. pasta, cooked al dente

Heat the oil in a large skillet over medium heat. Add the shallot, season with salt and pepper and cook until soft. Add the garlic and cook for one minute. Add the mushrooms and cook until the mushrooms are tender and starting to brown, stirring occasionally, about 5 to 7 minutes. Add the wine and cook until all the liquid evaporates. Add the stock and simmer for one minute. Remove the pan from the heat. Whisk in the sour cream. Drain the pasta, reserving about 1 cup of the pasta water, and add the drained pasta to the sauce. Add the Parmesan. Adjust seasoning. (If the pasta seems too dry, add a small amount of the reserved pasta water.) Serve immediately.

Note: This is the perfect amount for 2 hungry adults. The recipe can be doubled or tripled as needed.

Perfect Pasta:

1)      Use pasta which contains at least some semolina flour

2)      Use a large cooking pot

3)      Add cold water (1 lb. pasta = 5-6 quarts of water) to the pot

4)      Cover the pot and bring the water to a rolling boil.

5)      Add kosher salt (about 1-2 tablespoons per pound of pasta)

6)      Add the pasta all at once

7)      Stir immediately with a wooden spoon to prevent the pasta from sticking together and to the bottom of the pan

8)      Bring the water back to a boil as quickly as possible. Then reduce the heat only enough to prevent the water from boiling over on to your stove top. Do not cover the pan.

9)      Continue to periodically stir the pasta so that it cooks evenly

10)   DO NOT RELY ON THE PACKAGE INSTRUCTIONS FOR ACCURATE COOKING TIME. Taste testing is the only way to know when the pasta is al dente. (Al dente means “to the tooth” in Italian and refers to the fact that the pasta has a slight resistance when you bite into it. The pasta doesn’t have a hard center, nor is it soft.)

11)   If you are using the pasta for a hot dish with a sauce (like this recipe), save about a cup of the cooking water, drain the pasta (don’t rinse) and add it to the sauce and serve immediately. (Or you can place the hot pasta on a plate or in a serving bowl or platter and immediately cover with sauce.)

12)   If you are using the pasta for a cold dish (like my recipe for Shrimp and Macaroni Salad or Tuna Macaroni Salad), drain the pasta and immediately rinse with cold water. (Rinsing the pasta serves to both stop the cooking process and remove the thin coating of starch that can cause it to be sticky when cold. This method also works well for lasagna noodles.)


ANGEL HAIR PASTA WITH A BUTTER, SAGE, AND LEMON CREAM SAUCE

OLYMPUS DIGITAL CAMERA

Once in a while I have a stroke of genius. I’m not bragging here, I’m just stating a fact! And when I decided that I needed a simple meatless pasta dish to serve along with a chicken pasta casserole for an upcoming JazzVox pre-concert meal, I thought about one of my favorite pasta recipes – Pasta with Butter and Sage. But as much as I love that recipe (on this site BTW), it is a last minute wonder. And frankly, with as many as 35-40 people coming for a meal at 1:00pm on a Sunday afternoon, I just don’t have the luxury of serving “last minute wonders”. So I thought, how can I basically duplicate the flavors in one of my favorite pasta dishes without the last minute anxiety. (And yes, even though I have been cooking for a crowd for more years than I care to admit, I still suffer anxiety especially when there is a time restraint involved.) Frankly, I don’t know how caterers and restaurant chefs keep their sanity. If I had made a career in the food service, I would probably be serving time in a mental institution and you would not be hearing from me on a cooking blog! But more about this pasta.

Good pasta sauces usually involve multiple ingredients and a lot of time. This sauce has very few ingredients and takes almost no time to prepare. Now granted, this is not a low cal sauce. Anytime one of the ingredients is heavy cream, you know the calorie and fat count are going to be high. But this isn’t an everyday kind of sauce. This is a want to impress my date, about to propose marriage, must impress my in-laws, or desperately need to show my boyfriend’s ex-girlfriend why he chose me over you kind of sauce! So once in awhile, this is the sauce you should make for any of the afore mentioned reasons or just to celebrate being alive. If there ever was a sauce that serves to remind us that life is truly wonderful, this is the one.

And for all you foodies out there who know down to your toenails that Parmesan cheese goes with all foods Italian, this is one time I would recommend against its use. (I know – almost un-American, right?) But this sauce has a really delicate flavor. And although Parmesan is fabulous in a standard Alfredo sauce, it is my belief that the strong hint of fresh sage and lemon in this sauce would be overwhelmed by the addition of Parmesan cheese.

  • ½ c. (1 stick) unsalted butter
  • 10-12 fresh sage leaves, finely chopped (or more to taste)
  • 1 T. flour
  • ½ c. chicken broth or milk
  • 2 tsp. fresh lemon juice
  • 1 c. heavy cream
  • pinch kosher salt
  • freshly ground black pepper
  • 6-8 oz. angel hair or thin spaghetti pasta, cooked al dente

Melt the butter in a large skillet over medium heat and cook until the butter is a light golden brown; add the sage leaves and remove from heat. Whisk in the flour, return to low heat and cook for about 2 minutes. Whisk in the chicken broth, lemon juice, heavy cream, salt, and pepper. Cook until the mixture is hot and thickened.* Adjust seasoning and add the hot pasta. Serve immediately.

*The sauce can be made ahead of time and gently re-heated just before you are ready to serve.

OLYMPUS DIGITAL CAMERA

MARINATED BOCCONCINI (SMALL FRESH MOZZARELLA BALLS)

OLYMPUS DIGITAL CAMERA

Bocconcini, which literally translates as “little bites or little mouthfuls” in Italian, are small heavenly balls of fresh mozzarella cheese. And when you further enhance their flavor by marinating them in a savory olive oil, well there is simply nothing finer. Plus of course, they are just cute as all get-out.

I like to feature fresh mozzarella in some form or another every time I serve an antipasto platter. Along with thinly sliced salami, olives, and all the other usual suspects, which BTW tend to be straight from a jar or deli case, I like to serve at least one item on the platter that I have in some way “messed” with. But frankly, I don’t want to spend a lot of time on just the appetizer for an Italian meal on which I have already invested a great deal of time. So marinated bocconcini is perfect no matter how you look at it. It’s terribly easy to prepare, should be made ahead of time, looks just darling on the platter, and tastes like a million dollars. What more could anyone ask from the corpse of milk? (Thank you James Joyce for that lovely description of cheese!)

So next time you want a simple appetizer or a new and exciting addition for your green salads, or as a taste treat right out of the refrigerator container (shh, don’t tell Mr. C.), give this recipe a try. You will not regret joining the rest of us who are totally addicted to these little darlings. (And yes, being addicted to bocconcini is universally accepted as an appropriate response to once having tasted fresh mozzarella. In fact, if you don’t become addicted, your friends and family may request an intervention on your behalf!)

  • ¼ c. extra virgin olive oil
  • pinch crushed red pepper flakes
  • ½ tsp. dried oregano (Mexican is best)
  • 1 T. finely chopped fresh basil
  • 1 tsp. finely chopped fresh Italian parsley
  • 1 small garlic clove, finely minced
  • ½ tsp. kosher salt
  • freshly ground black pepper
  • 8-oz. bocconcini, drained (I try to find the really tiny bocconcini)

Whisk together the olive oil, red pepper flakes, oregano, basil, parsley, garlic, salt, and pepper in a small covered container. Add the bocconcini and stir gently until each ball has been totally introduced to the marinade. Cover the bowl and place in the refrigerator for 2-3 days before you plan to serve. Stir periodically to make sure each bocconcini gets its fair share of time in the olive oil bath!

Note: if there is any marinade left after the bocconcini have all disappeared, it makes a wonderful salad dressing.


SPAGHETTI WITH TURKEY OR CHICKEN MEATBALLS IN MARINARA SAUCE (AKA HEALTHY SPAGHETTI AND MEATBALLS)

OLYMPUS DIGITAL CAMERA

You know, there are actually times when I just want to cook healthy. I know that shocks many of you because of my predisposition to use butter with alarming regularity. But never-the-less, it’s true! I can actually be as health conscious as the next gal. So when my “good conscience angel” wins over my “bad conscience devil”, I make a meal featuring a recipe like this one.

Now granted, there is nothing wrong with this recipe. In fact, I love both the meatballs and the marinara sauce. And truly, I am not going to feel cheated in the least when I eat this dish. It’s just that when I look at the recipe, I have trouble seeing beyond the fact that it just plain looks good for us and therefore is inherently going to taste like sawdust! (You know, it really is hard to teach old dogs new tricks. And this old dog is no exception!)

But you just have to trust me on this one. The sauce is truly delicious and the meatballs are tender and flavorful.

So next time your “angel” wins, build a batch of these meatballs and stir up a pot of this sauce. You are going to feel absolutely elated serving your family such a healthy dish. And maybe, just because you have shown yourself to be such an exemplary contributor to your families good health, your “angel” will forgive you a second glass of wine! Could happen!

  • ¼ c. finely ground uncooked oats or dried bread-crumbs (I prefer ground oats)
  • ¼ c. finely grated Parmesan cheese + plus more to pass at the table
  • 2 T. chopped fresh parsley, divided
  • 2 garlic cloves, minced
  • ¾ tsp. kosher salt
  • freshly ground black pepper
  • 1 egg
  • 2 T. milk
  • 16 to 20 oz. ground turkey or chicken meat
  • 2 tsp. extra virgin olive oil
  • 8-10 mushrooms, chopped
  • marinara sauce (see recipe below)
  • 6-8 oz. thin spaghetti, cooked al dente

Combine breadcrumbs, Parmesan, parsley, garlic, salt, pepper, egg, and milk in a medium large mixing bowl. Gently stir in ground turkey. (Mix only until combined. Do not over mix.) Form into 1-inch meatballs (I use a small ice cream scoop) and place on a lightly greased rimmed baking sheet. Bake meatballs in a pre-heated 350 degree oven for approximately 20 minutes or until meat is no longer pink.

Meanwhile pour olive oil into a medium sized sauce pan. Sauté mushrooms until tender. Add the marinara sauce and the meatballs. Serve over al dente spaghetti. Offer Parmesan at the table.

Marinara Sauce:

  • 2 T. extra-virgin olive oil
  • ½ c. chopped onion
  • 2 cloves garlic, chopped
  • 1 (28-oz.) can chopped or diced tomatoes (Italian tomatoes preferably)
  • 1 bay leaf
  • pinch crushed red pepper flakes
  • 1 tsp. dried oregano ( I use Mexican oregano)
  • ½ tsp. kosher salt
  • freshly ground black pepper
  • 3 T. chopped fresh basil leaves
  • 1-2 T. butter, optional

In a large covered sauce pan, heat the oil over medium high heat. Add the onion and sauté until soft and translucent, about 6 minutes. Stir in the garlic and cook for an additional minute. Add the tomatoes, bay leaf, red pepper flakes, oregano, salt, and pepper. Stir to combine ingredients. Bring to a boil, reduce heat, cover, and simmer for about 30 minutes. (Take the lid off part way if the sauce is too thin or allow to gently burble away until the sauce reaches your desired thickness.) Remove from heat, discard bay leaf, add the basil, and adjust seasoning. If the sauce tastes acidic, add butter 1 tablespoon at a time to round out the flavor.

Note: this is a very basic marinara sauce that can be used in a myriad of recipes. Leftover sauce freezes beautifully.

CREAMY ANCHOVY GARLIC SPREAD

OLYMPUS DIGITAL CAMERA

It has been my experience that anchovies and garlic (the dynamic duo) can ward off almost any illness (not to mention werewolves, vampires, and witches (picture provided).

OLYMPUS DIGITAL CAMERA

Plus anchovies and garlic just taste fabulous together. So when I decided I wanted to feature them in a creamy spread, I of course went to my source of all things edible – the internet.

How in the wild world of haute cuisine did we ever exist without the internet? And why are there still people out there who refuse to even open the lid of a laptop? (Why am I asking you? You’re on the internet reading my ramblings!) Anyway, my point is – the internet is WONDERFUL!

So of course when I went recipe searching, there were lots of recipes with anchovies and garlic as key ingredients. None of the recipes however (at least in the 10 or so search pages I perused) seemed from first glance to achieve the creamy results I was after – except for one. So borrowing the bones of this dish from Darlene Hinton’s recipe on the Allrecipes site, I came up with this spread.

Now I know there are those of you out there who are anchovyphobic. I blame that on bad press. I mean really, if oysters hadn’t for centuries been touted as aphrodisiacs, who in their right mind would have ever put one of those ugly things in their mouth?

Anyway, please don’t hesitate to give this spread a try even if you do have a wee problem with hairy little fishes. (Just kidding.) And as a side note, anchovies are a truly wonderful addition to many dishes. I often start a red pasta sauce by melting a couple of anchovies in olive oil. And anchovies are simply wonderful in salads (think Caesar) or on pizzas, where they add just a lovely saltiness.

So be brave. Next time you serve Italian food, make this spread as a before dinner appetizer. It’s easy, relatively inexpensive, and different. That’s a good thing.

And regarding the picture of the “lady” who is about to open her front door to trick-or-treaters; if you consistently eat anchovies and garlic, you should never have to fear meeting the likes of her!

  • 2 small cloves garlic, rough chopped
  • 7-8 anchovy fillets
  • 6 T. unsalted butter, room temperature
  • 1 (8-oz.) package cream cheese, room temperature
  • ¼ c. sour cream
  • 2 dashes hot pepper sauce (I use Frank’s Red Hot Original)
  • freshly ground black pepper
  • 1 T. finely chopped fresh chives

Combine the garlic, anchovies, butter, cream cheese, sour cream, hot pepper sauce, and pepper in the container of a food processor. Process until smooth. Stir in the chives. Transfer to a serving bowl, and refrigerate for at least 6 hours or better yet, over night. Serve at room temperature with plain crackers (not quite as plain as saltines) or toasted baguette slices.

PASTA WITH ITALIAN SAUSAGE AND PEPPERS

OLYMPUS DIGITAL CAMERA

The first time I made this pasta dish, I followed the instructions to a tee. Of course the whole time my brain was screaming at me – where’s the garlic, where’s the onion, the red pepper flakes, shouldn’t I add a splash of wine for good measure, etc. But the friend who had given me the recipe insisted that the recipe was perfect as written. So I decided I would make the sauce, and if it needed a little “something” at the end of the cooking time, I could improvise at that point. So with only 5 ingredients in the pan, I let the sauce burble away until the peppers were tender. Then I tasted the sauce. Well as they say in the modern world of phone texting and abbreviated non-verbal conversations – OMG! The sauce was indeed perfection. There was absolutely no reason to add a single solitary pinch of anything that had not appeared on the original list of ingredients. The flavor was amazing, the consistency perfect, and the visual appeal from the different colored peppers was delightful to behold. Of course, I still had to add the pasta, basil, and cream. But I figured whoever invented this recipe had the whole pasta perfecto thing down pat. So I added the remaining ingredients, called Mr. C. to the table, and we have been enjoying this dish ever since.

And then a funny thing happened last evening as I was preparing this dish. I realized that I had yet to share this recipe with all of you. I was absolutely aghast! How could I possibly have been so remiss? After all, this delightful pasta has literally everything going for it. It is extremely simple to prepare, contains ingredients found in almost any grocery store in America, and especially at this time of year, with peppers and basil at their peak of perfection (not to mention lowest price of the year) it just happens to also be divinely delicious. A perfect dish to serve your family and friends. Add a nice side salad, a hunk of freshly baked crusty bread, and a bottle of your favorite vino, and life just don’t get much better my friends. (And no, you don’t have to tell anyone how easy this pasta dish is to prepare. This can just remain our little secret!)

  • 1 T. extra virgin olive oil
  • 1 lb. bulk Italian sausage, pork or chicken
  • 3 peppers, diced (yellow, orange, or red – I use a combination of all three)
  • 1 28-oz. can Italian peeled whole tomatoes (Roma or other) or 4 large tomatoes peeled and diced
  • freshly ground black pepper
  • 8 oz. small tube like pasta, penne, fusilli, etc. cooked al dente
  • 3-4 T. fresh basil chiffonade
  • 2 T. heavy cream or half and half
  • grated Parmesan cheese
  • grated Pecorino Romano cheese

Add olive oil to a medium large covered pan. Add the sausage and fry until it is dark brown. Add the peppers, canned tomatoes, and black pepper. Bring to a boil, reduce heat, cover and cook, stirring occasionally for about 45 minutes or until the peppers are very tender, but not mushy. When ready to serve, add the freshly cooked pasta, basil, and heavy cream.

OLYMPUS DIGITAL CAMERA

OLYMPUS DIGITAL CAMERA

Serve liberally sprinkled with a combination of the 2 cheeses.


PANZANELLA SALAD (TUSCAN BREAD SALAD)

OLYMPUS DIGITAL CAMERA

Over the years I’ve tasted several Panzanella salads. Some featured pine nuts, some didn’t taste like any anchovy paste was used, some used green olives rather than kalamata olives, while others contained Mozzarella cheese. But the one thing they all had in common was toasted bread, fresh tomatoes, and assorted garden veggies.

And when it comes right down to it, there isn’t one that I wouldn’t enjoy eating again. I mean really, how can any salad containing toasted bread, olive oil, olives, capers, and fresh vegetables not be delightful? And the most appealing aspect of this salad, beside the taste of course; the contents can vary depending on whatever veggies, olives, etc. you happen to have on hand.  This is Italian peasant food folks. Panzanella is not a rigid recipe that must be followed to the tee. It’s more like a rough guideline that can be different each time it’s prepared.

Panzanella evolved into the most commonly eaten summertime dish in Tuscany because every Tuscan housewife from the inventors in the 16th century through Tuscan cooks today have stale bread on hand at one time or another. And, like cooks everywhere, veggies that need to be eaten now! And olive oil, olives, capers, and good red wine vinegar in the pantry. Hence Panzanella seems to have almost invented itself. And thank heavens for that! There is probably no better dish to fix for family and friends on a hot summer evening. The dressing has such bold flavors that even bland flavored toasted bread comes alive when dressed with the tangy olive oil and vinegar emulsion. Add the crispness of the peppers, the saltiness of the kalamata olives, the bite from the red onion, the subtle peppery flavor from fresh basil, and you have a salad literally bursting with flavor. And nary a morsel of meat to be found!

So next time you need a salad that can be served as either a side or as a main dish, give Panzanella a try. And if you don’t happen to have both red and yellow peppers on hand, no big deal. Use what you have. Have tomatoes coming out of your ears? Add more than suggested below. Be creative. Remember, it’s a rustic salad and not meant to be exactly the same each time it’s served. Enjoy!

  • 2 T. capers, drained and roughly chopped
  • 2 garlic cloves, finely minced
  • 1 tsp. anchovy paste
  • ½ tsp. Dijon mustard
  • freshly ground black pepper
  • ½ tsp. kosher salt
  • ¼ c. vegetable stock
  • ¼ c. red wine vinegar
  • ½ c. extra virgin olive oil
  • 2 large, ripe tomatoes seeded and diced
  • 1 English cucumber partially peeled, seeded, and diced
  • ½ red onion, cut in half and thinly sliced
  • 1 red bell pepper, diced
  • 1 yellow bell pepper, diced
  • 6 c. rustic bread cubes, toasted
  • 1/3 c. halved pitted kalamata olives
  • 1/3-1/2 c. fresh basil chiffonade

Whisk together the capers, garlic, anchovy paste, mustard, pepper, salt, stock, vinegar, and olive oil. Set aside. In a large bowl combine the tomatoes, cucumber, onion, peppers, bread cubes, olives, and basil. Pour the dressing over all and toss until well combined. Serve immediately.


CLASSIC ITALIAN BAGUETTE

OLYMPUS DIGITAL CAMERA

This recipe from King Arthur Flour takes about 20 hours from start to finish. OK, 99% of the time you are not on active duty, but I still think it only fair to let you know that this is definitely not a quick bread! But, boy oh boy is it good. I served it at one of our recent JazzVox pre-concert dinners, and all three baguettes were gone before I even had a chance to snag a piece. (I hate it when that happens, but love that my guests appreciate homemade bread.) I actually try to have some kind of homemade bread with every JazzVox meal I serve. First of all, people love homemade bread, and being the cheap frugal cook that I am, I like to save a buck or two where I can. And three really good baguettes from the store would cost me over $10, whereas I can bake 3 baguettes for about $1. (I will leave you to do the math!)

So the first time I made this bread, I knew I had a winner. I actually have several recipes for baguette style breads on this blog because every one of them is delicious in their own right. And even though I live in fear of being considered a nag, but going forward anyway, BREAD IS EASY TO MAKE!

So next time you have a dinner party, consider making homemade bread. Even, or maybe I should say especially people who are truly conscientious about what they put in their mouths are not going to be afraid of a piece of homemade bread, unless of course they are gluten intolerant, but that’s another story. Homemade bread has no preservatives or funny ingredients that most people can’t even pronounce much less want to consume.  And many recipes for baguette type breads contain no sugar, or if the recipe calls for any, a very small amount. (Usually just enough to start the yeasty beasties on their happy feeding frenzy!)

So if you are postponing bread making because you don’t think it will be well received, think again. Bread is the staff of life. Frankly, I don’t know anyone who can resist a piece of bread straight out of the oven. So get out your KitchenAid mixer or a large bowl, buy yourself some yeast and bread flour, and whip up a batch using either this lovely recipe or any of the other bread recipes on this blog.

For more information on making bread, please visit my Bread Baking 101 post.

Starter:

  • ½ c. room temperature water
  • 1/16 tsp. active dry yeast
  • 1 c. unbleached bread flour  

Dough:

  • 1 c. + 2 T. lukewarm water
  • 1 tsp. active dry yeast
  • all of the starter
  • about 3½ c. unbleached bread flour
  • 2 tsp. kosher salt
  • extra virgin olive oil

Starter instructions:

Mix the yeast and water together. Stir in the flour. Cover and let rest at room temperature for about 14 hours. (Overnight works great.) After the 14 hours the “starter” should have risen a bit and appear “bubbly”.

Dough instructions:

Pour lukewarm water into a large prep bowl or into the bowl of your stand mixer. Sprinkle on the yeast. Let sit for a couple of minutes. Add all the starter, 3 cups of the flour, and the salt. Mix and knead everything together by hand or with your stand mixer for about 5 minutes adding additional flour as needed  to achieved a soft, smooth dough. Pour a little bit of olive oil on top of the dough, and using your hands, roll the dough into a ball with all sides very lightly greased with the oil. (Your hands should be nicely greased also!) Cover the bowl, and let the dough rise for 3 hours, gently deflating it and turning it over after 1 hour, and then again after 2 hours.

Ever so lightly grease a large baking sheet with olive oil. Divide the dough into three equal pieces and shape each piece into a rough, slightly flattened oval and place on the baking sheet. Cover with either greased plastic wrap or a piece of parchment paper. Let the dough rest for 15 minutes.

Working with one piece of dough at a time, fold the dough in half lengthwise, and seal the edges with the heel of your hand. Flatten it slightly, and fold and seal again. With the seam-side down, cup your fingers and gently roll the dough into a 15-inch log. Place the logs seam-side down on your baking pan. Repeat with the other two pieces. (Try to keep the baguette dough pieces evenly spaced on the pan.) Cover them again and allow the loaves to rise till they’ve become very puffy, about 1½ hours. Towards the end of the rising time, preheat your oven to 450 degrees.  Using a very sharp knife held at about a 45° angle, make three 8″ vertical slashes in each baguette. Spray the baguettes very lightly with cooking spray. (I use olive oil spray.) Bake the baguettes until they are a very deep golden brown, 25 to 30 minutes. Remove from the oven and cool on a rack.


VEGETABLE LASAGNA

OK, so if you’re striving to be good like Mr. C. and I are; trying to cut down on the amount of meat in your diet, and increase the number of veggies, this is the dish for you. There is simply no way you, your family or your friends will feel even the least bit cheated when you dive into a big old portion of my dear friend Sandy’s lasagna. (Some people still have the mistaken belief that if an entrée doesn’t contain meat, it isn’t going to satisfy their appetite. “What fools those mortals be!” (Sorry William for misquoting you, but it was necessary to get my point across!)

This lasagna is so full of flavor and that lovely “pasta dressed in yummy” feel, that no one will even notice that it is “meatless”. (And no, you don’t have to announce that there is no meat in this lasagna. Let it just be your little secret.) Serve it with a lovely salad and hot, crusty bread, and although the earth probably won’t stop spinning, your world might take on a new dimension of happiness.

It’s confession time. When Sandy served this to us one evening after one of their in-home concerts*, I made a complete fool of myself. I simply could not get enough of this lasagna. But Sandy and her husband Alan are good friends, so I’m counting on the fact that by now they have forgiven me for making such a piglet of myself. I just really did not want to stop eating. But thank heaven, they live in Chimacum, and the ferry from Port Townsend that we were scheduled to be on, was fast approaching the dock. So in order not to spend the rest of the night in our car on the ferry waiting line, I had to say goodbye to the lasagna before I literally dove head first into the pan. But Sandy, being the doll that she is, sent me the recipe. She even gave me permission to share it with you. (How cool is that?)

So dear friends, enjoy this amazing recipe. It is just plain over the top delicious! And Sandy, once again, thank you for this marvelous recipe.

*For information about in-home classical concerts in the Port Townsend vicinity visit www.rawsonduo.com.

  • 2-4 T. extra virgin olive oil
  • 1 large eggplant, partially peeled, sliced 1/4-inch
  • 1 red pepper, rough chopped
  • 1 yellow pepper, rough chopped
  • 10-12 good sized mushrooms, sliced
  • 1 medium zucchini, sliced
  • 1 lg. onion, chopped
  • 2-3 garlic cloves, minced
  • kosher salt
  • freshly ground black pepper
  • 1 (28-oz.) can crushed tomatoes
  • 1 T. tomato paste
  • 2 tsp. fresh oregano, chopped
  • ¼ c. chopped fresh basil
  • ¼ c. dry white wine
  • 9-oz. oven-ready lasagna noodles (I like Culinary Circle Authentic Bronze-cut Oven-Ready Lasagna noodles
  • 4-oz. goat cheese, crumbled
  • 1 c. combination of grated Parmesan, cheddar, Mozzarella – whatever is on hand

Sauté eggplant, peppers, mushrooms, zucchini, onion and garlic in olive oil until soft – each type of vegetable separately – adding salt and pepper to each new veggie.  As each veggie finishes cooking, remove to a bowl and start the next veggie. Then, in the same pan, after all the veggies have been sautéed, add the crushed tomato, tomato paste, oregano, basil, and wine.  Add the reserved veggies. Mix all together, layer with no-boil lasagna noodles, with a layer of goat cheese in between, and top with whatever cheese is in the fridge. Sandy lets the olive oil and veggies speak for themselves.

Bake uncovered in a 375 degree oven for about 30-40 minutes or until the lasagna is bubbly and the top is a nice golden brown. Allow to sit a few minutes before serving.