Category Archives: DESSERT RECIPES

FRUIT FILLED OATMEAL BARS

OLYMPUS DIGITAL CAMERA

When it comes to baking these days, give me the fast and easy, tried and true, no talent required recipes I have been making for years and years. And this old favorite not only fits all of the above criteria, but is uncommonly delicious too boot!

I received the recipe from my mother-in-law about 20 years ago, and have been making these fruit filled bar cookies ever since. The preparation really only requires a modicum of effort and a few pantry and fridge ingredients. The real effort comes when the bar cookies come out of the oven. It takes Herculean strength of character not to cut into these cookies the moment they are cool and devour the entire pan! (You simply must trust me on this one!)

But then, I’ve always been a sucker for fruit filled desserts. Remember Hostess Fruit Pies? As a kid I thought the cherry filled “pies” were the best food ever. Thankfully as I got a little older (I think about 6th grade), I stopped liking them (too cloyingly sweet) and transferred my affection to Hostess Cupcakes and Sugar Daddies!

Now that my taste buds have matured, I can’t imagine putting some of the things in my mouth that I found irresistible as a child.  Luckily, I grew out of my childhood food passions, with only a few lingering effects. Fruit filled desserts are still among my favorite taste treats.

So, if you too enjoy the subtle combination of a buttery crunchy crust and cooked sweetened fruit, give this recipe a try. I promise you will not regret the time spent baking a batch of these people pleasers. You might regret the calories consumed, but never the time spent. Enjoy.

  • 1½ c. flour
  • 1 tsp. baking powder
  • ½ tsp. salt
  • 1 c. firmly packed brown sugar
  • 1½ c. old-fashioned oats
  • ¾ c. (1½ sticks) cold butter
  • 10-oz. jam, jelly, or preserves (I like marionberry or blackberry jam/jelly and cherry preserves the best)

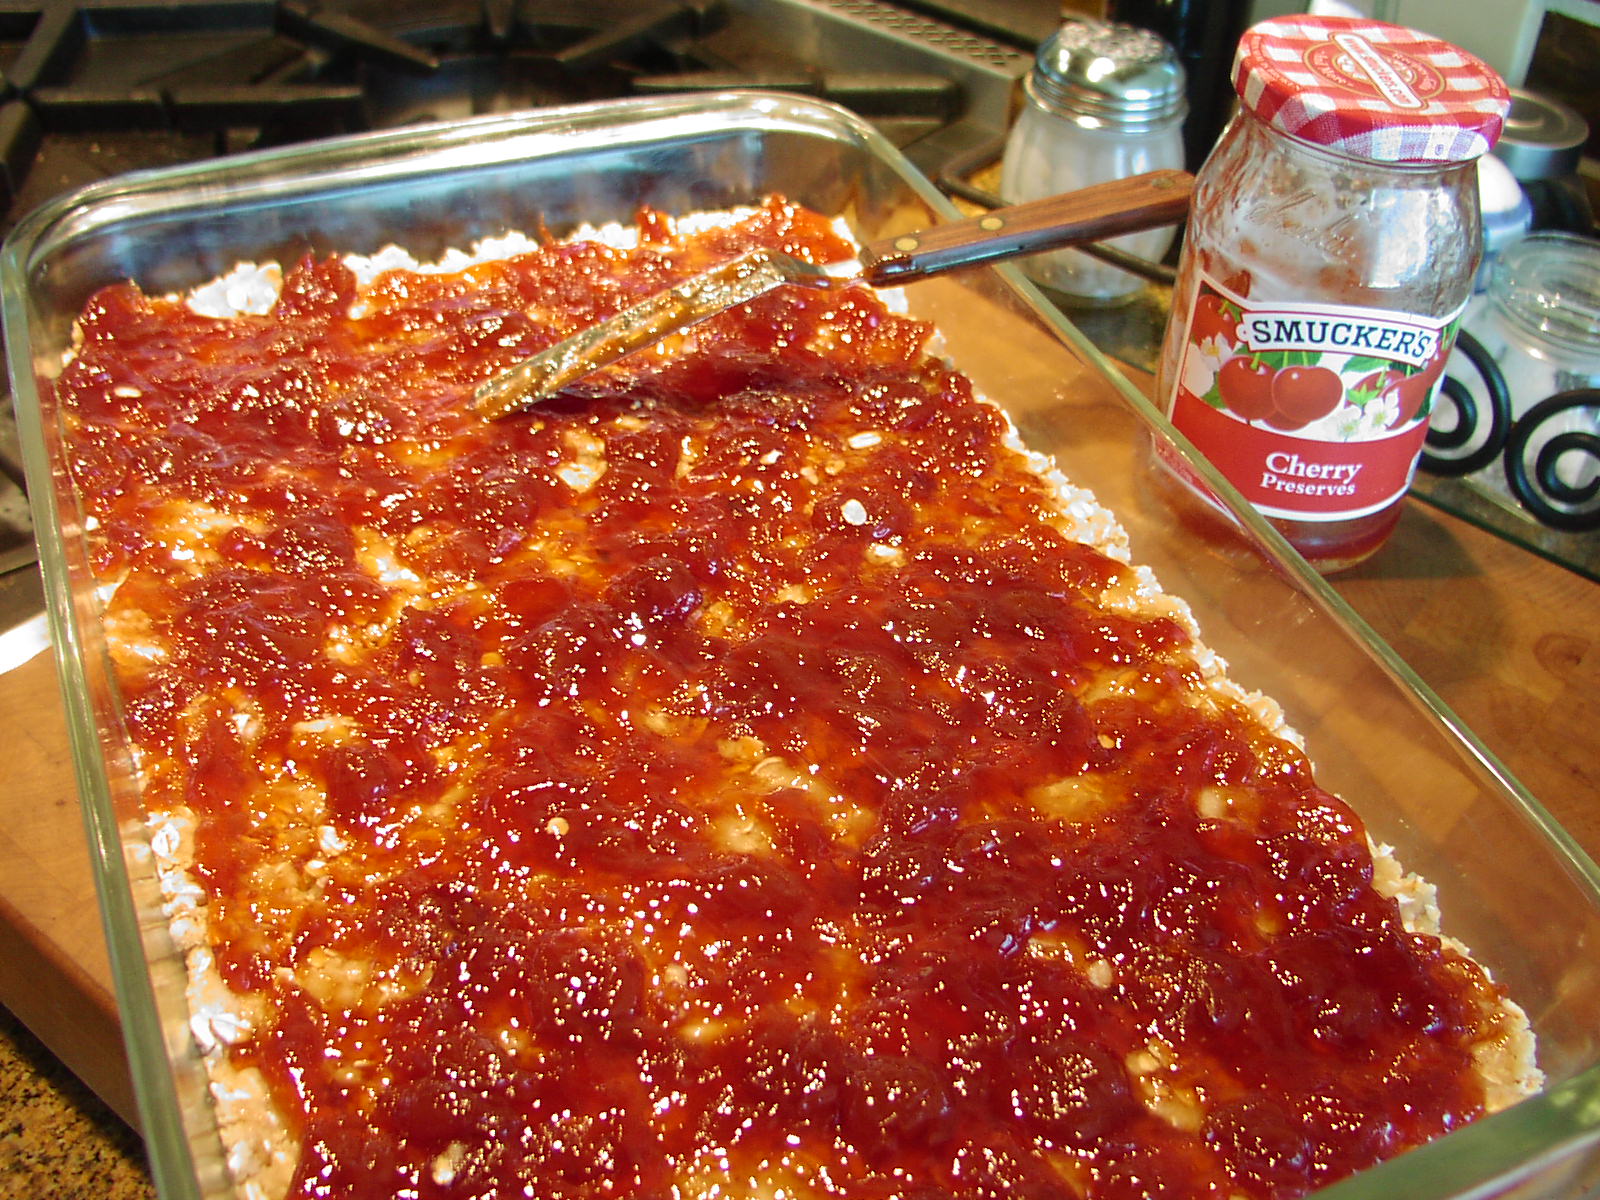
Combine the flour, baking powder, and salt in a mixer bowl. Add the brown sugar and mix until well blended. Add the oats and cold butter and beat until medium sized bits start sticking together. Press half of the mixture into a well buttered 8×8-inch baking pan. (Glass is best.) Spread jam evenly over the bottom crust.

OLYMPUS DIGITAL CAMERASprinkle remaining oat mixture evenly over the jam.

OLYMPUS DIGITAL CAMERABake in a pre-heated 325 degree oven for 35-40 minutes or until the filling is bubbly and the top crust is a nice golden brown.

OLYMPUS DIGITAL CAMERA(You might want to check after 25 minutes or so to make sure the top is not getting too brown. If so, cover with aluminum foil for the last few minutes.) Do not over-bake. Let cool completely before cutting.

Note: if using a metal pan set your oven to 350 degrees and check after 20 minutes.

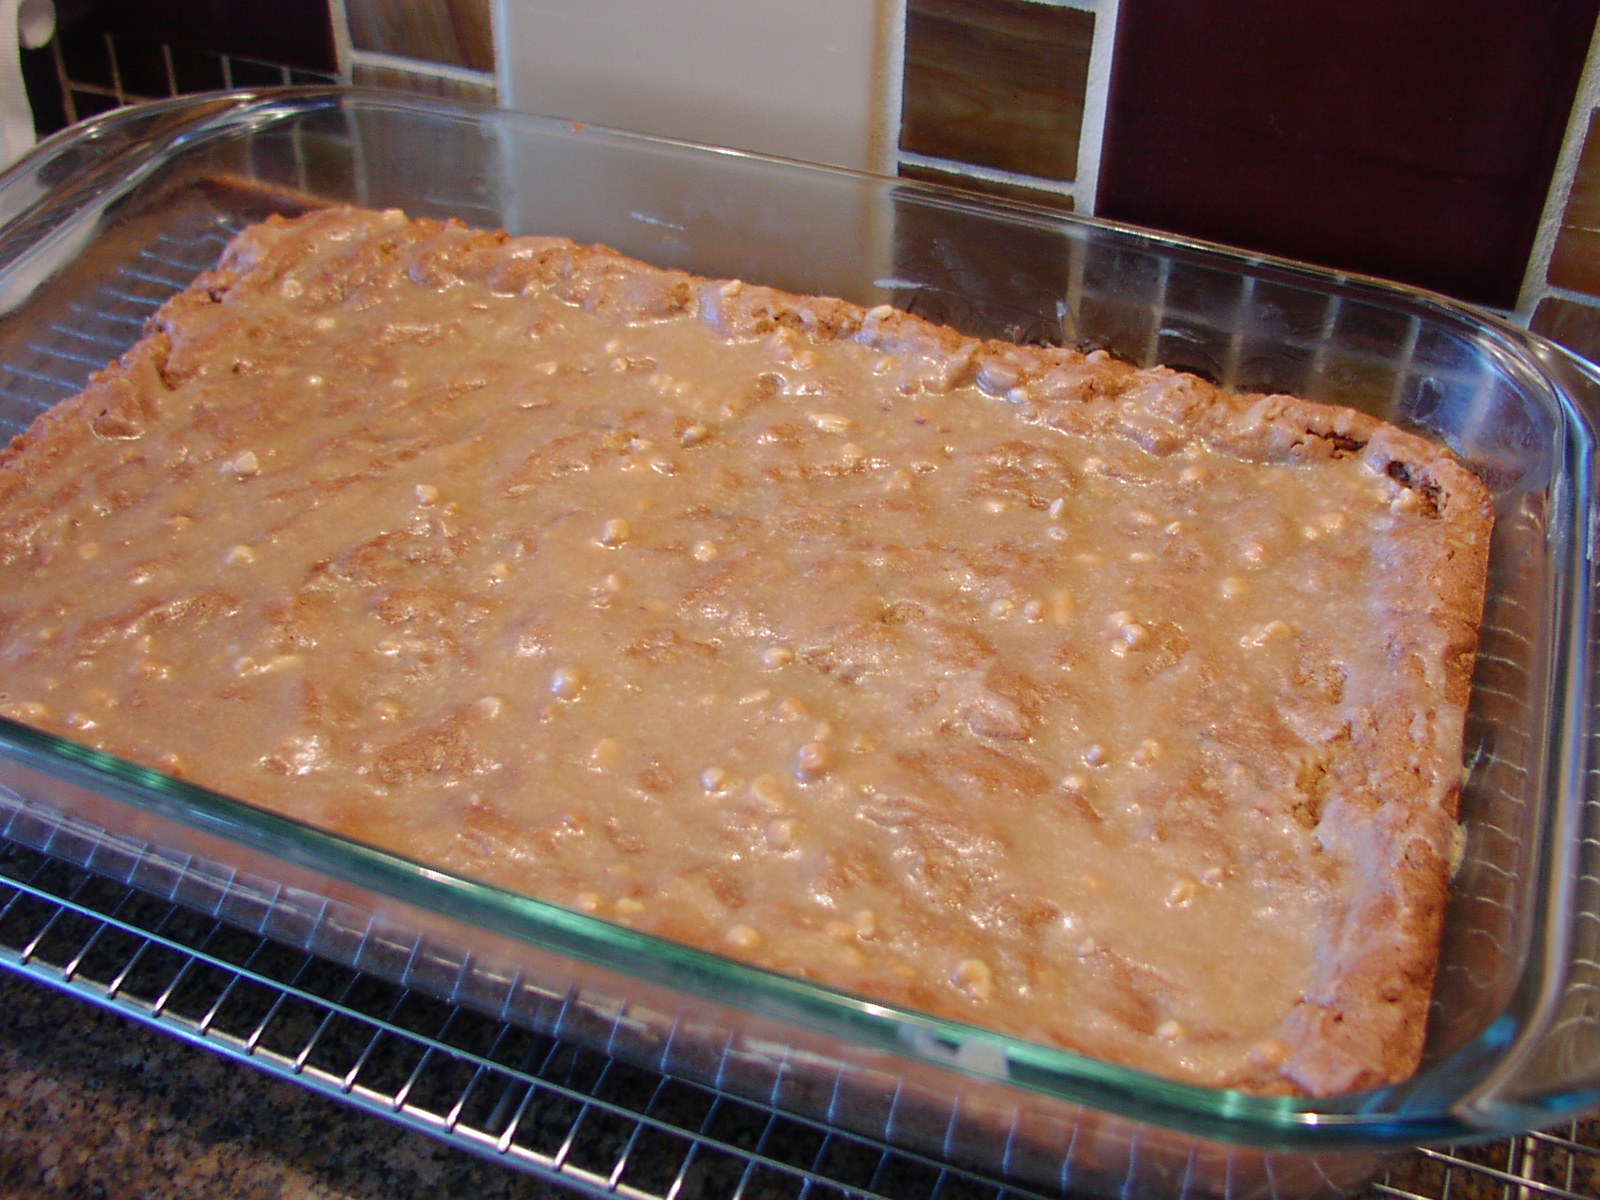
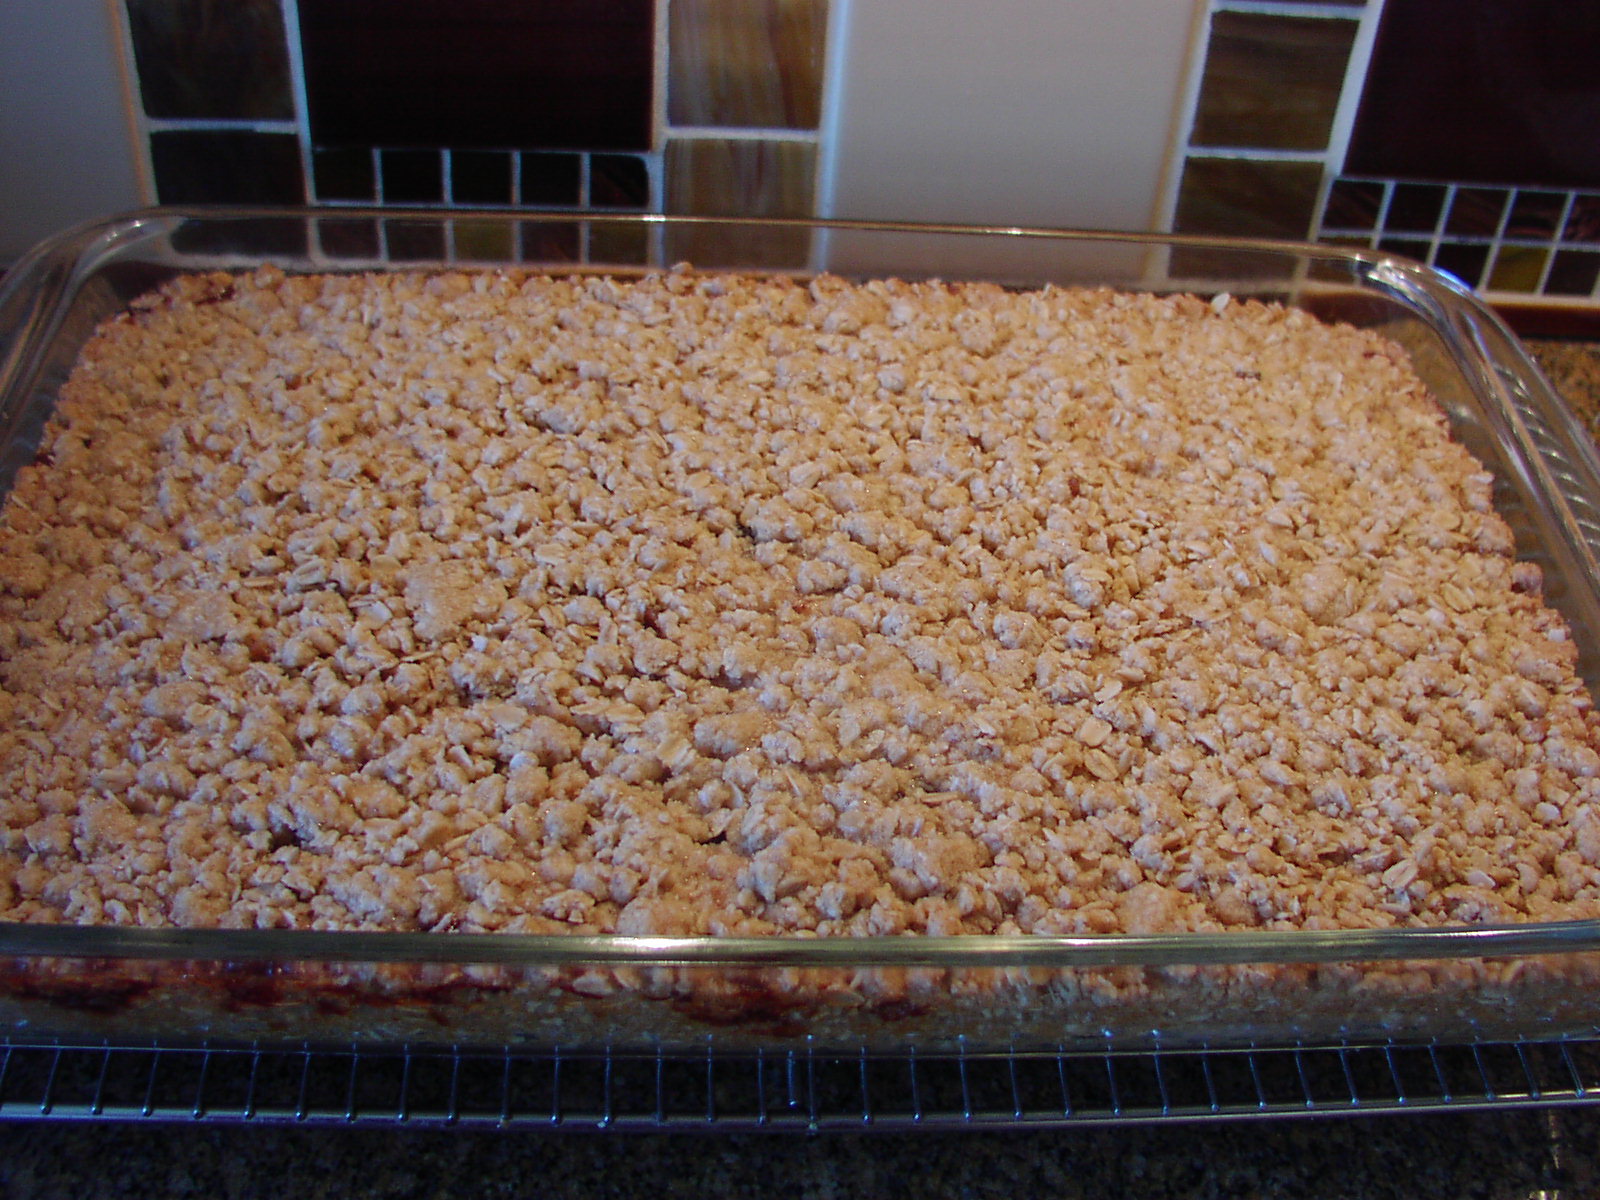
The picture above represents a double batch baked in a 10×16-inch glass pan.


PEANUT BUTTER, OATMEAL, AND CHOCOLATE CHIP BARS

OLYMPUS DIGITAL CAMERA

So, there are just those days when you need a sweet for your family or to take along to say a Saturday morning rehearsal of the BlueStreet Jazz Voices, and you have neither the desire or the strength to prepare a goodie that will take longer than 10 minutes to throw together. That’s how I came to make one of our favorite bar cookies for yesterday’s rehearsal. (I always like to bring a little something along to help the singers stay motivated when their sugar levels get into the dangerously low zone.) And not being the kind of person for whom sunrises are a “must see”, I always have to prepare treats the day before. Don’t get me wrong, I like sunrises as much as the next person. But at this time of year they come just a little too early for my liking! Plus, rehearsals start at the ungodly hour of 9:30am in Seattle, and I would have to get up at oh dark thirty in order to get treats prepared, baked, and cooled before leaving the house. Simply not going to happen! (BTW, I do my best work at about 4:30 in the afternoon, just when normal people are starting to wind down. Go figure!)

So Friday afternoon when I went in search of a little “something” to bake for Saturday morning, I found this old favorite in my second cookbook. And literally, these cookies take absolutely no time to concoct. Before you even realize you’re standing in front of your mixer, the dough is ready to plop in the pan. Then using the magic creating by turning the dial on your oven to the proper temperature and placing the filled baking dish in said hot oven, you have bar cookies that everyone will enjoy in under 45 minutes. Of course, you still have the tedious task of mixing three ingredients together to prepare the icing, but that can be done while the bar cookies are in the oven.

Of course, all this ease of preparation is predicated upon having all the necessary ingredients on hand. Duh! But being the kind of person I am, I practically get hives if all these staples are not in their proper place in my pantry or freezer at all times. (It’s called RSS – Replacement Shopper Syndrome.)

So next time you need a quick and easy cookie, give this recipe a try. But, I am not going to lie to you. These cookies are not really what would be considered good for you. But good, oh yah!

  • ½ c. butter (1 stick), room temperature
  • ½ c. granulated sugar
  • ½ c. brown sugar, packed
  • 1 egg, room temperature
  • 1/3 c. + 2 T. peanut butter, divided
  • 1 c. flour
  • ½ tsp. baking soda
  • ½ tsp. salt
  • 1 c. old fashioned oats
  • 1 c. chocolate chips
  • ½ c. powdered sugar
  • 2 T. milk

Cream the butter and sugars together until light and fluffy.  Add egg and the 1/3rd cup peanut butter and mix well. Whisk together the flour, soda, and salt and add to sugar mixture. Mix in the oats and chocolate chips. Press mixture into a lightly buttered 9×13-inch baking pan. (Glass is best.) Bake in a pre-heated 325 degree oven for 25-30 minutes or until the dough is just set and the top is a lovely golden brown. (350 degrees for 20-25 minutes if using a metal pan.) Meanwhile, whisk together the remaining 2 tablespoons peanut butter, powdered sugar, and milk. When the bars come out of the oven, drizzle with the powdered sugar mixture/icing.

OLYMPUS DIGITAL CAMERACool completely and cut into squares.


MEXICAN WEDDING COOKIES

So, who out there has never tasted a Russian Tea Cake, Swedish Tea Cake, Snowball, Butterball, Mexican Wedding Cookie or whatever name you use to identify these little 5 ingredient wonders? Probably no one, right? But on the off chance that you are among the half dozen or so people left in the United States that have not partaken of one of these incredibly tasty and easy to prepare cookies, I am going to provide you with this recipe so you too can come aboard the happy mouth train.

These cookies literally melt in your mouth. And cute? Who in their right mind could say no to such a darling little round ball liberally covered with powdered sugar? They look like little mini round pillows. (I’d have provided a picture but the cookies disappeared before I could get my camera out of the closet.)  Now granted, they are not the least expensive cookie to produce. But truly, you would have to be related to $crooge McDuck not to spend the money to make these little babies at least once a year.

Now some recipes I have made call for more flour, or less flour, or ground walnuts or almonds instead of pecans. But the 5 basic ingredients (butter, sugar, vanilla, flour, and nuts) remain the same in every recipe I have ever seen. Warning: don’t even think of using margarine or vegetable shortening instead of butter. You might find culinary experts from every country that has a version of this cookie appearing on your door step with strong words of displeasure at your disrespectful action. (We who are connoisseurs of these cookies take our use of the proper ingredients quite seriously.)

So next time you host an occasion that warrants a rich little dessert cookie (Christmas, wedding or baby shower, Monday night football, etc.) bake a batch of these cookies for your family and friends. I’m told they are the perfect end to any meal be it chicken cordon bleu or corn dogs and chips.

  • 1 c. (2 sticks) butter, room temperature
  • ½ c. powdered sugar, plus more for rolling
  • 1 tsp. vanilla
  • 2 c. all-purpose flour
  • 1 c. finely chopped pecans

Beat butter, powdered sugar, and vanilla until light and fluffy. Add the flour and pecans and beat until thoroughly combined. Shape dough into balls with small ice cream scoop or by hand. Place 1-inch apart on an ungreased baking sheet. Bake in a pre-heated 350 degree oven for 14-15 minutes or until bottoms of cookies are light brown. Transfer to wire rack and cool completely. Roll cookies in powdered sugar until evenly coated. Store cookies in an airtight container at room temperature.


MEXICAN BROWNIES

This wonderful brownie recipe comes from Aaron Sanchez. And unlike many of the recipes that I feature on this site, I have not changed one single solitary ingredient or amount in Aaron’s recipe. No need! However, I did change the assembly instructions a bit. I added the step of sieving the dry ingredients together to eliminate any possibility of lumps in the final product. This is not a difficult or very time consuming process, but one that guarantees that all your careful preparation work will not have been in vain. (No one appreciates biting into a lovely goody like this brownie and finding a small lump of cocoa or a wee chunk of cayenne, for example.)  Not a pleasant surprise. And dried ingredients are notorious for wanting to stick together. (And yes I know what you are thinking when it comes to dried spices. Fresh spices don’t clump together.)

But let’s be realistic here. Most of us who cook and bake a lot buy our spices in bulk. And regardless of what the experts say about only using fresh spices (they all work for large import companies, BTW), a dried spice older than 6 months is just as worthy of your regard as the fresh faced newcomer in your spice rack! Just because older spices have a little longevity going for them does not mean that they should be cast away like last year’s half  jar of Aunt Sarah’s homemade bread and butter pickles! (Note to self: clean the refrigerator!) Older spices just need to be understood.

So if using a sieve to break up little clumps of spice caused by repeated and infinitesimal exposure to moisture that robs the spice of essential oils, so be it. Beats the heck out of becoming “spice poor” or worse yet, “old spice phobic”! Just treat your older herbs and spices with the same kind of loving respect you afford your older loved ones. Visit them often, tell them how wonderful they are each time you reach for them, and treat them special. Nothing could be easier.

  • 1 c. unsalted butter (2 sticks), plus more for greasing
  • 2 c. sugar
  • 4 large eggs, room temperature
  • 2 tsp. vanilla
  • 2/3 c. good-quality unsweetened cocoa powder
  • 1 c. all-purpose flour
  • 1 tsp. ground cinnamon
  • ¼ tsp. ground cayenne pepper
  • ½ tsp. kosher salt
  • ½ tsp. baking powder

Place the butter in a large glass bowl and microwave at a low heat just until melted. Add the sugar, eggs, and vanilla; stir until well combined.

OLYMPUS DIGITAL CAMERA

In a separate bowl sieve the cocoa, flour, cinnamon, cayenne, salt, and baking powder together to eliminate any lumps. Add to the butter mixture and stir until smooth. Spread the batter in a lightly buttered glass 9×13-inch baking pan. Bake in a pre-heated 325 degree oven (350 if you are using a metal pan) for 20-25 minutes or until a toothpick inserted in the middle comes out fudgy. Cool completely before cutting into squares.

(And sorry about no picture of the brownies. They were gone before I could even think about reaching for my camera.)

CHOCOLATE AND PECAN TOFFEE BARS

OLYMPUS DIGITAL CAMERA

OLYMPUS DIGITAL CAMERA

Mr. C. recently celebrated his birthday. We were scheduled to perform on the actual day, so I asked him ahead of time if he would like to go out to dinner the day after his birthday or would he like me to prepare some of his favorite dishes in the comfort of our own home?  He chose to stay home, which was just fine with me. (We tend to stay so busy that an evening at home is a treat!) I asked him what he would like me to prepare, and he provided me with the following list: Gruyere Soup, steak (because we hardly ever eat steak any more), White Cheddar Cheese Grits, buttered fresh green beans, and some kind of a caramel and chocolate bar cookie. He told me he didn’t really care how I prepared the steak or what I served for appetizers he just really wanted the 5 items listed above.

Sounded good to me, so I chose to make him Steak au Poivre (recipe to follow later this week) and try out a slightly modified version of a bar cookie recipe I found on the “taste and tell blog” web site. And then of course, why not invite our good buddies Jim and Margo over for the celebration – voilà – a dinner party.

So for appetizers I served crackers with a small piece of smoked salmon, soft cream cheese spread with ginger jam, and a small bowl of castelvetrano olives. First course was the Gruyere soup, followed by the steak, grits, and the fresh green beans. For dessert, coffee, liqueurs of choice, and some of these incredible toffee bars. They were just amazing and exactly what the birthday boy wanted. (Love it when a plan comes together.)

So next time you want to make an incredibly tasty and ever so easy (you don’t even need to dirty your mixer) bar cookie, bake up a pan of these little darlings. You will not believe how incredible just 6 ingredients can taste. And making your own caramel for this recipe – a snap! And perfect to serve at Christmas time – oh yah! There is just nothing about these cookies that isn’t OK. Well, maybe the number of calories. But let’s just not count those nasty little calories this time, alright. In fact, I’m going to park these babies in a “calorie free zone” and leave them there in perpetuity. Now doesn’t that make you feel better? I am nothing if not on your side!

  • 2 c. all-purpose flour
  • 1½ c. packed brown sugar, divided
  • pinch of salt
  • ½ c. + 2/3 c. unsalted butter, room temperature
  • 1½ c. chopped pecans, divided
  • 1 c. semi-sweet chocolate chips

Mix together the flour, 1 cup brown sugar, and pinch of salt. Using your fingers or a table fork, massage in the ½ cup butter until the mixture resembles fine crumbs. Mix in 1 cup of the chopped pecans. Press into the bottom of a 9×13-inch baking dish, preferably glass. (Although I don’t really grease the pan, I do use the butter wrappers to kind of leave a mere trace of butter on the pan before I scoop in the flour mixture.)

In a medium saucepan, combine the remaining 2/3 cup butter and the remaining ½ cup brown sugar. Cook over medium heat until the mixture comes to a full boil, stirring constantly. Continue to boil for 1 minute. Remove from heat and carefully pour evenly over the crust. Smooth out the caramel with an offset spatula. (The tool pictured above.)

Bake the bars in a pre-heated 325 degree oven (350 if you are not using a glass pan) for 20-22 minutes, or until the caramel is bubbly. Remove from oven and sprinkle with the chocolate chips. Allow to set for about 4 minutes while the chocolate melts. Spread the chocolate into a thin layer over the top of the bar cookie (again using your offset spatula) and sprinkle with remaining ½ cup chopped pecans. Gently press the pecans into the soft chocolate with one of your fingers. (If you happen to get a little chocolate on your finger as you are securing the pecans to the chocolate, you can treat yourself to a little taste before the bars are cool. I call this – quality control!)  Allow the bars to cool completely before cutting into fairly small pieces. These are very rich (really almost a candy), and oh so yum.

Note: This is one bar cookie that actually improves with age. Mr. C. said they were better the second day. (Haven’t reached the third day yet, so can’t advise you if they just keep getting better. And at the rate they are disappearing from the pan, I may never have that answer to share with you!)

2nd Note: Offset spatulas are one tool that isn’t used every day, but when it comes time to spread something (like frosting or as in this case, hot caramel) on to something else there is not a better tool for the job. They are fairly inexpensive, so treat yourself next time you are in a store that sells cooking equipment.

FROSTED IRISH CREAM BROWNIES

You’re right. There is no picture attached. That’s because I served these for the first time this past Sunday to our JazzVox* guests, and before I could fetch my camera from the hall closet, half of the brownies were gone! You’d think I had starved our guests to this point, that I hadn’t already served them Spicy Baked Corn Beef with Mustard Sauce, Beer Braised Bangers (Sausages) with Onion Gravy, mashed potatoes, Braised Green Cabbage, fennel and apple slaw, Bread and Butter Pickles, and Light Rye Bread. (BTW, all the dishes underlined are already posted on this site and perfect to serve for St. Patrick’s Day. And yes, St. Paddy’s Day is just around the corner!)

So, for whatever reason, these brownies and the 50 or so White Chocolate Dipped Coffee Bean Shortbread I served during the concert intermission were gone before I could blink an eye, much less take a picture. And if I am to be completely truthful about these brownies, neither Mr. C. nor I even got a taste. (And yes, you’re right.  I said I would NEVER post a recipe I had not tasted.) But who am I to argue with 30 guests and 2 performers who all proclaimed the brownies amazing! I’m not that wretched as to dishonor these intelligent jazz lovers by discrediting their comments. How rude would that be? So take the word of some of the savviest people I know, and give these brownies a try.

And if you are a purest and only make your brownies from scratch, I sincerely offer my apologies. But there are just times when the cost factor outweighs the need to build something from scratch. And when I buy a big old 6 batch box of Ghirardelli Triple Chocolate brownie mix from Costco, I feel good about using our monetary resources judiciously. It’s simply the economically prudent thing to do under certain circumstances. (Not to mention, that even undoctored, the mix brownies are absolutely delicious!)

*for more information on JazzVox home concerts, visit our website www.jazzvox.com

  • 4 T. Irish cream liqueur, divided (I use Bailey’s)
  • water
  • 1/3 c. vegetable oil
  • 1 egg, room temperature
  • 1½ tsp. instant espresso coffee, divided (I use Medaglia D’oro) plus more for dusting
  • 1 pkg. chocolate brownie mix (I use Ghirardelli)
  • ½ c. (1 stick) unsalted butter, room temperature
  • 1¾ c. powdered sugar, plus more as needed
  • pinch of salt

Pour 3 tablespoon of the Irish cream into a 1/3 cup measuring cup. Add water until measuring cup is full. Pour into a medium sized bowl and whisk together with the vegetable oil, egg, and 1 teaspoon of the espresso powder. Add the dry brownie mix and stir until fully mixed. Pour into a lightly greased 9×13-inch pan. Glass pan if you have one. (Even if the mix instructions say to bake in an 8×8 or 9×9 pan use a 9×13.) Bake in a pre-heated 325 degree oven for 30-35 minutes. Do not over-bake. Fresh baked brownies appear under baked but cool to doneness. Meanwhile, cream together the butter and powdered sugar. (Will be a very dry mixture at this point.) In a small bowl, whisk together the salt, remaining 1 tablespoon of Irish cream, and the remaining ½ teaspoon of instant coffee. Add the cream mixture to the butter/powdered sugar mixture. Beat until very creamy and smooth. Add additional powdered sugar as needed. Spread evenly over cooled brownies. Sprinkle lightly with instant coffee. Chill until just before ready to cut and serve.

CHOCOLATE AND HAZELNUT FILLED PASTRY COOKIES

OLYMPUS DIGITAL CAMERA

Once in awhile I am forced to eat lunch by myself. It doesn’t happen very often because usually Mr. C is around and we eat together. But when he is out, I usually turn on the TV and watch the food network while I slam down my lunch. And that is just how I discovered this wonderful pastry recipe. I was watching an episode of 10 Dollar Dinners with Melissa D’Arabian. That day she was preparing Petite Nutella Pouchettes. They looked divine, so I decided to bake some and take them to rehearsal that evening. (Well I did change the pastry recipe a little, because I didn’t think Melissa’s recipe looked sweet enough, but that’s what I do, remember?)

Long story short, the cookies were a success. The dough was just sweet enough, and combined with the Nutella, well suffice it to say, these little babies should be standard fare in heaven!

So next time you want to serve a light and elegant little dessert pastry, these are the perfect choice. And to take these cookies totally over the top, Dan, a fellow BlueStreeter suggested that they be topped with a little dab of jam. Yum. Then I thought, how about a drizzle of raspberry puree? The list could go on and on. But however you decide to serve these cookies, I am sure your family and friends will not be disappointed. How could anyone be disappointed when butter, cream cheese, and Nutella are in a recipe? I mean really!!

  • 1 c. (2 sticks) unsalted butter, room temperature
  • 8-oz. cream cheese, room temperature
  • 1 tsp. vanilla
  • ¼ c. powdered sugar, plus more for dusting
  • ¼ tsp. salt
  • 2 c. flour
  • Nutella (chocolate-hazelnut spread)
  • water

Cream the butter and cream cheese together until light and fluffy. Add the vanilla, ¼ cup powdered sugar, and salt. With the mixer on low speed, spoon in the flour and mix until just combined. Place the dough on a well-floured surface (I use a pastry cloth) and roll it into a round, flat disk. Wrap in plastic wrap and refrigerate for at least an hour.

On the same floured surface, roll the dough out to 1/8-inch. (Make sure there is flour on your rolling pin too while you are rolling out the dough.) Using a 3-inch fluted biscuit cutter, cut out as many circles as you can. Place the rounds on a parchment paper lined baking sheet. Form the scraps into a ball, roll out and cut more circles. Place about a half teaspoon of Nutella in the middle of each pastry round.

OLYMPUS DIGITAL CAMERA

The easiest way I have found to shape these little darlings is to pick up a pastry, place it on the palm of your right hand, (Nutella side up, of course) and wet the perimeter of the circle with water using the index finger on your left hand. Then using gravity as a helper, fold the circle in half with the Nutella towards the bottom and the curve of the semi circle pointing towards heaven.  (Do not try to spread the Nutella.) Press edges together gently. Place back on the parchment paper and bake in a pre-heated 375 degree oven until golden, about 15 minutes. Cool completely on a wire rack. Place about ½ cup powdered sugar in a fine mesh strainer. Gently shake the strainer back and forth over the cooled pastries until they look like they have been gently kissed by snow. Store in an airtight container.


KAHLÚA BUNDT CAKE

OLYMPUS DIGITAL CAMERA

In my opinion there are only two types of people in this world; those who love chocolate and those who don’t. I base this statement on the fact that about 99.8% of my acquaintances would never think to utter the phrase “can take chocolate or leave it”!  My friends either really love chocolate, or don’t like it at all. No middle ground or ambiguity whatsoever. In fact, some of my friends take their love of chocolate so seriously that they don’t even consider eating a sweet unless it contains chocolate. (Yes Christine, I am referring to you!)

But within the group that love chocolate (most people I know), there are the people who love dark chocolate and the darker the better. Then there are those, like myself, who prefer milk chocolate or semi-sweet chocolate lovingly surrounded by other ingredients. (Think chocolate chip cookies or mint chip ice cream.)

But one of the recipes I make, that every chocolate lover I know can agree upon, is this Kahlúa Cake. It has the richness associated with dark chocolate without the bitterness. (At least my taste buds associate dark chocolate with bitterness.) And the best part, this is one of the easiest cakes you will ever bake. Just a few ingredients and no frosting, whipped cream, ice cream or even a sprinkling of powdered sugar required. In fact, any of these toppings/additions detract from the flavor of the cake rather than act as an enhancement.

So next time your sweet tooth (the one dipped in chocolate) acts up, give it what it wants. I guarantee that with just one small piece of this cake, your brain will release so many lovely little endorphins that you will feel as happy as someone who has simultaneously lost 10 pounds and won the lottery! And what could be better than that?

  • 1 chocolate cake mix (non pudding added variety)
  • 1 small pkg. (3.9-oz.) instant chocolate pudding
  • 1 pt. (2 cups) sour cream
  • ¾ c. vegetable oil
  • 4 eggs, room temperature
  • 1/3 c. Kahlúa
  • 6 oz. mini chocolate chips (use regular if you don’t have mini chips on hand)

Beat cake mix, pudding mix, sour cream, oil, eggs, and Kahlúa together for about 5 minutes. Fold in chocolate chips. Pour into a well greased and floured Bundt pan. Bake in a pre-heated 350 degree oven for approximately 45 minutes or until a toothpick inserted into cake comes out clean. Don’t over bake. Let sit for about 10 minutes then turn cake out onto a cooling rack or directly onto a cake plate. Allow cake to cool before serving.

EGGNOG BUNDT CAKE

OLYMPUS DIGITAL CAMERA

And yes I know Christmas has come and gone, but I am still going to post some recipes that I prepared this year for Christmas and/or New Year’s Eve that I thought were worthy of your discerning  taste buds. And this cake is one of them.

This recipe came to me via my daughter Paula. It was called Eggnog Bread. But I thought it would work better as a cake, so hence the name change. But whatever you choose to call this delicious baked good, you are sure to be pleased. It is moist and very delicious and just perfect for the holidays. As you can see in my yet another not-so-perfect picture, I dressed the cake up with a little bit of holly from our yard. (Twas for the holidays, after all!) And I know, food photography is never going to win me any awards. All my food pictures look like they were taken by a maladjusted monkey. Just think of viewing my efforts at photography as the price you have to pay to sign on to my site. (At least you don’t have to work your way through advertisements for acid reflux or hemorrhoid preparations to get to my recipes.)

On that happy note, Happy New Year everyone!

  • 1 pkg. yellow cake mix
  • 1/8 tsp. freshly grated nutmeg
  • 2 eggs, room temperature
  • 1 ½ c. eggnog
  • ¼ c. melted butter, cooled to room temperature
  • 2 T. spiced rum
  • ¾ c. powdered sugar
  • milk

Place the cake mix, nutmeg, eggs, eggnog, butter, and spiced rum in a mixing bowl and beat for about 4 minutes. Pour into a Bundt pan that has been lightly buttered and floured. Bake in a pre-heated 350 degree oven for about 45 minutes or until a wooden skewer inserted into the top comes out clean. Allow to cool in the pan for about 10 minutes and gently remove to a cake plate or cooling rack. When completely cool, drizzle with frosting. To make the frosting, whisk together the powdered sugar and enough milk to bring the drizzle to desired consistency. (It should pour, but not be so runny that it completely oozes off the cake.) Let drizzle/frosting harden before serving the cake.


NANTUCKET CRANBERRY CAKE

OLYMPUS DIGITAL CAMERA

I love cranberries and am always thinking of new ways to feature them especially during the holidays. I make Brandied Cranberries, Cosmopolitans, Waldorf Salad, Cheddar and Port Wine Cheese Ball (to name a few that are on this site). This year I decided I wanted to serve a dessert for Christmas Eve that contained these lovely ruby red gems.

Coincidentally, a couple of months ago, my dear friend Angela loaned me a book she thought I would enjoy by Laurie Colwin entitled “More Home Cooking”. Enjoy?!?!  It’s like reading a book written by my sister by another mother! She thinks the way I do. (Scary in and of itself!) However, even though we think alike, she is a true gourmet. I am merely a cheeseburger loving pagan compared with her tastes and culinary abilities. Never-the-less, her book is like listening to me talk and most of her recipes look and sound like they would be fabulous. And there in black and white was a recipe for a Nantucket Cranberry Pie. (It calls itself a pie, but in truth it is a cake!) And the recipe looked super easy to make! So I went on-line and researched other recipes for this simple dessert. Low and behold almost all the recipes were very similar. I tweaked Laurie’s recipe a bit and came up with my own version.

I am here to tell you, this is one of the best desserts I have ever had the pleasure to serve my guests. And it is beautiful, so it is perfect to serve over the holidays. It looks festive and tastes like you have slaved in the kitchen for hours. (I like that combination.) But the reality is that you don’t even have to use an electric mixer, just a whisk.  And in about 5 minutes the batter is ready to pour over the fresh cranberries and nuts. Yum! And of course, you know me. While I’m at it, let’s further guild the lily and add a dollop of freshly made whipped cream! After all, it’s the holidays and even those of us who don’t enjoy sweets that much go to bed dreaming about tomorrow morning’s cinnamon roll. So, what’s an extra dollop or two of whipped cream among friends during the holidays? Speaking of reasons to celebrate – Happy New Year everyone and thanks again for reading my blog.

  • 2 c. halved fresh cranberries
  • 1/2 c. chopped walnuts
  • 1 1/2 c. sugar, divided
  • 2 large eggs, room temperature
  • 3/4 c. (12 tablespoons) butter, melted and cooled slightly
  • 1/2 tsp. salt (or 1/4 tsp. if using salted butter)
  • 1/4 tsp. vanilla extract
  • 1 tsp. almond extract
  • 1 c. unbleached all-purpose flour
  • coarse white sparkling sugar, opt.
  • freshly whipped heavy cream, opt.

Generously butter a 10″ pie plate or spring-form pan.  Spread the chopped cranberries and nuts in the bottom of the pan. Sprinkle with 1/2 cup sugar. In a mixing bowl, whisk together the eggs, remaining 1 cup sugar, melted butter, salt, vanilla, and almond extract. When thoroughly combined stir in the flour just until absorbed into the other ingredients. Do not over-mix. Spread the thick batter over the cranberries and nuts.

Bake in a pre-heated 350 degree oven for 30 minutes. Remove from oven and sprinkle the coarse white sparkling sugar atop the batter. Bake for an additional 10-15 minutes or until a cake tester inserted into the center comes out clean of batter or crumbs. Remove the cake from the oven. Serve warm, or at room temperature with a dollop of whipped cream.

OLYMPUS DIGITAL CAMERA