Category Archives: DESSERT RECIPES

RUSTIC PEACH TART

OLYMPUS DIGITAL CAMERA

I love pie. But sometimes I just don’t want to be as fussy about the pie crust as is demanded in a “real” pie. That’s when I make a rustic tart! Now granted, you can’t use just any filling when you make a tart. But peaches, apples, cherries, or other fruits that don’t turn too saucy make perfect tart fillings. And the flavor – just as wonderful as any pie. Because, of course, all the ingredients are the same. (Stating the obvious has always been my forte!)

So next time someone says to you, “I’m hungry for quiche” – make a tart. Allow me to explain.

A couple of weeks ago Mr. C. suggested quiche for dinner. Now as everyone knows, quiche is a one crust (bottom) pie filled with a savory custard and cheese, meat, seafood, vegetables, or whatever takes your fancy. So when I make a quiche and use my favorite recipe for piecrust (recipe below), I am left with enough dough for a tart. Thus when asked for quiche, I also make a tart. (The logic is simple, right?!?!) Almost mathematical. Not quite pie r squared (or as some refer to it – pi r squared), but there are circles involved, and tasty circles to boot!

So do yourself and your family and friends a favor. Bake a tart. And if you still have the energy, make them a quiche too. Not coincidentally, the next recipe I plan to post is for a delicious version of Quiche Lorraine.  (Some would call that good planning. Those who know me would refer to it as happenstance!) Happy baking.

  • 1 pie crust
  • 4-5 ripe but firm peaches, peeled and cut into ¼ inch slices
  • 1 tsp. fresh lemon juice
  • ¼ tsp. almond extract
  • 2 T. unbleached all-purpose flour
  • 3 T. sugar
  • 1/8 tsp. ground cinnamon
  • pinch ground nutmeg
  • pinch salt
  • 1 T. unsalted butter, cut into small pieces

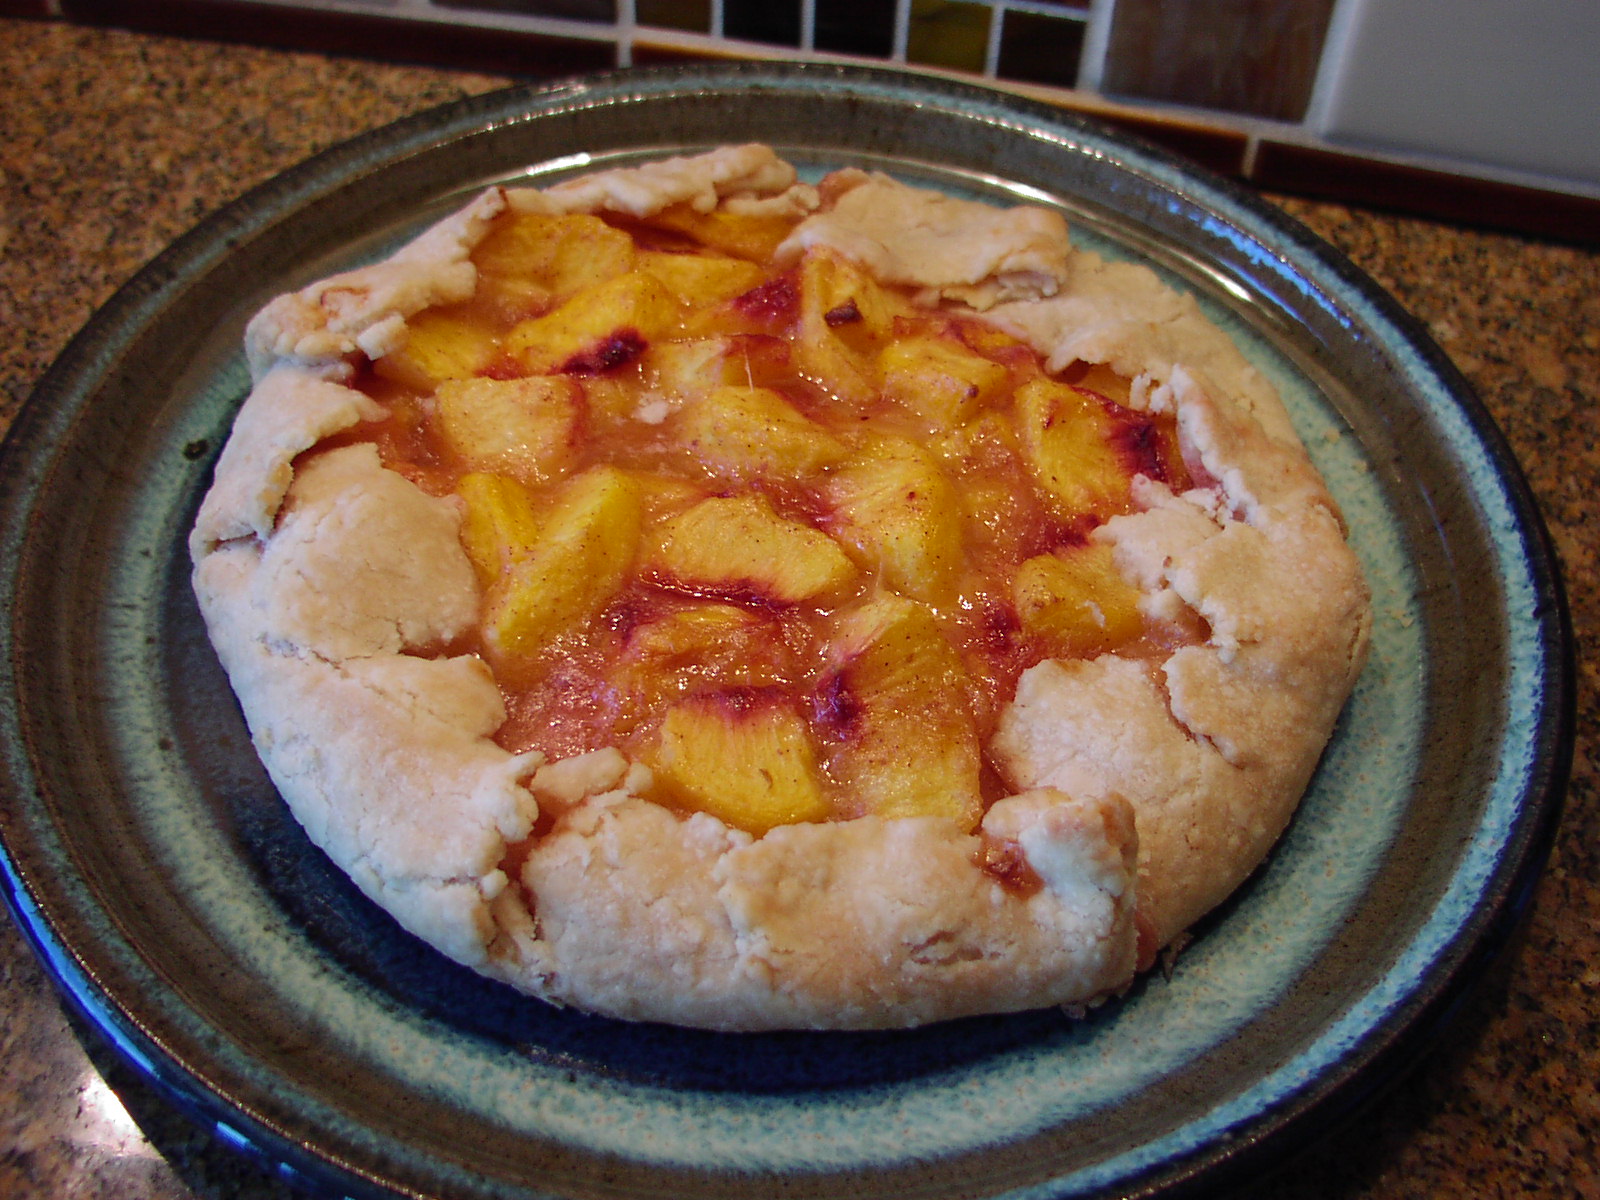
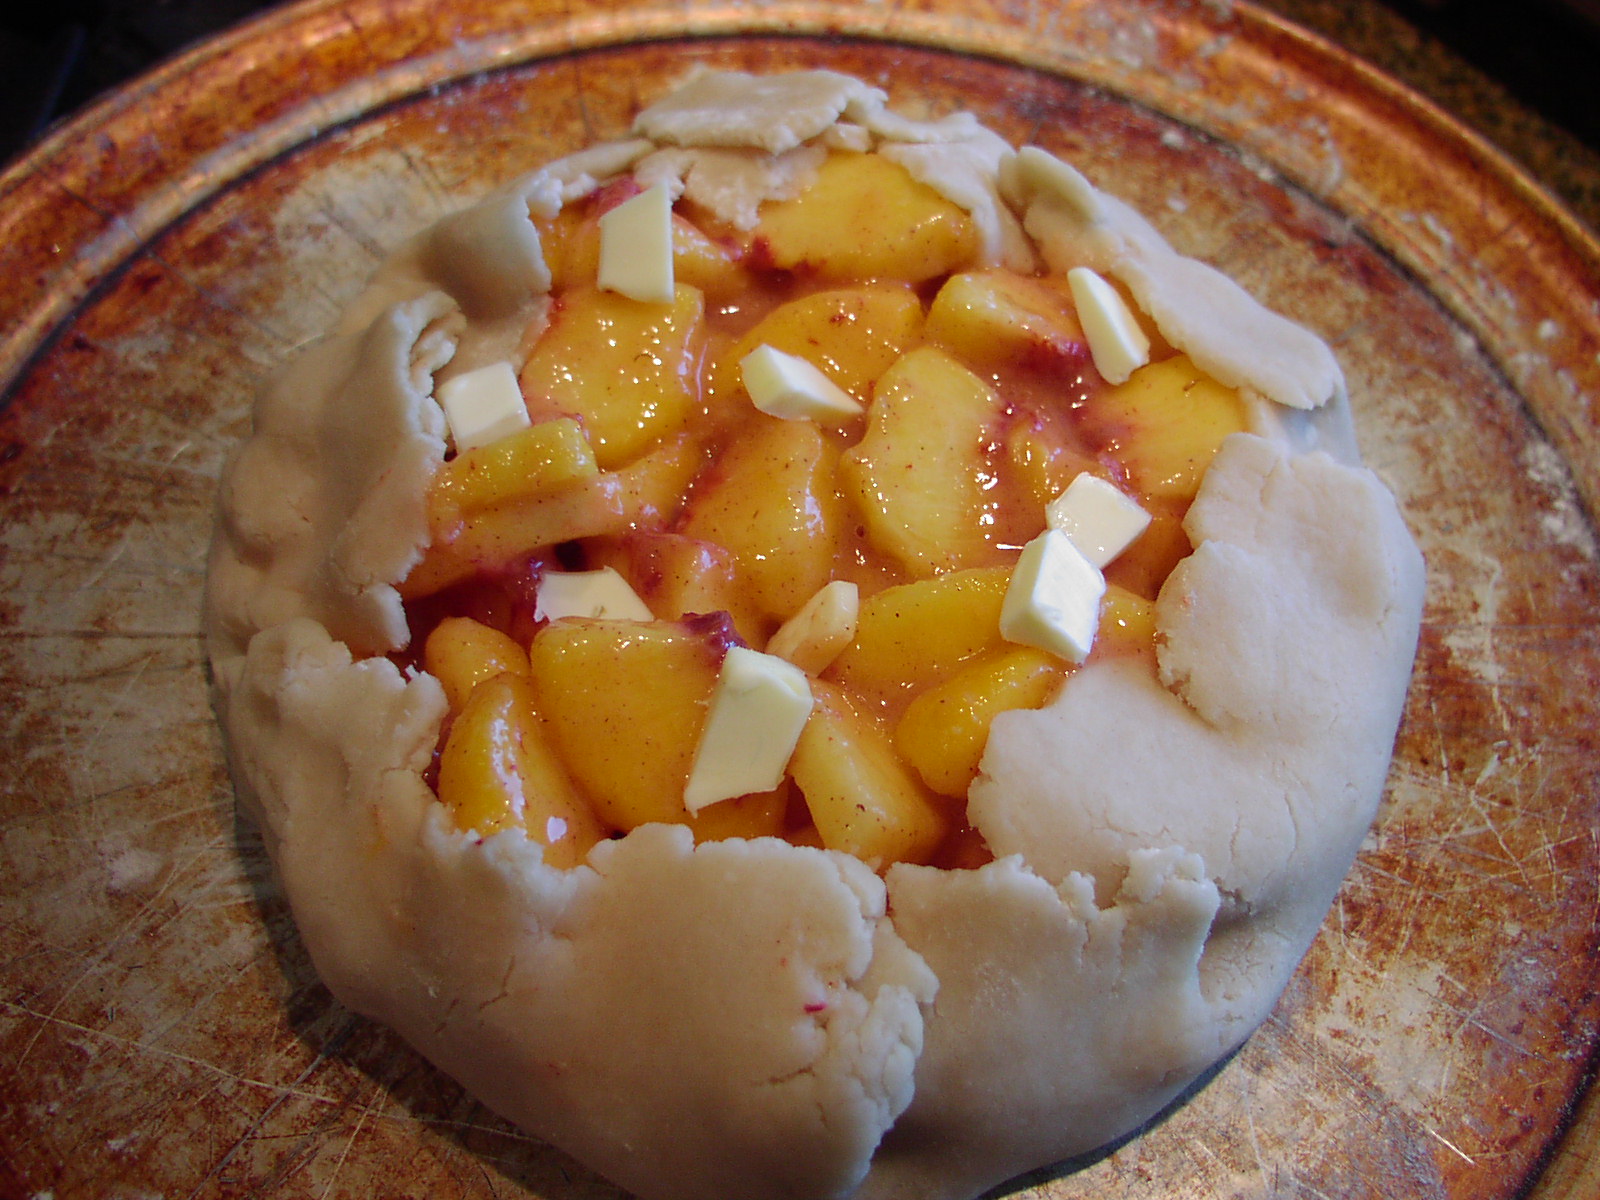
Roll your pie crust into a circle shape (does not have to be perfect) and place on a low sided baking sheet. Combine the cut peaches, lemon juice, and almond extract in a bowl. In a separate bowl, whisk together the flour, sugar, cinnamon, nutmeg, and salt. Pour the flour mixture over the peaches and gently stir until all the pieces of peach are covered with flour. Scoop the mixture onto the pie crust leaving about a 1½ inch edge uncovered. Gently fold the bare edges up over the filling. Dot with the butter.

OLYMPUS DIGITAL CAMERA

Bake in a pre-heated 375 degree oven for 35-40 minutes or until the filling is bubbly and the crust is a light golden brown. Hint: I use the convection setting on my oven for the last 10 minutes or so. This helps the pie crust brown.

PIE CRUST (makes a double crust)

  • ¼ c. very cold water
  • 2 c. flour
  • 1 tsp. salt
  • heaping 2/3 c. Crisco

Step 1 – Pour cold water into a small bowl.

Step 2 – Measure flour and salt into a mixing bowl.

Step 3 – Take 1/3 cup of the flour back out of the mixing bowl and stir it into the water. Make a paste. Set aside.

Step 4 – Add the Crisco (heaping 2/3 cup) to the flour and salt mixture. Mix together. (I use my KitchenAid mixer.)

Step 5 – Add the water/flour paste to the flour/shortening bowl and mix just until blended. Do not over-mix. Roll out dough and place in pie plate. This recipe makes enough dough for a double crust pie, if using a regular sized pie plate, or one large bottom crust with a little left over for pastry cookies or small tart like the one shown below.

Helpful hint: Use a pastry cloth to roll out your pie crust. It really makes a difference. You can find pastry cloths in almost any kitchen wares shop. Well worth the $10 or so.

GERMAN CHOCOLATE SHEET CAKE

OLYMPUS DIGITAL CAMERA

Contrary to popular belief, German chocolate cake did not originate in Germany. Its roots can be traced back to 1852 when American chocolatier, Samuel German, developed a type of sweet baking chocolate for the Baker’s Chocolate Company. The brand name of the product, Baker’s German’s Sweet Chocolate, was named in Mr. German’s honor.

And this delicious cake, which I prefer to serve as a sheet cake, is the ultimate result of Mr. German’s hard work. (And we all thank him to this day.)

And yes, I prefer sheet cakes to layer cakes. Why you ask?  Very simple. We entertain large groups of quests in our home, and sheet cakes are simply easier to build and easier to serve than a layer cake.  (Since entering “the golden years”, I’ve started pulling the “I’m not getting any younger” card to give myself permission to take a few steps here and there to make life easier for myself. And one of those “steps” is to mainly serve only sheet cakes and reserve time consuming layer cakes for very special occasions.)

Now I don’t want you to think that just because this recipe doesn’t call for 3 layers, each frosted with the wonderful caramel pecan and coconut frosting we have all come to love over the years that you will somehow feel cheated. Not going to happen. You are still going to get plenty of that fantastic frosting. So no need to worry. And truly, if you just can’t abide the thought of German Chocolate cake as a sheet cake, by all means, knock yourself out and make a layer cake. (3 – 8-inch pans should work just fine.)

But whatever shape you decide upon, be it the lazy person’s way (mine) or the traditionalist’s way (someone younger with more stamina), you are going to love serving this cake to your family and friends. You know the term “oldie but goodie”, well whoever coined that phrase must have had this enduring cake in mind. Because this cake has been around since I was a kid, and as everyone knows, that was a long time ago.

Actually, the first published recipe for German’s chocolate cake appeared in the Dallas Morning Star newspaper on June 13, 1957 as their “recipe of the day”. It was created by a Texas homemaker, Mrs. George Calay. The recipe was so delicious that it quickly spread to other newspapers and cookbooks, and soon became everyone’s “special” cake for birthdays, anniversaries, etc. And just so you know, June 11th is National German Chocolate Cake Day in America. (The things you learn on this site. Amazing, huh?)

And I know, everyone already has a recipe for German Chocolate Cake. But mine is a tad different. (Now there’s a surprise I bet you hadn’t thought possible.) Chuckle chuckle!

Cake:

  • 4 oz. German sweet chocolate, chopped
  • ½ c. water
  • 1 c. unsalted butter, room temperature
  • 2 c. granulated sugar
  • 4 eggs, room temperature, separated
  • 1 tsp. vanilla extract
  • 2½ c. cake flour
  • 1 tsp. baking soda
  • ½ tsp. salt
  • 1 c. buttermilk

 Frosting:

  • 4 lg. egg yolks
  • 1 (12-oz.) can evaporated milk
  • 1½ c. granulated sugar
  • ¾ c. unsalted butter
  • pinch salt
  • 1½ tsp. vanilla extract
  • 1 T. dark rum, opt.
  • 2 c. sweetened flaked coconut, toasted
  • 2 c. toasted pecans, chopped

Cake:

In your microwave oven, melt the chocolate with water; stir until smooth. Set aside to cool. In the bowl of your mixer, cream butter and sugar until light and fluffy. Add egg yolks, one at a time, beating well after each addition. Beat in the chocolate mixture and vanilla. Whisk the cake flour, baking soda, and salt together in a small bowl. Add to the creamed mixture alternately with buttermilk, beating well after each addition. Beat egg whites until stiff peaks form; fold into batter.

Spread batter evenly in a buttered and floured 9 x13-inch baking pan. Bake in a pre-heated 325 degree oven (if using a glass baking pan) or a 350 degree oven (if using a metal pan) for 35-40 or until a toothpick inserted near the center of the cake comes out clean. Remove from oven and cool completely on a wire rack before frosting. When the cake is cool and the frosting is ready, carefully spread the frosting over the surface of the cake. Let sit for a few hours before cutting into desired sized pieces.

Frosting:

Whisk the egg yolks and evaporated milk together in a large heavy saucepan. Add the sugar, butter, and pinch of salt; cook over medium heat for about 12 minutes or until thickened and golden brown, stirring constantly. (170 to 180 degrees on a candy thermometer.) Remove from heat and stir in the vanilla, rum, coconut, and toasted pecans.  Let stand, stirring occasionally, for 45 minutes or until cooled and the mixture is a good spreading consistency.


SALTED CARAMEL TURTLE BROWNIES

OLYMPUS DIGITAL CAMERA

One of the latest food trends is salted caramel. And although I often refrain from becoming a culinary sheep, I think in the case of salted caramels, I was the first person to follow the leader on this one. (Actually I would have jumped off a cliff with the rest of the sheep, metaphorically speaking of course, had it been necessary to do so!) Because if there ever was a combination made in heaven, it’s the salty sweet caramel. And I am a caramel lover. Milk chocolate covered nut filled caramels are my favorite, but caramel sauce on vanilla bean ice cream runs a close second. (Of course my picky stomach doesn’t appreciate either any longer, but a girl can still dream in caramel, right?)

So last week when I was looking for just that special dessert to serve on Valentine’s Day, I decided to make a turtle brownie. And of course, since I was topping the brownie with chocolate chips, pecans, and caramel – why not go one step further and sprinkle the caramel with a wee bit of finishing salt. So I did and it did. (I salted the top and it tasted mighty fine.)

So if you are ever in the mood for a brownie, (as if there was ever a time when you weren’t in the mood for a brownie), whip up a batch of these little darlings. The brownie itself has a wonderful flavor of its own, with a texture that is both cakey and fudgy at the same time. Then top the brownie batter as described above, pop the whole mess into the oven, let cool completely, (the only hard thing about making these brownies), and cut into desired size pieces. Voilà! You have just created an easy to make, easy to serve, and most definitely, easy to eat brownie. Congratulations!

Brownie batter:

  • 2 c. semi-sweet chocolate chips, divided
  • ½ c. (1 stick) unsalted butter, cut into pieces
  • 3 eggs
  • 1 tsp. vanilla extract
  • 1¼ c. unbleached all-purpose flour
  • 1 c. granulated sugar
  • 1 tsp. espresso powder (I use Medaglia D’oro)
  • ¼ tsp. salt
  • ¼ tsp. baking soda
  • ¾ c. chopped pecans

Caramel drizzle:*

  • ½ c. light brown sugar
  • 3 T. unsalted butter
  • ¼ c. heavy cream
  • ½ tsp. vanilla extract

Finishing touch:

  • coarse finishing salt (like Fleur de Sel or coarse sea or kosher salt)

Brownies: Melt 1 cup of the chocolate chips and butter together in a medium sized saucepan over low heat until the chocolate is melted and the mixture is smooth. Remove from heat and allow to cool. Mix in the eggs and vanilla. In a bowl whisk together the flour, sugar, espresso powder, salt, and baking soda. Add to the chocolate mixture and stir only until the batter is well blended. Pour into a buttered 13 x 9-inch baking pan. (Glass preferably.)

Sprinkle with remaining cup of chocolate chips and the pecans. Bake in a pre-heated 325 degree (for glass) or 350 degrees (for metal) oven on the middle rack for 30-40 minutes or until a tooth pick inserted into the center has just a few moist crumbs clinging to it. Meanwhile, prepare the caramel sauce. When the brownies are done, remove from oven and drizzle with the warm caramel. Very lightly sprinkle with finishing salt. Cool on a wire rack. Can be made up to three days ahead.

Caramel drizzle: While the brownies bake, combine the light brown sugar, butter, and heavy cream in a small saucepan. Cook over medium-low heat whisking constantly until the sugar completely melts and the sauce burbles and just starts to thicken, about 8 minutes. Remove from heat and whisk in vanilla. Allow to partially cool and thicken a bit while the brownies finish baking. (You might have a bit of extra sauce. This is not a bad thing. The sauce is wonderful in coffee or dolloped over ice cream.)

*If you prefer, you can melt 12 caramels with 2 tablespoons of milk in your microwave and drizzle your brownies with this mixture. It is quicker than making your own caramel, but more costly.


GLAZED ITALIAN LEMON COOKIES

OLYMPUS DIGITAL CAMERA

I love lemon, and I don’t care if it’s in a savory or a sweet. And none of this lemon juice that comes in a bottle or darling little plastic lemon looking thingy either! In my house, if lemon juice doesn’t come in its own little tree grown package, it’s just not happening at all! Plus, a lot of times, in addition to the juice of a lemon, the zest is also a required ingredient. And if you have ever tried to zest one of those little plastic lemon looking containers – well I know all of you are a lot smarter than that! My point is – use the real thing. Of course, if you simply must have your daily dose of Sodium Benzoate, Sodium Metabisulfite, and Sodium Sulfite (Preservatives), by all means use bottled ReaLemon. But if you want your lemon straight up with only a touch of additives such as sunshine and warm breezes, get thee to your produce section for the real thing! (And yes, sometimes I stoop to sarcasm to make a point. I’m not proud of this character flaw, but I just can’t seem to help myself!)

So with the flavor of lemon in mind, I decided a lemon cookie was exactly what was needed as one of the desserts for an upcoming JazzVox pre-concert meal. Usually when I serve a dessert that contains an ingredient that some of my guests may be allergic to, I also prepare a second goodie. So last weekend when I planned to serve Italian Dream Cake (on this site BTW), which contains nuts, I decided to also serve these lemon cookies. Of course I knew I already loved these cookies. But instead of rolling them in powdered sugar, which is how I introduced the recipe in my first cookbook (circa 1998), I decided a glaze would make a nice change. (Plus I had gone on the internet to research Italian lemon cookies, and a glaze topping seemed to be all the rage.) So my original recipe (Lemon Tea Cookies) became Glazed Italian Lemon Cookies. And yes, there are hundreds of Italian lemon cookie recipes out there. Many of which are very similar to these cookies. But when you already know that you have a winner, why try something new? I believe the old adage “if it ain’t broke, don’t fix it!” applies to all things culinary as well as government spending. Thank you Bert Lance for bringing this saying into common usage.

I hope you enjoy the recipe.

  • 1 c. unsalted butter, room temperature
  • 1½ c. powdered sugar, divided
  • 1 tsp. vanilla
  • 5 tsp. lemon zest, divided
  • ¼ tsp. salt
  • 2¼ c. unbleached all-purpose flour
  • 7 tsp. lemon juice

Cream butter, ½ cup of the powdered sugar, vanilla, 3 teaspoons of the lemon zest, and salt together.  Add the flour and mix only till combined. Roll into 1-inch balls or use a small ice cream scoop and drop onto ungreased cookie sheet. Bake for about 15 minutes in a pre-heated 400 degree oven. Cookies should be a light golden brown around the bottom when they are done. Do not overbake. Remove from pan and cool on a wire rack. When cool, dip the tops of the cookies in glaze and place back on wire rack to harden. Store in an airtight container.

While the cookies are baking, whisk together the remaining 1 cup of powdered sugar, the lemon juice, and the remaining 2 teaspoons lemon zest. Stir in additional juice if necessary, or powdered sugar to thicken.  


PEPPERMINT CANDY AND CHOCOLATE CHIP BISCOTTI

OLYMPUS DIGITAL CAMERA

If there is a flavor combination that screams Christmas louder than peppermint and chocolate, I truly don’t know what it is. So when I decided that a biscotti would be perfect for my coffee based theme for my adult children’s Christmas goody package this year, I came up with this recipe.

Now, to be honest, I usually do include either a cookie or a candy with this winning combination. But this year the lure of combining peppermint candy (good peppermint candy that is) and chocolate in a dunkable biscotti was just too overwhelming to even consider one of my regular alternatives. Besides, I knew I would be making our perennial favorite, Chocolate Peppermint Sandwich Cookies (recipe to come in a few days) for my good friends Jim and Margo for Christmas anyway. I simply have no choice. I didn’t make them last Christmas, and Jim hasn’t failed to mention my neglectful omission even once this entire past year! Also closer to Christmas I will be making Peppermint Bark. I also plan to post this candy recipe in the near future.

Other mint and chocolate favorites already on this site include Double Chocolate Mint Cookies, combination number 4 under Christmas Refrigerator Shortbread Cookies, and Grasshopper Brownies.

So while you are considering which cookies and candies to make for your family and friends this holiday season, think about preparing one of these recipes. And for those hard to gift people like your spouse’s uncle, your boss, or your brother-in-law who has everything but expects to be given something, a simple bag of gourmet coffee beans and a pretty bag of these biscotti is sure to win you points. (Even if it doesn’t win you points, it’s an easy solution. And we all need easy solutions at this hectic time of year! Think of it as your Christmas present to yourself.)

Enjoy the holidays my friends.

  • ¾ c. (1½ sticks) unsalted butter, room temperature
  • ¾ c. granulated sugar
  • 3 eggs, room temperature
  • 2 tsp. good peppermint extract
  • 3¼ c. unbleached all-purpose flour
  • 1 tsp. baking powder
  • ¼ tsp. salt
  • 1 c. crushed peppermint soft mint candy, like See’s, King Leo, or Bob’s Sweet Stripes
  • ½ c. mini semi-sweet chocolate chips or ½ cup chopped regular chocolate chips
  • melted white chocolate, milk chocolate, or semi-sweet chocolate for drizzle, opt.

In your mixer bowl, cream together the butter and sugar until light and fluffy. Add the eggs, one at a time, beating well after each addition. Beat in the extract. In a separate bowl, whisk together the flour, baking powder, and salt. Stir in the crushed peppermint candy and the chocolate chips. Gradually add the flour mixture to the creamed mixture, beating only until blended. Using your hands liberally greased with butter, divide the dough in half. On a parchment paper lined baking sheet, pat each half into a 12 x 2½-inch rectangle. Bake in a pre-heated 350 degree oven for 25 to 30 minutes, or until golden brown. Remove from oven. Carefully remove the loaves to wire cooling racks and cool for 15 minutes.

On a cutting board, cut the loaves at an angle into ¾-inch thick slices. Place the slices back on the parchment paper lined baking sheet(s) cut side down. Bake 12 to 15 minutes or until lightly browned. Remove from oven and cool completely on wire rack before drizzling with melted chocolate if desired. (I usually don’t decorate them because I’m lazy, and frankly they are sweet enough already. But if you are making them as a gift, a chocolate drizzle is a lovely touch.) Store in an airtight container.


BOURBON PECAN BARS

OLYMPUS DIGITAL CAMERA

Some of us, at least my husband and I, love pecan pie. And pecan pie is always welcome on Thanksgiving and Christmas, at least with our extended family. But invariably, on these occasions, there are several other wonderful desserts from which to choose. (Not complaining here you understand!) So a few years ago I decided that bar cookies that basically contained the same ingredients as our favorite pies was the way to go. First of all, bar cookies are much easier to make. But the main reason I thought about preparing them was that then I could sample all the desserts if I could have just a small portion of each. (Remember, it’s really just all about me!) And if you have ever tried to cut a pie into 14 pieces, you know that it is darned near impossible. The likelihood of placing anything that even remotely resembles a slice of pie onto someone’s plate after you have basically cut the pie to ribbons is highly unlikely. But a cute little 1-inch square of a bar cookie is fairly easy to manage. Plus it’s just darling to look at. (Remember, points for presentation!)

Now I am not saying that you should give up baking pies. That after all would border on sacrilege! And I have to admit, some types of pie are easier to cut into tiny slices than others. Pumpkin pie, for example, is fairly easy to cut into thin wedges. Apple pie, not so much.

So this Thanksgiving, I decided to try a new pecan bar recipe instead of preparing my regular pecan pie bar recipe that is already on this site. (Chewy Pecan Cookie Bars) Both are delicious, and absolutely perfect for the holidays.

So while you are thinking about what desserts to serve on Christmas Eve, Christmas day, or for New Year’s, consider a pie bar instead of a regular pie. You will be very surprised how well they are received by your friends and family.

Other bar cookie recipes on this site include Pumpkin Pie Bars with Bourbon-Caramel Whipped Cream, Apple Pie Bars, Mincemeat Bars with Brandy Whipped Cream, and Chocolate and Pecan Toffee Bars. They too are delicious and can be cut into almost bite size pieces.

Other desserts on this site that are also perfect for the holidays – Nantucket Cranberry Cake, Flourless Orange Chocolate Cake, Baba Au Rhum, Dried Cranberry and Almond Braided Danish, and Eggnog Bundt Cake.

Whatever you prepare, have fun doing so. And remember – if the dessert comes from your kitchen, or from the kitchen of one of your family members or friends, it is sure to be better than anything you can buy. After all, it was made with love. And isn’t that really what the holidays are all about? Peace to all this holiday season and happy baking.

Crust:

  • 1 c. unbleached all-purpose flour
  • 1/3 c. packed light brown sugar
  • ¼ c. toasted pecans, coarsely chopped
  • 1 tsp. kosher salt
  • ¼ tsp. baking powder
  • 6 T. unsalted butter, cut into ½‑inch pieces and chilled

Filling:

  • ½ c. packed dark or light brown sugar
  • 1/3 c. light corn syrup
  • 4 T. unsalted butter, melted and cooled
  • 1 T. bourbon
  • 2 tsp. vanilla extract
  • ½ tsp. kosher salt
  • 1 lg. egg, room temperature
  • 1¾ c. toasted pecans, coarsely chopped

Crust instructions:

Process flour, sugar, pecans, salt, and baking powder together in food processor until combined, about five pulses. Sprinkle butter over top and pulse until mixture is pale yellow and resembles coarse cornmeal, about eight pulses. Lightly butter an 8×8-inch pan (glass preferably). Pour mixture into prepared pan and press into even layer with your fingers. Bake crust in a pre-heated 325 degree oven (for glass), 350 degrees (for metal) until fragrant and beginning to brown, 20 to 25 minutes. Remove from oven and spread filling evenly over crust and sprinkle with pecans. Bake bars until top is  golden brown and cracks start to form across surface, 25 to 30 minutes, rotating pan halfway through baking.

Set pan on wire rack and let bars cool completely, about two hours. Cut into desired size pieces.

Filling Directions:

While the crust is baking, whisk sugar, corn syrup, melted butter, bourbon, vanilla, and salt together in large bowl until sugar dissolves. Whisk in egg until combined. Pour over baked crust.

Thank you Americas Test Kitchen for this wonderful recipe.

AMARULA AND BRANDY MALVA PUDDING

OLYMPUS DIGITAL CAMERA

We discovered this amazing dessert, basically South Africa’s answer to Latin America’s Tres Leche Cake (recipe on this site BTW), on our recent trip to South Africa. It is one dessert that a diner can almost always find on the menu. And there is a very good reason why it is featured so often. It’s absolutely delicious. And like apple pie, there appear to be as many variations of this popular dessert as there are pastry chefs or home bakers.

This variation was given to me by the owner/chef of the Soeterus Guest Farm in Calizdorp, South Africa. One of the two nights we stayed on the farm, Hannelie and her husband Jamesly fixed a wonderful dinner for all of us who were staying with them that night. We had marinated ostrich steaks that Jamesly grilled on the Braai (BBQ). Hannelie made three salads – a green salad with an amazing vinaigrette, a shredded raw carrot salad with fresh pineapple, and a fresh green bean and feta salad. Along with the grilled ostrich and salads, she also served tiny buttered new potatoes. All of the dishes were wonderful and we ate until we were totally full. Then she served dessert. OMG. Big squares of this amazing concoction with vanilla ice cream on the side.

Now I don’t normally eat sweets. Not because I don’t like them, but because as I have gathered a few post Medicare years under my belt, my stomach has decided that it will no longer tolerate refined sugar. And as much as I try and reason with my stomach, it usually wins and I forgo dessert. But not this evening! There are just times when you have to fly in the face of sagacity. And oh am I glad I did. The malva was so very wonderful. Soft, delicious, and actually quite light. Perfect after a heavy, rich meal.

Now don’t be put off after you read this recipe by the fact that this is a “5 steps to heaven” dessert. The “5 step” plan may seem onerous at first glance, but really the dessert goes together very quickly, and is SO worth the effort.

So next time you want to serve a dessert that is different and that is actually better if it is prepared a day or two ahead, give this South African classic a try. You will not be disappointed. In fact, you will probably thank me after you try this recipe. And I will respond like a true South African – “pleasure”!

Step 1 – Pudding:

  • 1 c. cake flour
  • 1 c. sugar
  • 2 T. cocoa
  • ¼ tsp. salt
  • 1½ tsp. baking powder
  • ½ c. vegetable oil
  • ½ c. boiling water
  • 4 eggs, room temperature, separated
  • 1 tsp. vanilla

Whisk together the cake flour, sugar, cocoa, salt, and baking powder. Set aside. Whisk together the vegetable oil and boiling water and gently mix with the dry ingredients. Separate the 4 eggs. Beat the yolks and vanilla together and stir in with the other ingredients. Whip the egg whites until soft peaks form. Fold into batter. Pour into a lightly buttered 9×13-inch pan. Bake in a pre-heated 325 degree oven for 30-35 minutes if using a glass pan, or 350 degree oven for about 25-30 minutes if using metal. Remove from oven when the pudding is set and immediately pour the Sauce evenly over the top. Cool completely and frost with Dulce de Leche. Refrigerate. When ready to serve, cut into pieces and dollop with Whipped Cream or vanilla ice cream. Sprinkle lightly with Cocoa powder.

Step 2 – Sauce:

  • 1 c. sugar
  • 1 c. water
  • 1 tsp. vanilla
  • 2 T. brandy
  • 2 T. Amarula Cream Liqueur* (look for an elephant on the label)
  • 1 tsp. espresso powder

Combine all the ingredients, bring to a boil, and while still hot, pour over the just out of the oven pudding.

Step 3 – Topping:

  • 1 can Dulce de Leche (to make your own, see instructions below)

Step 4 – Whipped Cream:

  • 1 pint whipping cream
  • 3 T. powdered sugar
  • 1 T. Amarula Cream Liqueur

Whip the cream to stiff peaks. Add the powdered sugar and Amarula and continue whipping until thoroughly combined.

Step 5 – Garnish:

  • Cocoa, for dusting

Homemade Dulce de Leche

  • 1 can sweetened condensed milk (solid cans without tab lids preferred)

Peel the label off the can of sweetened condensed milk. Place the can upright in a pan tall enough to allow water to cover the can by at least 2 inches. Add water. Bring the water to a very gentle boil, reduce the heat to low, and gently simmer for 3 hours, carefully turning the can (using tongs works best) halfway through the cooking process.

VERY IMPORTANT: Watch the water level carefully. Never allow the water level to fall below the top of the can. So add water as necessary and keep a careful eye on the simmering process.

After the simmering time, turn off the heat and allow the can to come to room temperature. Never open the can while it is still hot. It must reach room temperature before opening. After opening the can, stir and pour over the cooled pudding. Homemade Dulce de Leche can be made ahead and stored in the refrigerator.

*Amarula Cream (per the label on the bottle), “is a pure blend of nature’s fresh cream and the mysterious taste of the wild marula fruit. Africa’s majestic elephants walk for miles to feast on the sun-ripened marula fruit which is indigenous to the region’s vast subequatorial plains”.

Note about elephants: Elephants love citrus fruit. Upon entering a nature reserve, guests are always asked if they have any citrus fruit with them. If so, they are persuaded to leave it behind because elephants can smell it from miles away. Who knew? Good thing the fine rangers and other qualified nature reserve people are watching out for us poor uneducated tourists. I mean really, who wants to have their rental car turned over by an elephant in search of a lemon anyway?

IMG_0870

(Just one of the many darling “little” fellows we encountered while visiting nature reserves.)


SPICY PLUM CRUNCH

OLYMPUS DIGITAL CAMERA

I must be plum crazy. There just isn’t anything about plums I don’t like. They are easy to pit*, you don’t have to peel them, and they are just too delicious for words. And when you combine them with spices, sugar, and a crunchy topping, there is just nothing better. Well, except of course if you get the plums free of charge. (There’s absolutely nothing better than free fruit!) Which is just what happened to me last week.

We were over at our friends Mark and Vicki’s beautiful home in Mount Vernon, and their plum trees were covered with fruit. Vicki had been canning plum this and that until even she, who also happens to be “plum crazy” had thrown her hands in the air and declared – enough! So we were asked if we would like to take a few bushels home, (no thank you), but we would gladly accept a few (thank-you very much)!

So one of the creations Vicki had prepared was a Fresh Plum Relish. It was absolutely delicious. So I begged for the recipe, changed it just a bit, and came up with Fresh Plum and Dried Fig Chutney (recipe to follow later this week). I also decided to make a freezer jam. It too turned out amazing. So look for my Spicy Plum Freezer Jam recipe in the near future too.

But the pièce de ré·sis·tance, mainly because it is a stand-alone dish and not merely an accompaniment, is this delightful crunch.

The fruit part is sweet and lightly spiced, while the topping is crunchy, sweet, and buttery. In other words, there is just nothing not to like! So join my club of plum crazies, and fix one of these recipes starring fresh plums while they are at their peak and not coincidentally at their cheapest price of the year. Or better yet, find a friend with a sagging plum tree and offer to exchange a jar of freezer jam for a bag of plums. That would be what I call a win/win situation for everyone involved. And again Mark and Vicki, thanks for the fruit. It went to good use.

  • 2 T. + ¾ cup unbleached all-purpose flour
  • 1 tsp. ground cinnamon
  • ½ tsp. ground nutmeg
  • ¼ tsp. ground cloves
  • 1½ c. brown sugar, lightly packed, divided
  • 3 T. plum vodka, crème de cassis liqueur, or any raspberry flavored liqueur like Chambord or Framboise
  • 6 c. chopped plums (no need to peel)
  • ¾ c. granulated sugar
  • ¼ tsp. kosher salt
  • ¾ c. oats
  • ½ c. (1 stick) cold unsalted butter, diced
  • vanilla ice cream or sweetened whipped cream

Whisk together the 2 tablespoons of flour, cinnamon, nutmeg, cloves, ¾ cup of the brown sugar, and the plum vodka. Stir in the plums and pour the mixture into a lightly buttered 8 x 8-inch glass baking dish.  Combine the remaining ¾ cup flour, granulated sugar, remaining ¾ cup brown sugar, salt, oats, and butter in the bowl of an electric stand mixer fitted with the paddle attachment. (If you don’t have a stand mixer, cut the butter into the mixture by hand.) Mix on medium low speed until the mixture is crumbly and the butter is the size of peas. Scatter evenly over the top of the plums.

Bake in a pre-heated 350 degree oven for 40 to 45 minutes, or until the plums are bubbling and the top is browned.

OLYMPUS DIGITAL CAMERA

Serve warm or at room temperature with ice cream or whipped cream.

*If you ever have trouble pitting plums, just cut them in 6-8 sections top to bottom. Then simply peel the sections away from the fruit. BTW, this works for any fruit with a pit.


TRES LECHE (THREE MILKS) CAKE

OLYMPUS DIGITAL CAMERA

OLYMPUS DIGITAL CAMERA

So for years I have been hearing about this cake. But there was just something about the whole concept that never really appealed to me. But because I was fixing a Southwestern meal for last Sunday’s JazzVox pre-concert meal, I decided what-the-heck, give it a try. Well, you know, sometimes I can be a real dummy! If this cake is beloved throughout Latin America, which is literally millions of people, why in the world did I hesitate? Like I said – sometimes I can be a real dummy! Because ladies and gentlemen, this is one of the best desserts you will ever sink a fork into. It is incredibly easy to prepare, beautiful to look at, needs no special ingredients, and has to be prepared ahead of time so that it can spend some quality time in a cold environment. What can be better than that?

And you want compliments? Holy cow, I had people coming at me from all sides telling me how amazing it was. Everyone absolutely loved it!

So next time you want to impress the pickles out of your family or guests, make this dessert. The texture is somewhere between cake and pudding; so very soft and delightful on the tongue. (Just don’t forget the whipped cream. It is an absolutely mandatory part of the whole experience.) And I say “experience”, because that’s what eating a piece of this cake is. It’s a taste treat unlike any other and definitely one not to be missed.

And to those of you who for years told me about this cake to no avail, I offer my sincere apologies. I was so very wrong not to try this delicacy when it was first brought to my attention. But I’m a smart girl. I can learn. Next time someone waxes poetic about a favorite dish, I will try to be more receptive. I still draw the line at pickled pig’s feet and certain innards, but I will endeavor to keep a more open mind to other new taste adventures.

  • 1 c. unbleached all-purpose flour
  • 1½ tsp. baking powder
  • ¼ tsp. salt
  • 5 large eggs, room temperature, separated
  • 1 c. granulated sugar, divided
  • 1/3 c. whole milk
  • 2 tsp. vanilla extract
  • 1 (14-oz.) can sweetened condensed milk
  • 1 (12-oz.) can evaporated milk
  • 1 pint heavy cream, divided
  • ¼ c. powdered sugar
  • 2 c. sliced fresh strawberries (or berry of choice)

Whisk together the flour, baking powder, and salt in a large bowl. Beat the egg yolks with 3/4 cup of the sugar on high speed until the yolks are pale yellow. Stir in the whole milk and the vanilla. Pour the egg yolk mixture over the flour mixture and stir very gently until combined.

Beat the egg whites on high until soft peaks form. With the mixer on, add the remaining ¼ cup sugar and beat until the egg whites are stiff but not dry. Gently fold the egg white mixture into the flour mixture until just combined. Spoon the batter into a lightly buttered 9×13-inch glass pan and even out the surface. Bake on the middle rack in a pre-heated 325 degree oven until the cake is lightly golden and reaches an internal temperature of 200 degrees, 30-35 minutes. Remove the cake to a cooling rack. Cool completely before proceeding. (While the cake is cooling, I kind of push down the edges so the top is of even thickness.)

Meanwhile whisk together the sweetened condensed milk, evaporated milk, and ¼ cup of the heavy cream in a small bowl. Poke the top of the cake all over with a fork. Gradually pour the milk mixture over the top of the cake, cover with plastic wrap, and refrigerate overnight.

Place the remaining heavy cream into the bowl of a stand mixer. Using the whisk attachment, whisk until stiff peaks form. Change to medium speed and whisk in the powdered sugar. Spread the whipped cream topping over the cake and allow to chill in the refrigerator until ready to serve topped with strawberries.

MOCHA CHOCOLATE CHIP SHORTBREAD BAR COOKIES

OLYMPUS DIGITAL CAMERA

What is it about shortbread? And why is it that most people would choose shortbread over almost any other kind of cookie? And why do I keep posting recipes for shortbread? Well I know the answer to the last question at least. Personally, I absolutely adore shortbread because first and foremost, it’s not overly sweet. And almost anything I choose to add to the basic recipe is going to taste marvelous. And I love the amazing texture of shortbread. It’s at once soft, crisp, crunchy, crumbly, and best of all – buttery. And then of course there is the ease of preparation. So I guess when I analyse what it is about this amazing Scottish creation, every single factor leads to cookie perfection. (Of course what I still don’t understand is how the country that gave us shortbread could think up a concoction like haggis? My guess is that in order to get young Scottish children to eat this pudding made with sheep’s heart, liver, and lungs, minced onion, oatmeal, suet, spices, and salt encased in a sheep’s stomach, parents had to have something like shortbread to reward their children if they actually finished their plate!) But I digress…..

Now, did I happen to mention that shortbread bar cookies are really easy to prepare? I think so, but if I didn’t, I’m telling you now! In fact, the most novice of cooks should be able to whip up a batch of these cookies without a worry in the world.

So whether you have been baking cookies like I have (since God was a child), or you have never before baked anything with gluten in it, I suggest that shortbread is perfect regardless of your level of expertise. And just to make sure you know that shortbread is nothing if not adaptable, there are 12 other shortbread recipes on this site, (7 alone under “Christmas Refrigerator Shortbread Cookies”). So even if you are not a mocha or chocolate fan (all 2 of you), there should be a shortbread recipe already posted that speaks to your inner cookie monster. And yes, I am going to say it right here on this blog. Homemade shortbread is almost always better than packaged shortbread. And a lot cheaper too! Of course Walker’s shortbread could be the exception (flavor wise that is), but again, there’s still the monetary aspect to consider. They ain’t cheap! (And yes I know, some would say I’m what’s really cheap in this whole equation. I however, prefer to think of myself as merely “spendthrift challenged”! Thank you very much!!)

  • 1 c. (2 sticks) unsalted butter, room temperature
  • 2/3 c. powdered sugar
  • ½ tsp. vanilla
  • ¼ tsp. kosher or coarse sea salt
  • 2 c. unbleached all-purpose flour
  • 2 tsp. instant espresso coffee (I use Medaglia D’oro. It comes in a small red, white, and green labeled jar with a bright green lid.)
  • ½ c. mini chocolate chips

Whip the butter and powdered sugar together until creamy and light. Add the vanilla and salt; beat until smooth. In a separate bowl, whisk together the flour and espresso powder. Stir in the mini chocolate chips. Gradually add the flour mixture to the butter, mixing just until combined.

Scoop the dough into a lightly buttered 9×13-inch glass baking pan, pat into place, and level off the top with an offset spatula. Prick the dough all over with a fork.

Bake in a pre-heated 325 degree oven for about 40-50 minutes or until a light golden brown. (Do not under-bake.) Remove from oven and cool for about 6 minutes before cutting into desired size pieces. Cool completely before storing in an airtight container.