Category Archives: DESSERT RECIPES

CHOCOLATE OLIVE OIL CUPCAKES WITH CREAMY CHOCOLATE FROSTING

So here’s how it all started. My dear friend Vicki gifted me with a bottle of chocolate olive oil. And since I have never been impressed with flavored olive oil, I was naturally suspicious. Especially since it was chocolate and olive oil mixed together. Obviously too foreign a concept to resonate clearly in my brain! So therefore the bottle sat in my pantry for a good couple of years. It may have been hidden, but I never forgot that it was in there.

So one day last week I remembered the poor lonely bottle being ignored in my pantry and sought out recipes for this frankly intimidating ingredient. And oh my! I found this recipe on the Queen Creek Olive Mill site, but added espresso powder and used my own frosting recipe.

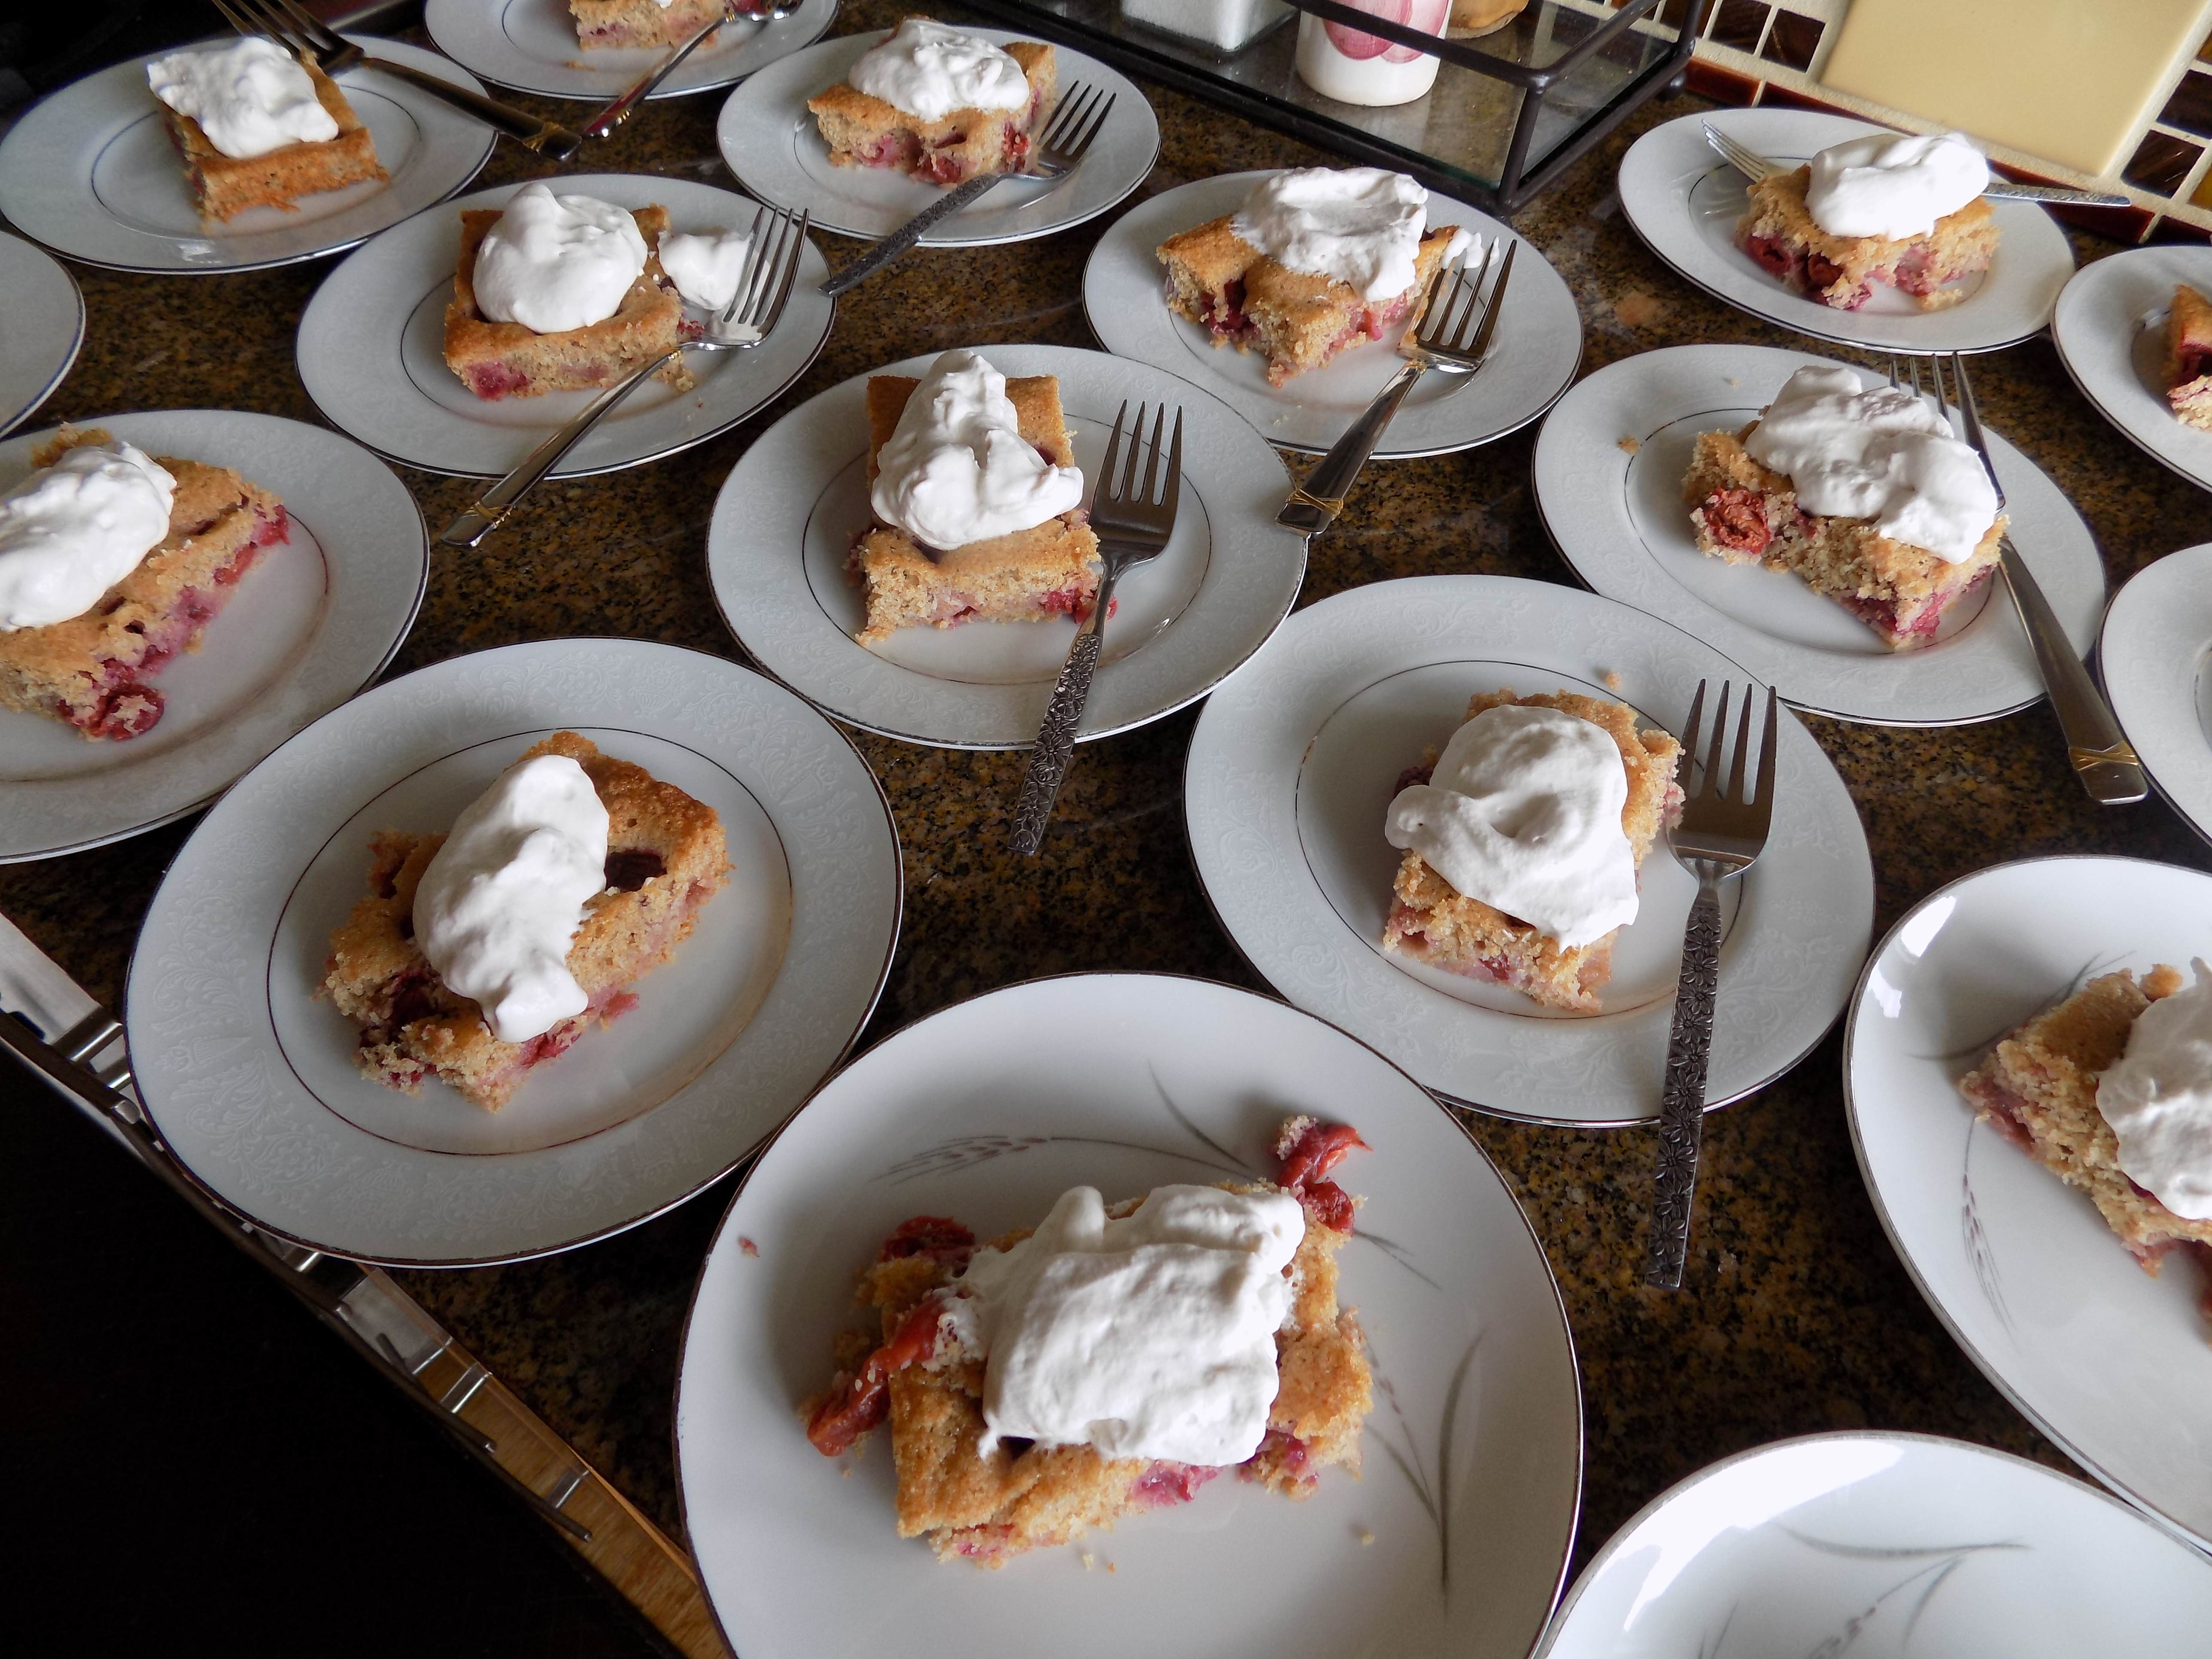
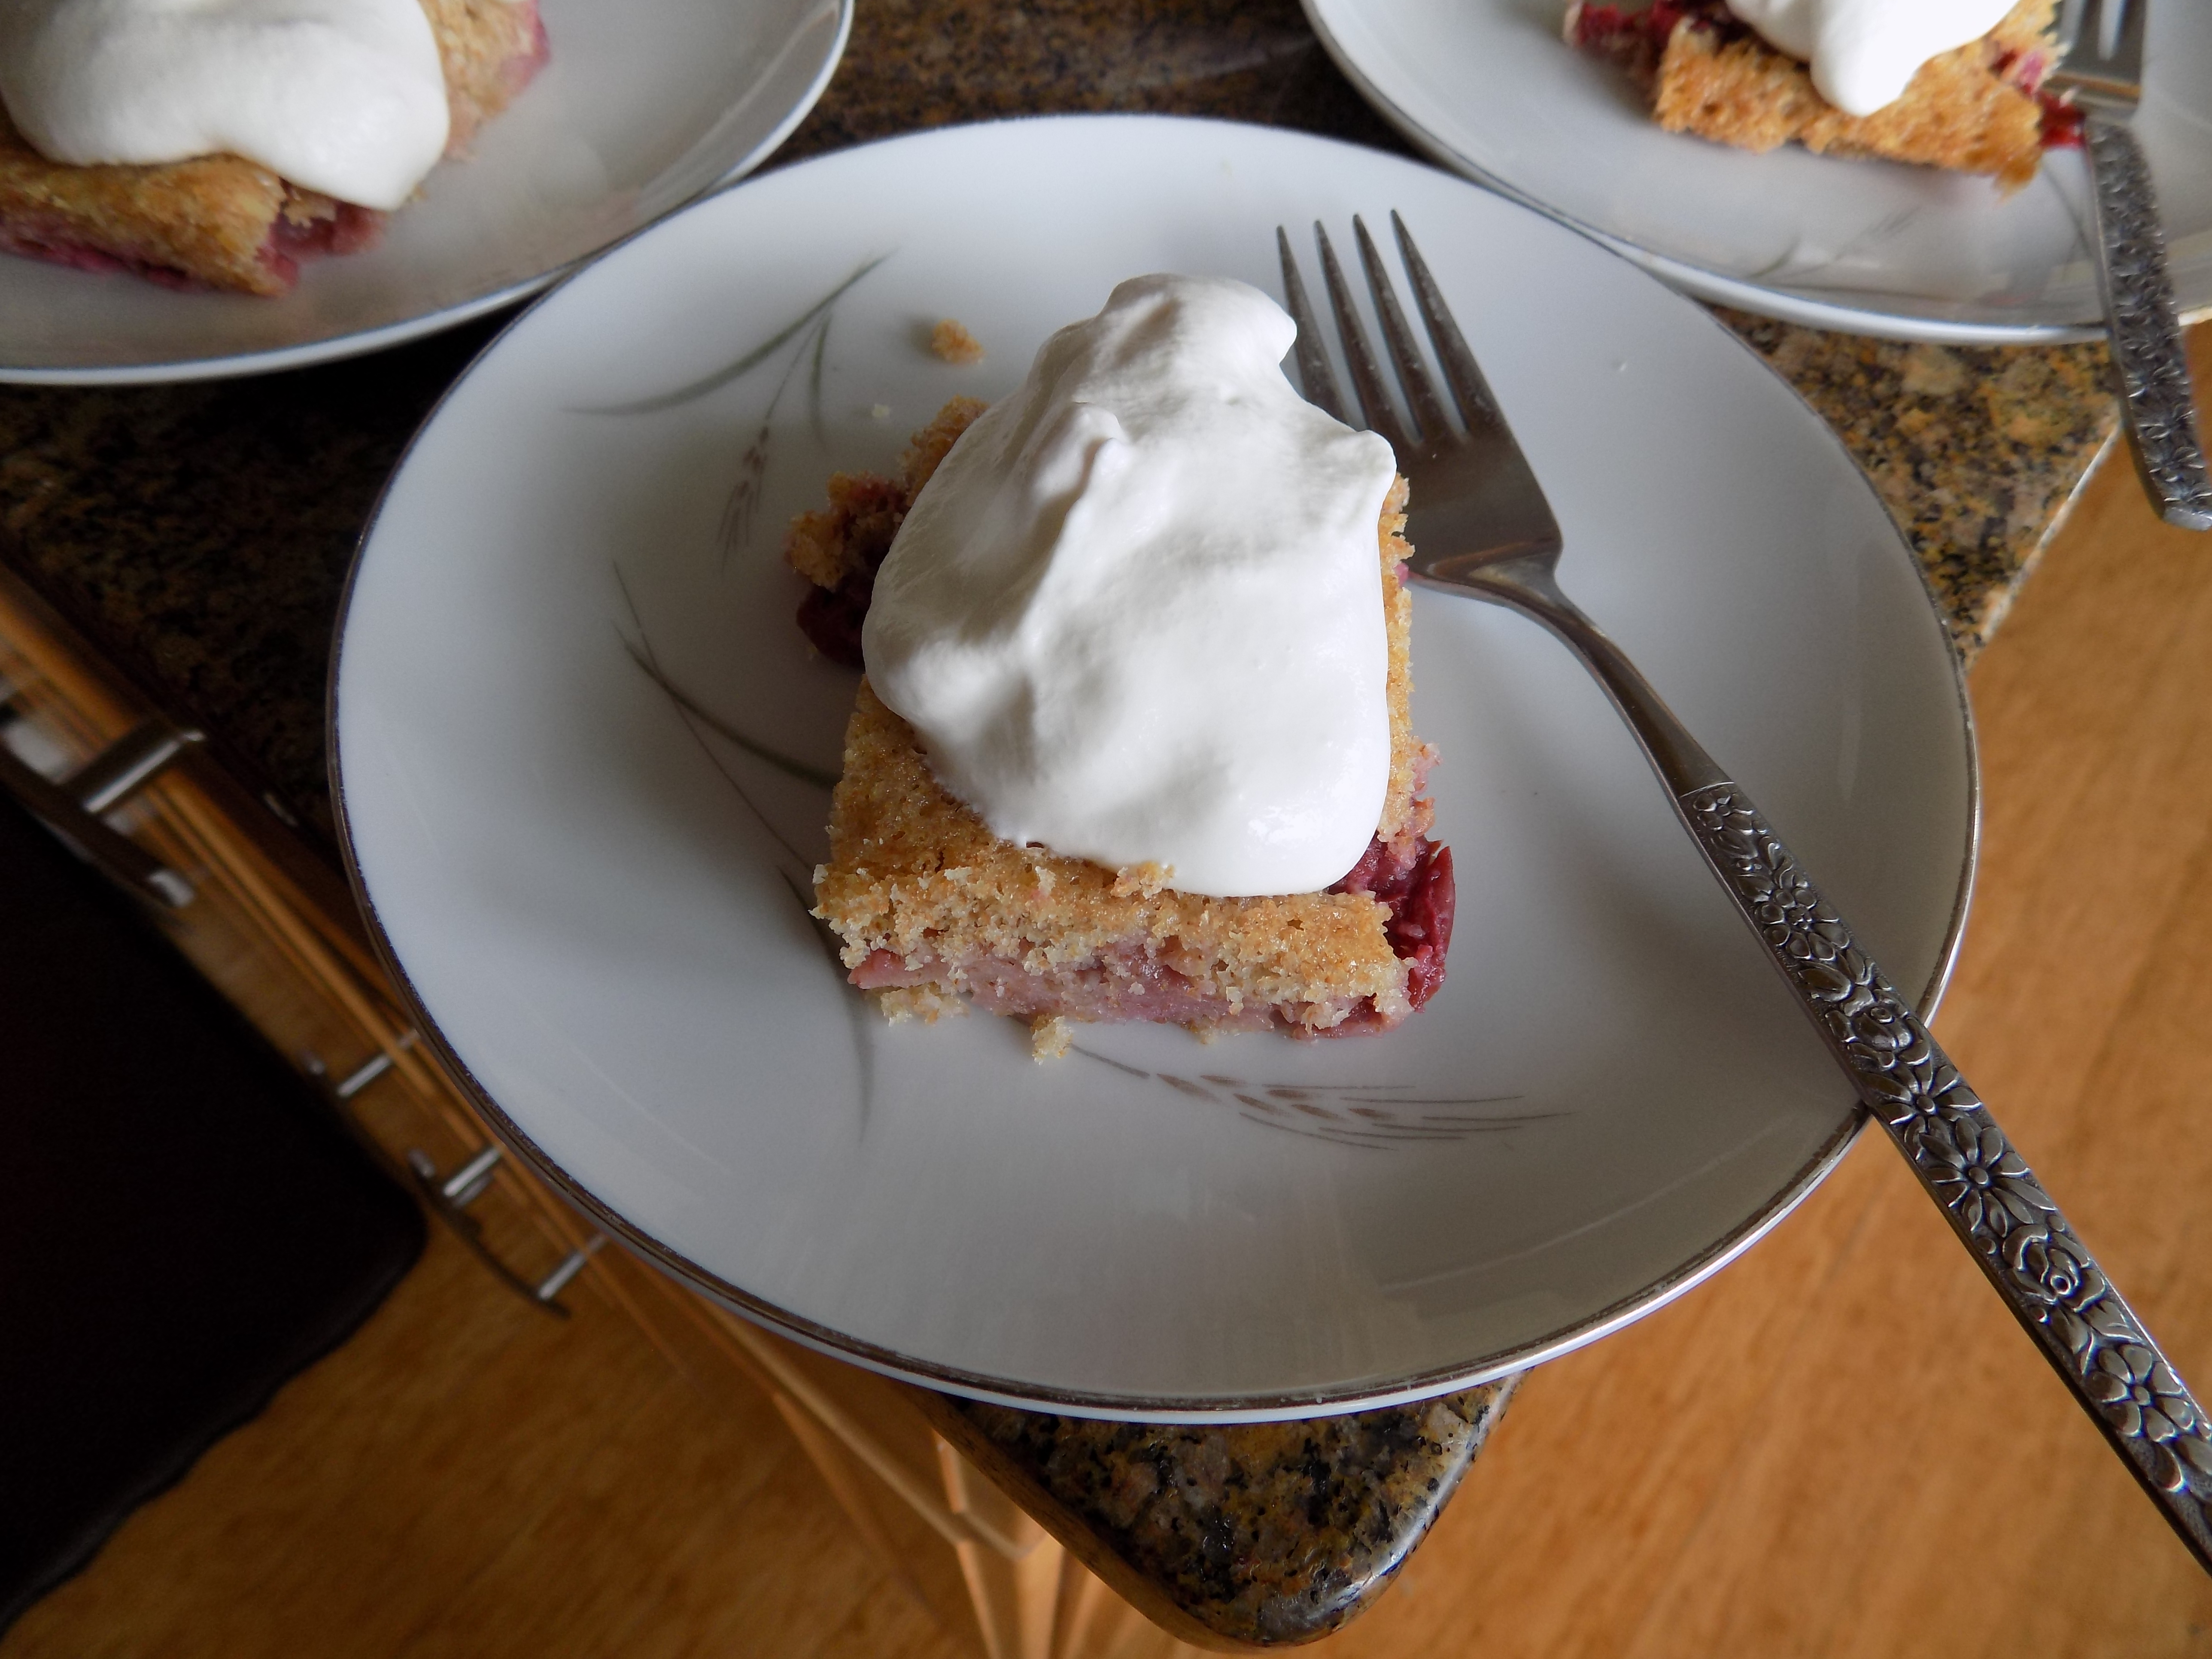
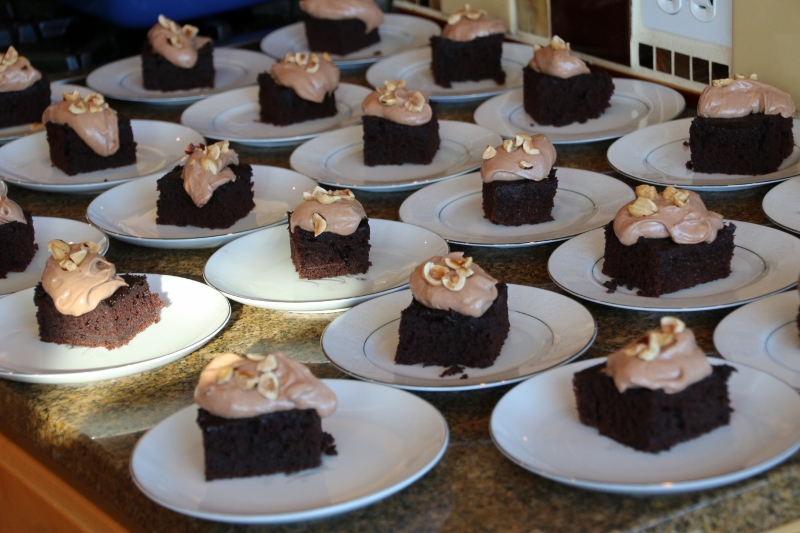
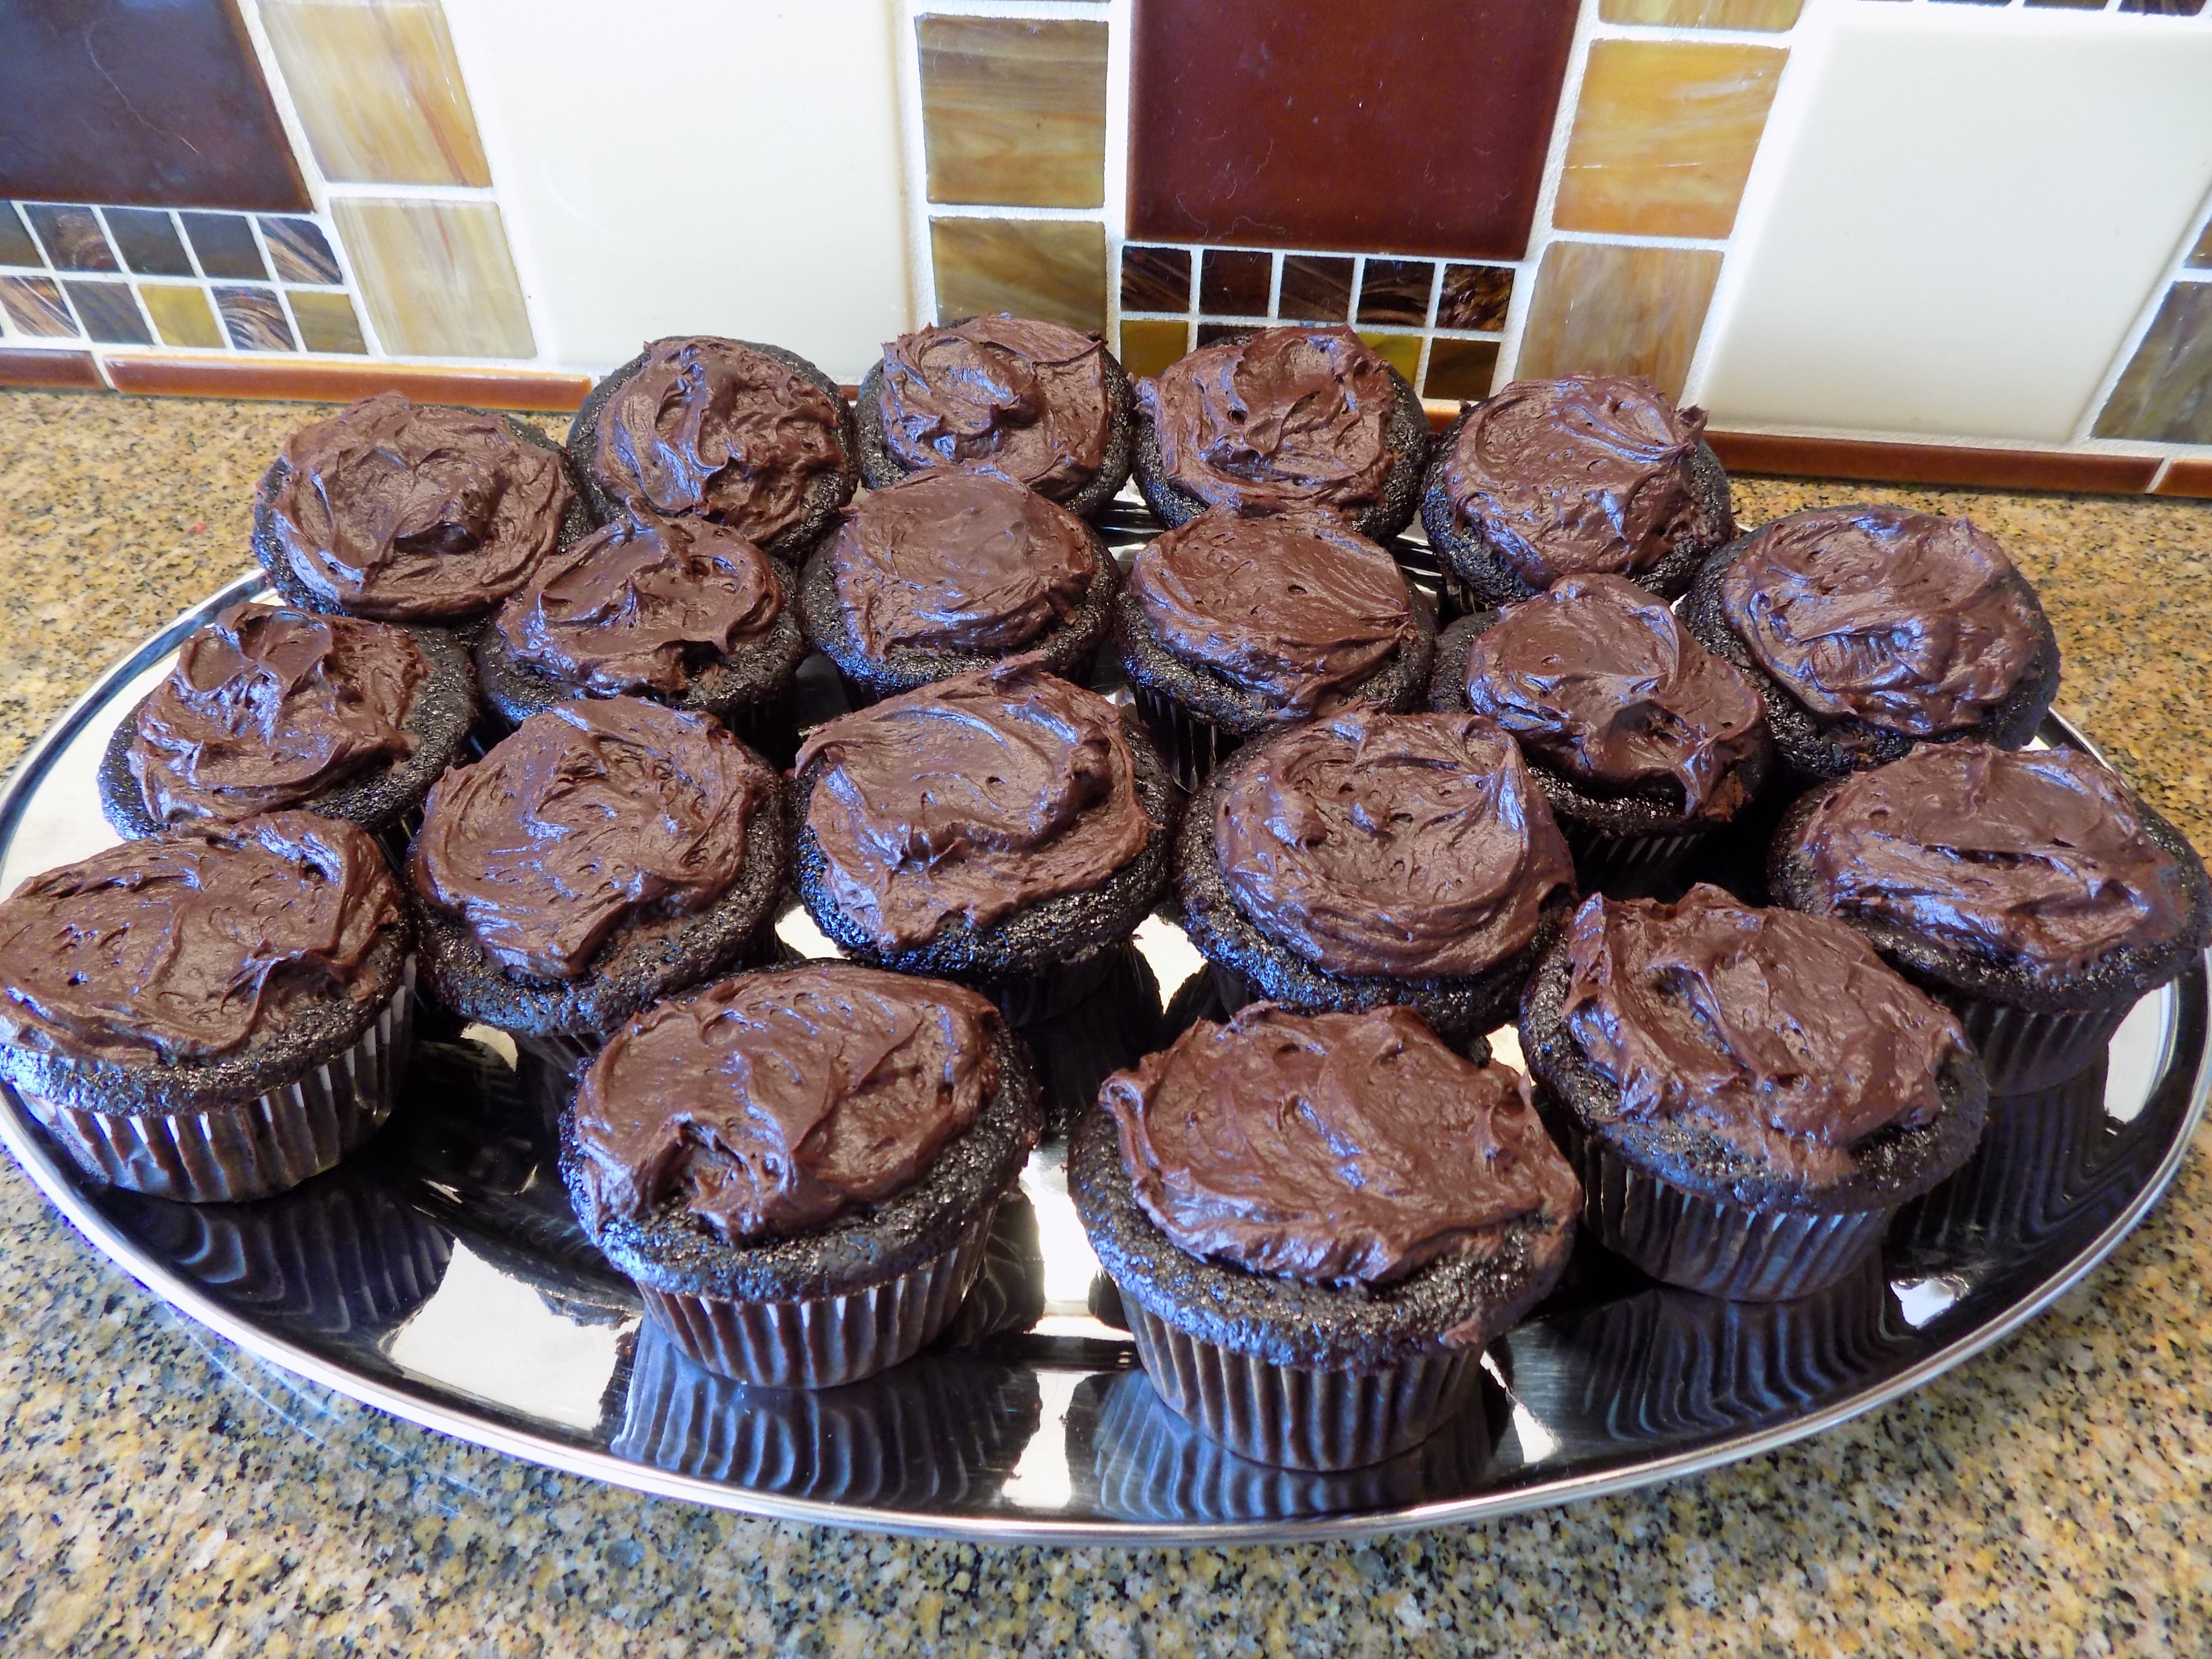
Well I’m here to tell you, this recipe makes possibly the best chocolate cupcakes I have ever had the pleasure of putting in my mouth. They turned out super moist, super chocolaty, and absolutely delightful. So much so, that I have spent about 6 hours now looking at other recipes that contain chocolate olive oil, because I know that olive oil is a lot healthier for me than either butter or vegetable oil. Actually I’m looking at sweet recipes that use regular olive oil too. (And yes, you can make this recipe with regular olive oil, as long as it isn’t too herby or bitter.)  

And why the espresso powder in both the cake and frosting recipes you might ask. Well, it’s because coffee is a great way to enhance the flavor of cocoa powder, resulting in a chocolatier flavor. And even if you don’t like the flavor of coffee, you poor deprived person, you won’t notice the coffee flavor. So not to worry.

So next time you want to make cupcakes that will knock the socks off whomever you are gracing with your baked goods, mix up a batch of these little darlings. They truly are out of this world. Thanks again Vicki for your fun gift. Actually, I found a recipe for preparing homemade chocolate olive oil. If it tastes as wonderful as it appears, I will be sharing the recipe with you in the near future. That and a couple of other homemade recipes for fabulous products introduced to me by my sister-in-law Katie – preserved lemons and black garlic. Thanks again Katie.

(And yes I know you can buy preserved lemons and black garlic in upscale markets or over the internet, so I will be posting recipes that include these 2 fantastic taste treats in the next couple of weeks. But because I’m cheap frugal, I’m going to show you how to make them at home too. That is, after I learn how first. Stand by!)

  • 1¾ c. unbleached all-purpose flour
  • 2 c. sugar
  • ¾ c. cocoa powder (I use Ghirardelli Majestic Premium Cocoa Powder from Cash & Carry)
  • 1½ tsp. baking powder
  • 1½ tsp. baking soda
  • 1 tsp. salt
  • ½ tsp. instant espresso coffee (I use Medaglia D’oro)
  • 2 eggs
  • 2 tsp. vanilla
  • ½ c. chocolate olive oil or “light” regular olive oil
  • 1 c. whole milk
  • 1 c. boiling water

Using a regular whisk, mix the flour, sugar, cocoa, baking powder, baking soda, salt, and espresso together in the bowl of your mixer. (You can also pour the ingredients into the mixer bowl through a fine mesh strainer.) You just want to eliminate any possible lumps.

Using the beater, add in the eggs, vanilla, and chocolate flavored olive oil. Add the milk and beat to blend. Add the boiling water. Continue to beat at low speed until well blended.

Pour the thin batter into cupcake paper lined cupcake pans and bake in a preheated 325 degree oven for 20 to 25 minutes. Cupcakes are done when a toothpick inserted into the center comes out clean.

Cool in pan for 10 minutes then remove to wire rack to finish cooling. Top with frosting.

Hint: Because the batter is so thin, I pour it into a glass measuring cup to fill the cupcake papers ¾ full. Don’t fill them any higher because the batter is going to expand a great deal. Should make 24 cupcakes.

Creamy Chocolate Frosting:

  • 3 c. powdered sugar, or more as needed
  • 7 T. unsweetened cocoa powder
  • ½ tsp. instant espresso coffee
  • 1/8 tsp. salt
  • 6 T. unsalted butter, room temperature
  • 1 tsp. vanilla extract
  • 5 T. half & half or heavy cream, or more as needed

In a medium bowl, sift the confectioners’ sugar, cocoa, instant espresso powder, and salt or press through a fine mesh strainer; set aside. (You just want to break up any lumps.)

In a large bowl, beat butter and vanilla together until smooth and creamy. Gradually beat in sugar mixture alternately with half & half. Beat until very light and fluffy. If necessary, adjust consistency with more half & half or powdered sugar.


MAPLE PECAN SHORTBREAD COOKIES

I love shortbread cookies for oh so many reasons. They are stinkin’ easy to build, their taste is unrivalled, and they are super crunchy. Now I’ve always understood the part about how easy they are to prepare (so few ingredients), and why they taste so great (has something to do with the butter), but I’ve never completely understood why they are so wonderfully crunchy, and remain so even after several days. I reasoned that storing them in an airtight container was part of the equation, but I knew instinctively that there had to be another reason. So I went in search of an answer.

According to several sources, the tender, crumbly texture of shortbread is the result of the high ratio of flour to liquid. In this case the liquid contained within the butter and the extracts. Transversely brownies, for example, contain a lower proportion of flour to the amount of liquid or egg resulting in a cakey or chewy texture. Furthermore, even the type of sugar you use can have an impact on the final result. Brown sugar contains more moisture than granulated sugar. So if you use brown sugar, your brownies are going to be even more moist and chewy. Cool, huh! Anyway, back to this recipe.

Maple flavoring and pecans just seem to be meant for each other. So when I got a wild hair to prepare shortbread to take along to Winthrop for a visit with Mr. Cs sister Katie and husband Rick (and not coincidentally attend a couple of chamber music concerts), I decided to try out this fabulous combination in cookie form. And it worked! Lovely maple flavor, and delicious additional crunch and taste from the finely chopped pecans. A great, all around the clock cookie. Equally delectable served first thing in the morning with a cup of coffee, or last thing in the evening with a wee dram of Scotch. This is a husband, sister-in-law, brother-in law, and baker approved recipe. Enjoy!

  • 1 c. (2 sticks) unsalted butter, room temp.
  • 1 c. powdered sugar
  • ½ tsp. vanilla extract
  • ½ tsp. maple extract (I use Cook’s Choice)
  • ½ tsp. salt  
  • 2 c. unbleached all-purpose flour
  • ¾ c. finally chopped pecans 

With an electric mixer, beat butter, powdered sugar, vanilla extract, maple extract, and salt until smooth and creamy. In a separate bowl combine the flour and chopped pecans. With mixer on low speed, add flour mixture, mixing just until a dough forms. With your hands, shape the dough into a long, thick, rope shape. Place on a long piece of plastic wrap. Again using your hands, wrap the dough into the plastic wrap gently shaping it into a round log with a 1½-inch circumference. Refrigerate for 1 hour.

Unwrap log and using a thin serrated knife, slice dough a generous 3/8-inch thick. (If dough feels really hard, leave at room temperature for 5 to 10 minutes before slicing). Arrange about 1-inch apart on baking sheets. (No need to grease the baking pan.)

Bake in a pre-heated 350 degree oven until lightly golden around the edges, 15 to 20 minutes. (Do not under-bake.)

Transfer to a wire rack to cool completely. Store at room temperature in an airtight container.


FUDGY BROWNIE, CHOCOLATE MOUSSE, AND RASPBERRY TRIFLE

Sometimes I get a wild hair to create a dessert that is kind of fancy. And for me, seeing a beautifully layered trifle in a lovely straight sided glass bowl, comes about as close to extravagant  as I am ever going to get. And if truth be told, trifle is not only lovely to behold, it is practically fool-proof to prepare and the taste and mouth feel are absolutely fabulous. Trifle is merely a layered dessert made with fruit, layers of cake, lady fingers, or as in this case brownies, layers of some type of liqueur fortified whipped cream, sometimes layers of custard, pudding, or mousse, then topped with whipped cream. Sounds onerous, right? Well it really isn’t!

And this trifle, based on a recipe from Gemma on the Bigger Bolder Baking site, is a perfect example. Yes there are several steps, but none are difficult, and all can be prepared ahead of time. (You can even cheat like I did, and use a mix for the brownie layer. See note below.)

And if you don’t happen to own a trifle dish, the best places I’ve found for something of this nature, at a reasonable price, are Marshall’s, Ross Dress for Less, or thrift shops.

So the next time you need a fantastic dessert for 15-20 people, make a trifle. You will forever thank me. And don’t hesitate to play with the ingredients. It’s peach season, make a trifle using peaches as the fruit. Love rhubarb and strawberries together, make a thick sauce and layer your trifle with this delicious compote. Just about any combination will work. Have fun. And if you make a trifle that rocks your socks, let me know. I’m always on the lookout for amazing new recipes to share with my readers.

And no, I didn’t decorate the top of the trifles. My dear friend Vicki put on the finishing touches. Thanks again to both you and Mark for helping me with last minute set-up for the JazzVox pre-concert meal.

Brownies:

  • 1 c. (2 sticks) unsalted butter, melted and cooled
  • 2 T. vegetable oil
  • 1 c. plus 2 T. brown sugar
  • 1 c. plus 2 T. granulated sugar
  • 4 lg. eggs, room temperature
  • 4 tsp. vanilla extract
  • 1 tsp. kosher salt
  • 1 c. unbleached all-purpose flour
  • 1 c. good quality, unsweetened cocoa powder
  • 1½ c. (9oz.) mini chocolate chips, or roughly chopped regular size chocolate chips, divided

Combine melted butter, oil, and both sugars in a medium sized mixing bowl. Whisk in the eggs, vanilla extract, and salt till batter smooth and creamy.

In a separate bowl whisk together the flour and cocoa which you have first run through a fine mesh strainer. (Nothing worse than having chunks of cocoa or flour in your finished product.) Gently fold the dry ingredients into the wet ingredients just until combined. (Do not over mix). Fold in half of the chocolate chunks.

Pour the batter into a parchment paper lined 7×11-inch baking pan (preferably glass), smooth out the top, and sprinkle with the remaining ¾ cup chocolate chips over the top. 

Bake for 35-40 minutes in a pre-heated 325 degree (for glass) oven just until the center of the brownies no longer jiggles and is just set to the touch. (Set your oven at 350 if you are using a metal pan.)

Remove from the oven and allow to cool completely before cutting into small chunks. Can be prepared a day ahead. 

Chocolate Mousse

  • 1 c. (6-oz.) semi-sweet chocolate chips
  • 1 (8oz.) pkg. cream cheese, room temperature
  • 2 c. whipping cream
  • 1 tsp. vanilla
  • pinch salt

Gently melt the chocolate chips in a glass bowl. Set aside to cool.

Using an electric mixer or the whip attachment for your stand mixer, beat the cream cheese until it is light, creamy, and totally devoid of lumps. 

Slowly add the whipping cream, vanilla, and salt. Continue beating until the mixture becomes thick. Take a large spoonful of the cream cheese mixture and quickly mix it into the cooled melted chocolate. Then swiftly fold the chocolate into the rest of the cream cheese mixture. Move quickly, because the chocolate will start to harden once added to the creamy mix.

Once the mixture is thick and creamy, place in the fridge until needed. The mousse can be made a day ahead.

Chambord Whipped Cream

  • 2 c. whipping cream (reserve a bit for decorating the top of the trifle)
  • 2 T. powdered sugar
  • 2 T. raspberry liqueur (Chambord, Framboise)

Beat the whipping cream until it reaches the stage just before hard peaks. (Somewhere between soft and hard peaks.) Beat in the powdered sugar and raspberry liqueur. Refrigerate until needed.

Raspberry Layer

  • 3 pints raspberries, divided

Garnish

Shaved chocolate (dark, milk, white or a combination thereof)

Building the Trifle

Cover the bottom of a trifle dish or 4-quart glass bowl with a bit of the chocolate mousse. Then cover the mousse with half of the brownie chunks. A few gaps here and there are great because then the next layer can help soften the brownie chunks.

Spread half of the Chambord whipped cream over the brownies. Press down a bit so the whipped cream fills in all the empty spaces.

Top the whipped cream with one pint of the raspberries. (Make sure some of the raspberries show through the glass.) Press down slightly. You want a nice compacted trifle. Spread on half or the chocolate mousse.

Repeat layering. (When you add the second layer of brownies, push them down a bit so they mush down into the chocolate mousse.)

Decorate the top with reserved whipped cream, the final pint of raspberries, and shaved chocolate. Refrigerate for at least a day before serving.

Note: If you are feeling lazy or overwhelmed, you can always use a package of brownie mix instead of baking your own brownies. To tell the truth, when I doubled this trifle recipe this past weekend, I used a couple of pouches from my supply of Ghirardelli Triple Chocolate Premium Brownie Mix (6 pouches to a box) I always keep on hand. Thank you Costco. Perfect brownies every time and I retained at least some of the sanity I am fervently trying to preserve! (I had several other dishes to prepare, and my energy level just isn’t where it used to be. And that’s putting it mildly!) But cooking is still my favorite way to keep my mind and body active. Now, where did I put that new box of baking soda again?

CREAM CHEESE POUND CAKE WITH VANILLA ICE CREAM AND STRAWBERRY RHUBARB ORANGE SAUCE

Sometimes inspiration comes from just looking out a window.

While I was dusting the window sill in my guest bedroom a few weeks ago, I looked down on a half wine barrel filled with dirt and rhubarb leaves. Couldn’t see the rhubarb stalks yet, but just the greenery alone was promise enough that better things were about to happen – like SPRING AND SUMMER! And rhubarb stalks. And strawberries. And picnics. And, and, and…..well the list just goes on and on!

And if ever there was a combination that positively smacked of summer being just around the corner, it’s rhubarb, and shortly thereafter – strawberries. So I decided to feature that mighty duo for our next pre-concert (JazzVox) dessert.

I already had the perfect pound cake recipe (Monica Parcell via Bon Appétit magazine) so that part was easy. But I knew that the sauce had to be special since it was featuring two of the crowning glories of the edible plant kingdom. But I wanted a new twist on a strawberry-rhubarb sauce.

Now everyone who knows me is aware of my passion for adding liqueur to my desserts. Not more than a wee dram of liqueur mind you (unless you forget about my Christmas fruitcake recipes), but just enough to add a depth of flavor that would be missed if it weren’t there!

So in doing research on rhubarb and strawberry sauces, I found a lot of recipes that contained a bit of lemon. Ah – citrus! That sounded good, but it wasn’t quite what I had in mind. Then I stumbled onto a couple of recipes that referenced orange juice or Cointreau in the sauce. Now you’re talkin’! So I decided instead of using a small amount of straight water to make the sauce, I would use some powerful orange juice. Then just to add that little “something”, I threw in some vanilla and Cointreau at the end. (I wanted to remind the strawberries and rhubarb how beloved they were to this cook.)  And the result: pretty darn palatable.

So if you want a dessert for a crowd that can be prepared well ahead of time, search no further. Both the cake and the sauce only improve with a little bit of age. The ice cream, well, I wouldn’t say it improves with time, but it doesn’t seem to suffer much either from a short stay in a sub-zero environment. BTW – I love ice cream.

Things I’ve learned from ice cream. 1) Stay out of direct sunlight 2) Don’t be scared of getting cold or being in the dark 3) Hang out with nuts 4) Go bananas once in a while 5) Stay true to yourself, even when surrounded by enjoyable distractions.

  • 1 c. un-salted butter, room temperature
  • 8-oz. cream cheese, room temperature
  • 3 c. sugar
  • 1 tsp. salt
  • 6 lg. eggs, room temperature
  • 4 tsp. vanilla
  • 3 c. unbleached all-purpose flour
  • good quality vanilla ice cream
  • Strawberry Rhubarb Orange Sauce (see recipe below)

Cream butter and cream cheese together in a large mixing bowl. Add sugar and salt and whip until mixtures is light and fluffy, about 5 minutes. Add eggs one at a time. Beat in vanilla. Add flour at low speed until well incorporated, but do not overbeat. Transfer batter to a lightly buttered glass 10×16-inch baking dish. (I use my glass Pyrex pan.) Level the top with an offset spatula.

Place the dish in a cold oven. Set the temperature to 200 degrees; bake for 20 minutes. Increase the temperature to 250 degrees; bake for 20 minutes. Increase temperature to 275; bake for 10 minutes. Increase temperature to 300 degrees and bake for about 20-30 minutes or until a toothpick inserted near the middle of the cake comes out clean. Remove from oven and cool on a rack. Can be made 2-3 days ahead of time.

To store, cover the top of the baking dish with plastic wrap and keep at room temperature. Do not refrigerate.  

When ready to serve, cut the cake into desired size pieces. Plate with a scoop (or two) of ice cream on the side dolloped with some of the sauce.   

STRAWBERRY RHUBARB ORANGE SAUCE

  • ¾-1 c. granulated sugar (depends on how sweet you like your sauce)
  • 2 T. orange juice concentrate
  • scant ½ c. water
  • 5 tsp. cornstarch
  • 3 c. diced rhubarb
  • 3 c. chopped fresh strawberries
  • 1 tsp. vanilla
  • 1 T. Cointreau (or any other orange flavored liqueur)

Combine sugar, orange concentrate, water, and cornstarch in a large sauce pan. Bring to a boil over medium heat. Add the rhubarb; reduce heat and cook, stirring occasionally, until the rhubarb is tender, 5 to 8 minutes. Add the strawberries, cook for 30 seconds and remove from heat. Stir in the vanilla and Cointreau.

Serve warm or at room temperature.


TUSCAN CANTUCCINI (ITALIAN TWICE-BAKED BISCUITS)

So, we are all familiar with biscotti (pronounced bee-Scott-tee), but probably less familiar with cantuccini (pronounced cantu chee (as in cheese) knee – emphasis on the chee). BTW, one biscotti is a biscotto, and one cantuccini is a cantucci. (Welcome to Italian language school.)

Anyway, cantuccini are a Tuscan twice-baked biscuit often served for dessert with Vin Santo. According to Total Wine, “The sweet dessert wine Vin Santo – “holy wine” – is unique to Italy’s Tuscany region. Traditionally, wine makers dry grapes by hanging the harvested bunches up or arranging them on racks in attics or barns. After three or four months, the semi-dried grapes are full of concentrated sugars and flavors. After pressing, the juice is fermented in small wooden barrels, and  aged for at least three years. The barrels are never completely filled, which exposes the wine to air. They’re also subject to varying temperatures throughout the year.

This treatment, which would wreak havoc on ordinary table wine, can have a delicious effect on Vin Santo. The wine emerges from aging with a characteristic nutty, caramel flavor, a deep golden color and an alcohol content that ranges from 14 to 17 percent. Vin Santo is typically made with Trebbiano and Malvasia grape varieties. A red Vin Santo may also be produced from Sangiovese.”

Me again – The only problem with Vin Santo, is that we have never found a good Vin Santo in the United States. We have brought back Vin Santo in our luggage after trips to Italy, but have never been able to find the real thing here in the states. BTW – If you know of a truly great Vin Santo that can be purchased here, please let me know. I would truly appreciate having that information.)

But back to these cookies/biscuits/type of biscotti/whatever you choose to call them. They are so very delicious. I actually took my old recipe (see Anise Biscotti with Almonds under Biscotti – 6 Ways from Sunday on this site) and adapted it to better resemble the cantuccini we experienced in Tuscany.

So if you want the perfect dessert for an Italian themed dinner, or just want to make a fairly simple cookie for your family to enjoy with breakfast, lunch, or dinner, give this recipe a try. These cantuccini are so much better than anything you can buy in a market or bakery, for about a 6th of the price.

It actually just about kills me when I see a package of 6 biscotti selling for more than it cost me to bake a large batch of these at home. (That’s why I got into home cooking and baking in the first place. I wanted good food without paying an arm and a leg for it. True confession!)

So save your shekels, insure the quality of the ingredients in the biscuits your family will be consuming, provide your family with a tantalizing olfactory experience, and take a break from it all with a lovely cup of coffee or tea and one of these old-world delights. You deserve it! Take care my friends.

  • ½ c. unsalted butter, room temperature 
  • 1 c. sugar
  • 3 eggs
  • 2 tsp. crushed anise seed (not ground) I use my mortar and pestle.
  • 1 tsp. vanilla
  • 3 c. unbleached all-purpose flour
  • 1 T. baking powder
  • ½ tsp. salt
  • 1 c. chopped slivered almonds, toasted

Cream butter and sugar together. Add the eggs, crushed anise seed, and vanilla.

In a separate bowl, whisk together the flour, baking powder, and salt. Combine with butter mixture. Stir in the toasted almonds.

Using your hands liberally greased with butter, divide the dough in half. On a parchment paper lined baking sheet, pat each half into a 12 x 3-inch rectangle.

Bake in a pre-heated 350 degree oven for 30 minutes. Remove from oven. Cool for 13 minutes. Cut each roll diagonally into ½-inch thick slices. Turn the slices cut-side down on the baking sheet. Bake for 13 minutes or until firm. Remove from oven and cool on baking sheet.

Store in an airtight container. 

Note: I suggest baking biscotti with straight oven heat. Convection baking browns them too quickly. These cantuccini are perfect with coffee, tea, or dunked in a glass of Vin Santo.


CSERESZNYÉS LEPÉNY (HUNGARIAN SOUR CHERRY CAKE)

When researching what dessert to serve with a Hungarian themed meal for our JazzVox guests this past weekend, I stumbled on this recipe from Saveur magazine. Hungarian Sour Cherry Cake. It seemed, from all my reading on the subject of favorite Hungarian foods, that cherries were universally loved. Almost to the point of being part of the genetic makeup of the Hungarian people. Who knew? So why look any further? Then I saw a picture of the “cake” and I wasn’t terribly impressed.

Definitely not a thing of beauty. And flat. It looked much more like a bar cookie than a cake. But who was I to question a dessert that was absolutely adored by the population of an entire nation! So I decided to serve the cake in spite of its lack of visual appeal. And boy am I glad I did! After tasting the cake, I knew why the cake so richly deserved to be cherished. It’s wonderful. Not too sweet, full of cherries, (who doesn’t love cherries) and featuring whole-wheat flour which lends a unique texture and earthy taste to the cake. My friend Vicki suggested that using whole-wheat pastry flour would result in the same desired flavor, but with a more refined texture. So I plan to use whole-wheat pastry flour the next time I bake this simple to prepare dessert. (See which I prefer!) So then how to serve the cake?

Well I have long believed that sweetened whipped cream is the answer to the age old question of how to garnish any dessert. So I whipped up some heavy cream, added a couple tablespoons of powdered sugar, and a few teaspoons of syrup from a jar of specialty cherries* that Mr. C. uses in his Manhattans. Then when it was time to serve dessert, I dolloped each individually plated piece of cake with the concoction. Added much appeal to the presentation and tasted absolutely perfect with the cake. 

So if you need a simple dessert that serves 10-12 people, this is the dessert for you. Just don’t forget to make the whipped cream. Left over whipped cream? Add a dollop to your coffee the next morning. Ain’t nothin’ finer!

(BTW, for Mr. Cs recipe for a perfect Manhattan, enter “Manhattan” in the search box on this site.)

  • 2 cubes (16 T.) unsalted butter, room temperature, plus more for greasing the baking pan
  • 1½ c. granulated sugar
  • 3 T. kirschwasser**
  • 1 tsp. vanilla extract 
  • 1 egg, room temp.
  • 2¼ c. regular whole-wheat flour or whole-wheat pastry flour
  • 1 T. baking powder
  • ¾ tsp. kosher salt
  • 1 c. milk (preferably whole milk)
  • 2 lb. pitted frozen sour cherries, thawed and “drained” on paper towels
  • ¼ c. all-purpose flour

In the large bowl of your mixer, beat the butter, sugar, kirschwasser, and vanilla together until pale and fluffy. Add egg; beat until incorporated.

In a medium bowl, whisk together the whole wheat flour, baking powder, and salt. With the mixer running on low speed, alternately add flour mixture and milk in 3 batches to make a thick batter. Spoon batter onto a buttered 13″ x 18″ x 1″ (half sheet) baking sheet and smooth out with an offset spatula. Toss cherries with the ¼ cup flour. Set cherries evenly over the top.

Bake in a pre-heated 375 degree oven until cake is golden brown and feels set to the touch, 30-35 minutes. Remove from oven and cool at least 30 minutes before serving.

Great topped with whipped cream that has been sweetened with powdered sugar and vanilla, a wee bit of kirschwasser, or my favorite – the syrup from a jar of really good cherries*.  

*I use the syrup from either Luxardo Maraschino Cherries or Culinary Circle Amarena Cherries. Both are Italian products.

**According to Wikipedia – “Kirschwasser (German for “cherry water”) or simply kirsch, is a clear, colorless fruit brandy traditionally made from double distillation of Morello cherries, a dark-colored cultivar of the sour cherry. However, it is now also made from other kinds of cherries. The cherries are fermented completely, including their stones. Unlike cherry liqueurs and cherry brandies, kirschwasser is not sweet. The best kirschwassers have a refined taste with subtle flavors of cherry and a slight bitter-almond taste that derives from the cherry seeds.”


CHOCOLATE SHEET CAKE WITH CHOCOLATE HAZELNUT TOPPING

When you are expecting a large number of guests, there is no simpler dessert to prepare than a sheet cake. And contrary to popular belief, cake can be really, really delicious. I found the cake part of this recipe on the Taste of Home site a few years ago. I first served it as Mocha Chocolate Cake with Sour Cream Frosting. (On this site) And it has become my number one favorite chocolate cake. And every time I make it, it always meets with rave reviews. The cake is so moist, tender, and delicious, that frosting or topping probably wouldn’t be necessary. But because I enjoy gilding a lily, I always frost or top the cake with a little “something”.

This time I decided to top the cake with a chocolate hazelnut concoction. (It was going to be dessert for an Italian themed meal, so of course chocolate hazelnut anything would have been perfect!)  I found the recipe on the Cookies and Cups website. It was actually a cake filling recipe, but it looked so wonderful, that I had to give it a try. Of course I messed with it by adding Frangelico, but then, how could a splash of Frangelico hurt?

In my mind I thought I was creating a frosting, but as sometimes happens, things don’t always work out exactly as planned. I felt the “frosting” was too soft to set properly. So I decided that serving pieces of cake with a generous dollop of this amazingly flavorful “topping”, then garnishing each serving with chopped hazelnuts, was the way to go. And not only did it end up tasting wonderful, the presentation was lovely.

For me, the most delightful thing about cooking is the experimental process. And there are so many wonderful internet cooking sites to help me achieve my goals. Anything I need, or any subject of interest is right at my fingertips. So special thanks to the wonderful cooks who share their recipes with the world. They make me a better cook and I totally appreciate every single one of them.

  • 1 c. unsalted butter, room temperature
  • 3 c. packed brown sugar
  • 4 eggs, room temperature
  • 4 tsp. vanilla extract, divided
  • 3 c. unbleached all-purpose flour
  • ¾ c. cocoa powder
  • 1 T. baking soda
  • ½ tsp. salt
  • 1½ c. room temperature coffee or 1½ c. water and 1 rounded tsp. instant espresso powder
  • 1-1/3 c. sour cream
  • 8 oz. heavy whipping cream
  • 8 oz. cream cheese, room temperature
  • ¾ c. chocolate hazelnut spread (I use Nutella)
  • 2 c. powdered sugar, or more as needed
  • 2 T. Frangelico (hazelnut liqueur)
  • chopped toasted hazelnuts, garnish

Cream the butter and brown sugar together. Add the eggs, one at a time, beating well after each addition. Beat in 3 teaspoons of the vanilla. Whisk together the flour, cocoa, baking soda, and salt; add to creamed mixture alternately with coffee and sour cream, beating well after each addition.

Pour into a greased and floured 9×13-inch glass pan and an 8×8-inch square or round pan or three 9-inch greased and floured baking pans. Bake in a pre-heated 350 degree oven for 25-35 minutes or until a toothpick inserted near the center comes out clean. Don’t over-bake! Remove from oven and place pans on wire racks to cool completely. When cool, cover with plastic wrap.  

In the bowl of your stand mixer, fitted with whisk attachment, beat the heavy cream until stiff peaks form. Transfer to another bowl and refrigerate until ready to use.

In the same mixing bowl, beat the cream cheese and chocolate hazelnut spread until smooth. Add the powdered sugar, remaining 1 teaspoon of vanilla, and the Frangelico; beat until smooth and all the ingredients are incorporated. Fold in the reserved whipped cream. Refrigerate until ready to serve generously dolloped onto cut pieces of cake. Garnish with chopped toasted hazelnut pieces.

(Thanks Brian and Bonnie for letting me know that my preparation instructions were incomplete before this revision. I must admit however, that I liked Brian’s idea that perhaps the Frangelico was just meant as a small treat for the baker, rather than an ingredient in the topping. But then, while you have the bottle out anyway, a wee dram for the baker could always become a part of the entire culinary experience. Just sayin’…….)

MINCE TARTS OR PIE WITH BOURBON CARAMEL WHIPPED CREAM

So what the heck is a mince tart? Well, I’m sure you’ve heard of mincemeat. Mince is merely mincemeat without the meat – thus “mince”! A sweet mixture of liquored and spiced minced fruit (apples, raisins, sultanas, currents, and candied orange peel), baked in a buttery crust. And a mince pie? (I’ll leave you to figure that one out on your own!)

It all started when Jim, this years’ Thanksgiving dinner host, asked me to bring dessert. No problem. I knew that meant French Apple Pie (recipe on site) and Pumpkin Pie Bars (also on site). Then he mentioned how much he loved mincemeat pie. (I can take a hint when I hear one!) So of course, I added mincemeat to the lineup.

At first I was tempted to buy mincemeat, but the good stuff is expensive.  For example: The lowest price I could find for a decent mincemeat – Cross and Blackwell Rum and Brandy Mincemeat, 29-oz. jar was $24.99 from ebay. At least it wasn’t $25.00, that would have been really too prohibitively expensive. (And yes I do know that $24.99 is really $25.00! But most retailers still must think that consumers don’t know the difference, because they continue to waste printer space and ink by not labeling a product $25, instead of $24.99!) Sorry for that little rant, but it bugs me that retailers think the general public is completely lacking intelligence! And grocery stores. What’s with “sales” prices on an item liked canned baked beans advertised as “3 for $6”? Why not just $2 a can? Because how many ever you buy, the price is still going to be $2 a can. You don’t have to buy 3 cans to get the “sale” price. (Sorry, I’ll stop now!) Back to this recipe.  

I had made homemade mince before, but it had been almost 15 years. So I looked up the recipe in my 2nd cookbook, made a couple of changes I felt were necessary (I’ve learned a thing or two about baking in the past 15 years), and came up with this recipe. And oh my! It turned out to be a really good mince recipe.

Now I know some of you have memories of mincemeat pies that weren’t terribly good. But I feel duty bound to encourage you to put your unpleasant memories behind you and give this mince a try. First of all, no critters were harmed in the making of this mince. Mince is simply, as stated above, a sweet mixture of liquored and spiced minced fruit (apples, raisins, sultanas, currents, and candied orange peel). There is nothing in mince not to like. And when you add a dollop of Bourbon Caramel Whipped Cream – it’s a holiday in your mouth.

So start a new tradition at your home this year. But don’t wait. Make the mince now so that it will be ready for Christmas. Like nice people, mince only improves with age.

  • 1½ c. raisins
  • 1½ c. golden raisins (sultanas)  
  • 1½ c. dried currents
  • 2/3 c. + ¼ c. bourbon or brandy, divided
  • 2 Granny Smith apples, peeled, cored, and finely minced
  • 8-oz. container candied orange peel
  • ½ c. (1 stick) unsalted butter, melted
  • ¾ c. brown sugar
  • ½ tsp. ground nutmeg
  • ½ tsp. ground cinnamon
  • ¼ tsp. ground mace
  • ¼ tsp. ground allspice
  • 1/8 tsp. ground cloves
  • finely grated zest and juice of 1 lemon
  • finely grated zest and juice of 1 orange
  • tart or pie pastry (recipes below)
  • coarse or granulated sugar

This recipe makes enough mince for 2 10-inch tarts or 2 8-inch pies

Place the raisins, sultanas, and dried currents in a small saucepan. Add the 2/3 cup bourbon, bring just to a boil, stir to coat all the fruit, remove from heat, and set aside to cool.

Meanwhile, combine the apples, candied orange peel, butter, brown sugar, spices, and the zest and juice of the lemon and orange, in a large ovenproof dish. When the raisins and currents are cool, stir into the apple mixture.  

Cover the dish and place in a cool place overnight. (The remaining bourbon gets added the next day.)

The following day, place the ovenproof dish in a cold oven, bring the temperature to 200 degrees, and bake for three hours, stirring every hour or so. Remove from oven, let cool completely, and stir in the remaining fourth cup bourbon.

Store covered in your refrigerator until ready to use. (Best if left to mellow at least 4 weeks, but if you are like me, the mince only gets to age for about a week. It’s still good, so no worries.)

MINCE TARTS (makes enough pastry for 2 10-inch tart pans)

  • 3 c. unbleached all-purpose flour
  • ¾ tsp. salt
  • ¾ c. (1½ sticks) unsalted butter
  • 5 to 6 T. ice water, enough to make a cohesive dough

Combine the flour, salt, and butter in a food processor. Pulse mixture until the mixture resembles fine crumbs. With the motor running, drizzle in the ice water, stopping when the dough comes together.

Divide the dough in half, and shape each piece into a flattened round disk. Wrap in plastic wrap, and refrigerate for 30 minutes.

When ready to prepare the tarts, remove the dough from the refrigerator. Let warm for 15 minutes or so, till it’s “rollable.”  

If using 10-inch tart pans, roll each disk into a 12-inch circle, about 1/8″ thick. (Remember, always roll the dough from the middle outward.) Using a plate or “whatever”, cut the dough into a 12-inch circle. (Save the scraps to use for decorative cutouts for the top of the tart.)

Note: If you are making tarts smaller or larger than 10 inches, measure the bottom of the tart pan plus double the height of the sides. Roll your pastry dough to that circumference. 

Gently nestle the dough circles into the tart pans. The pastry on the sides should be flush with the top of the tart pans. (Try not to stretch the pastry too much.) Cut shapes from the dough scraps: set aside.

Prick the bottom of each pastry several times with a fork. This helps to prevent puffing while the tart bakes.

Spoon mince into the pasty lined tart pans until it reaches the top of the crust. Gently press down as you fill the tart. Top with cut out decorative tart crust pieces liberally sprinkled with coarse or granulated sugar.

Bake the tarts in a preheated 400 degree oven for 28 to 30 minutes, or until the pastry is golden brown and the filling is bubbly. Half way through the baking time, cover the mince with a round piece of aluminum foil to prevent the mince from browning too much and becoming dry.

Remove the tarts from the oven and cool in the pan. When ready to serve, gently push up on the removable bottom of the tart pan and cut into very narrow wedges. Serve at room temperature with Bourbon Caramel Whipped Cream (recipe below) or topping of choice.

MINCE PIE 

  • 6 T. ice cold water
  • 3 c. flour
  • 1½ tsp. salt
  • heaping 1 c. Crisco

Step 1 – Pour cold water into a small bowl.

Step 2 – Measure flour and salt into a mixing bowl.

Step 3 – Take ½ cup of the flour back out of the mixing bowl and stir it into the water. Make a paste. Set aside.

Step 4 – Add the heaping cup of Crisco to the flour and salt mixture. Mix together. (I use my KitchenAid mixer.)

Step 5 – Add the water/flour paste to the flour/shortening bowl and mix just until blended. Do not over-mix. Divide dough in half. Roll out dough and place in 8-inch pie pans. Cut off excess dough and save for pie crust cut outs to decorative the top of the pie.

When ready to bake pies, pour mince into the pastry lined pans. Top with cut out decorative pie crust pieces liberally sprinkled with coarse or granulated sugar.

Cover edges of pie crust with 1½-inch strips of aluminum foil to prevent excessive browning. Remove foil last 5 minutes of baking time.

Bake in a pre-heated 375 degree oven for 30-35 minutes or until the crust is a very light brown and the filling is starting to bubble. Half way through the baking time, cover the mince with a round piece of aluminum foil to prevent the mince from browning too much and becoming dry.

Serve warm or at room temperature with Bourbon Caramel Whipped Cream (recipe below) or topping of choice.

Helpful hint: Use a pastry cloth to roll out your pie crust. It really makes a difference. You can find pastry cloths in almost any kitchen wares shop. Well worth the $10 or so.

BOURBON CARAMEL WHIPPED CREAM

  • ¼ c. unsalted butter
  • ½ c. brown sugar
  • tiny pinch salt
  • ¼ c. + 2 c. heavy whipping cream
  • 2 T. good bourbon

Whisk butter, brown sugar, and salt together over medium heat in a small heavy saucepan until brown sugar has dissolved completely. (This happens after the mixture comes to a boil and is allowed to burble for a couple of minutes or until it turns kind of shiny. Continue whisking the whole time the mixture is on the heat.) Remove from heat and gently whisk in the quarter cup heavy cream and bourbon. Allow caramel to come to room temperature and then refrigerate.

Beat the remaining 2 cups of whipping cream to stiff peaks. Add the cold caramel sauce and whip just until well blended. (The caramel sauce and whipped cream can be combined up to a few hours before serving.)  

CHOCOLATE CHIP, MACADAMIA NUT, AND TOASTED COCONUT BARS

I love bar cookies because not only are they delicious, they are just so darned easy to prepare. And I needed an easy treat to serve the guys who would be rehearsing in our home later that afternoon.

So having just returned from Hawaii where macadamia nuts are considered a staple, I decided to include them with a couple of my other favorite tropical ingredients to create a simple bar cookie that would remind all of us of warm and sunny places. I also wanted to be able to leave my stand mixer in the pantry and while I was at it, make the cookies GF (gluten free). (I sometimes ask a lot of myself!)     

So I started with a basic Blondie (a butterscotch or vanilla flavored bar cookie) recipe and went from there.        

Now I know what you are thinking. Not an inexpensive cookie to make. And of course, you are right. But these are quite rich so you really don’t need to eat a very large bar to feel like you have just eaten a rare treat.

So if some day you find yourself short of time, but need a really good cookie to serve your family or friends, I would recommend you give this recipe a try. If you want to fancy up your bars to look like an expensive dessert that just came from the kitchen of a fine restaurant, place 1 bar on top of (at an angle) a second bar placed on a lovely small plate. Surround the bars with 2-3 small scoops of vanilla ice cream, dollop with a small amount of real whipped cream, sprinkle with finely chopped macadamia nuts, and finally top with a shave or two of dark chocolate. If that doesn’t impress your family and friends, I don’t know what would? Komoika (enjoy)

  • ¾ c. unsalted butter
  • 1½ c. GF flour (I use Cup4Cup) or unbleached, all-purpose flour
  • 1 tsp. baking powder
  • ¼ tsp. kosher salt
  • 1½ c. brown sugar
  • 2 eggs
  • 1½ tsp. vanilla extract
  • 1 c. semi-sweet chocolate chips
  • 1 c. lightly salted macadamia nuts, chopped
  • 1½ c. toasted coconut

Melt the butter in a large glass bowl. Remove from microwave and set aside to cool. Meanwhile whisk the flour, baking powder, and salt together in a separate bowl. Set aside.

When the melted butter is cool, stir in the brown sugar and mix until well combined and smooth. Add the eggs and vanilla. Add the dry ingredients to the butter mixture and mix just until combined. Do not overmix. Gently stir in the chocolate chips, nuts, and coconut. Scoop the batter into a greased 9×13-inch baking pan and level with an offset spatula.

Bake in a pre-heated 325 degree oven (for glass) or 350 degree oven (if using a metal baking pan) for 30 to 40 minutes (takes longer when you use GF flour) or until the bottom is a nice golden brown and the top feels set when touched.

Remove from oven and place on a wire rack to cool. When completely cooled and the chocolate chips have once again hardened, cut into bars. Store in an airtight container.   


RUGELACH

Whenever I think about soft, delicious cookie like pastries, I think of rugelach. They are just so tasty. To my thinking it’s a sin and a shame that they are not served more often both at home and in restaurants. But then I have always daydreamed of owning my own restaurant for one reason, and one reason only. Dainty desserts. Allow me to explain how this has anything to do with this recipe.

After a lovely restaurant meal, I would be in heaven if I were able to order a couple 1-2 bite desserts to finish my meal. Miniature morsels of sweetness, just large enough to provide that little something that says my fine dining experience has come to a fabulous end. Instead, what is usually offered is the same old standard collection of choices, each large enough to easily serve 4-6 aging appetites! I don’t want a warm brownie the size of a dinner plate served with 2 scoops of not-so-special vanilla ice cream! 

I want a tiny tart (lemon and pecan come to mind), or a diminutive piece of pie bar (see several examples on this site), or a beautifully frosted miniature cupcake, or a tiny exquisite chocolate mousse served in an espresso cup, or a lovely truffle (the chocolate variety), or a perfect little shortbread cookie, or a delicious little pastry like rugelach. The variety that could be served is endless.

Now, because I understand that restaurants need to make money, I wouldn’t expect any restaurant to carry more than 6-8 types of these miniature wonders. Just as long as they were small, different, and absolutely delicious, I would be one happy lady. But enough about my daydreams. Back to rugelach.

According to Wikipedia, “rugelach is a Jewish pastry. It is very popular in Israel, commonly found in most cafes and bakeries. It is also a popular treat among American and European Jews. Traditional rugelach are made in the form of a crescent by rolling a triangle of dough around a filling.”

According to me, “rugelach is easy and relatively inexpensive to prepare, absolutely delicious, and enough different from other desserts/cookies/soft pastries, as to qualify for the “Dainty Desserts” menu at the restaurant I am still daydreaming about.”

(I’ll let you know when I open this restaurant. Do not hold your breath!)

  • 1 c. (2 sticks) unsalted butter, room temperature
  • 8 oz. cream cheese, room temperature
  • ¼ c. sour cream
  • 2 c. unbleached all-purpose flour
  • ¼ tsp. salt
  • 2 T. granulated sugar 

Cream the butter, cream cheese, and sour cream together in the bowl of your stand mixer. In a separate bowl, whisk together the flour, salt, and sugar. Slowly add the dry mixture to the wet mixture, mixing constantly, until dough holds together and begins to pull away from the sides of the bowl. (Don’t overmix.) Scoop dough onto a lightly floured surface and form into a rough ball shape. Divide the ball into four equal pieces and again roll into balls. Flatten each ball to look like a fat disc. Cover each disc with plastic wrap and place in the refrigerator. Refrigerate for at least 90 minutes, or up to 48 hours. Meanwhile, prepare one of the following fillings and the egg wash.

Brandied Apricot

  • 1 c. chopped dried apricots
  • 1½ c. water
  • pinch of kosher salt
  • ¼ tsp. nutmeg
  • ¼ c. brown sugar, depends how sweet you want your filling
  • ¼ c. brandy

Place the ingredients in a small pan. Bring to a boil, reduce heat, and simmer uncovered until most of the liquid has evaporated – 20-25 minutes. Remove from heat, cool, and mash. (Some small lumps are desired, so don’t mash too much.) Can be prepared ahead and kept in the refrigerator.

Cherry Almond

  • ¾ c. dried cherries
  • 1 c. toasted almond slivers
  • ½ c. cherry preserves
  • 1/8 tsp. almond extract

Combine ingredients in a food processor. Pulse until a thick, coarse paste forms. Can be prepared ahead and kept in the refrigerator.

Raspberry, Chocolate, and Pecan Filling

  • 1½ c. pecans, toasted and very finely chopped
  • 1/3 c. very finely chopped semisweet chocolate
  • ¾ c. raspberry jam

Combine and spread on dough as directed above. Can be prepared ahead and kept in the refrigerator.

Egg Wash:

  • 1 egg
  • 1 tsp. water
  • granulated sugar
  • ground cinnamon, opt.

Beat the egg and water together. Set aside.

To Assemble:

On a well-floured board, roll each disc of dough into a 9-inch circle. (Only take one disc out of the refrigerator at a time.) Using a small offset spatula, spread a scant quarter of the filling onto the dough to within 1-inch of the edge. Cut the circle into 12 equal wedges, cutting the whole circle first into quarters, then each quarter into thirds. Starting with the wide edge, roll up each wedge. Place the cookies, points tucked under, about an inch apart on a parchment paper lined baking sheet.

Brush each cookie with the egg wash. Lightly sprinkle with granulated sugar mixed with cinnamon to taste. Bake in a pre-heated 375 degree oven for 15 to 20 minutes, or until lightly browned. Remove to a wire rack and serve warm or at room temperature.

Rugelach will keep for a several days in a tightly sealed container. They can be rewarmed in a microwave

Hint: To get a perfect 9-inch circle, use a 9-inch cake pan. Place upside down on the dough and cut around the pan with a sharp knife. Save scraps. After the 4th dough round, you will probably have enough scraps to make another 9-inch circle.