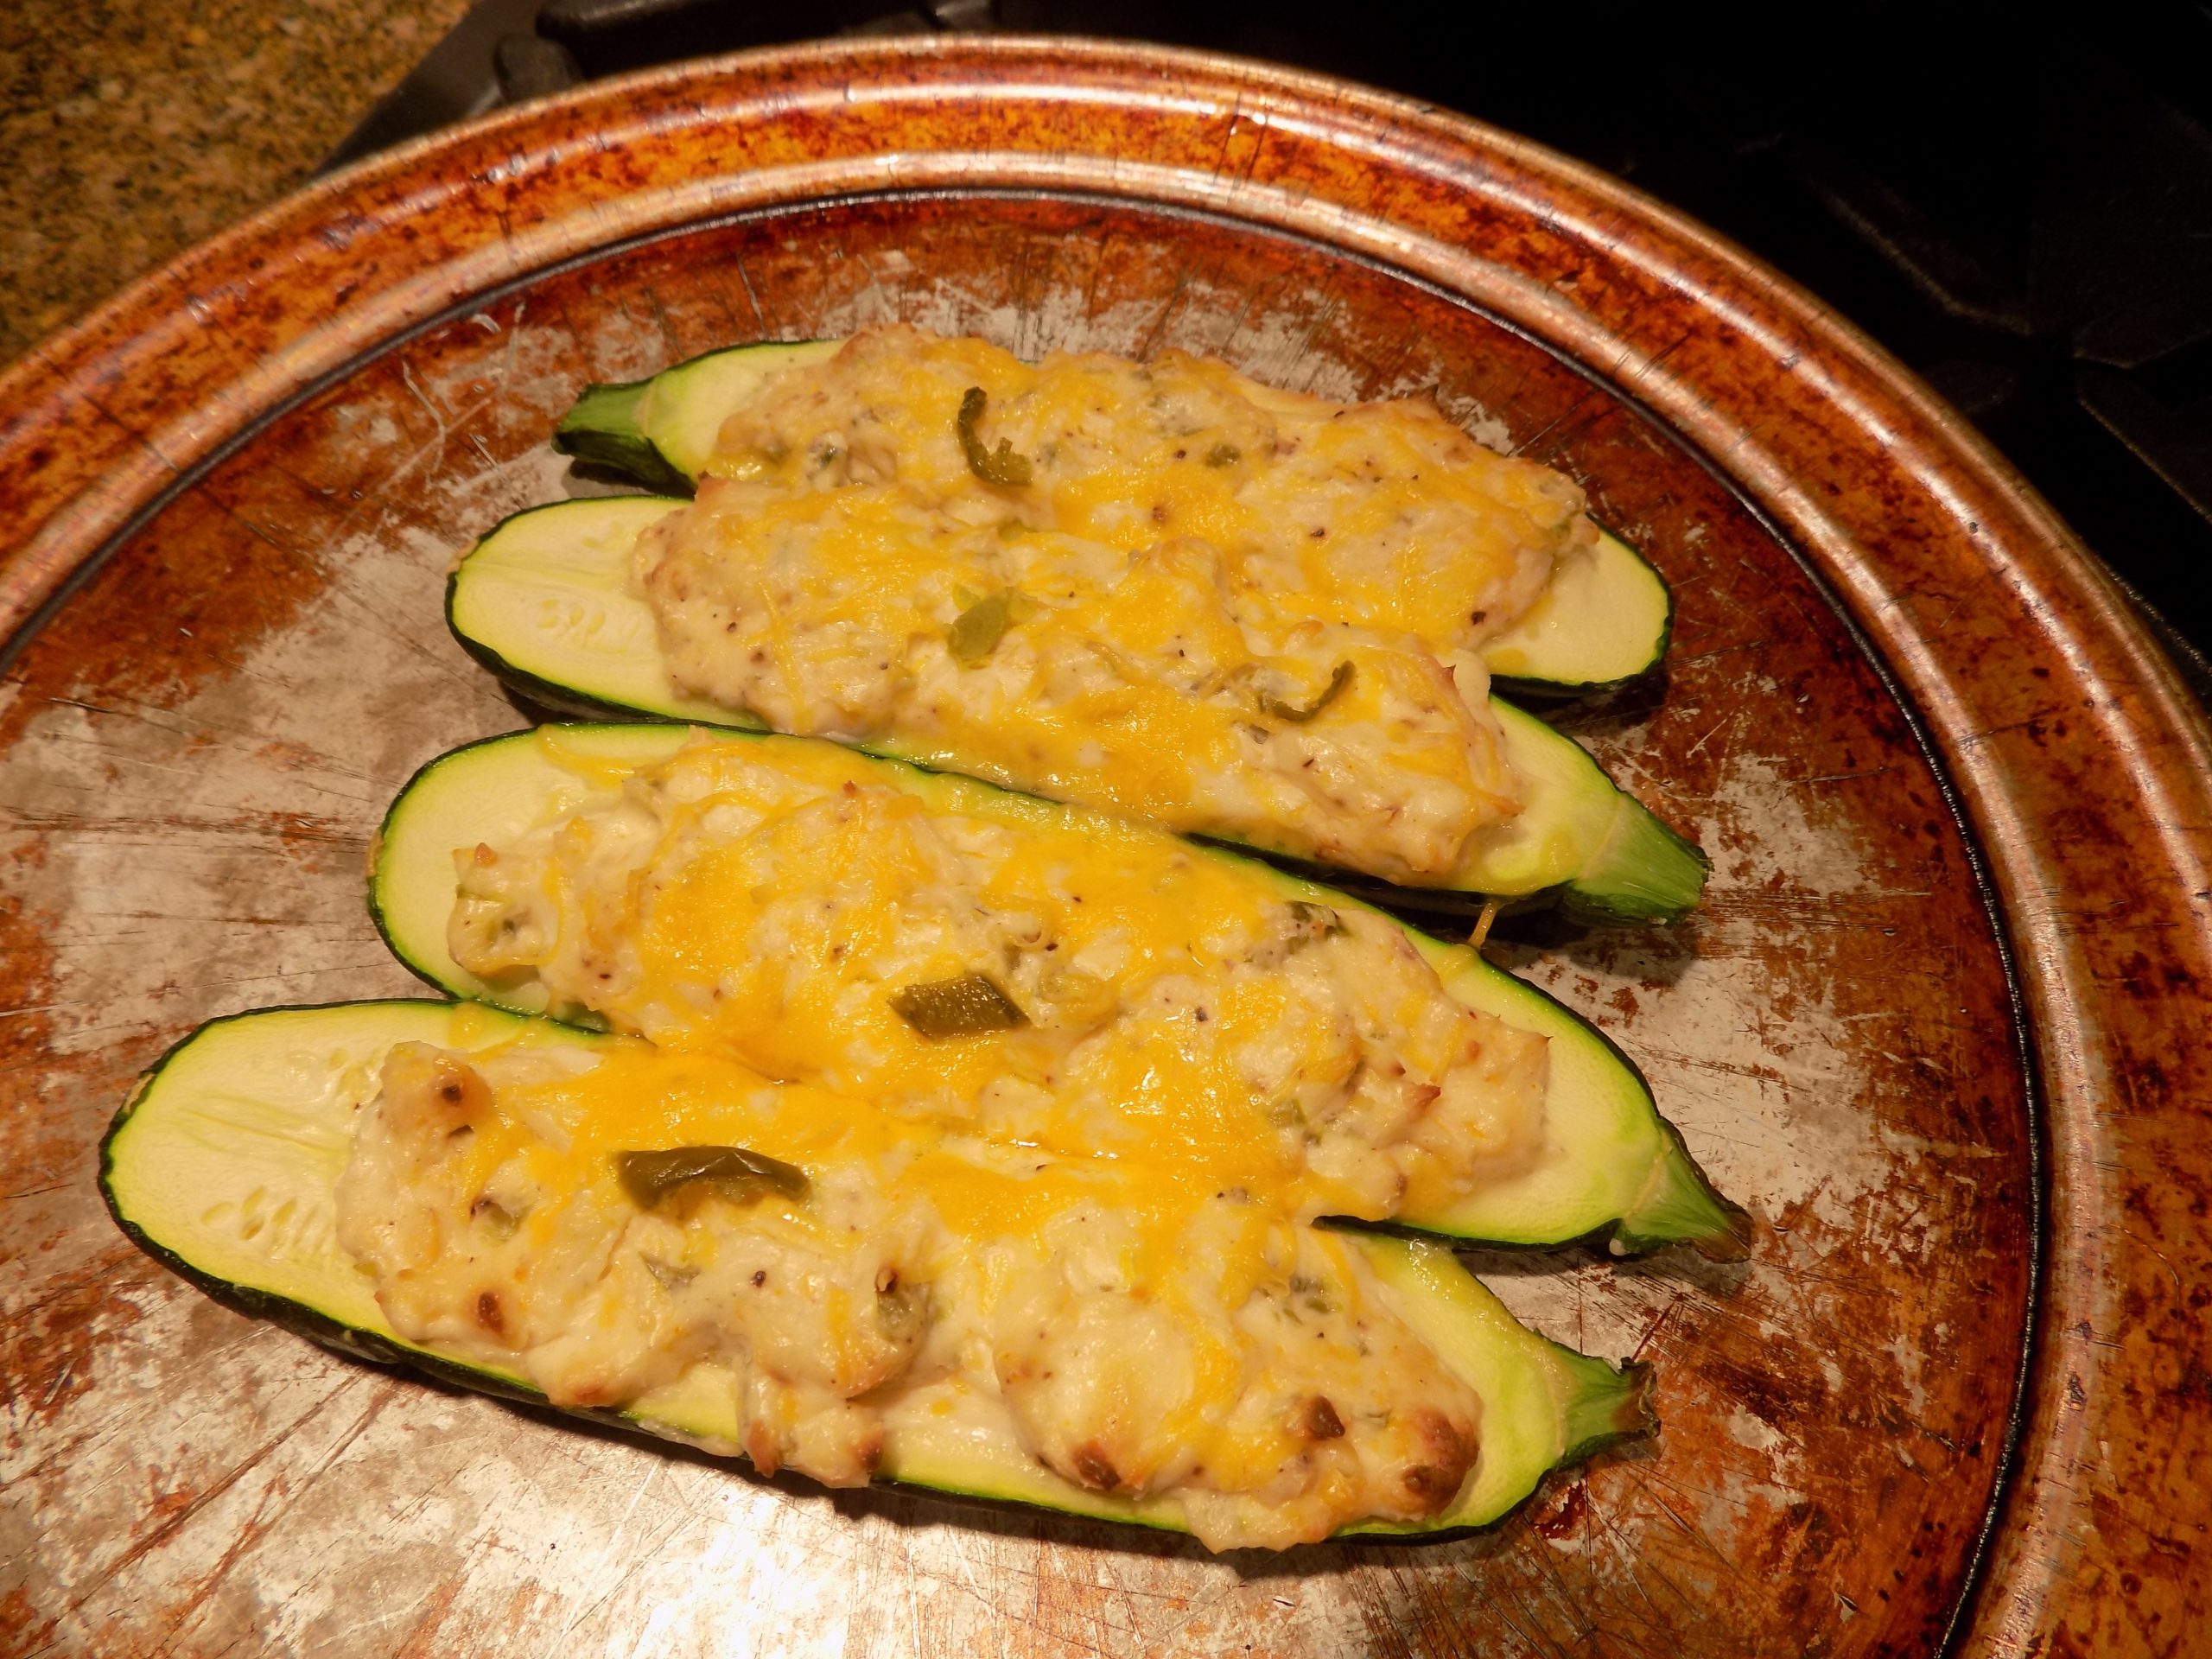
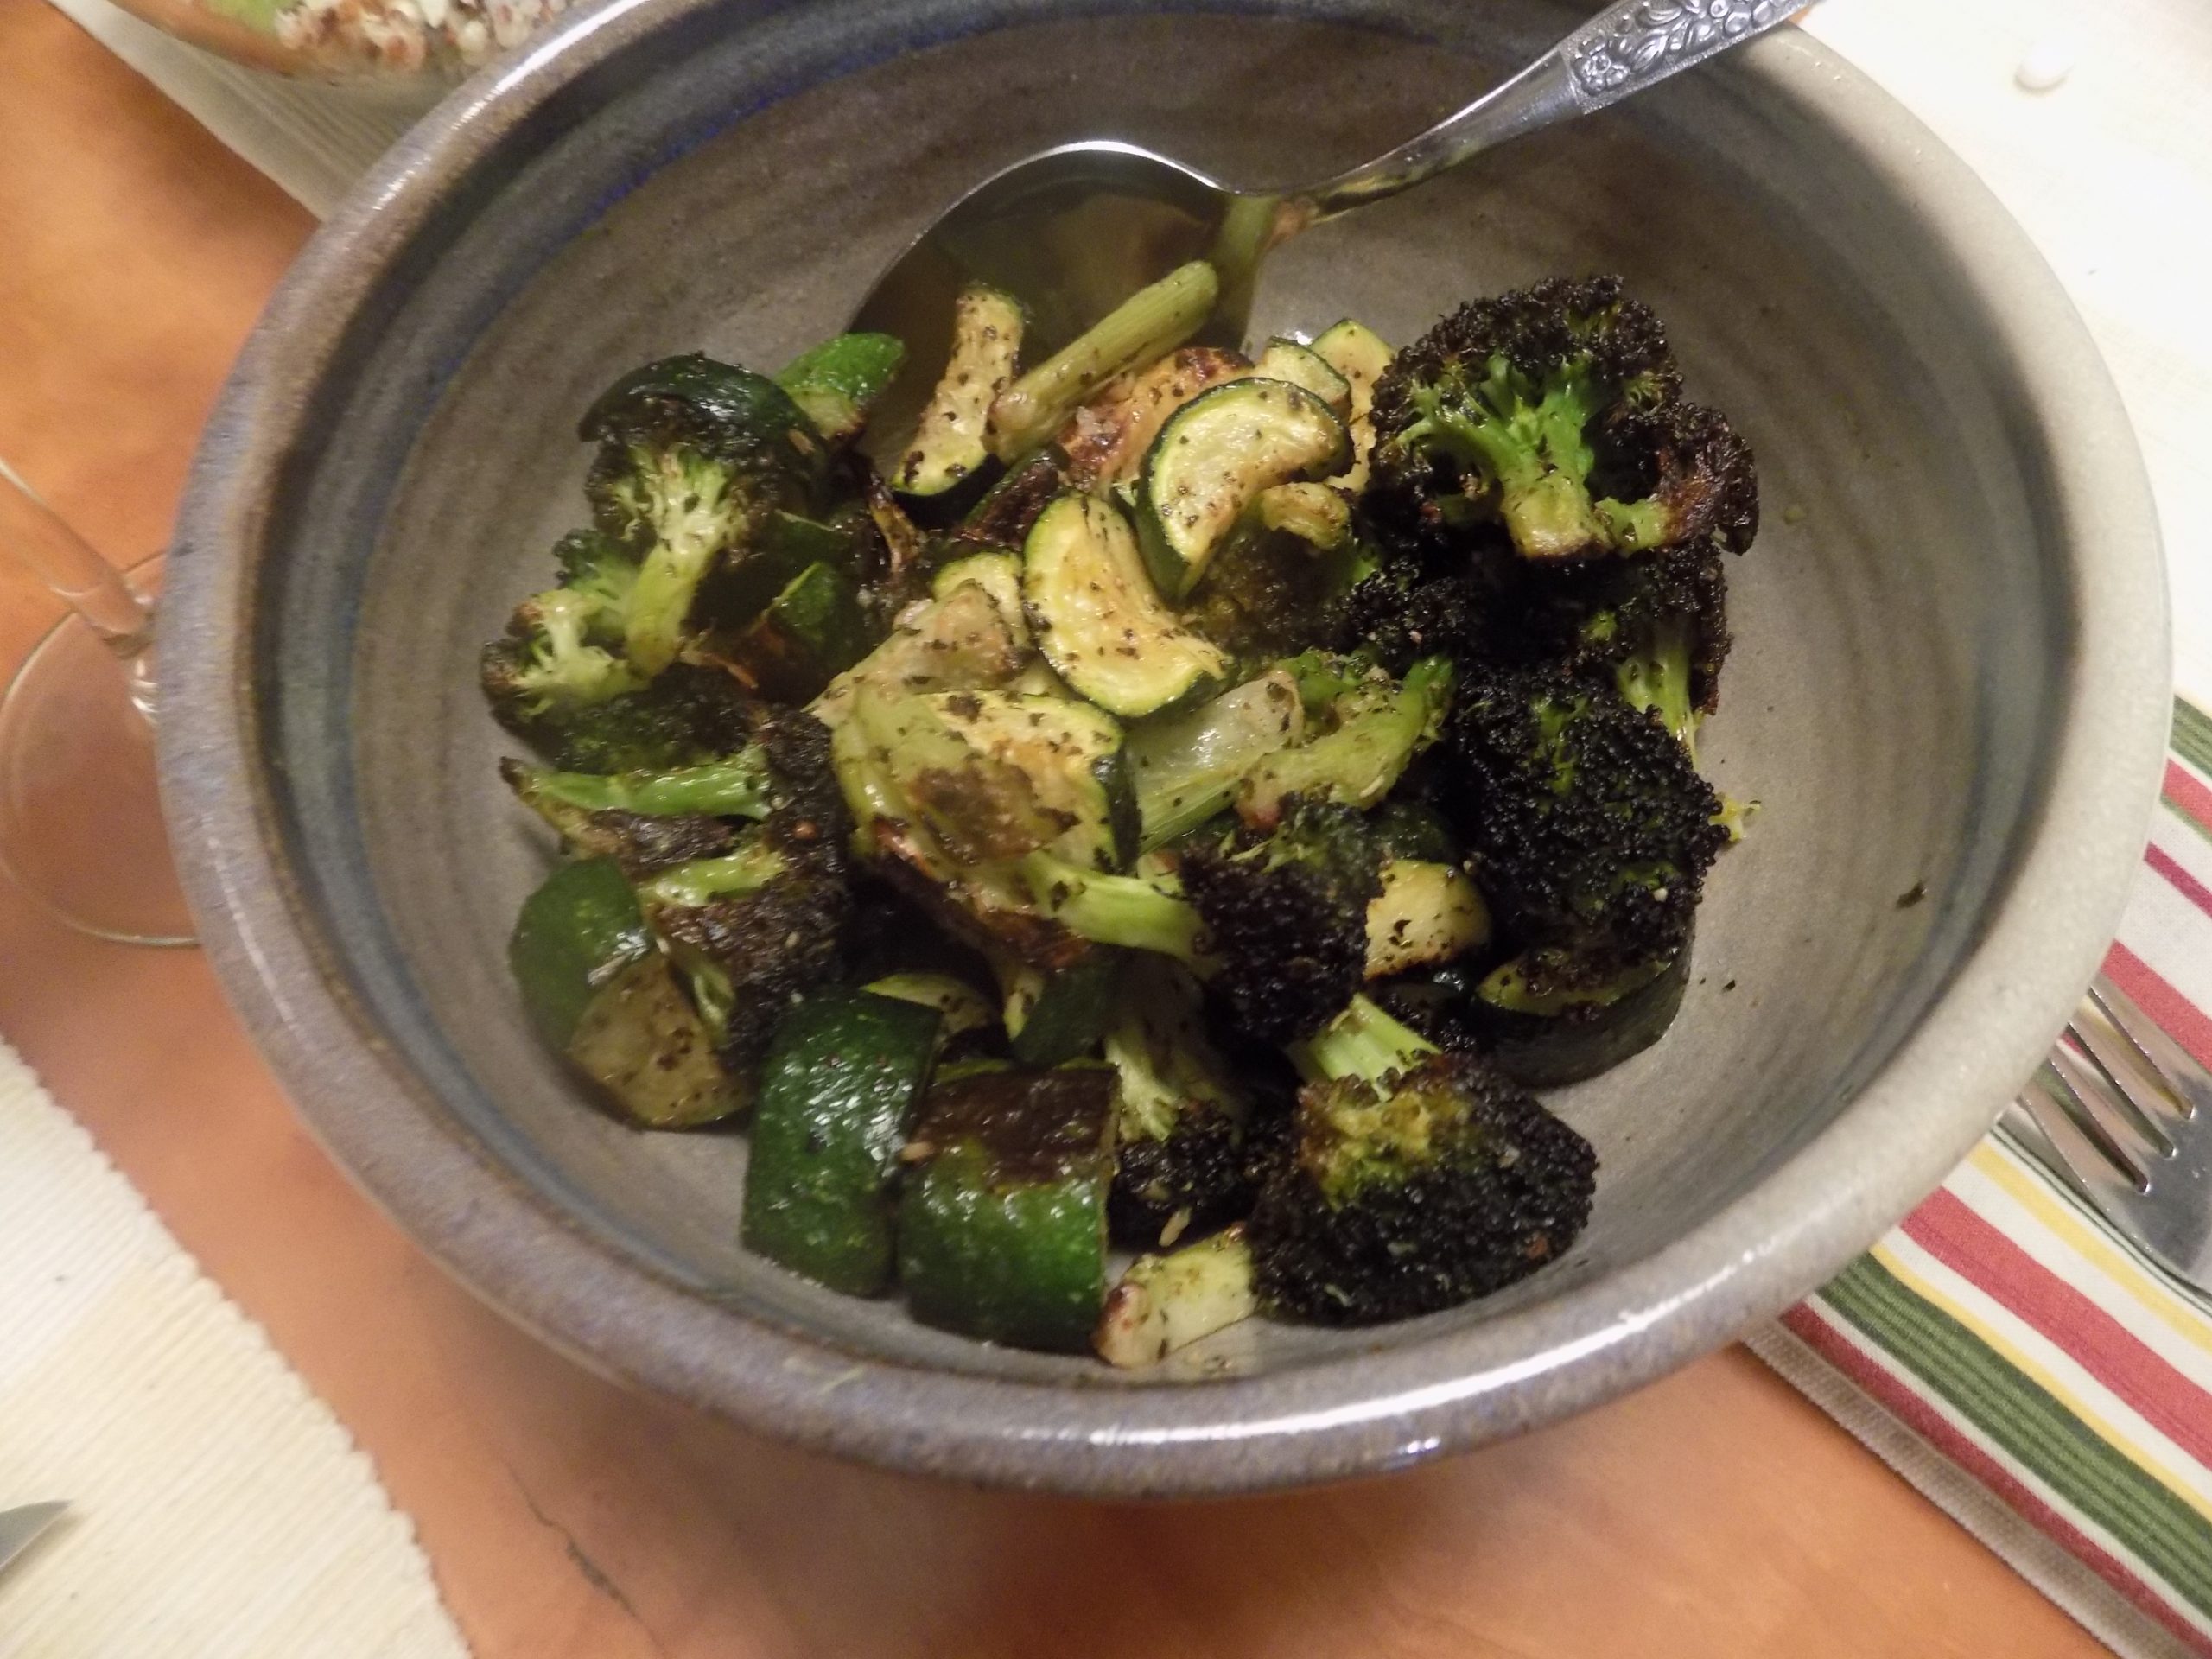
Category Archives: VEGETABLE SIDE DISH RECIPES

CREAMY MASHED SWEET POTATOES

I’ve said it before, and I’ll say it again – I love sweet potatoes. Love them! And this year for Christmas I served ham. And along with the ham I wanted to serve some type of sweet potato dish because ham and sweet potatoes are just a fabulous combination. But I didn’t want a pecan topping on my sweet potatoes this time, because I was serving a salad (Roasted Beets, Candied Pecans, and Feta Cheese Salad with a Balsamic Vinegar Dressing) which included pecans as an ingredient. So, my Sweet Potato Casserole with Butter Pecan Crumble Topping would have been just a bit too much pecan.

I decided instead, to just prepare the sweet potato part and leave the pecan topped version for another dinner. And oh am I glad I made this dish to serve along-side the ham. Sweet and delicious, and a perfect creamy textural compliment to the crunchy pecans in the salad. I also tried a new cornbread muffin recipe to complete the menu. You will not be seeing that recipe on this site because the muffins simply did not live up to my expectations. (See, I can be polite when I choose to be!)

So, for all of you out there who love sweet potatoes, give this simple recipe a try. It can be prepared a day or two in advance, so it is perfect for dinner parties, or holiday meals, or anytime preparing a dish ahead of time helps keep chaos in check on the day of the event.

As always, keep smiling and stay positive. And stay tolerant of your own foibles, as well as those of your family members. After all, it’s those idiosyncrasies that make us human. And ultimately make us lovable. Peace and love to all. And HAPPY NEW YEAR.  

2 very lg. ruby or garnet sweet potatoes (sometimes labeled incorrectly as yams)

⅓ c. brown sugar, packed

2 T. whole milk

¼ c. (½ stick) unsalted butter, softened

1 lg. egg

½ tsp. vanilla

¼ tsp. kosher salt

Bake sweet potatoes in a pre-heated 400-degree oven for about 90 minutes or until tender. Remove from oven and allow to cool to touch. Remove peel and throw the flesh into your food processor. Add the brown sugar, milk, butter, egg, vanilla, and salt. Whirl until smooth. Pour mixture into a buttered baking dish.

Bake in a pre-heated 350-degrees for 30-40 minutes. Remove from oven; let stand 10 minutes before serving.


MASHED POTATOES WITH BACON, CHEESE, CHIVES, AND SOUR CREAM

Sounds like the makings of a twice baked potato, right? Well, you are spot on if you came up with that spontaneous analysis. Because that’s just what I made last night as a side dish to go with marinated grilled flank steak and spinach salad. OK, not a twice-baked potato, but darn close.

As I am sure some of you are aware, my dear husband is not a potato lover. How can this be you might ask? Well forget it! I haven’t figured it out yet and we have been together for 3 decades. It’s just the way he is!

So yesterday when I was pondering what to serve with the grilled meat, I happened to glance in my veggie basket that lives on my kitchen counter. And there I recorded 4 Yukon Gold potatoes left over from Thanksgiving. And they very much needing to be used because that sickly green that can happen to potatoes that are left exposed too long to light, was in full regalia. So, potatoes for dinner was not an option. (I usually don’t keep potatoes around for this very reason. But not going to the store as often as usual, and not having an ounce of room available in my pantry has had a negative impact on my otherwise stellar ability to keep vegetables fresh. (Right, like that was ever the case! But it sounds good.) Anyway, before the poor darlings went any further over to the dark side, I decided these potatoes were going to be eaten this very evening. Come hell or high water. But how to make them palatable for my husband? Light bulb time! Mr. C. loves twice baked potatoes. But leaving the peels on these potatoes was not an option. So, use all the same ingredients that he loves, just all mixed together in a mash. And there was much rejoicing at table last evening. Mr. C. was happy. I was happy. And I’m sure the potatoes were happy to be of service.

So next time you want to change things up a bit, re-invent an old favorite. Tired of the same old salad dressing, make a new one. BTW, there are lots of salad dressing recipes on this site. Tired of the same old chili. Use chicken or white beans or taco seasonings in place of the usual ingredients you normally would include. Just use your imagination and trust your own judgement. If you are like me, you have been cooking for quite some time now. No time like the present to test your skills.

So, as always, have fun in your kitchen. Consider what foods make your family happy. And use alternative ingredients whenever possible rather than rushing off to your local grocery store. Stay safe.

Peace and love to all.

4 potatoes (your choice), peeled (again your choice), and cut into same sized cubes (trust me on this one)

3-5 slices of thick meaty bacon, cut and fried until crisp

2 T. unsalted butter

¾ c. grated sharp cheddar cheese

2 T. chopped fresh chives

⅓ c. sour cream, or more to taste

whole milk

kosher salt

freshly ground black pepper

Steam the potatoes until fork tender. (No crisp tender or al dente for this vegetable. You want soft, perfectly tender potato chunks.) Get rid of the water and dump the steamed potatoes back into the pan. Mash the heck out of them. Then stir in the cooked bacon, butter, cheese, chives, and sour cream. Add enough milk to reach your desired thickness. Taste and add salt and pepper as required.

If you aren’t going to be serving the potatoes immediately, keep them warm in your oven until you are ready to serve.  

CREAMY CARAMELIZED LEEKS AND PEAS

So, how about those pearl onions? What, no frozen pearl onions in the grocery store! What?!?! So there goes another plan shot to hell. OK, I’m a crafty cook, I can improvise. So, that’s just what I did.

Armed with 2 lovely organic leeks, and a pound of frozen peas, we still enjoyed one of our favorite dishes for Thanksgiving.  Just a little variation from the normal choice, but still within the allium family. So Creamy Caramelized Leeks and Peas instead of Creamy Caramelized Pearl Onions and Petite Peas. But you know what? We really enjoyed the subtle flavor of the leeks as opposed to big old bites of onion. But either way, onion (in whatever form) and peas are a match made in heaven. And either of these two recipes are perfect veggie dishes for the holidays or anytime a savory, creamy veggie dish is required.

So, I’m not going to spend too much time on this post. Just like it doesn’t take me a long time to build this delicious dish. Just know that when a creamy, veggie dish is just what your menu requires, you have multiple options from which to choose. 

As always, keep thinking delicious, keep thinking quick and easy to prepare, and keep loving your kitchen. It’s going to be a few more months before it will once again be safe to get together with friends, enjoy meals with our loved ones, and safely share the bounty of this great land with each other. In the meantime, stay happy, stay healthy, and stay informed. Peace and love to all.

2 leeks

1 T. extra virgin olive oil

2 T. unsalted butter

½ c. heavy cream

½ tsp. kosher salt

freshly ground black pepper

freshly ground nutmeg

1 (1 lb.) pkg. frozen petite peas

Remove the tough dark green ends and the root end from the leeks. Discard. Slice each leek in half lengthwise. Then cut into thin half-moons. Add the cut leeks to a big bowl of cold water and swish to release the dirt, which should sink to the bottom. Scoop out the leeks and pat them dry. (If there doesn’t appear to be any dirt, I don’t bother swishing the cut pieces. But look carefully before you make a decision.) 

Heat olive oil and butter in a large skillet over medium heat. And the leeks and stir fry for several minutes, or until the leeks are a lovely golden brown and soft. Reduce heat; pour in cream and slowly simmer until cream is thickened. Season with salt, pepper, and a bit of nutmeg.

Just before serving, place frozen peas in a small colander and rinse under cold water to remove any ice crystals. Drain and gently stir in with the leeks. Heat the mixture only until the peas are hot*. Add additional cream if necessary if the sauce is too thick. Adjust seasoning. Serve hot.

*You don’t really want or need to cook the peas. They are much tastier when served just heated through. In fact, when I make Pea Salad (another wonderful Thanksgiving side dish by-the-way) I don’t cook the peas at all. They are basically right out of the freezer when I add them to the other ingredients.

CHEEZY BAKED CAULIFLOWER

OK, pay attention now. Mr. C. actually likes cauliflower fixed this way. This preparation is basically just a spin-off of my other baked cauliflower recipe (Cheesy Roasted Cauliflower Casserole), which Mr. C. also enjoys. Most of the ingredients are either the same or comparable, but this version is a bit quicker and easier to prepare. And as you well know by now, I am getting more and more enamored with quick and easy.

So the other evening, faced with a big old head of organic cauliflower from our last farm box, I thunk up this version of an old classic – cauliflower in cheese sauce. (And yes I know, “thunk” is not a legitimate word, being a non-standard past tense and past participle of the verb “think”, but I like it non-the-less!) Anyway, this dish was a hit and it had been very easy to throw together. And of course, just because this recipe calls for only half a head of cauliflower, you can fix as much as you want. We just eat less than we used to, so my recipes are starting to reflect our reduced appetites. (If only that were the case with desserts. But no! Earlier today I baked up my version of the Levain Bakery’s Oatmeal Raisin cookies (absolutely fabulous BTW), so my appetite in certain areas hasn’t diminished in the least!) But, back to cauliflower. (And yes, I’m going to post the cookie recipe shortly.)

I love cauliflower, either raw or cooked. It will never replace green beans, zucchini, or broccoli as my favorite vegetables, but it is a good, reliable vegetable to have around. And it’s quite nutritional. Versatile too.   

But somehow, I always end up adding a few calories to cauliflower preparations, because I truly can’t conceive of Mr. C. eating it with just a sprinkle of salt and pepper. The simple fact is, that without a bit of doctoring, cauliflower would never be welcome at our table. So why stress about it?

Now, something to consider. If you serve cauliflower only because you feel you must, then I would suggest you stop thinking in those terms. Cauliflower is not a punishment. It is a truly wonderful veggie when treated with respect and a bit of special attention. But if you and your family simply do not like the taste, then find another veggie that you can all enjoy. (Or the majority of your family can enjoy.) Or try adding a sauce or oven roasting the cauliflower with olive oil and spices. (See my recipe for Roasted Cauliflower with Cumin and Curry.) Because a bit of sauce or spice can make all the difference.

So regardless if my preparations are a bit on the caloric side, I’m going to continue preparing and serving this delicious cruciferous veggie for as long as I can wield a knife and prepare a sauce! Because it’s good for us and I like it!

So as always, fix what you like. Eat healthy, but stick to the food you enjoy cooking and eating. You’re much more likely to actually eat an ingredient if you like the taste. And who cares if you eat spinach or broccoli every other night. I promise you no one is going to think less of you. And who the heck is keeping score anyway! And, if you are trying to keep your family healthy, then forgo worrying about a few calories here and there. Believe me, like I said before, I could never serve this veggie un-doctored or steamed broccoli, for example, without a side of “secret sauce”. (See recipe below.) It’s just the reality of serving and enjoying certain vegetables in our home.

So have fun in your kitchen. Remember, the game is afoot! If it takes a sauce to serve a veggie, then do it! No one is going to question your motive. And maybe, somewhere along the line, your spouse or one of your kids will learn to appreciate vegetables sans adornments. Don’t count on it! But it could happen! Peace and love to all. 

½ head cauliflower, cut into fairly small, same size pieces

¼ c. mayonnaise

2 tsp. Dijon mustard

2 small squirts hot sauce (I use Frank’s RedHot Sauce)

¼ tsp. granulated garlic

¼ tsp. kosher salt

freshly ground black pepper

2/3 c. grated sharp cheddar cheese

2 T. milk

paprika

Steam the cauliflower to crisp tender. (I place the steamer pot over high heat until I just start to see steam escaping around the lid. Then I turn off and heat and let the cauliflower sit covered for 3 minutes.)  At which point I transfer the hot cauliflower to a lightly greased shallow pan in a single layer.

While the cauliflower steams, whisk the mayo, mustard, hot sauce, granulated garlic, salt, pepper, cheddar cheese, and milk together. Spread evenly over the cauliflower. (Or as even as you can manage. The sauce will be very thick.)  Sprinkle lightly with paprika.

Bake in a pre-heated 350 degree oven for 30-35 minutes or until the sauce is melty. Serve immediately.

Secret Sauce:

1 part mayonnaise

1 part soy sauce

Mix together and serve with your favorite steamed veggie.


SPICY AND SAVORY HASSELBACK POTATOES

And yes, there are 4 potatoes on that baking pan. Served 2 the first night and heated the other two the next evening. The potatoes heated up wonderfully.

When it comes to serving potatoes to my husband, I have to be very careful. For some inane reason, Mr. C. is not a potato lover. Now granted, I’m thrilled that he is not the typical “meat and potatoes” kind of guy, because I could never be the kind of cook that would please him if that were his inclination. My tastes are simply too varied to ever have made my endeavors in the kitchen pleasant for him if his tastes were terribly restrictive. But other than regular potatoes and some cruciferous veggies (too numerous to mention), Mr. C. is even more adventurous than I am when it comes to partaking of new dishes. (Especially when we are traveling, the man will try anything!) So when I occasionally force a potato on him, it better be pretty darn tasty.

In our last garden box, 4 beautiful new white potatoes were included with all the other lovely organic produce. Yikes! Plus I already had two in my counter veggie basket. So now, what the heck was I going to do with all these potatoes?  

Since I already had a flank steak marinating in my fridge (recipe soon to follow), I thought a nice baked potato would make a fine accompaniment. But to make it more palatable for him, perhaps I should dress it up a bit. So hasselback potatoes came to mind because I knew he already enjoyed my other recipe for this unusual and tasty potato preparation. (See my other recipe at the bottom of this post.)

But I wanted a bit more zing in my hasselback potatoes this time because the tasty flank steak I was going to serve alongside the potatoes demanded an equally flavorful companion. So I came up with this preparation. And guess what? Yes, he liked the potatoes. No, even a potato prepared in this easy and delicious way was never going to turn him into a potato lover. I still claim that distinction in our household.

So as always, keep thinking of new and interesting ways to prepare food for yourself and your family. Keep staying safe. And keep counting your blessings. Peace and love to all.  

2 T. extra virgin olive oil

1 garlic clove, finely minced

1 tsp. finely chopped fresh rosemary

1 tsp. seasoned salt

½ tsp. kosher salt

¼ tsp. paprika

freshly ground black pepper

pinch cayenne pepper

4 med. sized potatoes

Combine olive oil, garlic, rosemary, seasoned salt, kosher salt, paprika, black pepper, and cayenne pepper together in a small bowl. Slice potatoes crosswise, leaving about ½-inch at bottom still attached. (Place pencils on each side of the potatoes when cutting to ensure you don’t slice all the way through.) Place potatoes on a rimmed baking sheet.

Using a pastry brush, coat the potatoes with the olive oil mixture, carefully working it between the slices and coating all sides. (I find this step works better when I carefully ply the slices apart and Mr. C. slathers on the olive oil mixture. And yes, it’s a messy job.)

Bake in a pre-heated 375 degree oven for about 60-70 minutes or until golden brown and soft when pierced with a fork. Serve immediately.

ACCORDIAN BAKED YUKON GOLD POTATOES (HASSELBACK)

2 T. butter, melted

1 garlic clove, finely minced

½ tsp. kosher salt

freshly ground black pepper

4 med. sized Yukon Gold potatoes, unpeeled or peeled – your choice

Combine butter, garlic, salt, and pepper. Slice potatoes crosswise, leaving about ½-inch at bottom still attached. (Place pencils on each side of the potatoes when cutting to ensure you don’t slice all the way through.) Using a pastry brush, coat the potatoes with butter mixture, carefully working it between the slices and coating all sides. Place potatoes on a rimmed baking sheet and bake in a pre-heated 375 degree oven for about 60 minutes or until golden brown, crispy, and soft when pierced with a fork. Serve immediately.


OVEN ROASTED DELICATA SQUASH “FRIES” WITH DIPS

And yes, there’s a “fry” in the Buffalo Dipping Sauce. Not a problem. I love Buffalo sauce. And better a fry than a fly!

OK, am I the only one who didn’t know about delicata squash fries? I mean really, someone should have mentioned these delightful and healthy morsels to me long ago. But if you are another of the uninformed, like I was until two days ago, read on and learn about my new discovery.

First of all, delicata squash fries are so, so delicious. And oh so easy to prepare. And when dipped in a delicious sauce, you are not going to miss any of the more traditional dunkable veggies, like French fries, in the least.

I mentioned earlier that prepared this way, delicata squash fries are a healthy way to eat this delightful fruit. And yes, botanically speaking, delicata squash, as well as other squash varieties such as butternut, acorn, hubbard, kabocha, pumpkin, and spaghetti, are all fruit because they contain seeds and develop from the flower-producing part of the plant. Whereas vegetables are the roots, stems, or leaves of a plant. Pretty cool, right!? And as a quick nutritional note, delicata squash are a good source of potassium and dietary fiber, and contains magnesium, manganese, and vitamins C and B. But back to the real reason I am posting this recipe.

I love squash. And to find such a simple recipe that tastes so great doesn’t happen every day. So I hope you enjoy delicata squash fixed this way as much as we do.

As always, keep fixing good and healthy food for your family. And try new recipes. It will be more fun for you as the cook, and I’m sure your family will enjoy tasting something new. Family dynamics at the best of times can be frustrating. But because of all the pandemic concerns, variety is a bit of a challenge these days. The same four walls can get mighty boring if some new adventure doesn’t come along to relieve the monotony. So a new dish on the table can help. And even if the results don’t work out as well as you planned, you have provided your family members with a new subject to gripe about. Peace and love to all. (Oh and yes, I still consider this a vegetable dish.)

1 delicata squash

1 T. extra virgin olive oil

½ tsp. kosher salt

freshly ground black pepper

Wash the squash, cut in half lengthwise, and scoop out the seeds. Cut each half into ½ – inch slices. Dry off with paper towels if necessary.

Place the slices in a bowl and drizzle with the olive oil. Sprinkle with the kosher salt and grind on plenty of pepper. Stir to combine.

Line a baking sheet with parchment paper and place the squash on the sheet in a single layer. Roast in a pre-heated 450 degree oven for 20 to 25 minutes or until tender and slightly browned. Turn the squash half way through the roasting. Remove from oven and serve hot out of the oven with either of the two delicious dip recipes listed below. (Or sans dips, and they’d still be wonderful.)      

BUTTERMILK HERB DIPPING SAUCE

 ½ c. plain Greek yogurt (low fat is fine)

¼ c. buttermilk (I like the Bavarian style)

½ tsp. granulated onion

scant ¼ tsp. dried dill weed

¼ tsp. kosher salt

¼ tsp. seasoned salt

freshly ground black pepper

1 garlic clove, finely minced

2 tsp. minced fresh Italian parsley

1 T. chopped fresh chives

Whisk the yogurt, buttermilk, granulated onion, dill weed, salt, and pepper together in a covered container. Stir in the garlic, parsley, and chives. Store in refrigerator.

BUFFALO DIPPING SAUCE

1 T. unsalted butter

2 T. Frank’s Red Hot Sauce

pinch granulated garlic

Melt the butter in a small container. Stir in the hot sauce and granulated garlic together.


INSTANT POT VEGETARIAN REFRIED BEANS

OK, I thought I was done using my Instant Pot because the last time I tried preparing dried beans this way, the darned things never got soft. Even though I added a bunch of extra time, they were still too hard. I assumed there was simply something wrong with my Instant Pot. Nope. The problem was not the pressure cooker. The problem had to do with the age of the beans I was trying to cook.

If you are anywhere around my age (older than dirt), then you grew up with parents who had either lived during the depression or shortly thereafter. And those of us who then grew up to be the cooks for our own families, remembered the lessons from our youth. Don’t waste food. Keep a stock of your favorite ingredients on hand. (Replacement Shop.) And save money any way possible.

We soon discovered that buying in bulk was a good way to stretch the food dollars. That meant, that buying a 5 pound bag of pinto or navy beans, for example, was much more cost effective than buying 5 – 1 pound packages. Because, dried beans last forever. Right?! Wrong!! 

Fact: Dried beans that are several years old (some say even two years old) may not soften no matter how long you cook them. Who knew? I sure as heck didn’t. I just always figured that because the beans were dried, they could happily sit in my pantry for years with no ill effects. Kind of like Twinkies. But in reality, beans are merely dried to extend their shelf-life. They were never meant to last a lifetime! Or even several years.

Now I know what you’re thinking. Does Patti really expect me to go through my pantry and throw away all those wonderful dried beans I‘ve been hoarding all these years? No, that is not what I’m telling you to do. But I’ve got to be honest with you. That’s what I’m going to do. Because frankly, some of my beans may have moved with us from our Bellevue home 12 years ago. Well maybe not, but darned close! And as much as it’s going to kill me to buy dried beans in small packages or small amounts of bulk beans, and forgo my inherent inclination to sock away masses of dried beans in case there’s a zombie apocalypse or devastating earthquake, that’s my plan from here on out. Because there truly is a difference between a one year old dried bean and a 5 year old dried bean. So on that happy note, I’m going to tell you all about this recipe.

I have been trying all of my adult life to build refried beans that had enough wonderful flavor on their own as not to require any type of embellishment or garnish. No added cheese, raw onion, sour cream, salsa, etc. Nada! And I finally reached my goal the other evening after only 56 years of trying. (Persistence is its own reward.) Anyway, this combination of ingredients really worked for us. And using recently purchased dried pinto beans, adding a wee bit of fat, and a lot of flavorful additives, these beans can be served as is. And proudly take their place alongside any other flavor packed Mexican dish. In other words – they are truly yummy. And creamy. And healthy. And very easy to prepare. Your Instant Pot does all the hard work. You just need to feed it a few ingredients, turn the thing on GO, then walk away and let the pot do its magic. Piece of cake. (And no, I am not naïve enough to believe that all dried beans on my grocery store shelves are not as old as the ones in my pantry. But it’s the best I can do to alleviate the problem of dried beans that will not get soft! Well that and cross my fingers.)

So believe me, I am really glad I gave my Instant Pot another chance. And yes I have apologized to it for any unfair comments I may have issued out of ignorance. And to the Instant Pots credit, I have graciously been forgiven.

As always, be kind, be forgiving, give others the benefit of the doubt, and be that person that everyone considers a good friend. Good friends are like stars. You can’t always see them, but you know they are there. Peace and love to all.  

1 c. dried pinto beans  

2 tsp. extra virgin olive oil

½ sm. yellow onion, chopped  

2 cloves garlic, minced

1 can (4-oz.) diced green chiles (I use mild hatch green chiles)

1/8 tsp. dried jalapeño*

2 c. vegetable broth (I use Better Than Bouillon Vegetable base)

1 c. water

1 sm. bay leaf

1 tsp. kosher salt

freshly ground black pepper

1 tsp. chili powder

1 tsp. dried oregano (Mexican oregano is the best)

1 T. unsalted butter

Thoroughly wash and pick over the pinto beans. Place in the instant pot. Heat the olive oil in a small frying pan. Add the onion and sauté until tender. Add the garlic and cook for 1 minute. Pour the onion and garlic into the pot. (Or you can use the sauté function on your Instant Pot.) 

Add the diced green chiles, dried jalapeño, broth, water, bay leaf, salt, chili powder, and oregano. Stir to combine.

Cook on High or Beans for 50 minutes. When the 50 minutes are over, let the pressure release naturally for 40 minutes. Carefully open the lid.  

Discard the bay leaf. Drain the beans reserving about a cup of water. (You probably won’t use that much additional liquid, but it’s better to be safe than sorry.) Using your immersion blender or potato masher, mush the beans until they reach your desired consistency, adding reserved liquid as needed. Stir in the butter, taste, and adjust seasoning. (You will probably need a bit more kosher salt at this point.) Serve warm as a side dish or as a glorious bean dip.

Can be prepared ahead of time and re-heated just before serving.

*I use dried powdered jalapeño quite a bit because I rarely have a fresh jalapeño on hand. The brand I use is Badia ground jalapeño. (You can purchase it through Amazon.)  

SLOW SIMMERED SMOKED PORK SHANK/HOCK WITH MIXED GREENS

Now, if you too are a fan of Stephen Sondheim and are familiar with the musical Into the Woods, then you’ve heard of another woman (actually a witch) who loves her greens as much as I do. Now I don’t have the power to make life miserable for unsuspecting thieves stealing greens out of my garden. But I do have the power to help you produce a dish of greens that even the most greens phobic person might actually enjoy. And ever so simple to prepare. Actually, the preparation could not be easier. A bit of time is required for chopping veggies, but even the most novice of cooks should have no problem turning out this Southern classic.

And I’m telling you true, this is a vegetable dish that is just chock full of vitamins (such as vitamins A, C, and K and folate) and minerals (such as iron and calcium). Greens are also a great source of fiber. And since our bodies need a little dietary fat to absorb some of the vitamins found in dark green leafy vegetables, the olive oil and small amount of fat from the pork shank do the job nicely. (Of course the shank and olive oil also provide flavor. So a win/win situation.)

So a couple of days ago when I made my pot of greens, it was mainly because I had greens that either needed to be eaten or tossed. And I absolutely hate to toss food. I had a big bunch of beet greens, 2 types of kale (common curly kale from our garden and lacinato kale from our farm box) and a couple handfuls of baby spinach. I already had a recipe for collard greens that I love (Collard Greens with Smocked Pork Hocks). But I wanted to see if I could use a mixture of greens, none of which were collard greens. BTW, collard greens are the most commonly used greens in Southern braises and stews. So I took my collard greens recipe, changed things up a bit, and went from there.

Well, after tasting this mixture of greens, I can’t imagine ever again finding the necessity to stick to just one kind of greens. For me now, it’s bring them all on! The greater variety the better!

So if you too would like to feed your family a vegetable dish that is so darned healthy as to actually make you feel giddy, this is the recipe for you.

However, in all honesty, my children would probably have turned their noses up at this dish if I had tried to feed it to them when they were young. They ate a wide variety of foods, some that even surprised me, but they still were, after all, typical kids. So I can’t promise you that your young children will fall down on their knees thanking you for feeding them this wonderfully healthy and flavorful dish. Quite to the contrary I would suspect. But if your family consists of adults, I say go for it!

As always, stay healthy, cook up a storm, and be the person your dog thinks you are. Peace and love to all.

1 T. extra virgin olive oil

1 c. diced yellow onion

3 cloves garlic, minced

2 c. low-sodium vegetable broth 

freshly ground black pepper 

¼ tsp. crushed red pepper flakes (or less if semi-spicy is a problem for you)

1 sm. smoked pork shank/hock 

12-16 c. (loosely packed) mixed greens (collard, mustard, turnip, beet, chard, spinach, kale, etc.)

sherry vinegar, for sprinkling, opt.

Heat the olive oil in a large covered Dutch oven or heavy pan. Sauté the onion over medium heat until almost tender. Add the garlic and cook for 1 minute.  

Add the vegetable broth, black pepper, and crushed red pepper flakes. Add the smoked shank, bring to a boil, cover, reduce heat, and simmer for an hour.

Add the greens. (They will wilt down as they cook,)

Simmer for 45 minutes. Do not boil. Add more vegetable broth if needed. May need more time, but be sure to check after 45 minutes. When done, greens will be dark green, tender, and will not have a raw taste.

Remove shank from pot, allow to cool, and remove the meat discarding as much fat and sinew as possible. Shred the meat and return it to the pot. Bring the meat and greens back to a boil when ready to serve. Adjust seasoning.

Serve in individual small bowls including some of the liquid. The liquid, often called pot liquor or potlikker, is possibly the best part of this whole wonderful dish. Pass the sherry vinegar.

CHEESY ROASTED CAULIFLOWER CASSEROLE

Cauliflower is one of those veggies that I don’t serve very often. And yes I know that I should fix it more regularly because it’s relatively inexpensive, easy to prepare, and is an extremely healthy vegetable. It’s basically full of nutrients. It also contains unique plant compounds that may reduce the risk of several diseases, including heart disease and cancer. But even with its impeccable pedigree, cauliflower is still a cruciferous vegetable and therefore a bit disdained by my dear husband. And of course there is always the consideration that cauliflower can cause gastrointestinal distress (gas and bloating). Which can be a little disconcerting if you are at a social gathering. But since the onslaught of covid-19, social gathering are prohibited anyway! So really not a problem, at least for now! But I digress…..

So last evening faced with a really large head of cauliflower that definitely needed to be eaten, I went in search of a way to disguise the potent flavor of this veggie.

Now don’t get me wrong. Mr. C. is a really good sport about eating his veggies. Even the ones I know he would never eat if I weren’t around. But because I know that Mr. C. endures rather than enjoys some of the vegetables I serve, I always try my best to make them as palatable for him as possible. And last evening, this recipe I cobbled together received Mr. Cs unsolicited comments expressing overall approval of the dish. (Sometimes the stars really are aligned perfectly.)

So if you too have someone at your table for whom cauliflower is not their favorite vegetable, give this recipe a try. With all the cheesy, creamy goodness going on, your picky eater may not even notice the “white veggie” hidden under the luscious sauce. Just call it “Cheese Casserole”. That should do the trick.

As always, keep cooking, keep playing well with others, keep taking care of yourself, and keep wearing a mask when necessary. We are all in this together. And until every single one of us works as a team, we are never going to reap the benefits of a positive united front against anything, be it Covid-19, racial and social injustice, or a decaying political system. Peace, love, and understanding to all.

1-1½ lg. head(s) of cauliflower, cut into small florets  

2 T. extra virgin olive oil

1 tsp. kosher salt 

freshly ground black pepper

½ c. sour cream 

2 T. whole milk 

1 tsp. Dijon mustard

generous pinch granulated garlic

couple squirts hot sauce (I use Frank’s RedHot sauce)

1½ c. grated sharp cheddar cheese, divided

paprika

2-3 sliced green onions or 2-3 T. chopped fresh chives

Preheat oven to 425 degrees. Line a large rimmed baking sheet with parchment paper.

In a greased 9×13-inch baking dish, combine the cauliflower with the olive oil, salt, and pepper. Make sure every bit of the cauliflower is coated with the seasoned oil. Transfer the cauliflower to the prepared baking sheet making certain the cauliflower is in a single layer. (Do not wash the baking dish.) Roast the cauliflower until crisp-tender, about 12-16 minutes.

Meanwhile, mix the sour cream, milk, Dijon mustard, granulated garlic, hot sauce, and ¾ cup of the grated cheddar cheese in the 9×13-inch baking dish. (Yes the same one you mixed the raw cauliflower with olive oil, salt, and pepper. And you’re right, I hate to wash dishes as much as the next gal!)

When the cauliflower is crisp-tender, transfer it back into the 9×13-inch baking dish. Stir it into the sour cream mixture until well combined. Top with the remaining shredded cheddar and sprinkle with paprika. Return to the oven and bake just until the cheese is melted, about 10 minutes.

Remove from oven and sprinkle with the green onions or chives. Serve hot out of the oven.

OVEN ROASTED BEETS AND CAULIFLOWER

I know this is a very simple recipe. Actually more of a concept than a recipe. But I used this combination of veggies last evening only because I had 2 orange beets and a partial head of cauliflower that really needed to be used. Kind of a now or never situation. I also had a partial shallot that had been in my fridge longer than I care to mention. So – what to do with these poor neglected veggies that would not only assuage my guilt for not using them sooner, but also provide a nice side dish to fried chicken and straight from the freezer Baked Cheddar Cheese and Fresh Chive Polenta. (And yes, I did nuke the polenta before I served it. And yes, leftover frozen polenta heats up beautifully.)

Anyway, against all odds, the combination of beets, cauliflower, and shallots was really tasty. And could not have been easier to prepare.

So I won’t linger over this post today. I know you have better things to do than read about a roasted veggie dish that you have probably either been building or have known about for years. It’s just that I was so surprised at how well these veggies complemented each other. So I felt duty bound to share my findings with you.

So if you too ever find yourself with this trio of veggies, forlorn and sulking like mine were yesterday, or fresh out of your garden, give them a good wash, cut them up, and decorate them with a bit of olive oil, salt, and pepper. Then pop them in the oven, and brighten your dinner table with their very presence. And yes of course you can include other veggies in this mix.

As always – stay healthy, stay happy, and eat your veggies. Even the ones that look like they’ve seen better days. In fact, most veggies purchased from a grocery store have already lost a good deal of their nutritional value by the time you lovingly place them in your grocery cart. So don’t over think using veggies that are a bit past their prime. (OK, maybe it’s best to throw out potatoes that have green skin.) But most veggies which have been held captive in your refrigerator veggie crisper drawer longer than planned are still better for you than say – chocolate cake! Plus even older veggies still retain a goodly portion of dietary fiber, which as we all know is needed to maintain a healthy body (and digestive system). Chocolate cake can simply not make that claim! Peace and love to all.

2 beets, cut into small cubes (I used orange beets cuz that’s what I had on hand)

2 c. cauliflower florets

1 lg. shallot, roughly minced

2 T. extra virgin olive oil, or more as needed

1/8 tsp. kosher salt

freshly ground black or rainbow peppercorns

Combine all above ingredients in a bowl. Pour coated veggies onto a rimmed baking sheet in a single layer.

Bake in a pre-heated 400 degree oven until caramelized and cooked through, about 35-45 minutes. Turn once or twice during cooking. Serve hot, warm, or at room temperature.