Category Archives: APPETIZER RECIPES

CASTELVETRANO OLIVE TAPENADE

OK, I know you can’t find castelvetrano olives just anywhere. But, if you have a Costco near you, Costco is your best bet. Of course if you live in the Seattle area, you can almost always find these little green gems at PFI. Don’t know about PFI, well you are about to learn about a great resource for all things delicious.

How best to describe how to get to PFI (Pacific Food Importers) from here. Since I am writing this post from Castle Rock State Park in Almo, Idaho (southern Idaho near the City of Rocks National Reserve and the Utah border) finding an address right now without internet access is impossible. So I am going to postpone any further writing until I get to a park with internet access.

Wells, finally – internet at my disposal. (Now writing from Wells, Nevada. Home of some of the most scenic mountain drives and hikes you could ever experience. Who knew?!?!) But back to PFI……

First thing you need to know is that PFI is not a fancy place. So don’t think you are going to a Central Market or Whole Foods type of store. Think absolute opposite! It’s a small hole-in-the-wall, warehouse type facility at the bottom of an alley just south of the International District, next to what used to be the Immigration Office (complete with a barbed wire fence) and just east of the railroad tracks and Safeco Field. Like I said, not a glamorous location. But, to me this place is mecca. The address is 1001 6th Ave So #B, Seattle 98134

But enough about PFI, and back to this recipe.

Whenever I want an appetizer that works with just about any type of food, I make a tapenade. First of all, tapenade is easy to make. Plus I almost always have the ingredients on hand. And of course the most important reason to serve this fabulous appetizer is that it is just plain delicious.

So get yourself some olives, and make this spread at your earliest convenience.

And sorry to those of you who have been waiting for this recipe. I’ve been seeing the wonderful states of Washington, Idaho, Utah, Nevada, and Oregon with Mr. C. and Pull-Winkle. (See picture of Pull-Winkle at bottom of post.)  

  • ¼ c. extra-virgin olive oil
  • 2 garlic cloves, roughly chopped
  • 3-4 anchovy fillets  
  • 1 tsp. fresh lemon juice
  • freshly ground black pepper
  • pinch dried thyme
  • 1½ c. pitted castelvetrano olives
  • 1 T. drained capers

In a small saucepan, combine the olive oil and garlic. Cook over low heat for 2-3 minutes or until the garlic starts to soften. Remove from heat and cool to room temperature.

Combine the cooled olive oil, garlic, anchovy fillets, lemon juice, a couple grinds of black pepper, and dried thyme in a food processor. Process until thoroughly pulverized. Add the olives and capers and pulse until they are coarsely ground. (Do not over process. You don’t want a paste.)Store in a lidded glass container. Refrigerate. 


CREAMY TUSCAN SPREAD OR DIP

I found the bones of this recipe on “the girl who ate everything” site. The recipe contained most, but not all, of the flavors I wanted to feature in an Italian appetizer. So I adopted the recipe, but added a few ingredients I felt should be represented in this dish. Call me an Italian ingredient snob, but I simply had to add some basil and Parmesan to the mix, along with a bit of sour cream for additional creaminess.

And you know what – it worked. My guests loved the spread, as did I!

So next time you want a hearty and delicious appetizer that can be made ahead, mix up a batch. After all – it’s Italian! What could be better than that?!?!  

  • 1 (8-oz.) pkg. cream cheese, room temperature
  • ¼ c. sour cream, or more as needed
  • ¼ tsp. kosher salt
  • freshly ground black pepper
  • 1 sm. garlic clove, finely minced
  • 2 T. minced fresh Italian parsley, plus more for garnish
  • 1/3 c. loosely packed chopped fresh basil
  • 1 (14-oz.) can artichoke hearts, drained and chopped  
  • ½ c. thinly sliced black olives
  • 4 green onions, finely chopped
  • 1/3 c. finely chopped sun-dried tomatoes
  • ¼ c. finely grated Parmesan cheese

Mix the cream cheese and sour cream together until smooth. Add the remaining ingredients. Adjust seasoning. Scoop into a pretty bowl. Cover with plastic wrap and chill for at least 4 hours. Serve at room temperature with crudité, crackers, or toasted baguette slices.


ARGENTINE PICADILLO EMPANADAS WITH CHIMICHURRI SAUCE

Before I begin this post, I want to share a definition with you. It is the basis for this entire post. The definition of shortening is any fat that is a solid at room temperature and used to make crumbly pastry and other food products.

Mr. C. and I visited Argentina in 2006 and enjoyed the most delicious empanadas. I knew with the first bite that when I returned home I would be trying my hand at empanada making. I got the gist of this recipe from one of the cookbooks I brought back with me. Well, I made the empanadas, but the pastry part was simply not as good as I remembered! Now, in the cookbook, both the pastry and the filling called for rendered pork fat, preferably from around the kidney. Being both uneducated on the unforeseen qualities of lard, and following my preconceived belief that lard was terribly bad for us (no actual knowledge to back up that idea you realize,) I spurned the use of lard in favor of butter.

So last week I decided to make empanadas for a concert gathering, and I went back to my old recipe and read what I had written about lard in my 2nd cookbook. I made the empanadas practically as written, (a few changes here and there) but again the pastry “feel” was just not perfect! Don’t get me wrong. The empanadas were good, but there was still something not-quite-right with the pastry part. So before I started writing this post, I decided to do a little research on the subject of lard.

I felt very foolish as I began learning about the merits of lard versus other forms of shortening – butter, margarine, or vegetable oils such as soybean and cottonseed oil, which have been hydrogenated to create a solid (think Crisco here). Hydrogenation creates trans-fatty acids which turn polyunsaturated fats into saturated fats.

So, where previously I thought of lard as the black hat wearing villain, I now learned that some lards (leaf lard, for example) are not only OK, they are actually good for us!

But as you know, sometimes a little knowledge can be bad. In this case, the ”bad” part is that “good” lard is expensive and not readily available. (The lard you most often find in grocery stores is hydrogenated. You do not want hydrogenated lard.)

For a good article on why you don’t want to use hydrogenated lard (or any other hydrogenated oil for that matter) visit the Natural News website and search for the article entitled “Why Hydrogenated Oils Should be Avoided at All Costs”. Truly worth a read. But back to this recipe.

So as I said, I made the empanadas and they were very well received. But with my new-found knowledge, I plan to start making all my pastry dough and pie crusts with leaf lard. I’m even going to start frying our morning eggs in lard. That is, when my shipment arrives. (And yes, I did have to order the lard on-line.)  I will keep you posted (literally) on how my new affair with lard works out.

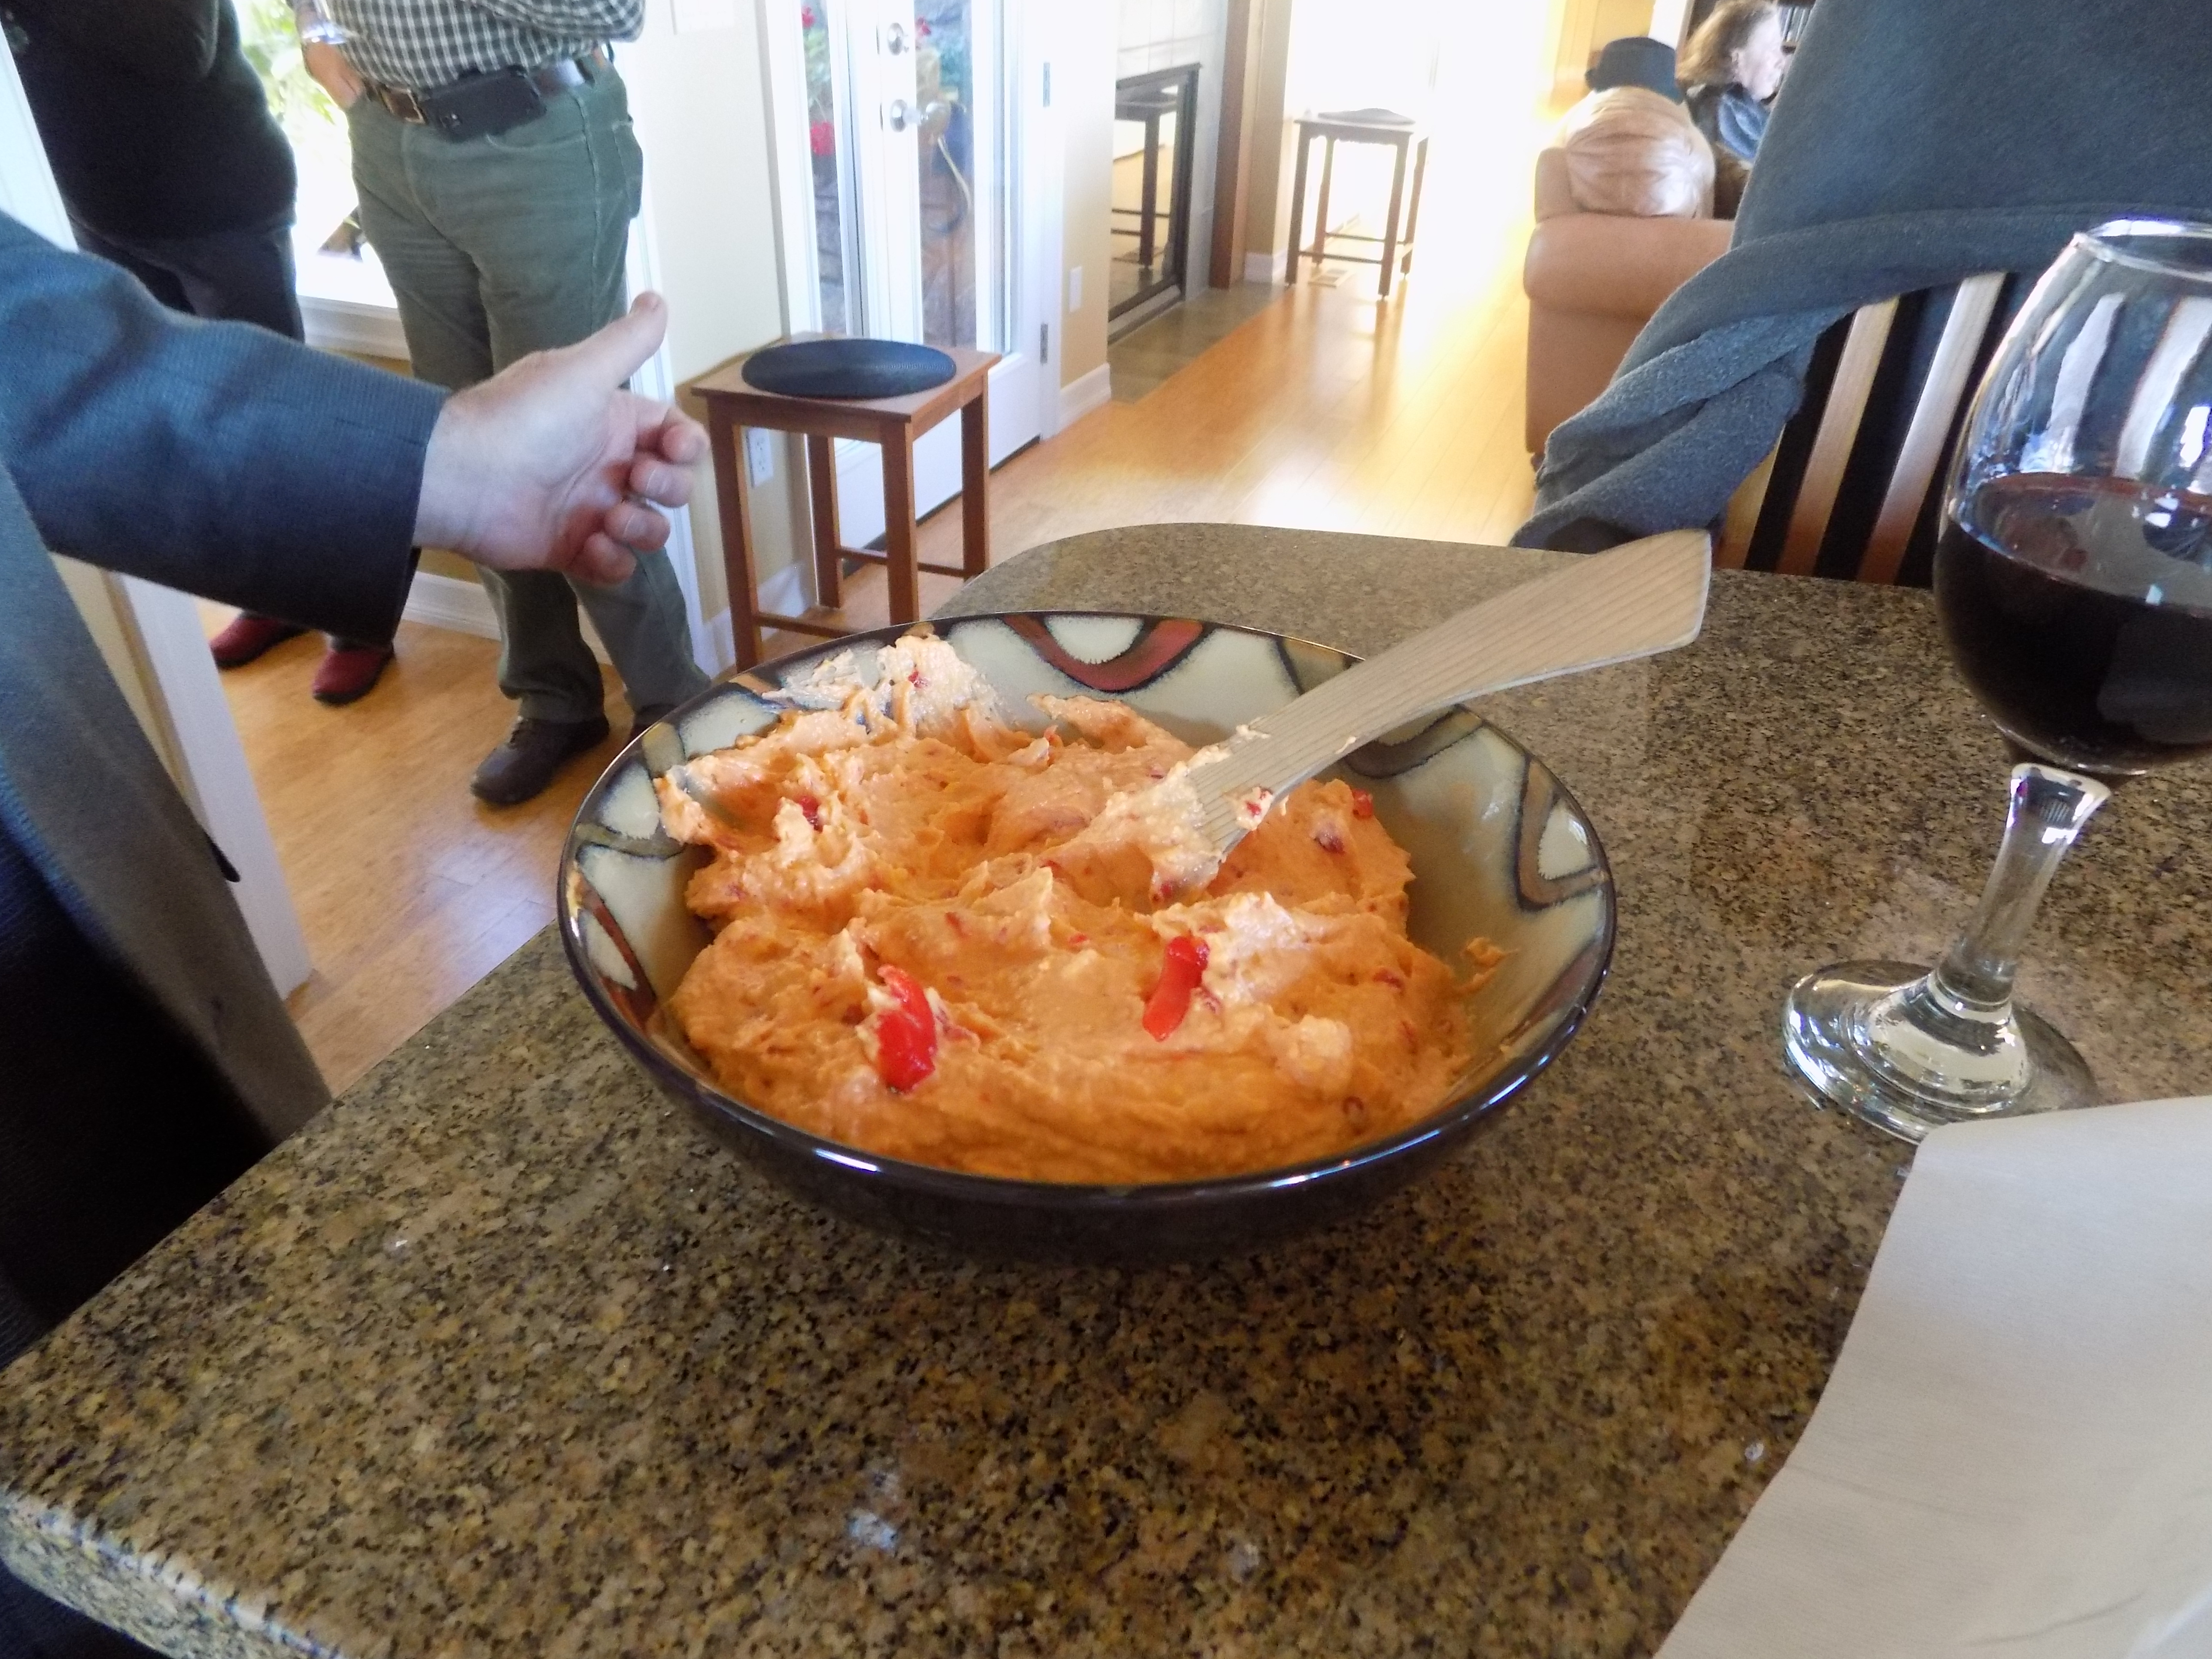
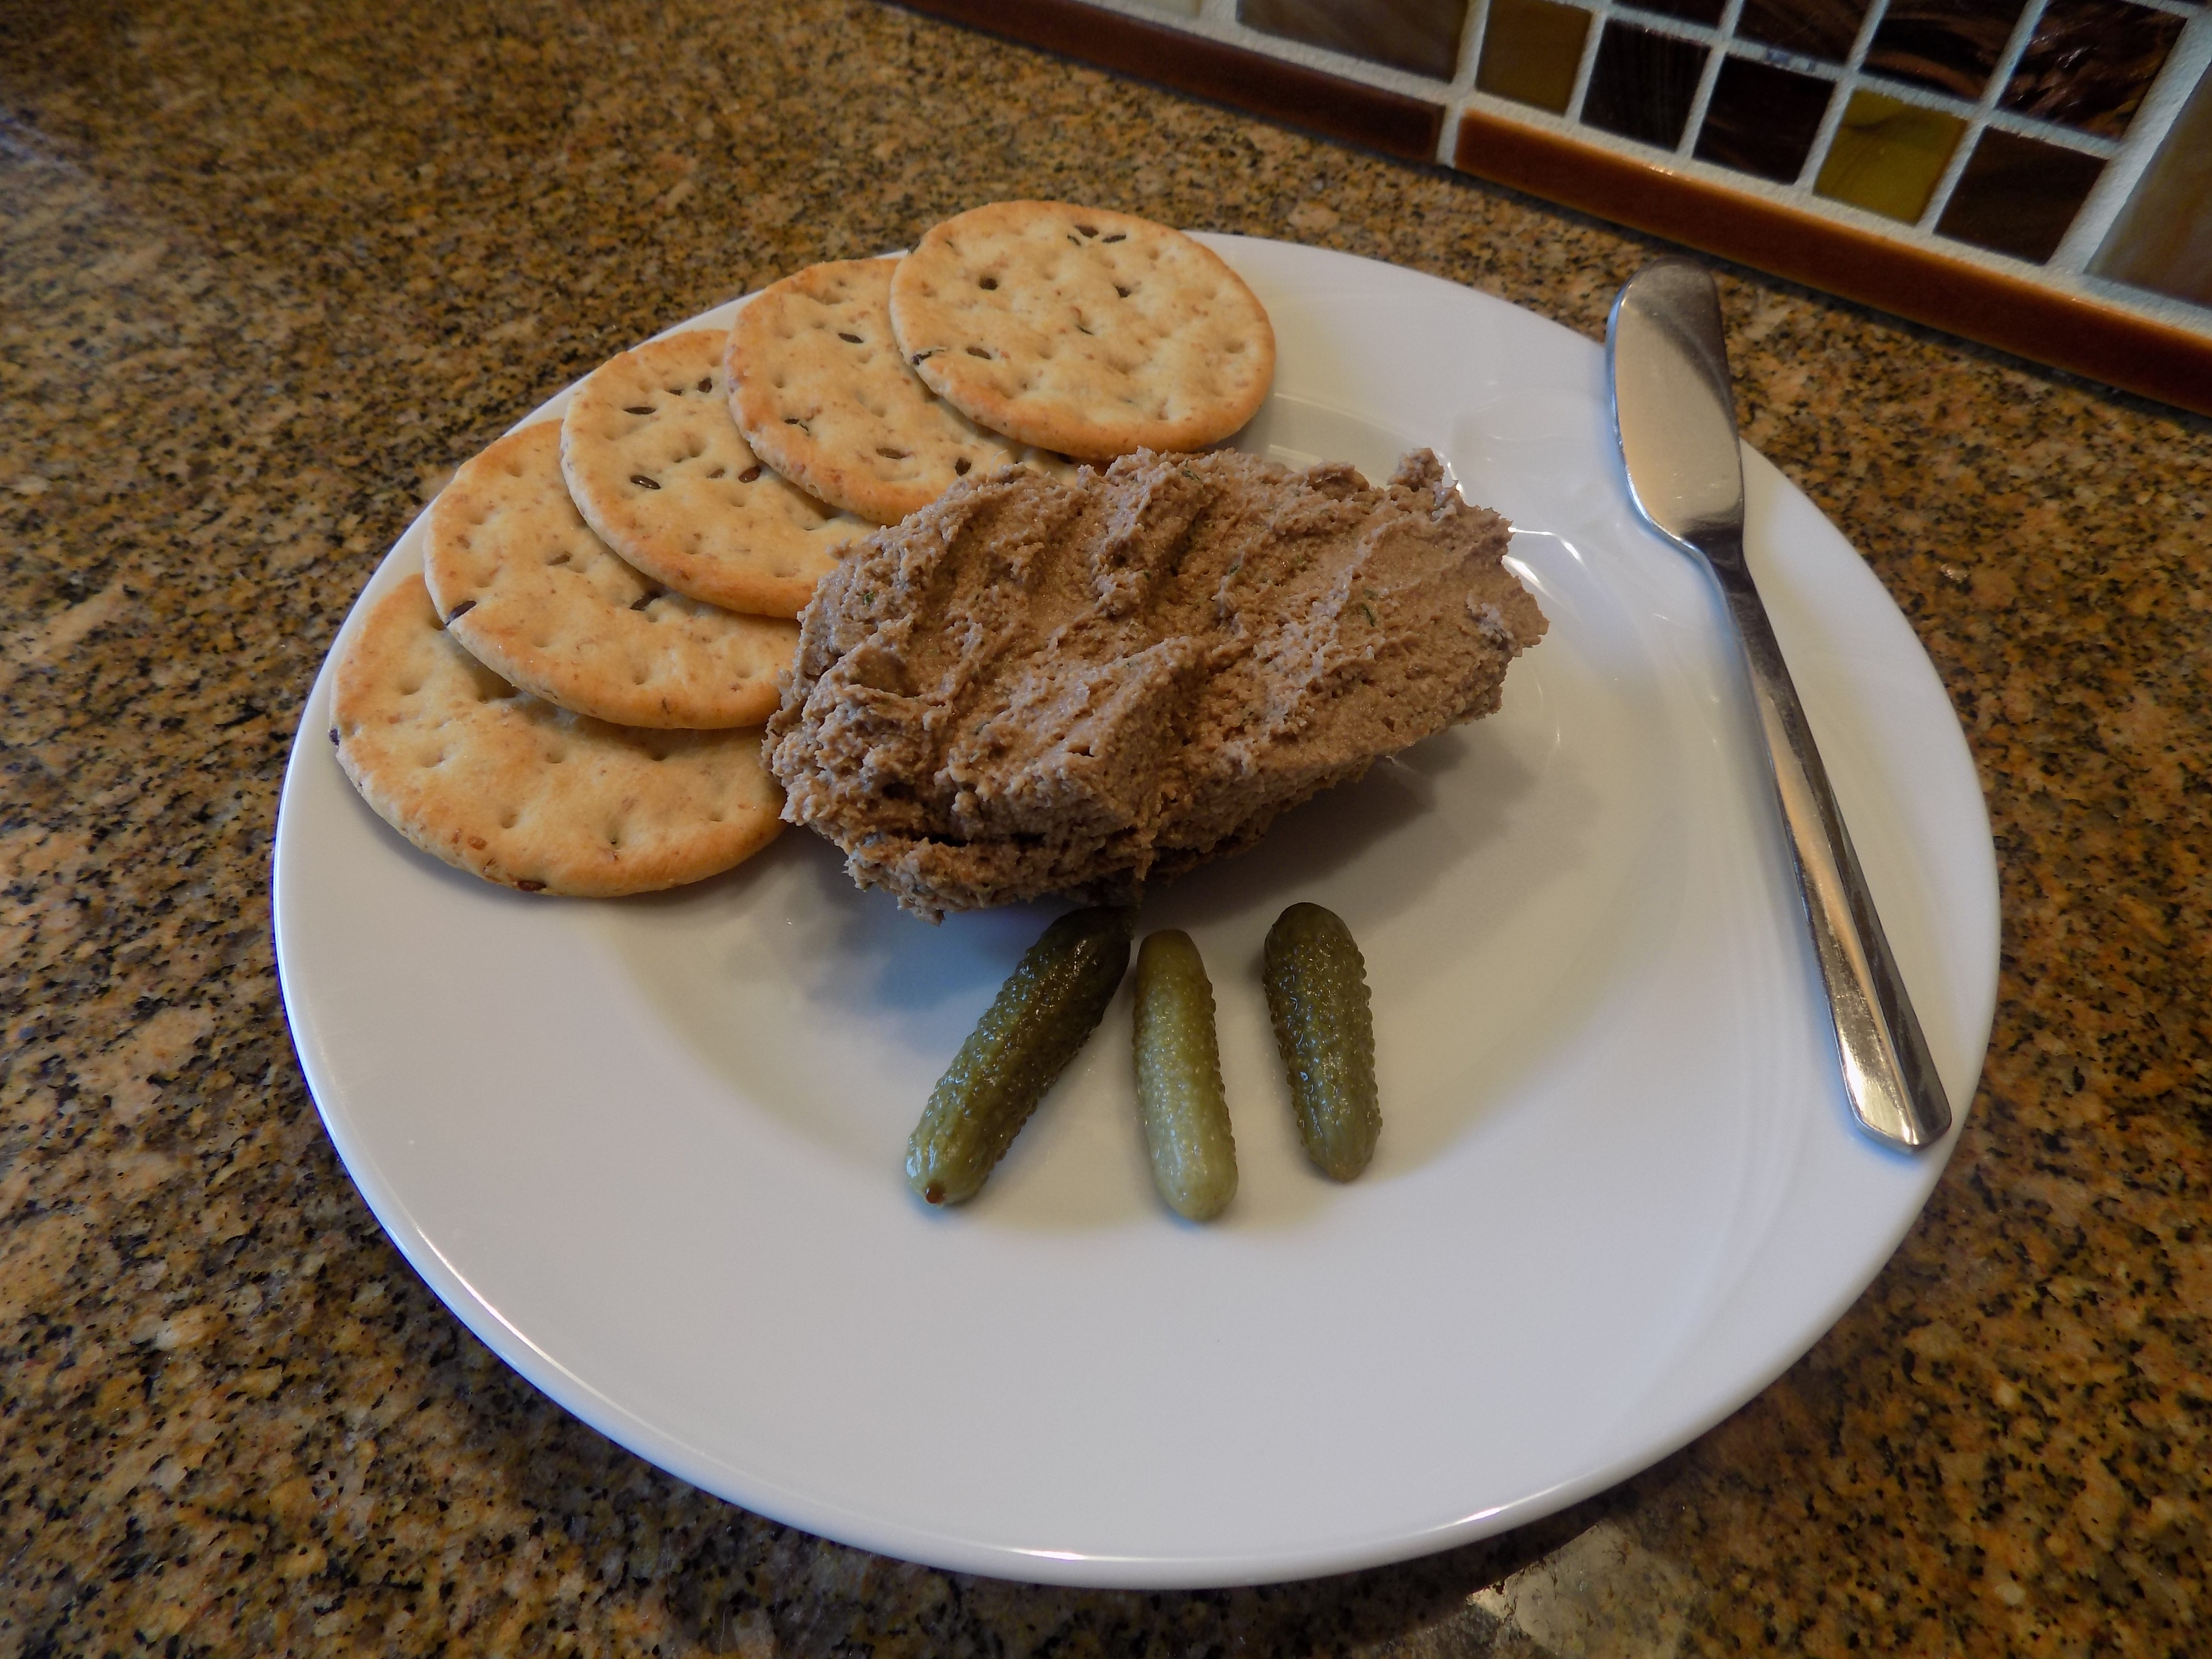
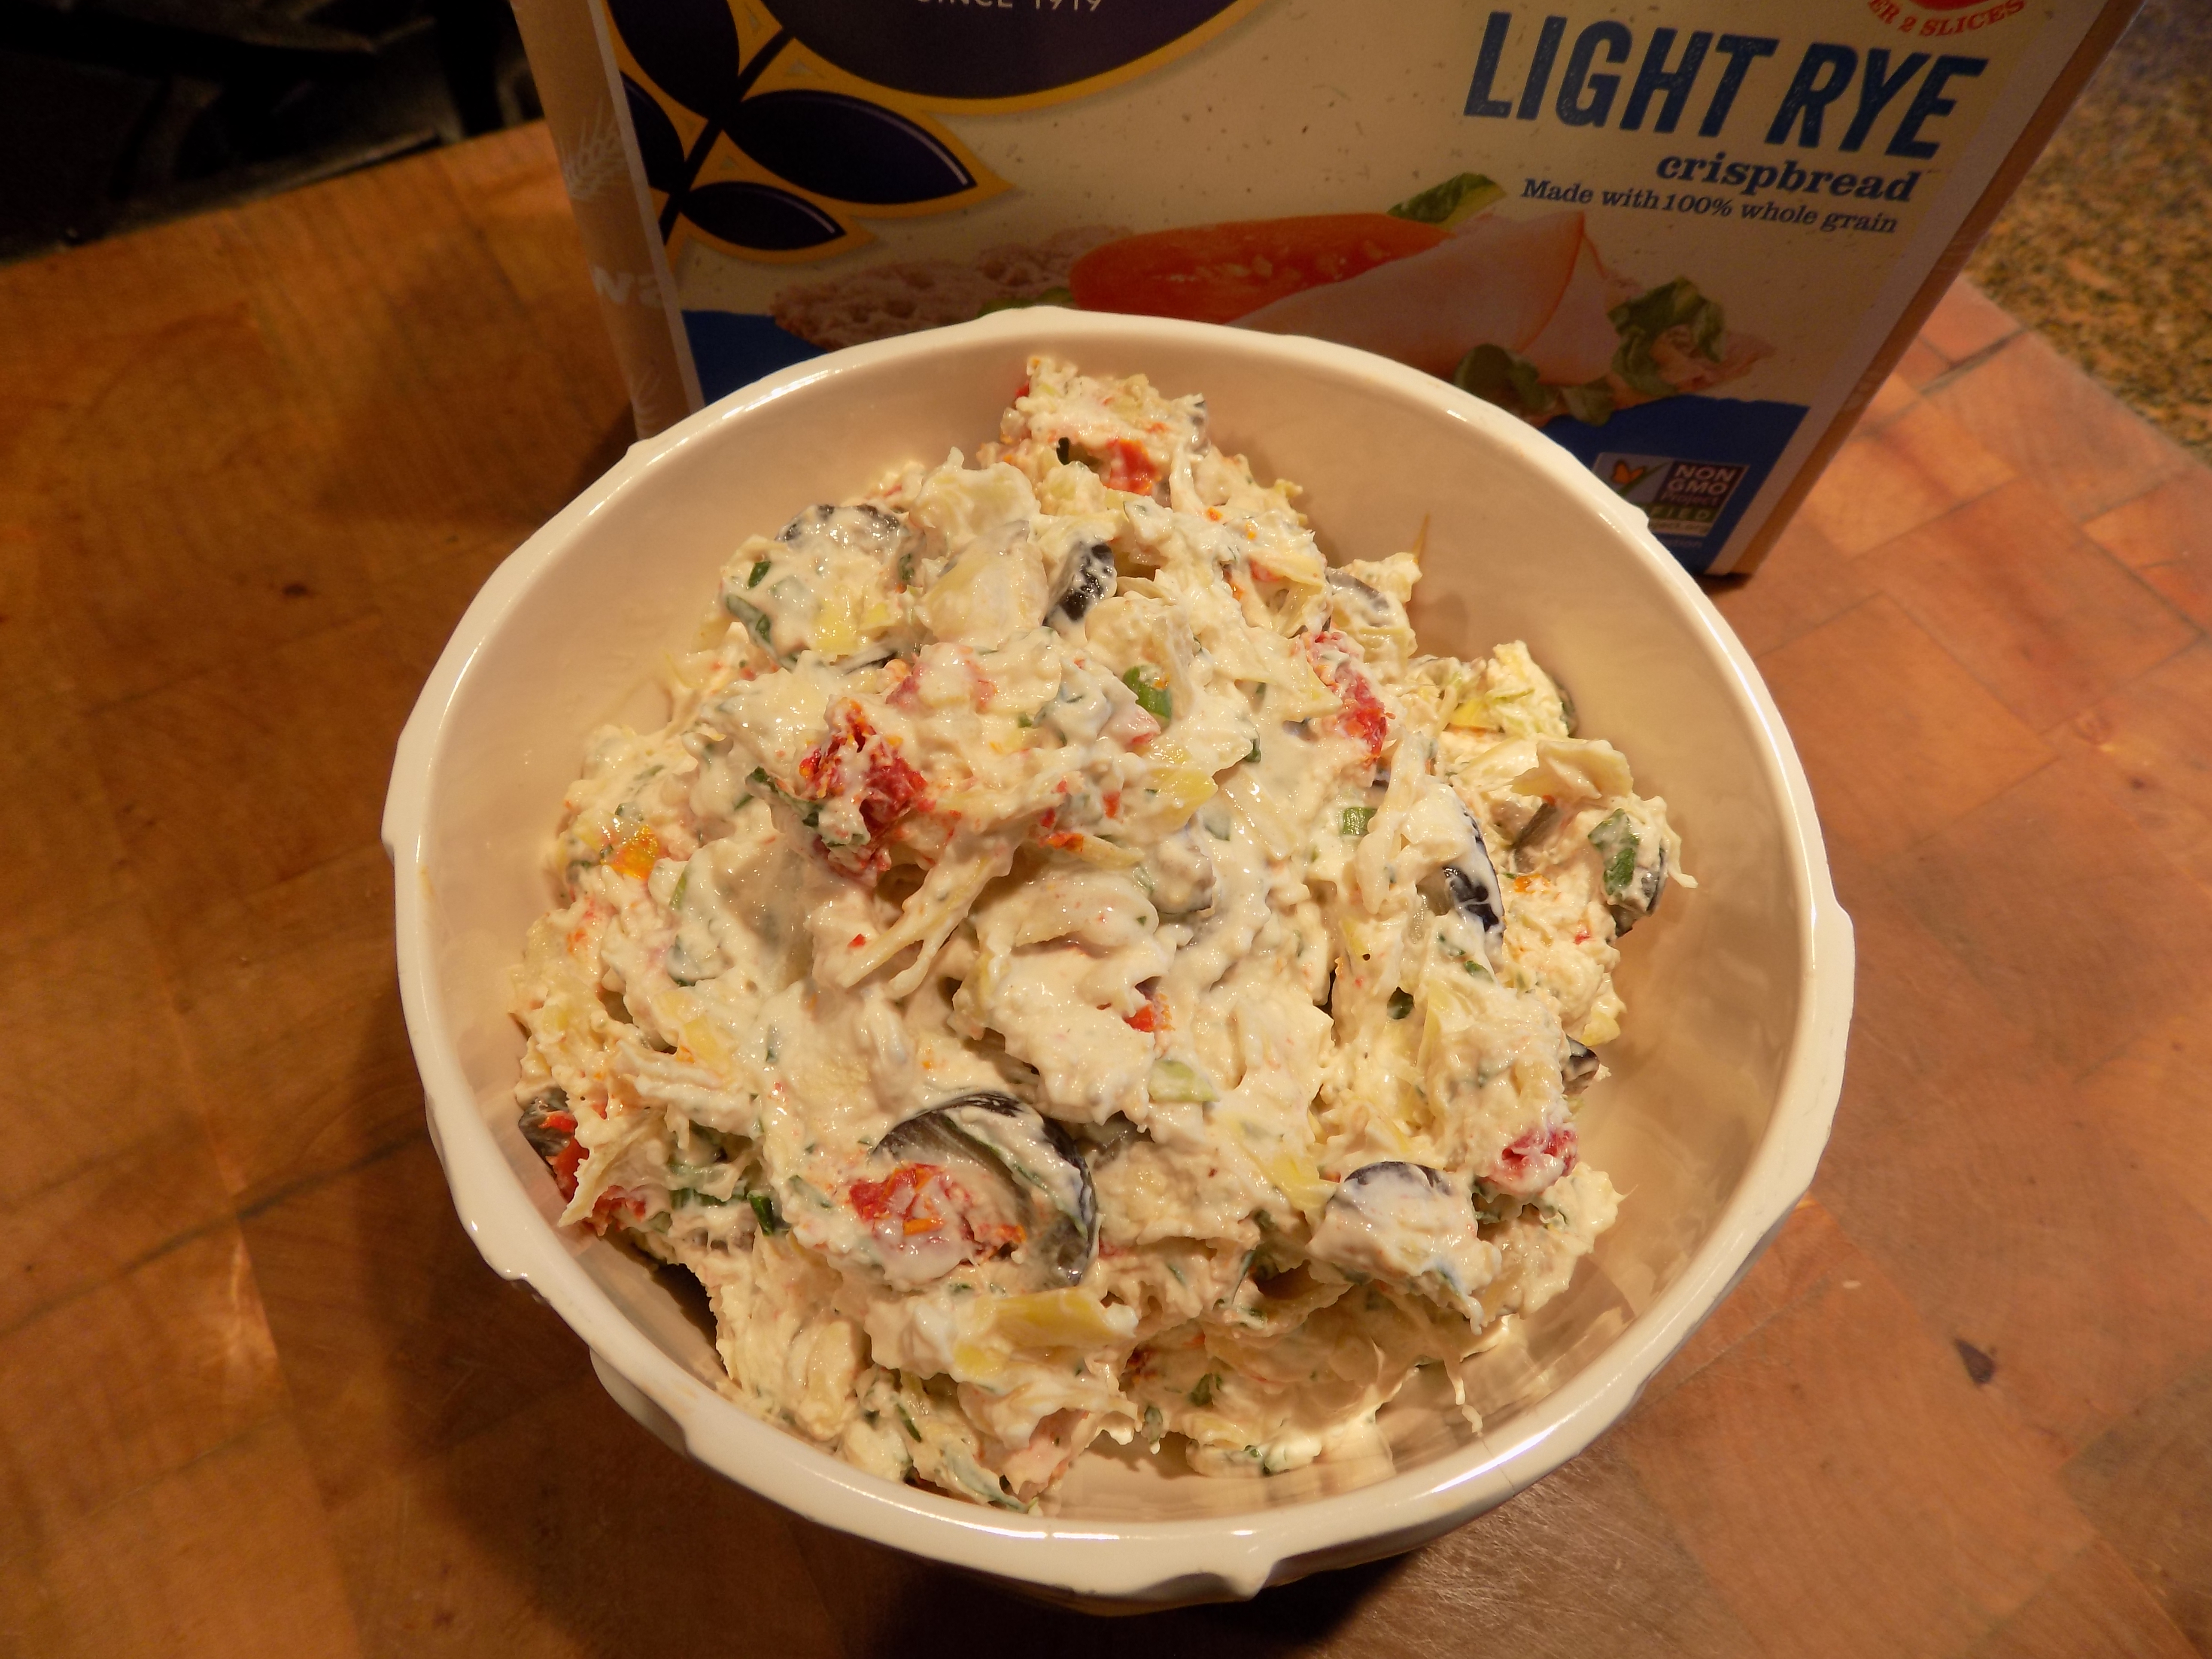
In the meantime, if you need a killer hors d’oeuvre to serve during the holidays, this recipe is perfect for a large crowd. Yes it takes some time to prepare, but you can do a lot of the prep work ahead of time. And as far as the Chimichurri Sauce goes, it’s amazing! Perfect with empanadas and killer on a beautifully grilled, medium rare steak. I tell you, Argentinians know how to eat. Some of the best food I ever ate was in Buenos Aires. Just sayin’!

For more information about leaf lard, read the attached article at the bottom of this post. Actually very interesting reading, especially for people like myself who previously thought Crisco was the be all and end all of flaky pastry! (It’s a generational thing!)

  • 6 c. unbleached all-purpose flour
  • 1 tsp. kosher salt
  • 1½ c. cold leaf lard* or 1½ c. unsalted butter (3 sticks) cut into small pieces
  • 3 eggs, divided (2 for the dough, 1 egg – white and yolk separated and both lightly whisked
  • ¾ c. milk, plus more as needed 

Mix the flour and salt in a large food processor. Add the lard and pulse until mixture resembles a coarse meal. Add 2 of the eggs and pulse until blended. Then add the ¾ cup milk. Pulse until a clumpy dough forms adding additional milk only as needed to obtain a soft, smooth, and elastic dough. (My food processor is not big enough for this much dough. But because it is such a simple recipe, I cut the ingredients in half and make two batches.)   

Split the dough into 2 large balls, flatten slightly into the shape of disks, cover with plastic wrap and chill at least 1 hour. After an hour, the dough can be used immediately or remain refrigerated until ready to use (1-2 days max).

Roll out dough into very thin sheets and cut out rounds, 3½ – 4-inch circumference for appetizers and 5 – 6- inch rounds for main dish empanadas. (Scraps can be clumped together, rolled out, and used for more empanadas.

Assembling and baking the empanadas:

To assemble the empanadas, place a spoonful of filling (see recipe below) on the middle of each empanada disc. (I use a small ice cream scoop to measure the amount of filling for each empanada.) The amount of filling varies depending on the size of the empanada. Hint: It’s much easier to seal an empanada that isn’t overstuffed.

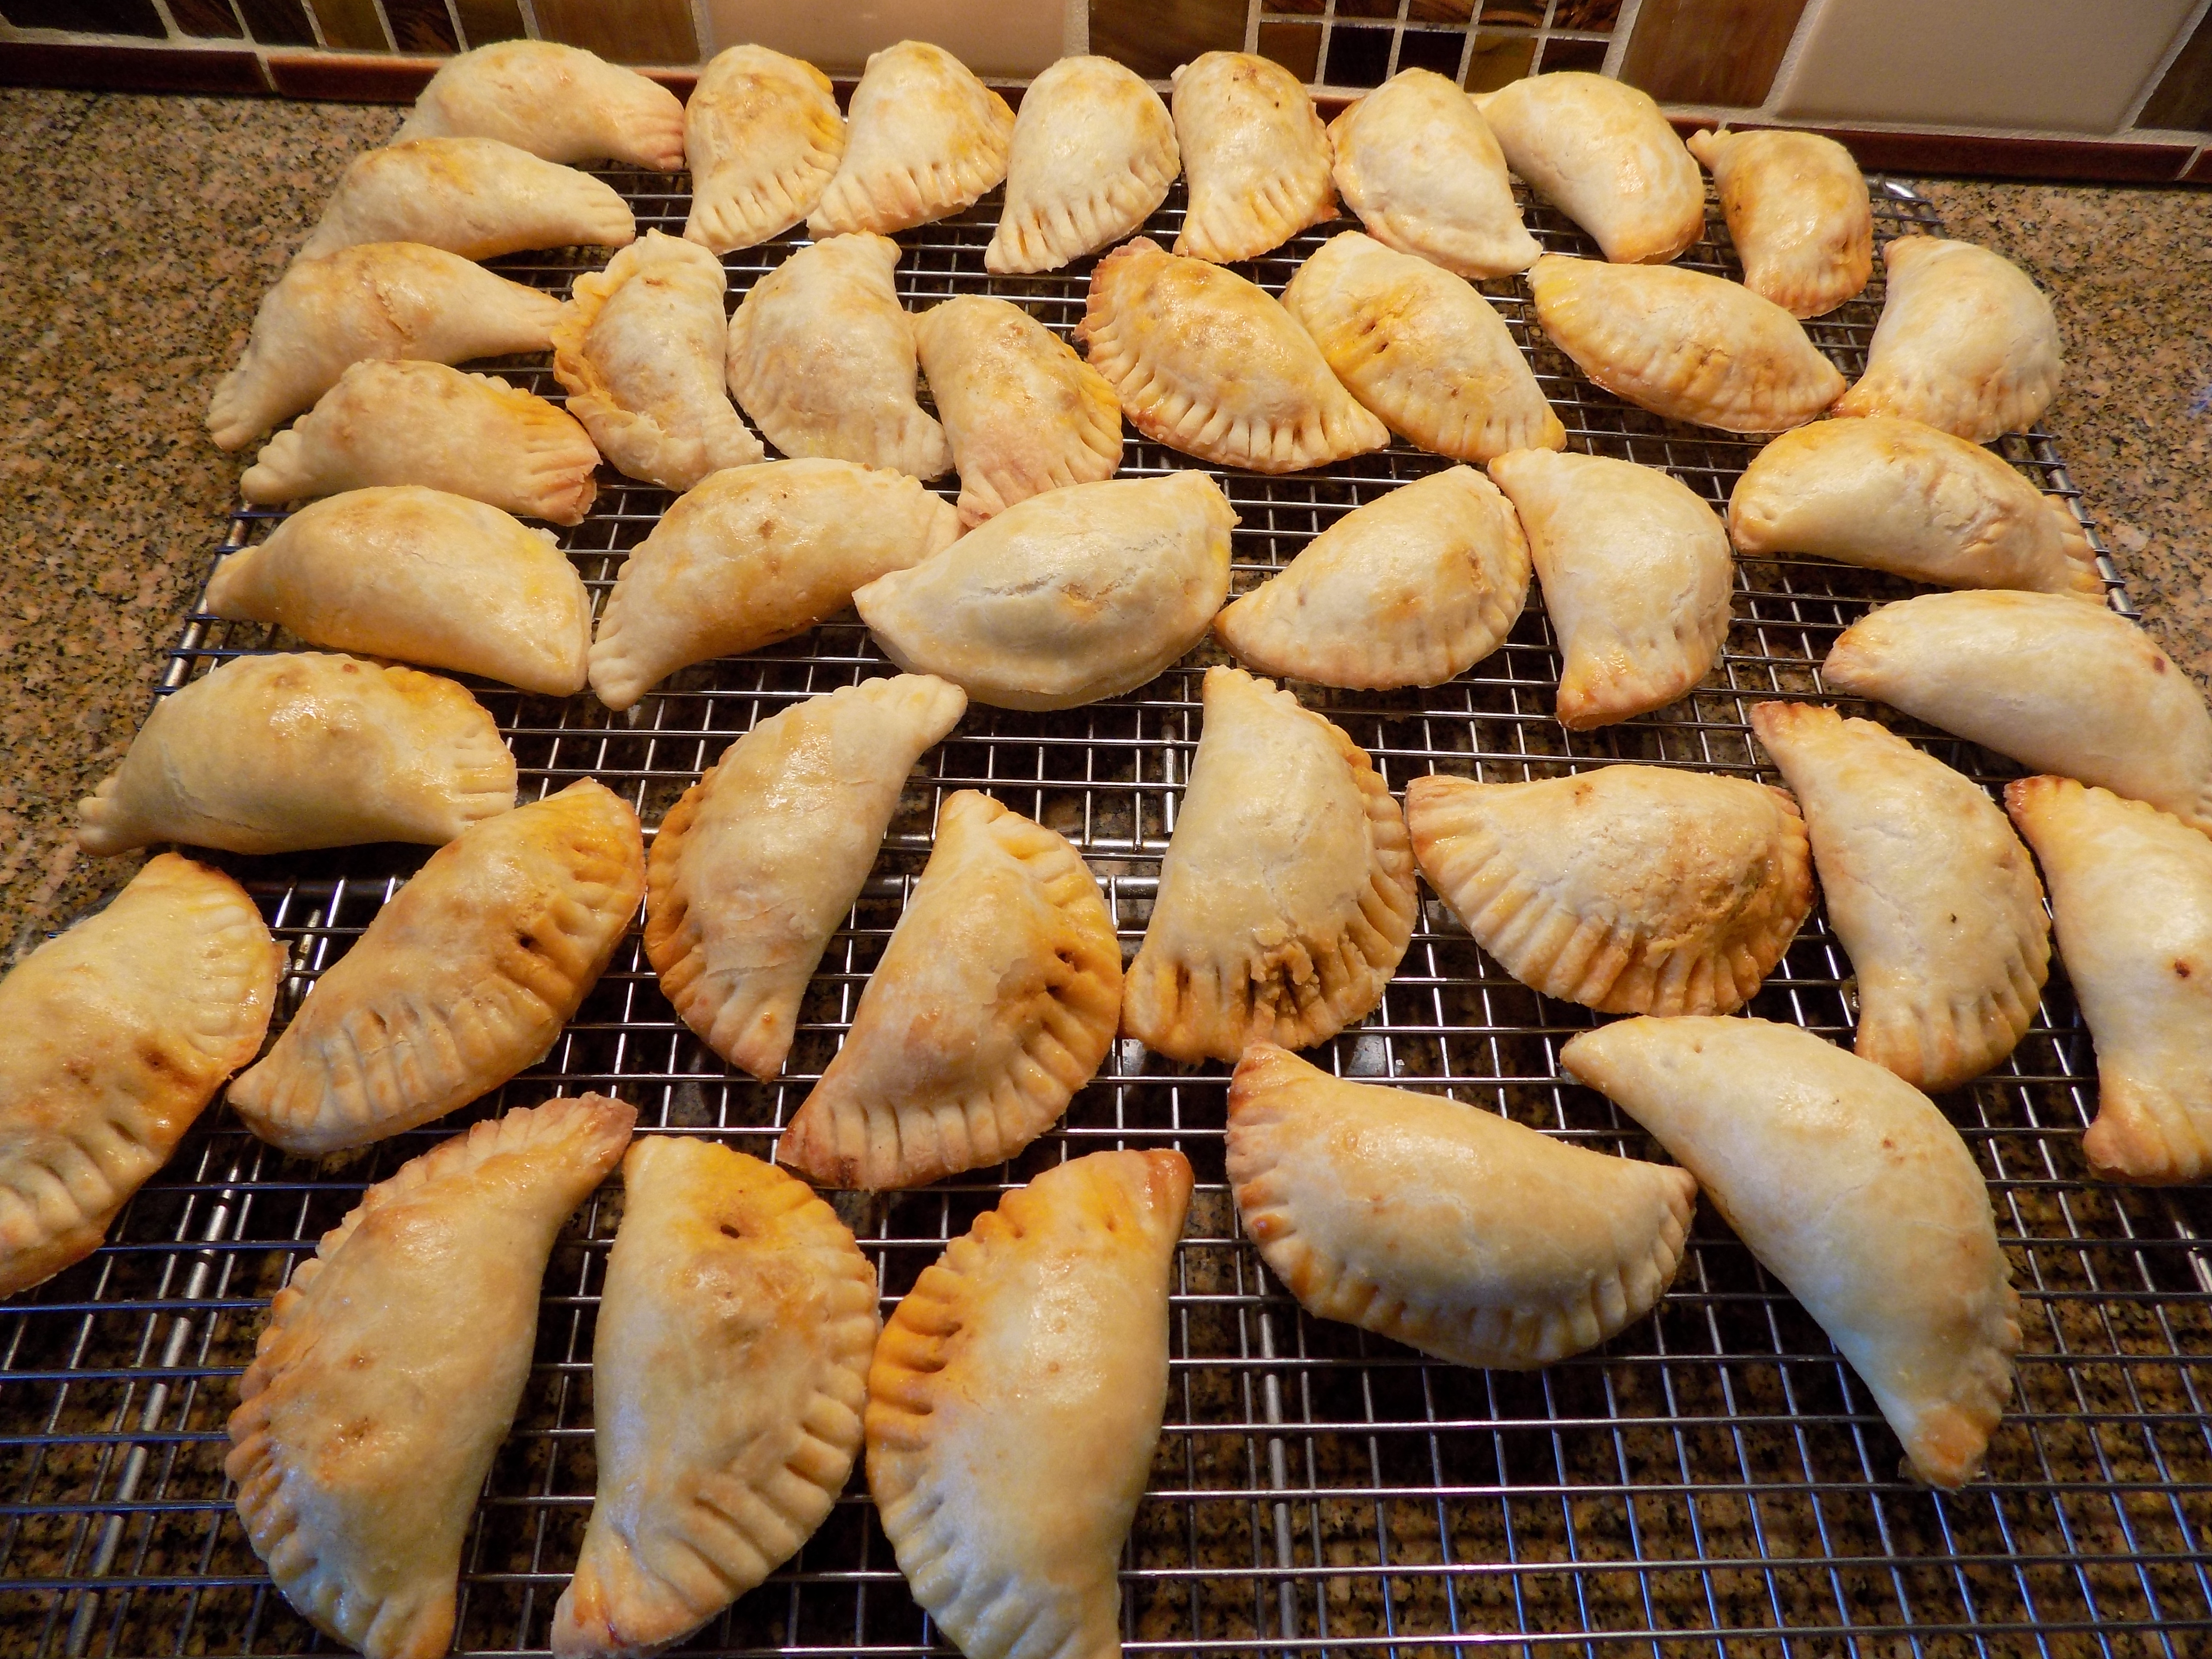
To seal the empanadas, brush half of the outside edge with a small amount of the beaten egg white, fold the other half over, and then use a fork to seal the edges. Simply press the tongs of the fork fairly lightly around the edge. When sealed, place about ½-inch apart on parchment paper lined baking pans small enough to fit in your refrigerator. After all the empanadas are formed, place pan(s) in refrigerate for at least 30 minutes before baking. (The time spent in cold storage helps the edges seal better and helps prevent the filling from leaking out.) Just before popping in the oven, lightly brush with the beaten egg yolk. 

Bake in a pre-heated 400 degree oven for about 20-24 minutes. The empanadas are done when they are a nice golden brown. Remove from oven and serve warm or allow to cool and store in an airtight container. Serve warm with Chimichurri Sauce (see recipe below).

Note: If you have a convection oven, use it for the last 10 minutes of baking time.

BEEF PICADILLO EMPANADAS 

  • ½ c. unsalted butter or lard
  • 1 lb. lean ground beef
  • 1 lg. onion, finely chopped
  • 3 cloves garlic, minced
  • 2 T. minced fresh parsley
  • 1 T. flour
  • 1 tsp. kosher salt
  • freshly ground black pepper
  • 1 T. smoked paprika
  • 2 tsp. chili powder, or more to taste
  • 1 tsp. dried oregano (I think Mexican oregano is the best)
  • 1½ tsp. ground cumin
  • 1 bunch green onions, very finely chopped
  • ½ c. golden raisins, coarsely chopped
  • ½ c. pimento stuffed green olives, coarsely chopped

Melt the butter in a large frying pan. Add the ground beef and onion; stir fry until the meat is no longer red and the onion is tender. (Break the meat apart as it cooks.) Add the garlic and parsley; cook for one minute. Stir in the flour and continue cooking for a couple of minutes.

Remove from heat and stir in the salt, pepper, paprika, chili powder, oregano, and cumin. Let cool before stirring in the green onions, raisins, and green olives. Taste and adjust seasoning if required. Refrigerate until ready to use. 
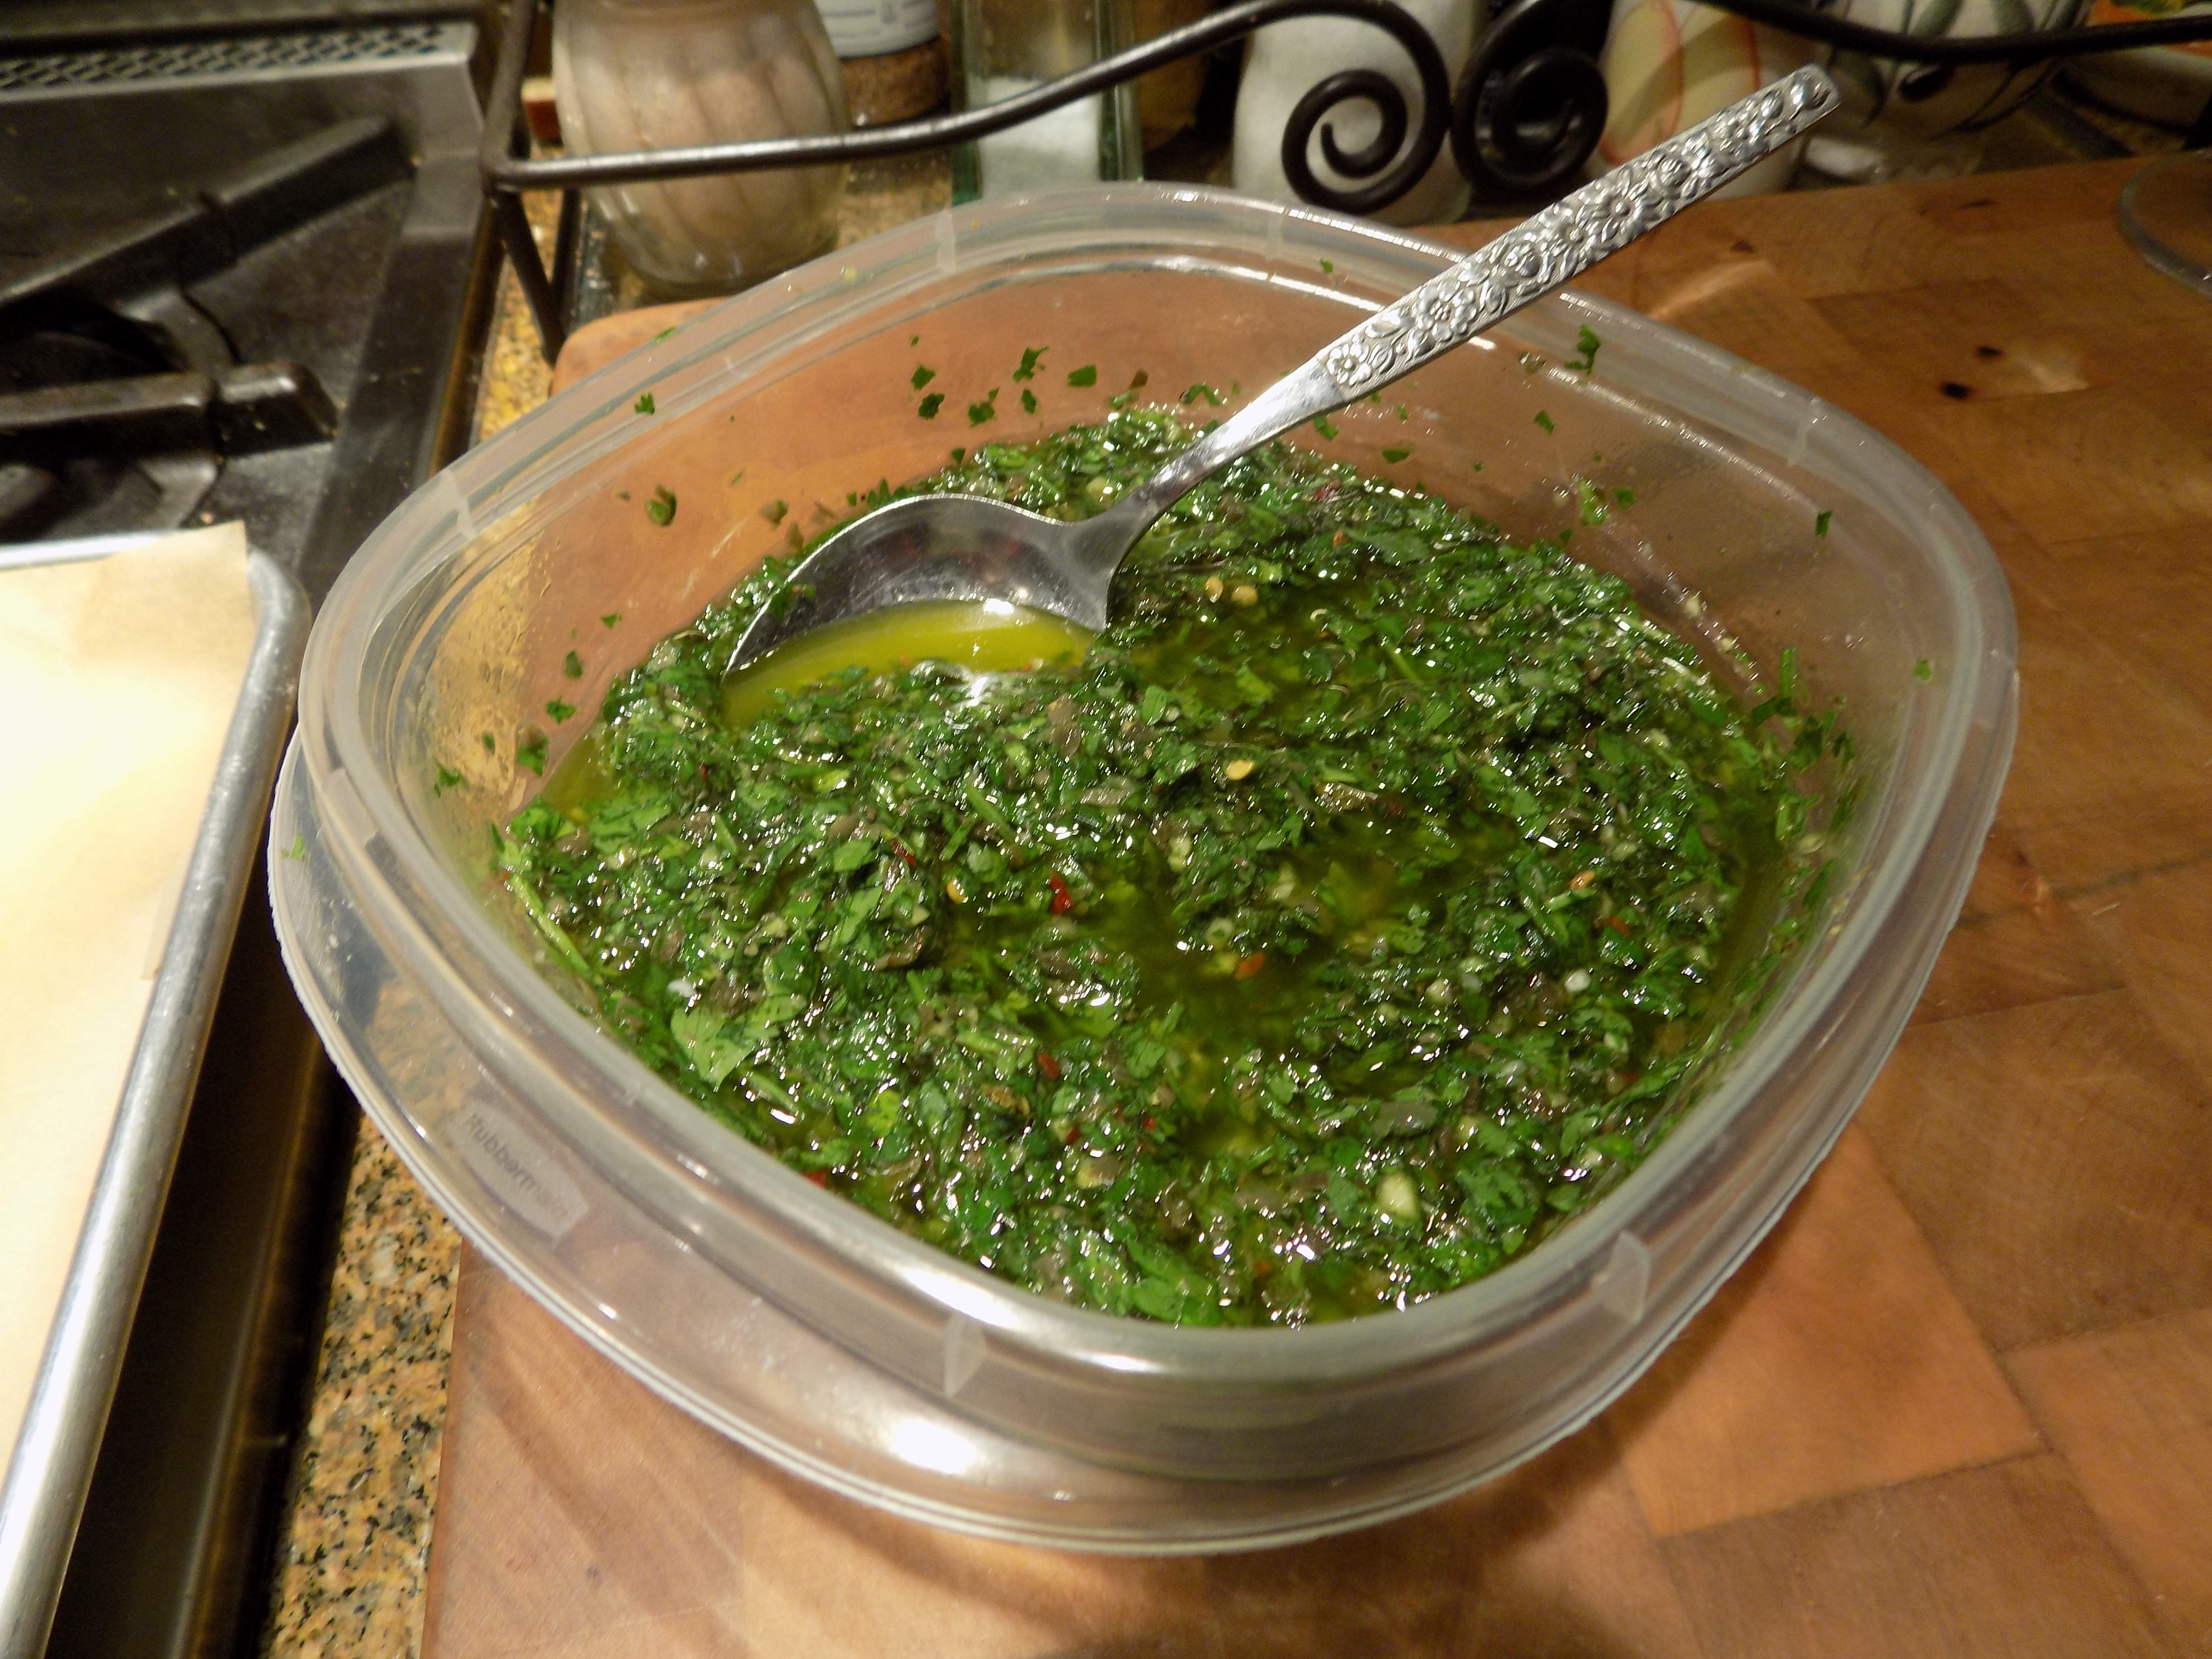
CHIMICHURRI SAUCE

  • 2 T. drained capers
  • 2 garlic cloves, rough chopped
  • 1 bunch Italian parsley
  • ½ bunch cilantro
  • 2 T. red wine vinegar
  • 1 tsp. kosher salt
  • freshly ground black pepper
  • ½ tsp. dried oregano (Mexican is best)
  • ¼ tsp. crushed red pepper flakes
  • ½ c. extra virgin olive oil

Place capers and garlic in the bowl of a food processor. Whirl until finely chopped. Add the parsley and cilantro and pulse 4-6 times to rough chop the leaves. (Don’t over process.) Transfer to a bowl. Stir in the vinegar, salt, pepper, oregano, crushed red pepper flakes, and olive oil.  Taste and adjust the salt and pepper as needed.  

Refrigerate until ready to use (preferably the same day).  

*From The Spruce: “Leaf lard is the highest grade of various types of lard. All lard is rendered pork fat; the term is usually used to refer to rendered pork fat suitable for cooking. Leaf lard specifically comes from the visceral, or soft, fat from around the kidneys and loin of the pig. As such, it has a very soft, super spreadable consistency at room temperature.

Like all types of lard, leaf lard has a high smoking point, making it an excellent choice for frying, pan-searing, and even grilling. Also, while leaf lard doesn’t have the porky flavor of caul fat, it does have a gentle back-note of subtle, gentle meatiness that hydrogenated lard lacks. So leaf lard is a good choice when you want that high smoking point, but you don’t want the final product to taste like pork. Two example that pop to mind: frying homemade doughnuts and making homemade French fries.

Due to its natural moisture content and mild flavor, leaf lard is particularly prized by bakers for use in producing flavorful and flaky pie crusts. Yes, pie crusts.

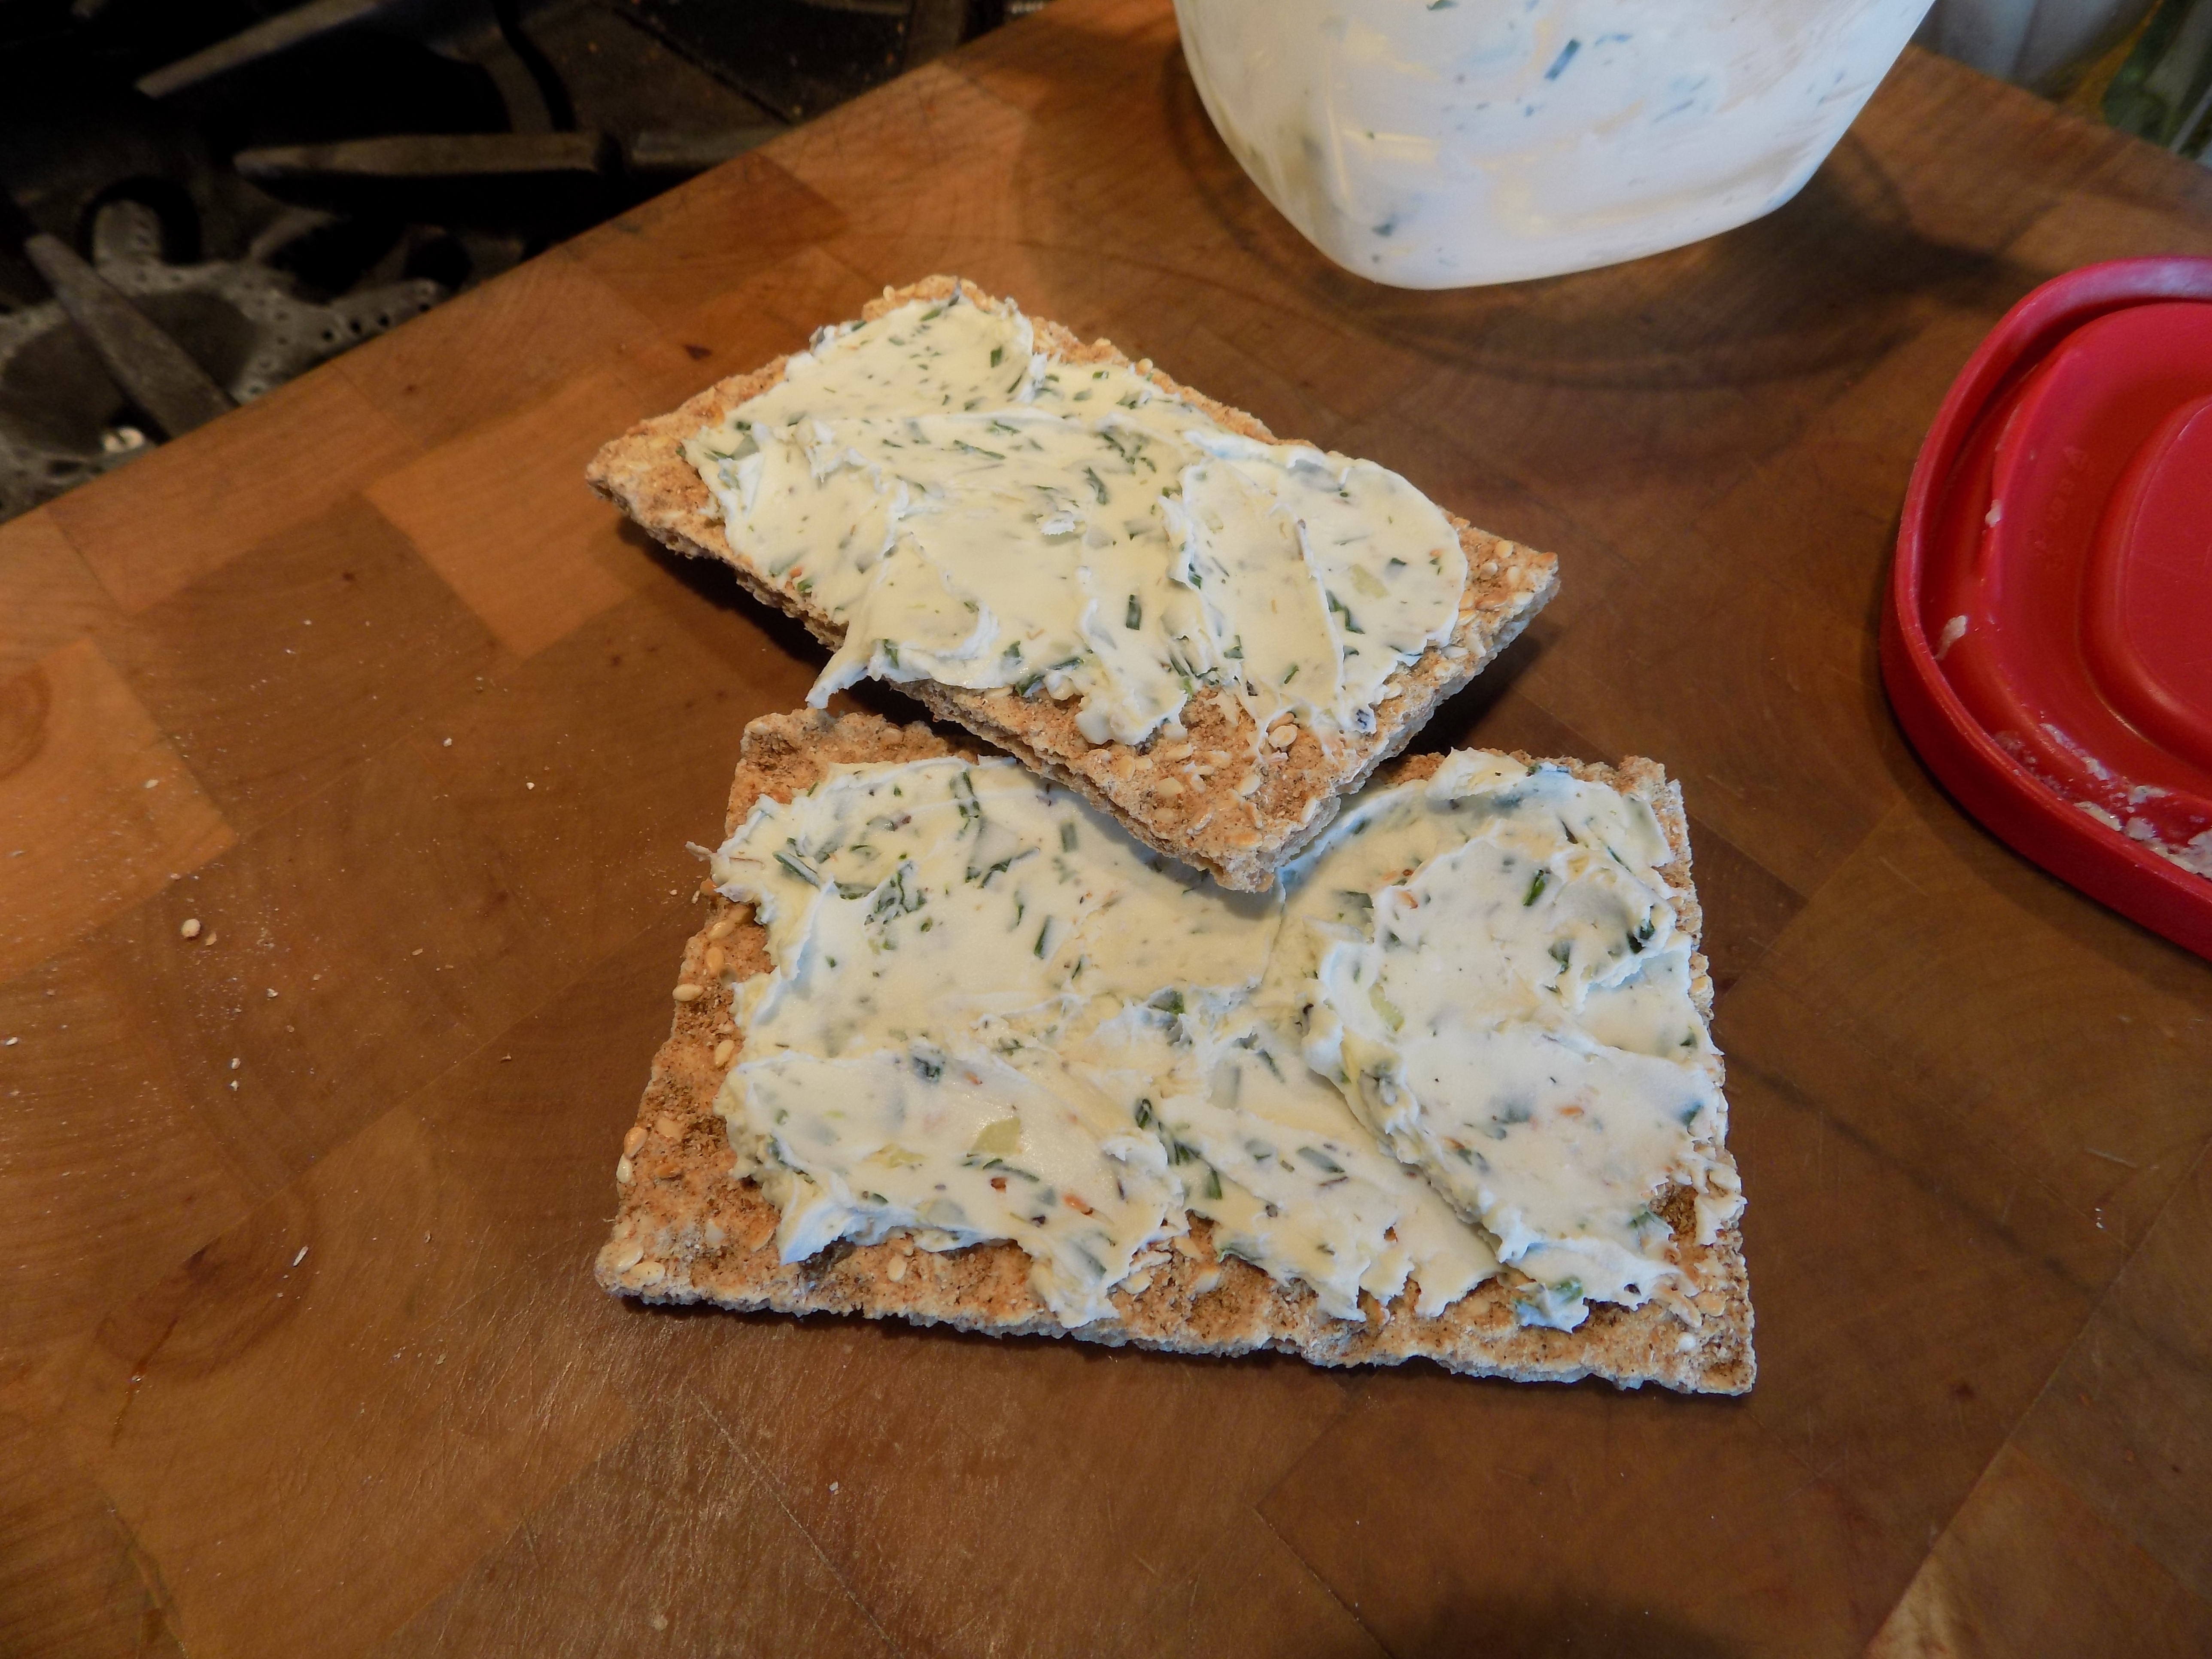
True lard-ophiles may even choose to spread leaf lard on bread. Add a sprinkle of salt and you’ll see why it’s common practice in some regions of the world.”


According to Danelle Wolford, former nurse, and I quote, “the three main reasons to cook with lard are:

LARD IS AS HEALTHY AS OLIVE OIL!

When compared with olive oil, lard is a close second in the monounsaturated fat department! Olive oil has about 77% monounsaturated fat, with lard at 48% monounsaturated fat. Butter ranks third with 30% monounsaturated fat and coconut oil is last at 6%. The main fat in lard (oleic acid) is a fatty acid associated with decreased risk of depression. A 2005 study from Thailand also reported that oleic acid has high anti-cancer benefits and can decrease your risk of breast cancer. Those same monounsaturated fats, are responsible for lowering LDL levels while leaving HDL (“good”) cholesterol levels alone. Shocking, right?

Lard also contains high amounts of Vitamin D, a necessary fat-soluble vitamin. It is estimated that 1 tablespoon of lard contains 1000 IU of Vitamin D! As a society, we are extremely deficient in Vitamin D. As a powerful immunity booster, the intake of Vitamin D can prevent those frequent colds and flu in your home each year. Our family caught a cold ONE time this year. ONCE. We eat A LOT of Vitamin D in our household because we believe that instead of buying a Vitamin D supplement (a processed, synthetic version of the vitamin), we try to eat the real stuff.

If you think you can get Vitamin D from plants, you are right. You can get some, but nothing comes close to lard! Mushrooms are the ONLY plant source of Vitamin D, with about 21 IU per mushroom. Personally I’d rather cook with a tablespoon of lard rather than eat 50 mushrooms every day. But that’s just me.

If you think you can get Vitamin D from the sun, you are right, again. But, the problem is, humans aren’t too efficient at assimilating Vitamin D from the sun. At the recommended 20-30 minutes of sun exposure per day you will only receive 100-200 IU. Pigs, on the other hand, are super-heroes at absorbing Vitamin D. This is why so much is stored in the fat under their skin.

Vitamin D aids in the absorption of calcium. Vitamin D will also aid in the removal of harmful toxic metals such as cadmium, aluminum, strontium. But one of the most important tasks of Vitamin D is hormone production and regulation. When you remember that many processes in the body are performed by hormones, you can see why it’s so important to include lard into your diet. Problems with your adrenals that can be manifested as fibromyalgia, problems with your thyroid that can be manifested as hypothyroidism, and problems with your sex hormones that can be manifested as infertility are all related to your deficiency in fat-soluble Vitamin D. The natural food sources that God has placed on earth contain these.

LARD MAKES EVERY RECIPE BETTER!

We use lard to make crispy fried chicken, make deliciously flaky pies, and cooking a simple food like eggs or hash browns. Lard isn’t smelly. It’s divine! Food was meant to be enjoyed! And trust me, lard makes EVERYTHING taste a little better.

LARD IS NATURAL and SUSTAINABLE

If you were to raise a pig in your backyard and butcher it when it’s about 250 pounds, you’d most likely get about 15-20 lbs. of lard. It would take about 6-9 months to raise a pig to market weight, so if your family ate about 1 pig a year, you can guess that eating 15-20 lbs. of lard per year would be a natural and sustainable amount. For our family of four, we eat about a pound of lard a month so about 12 pounds a year.”


SHRIMP APPETIZER OR MAIN COURSE SALAD

I love shrimp salad. But I don’t much care for the tiny, pre-cooked shrimp that are labeled “salad shrimp”. I prefer the nice big guys, lovingly sautéed just before adding to whatever version of a shrimp salad I happen to be preparing at the time. And yes I do know that the biggies are more expensive, but I’d rather have less shrimp if push comes to shove.

So, when good friends Jim and Margo invited us to dinner a couple weeks ago, and I asked what I could contribute, Jim said “how about an appetizer salad?” I said “how about a shrimp salad” and he said yes!!

So this is the result.

And if I do say so myself, it turned out pretty darn tasty. Plus it was very easy to prepare. (I just love it when a recipe comes together and it works! But believe me, that doesn’t always happen. Sometimes I try a dish, and although it is edible, it’s not something I ever want to serve again or pass on to my readers.)  But this recipe is a keeper. It’s terribly elegant when served as an appetizer and just plain wonderful when served as a main dish salad.

Speaking of main dish salads, I simply must tell you about eating a salad for dinner while on our recent trailer trip to British Columbia. (You can stop reading now if all you care about is this recipe. But if you want to hear a bit more about our recent trailer trip, continue reading at your own peril.)

As the pictures below show, we had a fabulous campsite at BCs Juniper Beach Provincial Park on the banks of the Thompson River. Ideal setting with the river so close, but not the ideal backdrop for a quiet dinner. I say, not quiet, because just across the river the main east/west line of the Canadian Pacific Railroad runs about 30 trains over any 24 hour period. And on the side of the river where we were camped, the Canadian National Railroad runs another 30 or so trains a day on their own east/west main line. So in case you are mathematically challenged, that’s a total of about 60 trains blasting our camp site with noise during every 24 hour period. And these are not dainty little trains. These are all incredibly long mother bear trains! Mr. C. counted the cars on a good number of the trains. The longest was 230 cars long! I kid you not! The average size was only about 150 cars long. Only! And many of the cars we counted had a second container on top of the one that was riding the rails. We didn’t even bother counting the second tier freight cars. It was just too overwhelming.

We were at Jupiter Beach for three nights and the trains won, hands down! Before camping at this park, I absolutely adored the clickety-clack of trains, especially at night. But after this episode with the trains from hell, I feel like a new mother just having gone through a difficult childbirth and saying to herself and anyone else who would listen, that never again would she subject herself to such an experience! But I suppose, like childbirth, the memory of “the trains” will fade and I will once again be able to look at a train and not flinch. I hope so. Because for 73 years I have loved trains with a passion. I hope to get back to that place, but frankly only time will tell. (Mr. C. thinks I’m suffering from PTTD (Post Traumatic Train Disorder), and I think he may be right. But good news. I recently read that gin helps with this disorder, so that’s encouraging. If gin truly is the wonder treatment, I should be fine in no time. I’ll let you know if it works.) Enjoy the recipe.

  • 1 T. unsalted butter
  • 1 lb. lg. uncooked shrimp
  • ½ tsp. seasoned salt
  • 1 shallot, minced
  • 1 celery stalk, finely diced
  • ½ c. finely diced red, yellow, or orange bell pepper (or combination of peppers)
  • juice of ½ lg. lime
  • 2 T. mayonnaise
  • freshly ground black pepper
  • 1 tsp. Old Bay Seasoning
  • dash hot sauce or 1 jalapeño, seeds and veins removed and finely diced
  • 1 tomato, seeded and diced
  • 1 Hass avocado, diced
  • romaine or Bibb lettuce leaves

Heat the butter in a medium-large fry pan. Add the shrimp and sprinkle on the seasoned salt. Sauté until the shrimp are just done. Do not overcook. Remove the pan from heat and set aside. Rough chop the shrimp when they are cool.

In a medium sized bowl combine the shallot, celery, bell pepper, lime juice, mayonnaise, salt, pepper, Old Bay Seasoning, and dash of hot sauce/diced jalapeño. Let stand for at least 5 minutes to allow flavors to blend. Taste and adjust seasoning. Gently fold in the chopped shrimp, tomato, and avocado. Adjust seasonings and serve as an appetizer either wrapped in lettuce leaves, heaped on one lettuce leaf, or over cut salad leaves. (See picture above.) Or serve as a main dish salad (see picture below) with whatever amount of cut lettuce you want stirred in with the other ingredients.


RANCH DRESSING AND DIP

Yes, I know. There is just something terribly ordinary about ranch dressing. So call me “ord” for short. Unlike some people’s incorrect perception of my culinary tastes, I am a devoted fan of ordinary food. Really fabulous ordinary food you realize, but still common and easily prepared or obtained.  I love burgers and mac and cheese and almost anything homemade. I’m actually uncomfortable in a restaurant when the entrée is over $30. I do dine at fancy restaurants, albeit infrequently, but only for special occasions. Then, while eating the “whatever”, I entertain myself by analyzing the cost of the ingredients in the dish or dishes I am eating. (And yes, I do consider the time it took to prepare the dish.) With few exceptions, I usually find that what we patrons are actually paying for is the bragging right. “We dined at Le Rip-Off Bistro last evening. It was marvelous, simply marvelous!”

If the food is actually amazing, I can forgive the price tag. Well at least a little bit. But if the food is mediocre, it not only depresses me; it makes me mad! Now, how fun is that? So I am usually better off dining at a restaurant where the food is good, but the term gourmet would never enter my head. So, having shared with you more than you ever wanted to know about me, let’s get on with this recipe.

The other evening, all I wanted as a side dish was a simple romaine and tomato salad with ranch dressing. So I proceeded with a basic recipe I had found in Sunset about 100 years ago, and added a couple of my own touches. The dressing turned out really, really good. Then we had our good buddies Jim and Margo over for dinner a couple nights ago, and I served the leftover dressing as a dip for crudité. (Just thought I’d use the cool French word for cut veggies just to prove I’m not totally lacking in culinary prowess! Don’t want to lose my gourmet fans after all!)

Anyway, enough blather. Just give this recipe a try. Use it as a dip or a salad dressing. Your choice. And if the mixture is a little too thick for the style of salad dressing you prefer, add a tiny bit more milk.

  • ½ c. sour cream (I use Mexican style)
  • 1/3 c. buttermilk (I use Bulgarian style)
  • 1 T. mayonnaise (I use Best Foods light)
  • 1 garlic clove, finely minced
  • ½ tsp. Worcestershire sauce
  • 1 tsp. dried dill weed
  • 1 tsp. dried parsley
  • 1 tsp. chopped dried chives, opt.
  • ¼ tsp. seasoned salt, or more to taste
  • freshly ground black pepper

Combine all the ingredients in a small jar; whisk until combined. Adjust seasoning. Refrigerate until needed.


CHILES RELLENOS CASSEROLE

OK, there are days (I hate to admit this) when I simply don’t want to cook dinner. All I want is to go out to eat! Practically anywhere! Just – out! And really, there need be no good reason for my lethargy towards dinner preparation on these days. I just know I don’t want to cook, mainly because my inspiration level is on empty.  Plus nothing sounds good. On those days what I need is for someone else to give me dinner suggestions (menu), do the prep work (cook), and clean up the mess (kitchen help). Not that Mr. C. doesn’t do the dishes after meals. He does. Actually, he is a marvel at efficiency when it comes to meal clean up. It’s just that some evenings I don’t even want him to spend time in the kitchen. I know – crazy.  So usually, on these occasions, we simply go out.

But then there are the times when I can’t even decide where I want to go. And the thought of putting on lipstick and driving more than 15 minutes seems way too onerous to even contemplate. (There aren’t an abundance of good restaurant choices near our home you see.) So when this happens, and it’s happening more regularly the older I get, I usually bite the bullet and fix the easiest and most delicious thing I can think of to prepare. And this dish fits the bill perfectly.

Now after looking at this recipe you are going to want to say to me “Patti, that looks like the most fattening conglomeration of ingredients I can imagine putting in my mouth”. And you know what? You’d be right! It is a cholesterol bombshell! But you know what else; it is heaven in a pan. And this heavenly concoction can be thrown together in under 15 minutes. (Of course there is the baking time. But who cares. While the casserole is in the oven you’ll have plenty of time to relax and have a nice adult beverage.)

So what to fix to go along with this caloric wonder? Well how about chicken dinner sausages, fresh from your freezer? And a simple little green salad with olive oil and vinegar dressing. Again, quick, easy, and delectable.

So the other evening when inertia had me firmly in its grip, I fixed this casserole, grilled some defrosted sausages, and made a simple little salad of romaine, red onion, tomatoes, marinated black olives, and lots of basil tossed with a simple vinaigrette. The whole meal took less time to prepare than the time I had already spent thinking about where I might want to go for dinner. Isn’t that pathetic?!?! (The things you learn about me through this blog.) Luckily for you, whatever I’ve got can’t be transmitted through the internet. So you can safely catch my drift, but not my silliness! Tiddely Pom*

  • 3 c. (12-oz.) grated Monterey or Pepper Jack cheese
  • 1½ c. (6-oz.) grated sharp cheddar cheese
  • 1 (7-oz.) can diced mild green chilies, drained if packed in water
  • 1 T. flour
  • 2 T. milk
  • 2 eggs

Combine the cheeses and place half of the mixture in a lightly greased 9×13-inch pan. Sprinkle the green chilies over the cheese. Sprinkle on the remaining cheese.

Whisk together the flour and milk. Add the eggs and beat until smooth. Pour over the cheeses and egg mixture.

Bake in a pre-heated 375 degree oven for 50-60 minutes or until firm and brown on top, sides, and bottom. Remove from oven and let sit for 5-8 minutes. Cut into small pieces for appetizer bites or larger pieces when serving as a side dish or main course.

*Don’t know the term Tiddely Pom? Look it up.

BREAKFAST EGG SALAD OR DEVILED EGGS WITH BACON

So, periodically fate steps in between me and my good intentions. This time, my intention was to make Breakfast Deviled Eggs with Bacon for a recent brunch I was hosting. Right!! And because I had planned very carefully and purchased my eggs the week before they were to be boiled and peeled, I thought peeling the eggs would be a snap. Wrong!! I must have purchased the freshest eggs in the greater Seattle area. Because not one (not even one) out of the 16 eggs I boiled peeled like it should have! I was so disgusted. (And yes I boiled them the way I always do, so it wasn’t my fault! It was the darned eggs fault! My story and I’m sticking to it!) So what to do with 16 eggs that look like the surface of the moon, complete with dead volcanoes, impact craters, and white lava flows?

Well considering myself to be a resourceful cook, I decided to use only 12 of them, and make egg salad. And by golly, there was rejoicing at Chez Carr. The only error I made was adding the bacon to the mixture on Saturday. (The event was on Sunday.) I should have waited and added the bacon just before I planned to serve because it lost its crisp texture sitting with wetter ingredients overnight. Lesson learned. (I made sure I included that information in my instructions below. Don’t want you making the same mistake I did!)

But regardless, the salad was absolutely decadent and my guests gobbled it up. Served on a crisp butter cracker, it was just a perfect way to serve my guests bacon and eggs.

Now, of course what will happen when you try this recipe, is that the eggs will peel beautifully. (It’s going to happen to me too the next time I want egg salad. So I have also written this recipe up as Breakfast Deviled Eggs with Bacon. Got to cover all my bases!)

So please enjoy both recipes. And don’t buy your eggs at Grocery Outlet if you don’t want really fresh eggs. Just sayin’. (Love Grocery Outlet BTW. Among other unusual items, they carry a great selection of sausage and cheeses at a terribly decent price.)

Please note: I recently discovered a great way to boil eggs. I have tried it 3 times now, and it has worked beautifully each time. See below for technical instructions.

BREAKFAST EGG SALAD WITH BACON

  • ½ c. light mayonnaise
  • ½ c. low fat sour cream
  • 2 tsp. Dijon mustard
  • ¼ tsp. kosher salt
  • freshly ground black pepper
  • 1 lb. lean bacon, cut into small pieces and fried until crisp, divided
  • ¼ c. chopped fresh chives
  • 12 hard-boiled eggs, peeled and shredded with a cheese grater (largest grate)

Combine the mayonnaise, sour cream, mustard, salt, pepper, three-fourths of the bacon*, and chives. Adjust seasoning. Gently stir in the grated eggs. Scoop into a serving bowl and sprinkle with remaining bacon. Serve with plain butter crackers.

*If you are preparing well ahead of when you plan to serve, set the bacon aside. Refrigerate the rest until about a half hour before you plan to serve. Then stir three-fourths of the bacon into the egg mixture and top with the remaining one-fourth. Serve immediately.

BREAKFAST DEVILED EGGS WITH BACON

  • 12 hard-boiled eggs, peeled and halved
  • ¼ c. light mayonnaise, or more as needed
  • ¼ c. low fat sour cream, or more as needed
  • 2 tsp. Dijon mustard
  • ¼ tsp. kosher salt
  • freshly ground black pepper
  • ½ lb. lean bacon, cut into small pieces and fried until crisp, divided
  • 2 T. chopped fresh chives
  • paprika

Remove yolks from the halved eggs and place in a bowl. Mash the yolks with the mayonnaise, sour cream, mustard, salt, pepper, most of the bacon, and chives. Add additional mayonnaise and sour cream to reach desired consistency. Adjust seasoning.

Using a very small ice cream scoop or teaspoon, scoop mixture into each egg white. Sprinkle with paprika and store in the refrigerator until ready to serve.

HARD BOILED EGGS

Bring a medium saucepan of water to a boil, then gently lower eggs (whatever amount) into the water. (I use a wire colander for this.) Lower the heat so that the eggs cook at a gentle simmer. (You don’t want a full rolling boil, just a gentle amount of bubbles.) Cook for 13 minutes for large eggs; 14 minutes for extra-large eggs.

When the eggs are finished cooking, transfer to an ice bath for 7 minutes. (And yes, you do need an ice bath for this step. Just cooling them under cold water isn’t sufficient.)

After 7 minutes, the eggs will be cool to the touch. Against your counter top, give the eggs several taps all over. Then “happy peeling”.

[contact-form][contact-field label=’Name’ type=’name’ required=’1’/][contact-field label=’Email’ type=’email’ required=’1’/][contact-field label=’Website’ type=’url’/][contact-field label=’Comment’ type=’textarea’ required=’1’/][/contact-form]

NEUFCHÂTEL – SPREAD THE WORD!

NEUFCHÂTEL CHEESE AND OLIVE SPREAD

Sometimes I go off on a wild tangent about something that will never bring about world peace, a higher literacy rate in the United States, or a magic formula for lowering stress when driving in Seattle traffic! But then, more often, my tangents are on a more attainable level and actually result in something over which I have some control. In this case I’m talking about reduced calories in an ingredient that is always, and I do mean always in my refrigerator. And that delicious ingredient ladies and gentlemen is cream cheese. Yep – cream cheese (or more accurately now Neufchâtel cheese).

Since deciding that my weight is way out of control, I have been paying greater attention to what I put in my mouth. Now for years I have been buying Neufchâtel cheese as frequently as I purchase cream cheese. I just assumed (my bad) that they were pretty much identical dairy products. And whichever happened to be on sale, or my fingers touched first, swiftly landed in my shopping cart. But in reading the packages, I soon found out that 1 tablespoon (1-oz.) of cream cheese has 100 calories, 84% fat, 8% carbs, and 8% protein. Whereas Neufchâtel cheese has only 70 calories, 1/3rd less fat (83%), 5% carbs, and 12% protein. So, why not cream cheese instead of Neufchâtel cheese? Well I think I just answered that question, but if you need me to break it down in another way – well it’s simple really!

Cream cheese by law must contain at least 33% milk fat and not more than 55% moisture. American Neufchâtel cheese contains only about 23% milk fat and has a slightly higher moisture content. This means that you need less other moisture rich ingredients to come up with a creamy, spreadable consistency. (Think less mayonnaise and sour cream, for example.)

Then I considered the taste of both. I found that for me, the flavor of Neufchâtel cheese is just as wonderful as cream cheese and just as perfect as the base for almost any type of spreadable. (I’m not sure I would use Neufchâtel cheese in a cheese cake, unless specifically listed in the recipe, but for dips and spreads it’s perfect.)

So, not requiring a baseball bat to hit me in the head before I pay attention to something – I have switched exclusively to Neufchâtel cheese for almost all of my cream cheese needs. And because I am so excited about my new found knowledge, I am going to share some of my favorite spread recipes with you in hopes that each and every one of you too will accept Neufchâtel cheese into your lives. (If that makes me a crusader, so be it!)

So I hope you enjoy the recipes and BTW – Happy Valentine’s Day. (It’s tomorrow, you know!)

And remember: Hunks or slices of cheese and dips or spreads that contain cheese (including cream cheese and Neufchâtel cheese), should always be served at room temperature. The wonderful creamy texture and complex taste of cheese cannot be fully appreciated if the cheese is still cold.

And you will note that all the recipes below call for “light” mayonnaise (I use Best Foods) and “lowfat” sour cream (I use Tillamook). Both are excellent products and all of the spread recipes on this post are just delightful (thank you very much) and happy as Puget Sound clams to find themselves lightened up!

NEUFCHÂTEL CHEESE AND OLIVE SPREAD

  • 1 (8-oz.) pkg. Neufchâtel cheese, room temperature
  • 1-2 T. low fat sour cream
  • ½ tsp. Worcestershire sauce
  • 1/8 tsp. granulated garlic
  • freshly ground black pepper (not too much)
  • 1 small can chopped black olives
  • 3 T. finely chopped green olives

Combine all ingredients. Refrigerate for several hours to combine flavors. Serve with fresh vegetables or crackers. Also wonderful served as a canapé.

NEUFCHÂTEL CHEESE AND VEGETABLE SPREAD

  • 1 (8-oz.) pkg. Neufchâtel cheese, room temperature
  • ¼ tsp. seasoned salt
  • freshly ground black pepper (not too much)
  • 1 T. finely minced carrot
  • 1 T. finely minced green pepper
  • 2 T. finely minced red pepper
  • 2 tsp. finely minced fresh parsley
  • 2 tsp. finely minced shallot
  • 1 small garlic clove, finely minced

Combine all ingredients. Refrigerate for several hours to combine flavors. Serve with fresh vegetables or crackers. Also wonderful served as a canapé.

VIENNESE LIPTAUER (NEUFCHÂTEL CHEESE, ANCHOVY, AND CAPER SPREAD)

  • 1 (8-oz.) pkg. Neufchâtel cheese, room temperature
  • ½ c. unsalted butter, room temperature
  • 3 T. low fat sour cream
  • 1 T. Dijon mustard
  • 2-3 tsp. anchovy paste
  • 1½ tsp. paprika
  • ¼ tsp. kosher salt
  • 1 tsp. caraway seeds
  • 1 tsp. capers, drained and finely minced
  • 1 T. grated or finely chopped onion

Whirl the Neufchâtel cheese, butter, sour cream, mustard, anchovy paste, paprika, and salt together in a food processor until very smooth. Taste and adjust the seasoning. Add the caraway seeds, capers, and onion. Pulse a couple of times just to incorporate the new additions. (You do not want them pulverized!) Scoop into serving dish. Cover with plastic wrap and refrigerate for at least an hour before serving. Serve at room temperature with rye bread or Finn Crisp, a thin rye crisp bread with caraway. Finn Crisp comes in a small, mostly red package and can be found at most grocery stores.

SHARP CHEDDAR CHEESE AND CREAMY HORSERADISH SPREAD

  • 8 oz. grated sharp cheddar cheese
  • 6 oz. Neufchâtel cheese, room temperature
  • 1 tsp. distilled white vinegar
  • 6 T. heavy cream
  • 1 T. creamy horseradish (I use Beaver Brand Hot Creamy Horseradish)
  • pinch of kosher salt
  • freshly ground black pepper

Whirl all the ingredients together in a food processor until creamy and smooth. Refrigerate for at least 2 days before serving at room temperature with crackers. Cornichons (crisp, sour pickles made from really tiny cucumbers) are a wonderful accompaniment to this cheese spread.

BACON, DATE, AND NEUFCHÂTEL CHEESE SPREAD

  • 8-oz. Neufchâtel cheese, room temperature
  • 2 T. milk
  • ½ c. crumbled cooked bacon
  • ½ c. chopped dates
  • 2 green onions finely minced
  • pinch kosher salt
  • freshly ground black pepper
  • balsamic glaze, opt.

Whip the Neufchâtel cheese and milk together. Stir in the bacon, dates, green onions, salt, and pepper. Serve in a small bowl or on a small plate drizzled with balsamic glaze.

SMOKED SALMON SPREAD 

  • 8-oz. Neufchâtel cheese, room temperature
  • ½ c. low fat sour cream
  • 2 tsp. finely minced green onion
  • 2 tsp. minced fresh parsley
  • 2-3 tsp. fresh lemon juice, or more to taste
  • ¼ tsp. kosher salt
  • freshly ground black pepper
  • ½ lb. smoked salmon
  • milk

Beat Neufchâtel cheese and sour cream together. Add green onions, parsley, lemon, salt, pepper, and smoked salmon. Stir until salmon is broken down and mixture is creamy. Add milk until you reach desired consistency. Refrigerate at least 4 hours before serving.

Beat Neufchâtel cheese and sour cream together. Add green onions, parsley, lemon, salt, pepper, and smoked salmon. Stir until salmon is broken down and mixture is creamy. Add milk until you reach desired consistency. Refrigerate at least 4 hours before serving.

CREAMY ANCHOVY GARLIC SPREAD

  • 2 small cloves garlic, rough chopped
  • 7-8 anchovy fillets
  • 6 T. unsalted butter, room temperature
  • 1 (8-oz.) pkg. Neufchâtel cheese, room temperature
  • ¼ c. low fat sour cream
  • 2 dashes hot pepper sauce (I use Frank’s Red Hot Original)
  • freshly ground black pepper
  • 1 T. finely chopped fresh chives

Combine the garlic, anchovies, butter, Neufchâtel cheese, sour cream, hot pepper sauce, and pepper in the container of a food processor. Process until smooth. Stir in the chives. Transfer to a serving bowl, and refrigerate for at least 6 hours or better yet, overnight. Serve at room temperature with plain crackers (not quite as plain as saltines) or toasted baguette slices.

JALAPEÑO POPPER DIP/SPREAD

  • 1 (8-oz.) pkg. Neufchâtel cheese, room temperature
  • ½ c. light mayonnaise
  • ¼ c. grated Monterey Jack cheese
  • ¼ c. grated sharp cheddar cheese
  • ¼ c. grated Parmesan cheese
  • ¼ c. sliced pickled jalapeños (I use Mrs. Renfro’s) + a couple slices for garnish
  • ½ fresh jalapeño, seeded, de-veined, and finely chopped, or more to taste

Whirl the Neufchâtel cheese, mayonnaise, Monterey Jack cheese, cheddar cheese, and Parmesan cheese together in a food processor until smooth. Add the pickled jalapeños and the finely chopped fresh jalapeño and whirl until only small bits of the fresh jalapeño remain visible. Do not over process. You want those little bits of green to remain. Spread the mixture into a lightly buttered casserole. Bake in a pre-heated 375 degree oven for about 20 minutes. You should be able to see the mixture gently bubbling around the edges and the top should be turning a light golden brown when the dip is hot. Allow to rest for about 5 minutes. Serve with tortilla chips.

ROASTED RED PEPPER CHEESE SPREAD

  • 8-oz. Neufchâtel cheese, room temperature
  • ½ c. light mayonnaise
  • scant 1/3 c. rough chopped roasted red pepper
  • 1 tsp. finely minced onion
  • 1/8 tsp. granulated garlic
  • pinch kosher salt
  • freshly ground black pepper
  • 1 c. grated sharp cheddar cheese
  • 1 c. grated Monterey Jack cheese

Combine all ingredients in a food processor and whirl until smooth. Spoon into a serving bowl, cover with plastic wrap, and refrigerate at least 24 hours before serving at room temperature. Great spread on multi-grain crackers.

CHEDDAR AND PORT WINE SPREAD

  • 8 oz. Neufchâtel cheese, room temperature
  • 2 c. (scant) shredded sharp cheddar cheese
  • 3 T. tawny port (I use Benjamin Australia Tawny Port)
  • ½ c. dried cranberries, roughly chopped
  • ½ c. toasted chopped pecans

Combine Neufchâtel cheese, cheddar cheese, and port in a food processor. Whirl until creamy and smooth. Stir in chopped dried cranberries. Scoop into a small serving bowl. Cover with plastic wrap and refrigerate until about an hour before ready to serve. Sprinkle with pecans just before serving. Great with crackers and thin apple slices.

LOX AND PARTY RYE BREAD WITH CAPER AND RED ONION SPREAD

  • 8 oz. Neufchâtel cheese, room temperature
  • 1/3 c. capers, roughly chopped
  • ¼ c. finely chopped red onion
  • 2 tsp. fresh lemon juice
  • pinch kosher salt
  • freshly ground black pepper
  • party rye bread
  • 6 oz. thinly sliced lox

Combine Neufchâtel cheese, capers, red onion, lemon juice, salt, and pepper. Spread on party rye; top with lox.

GARLIC AND HERB CHEESE SPREAD (MOCK BOURSIN CHEESE)

  • 8 oz. Neufchâtel cheese, room temperature
  • ½ c. (1 stick) unsalted butter, room temperature
  • ¼ tsp. dried thyme leaves
  • ¼ tsp. dried marjoram leaves
  • ¼ tsp. dried dill weed
  • ¼ tsp. dried basil
  • ¼ tsp. freeze dried chives
  • ½ tsp. granulated garlic
  • freshly ground black pepper
  • 1 T. finely minced fresh parsley
  • 2 T. finely grated Parmesan cheese

Cream all ingredients together or whirl in a food processor. Refrigerate at least 4 hours. Bring to room temperature before serving with a variety of crackers. Also wonderful spread on a grilled steak. It melts beautifully on the cooked steak and leaves a lovely puddle into which you can dip your pieces of steak.

SUN DRIED TOMATO AND FRESH BASIL SPREAD

  • 1 (8-oz.) pkg. Neufchâtel cheese, room temperature
  • 2 T. sun dried tomato bits (not oil packed is the best, but if all you have are sun dried tomatoes packed in oil, just drain slightly and chop finely)
  • 5-6 large basil leaves, finely chopped
  • 1 T. chopped fresh parsley**
  • 2 small cloves of garlic, finely minced**
  • ½ c. finely grated Parmesan cheese
  • freshly ground black pepper
  • 2 heaping tablespoons light mayonnaise or low fat sour cream

Combine all ingredients; refrigerate at least 24 hours before serving at room temperature with crackers, toasted baguette slices, or even bagels.

**Hint: When you have both parsley and garlic to mince, and they are going into a recipe at the same time, mince them together. The parsley helps keep the garlic from “skipping” around your cutting board. In the case of this recipe, I add the basil to the garlic and parsley too. I’m lazy – what can I say?


EASY CHINESE DUMPLINGS/POTSTICKERS ANYONE?

I love good Chinese food. (I know, I’ve said it before!) But in all honesty, what I enjoy the most is Dim Sum (點心). According to Wikipedia, dim sum is described as “a style of Chinese cuisine (particularly Cantonese but also other varieties) prepared as small bite-sized portions of food served in small steamer baskets or on small plates. Dim sum dishes are usually served with tea, and together form a full tea brunch. Dim sum traditionally are served as fully cooked, ready-to-serve dishes. In Cantonese teahouses, carts with dim sum will be served around the restaurant for diners to order from without leaving their seats.”

When we lived in Bellevue, going to a Chinese restaurant that served dim sum was easy. Just a short 20 minute ride from our house to the International District and we were in dim sum heaven. But now that we live (on a good traffic day) 75 minutes away from the district, we are not so prone to jump in the car for a lunch time excursion.

But that doesn’t mean that I don’t still love dim sum. It just means that if I want dim sum, I pretty much have to make it myself. And believe it or not, as frightening as that sounds, it’s doable! All you need is a little time, confidence, and a few readily available ingredients. (Well, at least in the 3 recipes I’m sharing with you today!)

So go ahead. Be brave. Put on your big kid pants and get out to your kitchen and prepare a treat that everyone will love. Just make enough while you’re at it. They freeze beautifully. Just don’t cook them before you freeze them. Simply lay them out on a lightly greased baking sheet. Allow them to freeze solid individually, then bag them up. Then any time you want dim sum for lunch or have a yen for appetizers before dinner, take a few out, steam as directed below, and enjoy. (No need to defrost before placing in the steamer.)

And please know that if you live close by, I am always available as a taste tester. I take great pride in being considered approachable and I’m always more than eager to assist in the quest for fine cuisine.

CHINESE PORK AND SHRIMP SHU MAI (DUMPLINGS) WITH GINGER-SOY DIPPING SAUCE 

  • ½ lb. ground pork
  • ½ lb. chopped fresh shrimp
  • 4 diced water chestnuts
  • 2 green onions, very finely minced
  • 3 fresh shiitaki mushrooms, minced
  • 3 dried shiitake mushrooms, soaked in hot water for 30 minutes, then drained and minced
  • 1 T. rice wine or dry sherry
  • 1½ T. cornstarch
  • ½ tsp. sugar
  • 2 tsp. low sodium tamari or soy sauce
  • 2 tsp. sesame oil
  • ½ tsp. kosher salt
  • freshly ground black pepper (not too much)
  • 24-30 round won ton wrappers 

Combine pork, shrimp, water chestnuts, green onions, and mushrooms together in a bowl. In a separate bowl, whisk together the rice wine, cornstarch, sugar, tamari, sesame oil, salt, and pepper. Add to the pork mixture. Place a tablespoon of the mixture in the center of each won ton wrapper. Gather the sides up around the filling so that it looks like a tiny purse. Allow some of the filling to show at the top. If you have trouble, dab a little water on the skin so that it sticks together better.

Place onto a lightly greased baking sheet. Repeat until all the filling and wrappers have been used. Place shu mai in the refrigerator or freezer for 1 hour. Lightly coat your steamer rack(s) with cooking spray. Place the cold shu mai onto the prepared steamer racks, 1-inch apart. Cover steamer, and cook dumplings for 15-20 minutes or until the wrapper is tender and the filling is cooked completely. Serve with Ginger-Soy Dipping Sauce.  (See recipe below)

VEGETABLE POTSTICKERS WITH GINGER-SOY DIPPING SAUCE (Vegetarian)  

  • 3 T. vegetable oil
  • 2 tsp. minced ginger
  • ½ lg. onion, finely chopped
  • 1 lg. garlic clove, finely minced
  • 1 c. shiitake mushrooms, chopped (you can use part re-hydrated dried mushrooms)
  • ¾ c. finely shredded green cabbage
  • ¼ c. finely shredded carrot
  • 2 green onions, finely minced
  • ¼ tsp. white pepper
  • 1 tsp. sesame oil
  • 5 tsp. Shaoxing wine or dry sherry
  • 1 T. GF tamari or soy sauce
  • ½ tsp. sugar
  • 1 pkg. round won ton wrappers

In a wok or large skillet over medium heat, add the oil and ginger. Cook for 30 seconds, until fragrant. Add the onions and stir-fry until translucent. Add the garlic and cook for one minute. Add the chopped mushrooms and stir-fry for another 3-5 minutes, or until the mushrooms are tender and any liquid released by the mushrooms has cooked off.

Add the cabbage and carrot and stir-fry for another 2 minutes, or until the veggies are tender and all the liquid released has been cooked off. Remove from heat and allow to cool.

When cool add the minced green onion, white pepper, sesame oil, Shaoxing wine, tamari, and sugar. Taste and adjust seasoning.

To assemble, scoop 1 scant tablespoon of filling onto the center of the wrapper. Fold the wrapper in half to form a half circle. Using a fork, crimp the edges together. (Make sure to seal as tightly as possible.)

Place onto a lightly greased baking sheet. Repeat until all the filling and wrappers have been used. Place potstickers in the refrigerator or freezer for 1 hour.

Lightly coat your steamer rack(s) with cooking spray. Place the cold potstickers onto the prepared steamer racks, 1-inch apart. Cover steamer, and cook dumplings for 12-14 minutes. Serve with Ginger-Soy Dipping Sauce. (See recipe below)

Thanks to the Woks of Life website for the main gist of this recipe.

SHRIMP SHU MAI (CHINESE SHRIMP DUMPLINGS) WITH GINGER-SOY DIPPING SAUCE

  • 1 garlic clove, minced
  • ½-inch piece fresh ginger, peeled and minced
  • ¼ tsp. lime zest
  • ½ lb. lg. uncooked shrimp, peeled, deveined, and coarsely chopped
  • 1 tsp. low sodium tamari or soy sauce
  • ½ tsp. rice wine vinegar
  • ½ tsp. sesame oil
  • ¼ teaspoon salt
  • 1/8 tsp. white pepper
  • 1 green onion, very finely minced
  • 20-24 round wonton wrappers

Place garlic, ginger, and zest in a food processor and pulse 6 to 8 times or until finely ground and well combined. Scrape down sides of bowl.


Add half of the shrimp, Tamari, vinegar, sesame oil, salt, and pepper to the food processor and process until a smooth paste just comes together. Pour mixture into a mixing bowl and fold in the minced green onion and remaining shrimp.


Place scant tablespoon of the mixture into the center of a wonton wrapper. Gather the sides of the wonton skin up around the filling so that it looks like a tiny purse. Allow some of the filling to show at the top. If you have trouble, dab a little water on the skin so that it sticks together better.

Place onto a lightly greased baking sheet. Repeat until all the filling and wrappers have been used. Place shu mai in the refrigerator or freezer for 1 hour. Lightly coat your steamer rack(s) with cooking spray. Place the cold shu mai onto the prepared steamer racks, 1-inch apart. Cover steamer, and cook dumplings for about 20 minutes. Serve with Ginger-Soy Dipping Sauce. (Recipe below.)

GINGER-SOY DIPPING SAUCE

  • ½ c. low sodium tamari or soy sauce (use GF tamari or soy sauce for vegetarian)
  • 2 T. rice vinegar
  • 1 T. sesame oil
  • pinch crushed red pepper flakes
  • 2 finely minced green onions
  • 2 garlic cloves, finely minced
  • 1 T. finely minced fresh ginger

Combine all ingredients.


FIG AND ORANGE JAM

dscn0213

dscn0214

People often ask me how I became a good cook. What they should be asking me is why I became proficient in the kitchen. That answer is easy. I love good food! And not always being able to afford some of the food I dearly love – well it simply fell to me to figure out how to reproduce it at home. For example: I love French Chicken Liver Pâté. But buying it is ridiculously expensive. So years ago I searched my recipe books (there was no internet at the time) and came up with a pâté that was every bit as good as most pâtés on the market. And to this day, I still prefer to deconstruct a product and rebuild it in my own fashion, to simply turning over my hard earned money at the grocery store. All this information just to explain why I am sharing this recipe with you today.

I fell in love with Dalmatia Orange Fig Spread at first taste. But an 8.5-oz. bottle costs $5.99 at Walmart. Walmart! And 8.5-oz. just ain’t that much spread! And what are we talking about here people? A couple three dried figs, a bit of orange, and some sugar! I mean really Croatia, even with shipping costs, that’s a lot of money for a tiny bottle of jam.

So being the cheap frugal person that I am, I decided I could make this delicacy at home. I found the basic recipe on the kitchn.com website (great website BTW), but added my own touches. And if I do say so, it’s really pretty darn tasty. It’s not exactly the same, because of course I don’t have access to the same kind of oranges, for example, that grow in Croatia. But as an inexpensive alternative, it’s just fine.

Now I realize, not everyone has a bottle of orange liqueur hanging around. But for those of us who love margaritas, it’s a staple ingredient. So it’s worth the investment, even if it’s just for a perfect margarita! (Mr. Cs recipe for a perfect Margarita is on this site BTW.) But as an added benefit, you can do yourself a favor and make this lovely fig jam too. And I’m telling you, when lightly spread over softened goat cheese, there is simply nothing finer.

So be brave. It’s a new year, and what a year it promises to be! (We are not in Kansas anymore Toto, as the saying goes.) So step out of your comfort zone and try this jam. You will be amazed how easy it is to prepare. And how fast it will disappear when you serve it to your family (the adults in your family that is) and friends. Happy New Year everyone, and stay positive. That’s the best thing we can do to lift the spirits of those around us. Well that, and feed them well. And this jam is a great way to start doing just that!

  • 6-oz. (about 22 whole) dried Mission figs, stems removed and very finely chopped
  • ½ c. brown sugar
  • ½ c. granulated sugar
  • ½ c. water
  • ½ c. orange juice
  • 3 T. lemon juice, or more to taste
  • 1 T. Grand Marnier or other orange flavored liqueur
  • ¼ tsp. pure vanilla extract
  • 1-2 tsp. orange zest (try 1 teaspoon first)

Combine figs, sugars, water, orange juice, and lemon juice in a medium saucepan and bring to a boil. Reduce heat and simmer until the liquid has thickened slightly, about 15 minutes. Remove from heat, let cool for about 30 minutes. Place in a food processor, add Grand Marnier and vanilla. Whirl until smooth. Stir in the orange zest. (Don’t whirl after the zest is added.)  Let cool completely before storing in an airtight container in the refrigerator.

Note: For the fabulous appetizer I described above, soften goat cheese with a small amount of heavy cream or whole milk to desired consistency. Scoop into a small bowl. Place fig and orange jam in another small bowl. Offer a variety of plain crackers in a basket, and some thinly sliced Honey Crisp apples on a plate, a couple of spreading implements, and you have an appetizer that your friends and family will talk about for years.