Category Archives: CASSEROLE RECIPES

CHICKEN ENCHILADA SUIZAS CASSEROLE

So, depending on whether or not you are trying to eat healthier, you are in for a treat with this recipe (slightly modified by yours truly) from the Joyful Healthy Eats site. And in case you have never enjoyed an enchilada suizas, you probably don’t know that most of the time the key ingredients are a various combination of butter, sour cream, heavy cream, crème fraiche, half & half, and cheese. Lots of cheese. (I mean really, what’s not to like?) But in this recipe, there is nary a mention of butter, sour cream, heavy cream, crème fraiche, or half & half. There is of course cheese in this recipe, but then how could it not contain cheese, since the very definition of suizas means Swiss and alludes to its copious use of cheese and other dairy products.

But, using only non-fat Greek yogurt along with both Mozzarella and Monterey Jack cheese, the total fat content in this recipe is far lower than in typical recipes for this amazing dish.

Also, layering the tortillas rather than rolling them up, reduces the amount of time it takes to prepare these enchiladas. And any time I can save time as well as calories, I say hurray to that!

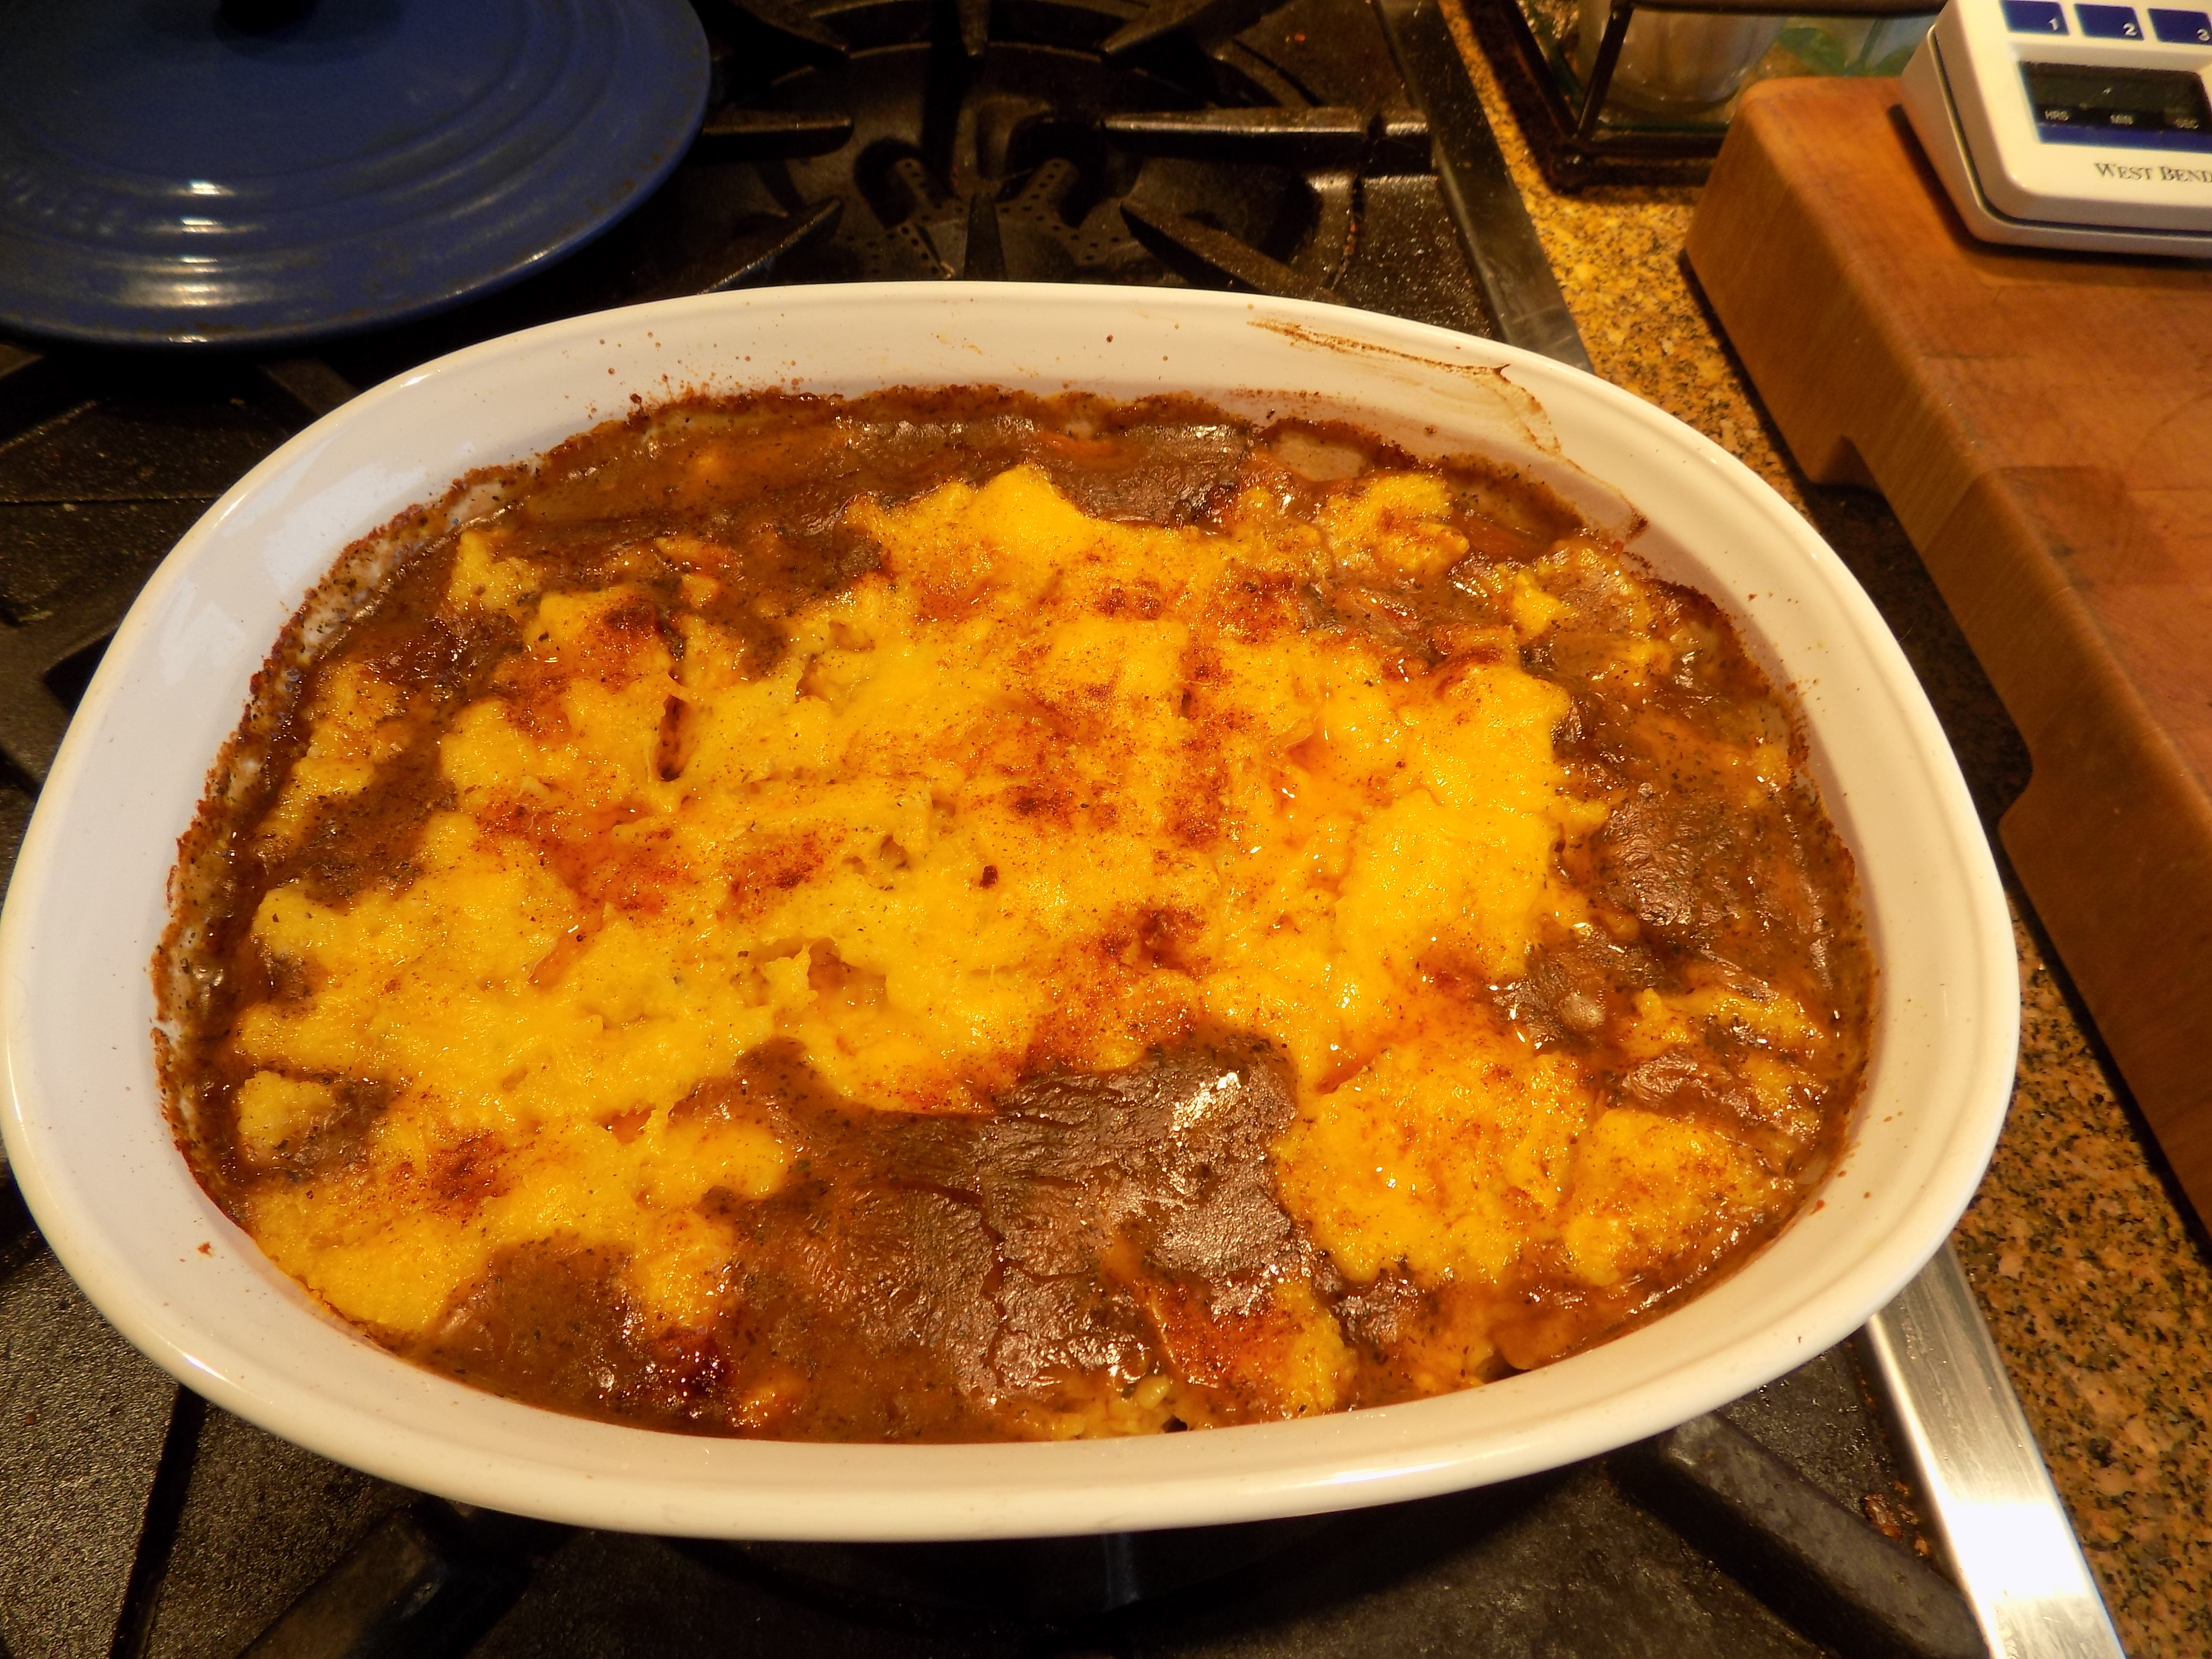
So what you are left with is a delicious casserole filled with tender chicken pieces, tortillas and cheese that simply melt into the lovely green chili sauce. If it sounds delightful, you would not be wrong. This casserole is really, really amazing. And the best part. You don’t have to feel guilty eating it! Of course, it still has calories. But about half as many as most enchiladas suiza. And it’s gluten free. And isn’t that always special!

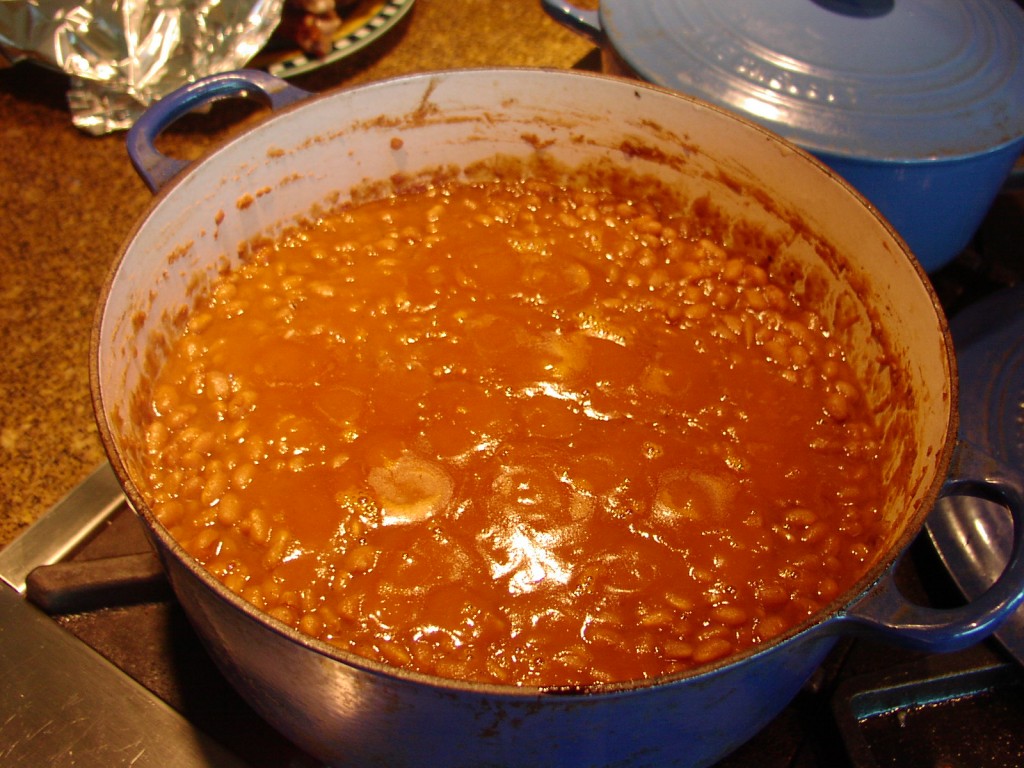
So do yourself a favor. Next time you want Mexican food, make it at home. Paired with my recent post for Mexican Black Beans, you have a healthy, nutritious, and delectable meal you can serve your family and friends that is every bit as good, if not considerably better than you can find in most Mexican restaurants.

Now, if you are the kind of person who doesn’t feel a Mexican meal is complete without rice, I have a great recipe for you to try that’s already on this site. And if you guessed that the recipe would be entitled Mexican Rice, give yourself a gold star. Just be for-warned. There are no tomatoes in my recipe. (Just throwing that out there so you won’t be surprised when you read the ingredient list.) I just don’t happen to like most tomato flavored rice recipes. So my recipe is completely different. (Pretty darn delicious too.) So give all three of these recipes a try. Throw a Mexican dinner for your family and friends. Just don’t forget the Guacamole and Margaritas. (And yes, I have recipes for them too. So make that – five new recipes to try.) But wait, there’s one more recipe you need to make for your family and friends – Tres Leche (Three Milks) Cake. (Actually there are even more Mexican recipes if you search under Mexican Food Recipes.) OK, I’m done now. You may be excused. Buen provecho.

Chicken:

2 boneless skinless chicken breasts

1 tsp. extra virgin olive oil

½ tsp. seasoned salt

freshly grated black pepper

¼ tsp. granulated garlic

¼ tsp. paprika

Place chicken breasts in an 8×8-inch baking pan. Pour on the olive oil. Using your hands, best tool in the kitchen BTW, massage the oil all over the chicken. Wash your hands and mix together the seasoned salt, pepper, granulated garlic, and paprika. Sprinkle the mixture evenly over both sides of the chicken.

Bake in a pre-heated 450 degree oven for 20-25 minutes or until the chicken is cooked through and no longer pink.  If you use an instant read thermometer to measure the temperature at the thickest part of the breast, it should read about 170 degrees. Remove from oven and allow to cool completely before dicing into small cubes. (Save the juices that have accumulated in the bottom of the pan as the chicken cools. You are going to add them to the sauce.)

Green Chili Sauce:

1 T. extra virgin olive oil

1 c. chopped yellow onion

2 garlic cloves, minced

¼ tsp. ground coriander

½ tsp. ground cumin

¼ tsp. kosher salt

freshly ground black pepper

4 c. (1 qt.) chicken stock

7-8 oz. canned diced green chilies

2 T. water

2 T. cornstarch

2/3 c. plain non-fat greek yogurt

Heat the oil in a large skillet. Add the onion. Sauté until translucent, about 3-4 minutes. Add the garlic and sauté for 30 seconds. Add the ground coriander, ground cumin, salt, and pepper. Stir in the chicken stock and green chilies. Bring to a boil, and simmer for 10 minutes or until the chicken stock has reduced a bit.

In a medium sized bowl, whisk together the water and cornstarch. Add to the skillet along with the juices from baking the chicken, and cook until the sauce thickens. Remove pan from heat and whisk in the yogurt. Taste and adjust seasoning. 

Building the Casserole:

15 small white corn tortillas or 10 regular sized

1½ c. shredded low-fat mozzarella cheese

1 c. shredded Monterey Jack cheese

avocado chunks, opt.

diced fresh tomatoes, opt.

Spread a very small amount of the sauce on the bottom of a lightly greased 9×13-inch baking pan. Add a layer of tortillas (feel free to cut them to fit the pan), then 1/3rd of the remaining sauce, cooked chicken, and cheeses. Repeat 2 more times. Finish with the last of the shredded cheese on top. (If it looks like a little more cheese on top would be nice, you know where your grater lives!)

Bake in a pre-heated 350 degree oven for 30-40 minutes or until the cheese on top is starting to brown and is nice and melted, and the sauce around the edges of the pan is bubbly. Let sit for about 5 minutes before serving.

Serve garnished with freshly diced avocado and tomatoes.


OVEN BAKED POTATO KUGEL

I love scalloped potatoes, potato gratins, and just about every which way you can think of to calorie up cut potatoes and bake them in the oven. But after discovering this recipe inspired by Tory Avery, I now have a way of serving a potato casserole without as many calories as most of my regular favorites. And why is that you might ask. Well, notice the absence of two of the most caloric ingredients in most potato casseroles – cheese and heavy cream. And yet, even without these ingredients, this kugel is creamy and delicious.

Now granted, you are invited to add a bit of sour cream as a topping. But I never said it was a low calorie dish. It just has less calories than most of its potato casserole predecessors. (At least the ones I love the most.)

But, boy oh boy is this kugel delicious. It’s like a big old potato latke, without having to spend time frying large spoonful’s of potato mixture in hot oil on top of your stove. (And if you have never done this, please take it from me. You can spend hours frying potato latkes. Because as soon as you fry a couple three, they’re gone. So you have to fry more. You see where I’m going with this, right?)

Anyway, if you want a simple potato dish to add a certain je ne sais quoi to an otherwise traditional assortment of other offerings on your table, give this recipe a try. It’s really yummy, easy to fix, economical, and different from most other potato preparations. Just remember to include something crunchy in your menu. Actually that’s important regardless of whether you serve this dish or not. If you don’t already, get used to planning for at least one crunchy component in every meal you serve. It will soon become a habit, and as you well know, habits are hard to break. Happy kugel to you and yours.

5 lbs. russet potatoes (about 10 medium-sized potatoes)

1 bunch green onions, divided

6 eggs

6 T. potato or corn starch  

2 tsp. kosher salt

freshly ground black pepper

4 T. extra virgin olive oil, divided

sour cream, opt. for garnish

Place a 9×13 metal or ceramic baking dish or pan in the oven and preheat oven to 400 degrees, letting the dish heat up inside. (Glass does not work well for this recipe.)

Peel the potatoes, then use a food processor or hand grater to grate them into large shreds. Place the potato shreds in a large mixing bowl and cover with cold water. Let the shreds sit for a few minutes.

Meanwhile, wash and mince the green onions. (Don’t even think about discarding the green part. Cut that part up too.) Set aside.  

In a large mixing bowl, whisk together the eggs, potato starch, salt, and pepper until fluffy. Drain the potato shreds in a colander, pushing down firmly on top of the shreds with your hands to push out the excess liquid. Place the grated potatoes in the bowl with the seasoned eggs. Stir in about ¾ of the minced green onions and mix all together until well combined.

Take the preheated baking dish out of the oven. Quickly pour in 3 tablespoons of the olive oil, then use a pastry brush to carefully spread the oil around the bottom and sides of the hot dish. (The hot dish and oil will help guarantee a beautiful brown and crisp bottom crust for the kugel.)

Quickly spread the potato mixture into an even layer in the baking dish, then drizzle remaining 1 tablespoon of olive oil across the top.

Bake uncovered in a pre-heated 400 degree oven for 60-70 minutes or until the top is nicely browned. If the kugel seems to be browning too quickly, cover the pan with aluminum foil to keep it from over-browning. But in order for the potatoes to become tender, it truly takes about 70 minutes of baking time.

The kugel tastes best hot from the oven, but do let it set up for 5-10 minutes before slicing and serving. Pass the sour cream and remaining minced green onion.


INSTANT POT AND OVEN OLD FASHIONED BAKED BEANS

before the beans went in the oven

So call me old-fashioned, but I don’t think a BBQ picnic is complete without baked beans. And not the kind of baked beans containing fancy new ingredients like quinoa, agave nectar, or stevia. I’m talking about the kind of baked beans I’ve been preparing since my early 20s. Dry beans rehydrated with lots of ketchup, brown sugar, bacon, onion, rum, Dijon mustard, etc. (OK, I didn’t use rum or Dijon mustard when I first started making baked beans. But a few concessions for the sake of flavor simply had to be made as I developed as a cook. And I’m sure my father, the baked bean maker in our family would agree with each of my respective inclusions.)

So, because I consider myself to be am open minded person, and my daughter Paula just happened to have gifted me with an Instant Pot a couple of Christmas’s ago, I decided to make this recipe for baked beans a generational mash up.

First and foremost, baked beans have to be made from scratch. (And yes I have cheated over the years and purchased a big old can of baked beans and doctored them up to my liking. But in my defense, that was when I was much younger, still working, and had kidlets littered about the house. However, now that I am retired with virtually nothing stopping me from spending hours in the kitchen, I no longer go that route.)

Anyway, this recipe contains all of the ingredients I used when I began preparing baked beans decades ago, except for of course the aforementioned rum and Dijon mustard.

So if you too love baked beans, give this recipe a try. And yes it still takes a good deal of time to bake beans from scratch. But most of the time you are free to pursue other activities. Very little prep time is involved. The rest of the time your Instant Pot and oven are doing the heavy work.   

So host a picnic before the summer is over. There is just no better way to spend quality time with your family and friends than by getting your faces totally smeared with BBQ sauce, or having your arms and elbows become sodden from the juices dripping out of a luscious hamburger. Good times my friends. Good times!

And for a recipe for Vegetarian Baked Beans – check out the recipe already on this site.

2 lbs. Great Northern beans, picked over and washed (about 4½ cups dry beans)

8 c. water, plus more as needed

1 lg. yellow onion, chopped, divided

2 tsp. paprika

3 garlic cloves, chopped

2 bay leaves

¾ lb. lean thick-cut bacon, cut into small pieces

2/3 c. molasses (not blackstrap – too strong)

2 c. ketchup, or more to taste

½ dark rum, opt.

2 T. Worcestershire sauce

2 T. dried parsley

½ tsp. dried thyme leaves

½ tsp. dried savory

1-2 tsp. seasoned salt

freshly ground black pepper

¼ c. Dijon mustard

1½ c. brown sugar

Place half of the beans, water, half of the chopped onion, paprika, garlic, and bay leaves in the Instant Pot. Note the water level for future reference. Set on high and cook for 35 minutes. (See guide below if not using Great Northern dry beans.) Once machine is done cooking, allow it to naturally release pressure for about 20 minutes. Manually release the remaining pressure and carefully remove the lid. Using a large slotted spoon, lift the beans into a container. Save the water.

Add the remaining half of the dry beans and enough water to bring the level in the pot up to where it was for the first set of beans.

Please note: If you have a large Instant Pot, you may be able to pressure cook all the dry beans at once. If so, lucky you! I only have a 6 quart pot so I had to cook the beans in 2 batches.

While the beans are cooking, fry the bacon in a large fry-pan until crisp. Add the remaining onion and sauté just until translucent. (And no, you don’t drain off the bacon fat unless there is quite a bit. But with lean bacon you shouldn’t have too much.) Remove pan from heat and stir in the molasses, ketchup, rum, Worcestershire sauce, parsley, thyme, savory, salt, pepper, Dijon mustard, and brown sugar.

When the beans are all cooked, drain off all the water. (Save a couple cups of the water just in case additional liquid is needed during the baking process.) After the beans are drained, add them to the fry pan. Taste the sauce and adjust seasoning as required.

Pour into an oven proof covered casserole. Cover and bake in a pre-heated 275 degree oven for about 2 hours. Remove the lid and continue baking for another hour so that the top can brown nicely. (During the baking time, check the beans periodically to make sure they aren’t drying out too much. Add reserved Instant Pot water as needed.)

Remove from oven and serve warm.

Can be made ahead, refrigerated, and warmed just before serving.  

Instant Pot Cooking Time for Dried Beans:

Black Beans–30 Minutes on High Pressure

Chickpeas–40 Minutes on High Pressure

Kidney Beans–35 Minutes on High Pressure

Pinto Beans–25 Minutes on High Pressure

Navy Beans–30 Minutes on High Pressure

CHICKEN CORDON BLEU CASSEROLE

Once in a while I get an idea that won’t stop nagging at me. And the inspiration for this recipe came as one of those thoughts that just would not go away! And I’m glad it didn’t. Because the result was this recipe that is ever so much easier not only to prepare, but to eat than a regular chicken cordon bleu.

Now the first time I prepared this dish, I made the mistake of not making enough sauce. The casserole came out too dry. (My own fault since I glommed this recipe together from several I looked at on the internet.) But having eliminated that problem by doubling the sauce part, this is now a dish fit to serve company. Very tasty, and can be prepared ahead of time. I love that in a casserole.

So if you too love chicken cordon blue, but don’t appreciate the mess associated with the real thing, give this dish a try. It’s lovely. Great flavor and even a nice presentation.

And a general apology to our guests Tim & Susie, Todd & Cindy for having to eat my first attempt at this recipe. This version is much better. Honest it is!

And sorry about no photo of the casserole. Must have been brain dead. Just imagine a Pyrex dish with browned crumbs on the top and you have the whole picture. So to speak.

Chicken:

2 T. unsalted butter

4 boneless, skinless chicken breasts, cut into ¾-inch cubes  

kosher salt

freshly ground black pepper

Heat the butter in a large skillet. Add the chicken cubes lightly sprinkled with salt and pepper. Fry just until cooked through. Do not over-cook. Remove pan from heat. Using a large slotted spoon, transfer the cooked chicken to a roughly 9×13-inch casserole or glass Pyrex dish. Set aside. Pour the remaining liquid from the fry pan into a 4 cup measuring implement. Set aside.

Sauce:

6 T. unsalted butter

3 cloves garlic, finely minced

6 T. all-purpose flour

3 c. whole milk (approximately)

1 tsp. chicken bouillon  

3-4 T. Dijon mustard, or to taste

1½  c. grated Parmesan cheese

kosher salt

freshly ground black pepper

Melt the butter in a heavy pan. Add the garlic and cook for 1 minute. Whisk in the flour, and cook for 1-2 minutes. Add enough milk to the reserved chicken frying liquid to make 4 cups. Slowly pour in the milk mixture while whisking quickly to avoid lumps. Add the chicken bouillon. Whisk constantly over medium heat until the mixture begins to simmer and thicken, about 3-5 minutes. Once the sauce has bubbled and thickened, remove from heat and stir in the mustard and Parmesan cheese. Stir until the cheese is melted. Season to taste with salt and pepper.

Casserole Assembly:

12 slices deli ham (about ½ lb.), cut into small pieces (I use Black Forrest ham)

12 oz. shredded Swiss cheese, or more to taste

2 T. unsalted butter  

2 c. Panko bread crumbs    

Scatter about half the cut ham over the cooked chicken pieces. Evenly place the grated Swiss cheese over the first bit of ham. Scatter the remaining ham over the cheese. Spread the sauce evenly over the top.  

Melt the remaining 2 tablespoons of butter in a skillet over medium heat. Remove pan from heat and stir in the panko. Sprinkle over the top of the casserole. Note: If you are making this dish ahead of time, don’t add the Panko topping until just before you pop the casserole in the oven.

Bake in a pre-heated 350 degree oven for 30-40 minutes or until the top is browned and the casserole is bubbling. The last half of the baking time can be convection. (This will help brown the top.) Remove from oven and let sit for about 5 minutes before serving. 


GRUYÈRE CHEESE, SPINACH, AND MUSHROOM BREAKFAST CASSEROLE

In this day and age, if I don’t know all of the people coming to our home for a JazzVox pre-concert meal, having a vegetarian main dish option always makes me feel more comfortable. I simply can not stand having anyone feel like they are being left out. So as much as possible I make certain that there are at least several dishes that everyone can enjoy. Ok, I don’t go so far as to plan the menu around someone who only eats vegan. My efforts only extends so far. But if I know ahead of time that someone is gluten intolerant, or can’t eat nuts, I make certain that they won’t go hungry or feel deprived.

So for our last JazzVox concert for hosts and regulars, I decided to serve brunch. And because breakfast casseroles are so easy to prepare and must be made ahead of time, why would I serve anything else? My only problem was that in my repertoire of breakfast casseroles, none were vegetarian. So I did what I always do in cases like this – I stole borrowed someone else’s perfectly wonderful recipe. So this is my take on a recipe I found on the Food Network. A couple minor changes here and there, but who’s counting?  

So for a memorable Christmas breakfast this year, prepare this casserole a couple days ahead. Then fry up some sausages or bacon ahead of time and build some cinnamon rolls ahead and freeze them. Then Christmas morning all you have to do is turn on the oven and prepare a simple fresh fruit salad (dressed only with a tiny bit of vanilla Greek yogurt and brown sugar), and combine some orange juice and sparkling wine or Champagne together for a lovely mimosa for all the adults at table. I mean really, what a way to celebrate Christmas morning!  

You know, none of us know what will happen in the immediate future, so go for the gusto while you may. You will never regret that you created too many wonderful and memorable occasions for your family and friends. Or that you always served them wonderful food.

Love comes in all forms. And showing your feelings and love through good food to me is an essential part of that equation. As a very wise woman once told me – the best way to live a happy and fulfilling life is to always treat your family as friends, and your friends as family. And since I have always loved good food, I figure that good food is also of equal importance to everyone I feed. Thus, I have always tried to provide food that is as appetizing and nutritious as possible. Sometimes I succeed better than others, but my intentions are always to provide the tastiest and most wholesome food possible. You know the old aphorism – “she wasn’t good, but she had good intentions”. Well that was written for me when it comes to the kitchen. Some dishes just turn out better than others. But my intentions are always honorable!)

Happy holiday to all my readers in this most delicious of seasons.

For my other breakfast casserole recipes, see Italian Sausage, Mushroom, Cheese, and Egg Casserole, Roasted Potato, Ham, and Sharp Cheddar Cheese Breakfast Casserole, and Pancetta and Gruyère Breakfast Casserole.  


  • 4 T. extra-virgin olive oil, divided, plus more for greasing the dish
  • 8 c. cubed sourdough bread (crust removed, cut into 1-inch cubes)
  • kosher salt
  • freshly ground black pepper
  • 10 oz. button mushrooms, sliced (about 4 cups)
  • 2 cloves garlic, minced  
  • 1 tsp. fresh thyme leaves, roughly chopped
  • 5 oz. fresh baby spinach (about 5 cups)
  • 2 c. grated Gruyère cheese (use imported Gruyère, if possible)
  • 1/3 c. grated Parmesan
  • 8 lg. eggs, room temp.
  • 2½ c. half-and-half

Toss the bread cubes with 2 tablespoons of the oil, ¼ teaspoon salt, and a few grinds of pepper in a large bowl. Heat a large skillet over medium heat. Add the bread to the skillet, and cook, tossing occasionally, until toasted and hard, about 8-10 minutes. Return the toasted bread to the bowl to cool.

Wipe out the skillet. Heat the remaining 2 tablespoons oil over medium-high heat. Add the mushrooms and cook until they start to brown. Add the garlic, thyme, another ¼ teaspoon salt, and more pepper; stir continuously for 1 minute, then fold in the spinach. Continue to cook until the spinach is wilted, 1 to 2 minutes. Remove from the heat.

Place half the bread cubes in a lightly greased 9×13-inch glass baking dish or 3 qt. casserole dish. Sprinkle with half of the Gruyère and Parmesan. Add all of the mushroom-spinach mixture in an even layer. Top with the remaining bread cubes, Gruyère, and Parmesan.

In a large bowl, whisk together the eggs, half-and-half, ½ teaspoon salt and several grinds of pepper. Pour the egg mixture over the other ingredients. Cover with plastic wrap, and refrigerate for at least 6 hours up to 2 days. Remove the casserole from the refrigerator 30 minutes before baking.

Bake the casserole in a preheated 350 degree oven until the custard is set and the top is golden brown, 50 to 55 minutes. Cool for at least 15 minutes before serving warm or at room temperature.

CHICKEN WITH PROSCIUTTO AND PEPPER JACK CHEESE

After two weeks of painters having their way with our living room, kitchen, butler’s pantry, entry way, hall, stairway to the lower level, downstairs hall, and our master bath, I was just about ready to go crazy. (They aren’t quite done yet, but at least I can see my floors and the counters in my kitchen.) So, this past Friday, after they had removed most of the protective paper and tape from the kitchen, I was finally able to cook a real dinner for the first time in 13 days. 13 DAYS!

Now, I don’t know whether this chicken dish tasted amazing because I was totally tired of restaurant food, or because it truly was flat out delicious, but I’m going to lean towards the latter. Plus it was easy to prepare. That’s always a plus in my book!

I found this recipe on the Genius Kitchen site, but of course I made a few changes. I often do a search under ingredients that I really need to use up before they go bad. And sometimes the list is very unusual. But I never fail to find a recipe, even if the ingredients appear at first site to be totally incompatible. Not these ingredients which were obviously made for each other. But you know what I mean. Ingredients like brie and mango chutney. (See my recipe under Two Brie or Not two Brie. Or bacon, onions, garlic, and brown sugar under Bacon Jam.)

So when I searched under chicken, prosciutto, and Pepper Jack cheese, there were a fair number of recipes that included this combination. But the basis for this recipe really caught my eye. And I am so glad it did! This recipe is so scrumptious it should be in its own category – Perfect for Company!

So next time you need an easy and stress less main dish for a family and/or friends gathering, I recommend this lovely recipe. It can easily be doubled, tripled, etc. It can even be made ahead and refrigerated until needed. If you do make it ahead, be sure to bring it to room temperature before you place it in your oven. You really don’t want to overcook the chicken by having it in the oven for any longer than necessary.

  • ¼ c. unbleached all-purpose flour 
  • ½ tsp. kosher salt
  • freshly ground black pepper
  • 2 boneless, skinless chicken breasts, cut in half lengthwise
  • 4 T. unsalted butter, divided
  • 4 slices thinly cut prosciutto, roughly chopped into pieces
  • 1 c. shredded Pepper Jack cheese 
  • 2 T. finely chopped shallot  
  • 8-10 button mushrooms, thinly sliced
  • 2 small garlic cloves, minced
  • ¼ tsp. dried thyme
  • ¼ c. dry white wine
  • ¼ c. chicken broth
  • ¼ c. dry sherry
  • ¼ c. half & half, whole milk, or whipping cream

Place the flour, salt, and pepper in a bag. Shake the bag to blend the ingredients. Add the chicken and shake until the chicken pieces are totally coated. (Save any remaining flour in the bag for the sauce.)

Melt 3 tablespoons of the butter in a large frying pan over medium heat. Cook the chicken until it is a nice golden brown on both sides. Remove from frying pan (set aside the pan) and place the chicken in a lightly buttered 9×13-inch Pyrex baking dish or casserole in a single layer.

Top each piece with a quarter of the cut prosciutto and a quarter of the shredded cheese. Set aside.

Return the frying pan to the stove, add the remaining 1 tablespoon of butter, and cook the shallots and mushrooms until the shallots are soft. Add the garlic and cook for one minute.

Add about a rounded teaspoon of the coating flour to the pan; cook for one minute. Stir in the thyme, white wine, and broth. Let burble over low heat for about 5 minutes. Add the sherry and heavy cream. Adjust seasoning. Cook for another minute or two.

Pour the sauce over the chicken. Bake in a pre-heated 375 degree oven for about 20 minutes or until bubbly.


CAULIFLOWER “RICE” CASSEROLE WITH GROUND BEEF, SOUR CREAM, BLACK OLIVES, AND PEPPER JACK CHEESE

So, if you are culinarily savvy, you probably already know about, and have even used cauliflower rice. However, if you are like me, still basically cooking like I did 30 years ago, you may be thinking to yourself – cauliflower what? Well welcome to my world pilgrim. Until my daughter Paula introduced me to this healthy, delicious, versatile, and low carb substitute for rice, I was completely oblivious to how this humble Brassica oleracea can help people cut back on carbs while at the same time adding more vegetable matter to their diet.

Now of course I have been serving cauliflower to my family and friends since the beginning of my awareness that the room my mother should have spent more time in had a purpose other than to contain a cookie jar! (In other words, since my early 20s.) But I have always lagged behind other cooks when it came to trying new ingredients and using modern cooking techniques, tools, and appliances. I even fought against getting a microwave back when they were the hottest new appliance since the electric fry pan! (I tend to be kind of oblivious when it comes to new gadgets and trendy new food preparations. Maybe if I routinely watched television and therefore commercials, I would know more about what’s new and exciting in the kitchen. But alas – just not going to happen! I will simply have to rely on family and friends for information on innovative new taste treats, products, and appliances. Thanks again for the Instant Pot Paula.)  

But the older I get, the more I love it when people introduce me to wonderful new cooking concepts or as in this case, a brilliant and tasty use for a readily available, inexpensive, and healthy vegetable. Who knew just by chopping a head of cauliflower into rice sized pieces, that many of my favorite recipes could easily be adapted to a healthier version? Not me, that’s for darn sure. So thank you again darling daughter for the cauliflower rice “heads” up.

And while I’m on the subject of cauliflower, I should mention that this casserole is delicious and Mr. C absolutely loves it. (Whoa! Mr. C in the same sentence with cauliflower and love. That’s not a sentence I can write every day and may never have the opportunity to write again. I should mark my calendar. Maybe go buy a lottery ticket? Have a second martini tonight to celebrate the occasion? Not to worry, I’ll think of something memorable.)

  • 1 T. extra virgin olive oil
  • 2-3 c. cauliflower rice (packaged or chopped in your food processor) 
  • 2 tsp. steak seasoning, divided (I use Montreal Steak Seasoning)
  • freshly ground black pepper
  • 1 lb. lean ground beef
  • ½ c. chopped onion
  • 2 garlic cloves
  • ½ tsp. beef base (I use Better Than Bouillon Beef Base)
  • 1 egg
  • 1 c. sour cream (Mexican crema agria is best for this dish)
  • 2 c. grated Pepper Jack cheese, divided (you can substitute sharp cheddar cheese if you prefer)
  • 1 can (2.25 oz.) sliced black olives, drained
  • 3-4 green onions, thinly sliced

Heat the olive oil in a large frying pan. Add the cauliflower rice, 1 teaspoon of the steak seasoning, and pepper. Sauté the cauliflower until crisp tender, about 4-5 minutes. Remove from pan and set aside.

Add the ground beef to the pan and cook until just brown. Add the onions and cook until tender. Add the garlic and cook for 1 minute.

Meanwhile whisk together the remaining 1 teaspoon steak seasoning, beef base, egg, and sour cream. Pour over the meat mixture, along with the sautéed cauliflower rice; stir until well combined. Remove pan from heat. Stir in 1½ cups of the cheese and the black olives. Adjust seasoning.

Scoop into a lightly greased casserole or Pyrex dish. Sprinkle with remaining ½ cup cheese and green onions.

Bake in a pre-heated 350 degree oven for about 30 minutes or until the top is starting to brown and the casserole is bubbly. Remove from heat and let sit for 5-8 minutes to set up before serving.


CHEDDAR CHEESE POLENTA TOPPED SHEPHERD’S PIE

This is a yet another recipe from our dear friend Jim for a shepherd’s pie that features leftover steak, pot roast, sirloin tip roast, you name it! But don’t let the fact that you don’t have any leftover beef stop you from making this fantastic dish.

Cooking class: The main thing to consider when using cooked beef or cooking some beef right on the spot, is that you should use either a tender piece of cooked steak, or a less expensive piece of beef that has already been tenderized by the cooking method. Like pot roast for example. The reason I mention this is because if you simply fry up a piece of bottom round, for example, then cut it into bite sized pieces, your chances of the beef staying tender after baking for 35 to 40 minutes in a thick liquid is slim. Better to start with an already cooked steak or tenderized piece of meat. If none available, your next option is to grill or fry up a high quality, fairly marbled piece of steak to no more than medium rare. Allow the meat to cool completely, then cut it into bite sized pieces.

But enough about my opinion of the meat you choose to use in this dish. On to the rave reviews this pie garnered from Margo, Mr. C. and me while we stuffed our faces at Jim and Margo’s table a couple of weeks ago.

Wow! I think that was the first word out of my mouth that evening. Quickly followed I’m sure with – please sir, may I have some more? (Sounds familiar, right?) But I meant it. The shepherd’s pie was just amazing. So of course the first thing after dinner I made Jim write down the recipe. (Of course I did.) Because I really wanted to be able to make this dish any old-time I felt like it, and I wanted to share this fabulous recipes with you.

So, last evening, having leftover pot roast in the refrigerator, I prepared Jims’ recipe (only minor changes here and there) and the recipe below is the result.

I have to tell you, this recipe for shepherd’s pie is absolutely scrumptious. Truly the best I have ever tasted. And yes, I can hear you saying “but it isn’t topped with mashed potatoes”. OK, if you must, you can top the pie with mashed potatoes. Just don’t mess with the filling part because it is perfection personified!

Jim, thank you again for this marvelous recipe. Also to you and Margo for being such wonderful people and such dear friends. I don’t know what we did to deserve you, but whatever it was, it must have been spectacular!! 

  • 2 T. extra virgin olive oil
  • 1 med. onion, chopped
  • 1 lg. carrot, cut into small dice
  • 1 small rutabaga, cut into small dice
  • ½ lb. button mushrooms, sliced
  • ¼ c. white (dry) vermouth
  • freshly ground black pepper
  • 2 tsp. herbs de Provence (see my recipe below)
  • 1 T. chopped fresh parsley
  • 2 T. unsalted butter
  • 2 T. flour
  • 2 c. vegetable stock (can be made with Better Than Bouillon and water)
  • 2 tsp. beef flavoring (Better Than Bouillon, straight out of the jar)
  • 2-3 c. cubed leftover steak, pot roast, sirloin tip roast, etc.
  • ½ c. uncooked frozen petite peas, opt.
  • paprika

Heat the olive oil in a large fry pan. Sauté the onion, carrot, and rutabaga until the veggies are starting to get tender. Add the mushrooms; continue cooking until the carrot pieces are completely crisp tender. Deglaze the pan with the vermouth, then add the pepper, herbs de Provence, and parsley.

Add the butter and flour; cook for a good 2 minutes whisking the entire time. Slowly whisk in the vegetable stock and beef flavoring. Allow sauce to thicken stirring continually.  Add the leftover meat. Bring to a boil and adjust seasoning.  (Don’t add too much salt, because the polenta also contains salt.) Stir in the uncooked peas.

Pour into a casserole dish, top with polenta, and sprinkle lightly with paprika. (Leftover polenta works great for this dish.)

Bake the pie in a pre-heated 350 degree oven for 35-40 minutes or until the filling is hot and bubbly. Remove from oven and let sit for 8-10 minutes before serving.

CHEDDAR CHEESE POLENTA

  • ½ c. whole milk
  • 1½ c. chicken stock or water
  • ¼ tsp. kosher salt
  • freshly ground black pepper
  • ½ c. finely ground polenta/cornmeal
  • 1 T. unsalted butter
  • 1 c. shredded sharp cheddar cheese

Bring the milk, stock, salt, and pepper to a boil in a covered, medium-sized saucepan. Pour polenta slowly into boiling liquid, whisking constantly until all polenta is stirred in and there are no lumps. Reduce heat to low and simmer, whisking often, until polenta starts to thicken, about 5 minutes. Polenta mixture should still be slightly loose.

Cover and cook for 20-30 minutes, whisking every 5 to 6 minutes. When polenta is too thick to whisk, stir with a wooden spoon. Polenta is done when the texture is creamy and the individual grains are tender. Turn off heat and gently stir the butter into the polenta then mix in the cheese. Adjust seasoning before topping the Shepherd’s pie.

Note: I made the polenta before I started working on the shepherd’s pie. The polenta happily burbled away while I chopped the veggies for the pie. When I was ready to top the pie, the polenta was already fairly stiff. I merely scraped off portions of the polenta and carefully smeared them all over the top of the beef mixture. Piece of cake.

HERBS DE PROVENCE  

  • 1 T. dried savory
  • 1 tsp. dried rosemary leaves, semi broken down in a grinder or mortar and pestle
  • 1 tsp. dried basil
  • 1 tsp. dried marjoram
  • 1 tsp. dried oregano
  • 1 tsp. dried thyme, semi broken down in a grinder or mortar and pestle
  • 1 tsp. dried parsley

Combine all ingredients in a bowl. Store in an airtight container in a cool, dark place. Notice there is no lavender in my mix. I do not care for cooking lavender, therefore I leave it out!


GRILLED PORK TENDERLOIN AND NOODLE CASSEROLE

OK, yesterday I promised to post a couple of recipes to help you use up some of your leftover grilled pork tenderloin from my 2 recent posts starring this fabulous cut of pork.

Now I realize, having leftover meat is not a bad thing, in fact it’s a great thing. But what to do with it can sometimes be daunting. So this is what I did to utilize the leftover pork tenderloin from my recipe for Grilled Pork Tenderloin with Bourbon BBQ Sauce. I made a casserole. And oh boy was it good. And no, I didn’t use the leftover BBQ sauce. But the pork itself was seasoned perfectly for the other ingredients in this casserole. (You’d think I actually planned it that way. But boy would you be wrong. Just a lucky coincidence!)

For the rest of the casserole, I only used ingredients I happened to have on hand, so no trip to my local grocer was necessary. So if you decide to try this recipe, you too can use what you happen to have on hand. No red bell pepper, no problem. Swiss cheese, but no cheddar – knock yourself out. Hate peas – who cares! It’s a casserole using leftover meat – make it your own. This recipe is just a suggestion for what to do when staring at leftover pork tenderloin in your refrigerator and not wanting to serve it exactly like you did the previous evening.

Of course, you could always just thinly slice the meat, then gently warm it in the leftover BBQ sauce, and slather it between two halves of a lovely, crispy bun. But what fun would that be, when instead you could empty out your refrigerator veggie bin and have leftover casserole for your next days’ lunch? Your welcome!

  • 5 T. butter, divided
  • 2 T. flour
  • 1½ c. milk (I use whole milk)
  • ¼ tsp. kosher salt
  • freshly ground black pepper
  • 1 tsp. dried parsley
  • pinch crushed red pepper flakes, opt.
  • 1 tsp. Dijon mustard
  • 2 tsp. Worcestershire sauce
  • ½ c. diced onion
  • ½ c. finely diced celery
  • ¼ c. red bell pepper, finely diced
  • 6-8 sliced fresh mushrooms
  • 2 garlic cloves, finely minced
  • ½ c. sour cream, or more to taste
  • 1½ c. grated sharp cheddar cheese
  • ½ c. frozen petite peas
  • 2 c. egg noodles, cooked al dente and drained 
  • 2 c. thinly sliced cooked pork tenderloin, cut into narrow strips  
  • ¾ c. Panko breadcrumbs

Melt 2 tablespoon of the butter in a small saucepan. Whisk in the flour and stir for about a minute. Gradually whisk in the milk and cook until the sauce is thick and creamy. Take off heat and stir in the salt, pepper, parsley, crushed red pepper, Dijon mustard, and Worcestershire sauce. Set aside.

Melt 2 tablespoons of the butter in a large skillet over medium heat. Stir in the onion, celery, red pepper, and mushrooms; sauté until the onion turns translucent. Don’t allow the veggies to brown. Stir in the garlic and cook for one minute.     

Remove pan from heat and stir in the prepared sauce and sour cream until well combined. Then add the cheese, peas, cooked noodles, and cut pork. Adjust seasoning.

Dollop mixture into a lightly greased 9×13-inch baking dish (preferable glass) or ceramic casserole dish.

Melt the final 1 tablespoon butter in a small pan. Stir in the Panko. Sprinkle topping evenly over the casserole.

Bake in a preheated 325 degree oven for 35-40 minutes, or until bubbly and the topping is a nice golden brown.


CREAMY BAKED PASTA PRIMAVERA

In my quest for vegetarian options to offer family and friends, I threw caution to the wind and glommed together this recipe for a primavera in the form of a casserole/lasagna want-to-be. (Too lazy to use lasagna noodles, so used fusilli instead.) (Coincidentally, using fusilli pasta is easy to serve. That always works for me!)

Now, at first glance you might think this recipe very time consuming to fix. But if you study the preparation instructions you will find that actually this dish comes together relatively quickly. Nothing fancy happening in any of the steps. And oh the results. If you are a veggie and cheese lover like I am, this is a dish you will love from first bite.

Now I’m not going to tell you that just because veggies are the star of this show, that this is a nutritionally perfect pasta dish. Yes the veggies are marvels of nature, but the butter, whipping cream, and various cheeses offset some of the benefits gained by “eating your veggies”. But once in a while, every mouth deserves a break from the mundane. And if you are going to indulge every so often, at least you can eat something with some nutritionally redeemable qualities at the same time. (That’s my theory and I’m sticking to it!)

So chop us some of your favorite veggies. (Be inventive and use the veggies you like best.) Grate some cheese, and al dente you up some pasta. (Use your favorite pasta. Doesn’t have to be fusilli.) Stir them all together, throw the whole mess in the oven, and serve yourself up a treat.

Perfect served with a nice crisp green salad and some chewy Italian bread. 

  • 3 T. extra virgin olive oil, plus more as needed
  • 1 sm. carrot, halved lengthwise, then thinly sliced into half rounds  
  • ½ yellow onion, chopped
  • ¼ red onion, chopped
  • ½ bunch asparagus, sliced into diagonal ¾-inch pieces
  • 1 red pepper, seeded and sliced into thin strips
  • 14-16 button mushrooms, thinly sliced
  • 1 sm. yellow summer squash, cut into ¾-inch pieces
  • 1 med. zucchini, cut into ¾-inch pieces
  • 3 garlic cloves, minced
  • ¼ tsp. kosher salt
  • freshly ground pepper
  • 1 c. halved small cherry or grape tomatoes
  • ½ c. unsalted butter (1 stick)
  • 1 c. heavy whipping cream
  • 1 c. whole milk
  • 4 oz. (½ lg. pkg.) cream cheese
  • 1½ tsp. Italian seasoning
  • 2 c. grated Parmesan cheese
  • 1 c. frozen petite peas
  • ¾ lb. fusilli pasta, cooked al dente  
  • vegetable broth or pasta water, as needed
  • 1 c. grated mozzarella cheese

In a large skillet, heat the olive oil over medium heat. Add the carrot and sauté for about 4 minutes. Add the yellow onion, red onion, asparagus, red pepper, and mushroom slices. Sauté until all the veggies are crisp tender, about 4-5 minutes. Add the squash and zucchini and sauté for a couple of minutes. Add the garlic, salt, pepper, and tomatoes; cook for 1 minute. Remove pan from heat; set aside.

In a saucepan set over medium heat, whisk together the butter, heavy whipping cream, milk, and cream cheese until the butter melts and the sauce is smooth and starting to thicken, 3-5 minutes. Remove from heat and add the Italian seasoning and grated Parmesan cheese. Adjust seasoning.

In a large bowl, combine the peas, cooked veggies, sauce, and al dente pasta. If the sauce needs a little more liquid, stir in a small amount of vegetable broth or pasta water.

Lightly grease a 9×13-inch baking dish and scoop in the pasta mixture. Pat down a bit and sprinkle with the grated mozzarella.

Bake in a pre-heated 375 degree oven for 30-40 minutes or until the entire dish is heated through and the mozzarella is melted and turning a light golden brown.

Please Note: If you are making this dish ahead of time, let each part of the recipe come to room temperature before mixing together. Cover and refrigerate until about an hour before you place in pre-heated oven.