Category Archives: CAKES – see PATTI CAKES

SPICED AND SPIKED CREAM CHEESE FROSTING

As you well know, I love to mess with already perfectly wonderful recipes just for the heck of it. And one of my favorite things to do is experiment with adding liquor or liqueur to dessert items such as cake batter, pie filling, frosting, glaze, whipped cream, etc. etc.

So while contemplating how to kick my cream cheese frosting recipe for Apple Cake (on this site) up a notch, I decided to add some cinnamon, because there’s cinnamon in the cake batter, and some Calvados (apple flavored brandy) because there are apples in the batter. (I’ve always excelled at stating the obvious!)

Anyway, that’s exactly what I did when I prepared the frosting for the apple cake I made for last weekend’s JazzVox pre-concert meal. And our guests told me they thought the frosting was pretty darn OK.

Note: When I use alcohol in a dessert, I usually cut down on the amount of vanilla. (If vanilla is called for, that is!)

So next time you make a cake, try enhancing the flavor of the batter and/or the frosting  with a bit of spice and/or a wee dram of something from the adult beverage category. And please don’t worry about the alcohol content. Adding a tiny bit of liquor or liqueur to your frosting recipe is about the same as adding pure vanilla extract. Pure vanilla extract legally has to contain at least 35% alcohol, which is basically the same proof as vodka or rum. So don’t fret about adding alcohol to your favorite frosting even if your children are going to be the primary consumers. You have undoubtedly been “spiking” their frosting since the first time they smeared it all over their face, your clothes, and the tray of their high chair! Have a great day.

  • ½ c. (1 stick) unsalted butter, room temperature
  • 1 (8-oz.) pkg. cream cheese, room temperature
  • pinch salt
  • 2 T. brown sugar
  • ¼ tsp. ground cinnamon
  • ½ tsp. vanilla
  • 1½ T. liqueur – Calvados, brandy, bourbon, spiced rum, etc. (whatever flavor goes best with the ingredients in your baked goodie)
  • 1 lb. powdered sugar, more or less

Beat the butter, cream cheese, salt, and brown sugar together until creamy. Mix in the cinnamon, vanilla, and liqueur. Add powdered sugar until you reach your desired consistency.

FYI: For more information about pure vanilla extract, read the January 21, 2015 article entitled Why Don’t You buy Vanilla Extract in a Liquor Store by Michael Y. Park (via Bon Appétit magazine). It’s a really well written, informative, and scary article!


CHOCOLATE OLIVE OIL CUPCAKES WITH CREAMY CHOCOLATE FROSTING

So here’s how it all started. My dear friend Vicki gifted me with a bottle of chocolate olive oil. And since I have never been impressed with flavored olive oil, I was naturally suspicious. Especially since it was chocolate and olive oil mixed together. Obviously too foreign a concept to resonate clearly in my brain! So therefore the bottle sat in my pantry for a good couple of years. It may have been hidden, but I never forgot that it was in there.

So one day last week I remembered the poor lonely bottle being ignored in my pantry and sought out recipes for this frankly intimidating ingredient. And oh my! I found this recipe on the Queen Creek Olive Mill site, but added espresso powder and used my own frosting recipe.

Well I’m here to tell you, this recipe makes possibly the best chocolate cupcakes I have ever had the pleasure of putting in my mouth. They turned out super moist, super chocolaty, and absolutely delightful. So much so, that I have spent about 6 hours now looking at other recipes that contain chocolate olive oil, because I know that olive oil is a lot healthier for me than either butter or vegetable oil. Actually I’m looking at sweet recipes that use regular olive oil too. (And yes, you can make this recipe with regular olive oil, as long as it isn’t too herby or bitter.)  

And why the espresso powder in both the cake and frosting recipes you might ask. Well, it’s because coffee is a great way to enhance the flavor of cocoa powder, resulting in a chocolatier flavor. And even if you don’t like the flavor of coffee, you poor deprived person, you won’t notice the coffee flavor. So not to worry.

So next time you want to make cupcakes that will knock the socks off whomever you are gracing with your baked goods, mix up a batch of these little darlings. They truly are out of this world. Thanks again Vicki for your fun gift. Actually, I found a recipe for preparing homemade chocolate olive oil. If it tastes as wonderful as it appears, I will be sharing the recipe with you in the near future. That and a couple of other homemade recipes for fabulous products introduced to me by my sister-in-law Katie – preserved lemons and black garlic. Thanks again Katie.

(And yes I know you can buy preserved lemons and black garlic in upscale markets or over the internet, so I will be posting recipes that include these 2 fantastic taste treats in the next couple of weeks. But because I’m cheap frugal, I’m going to show you how to make them at home too. That is, after I learn how first. Stand by!)

  • 1¾ c. unbleached all-purpose flour
  • 2 c. sugar
  • ¾ c. cocoa powder (I use Ghirardelli Majestic Premium Cocoa Powder from Cash & Carry)
  • 1½ tsp. baking powder
  • 1½ tsp. baking soda
  • 1 tsp. salt
  • ½ tsp. instant espresso coffee (I use Medaglia D’oro)
  • 2 eggs
  • 2 tsp. vanilla
  • ½ c. chocolate olive oil or “light” regular olive oil
  • 1 c. whole milk
  • 1 c. boiling water

Using a regular whisk, mix the flour, sugar, cocoa, baking powder, baking soda, salt, and espresso together in the bowl of your mixer. (You can also pour the ingredients into the mixer bowl through a fine mesh strainer.) You just want to eliminate any possible lumps.

Using the beater, add in the eggs, vanilla, and chocolate flavored olive oil. Add the milk and beat to blend. Add the boiling water. Continue to beat at low speed until well blended.

Pour the thin batter into cupcake paper lined cupcake pans and bake in a preheated 325 degree oven for 20 to 25 minutes. Cupcakes are done when a toothpick inserted into the center comes out clean.

Cool in pan for 10 minutes then remove to wire rack to finish cooling. Top with frosting.

Hint: Because the batter is so thin, I pour it into a glass measuring cup to fill the cupcake papers ¾ full. Don’t fill them any higher because the batter is going to expand a great deal. Should make 24 cupcakes.

Creamy Chocolate Frosting:

  • 3 c. powdered sugar, or more as needed
  • 7 T. unsweetened cocoa powder
  • ½ tsp. instant espresso coffee
  • 1/8 tsp. salt
  • 6 T. unsalted butter, room temperature
  • 1 tsp. vanilla extract
  • 5 T. half & half or heavy cream, or more as needed

In a medium bowl, sift the confectioners’ sugar, cocoa, instant espresso powder, and salt or press through a fine mesh strainer; set aside. (You just want to break up any lumps.)

In a large bowl, beat butter and vanilla together until smooth and creamy. Gradually beat in sugar mixture alternately with half & half. Beat until very light and fluffy. If necessary, adjust consistency with more half & half or powdered sugar.


CREAM CHEESE POUND CAKE WITH VANILLA ICE CREAM AND STRAWBERRY RHUBARB ORANGE SAUCE

Sometimes inspiration comes from just looking out a window.

While I was dusting the window sill in my guest bedroom a few weeks ago, I looked down on a half wine barrel filled with dirt and rhubarb leaves. Couldn’t see the rhubarb stalks yet, but just the greenery alone was promise enough that better things were about to happen – like SPRING AND SUMMER! And rhubarb stalks. And strawberries. And picnics. And, and, and…..well the list just goes on and on!

And if ever there was a combination that positively smacked of summer being just around the corner, it’s rhubarb, and shortly thereafter – strawberries. So I decided to feature that mighty duo for our next pre-concert (JazzVox) dessert.

I already had the perfect pound cake recipe (Monica Parcell via Bon Appétit magazine) so that part was easy. But I knew that the sauce had to be special since it was featuring two of the crowning glories of the edible plant kingdom. But I wanted a new twist on a strawberry-rhubarb sauce.

Now everyone who knows me is aware of my passion for adding liqueur to my desserts. Not more than a wee dram of liqueur mind you (unless you forget about my Christmas fruitcake recipes), but just enough to add a depth of flavor that would be missed if it weren’t there!

So in doing research on rhubarb and strawberry sauces, I found a lot of recipes that contained a bit of lemon. Ah – citrus! That sounded good, but it wasn’t quite what I had in mind. Then I stumbled onto a couple of recipes that referenced orange juice or Cointreau in the sauce. Now you’re talkin’! So I decided instead of using a small amount of straight water to make the sauce, I would use some powerful orange juice. Then just to add that little “something”, I threw in some vanilla and Cointreau at the end. (I wanted to remind the strawberries and rhubarb how beloved they were to this cook.)  And the result: pretty darn palatable.

So if you want a dessert for a crowd that can be prepared well ahead of time, search no further. Both the cake and the sauce only improve with a little bit of age. The ice cream, well, I wouldn’t say it improves with time, but it doesn’t seem to suffer much either from a short stay in a sub-zero environment. BTW – I love ice cream.

Things I’ve learned from ice cream. 1) Stay out of direct sunlight 2) Don’t be scared of getting cold or being in the dark 3) Hang out with nuts 4) Go bananas once in a while 5) Stay true to yourself, even when surrounded by enjoyable distractions.

  • 1 c. un-salted butter, room temperature
  • 8-oz. cream cheese, room temperature
  • 3 c. sugar
  • 1 tsp. salt
  • 6 lg. eggs, room temperature
  • 4 tsp. vanilla
  • 3 c. unbleached all-purpose flour
  • good quality vanilla ice cream
  • Strawberry Rhubarb Orange Sauce (see recipe below)

Cream butter and cream cheese together in a large mixing bowl. Add sugar and salt and whip until mixtures is light and fluffy, about 5 minutes. Add eggs one at a time. Beat in vanilla. Add flour at low speed until well incorporated, but do not overbeat. Transfer batter to a lightly buttered glass 10×16-inch baking dish. (I use my glass Pyrex pan.) Level the top with an offset spatula.

Place the dish in a cold oven. Set the temperature to 200 degrees; bake for 20 minutes. Increase the temperature to 250 degrees; bake for 20 minutes. Increase temperature to 275; bake for 10 minutes. Increase temperature to 300 degrees and bake for about 20-30 minutes or until a toothpick inserted near the middle of the cake comes out clean. Remove from oven and cool on a rack. Can be made 2-3 days ahead of time.

To store, cover the top of the baking dish with plastic wrap and keep at room temperature. Do not refrigerate.  

When ready to serve, cut the cake into desired size pieces. Plate with a scoop (or two) of ice cream on the side dolloped with some of the sauce.   

STRAWBERRY RHUBARB ORANGE SAUCE

  • ¾-1 c. granulated sugar (depends on how sweet you like your sauce)
  • 2 T. orange juice concentrate
  • scant ½ c. water
  • 5 tsp. cornstarch
  • 3 c. diced rhubarb
  • 3 c. chopped fresh strawberries
  • 1 tsp. vanilla
  • 1 T. Cointreau (or any other orange flavored liqueur)

Combine sugar, orange concentrate, water, and cornstarch in a large sauce pan. Bring to a boil over medium heat. Add the rhubarb; reduce heat and cook, stirring occasionally, until the rhubarb is tender, 5 to 8 minutes. Add the strawberries, cook for 30 seconds and remove from heat. Stir in the vanilla and Cointreau.

Serve warm or at room temperature.


CSERESZNYÉS LEPÉNY (HUNGARIAN SOUR CHERRY CAKE)

When researching what dessert to serve with a Hungarian themed meal for our JazzVox guests this past weekend, I stumbled on this recipe from Saveur magazine. Hungarian Sour Cherry Cake. It seemed, from all my reading on the subject of favorite Hungarian foods, that cherries were universally loved. Almost to the point of being part of the genetic makeup of the Hungarian people. Who knew? So why look any further? Then I saw a picture of the “cake” and I wasn’t terribly impressed.

Definitely not a thing of beauty. And flat. It looked much more like a bar cookie than a cake. But who was I to question a dessert that was absolutely adored by the population of an entire nation! So I decided to serve the cake in spite of its lack of visual appeal. And boy am I glad I did! After tasting the cake, I knew why the cake so richly deserved to be cherished. It’s wonderful. Not too sweet, full of cherries, (who doesn’t love cherries) and featuring whole-wheat flour which lends a unique texture and earthy taste to the cake. My friend Vicki suggested that using whole-wheat pastry flour would result in the same desired flavor, but with a more refined texture. So I plan to use whole-wheat pastry flour the next time I bake this simple to prepare dessert. (See which I prefer!) So then how to serve the cake?

Well I have long believed that sweetened whipped cream is the answer to the age old question of how to garnish any dessert. So I whipped up some heavy cream, added a couple tablespoons of powdered sugar, and a few teaspoons of syrup from a jar of specialty cherries* that Mr. C. uses in his Manhattans. Then when it was time to serve dessert, I dolloped each individually plated piece of cake with the concoction. Added much appeal to the presentation and tasted absolutely perfect with the cake. 

So if you need a simple dessert that serves 10-12 people, this is the dessert for you. Just don’t forget to make the whipped cream. Left over whipped cream? Add a dollop to your coffee the next morning. Ain’t nothin’ finer!

(BTW, for Mr. Cs recipe for a perfect Manhattan, enter “Manhattan” in the search box on this site.)

  • 2 cubes (16 T.) unsalted butter, room temperature, plus more for greasing the baking pan
  • 1½ c. granulated sugar
  • 3 T. kirschwasser**
  • 1 tsp. vanilla extract 
  • 1 egg, room temp.
  • 2¼ c. regular whole-wheat flour or whole-wheat pastry flour
  • 1 T. baking powder
  • ¾ tsp. kosher salt
  • 1 c. milk (preferably whole milk)
  • 2 lb. pitted frozen sour cherries, thawed and “drained” on paper towels
  • ¼ c. all-purpose flour

In the large bowl of your mixer, beat the butter, sugar, kirschwasser, and vanilla together until pale and fluffy. Add egg; beat until incorporated.

In a medium bowl, whisk together the whole wheat flour, baking powder, and salt. With the mixer running on low speed, alternately add flour mixture and milk in 3 batches to make a thick batter. Spoon batter onto a buttered 13″ x 18″ x 1″ (half sheet) baking sheet and smooth out with an offset spatula. Toss cherries with the ¼ cup flour. Set cherries evenly over the top.

Bake in a pre-heated 375 degree oven until cake is golden brown and feels set to the touch, 30-35 minutes. Remove from oven and cool at least 30 minutes before serving.

Great topped with whipped cream that has been sweetened with powdered sugar and vanilla, a wee bit of kirschwasser, or my favorite – the syrup from a jar of really good cherries*.  

*I use the syrup from either Luxardo Maraschino Cherries or Culinary Circle Amarena Cherries. Both are Italian products.

**According to Wikipedia – “Kirschwasser (German for “cherry water”) or simply kirsch, is a clear, colorless fruit brandy traditionally made from double distillation of Morello cherries, a dark-colored cultivar of the sour cherry. However, it is now also made from other kinds of cherries. The cherries are fermented completely, including their stones. Unlike cherry liqueurs and cherry brandies, kirschwasser is not sweet. The best kirschwassers have a refined taste with subtle flavors of cherry and a slight bitter-almond taste that derives from the cherry seeds.”


CHOCOLATE SHEET CAKE WITH CHOCOLATE HAZELNUT TOPPING

When you are expecting a large number of guests, there is no simpler dessert to prepare than a sheet cake. And contrary to popular belief, cake can be really, really delicious. I found the cake part of this recipe on the Taste of Home site a few years ago. I first served it as Mocha Chocolate Cake with Sour Cream Frosting. (On this site) And it has become my number one favorite chocolate cake. And every time I make it, it always meets with rave reviews. The cake is so moist, tender, and delicious, that frosting or topping probably wouldn’t be necessary. But because I enjoy gilding a lily, I always frost or top the cake with a little “something”.

This time I decided to top the cake with a chocolate hazelnut concoction. (It was going to be dessert for an Italian themed meal, so of course chocolate hazelnut anything would have been perfect!)  I found the recipe on the Cookies and Cups website. It was actually a cake filling recipe, but it looked so wonderful, that I had to give it a try. Of course I messed with it by adding Frangelico, but then, how could a splash of Frangelico hurt?

In my mind I thought I was creating a frosting, but as sometimes happens, things don’t always work out exactly as planned. I felt the “frosting” was too soft to set properly. So I decided that serving pieces of cake with a generous dollop of this amazingly flavorful “topping”, then garnishing each serving with chopped hazelnuts, was the way to go. And not only did it end up tasting wonderful, the presentation was lovely.

For me, the most delightful thing about cooking is the experimental process. And there are so many wonderful internet cooking sites to help me achieve my goals. Anything I need, or any subject of interest is right at my fingertips. So special thanks to the wonderful cooks who share their recipes with the world. They make me a better cook and I totally appreciate every single one of them.

  • 1 c. unsalted butter, room temperature
  • 3 c. packed brown sugar
  • 4 eggs, room temperature
  • 4 tsp. vanilla extract, divided
  • 3 c. unbleached all-purpose flour
  • ¾ c. cocoa powder
  • 1 T. baking soda
  • ½ tsp. salt
  • 1½ c. room temperature coffee or 1½ c. water and 1 rounded tsp. instant espresso powder
  • 1-1/3 c. sour cream
  • 8 oz. heavy whipping cream
  • 8 oz. cream cheese, room temperature
  • ¾ c. chocolate hazelnut spread (I use Nutella)
  • 2 c. powdered sugar, or more as needed
  • 2 T. Frangelico (hazelnut liqueur)
  • chopped toasted hazelnuts, garnish

Cream the butter and brown sugar together. Add the eggs, one at a time, beating well after each addition. Beat in 3 teaspoons of the vanilla. Whisk together the flour, cocoa, baking soda, and salt; add to creamed mixture alternately with coffee and sour cream, beating well after each addition.

Pour into a greased and floured 9×13-inch glass pan and an 8×8-inch square or round pan or three 9-inch greased and floured baking pans. Bake in a pre-heated 350 degree oven for 25-35 minutes or until a toothpick inserted near the center comes out clean. Don’t over-bake! Remove from oven and place pans on wire racks to cool completely. When cool, cover with plastic wrap.  

In the bowl of your stand mixer, fitted with whisk attachment, beat the heavy cream until stiff peaks form. Transfer to another bowl and refrigerate until ready to use.

In the same mixing bowl, beat the cream cheese and chocolate hazelnut spread until smooth. Add the powdered sugar, remaining 1 teaspoon of vanilla, and the Frangelico; beat until smooth and all the ingredients are incorporated. Fold in the reserved whipped cream. Refrigerate until ready to serve generously dolloped onto cut pieces of cake. Garnish with chopped toasted hazelnut pieces.

(Thanks Brian and Bonnie for letting me know that my preparation instructions were incomplete before this revision. I must admit however, that I liked Brian’s idea that perhaps the Frangelico was just meant as a small treat for the baker, rather than an ingredient in the topping. But then, while you have the bottle out anyway, a wee dram for the baker could always become a part of the entire culinary experience. Just sayin’…….)

IRISH CREAM AND PECAN BUNDT CAKE

Yesterday was my dear father-in-law John’s 98th birthday. My sister-in-law and brother-in-law came over from Winthrop, we drove up from Camano Island, and the 5 of us went out for dinner. Of course first we had appetizers and a drink at John’s home before venturing into the bustling town of La Conner to dine. And as usual the 5 of us had a grand time.

Previously I had decided that John needed a birthday cake. Of course he did! So in trying to keep my work to a minimum (getting lazy in my “full speed ahead” advancement into old age), I decided to work up a recipe for a Bundt cake that would be easy to prepare, a bit different, and easy to prepare. Did I mention I also wanted it to be easy to prepare? Anyway, this is the result.

Now, not to change the subject (and of course I am going to do just that), but I am pretty darned disgusted with manufacturers whose products used to be a standard weight that I could depend upon. Until yesterday, I was completely oblivious to the package weight change on cake mixes. I don’t even know why the weight verbiage caught my eye, but before I went any further with this recipe, I checked the weight on the other cake mixes in my pantry. They were all 15.25 ounces instead of the standard 18.25 ounces. That’s a 3 whole ounce reduction! What? Why? And when did this happen? And why didn’t they just ask me if I would be willing to spend a little extra money to keep the same number of ounces? I would have answered in the affirmative. It also registered on me that the change in ounces would make a significant impact on the final product when I used cake mixes as an ingredient. Then I got mad! Grrrrr! So I went on line and did some research on the subject.

Patti’s seat-of-the pants economic analysis: Companies live or die by their bottom line. Apparently manufacturers realized that their profit margin would increase significantly if they simply decreased the amount of product contained in any given package, but failed to adjust the price accordingly. Duh! In other words, consumers would continue to pay the same price for their product, but the content of the package would be much reduced. And consumers like myself, who don’t necessarily check package weight, but rather focus on the ingredient list don’t figure it out, sometimes for years. (Guilty as charged!) In my defense, I simply don’t use cake mixes that often, but I have several killer cake recipes on this site that call for an 18.25-oz. cake mix. As a result of finally realizing what has happened in the cake mix world, I plan to edit my blog recipes in the very near future to include extra cake mix as explained below.

My solution: Since cake mixes now all seem to come in 15.25-oz. packages rather than 18.25 ounce packages, I’m going to simply add about 1/3 cup yellow cake mix to all my recipes that call for an 18.25 ounce cake mix. (I’ll use yellow because it won’t add or detract from the flavor of the cake I’ll be baking.) And yes, I know it’s a pain to always have to add that little extra cake mix. But I frankly can’t think of any other way around the problem. I’m simply going to keep an extra open cake mix (stored in an airtight container) at the ready. One additional cake mix should last me through several recipes.

I’m sure many of you are way ahead of me on this new product challenge. But sometimes I’m just clueless. This was obviously one of those times. But I still know a good cake when I taste one. And this is one good cake!

  • 1 c. chopped pecans, divided
  • 1 package (15.25-oz.) yellow cake mix
  • 1/3 c. additional cake mix
  • 1 pkg. (3.4-oz.) instant vanilla pudding mix
  • 4 eggs
  • ¼ c. room temperature water
  • ½ c. vegetable oil
  • ¾ c. + 2 T. Irish cream liqueur, divided
  • 1 tsp. espresso powder
  • 2 T. hot water
  • 1-2 c. powdered sugar, or more as needed

Grease and flour a 10-inch Bundt pan. Sprinkle ½ of the chopped nuts evenly over bottom of pan. Reserve the rest of the chopped nuts for the cake batter.

In a large mixing bowl, beat cake mix and dry pudding mix together. Add the eggs, ¼ cup room temperature water, oil, the ¾ cup of Irish cream liqueur, and the remaining chopped nuts. Beat for 5 minutes at high speed. Pour batter over nuts in pan.

Bake in a preheated 325 degree oven for 52-57 minutes, or until a toothpick inserted into the cake comes out clean. Do not overbake. Remove from oven. Cool for 10 minutes in the pan, then gently pry the cake away from the sides of the pan, and gently invert onto a serving dish. Cool completely before adding the glaze.

To make the glaze: In a small bowl, whisk together the espresso powder, hot water, the 2 tablespoons Irish Cream Liqueur, and enough powdered sugar to bring to desired consistency. When the cake is cool, drizzle glaze over the top letting it flow down the sides. Let the glaze set before serving.

To reiterate: – Adding an additional 1/3rd cup cake mix whenever you use a cake mix as an ingredient and the recipe calls for an 18.25-oz. cake mix and what you have in front of you is a 15.25-oz. cake mix, solves the weight problem and thus assures you a wonderful final product. But please note, if you are simply making the cake as is, and not using the cake mix as an ingredient, follow the instructions on the package.


GOOEY LEMON BUTTER CAKE

Now I know, there are those few (not mentioning any names here Paul) who love the flavor of lemon, but not in a dessert. But for many people, myself included, any type of lemon dessert is just about as good as it gets. I adore lemon meringue pie, lemon cookies (see Glazed Italian Lemon Cookies on this blog) and of course – lemon gelato. So for our last JazzVox pre-concert meal, I decided to give in to my lemon cravings and prepare a very unusual sweet for my guests. 

Now I had baked gooey butter cakes before, so I knew that they were not only delicious, but different. So with lemon in mind, I went on line and found this marvelous recipe for a lemon gooey butter cake on the “go bold with butter” site.  So last weekend I made a double batch of this cake for our JazzVox guests.

All thoughts of lemon gelato and even lemon meringue pie disappeared after my first bite. The crust was crisp and slightly chewy, and the filling super gooey, lemony, and heavenly.   

Now something you should know. Gooey butter cakes are about as much like a standard cake as tap water is to vodka! A regular cake (let’s take a homemade white cake as an example) usually has a rich, moist, fine crumb (the individual particles of cake), and a “melt in your mouth” sensation when you eat it. This cake is much more like a lemon bar on steroids! But since this dessert is classified as a “cake”, who am I to rock the apple cart and call it anything but its given name?!?!

Ease of preparation and availability of ingredients are also aspects of this recipe which make it a pleasure to prepare and serve to your family and friends.

So next time you want to build a unique dessert that absolutely everyone will love (except Paul, of course), bake this butter cake. As I always say – vive la différence. And never more so than with this “cake” which is really more of a bar/pudding with crust/whatever!! Enjoy

  • 2 c. cake flour
  • 1½ c. granulated sugar
  • 2 tsp. baking powder
  • ¼ tsp. kosher salt
  • 1 small egg, room temperature
  • ½ c. (1 stick) unsalted butter, melted
  • 2 T. whole milk
  • 8 oz. cream cheese, room temperature
  • 3 large eggs, room temperature
  • ½ tsp. vanilla extract
  • 2 tsp. lemon zest
  • 4 T. fresh lemon juice
  • 3¾ c. powdered sugar, plus extra for sprinkling
  • ½ c. (1 stick) unsalted butter, melted

Blend the cake flour, sugar, baking powder, and kosher salt together with an electric mixer. Add the small egg, ½ cup melted butter, and milk. Beat on low speed for 2 minutes. After 2 minutes, scrape down the bowl with a rubber spatula. The batter should come together into a loose ball. Pat the batter evenly into the bottom of an ungreased 9×13 pan. (Use glass if possible.) Set the pan aside.

Using the same mixing bowl, beat the cream cheese until smooth. Add the 3 large eggs, and beat until smooth. Pour in vanilla extract, lemon zest, and lemon juice, beating until combined. Add the powdered sugar and beat well. Finally, slowly add the last ½ cup of melted butter, mixing well to combine.

Pour the batter on top of the bottom layer and spread evenly over the entire crust.

Bake in a pre-heated 325 degree oven (glass) or 350 degree (metal) for 50-60 minutes, or just until set. Do not over-bake. The outer edges of the cake should be brown, but the center should still jiggle when the pan is shaken.

Remove from oven and place on a wire rack to cool before cutting into serving sized pieces. Before serving, lightly sprinkle powdered sugar on each piece. (To sprinkle, place powdered sugar in a fine mesh wire strainer. Then gently shake the strainer until desired amount is achieved.)

Please note: This cake can be made a day or two ahead. The crust stays crisp and the filling does not get watery even after 2 or 3 days. Perfect.

My “muse” Miles –  sleeping on the job! Again!


CARIBBEAN BLACK FRUITCAKE

dscn0141dscn0161


OK, since I started 2017 by cancelling a brunch because of icy condition on the fair isle of Camano, I might as well go the whole way and offer up a fruitcake recipe to start 2017.

Now some people might see this as a bad sign for the coming year. But those of you who know me well, or don’t know me personally, but trust me none-the-less, realize that it is not in my nature to steer you wrong!

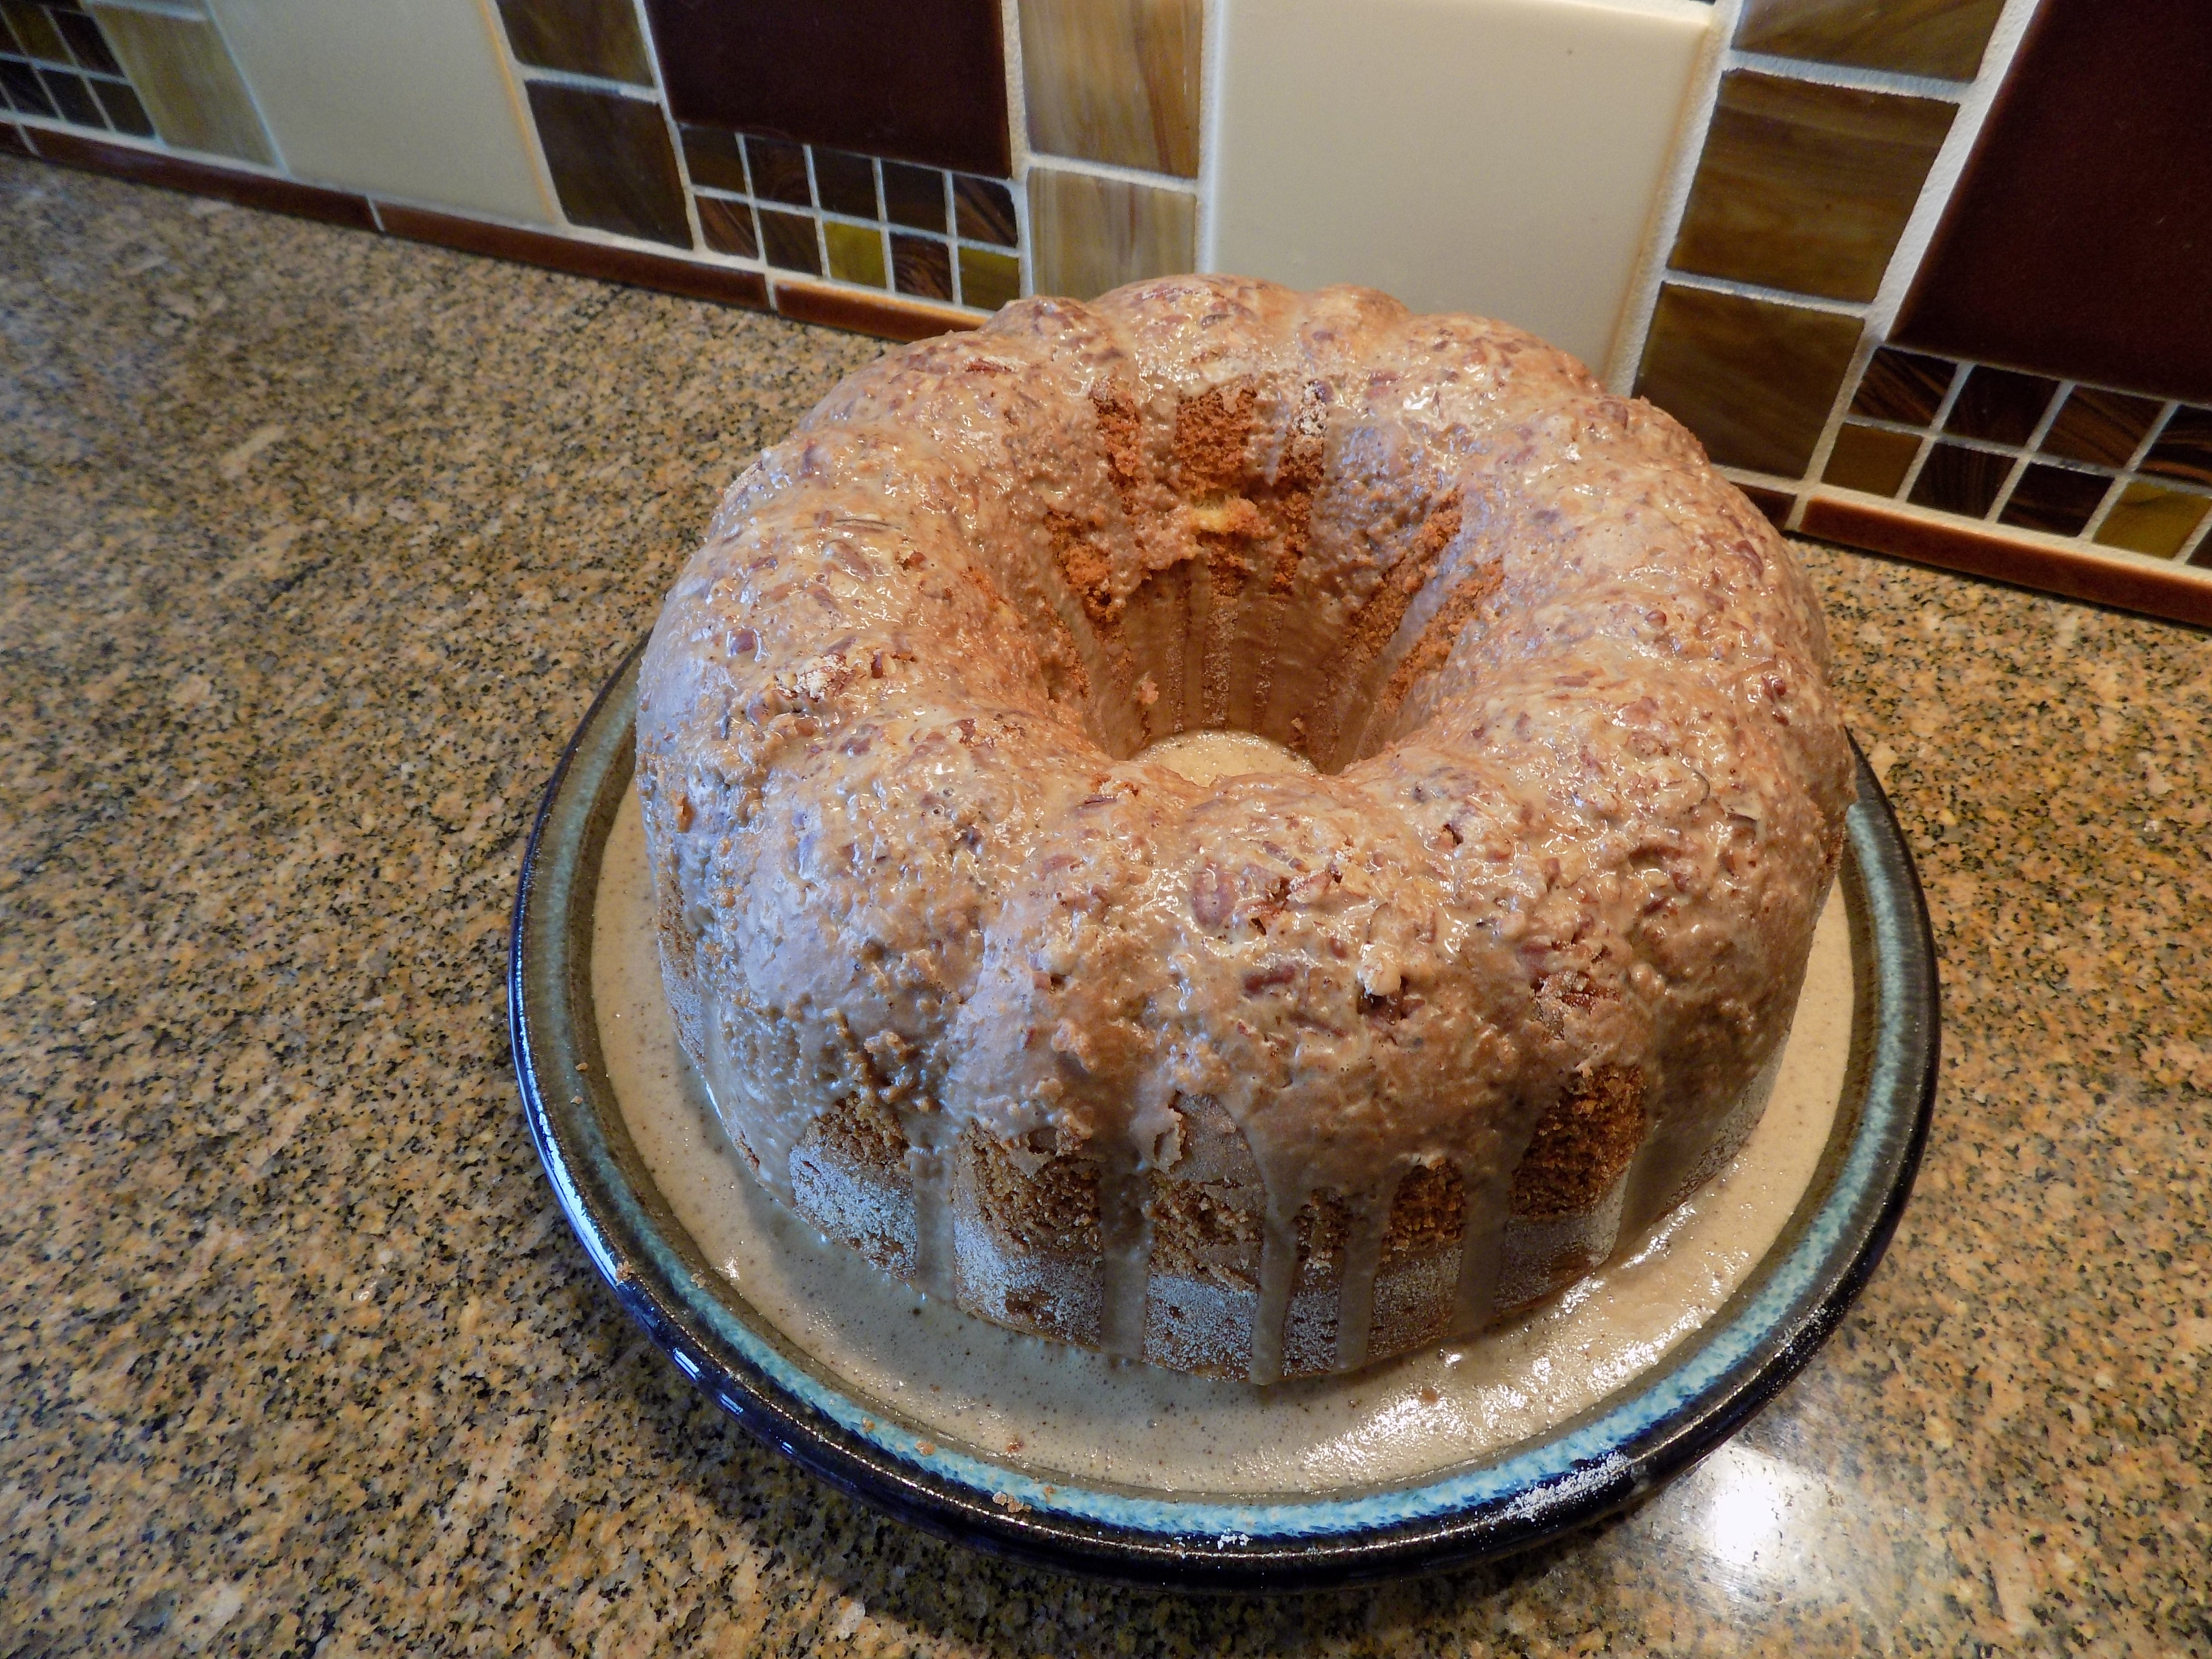
So, if you are one of the lucky people who have experienced a truly great fruitcake in your past, let me tell you without even a quarter ounce of equivocation, that this is a fruitcake not to be missed. It is full of flavor, with a lovely moist, dense, and tender crumb. Hints of orange and the taste of exotic spices fills your mouth, while the occasional crunch from the nuts is a pleasant offset to the soft texture of the cakey part. And the best thing about this fruitcake – you can make it yourself! You don’t ever again have to pay $39.95 plus tax and shipping to enjoy a high quality, fantastic tasting holiday treat. You can do it all fairly easily in your very own kitchen.

All you need is a modicum of planning, a few interesting ingredients, a visit to a grocery store for bulk dried fruits and nuts, an internet search for burnt sugar syrup (it’s what makes the fruitcake black), and an adventurous spirit! Put it all in the oven (not the planning, internet search, or adventurous spirit, of course, but all the rest) and share this little bit of heaven with your family and friends.

And in case you were wondering where I learned to make this delightful creation, it was during our vacation to Belize. My friend Vicki and I took a class from a local chef and this recipe is as close to her recipe as was reasonable. (You had to be there to understand why I couldn’t quite match her recipe ingredient for ingredient.) (If you want to know more about our adventure while in Belize, search under “Belize” and all will be revealed.)

So faithful readers, when you are planning your holiday goodies at the end of this year, please consider making fruitcake. I know some of your family will make jokes about receiving fruitcake, like – great, we can use a slice to balance our wobbly kitchen table, or it will work as a sandbag during flooding season, or my personal favorite – we can use it as a speed bump to slow down the drag racers in our neighborhood. But their verbal lampoon will swiftly disappear with their first bite. I’ve actually known grown men (not mentioning any names here Willie) who love fruitcake so much that they will actually hide or eat most of it themselves, thus preventing their wives (Eden – one of my daughters) from partaking of this treat meant for BOTH of them! But I digress…..

So please don’t hesitate to make this recipe or the Holiday Fruitcake recipe at the bottom of this post. Both are absolutely delicious. Even the most jaded connoisseur will become a devoted fan of fruitcake if given a chance. Sandbag, indeed!

CARRIBEAN BLACK FRUITCAKE    

  • 1 c. pecans, coarsely chopped
  • ¾ c. whole raw almonds, coarsely chopped
  • 3 c. dried fruit* (apricots, cherries, blueberries, pineapple, etc.), coarsely chopped
  • ½ c. pitted dates, coarsely chopped
  • ½ c. currants
  • 4 oz. container candied orange peel
  • 4 oz. container candied red or green cherries, halved
  • 2½ c. dark rum (I used half Cruzan Aged Rum and half Myer’s Original Dark Rum)
  • ½ c. Crème Sherry

Mix together all ingredients in a 3-quart glass container with a tightfitting lid. Cover and store in a cool, dark place for 1 week.

*I used ¾ cup golden raisins, ½ cup candied pineapple pieces, ½ cup dried blueberries, ½ cup chopped candied papaya, ½ cup chopped dried apricots, and ¼ cup chopped dried cherries

For the cake batter:

  • 3 c. all-purpose flour
  • ½ tsp. kosher salt
  • 1 T. baking powder
  • 1 tsp. espresso powder
  • 1 T. ground cinnamon
  • 2 tsp. ground nutmeg
  • 1½ tsp. ground allspice
  • 1 tsp. ground clove
  • 1 lb. (4 sticks) unsalted butter, room temperature
  • 2¼ c. packed light brown sugar
  • 6 lg. eggs, room temperature
  • zest of lg. orange
  • 2 tsp. vanilla extract
  • ¾ c. burnt sugar syrup (Blue Mountain Country is best) (it’s what makes the cake black)

Whisk flour, salt, baking powder, espresso powder, cinnamon, nutmeg, allspice, and cloves together in a large bowl. Set aside.

Place butter and brown sugar in the bowl of a stand mixer fitted with a paddle attachment, and beat on medium speed until light, fluffy, and pale yellow. Scrape down the sides of the bowl, and return the mixer to medium speed. Add eggs one at a time, letting each mix in fully before adding the next. Add orange zest and vanilla. Scrape down the sides of the bowl and return the mixer to low speed.

Drain macerated fruit and nuts. Set aside. Do not discard the left over liquid!

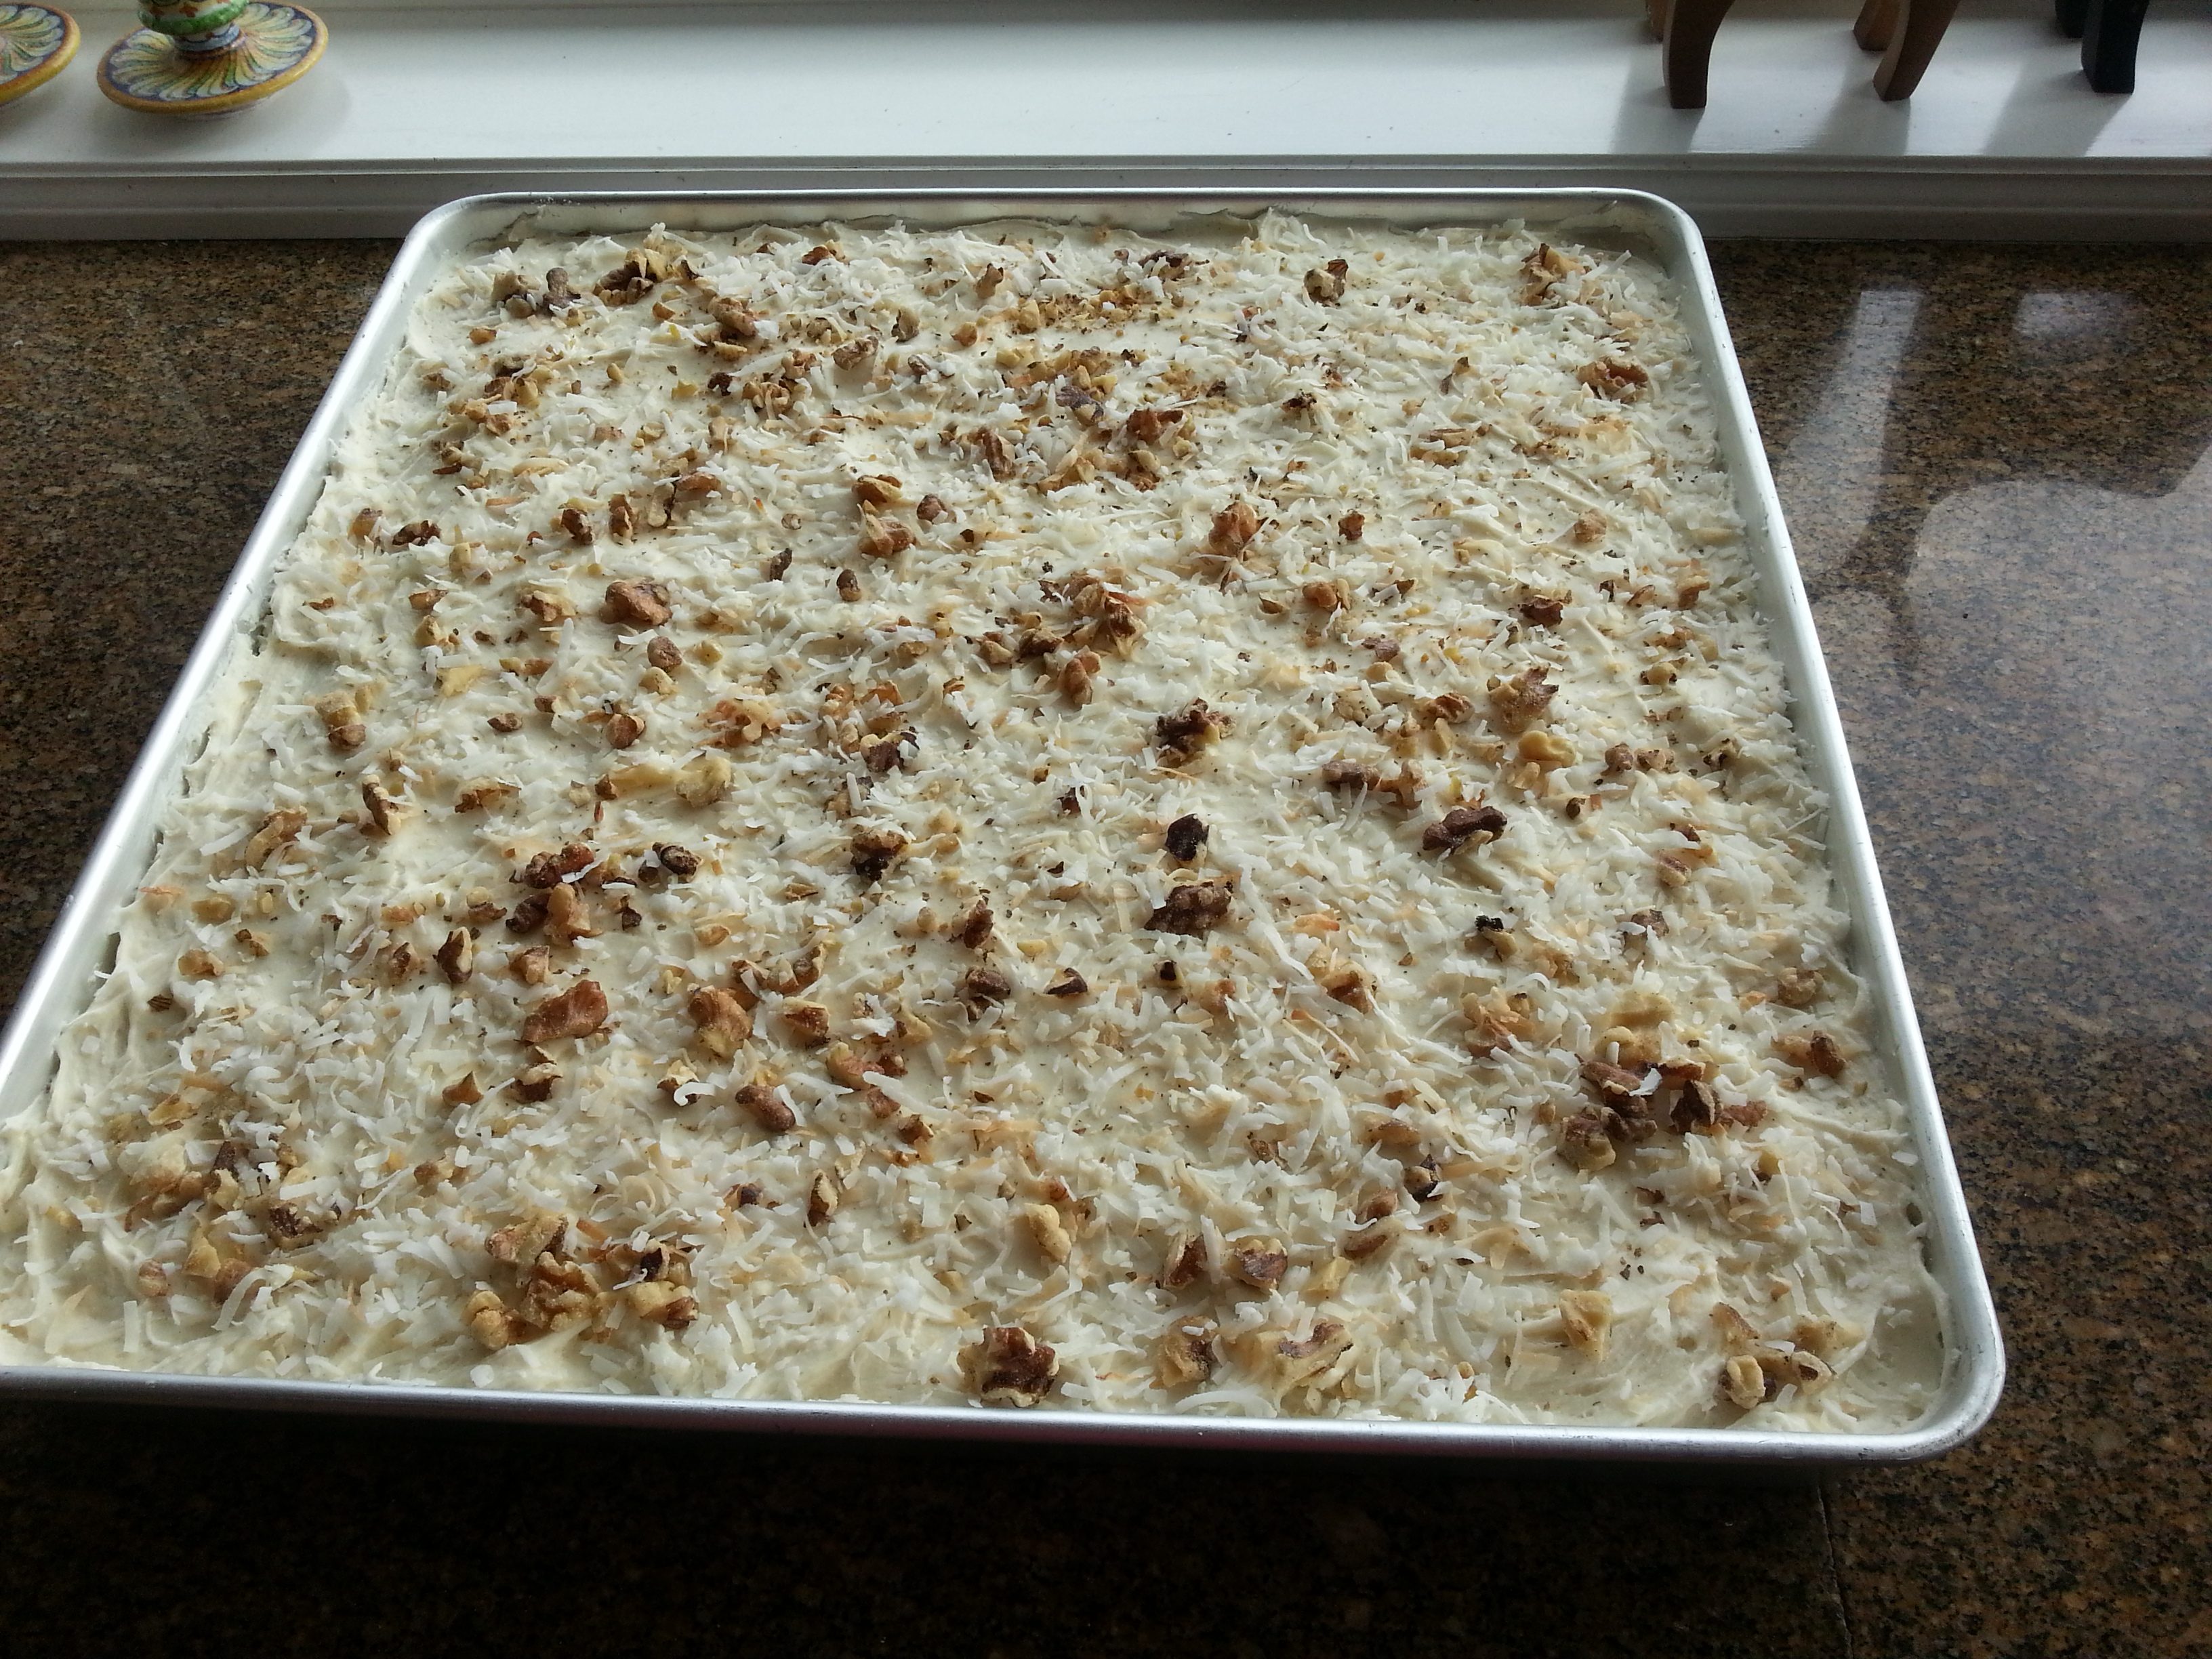
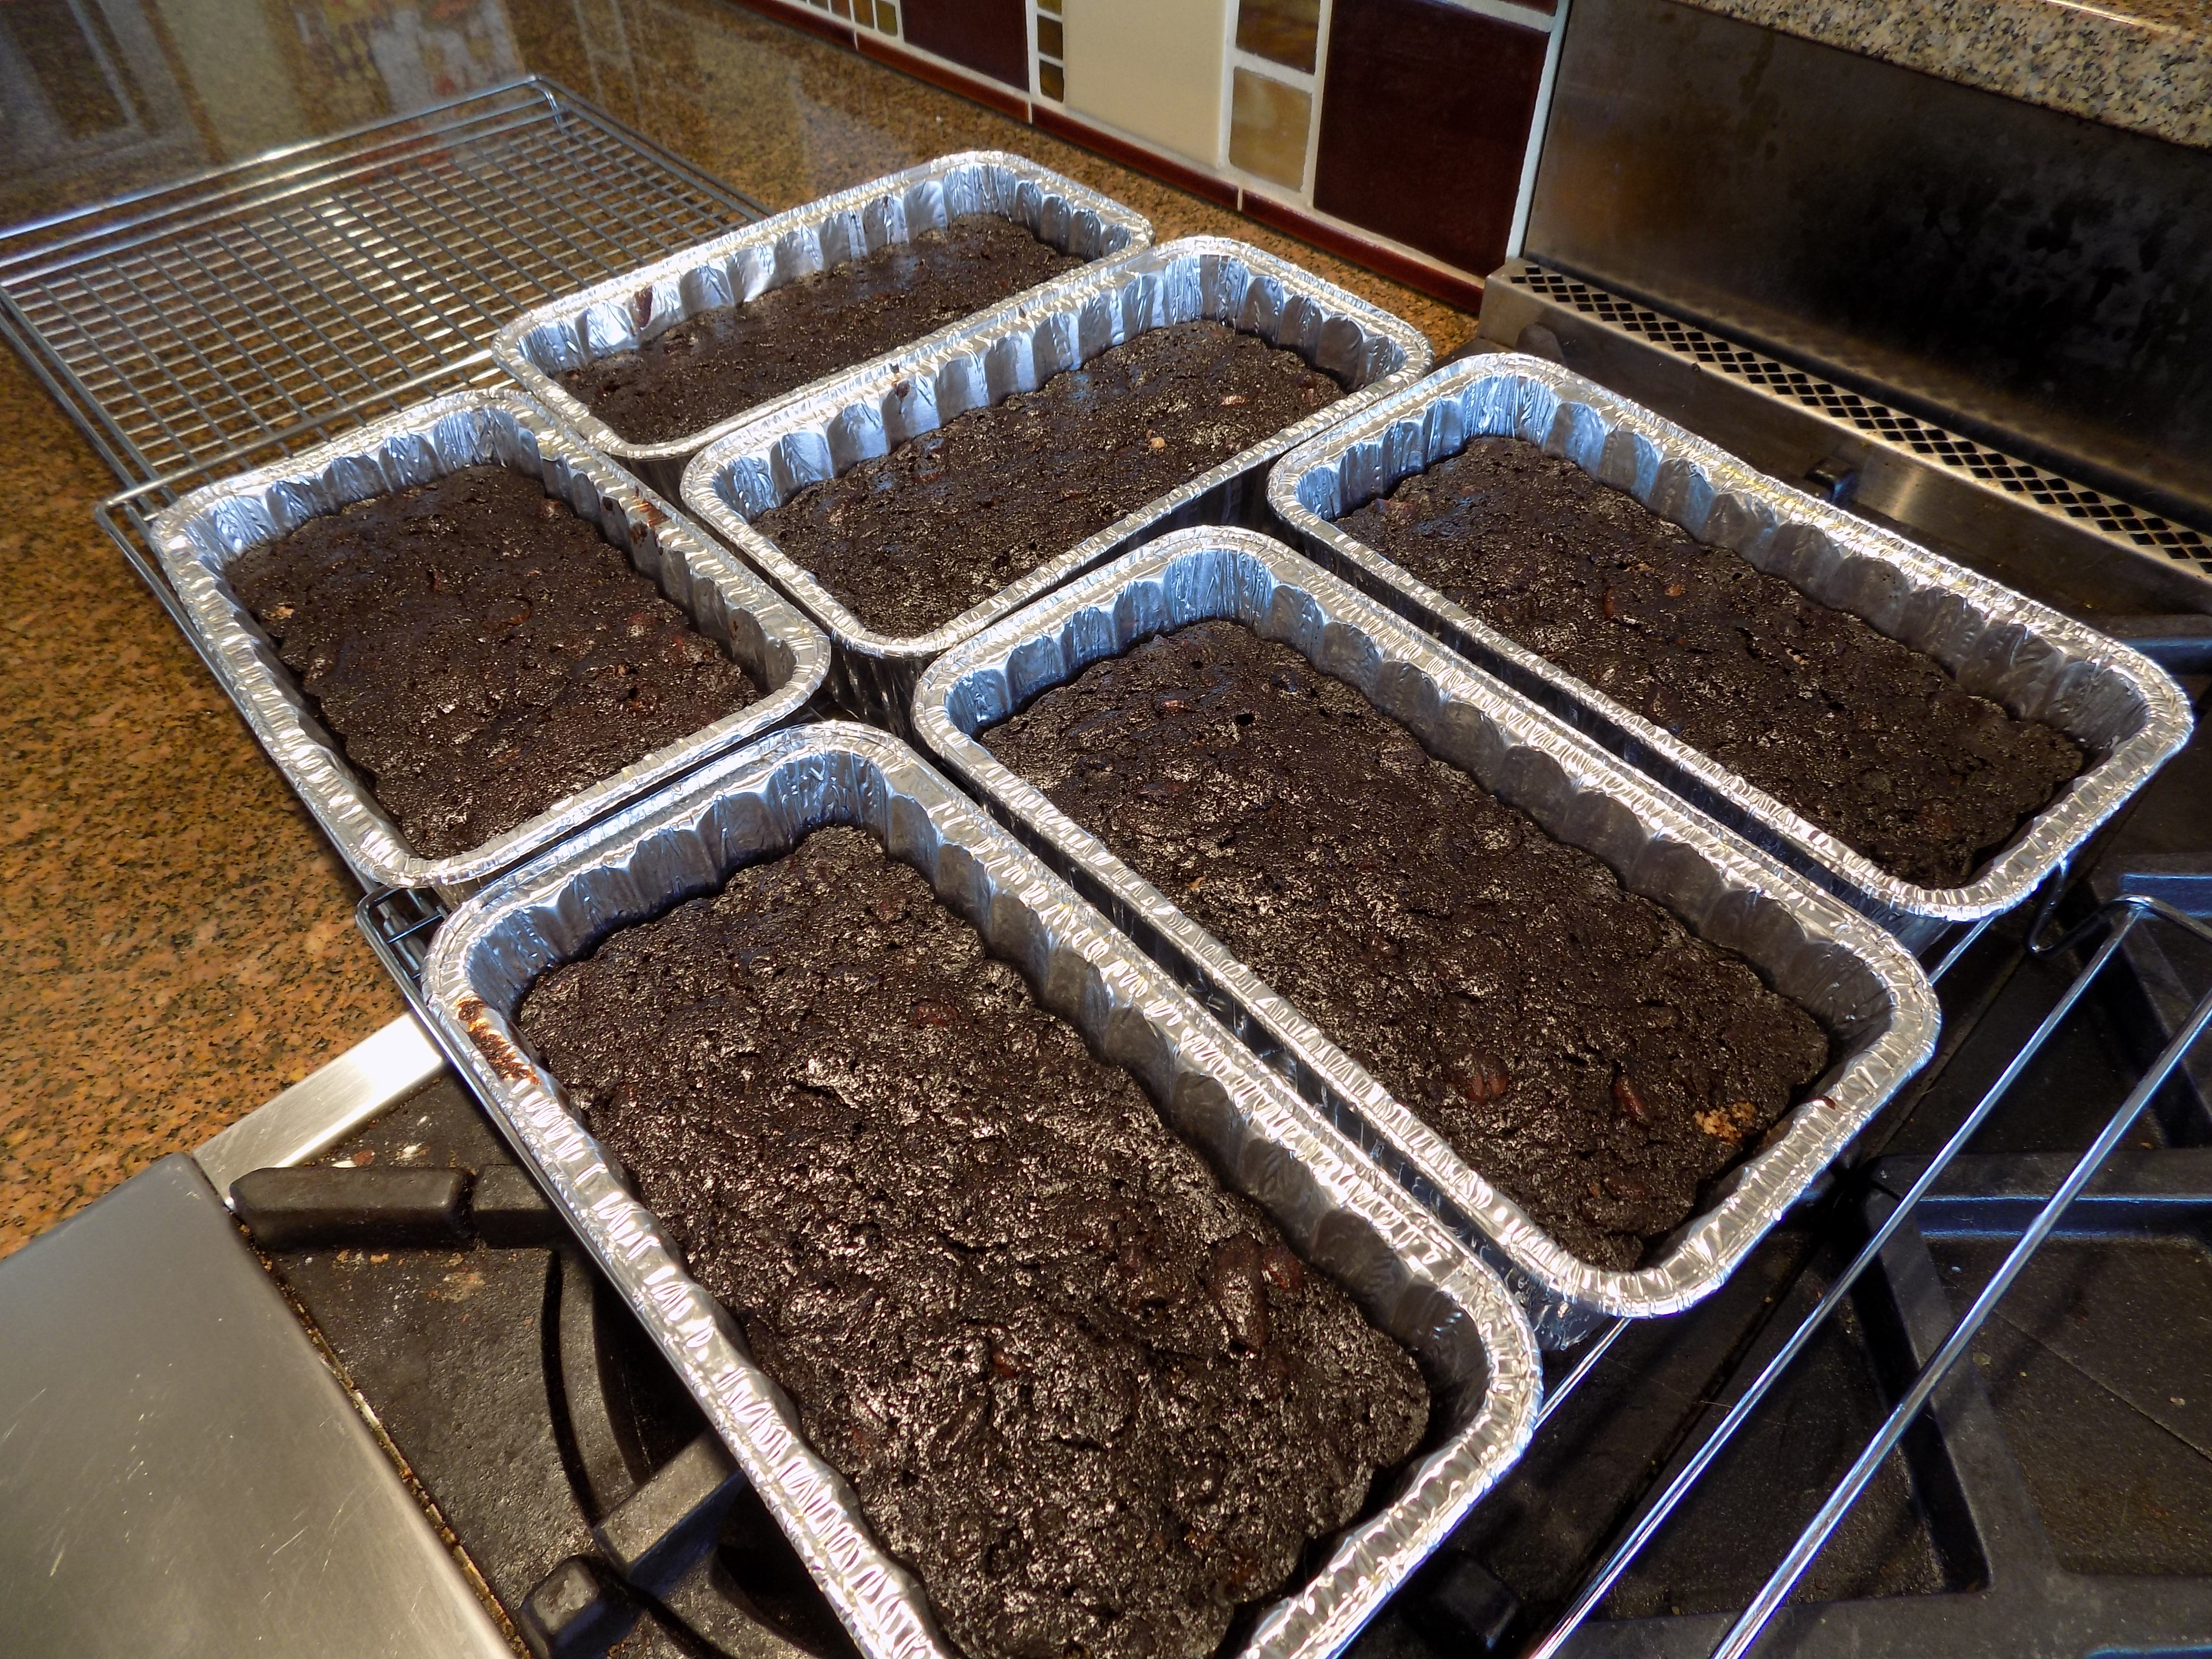
Add flour mixture, any unabsorbed booze from macerating the fruit, and burnt sugar to butter mixture; mix until just combined. Let the batter rest for about 2 hours. Add the drained fruit and nut mixture to the batter. Divide batter evenly between 3 buttered 9 x 5-inch or 5 buttered 8 x 3 7/8-inch loaf pans. (I personally prefer the smaller pans.)

Place a large shallow pan of water on the lowest rack in your oven.

Bake fruitcakes on a rack in the middle of a pre-heated 300 degree oven until a cake tester comes out clean, about 2 hours for 9 X 5 loaf pans or 90 minutes for 8 x 3 7/8-inch loaf pans.  (The cake centers will be moist but not wet.)

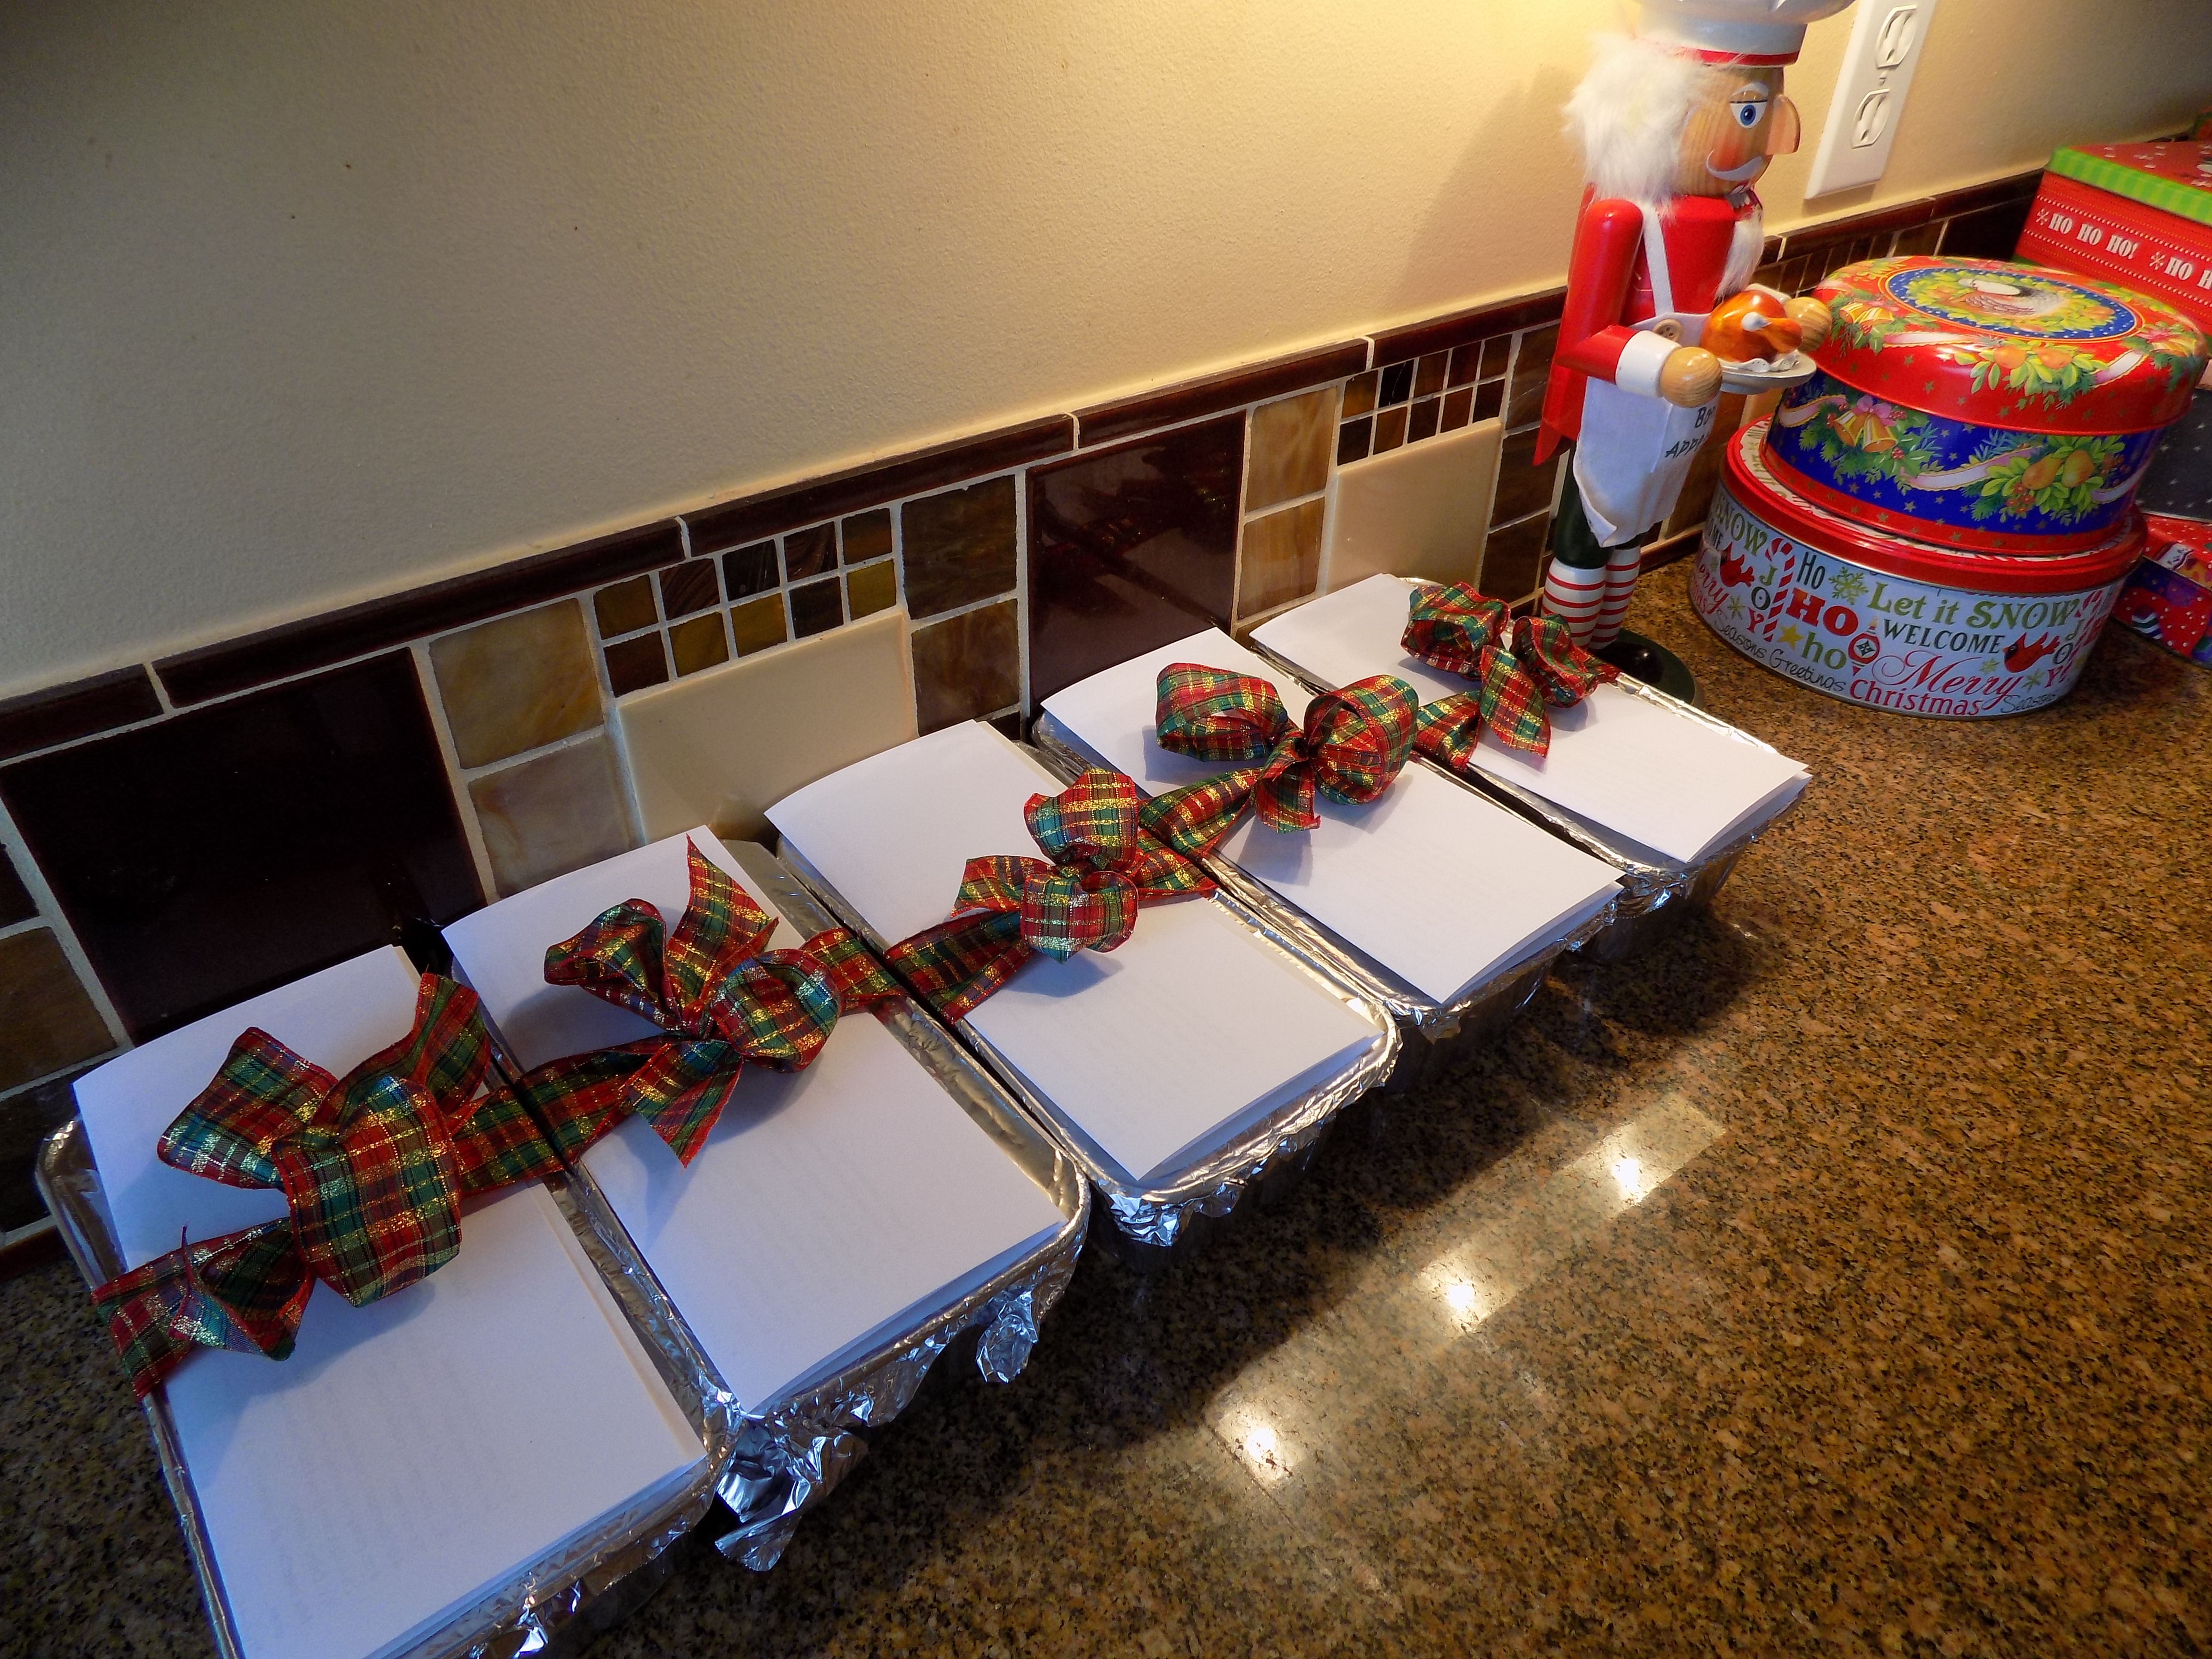
Let cool completely. If you have baked the cakes in aluminum pans to give away, don’t remove the cakes from the pans. If you have baked them for your own consumption, you can leave the fruitcake in the pans or turn out of the pans and wrap in plastic wrap and then aluminum foil. Best if aged for a couple of weeks.

To age, store each cooled cake in a re-sealable plastic bag or covered with aluminum foil at room temperature for up to 2 months. A dark cupboard or pantry is ideal, but do not refrigerate, as the moisture level will change the texture.

HOLIDAY FRUITCAKE

  • 1 lb. dried fruit medley (peaches, pears, apricots, apples, and golden raisins or currents)
  • ½ lb. dried Bing cherries
  • 1 lb. chopped dates
  • 1 lb. candied/glazed pineapple, coarsely chopped
  • 21-oz. container red candied/glazed cherries, coarsely chopped
  • 1 lb. coarsely chopped pecans
  • 3 c. spiced rum
  • 1 c. unsalted butter, room temperature
  • 2 c. brown sugar
  • 2 tsp. cinnamon
  • 1½ tsp. ground allspice
  • 1½ tsp. ground nutmeg
  • 5 lg. eggs
  • 2 c. unbleached all-purpose flour
  • 2 tsp. baking powder
  • ½ tsp. salt

Combine fruit, nuts, and rum in a covered glass container for 3 to 7 days. 7 days is best.

Cream butter, sugar, and spices until light and fluffy. Add eggs one at a time. In a separate bowl whisk the flour, baking powder, and salt together. Stir into butter mixture along with the macerated fruit, nuts, and any remaining liquid.

Place a large shallow pan of water on the bottom rack of your oven to prevent the cakes from baking too dry.

Line 3 greased 9×5-inch loaf pans or 1 greased 9×5-inch and 5 greased 7×4-inch loaf pans with parchment paper and grease paper lightly. Divide the batter evenly and bake in the middle of your pre-heated 275 degree oven for 2-2½ hours or until a toothpick inserted in the center comes out clean. Remove from oven and cool on racks for one hour. Remove cakes from pan, and carefully peel off the parchment paper. When completely cool, wrap in foil and store for at least 1 month.


GF CARROT CAKE WITH CREAM CHEESE FROSTING

20161016_104821

In an effort to include recipes for everyone, young and old, sober or otherwise, vegetarians, gluten avoiders, spicy lovers, and even those poor souls who only eat meat and potatoes, I offer up this adaptation of a Bette Hagman GF recipe for all of my readers who are gluten intolerant. (Usually I can’t abide intolerance, but for gluten, I make an exception!)
And if ever there was a cake that almost everyone loves and should be able to enjoy, it’s carrot cake. My feeling is, if there’s a way around a problem like gluten flour, then let’s go for it. And Bette Hagman, one of the pioneers in GF cooking, did just that.
Now of course, I couldn’t leave even a Bette Hagman recipe alone! (I’d apologize to Bette, but she now resides with the angels, and my direct line to heaven seems to have been severed.) But even if I could apologize I would argue in my own defense. I simply like a spicier base cake, and I happen to think toasted coconut in a carrot cake is essential.
So if you and/or yours happen to be gluten intolerant or simply want to try giving gluten a rest, give this lovely cake a try. It’s moist and delicious, and I promise you, no one will miss the gluten. And really, when you think about it, who knows what gluten tastes like anyway? No one I know walks into my home and begs to be fed a soup spoon full of wheat flour. Or runs up to me, grabs me by the arm, leads me to the pantry screaming “give me flour, or give me death”! So who really gives a buttery French croissant if there is or is not a spec of gluten in a recipe? As long as the end result is delicious, which incidentally is the goal of everyone who spends any time in the kitchen, then life is good. So experiment my friends. And if you have a favorite GF recipe you would like to share with the world, please write it down and send it to my email address www.chezcarrcuisine@wavecable.com. I will gladly prepare the recipe and if it meets the exacting standards of Mr. C., I will post it and take all the credit. Just kidding. The glory and recognition will be all yours. And of course, the undying thanks from my GF readers.

  • 16 oz. crushed pineapple
  • 1 c. golden raisins
  • 2 c. granulated sugar
  • 4 eggs, room temperature
  • 1 c. mayonnaise (yes – mayonnaise)
  • 1 tsp. vanilla
  • 3 c. grated carrots
  • 1½ c. toasted chopped walnuts, divided
  • 1½ c. toasted coconut, divided
  • 1½ c. white rice flour
  • ½ c. soy flour
  • ½ c. potato starch
  • 2 tsp. baking soda
  • ½ tsp. salt
  • 2 tsp. ground cinnamon
  • 1 tsp. ground mace
  • ¼ tsp. ground cloves
  • ¼ tsp. ground nutmeg

Pour the pineapple plus juice into a small saucepan. Add the raisins and simmer over low heat until the raisins are plump and juicy. Remove from heat and allow to cool.

In a large mixing bowl cream the sugar, eggs, and mayonnaise together. Add the vanilla, carrots, 1 cup of the toasted walnuts, 1 cup of the toasted coconut, and the cooled pineapple/raisin combination.

In another bowl, whisk together the flours, soda, salt, cinnamon, mace, cloves, and nutmeg. Stir the flour mixture into the carrot mixture until well blended.

Pour into a lightly buttered and rice floured 10×16-inch glass baking dish*. Smooth top with an offset spatula or table knife. Bake in a pre-heated 325 degree oven* for approximately 40-45 minutes. If already getting brown after 20 minutes or so, gently tent with aluminum foil to prevent further browning. Remove from the oven when a pick stuck in the middle of the cake comes out clean. Place pan on a wire rack. Cool completely before topping with Cream Cheese Frosting (recipe below). Garnish with remaining half cup of toasted coconut and half cup of toasted walnuts.

Please note: Most of the time when I bake cakes or breads that contain veggies or fruit, I freeze them for a couple of days before I frost and serve them. But with this cake, because I am a novice at working with flours other than wheat, I have not frozen the cake before serving. If any of you are GF experts, I would welcome your thoughts on the subject. Thank you.

*If using a metal baking pan, increase heat to 350 degrees and check if done after 35 minutes.

CREAM CHEESE FROSTING

  • ½ c. (1 stick) unsalted butter, room temperature
  • 8 oz. cream cheese, room temperature
  • 1 tsp. vanilla
  • pinch salt
  • 3½ c. powdered sugar or more if needed

Cream butter and powdered sugar together until well blended. Add the vanilla and salt and enough powdered sugar to make a firm but not stiff consistency. Beat until smooth and easy to spread.

CARROT CAKE WITH CREAM CHEESE FROSTING

20161016_104821

So I know, every good cook has a recipe for carrot cake. But does every good cook have a “killer” recipe for carrot cake. (There is a difference you know!) I consider this recipe, which I have been preparing since a few of you were only glimmers in your father’s eyes, the most moist and delicious vegetative cake that I have ever had the pleasure of taking out of my oven. But one thing I must warn you about, besides of course the tendency to become addicted to it, is that this cake only reaches its full potential after it has been frozen. It really needs to spend a short time in your freezer to attain the moist consistency all of us treasure in a truly wonderful carrot cake.

Now I know that statement sounds preposterous. But if you have read any of my other recipes for cakes or breads that contain fruit or veggies, I almost always recommend a short resting period in your freezer as the best way to ensure perfection. (And no, I didn’t learn this trick from my many years studying at Le Cordon Bleu. I learned it from my dear friend Linda’s mother Rhoda. And to the best of my knowledge, Rhoda didn’t learn this trick from her years at Le Cordon Bleu either! (Like either of us ever attended any cooking school, much less Le Condon Bleu!) We both perfected our culinary skills in the school of “what’s for dinner, mom”?

But you truly can’t appreciate this cake until you have sunk a fork down through the not-too-sweet frosting and into the moist and tender crumb of this cake. When it reaches your mouth, you not only have the wonderful mouth feel, you have the depth of flavor from the spices, golden raisins that have simmered in pineapple juice, the toasted coconut, and the lovely tasty crunch from the toasted walnuts.

I am not going to tell you that this cake comes together in 30 minutes, because it absolutely does not. You have to simmer the raisins, toast the coconut and walnuts, grate the carrots, and mix the batter, etc. But, if you want to create a cake that has all the characteristics of that perfect carrot cake that you long for every time you see it on a menu, you have to spend the time and do it right. Of course you can always go to your favorite restaurant or bakery and pay through the teeth for just one piece. Or you can set aside a bit of time and make yourself a treat that can be shared with your family and friends for a fraction of the cost. Of course the advantage of making this cake rather than just buying a piece, is that you get to have seconds. And who in their right mind doesn’t want a second piece of carrot cake, especially around midnight or with their morning coffee?

So do yourself and your family a favor. Make one of these cakes for your next birthday celebration, or as a treat for your family and guests after your next dinner party. Remember, you really need to bake the cake ahead of time, freeze it, and then frost it the day you plan to serve it for dessert. So the hard work is all done ahead of time. That leaves you with plenty of time the day of your get-together to concentrate on the other dishes you are planning to serve. And isn’t that a plus?

So enjoy my friends. And always remember to eat your veggies!

  • 8 oz. crushed pineapple
  • 1 c. golden raisins
  • 2 c. granulated sugar
  • 3 eggs, room temperature
  • 1 c. vegetable oil
  • 2 tsp. vanilla
  • 2 c. grated carrots
  • 1½ c. toasted chopped walnuts, divided
  • 1½ c. toasted coconut, divided
  • 2 c. unbleached all-purpose flour
  • 1 tsp. baking soda
  • ½ tsp. salt
  • 2 tsp. ground cinnamon
  • 1 tsp. ground mace
  • ¼ tsp. ground cloves
  • ¼ tsp. ground nutmeg

Drain the pineapple juice into a small saucepan. Set pineapple aside. Add raisins to the juice and bring to a simmer over low heat. Remove from heat and set aside to cool.   

In a large mixing bowl cream the sugar, eggs, and oil together with a whisk. (No mixer needed for this recipe.) Add the vanilla, carrots, 1 cup of the toasted walnuts, 1 cup of the toasted coconut, the reserved pineapple, and the cooled raisins.

In another bowl whisk together the flour, soda, salt, cinnamon, mace, cloves, and nutmeg. Stir flour mixture into the carrot mixture just until thoroughly blended.  

Pour into a lightly buttered and floured 9×13-inch glass baking dish. Bake in a pre-heated 325 degree oven for approximately 45 minutes or until a pick inserted into the middle of the cake comes out clean. Remove from oven and place pan on a wire rack. Cool completely before covering with plastic wrap and placing in the freezer for no shorter time than 2 days. (I warned you in my introduction!)

The day you plan to serve the cake, remove from freezer and allow to come to room temperature.

Frost with Cream Cheese Frosting (recipe below) and garnish with remaining half cup of coconut and half cup of walnuts.

CREAM CHEESE FROSTING

  • ½ c. (1 stick) unsalted butter, room temperature
  • 8 oz. cream cheese, room temperature
  • 1 tsp. vanilla
  • pinch salt
  • 3½ c. powdered sugar or more if needed

Cream butter and powdered sugar together until light and fluffy. Add the vanilla, salt, and enough powdered sugar to make a firm but not stiff consistency. Beat until smooth and easy to spread. Spread evenly over cake. Garnish with remaining half cup coconut and half cup walnuts.