Category Archives: BREAKFAST RECIPES

FRUIT AND NUT MUESLI

When we were in Central Europe recently, we were offered muesli almost every morning as one of the many offerings provided with our breakfast buffet. Not granola, it was definitely muesli. And always with our choice of yogurt. Which of course reminded me that my family has been calling muesli and granola “Breakfast in Siberia” since 1978. (My former husband and I took our three youngest kids to Europe for 5 weeks. And while we were staying with relatives in Sweden, the combination of muesli topped with yogurt was always lovingly referred to by that particular moniker.)

Now you may wonder what the difference is between granola and muesli. The main difference is that while both are made of various combinations of grains, nuts, seeds, and dried fruits, muesli is usually unbaked. While granola is baked and is sweeter and contains more oil which binds the ingredients together into crunchy clumps.

Now you know me. I almost always have to break the rules somewhere along the line when it comes to food. And of course, this recipe is no exception. But in my defense, it simply made sense to bake some of the ingredients for the sake of texture and flavor. So this muesli spends a bit of quality time in the oven. But there are no clumps, so there is still that distinction.

And yes I have recipes on this site for granola too. I love my granola recipes and still make each one of them to this day. But I so enjoy variety. And if breakfast isn’t the meal where a bit of variety is really appreciated, I don’t know a marshmallow from a boiled potato!

So make this recipe next time you want a healthy diversion from Cocoa Puffs. Or you are tired of paying an inordinate amount of money at the grocery store for a package of muesli that is 95% oats and 5% nuts, fruit, or seeds. I promise you that with your first bite you will know what you have been missing by not making your own breakfast cereal. Happy breakfast to you all!

scant 1 tsp. kosher salt

¾ tsp. cinnamon

2 T. vegetable oil

3 T. real maple syrup

2 tsp. vanilla extract

5 c. old-fashioned oats

1½ c. mixed nuts (almonds, pecans, walnuts, hazelnuts)

1½ c. coconut

½ c. chia seeds

1½ c. mixed dry fruit

In a large mixing bowl whisk together the salt, cinnamon, veggie oil, maple syrup, and vanilla. Stir in the oats, nuts, and coconut. Mix well.  

Pour the mixture onto a rimmed baking sheet. Bake in a pre-heated 350 degree oven until the oats and coconut flakes are lightly golden and fragrant, about 15 minutes. Stir half way through the baking time. Don’t wash the bowl. Add the chia seeds and nuts to it.

When the oat mixture is just out of the oven, pour it over the chia seeds and fruit. Mix well. Allow to cool completely before storing in an airtight container. Serve with milk or yogurt. 

SHIRRED EGGS à la NERO WOLFE

It has been quite the winter, at least the past week or so. With unprecedented low temperatures and heavy precipitation, we have had several snow storms the last few days resulting in 10-12 inches of snow here on Camano Island.

For us that means – we ain’t goin’ nowhere! We live on a hill, with a steep drive way, and even though Mr. C. shovels the snow off the driveway daily, there is no way we are going to risk life and limb just to fishtail to the grocery store, or wherever, even for the sake of a vast amount of bragging rights!

So what to do with the time? Of course we could have done some deep cleaning on our house. Right, like that’s going to happen! (We didn’t want to set some kind of snowy weather precedent, after all!) Or we could spend our time recovering from surgery (me), recovering from the horrible cold/flu that’s going around (both of us), reading books (both of us), researching recipes (that would be me) or working on Beethoven, Mozart, and Schubert piano sonatas (Mr. C. for sure). So that’s what we did.

For me, it was re-reading for the umpteenth time, many of the Rex Stout books featuring my favorite detective Nero Wolfe. I love Nero. And I know. I shouldn’t presume to call him by his first name. But since I feel that I know him better than most, thanks to Archie Goodwin, and share a couple of his most characteristic traits (being round and worshipping excellent food), that he would forgive me this tiny indiscretion. All of which brings me to this recipe.

I have known for a long time that there are really no subjects that haven’t in some way been covered on the internet. But even so, I was quite surprised when I decided that I would like to try preparing a couple of Nero’s favorite dishes. (Like a fictional character is going to be the author of gourmet recipes!) But on my first search, right there in print, was an invitation to purchase the Nero Wolfe cookbook. Holy cow. And I must say, I was sorely tempted.

But then the practical side of me took over (pfui) and I realized that as much as I admire haute cuisine and love hearing Nero and Fritz (his cook/chef) discuss dishes like Bacalhau (Portugese Salt Cod), the chances of me ever preparing most of the dishes in the cookbook was somewhere between slim and nil! So I tucked my credit card back where it belonged, and searched other posts for simpler and more modest recipes from the cookbook. Which of course I found. And this is one of them. Hopefully, more to follow.

Since it’s Valentine’s Day, and both of us long ago decided we would not celebrate Hallmark holidays (no gifts or cards exchanged), I never-the-less fixed this recipe for breakfast this morning. (OK, I still have a bit of romance in my soul.) But you can bet your bottom dollar, I’m not going to wait for a special occasion to serve it again.

So next time you feel like a little something fancy would brighten your otherwise normal first meal of the day, give this recipe a try. It truly is delicious and very easy to prepare.

And just for Mr. C. because he asked, shirred eggs, also known as baked eggs, are eggs that have traditionally been baked in a flat-bottomed dish (shirrer) which is another name for a ceramic or porcelain ramekin.  

unsalted butter

4 breakfast link  sausages, fully cooked

2 T. half & half

4 tsp. dry sherry

4 lg. eggs

kosher salt

freshly ground black pepper

paprika

1 tsp. chopped fresh chives

Generously butter 2 shallow baking dishes. (I use small oblong Corningware French White dishes.)

Place 2 cooked sausages in each dish. Add 1 tablespoons half & half and 2 teaspoons dry sherry to each dish. Carefully add 2 eggs to each dish (don’t let the yolks break), then sprinkle lightly with salt, pepper, paprika, and chives.

Bake in a pre-heated 325 degree oven for 14 to 17 minutes or until the egg white is set and the yolk is still runny (or cooked to desired firmness). (I used convection the last 3 minutes.) Remove from oven and serve immediately with toast.

Enjoy the dish.

GRUYÈRE CHEESE, SPINACH, AND MUSHROOM BREAKFAST CASSEROLE

In this day and age, if I don’t know all of the people coming to our home for a JazzVox pre-concert meal, having a vegetarian main dish option always makes me feel more comfortable. I simply can not stand having anyone feel like they are being left out. So as much as possible I make certain that there are at least several dishes that everyone can enjoy. Ok, I don’t go so far as to plan the menu around someone who only eats vegan. My efforts only extends so far. But if I know ahead of time that someone is gluten intolerant, or can’t eat nuts, I make certain that they won’t go hungry or feel deprived.

So for our last JazzVox concert for hosts and regulars, I decided to serve brunch. And because breakfast casseroles are so easy to prepare and must be made ahead of time, why would I serve anything else? My only problem was that in my repertoire of breakfast casseroles, none were vegetarian. So I did what I always do in cases like this – I stole borrowed someone else’s perfectly wonderful recipe. So this is my take on a recipe I found on the Food Network. A couple minor changes here and there, but who’s counting?  

So for a memorable Christmas breakfast this year, prepare this casserole a couple days ahead. Then fry up some sausages or bacon ahead of time and build some cinnamon rolls ahead and freeze them. Then Christmas morning all you have to do is turn on the oven and prepare a simple fresh fruit salad (dressed only with a tiny bit of vanilla Greek yogurt and brown sugar), and combine some orange juice and sparkling wine or Champagne together for a lovely mimosa for all the adults at table. I mean really, what a way to celebrate Christmas morning!  

You know, none of us know what will happen in the immediate future, so go for the gusto while you may. You will never regret that you created too many wonderful and memorable occasions for your family and friends. Or that you always served them wonderful food.

Love comes in all forms. And showing your feelings and love through good food to me is an essential part of that equation. As a very wise woman once told me – the best way to live a happy and fulfilling life is to always treat your family as friends, and your friends as family. And since I have always loved good food, I figure that good food is also of equal importance to everyone I feed. Thus, I have always tried to provide food that is as appetizing and nutritious as possible. Sometimes I succeed better than others, but my intentions are always to provide the tastiest and most wholesome food possible. You know the old aphorism – “she wasn’t good, but she had good intentions”. Well that was written for me when it comes to the kitchen. Some dishes just turn out better than others. But my intentions are always honorable!)

Happy holiday to all my readers in this most delicious of seasons.

For my other breakfast casserole recipes, see Italian Sausage, Mushroom, Cheese, and Egg Casserole, Roasted Potato, Ham, and Sharp Cheddar Cheese Breakfast Casserole, and Pancetta and Gruyère Breakfast Casserole.  


  • 4 T. extra-virgin olive oil, divided, plus more for greasing the dish
  • 8 c. cubed sourdough bread (crust removed, cut into 1-inch cubes)
  • kosher salt
  • freshly ground black pepper
  • 10 oz. button mushrooms, sliced (about 4 cups)
  • 2 cloves garlic, minced  
  • 1 tsp. fresh thyme leaves, roughly chopped
  • 5 oz. fresh baby spinach (about 5 cups)
  • 2 c. grated Gruyère cheese (use imported Gruyère, if possible)
  • 1/3 c. grated Parmesan
  • 8 lg. eggs, room temp.
  • 2½ c. half-and-half

Toss the bread cubes with 2 tablespoons of the oil, ¼ teaspoon salt, and a few grinds of pepper in a large bowl. Heat a large skillet over medium heat. Add the bread to the skillet, and cook, tossing occasionally, until toasted and hard, about 8-10 minutes. Return the toasted bread to the bowl to cool.

Wipe out the skillet. Heat the remaining 2 tablespoons oil over medium-high heat. Add the mushrooms and cook until they start to brown. Add the garlic, thyme, another ¼ teaspoon salt, and more pepper; stir continuously for 1 minute, then fold in the spinach. Continue to cook until the spinach is wilted, 1 to 2 minutes. Remove from the heat.

Place half the bread cubes in a lightly greased 9×13-inch glass baking dish or 3 qt. casserole dish. Sprinkle with half of the Gruyère and Parmesan. Add all of the mushroom-spinach mixture in an even layer. Top with the remaining bread cubes, Gruyère, and Parmesan.

In a large bowl, whisk together the eggs, half-and-half, ½ teaspoon salt and several grinds of pepper. Pour the egg mixture over the other ingredients. Cover with plastic wrap, and refrigerate for at least 6 hours up to 2 days. Remove the casserole from the refrigerator 30 minutes before baking.

Bake the casserole in a preheated 350 degree oven until the custard is set and the top is golden brown, 50 to 55 minutes. Cool for at least 15 minutes before serving warm or at room temperature.

CREAMY STEEL CUT OATMEAL

OK, sorry about no picture, but really, who doesn’t know what a bowl of oatmeal looks like? And this oatmeal looks like every other bowl of oatmeal. The difference, and you knew there had to be a difference or I wouldn’t have bothered posting this recipe in the first place, is in the flavor and texture.

The cinnamon gives the porridge a rich flavor, and the golden raisins add both texture and sweetness. And of course, a dab of butter and a spoonful of sugar always make anything taste better. Even taking medicine, I’ve heard!

So if you want to up your fiber intake, provide your body with important minerals (thiamin, magnesium, phosphorus, zinc, manganese, selenium, and iron), and make it to lunch without fainting or munching on a sugary product for energy, you “oat” to add oatmeal to your breakfast rotation.

  • 1 c. water
  • 1 c. milk, plus more for serving
  • pinch salt
  • lg. pinch ground cinnamon
  • ½ c. steal cut oat meal (I use McCann’s Steel Cut Oat Meal)
  • ¼ c. golden raisins
  • dab of butter
  • brown sugar

Bring water, milk, salt, and cinnamon to a boil. Sprinkle on the oats and stir well. When the porridge is smooth and starting to thicken, reduce heat, cover, and simmer for 30 minutes, stirring periodically. After the oats have cooked for 15 minutes, add the golden raisins. Stir frequently towards the end of the cooking time.

Serve with a dab of butter, brown sugar, and additional milk. Or add fresh fruit for a lovely change of flavor.

Please Note: Nutritionally, steel-cut oats, old-fashioned rolled oats, and quick oats are the same. All oats start as oat groats, with only the outer husk removed. The main difference between steel-cut oats and quick oats lies in the processing. Steel-cut oats are simply oat groats cut into two or three pieces, for a relatively unprocessed product. Rolled or old-fashioned oats are produced by steaming and rolling the oat groats for faster cooking. Quick oats are just old-fashioned oats that have been chopped into smaller pieces for even faster cooking. The main advantages of using steel cut oats in your porridge are the chewier texture and nuttier flavor.


MAPLE SYRUP AND CINNAMON GRANOLA (ZERO CHOLESTEROL)

Part of our morning routine is to have breakfast. Sounds pretty normal, right? But you would be surprised at the number of people for whom a latte is their only nourishment before lunch. Not so at Chez Carr. We love breakfast. But the older we get, the more we have to watch what we eat. (That sounds pretty normal too.)

So, in keeping with watching our cholesterol levels and trying to help you do the same, may I recommend that you incorporate granola into your morning repast. Many granolas, like this one,  contain zero cholesterol ingredients. Zip, zero, nadda! Of course, granola on its own would be pretty hard to swallow. Literally! So we usually eat our daily ¼ cup of granola with ¼ cup of Greek yogurt, at roughly 10mg of cholesterol, or with a ¼ cup of 2% milk with roughly 5mg of cholesterol. Since the Mayo clinic recommends no more than 300mg of cholesterol for healthy people, and no more than 200mg for those with diabetes, high cholesterol, or heart disease, I feel OK with serving yogurt or 2% milk with our granola.

Now I realize you can buy granola with zero cholesterol ingredients. But homemade granola contains zero ingredients with unpronounceable names. (You pay dearly for those names that are too difficult to say!) You also don’t get nearly the amount of nuts and dried fruit as in a homemade granola.

And yes, I know granola is not inexpensive. But if you buy your oats, nuts, coconut, and dried fruit in bulk, you will save an amazing amount of money. And truly, making your own granola takes just minutes to prepare. And parents, those boxes of sugared cereal are not a substitute for healthy granola or a well balanced hot meal. They are never going to keep your children energized until lunch. (No guilt trip intended.)

True story. I fixed a simple breakfast for my kids every school morning. Usually scrambled eggs, toast, and juice. Sometimes oatmeal or another hot cereal, but always something hot and nourishing. When my dearly loved son Sven went away to college he told me he was excited because he could finally eat cold cereal for breakfast! His enthusiasm lasted for a week. Exactly 7 days after being away from home he called me. The first words out of his mouth were “cold cereal isn’t as great as I thought it would be, and the coffee here is terrible!” You would be proud of me. I didn’t start laughing until he was off the phone.

  • 1/3 c. extra virgin olive oil  
  • ¼ c. real maple syrup  
  • ¾ tsp. vanilla  
  • 1¼ tsp. ground cinnamon  
  • ½ tsp. ground nutmeg  
  • 1 tsp. fine-grain sea salt  
  • 4-6 c. old-fashioned rolled oats  
  • 3 c. nuts – walnuts, almonds, pecans, cashews, hazelnuts (I use a combination)
  • 1 c. unsweetened coconut
  • 1½ c. chopped dried fruit – apples, prunes, cherries, blueberries, apricots, golden raisins (again, I use a combination)

Whisk together the olive oil, maple syrup, vanilla, cinnamon, nutmeg, and salt in a large bowl. Add the oats, nuts, and coconut.  Spread evenly on a parchment paper lined baking sheet. (Don’t wash the bowl yet.)

Bake in a pre-heated 325 degree oven until lightly browned, about 25-30 minutes. Stir once or twice during the baking. (Watch carefully, as coconut and nuts can burn easily.) Remove from oven and scoop back into the mixing bowl. Add the chopped dried fruit. Stir to combine. Let cool completely before storing in an airtight container.

Please note: I now make this granola with 6 cups of oats. The granola doesn’t clump using the 2 extra cups of oats, but oats are really good for us. So, we can live without the clumps. And the overall flavor is just as good. (8-24-2019)


CREAM CHEESE DANISH

I love to bake. I’m told, however, that my first attempts were not well received by my family. This may have something to do with the fact that not only did my first efforts contain flour, sugar, and eggs, they also included sand. I was 3 or 4. Apparently I was just old enough to find a bowl, pilfer flour and sugar out of the large under counter bins (we lived in an old farm house) and purloin eggs out of the ever present bowl in the refrigerator. (We lived on a chicken farm.) I also knew where the muffin tins lived, and how to turn on the hose. I’m told that on more than one occasion, I became seriously upset (read here hissy fit) when I was told not to “bake” anymore sand pies.

It was about then that my mother decided (I assume) to start teaching me how to bake “real” goodies. And I’ve never stopped. So when I decided to serve brunch for our last pre-concert meal, I was in heaven thinking about what pastries I could serve our guests.

And the first pastry that came to mind was this recipe. And what I usually do when I think about preparing one of my own recipes, I signed onto this site to print a copy. What?!?! No cream cheese Danish on my blog. How had I been so remiss? So ladies and gentlemen, I am correcting that appalling omission right here and now.

Now I know what some of you are thinking. “Patti, you want me to make a cream cheese Danish? Are you out of your unbleached, all-purpose flour lovin’ mind?” And believe me, I get it. I was quite intimidated the first time I contemplated making pastry too. But as I prepared this recipe, I realized it wasn’t difficult at all. You simply needed to know how to read and follow instructions. (Heck, everyone who has been in the kitchen, even if only to prepare Top Ramen, has learned how to follow directions!) So get over your fear and give this decadent pastry a try. You don’t even need a mixer. But, if you don’t have the time or inclination right now, save the recipe and consider making it ahead for Christmas morning.  

I always make something fun for Christmas morning. This year I’ve already decided that this Danish filled with the Dried Cherry Compote (recipe below) will be on our breakfast table. Hope you make a similar decision. Then, when asked where you got the amazing pastry, tell them Mrs. Santa sent it along with all the other gifts.

Christmas is such fun! Part magic, and part an indecent amount of work for Mrs. Santa. So what’s one more task? You can always sleep later, that is after all the wrapping paper has been cleared away, the turkey is nothing but cleaned skin and bones, and the left over wine has mysteriously disappeared! 

  • ½ c. milk, room temperature 
  • 1 T. or 1 pkg. active dry yeast
  • 3 T. sugar
  • 2 eggs, room temperature
  • 1 tsp. salt
  • 2 tsp. vanilla, divided
  • 3½ c. bread flour
  • 1 c. cold unsalted butter
  • 2 packages (8 oz.) cream cheese, room temperature
  • 1 c. granulated sugar, plus more for dusting
  • filling (see filling suggestions below)

In a small bowl, whisk together the milk, yeast, sugar, eggs, salt, and 1 teaspoon of the vanilla. Set aside. Pour the bread flour into a bowl and grate the butter over the flour. With a table knife (yes, just a plain old table knife), cut the butter into the flour. (There will still be lumps of butter, but generally distribute the butter as best you can. Actually you want some lumps. They help keep the dough tender.)

Pour the milk mixture over the flour and butter mixture, and using your table knife again, run your knife through the dough until the mixture holds together. Remove dough from bowl, shape into a rough ball, wrap in plastic wrap, and refrigerate for 2 hours.

Meanwhile whip the cream cheese, sugar, and remaining 1 teaspoon vanilla together.

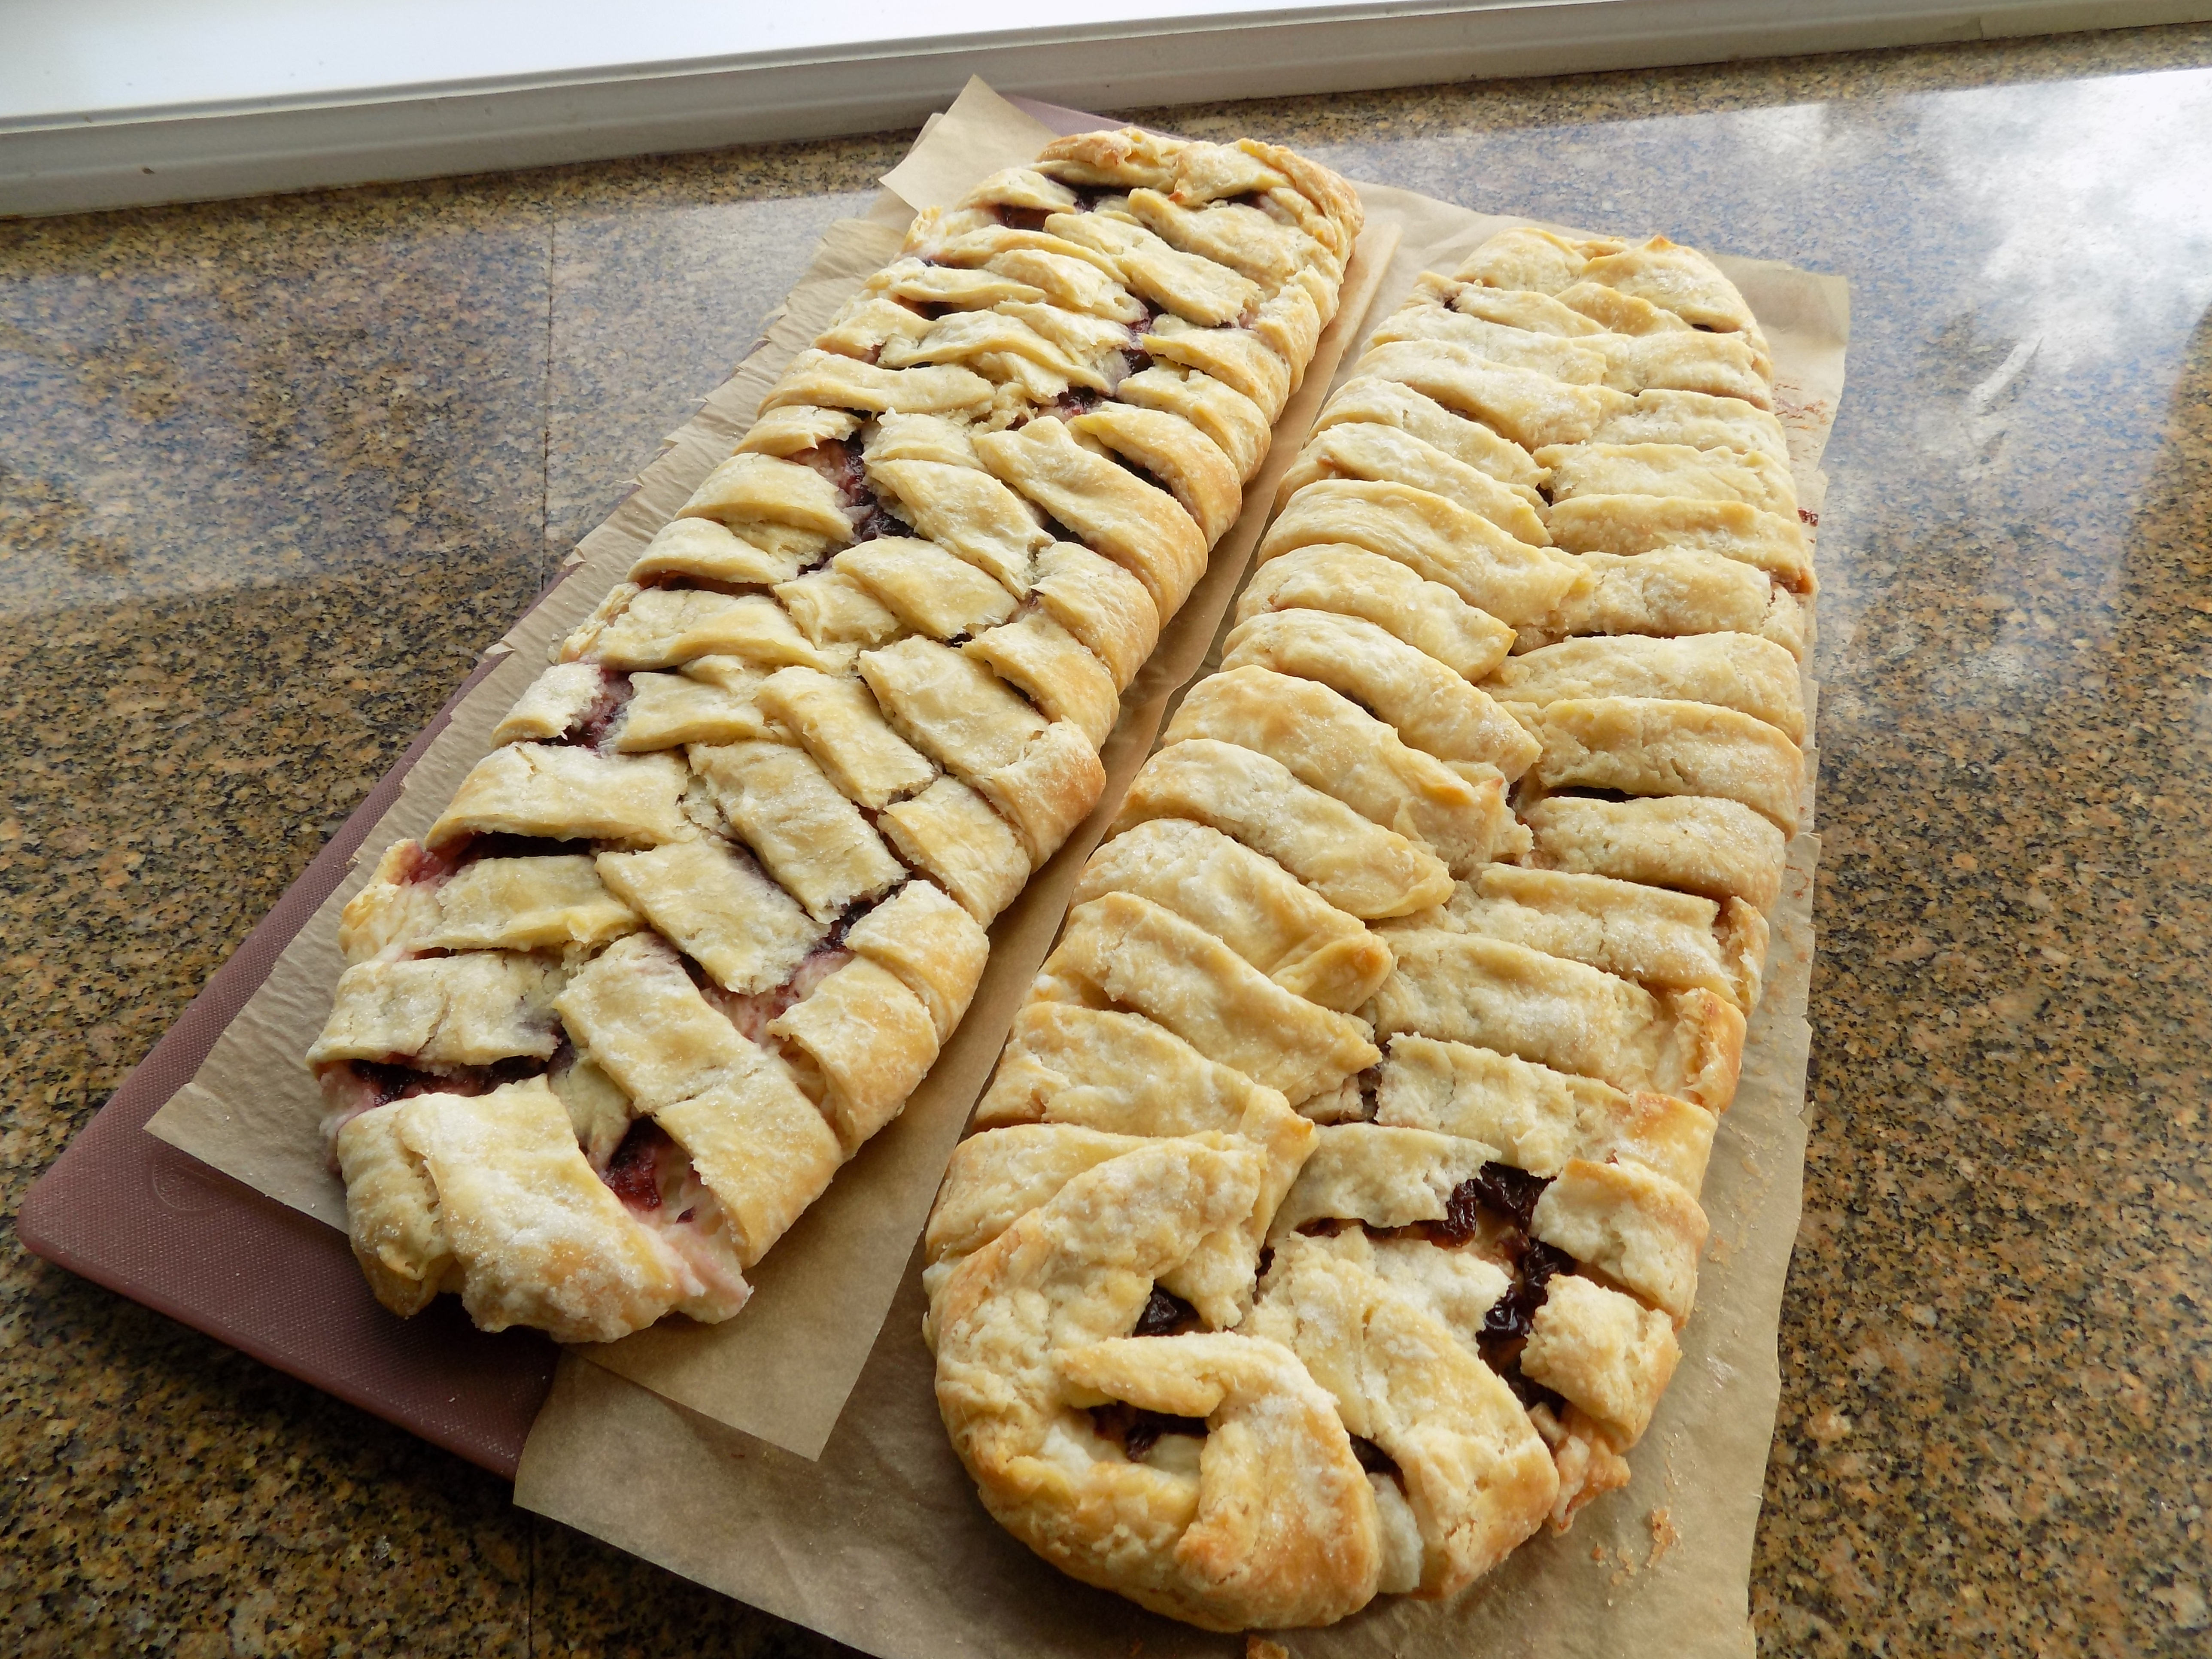
When ready to roll out the dough, cut the dough ball into 2 portions and roll each into a 10×14 rectangle. Place each on a parchment paper lined baking sheet*. Mentally divide the dough into thirds running the long way. Spread the cream cheese mixture down the middle third of each pastry. (Yes it will be quite thick.) Then spread a thin layer of your filling of choice over the cream cheese.

On the outside 2/3rd of the dough, cut 1-inch strips from the edge of the dough to the filling. Starting at one end, braid the strips over the filling. Sprinkle with just a dusting of sugar, cover each with a tea towel, and let sit for 30 minutes.

Bake the Danish in a pre-heated 350 degree oven for 25-35 minutes or until the top is lightly browned. Do not over-bake. There is so much butter in the dough, that if you bake it too long, the bottom will be over-browned. Remove from oven and allow to cool completely. Cut and serve at room temperature. Can be made a day ahead and left on your counter overnight lightly covered with a tea towel.

*I use the kind of cookie sheet that has three flat sides. That way, after the 2 Danish have baked, I can slide them right off onto cooling racks.

Dried Cherry Compote

  • 1 c. dried cherries, finely chopped
  • 2 T. granulated sugar
  • 2 T. brown sugar
  • ¼ c. water
  • 2 T. brandy

Combine the chopped dried cherries, both sugars, water, and brandy in a medium sized saucepan. Heat on medium, stirring occasionally. Allow mixture to thicken and cherries to cook down slightly, but still maintaining their shape, 10-15 minutes. Allow mixture to cool completely before spreading on cream cheese filling.

Other Filling Suggestions

Any type of Jelly, jam, or fruit spread – raspberry, Marionberry, strawberry, blackberry, boysenberry, etc., or orange marmalade, apricot preserves, lemon curd, etc. You could even try Nutella. Go for it! It’s all good.
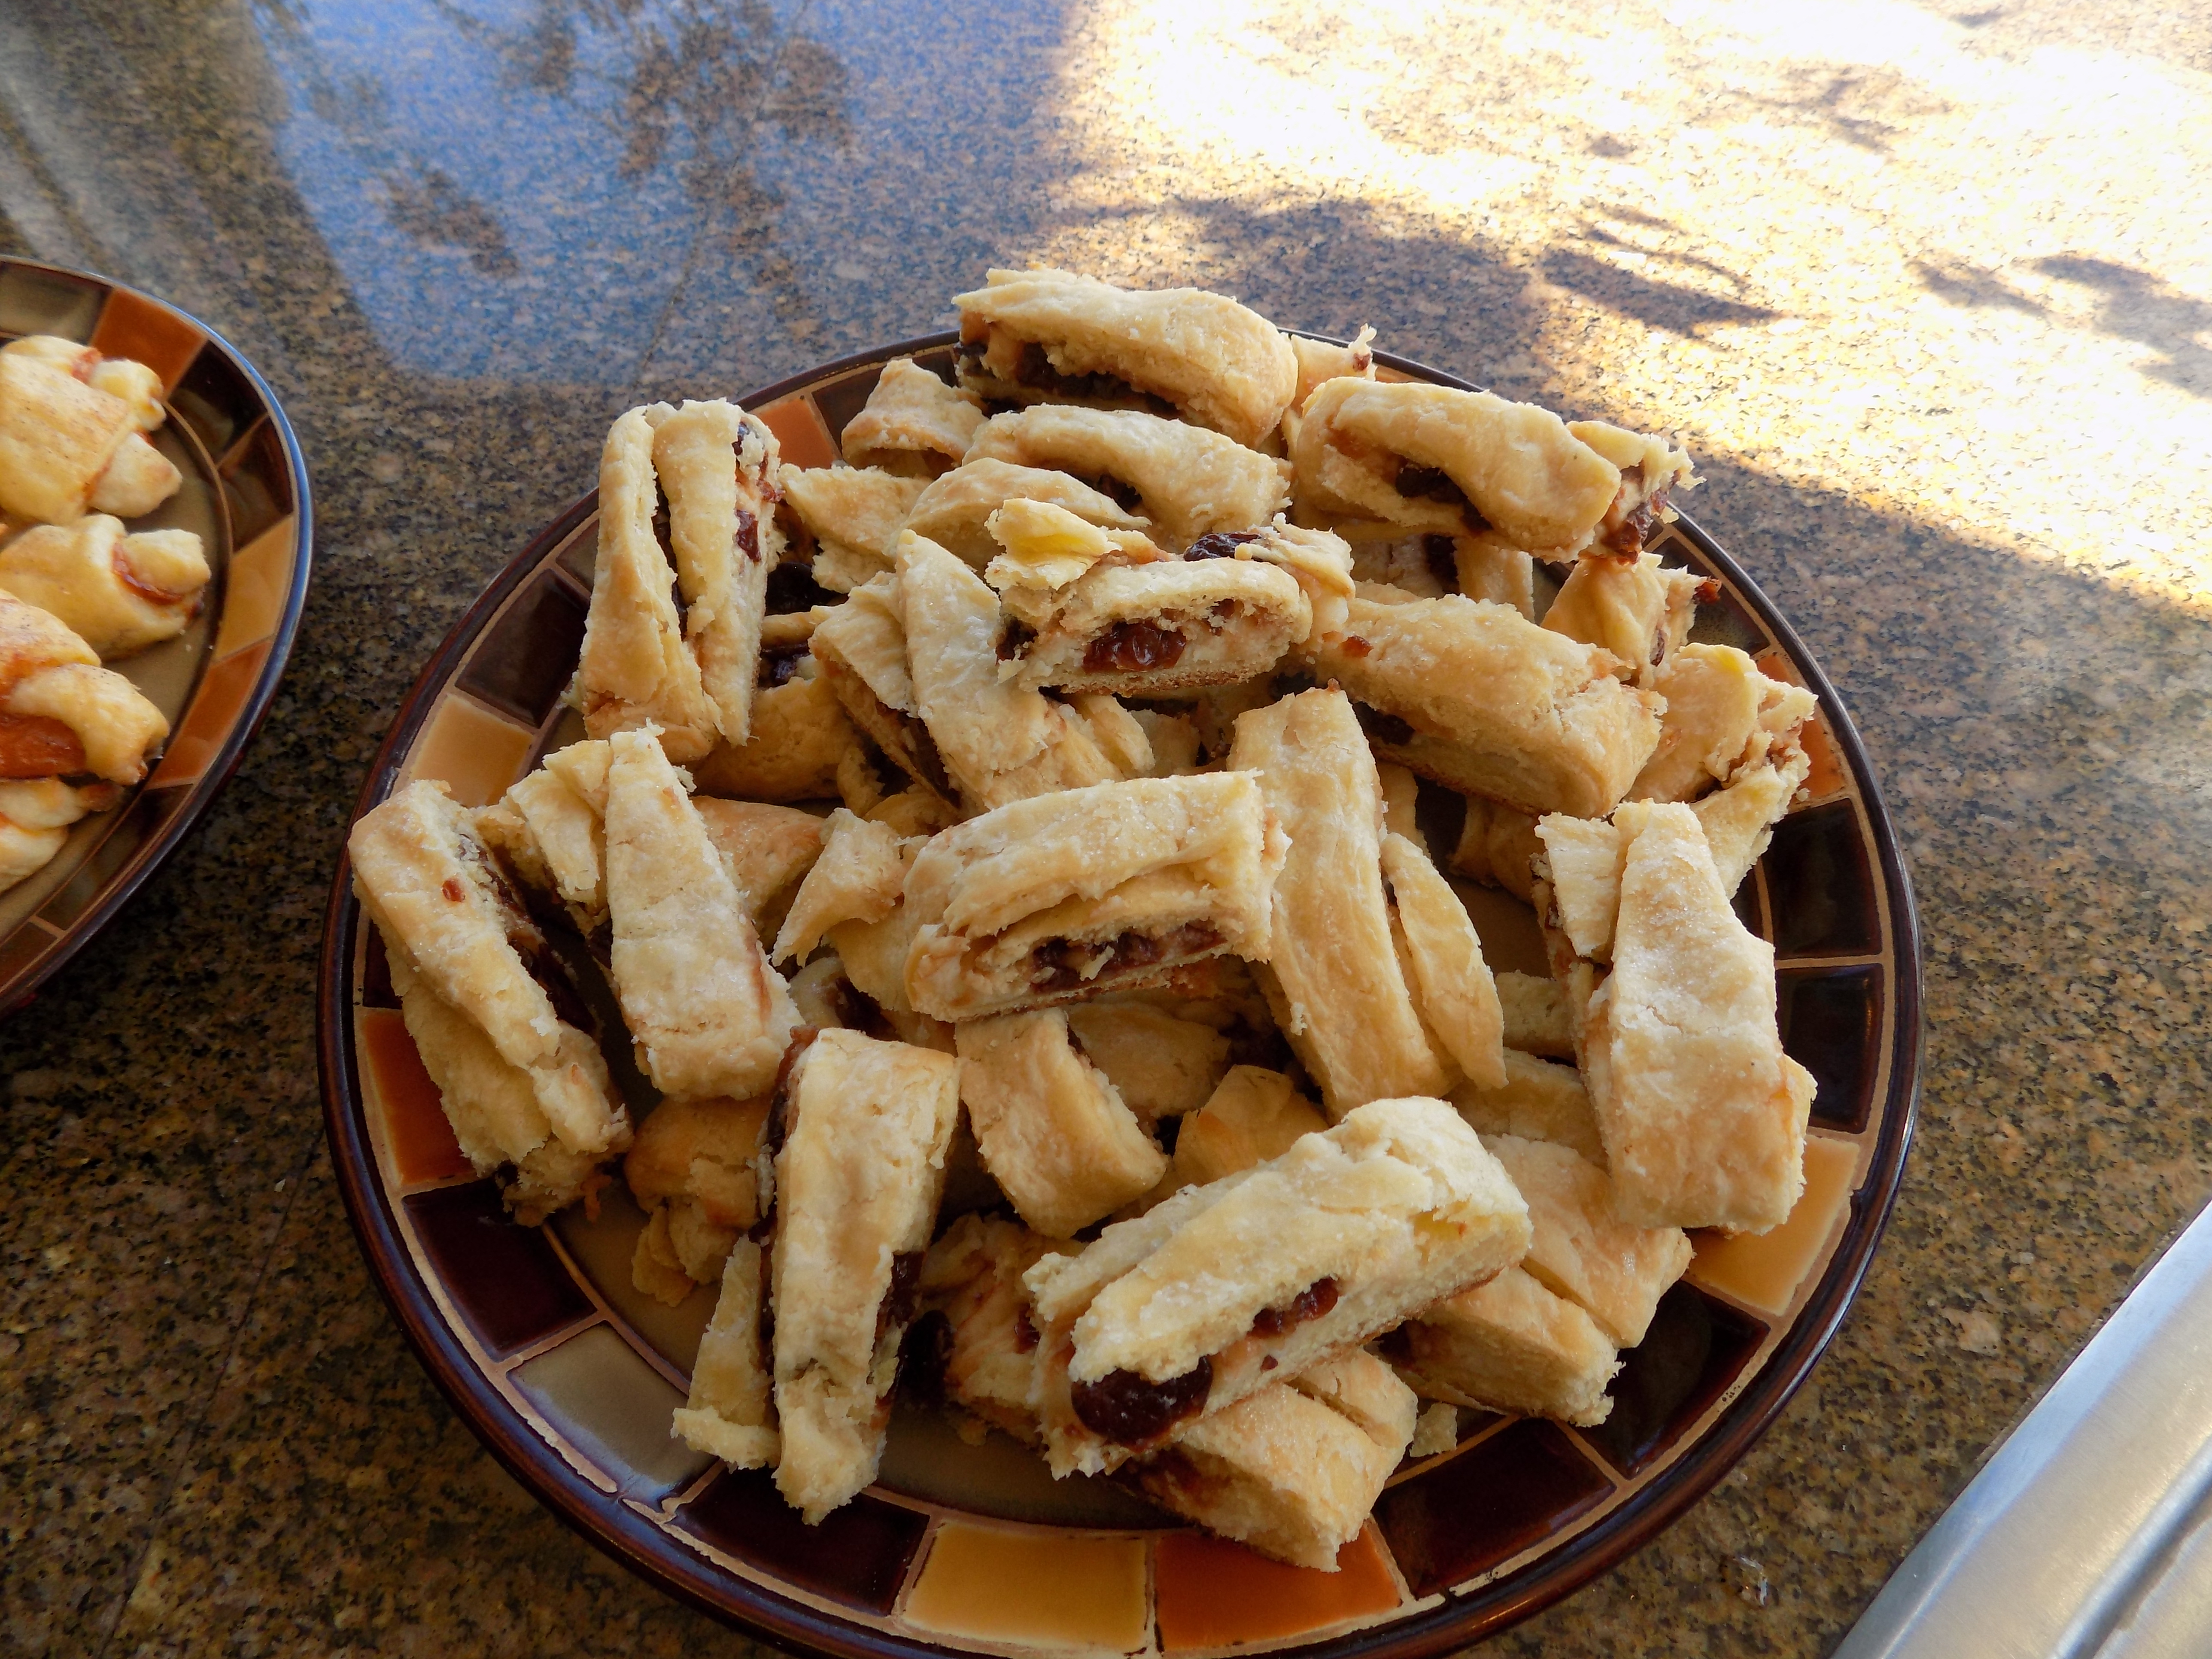
Cherry filled

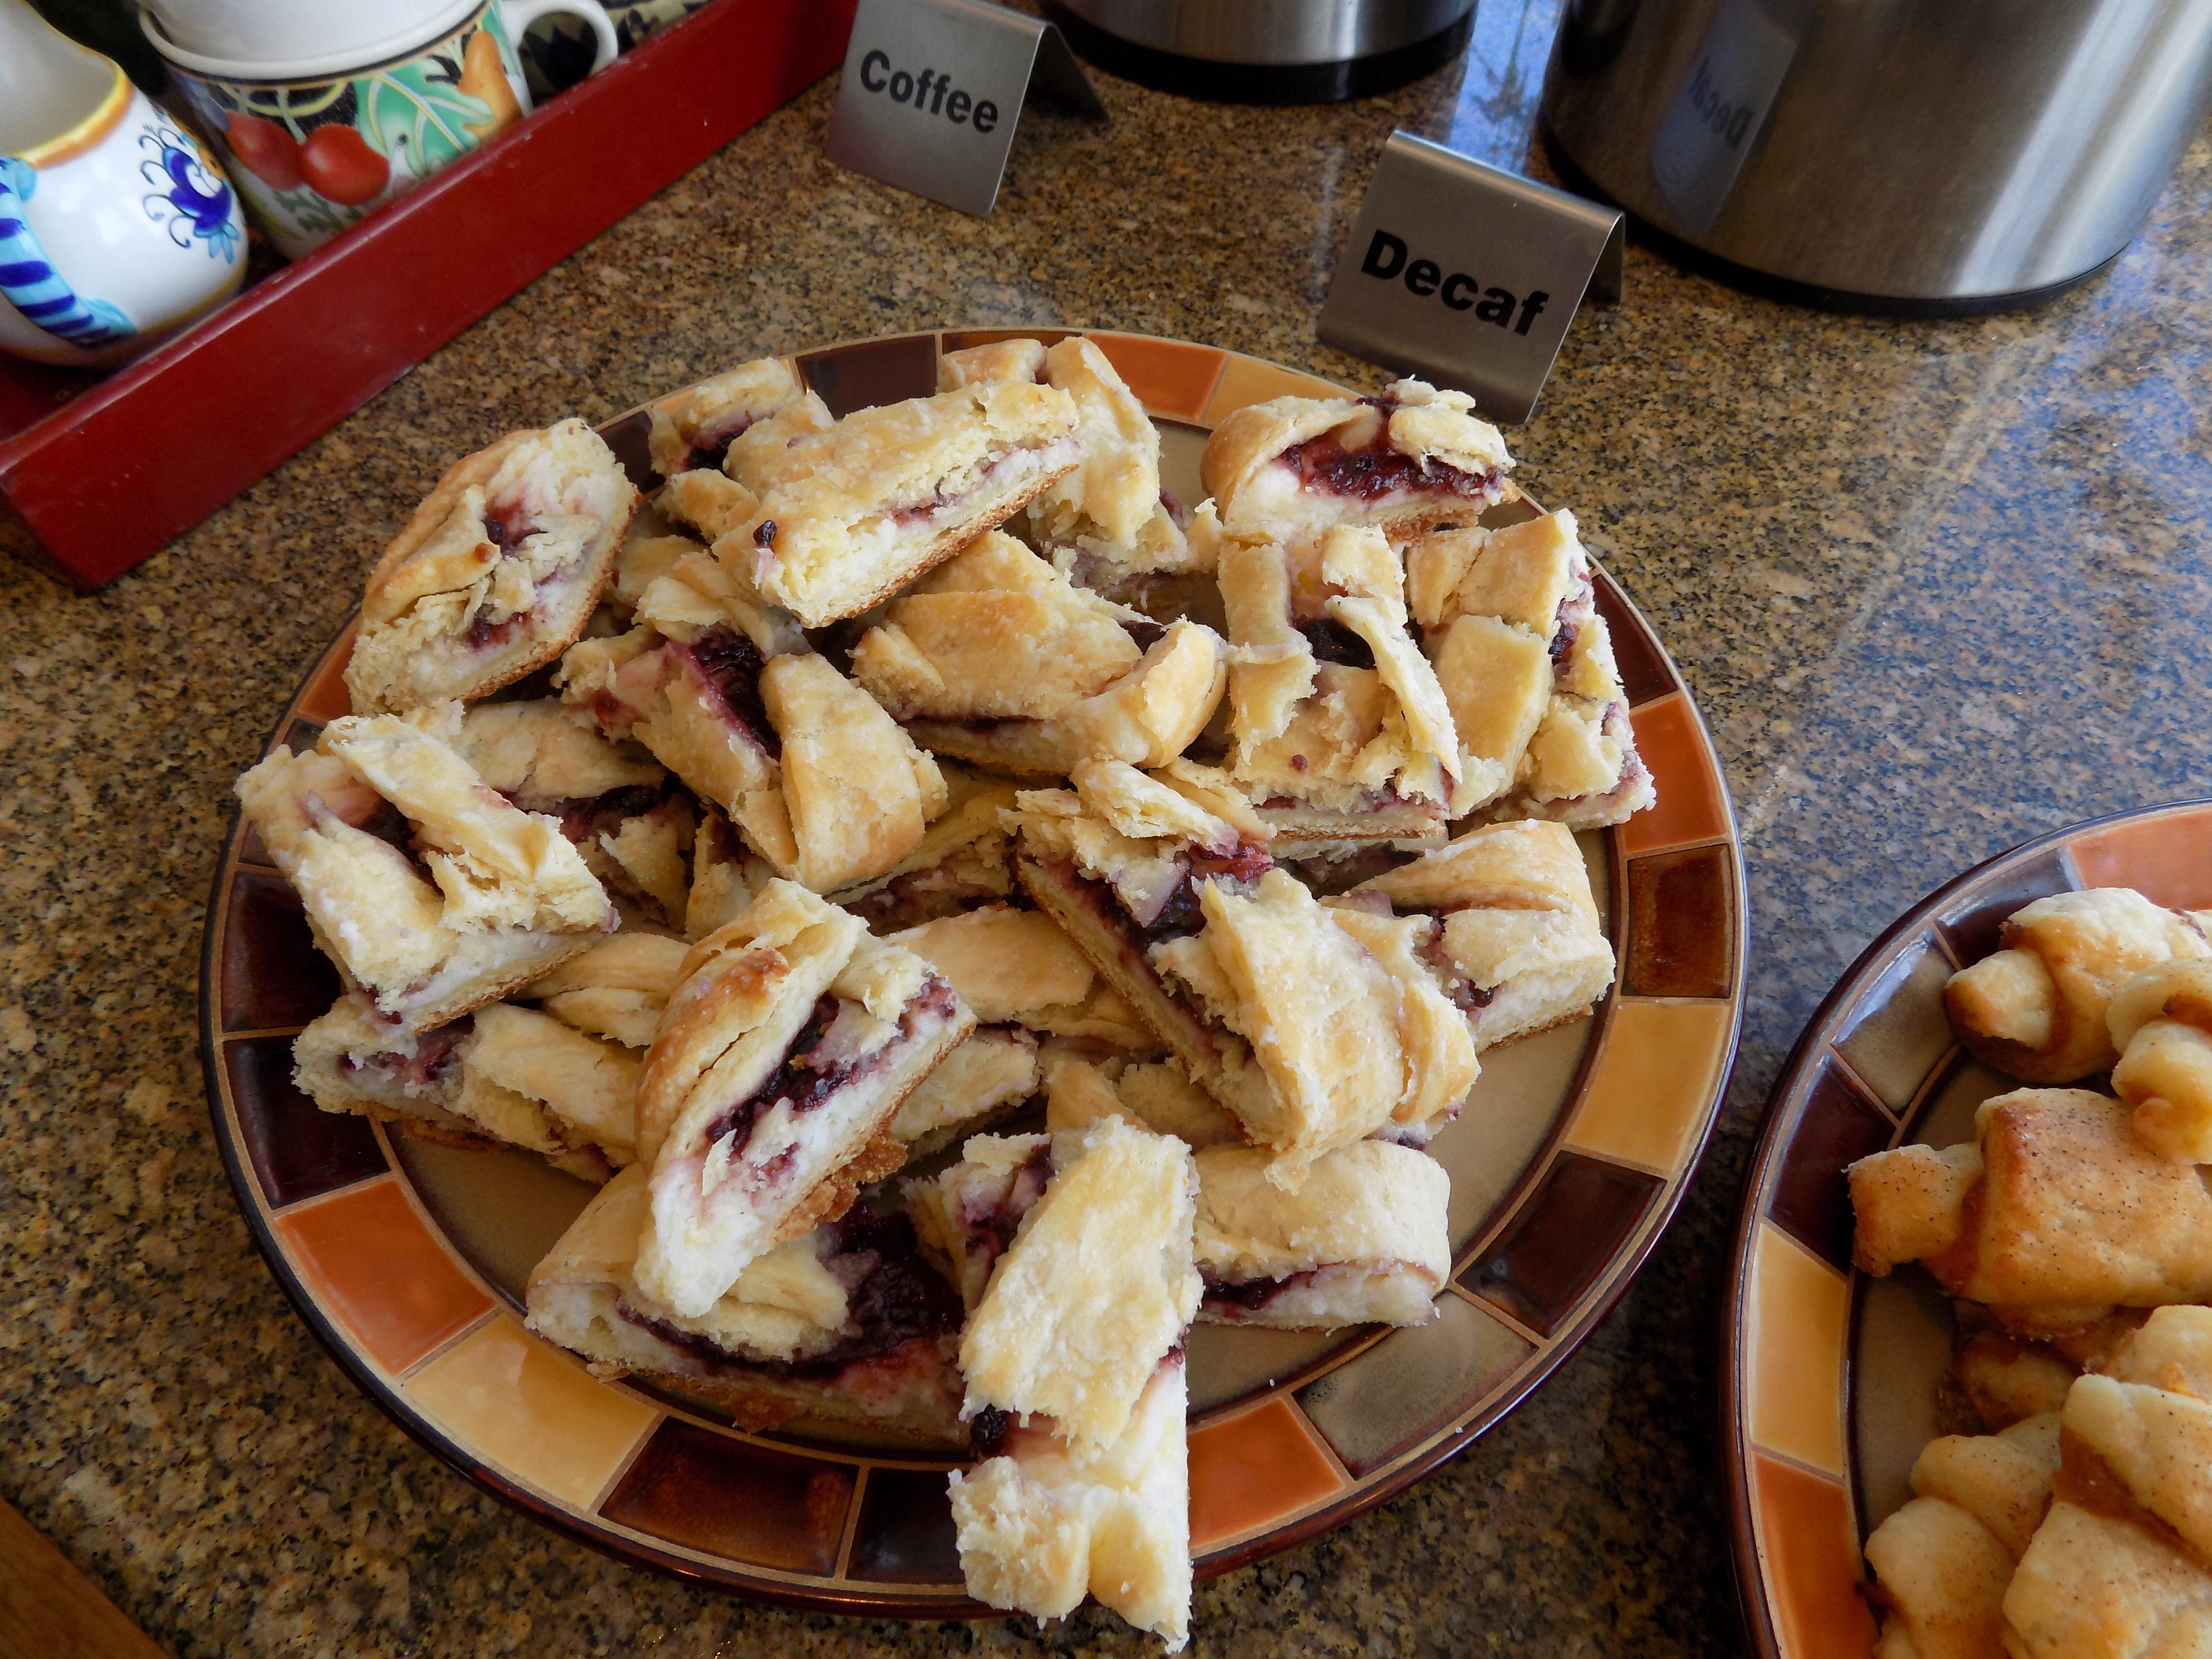
blackberry jam filled


ITALIAN SAUSAGE, MUSHROOM, CHEESE, AND EGG BREAKFAST CASSEROLE

While I was gathering frozen items to take along on our March trailer trip, I grabbed a package of this breakfast casserole along with the other items I needed. I always start our journeys with a full freezer including several kinds of meat, extra butter (never leave home without it), ice cream (for Mr. C), a small amount of  ice (for our first nights “safe arrival” drink), and anything else that I think might provide meal variety and preparation ease along the road.

In addition to the usual items, this year I included frozen broccoli cheese soup, cinnamon rolls, a pasta casserole, and a vacuum packed 2 person portion of this breakfast casserole.

When we are out in our trailer, I almost always fix breakfast. This trip however, we ate out for breakfast one morning mainly for nostalgic reasons. We used to own a condo in Long Beach, Washington, so we just had to eat at least one meal at our favorite restaurant in the area (42nd Street Café and Bistro) while we were “camped” for one night at Cape Disappointment State Park. (I say “camped”, but in reality, calling a fully equipped trailer parked at a state park or RV park “camping” is nigh onto ludicrous. A walk around queen sized bed, full bathroom, three burner stove plus oven, refrigerator/freezer, microwave, furnace, air conditioner, TV, radio, etc. is about as far from real camping (sleeping in a tent, cooking over a fire or camp stove, keeping your perishables in a cooler, etc.) as spending a night in a youth hostel compared to a 5 star hotel! Actually, even further apart. At least spending the night in a youth hostel, you don’t have to leave your warm bed and run through a torrential downpour to reach a bathroom in the middle of the night!) But I digress……………….. And no, I don’t feel guilty in the least. I did my share of tent camping when I was younger and loved every minute of it. But at a certain age, even the most avid tent camper must pay attention to Mother Nature when she starts sending out not-so-subtle hints that it might be time to make a change. (The onset of regular night calls and tender knees, to mention a couple of the hints both Mr. C and I received from Her Grace.)

For a few pictures of our “camping” experience, see pictures below.

Anyway, what I am trying to get at, in my own easily distracted way, is that for one of our breakfasts, it was a delight to open our trailer freezer, pull out the package containing this casserole, heat it up in the microwave, (yes I know I’m spoiled) and have a tasty bit of variety from our normal breakfast meat and eggs over easy.

I guess I should really get back to the subject at hand and mention that this casserole is very easy to prepare, fairly economical, and just plain delicious. And if you haven’t already gathered that it freezes beautifully, let me take this opportunity to make that fact known to you as well.

So do yourself and your family a favor. Make up a double batch of this breakfast casserole. Serve one batch and save the other in your freezer. Then some morning when even the thought of getting out of bed, much less cooking breakfast is repugnant, whip your frozen casserole out of the freezer, and treat yourself to a fabulous breakfast with virtually no preparation involved. OK, you do have to work the buttons on your microwave. But that’s where a hot, steaming cup of coffee really helps! Good morning sunshine! Breakfast’s ready.

  • 1 T. unsalted butter
  • ¼ lb. button mushrooms, sliced
  • 1 lb. bulk Italian sausage
  • 2 c. half & half
  • ¼ tsp. dry mustard
  • 1 tsp. kosher salt
  • freshly ground black pepper
  • 1 T. dried parsley
  • 4 eggs
  • 1 c. grated sharp cheddar cheese
  • 6 slices cubed white bread

Melt butter in medium fry pan. Brown mushrooms in butter and remove from pan. Add sausage and cook until starting to brown. Remove from pan and drain on paper towels.

Pour a tiny bit of the half & half in a large bowl. Add the dry mustard and whisk until smooth. (If you add the mustard to all the liquid, you will have the very devil of a time breaking up the small dried mustard clumps. Trust me on this one!) When smooth add the remaining half & half, salt, pepper, parsley, and eggs. Whisk until the eggs are well combined. Stir in the cheese, bread, cooked mushrooms, and sausage.

Pour into a lightly buttered casserole or 9×13-inch pan, cover with plastic wrap, and refrigerate overnight. Remove from refrigerator about an hour before you plan to bake the casserole.

Bake uncovered in a pre-heated 350 degree oven for 40-50 minutes or until firm to the touch and lightly browned. Let sit for 5 minutes before serving. Freezes beautifully.

Our trailer parked at Morro Bay State Park. Picture taken from the golf course.

Another picture taken from the golf course. (Man taking his golf clubs for a stroll – Mr. C.)

Rough life at Jalama Beach (Santa Barbara county park).

Any closer to the Columbia River while parked at Peach Beach RV Park across the river from Biggs, Oregon and we would have been IN the river! Pretty darn wonderful!

MIXED NUT AND DRIED FRUIT GRANOLA

Included in our Christmas package from daughter Ursala, was a special gift for Mr. C. His own package of granola. (He shared his granola with me, so I let him live. Smart guy that he is!) Anyway, the granola was over-the-top delicious. So I asked for the recipe. (Well, of course I did!)

Now I know what you’re thinking – “Patti, you’ve already posted two granola recipes on this site”. True enough. But if you and your family are anything like me and mine, well granola as part of a well-balanced and hearty breakfast is a must. And who doesn’t like variety in their food selection, especially in cereal?

Now for those of us in the baby boomer (and older) generation, a big old bowl of granola might add too many calories if accompanied by toast, egg, and a breakfast meat. But for someone like myself, who is trying to be good, a delicious breakfast of a plain piece of toasted grain and seed bread, topped with 2 over-easy eggs, a chicken sausage patty about the size of an Oreo cookie, a quarter cup of homemade granola with a small amount of fresh fruit and a quarter cup of vanilla yogurt is only about 500 calories. And I’m telling you, there is no way I am ever going to be hungry before lunch when I start my day with this high in protein and fiber breakfast. I truly look forward to a small variation of this breakfast menu every morning. OK, not as much as my cup of coffee and the newspaper, but it’s next on my list.

And yes, I know there are some really good granolas that can be purchased at your local grocery emporium. But they come at a price – a very high price! And while homemade granola isn’t exactly inexpensive to make, you sure as heck get a better return for your hard earned dollars! Plus, you have control over the quality of the ingredients. Which, in case you haven’t already deduced, is the main reason, along with eliminating ingredients with names that I can’t pronounce from my diet, that I am such an advocate of home cooking.

OK, off your soap box Patti. After all, it is clearly pointless to attempt to convert those who by their very interest in this recipe have already demonstrated a love of home cooking. (Maybe someday I will learn not to “preach to the choir”. But alas, that day has yet to come. Sorry!)

Thanks again darling Ursala for the granola. 

  • ½ c. + 2 T. extra virgin olive oil
  • ½ c. honey
  • ¾ tsp. vanilla
  • 1¼ tsp. ground cinnamon
  • ½ tsp. ground nutmeg
  • 1 tsp. fine-grain sea salt
  • 4 c. oats
  • 3 c. nuts (slivered or whole almonds, pecans, cashews, hazelnuts)
  • 2 c. unsweetened coconut
  • 2 c. chopped dried fruit, such as dates, cherries, apples, apricots, blueberries, etc.

Whisk together the olive oil, honey, vanilla, cinnamon, nutmeg, and salt in a large bowl. Add the oats, nuts, and coconut.  Spread evenly on a parchment paper lined baking sheet. (Don’t wash the bowl yet.)

Bake in a 325 degree oven until lightly browned, about 25-30 minutes. Stir once or twice during the baking. (Watch carefully, as coconut and nuts can burn easily.) Remove from oven and scoop back into the mixing bowl. Add the chopped dried fruit. Stir to combine. Let cool completely before storing in an airtight container. Based on a Michael Symon recipe.


CORNED BEEF HASH BREAKFAST SCRAMBLE

So, here it is the day after St. Patrick’s Day and you have a big old hunk of left over corned beef staring at you every time you open your refrigerator. You already know that Reuben sandwiches are in your near future, but what to do with the rest is still nagging at you from the edges of your organized mind. Well, I have the perfect solution to your quandary. Make hash!

Now, you need to know that I love corned beef. So when I go to the bother of braising corned beef, I don’t stop with just one brisket. I usually braise 2 at a time. And yes I do mean braise. The term “braise” means (at least to me) taking a less-tender cut of meat (often beef) and slowly (low heat over a long period of time) cooking it partially covered with a liquid until tender. (Think pot-roast.) And especially with corned beef, the result of braising rather than boiling is significant. Boiling seems to draw all the flavor out of the meat, while braising seems to impart the flavor of the herbs and spices, while at the same time allowing the meat to obtain a very pleasant firm but tender texture. (Boiling alone seems to make for a loose texture that I personally find less desirable.)

But back to this scramble.

The only time Mr. C. and I eat breakfast out is when we are traveling. And why – well – breakfast is easy to fix, and I have control over everything from the amount of salt and fat used, to the quality of the eggs. But breakfasts can become a bit tedious. So every once in a while I like to replace our usual over-easy eggs with an egg dish that surprises our taste buds. And that’s just what happened this morning when I served up some of this scramble. My taste buds were on full alert because this dish was so yummy. Even Mr. C., who, if never presented with another potato, except in the form of French fries, had to agree that this scramble was mighty fine. (He even had seconds!)

So if you too would like to serve a new and different taste treat for breakfast some morning, give this recipe a try.

If you would like to check out additional corned beef recipes, including a recipe for a killer Rueben Sandwich, search under “corned beef” on this site.

Lastly, don’t even think of using canned corn beef in this recipe. You would be visited by three spirits, all of whom would look just like me! And each one would be even more unpleasant than the ones that visited Ebenezer Scrooge!

(On a friendlier note – check out the picture at the end of this post. Max, on the left, and Miles next to my computer, helping me write yesterday’s post. So nice to have office help.)

  • 2 tsp. extra virgin olive oil
  • ¼ tsp. kosher salt
  • freshly ground black pepper
  • 2 unpeeled russet potatoes, cut small dice
  • 2 T. unsalted butter
  • 1 onion, diced
  • 1 red pepper, diced
  • 2 cloves garlic, minced
  • 3 c. diced baked corned beef (see recipe below)
  • 8 lg. eggs
  • ½ c. milk
  • 2 tsp. Worcestershire sauce
  • ¼ tsp. seasoned salt
  • 1 T. chopped fresh parsley leaves, opt.

Whisk the olive oil, kosher salt, and pepper together in a medium sized bowl. Pat the diced potato pieces dry and add to the bowl; stir until potato pieces all covered with a thin coating or oil. Place potatoes in a single layer on a baking sheet lightly coated with cooking spray. Bake in a pre-heated 450 degree oven for 18-20 minutes, or until golden brown and crisp. (Use convection if available.) Remove from oven and set aside.

Meanwhile melt the butter in a large skillet over medium high heat. Add the onion and red pepper and fry, stirring often, until onion becomes translucent, about 3-4 minutes. Stir in the corned beef and fry, stirring frequently, until slightly browned, about 3 minutes. Add the reserved potatoes.

While the hash is frying, whisk the eggs, milk, Worcestershire sauce, and seasoned salt together and pour over the hash.  

Reduce heat and stir gently lifting the mixture off the bottom of the pan and flipping until the egg mixture is set. Serve immediately garnished with parsley.

Note: Before you add the egg mixture, the hash can be frozen. It freezes beautifully.

CORNED BEEF

  • 2 lg. bay leaves, torn into tiny pieces
  • 1 tsp. black pepper corns
  • 1/8 tsp. crushed red pepper flakes
  • 1 tsp. coriander seeds
  • ½ tsp. mustard seeds  

Combine bay leaves, pepper corns, red pepper flakes, coriander, and mustard seeds along with the little packet of spices that comes with the corned beef. Set aside.

Place brisket in a large covered Dutch oven. Pour 2 cups of water into the pan along with 1/3rd of the spice mix. (The spices should be in the water.) Cover Dutch oven with lid and bake in a pre-heated 350 degree oven for 1 hour. After 1 hour, use your sucky upy (my term for a turkey baster) to drain/suck the water from around the corned beef.* Add 2 cups fresh water, another third of the spice mix and cover. Bake another hour. After second hour, drain and replace water and add the last of spices. And you guessed it, bake for another hour, or until the brisket reaches an internal temperature of 175 degrees and is fork tender. Remove from oven, place on a platter, and let rest at least 45 minutes before cutting into small cubes.  Note: This way of cooking corned beef results in a very flavorful tightly grained but tender meat. Perfect for hash. Great for sandwiches too.

*An alternate method for changing the water is to remove the corned beef from the pan and simply pour off the water.


BLOODY GOOD MARY

I recently realized that I hadn’t posted any recipes for adult beverages since December of 2015. That’s just sick and wrong! Because mixed drinks, when done correctly, rank right up there with any other truly great recipe. So I plan to immediately remedy my deplorable lack of good judgement in this regard.

The first recipe I am going to post is my rendition of a Bloody Mary.

To begin with, I don’t start with V-8 or any other already doctored tomato juice. I like to control the flavor completely by just the ingredients I add to the mix. Plus, V-8 tends to be more expensive than plain tomato juice, and contain more sodium.

Now one thing you should know about this recipe. It’s not for sissies! It possesses a goodly amount of pucker power from the lemon juice and a lively kick from the hot sauce and horseradish. But what it does for simple vodka is nothing short of amazing.

So next time you feel like greeting the morning with a new taste sensation, build a batch of this seasoned tomato juice. Then simply add a bit of vodka (or none at all for that matter) and watch the sun rise with new found enthusiasm. Good morning, America!

  • 1 c. tomato juice
  • juice of 1 lemon (save the juiced lemon carcass in a plastic bag in the refrigerator for when you serve the drink) 
  • 1 tsp. Worcestershire sauce
  • 5-6 drops hot sauce (I use Frank’s Red Hot)
  • freshly ground black pepper
  • ½ tsp. celery salt
  • 1 tsp. prepared horseradish, or more to taste
  • 3 oz. cold vodka
  • kosher or other coarse salt
  • celery stalks, pickled beans or asparagus, etc., garnishCombine the tomato juice, lemon juice, W. sauce, hot sauce, pepper, celery salt, and horseradish in a pitcher. Refrigerate overnight. Just before serving add the vodka. Adjust seasoning. When ready to serve, rub the reserved lemon carcass around the rim of the glass and dip in coarse salt. Add ice to 2 glasses and pour in tomato juice mixture. Garnish with celery stalks, leaves side up.